Leaderboard

Popular Content
Showing content with the highest reputation on 02/11/2022 in all areas
-
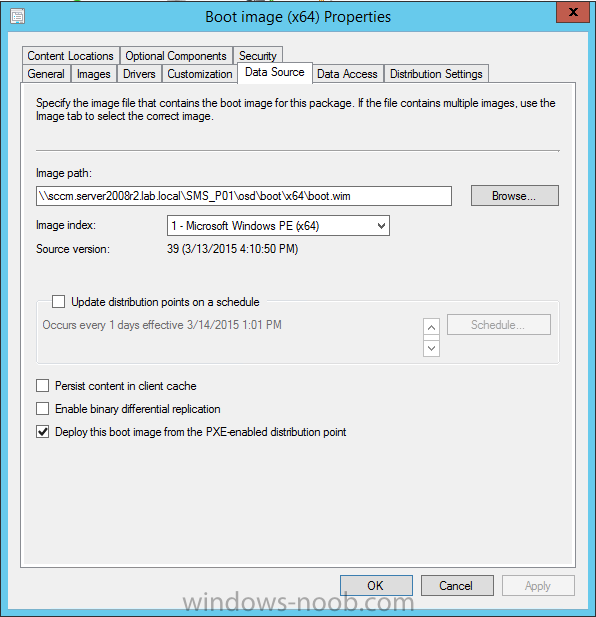
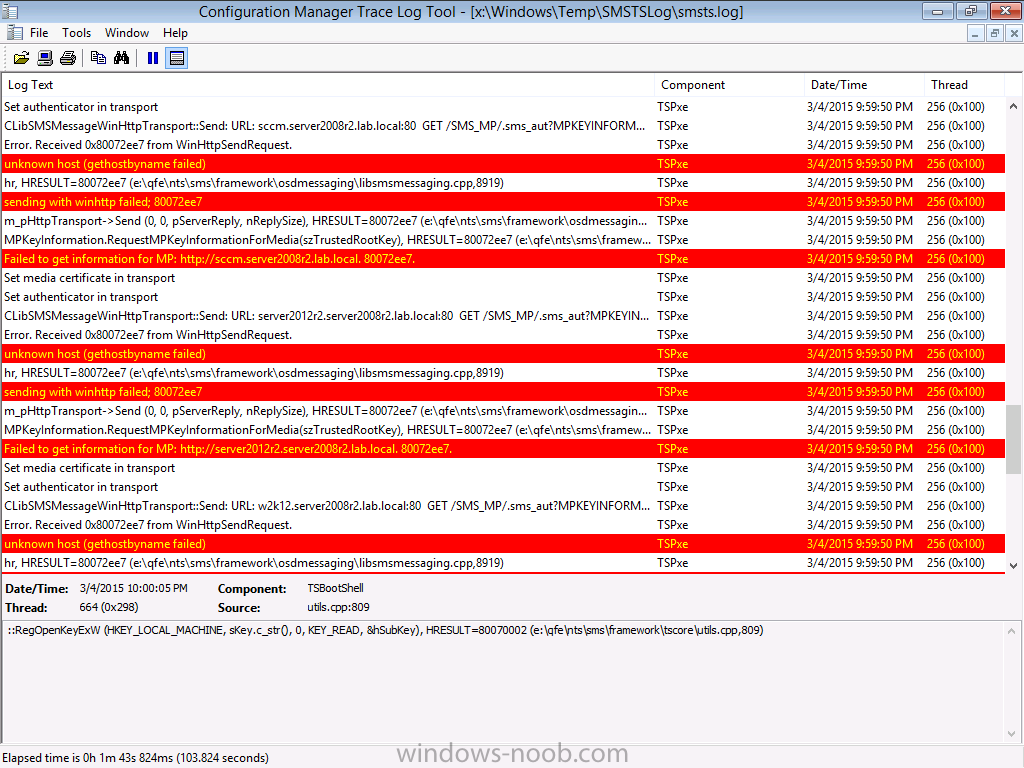
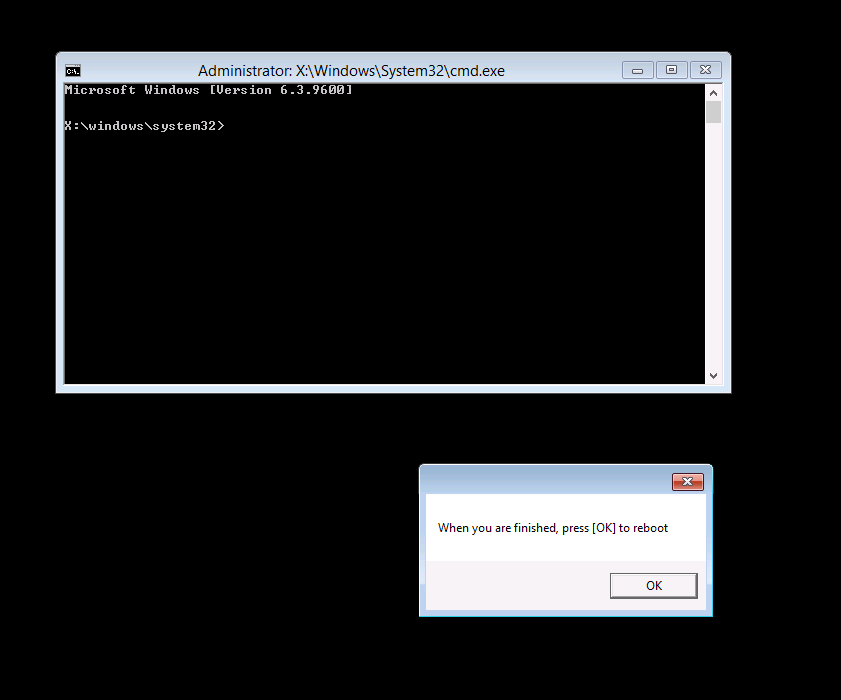
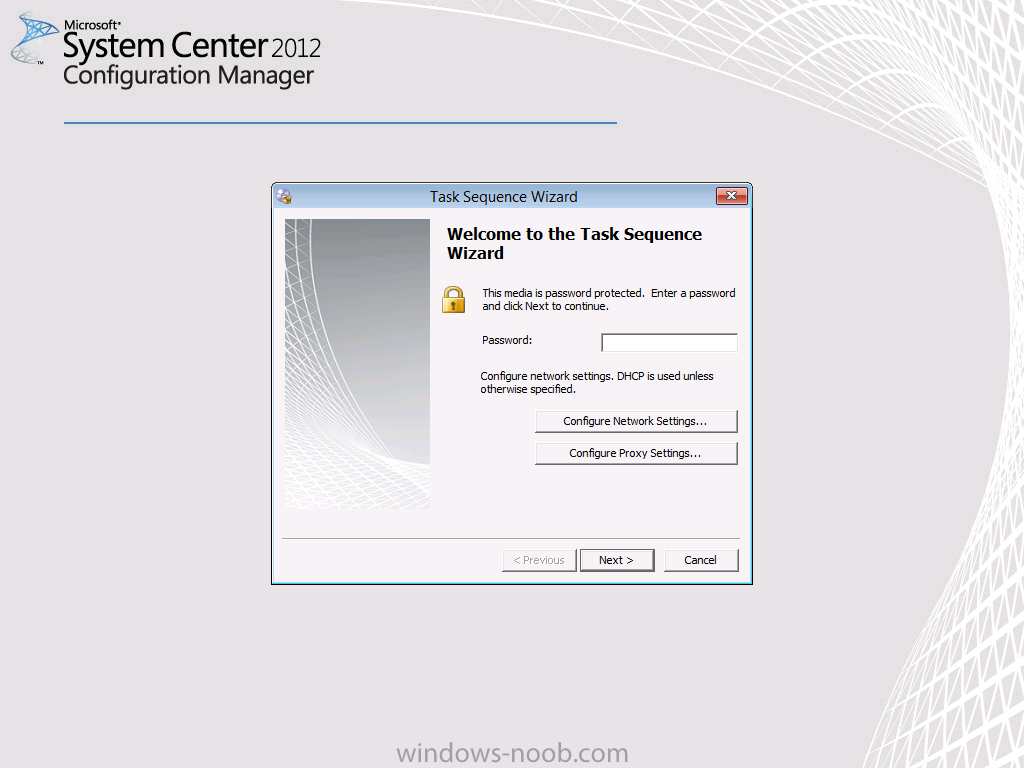
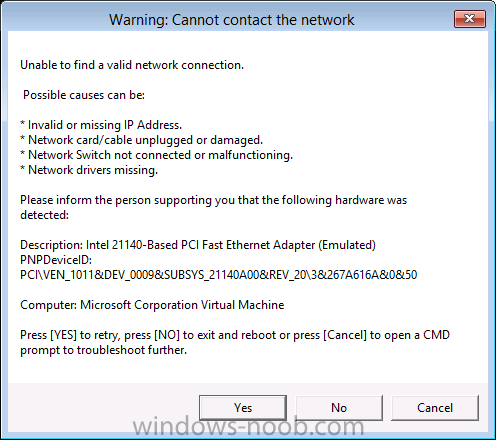
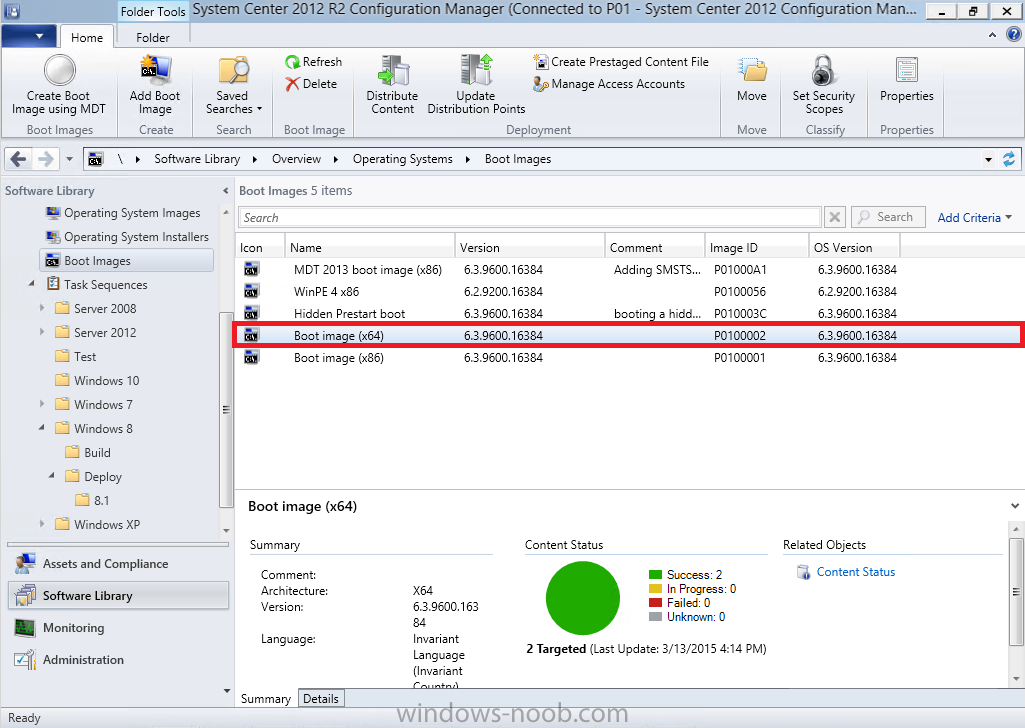
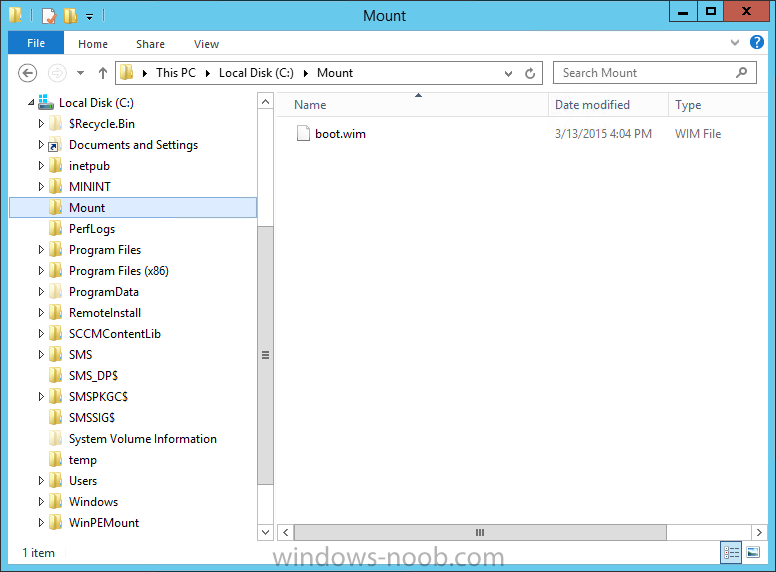
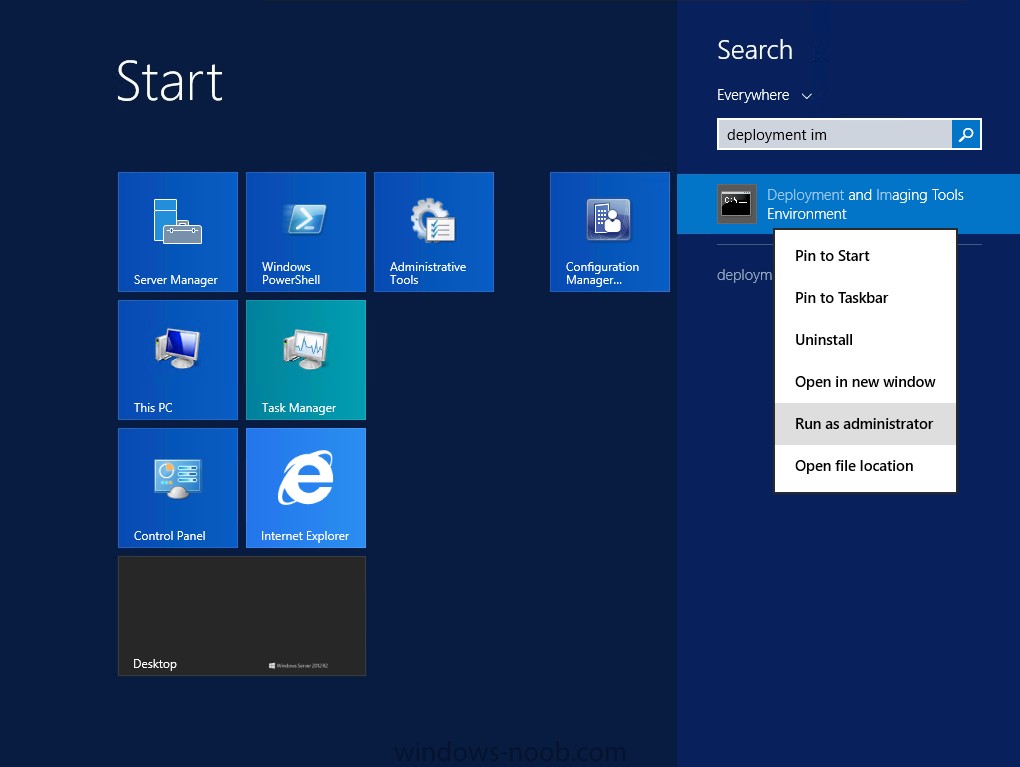
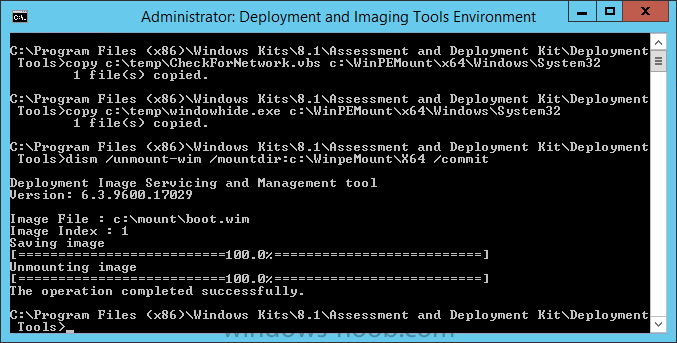
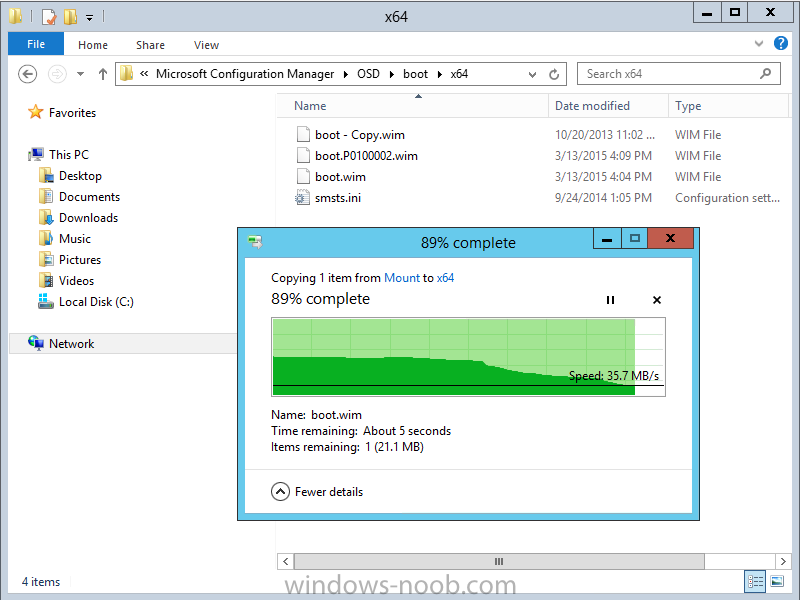
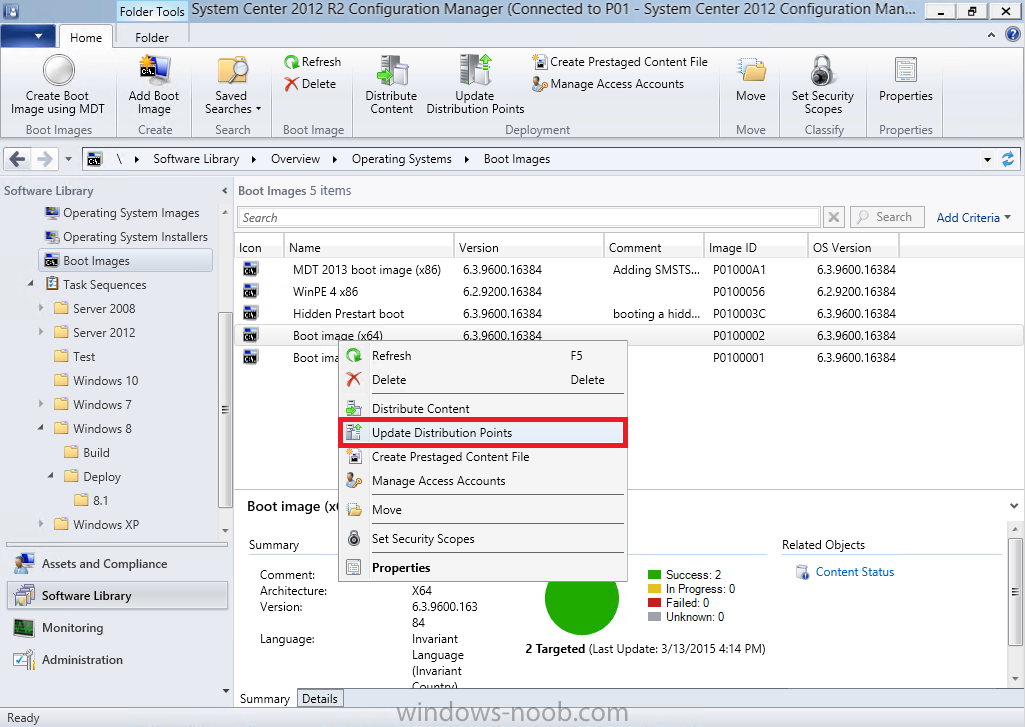
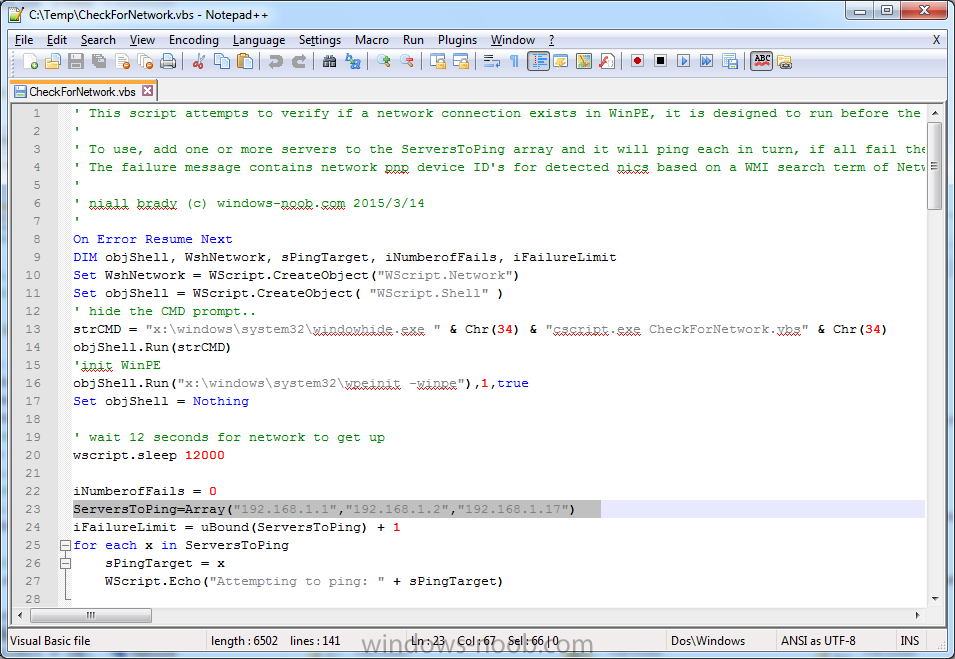
Introduction I've been thinking about doing something with this issue for some time now and finally got around to implementing it, however credit where credit is due I've based this on a method developed by a colleague of mine (Magnus Mourujärvi) to work with a 3rd party's custom boot wims. Basically that method is a registry hack which takes place in the boot wim. Problem We've all seen this happening, you get new hardware, you PXE boot, it pulls down the boot wim but as you don't have network drivers in your boot wim the task sequence won't run, or worse it just reboots without telling you why. checking the SMSTSLog will give you clues as to the problem... Troubleshooting it further would involve doing some clever use of wbemtest to find out what the network card pnp device id is in order to identify what the right driver is to be added into your boot wim. It was this process that I wanted to simplify, making it easy to identify the problem and the helping the user identify the Network card in question. Solution Add two files to your boot wim, update them to the distribution points and sit back and watch the show. Well ok, not quite that easy, there are some steps to do, documented below. Step 1. Get the script Note: there is a newer version of the script here which also checks for SATA connections (storage) Download the CheckForNetwork.vbs script here. Yeah it's a vbs, if I get time I'll convert it to PowerShell. CheckForNetwork.zip Extract it to C:\Temp In the script locate the ServersToPing array and edit it to match one or more servers you want to ping in your address, and save the script. Step 2. Copy a file from the MDT 2013 Toolkit Locate your MDT Toolkit files package and browse to the folder matching the architecture of the boot image you intend to edit, for example if you plan on editing the x64 boot wim then use a path similar to below: \\sccm\d$\sources\os\MDT 2013\Toolkit\Tools\x64 Locate a file called windowhide.exe and copy it to C:\Temp Step 3. Create some temp folders On the C:\ of your chosen server, create the following folder structure C:\Mount C:\WinPEMount\ C:\WinPEMount\X64 C:\WinPEMount\X86 Step 4. Make a copy of your boot wim Identify your target boot wim in the Configuration Manager console as shown below, this will be the boot wim we are going to make changes to... Right click the boot wim and select the data source folder, make a note of the Image Path Make a backup copy of the boot wim (ctrl+c and then ctrl+v) and then copy the boot.wim file (or WinPE.wim if it's a MDT created boot wim) to C:\Mount as shown below. Step 5. Mount the boot wim and make some changes Using Run as Administrator, start the Deployment Imaging and Tools Environment cmd prompt as shown below In the CMD Prompt that opens, mount the boot wim by issuing the following command: dism /mount-wim /wimfile:c:\mount\boot.wim /index:1 /mountdir:c:\winpemount\x64 Tip: In the above command i'm mounting a Configuration Manager boot image called boot.wim, if this was a MDT Created boot image it would be named WinPE.wim. Now that the boot image is mounted, we can make our modifications. First we will edit a registry key but to do that, we need to mount it. Using REG.exe mount the SYSTEM hive of the mounted boot wim REG.EXE load HKEY_LOCAL_MACHINE\Mount\ "C:\WinPEMount\X64\Windows\System32\Config\SYSTEM" Once done, change the current value for CmdLine in the mounted registry hive to run our script instead reg add "HKEY_LOCAL_MACHINE\Mount\Setup" /v CmdLine /t REG_SZ /d "cscript.exe CheckForNetwork.vbs" /f Next we commit those changes to the mounted registry REG.EXE unload HKEY_LOCAL_MACHINE\Mount and now we copy two files from C:\Temp to C:\WinPEMount\X64\Windows\System32 (assuming you are editing the x64 boot image) copy c:\temp\CheckForNetwork.vbs c:\WinPEMount\x64\Windows\System32 copy c:\temp\windowhide.exe c:\WinPEMount\x64\Windows\System32 Now that we've made our changes, we want to commit them to the boot wim (write the changes) dism /unmount-wim /mountdir:c:\WinpeMount\X64 /commit as shown below Step 6. Copy the modified boot wim back to the Image Path in Step 4. Now that we've made the changes we need, copy the modified boot wim from C:\Mount back to it's original location Step 7. Update your boot image to the distribution points In the Configuration Manager console, locate your boot image, right click and update it to the distribution points as shown below Once done you are ready to test the new functionality in the boot image. Step 8. Review the changes If the network works ok in WinPE, the task sequence will load as normal and you won't see any popup, or notice anything other than an additional 12 seconds added to your boot time. However, in the event that you have no network and cannot ping any server in the array of server IP's listed in the script, you will see the following warning popup after WinPE starts (before the PXE password and before a task sequence is selected). Note: The script try's to hide Wireless nics from being displayed in the results as we don't use wireless nics for OSD, yet. As you can see from the message it provides the following info a reason for the popup (no network connectivity) lists the detected Network Card lists the PNP Device ID identifies the Computer model and gives the user some options click YES to retry (for example if the network cable was not connected) click CANCEL to open a CMD prompt if further troubleshooting is needed click OK to reboot. Below you can see what happens when the user clicks on Cancel well that's it ! have fun :-) cheers niall


 1 point