anyweb
-
Posts
9,108 -
Joined
-
Last visited
-
Days Won
363
Everything posted by anyweb
-
 and here's a video I did when a root cert expired -
 -
renewing certificates isn't so bad, have a read of my guide here > https://www.niallbrady.com/2020/08/16/how-can-i-replace-an-expired-iis-certificate-in-a-pki-enabled-configmgr-environment/
-
can you please show me a screenshot of where you are seeing this error ?
-
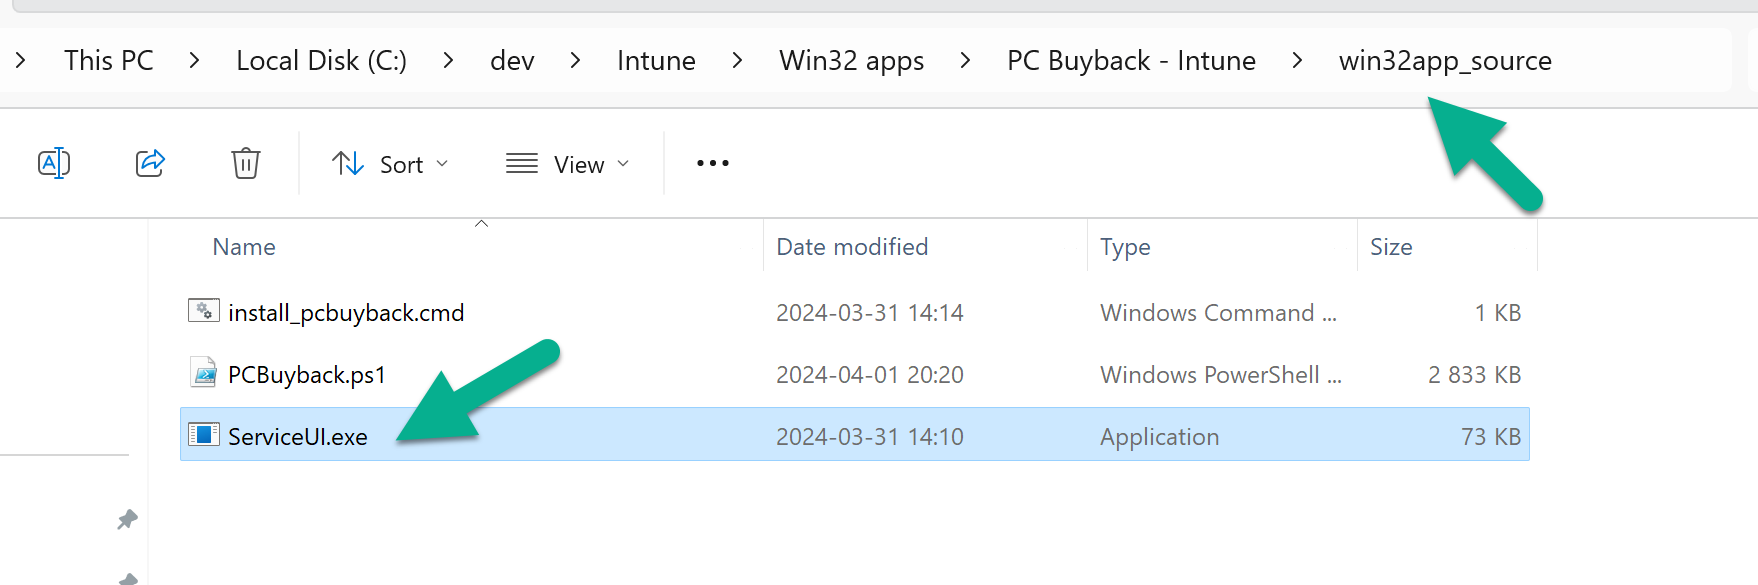
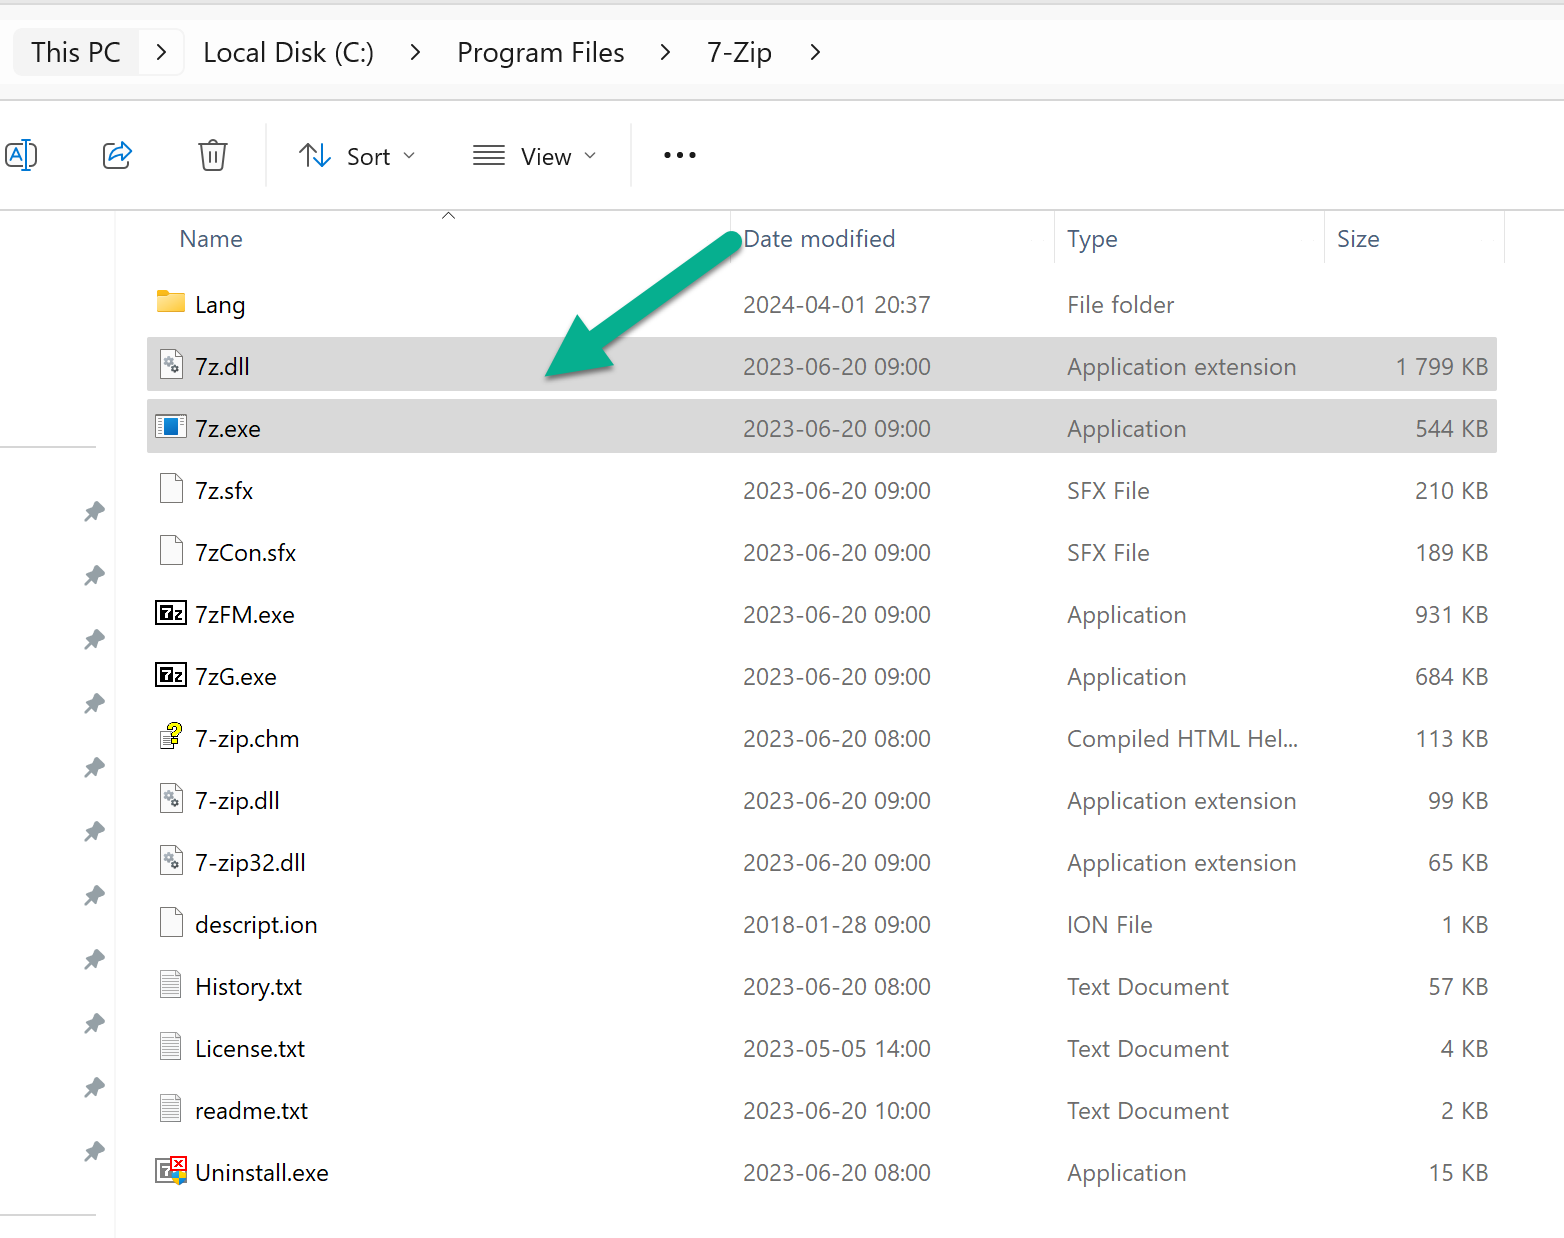
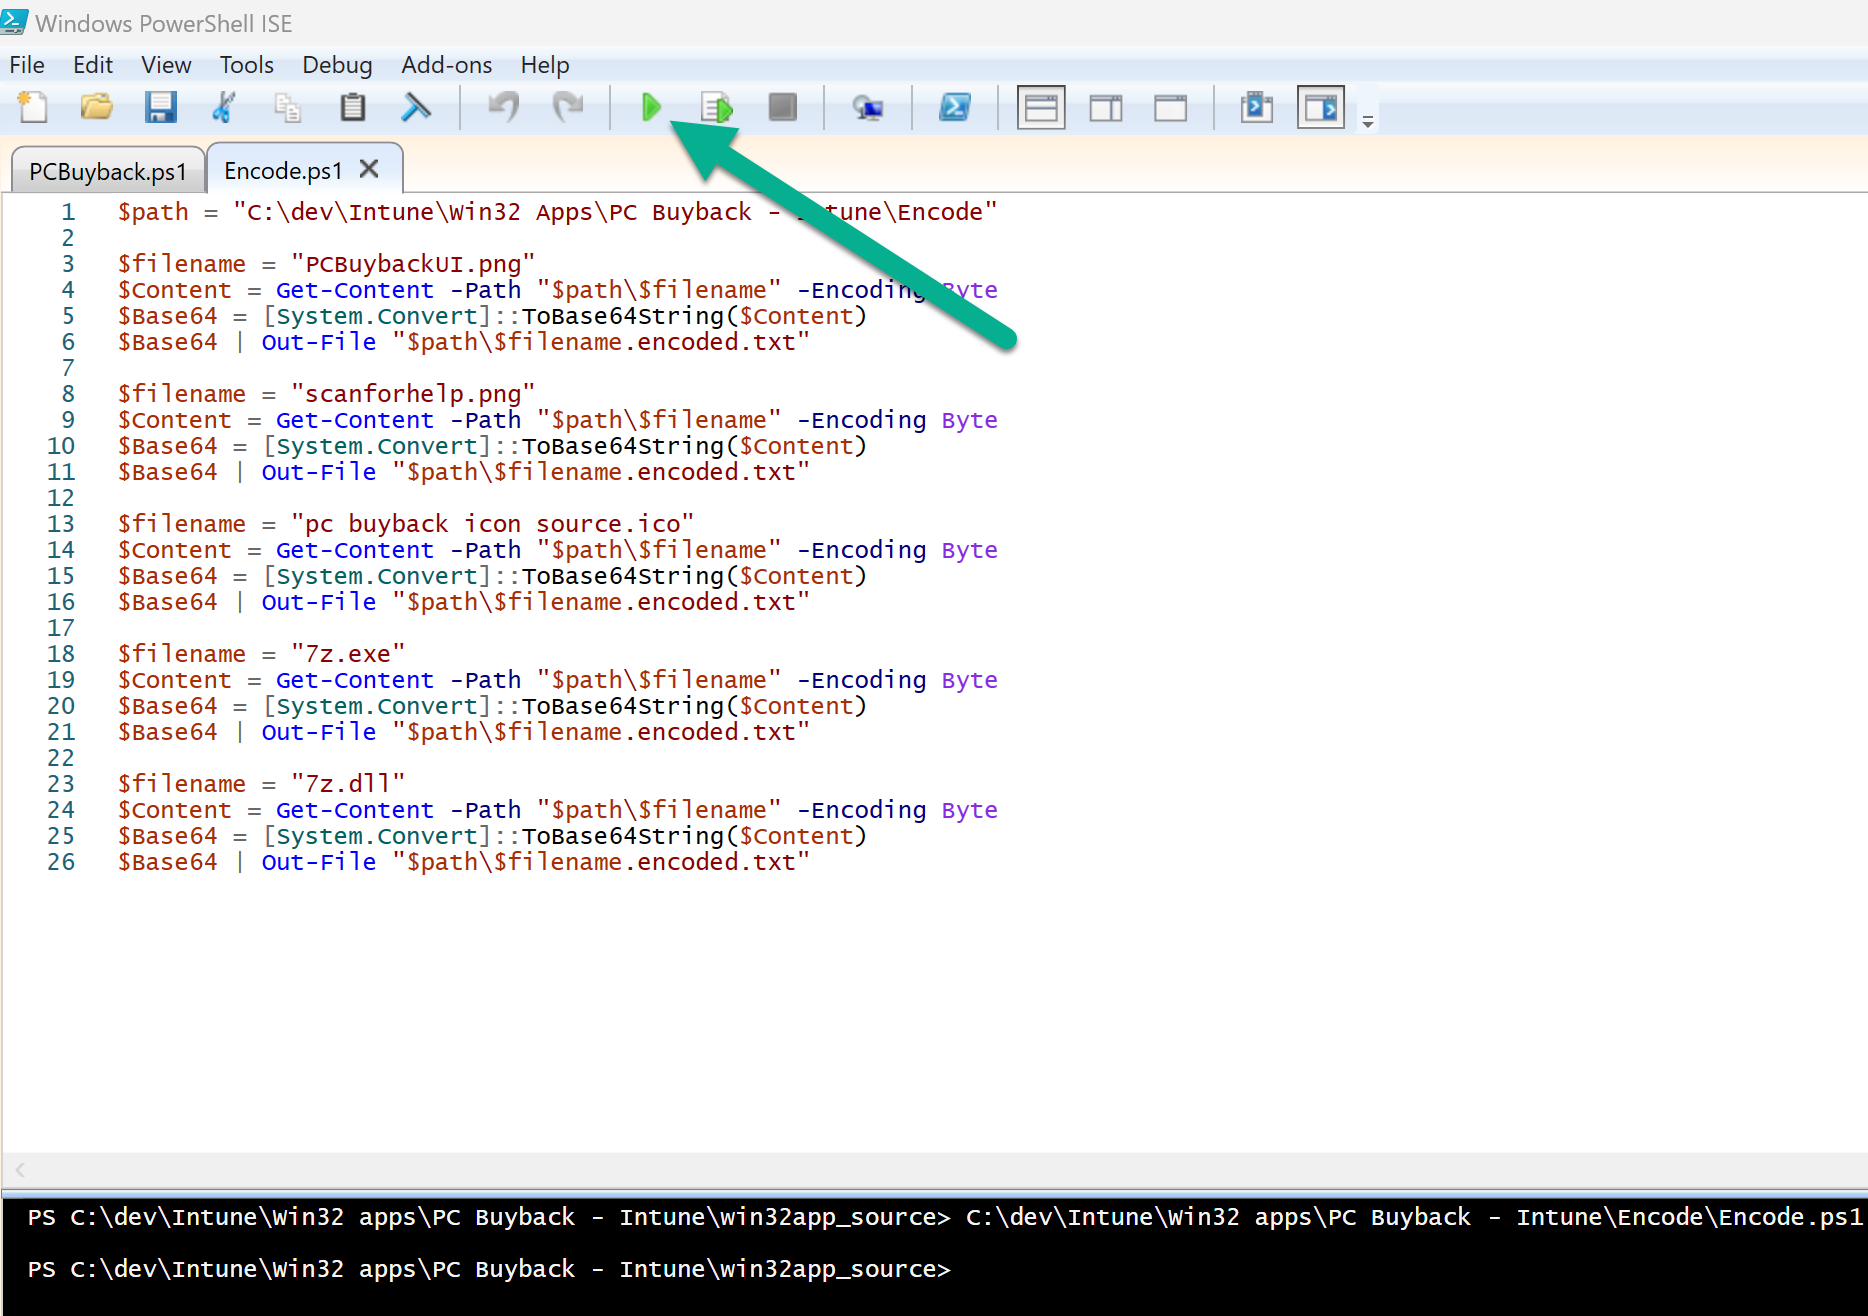
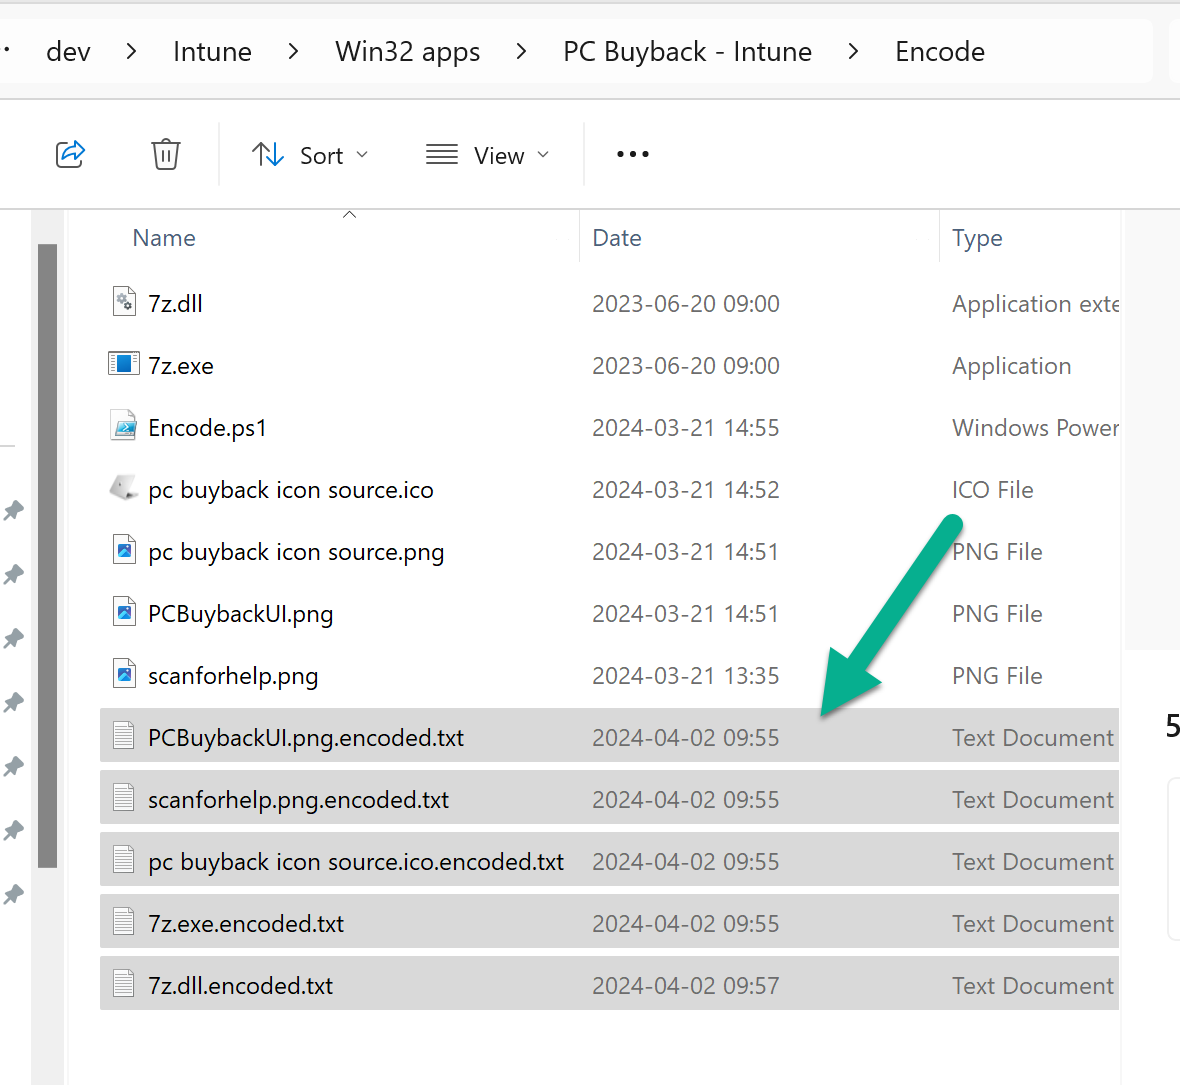
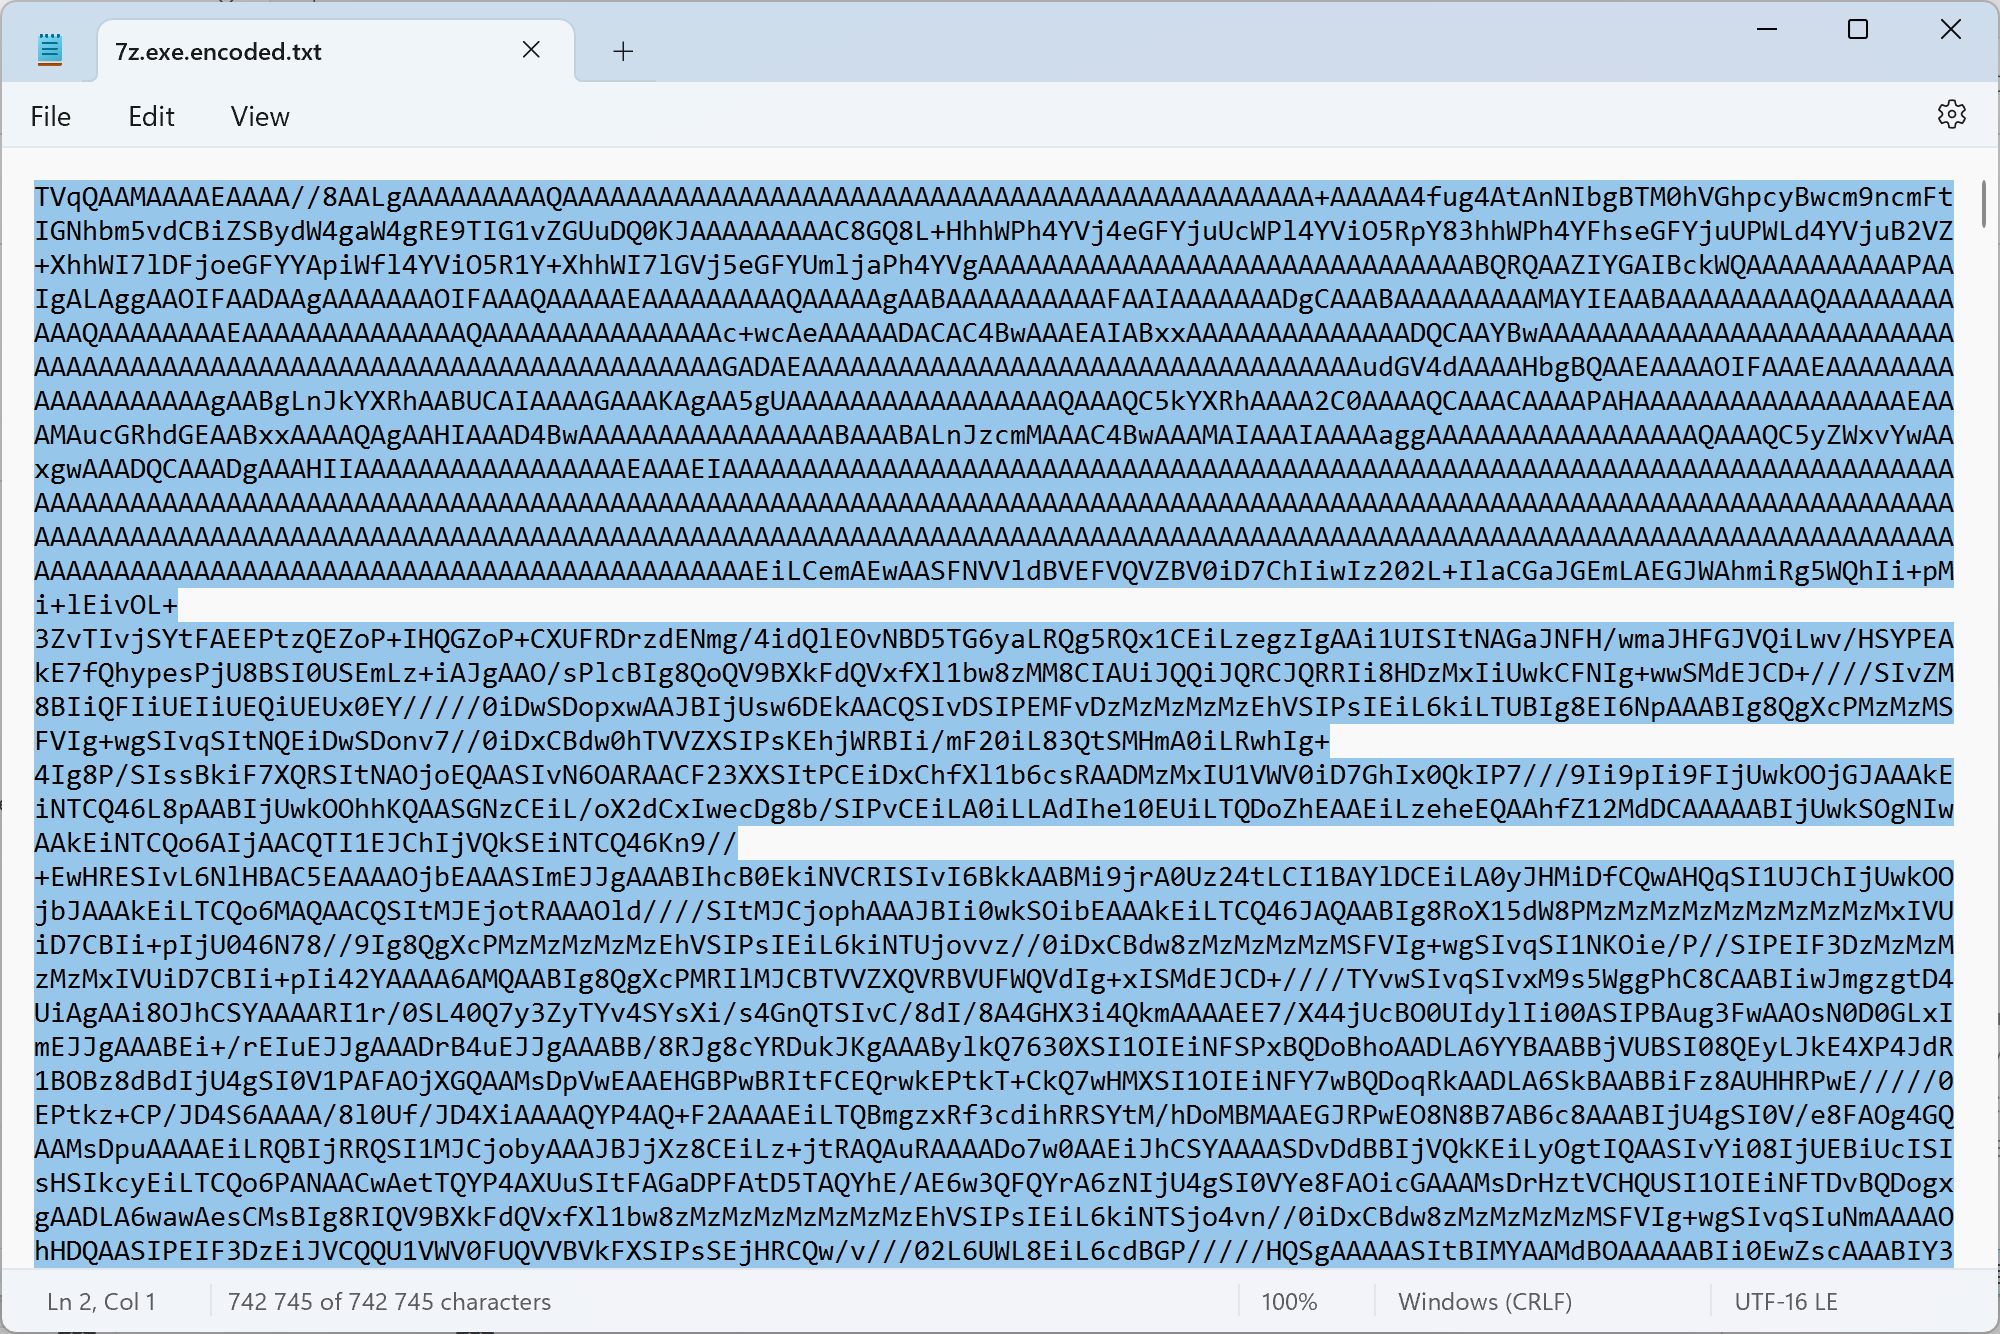
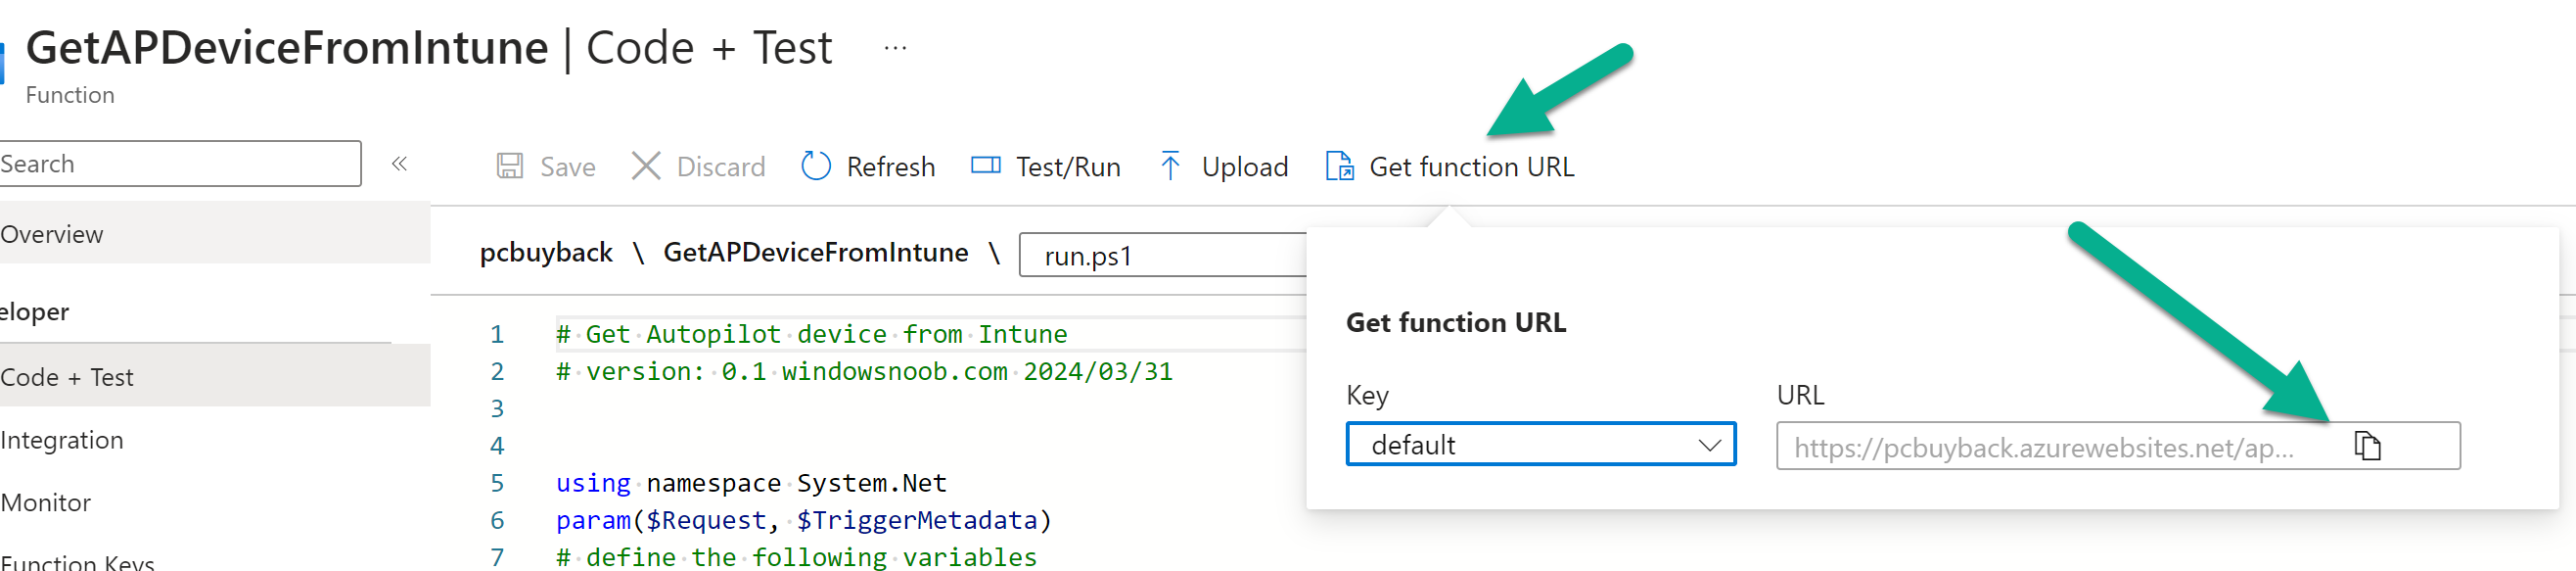
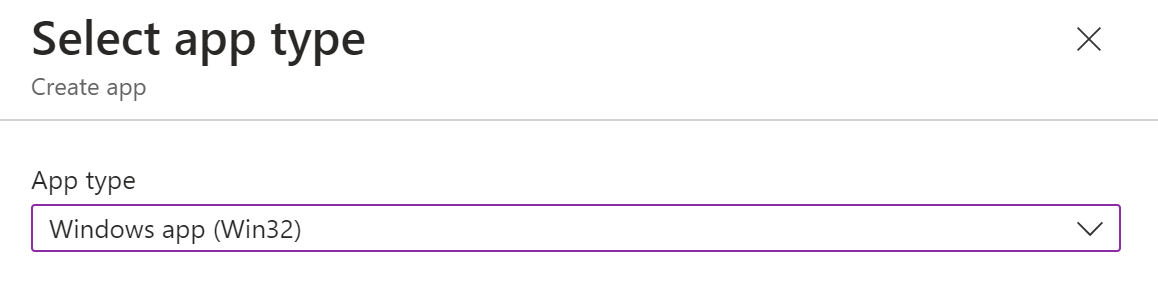
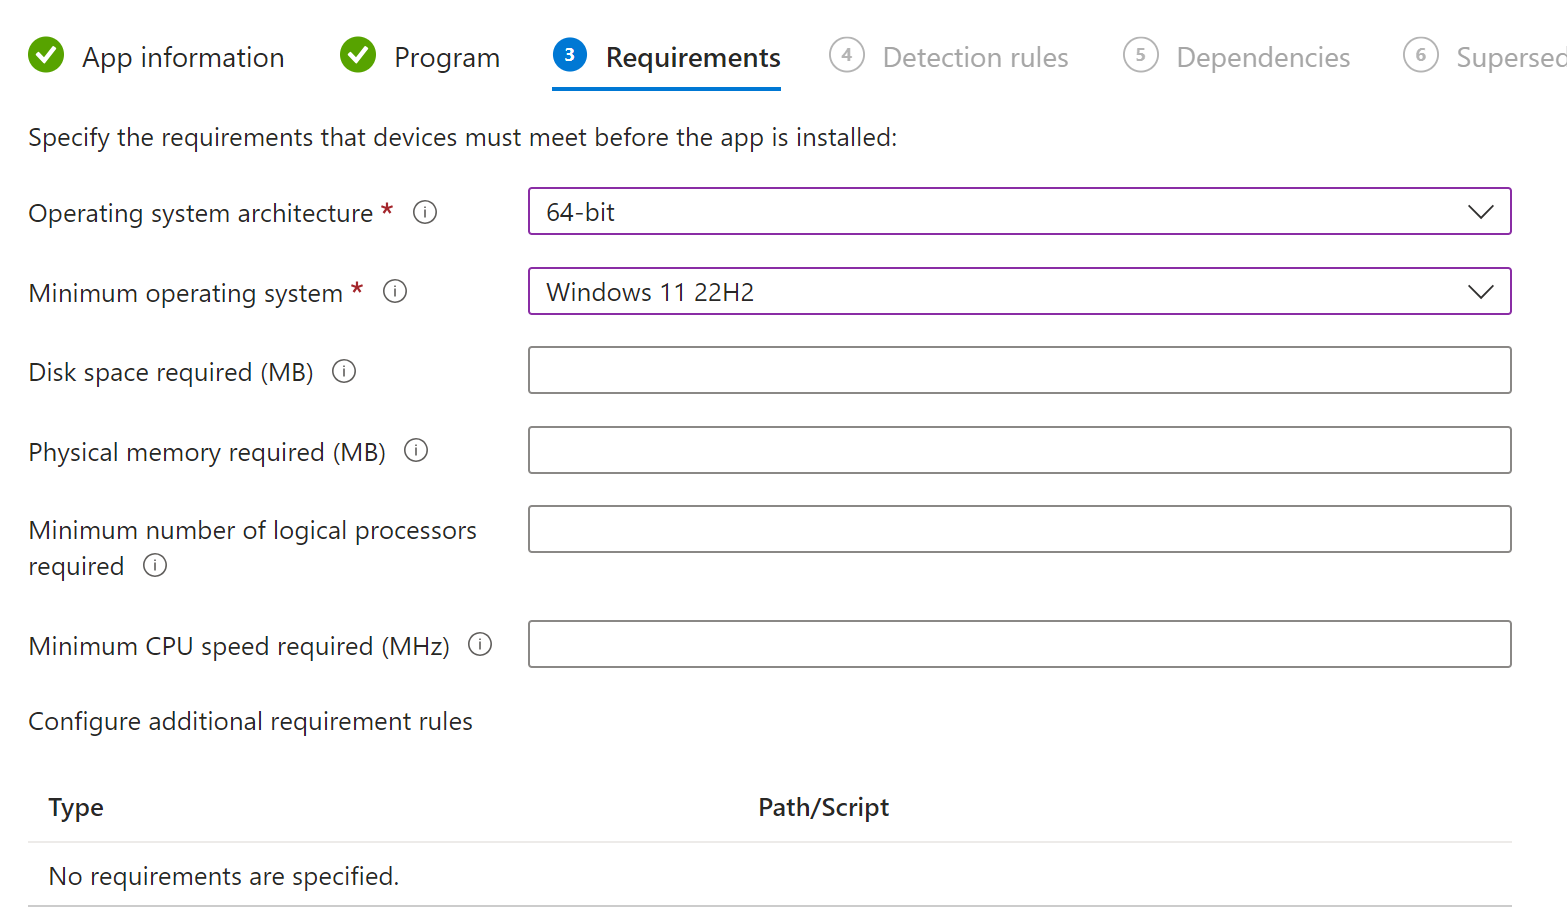
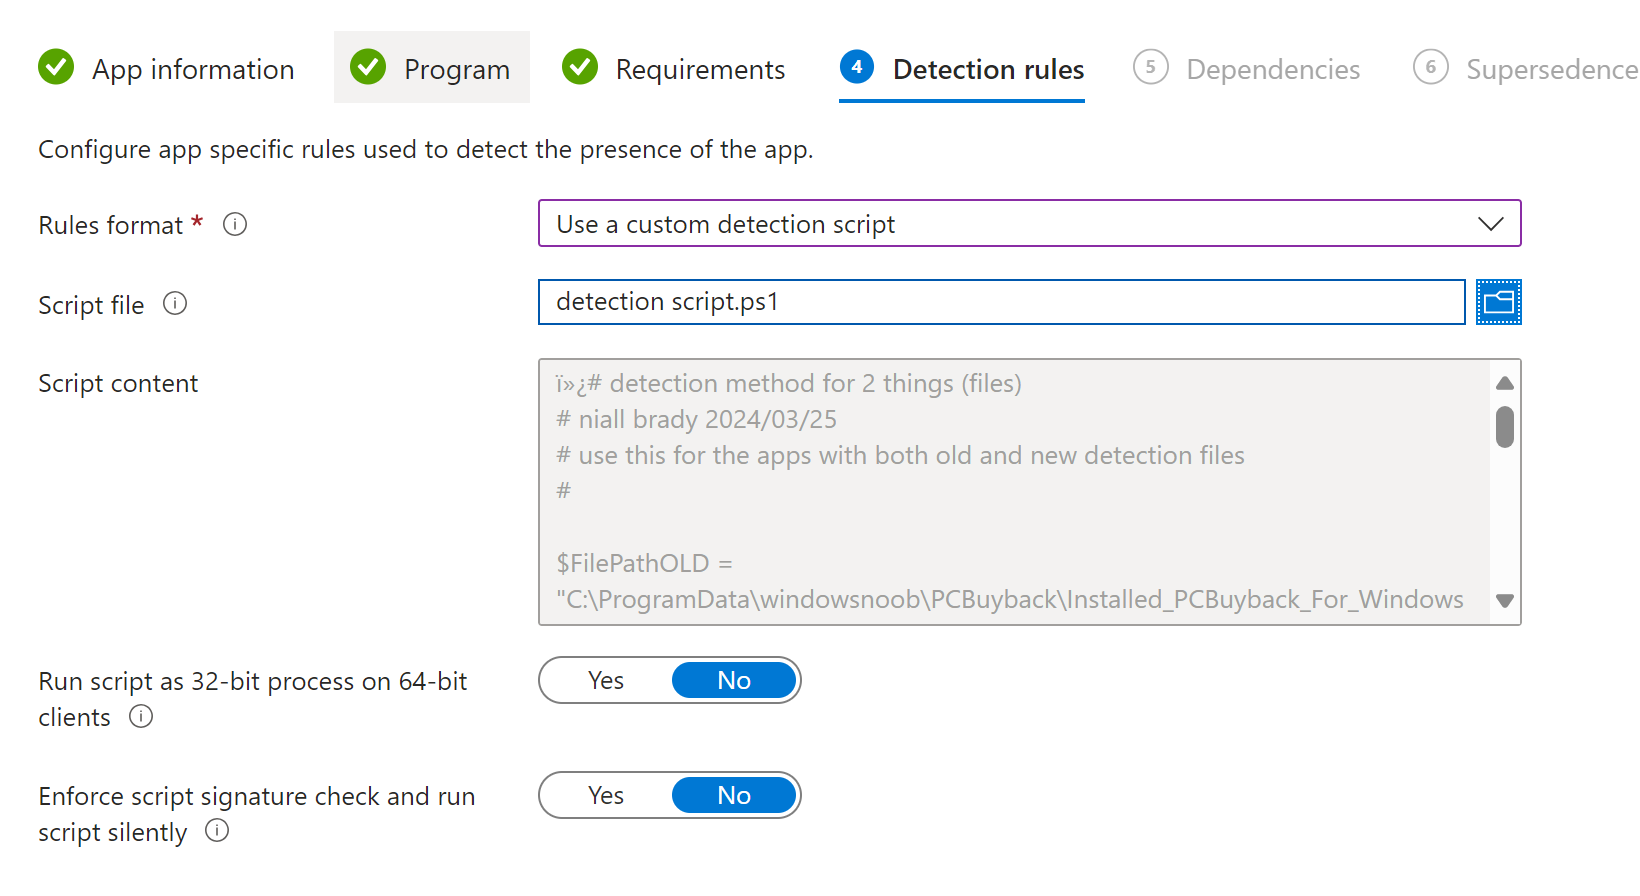
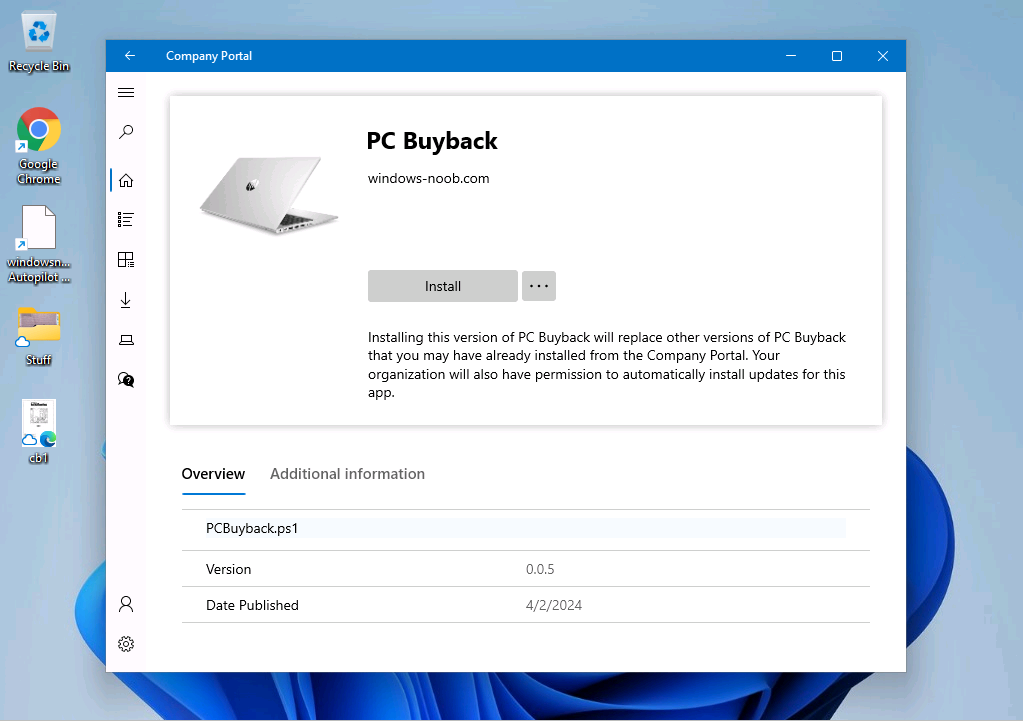
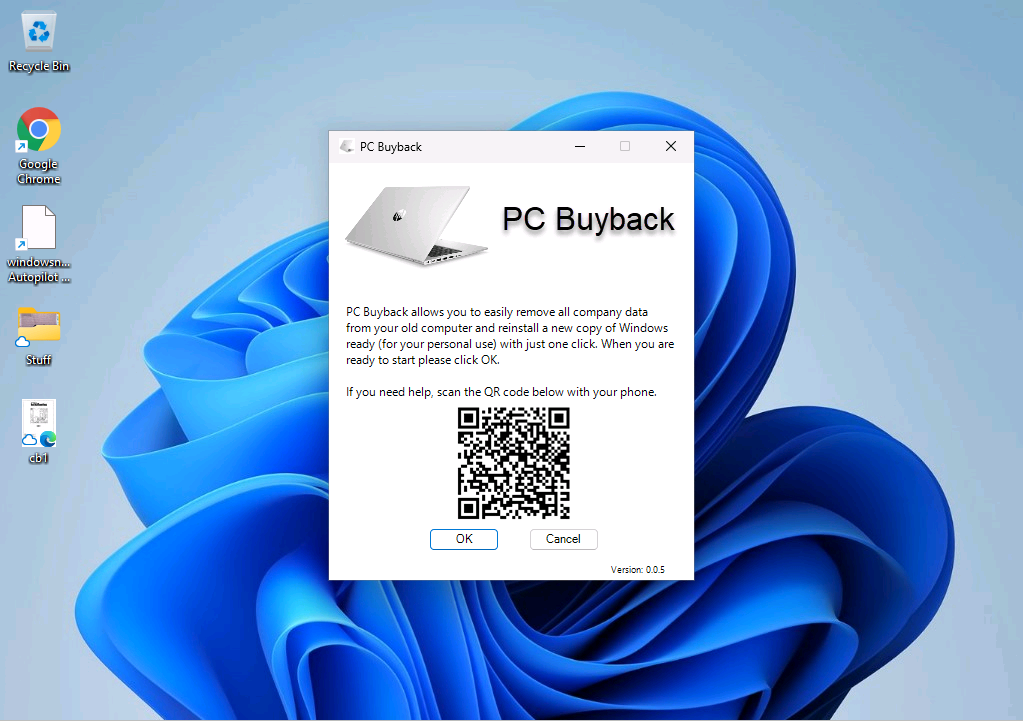
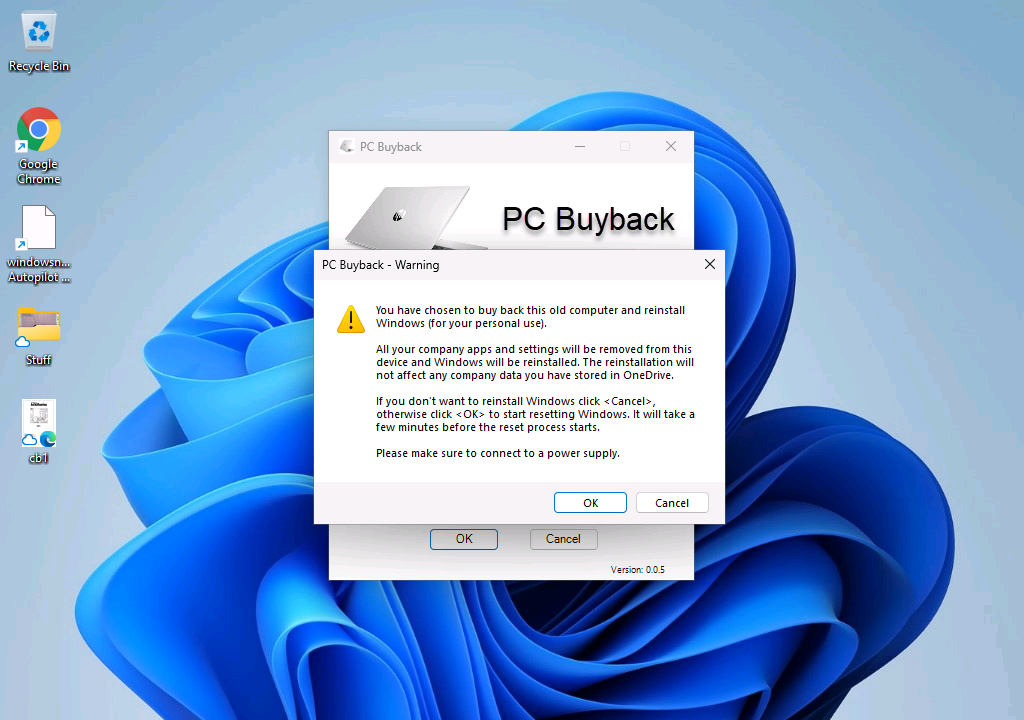
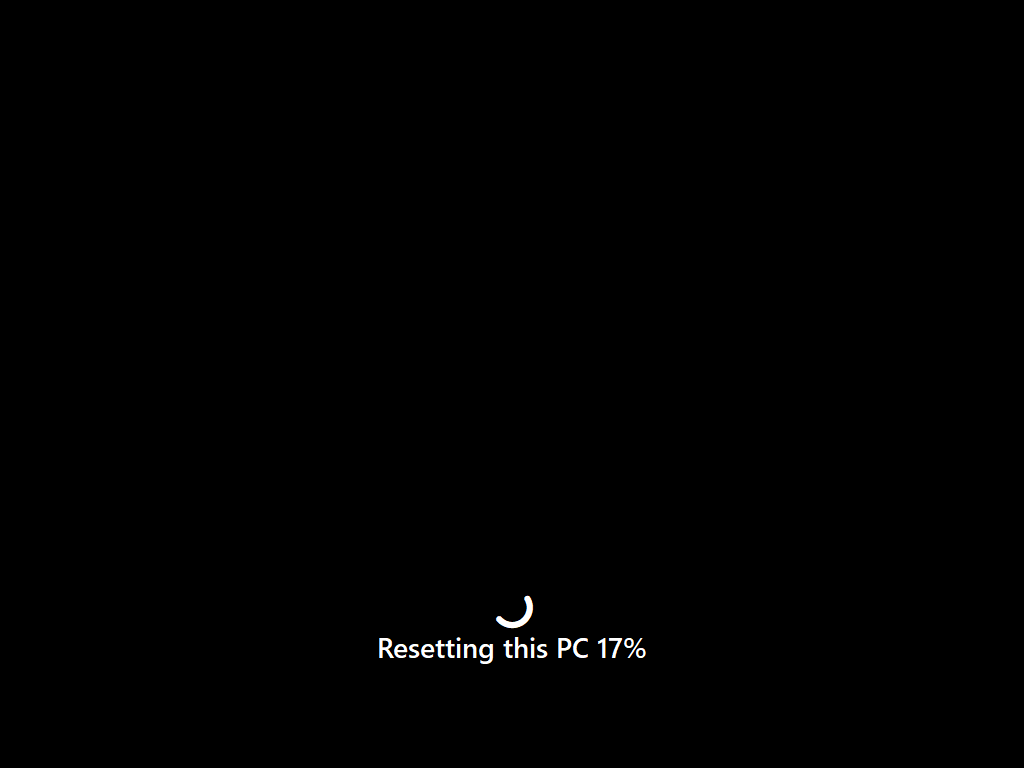
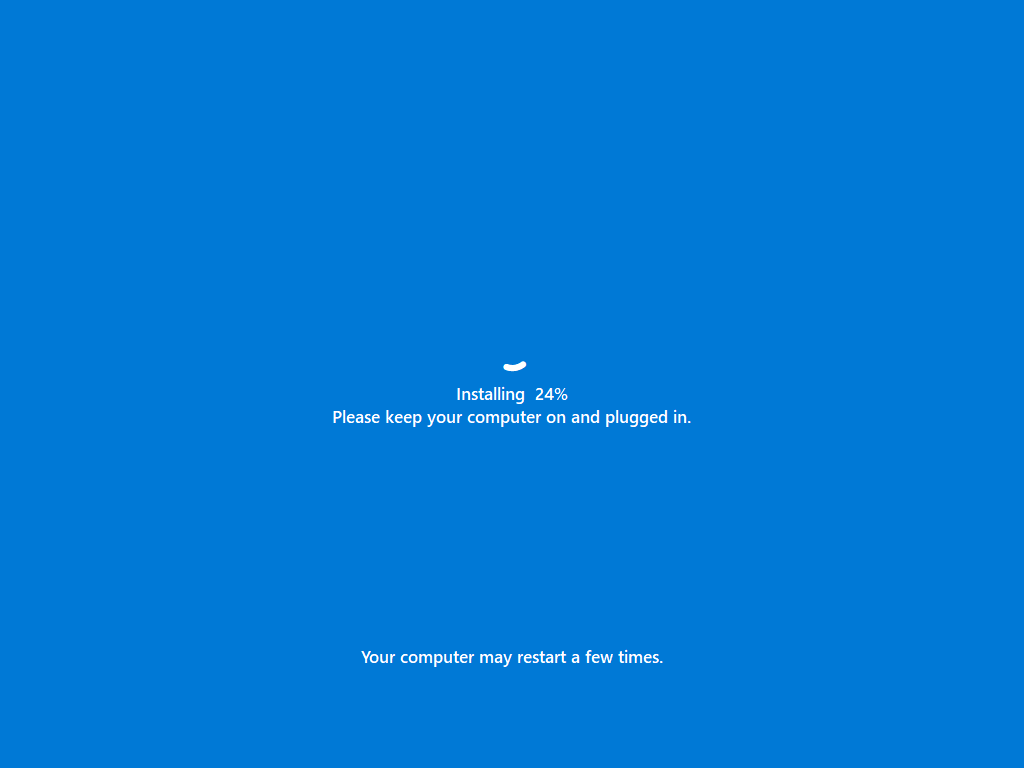
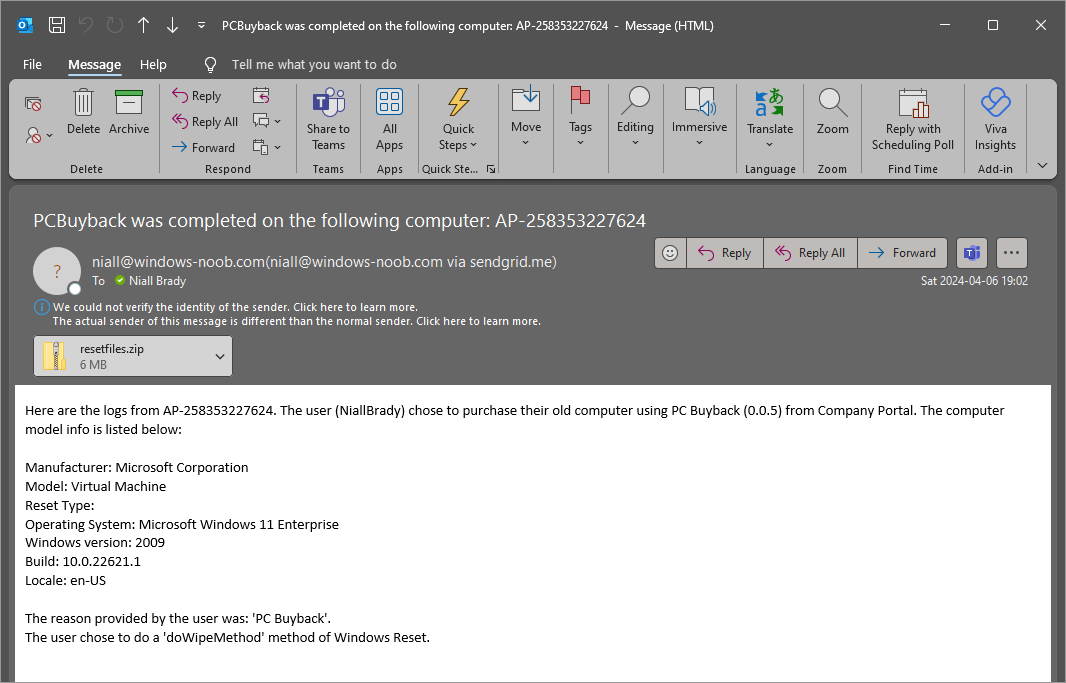
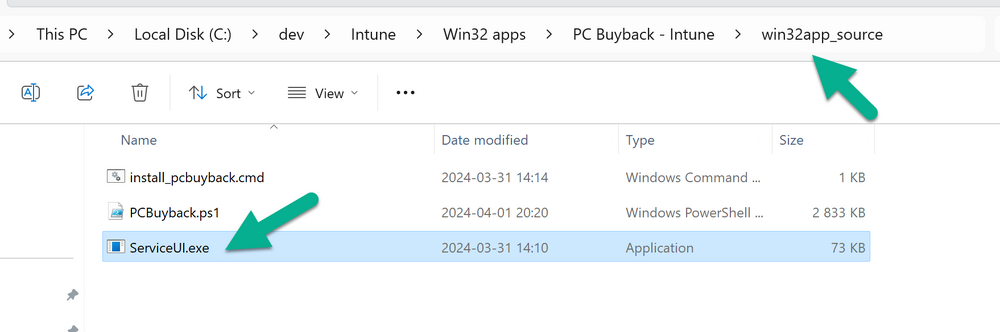
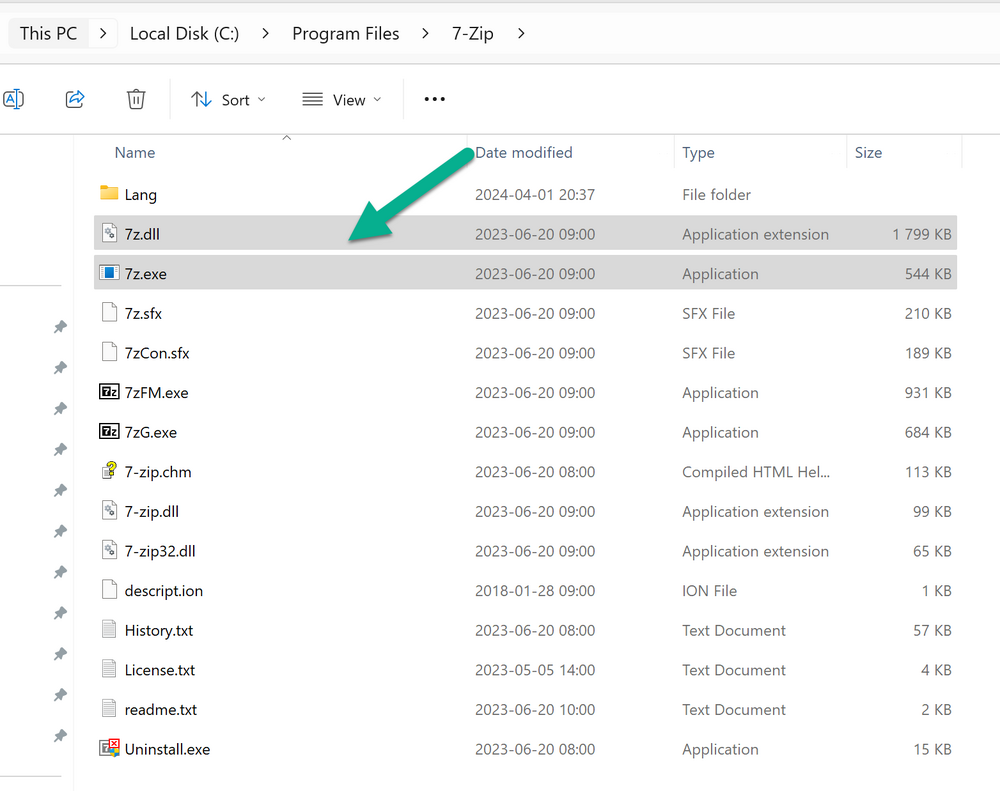
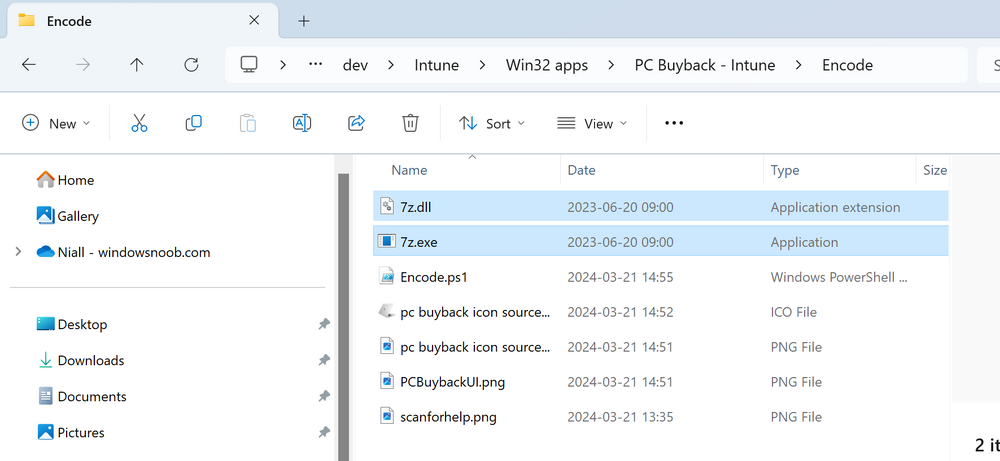
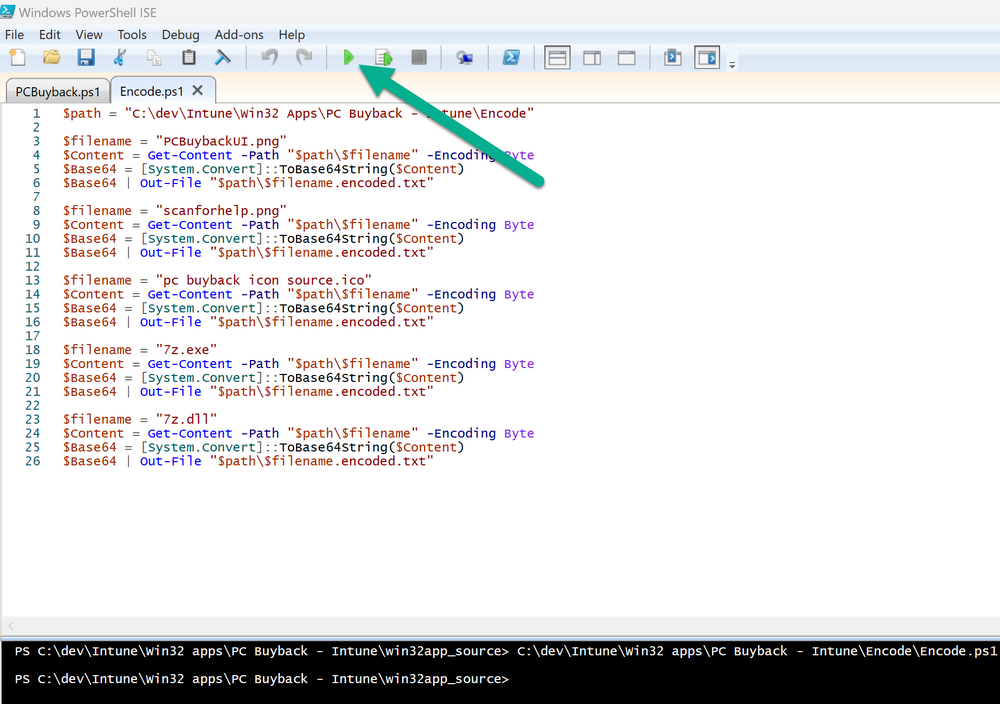
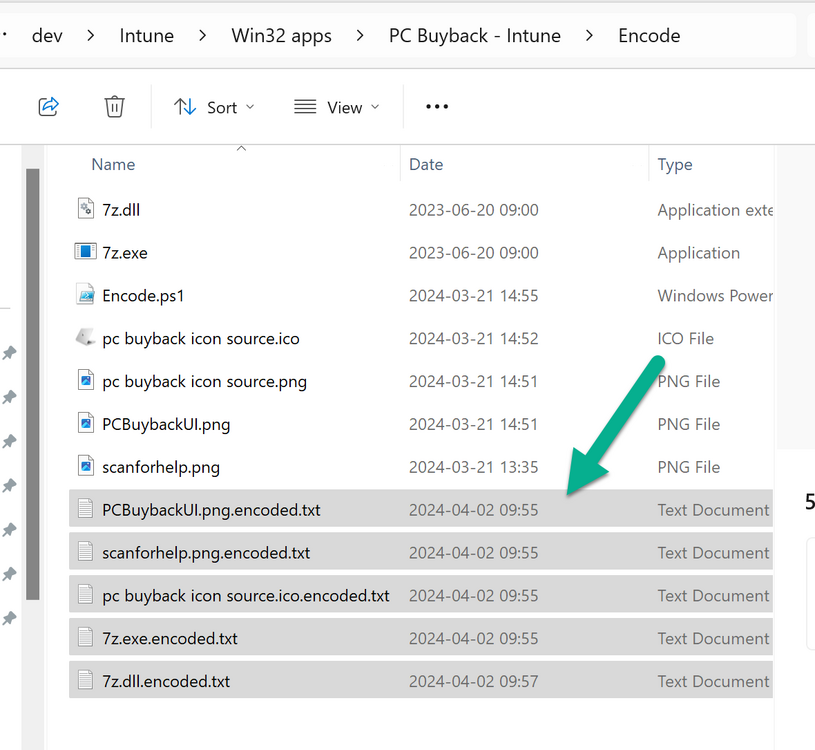
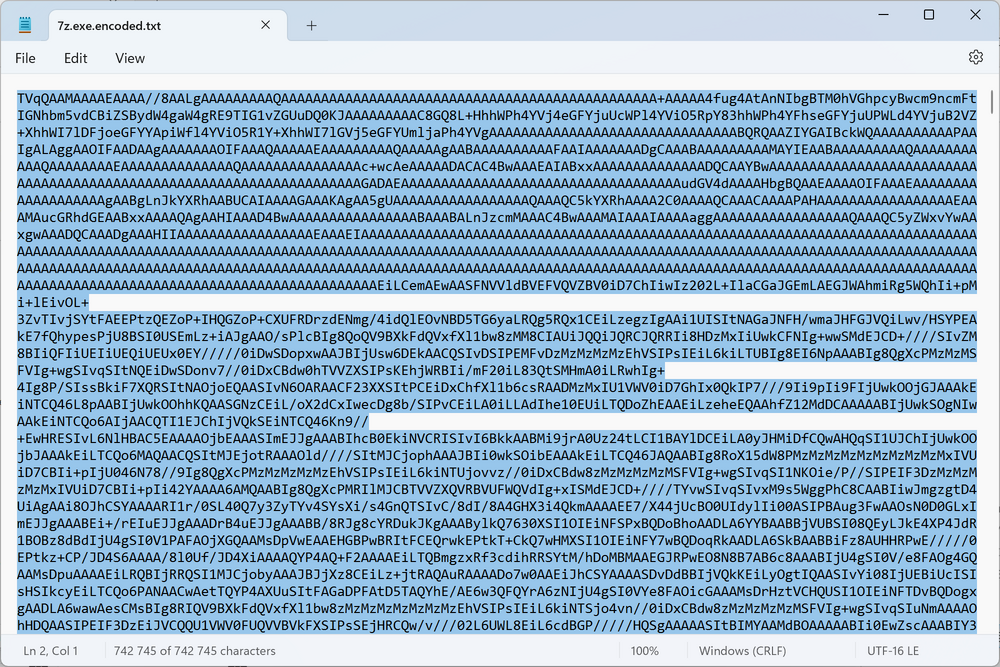
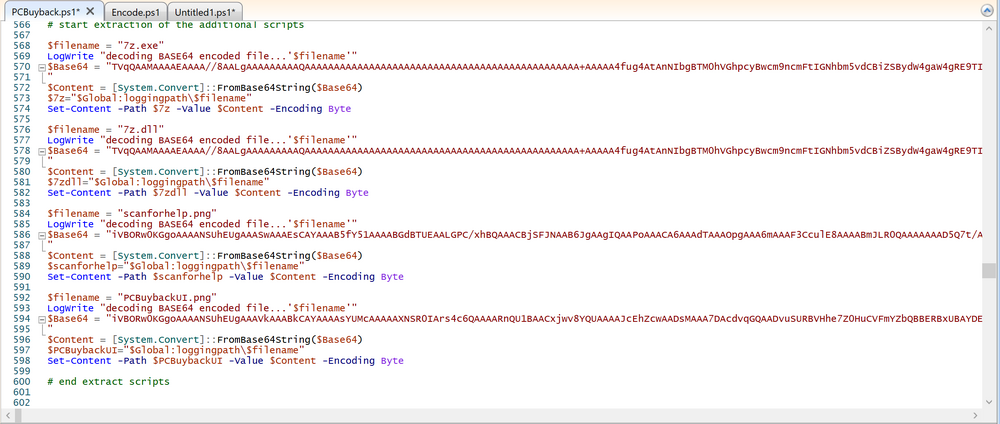
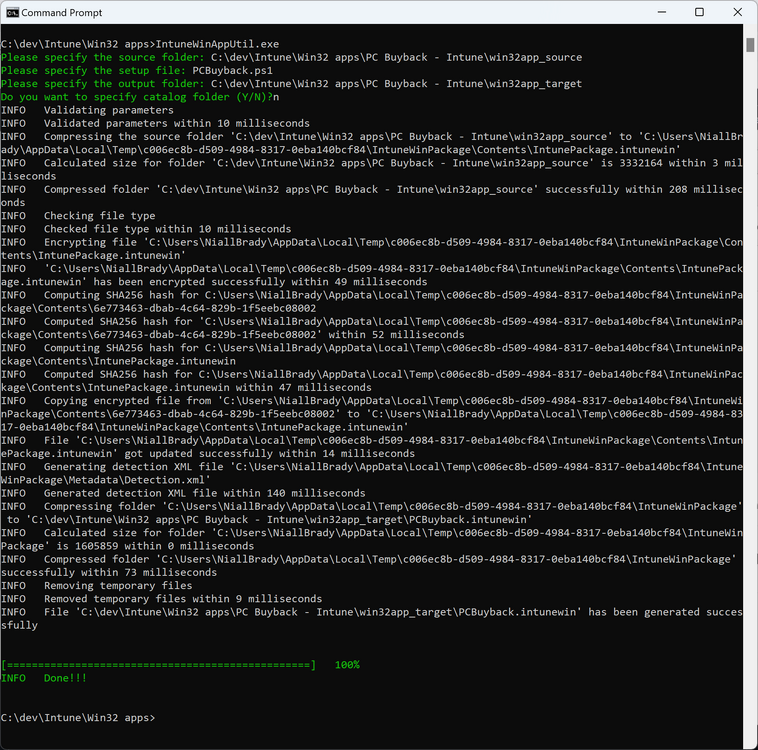
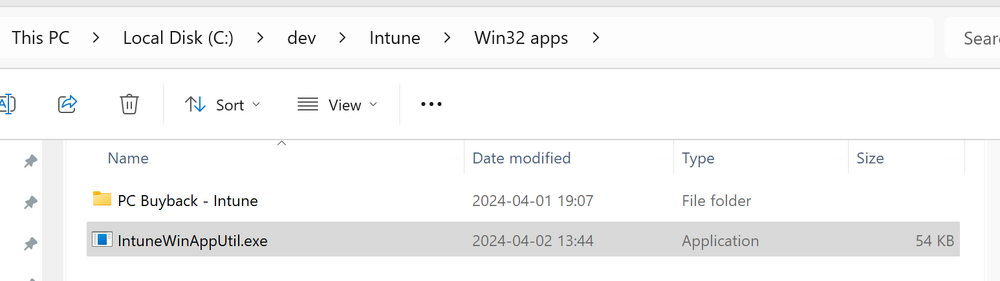
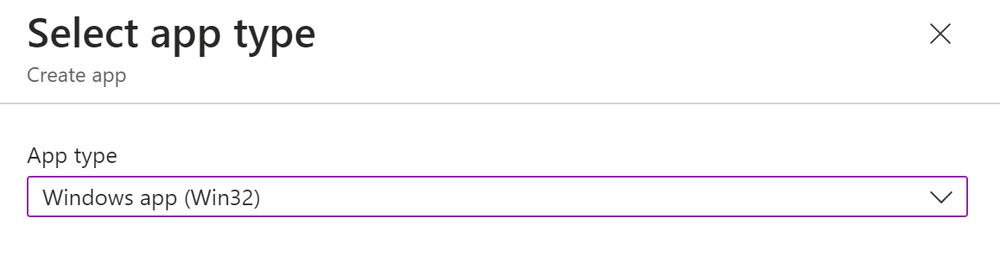
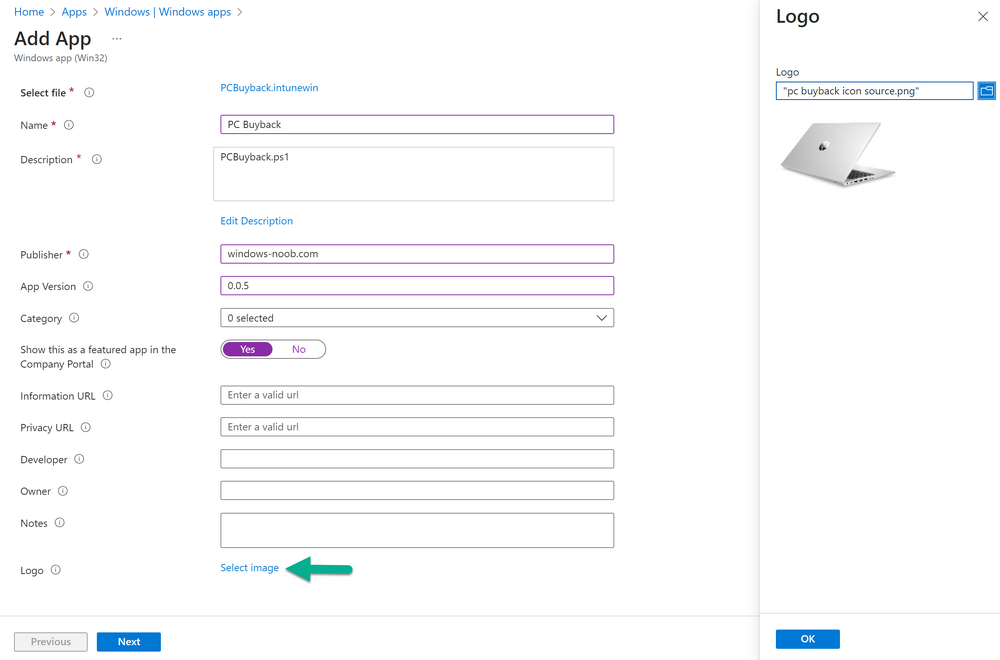
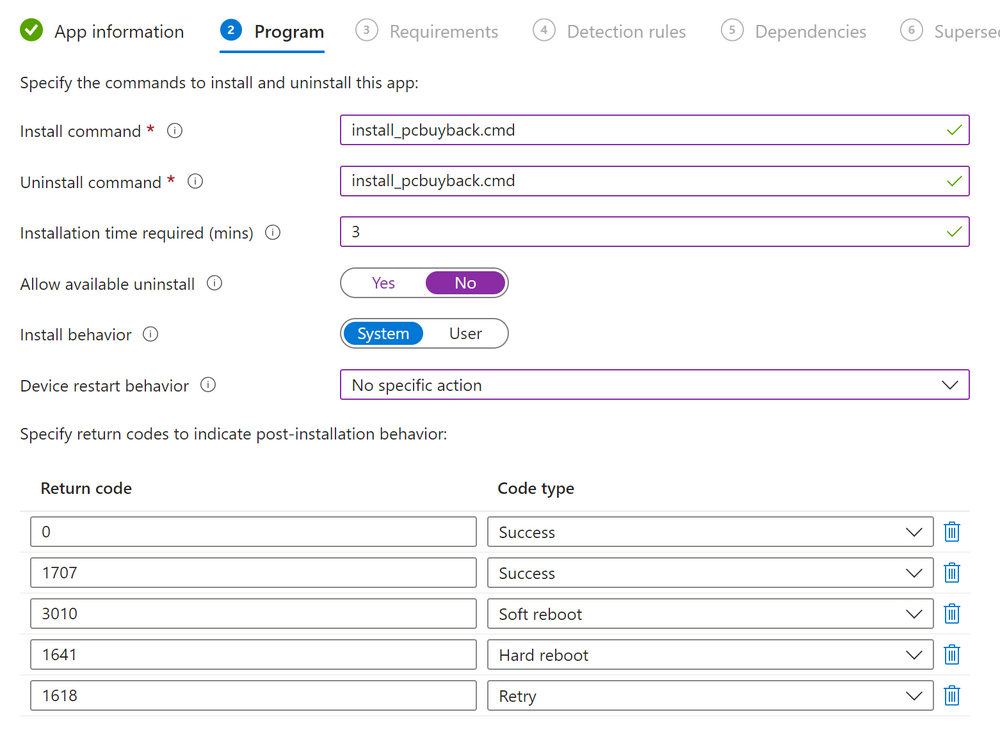
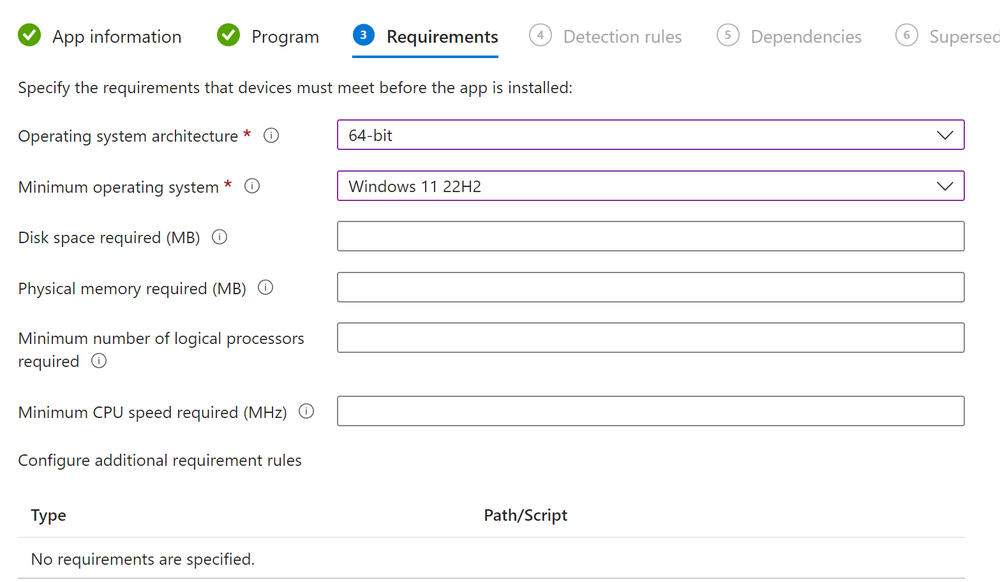
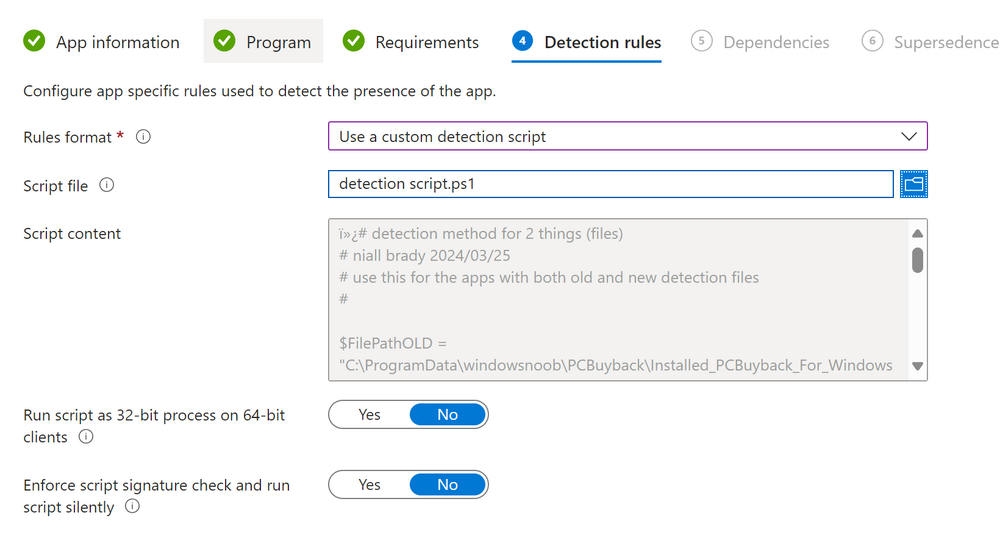
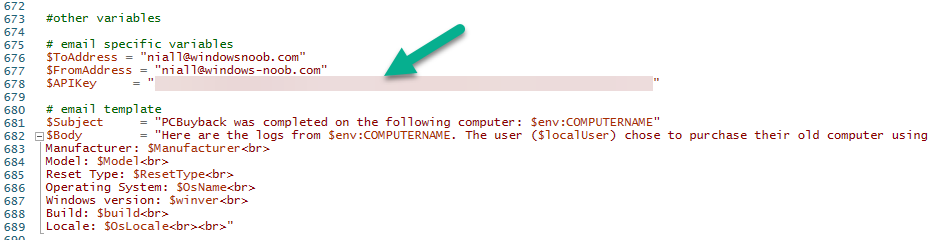
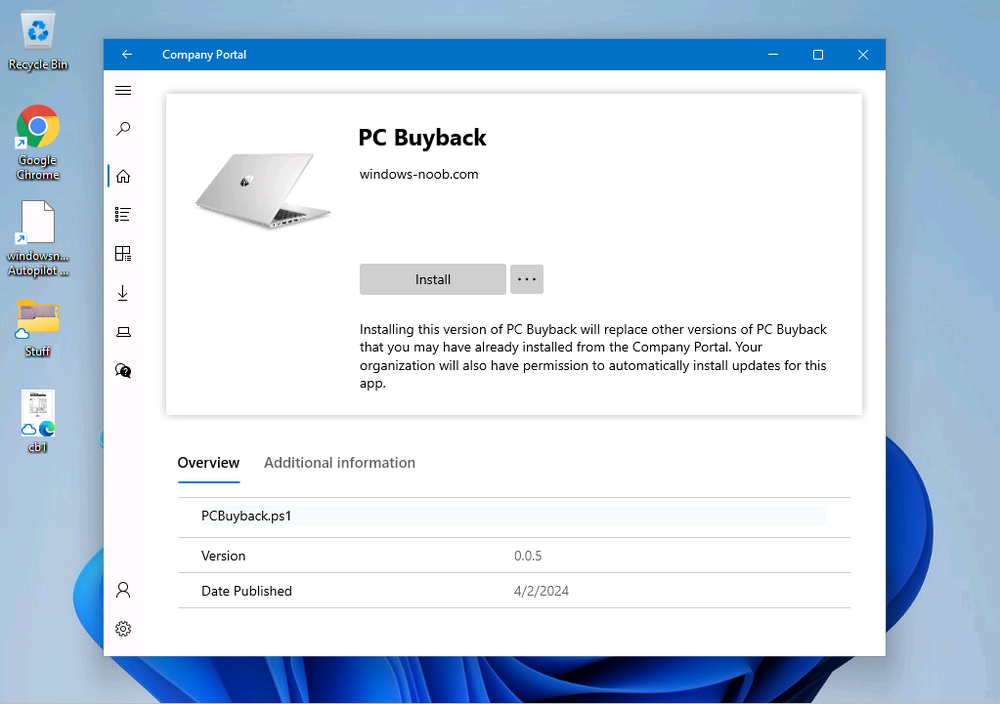
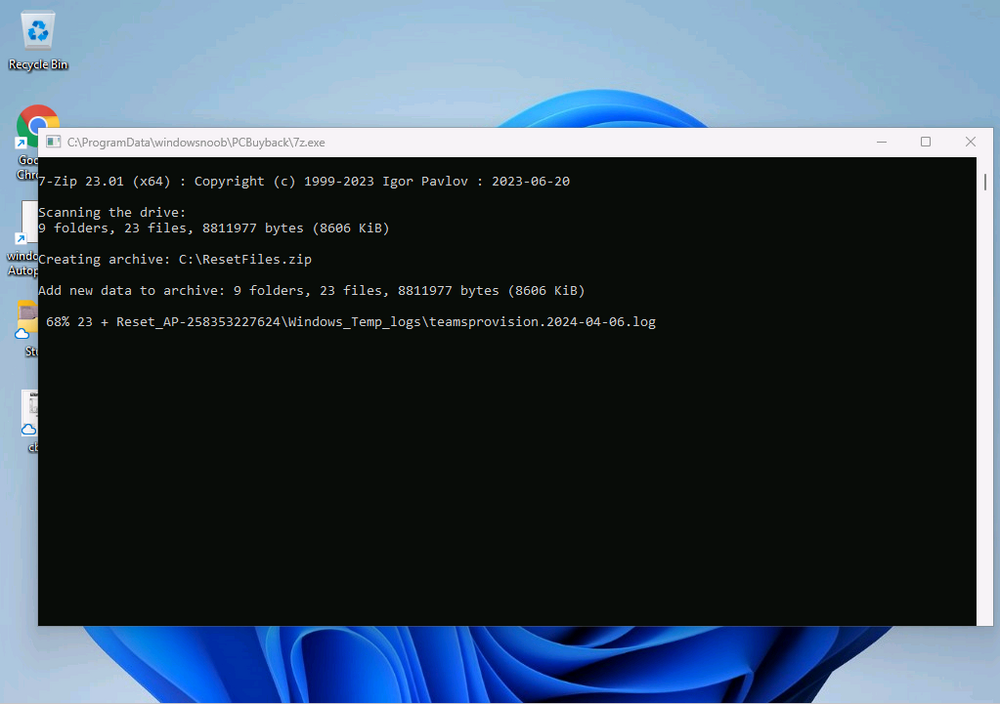
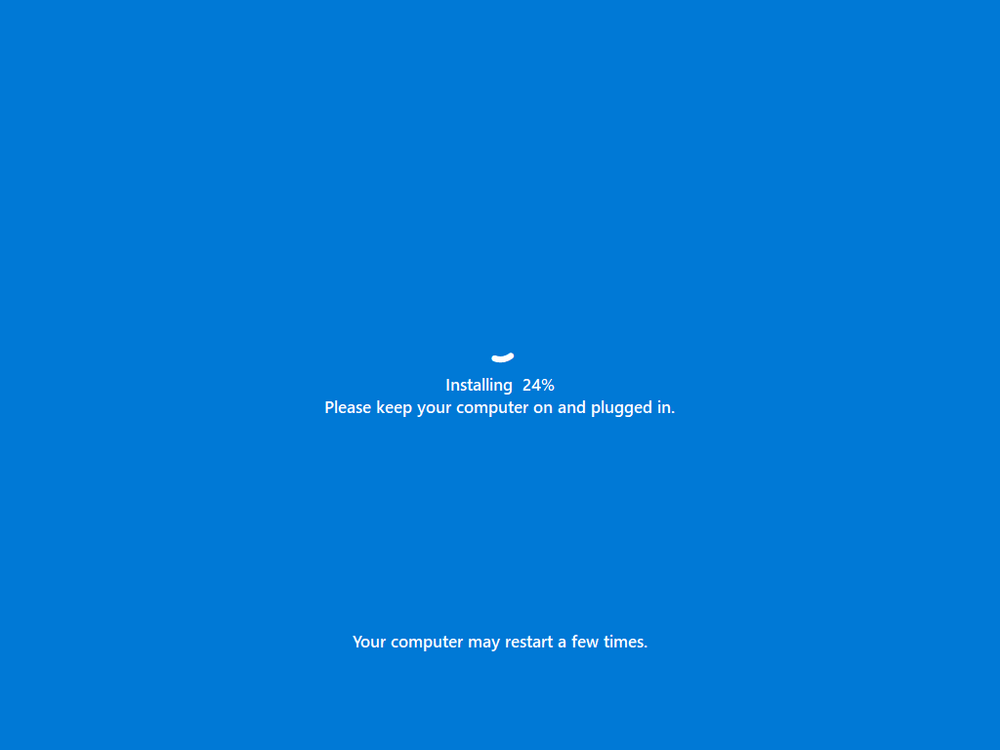
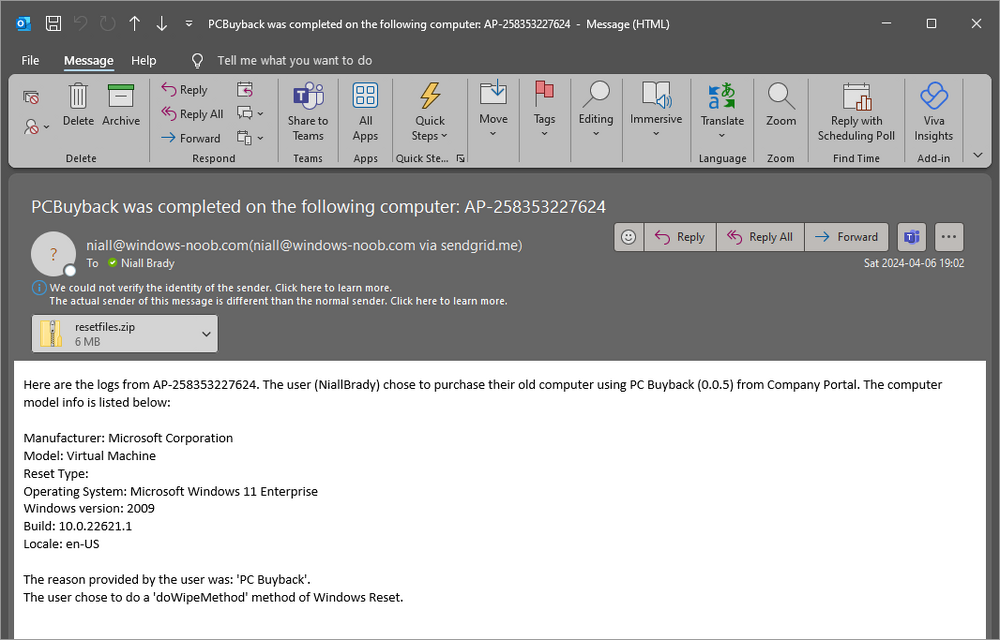
Introduction In part 1 I showed you how to prepare Azure for the PC Buyback app, in this part we'll add the Win32 app, deploy it and see how it behaves on a Windows Autopilot registered device. Step 1. Download the scripts Download this zip and extract to C:\Dev\Intune\Win32 apps Note: you must be a logged on member of windows-noob.com to download the ZIP PC Buyback - Intune.zip Step 2. Get ServiceUI.exe from MDT You'll need the ServiceUI.exe executable file to display user interfaces (UI) to end users when operating in SYSTEM context. To get the file, download and install MDT somewhere and navigate to C:\Program Files\Microsoft Deployment Toolkit\Templates\Distribution\Tools\x64. To download MDT click here. Copy the 64 bit version of ServiceUI.exe file to your extracted win32app_source folder so it looks like this. Step 3. Get 7Zip for compressing files Download 7Zip and install it. Copy 7z.dll and 7z.exe from the default folder C:\Program Files\7-Zip Copy those 2 files to C:\Dev\Intune\Win32 apps\PC Buyback - Intune\encode In PowerShell ISE run the Encode script.. After it is completed encoding the files, you'll have a bunch of additional text files in the encode folder. Open each text file using notepad, press CTRL+A to mark all the text, then copy using CTRL+C and paste the content of each file using CTRL+V into the corresponding section of the PCBuyback.ps1 script as shown below. Note: The QR code used in the PC Buyback app points to part 1 of this blog series, but you can customize it to point to an internal knowledge base article to assist users with the entire process. One thing to keep in mind, I used https://www.qr-code-generator.com to create the QR code, but after creating it, you'll need to resize it to 118x120 pixels (in MS paint or similar). Step 4. Modify variables In the PCBuyback.ps1 script, configure the following email related variables: $ToAddress $FromAddress $APIkey Next, copy the Function URL for each of the http triggers you created in part 1, below shows you how to do that paste those URLs into the corresponding variable in the script Save the changes to the PCBuyback.ps1 script. Step 5. Get the Microsoft Win32 content prep tool Download the Win32 content prep tool from here. Copy the IntuneWinAppUtil.exe file to your Win32 apps root folder, it should look like this. Open a command prompt and browse to the PCBuyback folder structure. Launch the IntuneWinAppUtil.exe file and answer the following. Please specify the source folder: win32app_source Please specify the setup file: PCBuyback.ps1 Please specify the output folder: win32app_target Do you want to specify catalog folder (Y/N)? n as shown here. Step 6. Add the Win32 app in Intune Log into Intune and add a new Win32 App. Below are some screenshots showing how I've configured the app. For Select app type, select Windows app (Win32) from the drop down menu Click on Select app package file and point it to the pcbuyback.intunewin file in the win32app_target folder, fill in some info about the app, for the logo, click on Select image and point it to the encode folder where the icon file can be used fill in the install commands, point it to install_pcbuyback.cmd fill in the requirements, and for detection rules point it to the detection script in the root of the PC Buyback - Intune files finally deploy it to an Entra ID group that contains the computers that are targeted for buyback, and deploy it as Available. Step 7. Test the app on a device On a test device that is already enrolled into Intune and Windows Autopilot registered, add the device to the azure ad group above and launch Company Portal. The PC Buyback app should appear. Click Install and after a few moments the app should appear. Clicking OK shows a warning and clicking OK to the warning starts the process, after a few moments it will remove the device from Intune, then remove the Windows Autopilot registered device and zip up the logs before emailing them After emailing the logs and confirmation that it's done PC Buyback, it will restart after the restart it will start resetting Windows removing all apps and settings that were on the device After the reset, Windows installs itself again... and after the reinstallation, it's back to the first screen of the OOBE, so the user can now setup their device personally When the user runs PC Buyback an email is sent to the email address you configured... and the process will store details in Azure tables (coming in Part 3) Troubleshooting If the app fails for whatever reason, it will log the details in C:\ProgramData\windowsnoob\PCBuyback\win.ap.pcbuyback.log Below is a sample of that log file from a successfully wiped device 04/06/2024 10:00:42 Starting script: 'Win.AP.PCBuyback' version: '0.0.5' ... 04/06/2024 10:00:42 extracting scripts to 'C:\ProgramData\windowsnoob\PCBuyback'... 04/06/2024 10:00:42 decoding BASE64 encoded file...'7z.exe' 04/06/2024 10:00:43 decoding BASE64 encoded file...'7z.dll' 04/06/2024 10:00:45 decoding BASE64 encoded file...'scanforhelp.png' 04/06/2024 10:00:45 decoding BASE64 encoded file...'PCBuybackUI.png' 04/06/2024 10:00:47 Detecting the logged on user... 04/06/2024 10:00:47 localuserfull was identified as: 'AzureAD\NiallBrady' 04/06/2024 10:00:47 Detection method 1: The user was identified as: NiallBrady 04/06/2024 10:00:47 SID: 'S-1-12-1-1583932090-1131944776-3006070936-2698034199' 04/06/2024 10:00:47 found sid 04/06/2024 10:00:48 registrypath is: HKU:\S-1-12-1-1583932090-1131944776-3006070936-2698034199\SOFTWARE\windowsnoob\Autopilot 04/06/2024 10:00:48 Checking if registryvalue: 'PCBuyback' in registrypath: 'HKU:\S-1-12-1-1583932090-1131944776-3006070936-2698034199\SOFTWARE\windowsnoob\Autopilot' exists... 04/06/2024 10:00:49 Reg key exists... 04/06/2024 10:00:49 registrypath is: HKU:\S-1-12-1-1583932090-1131944776-3006070936-2698034199\SOFTWARE\windowsnoob\Autopilot 04/06/2024 10:00:49 Checking if registryvalue: 'PCBuyback' in registrypath: 'HKU:\S-1-12-1-1583932090-1131944776-3006070936-2698034199\SOFTWARE\windowsnoob\Autopilot' exists... 04/06/2024 10:01:09 Reason added: '' 04/06/2024 10:01:11 The user chose OK to the PCBuyback warning, starting the reset process... 04/06/2024 10:01:11 Is this a Windows Autopilot device: 04/06/2024 10:01:11 Checking if the device is registered as a Windows Autopilot device started... 04/06/2024 10:01:11 Device serial number: 3135-5201-3107-6925-8353-2276-24 04/06/2024 10:01:19 DEBUG: The following was returned from the graph call. ' 04/06/2024 17:01:19 Starting Azure function... 04/06/2024 17:01:19 Connected to tenant: windowsnoob.com. 04/06/2024 17:01:19 supplied serial number: '3135-5201-3107-6925-8353-2276-24'. 04/06/2024 17:01:19 Get Device Reference from Intune. DeviceTrue. 04/06/2024 17:01:19 Serial number: 3135-5201-3107-6925-8353-2276-24 is an autopilot machine. Exiting Azure function.' 04/06/2024 10:01:19 the device was detected as a Windows Autopilot device, so let's remove it as a registered AP device 04/06/2024 10:01:19 Remove Windows Autopilot device from Intune started. 04/06/2024 10:01:19 Windows Autopilot device serial number: 3135-5201-3107-6925-8353-2276-24 04/06/2024 10:01:20 DEBUG: The following was returned from the graph call. 'Success' 04/06/2024 10:01:20 Removed Windows Autopilot device '3135-5201-3107-6925-8353-2276-24' from intune. 04/06/2024 10:01:20 Exiting the Intune based PC Buyback script, thanks for watching :-). If all went well and if the recovery partition on this device is healthy, Windows Reset should begin in the next few moments... 04/06/2024 10:01:20 DEBUG: The user chose OK to the PC Buyback Warning message. Starting the Windows reinstallation process now... 04/06/2024 10:01:20 checking for Power... 04/06/2024 10:01:20 virtual machine detected, will not check for power. 04/06/2024 10:01:20 Creating folder to store logs etc... 04/06/2024 10:01:20 Grabbing the reason why the user wanted to reset... 04/06/2024 10:01:20 Grabbing 'C:\ProgramData\windowsnoob\PCBuyback' logs 04/06/2024 10:01:20 Grabbing Windows temp logs 04/06/2024 10:01:20 DEBUG: Folder size (in bytes) = 2.22250366210938 04/06/2024 10:01:20 DEBUG: truncated bytes = 3 04/06/2024 10:01:20 Folder size (in MB) = 3 04/06/2024 10:01:20 Log files size: 3 04/06/2024 10:01:20 Log file size limit = 10 04/06/2024 10:01:20 Log file size (3) is less than 10, will include temp logs in email... 04/06/2024 10:01:20 Creating Autopilot cab file... 04/06/2024 10:01:42 adding C:\ProgramData\windowsnoob\PCBuyback\Win.AP.PCBuyback.log


-
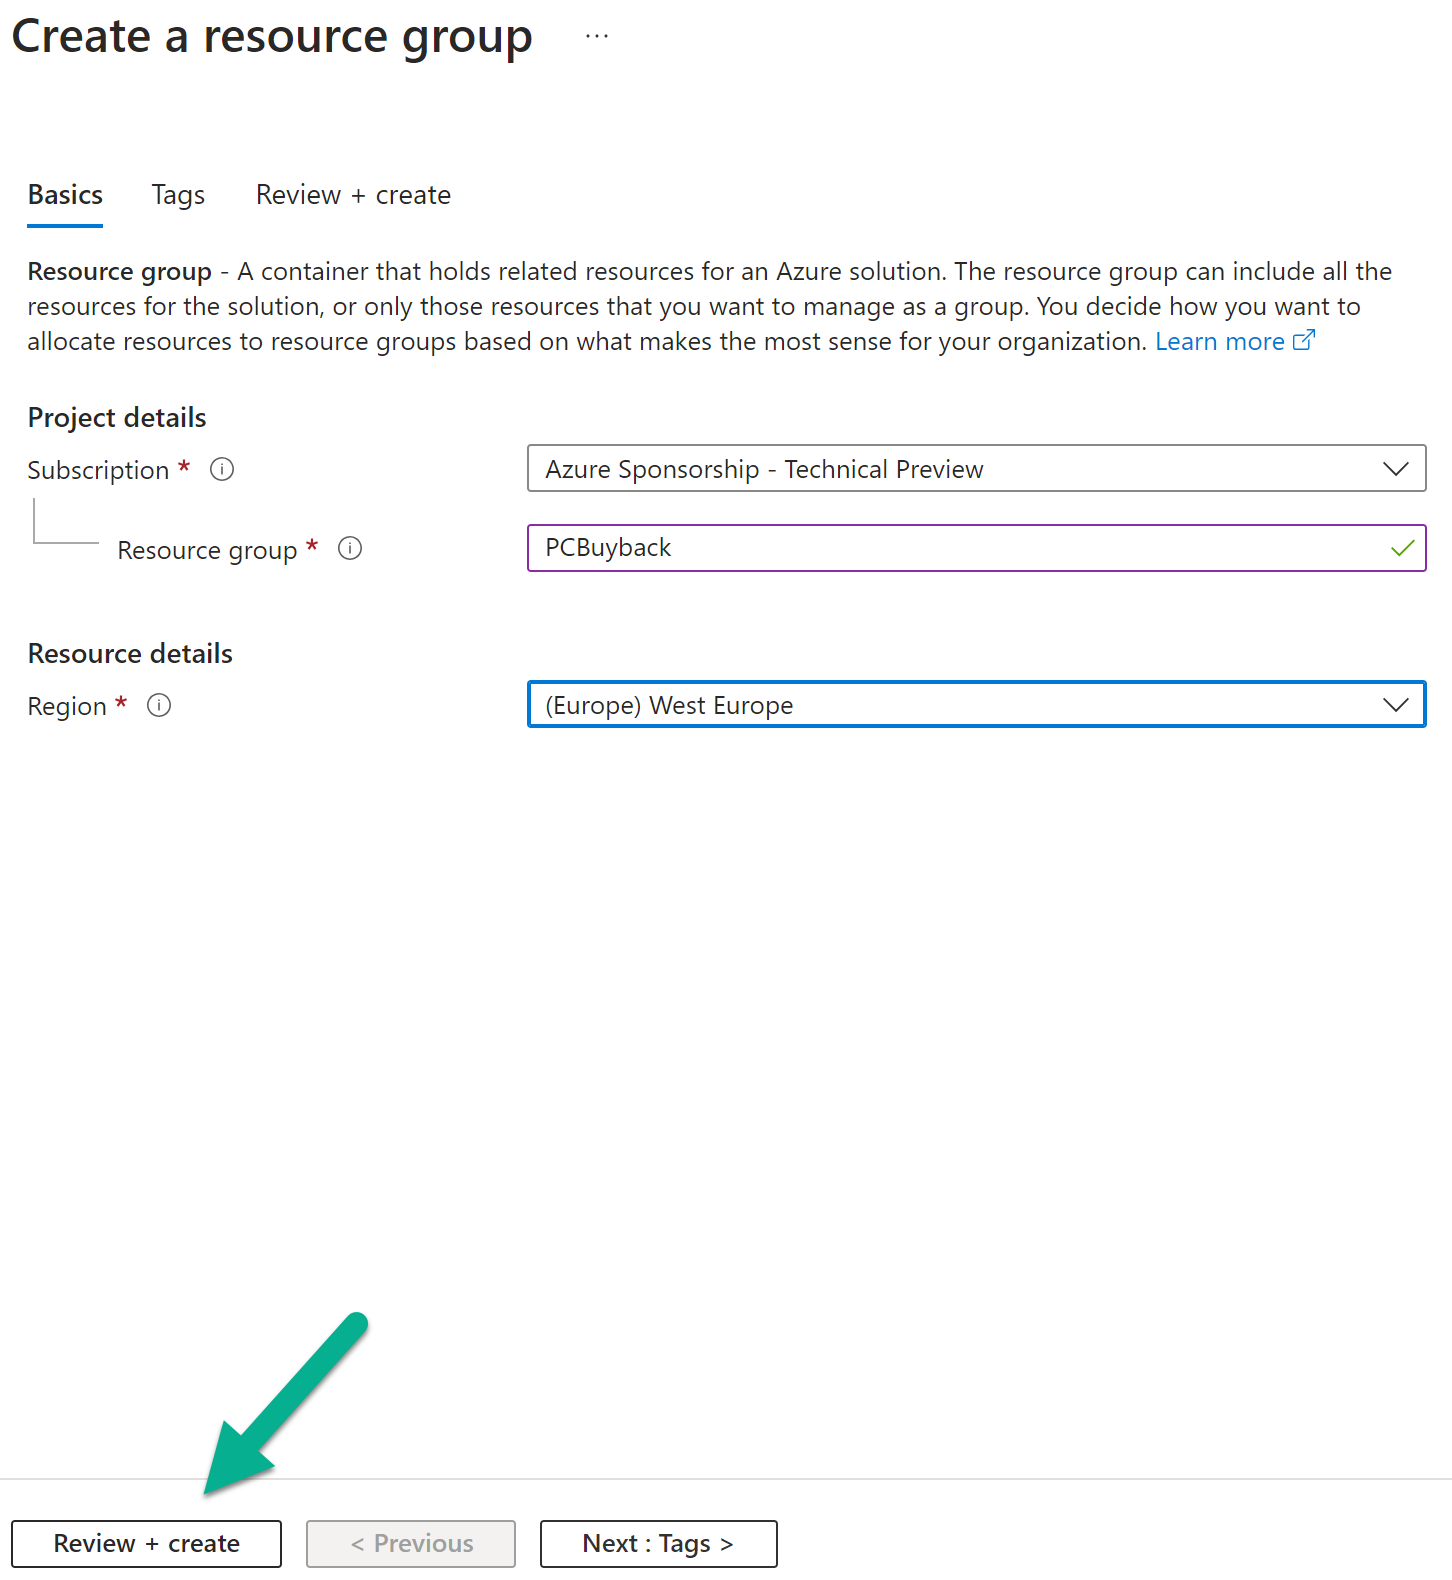
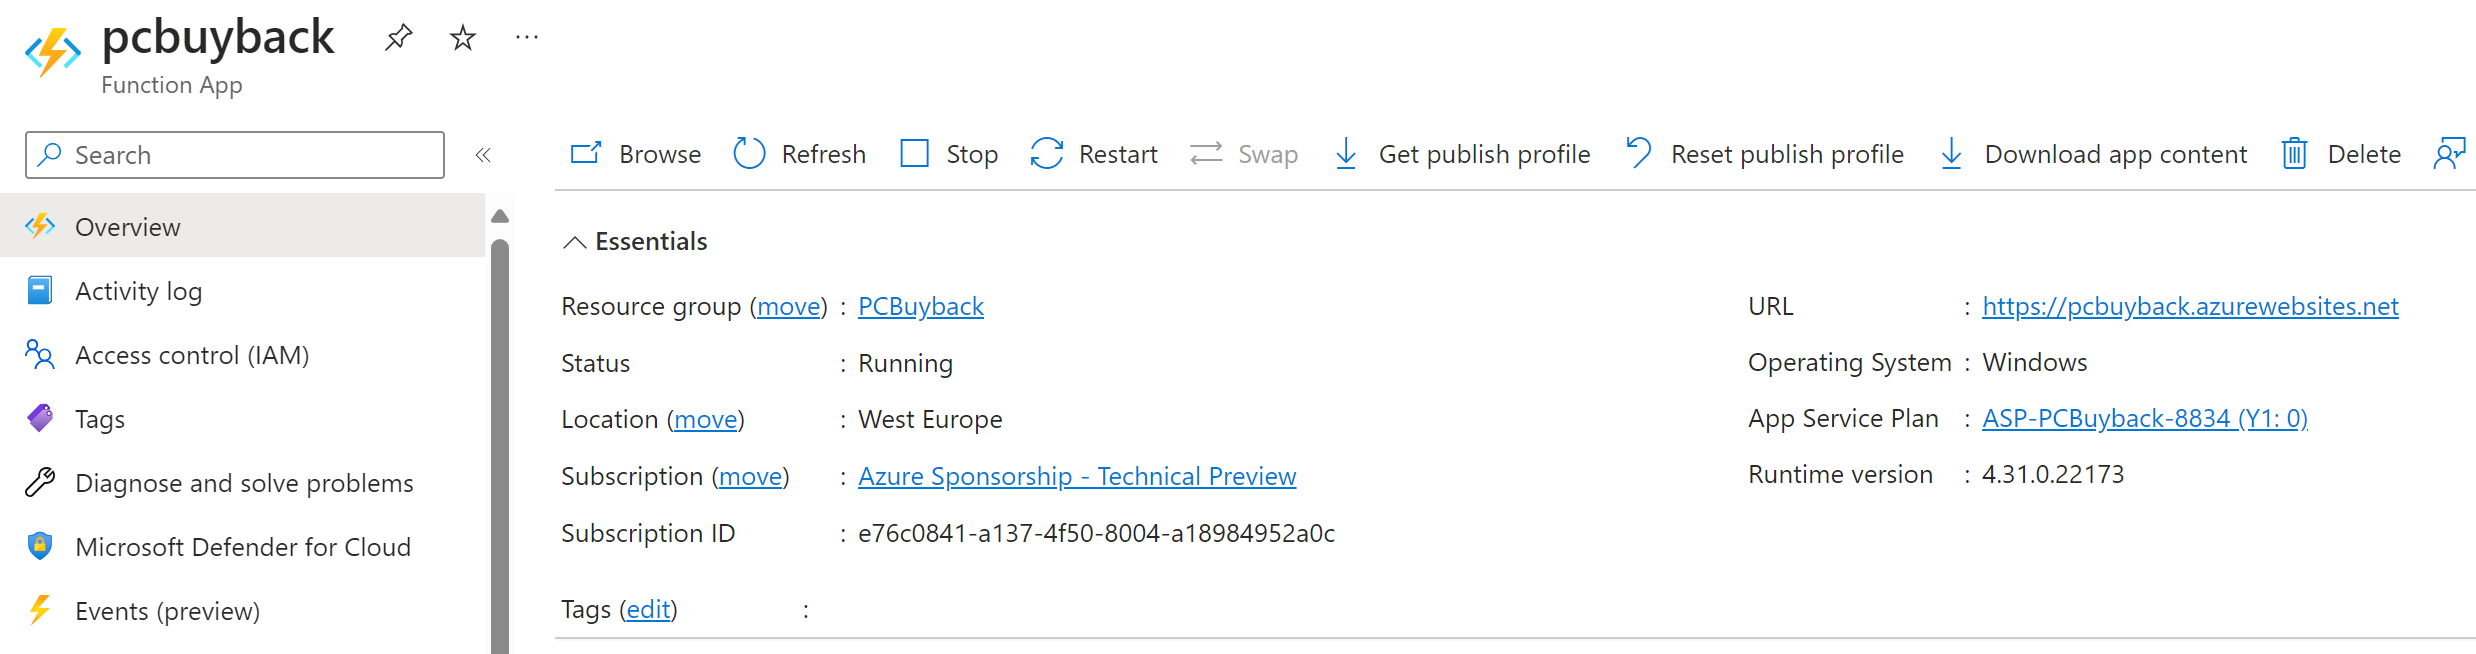
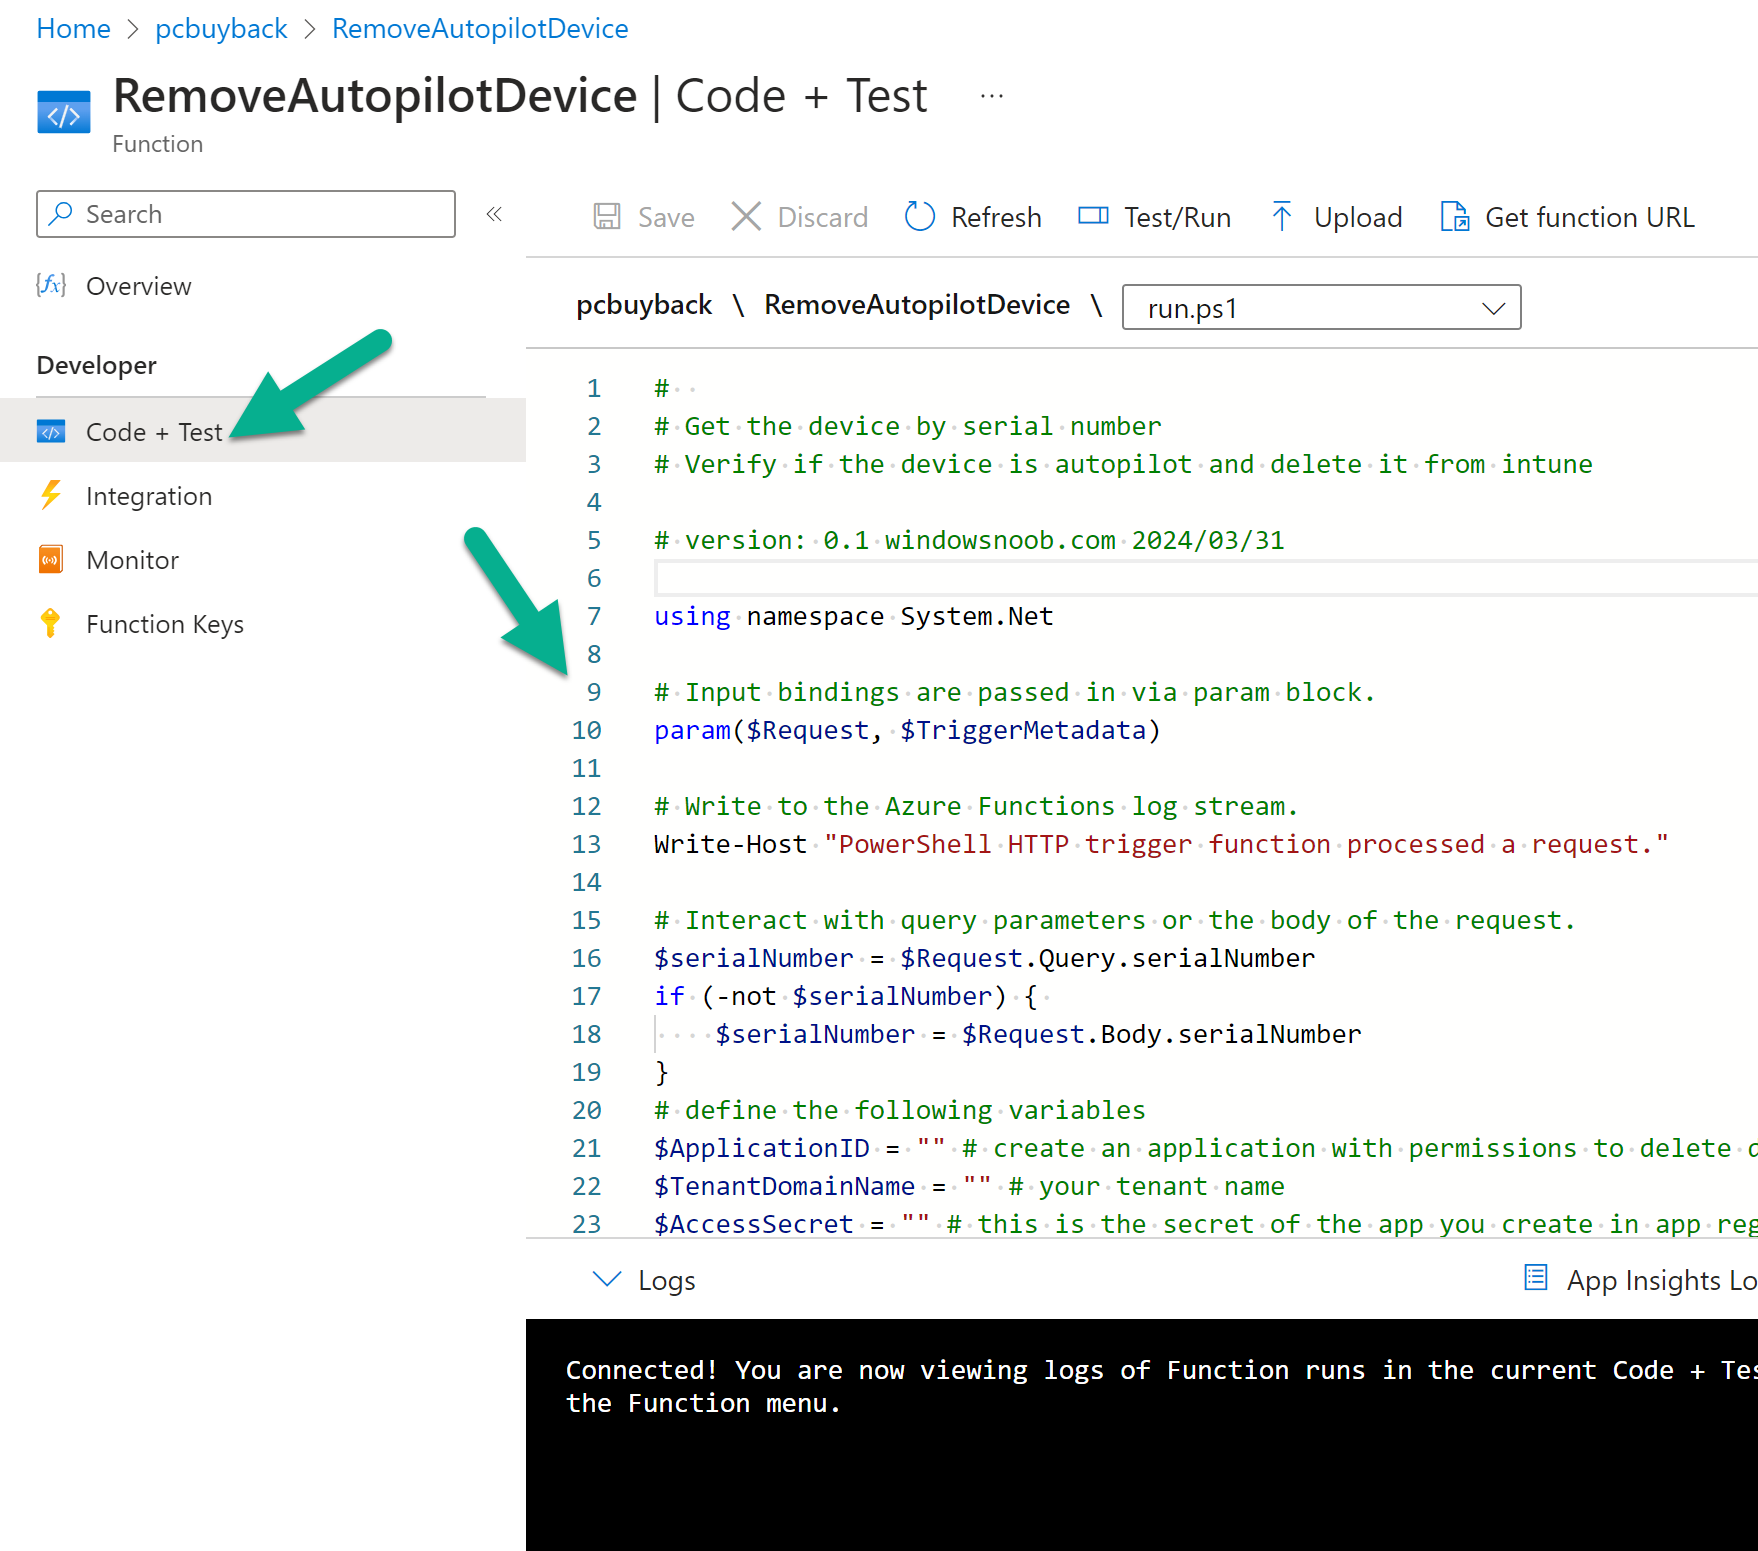
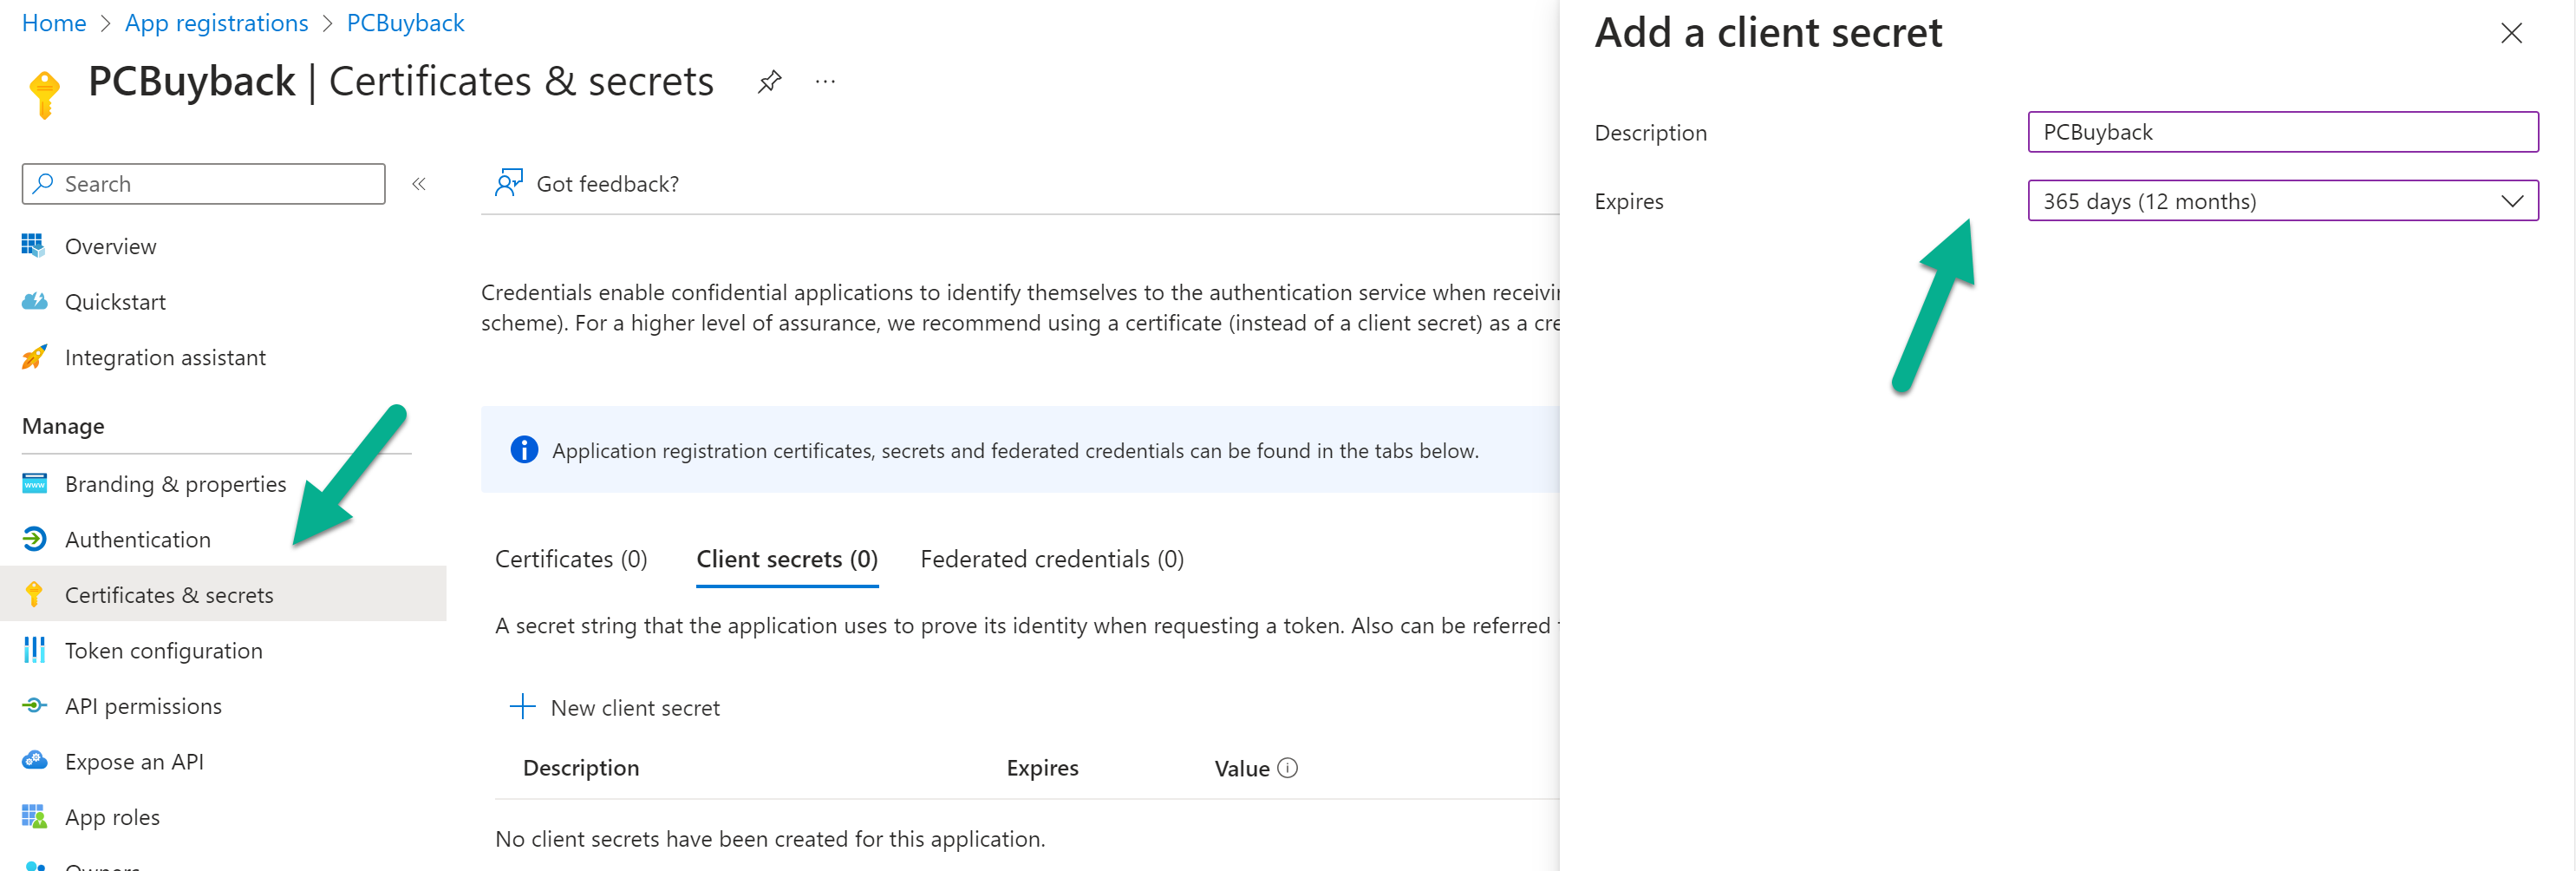
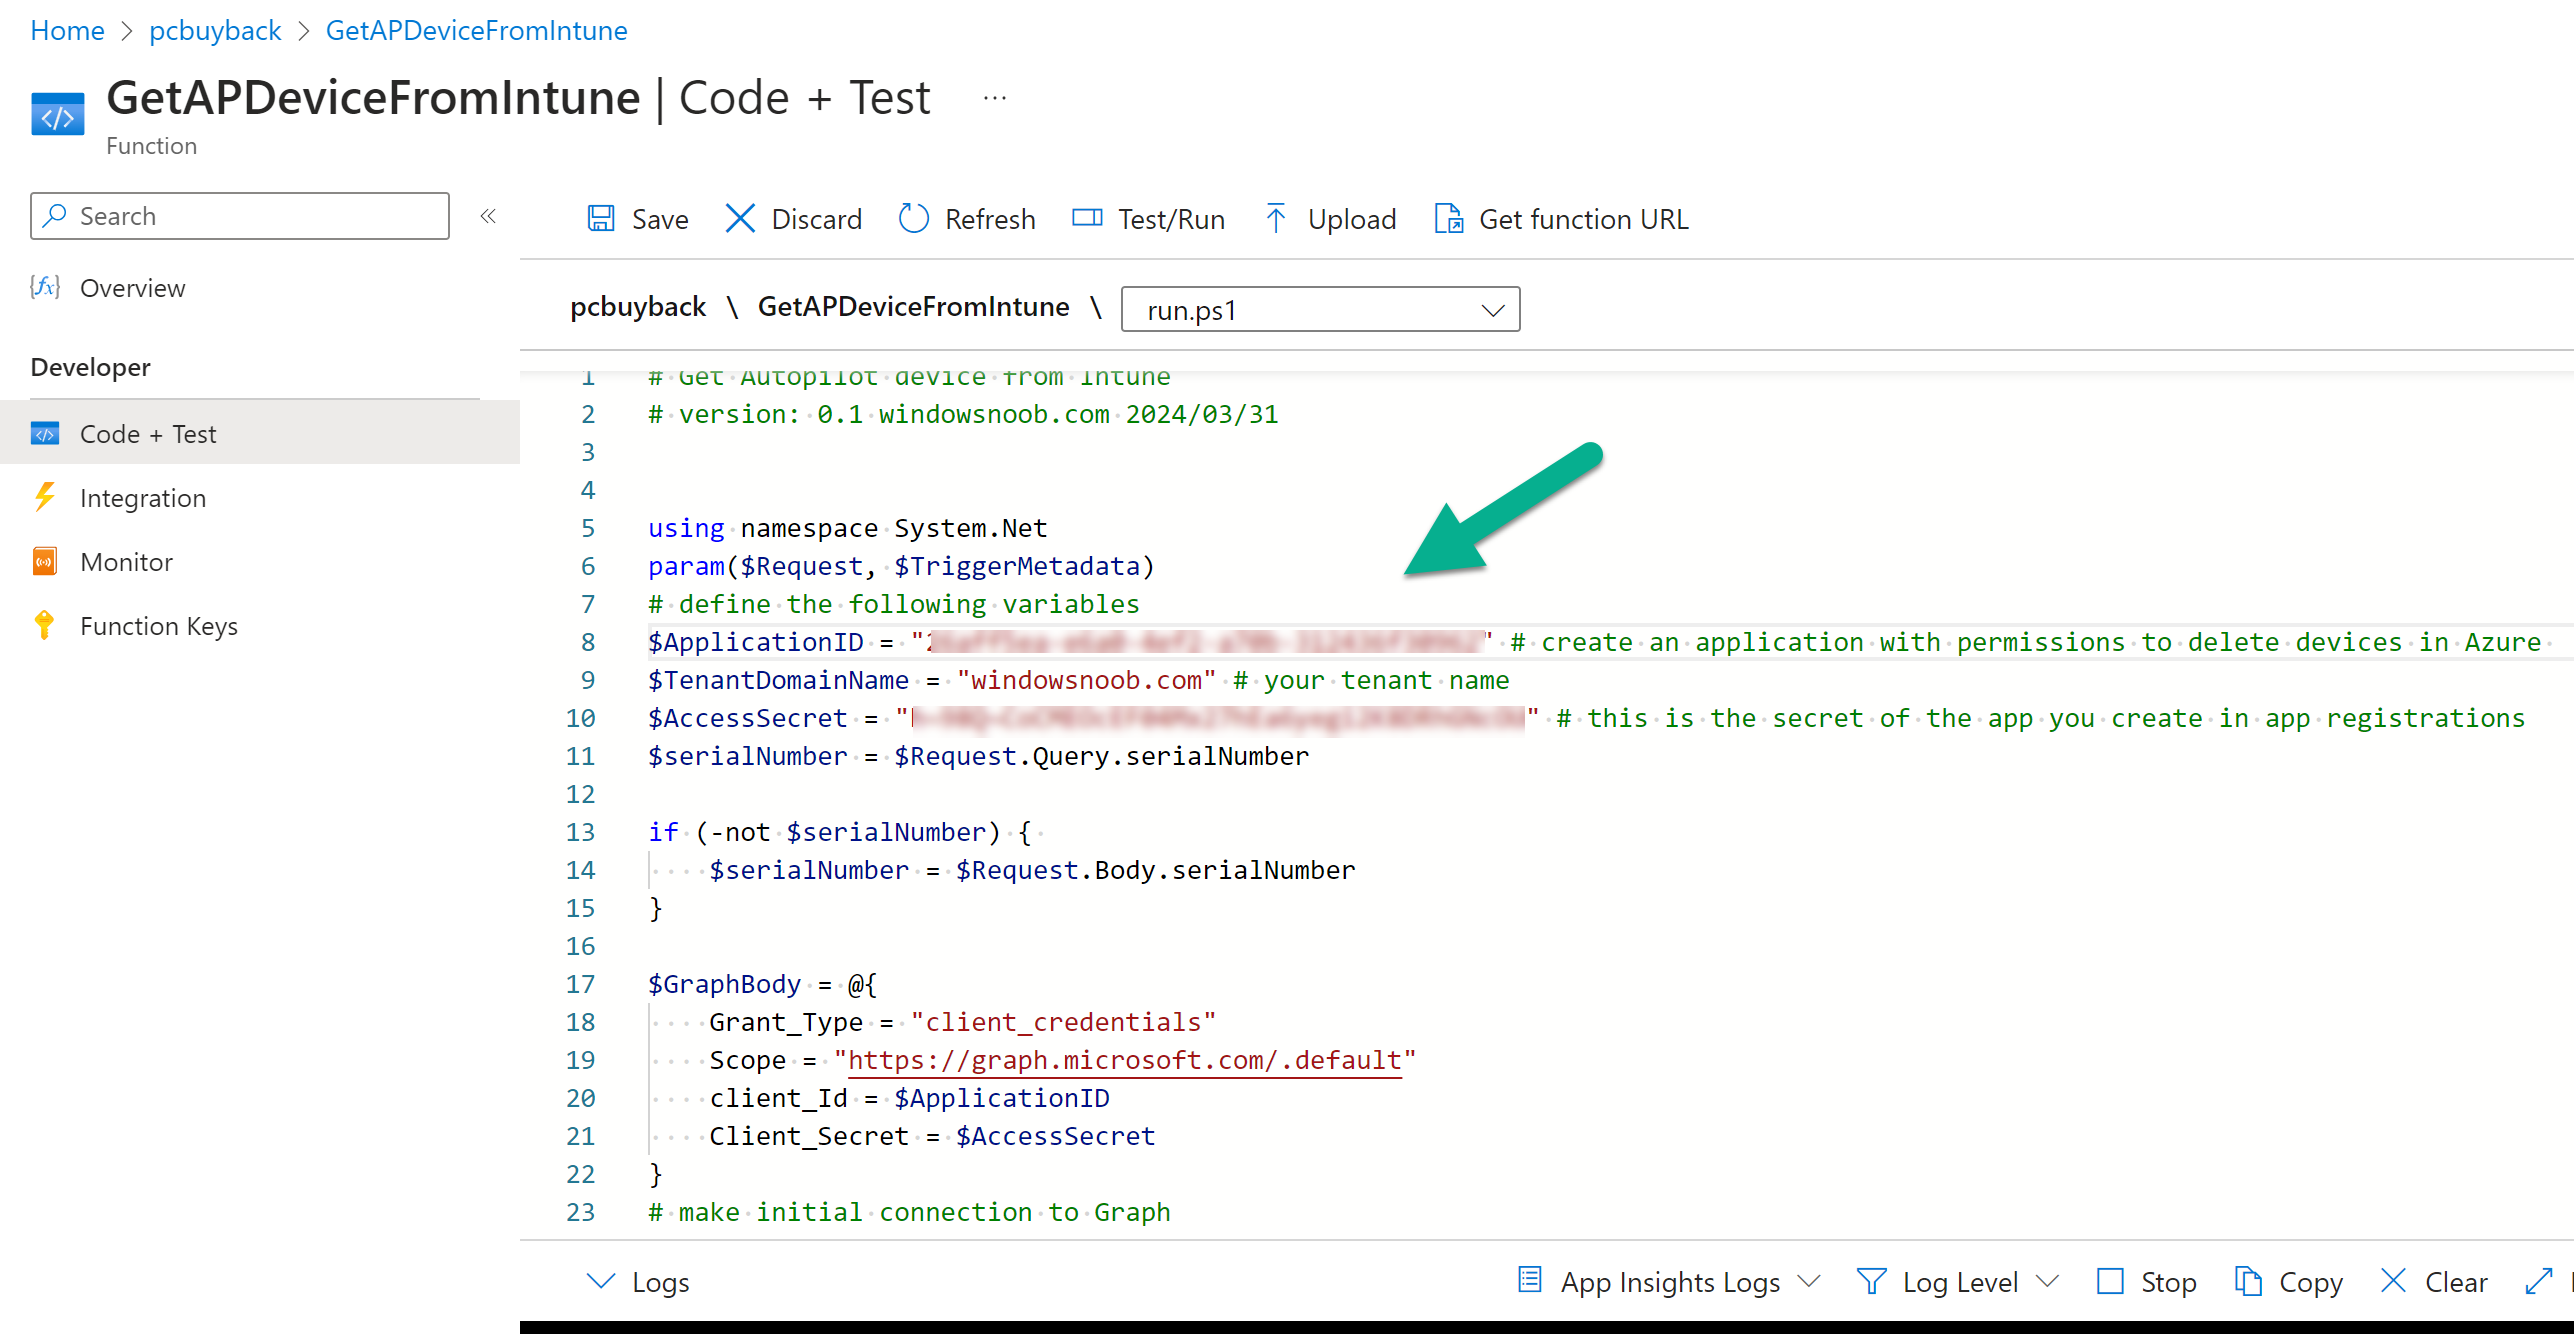
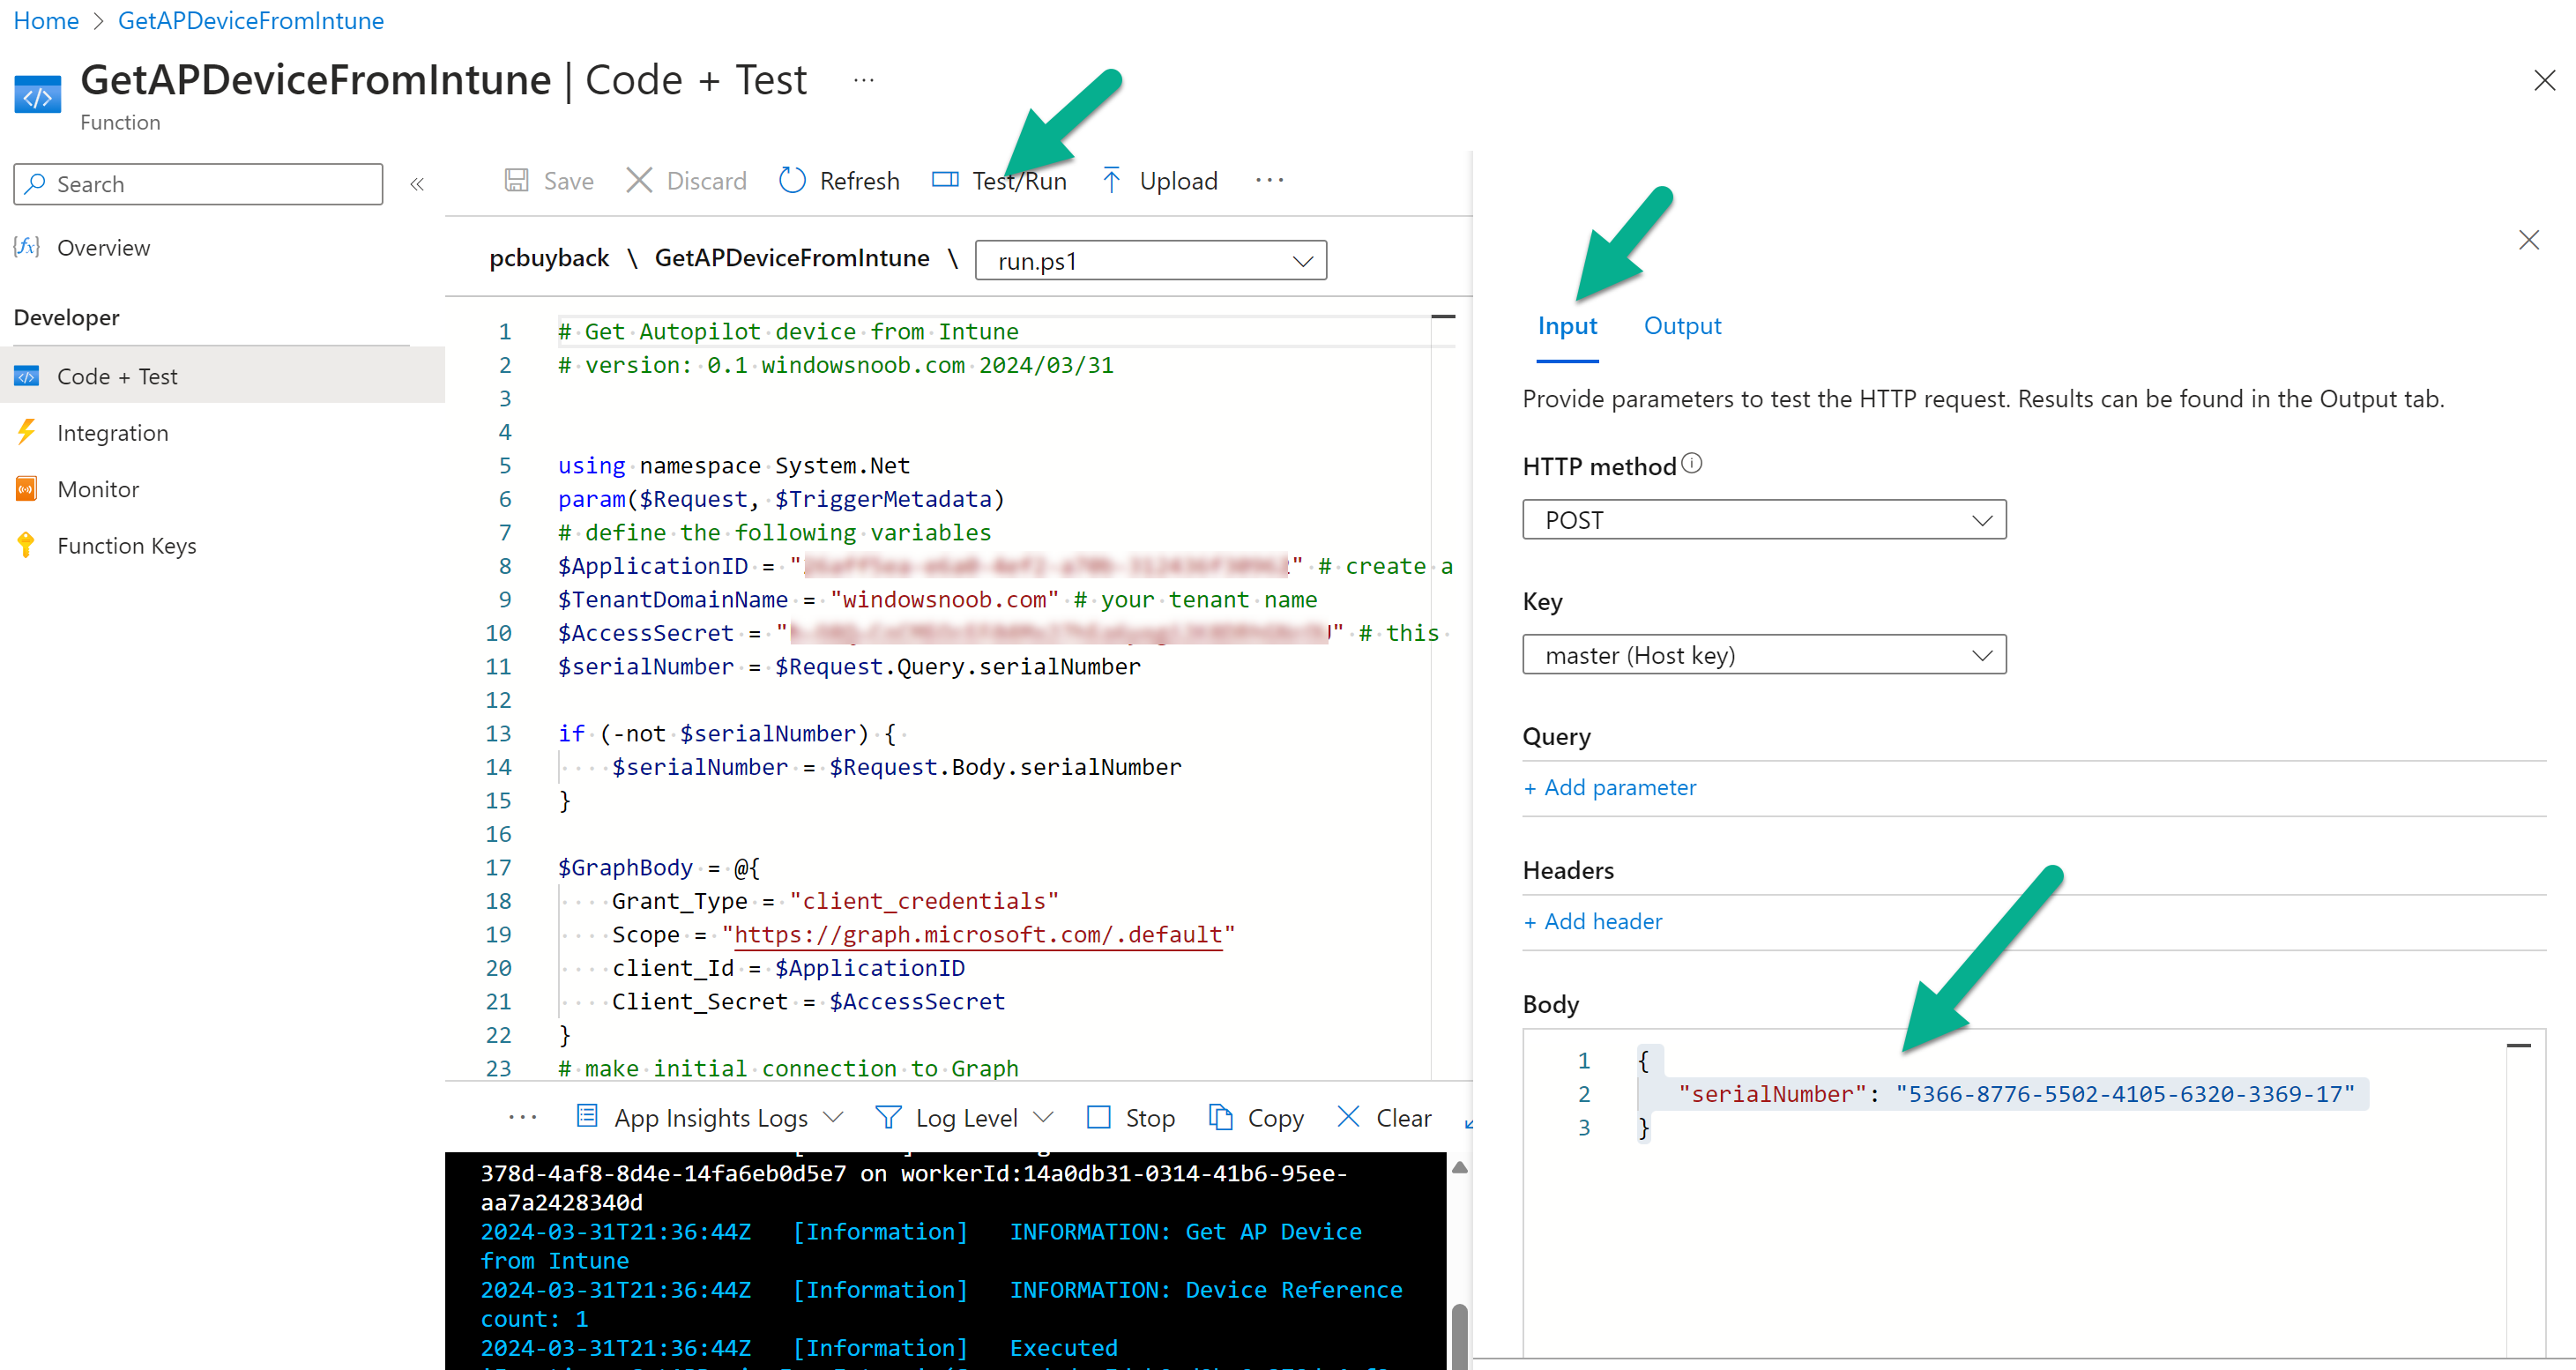
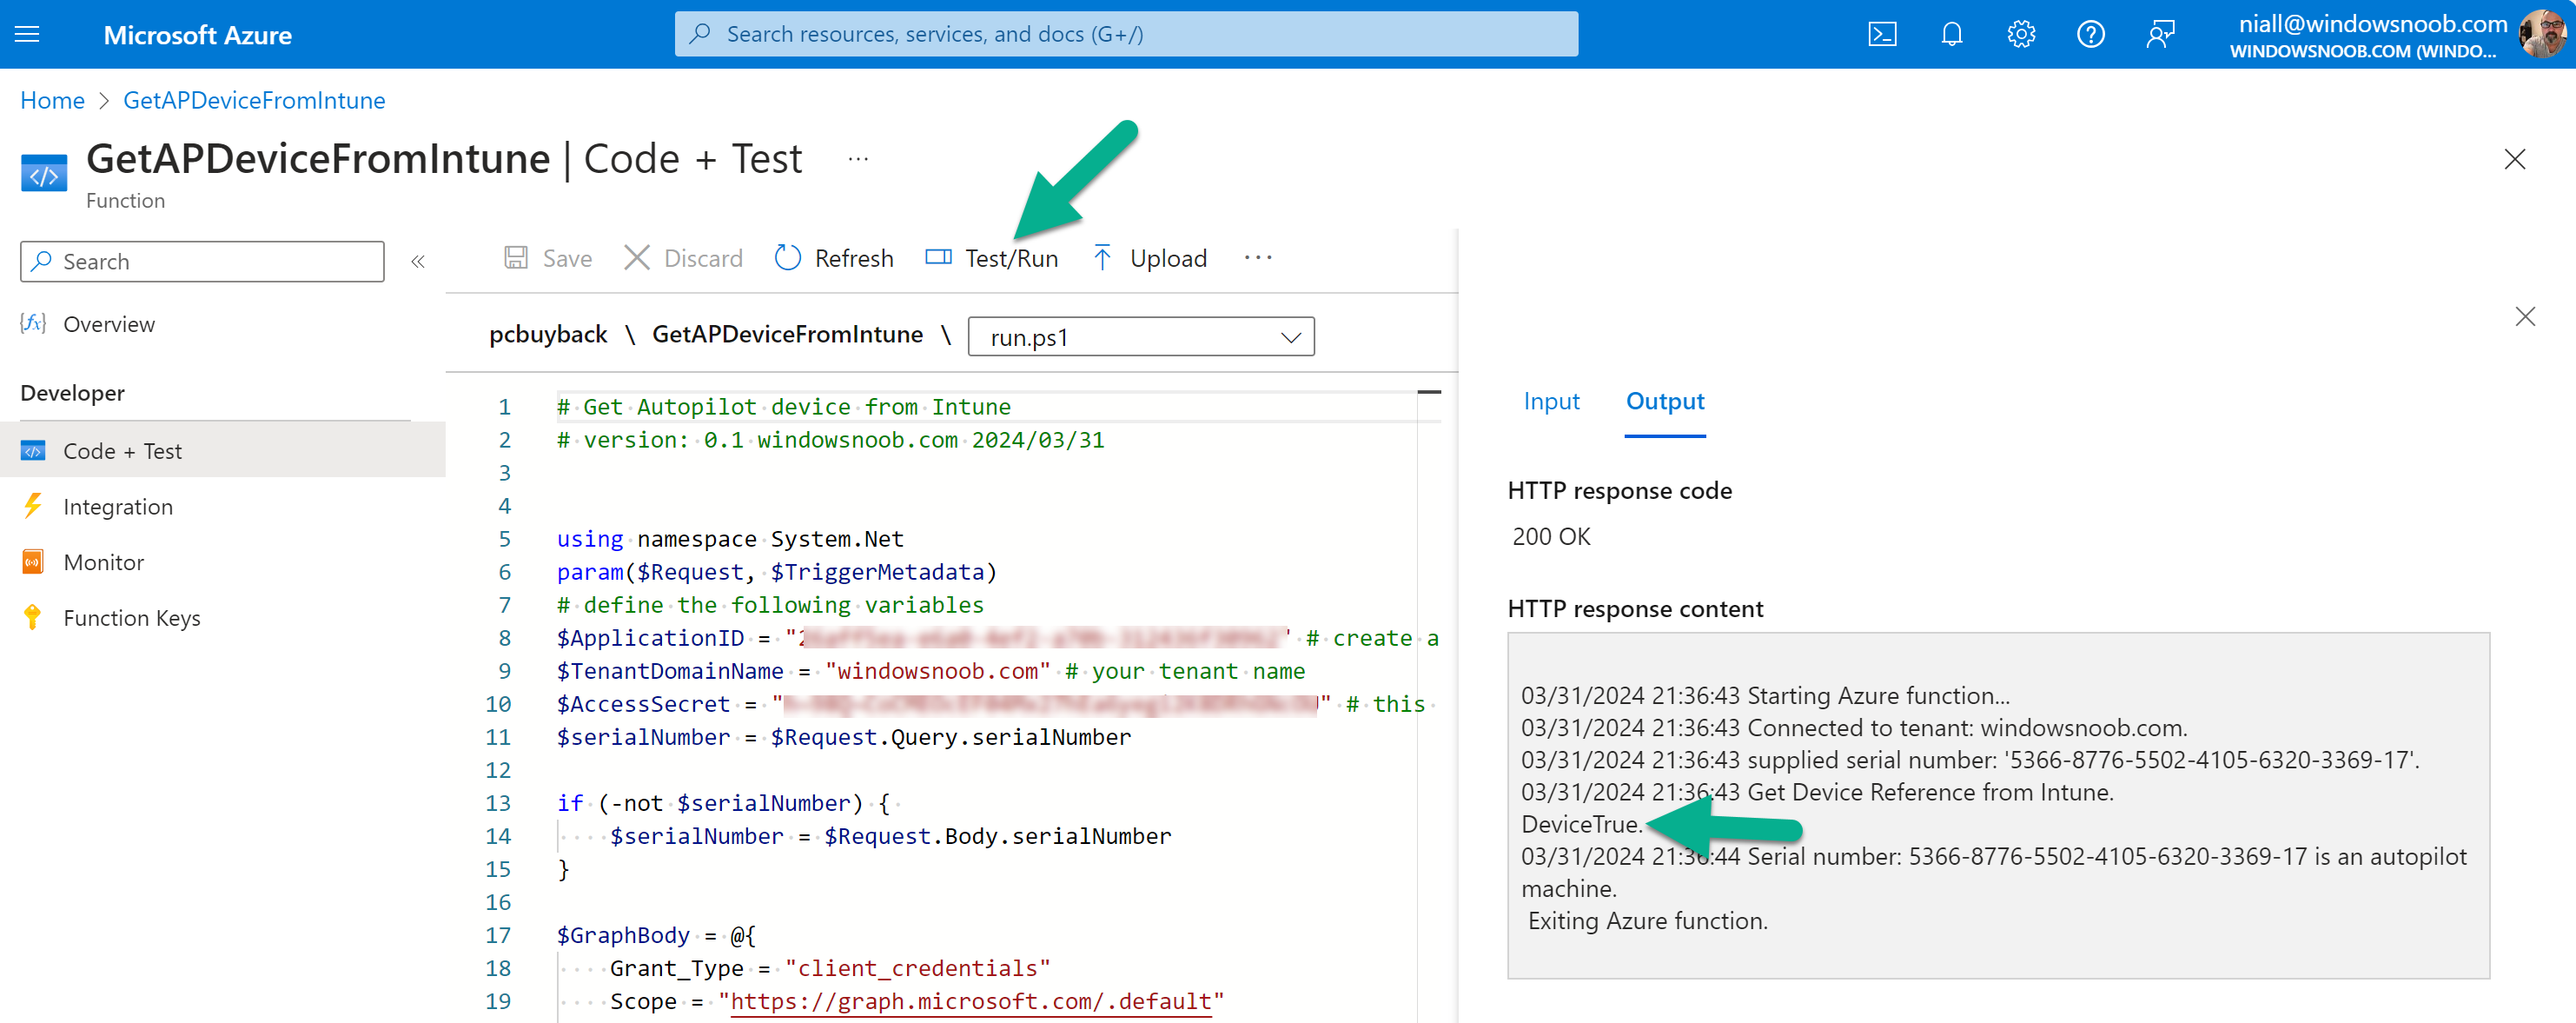
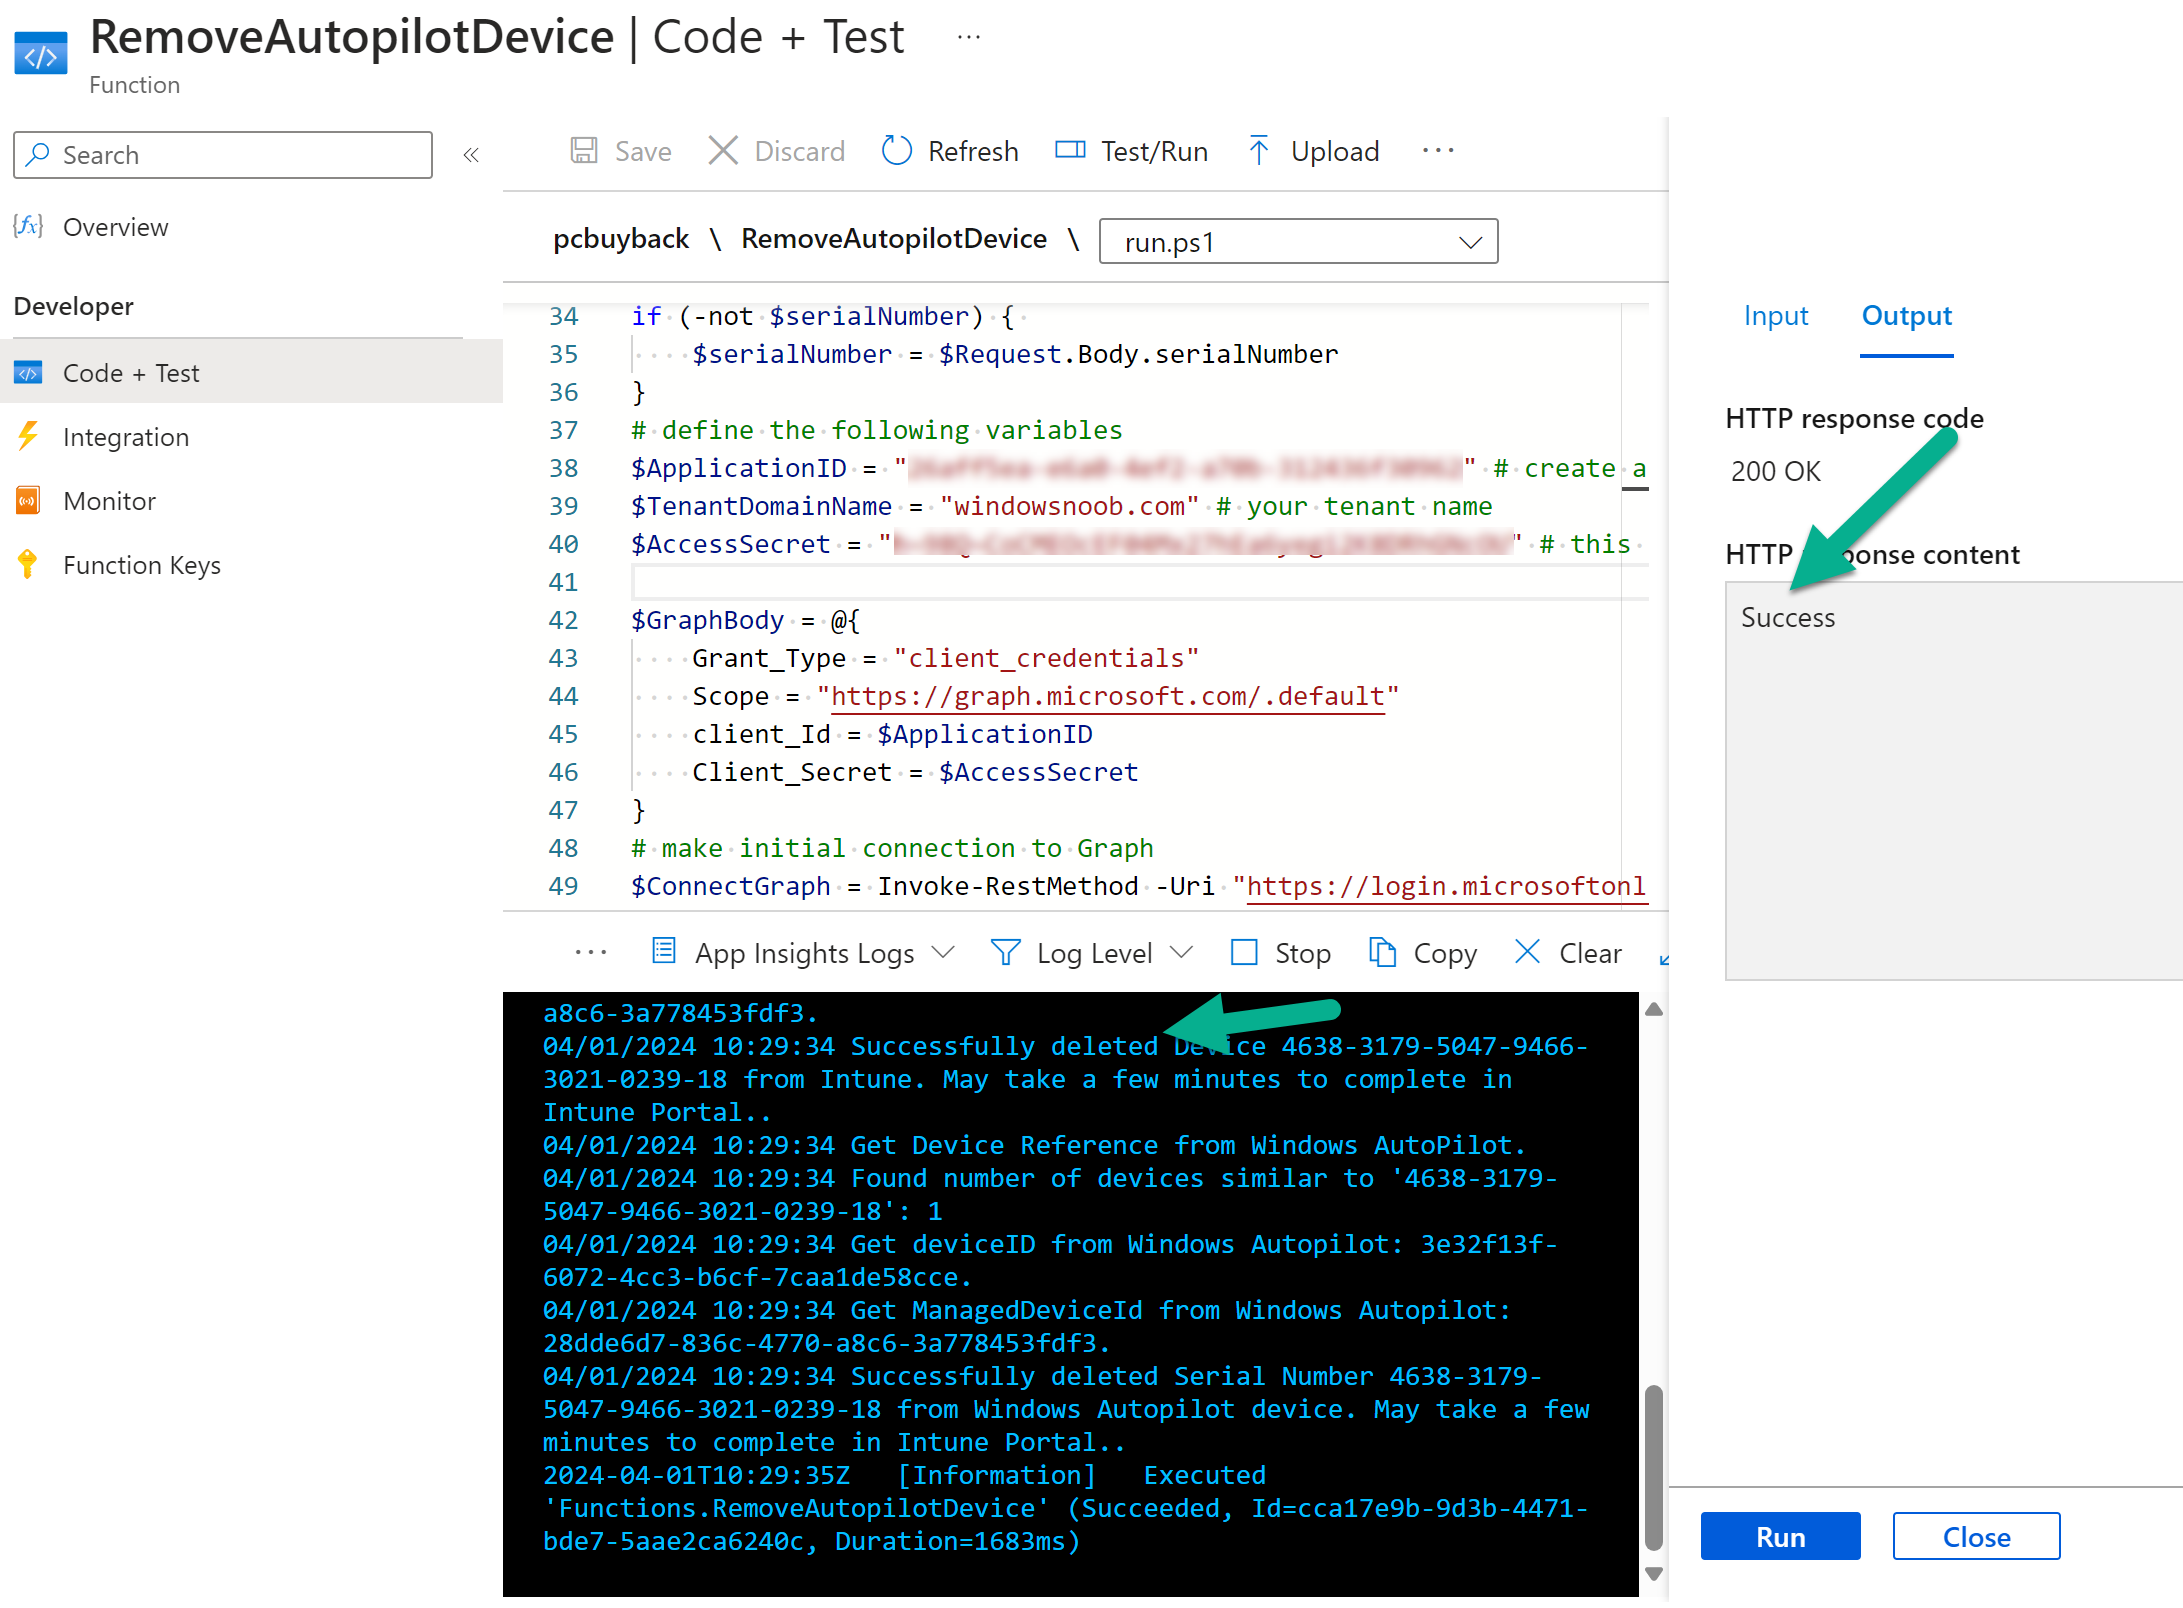
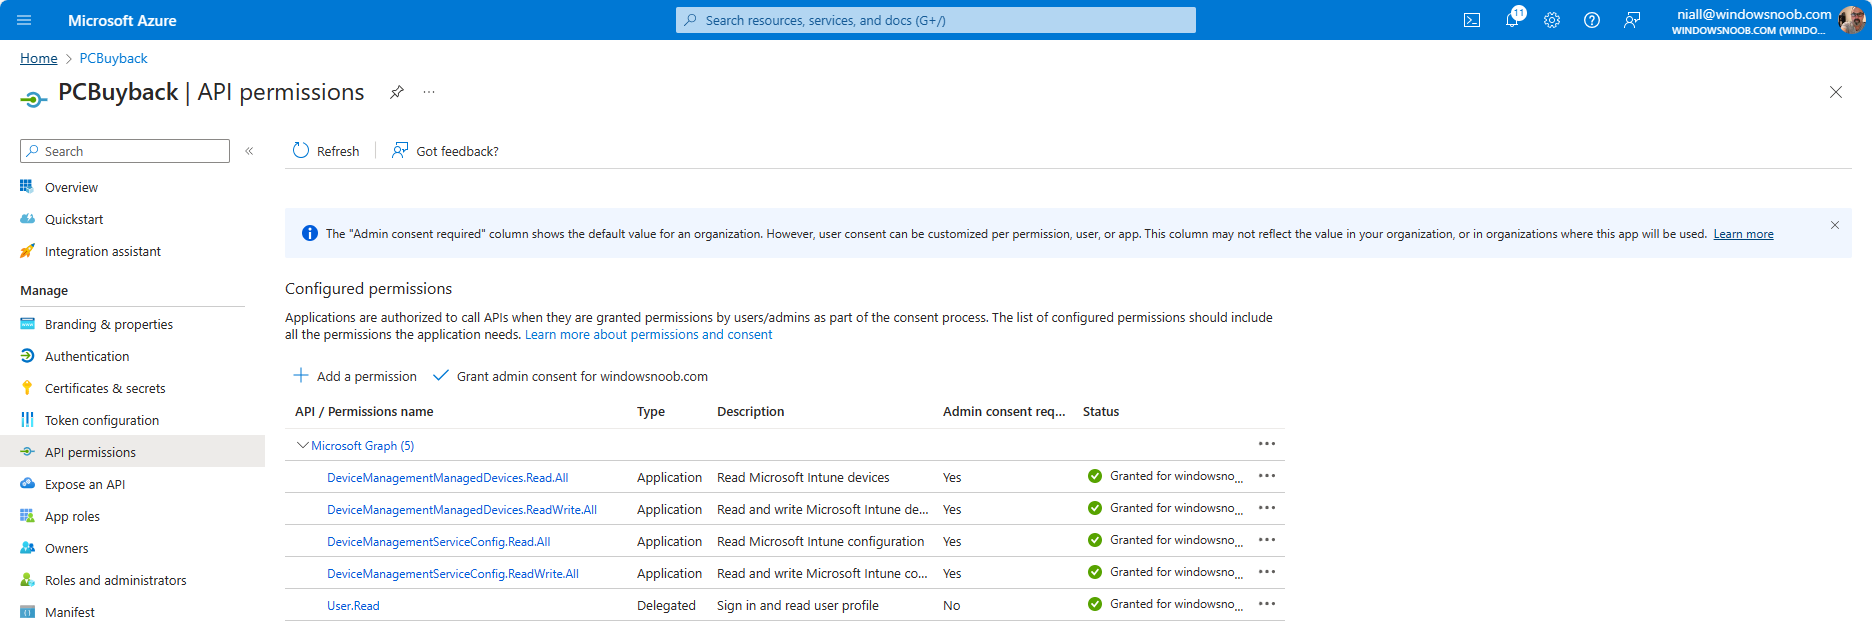
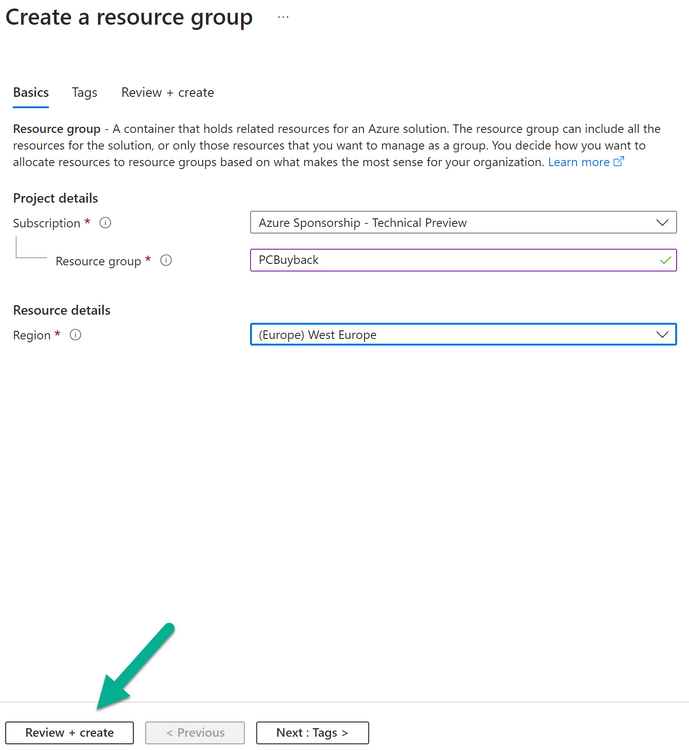
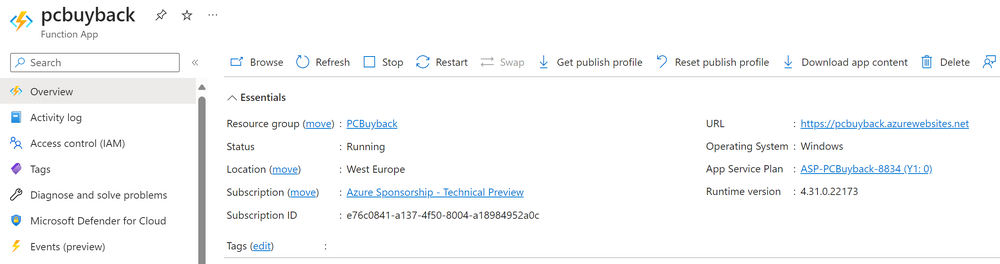
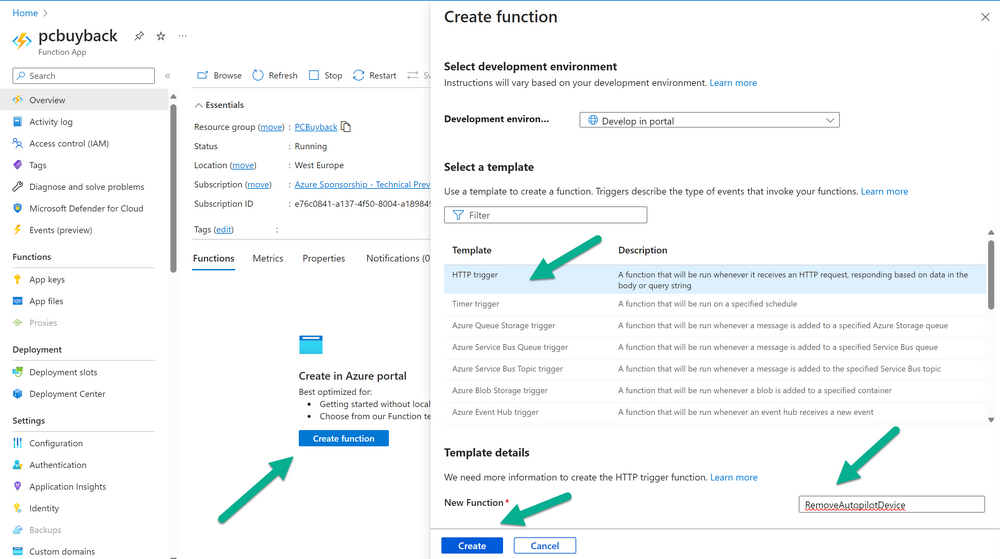
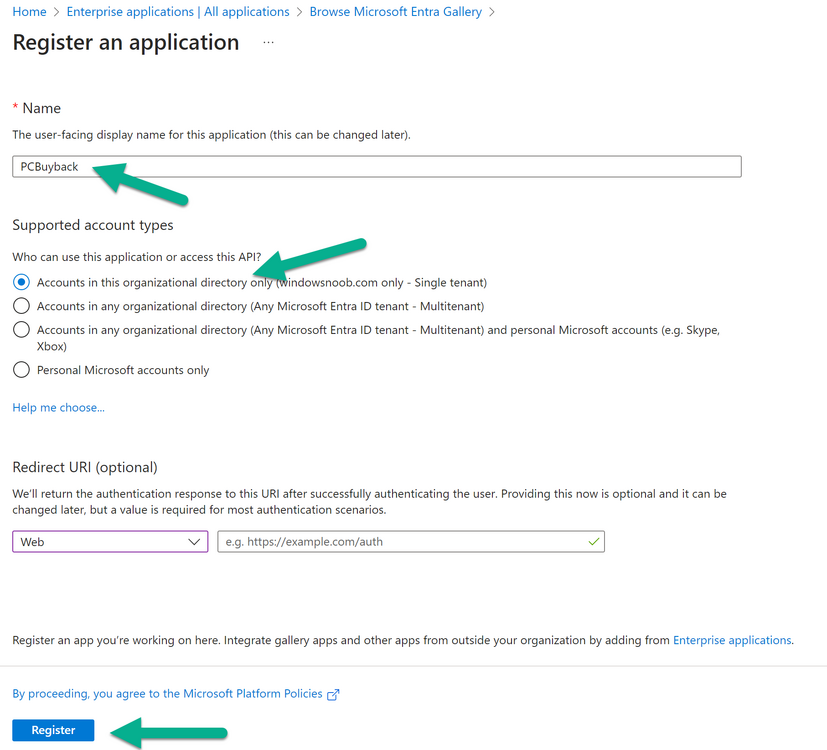
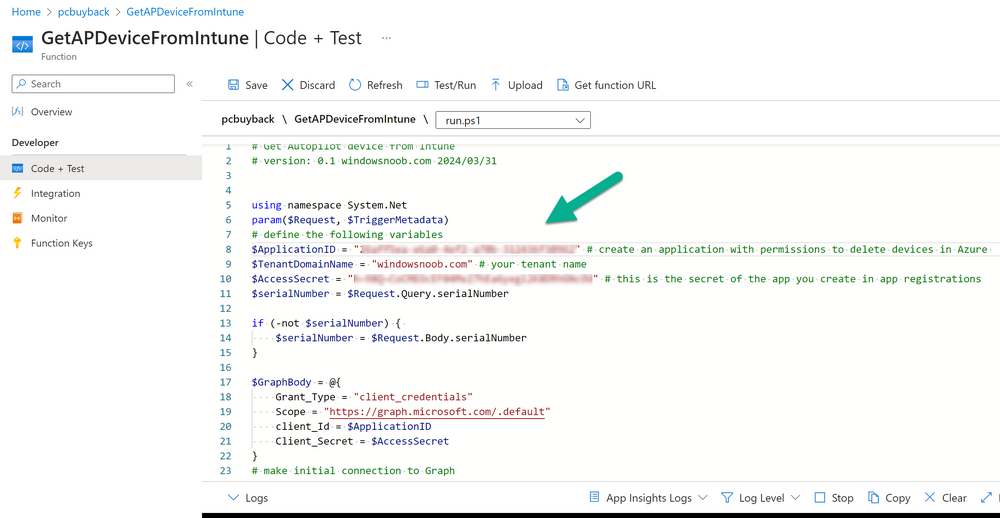
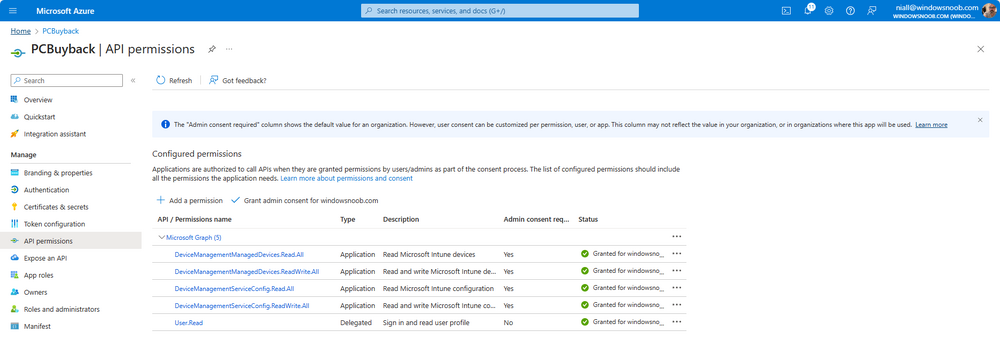
Introduction Windows Autopilot allows you to quickly enroll devices using policies, apps and settings applicable to your tenant, and that's great for deploying new Windows devices. Those devices can be registered as Windows Autopilot registered devices by the OEM (Original Equipment Manufacturer) or by a third party integrator or by the organization themselves by importing the Windows Autopilot hardware CSV into Intune. After a device has reached end of life however, it needs to be disposed of or sold on. It would be nice to offer end users the ability to buy back their old Company hardware with minimum fuss, but at the same time to remove Intune management and remove the device from Windows Autopilot registration while installing a new copy of Windows 11 professional that the end user could use for their own personal use. I created a Win32 app that does all this called PC Buyback. The app integrates with a back end Azure app using http triggers to do the magic. This post will cover the app features and code needed to implement it in your own tenant. The features of the app are as follows: Easy to use Self-Service app available in Company Portal Removes company data and apps Reinstalls Windows Changes Windows edition using OEM license info stored in BIOS Emails results to a company inbox Logging to Azure tables (optional) Note: In this blog, the app uses http triggers that use certificate secrets, this is fine in a lab, but in production you should use Azure Key Vault instead as it's more secure. Step 1. Create resource group In Entra, using an account that has permission to create Resource Groups in your subscription, create a resource group called PCBuyback, create it in the region that your tenant is located. Step 2. Create a function app in the resource group In the PCBuyback resource group, create a function app in the same region as the resource group you created above. Step 3. Create a RemoveAutopilotDevice http trigger In the Function app, create a trigger called RemoveAutopilotDevice In the newly created Http trigger, click on Code + Test and paste in the following code to overwrite the existing code... # # Remove Autopilot device by serial number # Verify if the device is autopilot and delete it from intune # version: 0.1 windowsnoob.com 2024/03/31 using namespace System.Net # Input bindings are passed in via param block. param($Request, $TriggerMetadata) # Write to the Azure Functions log stream. Write-Host "PowerShell HTTP trigger function processed a request." # Interact with query parameters or the body of the request. $serialNumber = $Request.Query.serialNumber if (-not $serialNumber) { $serialNumber = $Request.Body.serialNumber } # define the following variables $ApplicationID = "" # create an application with permissions to delete devices in Azure $TenantDomainName = "" # your tenant name $AccessSecret = "" # this is the secret of the app you create in app registrations $GraphBody = @{ Grant_Type = "client_credentials" Scope = "https://graph.microsoft.com/.default" client_Id = $ApplicationID Client_Secret = $AccessSecret } # make initial connection to Graph $ConnectGraph = Invoke-RestMethod -Uri "https://login.microsoftonline.com/$TenantDomainName/oauth2/v2.0/token" -Method POST -Body $GraphBody #get the token $token = $ConnectGraph.access_token # to improve logging... $body = " `n" $response = "" $body = $body + "$(Get-Date)" + " Starting Azure function...`n" $body = $body + "$(Get-Date)" + " Connected to tenant: $TenantDomainName.`n" # now do things... if ($serialNumber) { $body = $body + "$(Get-Date)" + " You supplied serialNumber: '$serialNumber'" + ".`n" Try{ # Get Device Reference from Intune $body = $body + "$(Get-Date)" + " Get Device Reference from Intune" + ".`n" $Device = Invoke-RestMethod -Method Get -uri "https://graph.microsoft.com/v1.0/deviceManagement/managedDevices?`$filter=contains(serialNumber,'$serialNumber')" -Headers @{Authorization = "Bearer $token"} | Select-Object -ExpandProperty Value If($Device){ $body = $body + "$(Get-Date)" + " Found number of devices similar to '$serialNumber': $($Device.count)" + "`n" Foreach($d in $Device){ If($d.serialNumber -eq $serialNumber){ $body = $body + "$(Get-Date)" + " Get deviceID from Intune: $($d.id)" + ".`n" Invoke-RestMethod -Method Delete -uri "https://graph.microsoft.com/v1.0/deviceManagement/managedDevices/$($d.id)" -Headers @{Authorization = "Bearer $token"} $body = $body + "$(Get-Date)" + " Successfully deleted Device $($d.serialNumber) from Intune. May take a few minutes to complete in Intune Portal." + ".`n" Write-Host $body $response = "Success" break } } } Else{ $body = $body + "$(Get-Date)" + " serialNumber: $serialNumber does not exist in Intune" + ".`n" $response += "Failed" Write-Host $body } } Catch{ $body = $body + "$(Get-Date)" + " $($Error)" + ".`n" $body = $body + "$(Get-Date)" + " Failed to get Device Reference from Intune." + ".`n" $response += "Failed" Write-Host $body } Try{ # Get Device Reference from Windows AutoPilot $body = $body + "$(Get-Date)" + " Get Device Reference from Windows AutoPilot" + ".`n" $Device = Invoke-RestMethod -Method Get -uri "https://graph.microsoft.com/v1.0/deviceManagement/windowsAutopilotDeviceIdentities?`$filter=contains(serialNumber,'$serialNumber')" -Headers @{Authorization = "Bearer $token"} | Select-Object -ExpandProperty Value If($Device){ $body = $body + "$(Get-Date)" + " Found number of devices similar to '$serialNumber': $($Device.count)" + "`n" Foreach($d in $Device){ If($($d.serialNumber) -eq $serialNumber){ $body = $body + "$(Get-Date)" + " Get deviceID from Windows Autopilot: $($d.id)" + ".`n" $body = $body + "$(Get-Date)" + " Get ManagedDeviceId from Windows Autopilot: $($d.managedDeviceId)" + ".`n" Invoke-RestMethod -Method Delete -uri "https://graph.microsoft.com/v1.0/deviceManagement/windowsAutopilotDeviceIdentities/$($d.id)" -Headers @{Authorization = "Bearer $token"} $body = $body + "$(Get-Date)" + " Successfully deleted Serial Number $($d.serialNumber) from Windows Autopilot device. May take a few minutes to complete in Intune Portal." + ".`n" $response = "Success" Write-Host $body break } } } Else{ $body = $body + "$(Get-Date)" + " Serial Number: $serialNumber does not exist in Windows Autopilot" + ".`n" $response += "Failed" Write-Host $body } } Catch{ $body = $body + "$(Get-Date)" + " $($Error)" + ".`n" $body = $body + "$(Get-Date)" + " Failed to get Serial Number: $serialNumber from Windows Autopilot." + ".`n" $response += "Failed" Write-Host $body } $body = $body + "$(Get-Date)" + " Exiting Azure function." } # Associate values to output bindings by calling 'Push-OutputBinding'. Push-OutputBinding -Name Response -Value ([HttpResponseContext]@{ StatusCode = [HttpStatusCode]::OK Body = $response }) Step 4. Create a GetAPDeviceFromIntune http trigger In the Function app, create a another http trigger called GetAPDeviceFromIntune and paste in the following code for that trigger. # Get Autopilot device from Intune # version: 0.1 windowsnoob.com 2024/03/31 using namespace System.Net param($Request, $TriggerMetadata) # define the following variables $ApplicationID = "" # create an application with permissions to delete devices in Azure $TenantDomainName = "" # your tenant name $AccessSecret = "" # this is the secret of the app you create in app registrations $serialNumber = $Request.Query.serialNumber if (-not $serialNumber) { $serialNumber = $Request.Body.serialNumber } $GraphBody = @{ Grant_Type = "client_credentials" Scope = "https://graph.microsoft.com/.default" client_Id = $ApplicationID Client_Secret = $AccessSecret } # make initial connection to Graph $ConnectGraph = Invoke-RestMethod -Uri "https://login.microsoftonline.com/$TenantDomainName/oauth2/v2.0/token" -Method POST -Body $GraphBody #get the token $token = $ConnectGraph.access_token Write-Host "Get AP Device from Intune" # to improve logging... $body = " `n" $body = $body + "$(Get-Date)" + " Starting Azure function...`n" $body = $body + "$(Get-Date)" + " Connected to tenant: $TenantDomainName.`n" # now do things... if ($serialNumber) { $body = $body + "$(Get-Date)" + " supplied serial number: '$serialNumber'" + ".`n" try { # Get Device Reference from Intune $body = $body + "$(Get-Date)" + " Get Device Reference from Intune" + ".`n" $DeviceReference = Invoke-RestMethod -Method Get -uri "https://graph.microsoft.com/v1.0/deviceManagement/windowsAutopilotDeviceIdentities?`$top=25&`$filter=contains(serialNumber,'$serialNumber')" -Headers @{Authorization = "Bearer $token"} | Select-Object -ExpandProperty Value #Write-Host $body Write-Host "Device Reference count: $($DeviceReference.Count)" if($DeviceReference.Count -gt 0) { $body = $body + "DeviceTrue" + ".`n" $body = $body + "$(Get-Date)" + " Serial number: $serialNumber is an autopilot machine" + ".`n" } Else { $body = $body + "DeviceFalse" + ".`n" $body = $body + "$(Get-Date)" + " Serial number: $serialNumber is not an autopilot machine" + ".`n" #Write-Host "Device doesn't Exists" } } Catch { $body = $body + "$(Get-Date)" + " $($Error)" + ".`n" $body = $body + "$(Get-Date)" + " Failed to get Device Reference from Intune." + ".`n" } } $body = $body + "$a Exiting Azure function." # Associate values to output bindings by calling 'Push-OutputBinding'. Push-OutputBinding -Name Response -Value ([HttpResponseContext]@{ StatusCode = [HttpStatusCode]::OK Body = $body }) Step 5. Create an enterprise app In Microsoft EntraId, create an enterprise app called PCBuyback Step 6. assign permissions to the app Once created, click on API permissions and using the + Add a permission button, add permissions as I've listed below. Note that these are Application permissions (type) for Microsoft Graph, once done, don't forget to grant permission for your tenant. Step 7. Create a secret In production use Azure key vault, for your lab you can quickly create a secret to test this. Copy the value somewhere safe as you'll need it for the next step. Step 8. Edit the variables in the two triggers In the two http triggers you just created, edit the variables and paste in the Enterprise App ID and secret, and your tenant name like so Once done, save the changes Step 9. Verify the http triggers Now that you've created the triggers and assigned permissions, you'll need to verify that they do what they are supposed to do. Let's start with the GetAPDeviceFromIntune. To test this, paste in the serial number of a Windows Autopilot registered device and click on Test/Run. Replace the serial number below with the serial number of the computer you want to test with. { "serialNumber": "5366-8776-5502-4105-6320-3369-17" } After running, we can see it reports that the device is true as it is a Windows Autopilot registered device. Now we know it works, let's test the other trigger. And that too, works great! That's it for part 1, see you in the next part where we'll create the Win32 app and test it !


-
SCCM - Bitlocker
anyweb replied to Bocar FOFANA's topic in System Center Configuration Manager (Current Branch)
what version of SCCM are you testing with ? -
SCCM - Bitlocker
anyweb replied to Bocar FOFANA's topic in System Center Configuration Manager (Current Branch)
have you reviewed my guides here ? https://www.niallbrady.com/2019/11/13/want-to-learn-about-the-new-bitlocker-management-in-microsoft-endpoint-manager-configuration-manager/ -
can you share exactly what you have in the step that's failing? i do see the following typo above $TSEnv = New-Objct should be $TSEnv = New-Object
-
can you show me a snippet of the new errors seen ? looking back at the original error it's complaining about 'invalid date' did you see that ?
-
ADR - No Updates for Feb
anyweb replied to clush's topic in System Center Configuration Manager (Current Branch)
you need to trigger a Software Update sync and look at the wsyncmgr.log and WSUSctrl.log to figure out the problem -
ADR - No Updates for Feb
anyweb replied to clush's topic in System Center Configuration Manager (Current Branch)
have you checked and verified that WSUS is syncing correctly and no issues there ? -
for context, here's a snapshot of what yours is downloading before it fails versus the same moment from my working lab

-
from what i can see here it's downloading the wrong type of boot image have you deployed the X64 boot wim from your distribution point and made it PXE bootable ?
-
did you follow the guide exactly ? did you verify IIS was working as per my guide before switching ? did you also add your root CA as per step 5 here ?
-
there are many things to think about here, for example, how is your task sequence deployed ? is it deployed to All Unknown Computers ? and also to a collection containing these computers (if they are already known in SCCM) ?
-
Don't take this the wrong way, but consider looking at Intune and Windows Autopilot, as that is where Microsoft is investing time, money and effort today. SCCM is great but as it's a 'legacy' on-premises based system, it's not getting the focus it used to, so if you want to get 'current' then look at modern management of devices, using Intune and Windows Autopilot if you cannot move to the cloud, then we can focus on trying to assist you with your goal, best of luck.
-
take note of the mac address of your HP model, and check the SMSPXE.log on the distribution point, search for the mac address, if you don't see it you have other issues. Back to your HP model, which one is it ?
-
it clearly states that it cannot install SMSSETUP\BIN\X64\SQLSysClrTypes.msi search for a log file for that msi, it might be called SQLSysClrTypes.log also, check that the file SMSSETUP\BIN\X64\SQLSysClrTypes.msi is not ZERO bytes in size, if so that's the issue cheers niall
-
have you tried this >
-
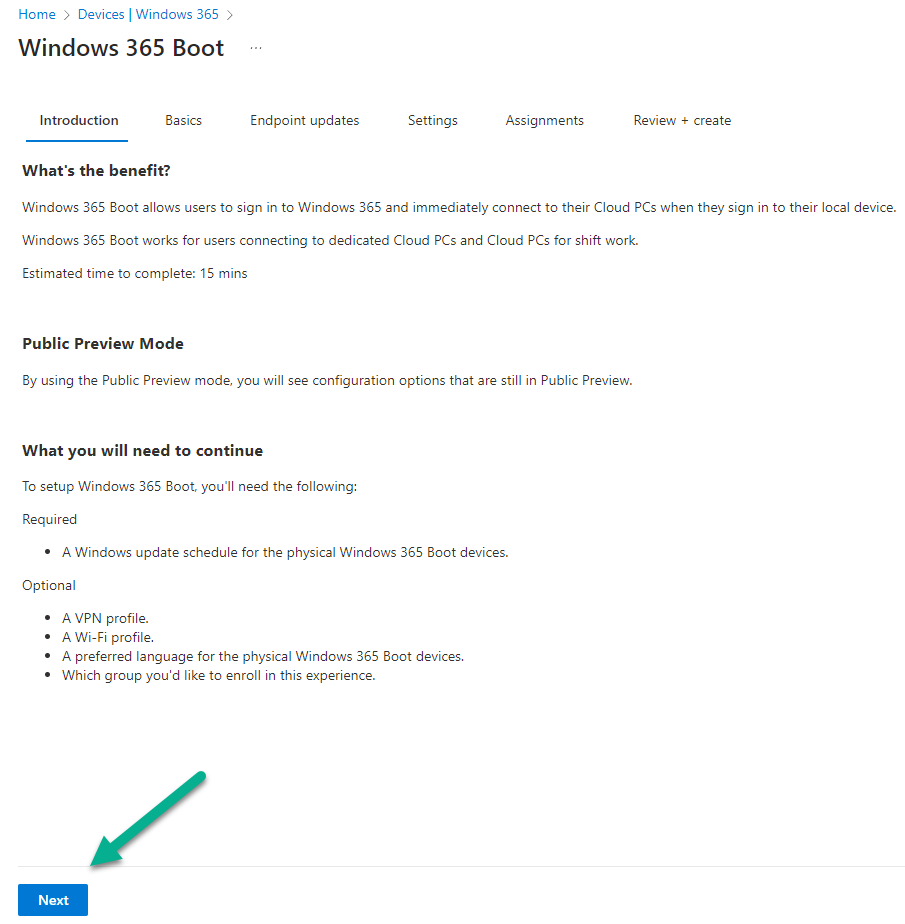
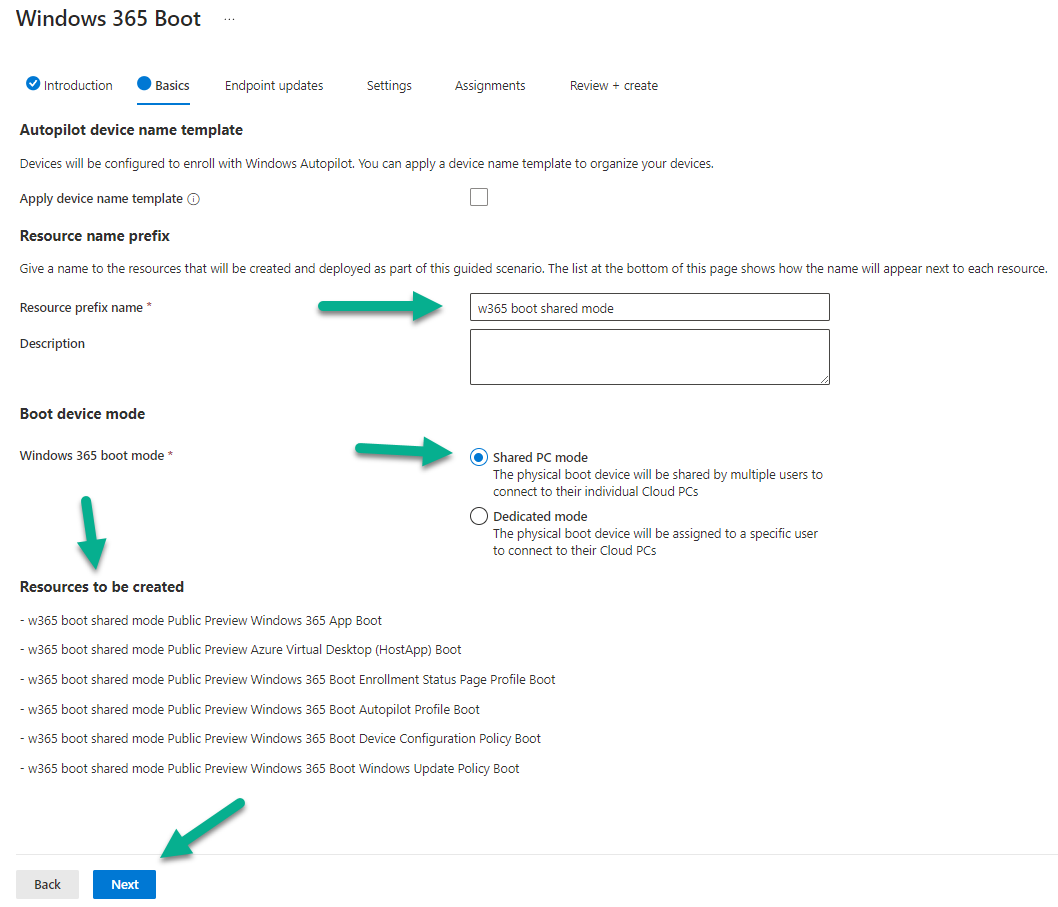
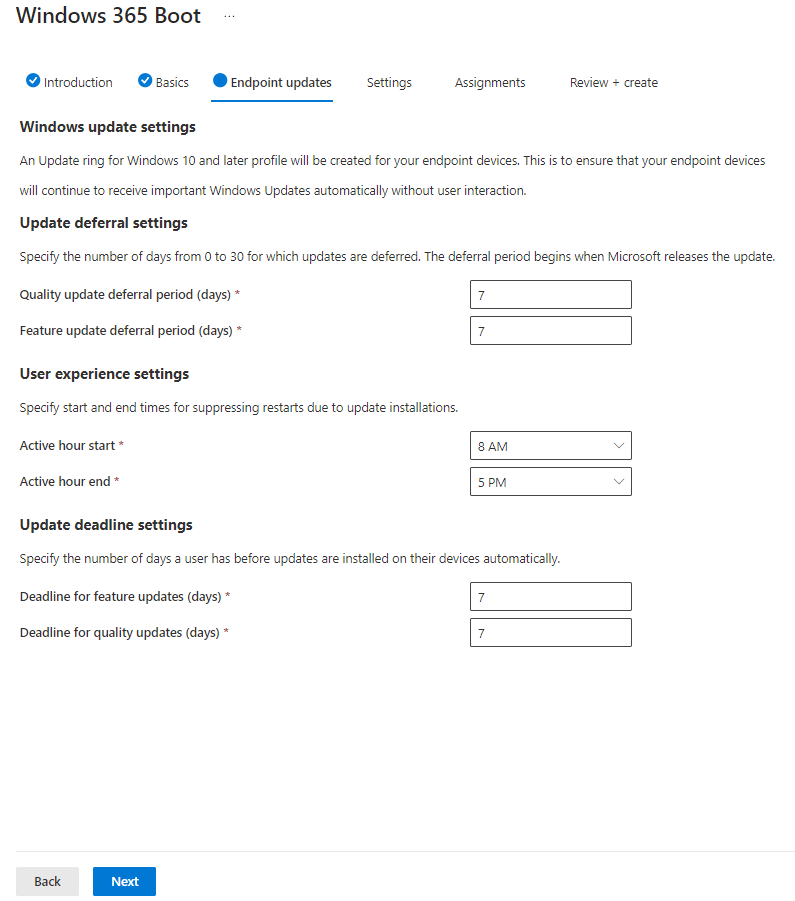
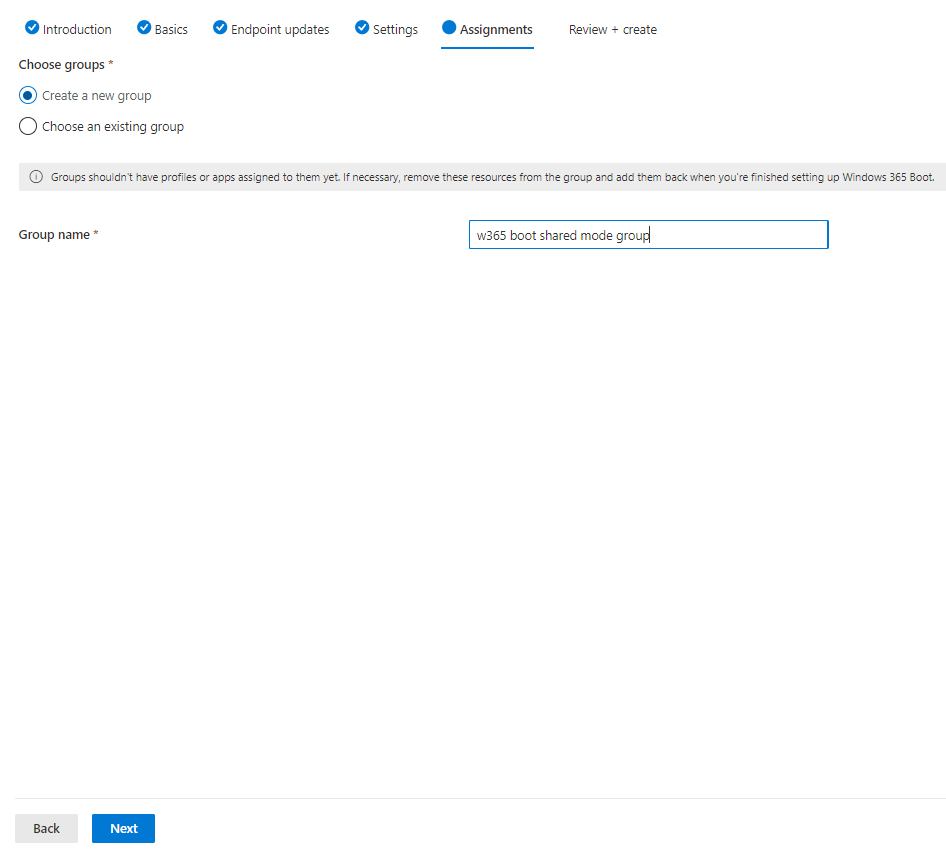
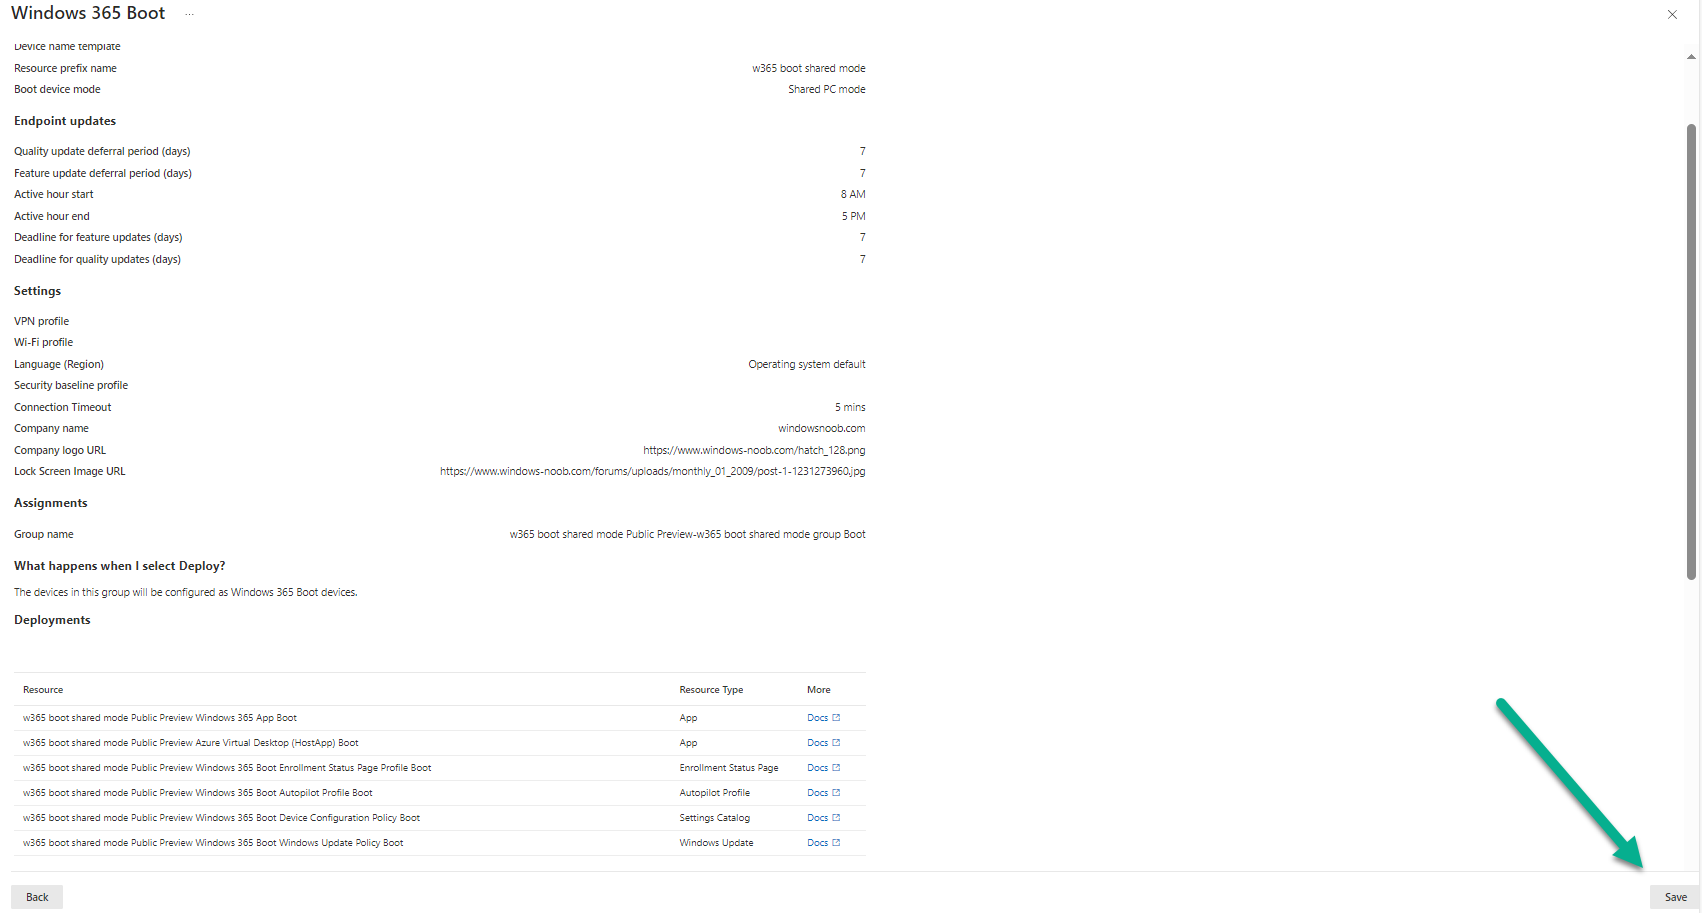
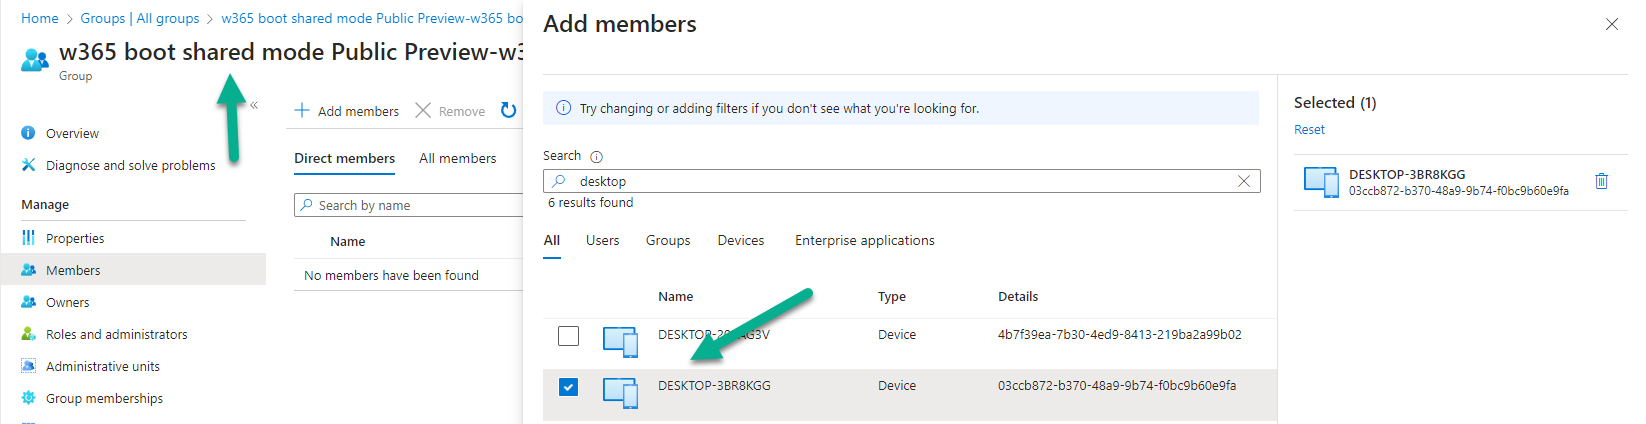
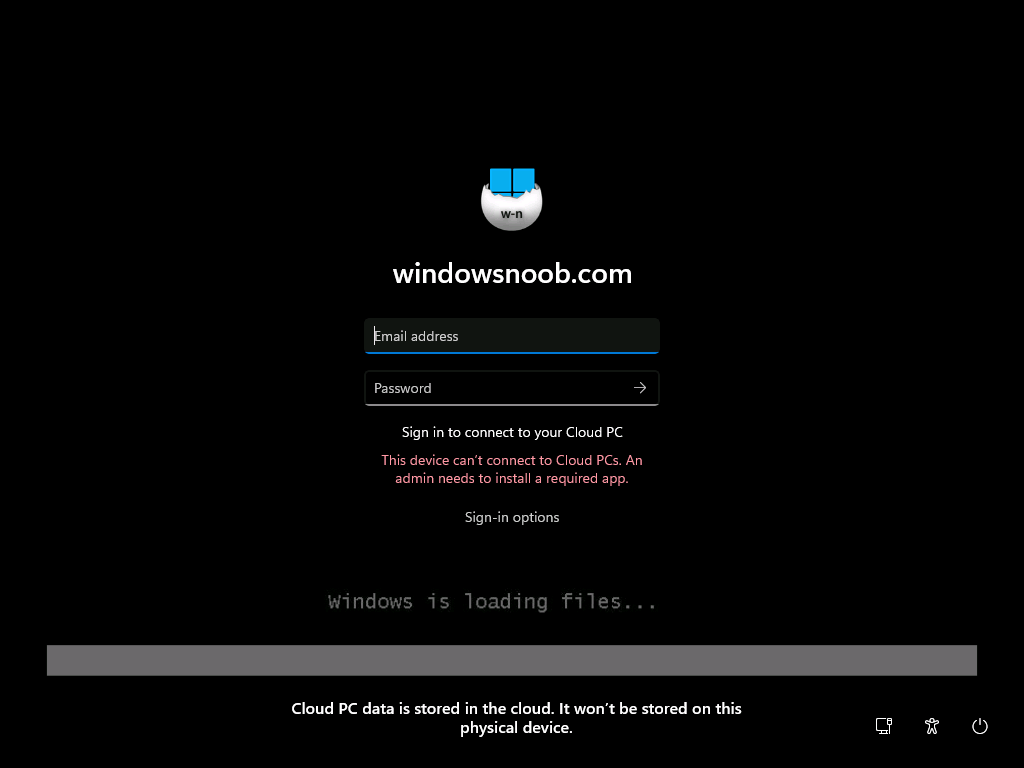
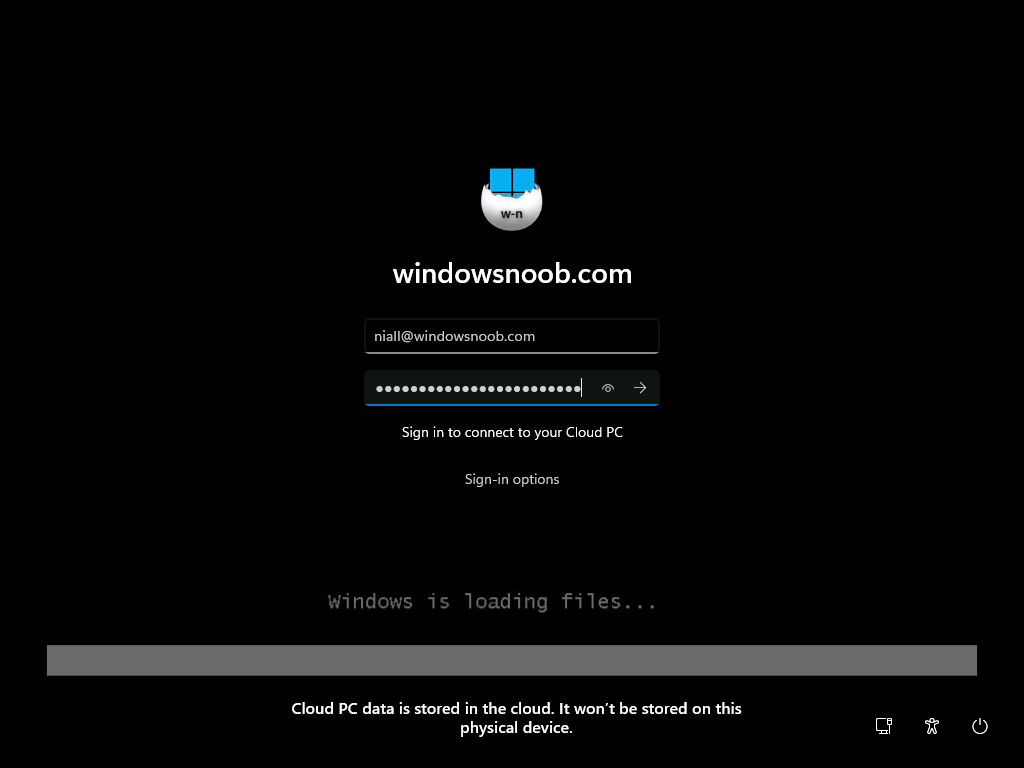
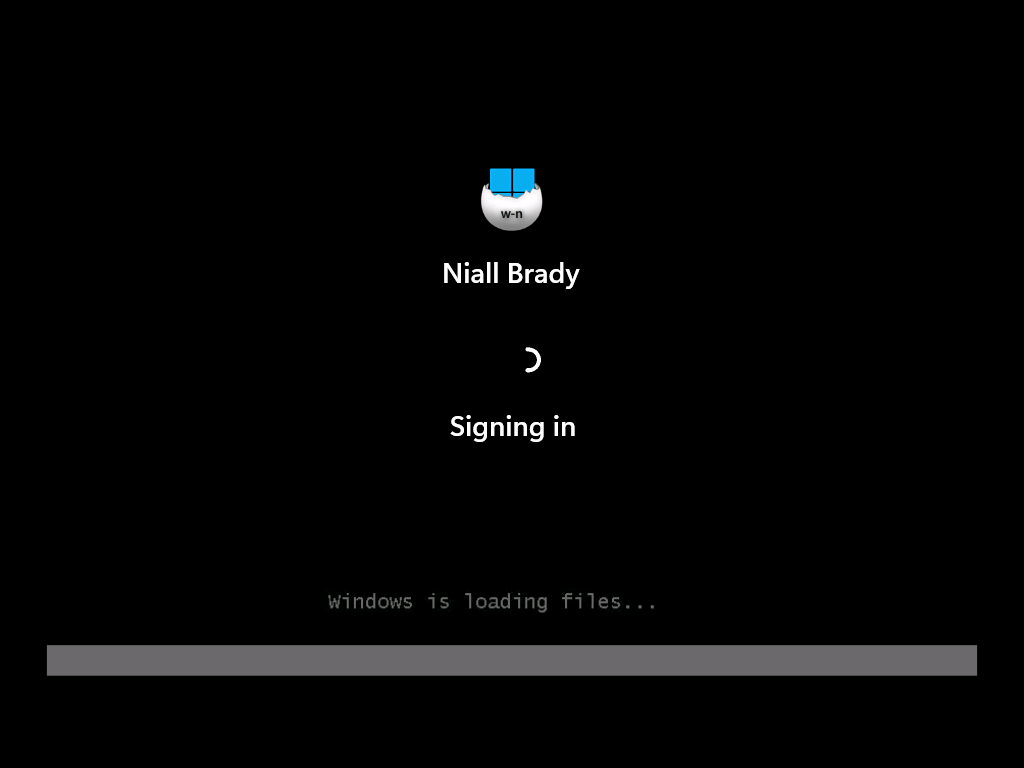
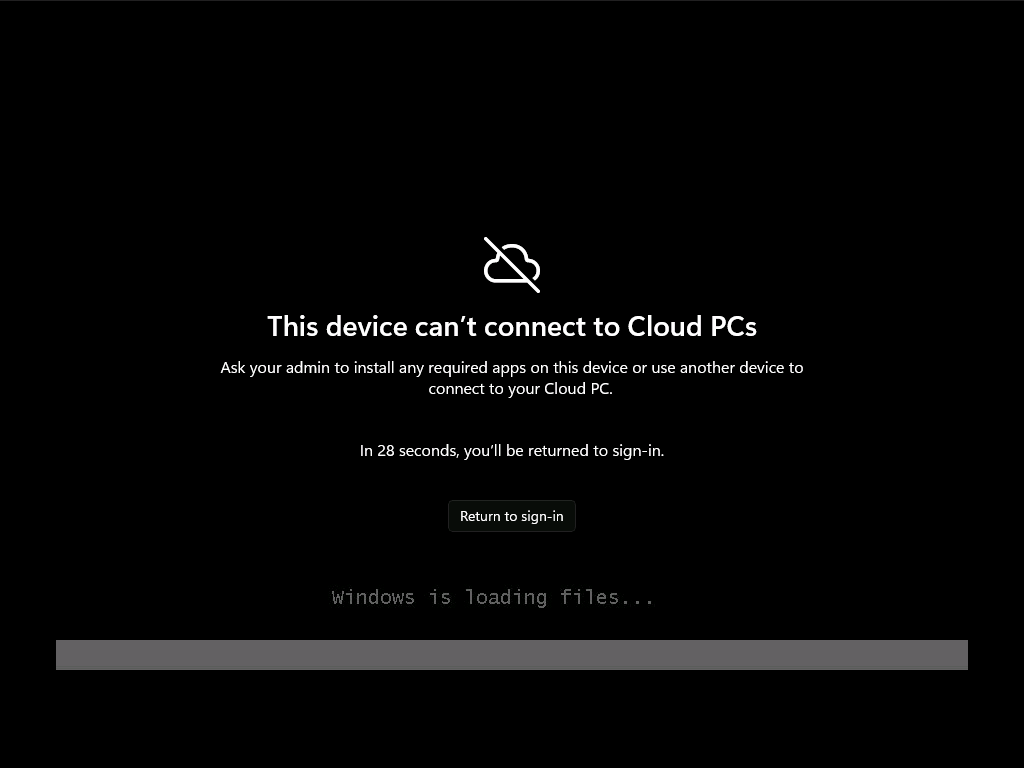
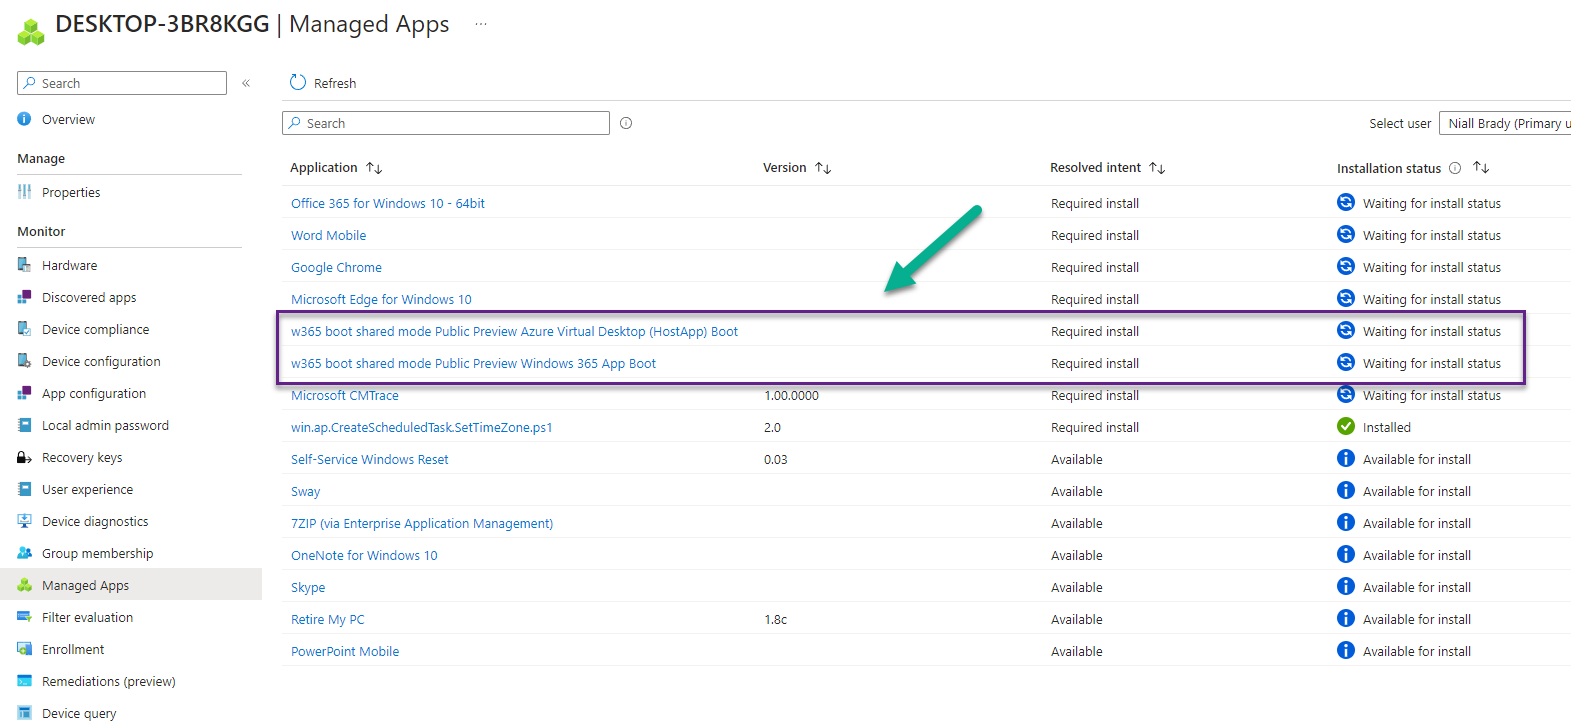
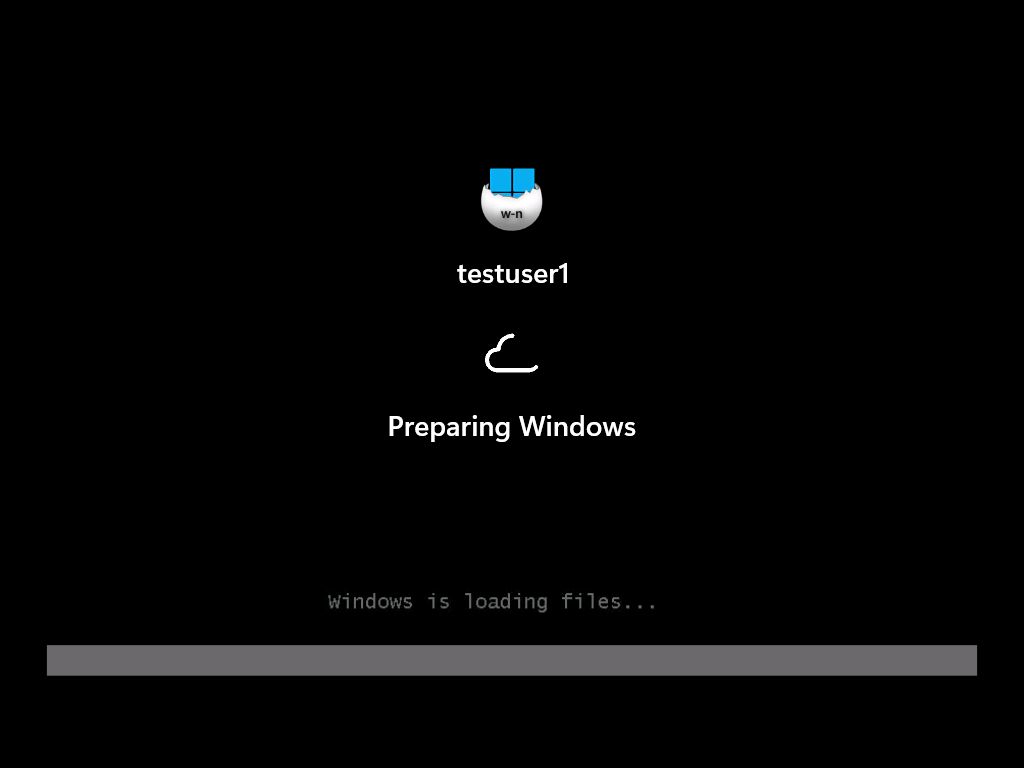
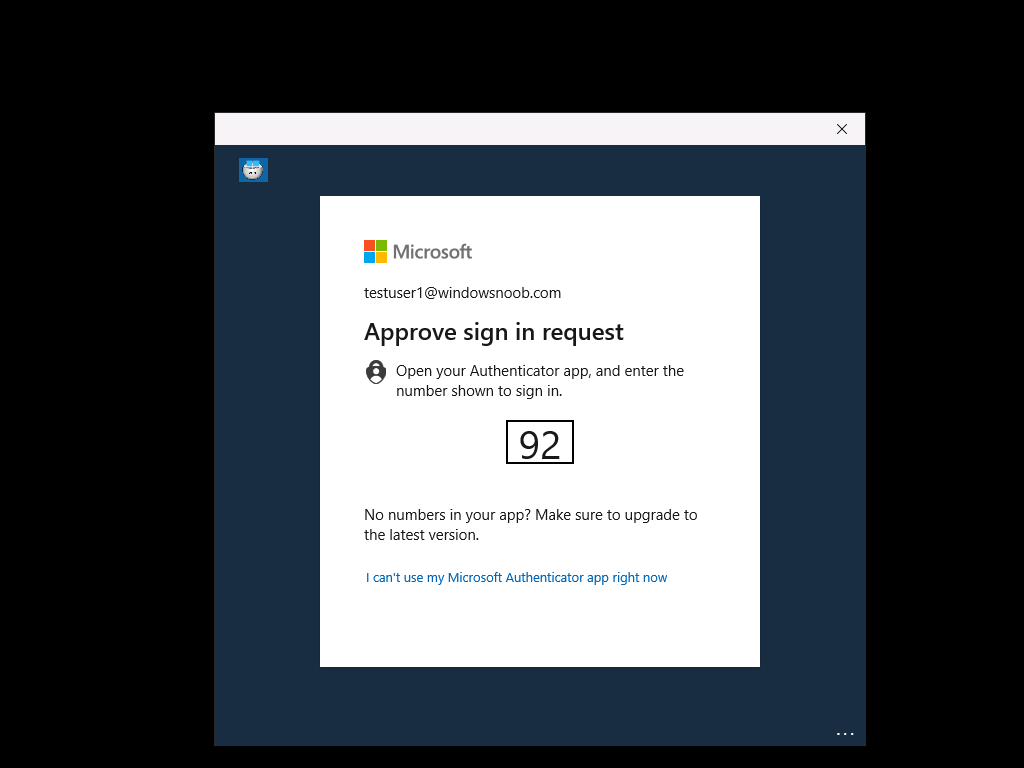
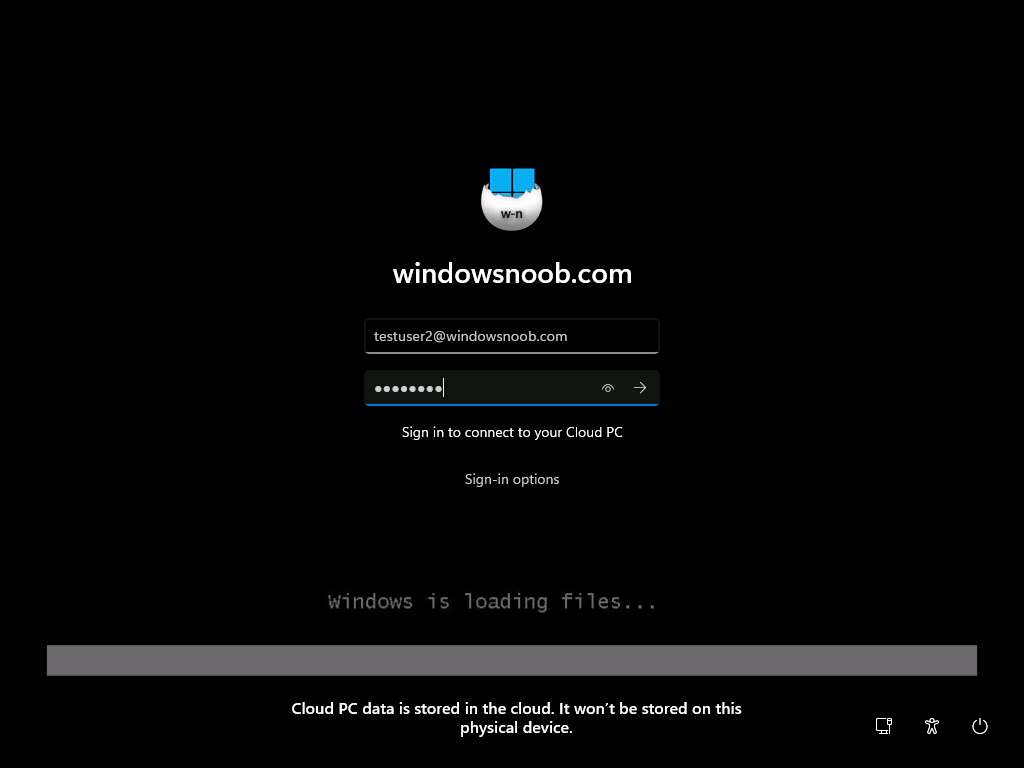
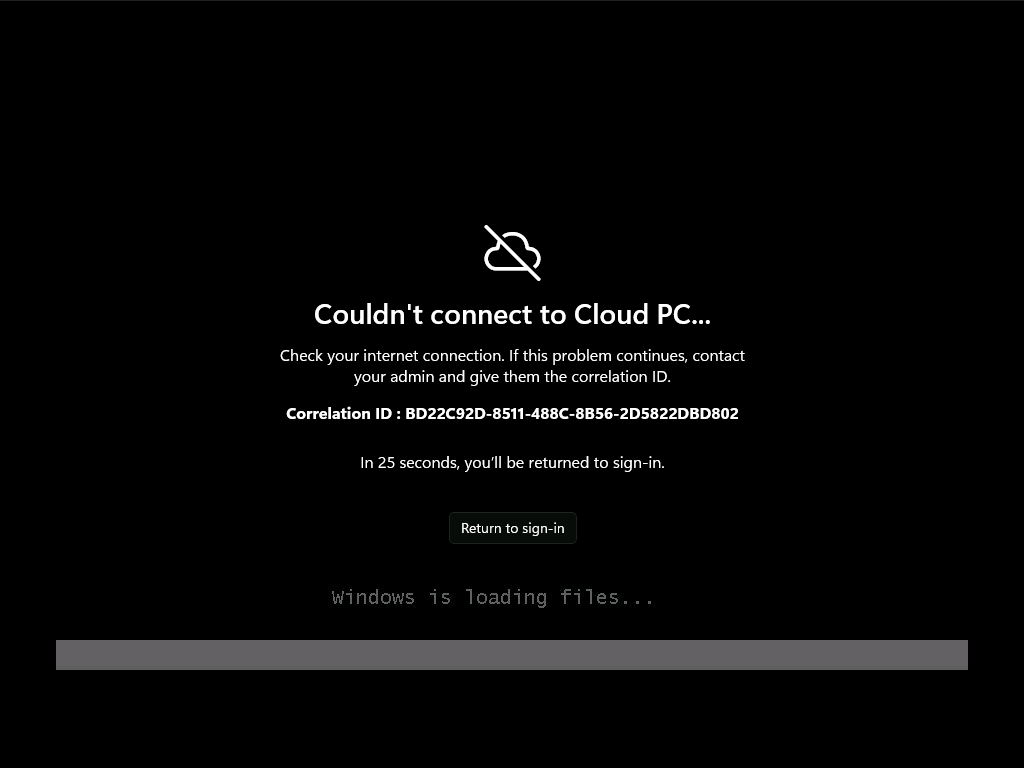
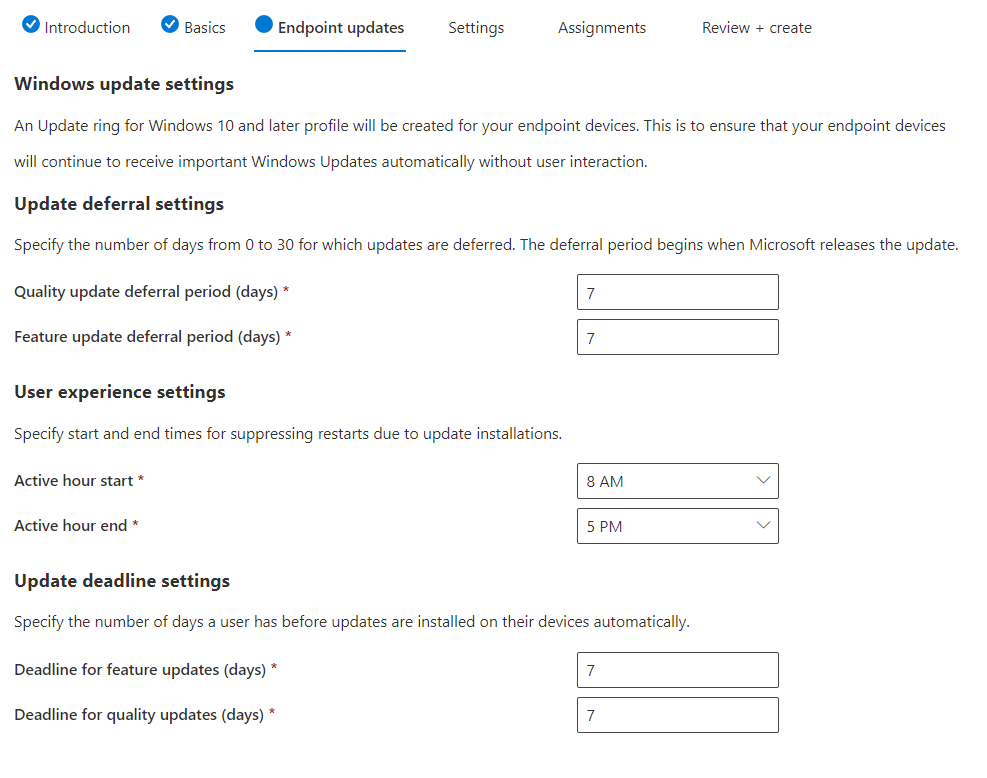
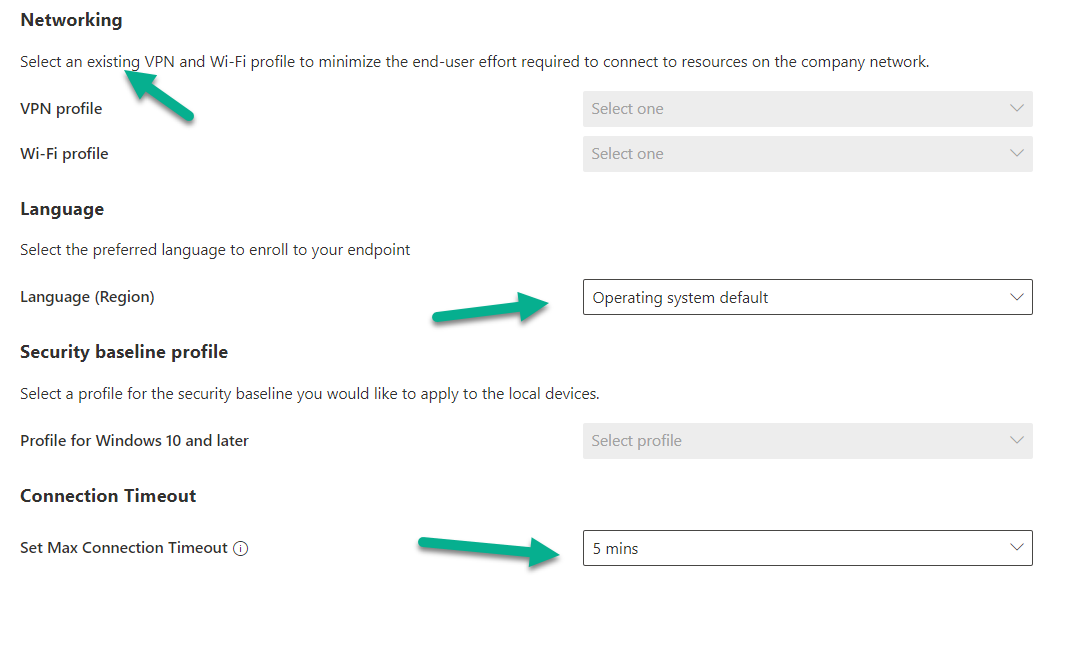
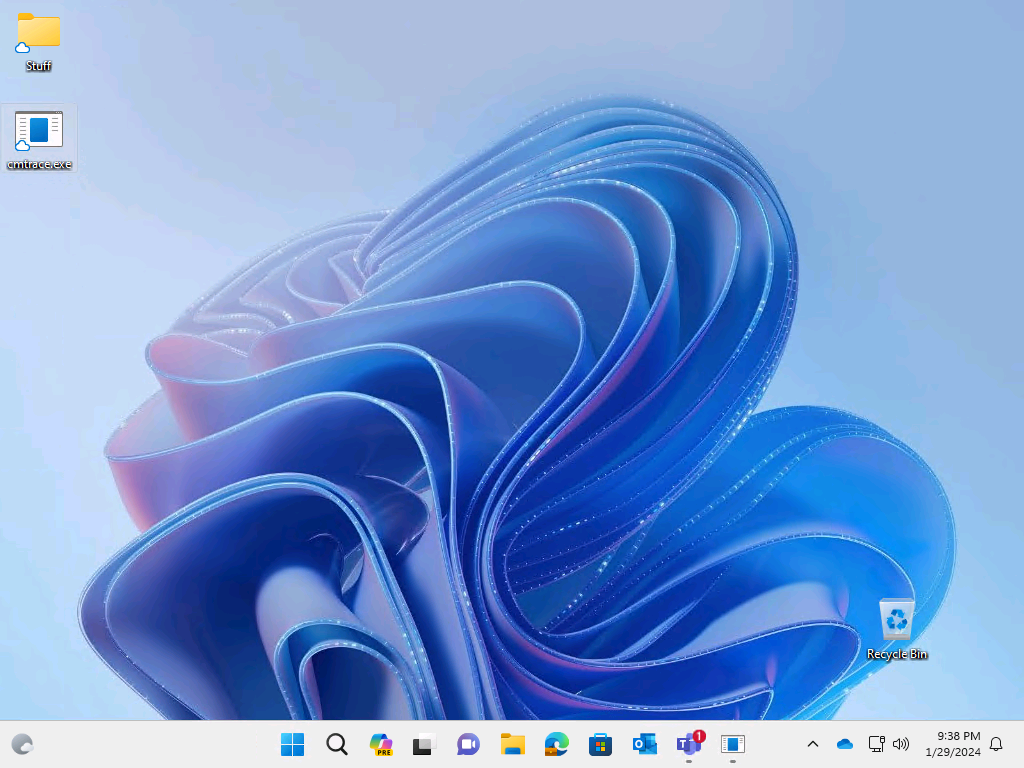
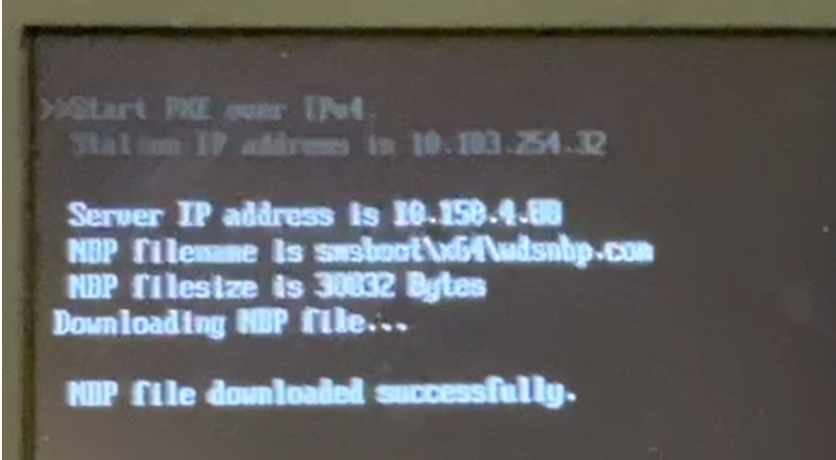
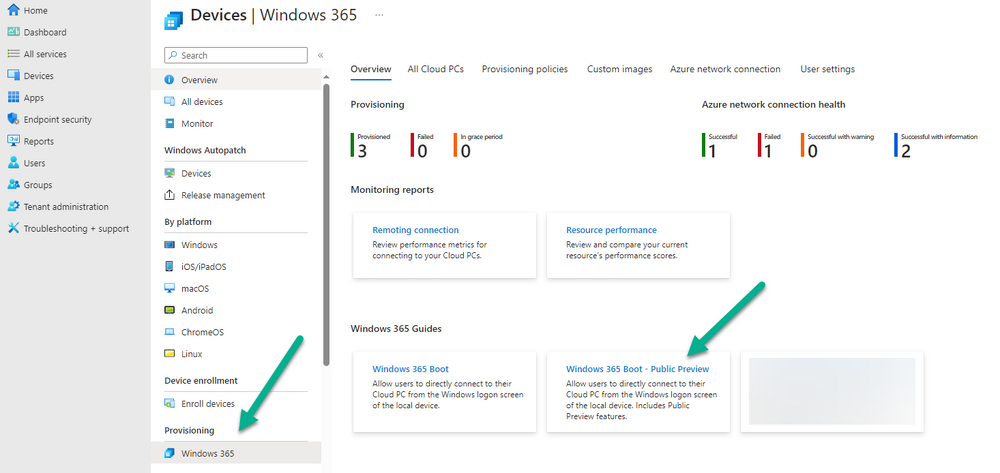
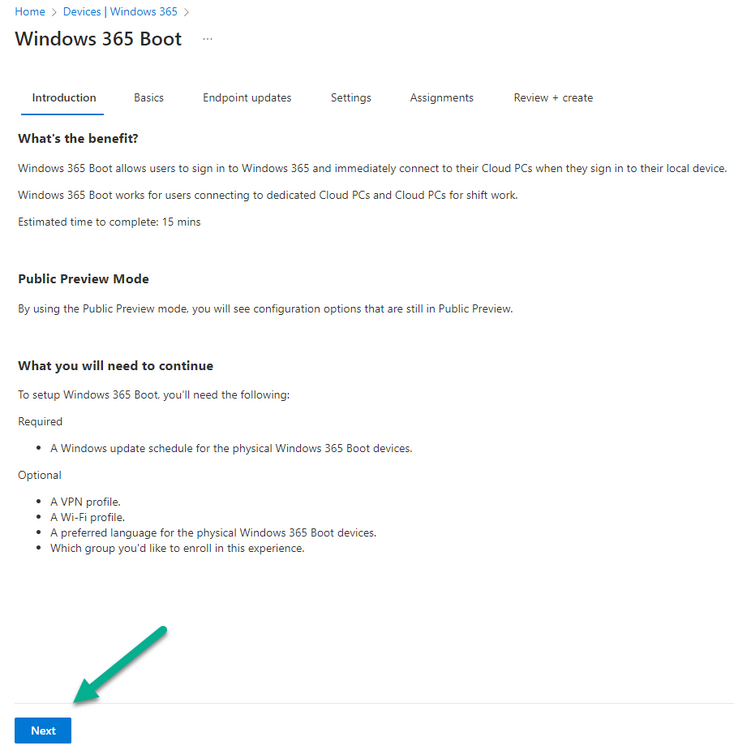
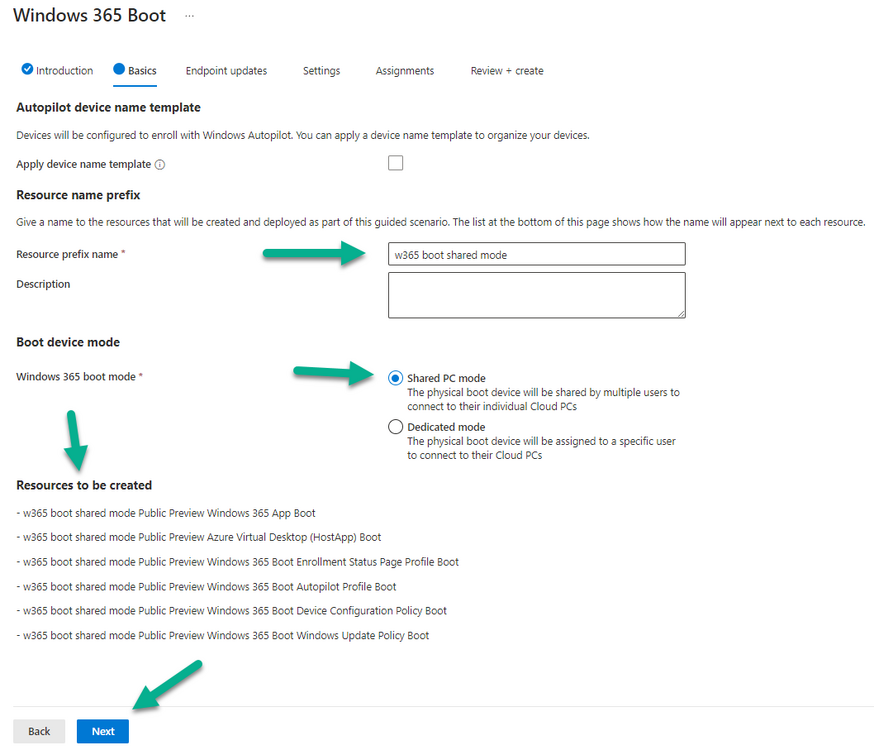
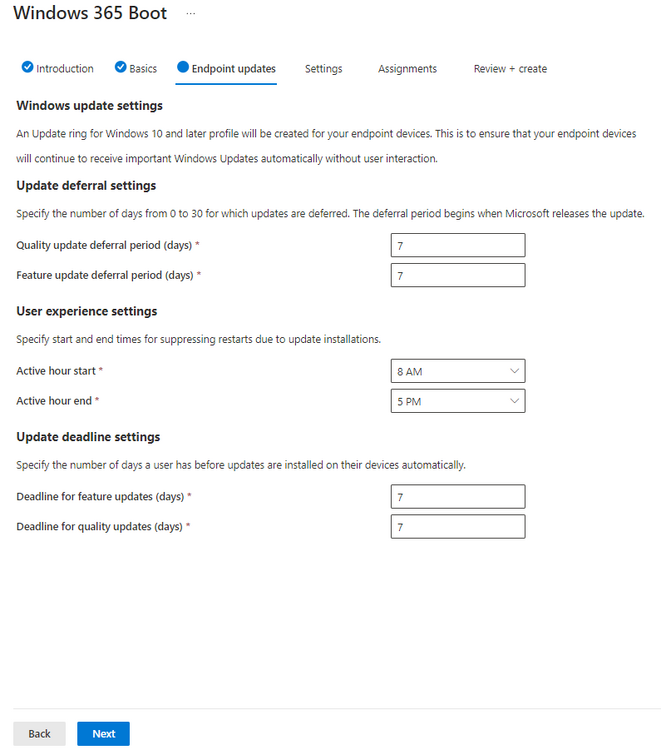
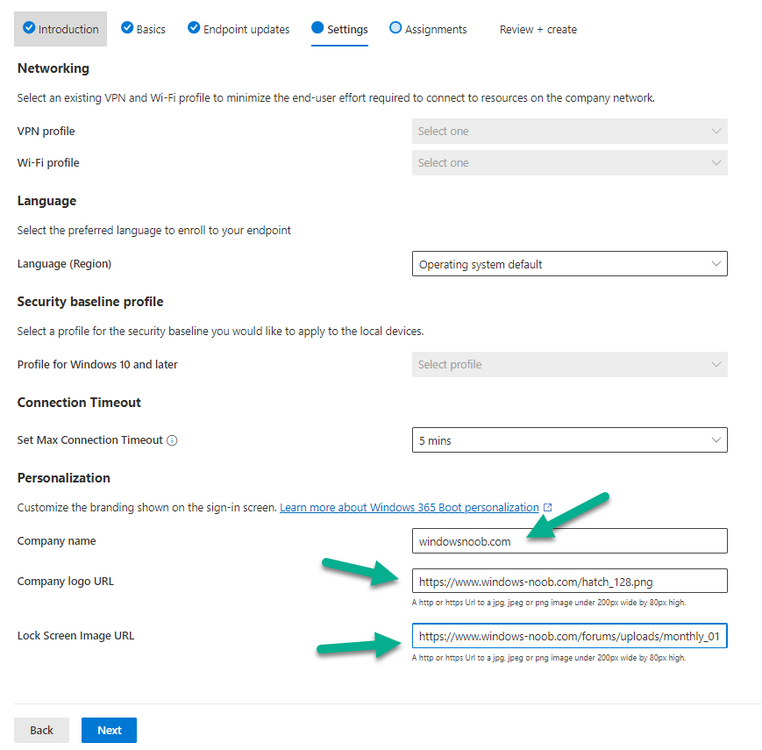
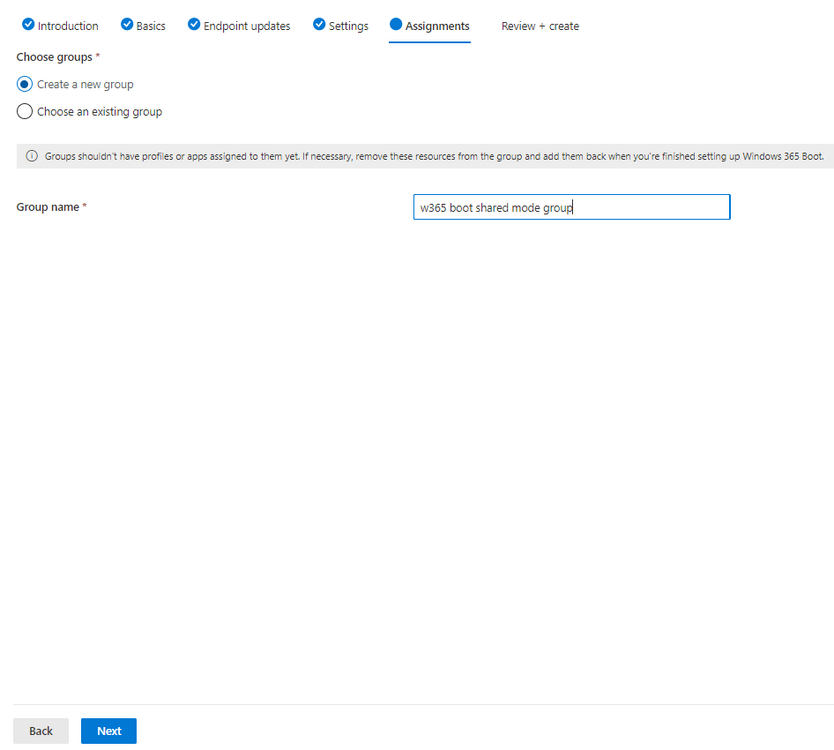
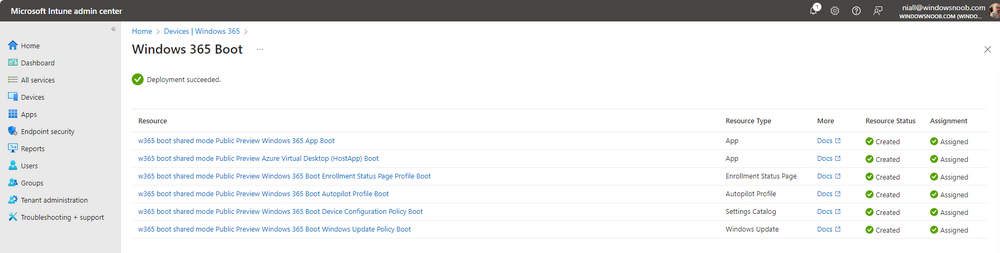
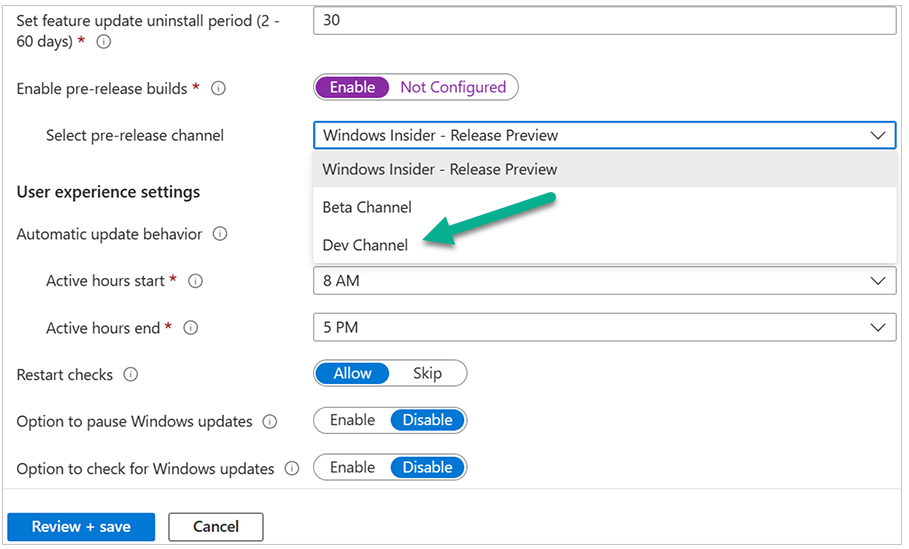
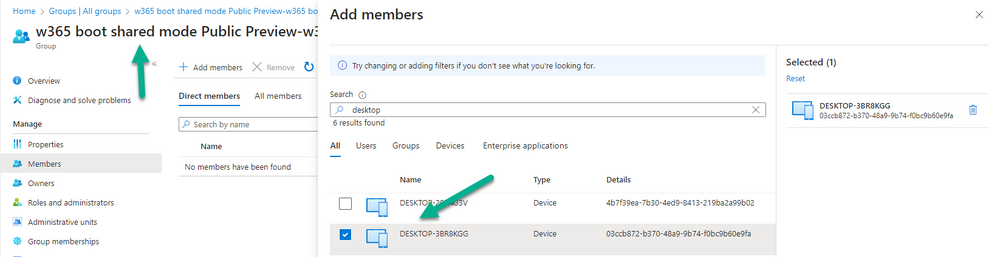
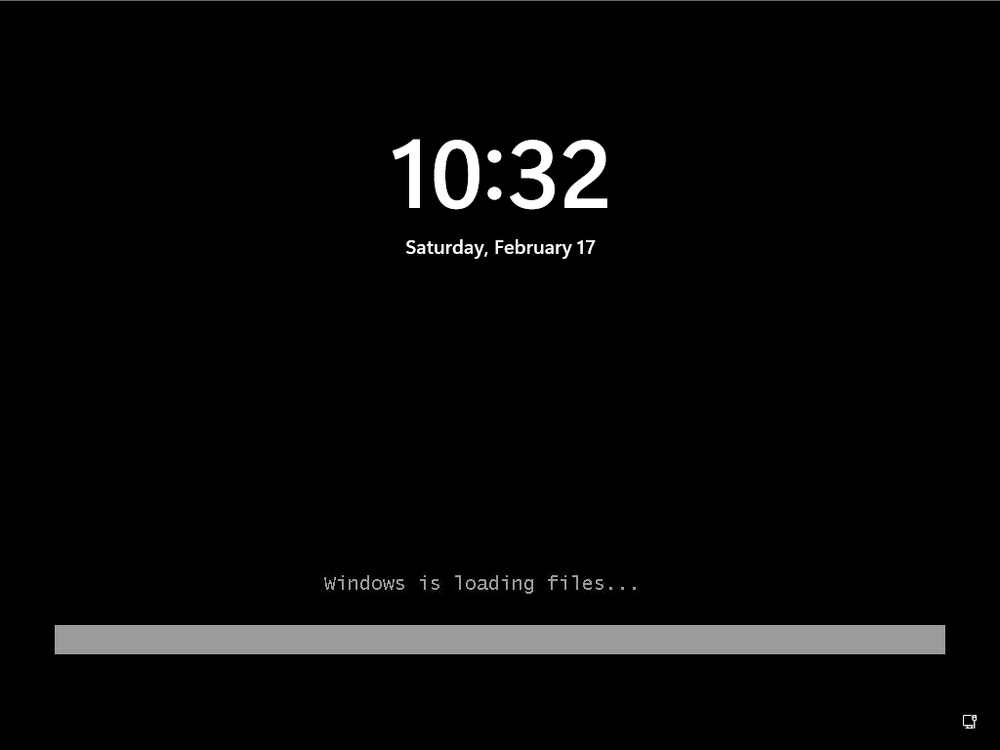
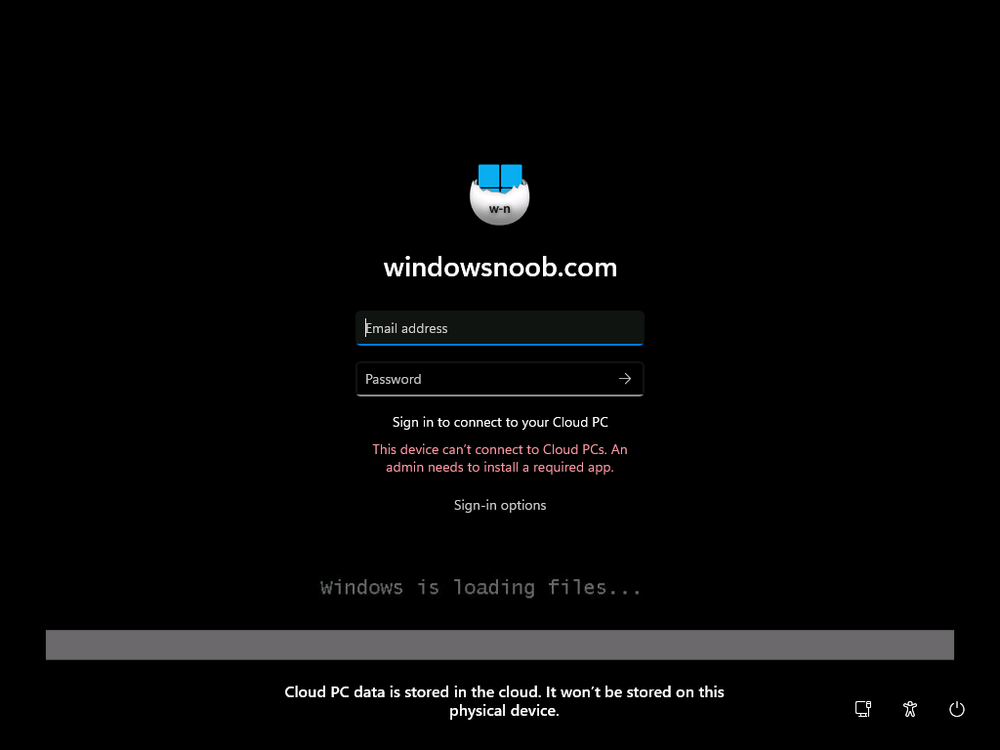
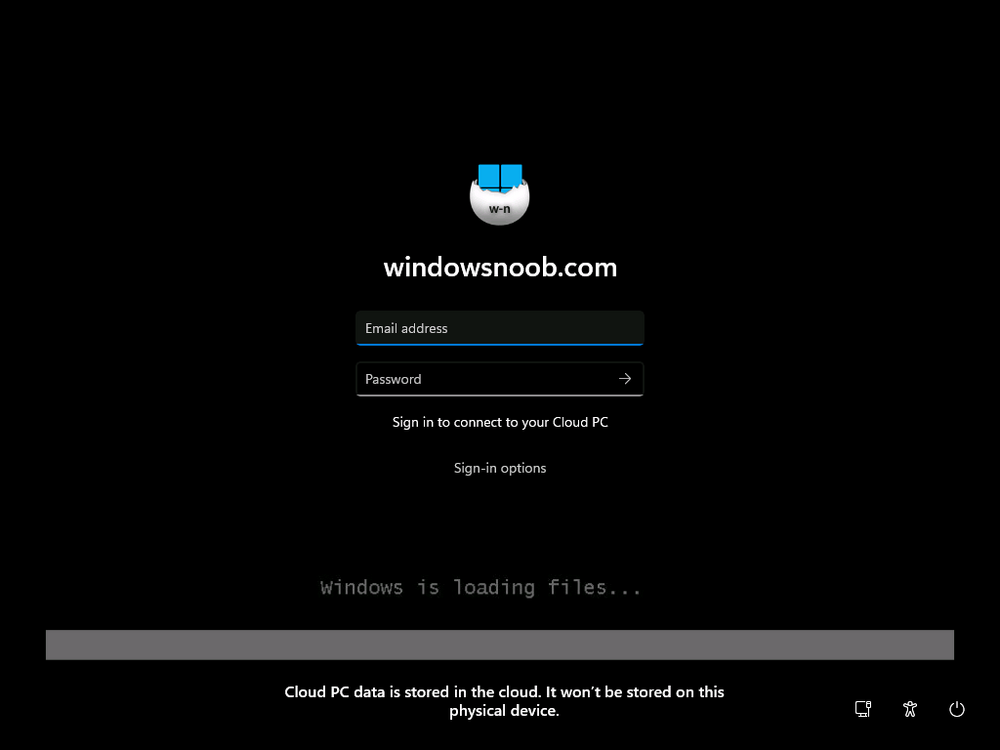
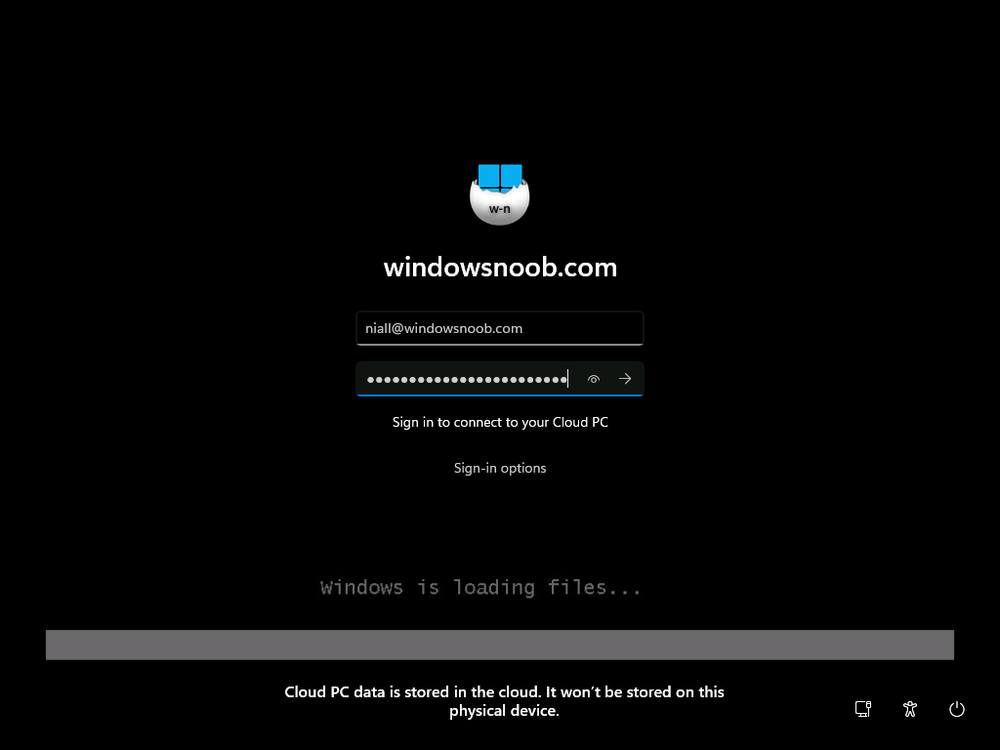
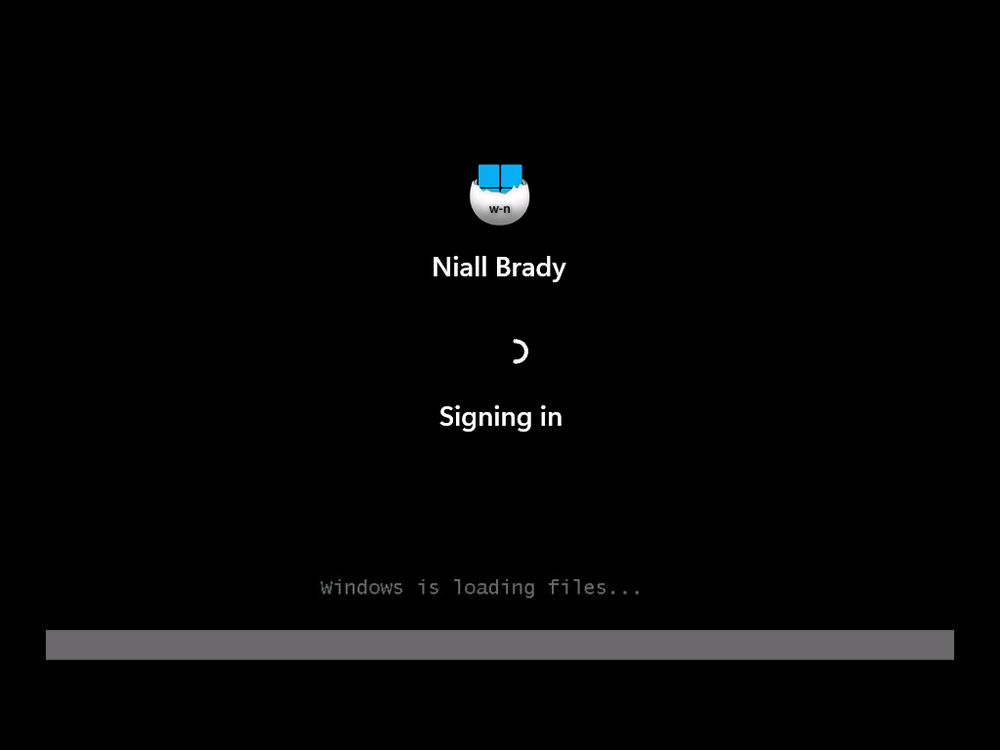
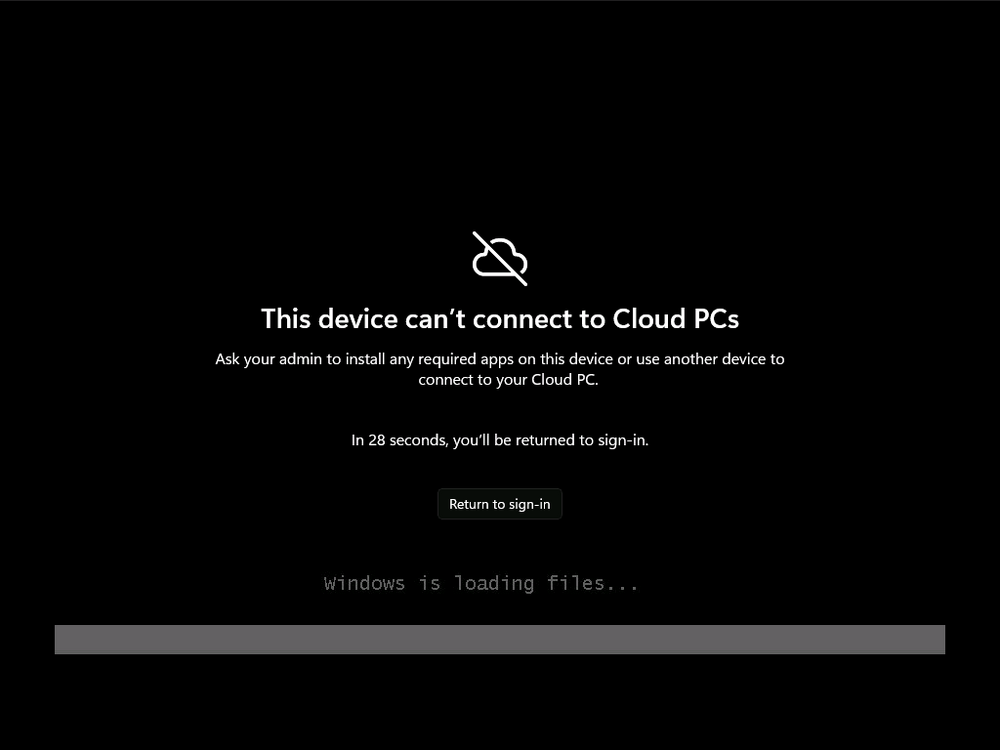
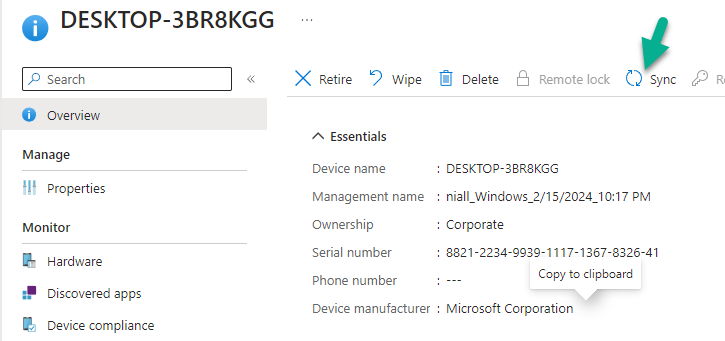
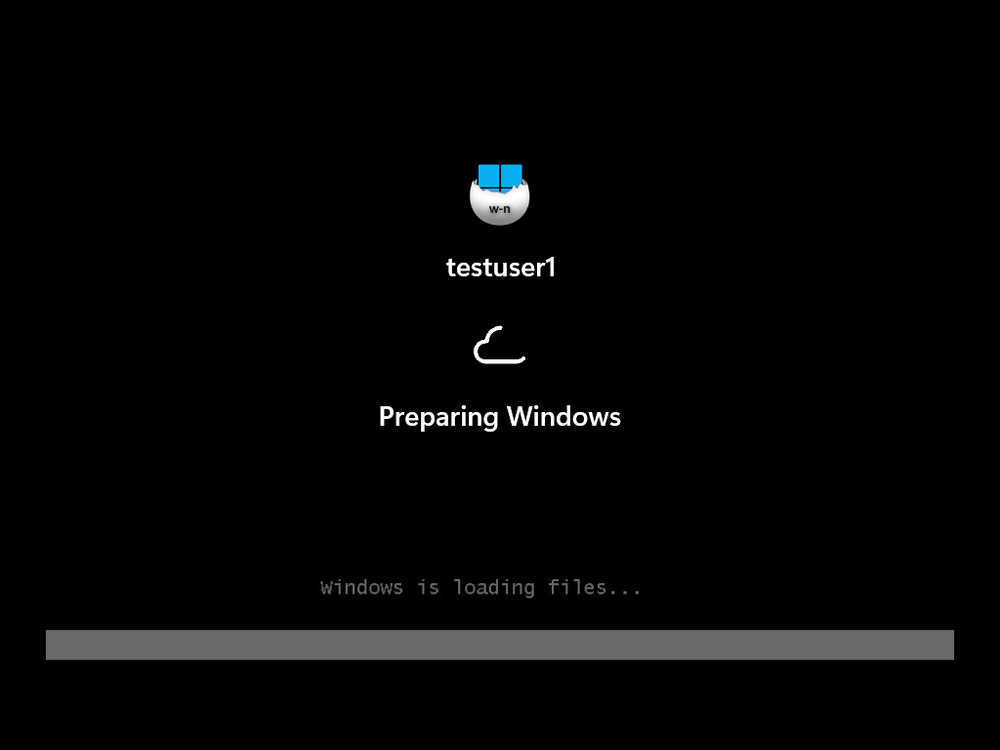
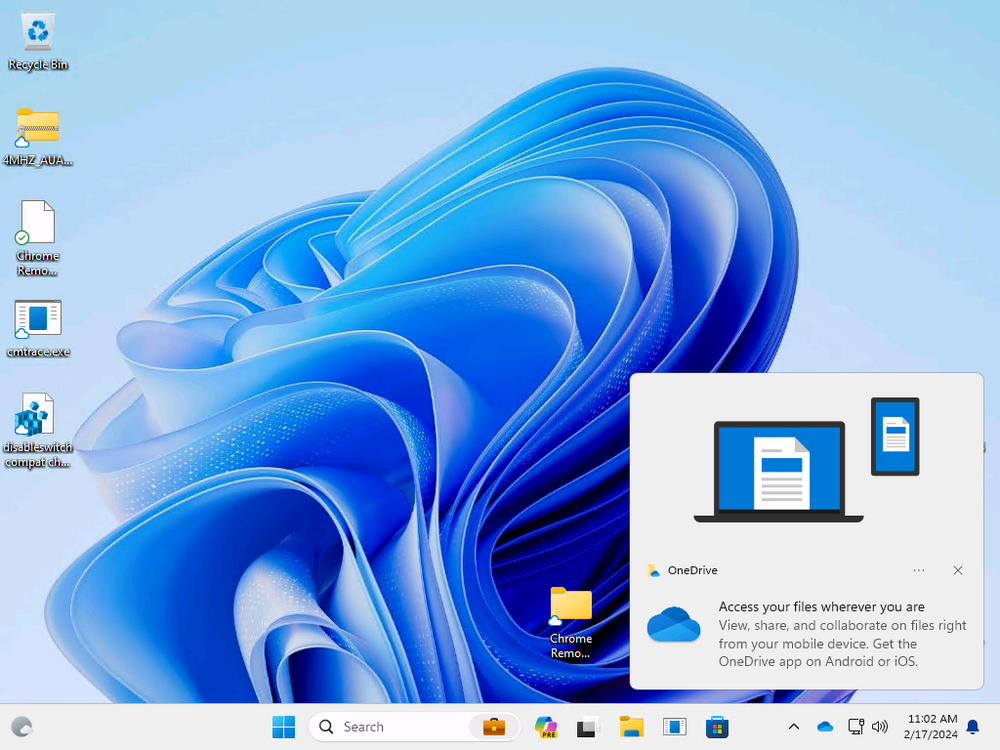
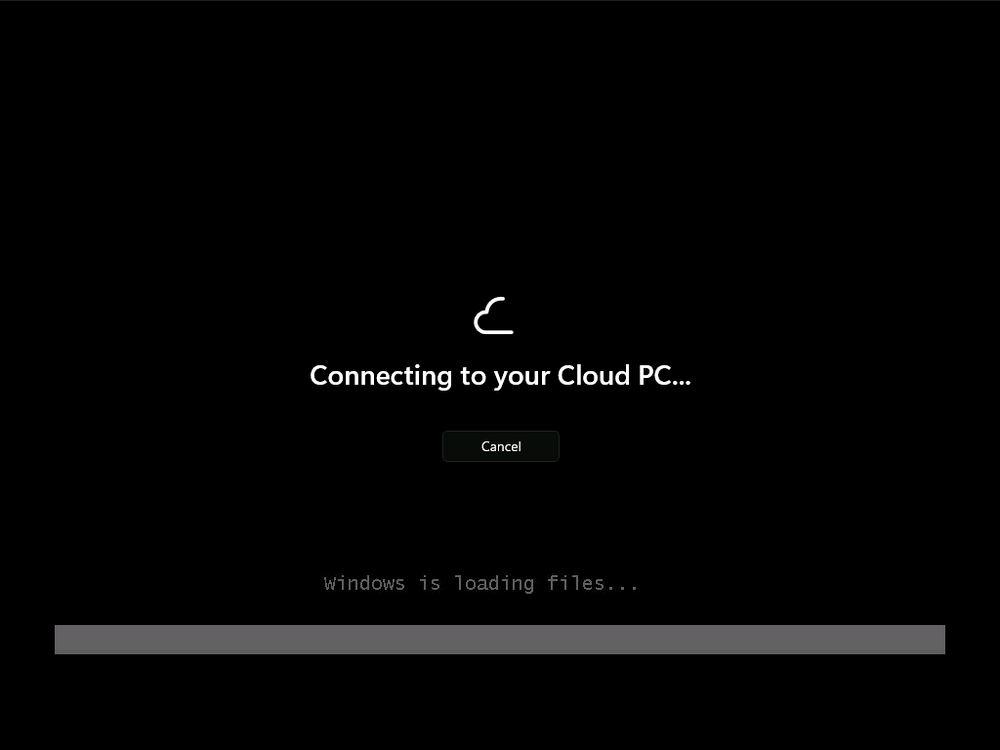
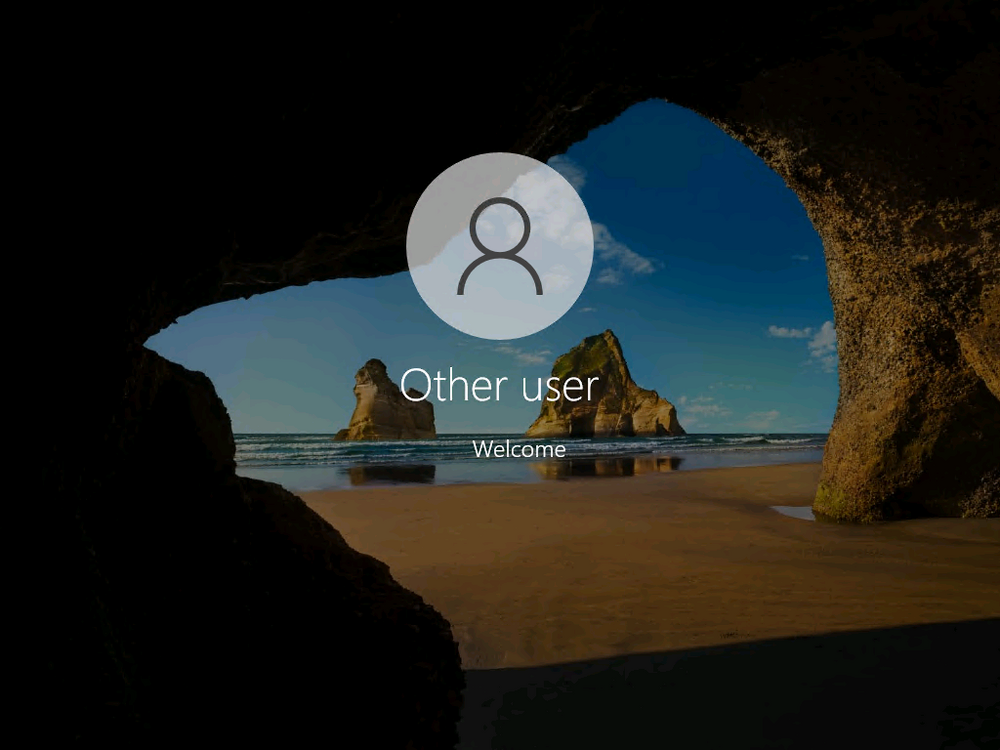
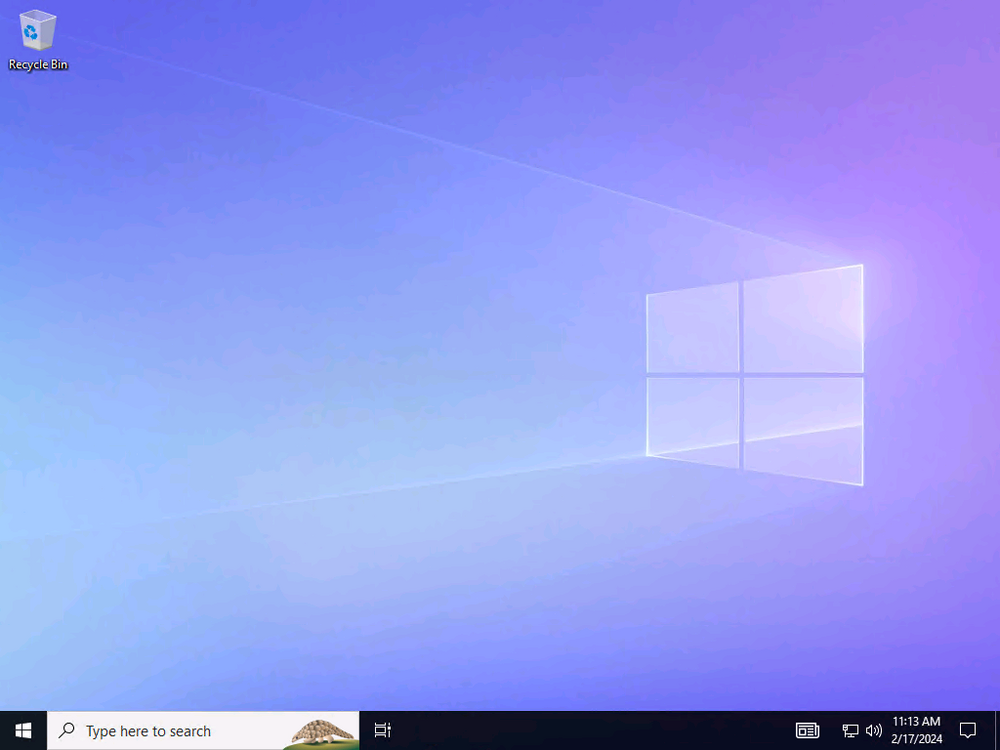
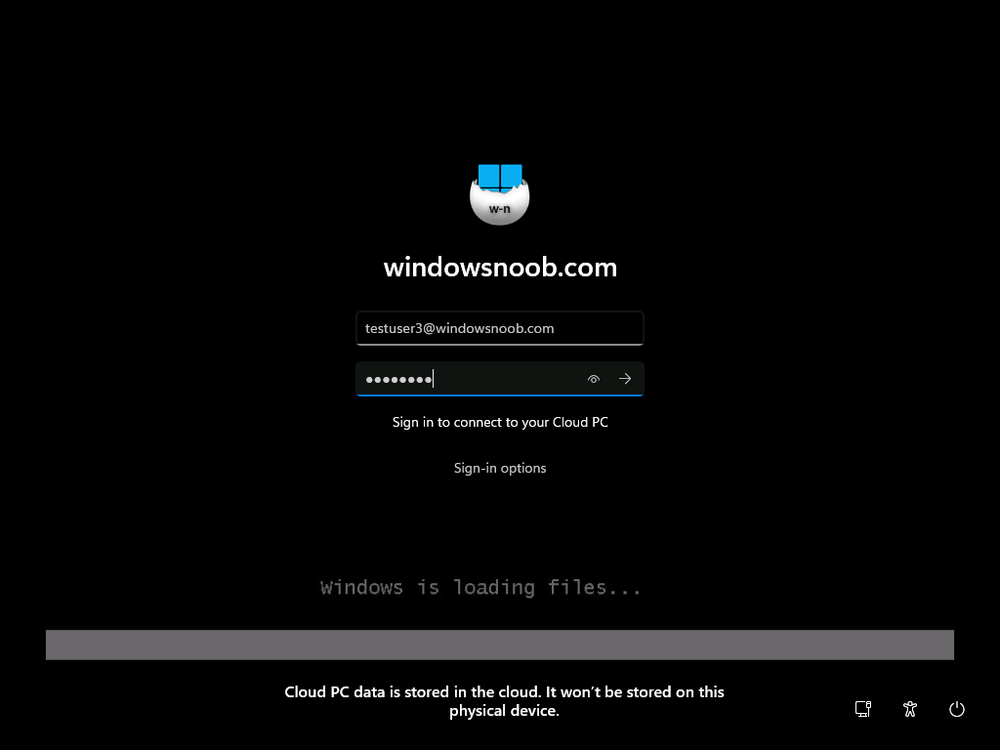
Introduction Microsoft released Windows 365 Boot (Generally Available) September 2023, and are now adding new abilities to that feature. If you are new to Windows 365 Boot please take a look at the blog post from myself and Paul on the subject here. So what's new ? 2 things stand out actually namely: Shared PC mode Dedicated mode for Windows 365 Boot Described here I took a look at these public preview features and I'll share my findings below. In this blog post, let's look at shared mode. I already looked at dedicated mode and you can review my blog post here. So what is Windows 365 Boot shared mode ? Shared PC mode means that the physical boot device will be shared by multiple users to connect to their individual Cloud PCs. So let's give it a try. Requirements Windows 11-based endpoints (Windows 11 Pro and Enterprise) Microsoft Intune Administrator rights Windows 365 Cloud PC license. See Create provisioning policies for guidance on how to create Cloud PCs Enrollment in the Windows Insider Dev Channel and running Windows 11 Insider Preview Build 23601 or higher Step 1. Configure policy Open the Intune portal and browse to the Windows 365 node. From there click on Windows 365 Boot Public Preview (or Windows 365 Boot) to launch the Windows 365 Boot - Public Preview guided scenario. That will launch a new wizard, have a read and then click Next On the Basics screen, give the Resource prefix a name and select Shared mode from the options. You can also optionally use the device name template, but I won't bother in this example. In the screenshot below I've also highlighted a list of resources that will be created when you complete the wizard. Click Next and you'll be presented with an Endpoint updates screen, select your desired options there to ensure that your Corporate devices used for Windows 365 Boot will get updates according to your desired schedule. Your Cloud PCs will have their own update settings and could for example be managed by Windows Autopatch. Click Next once done. The next screen will show settings available. Some will be greyed out and not selectable (as per my screenshot) as they require you to have previously created a VPN/Wi-Fi profile or security baseline. If you have previously created these profiles you can select them here. In addition you can select a language, select a security baseline and choose your desired connection timeout (the default is 5 minutes) which you can extend as far as 20 minutes before a timeout error message appears. Next you can see the Personalization section, and this is unique to Windows 365 Boot Shared Mode and it allows you to customize the branding shown in the sign-in screen. So let's configure those settings here. Note that the Company logo URL and Lock Screen Image URL must be under 200 pixels by 80 pixels and either a jpg, jpeg or png format. I pasted it some hastily found images from windows-noob.com as my first test. next, you can create a new group (recommended) or use an existing group. Pay close attention to the note, groups shouldn't have profiles or apps assigned to them yet. If necessary remove resources from the group and add them back when you are finished setting up Windows 365 Boot. I opted for creating a new group called w365 boot shared mode group. Finally review the summary and click Save, it was spaced out way over to the right for me, and strangely wasn't highlighted in blue like the previous screens, this is a strange decision UI wise but hopefully will be fixed when it goes Generally Available. after that if everything went well it'll create the resources and give you a summary of the actions including links to learn.microsoft.com docs sites for more info. Step 2. Prepare a computer Next you need to prepare a computer for use with Windows 365 Boot shared mode, as this is still in public preview it needs to be enrolled in the Windows Insider Dev Channel and running Windows 11 Insider Preview Build 23601 or higher. You can configure Intune update policy to target the device with this setting. Once the computer is at the desired level (Windows Insider Preview dev channel and greater than Windows 11 Insider Preview Build 23601) add it to the Windows 365 Boot shared mode group you created in step 1. then reset the device and hand the computer over to the user to enroll into Windows Autopilot. Step 3. Experience Windows 365 Boot shared mode Now everything is ready to test shared mode. You should see a new login experience. You can use Windows Hello for Business biometrics or PIN to login to your Cloud PC! Check out the login screen below, isn't it cool ! It comes complete with date and time. I selected this desktop background as I thought it would add a cool semi-retro look for a Cloud PC and remind us of the legacy on-premises ways of deploying PC's. Tip: If you want the same background you can grab it from here. Clicking on the login showed me the following, so I guess it hadn't installed the required Windows apps yet (more about that later)... but on a positive note it's showing the company name (windowsnoob.com) and both the desktop background and the logo I pointed it to during the guided scenario, so that's a win. In addition it clearly knows that this is a Cloud PC scenario as you are reminded of that with the text at the bottom of the screen. Note: In case it's not obvious, the 'Windows is loading files...' is a desktop background, it's nothing to do with Cloud PC's. The time it took me to write the text above, was enough for it to 'install the app' needed to continue, as when I clicked again I saw the following, much better. I entered my login info and clicked the arrow to start logging in After doing that I saw a cool animation here which very quickly jumped to the following screen So i guess it's not ready yet. But hey, it's public preview ! It does state that I should ask an admin to install any required apps on this device, so let's check out what IS installed on the device in Intune. Those 2 apps need to be installed successfully before everything will work, so time for a quick cup of coffee. I think a better use of real estate on the error screen would be a sync button to 'trigger' an actual Intune policy sync, to speed up the app delivery rather than having to annoy an admin to do the same thing. But that's what I ended up doing, as an Admin, I triggered a sync. while waiting for the sync I tried another user, testuser1. This moved forward ... and prompted me for MFA and that worked just fine ! After further troubleshooting, the obvious dawned on me, my normal user (niall@windowsnoob.com) Cloud PC license had expired and therefore would NEVER work for that user, I'll feed this info back to the Product Group as a possible area of improvement. To test some more I tried another Cloud PC user (testuser2) to see how that experience was. I clicked on sign out (for testuser1) and logged in as testuser2. Once again, I saw 'preparing Windows' and things looked totally fine, I was prompted for MFA and then...Connecting to your Cloud PC. That user had a Windows 10 Cloud PC assigned, so it flipped to that old UI. and sure enough, it logged on, all good ! Finally, I tried another user (testuser3) which had no Cloud PC license assigned, to see what if any error I got. but now I got a new error, shown below. I expected it to fail for this user, but it would be nice to get a more useful error message, such as 'no Cloud PC assigned to this user', error. Summary Windows 365 Boot shared mode works very nicely indeed as long as the shared users have valid Cloud PC licenses. If you have the prerequisites it works like a dream ! Quick and easy. In my testing for this blog post, I tested with 4 users, listed below: niall@windowsnoob.com - Expired Cloud PC license testuser1@windowsnoob.com - Valid Cloud PC license testuser2@windowsnoob.com - Valid Cloud PC license testuser3@windowsnoob.com - No Cloud PC license When errors occur I'd like to see more accurate info on the 'error' screen, for example it could have told me my license had expired, or that the user had no license assigned at all and saved me some time troubleshooting. Secondly I'd like to see a 'sync' button there to speed up app delivery if that is actually part of the problem, and lastly, why not extend the 30 seconds error screen to a few minutes ? When things go wrong, users want to take a photo of why they can't work so they can send it to their boss and the screen timing out and reverting to the login prompt happens a bit too quickly making a bad situation even more stressful. I don't want to focus on the negative, as this is definitely a great new feature, and one that I hope you test too ! thanks for the great work Windows 365 team, it's really developing at a fast pace !


-
did you distribute your updated boot.wim to all distribution points ?
-
this section goes into detail about the certificate in relation to the boot image -
-
please take a look at my video here -
-
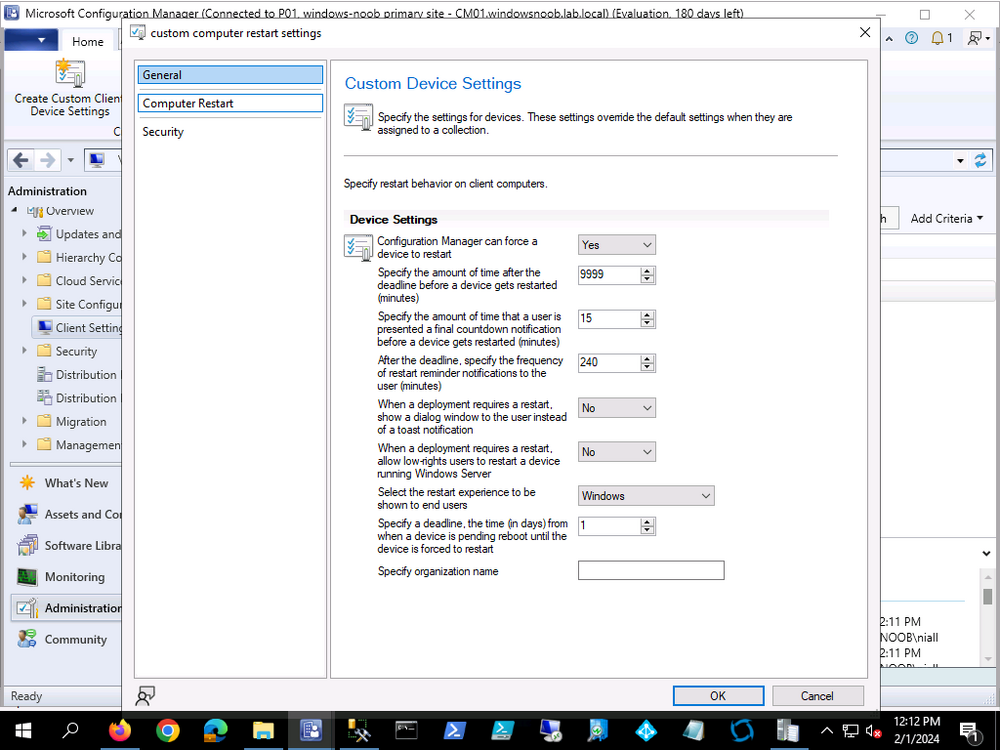
you could just create a collection with these special computers and target them with different (custom) client settings with an appropriate forced restart time that works for those users, then deploy those custom client settings to the collection containing those computers and make sure the priority of these client settings is higher than the normal client settings
-
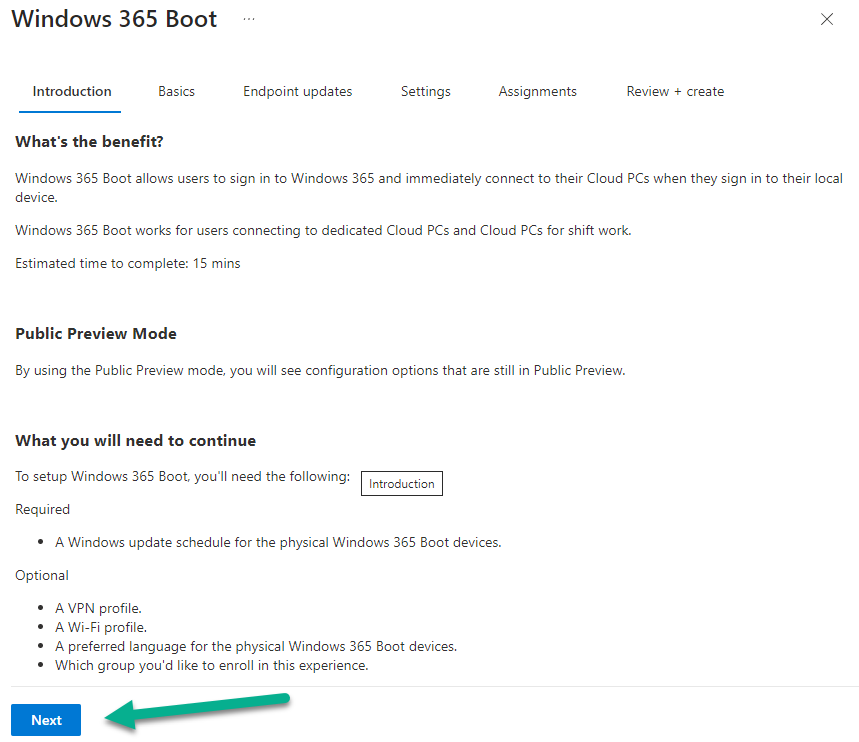
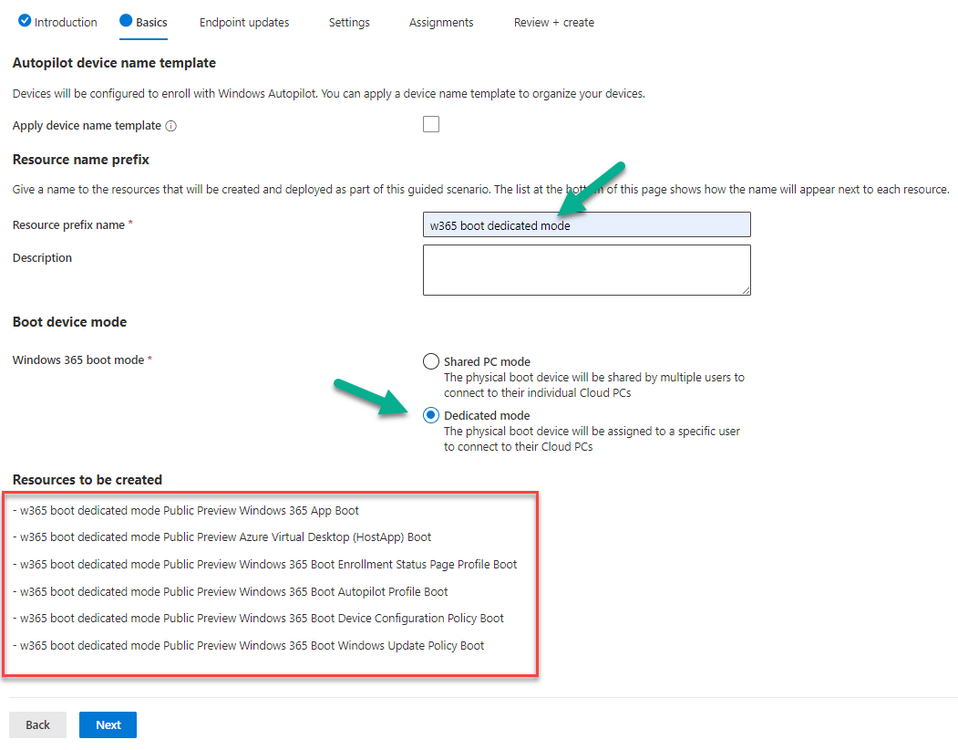
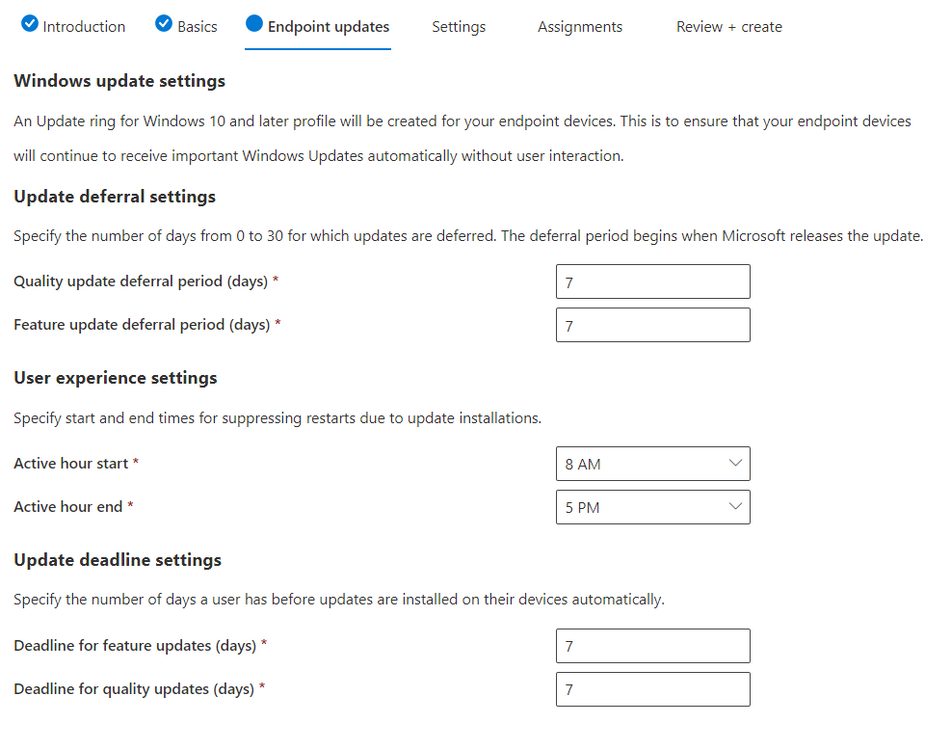
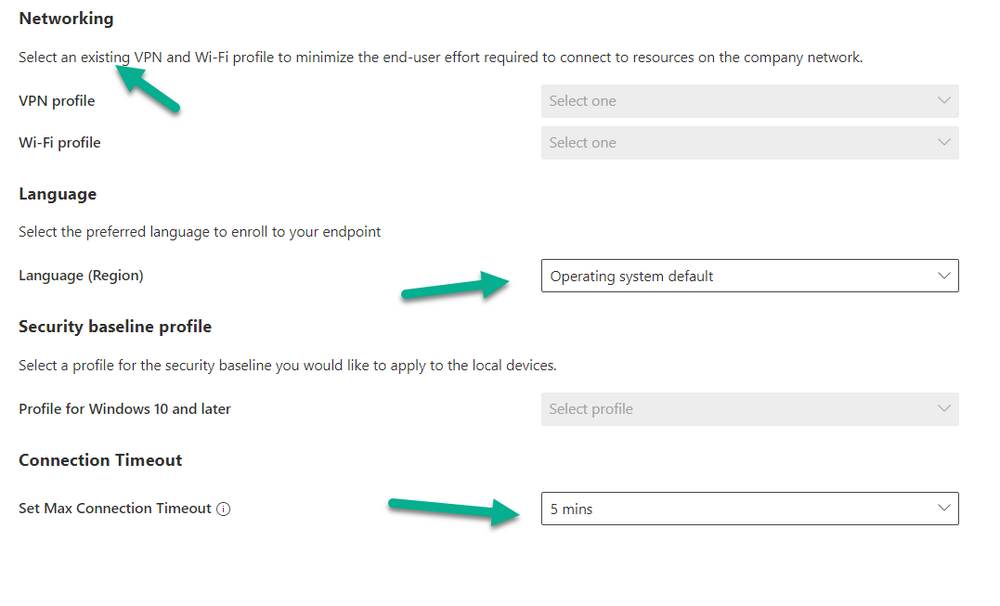
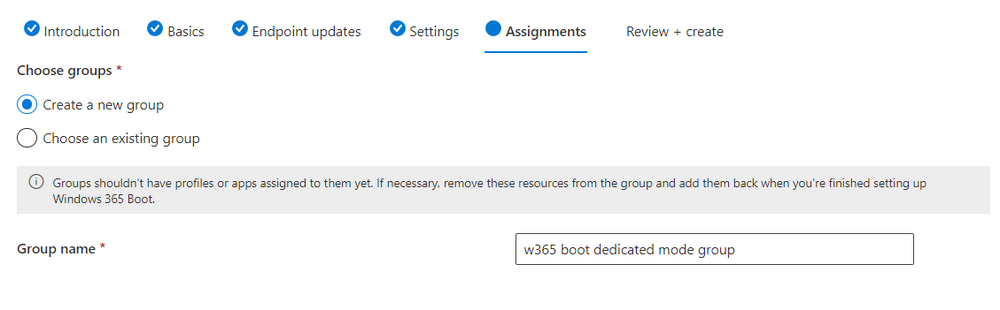
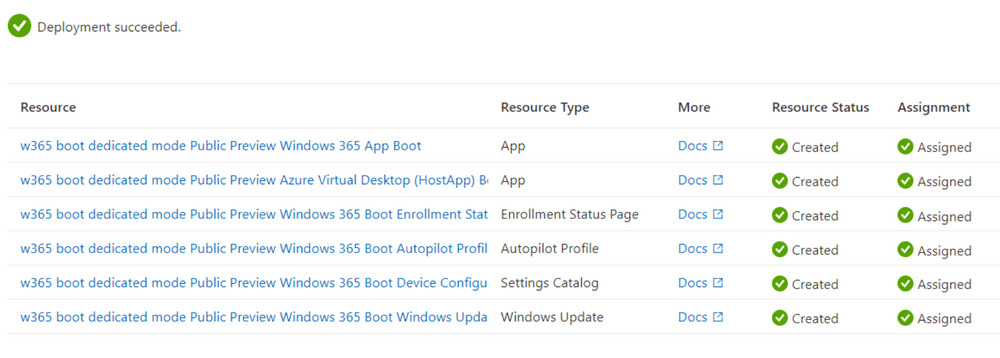
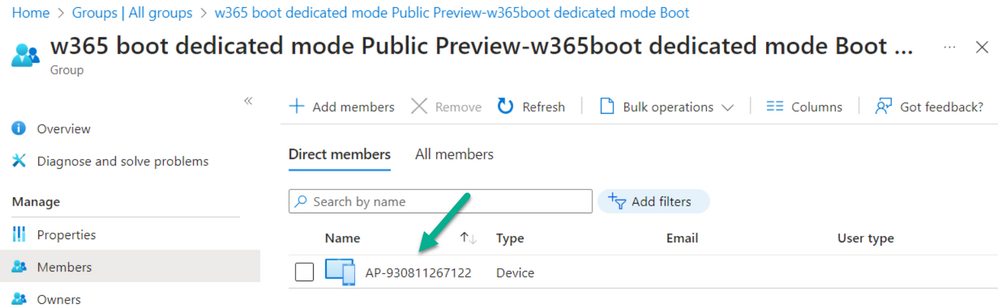
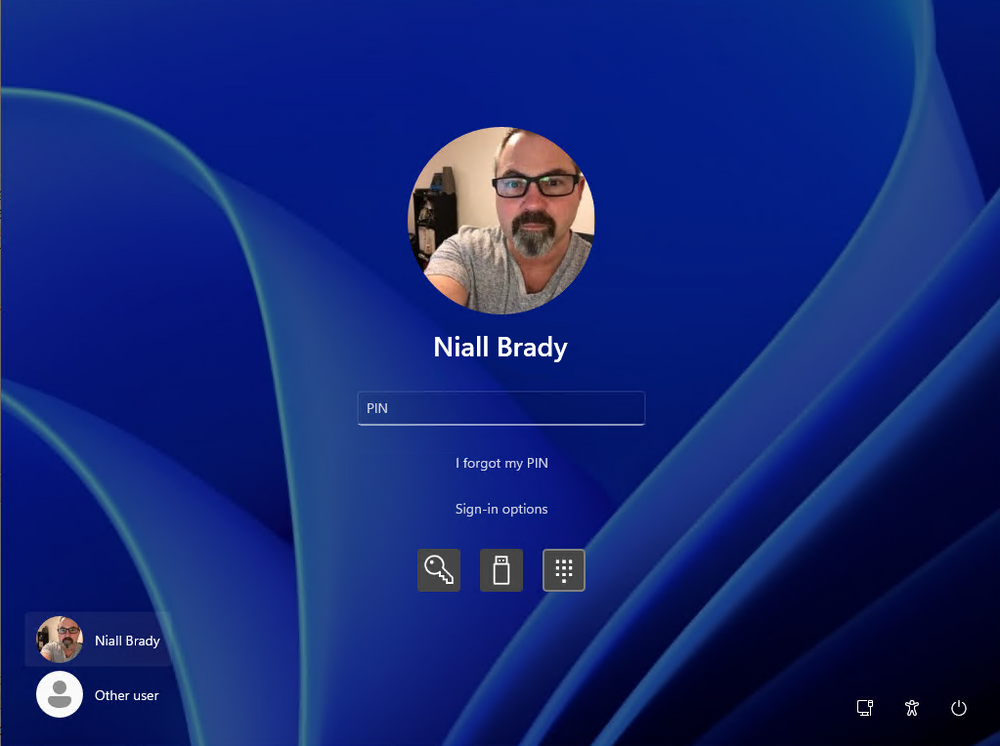
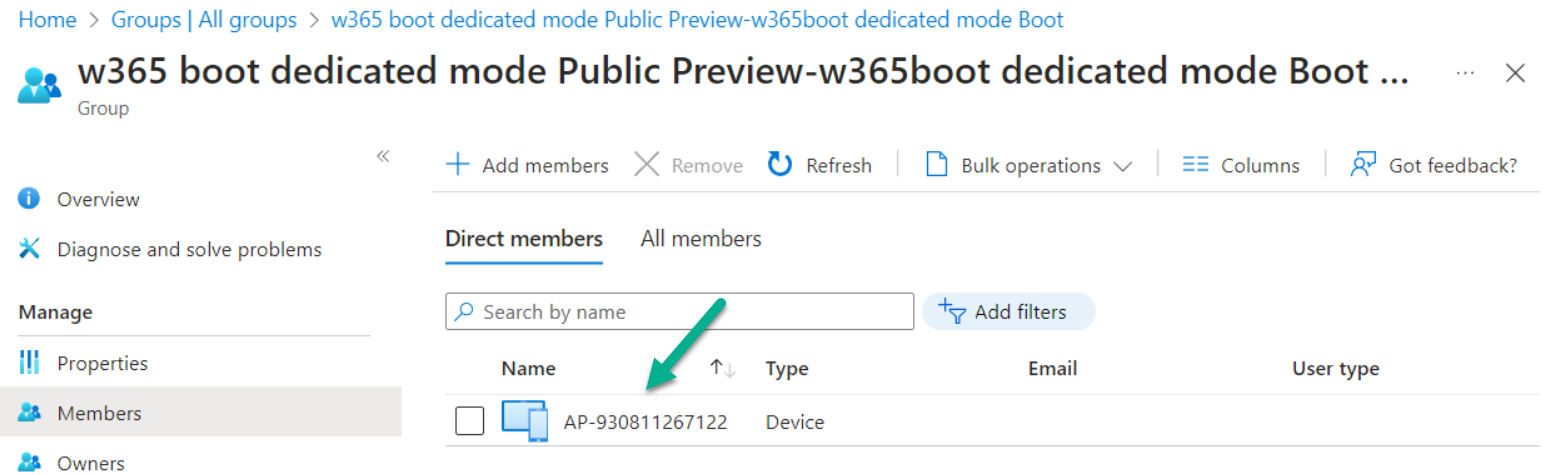
Introduction Microsoft released Windows 365 Boot (Generally Available) September 2023, and are now adding new abilities to that feature. If you are new to Windows 365 Boot please take a look at the blog post from myself and Paul on the subject here. So what's new ? 2 things stand out actually namely: Shared PC mode Dedicated mode for Windows 365 Boot Described here I took a look at these public preview features and I'll share my findings below. In this blog post, let's look at dedicated mode. But what is it ? well according to the official blog post it allows you to assign a dedicated corporate device to a users Cloud PC and to...: So let's give it a try. Step 1. Configure policy First off, open Intune and browse to the Windows 365 node. From there click on Windows 365 Boot Public Preview (or Windows 365 Boot) to launch the guided scenario. That will launch a new wizard, have a read and then click Next On the Basics screen, give the Resource prefix a name and select Dedicated mode from the options. You can also optionally use the device name template, but I won't bother in this example. In the screenshot below I've highlighted a box in red to show what resources will be created when you complete the wizard. Click Next and you'll be presented with an Endpoint updates screen, select your desired options there to ensure that your Corporate devices used for Windows 365 Boot will get updates according to your desired schedule. Your Cloud PCs will have their own update settings and could for example be managed by Windows Autopatch. Click Next once done. The next screen will show settings available. Some will be greyed out and not selectable (as per my screenshot) as they require you to have already created a VPN/Wi-Fi profile or securty baseline. If you have previously created these profiles you can select them here. In addition you can select a language, security baseline and connection timeout (default is 5 minutes) which you can extend as far as 20 minutes, although I think that the end user would be pretty miffed if they had to wait 20 minutes to connect to their Cloud PC or before an error message occurred. next, you can create a new group (recommended) or use an existing group. Pay close attention to the note, groups shouldn't have profiles or apps assigned to them yet. If necessary remove resources from the group and add them back when you are finished setting up Windows 365 Boot. Finally review the summary and click create. You'll get a nice summary screen complete with links to Docs explaining the features being created as part of the Windows 365 Boot feature. Step 2. Prepare a computer Next you need to prepare a computer for use with Windows 365 Boot dedicated mode, as this is still in public preview it needs to be enrolled in the Windows Insider Dev Channel and running Windows 11 Insider Preview Build 23601 or higher. You can configure Intune update policy to target the device with this setting. Once the computer is at the desired level (Windows Insider Preview dev channel and greater than Windows 11 Insider Preview Build 23601) you can reset the device and add it to the Windows 365 Boot dedicated mode group you created in step 1. Finally, hand the computer over to the user to enroll into Windows Autopilot. Step 3. Experience Windows 365 Boot dedicated mode Now everything is ready to test dedicated mode. Let the device get policy and once done you should see a new login experience. You can use Windows Hello for Business biometrics or PIN to login to your Cloud PC! the user logs on and... it should go pretty much straight to the Cloud PC desktop, but if there are any network issues, or anything that slows down that direct internet connection between the corporate device and the Cloud PC then you may see some logon delays as the bits and bytes navigate their way through VPN's. Below is an example of that. When network delays cause interference, they'll see the new login experience along with some new helpful text to explain what is going on As this was my first time logging on some work had to take place in the background and I saw the following followed by this, notice the timer showing how much time is left, that's the setting that you configure in the policy creation some moments later followed by your Cloud PC desktop Success ! Summary Dedicated mode is a cool new Windows 365 feature and one I'd recommend you start testing right now in public preview. This gives users the ability to use real hardware to connect quickly to their Cloud PC and informs them when things are being delayed due to traffic congestion etc. If you'd like to see how Windows 365 Boot shared mode differs, then please check out my blog post here.