Jump to content


anyweb

Root Admin
  • Posts

    9,108
  • Joined

  • Last visited

  • Days Won

    362

Posts posted by anyweb

  1. Introduction

    This is Part 9 in a new series of guides about getting started with Windows 365. This series of guides will help you to learn all about Windows 365 in a clear and insightful way. This series is co-written by Niall & Paul, both of whom are Microsoft Enterprise Mobility MVP’s with broad experience in the area of modern management. At the time of writing, Paul is a 7 times Enterprise Mobility MVP based in the UK and Niall is a 13 times Enterprise Mobility MVP & a Windows and Devices for IT MVP based in Sweden.

    In this series we aim to cover everything we learn about Windows 365 and share it with you to help you to deploy it safely and securely within your own organization. In Part 1 we introduced you to Windows 365, selecting the right edition with the level of management that you need, choosing the plan that suits your users needs at a cost you can afford, or modifying the configuration to make it more suited to your individual needs, purchasing licenses and saving money for your organization via the Windows Hybrid Benefit. In Part 2 you learned how to provision an Azure Ad joined Cloud PC and take a look at the different network options available when provisioning an Azure Ad joined Cloud PC. In Part 3 you learned about the steps needed to successfully provision a Hybrid Azure Ad Joined Cloud PC. In Part 4 you saw the many different ways you can connect to your Cloud PC from many device be it Android, Mac, Windows, Linux or iPhone and you learned that not all connection options have the same abilities. In Part 5 we covered the management capabilities of your Cloud PCs and explained the different options available depending on which version (Business versus Enterprise) that you purchase. In Part 6 we looked at the built in configurable backup technology in Windows 365 which is known as Point-in-time restore, which gives the admin (or user) the ability to restore Cloud PC's to an earlier time before a problem such as a Ransomware incident occurred. In Part 7 we looked at the ability to use Windows Autopatch to patch your Cloud PC's with ease and covered how to allow access to admins without licenses, enrolling into Windows Autopatch, the Readiness assessment tool, device registration and moving devices between deployment rings. Finally we looked at Windows Autopatch reports and the overall User Experience. In Part 8 we looked at the long awaited Windows 365 Boot feature and showed you how to configure and use it. In this part we'll look at another new feature, which is finally in public preview, called Windows 365 switch.

    Below you can find all parts in this series:

    In this part we'll cover the following:

    • Introduction to Windows 365 switch
    • Prerequisites
    • Enabling Windows 365 switch
    • Using Windows 365 switch
    • Recommended reading
    • Windows 365 switch in action
    • Troubleshooting
    • Summary

    Introduction to Windows 365 Switch

    Windows 365 switch was released to public preview August 8th, 2023. Windows 365 switch provides a new way of quickly flipping between a Local PC and your Cloud PC by simply clicking on the task view icon without the need to use https://windows365.microsoft.com or the Windows 365 app, this is great for bring-your-own device (BYOD) scenarios when you connect from your own Windows device to a secure company owned Cloud PC

    windows365switch.gif

    Update: Windows 365 Boot and Switch became Generally Available 26th September, 2023, so as long as you are using Windows 11 22H2 with build 2361 or later (or natively in Windows 11 23H2 later in Q4), then there should be no need to use the Windows Insider Preview steps mentioned below.

    Prerequisites

    Windows 365 switch has the following prerequisites, these may change when it becomes Globally Available later this year.

    • Windows 11 (Enterprise or Professional) on the local and Cloud PC
    • Enroll into the Windows Insider Program (beta or dev channel) - Windows 11 Build 22631.2129 (or higher) on both the local and Cloud PC
    • Windows 365 Cloud PC license

    Most likely these the second requirement will be dropped once Windows 11 23H2 ships (we are guessing here).

    Enabling Windows 365 Switch

    1. Join the Insider beta channel on your Cloud PC. You can do this manually or automated.

    Manual Method

    In Windows Settings, select Windows Update, and select the Windows Insider Program. Click Get started to start a 4 step wizard.

    join the insider program.png


    In there, connect using a live account

    link an account.png

    and select the Beta Channel (dev works too, but beta is recommended).

    choose Beta channel.png

    Once done, you'll need to restart the device to enable the Windows Insider Preview.


    2023-08-09_12-29-22.png

    After the restart, use Windows Update to update the device, this might take a few downloads, so verify exactly which build is being downloaded...

    downloading the right build.png

    so that the build version is greater than or equal to Windows 11 Build 22631.2129

    correct build number.png

    Automated method

    Another option for this is to create an update ring in Intune, to forcefully update your Cloud PC and Local PC to the Insider Preview Beta Channel.

    create update ring to automate enrollment to beta channel.png

    Keep in mind that you'll need to also to configure sending optional diagnostics data to On.

    diagnostics data to on.png

    2. Install a local PC using the Insider beta channel

    Repeat everything in the above step on your Local PC to get it into Windows Insider Preview and on to the correct build.

    Please Note: Make sure to login to that Local PC using the same user who is licensed to connect to the Cloud PC.

    3. Download and install the latest version of the Windows 365 app

    On your Local PC, download the Windows 365 app from the store.

    get windows 365 app.png

    open the Windows 365 app and make sure you have version 1.3.177.0 or newer, you can see the version number by clicking on the settings icon in the Windows 365 app as shown below.

    windows 365 app version.png


    Once installed, we need to wait, that's right wait a few hours until the Windows 365 app is ready for Switch.

    th-2541468944.jpg

    How will you know it's ready ? well it will list more (or less) options in the Windows 365 app.

    Below are the options you'll see when Windows 365 Switch is NOT available yet

    switch not available yet.png

    and below are the options you'll see when Windows 365 Switch is available, a new option Add to Task view is now available.

    add to task view.png


    Using Windows 365 Switch

    Once the option shows up in your Windows 365 app, you can pin the app to the taskbar or add to task view. After adding it to task view you can use Windows 365 Switch in a variety of different ways.

    added to task view.png

    First, by clicking on the task view button directly. It will show you current desktop and your Cloud PC.

    click task view then click cloud pc.png

    When you click on your Cloud PC, it will switch to your Cloud PC instantly, however.... the first time it connects will take a few moments.

    connecting to your cloud pc.png

    after entering your credentials (for haadj)

    Cloud PC Connected.png

    To get back to your local PC, click on task view in the Cloud PC and select Local Desktops...

    local desktops.png


    Windows 365 switch in action

    Here's a video of Windows 365 Switch in action


    Keystrokes

    You can also use key strokes either on your touch enabled monitor or touch pad  (three finger swipe from the base of the screen or base of the touchpad) or using the following key combinations.

    • Switch to Cloud PC CTRL + Windows key + right cursor key
    • Switch to Local PC CTRL + Windows key + left cursor key

    Recommended reading


    Troubleshooting

    On the Local PC, in the logged on users profile look at their temp folder, it's hidden in the appdata but you'll find it.

    2023-08-10_00-04-21.png


    Summary

    Windows 365 switch provides yet another way of quickly accessing your Cloud PC in a way that is quick and easy (once everything is in place). At the time of writing this was in public preview so some caveats were in place like needing to use the Windows Insider Preview releases and other drawbacks such as only being able to access one of your Cloud PC's. Once you have it working however, it's quick and painless and the attraction is easy to see.

    We did have some issues however, including enrolling an Autopilot PC as User A (BYOD user) and then connecting to the Cloud PC via the Windows 365 app as user user B (licensed user). The connection worked, but the Windows 365 Switch part did not. We have raised this point with the Product Group, let's see what they say. Also, the 'wait for some hours' thing is not something we want to see in production (Global Availability). Consultants cost money and waiting for a feature to appear is not an option. Let's hope that is also fixed.


  2. Introduction

    In the latest Windows 365 update from Microsoft, they’ve added a long awaited and desired feature, the ability to use the local PC’s web camera in your Cloud PC via the web client. The web client is another way of saying the web browser that you use to connect to your Windows 365 Cloud PC.

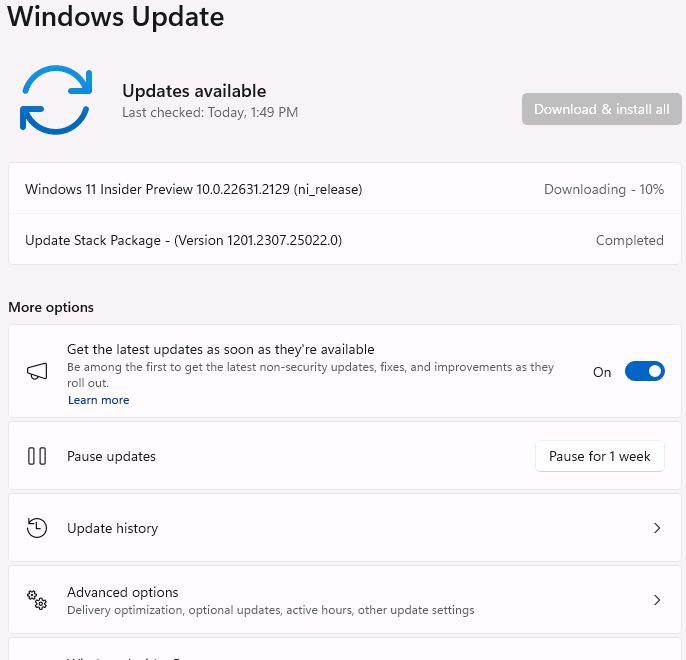
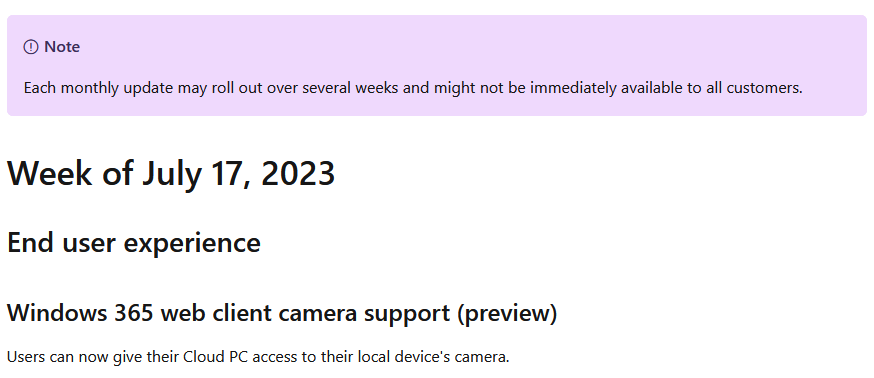
    While this preview feature was released the week of July 17th, it may not show up for you yet, take note of the note in the graphic below where it states that each monthly update may roll out over several weeks and might not be immediately available to all customers.
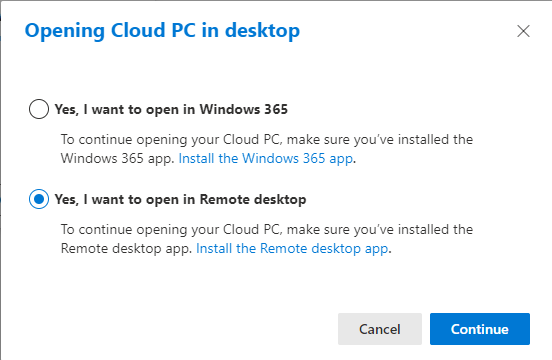
    not-immediatly-available.png

    How does it work ?

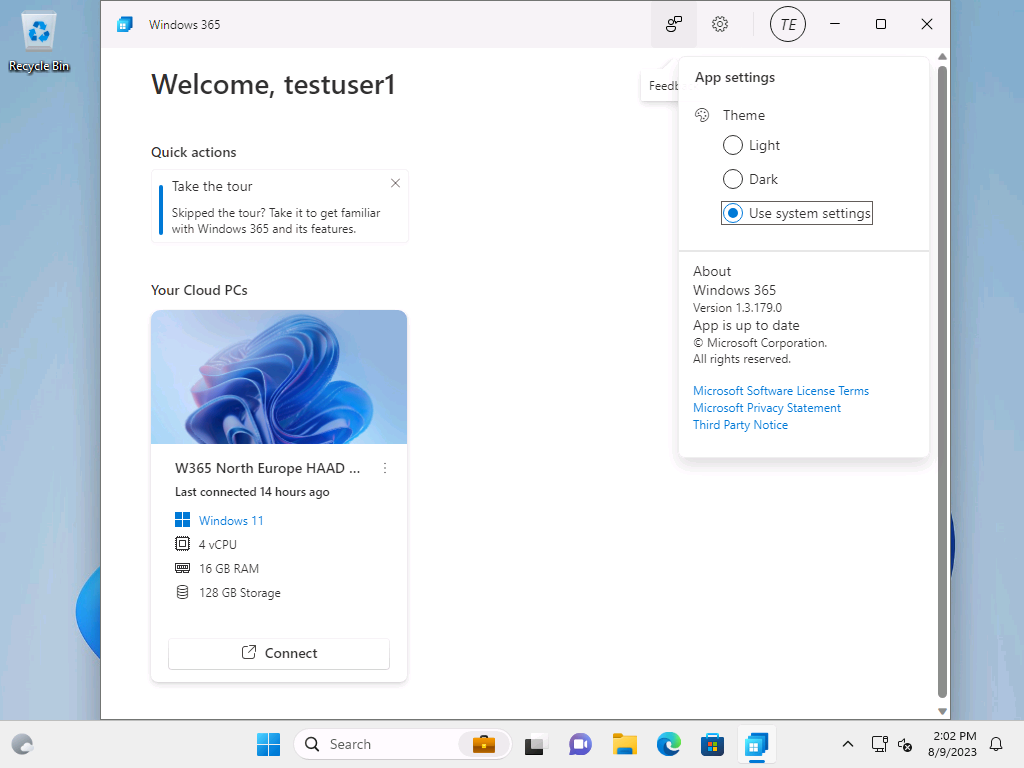
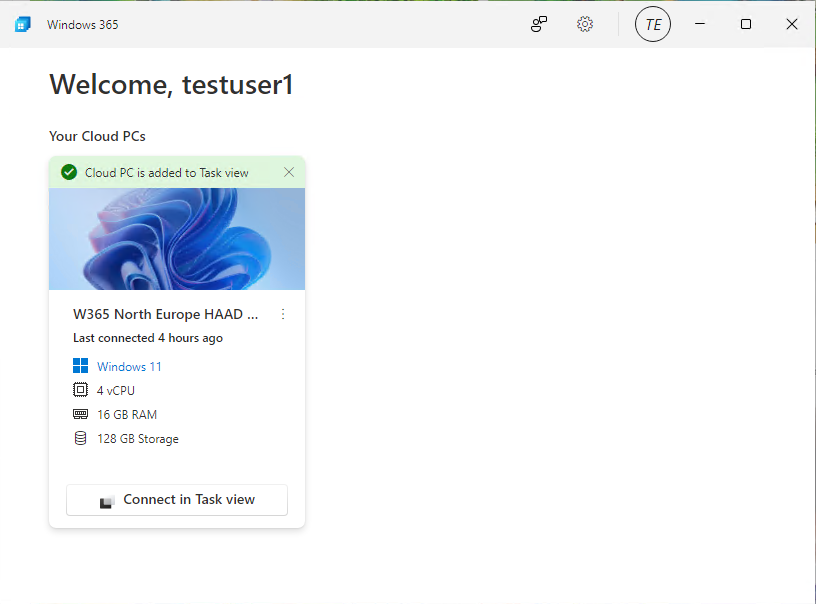
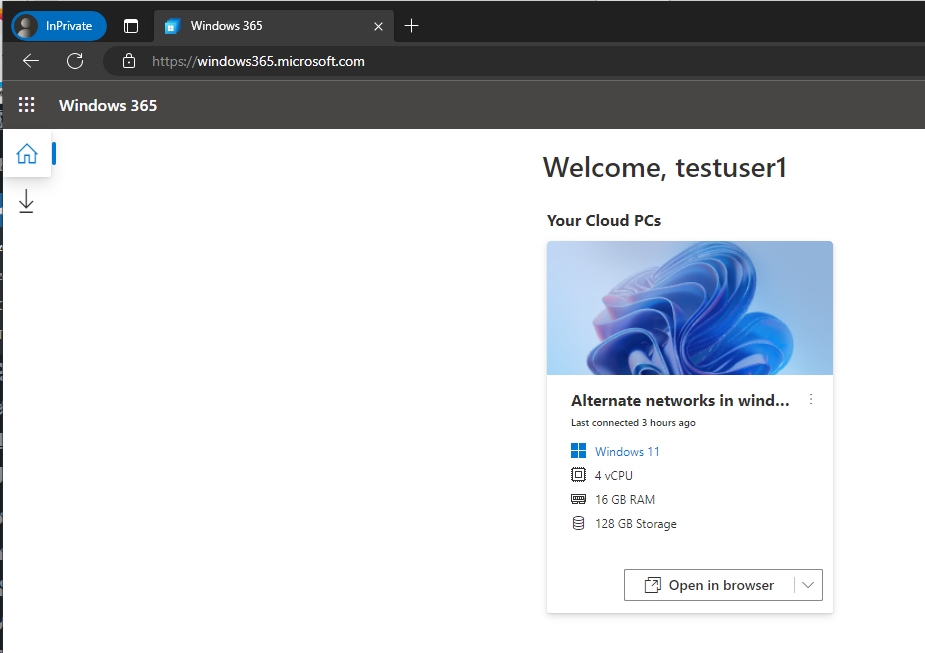
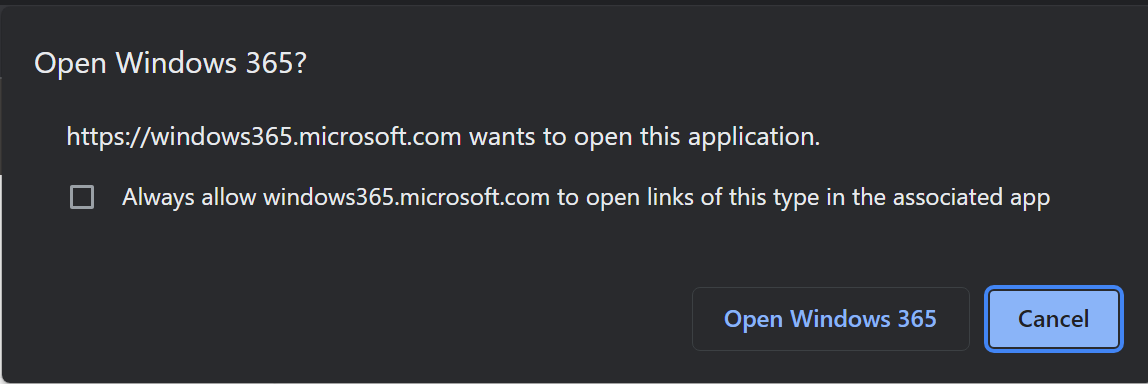
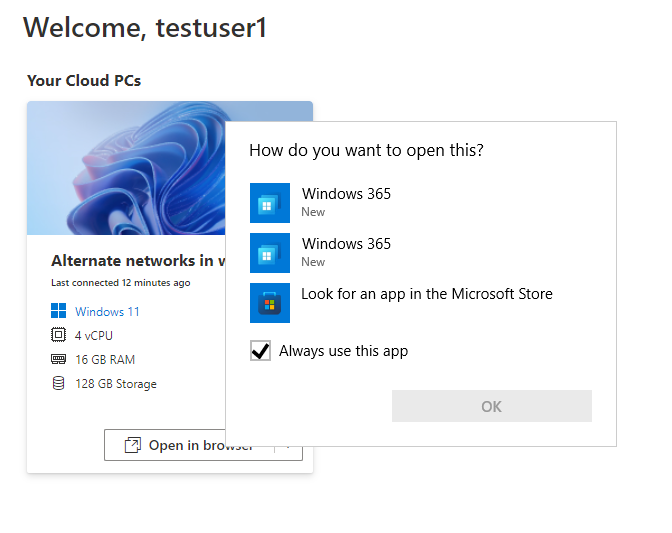
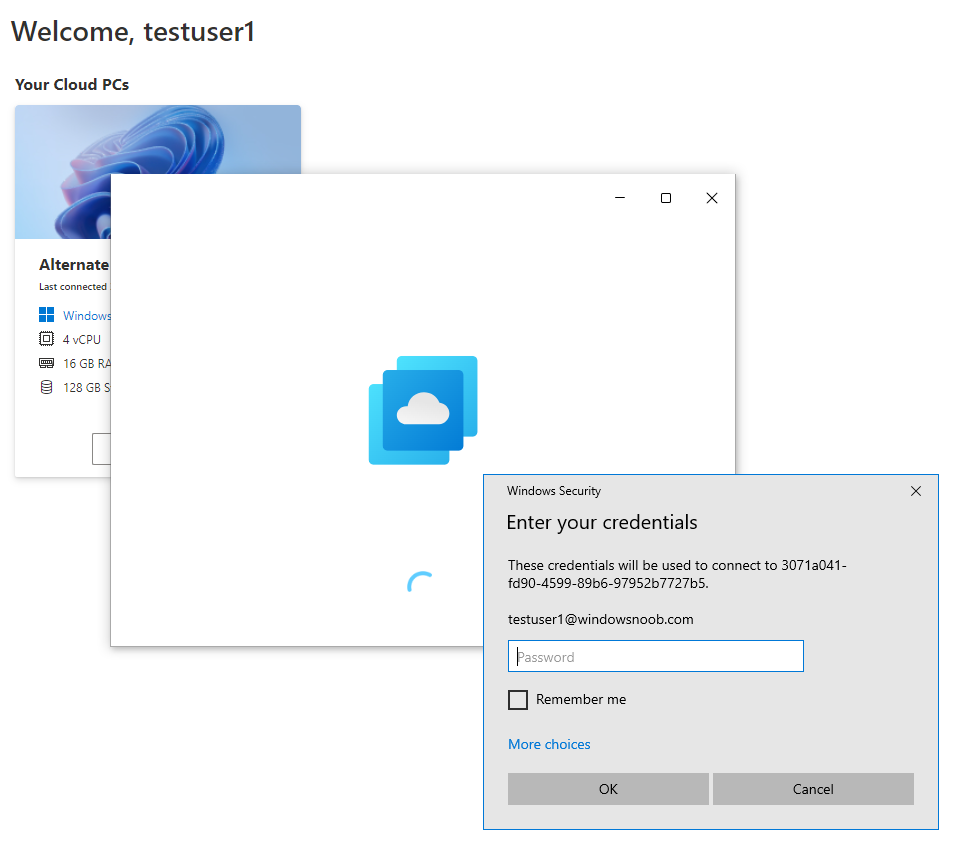
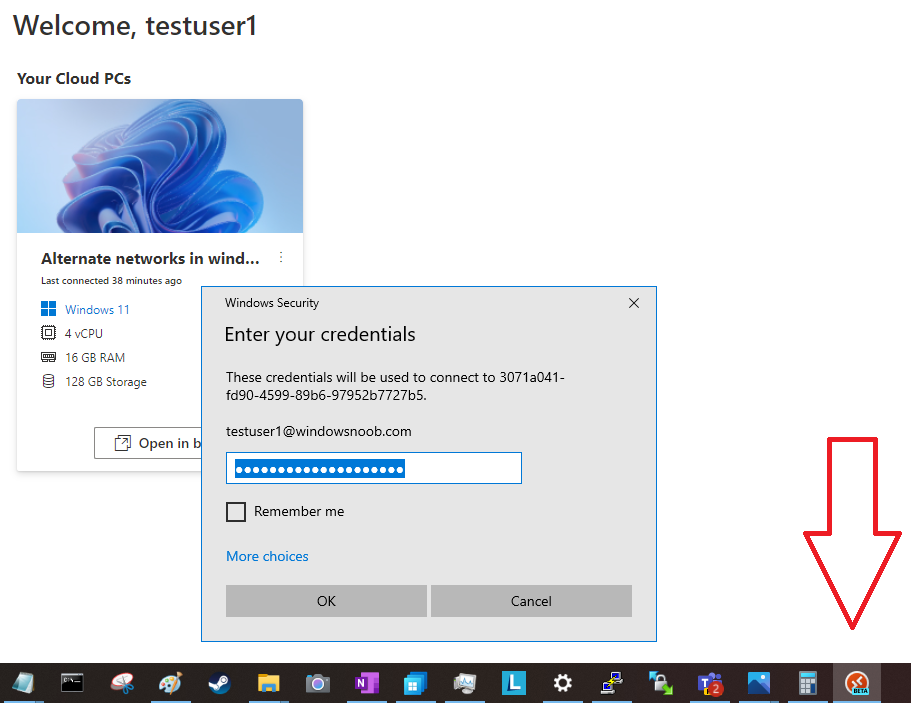
    To use the web client simply use a web browser of your choice and browse to windows365.microsoft.com and enter the  credentials (when prompted) of a user that is assigned a Windows 365 license. Once done you’ll see a screen similar to this showing the Windows 365 Cloud PC’s assigned to that user.

    Open-In-Browser.png

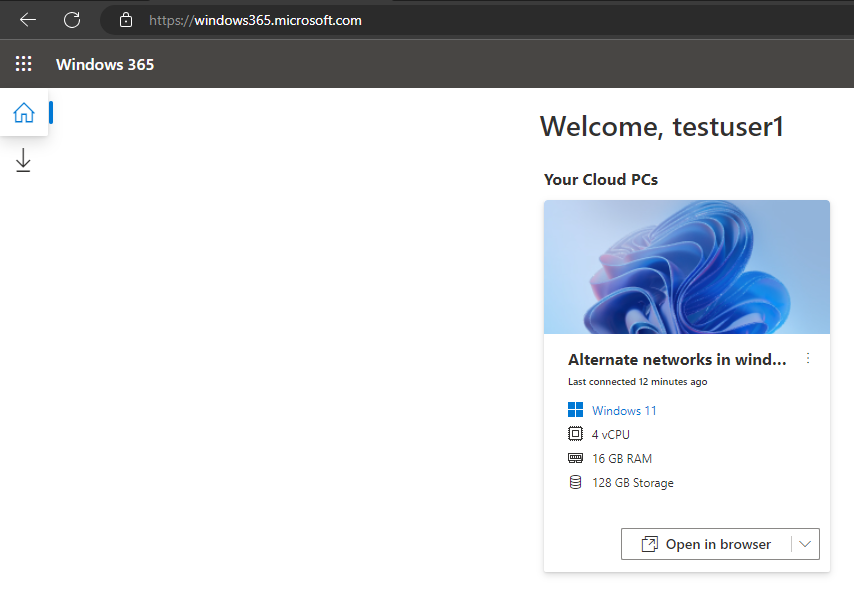
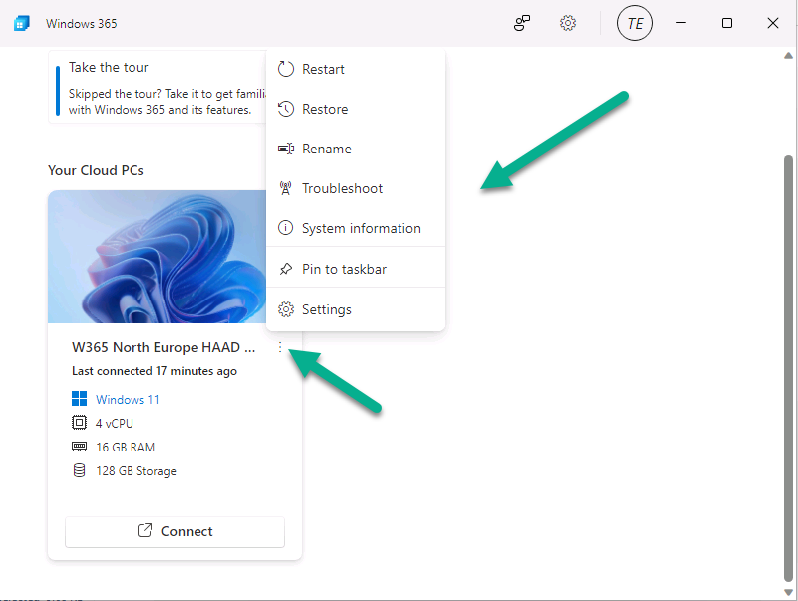
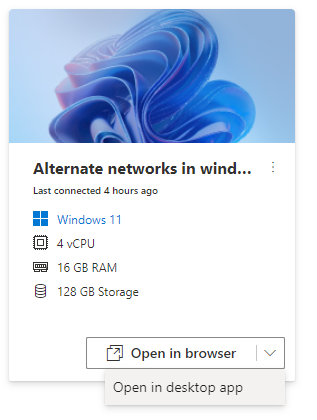
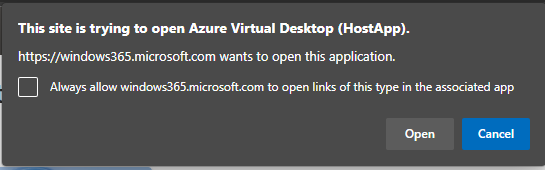
    Click on the Open in browser button.

    you should see a bunch of options such as below, if you don’t see Camera (Preview) yet, then wait and try again, it should be available globally by July 31st, 2023.

    F15AefnaAAAinm3.png

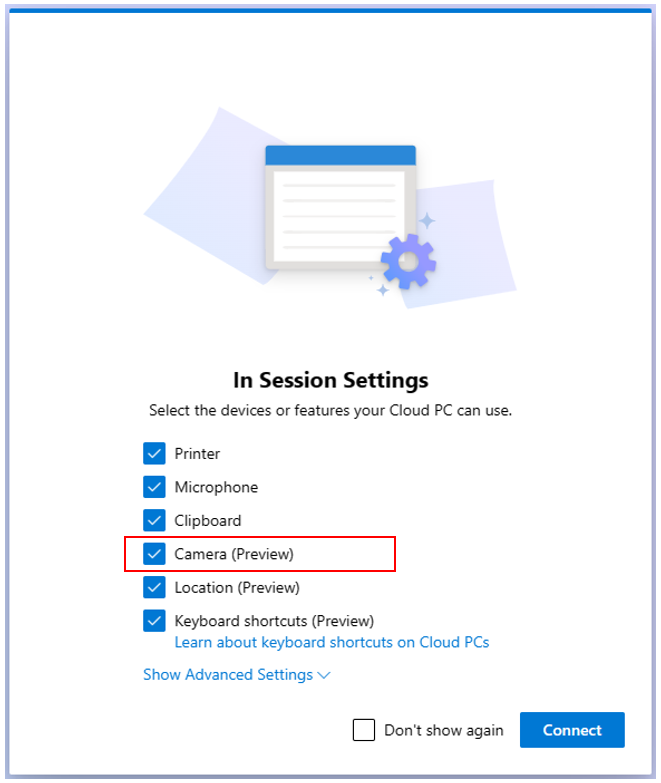
    If you do see it then continue !

    You should see a popup in the top left of the browser asking you to Allow (or block) the Camera.

    allow-camera.png

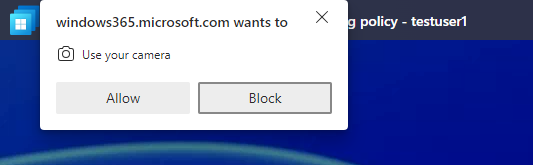
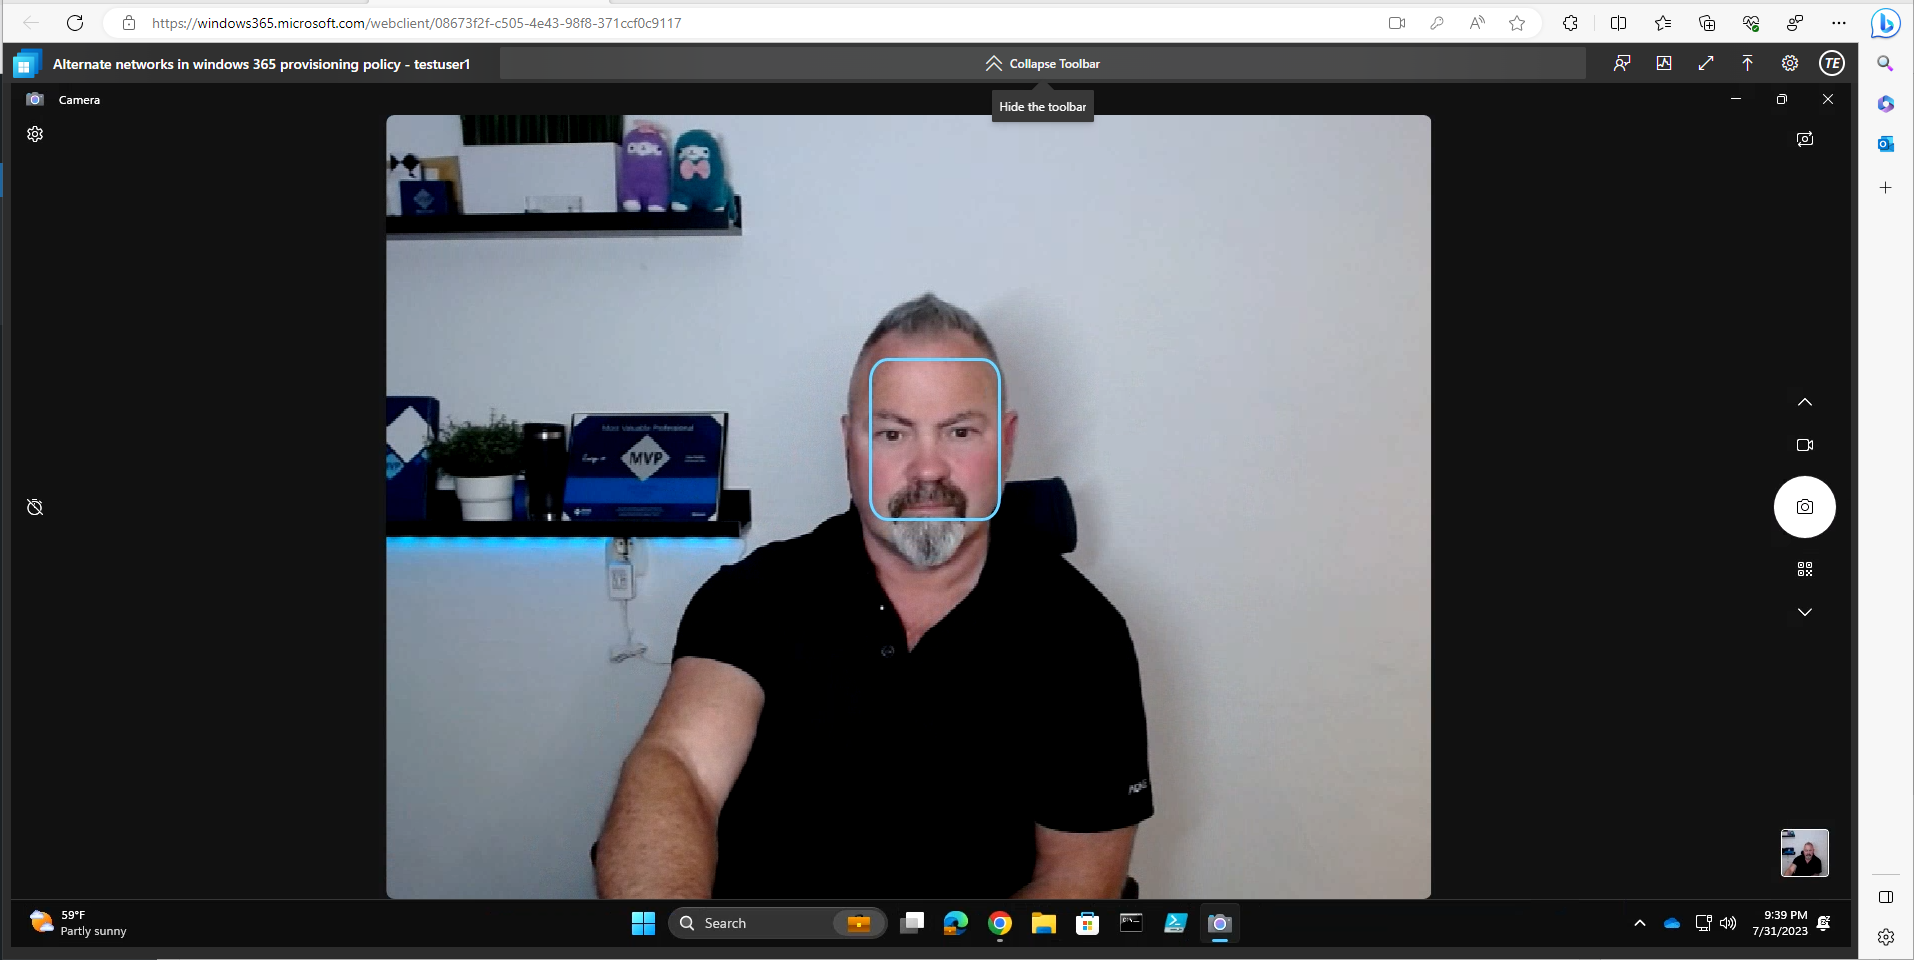
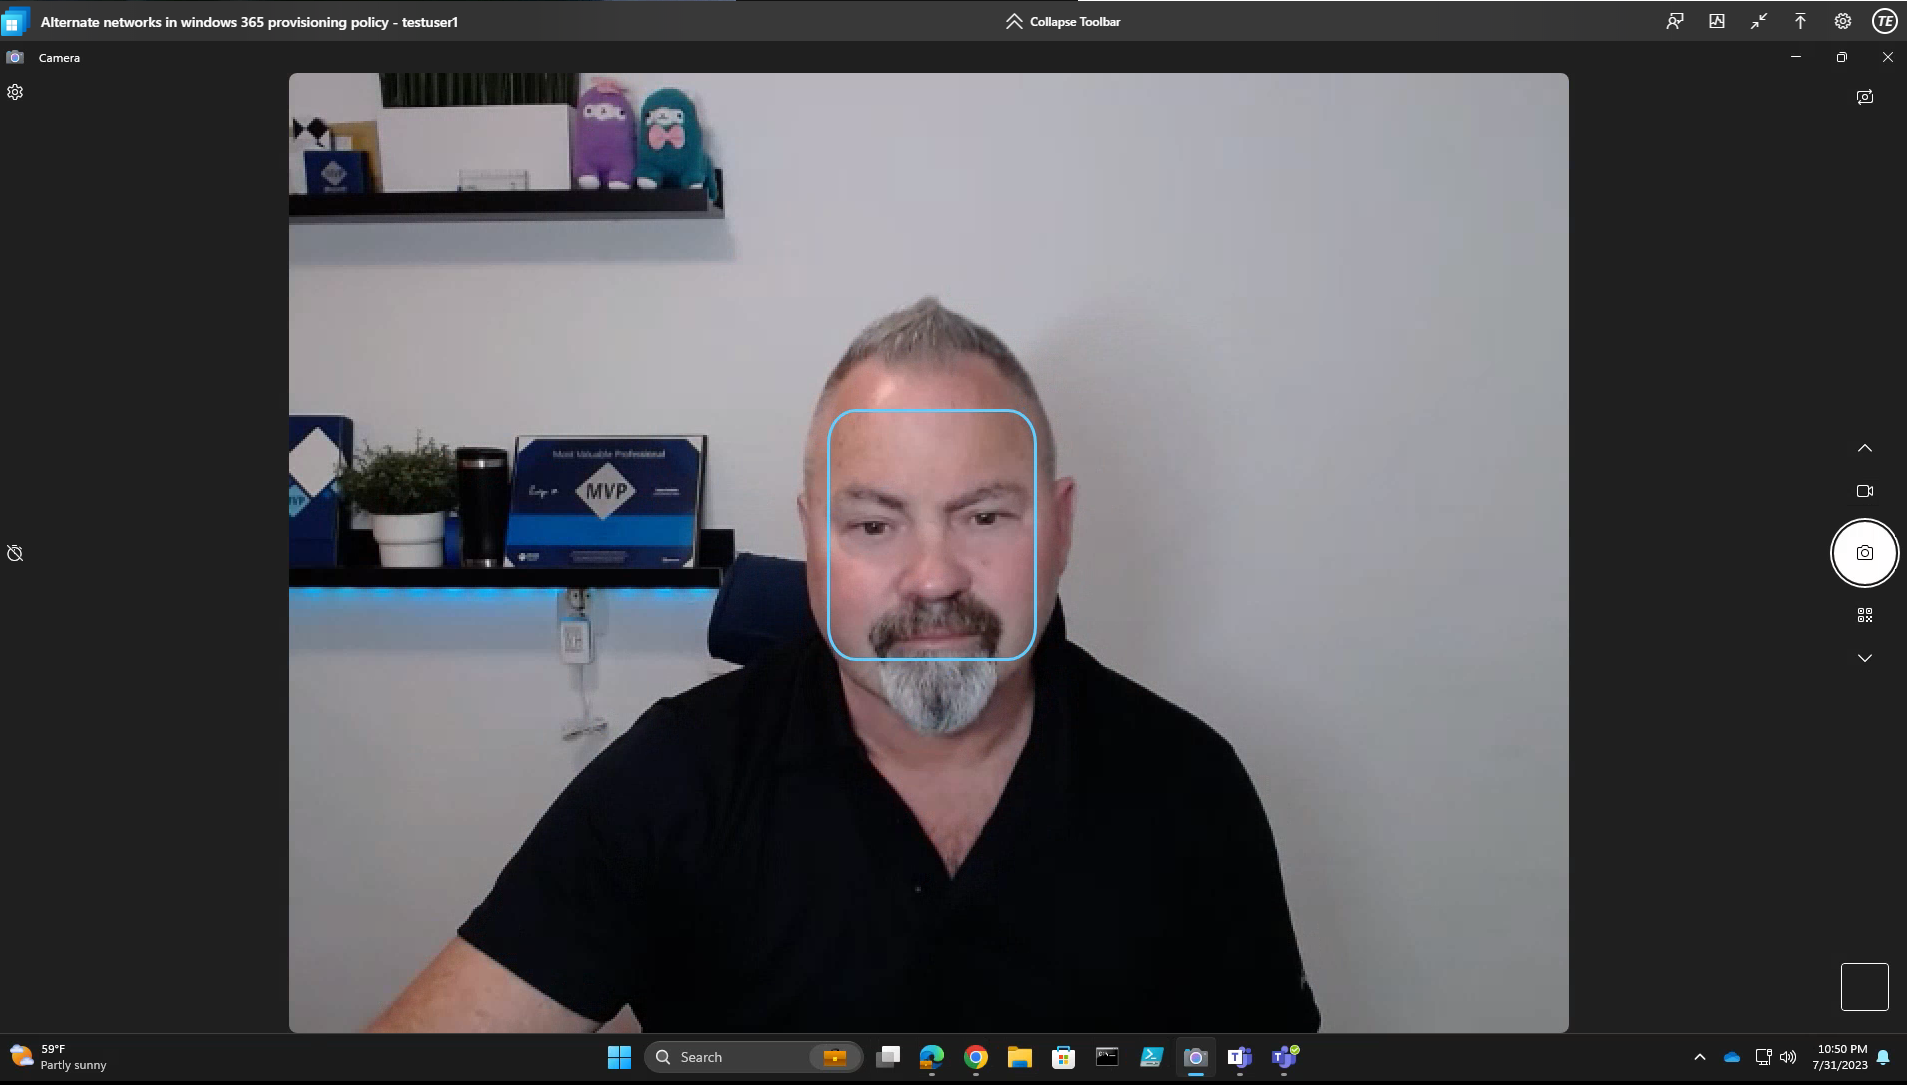
    Click Allow and continue. To test the camera, I used the built in camera app. Once launched I could see it was working !

    Great 🙂

    no fine tune control of the camera.png

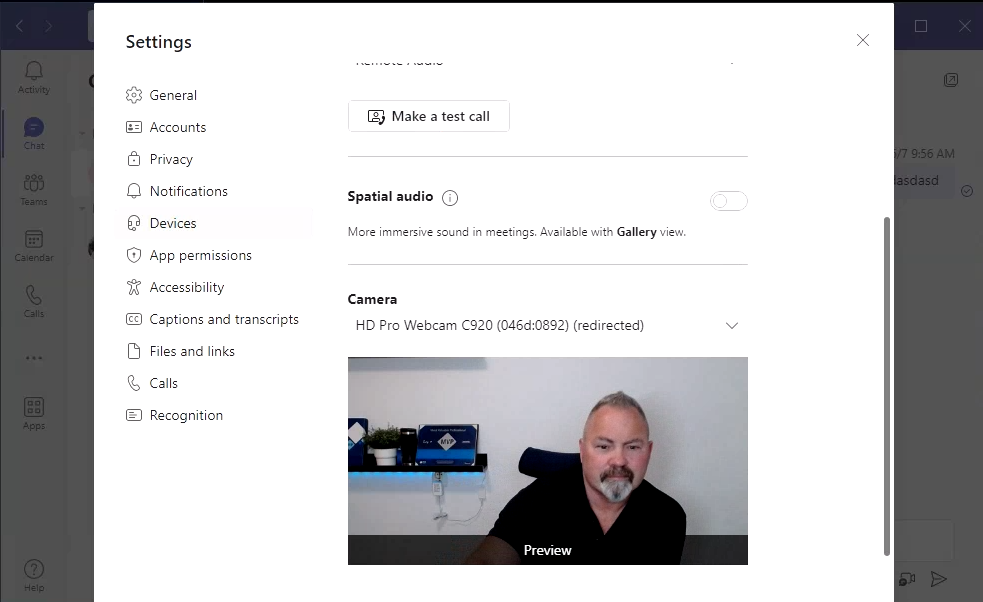
    Next, I launched Teams and configured the settings in there to use the camera, it worked ! but the quality again, was at the minimum level, which no chance to change focus or brightness.

    quality-of-webcam-in-teams.png

    Next I tested flipping from the external camera to the inbuilt camera, that worked but as with the Logitech camera I couldn’t control focus/brightness or quality.


    alternate camera.png

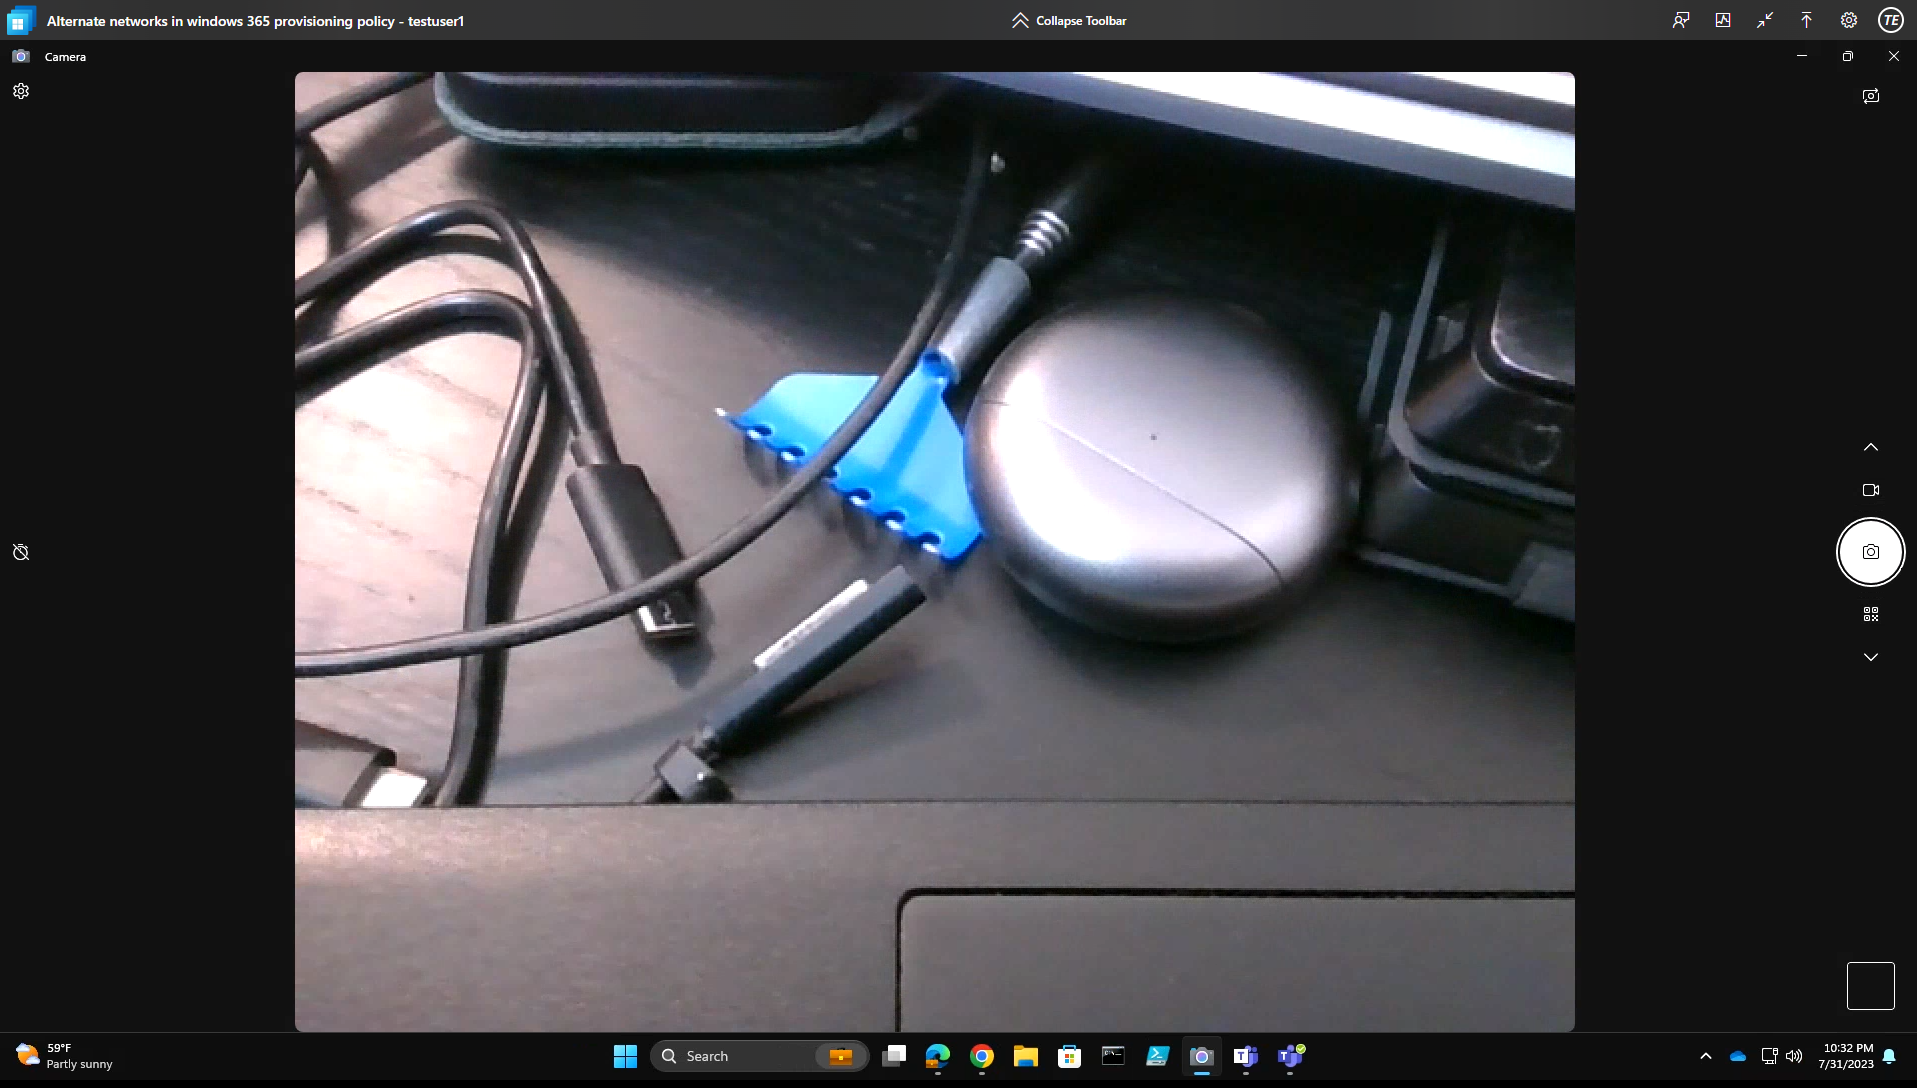
    Finally, I tried using another browser (the above was using Edge) and this time I used Chrome. The results seemed slightly better (better focus/resolution) even though the settings of the Camera app still revealed the same resolution, so I don’t know what’s going on there…

    chrome.png

    While this new feature is great there are some downsides which I’ll mention below.

    You cannot control fine tune settings that are normally present on my Logitech HD Pro C920 such as:

    • Brightness
    • Focus
    • Resolution

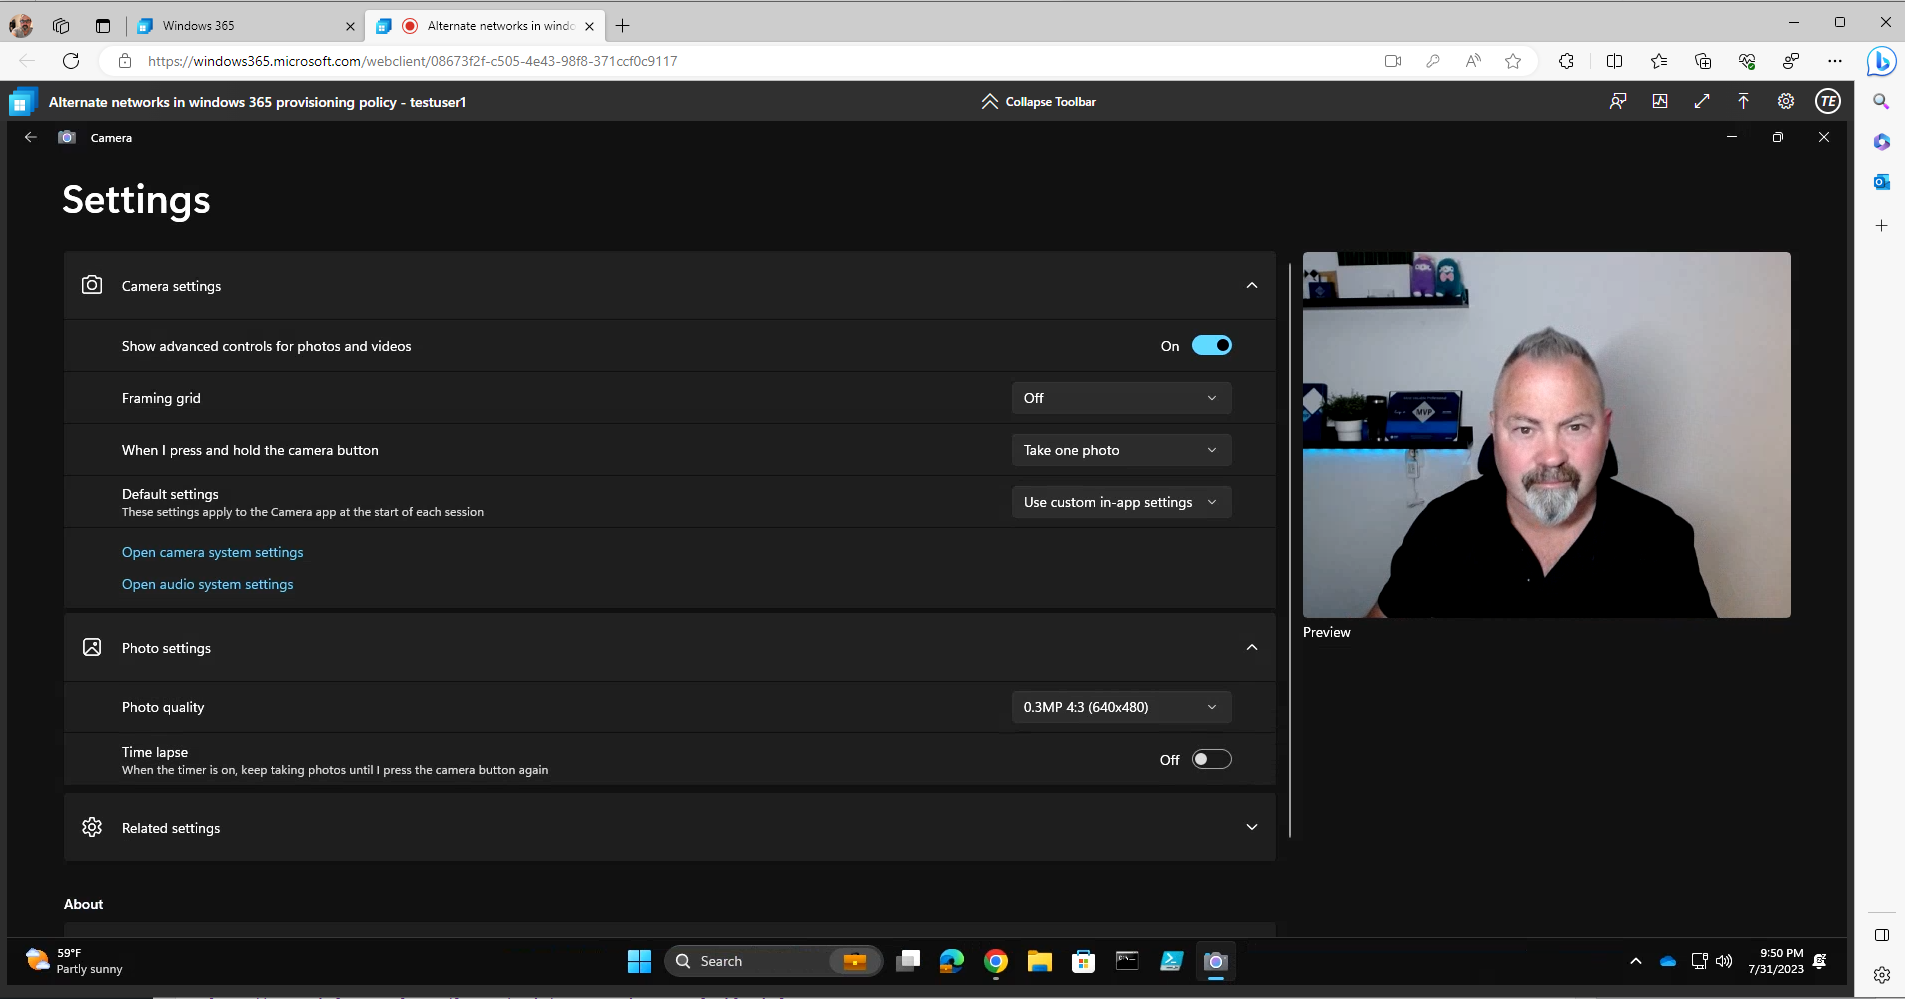
    The resolution seems adequate but not up to the quality I expect for my camera. For example, when looking at the quality on the Windows 365 Cloud PC redirected it’s set to a bare minimum (and I cannot see how to change it) 0.3 MP at 640 x 480 resolution.

    Yes, there is a drop down menu at the 0.3 MP at 640 x 480 resolution but it only shows that resolution and nothing else.

    settings available in Windows 365.png

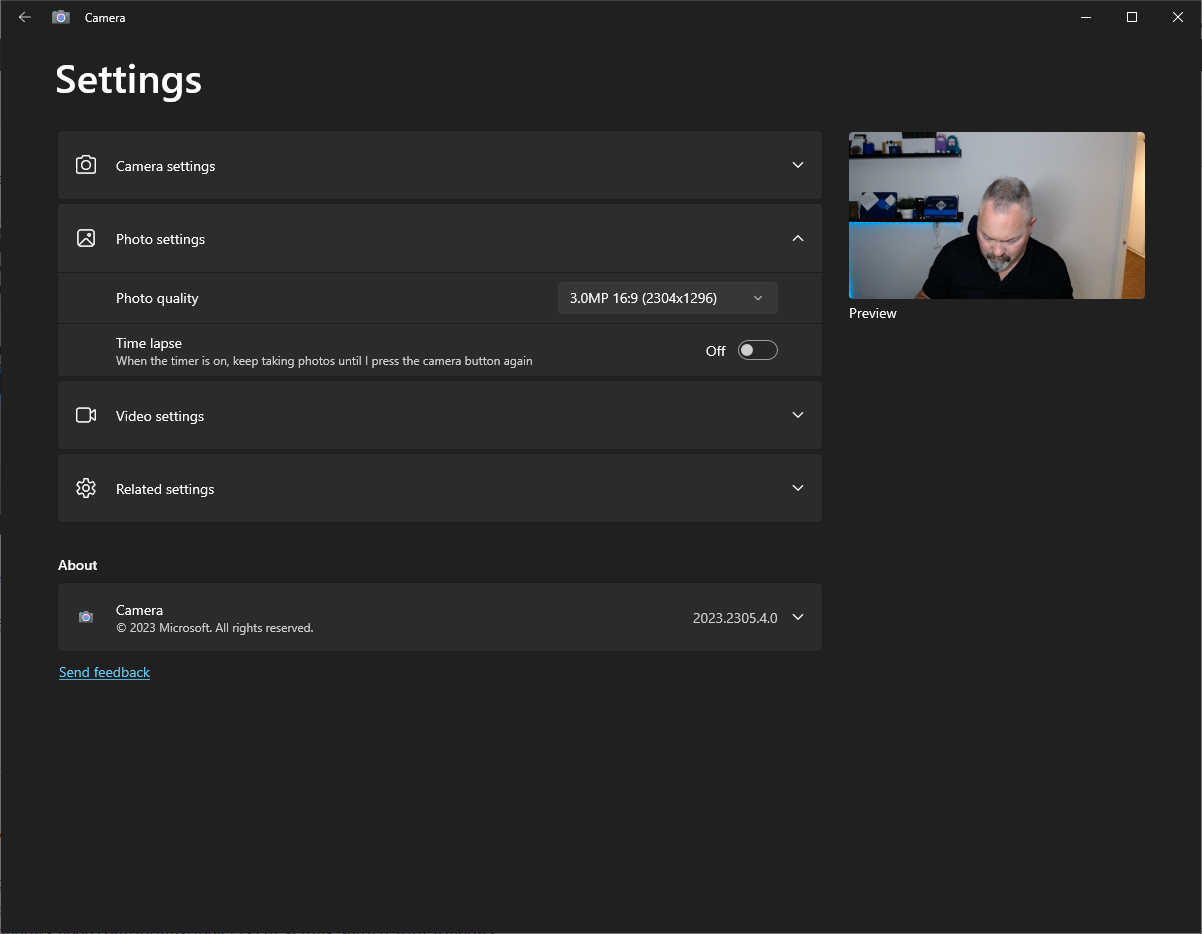
    But looking at the same camera on the local host PC I get a full 3.0 MP at 2304 x 1296 resolution, and the results are quite different.

    That’s quite a difference!

    settings available in host pc.png

    Summary

    I understand this is still in preview but it would be nice to have control over the cameras true functionality to provide a better end user experience.

    That said, well done to the Microsoft Product Group for listening to our earlier complaints about the lack of this functionality, I’m impressed that it’s finally here and I look forward to it improving before GA.

    cheers

    niall

    Related reading

  3. Introduction

    The Windows 365 product group keep on listening to customer feedback and adding new features. One recent example of this is the following new setting, when browsing to https://windows365.microsoft.com you can now open in browser or open in desktop app.

    Let's take a look at this new open in desktop app feature.

    How does it work ?

    To use the web client simply browse to https://windows365.microsoft.com and enter the  credentials (when prompted) of a user that is assigned a Windows 365 license. Once done you'll see a screen similar to this showing the Windows 365 Cloud PC's assigned to that user.

    w365-browser.png

    Normally the end user would click on Open in browser and continue their Windows 365 session right there (in the browser), but now there's an additional option in the drop down, called Open in desktop app.

    Note: Opening your Windows 365 Cloud PC using the Windows 365 App provides the best experience as more features are available.

    Open-in-desktop-app.png

    If the user selects Open in desktop app they'll see the following user interface (UI). There are actually an additional 2 options provided.

    • Yes, I want to open in Windows 365
    • Yes, I want to open in Remote Desktop

    Selecting the Windows 365 app option

    The default option is to open using the Windows 365 app, however you can also select to use the Remote Desktop client agent (AVD).

    yes-i-want-to-open-in-windows-365.png

    Selecting the default may show the following on the first run (for Windows 10 devices with the Windows 365 App installed), I tested this using Edge in InPrivate mode on Windows 10:

    this-site-is-trying-to-open-Pick-an-app.

    on a Windows 11 device using Chrome in Incognito mode, I saw this, note how it correctly knows that you have the Windows 365 app installed already:

    windows-11-prompt.png

    You can place a check mark in the box provided to avoid answering the question again.

    Next you may see a prompt similar to the following, I saw it on my Windows 10 laptop with the Windows 365 App installed, however this did not show up on the Windows 11 laptop when using Chrome or when using Edge).

    how-do-you-want-to-open-this.png

    Opinion: While it's not exactly hard to figure out, I think it would be better to connect the latest version of the Windows 365 app installed on the device with the 'open in desktop app' choice. I've submitted this feedback to the product group, and this does seem to be related to the operating system you are running on the host, namely Windows 10.

    Selecting the first Windows 365 app, and clicking OK

    how-do-you-want-to-open-this-selected-fi

    starts the Windows 365 app and that prompts for credentials

    prompt-for-creds.png

    which once entered opens the Windows 365 Cloud PC as expected.

    Selecting the Remote desktop option

    Once you select the second option

    open-in-remote-desktop.png

    and click on Continue, you'll see the following the first time you try.

    open-azure-virtual-desktop-hostapp.png

    Which isn't exactly the same as Remote Desktop, but let's ignore that. Once you click Open it does indeed launch that app as shown here.

    AVD-app.png

    and after entering your credentials your Windows 365 Cloud PC is usable as before.

    well that's a look at this new feature, and it's great that the Product Group are continuously developing new features for customers, what do you think of this change, does it help or confuse your users?

    cheers

    niall

  4. This SysAdmin Day, Backup & WIN with Hornetsecurity!

    It's that time of year again: SysAdmin Day, reminds us to appreciate all the Sysadmins around the world, who are always ready to support our requests, bizarre as they may seem, with patience and
    dedication. From the Hornetsecurity team, here goes a big thank you!

    hornetsecurity sad.png


    If you are a System/IT Admin and use Hyper-V or VMware, celebrate with us, by taking a chance to win a Pixel Tablet. Get Started today by signing up for a 30-day free trial of VM Backup V9.

    HOW CAN YOU WIN?
    1. Sign up for a 30-day free trial of VM Backup V9
    2. Download & Set Up your VM Backup
    3. Upload a screenshot of your dashboard showing at least 1 successfully backed up VM!


    The FIRST 50 eligible participants will also receive a €10 Amazon Voucher when signing up and setting up the trial for VM Backup!

    What are you waiting for? Sign up Now!

×
×
  • Create New...

Important Information

We have placed cookies on your device to help make this website better. You can adjust your cookie settings, otherwise we'll assume you're okay to continue.