Search the Community
Showing results for tags 'SCOM Agent Install'.
Found 1 result
-
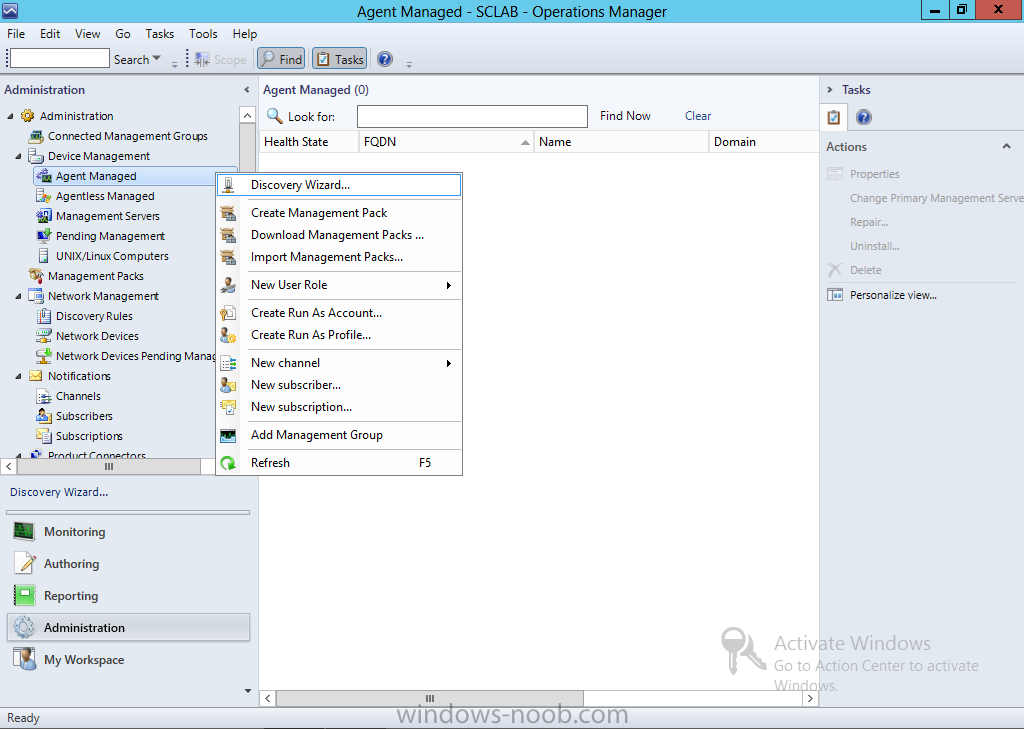
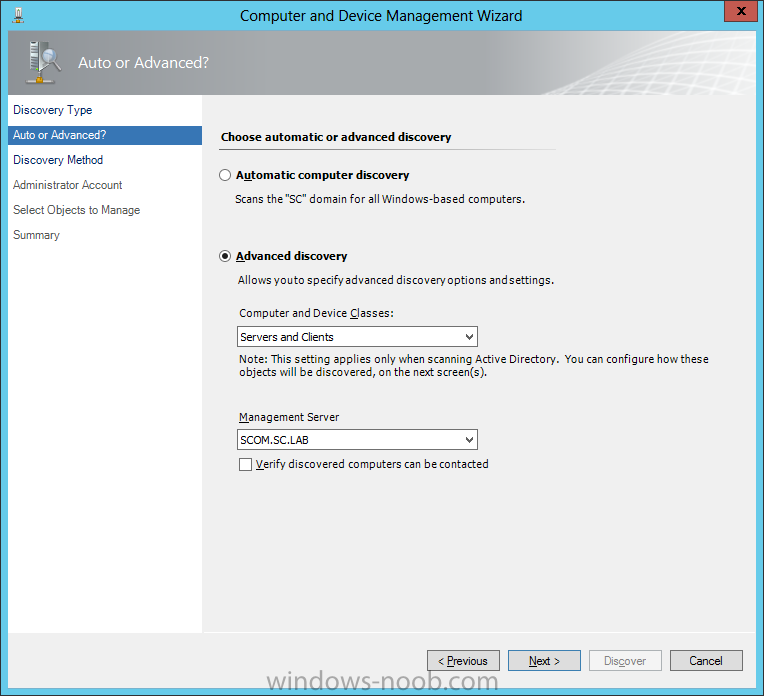
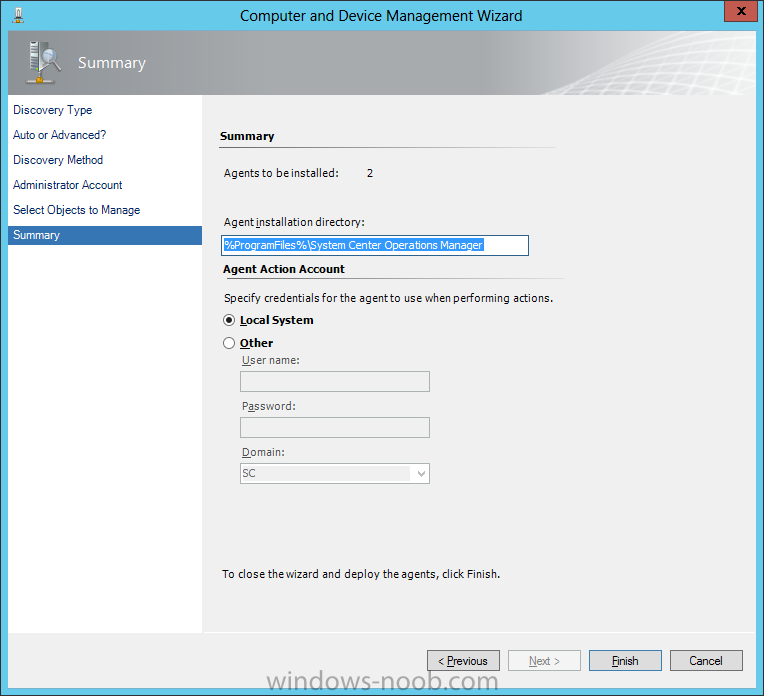
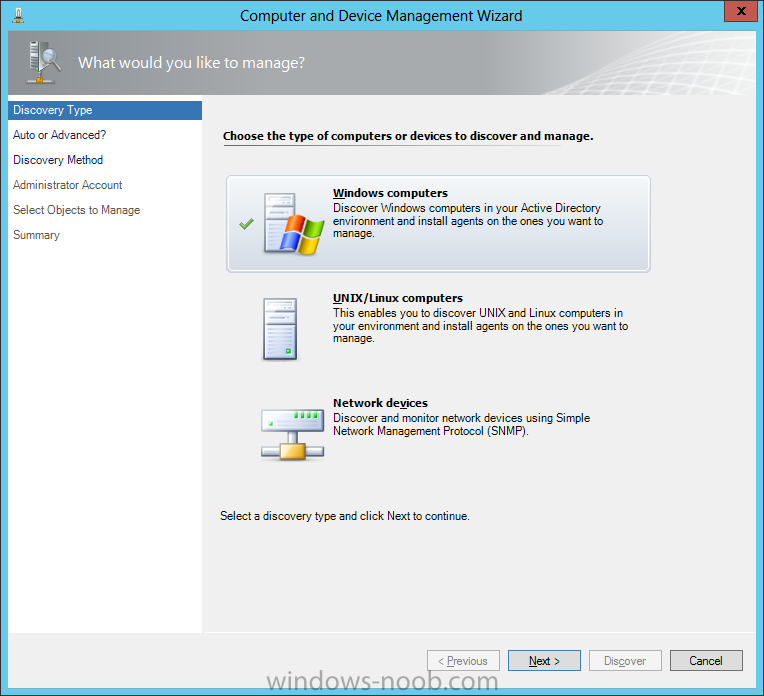
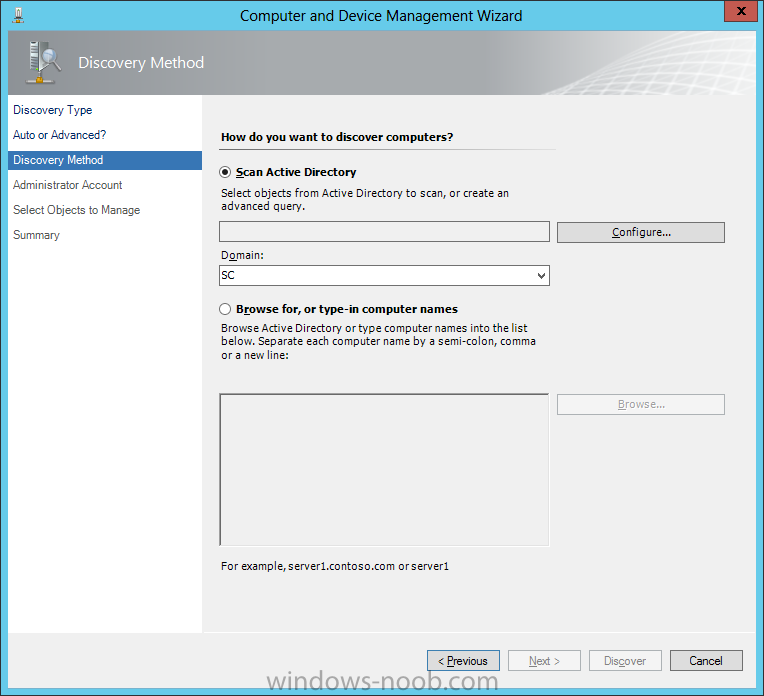
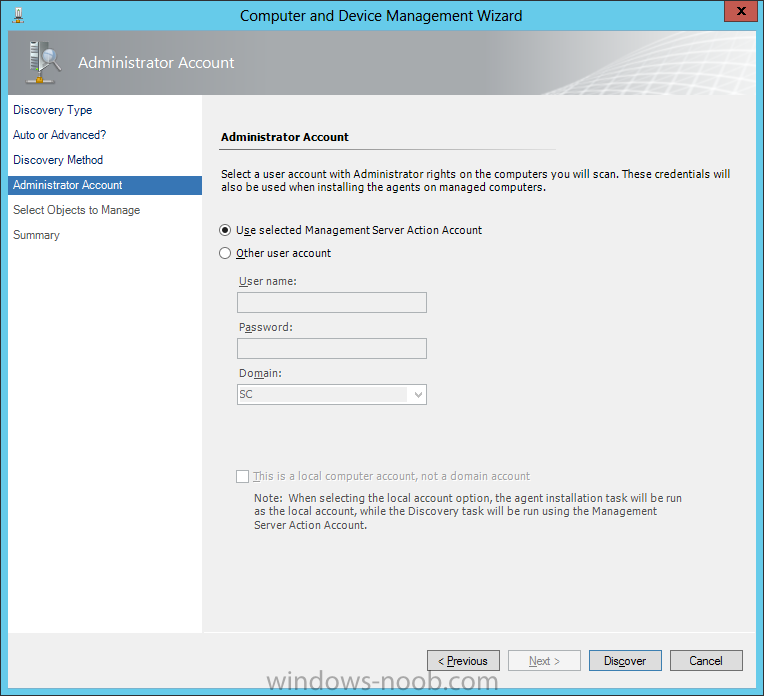
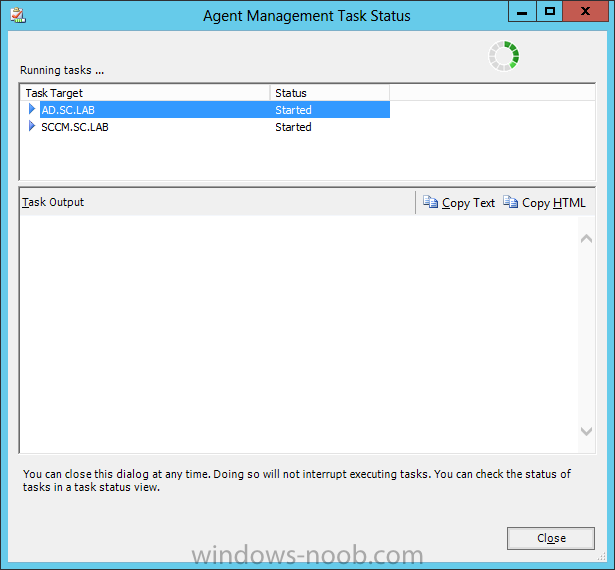
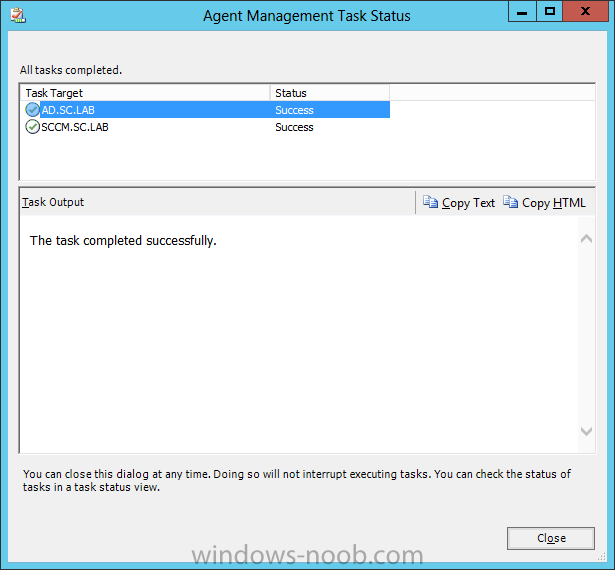
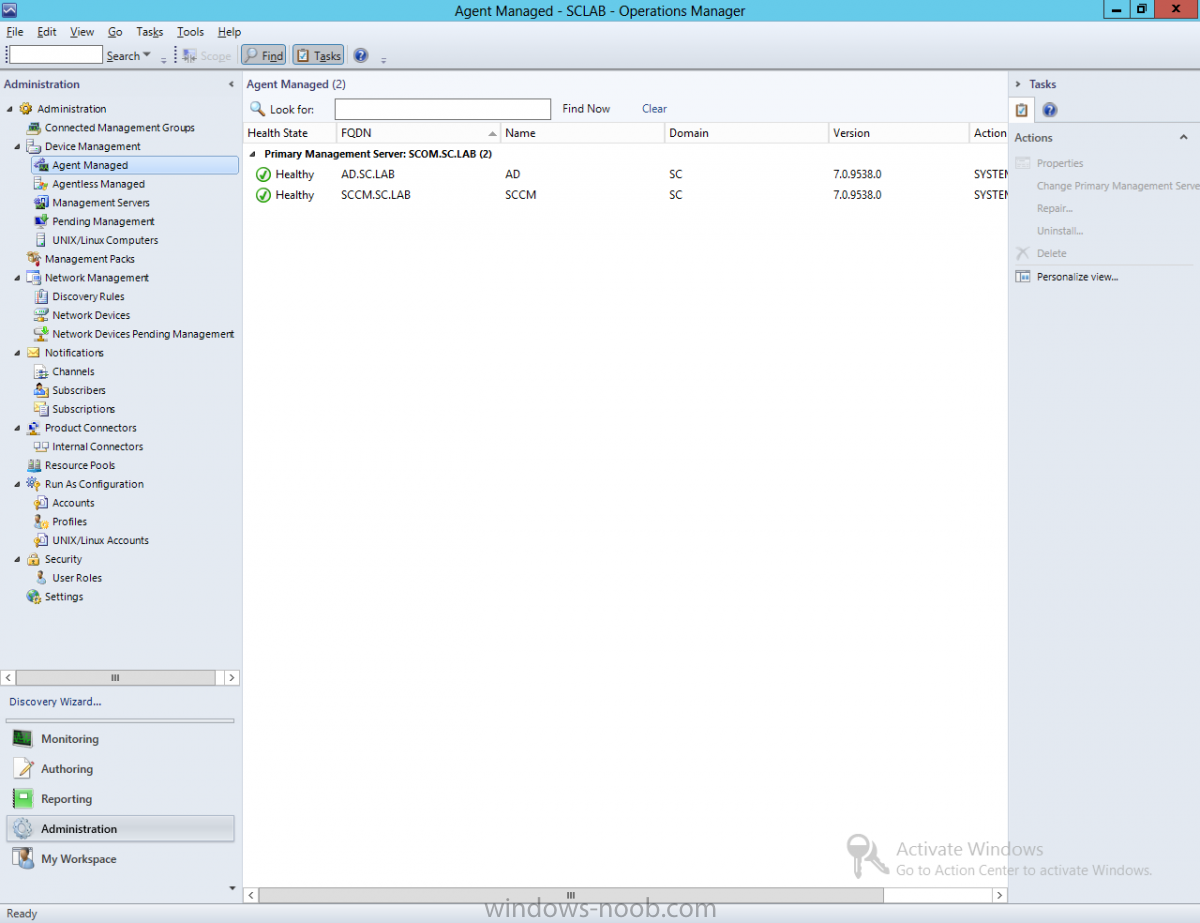
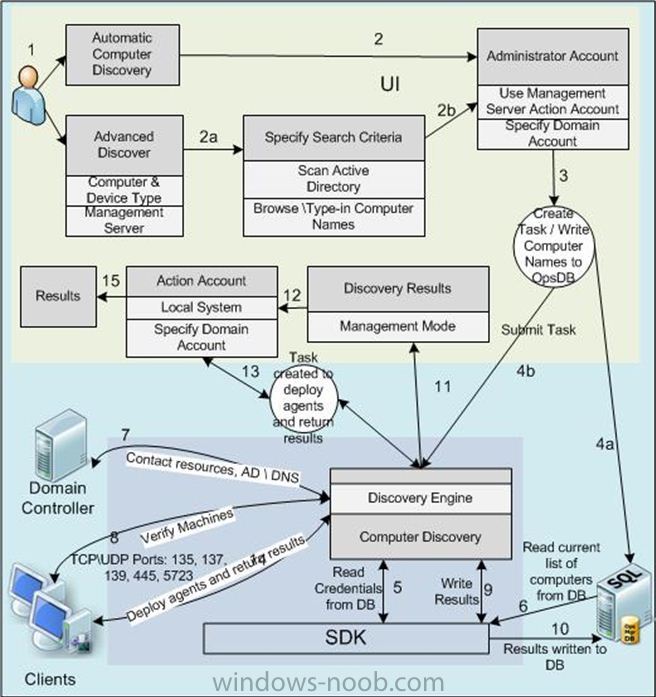
 Hello everyone, if you have been following along with my installation guides, you should now have SCOM installed. But SCOM won’t do you any good if it doesn’t have any computers or devices to manage, so that’s where we will start as part of these Configuration guides. First, start by launching the SCOM console. Now, navigate to the Administration pane. From there, under Device Management find ‘Agent Managed’. Right-click on the Agent Managed item, and choose Discovery Wizard. The Computer and Device Management Wizard will start. You must first choose why type of device you want to discover and manager. You have 3 choices, Windows Computers, UNIX/Linux Computers, or Network Devices. For our example we will choose Windows Computer, and then click Next. On the Auto or Advanced screen, you can choose to let SCOM scan the domain to find the computers, or if you want more control over which systems are monitored, you can choose the Advanced Discovery. If you choose the Advanced option, you can also choose if you want to discover only servers, clients, or both. Additionally, you can choose which Management Server you want the discovered systems to be managed by. Since we only have one Management Server in our lab, we only have one option, but in a Production environment you can use this to balance the load between multiple Management Servers. Make your appropriate selections, and click Next. Next you need to specify the Discovery Method that will be used. Again, you can allow SCOM to scan Active Directory, or you can manually type the computer names for it to check against. From my own personal experience, it is usually best to manually type the names of the computers, as this gives you more control over what systems are added to SCOM, and how many at a time. Choose your appropriate options, and click Next. You can now specify the Administrator Account to use. We will accept the default selection to use the Management Server Action Account, and then click Discover to initiate the process. SCOM will then go off and attempt to communicate with the specified systems. Here is a diagram that shows how computer discovery works in SCOM. The systems that SCOM is able to communicate with will appear in the Discovery Results. From there, select the device(s) that you want to install the SCOM agent on. In our example we will install the SCOM agent on all systems in our lab environment. Make your selection(s) and click Next. On the Summary screen, you can control where the SCOM Agent will be installed. In my personal experience, the default location is sufficient. You can also provide an Agent Action Account. In a lab environment, we can use the Local System, however, in a Production environment I have personally seen a designated Agent Action Account (usually a Service Account) be used in this context. Make the appropriate selection/input, and click Finish. SCOM will then start the Agent installation task. Depending on your network, the number of devices, etc. it may take a while to complete. When the discovery and agent installation completes, it should look like this. You can click Close on the status window. Returning back to the SCOM console, you will now see the system(s) that you discovered and installed the Agent on. Congratulations, not only do you have a working SCOM environment, but you also have SCOM actively monitoring! In the next part of this series, we will Import Management Packs.