Search the Community
Showing results for tags 'Service Manager'.
Found 19 results
-
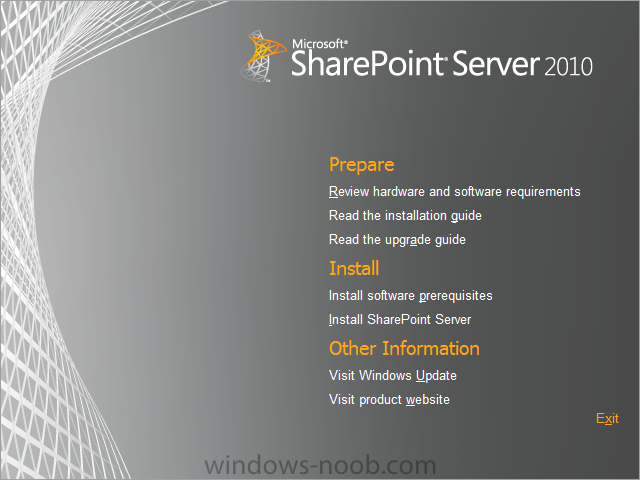
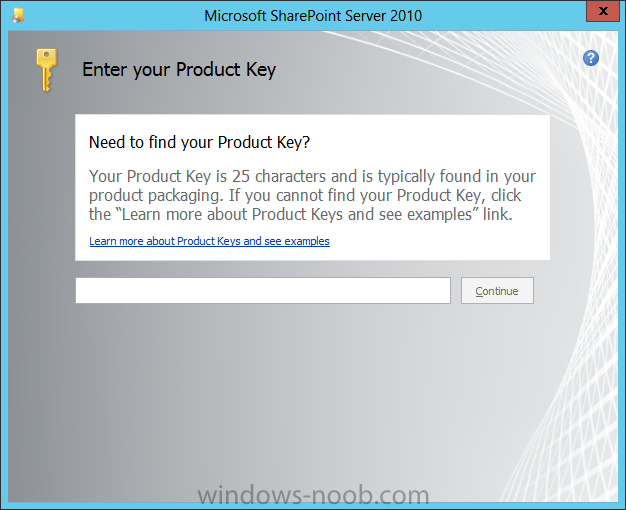
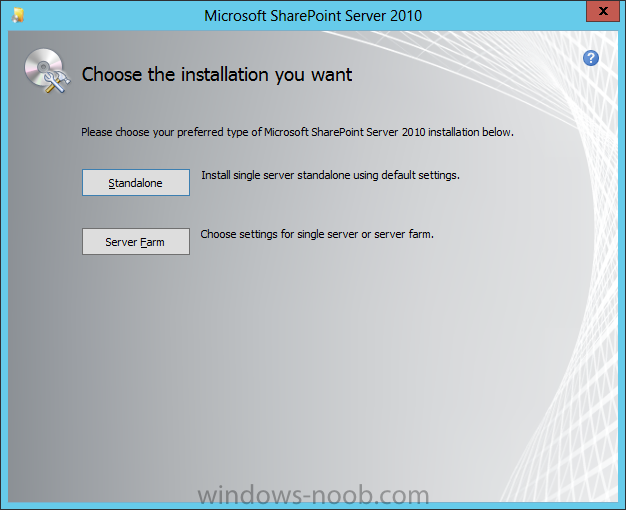
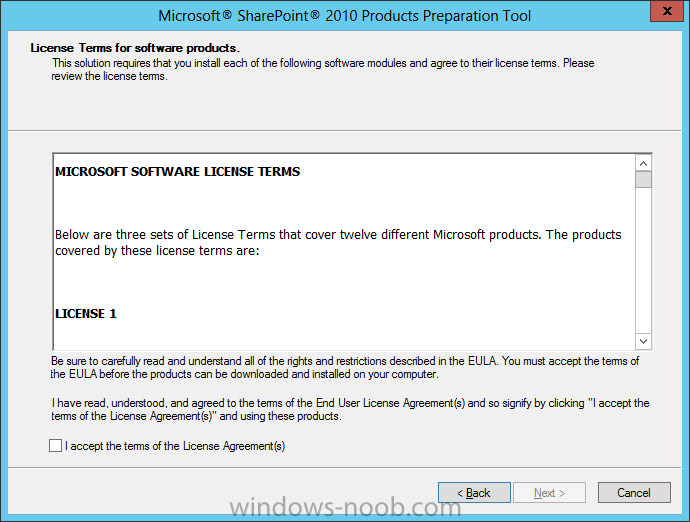
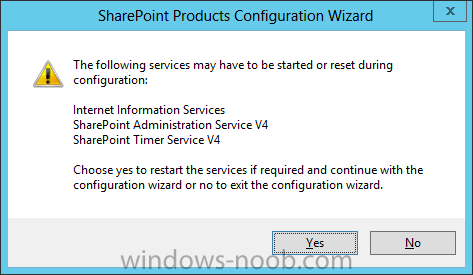
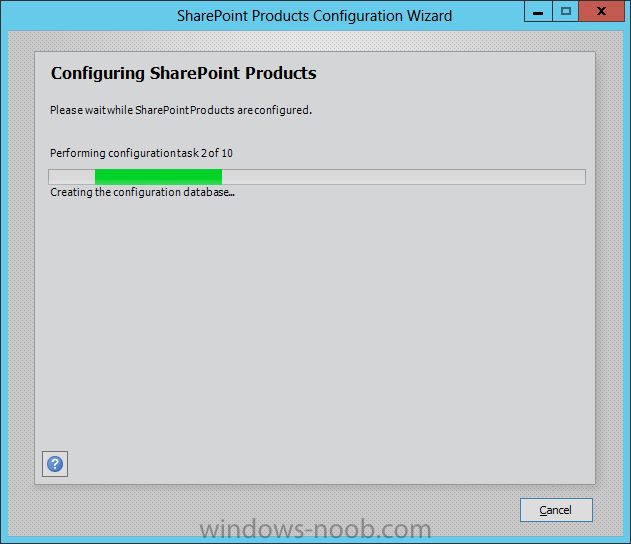
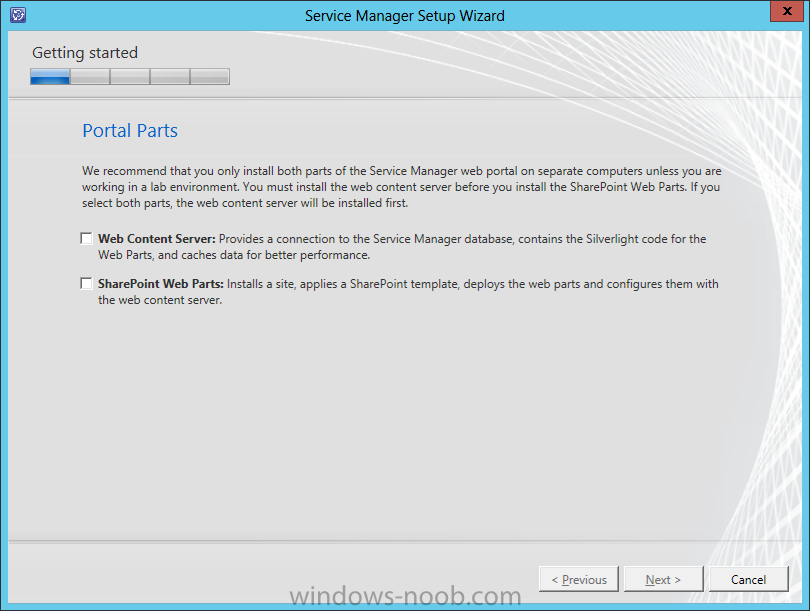
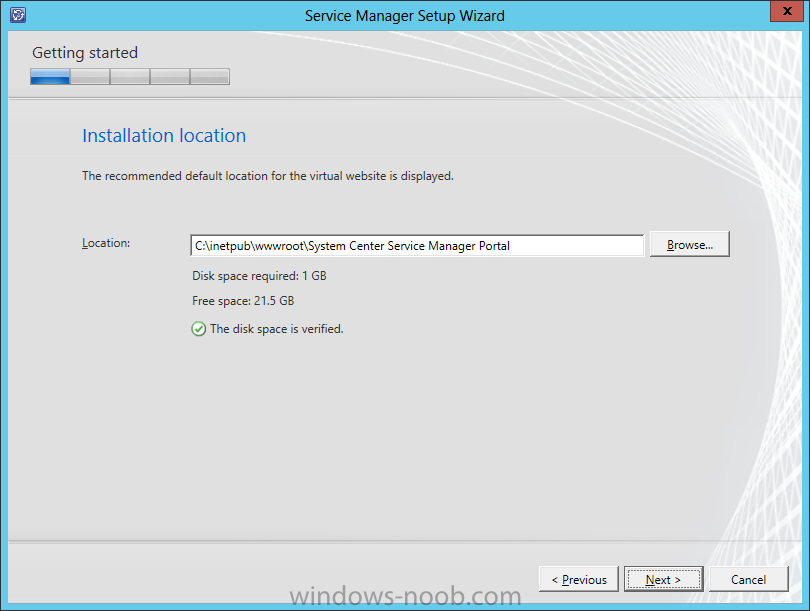
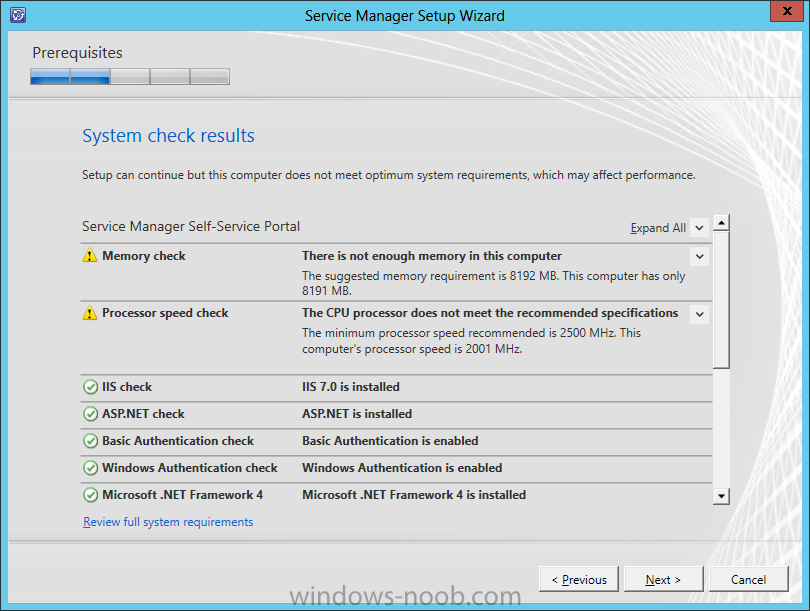
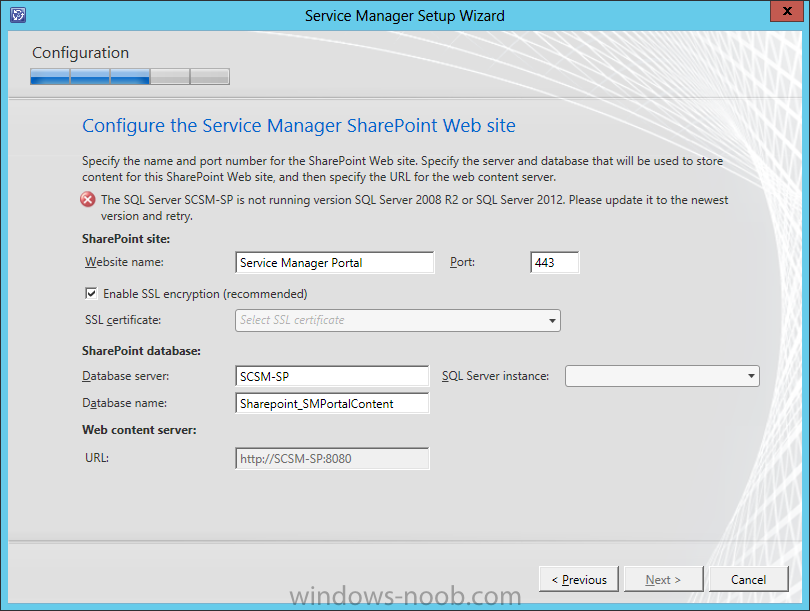
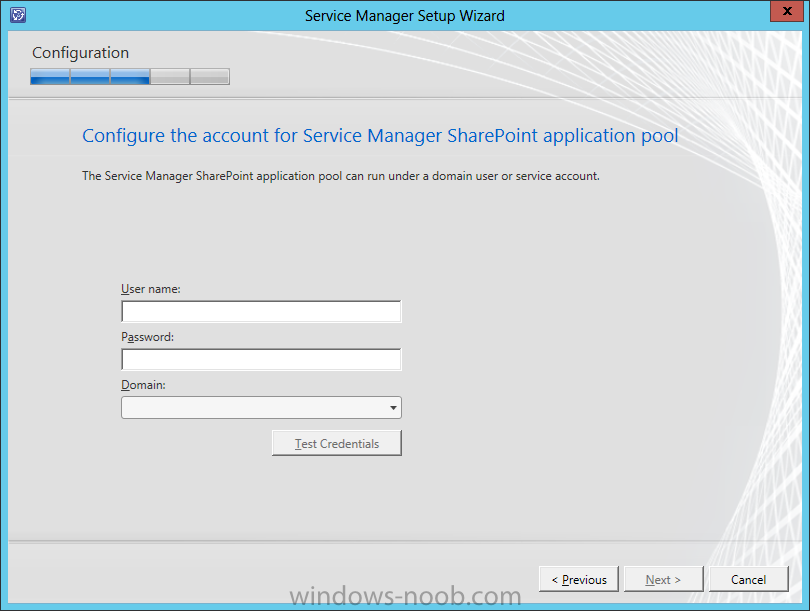
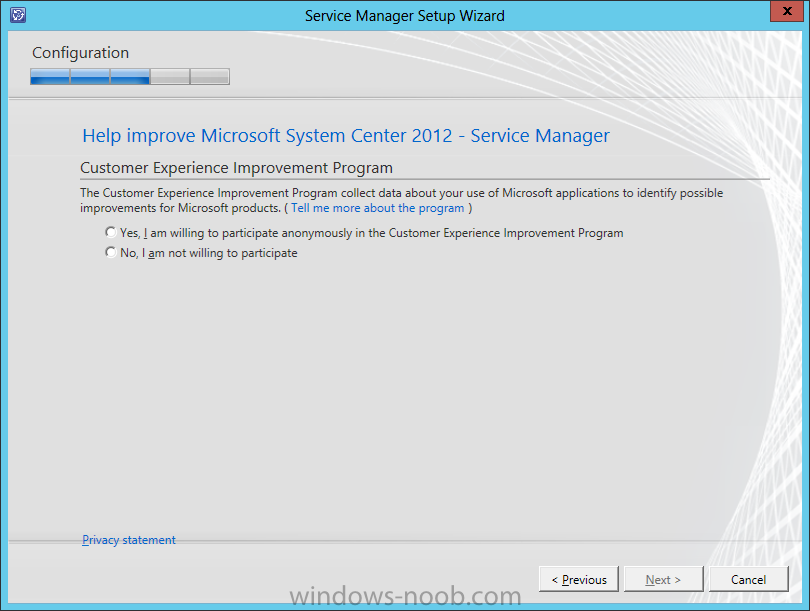
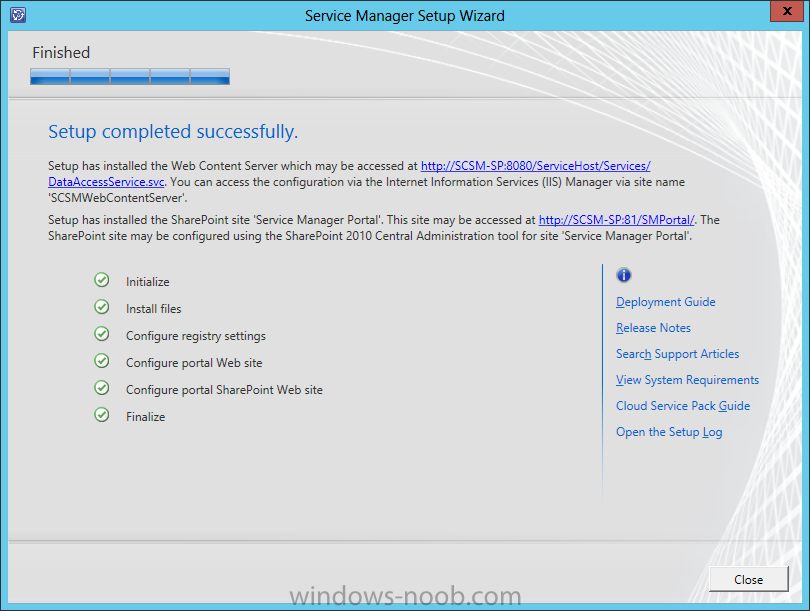
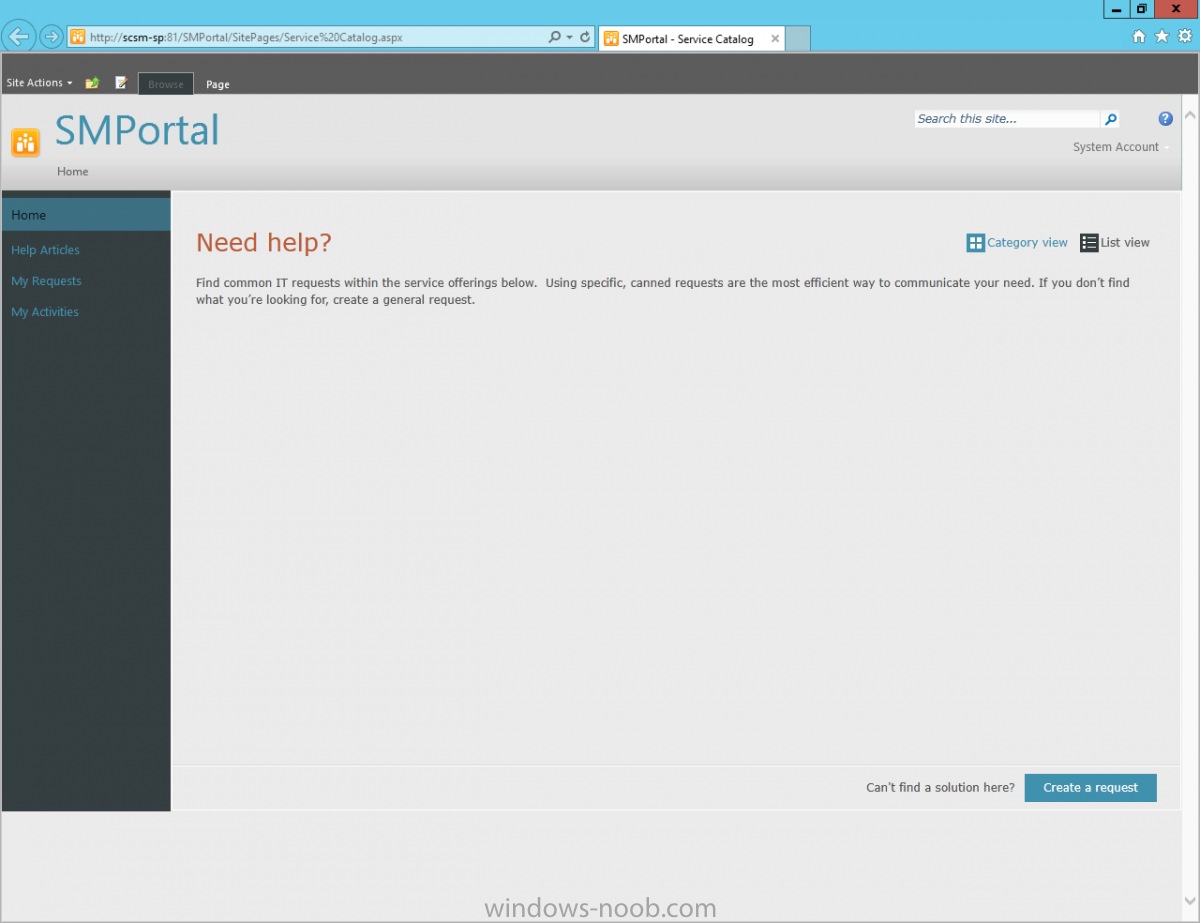
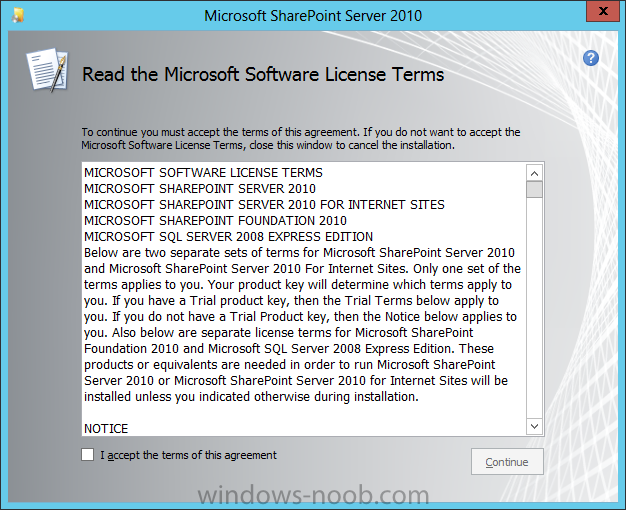
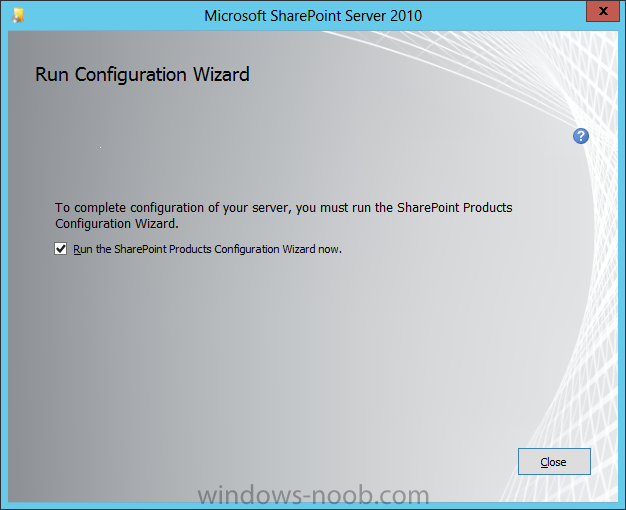
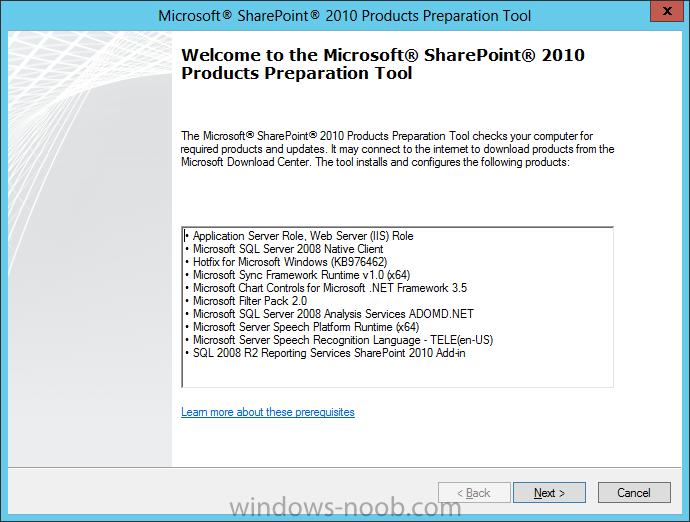
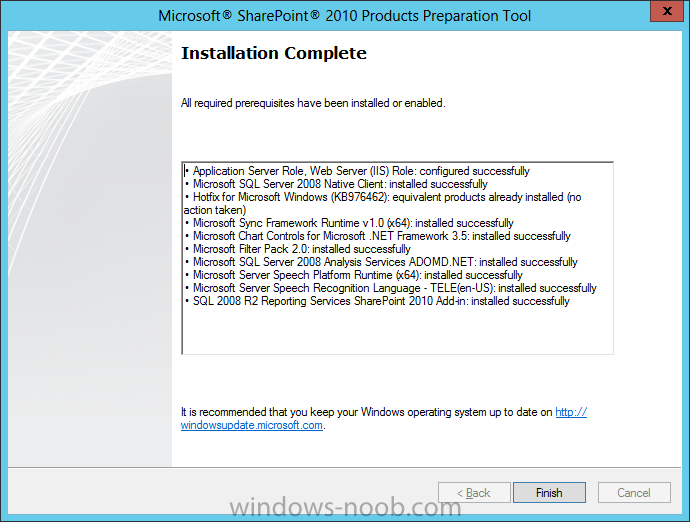
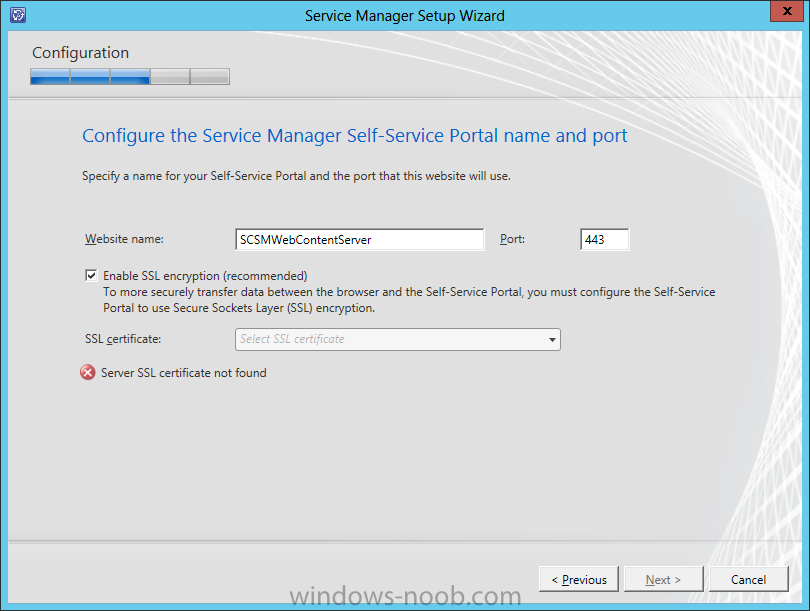
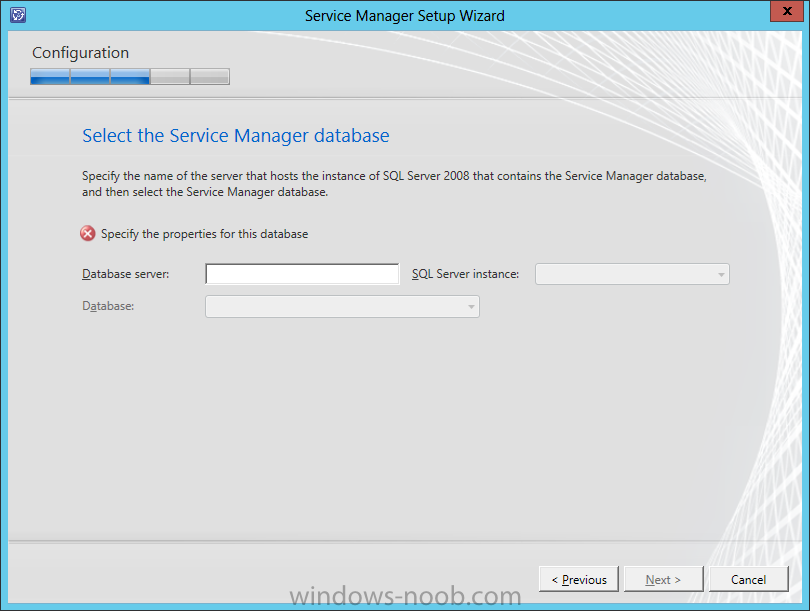
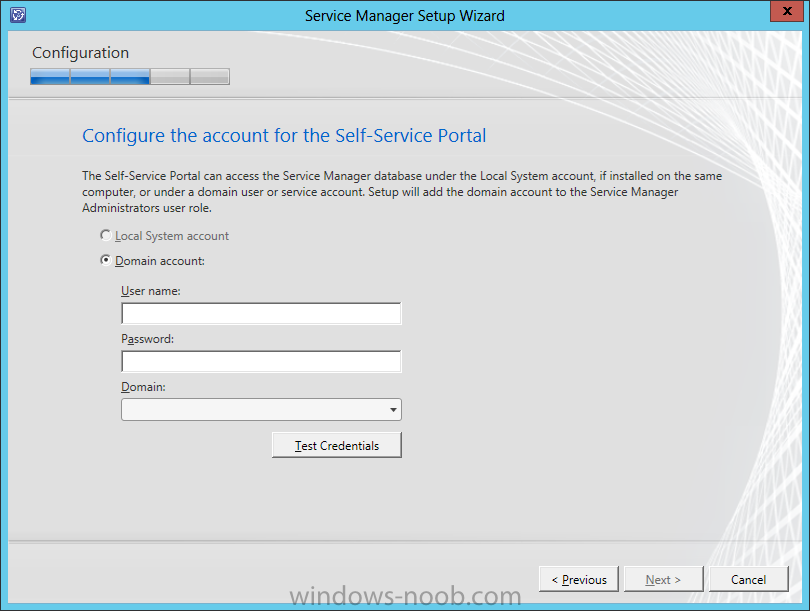
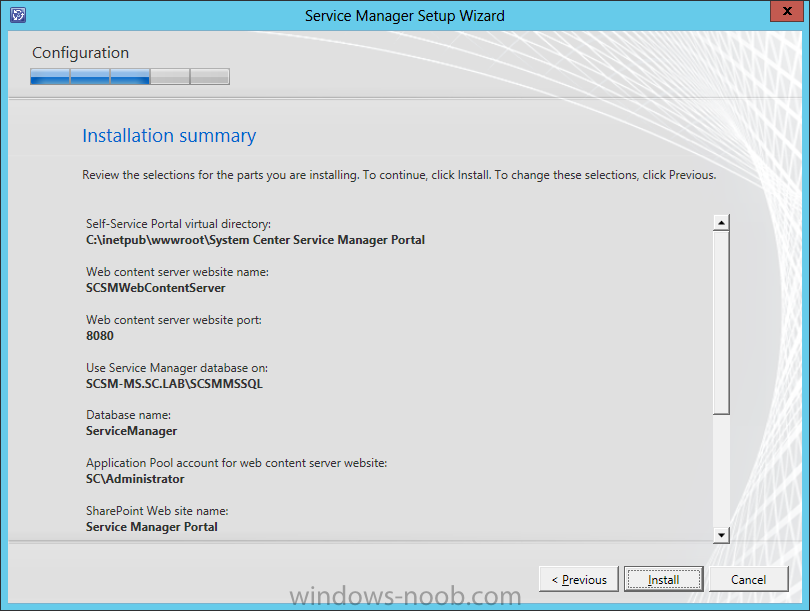
 Now that we have the Service Manager Management Server, and the Warehouse Server installed, the last piece we need to install is SharePoint for the Self-Service Portal. Install PrerequisitesTo start, before we will actually be able to install Service Manager Self-Service Portal, we don’t actually have to install any prerequisites, because by installing SharePoint, this will install all prerequisites required. As a reference, here are the requirements for the Self-Service Portal: § IIS 7.0 o Basic Authentication o Windows Authentication § ASP.NET § .NET Framework 4.0 § SharePoint Server 2010 o Language Pack for SharePoint Server 2010 or SharePoint Foundation 2010 – English § WCF Service HTTP Install SharePointStart by either mounting or extracting the ISO (en_sharepoint_server_2010_with_service_pack_2_x64_dvd_2581604.iso) and running the splash.hta. On the splashscreen, first click on the link ‘Install Software Prerequisites’. SharePoint Prerequisites On the Welcome page, click Next. Note that if you don’t have the roles/features, and elements that are listed installed, the setup will install/add them for you automatically. On the License Terms page, read the information presented, check the ‘I accept the terms of the License Agreement(s)’ checkbox, and click Next. Once the prerequisites have been installed, click Finish. Now that the prerequisites are installed, let’s continue with the installation of SharePoint. SharePoint Install ContinuedOn the splashscreen, click the ‘Install SharePoint Server’ link. You will be prompted to enter your Product Key before the installation will continue. Read the License Terms, click the ‘I accept’ checkbox, then click Continue. Next we need to choose the Installation we want. For this purpose, in a lab environment, we will choose Standalone. Once the installation completes (which should be quick because we already have the prereqs installed), ensure that the ‘Run the SharePoint Products Configuration Wizard now’ checkbox is selected. Then click Close. SharePoint Configuration WizardThe SharePoint Configuration Wizard will launch. Click Next. When you click Next, you will encounter the following Warning message. Click Yes. The Configuring process may take a little while, so you will have to be patient. Once the configuration is complete, click Finish. This will cause the default website to open in a browser. The default SharePoint site will launch. For now, just close the browser. We need to install the Service Manager self-service elements. Install Service Manager Self-Service PortalNow that we have SharePoint installed, we can now install the Self-Service Portal. Start by either extracting the DVD contents, or mounting the ISO (the TechNet ISO is currently labelled as mu_system_center_2012_service_manager_with_sp1_x64_dvd_1348926). Start by opening your DVD drive, navigating to the corresponding architecture (i.e. x86 or amd64), and run the Setup.exe. On the splash screen click the Service Manager Web Portal install link. On the Portal Parts screen, select the part(s) you want to install. Note that if you want to install both parts, you need to select them both at this point. You will not be able to come back and install the other part. Since we are in a lab environment, then we will install both parts on the same server. Select both Portal Parts and then click Next. On the Product Registration page, read the License Terms, accept them, and then click Next. On the Installation Location page, you can change the location if you desire, then click Next. The Prerequisites checker will run automatically. Correct any issues that are reported, until you are able to continue with the installation. Then click Next. Next you have to configure the Portal name and port. You can choose to use SSL or not, but it is selected by default. Make your appropriate modifications, and then click Next. Now you need to like the portal to the Service Manager database. Provide the database server, instance, and database name for the Service Manager database (not the warehouse). Then click Next. You also need to provide an account for the Portal to use when accessing the database. Provide the required information and click Test Credentials. You will not be able to continue with the installation without successfully testing the credentials. Then click Next. Next we need to configure the SharePoint website. You need to provide a name, port, SSL certificate, as well as a location for the SharePoint database. Then click Next. You also need to provide an account for the SharePoint Application Pool. You need to test the credentials successfully. Then click Next. Now you can choose if you want to join the CEIP program. Then click next. New to System Center 2012, you can choose to include the product in Microsoft Updates. Make your selection and then click Next. Finally, review the selections/information on the Summary page, and then click Install. Once the installation is complete, click Close. You can also click on the link provided to test the Service Manager Portal. When you launch the Service Manager Portal for the first time, you may be prompted for credentials, and you may also get a message about Silverlight. If you don’t already have Silverlight installed, you will not be able to use the portal. Congratulations, you now have Service Manager, complete with the Self-Service Portal installed.


- 3 replies
-
- 1
-

-
- Service Manager
- System Center 2012
- (and 2 more)
-
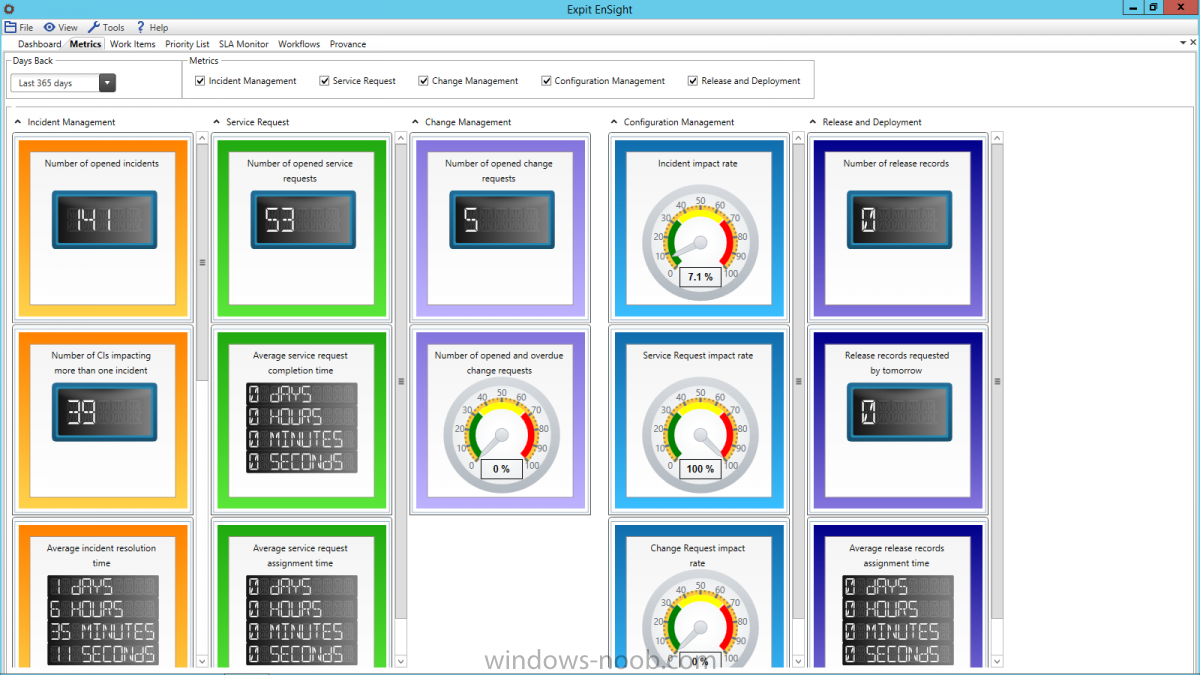
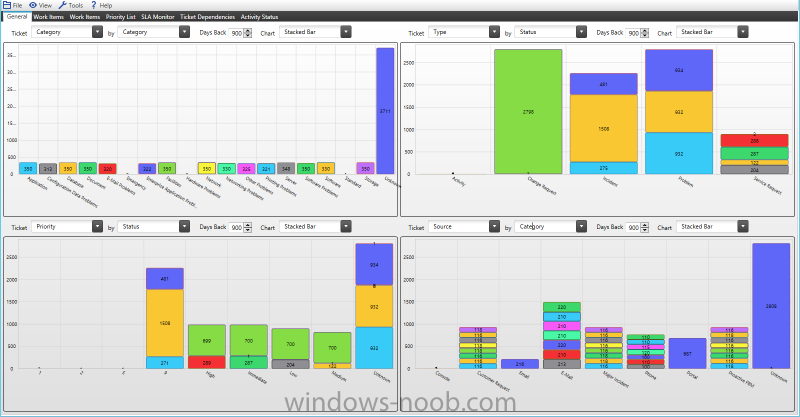
Hi, I would like to share with everyone a brief background info about our product we released sometime back. Expit EnSight is an advanced analytics and dashboards platform for Microsoft System Center Service Manager 2012 that enables service managers to view, analyze, report on all work items, workloads, workflows, through a single console. Expit EnSight for Service Manager 2012 provides a comprehensive view for events in Service Manager tailored for IT managers and NOC facilities. Using EnSight, users can easily sort tickets by source, category, support group or the status of every ticket during the current month or within a specific time range. Expit EnSight also gives decision makers team workload viewing capabilities to monitor team workload distribution Features Supports SCSM reporting without the need for a data warehouse Light weight installation, ready to use in 5 minutes Supports SCSM 2012, 2012 SP1, 2012 R2 Live feedback on all tickets and events in SCSM 2012 Show tickets in current day/month/year or using custom dates SLA monitoring facility to keep track of critical tickets Display tickets progress per analyst or team Filter tickets by status, category, source, impact, and support group Monitor tickets opened by critical users or assets Data retrieval options (Light Dataset and Full Dataset) Control visibility of tabs and queue indicator Metrics tab with pre-built KPI’s for SCSM Provance Tab to forecast contract and warranty expiry Dynamic tab displays for multi-screen environments Supports Windows 7, 8, Windows Server 2008, 2008 R2, 2012 and 2012 R2 Download link: http://expit.com/expit-ensight–community-edition-/product-download/7 Product page: http://expit.com/ensight-for-scsm/m/60 Please share your reviews

-
Hello All, I wanted to share this article/post that I wrote recently about an error I encountered while installing Service Manager to a named instance of SQL Server. URL: http://adinermie.wordpress.com/2014/03/26/service-manager-2012-r2-installation-fails-to-identify-sql-server-instance-and-throws-access-denied-error/ Don't forget to check out my blog regularly, as I post article there first before re-posting here.
-
Hello All, I wanted to share this article/post that I wrote recently about an error I encountered while trying to configure SCOM monitoring on a System Center 2012 R2 Service Manager installation. URL: http://adinermie.wordpress.com/2014/05/03/scom-2012-r2-agent-on-service-manager-error-the-management-group-configuration-could-not-be-saved/ Don't forget to check out my blog regularly, as I post article there first before re-posting here.
-
Install SQL Server At this point, since we will be installing SQL Server on the same server that we will be installing our System Center product, it is expected that you have the VM created, the OS is installed, the appropriate networking has been configured, and it is joined to your lab domain. To avoid a specific installation error (see the end of the Install SQL Server section), you have to install the .NET Framework 3.5. So we’re going to complete this first before we start the installation of SQL. .NET Framework Installation To install the specific version of .NET that we require (version 3.5 in this case), start by launching the Server Manager, and selecting Manager > Add Roles and Features. On the Add Roles and Features Wizard, read the information on the Before You Begin screen, and then click Next. On the Installation Type screen, select ‘Role-based or feature-based installation’, and click Next. On the Server Selection screen, since we are installing SQL on the same server as Orchestrator, ensure that it is selected, and then click Next. On the Server Roles screen, we are not installing a Role, but rather a Feature, so just click Next. On the Features screen, select .NET Framework 3.5 Features, and click Next. Since in Windows Server 2012 the .NET Framework 4.x is the main framework, the OS installation does not contain the source files for this installation. Therefore, you will need to click on the ‘Specify an alternate source path’ link at the bottom of the dialog. You will need to provide the path to where the source files are. This is found within the installation media of Windows Server 2012. If you insert a DVD or mount an ISO, specify the path to the SxS folder (i.e. D:\Sources\SxS), and then press OK. Click Install, and once it has completed, click Close. SQL Installation Start by either extracting or mounting the SQL Server ISO, and run the setup.exe. In this example, we are installing SQL Server 2012 SP1. On the main installation screen, click on the Installation link on the left pane. From the Installation screen, click the ‘New SQL Server stand-along installation or add features to an existing installation’ link. This is initiate the installation. First, the Setup Support Rules will check for any issues. As long as there isn’t any ‘Failed’ issues, click OK to continue with the installation. Next, enter your product key or select the evaluation copy to install, and press Next. Accept the License Terms and choose if you will send usage data to Microsoft, then press Next. If you have an Internet connection, the installer will check if there are any applicable updates to the installation, and will download the updates to use during the install. Click Next. The Setup will perform another Setup Support Rules check. As long as there are no Failures, you can click Next. Next is the Setup Role. For our needs, we will choose ‘SQL Server Feature Installation’, then press Next. For the Feature Selection, select the following (depending on which Service Manager component you are installing), and then press Next. SCSM Management Server: Database Engine Services Full-Text and Semantic Extractions for Search Management Tools – Complete (Optional) SCSM Warehouse Server: Database Engine Services Full-Text and Semantic Extractions for Search SQL Server Reporting Services (SSRS)Collation: SQL_Latin1_General_CP1_CI_AS SQL Server Analysis Services (SSAS)Collation: Latin1_General_100_CI_AS Management Tools – Complete (Optional) The Installation Rules will run to determine if anything will block the SQL installation. If there are no Failures, click Next. Next we will configure the instance. You can choose either to use a Default instance, or a Named instance. In this example, I will use a named instance, so as to not get this installation of SQL mixed up with any other I will have in my lab. Make your applicable choice, and click Next. The setup will check and confirm there is enough space on the drive for the installation. If everything is reported as OK, click Next. You next have to configure the server, which includes the Service Accounts and Collation. In Production, it is best practice to have a separate account for each of the services. In our lab, we will leave everything at defaults, with the exception of changing the ‘SQL Server Agent’ startup type from ‘Manual’ to ‘Automatic’. After you have completed this, don’t click Next, but rather click on the Collation tab. On the Collation tab, you will need to click the Customize button to be able to change it appropriately. On the Customize dialog, select ‘SQL collation, used for backwards compatibility’. Within the list, find ‘SQL_Latin1_General_CP1_CI_AS' and select it, then click OK. NOTE: If you are changing the Collation for SQL Server Analysis Services (SSAS), then use 'Latin1_General_100_CI_AS' Collation. You will be back on the Server Configuration dialog, click Next. On the Database Engine Configuration screen, leave the Authentication Mode at ‘Windows authentication mode’. What do have to change is to add SQL Server Administrators. Click the Add button. On the next dialog, you will need to add either the user(s) or security group(s) you want to have administrator access to SQL. At a bare minimum, add the current user account, so that you can log into SQL Server. Add the user(s)/security group(s), and click OK. You will be back on the Database Engine Configuration screen, and your accounts will now be present. In my example, I have an Active Directory Security Group I specifically created for SQL Administrators. Then click Next. You can choose to send Error Reporting information to Microsoft. Make your choice, and click Next. The setup will now re-check the configuration rules, based on the selections and information that has been supplied. If it passes, click Next. Review the information on the Ready To Install screen, and then click Install. Note: during the installation, you may encounter the following error message. This is due to not having the .NET Framework 3.5 installed prior to attempting to install SQL Server. If you encounter this, cancel the SQL server installation, and install the .NET Framework 3.5 (which is an available feature within Roles and Features). You may have to wait a while for the Installation Progress to complete. On the Complete screen, click Close. Congratulations, you now have SQL Server installed and are finally ready to install System Center Service Manager (SCSM).
-
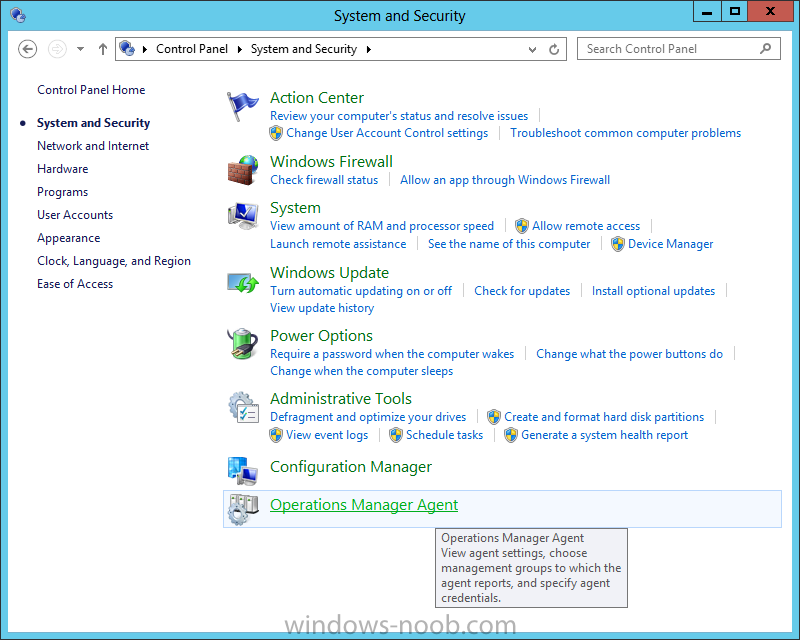
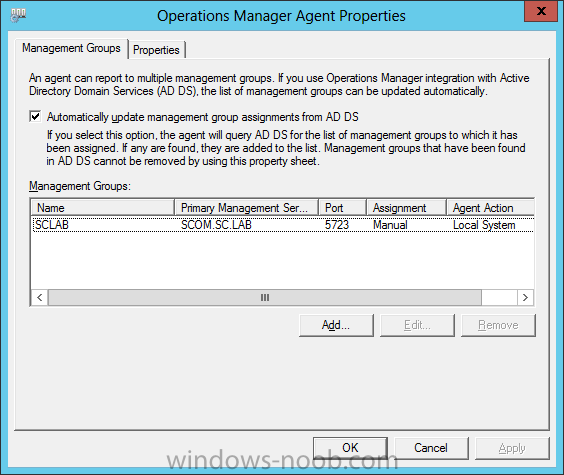
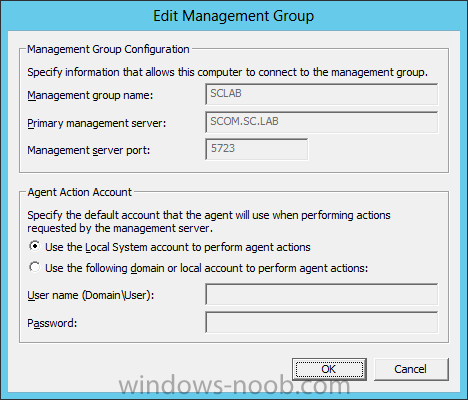
Management Group Names Must be UniqueWhen you deploy both a Service Manager and data warehouse management server, you are asked to provide a management group name. You are also asked to provide a management group name when you deploy Operations Manager. The management group names that you use for the Service Manager management group, the data warehouse management group, and the Operations Manager management group must be unique. Important: If Operations Manager and Service Manager share the same management group name, you will have to reinstall the Service Manager management server. Because it is not possible to rename a management group, you will either have to completely reinstall Service Manager with a different management group name or choose not to manage your Service Manager installation with Operations Manager. Database CollationsYou must use the same supported language collations if you intend to import data from Operations Manager into Service Manager. However, this is true only for the OperationsManager database in Operations Manager and the SM DWStagingAndConfig database when you create an Operations Manager Data Source for the data warehouse. Specifically, this appears in the Service Manager console as a Data Warehouse Data Source. This does not affect either the System Center Operations Manager to System Center Service Manager Configuration Item connector or the System Center Operations Manager to System Center Service Manager Alert Incident connector. System Center 2012 – Operations ManagerSystem Center 2012 – Operations Manager is supported by Service Manager and Service Manager SP1 for connectors and agents. However, only corresponding System Center versions are supported when you register a data source in the Data Warehouse workspace. System Center 2012 – Operations Manager agents were not supported with System Center 2012 – Service Manager. However, the agent that is automatically installed by System Center 2012 – Service Manager SP1 is compatible with System Center 2012 – Operations Manager and System Center 2012 – Operations Manager SP1. After Service Manager Setup completes, you must manually configure the agent to communicate with the Operations Manager management server. To validate that the Operations Manager Agent was installed, open Control Panel and verify that the Operations Manager Agent is present. To manually configure the Operations Manager agent, see Configuring Agents. Changing the Account Configuration for an AgentYou can use the following procedure to change the account that the agent will use when performing actions requested by the management server. To change the account configuration for an agentOn the agent-managed computer, in Control Panel, double-click Operations Manager Agent. (In the category view of Control Panel in Windows Server 2008, Operations Manager Agent is in the System and Security category.) On the Management Group tab, select a management group and then click Edit. In the Agent Action Account section, edit the account information and then click OK.


-
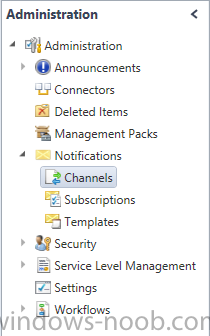
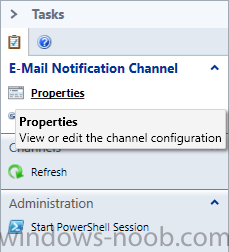
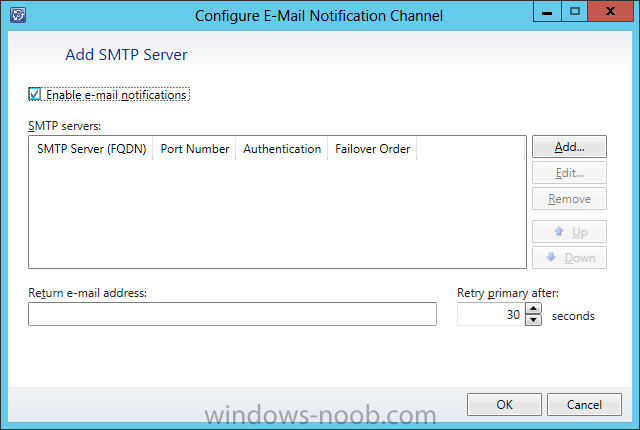
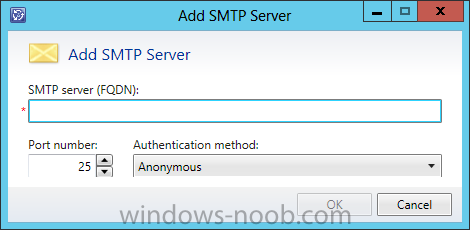
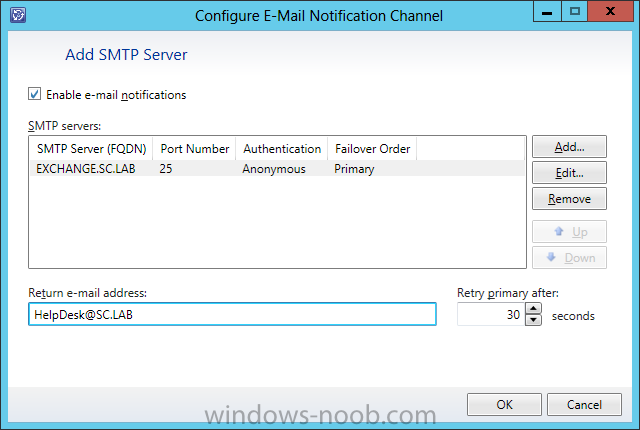
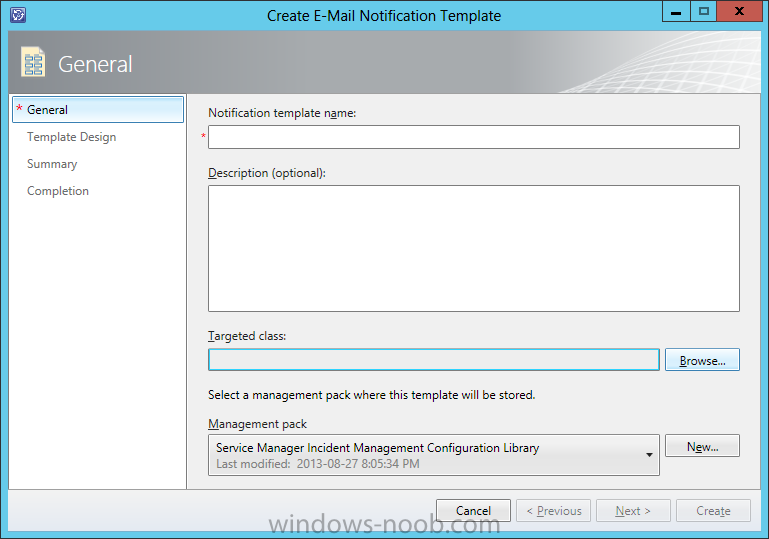
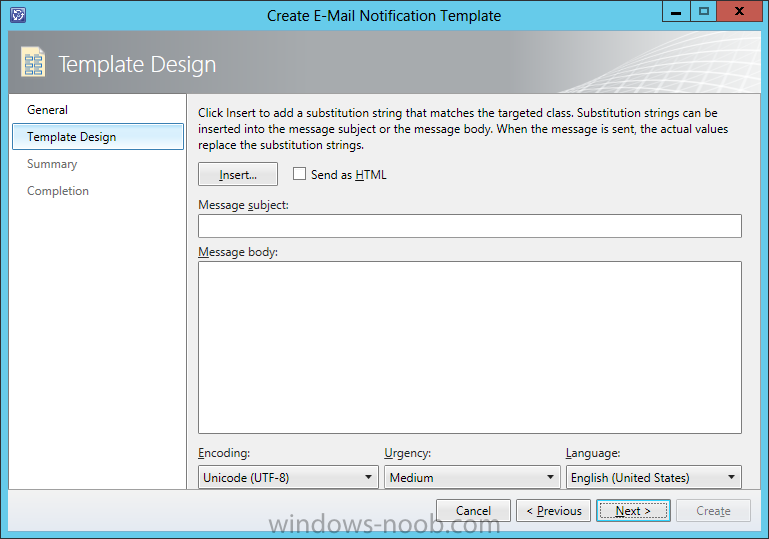
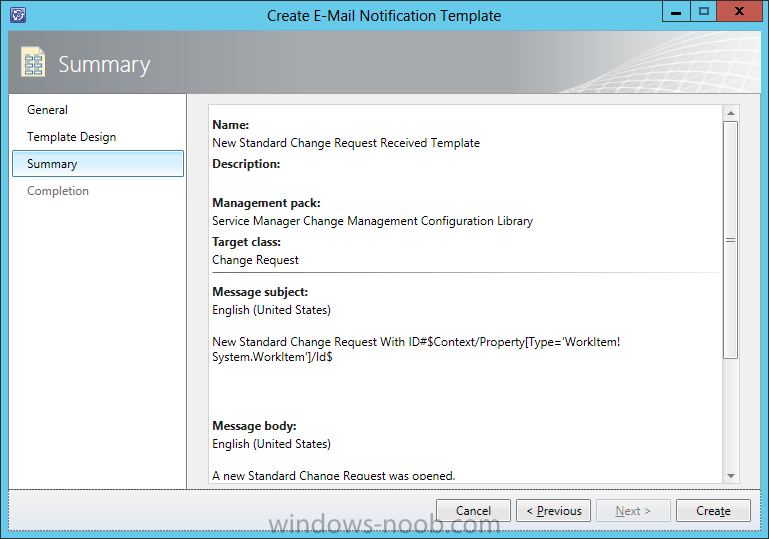
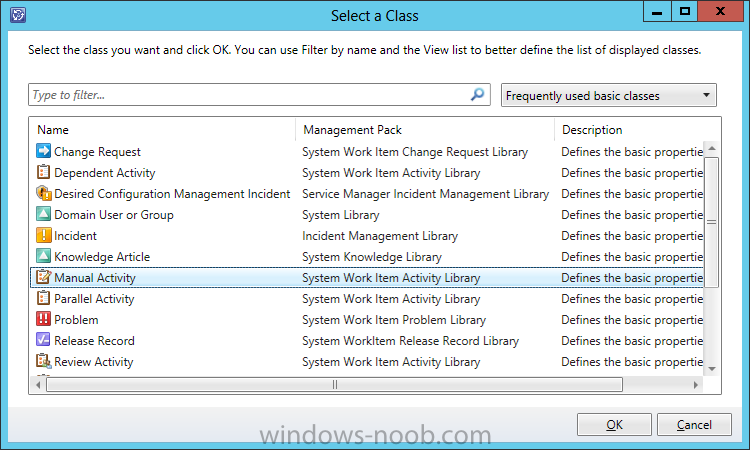
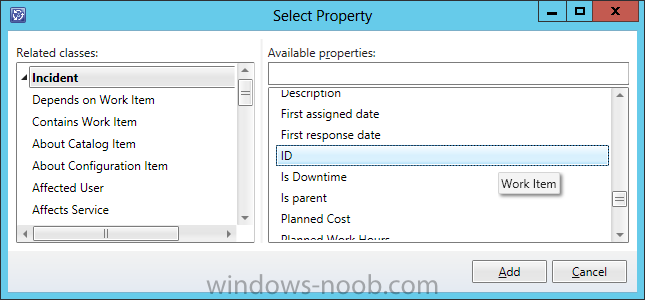
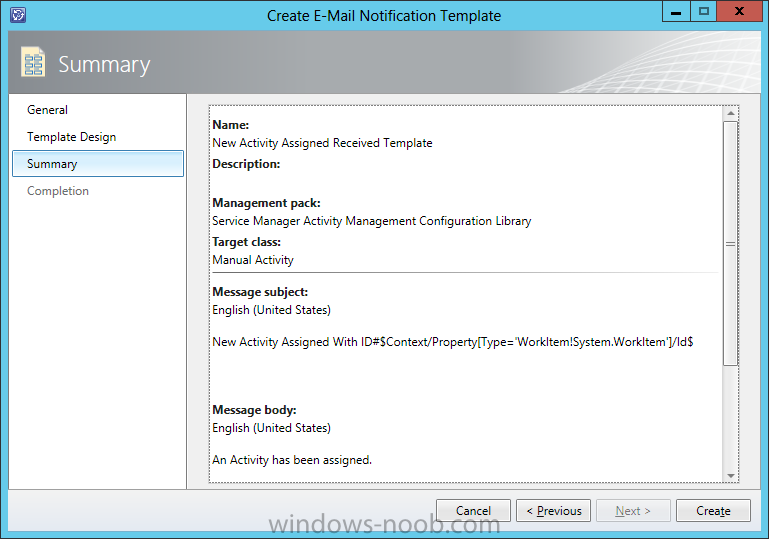
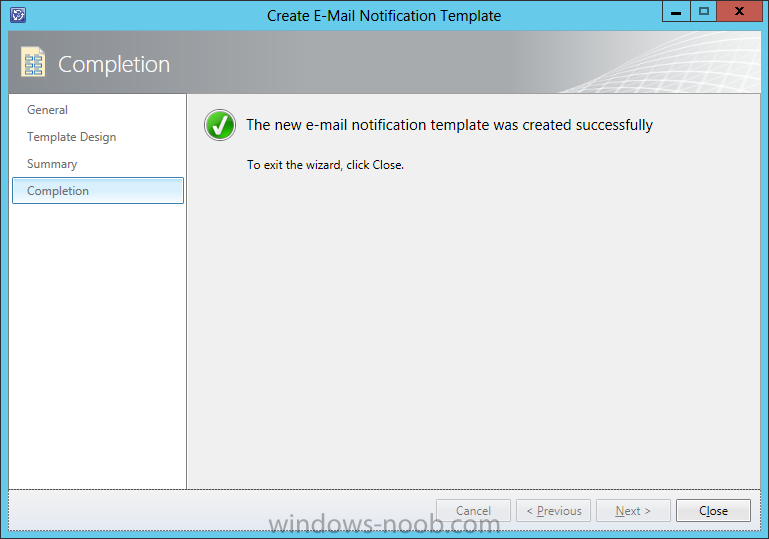
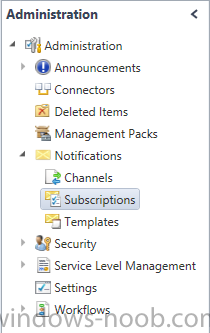
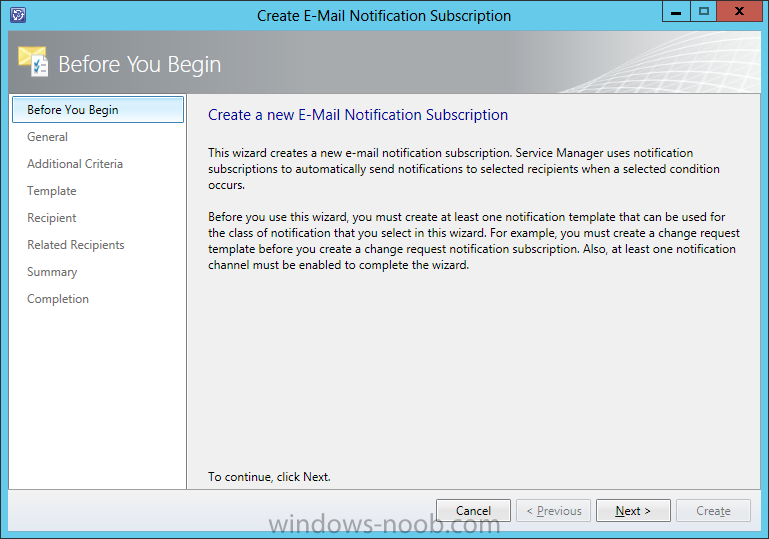
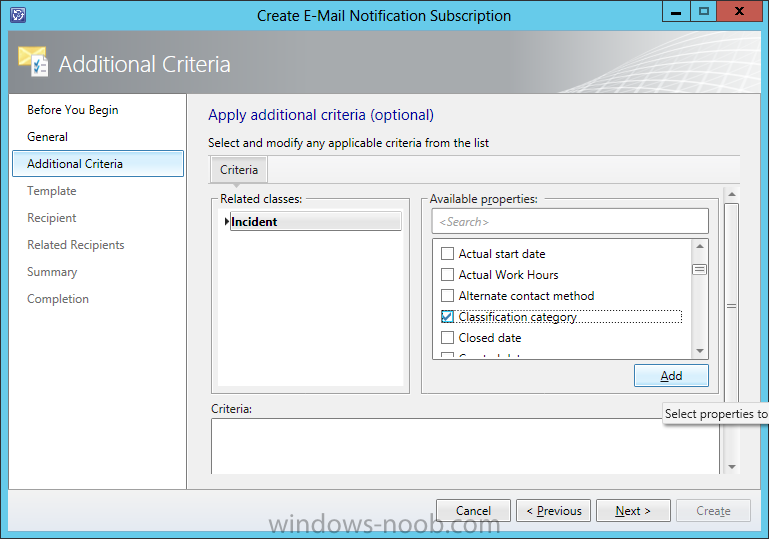
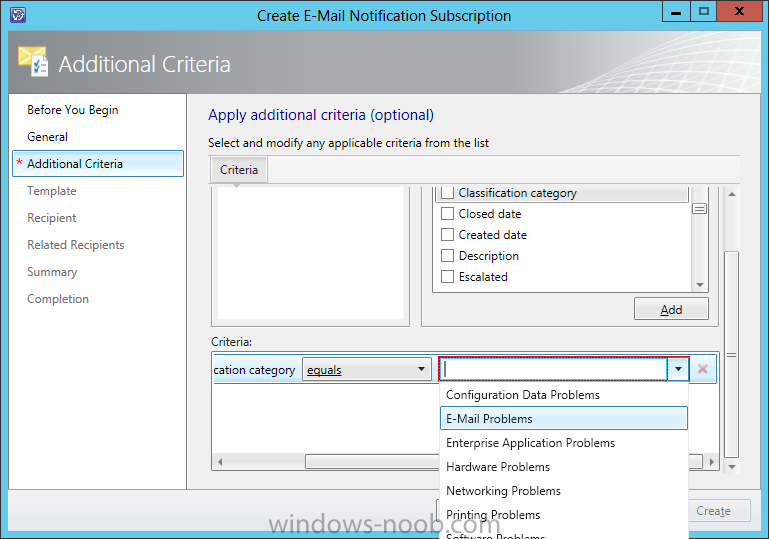
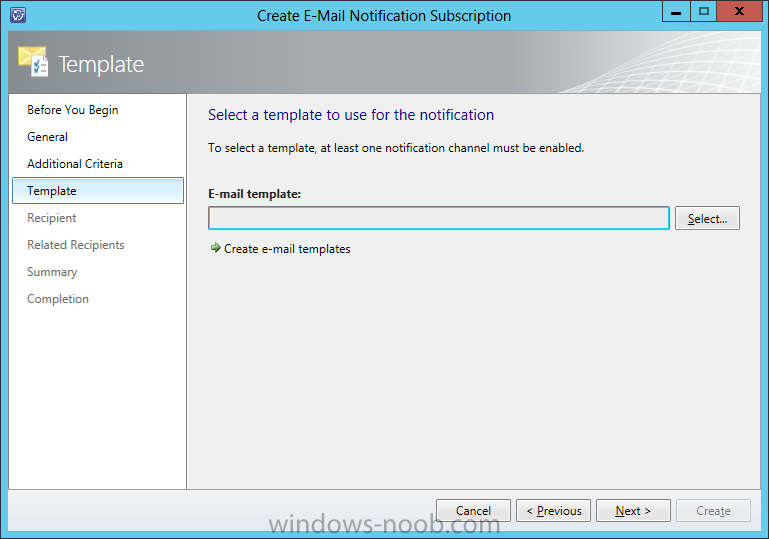
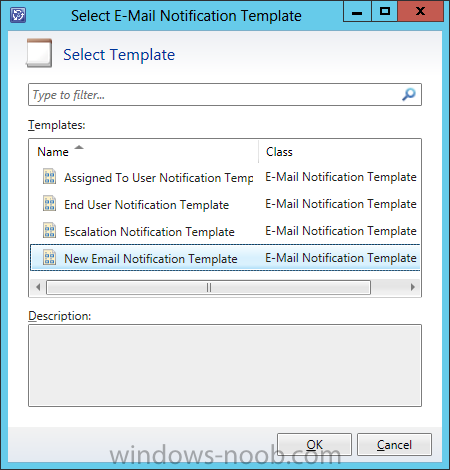
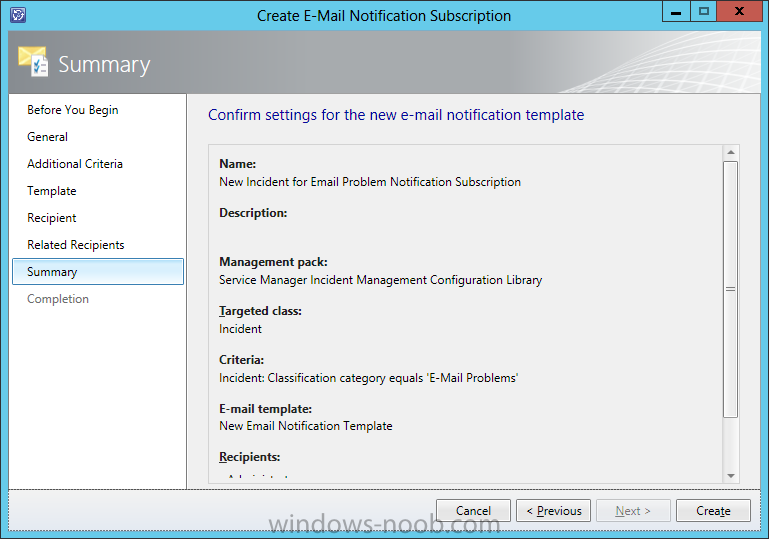
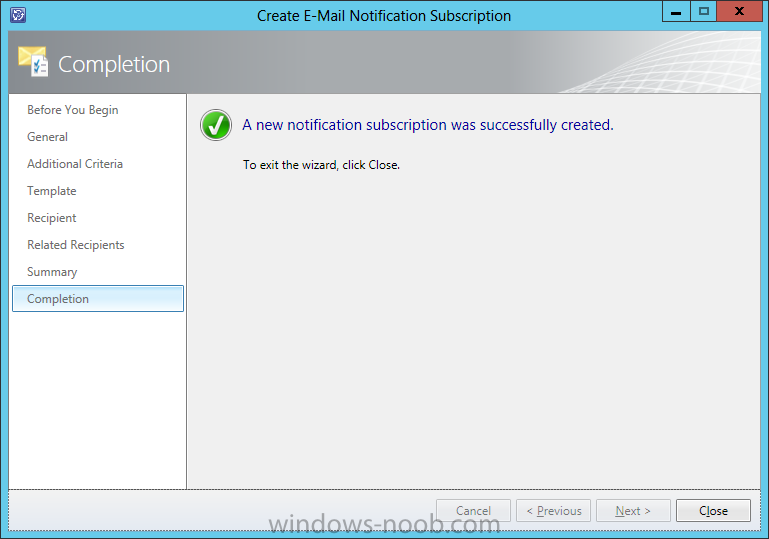
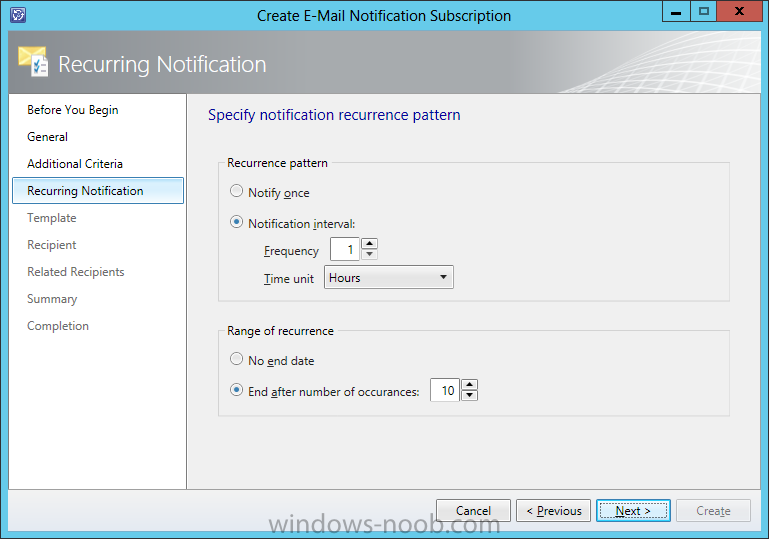
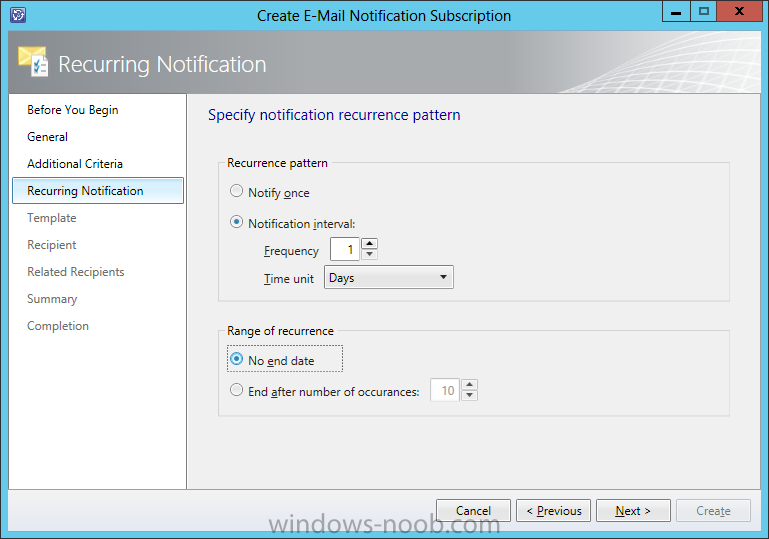
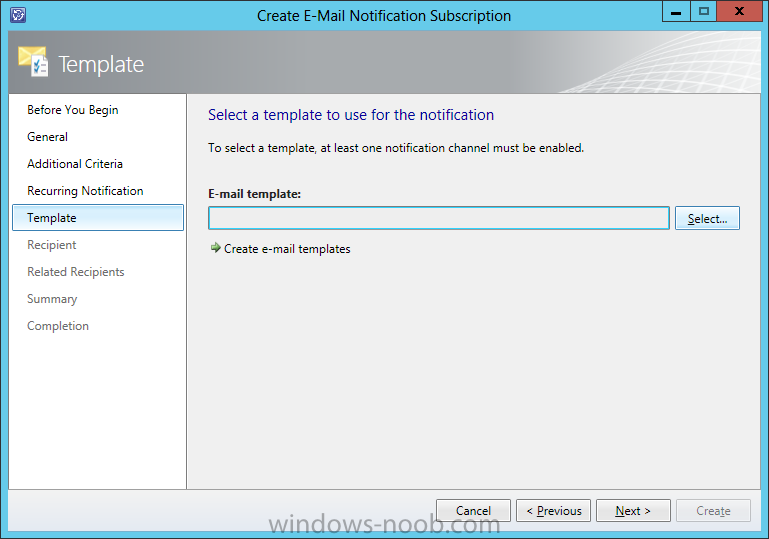
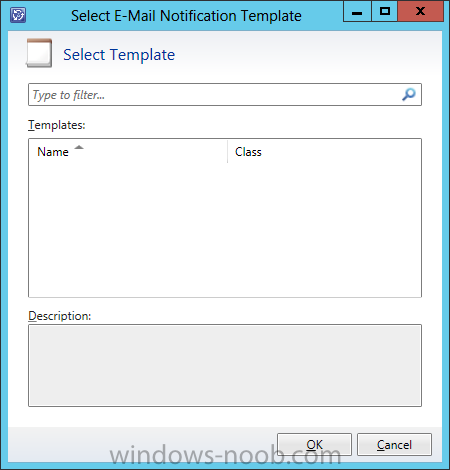
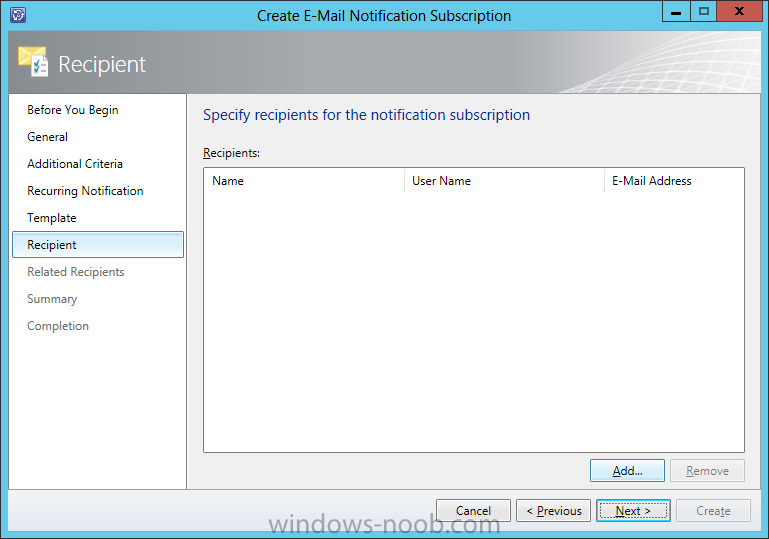
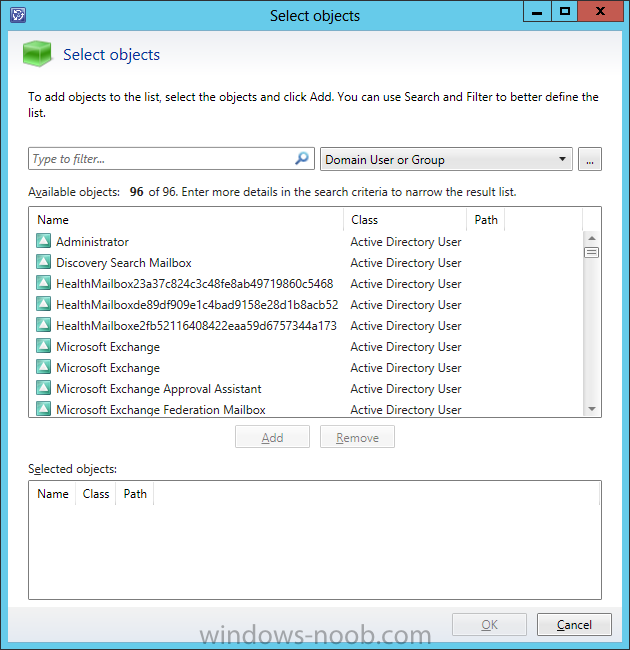
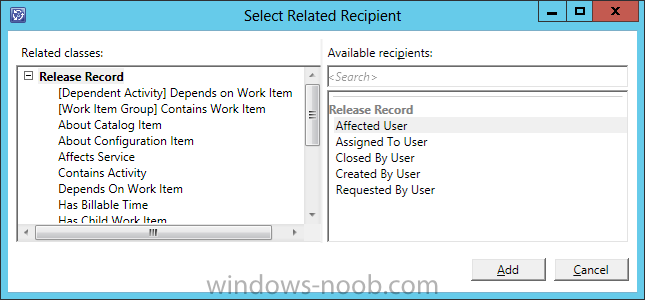
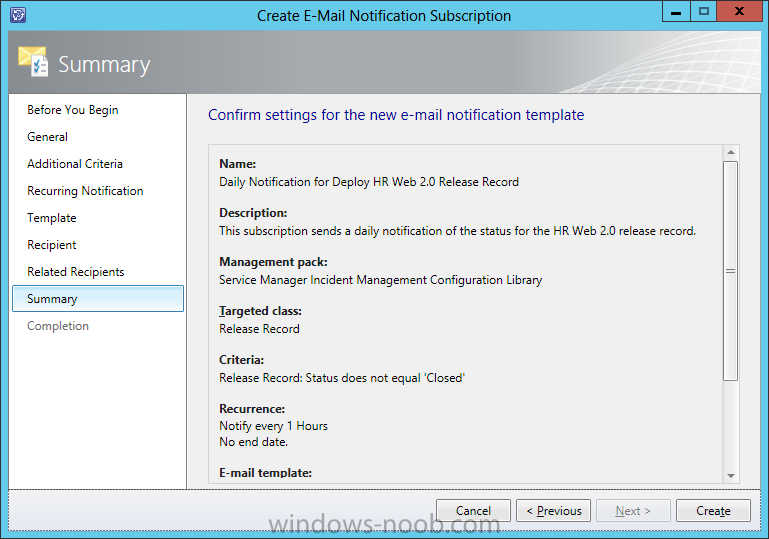
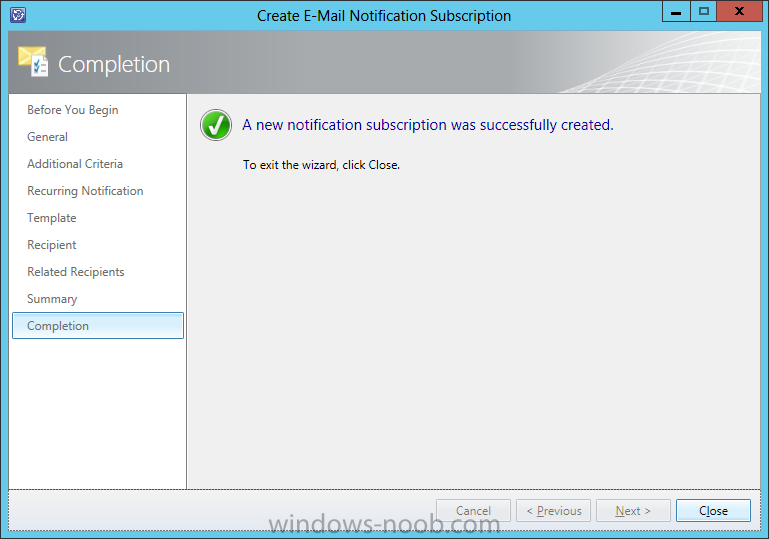
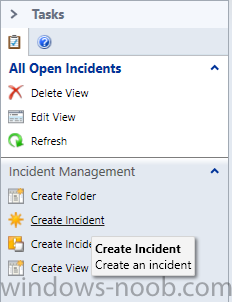
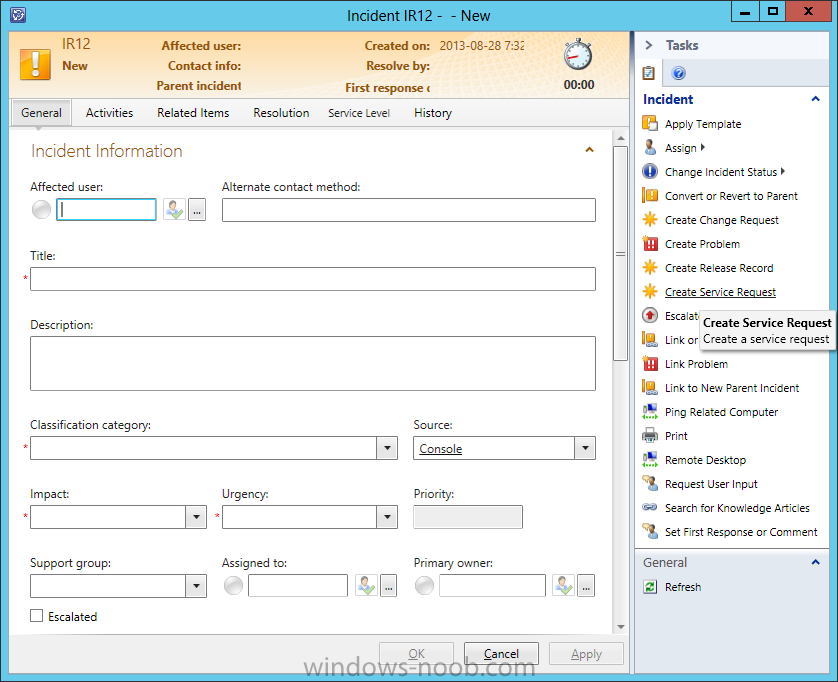
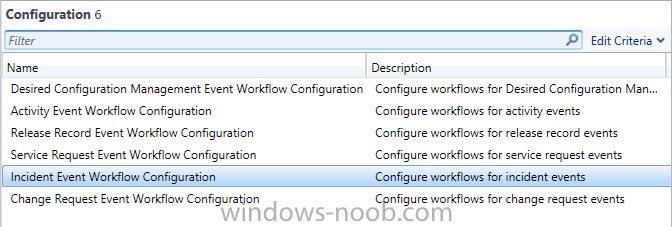
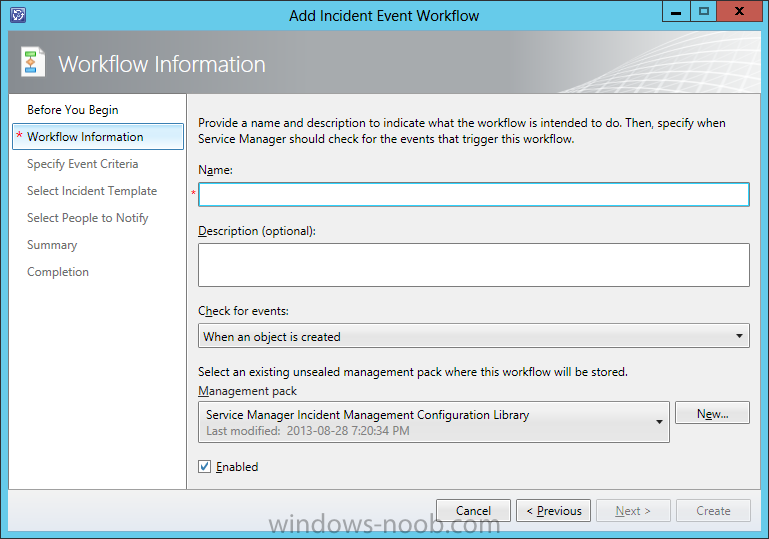
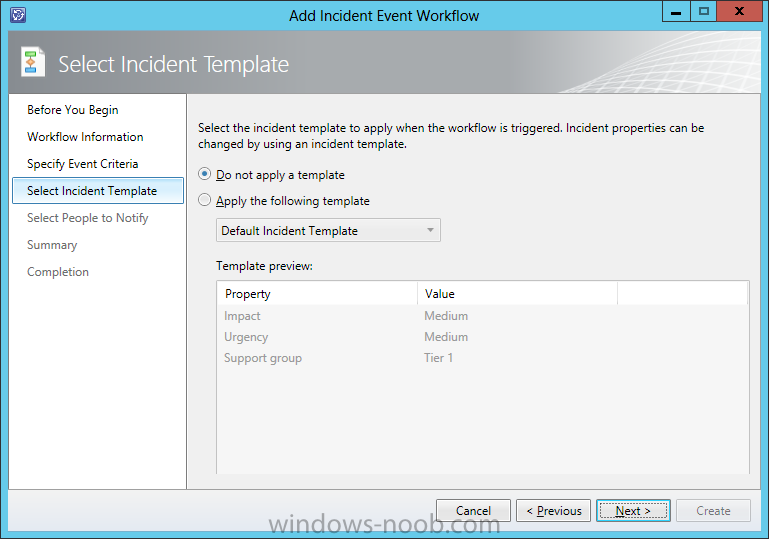
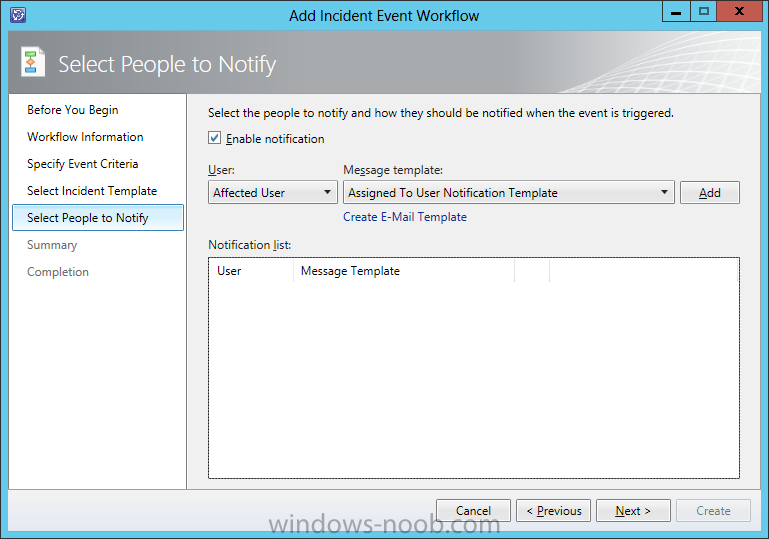
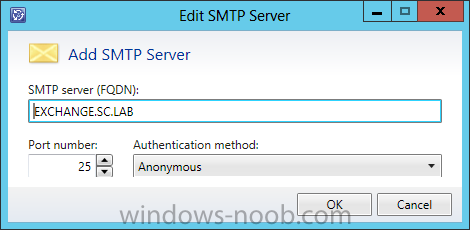
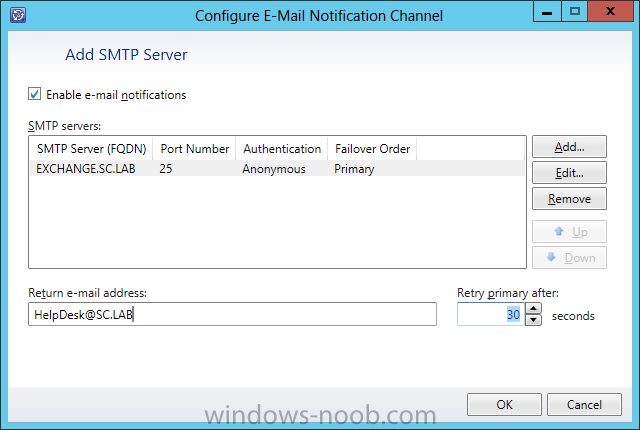
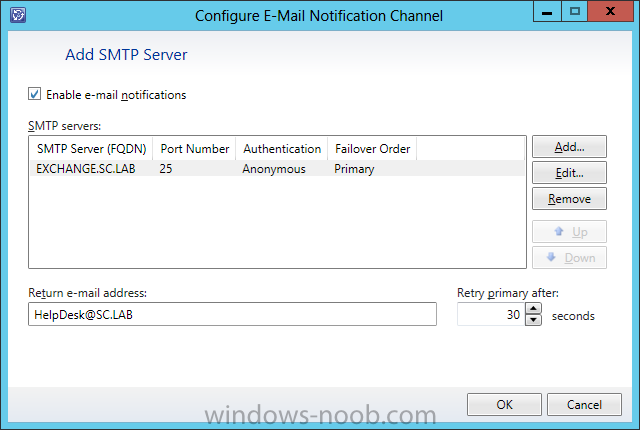
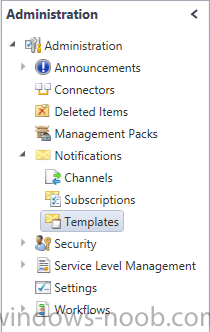
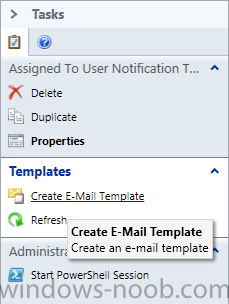
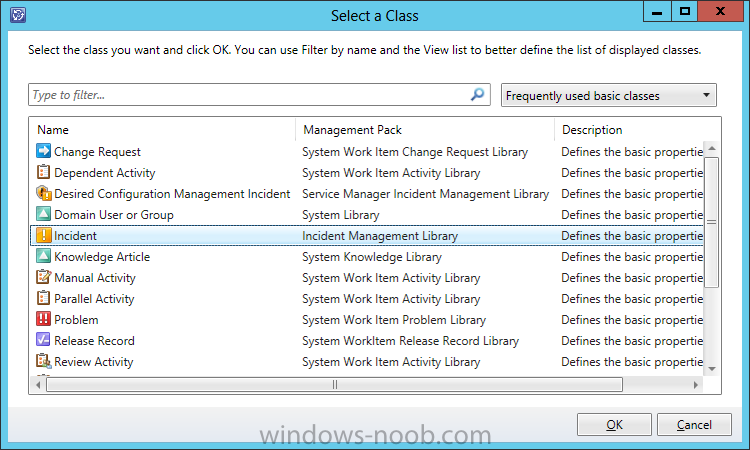
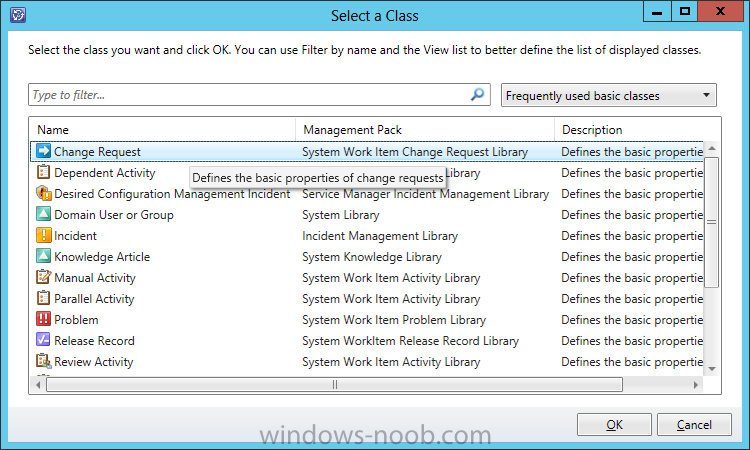
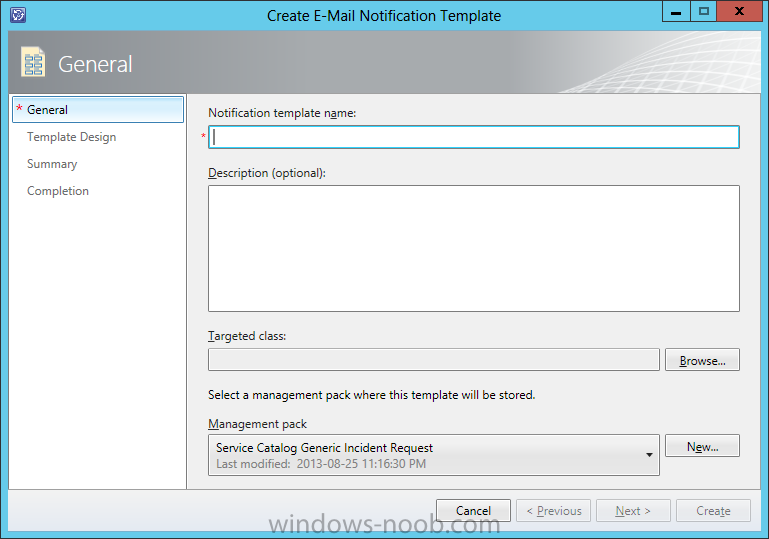
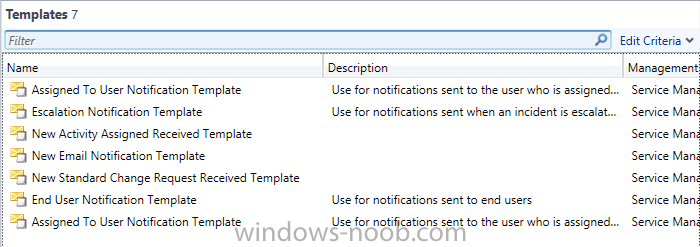
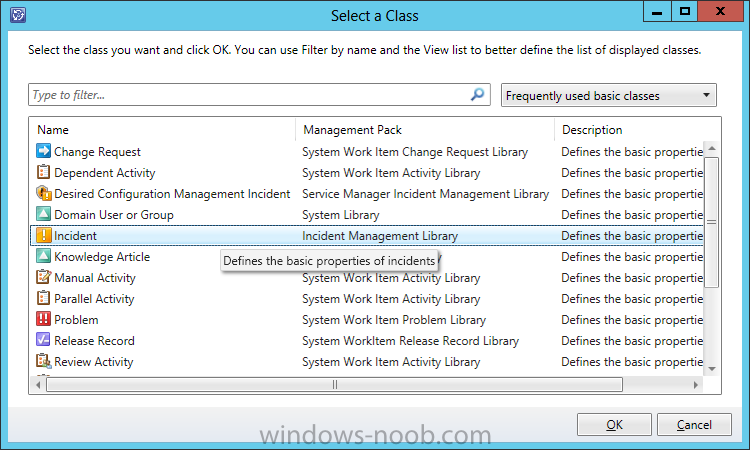
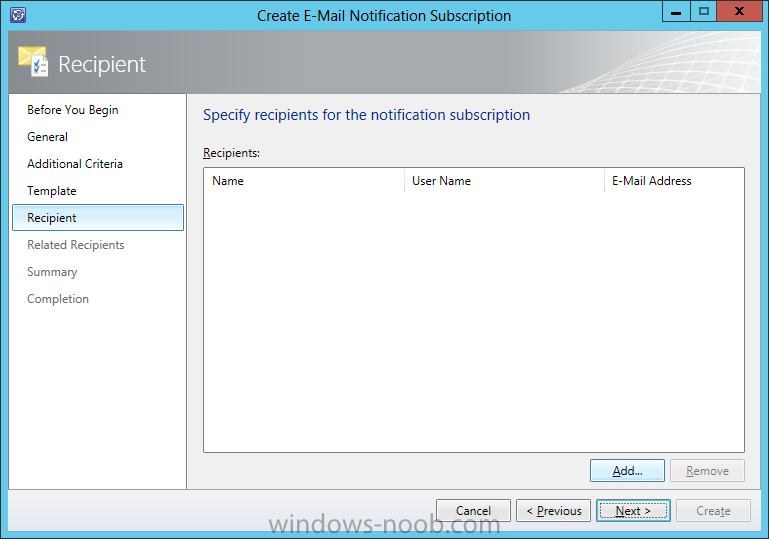
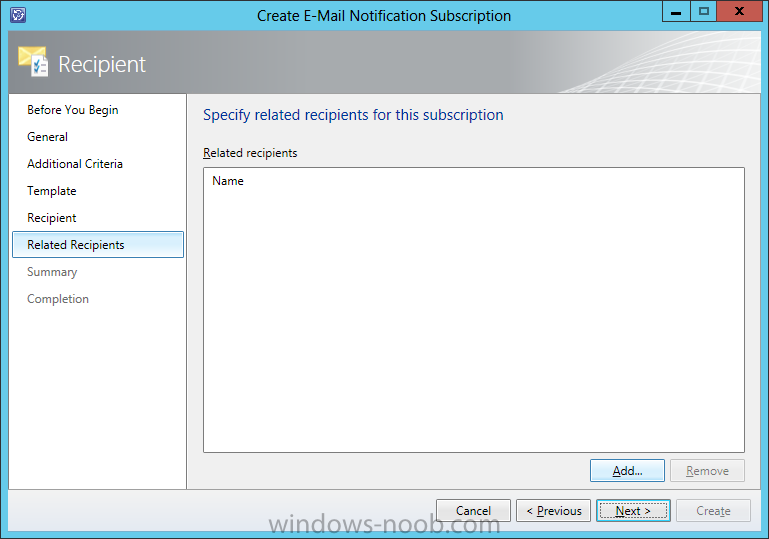
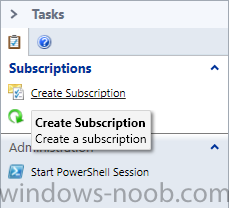
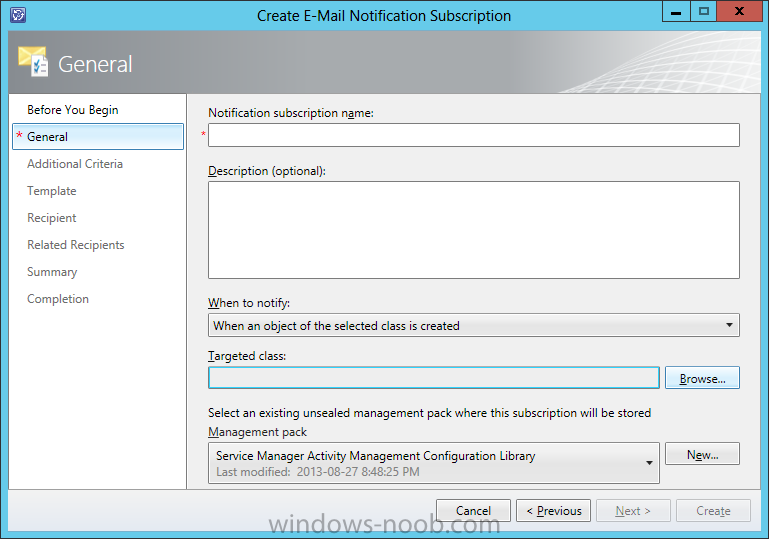
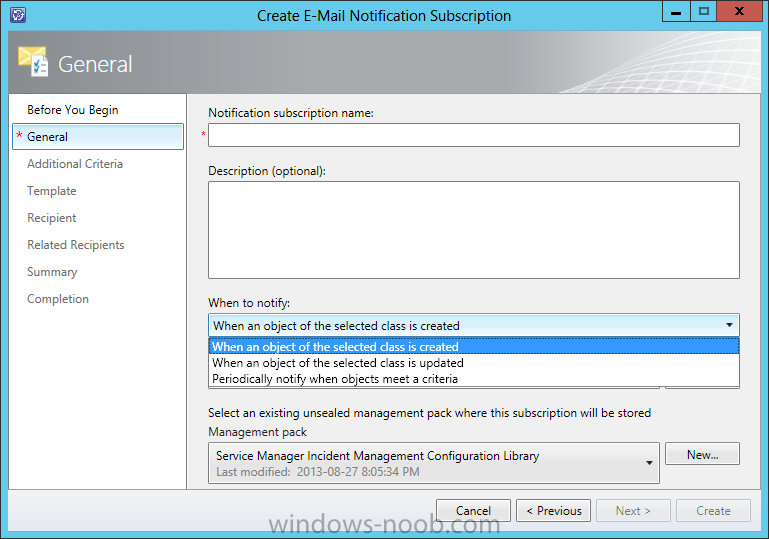
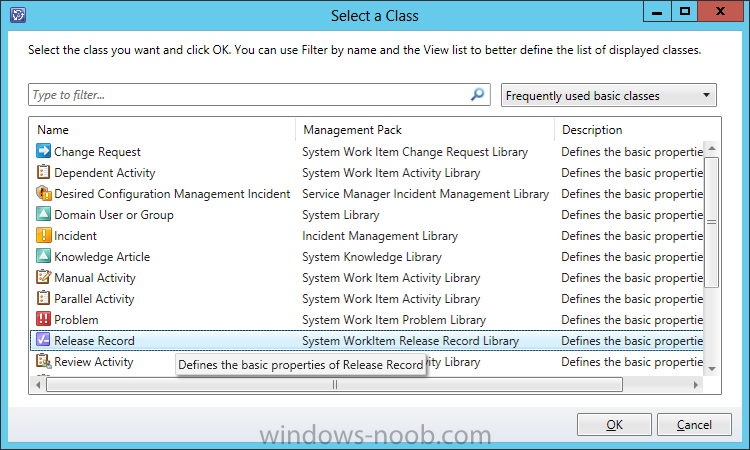
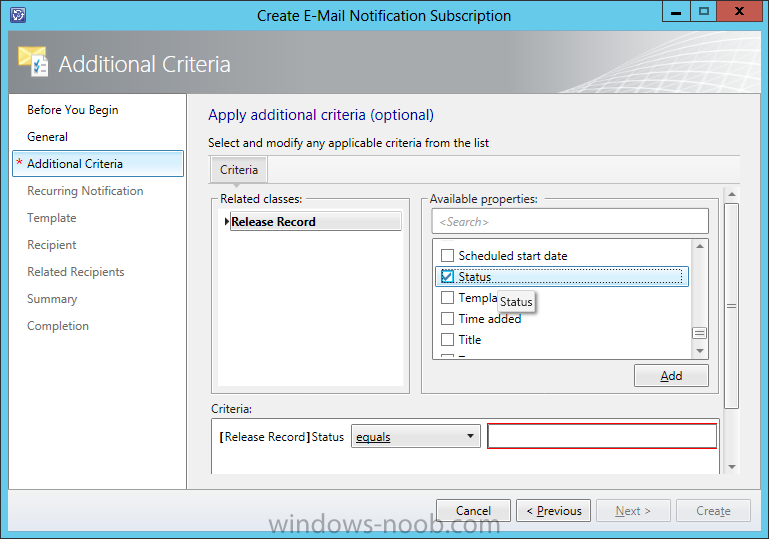
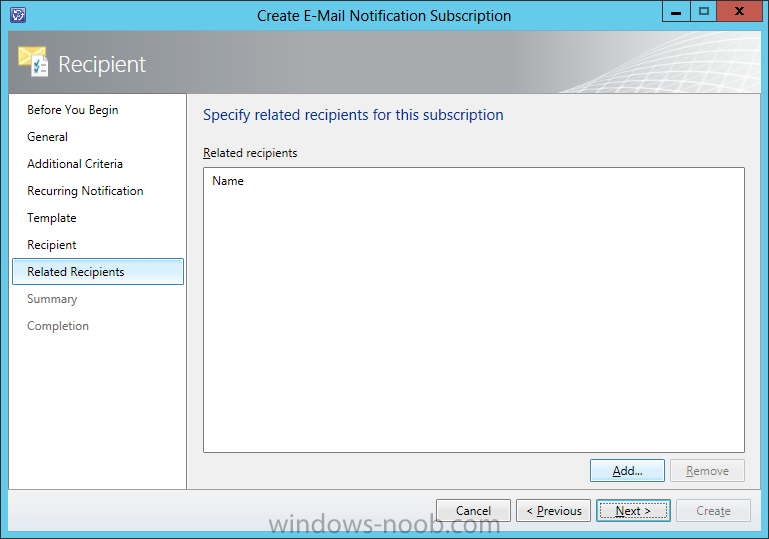
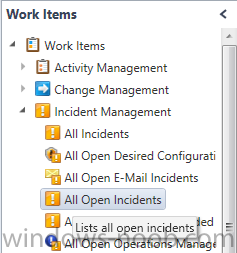
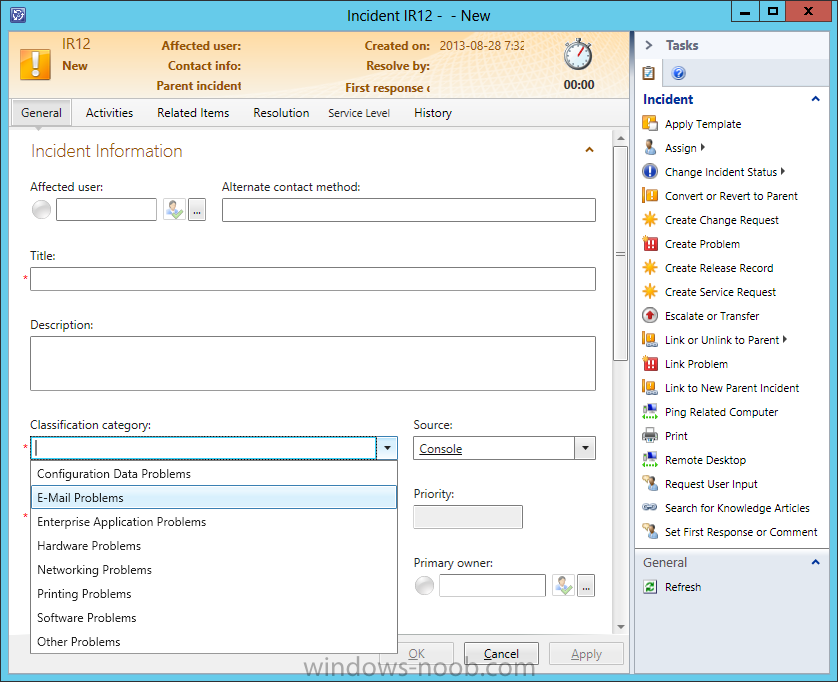
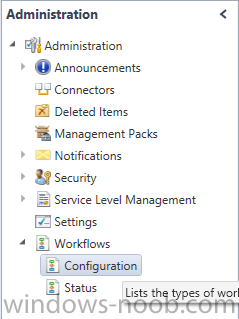
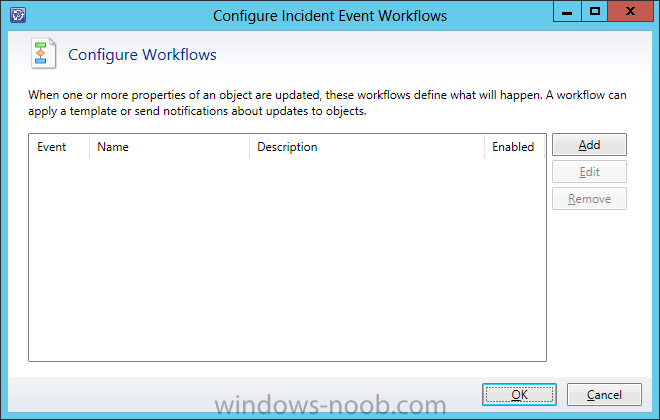
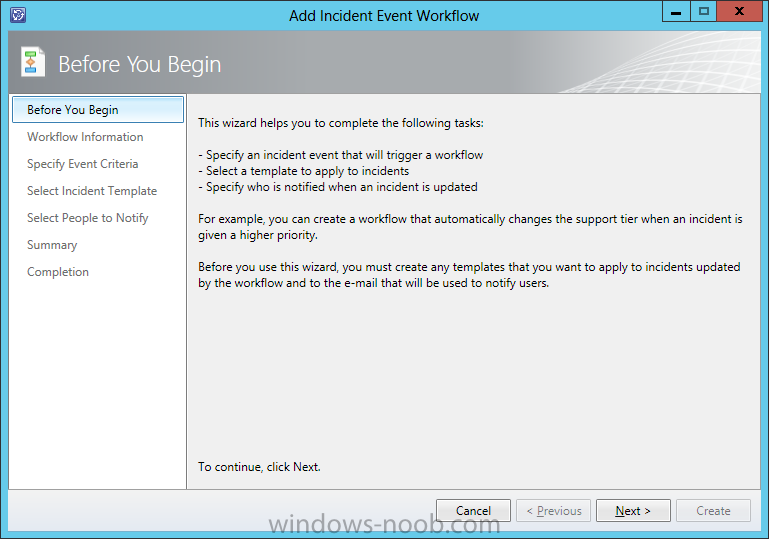
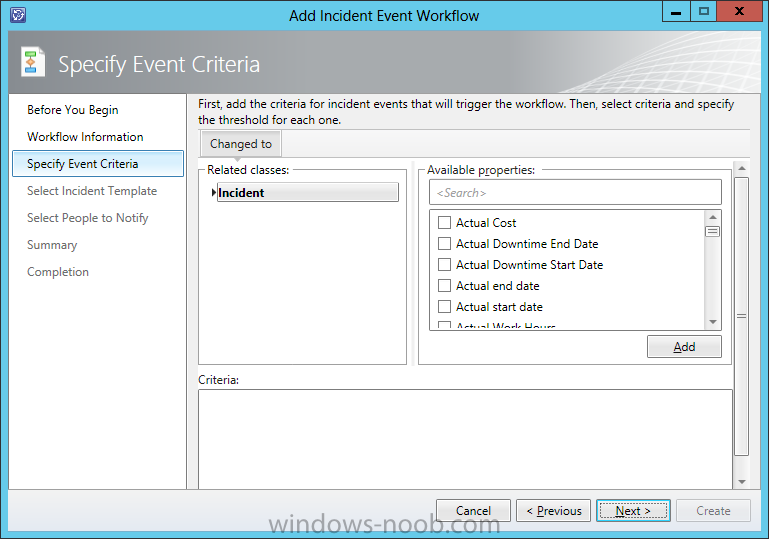
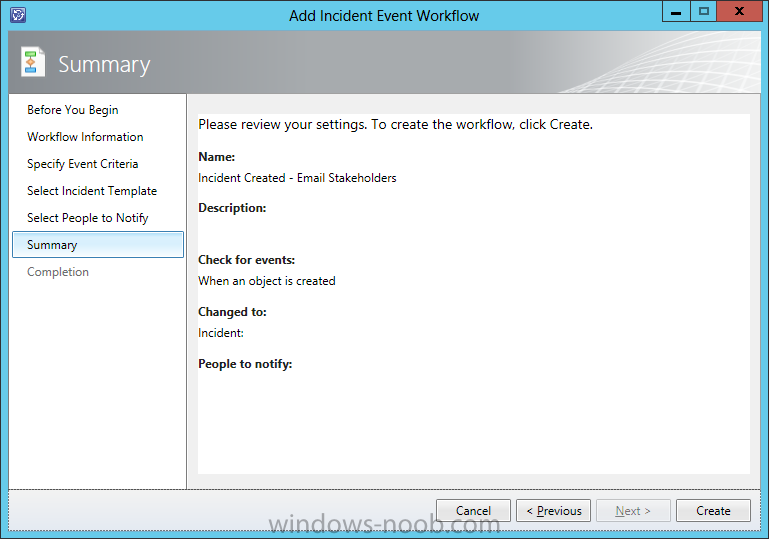
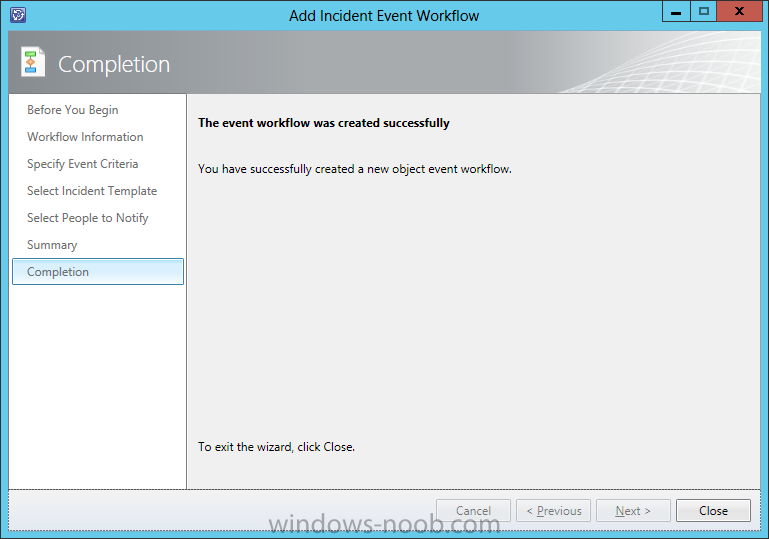
Before notifications are sent, first configure each notification channel, such as the settings for Simple Mail Transfer Protocol (SMTP). Notification messages are sent based on a notification template. Therefore, you must create a notification template. You can then use the Notification Subscription Wizard to subscribe a group of users to a notification that will be sent whenever the changes that you specify occur. Finally, you can verify that a notification is sent by manually generating the change. To configure email notificationsIn the Service Manager console, click Administration. In the Administration pane, expand Notifications, and then click Channels. In the Channels pane, click E-Mail Notification Channel. In the Tasks pane, under E-Mail Notification Channel, click Properties to open the Configure E-Mail Notification Channel dialog box. Select the Enable e-mail notifications check box. Click Add. In the Add SMTP Server dialog box, type the fully qualified domain name (FQDN) of the SMTP server that you want to use. In the Port number box, type or select the SMTP port number that you want to use. For example, select 25. In the Authentication method box, select either Anonymous or Windows Integrated. For example, select Anonymous. Then, click OK. In the Return e-mail address box, type the email address of the service account that is used during setup. In the Retry primary after box, type or select the number of seconds that you want Service Manager to wait before it tries to resend outgoing email notifications. For example, select 25. Click OK to close the dialog box. To validate email notification configurationIn the Channels pane, click E-Mail Notification Channel. In the Tasks pane, under E-Mail Notification Channel, click Properties to open the Configure E-Mail Notification Channel dialog box. Verify that the configuration you entered is correct. To create a notification template for incidentsIn the Service Manager console, click Administration. In the Administration pane, expand Notifications, and then click Templates. In the Tasks pane, under Templates, click Create E-mail Template. On the General page of the Create E-mail Notification Template Wizard, in the Notification template name box, type a name. For example, type New E-mail Incident Template. Optionally, in the Description box, you can type a description for the template that you are creating. Next to the Targeted class box, click Browse. In the Choose Class dialog box, click Incident, and then click OK. Make sure that an unsealed management pack of your choice is selected, and then click Next. On the Template Design page, in the Message subject box, type a subject for the email template. For example, type New Incident created with ID#. Then, click Insert. In the Select Property dialog box, select ID, and then click Add. In the Message body box, type a description to indicate that a new incident was opened for an email problem. Use the other default values on this page, and then click Next. On the Summary page, review the settings that you have selected for the template. Then, click Create. On the Completion page, click Close. To create a notification template for change requestsIn the Service Manager console, click Administration. In the Administration pane, expand Notifications, and then click Templates. In the Tasks pane, under Templates, click Create E-mail Template. On the General page of the Create E-mail Notification Template Wizard, in the Notification template name box, type a name. For example, type New Standard Change Request Received Template. Optionally, in the Description box, you can type a description for the template that you are creating. Next to the Targeted class box, click Browse. In the Choose Class dialog box, click Change Request, and then click OK. Make sure that an unsealed management pack of your choice is selected, and then click Next. On the Template Design page, in the Message subject box, type a subject for the email template. For example, type New Standard Change Request with ID#. Then, click Insert. In the Select Property dialog box, select ID, and then click Add. In the Message body box, type a description to indicate that a new standard change request was opened. Use the other default values on this page, and then click Next. On the Summary page, review the settings that you have selected for the template. Then, click Create. On the Completion page, click Close. To create a notification template for a newly assigned activityIn the Service Manager console, click Administration. In the Administration pane, expand Notifications, and then click Templates. In the Tasks pane, under Templates, click Create E-mail Template. On the General page of the Create E-mail Notification Template Wizard, in the Notification template name box, type a name. For example, type New Activity Assigned Received Template. Optionally, in the Description box, you can type a description for the template that you are creating. Next to the Targeted class box, click Browse. In the Select a Class dialog box, click Manual Activity, and then click OK. Make sure that an unsealed management pack of your choice is selected, and then click Next. On the Template Design page, in the Message subject box, type a subject for the email template. For example, type New Activity Assigned with ID#. Then, click Insert. In the Select Property dialog box, select ID, and then click Add. In the Message body box, type a description to indicate that an activity has been assigned. Use the other default values on this page, and then click Next. On the Summary page, review the settings that you have selected for the template. Then, click Create. On the Completion page, click Close. To validate template creationVerify that the new template you created appears in the list of notification templates. To create a notification subscription for an incidentIn the Service Manager console, click Administration. In the Administration pane, expand Notification, and then click Subscriptions. In the Tasks pane, click Create Subscription. On the Before You Begin page of the Create E-mail Notification Subscription Wizard, click Next. On the General page, in the Notification subscription name box, type a name. For example, type New Incident for E-mail Problem Notification Subscription. Optionally, in the Description box, you can type a description for the subscription that you are creating. Next to the Targeted class box, click Browse. In the Choose Class dialog box, choose a class. For example, click Incident. Then, click OK. In the When to notify box, select When an object of the selected class is created. Make sure that an unsealed management pack of your choice is selected, and then click Next. On the Additional Criteria page, select Incident. In the Available Properties list, select Classification Category, and then click Add. On the Additional Criteria page, click the Criteria tab. In the Criteria area, next to [incident] Classification Category, select equals. In the list, select E-mail Problems, and then click Next. On the Template page, next to the E-mail template box, click Select. In the Select Objects dialog box, in the Templates list, select a notification template. For example, select New E-mail Incident Template, click OK, and then click Next. On the Recipient page, click Add. In the Select Objects dialog box, search for the appropriate user, and then select the user. Click Add, click OK, and then click Next. For example, select the user account for a messaging analyst or messaging administrator. NOTE: The notification address must be configured for the user account of the messaging analyst or messaging administrator. On the Related Recipients page, click Add. In the Select Related Recipient dialog box, search for the appropriate class, and then select the appropriate substitution string that represents the user. Click Add, click OK, and then click Next. For example, select additional user accounts that you want to send the notification to. On the Summary page, review the settings that you selected for the notification subscription, and then click Create. On the Completion page, click Close. To create a periodic notification subscription for a release recordIn the Service Manager console, click Administration. In the Administration pane, expand Notifications, and then click Subscriptions. In the Tasks pane, click Create Subscription. On the Before You Begin page of the Create E-mail Notification Subscription Wizard, click Next. On the General page, in the Notification subscription name box, type a name. For example, type Daily Notification for Deploy HR Web 2.0 Release Record. Optionally, in the Description box, you can type a description for the subscription that you are creating. For example, type This subscription sends a daily notification of the status for the HR Web 2.0 release record. In the When to notify box, select Periodically notify when objects meet a criteria. Next to the Targeted class box, click Browse. In the Choose Class dialog box, choose a class, and then click OK. For example, click Release Record. Make sure that an unsealed management pack of your choice is selected, and then click Next. On the Additional Criteria page, select Release Record. In the Available Properties list, select Status, and then click Add. In the Criteria area, next to [Release Record] Status, select does not equal. In the list, select Closed, and then click Next. On the Recurring Notification page under Recurrence pattern, select Notify every <TimeInterval> and then choose an interval. For example, set the recurrence pattern to every 1 day. On the Recurring Notification page under Range of recurrence, select a range of recurrence or choose no end date. For example, select No end date. On the Template page, next to the E-mail template box, click Select. In the Select Template dialog box, in the Templates list, select a notification template that you have created for release record notifications. On the Recipient page, click Add. In the Select Objects dialog box, search for the appropriate user, and then select the user. Click Add, click OK, and then click Next. For example, select the user account for the release manager. NOTE: The notification address must be configured for the user account of the messaging analyst or messaging administrator. On the Related Recipients page, click Add. In the Select Related Recipient dialog box, search for the appropriate class, and then select the appropriate substitution string that represents the user. Click Add, click OK, and then click Next. For example, select additional user accounts that you want to send the notification to. On the Summary page, review the settings that you selected for the notification subscription, and then click Create. On the Completion page, click Close. To validate a notification subscriptionLocate the notification subscription that you created in the list of subscriptions. To verify a notification configurationIn the Service Manager console, click Work Items. In the Work Items pane, expand Work Items, expand Incident Management, and then click All Open Incidents. In the Tasks pane, under Incident Management, click Create Incident. In the Incident <Number> New form, enter the required information in the Affected user, Title, Classification Category, Impact, and Urgency boxes. In the Classification Category list, select E-mail Problems, and then click OK. Verify that an email notification that contains the information you entered in the template is received. The email title should contain the incident ID number. To create a messaging-enabled universal security groupIn the Exchange Management Console, navigate to Recipient Configuration, right-click Distribution Group, and then click New Distribution Group. On the Introduction page, either choose an existing universal group or create a new group. On the Group Information page, select the Security group type. Complete the creation of the group. Add members to the group by right-clicking them, clicking Properties, and accessing the Members tab. Wait for Service Manager to sync with Active Directory Domain Services (AD DS), or perform a manual Synchronization from Administration>Connectors. (Click AD Connector, and then click the Synchronize Now task on the right-hand side). Once the Active Directory synchronization has completed, the newly created group will be available as a configuration item in Service Manager, and it can be selected in the user picker fields, such as Affected User and Assigned To. To create a workflow to notify stakeholders when an incident is createdNavigate to Administration > Workflows > Configuration. Double-click Incident Event Workflow Configuration. Click Add, and then click Next on the Before you Begin page. Give the workflow a name, such as “Incident Created – Email Stakeholders”. Leave the default of When an incident is created in the Check for Events drop-down list. Select one of your custom management packs (or create one) to store the workflow in, and then click Next. Click Next on the Specify Incident Criteria page. (We want this workflow to run when any new incident is created.) Optionally, apply a template. (In this case we are creating the workflow for notification only, so we choose Do not apply a template.) In the Select People to Notify dialog box, select the Enable notification check box. Add the appropriate users you want to notify with the appropriate templates. Click Next, and then click Create to complete creation of the workflow. To test the workflow and mail the enabled universal security group Create an incident and assign it to the messaging-enabled universal security group that you created earlier.Before notifications are sent, first configure each notification channel, such as the settings for Simple Mail Transfer Protocol (SMTP). Notification messages are sent based on a notification template. Therefore, you must create a notification template. You can then use the Notification Subscription Wizard to subscribe a group of users to a notification that will be sent whenever the changes that you specify occur. Finally, you can verify that a notification is sent by manually generating the change.


-
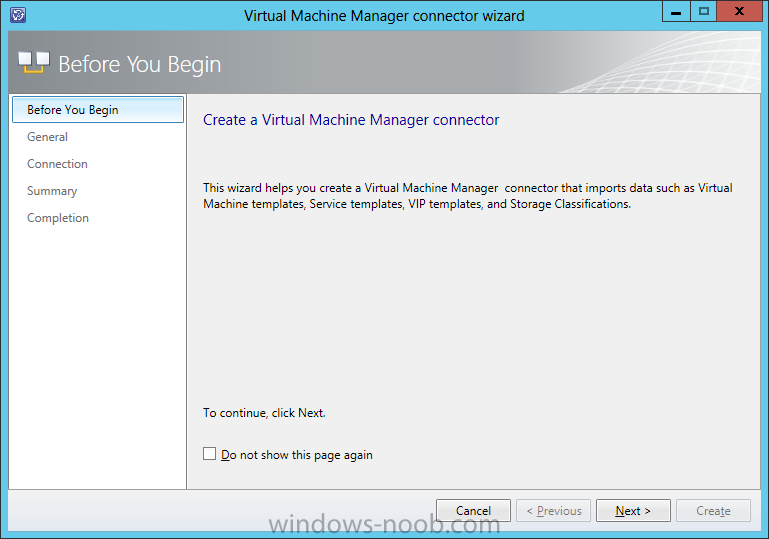
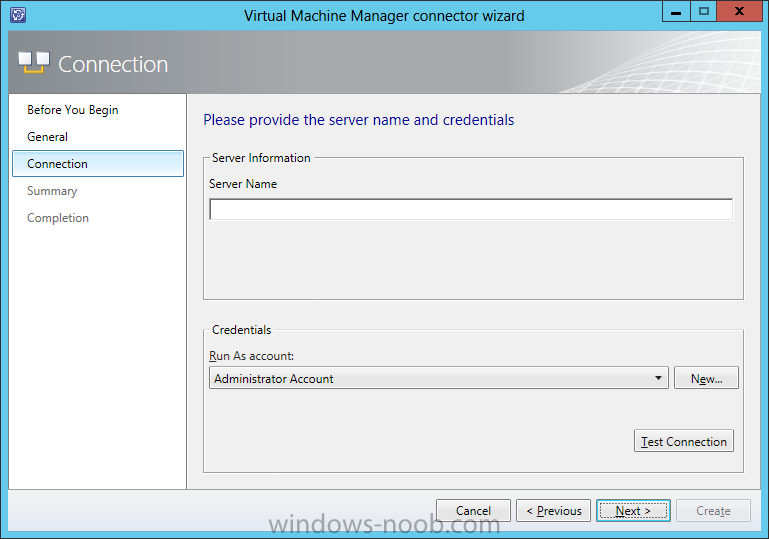
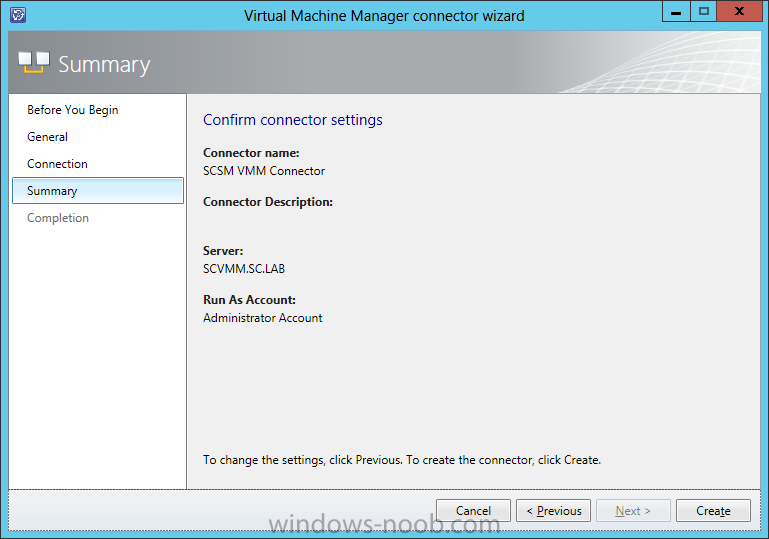
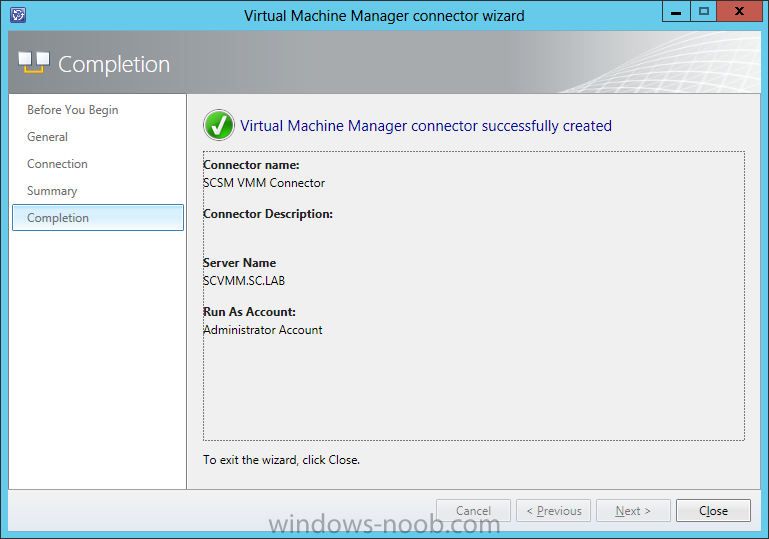
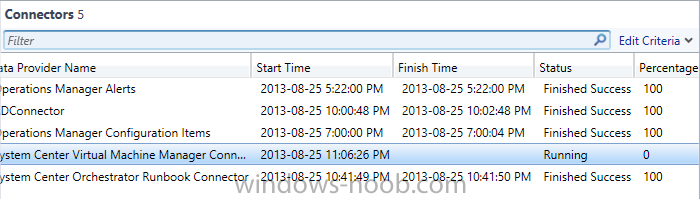
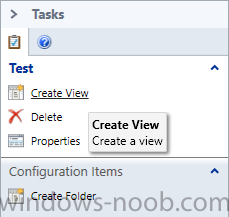
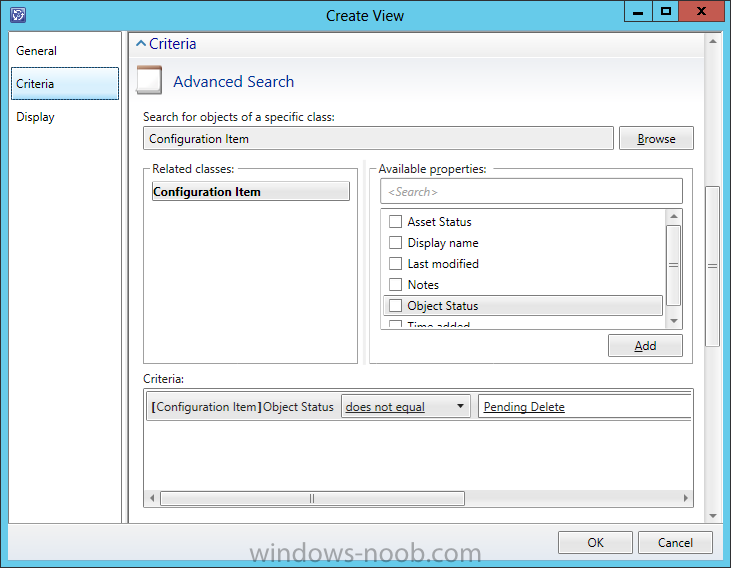
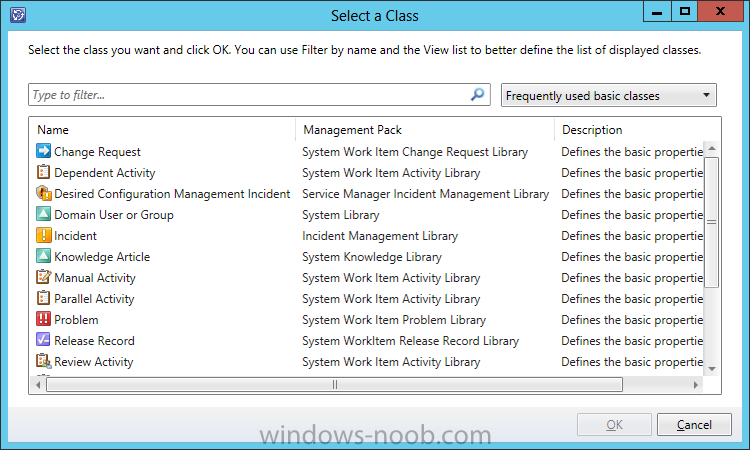
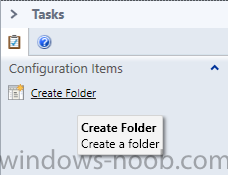
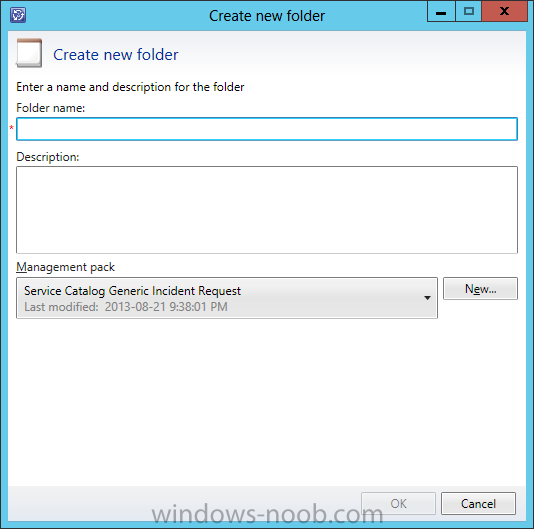
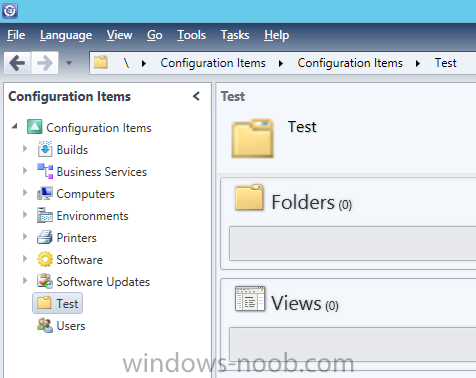
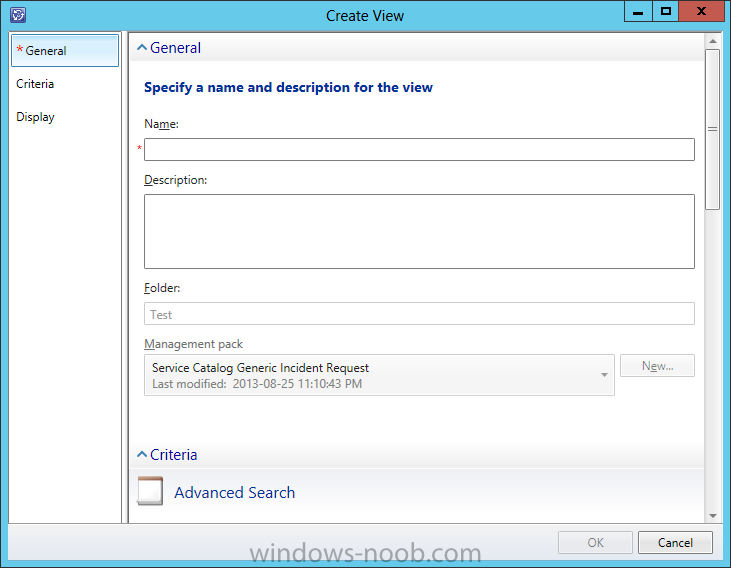
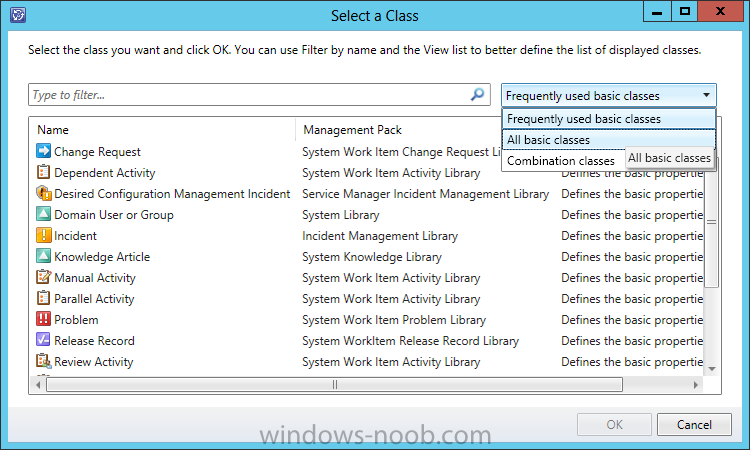
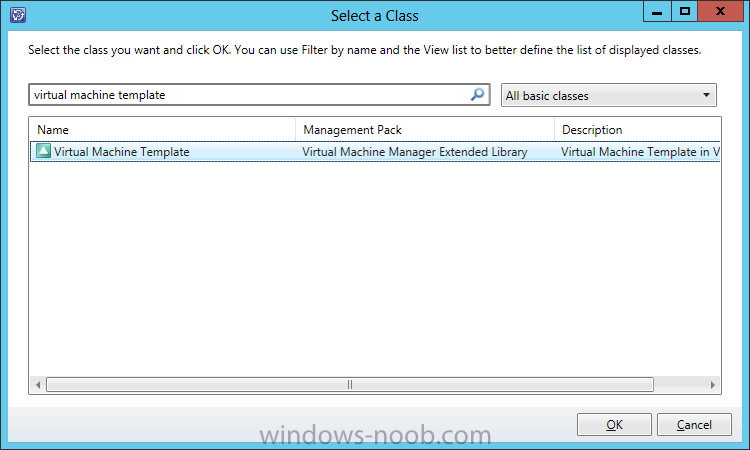
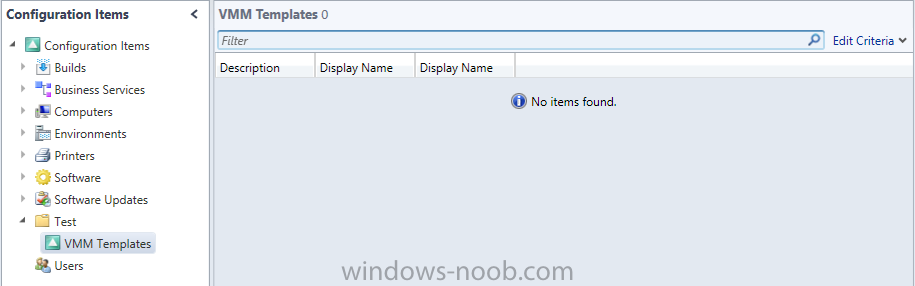
To create a System Center Virtual Machine Manager connectorIn the Service Manager console, click Administration. In the Administration pane, expand Administration, and then click Connectors. In the Tasks pane, under Connectors, click Create Connector, and then click Virtual Machine Manager connector. Complete these steps to complete the Virtual Machine Manager Connector Wizard: On the Before You Begin page, click Next. On the General page, in the Name box, type a name for the new connector. Make sure that Enable this connector is selected, and then click Next. On the Connection page, in the Server Information area, type the same of the computer hosting Virtual Machine Manager (VMM). On the Connection page, in the Credentials area, either select an existing account or click New, and then do the following: In the Run As Account dialog box, in the Display name box, type a name for the Run As account. In the Account list, select Windows Account. Enter the credentials for an account that has rights to connect VMM, and then click OK. On the Connection page, click Test Connection. In the Test Connection dialog box, make sure that The connection to the server was successful appears, and then click OK. On the Connection page, click Next. On the Summary page, make sure that the settings are correct, and then click Create. On the Completion page, make sure that you receive a “Virtual Machine Manager connector successfully created” message, and then click Close. To validate the creation of a System Center Virtual Machine Manager connectorIn the Connectors pane, locate the System Center Virtual Machine Manager connector that you created. Review the Status column for a status of Running. NOTE: Allow sufficient time for the import process to finish if you are importing a large number of virtual machines or clouds. In the Service Manager console, click Configuration Items. In the Tasks pane, click Create Folder. In the Create New Folder Wizard, do the following: In the Folder name box, type a name for the folder. For example, type Test. In the Management pack area, make sure that an unsealed management pack of your choice is selected, and then click OK. For example, select Service Catalog Generic Incident Request. In the Configuration Items pane, click the folder you just created. For example, click Test. In the Tasks pane, click Create View. In the Create View Wizard, do the following: On the General page, in the Name area, type a name for this view. For example, type VMMTemplates. In the Management pack area, make sure that an unsealed management pack of your choice is selected. For example, select Service Catalog Generic Incident Request. In the navigation pane of the wizard, click Criteria. In the Advanced Search area, click Browse. In the drop-down list (located to the right of the Type to filter box), select All basic classes. In the Type to filter box, type virtual machine template, click Virtual Machine Template, click OK, and then click OK to save and close the form. In the Configuration Items pane, expand the folder you created, and then click the view you created. For example, expand Test, and then click VMMTemplates In the VMMTemplates pane, you will see the Virtual Machine Manager templates that have been created.


-
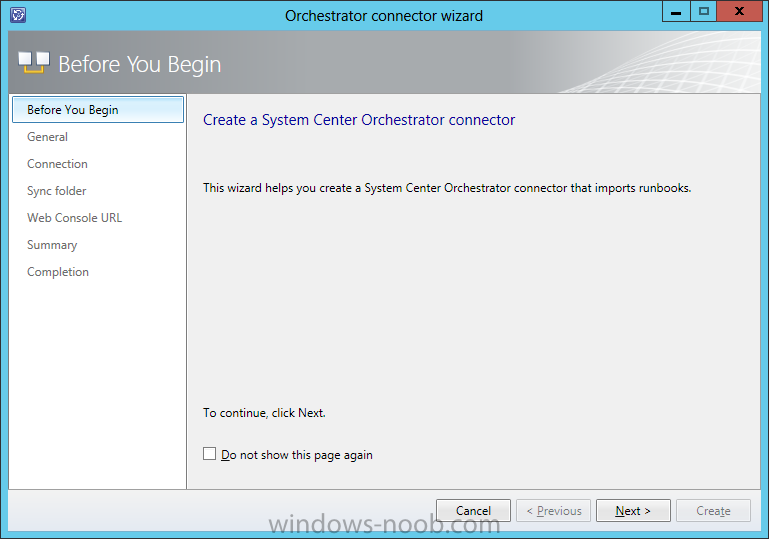
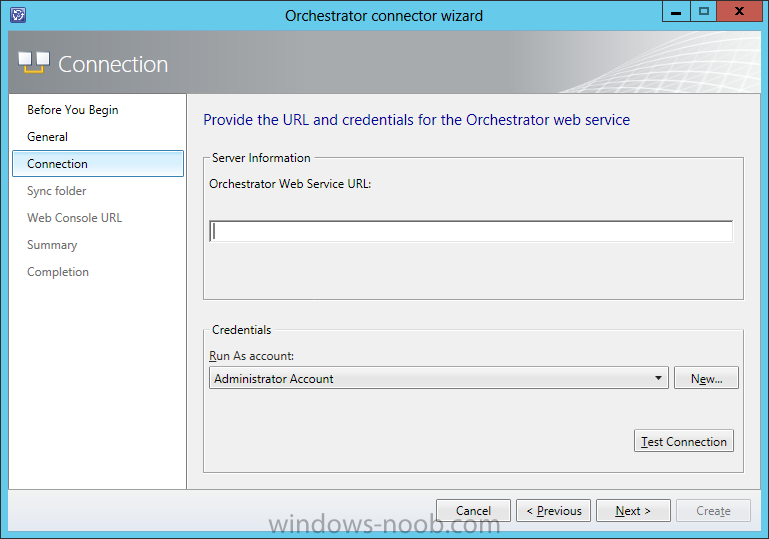
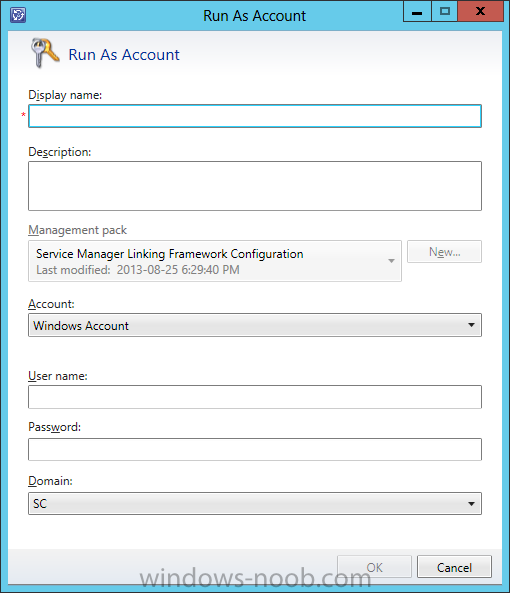
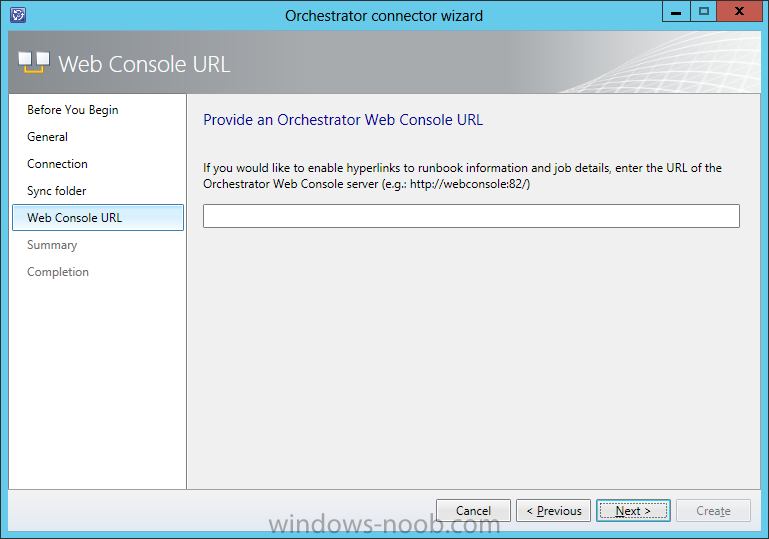
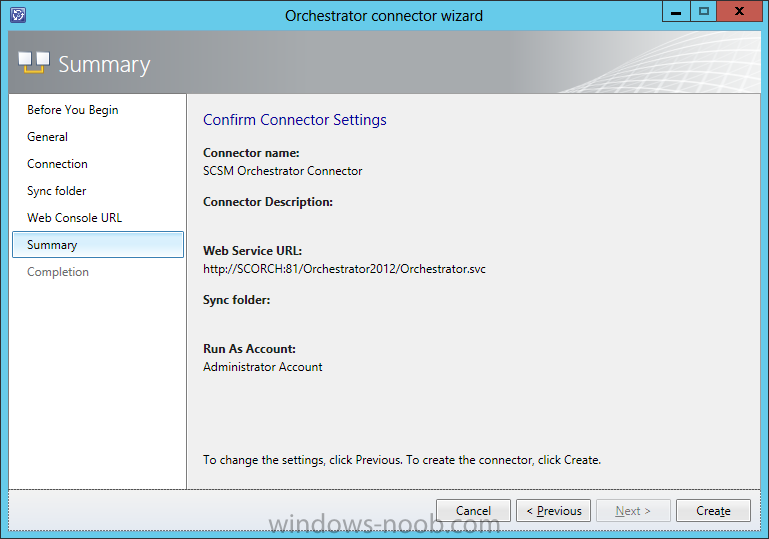
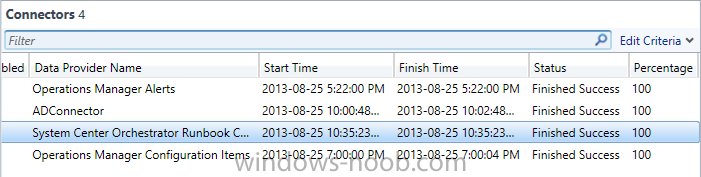
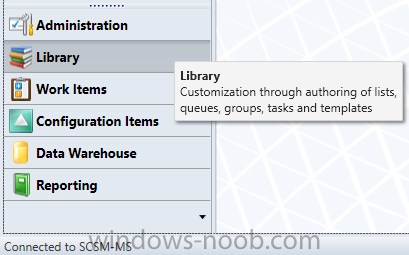
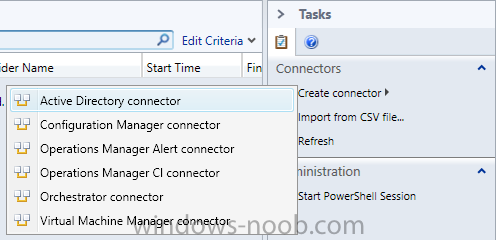
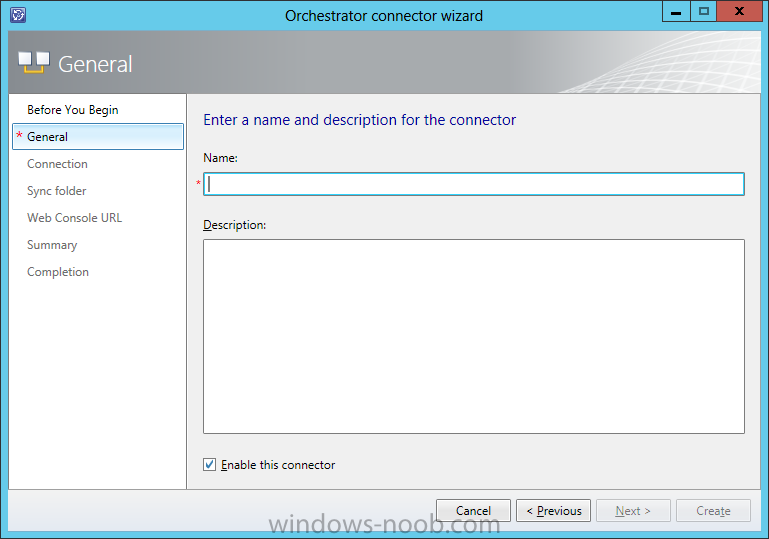
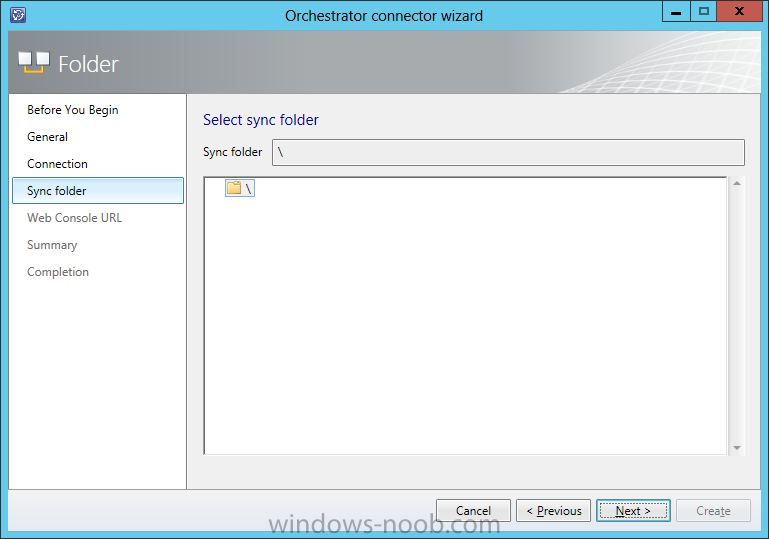
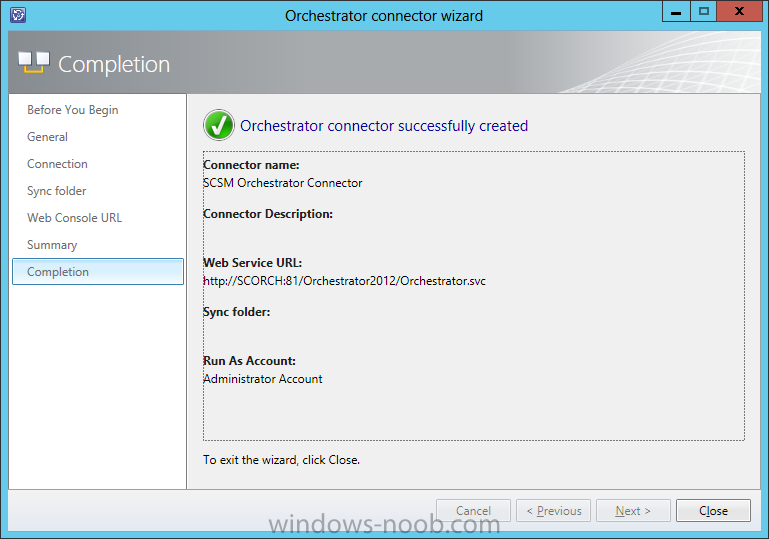
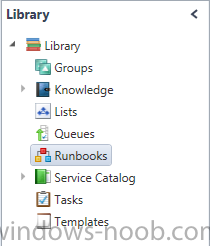
To create an Orchestrator connectorIn the Service Manager console, click Administration. In the Administration pane, expand Administration, and then click Connectors. In the Tasks pane, under Connectors, click Create Connector, and then click Orchestrator connector. Perform these steps to complete the Orchestrator Connector Wizard: On the Before You Begin page, click Next. On the General page, in the Name box, type a name for the new connector. Make sure that Enable this connector is selected, and then click Next. On the Connection page, in the Server Information area, type the URL of the Orchestrator Web service. On the Connection page, in the Credentials area, either select an existing account or click New, and then do the following: In the Run As Account dialog box, in the Display name box, type a name for the Run As account. In the Account list, select Windows Account. Enter the credentials for an account that has rights to connect Orchestrator, and then click OK. On the Connection page, click Test Connection. In the Test Connection dialog box, make sure that the message “The connection to the server was successful” appears, and then click OK. On the Connection page, click Next. On the Folder page, select a folder, and then click Next. On the Web Console URLNext. On the Summary page, make sure that the settings are correct, and then click Create. On the Completion page, make sure that you receive the message “Orchestrator connector successfully created,” and then click Close. To validate the creation of an Orchestrator connectorIn the Connectors pane, locate the Orchestrator connector that you created. Review the Status column for a status of Finished Success. NOTE: Allow sufficient time for the import process to finish if you are importing a large number of runbooks. In the Service Manager console, click Library. In the Library pane, expand Library, and then click Runbooks. Review the Runbooks pane, and note that your runbooks have been imported.


-
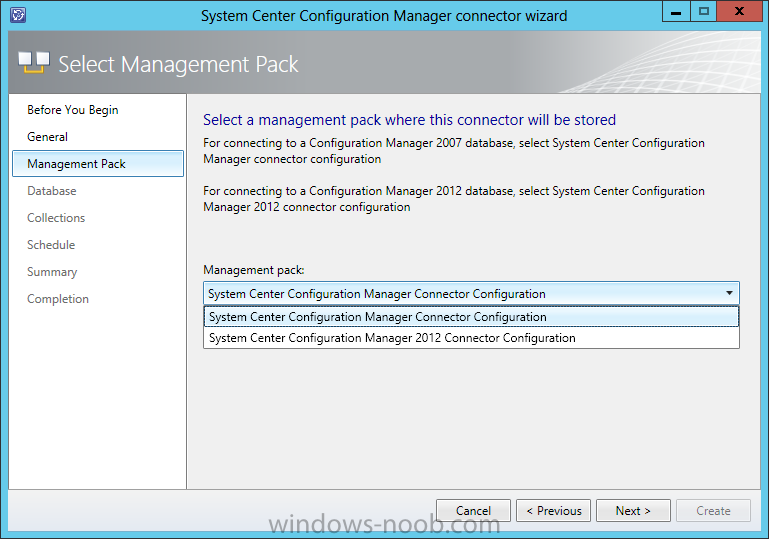
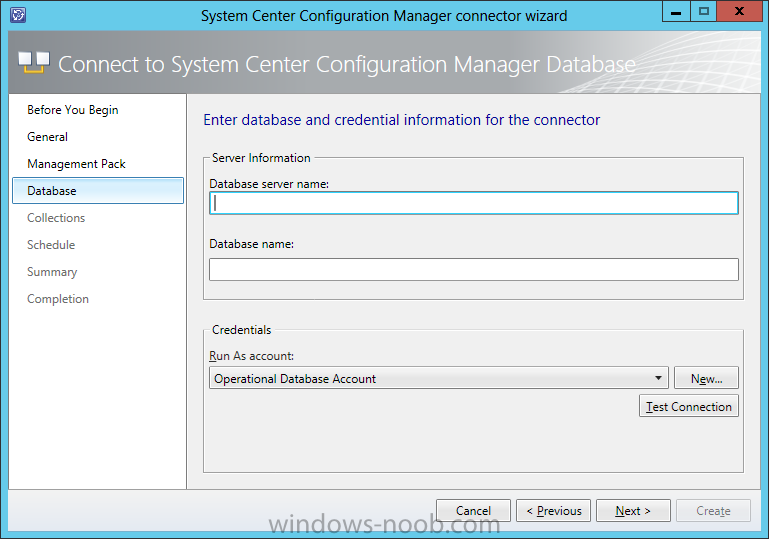
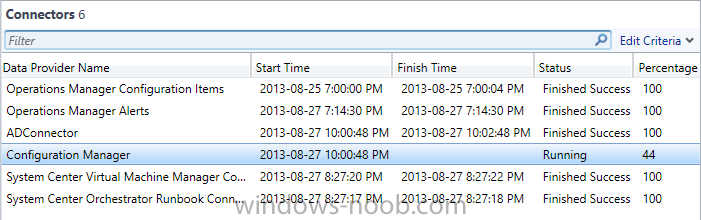
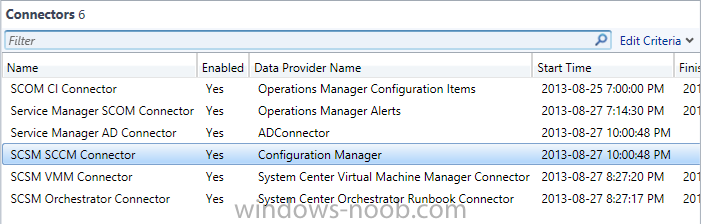
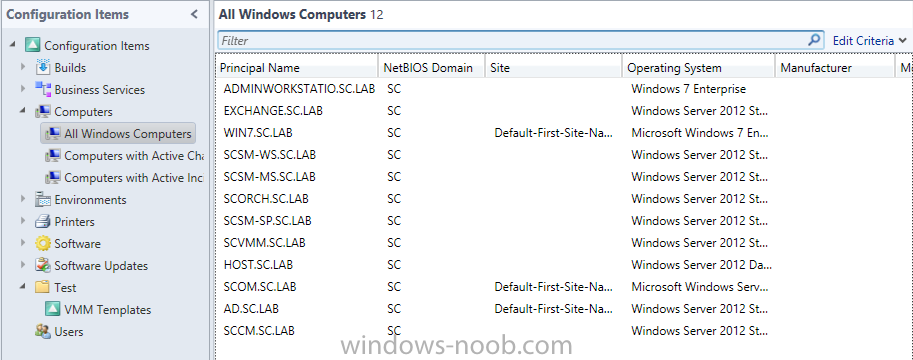
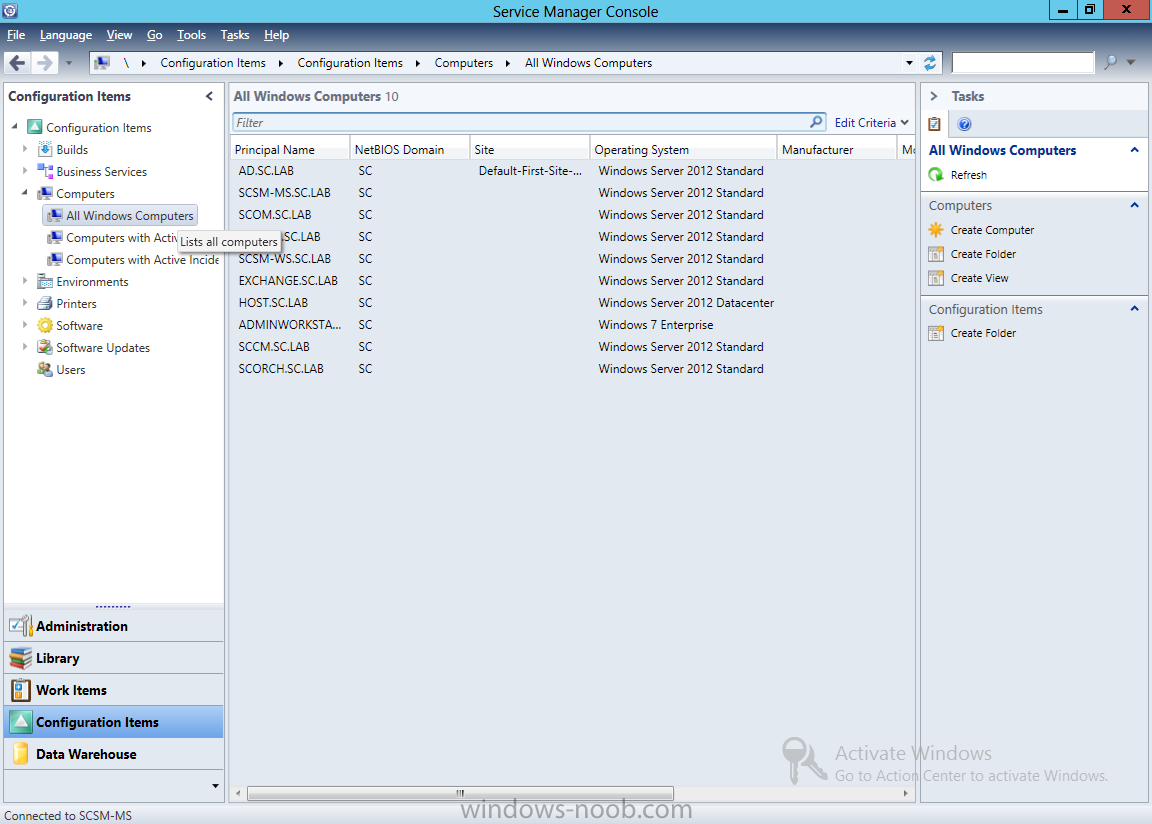
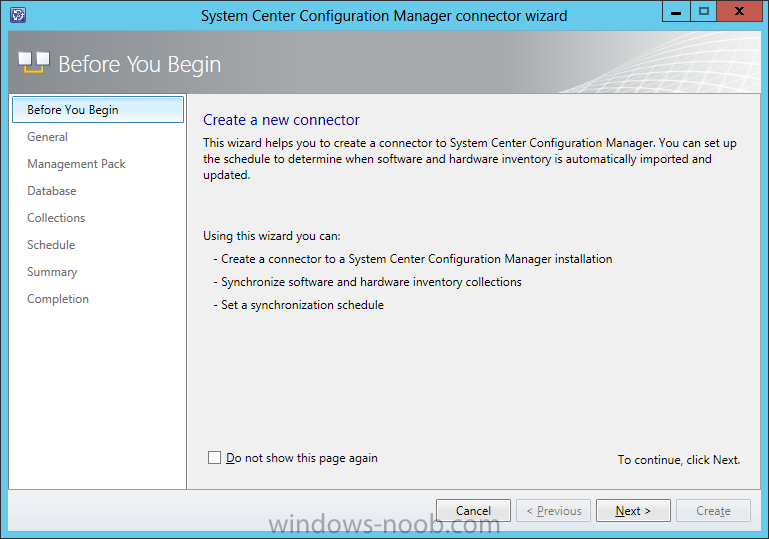
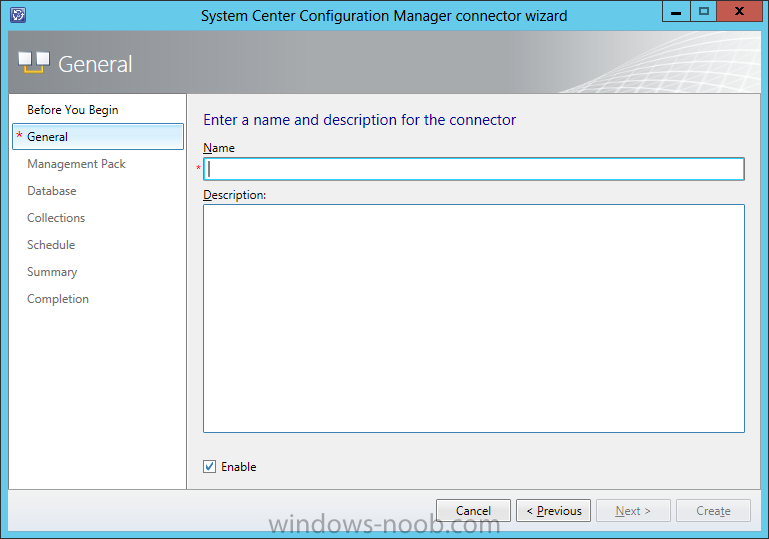
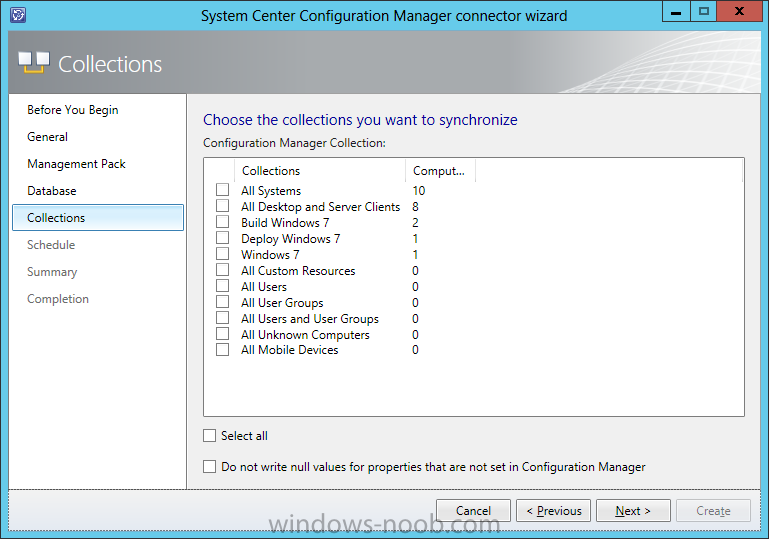
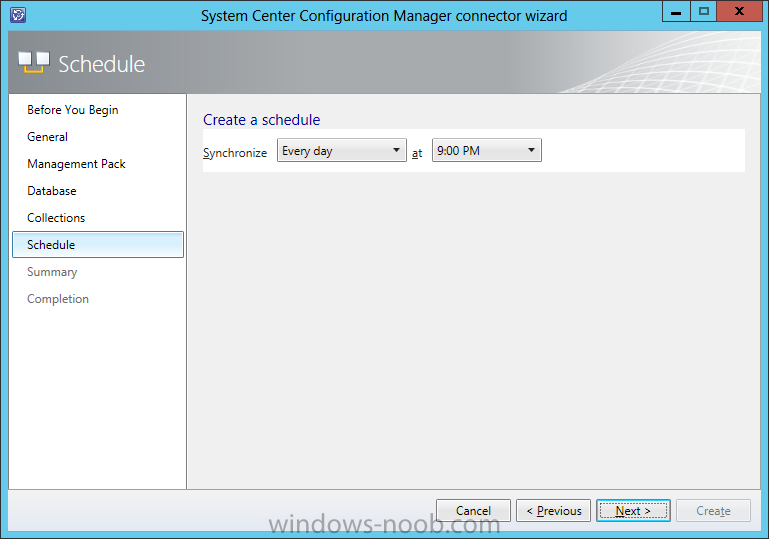
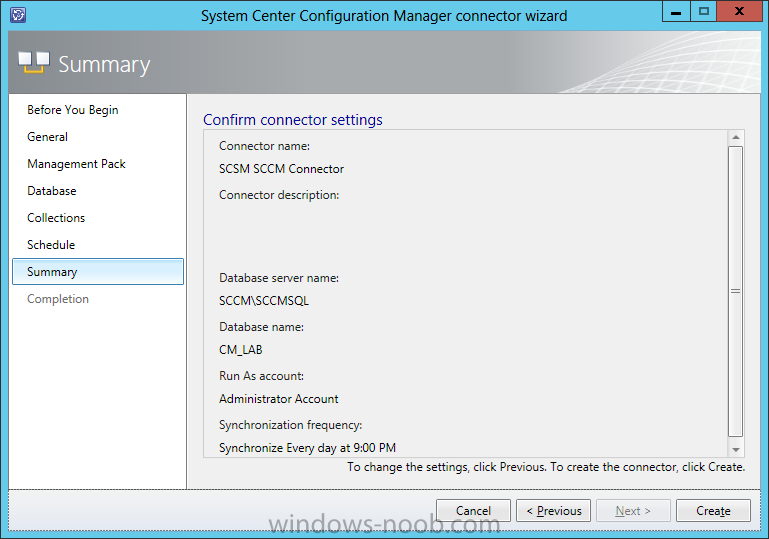
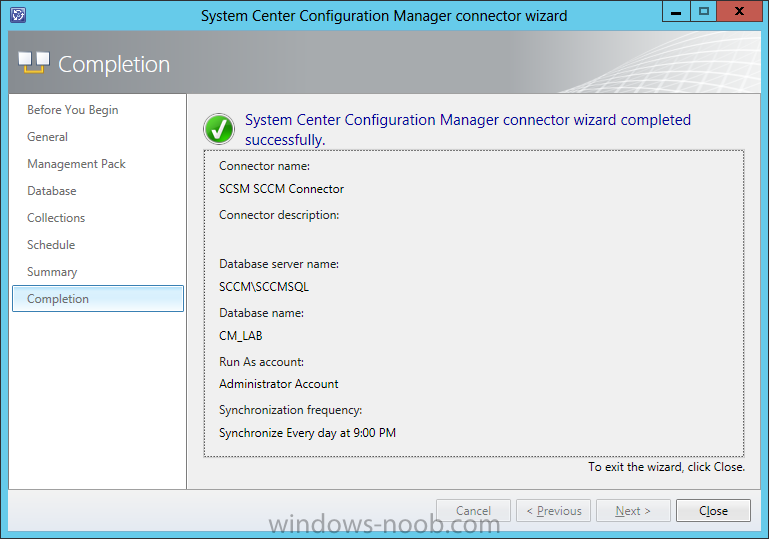
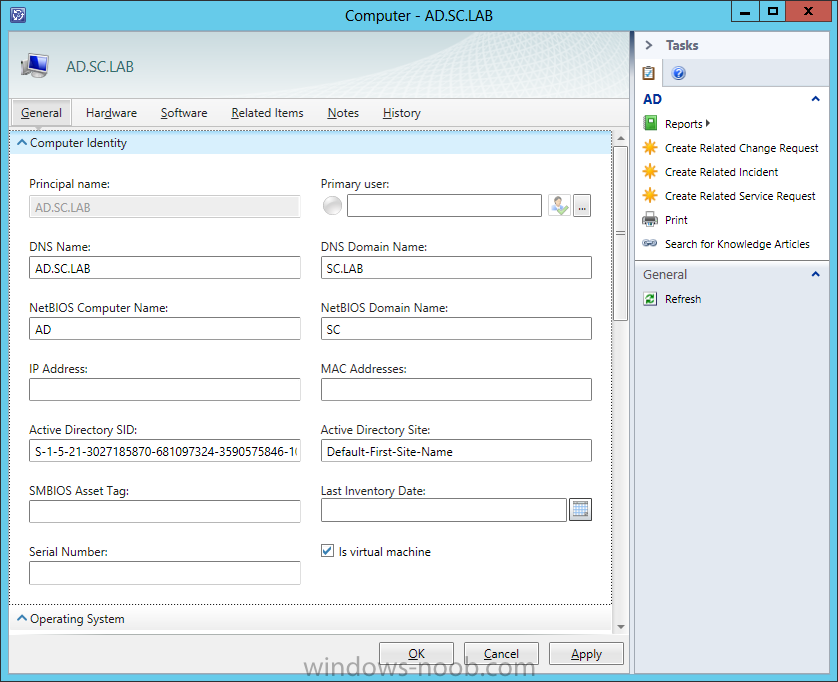
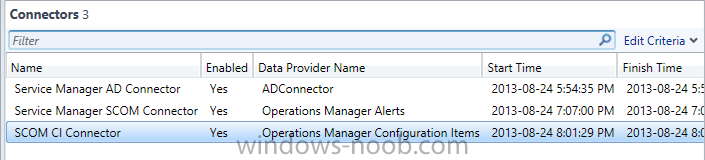
Important: Before you can create the Configuration Manager connector, you have to verify that System Center Configuration Manager is installed in your environment, and you have to turn on Windows User Account Control (UAC). To create a Configuration Manager connectorIn the Service Manager console, click Administration. In the Administration pane, expand Administration, and then click Connectors. In the Tasks pane, under Connectors, click Create Connector, and then click Configuration Manager Connector. The System Center Configuration Manager Connector Wizard starts. On the Before You Begin page, click Next. On the General page, do the following: In the Name box, type a name for the new connector. In the Description box, type a description for the new connector. Make sure that the Enabled check box is selected, and then click Next. On the Select Management Pack page, in the Management Pack list, select either System Center Configuration Manager Connector Configuration or System Center Configuration Manager 2012 Connector Configuration, and then click Next. On the Connect to System Center Configuration Manager Database page, do the following: In the Database Server Name box, type the server name of the server that is hosting the System Center Configuration Manager site database and the database named instance, if applicable. In the Database Name box, type the name of the System Center Configuration Manager site database. In the Credentials area, select a Run As account, or create a new Run As account. The user account that you specify as the Run As account must be a member of the smsdbrole_extract and the db_datareader groups for the Configuration Manager site database. In the Credentials area, click Test Connection. In the Credentials dialog box, in the Password box, type the password for the account, and then click OK. In the Test Connection dialog box, if you receive the following confirmation message, click OK: The connection to the server was successful. Click Next. On the Collections page, select the appropriate collection, and then click Next. On the Schedule page, in the Synchronize list, set the frequency and time of synchronization, and then click Next. On the Summary page, confirm the connector settings you made, and then click Create. On the Confirmation page, make sure that you receive the following confirmation message: “You have successfully completed the System Center Configuration Manager Connector Wizard.” Then, click Close. NOTE: The System Center Configuration Manager Connector Wizard may take several hours to import data from System Center Configuration Manager. To validate the creation of a Configuration Manager connectorConfirm that the Configuration Manager connector that you created is displayed in the Connectors pane. In the Service Manager console, click Configuration Items. In the Configuration Items pane, expand Configuration Items, expand Computers, and then click All Windows Computers. Verify that the intended computers from Configuration Manager appear in the All Windows Computers pane. In the middle pane, double-click a newly imported computer. Verify that the appropriate computer details appear in the computer form. To confirm the status of a Configuration Manager connectorView the columns in the Connector pane; the columns contain information about the start time, the finish time, the status, and the percentage of completion.


-
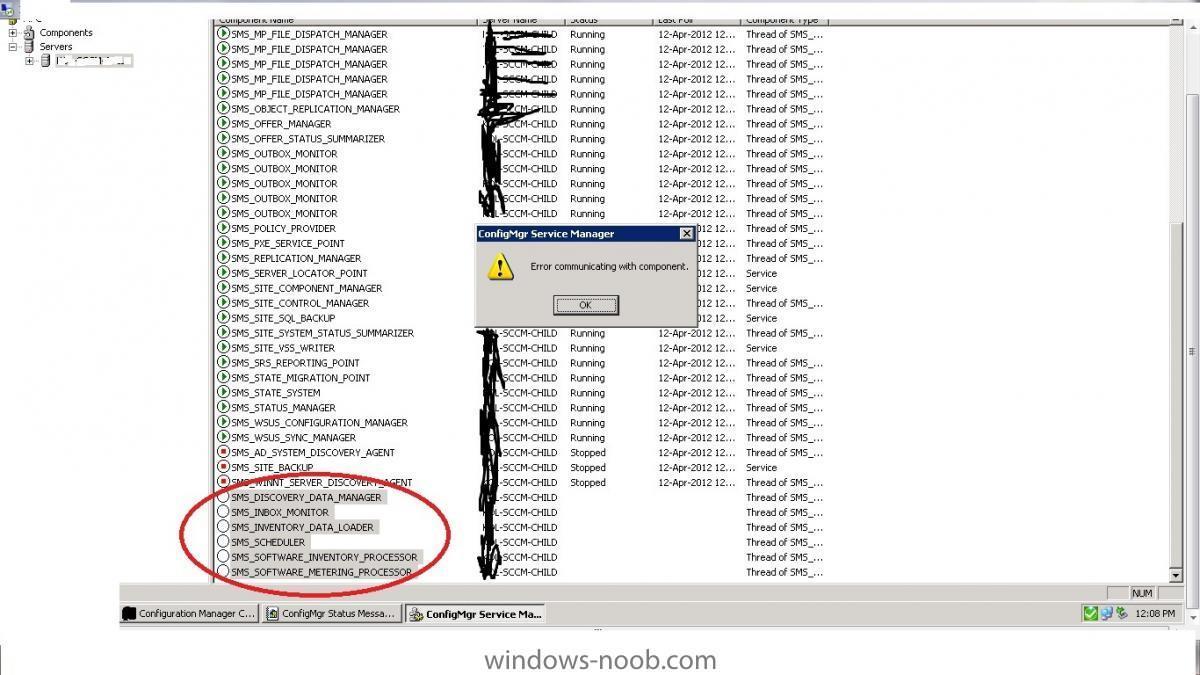
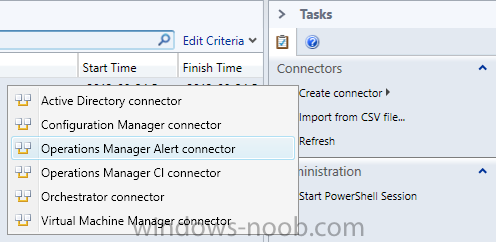
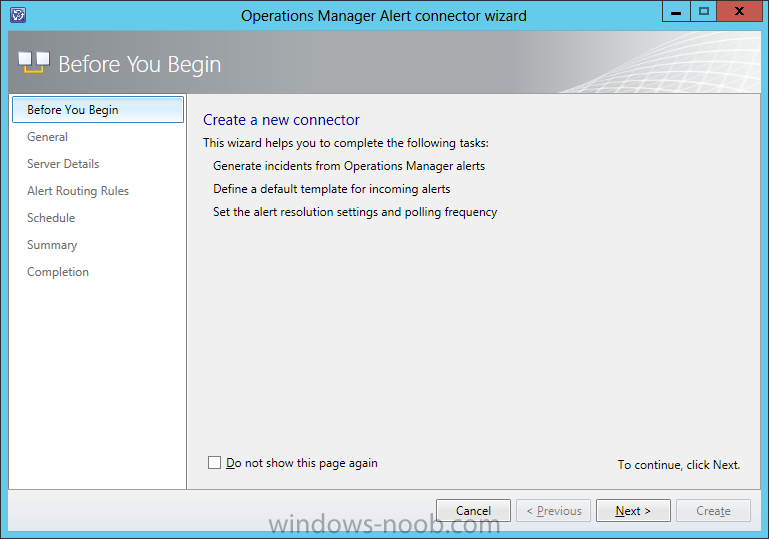
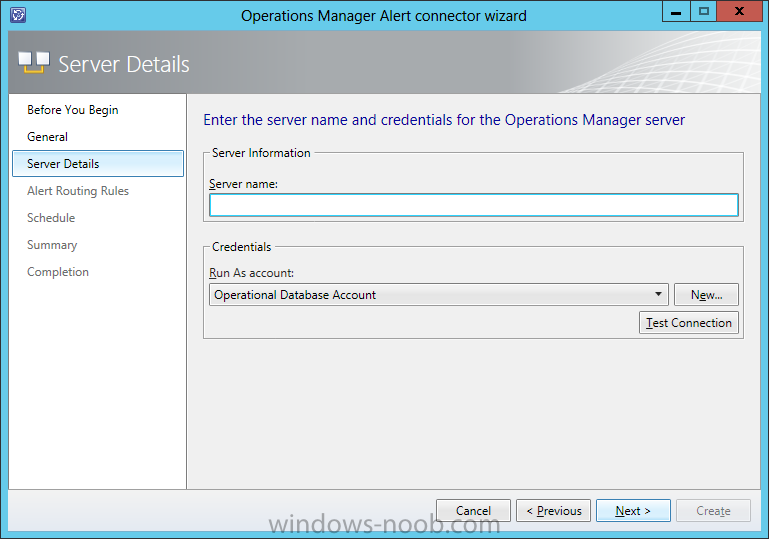
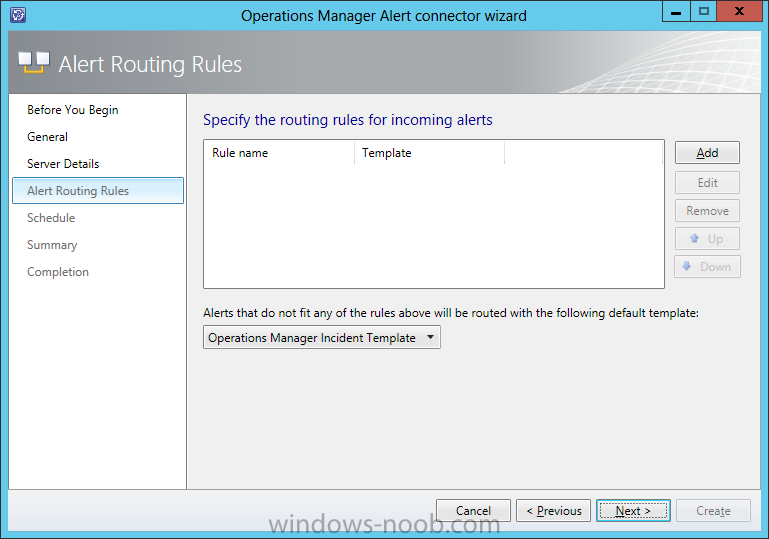
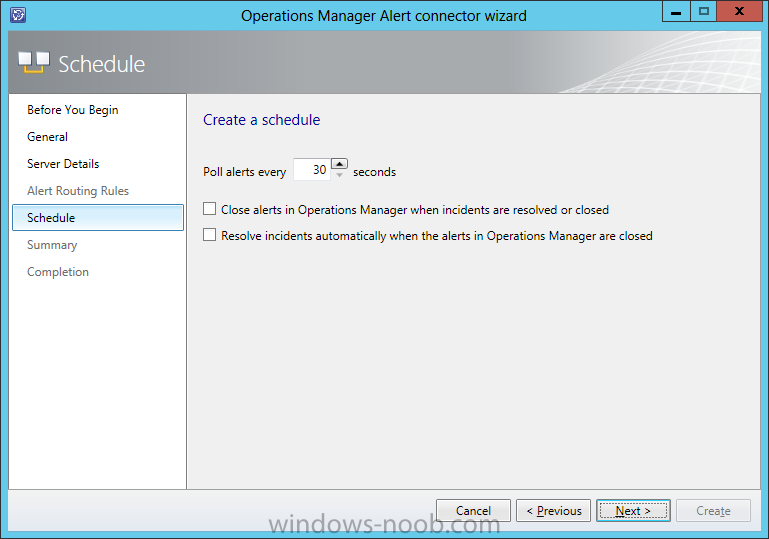
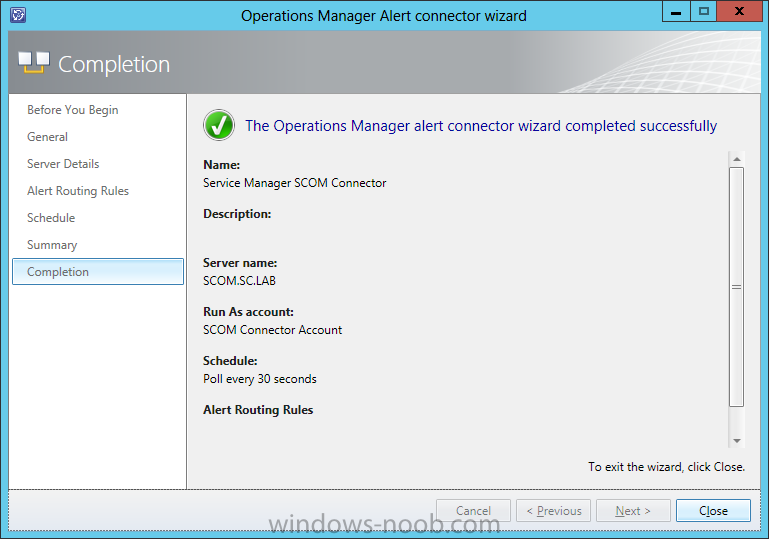
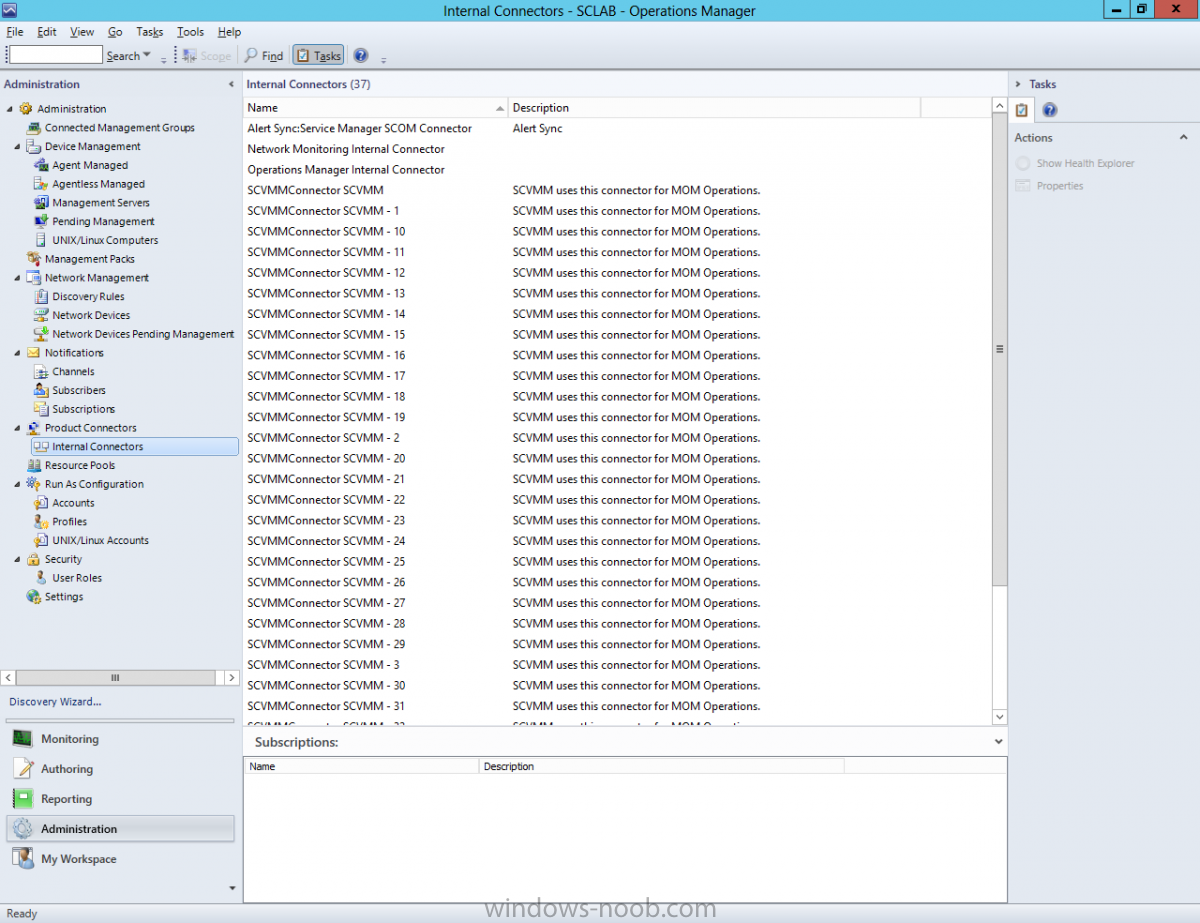
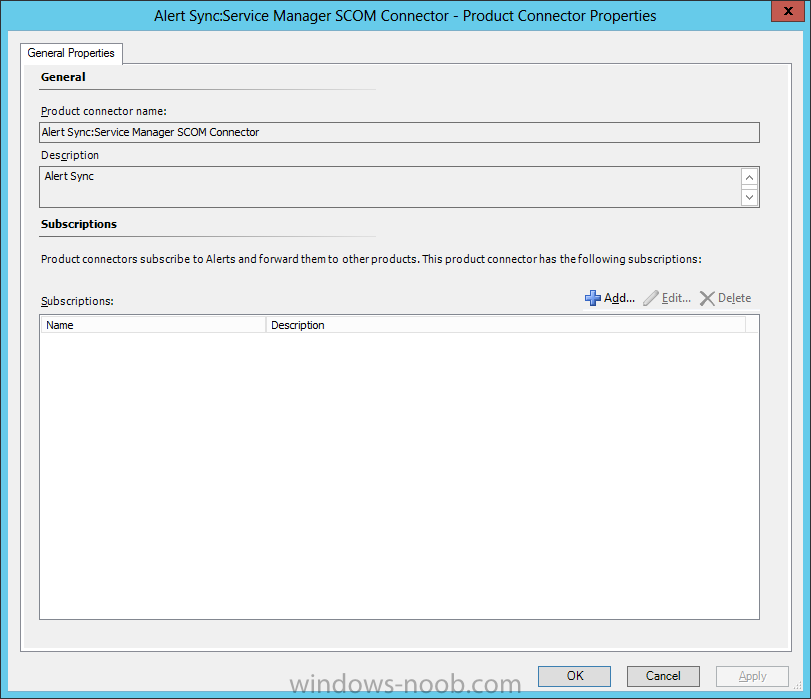
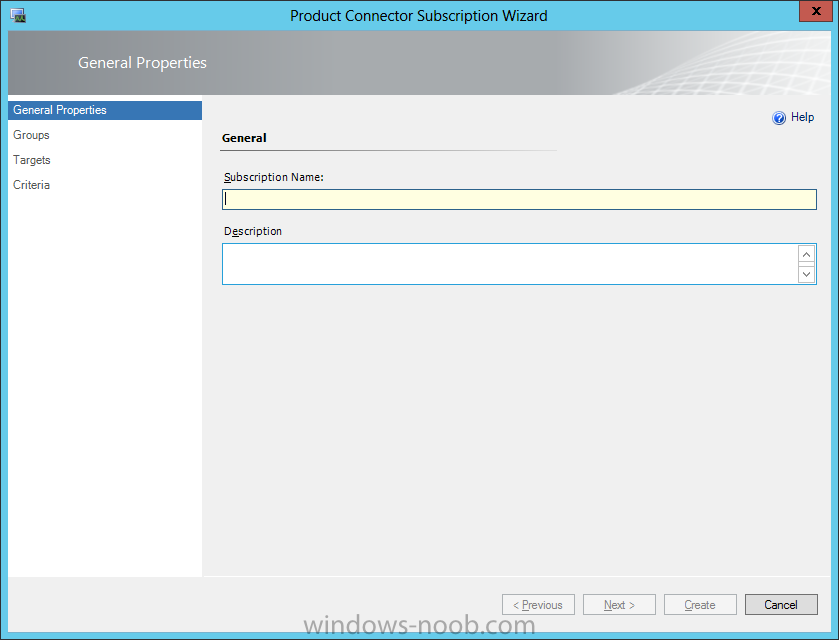
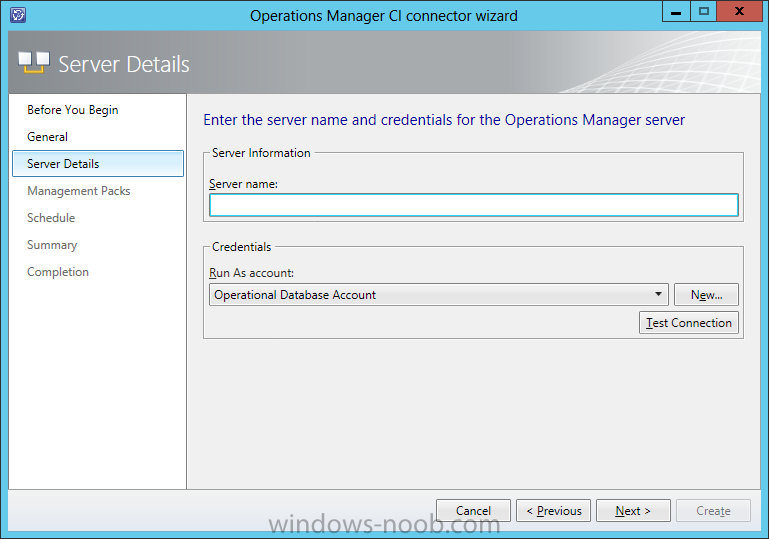
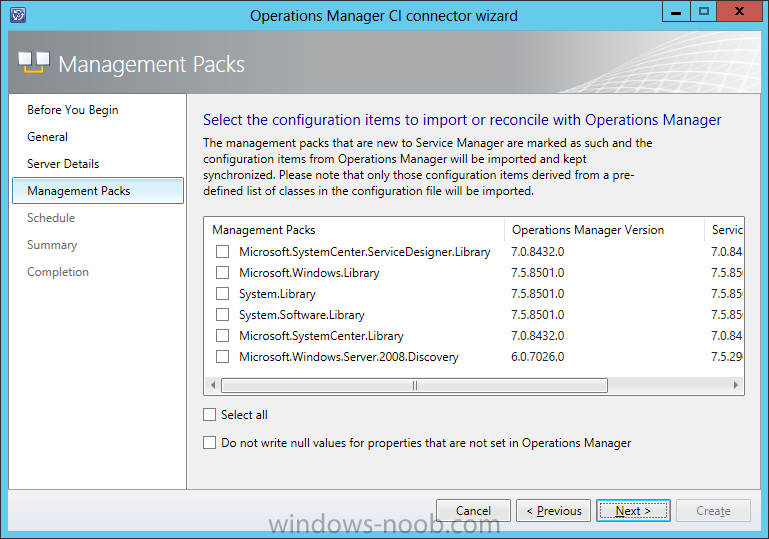
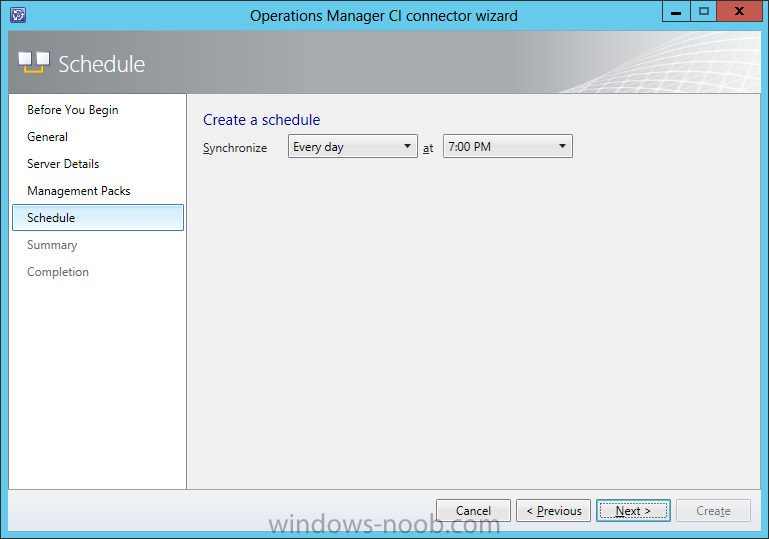
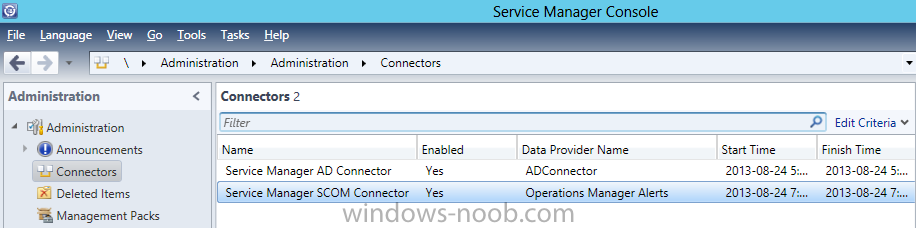
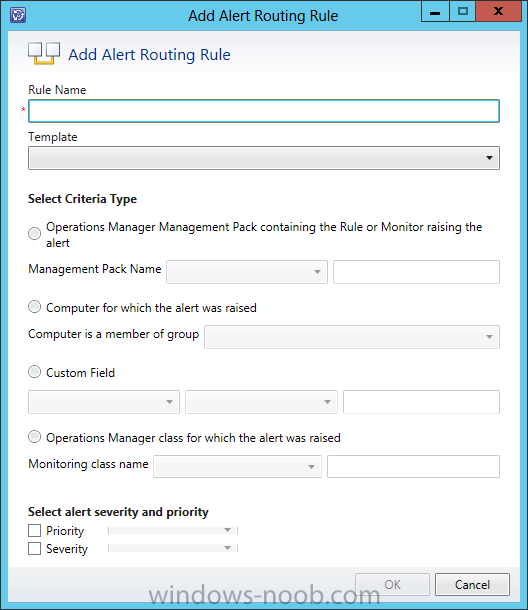
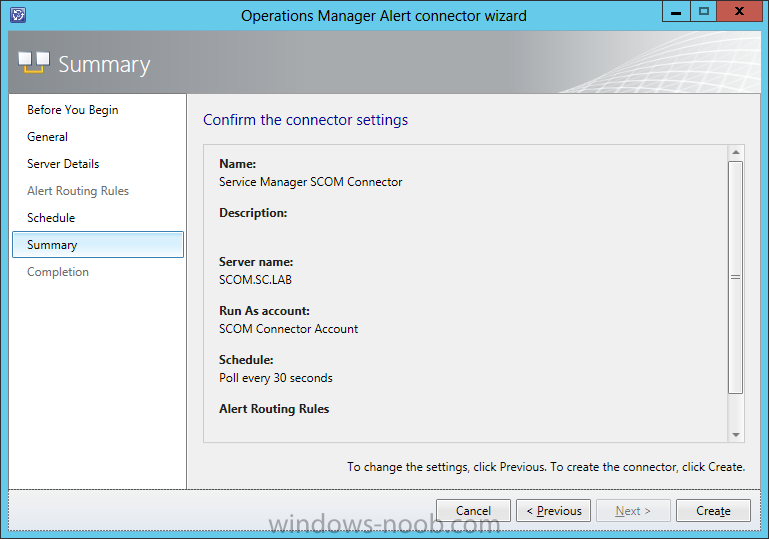
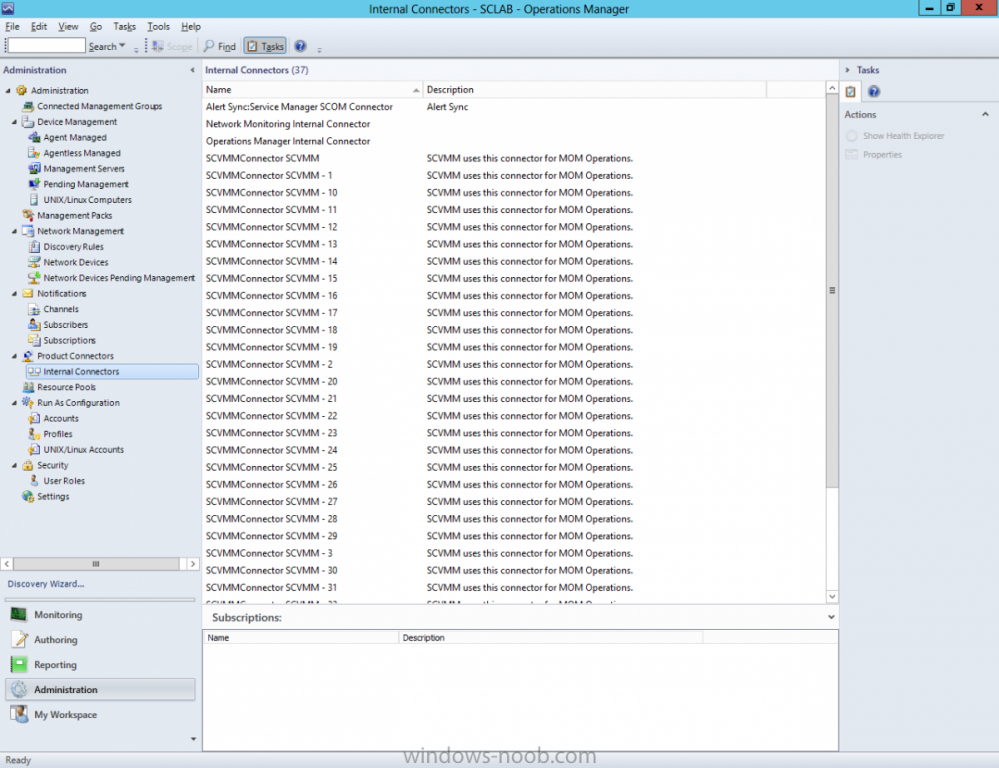
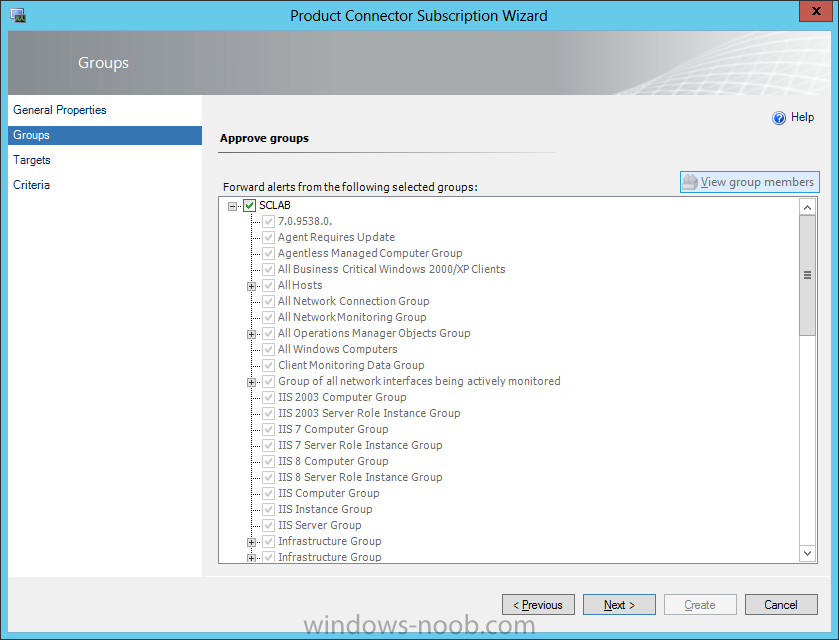
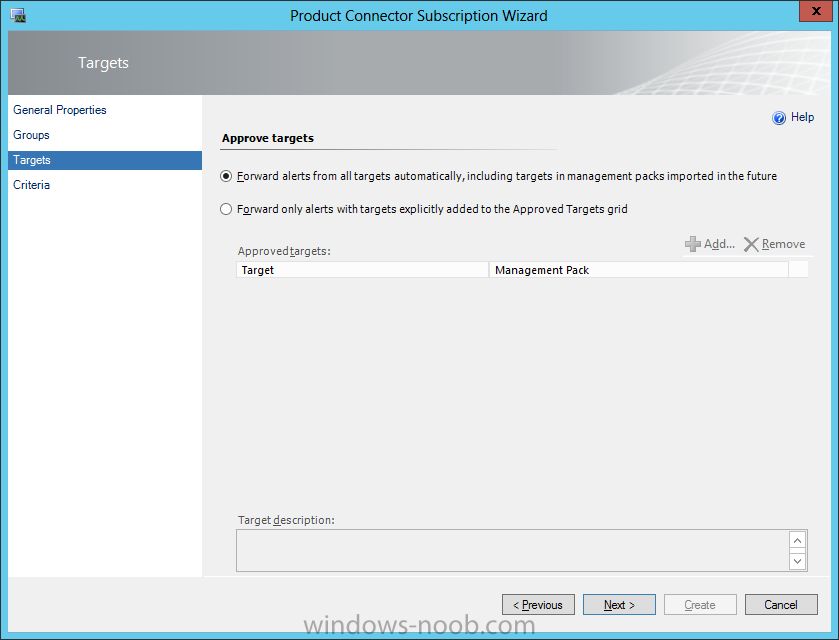
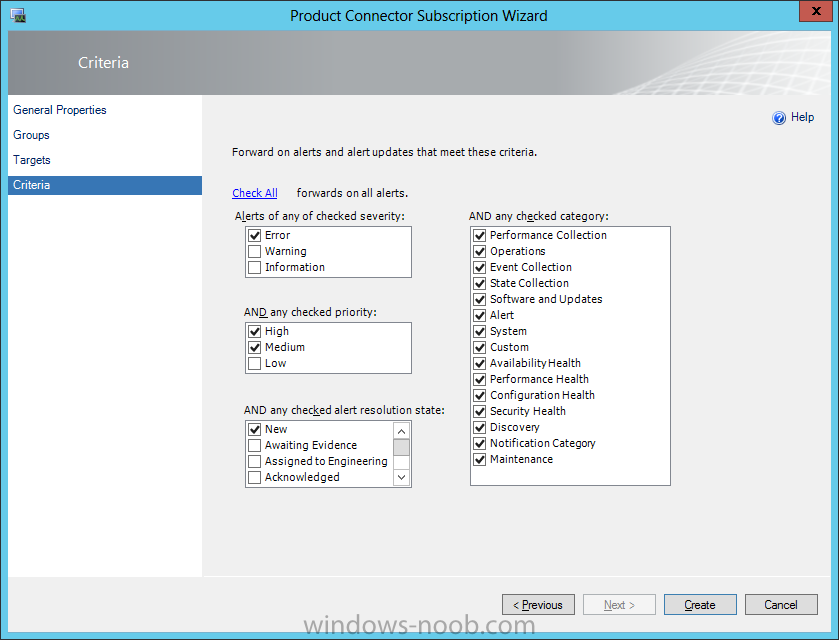
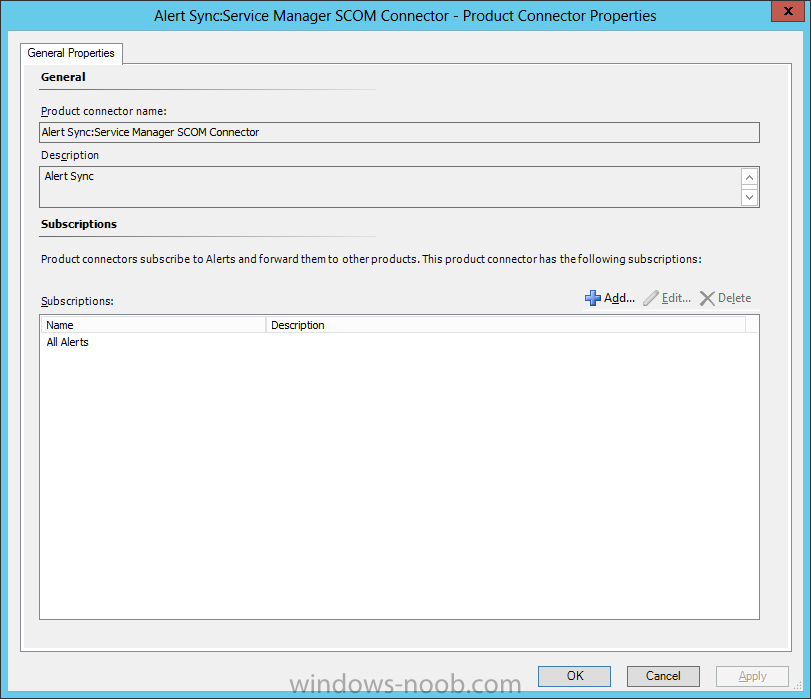
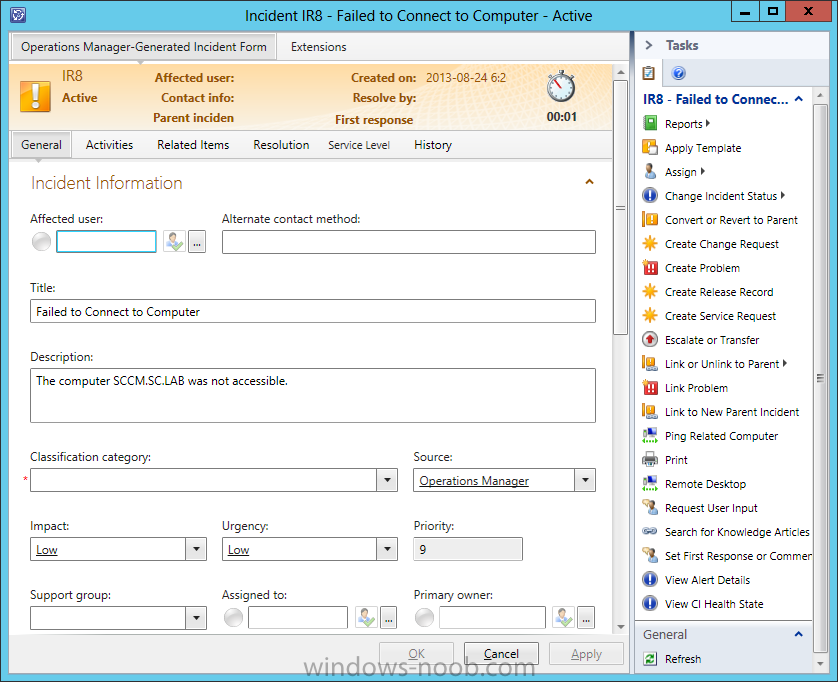
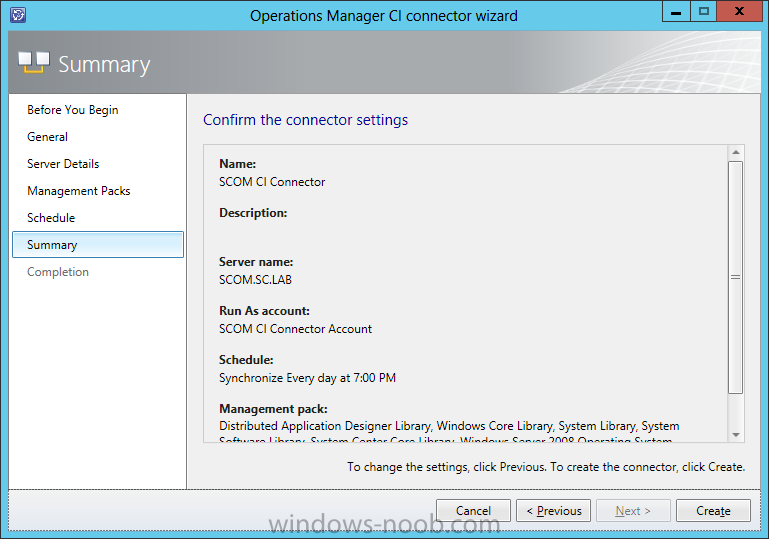
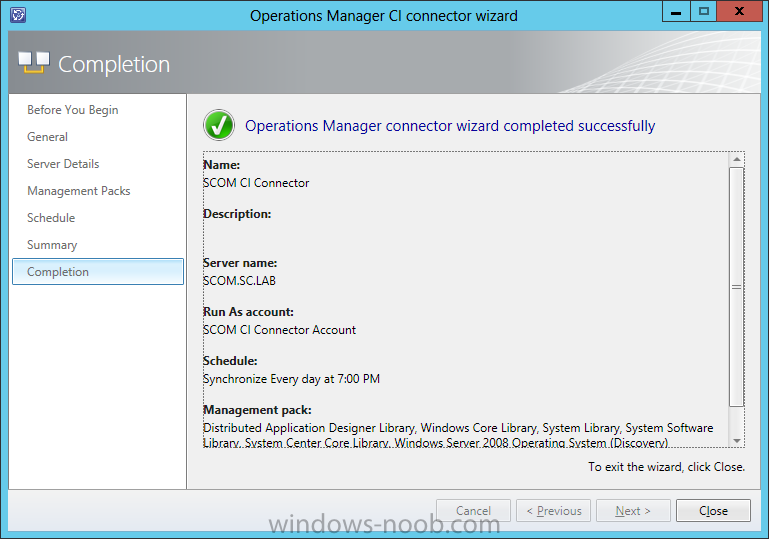
Two connectors for Operations Manager are available in System Center 2012 – Service Manager: the configuration item (CI) connector that imports objects that are discovered by Operations Manager into the Service Manager database, and an alert connector that can create incidents based on alerts. System Center Operations Manager collects information about many different types of objects, such as hard disk drives and Web sites. To import objects that are discovered by Operations Manager, Service Manager requires a list of class definitions for these objects; the list of definitions is in the System Center Operations Manager management packs. Therefore, you must import some System Center Operations Manager management packs into Service Manager. When you install Service Manager, a set of System Center Operations Manager management packs for common objects and the required Windows PowerShell scripts are copied to your Service Manager installation folder. If you have installed additional management packs in Operations Manager, and you want to add the data from those additional management packs to Service Manager, you can modify the configuration item (CI) connector to add the additional management packs. To create an Operations Manager alert connectorIn the Service Manager console, click Administration. In the Administration pane, expand Administration, and then click Connectors. In the Tasks pane, under Connectors, click Create Connector, and then click Operations Manager Alert Connector. Complete the following steps to complete the Operations Manager Alert Connector Wizard: On the Before You Begin page, click Next. On the General page, in the Name box, type a name for the new connector. Make sure that the Enable check box is selected, and then click Next. On the Server Details page, in the Server name box, type the name of the server that is hosting the Operations Manager root management server. Under Credentials, click New. In the Run As Account dialog box, in the Display name box, type a name for this Run As account. In the Account list, select Windows Account. In the User Name, Password, and Domain fields, type the credentials for the Run As account, and then click OK. For more information about the permissions that are required for this Run As account, see Accounts Required During Setup in the Planning Guide for System Center 2012 - Service Manager. On the Server Details page, click Test Connection. If you receive the following confirmation message, click OK, and then click Next: “The connection to the server was successful.” On the Alert Routing Rules page, click Add. In the Add Alert Routing Rule dialog box, create a name for the rule, select the template that you want to use to process incidents created by an alert, and then select the alert criteria that you want to use. Click OK, and then click Next. On the Schedule page, select Close alerts in Operations Manager when incidents are resolved or closed or Resolve incidents automatically when the alerts in Operations Manager are closed, click Next, and then click Create. Start the Operations Manager console on the SCOM server. Use the appropriate method, based on the version of Operations Manager you are using: In Operations Manager 2007 Service Pack 1 (SP1), in the Administration pane, click Product Connectors. In Operations Manager 2007 R2 and in System Center 2012 - Operations Manager, in the Administration pane, click Product Connectors, and then click Internal Connectors. In the Connectors pane, click the name of the alert connector that you specified in Service Manager. In the Actions pane, click Properties. In the Alert Sync: <name of connector> dialog box, click Add. In the Product Connector Subscription Wizard dialog box, on the General page, in the Subscription Name box, type the name for this subscription. For example, type All Alerts, and then click Next. On the Approve groups page, click Next. On the Approve targets page, click Next. On the Criteria page, click Create. In the Alert Sync:<name of connector> dialog box, click OK. To validate the creation of an Operations Manager alert connector· Confirm that the connector you created is displayed in the Service Manager console in the Connectors pane. · Confirm that incidents are created in Service Manager from alerts in Operations Manager. To create an Operations Manager CI connectorIn the Service Manager console, click Administration. In the Administration pane, expand Administration, and then click Connectors. In the Tasks pane, under Connectors, click Create Connector, and then click Operations Manager CI Connector. Complete the following steps to complete the Operations Manager CI Connector Wizard: On the Before You Begin page, click Next. On the General page, in the Name box, type a name for the new connector. Make sure that the Enable check box is selected, and then click Next. On the Server Details page, in the Server name box, type the name of the server that is hosting the Operations Manager root management server. Under Credentials, click New. In the User name, Password, and Domain boxes, type the credentials for the Run As account, and then click OK. For more information about the permissions that are required for this Run As account, see Accounts Required During Setup in the Deployment Guide for System Center 2012 - Service Manager. On the Server Details page, click Test Connection. If you receive the following confirmation message, click OK, and then click Next: “The connection to the server was successful.” On the MP Selection page, click Select all, or select the management packs that define the configuration items you want to import, and then click Next. On the Schedule page, click Next, and then click Next. On the Summary page, review the selections made and then click Create. On the Completion page, click Close. To validate the creation of an Operations Manager CI connectorConfirm that the objects that Operations Manager discovered are listed as configuration items in Service Manager. To confirm the status of an Operations Manager connectorView the columns in the Connector pane; the columns contain information about the start time, the finish time, the status, and the percentage of import completion.


-
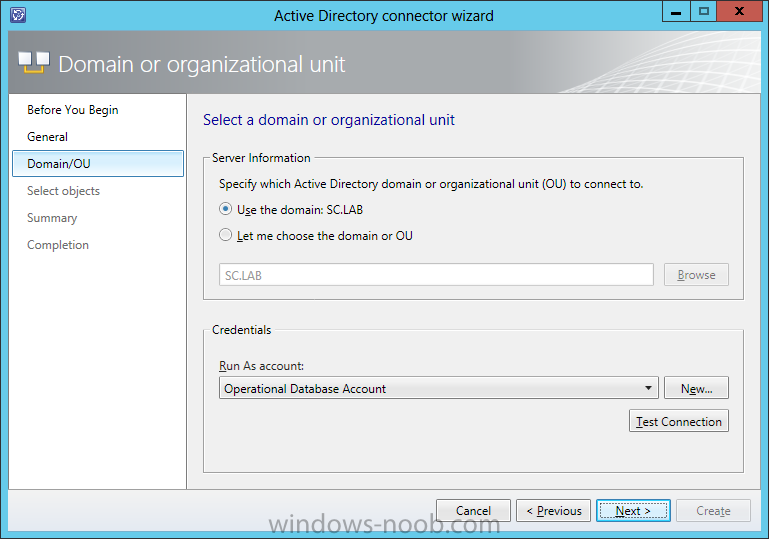
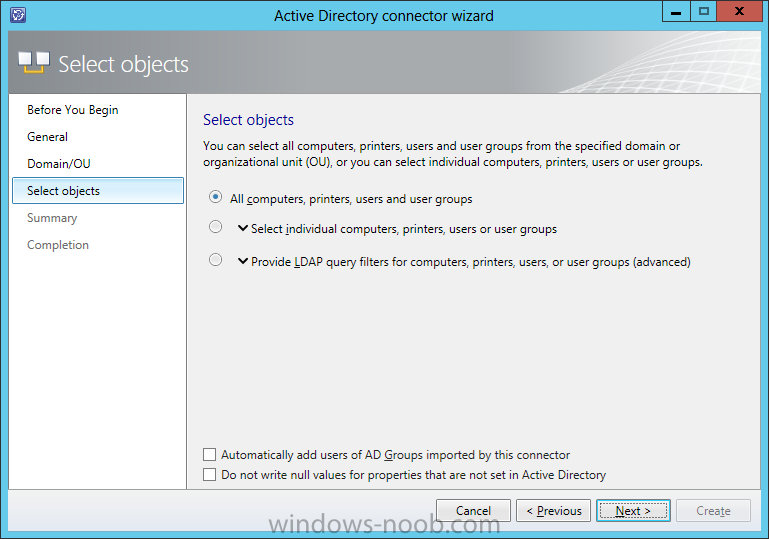
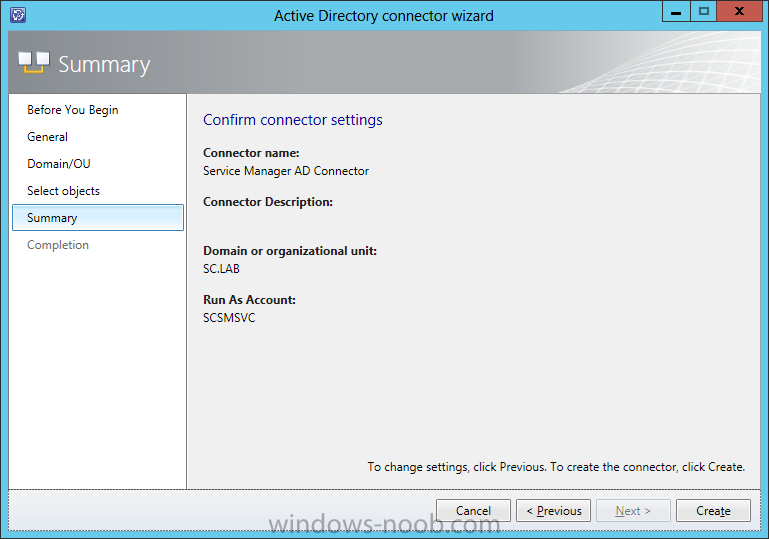
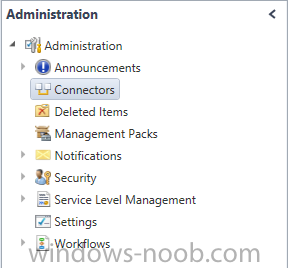
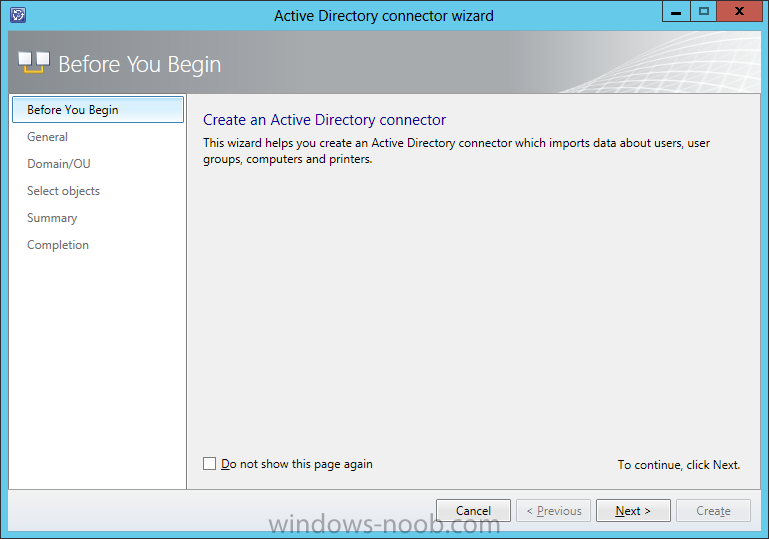
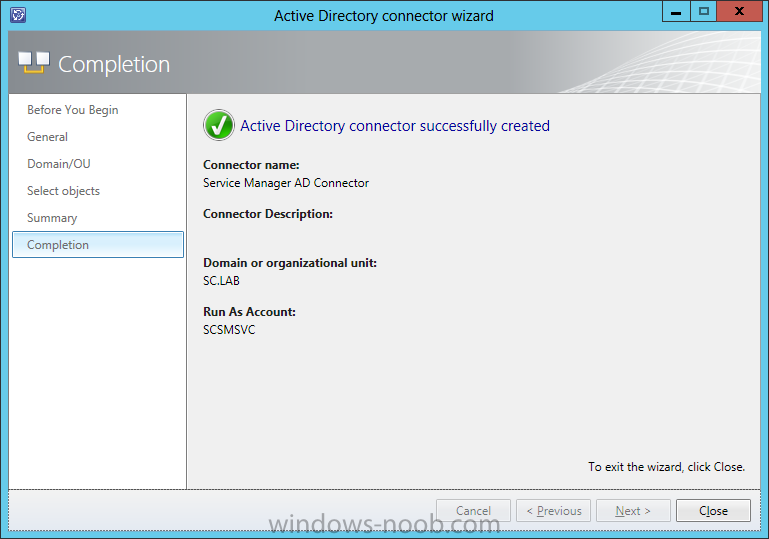
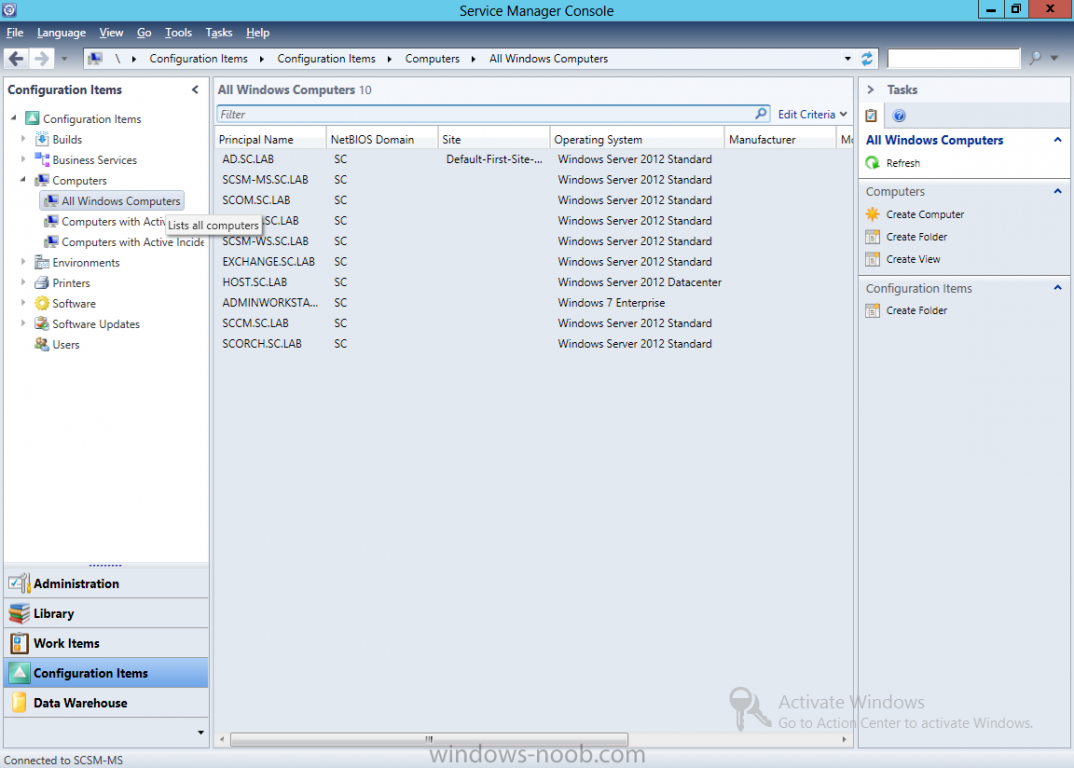
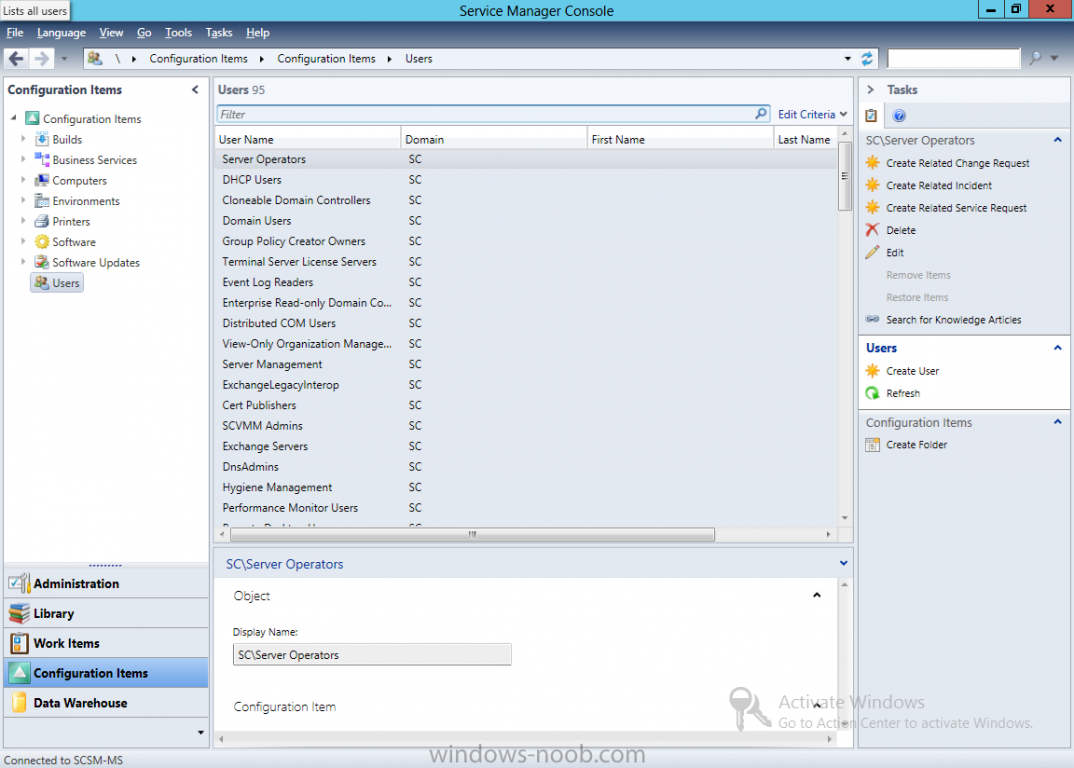
Now we are going to configure the Active Directory (AD) connector to Service Manager. In the Service Manager console, click Administration. In the Administration pane, expand Administration, and then click Connectors. In the Tasks pane, under Connectors, click Create Connector, and then click Active Directory Connector. Complete these steps in the Active Directory Connector Wizard: On the Before You Begin page, click Next. On the General page, in the Name box, type a name for the new connector. Make sure that the Enable this connector check box is selected, and then click Next. On the Domain or organizational unit page, select Use the domain: <domain name>. Or, select Let me choose the domain or OU, and then click Browse to choose a domain or an organizational unit (OU) in your environment. In the Credentials area, click New. In the Run As Account dialog box, in the Display name box, enter a name for the Run As account. In the Account list, select Windows Account. Enter the credentials for an account that has rights to read from AD DS, and then click OK. On the Domain or organizational unit page, click Test Connection. In the Test Connection dialog box, make sure that The connection to the server was successful is displayed, and then click OK. On the Domain or organizational unit page, click Next. On the Select objects, do the following: Select All computers, printers, users, and user groups to import all items or, Select Select individual computers, printers, users or user groups to import only the selected items or, Select Provide LDAP query filters for computers, printers, users, or user groups if you want to create your own Lightweight Directory Access Protocol (LDAP) query. If you want new users that are added to any groups you import to be added automatically to Service Manager, select Automatically add users of AD Groups imported by this connector, and then click Next. On the Summary page, make sure that the settings are correct, and then click Create. On the Completion page, make sure that you receive the following confirmation message: “Active Directory connector successfully created.” Then, click Close. To validate the creation of an Active Directory connectorIn the Connectors pane, locate the Active Directory connector that you created. You might have to wait for a minute before the connector appears. In the Connectors pane, review the Status column for a status of Finished Success. In the Configuration Items pane, expand Configuration Items. Expand Computers and All Windows Computers, and verify that the intended computers from AD DS appear in the All Windows Computers pane. Expand Printers, expand All Printers, and then verify that the intended printers from AD DS appear in the All Printers pane. In the Service Manager console, click Configuration Items. In the Configuration Items pane, click Users, and then verify that the intended users and user groups from AD DS appear in the Users pane. To confirm the status of an Active Directory connectorView the columns in the Connector pane; the columns contain information about the start time, the finish time, the status, and the percentage of imported configuration items.


-
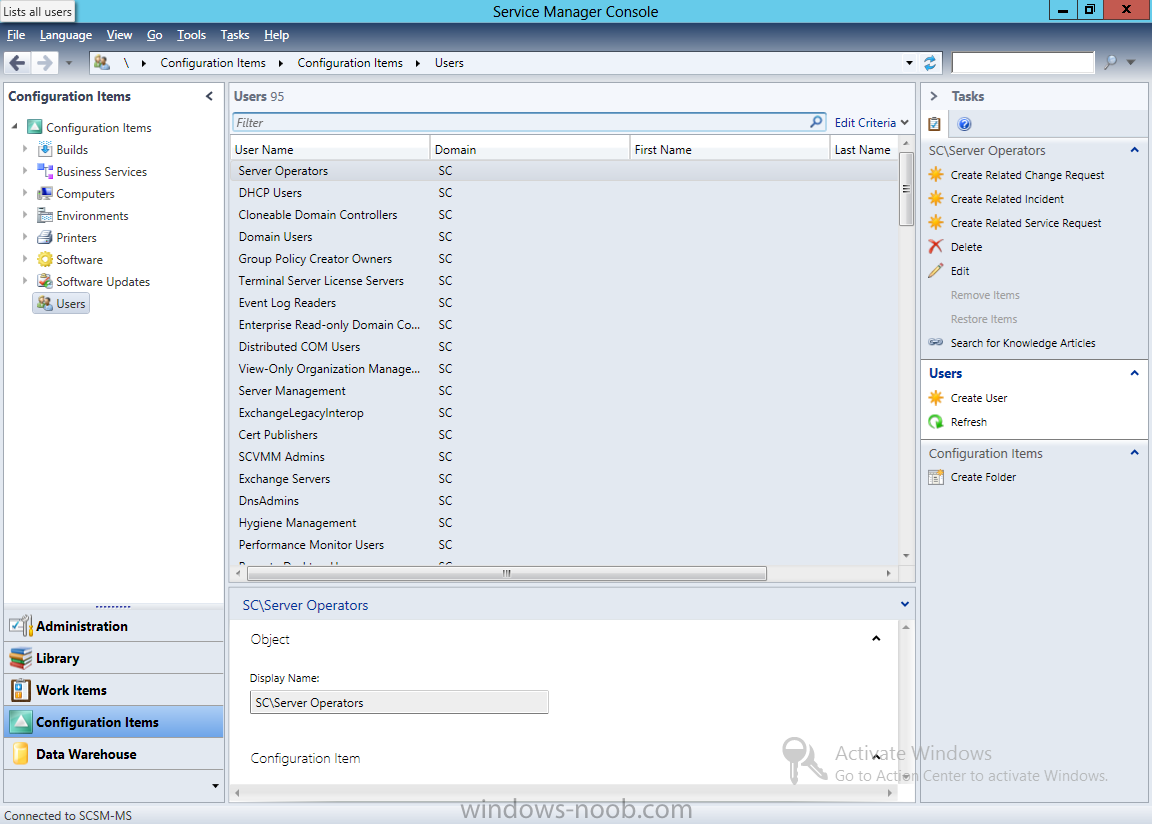
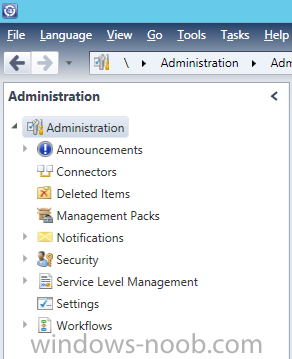
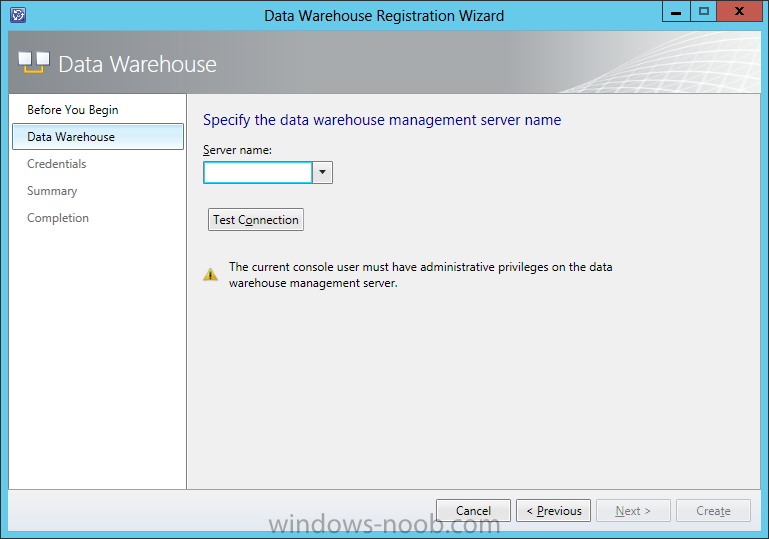
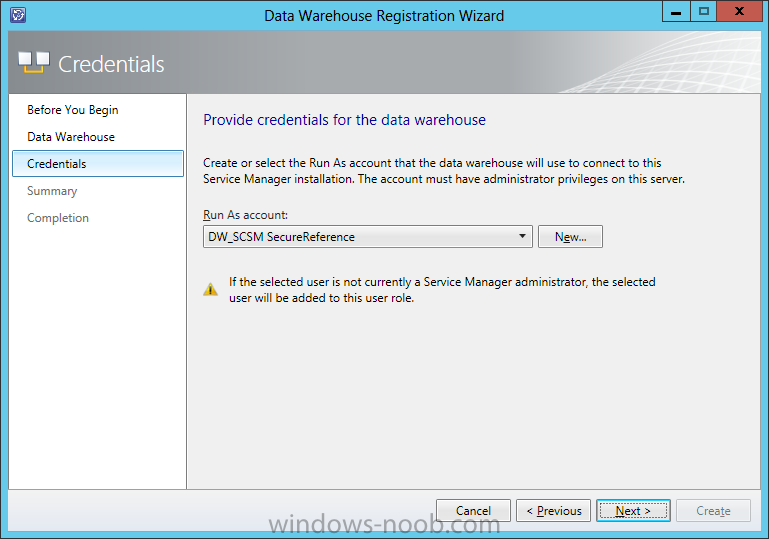
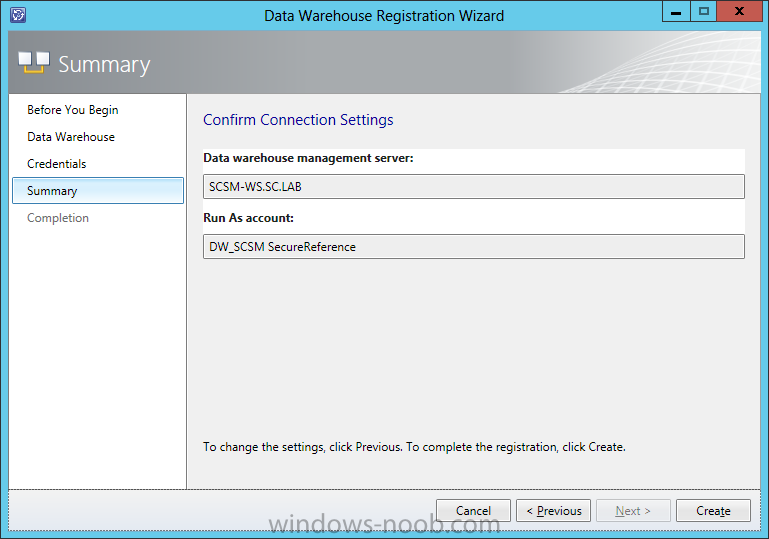
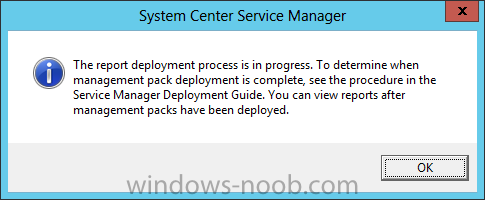
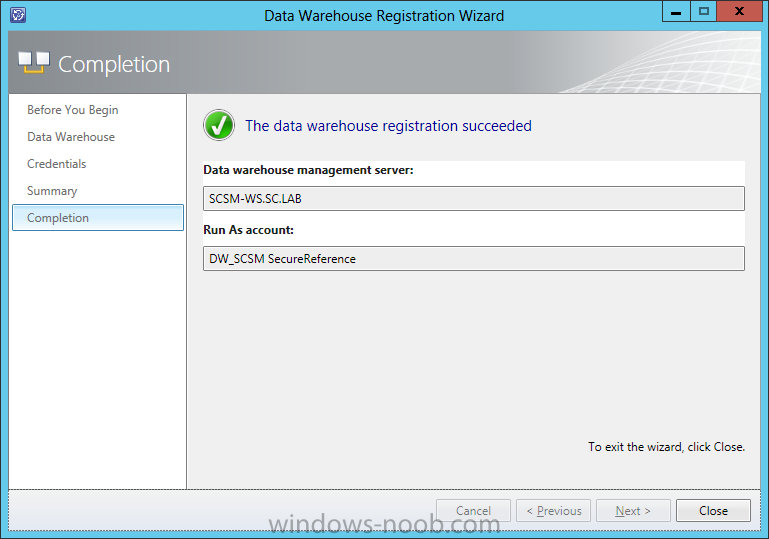
Hello everyone, if you have been following along with my guides, you should now have the Service Manager Management Server and Warehouse Server installed. We have a lot of configuration to go through. To start we will register the data warehouse. With an account that is a member of the Service Manager and data warehouse management administrators group, log on to the computer that hosts the Service Manager console. In the Service Manager console, select Administration. In the Administration pane, expand Administration. In the Administration view, in the Register with Service Manager’s Data Warehouse area, click Register with Service Manager Data Warehouse. In the Data Warehouse Registration wizard, on the Before You Begin page, click Next. On the Data Warehouse page, in the Server name box, type the fully qualified domain name (FQDN) of the computer hosting the data warehouse management server, and then click Test Connection. If the test is successful, click Next. On the Credentials page, you can accept the default entry in the Run as account list, and then click Next, or you can enter credentials from a user or group of your own choosing. On the Summary page, click Create. On the Completion page, when The data warehouse registration succeeded appears, click Close. A dialog box states that the report deployment process is not finished. This is to be expected. On the System Center Service Manager dialog box, click OK. In a few minutes, after you close the Data Warehouse Registration Wizard, the Data Warehouse button will be added to the Service Manager console. In the Service Manager console, click the arrow at the lower right corner of the Service Manager console buttons, and then click Show More Buttons. Now we have the Data Warehouse registered.


-
- 1
-
-
- Service Manager
- System Center 2012
- (and 1 more)
-
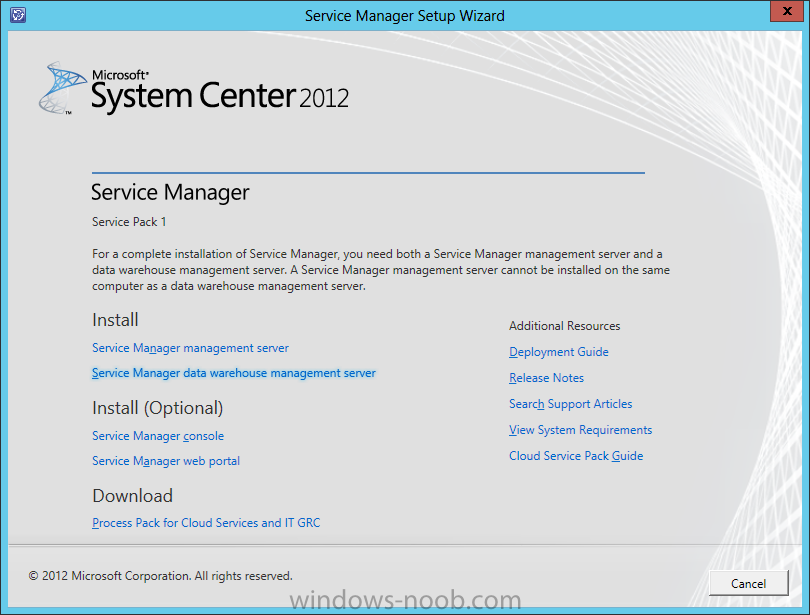
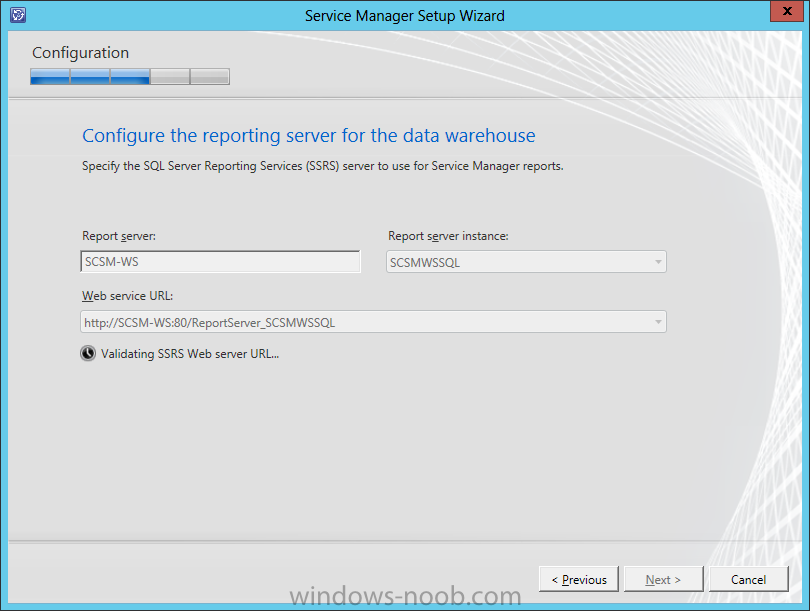
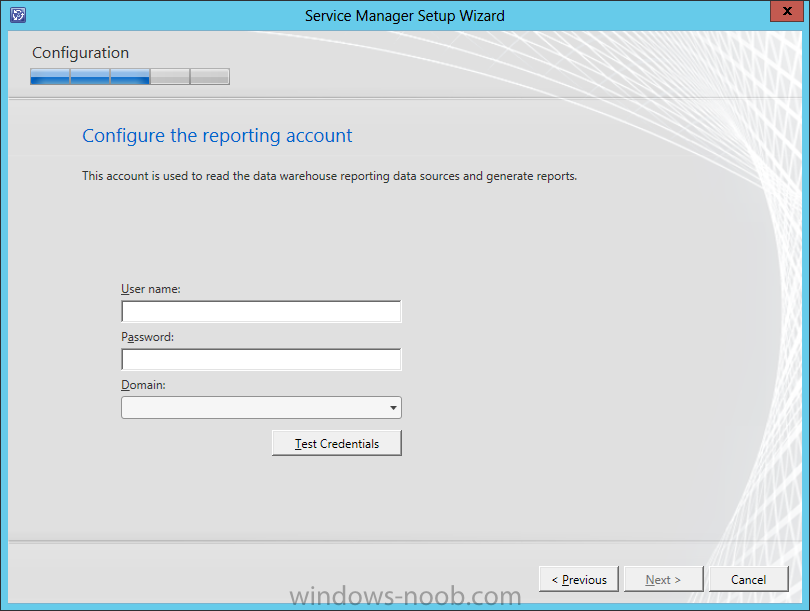
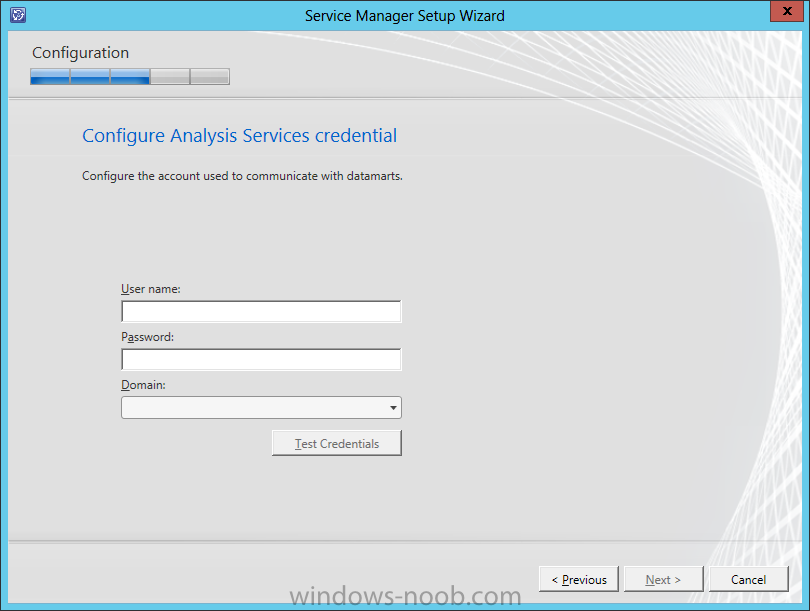
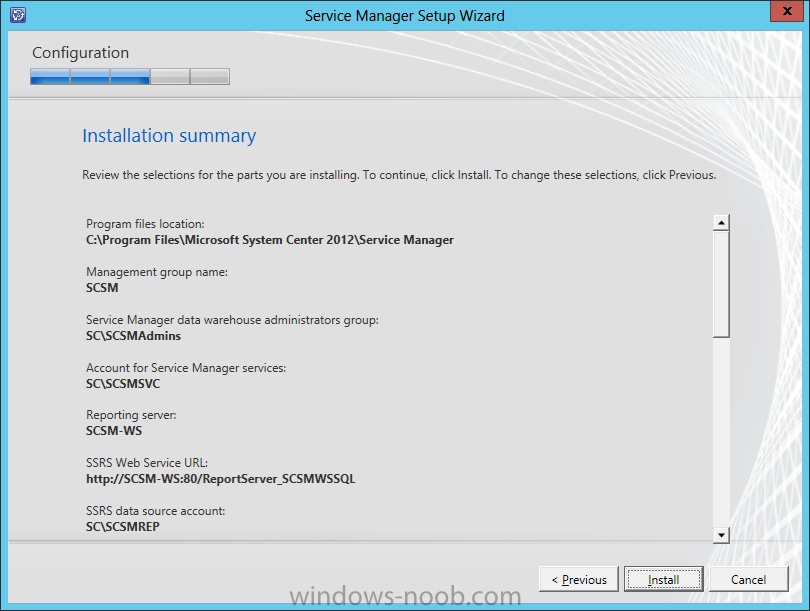
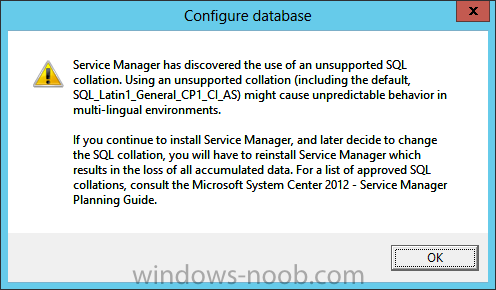
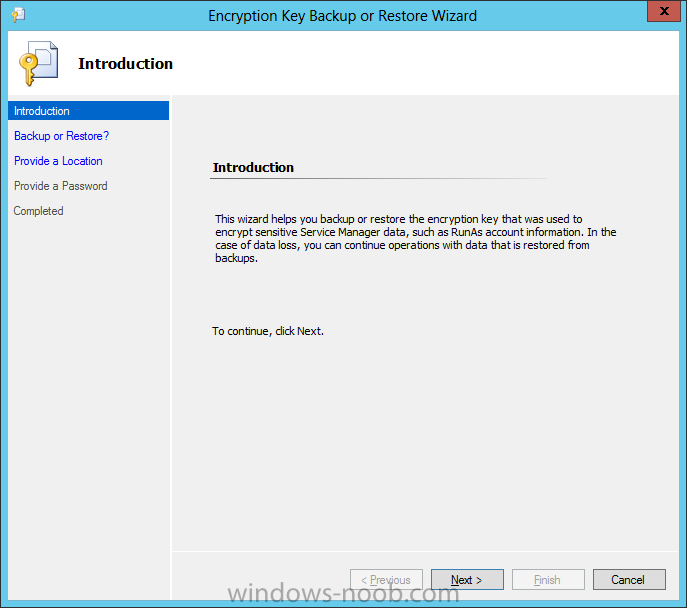
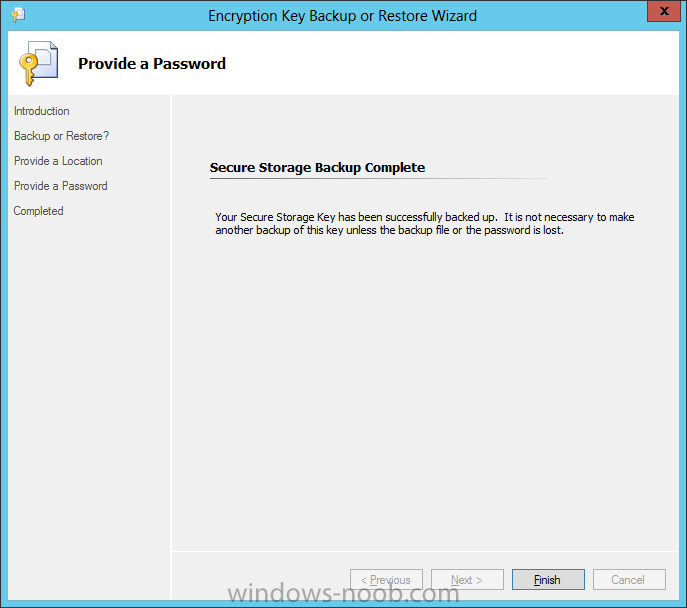
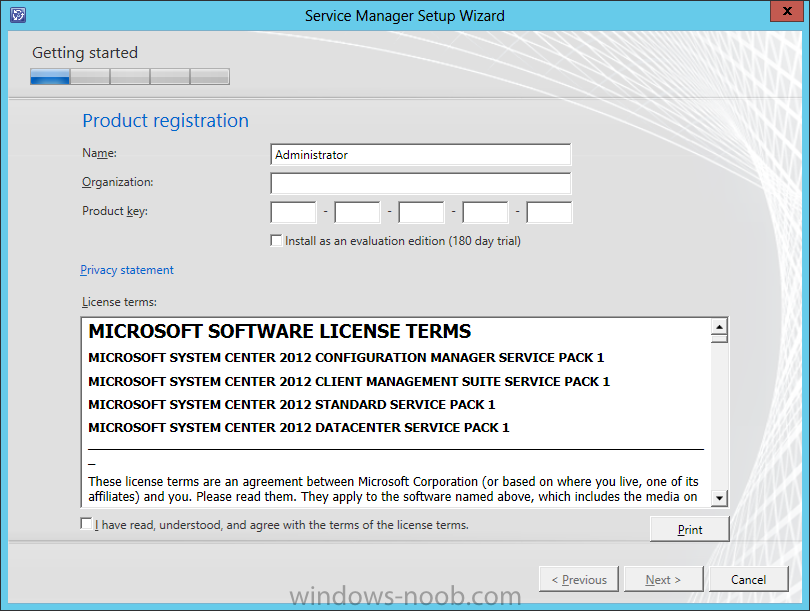
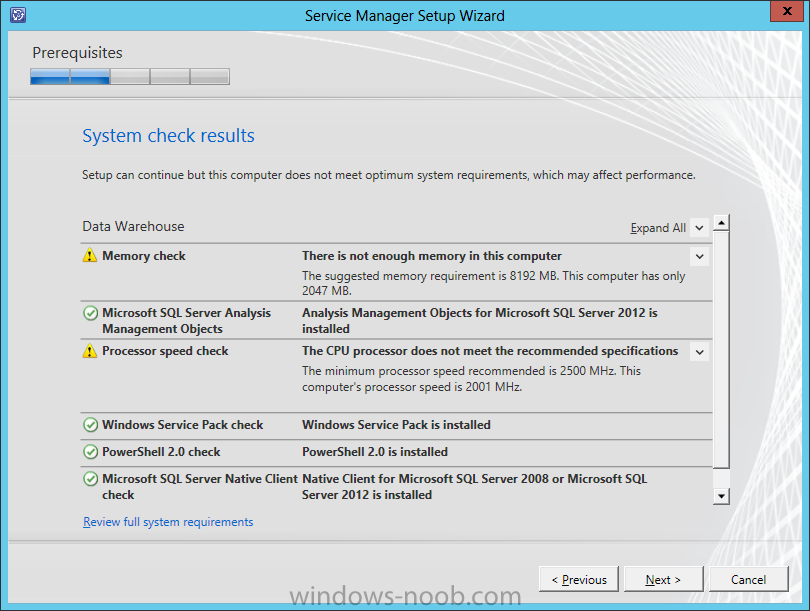
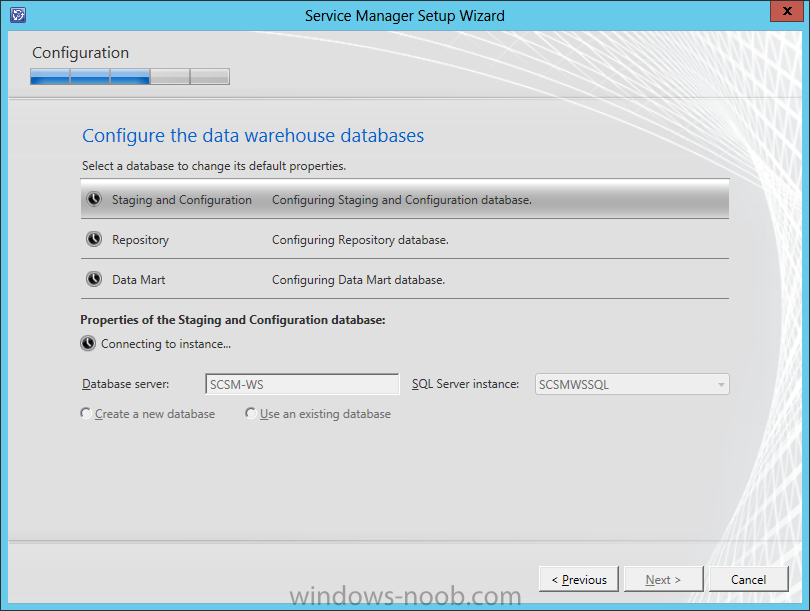
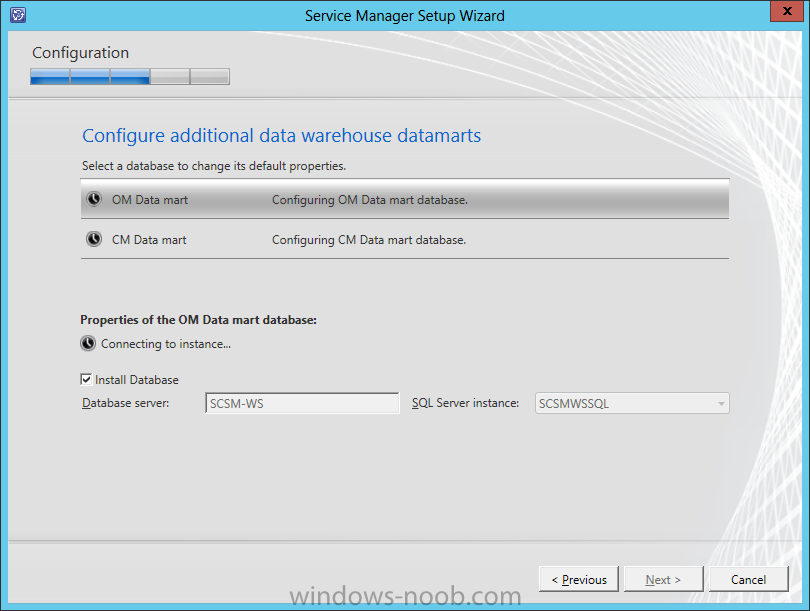
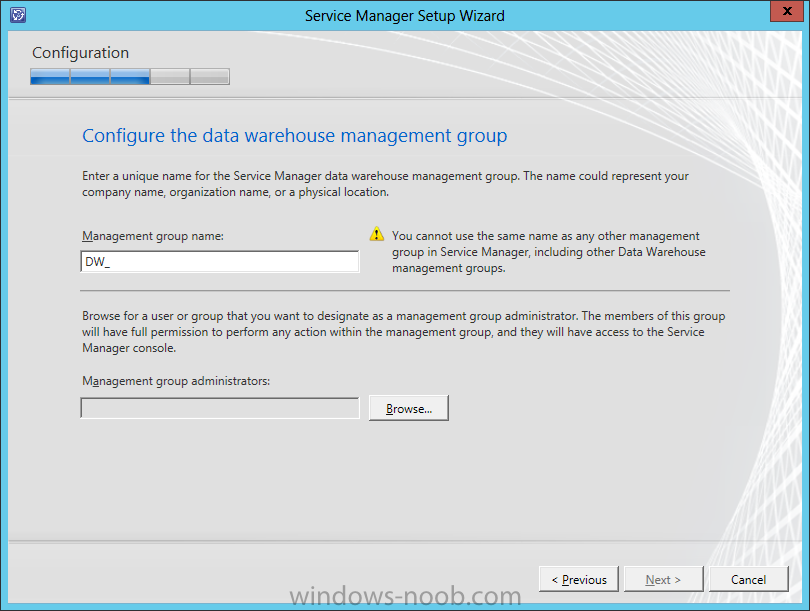
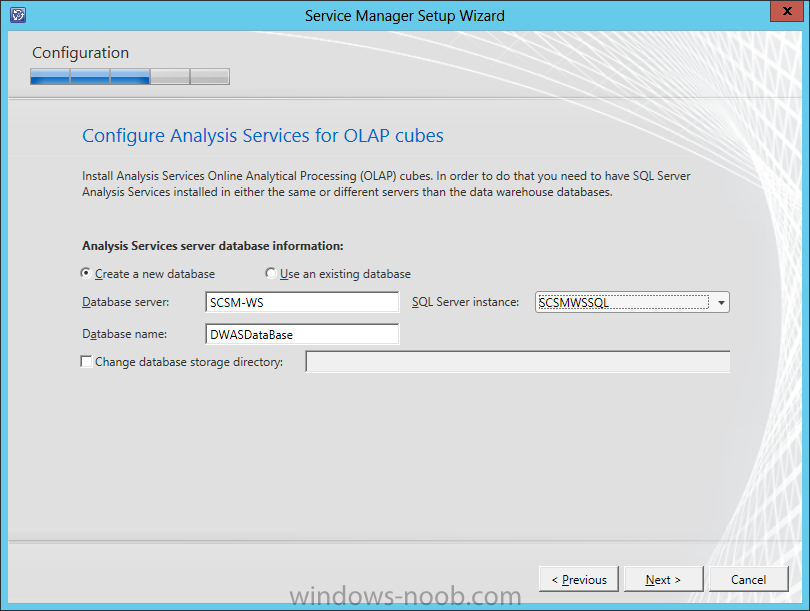
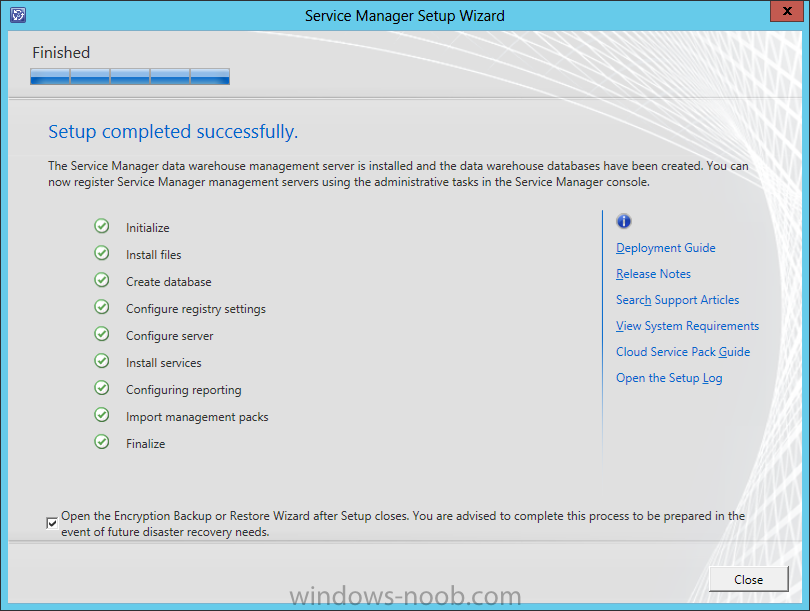
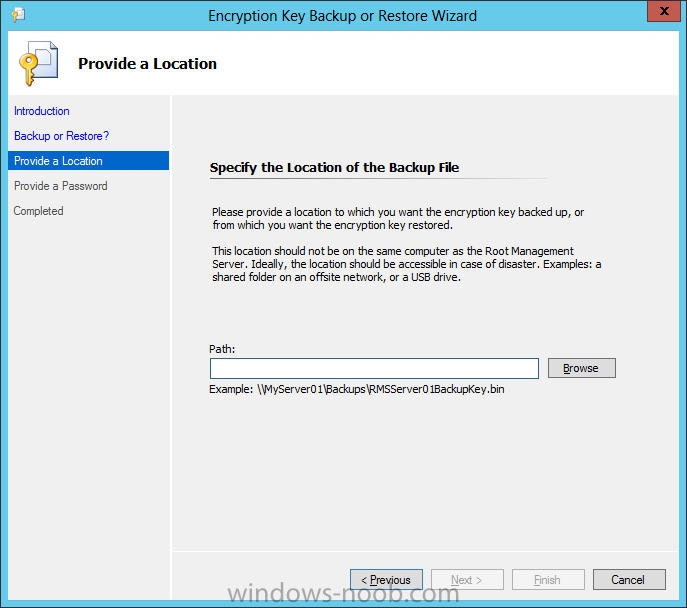
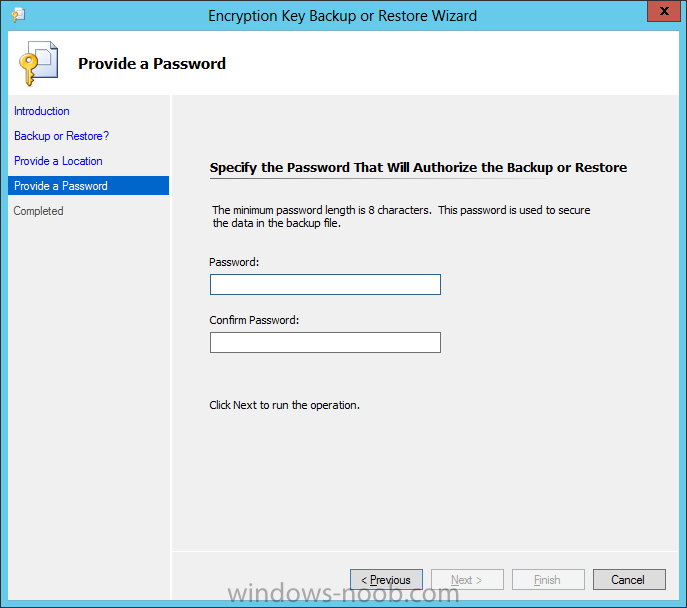
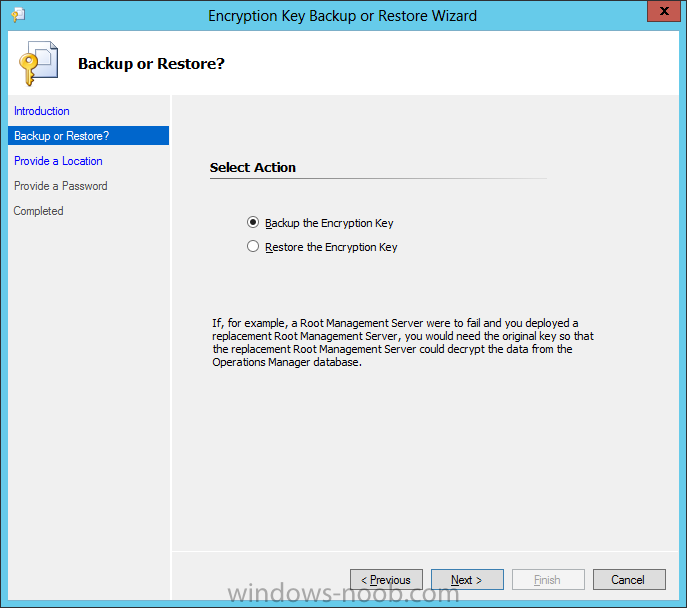
Now that we have the Service Manager Management Server installed, we can move onto the Data Warehouse. Install PrerequisitesTo start, before we will actually be able to install Service Manager Management Server, we have to install a few prerequisites. § .NET Framework 3.5 SP1 § Microsoft SQL Server Analysis Management Objects § Microsoft SQL Server Native Client Install SCSM-WS (Warehouse Server)Start by either extracting the DVD contents, or mounting the ISO (the TechNet ISO is currently labelled as mu_system_center_2012_service_manager_with_sp1_x64_dvd_1348926). Start by opening your DVD drive, navigating to the corresponding architecture (i.e. x86 or amd64), and run the Setup.exe. On the splash screen click the Service Manager Data Warehouse Management Server install link. On the Product Registration screen, enter a Name, Organization, and Product Key. Also read the License Terms and check the ‘I agree’ checkbox, then click Next. On the Installation Location screen, you can either accept the default location, or change it according to your needs. Then click Next. The Prerequisite checker will run and indicate if there are any issues preventing the installation from continuing. If there are any identified issues, resolve the issue(s) until all checks are green and/or if there are only Warnings left. Then click Next. The next screen is to configure the Data Warehouse databases. You may encounter this Warning message. This is the same message from when we installed the Management Server for Service Manager. Click OK. This will return you to the Data Warehouse database screen. It may take some time but once it has connected to the instance successfully, click Next. When you click Next on the Data Warehouse database screen, you will be presented with the Data Warehouse Datamarts screen. This is where Service Manager collects the data from Operations Manager (OM), and Configuration Manager (CM). You will encounter this Warning message again, just click OK. This will return you to the Data Warehouse Datamarts screen. It may take some time but once it has connected to the instance successfully, click Next. On the Data Warehouse Management Group screen, provide a group name. Note that this should be different from other Management Groups (i.e. SCCM, SCOM). Also add a user or group as the Administrator. In a Production environment, it is best to use an Active Directory Security Group as it is easier to add/remove individuals. On the Reporting Server screen, you will have to wait for the validation to complete, then click Next. Next you need to either specify to use a Local Account, or specify a Domain Account for the Service Manager services. This can be the same domain account used for the services on the Management Server. You will not be able to click Next until the credentials are tested successfully. Once it is, then click Next. On the Reporting Account screen, provide an account and click the Test Credentials button. Then click Next. On the Analysis Services screen, we will accept the defaults in our lab example, and click Next. You next need to provide an Analysis Services service account. Provide the credentials and click the Test Credentials button. You will not be able to click Next until you do. Once tested, then click Next. On the CEIP screen, choose whether you will join the program, and then click Next. New to System Center 2012, you can choose to include the System Center product in Microsoft Updates. Make your applicable choice and then click Next. On the Summary screen, review the selections made, and then click Install. Once the installation is complete, ensure that the ‘Open the Encryption Backup or Restore Wizard’ checkbox is selected. Then click Close. Encryption Key BackupWhen the Encryption Key Backup wizard launches, read the Introduction information and then click Next. On the Backup or Restore screen, select ‘Backup the Encryption Key’ and click Next. On the Provide A Location screen, it is recommended to store the Encryption Key backup in a secure location (i.e. a file server that is regularly backed up). Enter an applicable UNC path, along with a filename, and then click Next. On the Provide A Password screen, provide a password for security purposes (and keep it in a secure location), and click Next. Once the backup is complete, click Finish. That completes the installation of Service Manager’s Warehouse Server. We now need to install the SharePoint / Self-Service Portal.


-
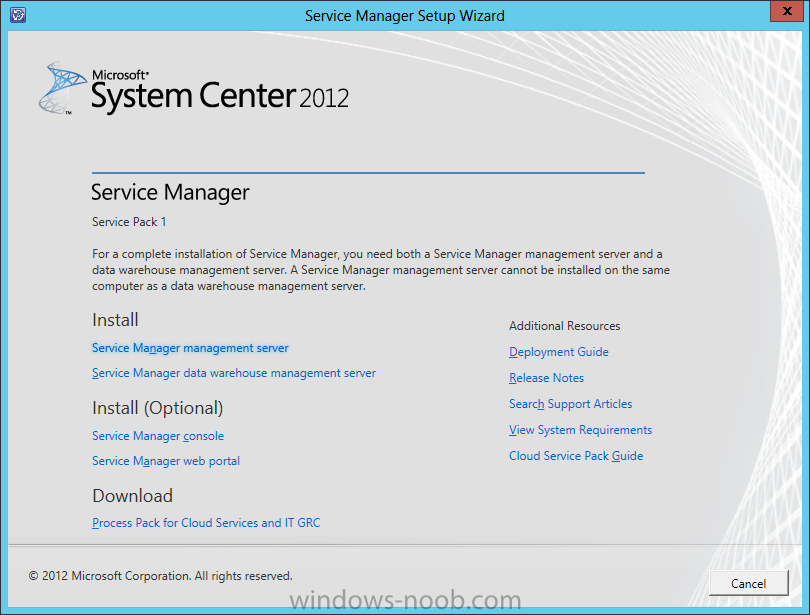
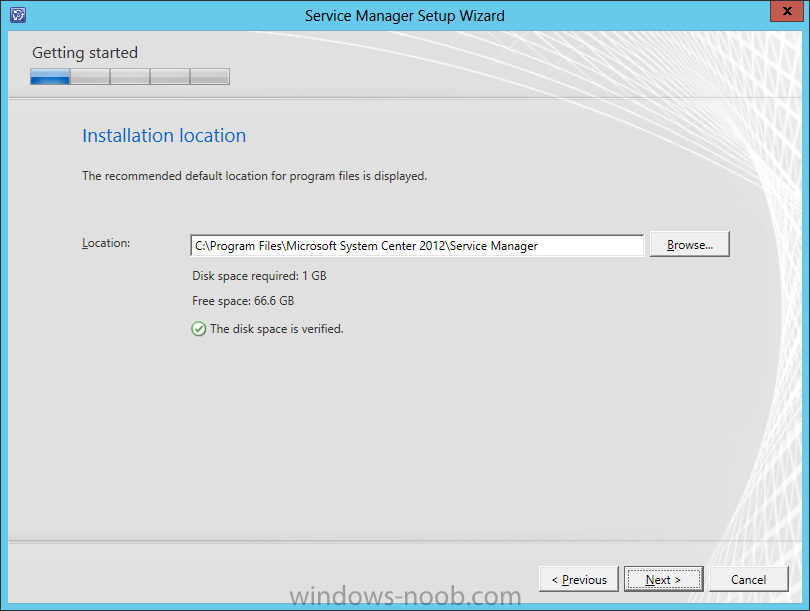
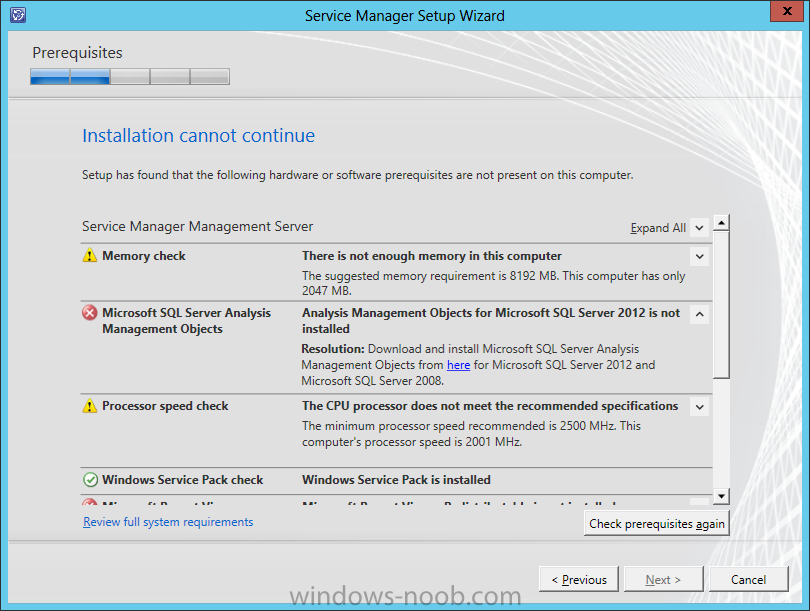
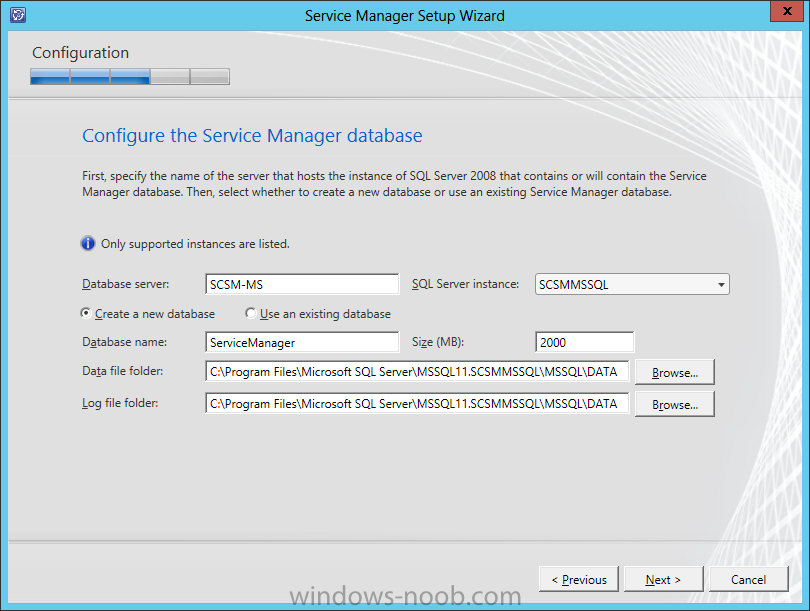
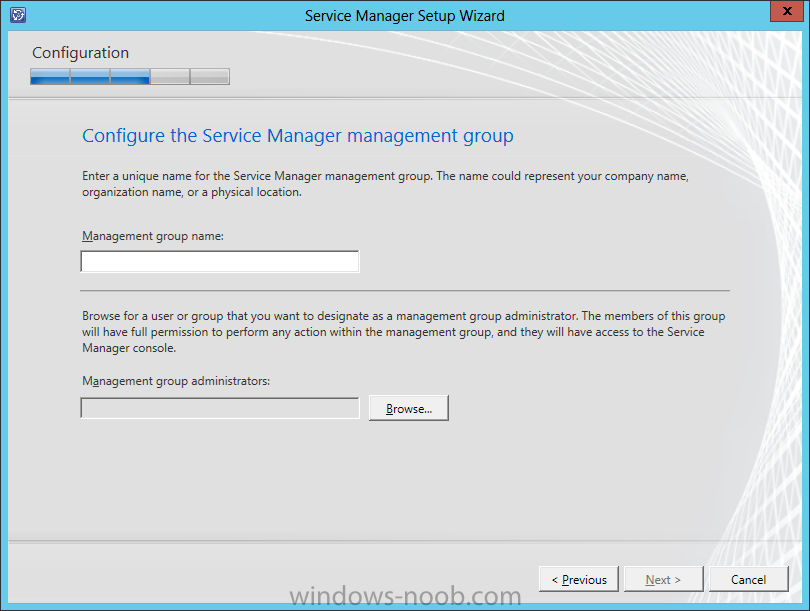
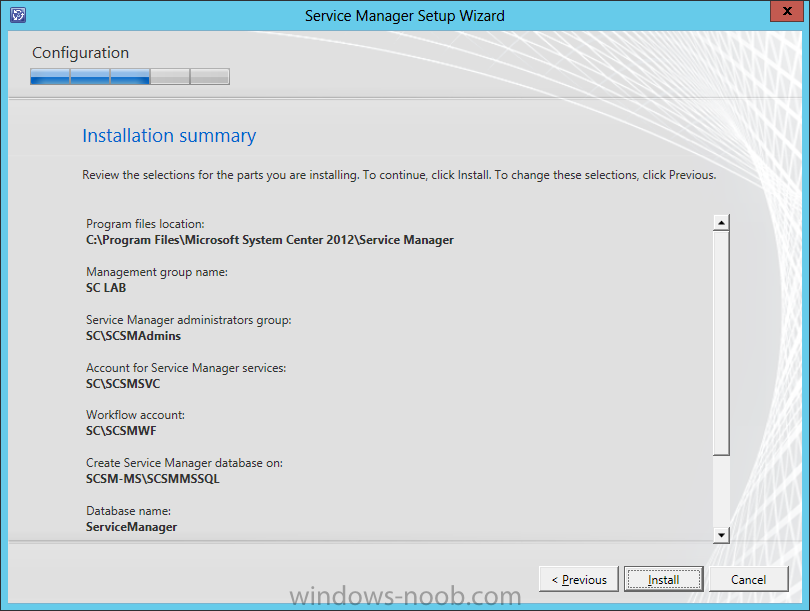
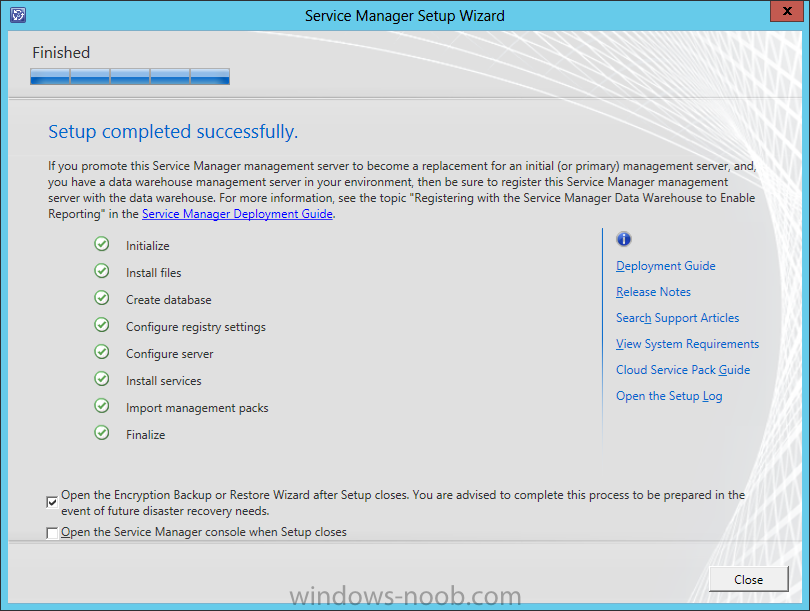
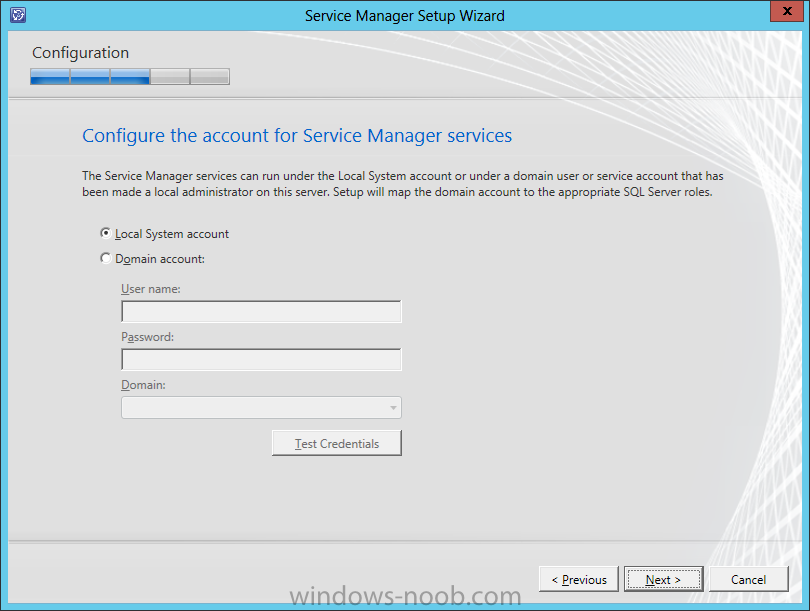
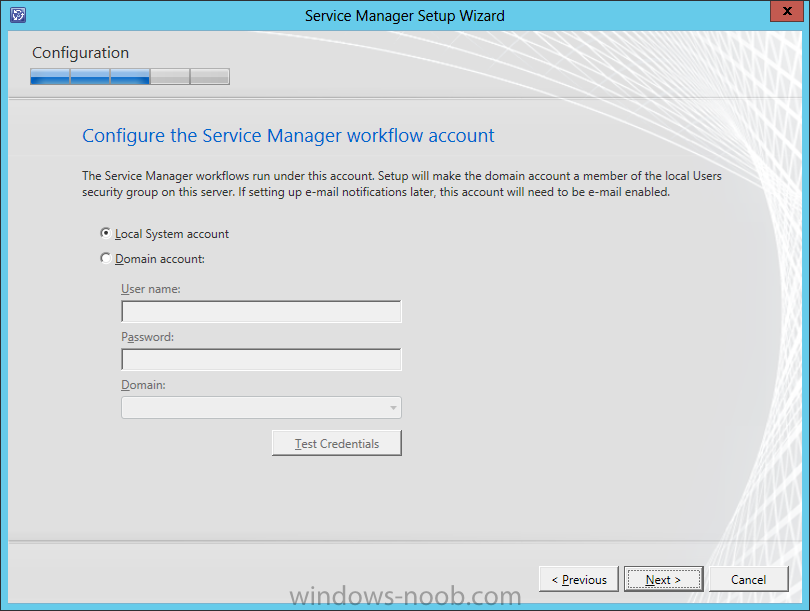
We are now finally ready to install Service Manager. As an FYI, Service Manager requires a minimum of 2 servers. This is the largest deployment (as far as VMs go) even in a lab. This is because we cannot deploy Service Manager on a single server, even in a lab/POC environment. In fact, even Microsoft’s single computer scenario, actually tells you to install it on a physical host with a VM for the warehouse! And that doesn’t even take into account the SharePoint server needed for the self-service portal. So in our lab example, we will have 3 VMs. The first VM will have the Service Manager Management Server, Service Manager Database, and Service Manager Console. The second VM will have the Data Warehouse Management Server and the Data Warehouse Database. The third VM will be for SharePoint and the self-service portal. Install PrerequisitesTo start, before we will actually be able to install Service Manager Management Server, we have to install a few prerequisites. § .NET Framework 3.5 SP1 § Microsoft SQL Server Analysis Management Objects § Microsoft Report Viewer Redistributable § Microsoft SQL Server Native Client Install SCSM-MS (Management Server)Start by either extracting the DVD contents, or mounting the ISO (the TechNet ISO is currently labelled as mu_system_center_2012_service_manager_with_sp1_x64_dvd_1348926). Start by opening your DVD drive, navigating to the corresponding architecture (i.e. x86 or amd64), and run the Setup.exe. On the splash screen click the Service Manager Management Server install link. On the Product Registration screen, enter the applicable information, including reading and accepting the license terms, and click Next. On the Installation Location screen, you can change the install location if you want to, or accept the defaults, then click Next. From my personal experience, I have seen setups in Production environments have a dedicated HDD for the Operating System, and another for middleware. The Prerequisite check will run, and inform you of any issues found. If there are issues detected, resolve them as indicated, and then click the Check Prerequisites Again button. Until everything passes (or if there are only Warnings left), you will not be able to continue with the installation. Once the prereq check passes, you can click Next to continue with the installation. On the Service Manager database screen enter the SQL server name and select the appropriate instance, then click Next. For this lab example, we are installing the Service Manager database on the same server as the Service Manager Management Server. NOTE: You may encounter the following error when you get to the Service Manager Database screen. To understand more about this, see this TechNet article. According to Microsoft: “You can bypass this warning message and continue to install using the SQL_Latin1_General_CP1_CI_AS.” Read the article so that you are aware of why this occurs, etc. This is particularly important if you plan on using Service Manager’s CMDB in connection with System Center Operations Manager (SCOM) and/or System Center Configuration Manager (SCCM). When you encounter this Warning, just click OK. Your Service Manager database screen should look something similar to this. On the Management Group screen, provide a Management Group Name, and also add Group Administrators. It is easier if you create/add an Active Directory Security Group and add it as the Management Group Administrators, so that all you have to do is add users to the Security Group. Then click Next. On the Service Manager Services screen, either accept the default of Local System Account, or choose to provide a Domain Account. NOTE: If you choose to use a Domain Account, the Next button will be disabled until that account is successfully tested (via the Test Credentials button). Make your applicable choice, and then click Next. On the Service Manager Workflow Account screen, either accept the default of Local System Account, or choose to provide a Domain Account. NOTE: If you choose to use a Domain Account, the Next button will be disabled until that account is successfully tested (via the Test Credentials button). Make your applicable choice, and then click Next. On the CEIP screen, you can choose to join the program or not. There may be concerns about sending Production-type data to Microsoft, however, I recommend joining the program as this is how Microsoft improves their software. If no one sent their experience information, then the tools we use would never be improved. Mark your choice and then click Next. The Microsoft Update screen is new to System Center. Make your choice and click Next. Review the information presented on the Summary screen, and click Install. Once the installation in complete, ensure that the ‘Open the Encryption Backup or Restore Wizard after Setup Closes’ checkbox is selected. It is recommended to backup the encryption key as part of your disaster recovery planning. Encryption Key BackupWhen the Encryption Key Backup wizard launches, read the Introduction information and then click Next. On the Backup or Restore screen, select ‘Backup the Encryption Key’ and click Next. On the Provide A Location screen, it is recommended to store the Encryption Key backup in a secure location (i.e. a file server that is regularly backed up). Enter an applicable UNC path, along with a filename, and then click Next. On the Provide A Password screen, provide a password for security purposes (and keep it in a secure location), and click Next. Once the backup is complete, click Finish. That completes the installation of Service Manager’s Management Server. We now need to install the Service Manager Warehouse Server.


-
- 1
-
-
- Service Manager
- System Center 2012
- (and 1 more)
-
Install Active Directory Domain Services Now that we have the VMs created, and the OS installed on both, we need to first install/setup Active Directory (AD). When you log into a new installation of Server 2012, Server Manager will auto launch. From Server Manager, click on Manage, and choose ‘Add Roles and Features’. On the Add Roles and Features Wizard, read the information on the Before You Begin dialog, and then click Next. On the Installation Type screen, select ‘Role-based on feature-based installation’ and then click Next. On the ‘Server Selection’ screen, since we are installed Active Directory on this local system, ensure that it is selected, and click Next. Side note: Windows Server 2012 has a new feature that allows you to remotely install Roles and Features on other systems. On the Server Roles screen, select ‘Active Directory Domain Services’. When you select ‘Active Directory Domain Services’, immediately you will be presented with the following dialog. Click Add Features. On the Features screen, accept what has already been selected by default, and click Next. On the AD DS screen, read the information presented, and click Next. On the Confirmation screen, check the ‘Restart the destination server automatically if required’ checkbox, and then click Install. Note: You are not required to check the ‘restart’ checkbox, however, you’re going to have to restart the system anyways after the installation, so you might as well let the system do it for you. Note: When you check off the ‘Restart the destination server automatically if required’ checkbox, you will immediately be prompted with the following dialog. Click Yes. On the Results screen, click Close. After the system restarts, and Server Manager launches, you will have to promote the server as a domain controller. This is because Active Directory has been installed, but that process does not automatically promote the server. Click on the ‘Promote this server to a domain controller’ link. On the Deployment Configuration screen, select ‘Add a new forest’ since this is the first domain controller in our lab. Then enter a root domain name, and click Next. In my example I am using “SC.LAB” for System Center Lab (since I will be installing all other System Center products in my lab eventually). For the Domain Controller Options, select the appropriate Forest functional level, and Domain functional level. This is more applicable if you already have an existing domain and are adding a new domain controller. But since this is the first domain controller in our new domain, then we’ll use the highest level, that of Windows Server 2012. Also, don’t forget to create the Directory Service Restore Mode password. Then press Next. On the DNS Options screen, you can ignore this warning message and click Next. On the Additional Options screen, click Next. On the Paths screen, normally you would change the location for the database, log files, and SYSVOL, but since we are just in a lab environment, we’ll leave it at the defaults and click Next. On the Review Options scree, review what you have entered/selected, and click Next. The Prerequisites Check screen will check and confirm that everything passes before promoting the system as a domain controller. You will notice in my screenshot, that I have 1 warning because I didn’t set a static IP for the server yet. After installation completes, the system will automatically restart. You will then be presented with the login screen. Something to note here, that because we were originally logged in with a local account, the first time you want to log on using a domain account you will have to type the domain\username; in my example SC\Administrator. When you login, you will then see in the Server Manager, that AD DS is now listed, along with DNS. Now all that you need to do is assign a static IP to your domain controller. To do this, in Server Manager, select Local Server from the panel on the left. From there, click on the Ethernet link labelled ‘IPv4 address assigned by DHCP, IPv6 enabled’. This will cause the Networks Connections explorer to open. From here, right click on the Ethernet network that is displayed. This is in fact the network connection that we configured when we first created the VM. On the Ethernet Properties dialog, select ‘Internet Protocol Version 4 (TCP/IPv4)’ and click the Properties button. Within the Internet Protocol Version 4 (TCP/IPv4) Properties dialog, enter a static IP, gateway, and DNS that is applicable to your network. Once all the items have been entered, click OK. You will also have to click Close on the Ethernet Properties dialog as well. Congratulations, you now have a domain setup in your lab environment. Add Systems to Your Domain Now that you have your domain setup, you need to add your other VMs to the domain before being able to install Service Manager. Log into the system you want to add to the domain. To do this in Server 2012, launch Server Manager, and click on Local Server. Then click on the computer name. This will launch the System Properties dialog. From this dialog, click the Change button. From this dialog, select the Domain option for ‘Member of’, and enter the domain name you want to join and press OK. After pressing OK, you are immediately presented with a Windows Security dialog, in which you need to enter the credentials of an account that has Domain Admin rights. Enter the credentials and click OK. Once the system is successfully joined to the domain, you will receive the following Welcome message. Press OK. After you press OK to the Welcome message, you will receive a second prompt, indicating that you need to restart the system for the changes to take effect. You will be back on the System Properties dialog. Press Close. When you press Close, you will receive yet another prompt about restarting the system. You can choose to Restart Now or Restart Later, but you won’t be able to install Service Manager without the VMs being added to the domain. After the system restarts, you will then be presented with the login screen. Something to note here, that because we were originally logged in with a local account, the first time you want to log on using a domain account you will have to type the domain\username; in my example SC\Administrator. Now we have our Active Directory server setup and ready, and the VMs we will be installing Service Manager on are joined to the domain.
-
Install the Operating System Now that we have created the VMs for our lab, we can install the Operating System (OS). Start by connecting to one of the VMs, either by double clicking on the VM in Hyper-V Manager, right click the VM and choose Connect, or click on Connect from the Action pane/menu. When you have the VM connection up, and an ISO mounted, power the VM on. On the Windows Setup screen, select the Language, Time/Currency Format, and Keyboard Method appropriate, and click Next. All you have to do now is click Install Now. Next you have to choose the Operating System and version you want to install. In our lab example, I will choose Windows Server 2012 Standard (Server with a GUI). Make your selection and then click Next. You will have to accept the license terms, and then click Next. For the Installation Type, since we don’t already have an OS installed, we will choose the ‘Custom: Install Windows only (advanced)’ option. Now select the hard drive that you want to install the OS to. Since we only created one hard drive when setting up the VM, we only have one to choose from. Select it, and click Next. Now all you have to do is wait for the installation to finish. Once the installation is complete, you will be prompted to enter a password for the local administrator account. This is different from a domain-based local administrator account. Enter a password and click Finish. After some final quick configuration, you will then be presented with the login screen. Now repeat these steps for the other VMs in the lab. NOTE: After you install an OS, you will need to rename the computer within the OS. To do this in Server 2012, launch Server Manager, and click on Local Server. Then click on the computer name. This will launch the System Properties dialog. From this dialog, click the Change button. From this dialog, enter the name you want to call the computer. Press OK after entering the name. You will encounter the following prompt. Click OK. Then click Close on the System Properties dialog. You can choose to either Restart Now or Restart Later, but the name change will not take effect until you do so.
-
Introduction: I use Hyper-V in my LAB and that's what all these virtual machines will be running on. In my lab, I have Windows Server 2012 Datacenter installed as the server OS on the host machine. All other virtual machines will be running Windows Server 2012 Standard edition, with the graphical user interface (GUI). My hardware consists of the following: Intel Xeon E5-2620 Asus P90X79 WS 64 GB G.Skill Ripjaws Z Series 2 x 256 GB / 1 x 512 GB Samsung 840 Pro Series SSD High Level Plan Here is a high level of what we are going to complete in this initial part of the series. Create the Lab Environment Install the Operating System Install Active Directory Domain Services Install SQL Server Install System Center Service Manager So now let’s start with the first part, system requirements and creating the lab environment. System Requirements Note: The following TechNet articles describe the Hardware and Software requirements for deploying Service Manager. This is the largest deployment (as far as VMs go) even in a lab. This is because we cannot deploy Service Manager on a single server, even in a lab/POC environment. In fact, even Microsoft’s single computer scenario, actually tells you to install it on a physical host with a VM for the warehouse! And that doesn’t even take into account the SharePoint server needed for the self-service portal. So in our lab example, we will have 3 VMs. The first VM will have the Service Manager Management Server, Service Manager Database, and Service Manager Console. The second VM will have the Data Warehouse Management Server and the Data Warehouse Database. The third VM will be for SharePoint and the self-service portal. Service Manager Management Server 4-Core 2.66 GHz CPU 8 GB of RAM 10 GB of available disk space ADO.NET Data Services Update for .NET Framework 3.5 SP1 for Windows Server 2008 R2 SQL Server 2008 R2 Native Client or SQL Server 2012 Native client Microsoft Report Viewer Redistributable Service Manager Database 8-core 2.66 gigahertz (GHz) CPU 8 gigabytes (GB) of RAM for 20,000 users, 32 GB of RAM for 50,000 users 80 GB of available disk space RAID Level 1 or Level 10 drive SQL Server Reporting Services (SSRS) The SQL Server and Analysis Services collation settings must be the same for the computers hosting the Service Manager database, data warehouse database, analysis services database, and Reporting Services database. For Service Manager in System Center 2012 SP1 and and System Center 2012 R2 Service Manager: SQL Server 2012 Analysis Management Objects, which are part of the SQL Server 2012 Feature Pack, are required regardless of the SQL Server version that you use Service Manager Console 2-core 2.0 GHz CPU 4 GB of RAM 10 GB of available disk space Microsoft Report Viewer Redistributable You must have Microsoft Excel 2007 or later installed in order view OLAP data cubes on the computer running the Service Manager console. ADO.NET Data Services Update for .NET Framework 3.5 SP1 for Windows Server 2008 R2 For Service Manager in System Center 2012 SP1 and System Center 2012 R2 Service Manager: SQL Server 2012 Analysis Management Objects are required regardless of the SQL Server version that you use Data Warehouse Management Server 4-Core 2.66 GHz CPU 8 GB of RAM When a data warehouse management group and SQL Server Analysis Services are hosted on a single server, it should contain at least 16 GB RAM. 10 GB of available disk space SQL Server 2008 R2 Native Client or SQL Server 2012 Native client Data Warehouse Databases 8-core 2.66 GHz CPU 8 GB of RAM for 20,000 users, 32 GB of RAM for 50,000 users 400 GB of available disk space RAID Level 1 or Level (1+0) drive SQL Server Reporting Services (SSRS) The SQL Server and Analysis Services collation settings must be the same for the computers hosting the Service Manager database, data warehouse database, analysis services database, and Reporting Services database. For Service Manager in System Center 2012 SP1 and and System Center 2012 R2 Service Manager: SQL Server 2012 Analysis Management Objects, which are part of the SQL Server 2012 Feature Pack, are required regardless of the SQL Server version that you use Self-Service Portal: Web Content Server with SharePoint Web Parts 8-Core 2.66 GHz CPU 8-core, 64-bit CPU for medium deployments 16 GB of RAM for 20,000 users, 32 GB of RAM for 50,000 users 80 GB of available hard disk space Microsoft Internet Information Services (IIS) 7 with IIS 6 metabase compatibility A Secure Sockets Layer (SSL) certificate can be used on the IIS server that hosts the Self-Service Portal For Service Manager in System Center 2012 SP1 and System Center 2012 R2 Service Manager: SQL Server 2012 Analysis Management Objects are required regardless of the SQL Server version that you use Create the Lab Environment: Hyper-V Configuration As mentioned, my environment uses Hyper-V. So, we’re going to start by configuring Hyper-V for our needs, and creating the Virtual Machines (VMs) required for our lab. The first thing we need to do is setup a Virtual Switch for the VMs to connect through. Launch Server Manager, click on Tools, and select Hyper-V Manager. When Hyper-V loads, it will have nothing in it. Even if we were to create a VM, it wouldn’t have a network connection to use. So we’ll start with creating a Virtual Switch. As you can from my screenshot, I have 2 LAN ports on my host. One of them has a connection to my home network and the Internet. In the Hyper-V Manager, click the Virtual Switch Manager from the Actions pane. Now, click on the Create Virtual Switch button. From here, you now need to configure the virtual switch that your VMs will use. Give it a name to clearly identify it (in my case I called it ‘External Network’), and choose the connection type. For more information about virtual networks, see the following TechNet article: http://technet.microsoft.com/en-us/library/cc816585(v=ws.10).aspx. Here is an excerpt from the article: External virtual networks. Use this type when you want to provide virtual machines with access to a physical network to communicate with externally located servers and clients. This type of virtual network also allows virtual machines on the same virtualization server to communicate with each other. This type of network may also be available for use by the management operating system, depending on how you configure the networking. (The management operating system runs the Hyper-V role.) For more information, see “A closer look at external virtual networks” later in this topic. Internal virtual networks. Use this type when you want to allow communication between virtual machines on the same virtualization server and between virtual machines and the management operating system. This type of virtual network is commonly used to build a test environment in which you need to connect to the virtual machines from the management operating system. An internal virtual network is not bound to a physical network adapter. As a result, an internal virtual network is isolated from all external network traffic. Private virtual networks. Use this type when you want to allow communication only between virtual machines on the same virtualization server. A private virtual network is not bound to a physical network adapter. A private virtual network is isolated from all external network traffic on the virtualization server, as well any network traffic between the management operating system and the external network. This type of network is useful when you need to create an isolated networking environment, such as an isolated test domain. For our demonstration, we are going to use an External Network so that the VMs can communicate with the Host system. Make all the appropriate selections and so forth, and then press OK. You may encounter the following warning message. This is because we are remotely connecting to the Host machine using the same network connection that we are about to setup as a Virtual Switch (hence selecting the ‘Allow management operating system to share this network adapter’ checkbox). Press ‘Yes’ to the dialog. Now that we have the virtual switch setup, we can start creating VMs for our lab. Create the Virtual Machines Let’s now create the VM’s we will need for the lab, specifically one for Active Directory, and 3 for Service Manager (since we can’t install all roles on the same server). In Hyper-V Manager, from the Actions pane, click on New and choose Virtual Machine. On the New Virtual Machine wizard beginning screen, click read the information presented and then click Next. Enter a name for the VM. Note that this is NOT the name the VM will have within the Operating System (unless you name it the same), but rather, used as an identifier in Hyper-V Manager. After you have entered a name, click Next. Now assign the amount of memory you want your VM to have, and then press Next. This is the screen where you connect your VM to the network that we created, then press Next. This is the screen where you configure how large a hard drive the VM will have. Make the appropriate customizations and click Next. For the Installation Options, choose if you will install an OS later, or if you want to use an ISO, then click Next. On the Summary screen, review your selections and entries, and click Finish. Once the VM is created, it will appear in the Hyper-V Manager. If you want to configure further settings, like the number of CPUs and mounting an OS ISO, right click on the VM and choose Settings or click on Settings from the Actions pane. Repeat these steps for each VM you need to create, in our case one for Active Directory and 3 for Service Manager. Here are the settings I have used for each of the VM’s: Active Directory: Virtual Machine Name: AD Memory: 2048 MBNOTE: Active Directory doesn’t need 2 GB of RAM, it will run fine with 512 MB. I just increased the RAM so that the OS would install/respond faster during setup. CPUs: 2 OS: Windows Server 2012 SCSM Management Server: Virtual Machine Name: SCSM-MS Memory: 8192 MBNOTE: You may need to increase the amount of RAM this VM has, depending on performance. CPUs: 4 HDD: 80 GB OS: Windows Server 2012 SCSM Warehouse Server: Virtual Machine Name: SCSM-WS Memory: 8192 MBNOTE: You may need to increase the amount of RAM this VM has, depending on performance. CPUs: 4 HDD: 80 GB OS: Windows Server 2012 SCSM SharePoint Server: Virtual Machine Name: SCSM-SP Memory: 8192 MBNOTE: You may need to increase the amount of RAM this VM has, depending on performance. CPUs: 4 HDD: 80 GB OS: Windows Server 2012
-
Hi, I am on a critical situation in SCCM 2007 r3 , some servies are not working properly. I am attach herewith a screen shot..