Search the Community
Showing results for tags 'conditional access'.
Found 4 results
-
Are you planning to deploy Microsoft Intune and looking for straightforward technical guidance to help you accelerate this effort? Please join us as we share our deployment experience working with customers from all over the world, covering Intune pilot planning, deployment and management. At the end of this session, you will have a solid foundation to deliver a successful Intune pilot deployment in your organization. The above is a session I did with Peter Daalmans @ Microsoft Ignite on Friday 29th of September 2017, please check it out especially if you are interested in Microsoft Intune. cheers niall
-
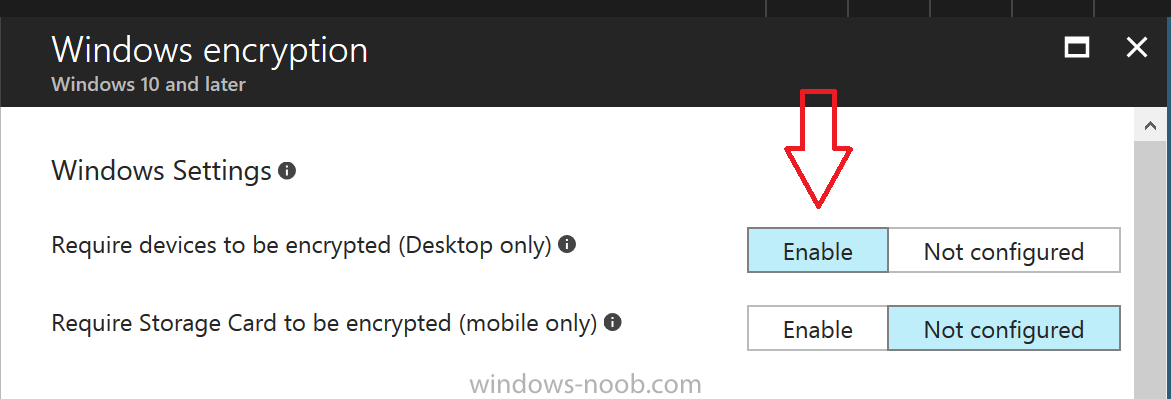
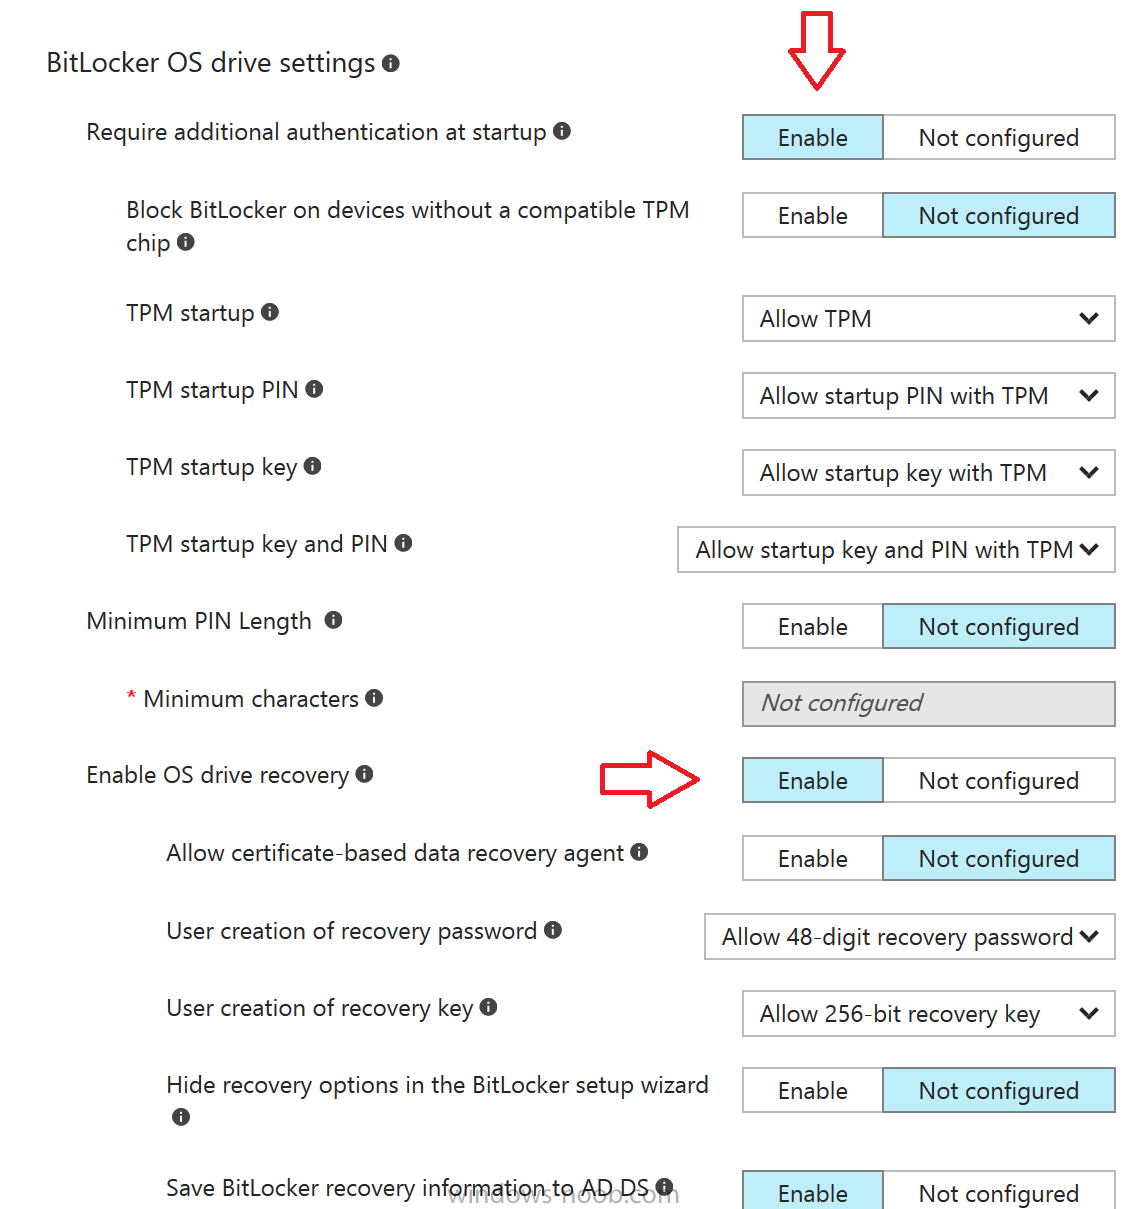
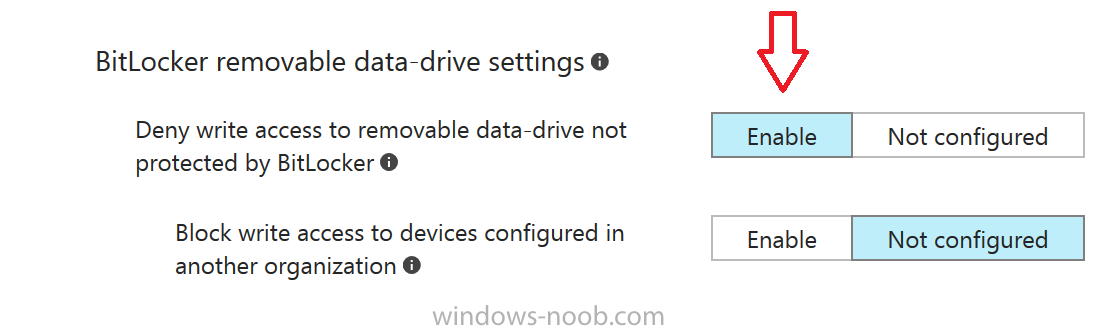
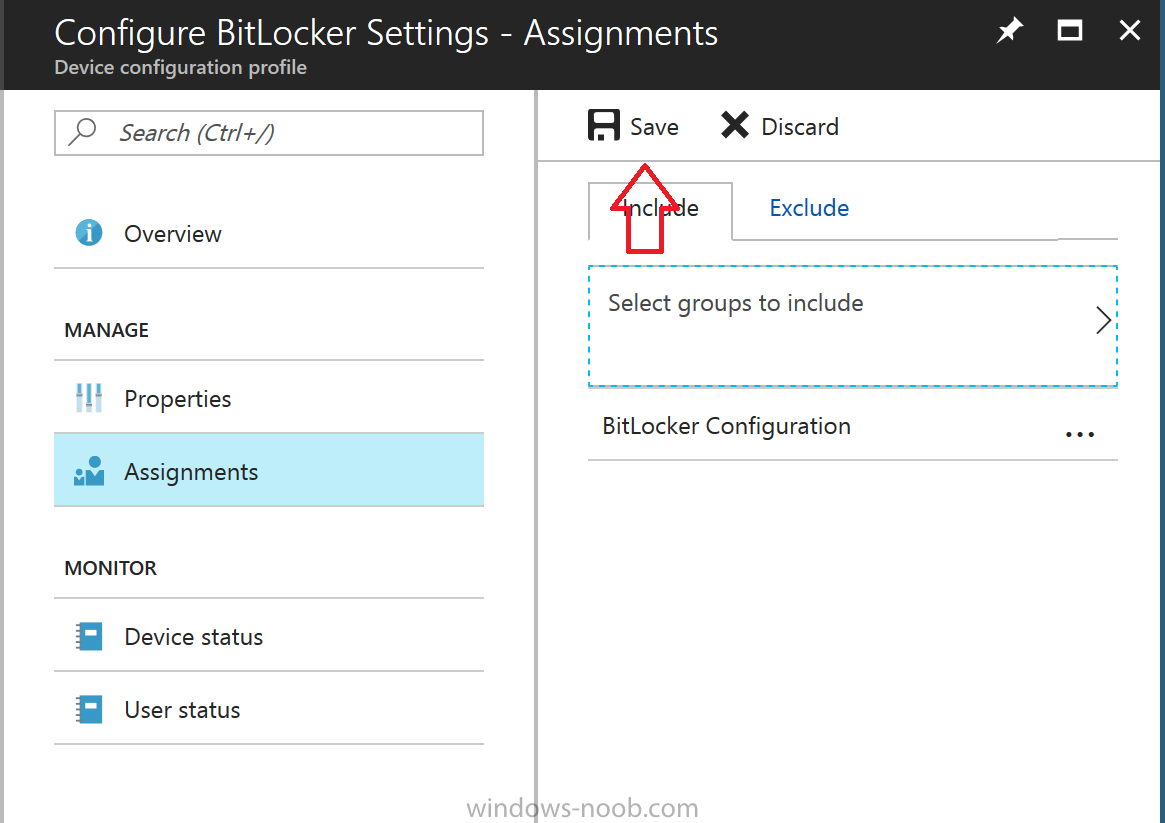
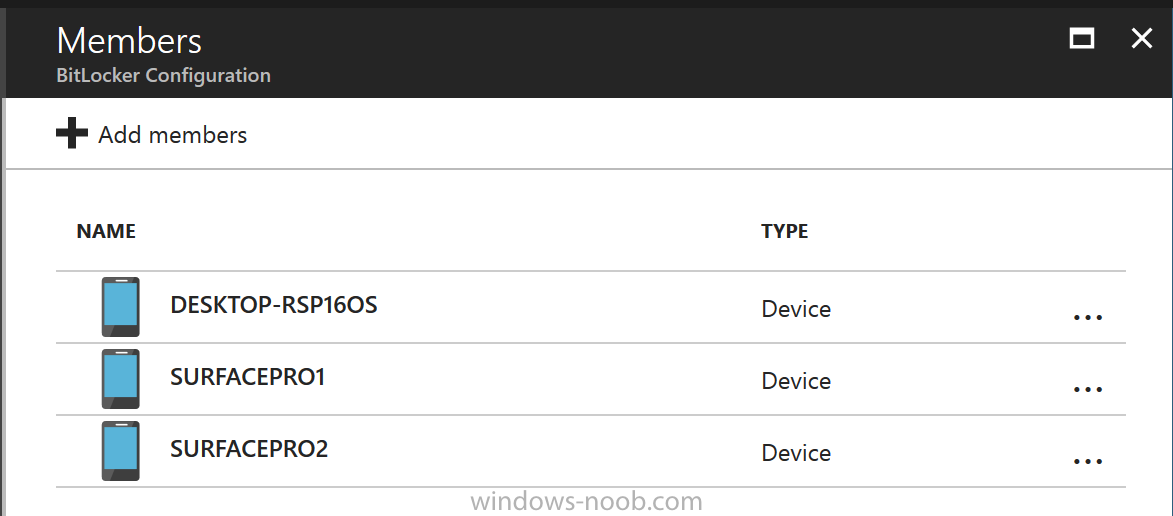
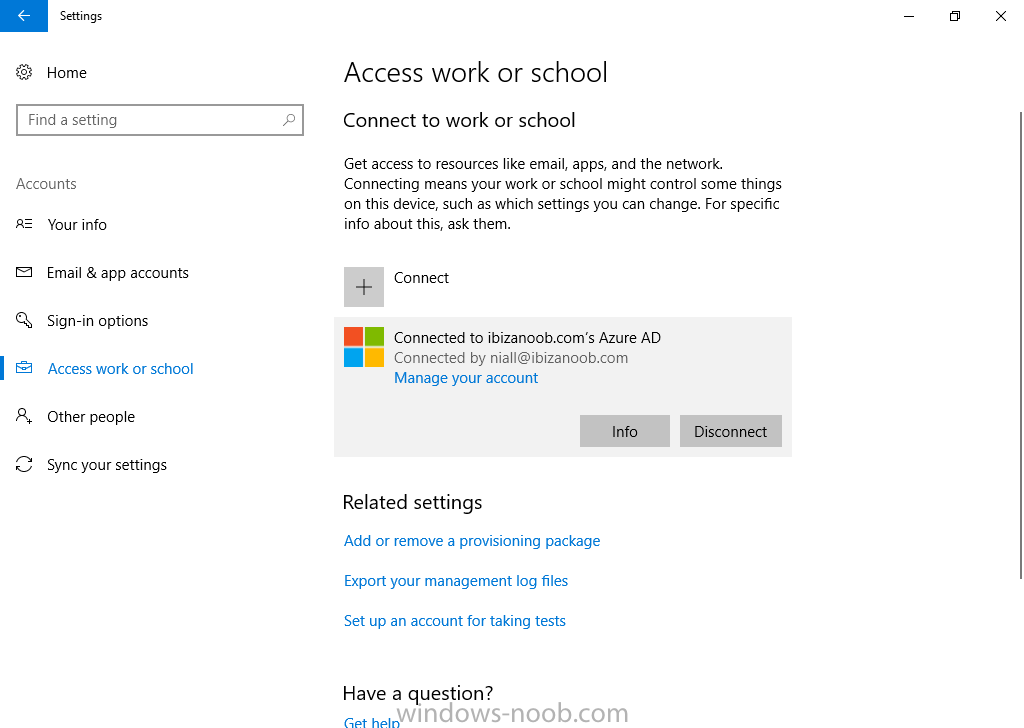
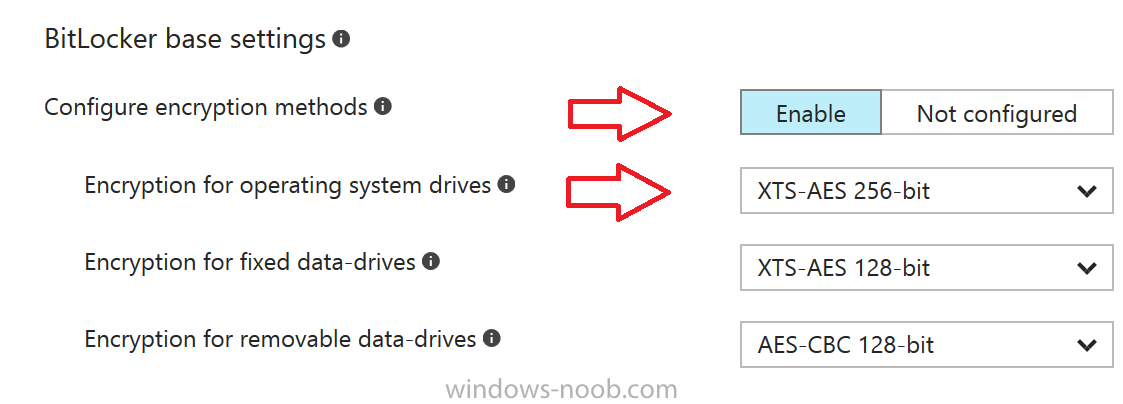
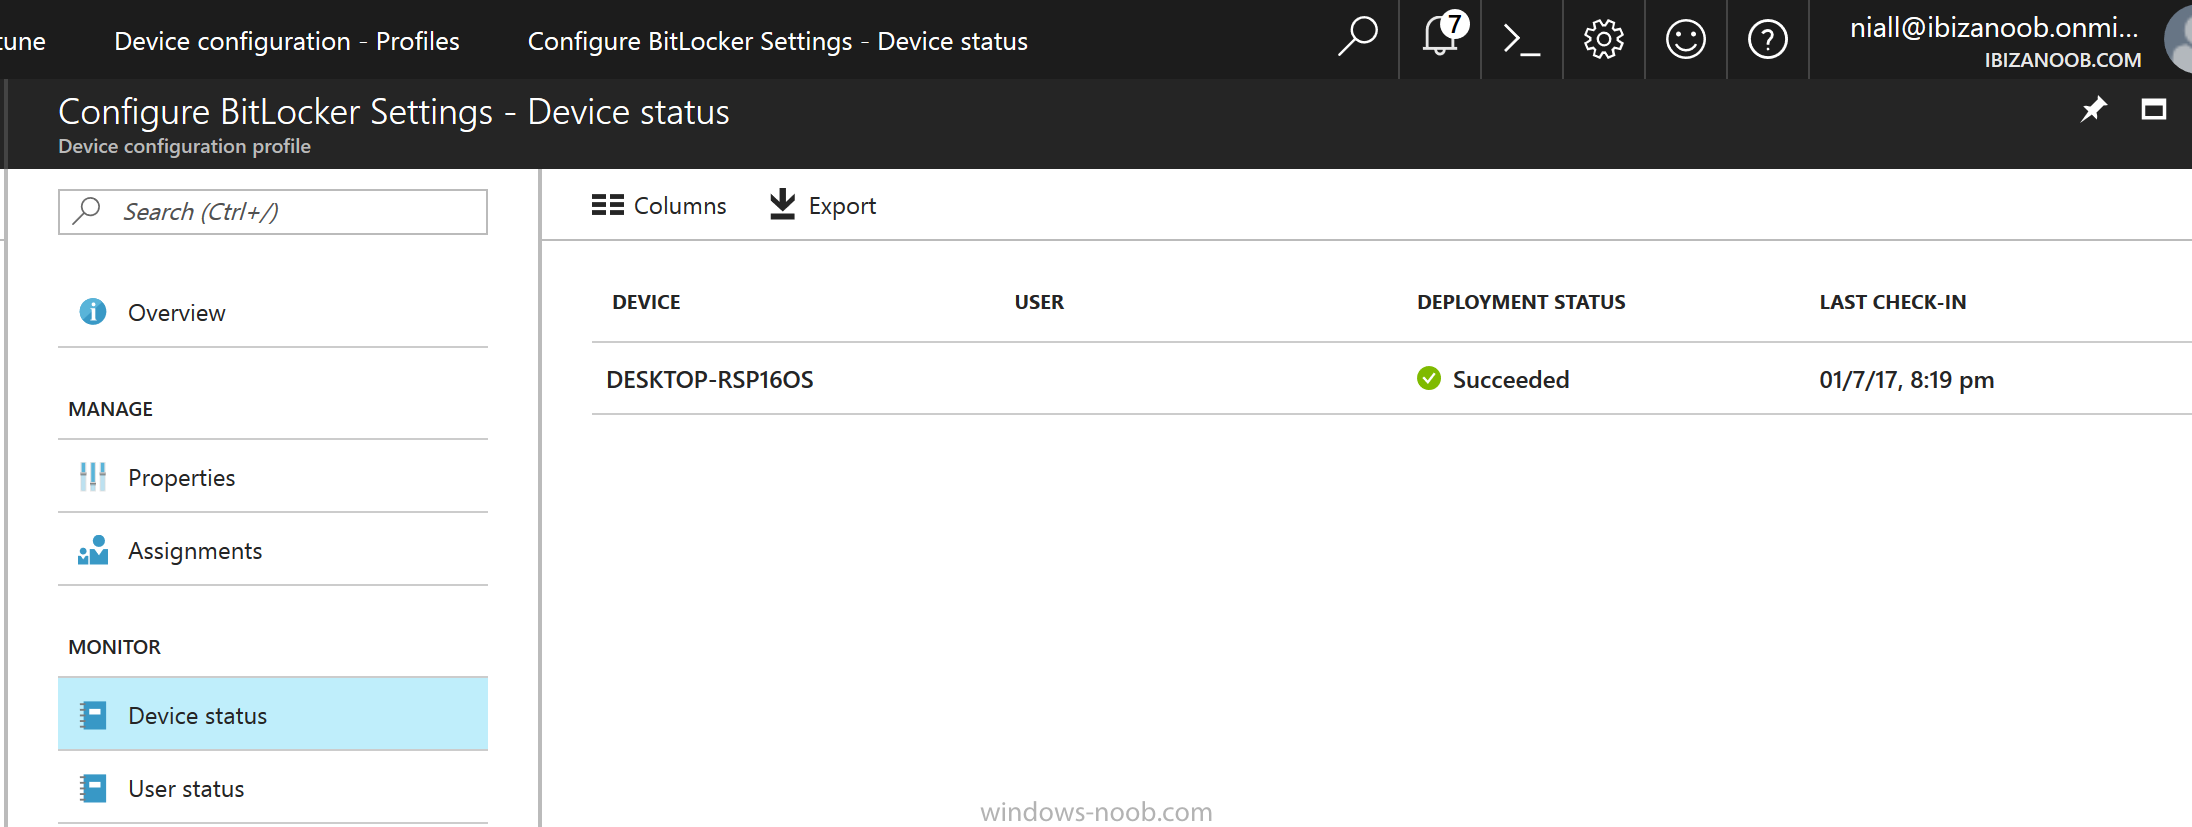
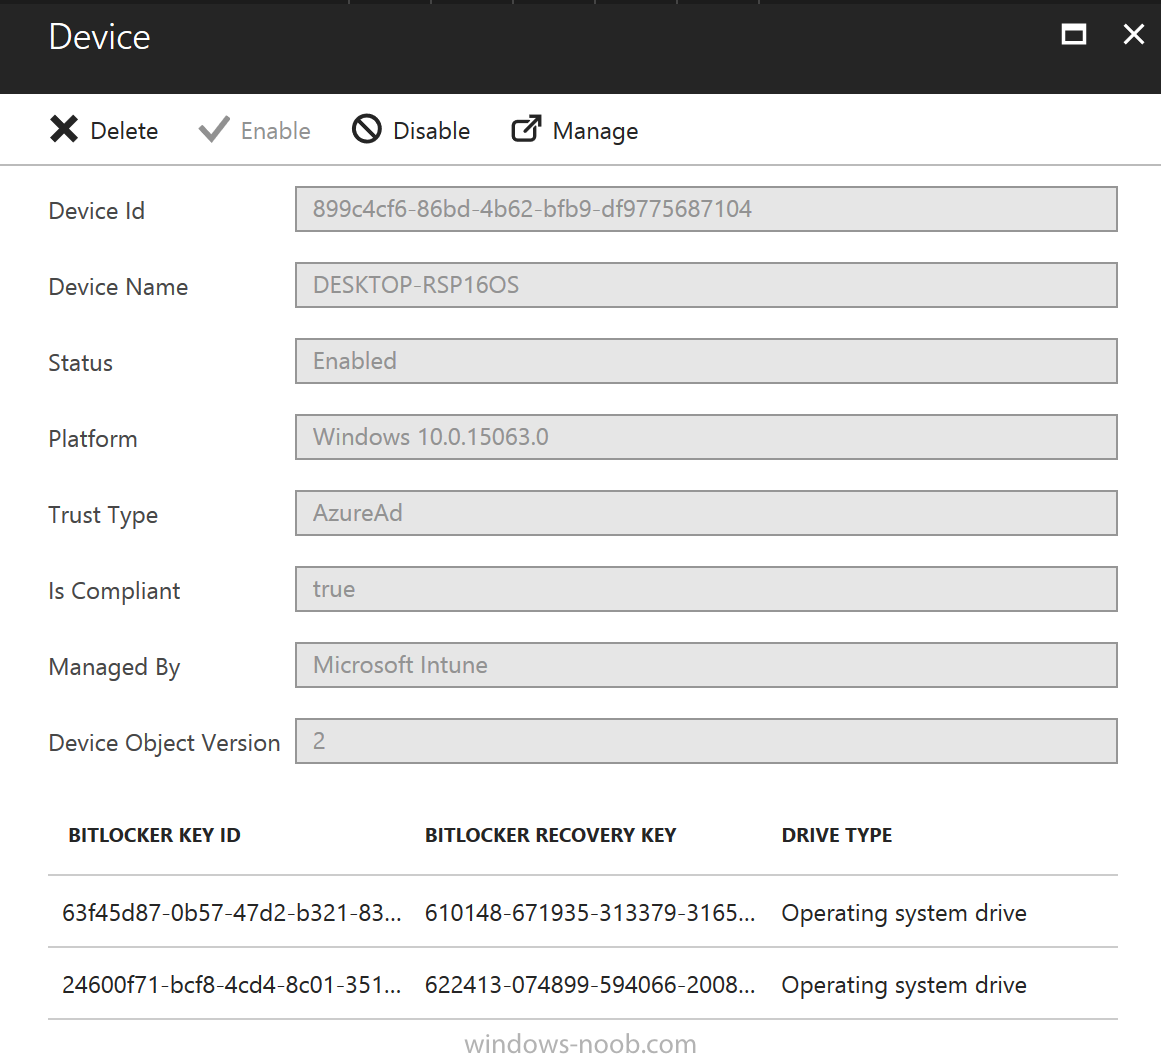
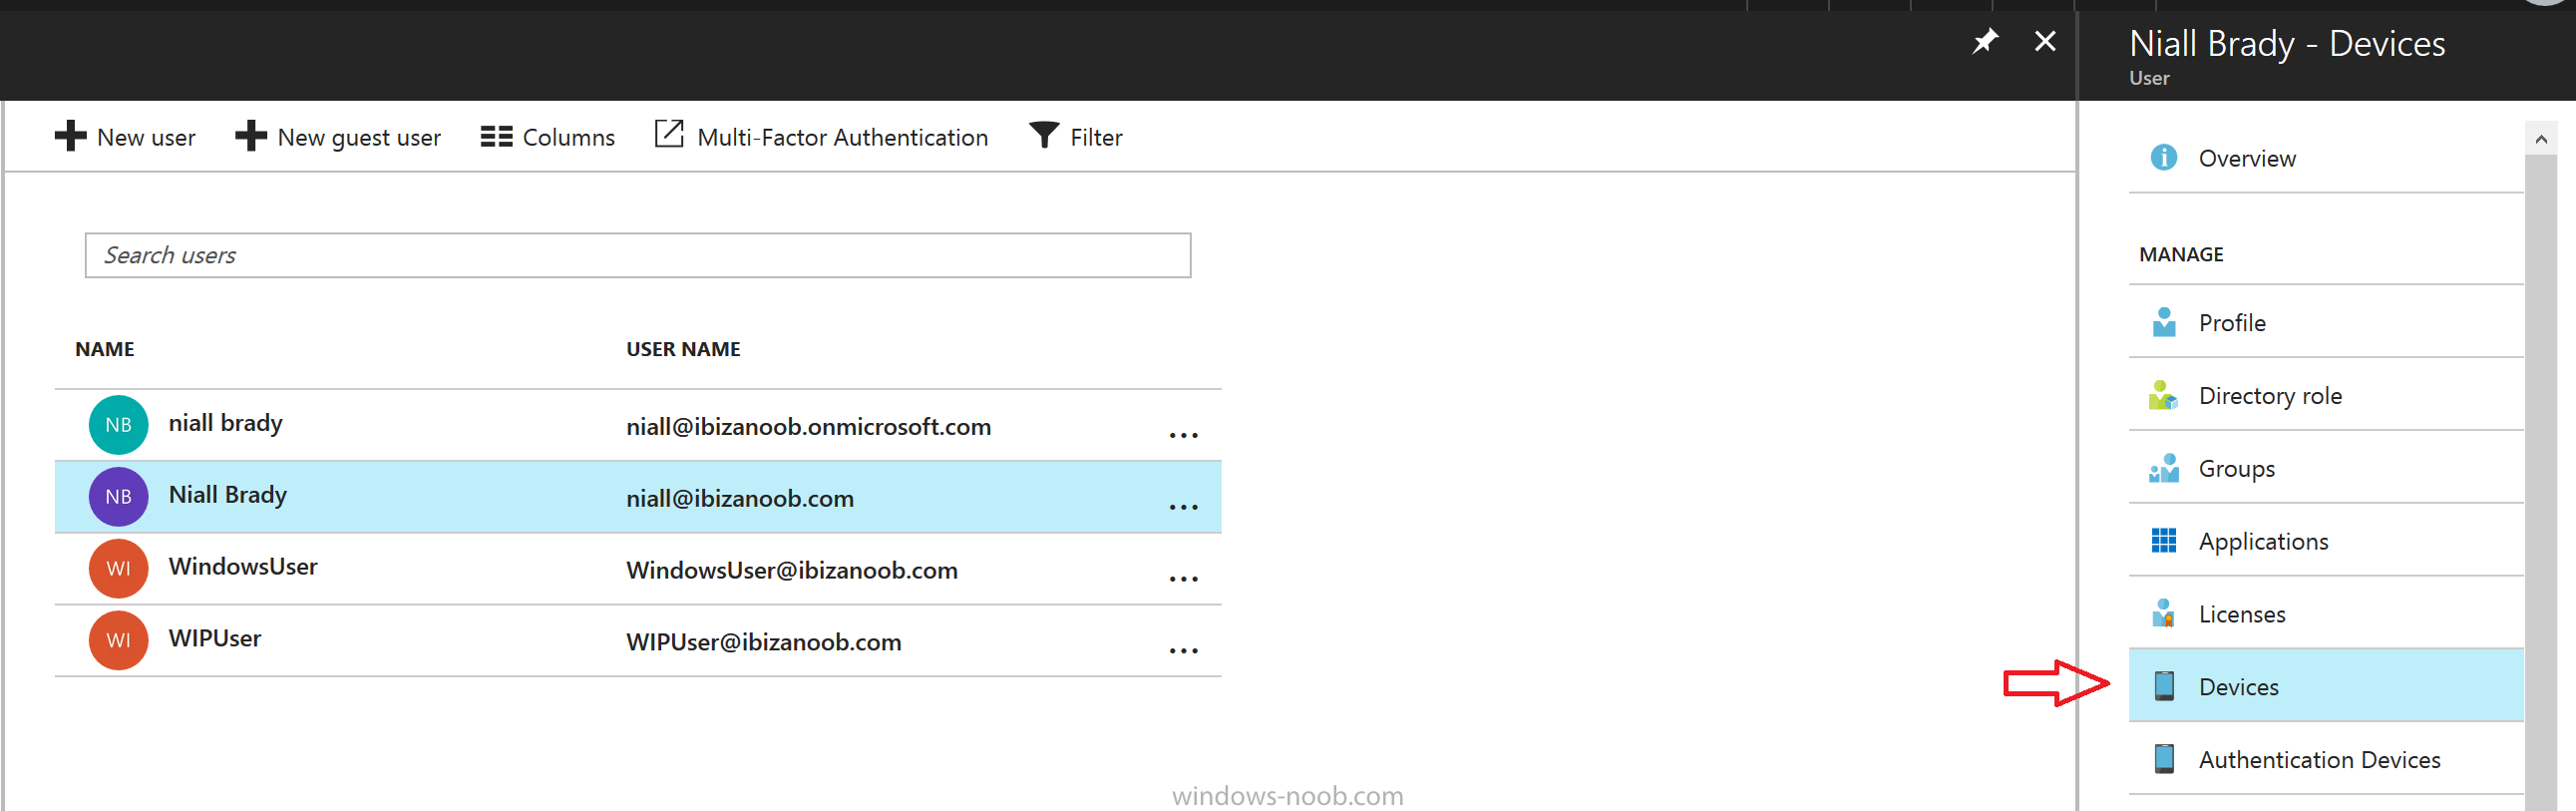
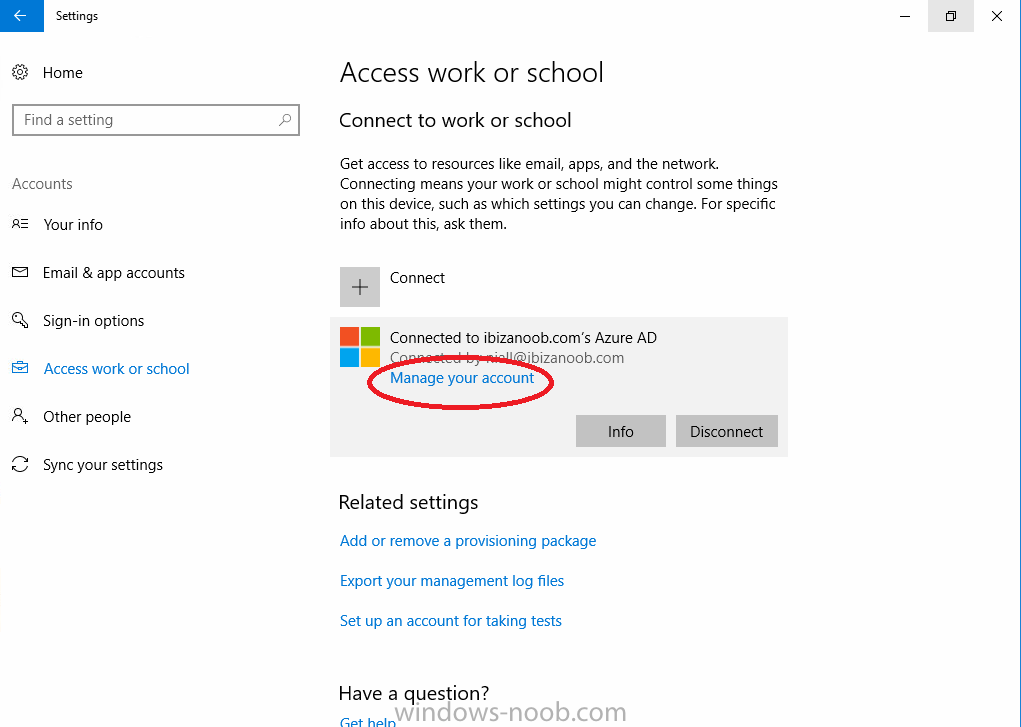
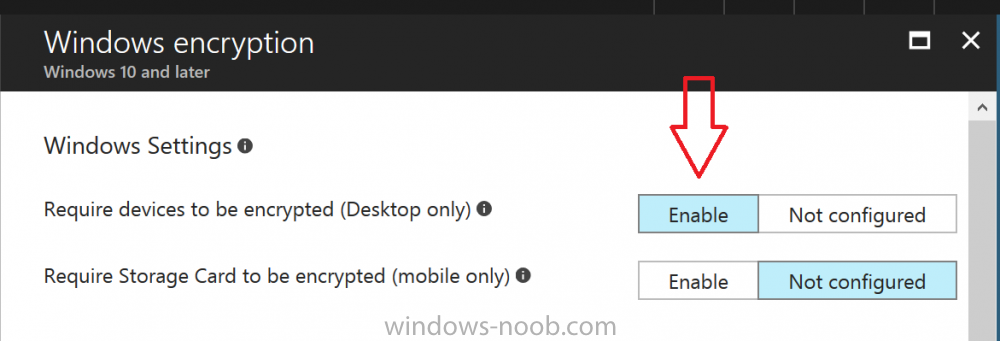
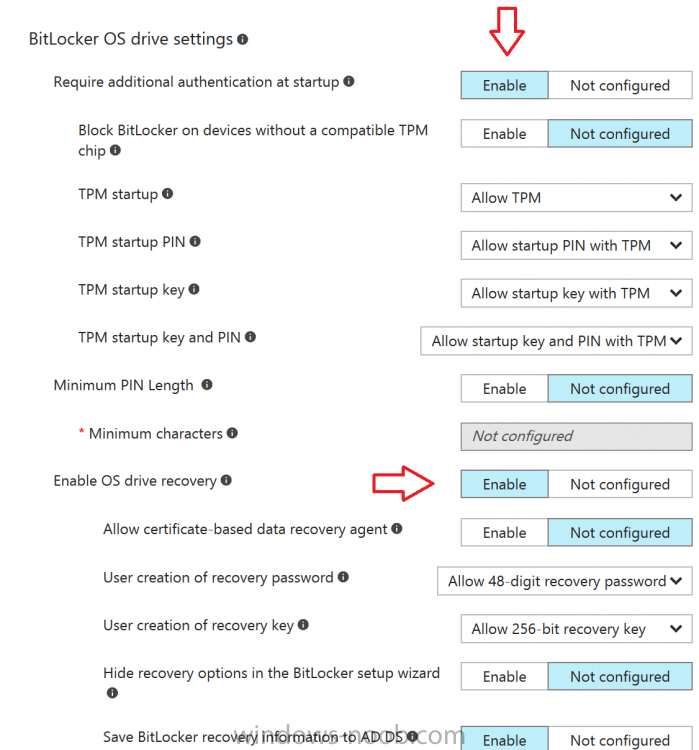
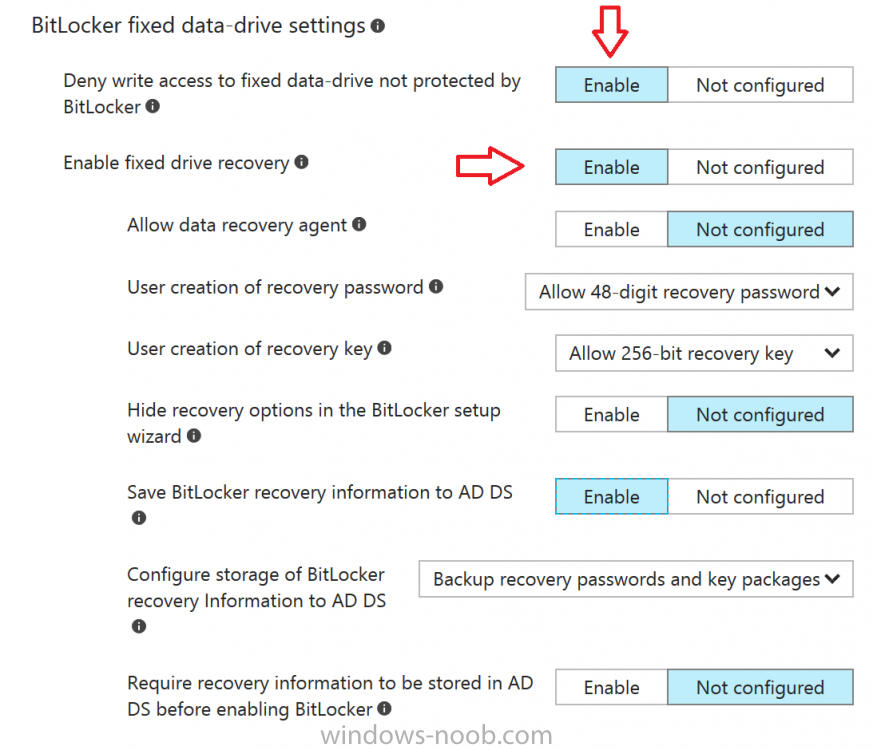
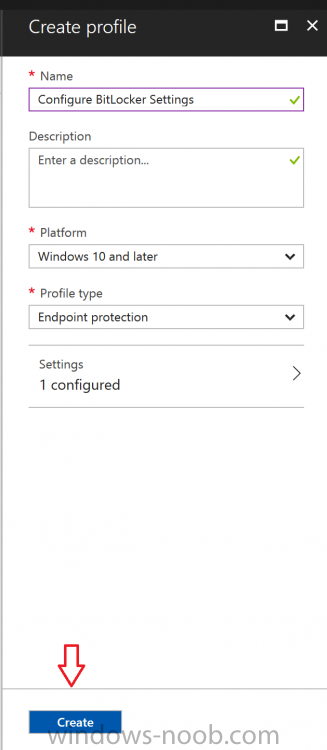
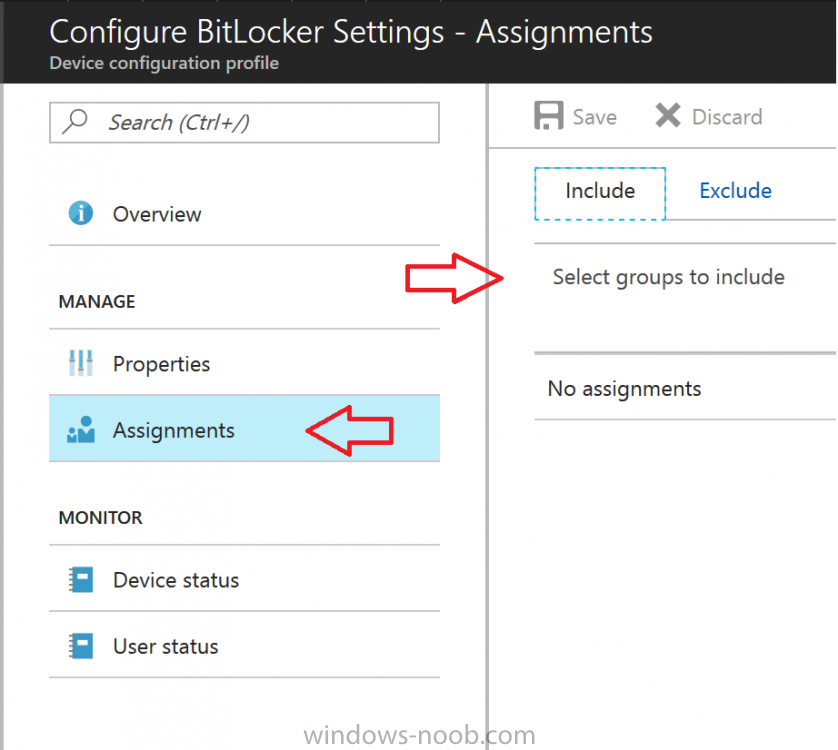
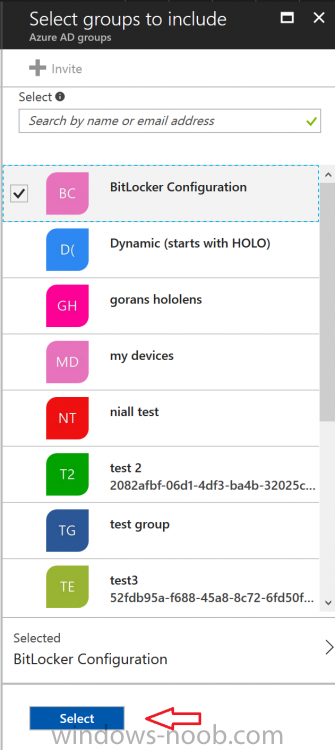
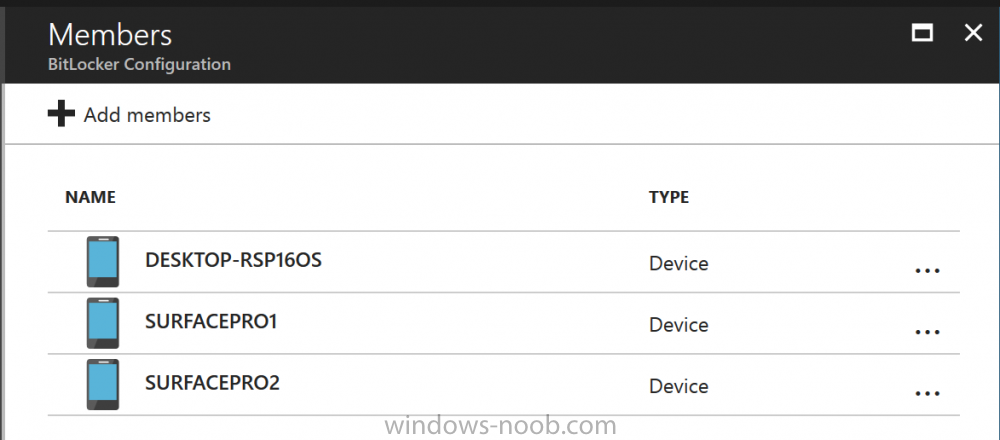
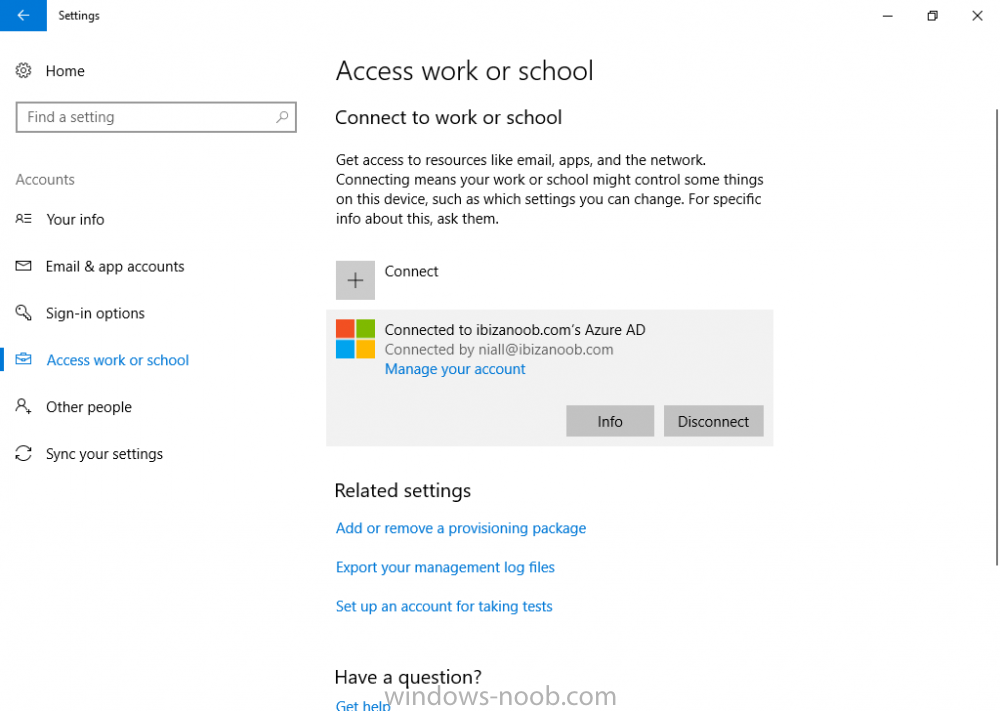
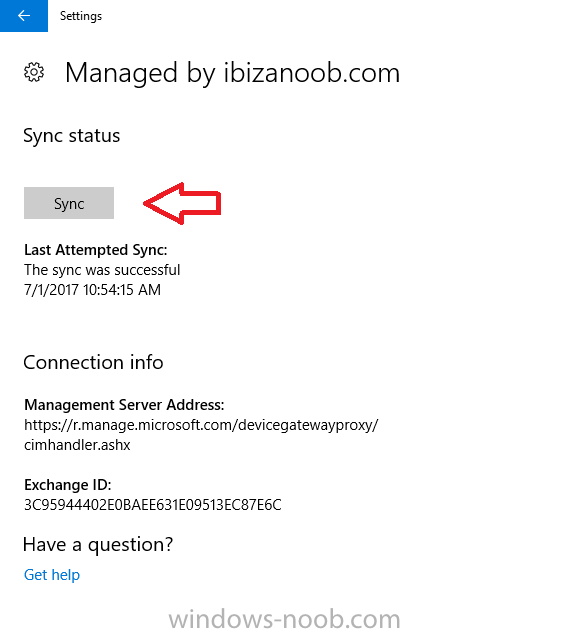
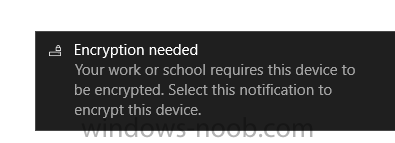
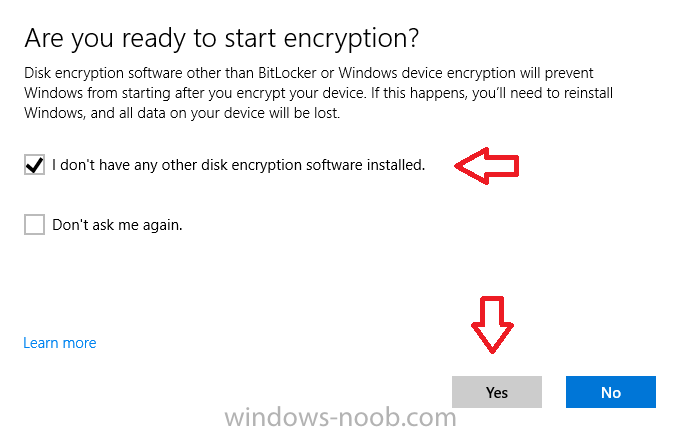
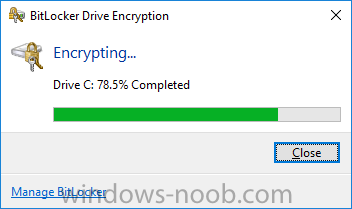
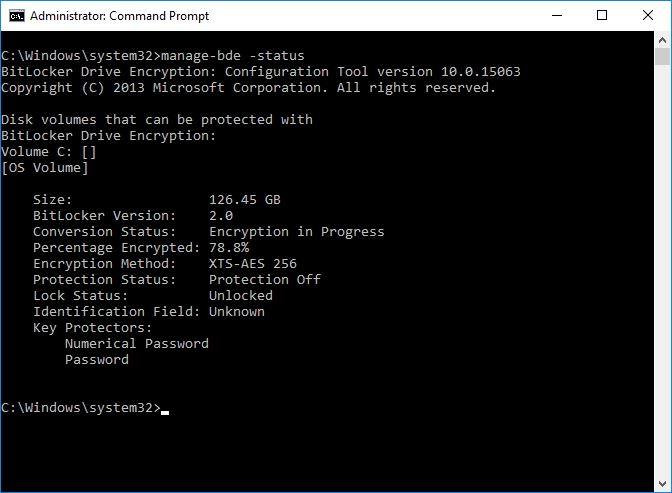
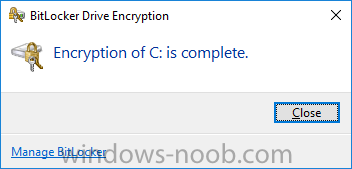
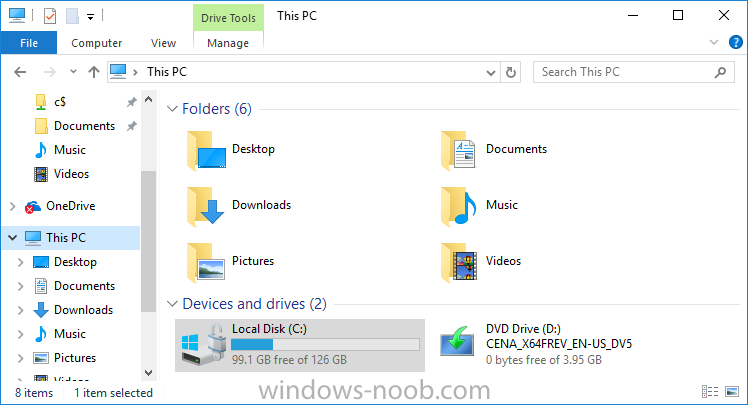
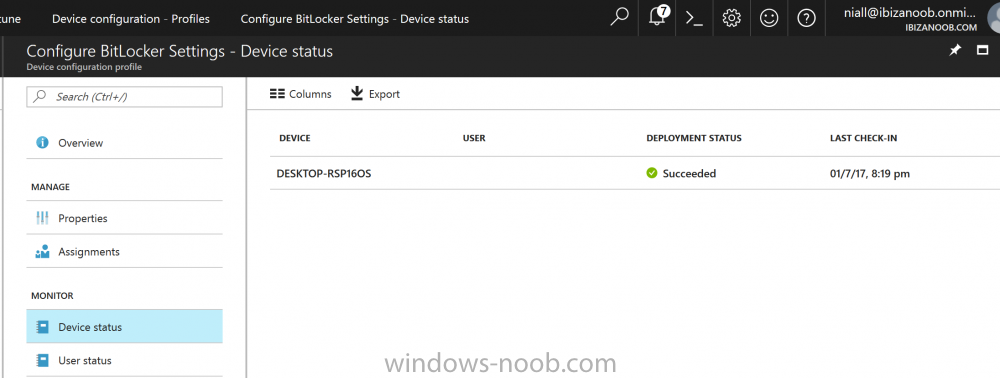
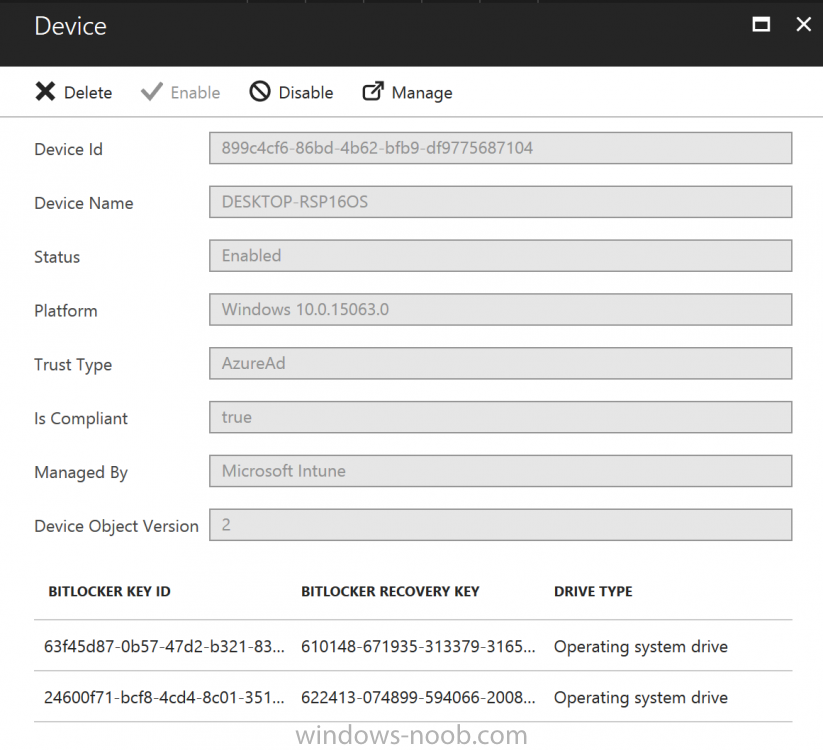
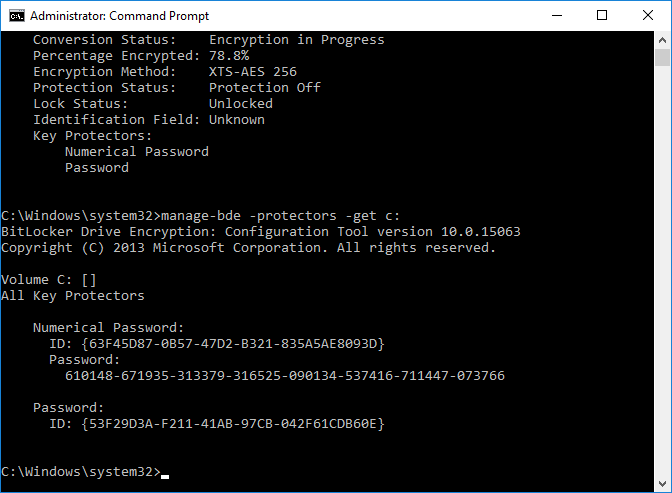
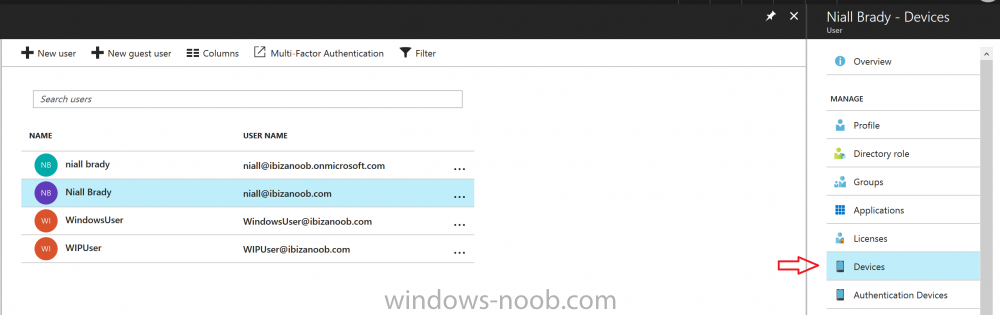
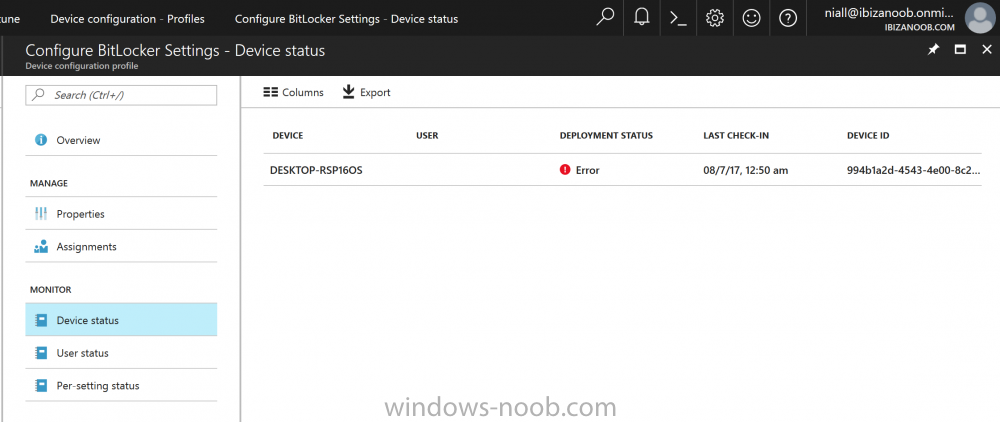
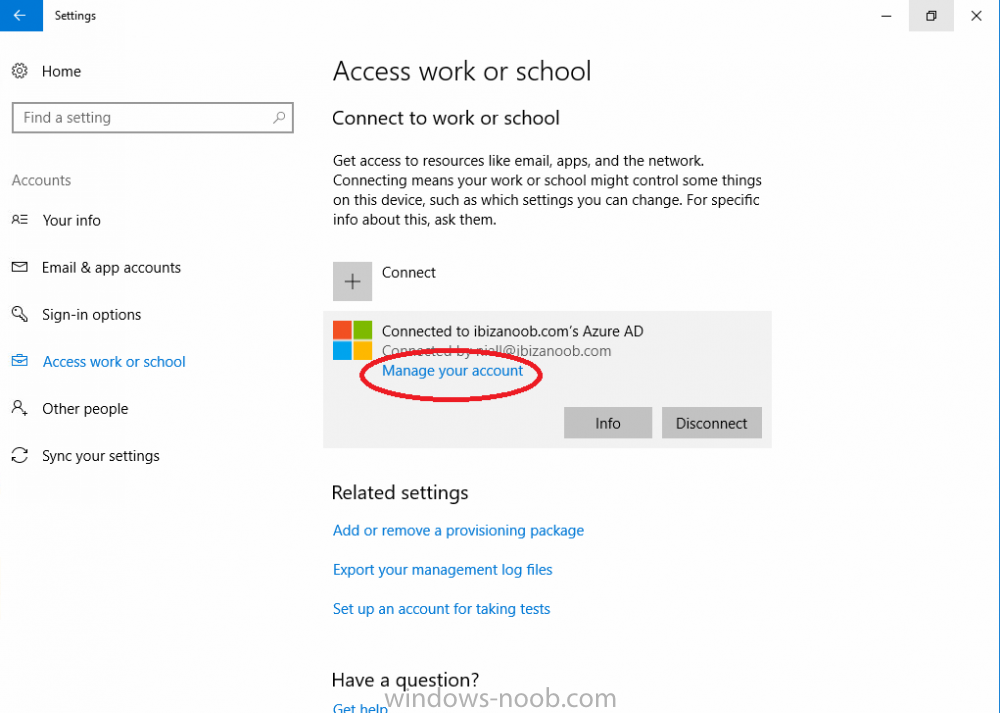
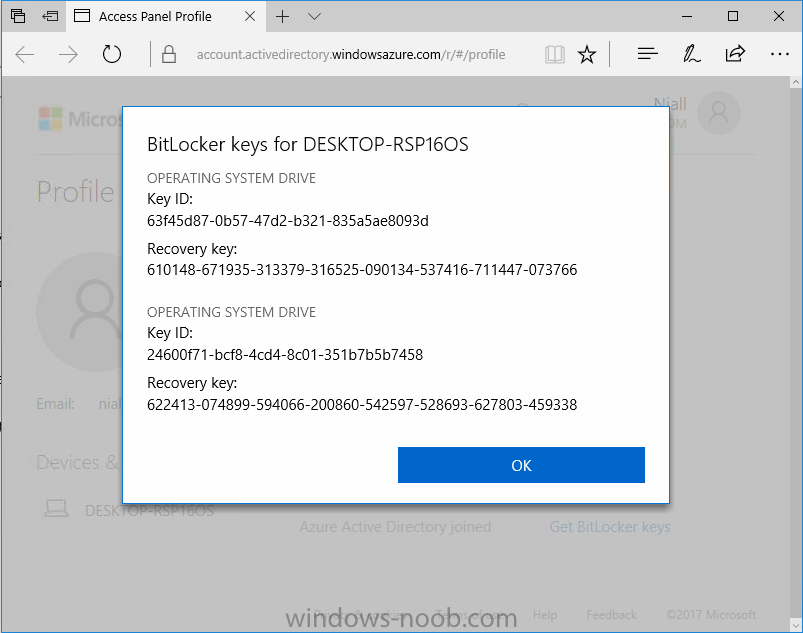
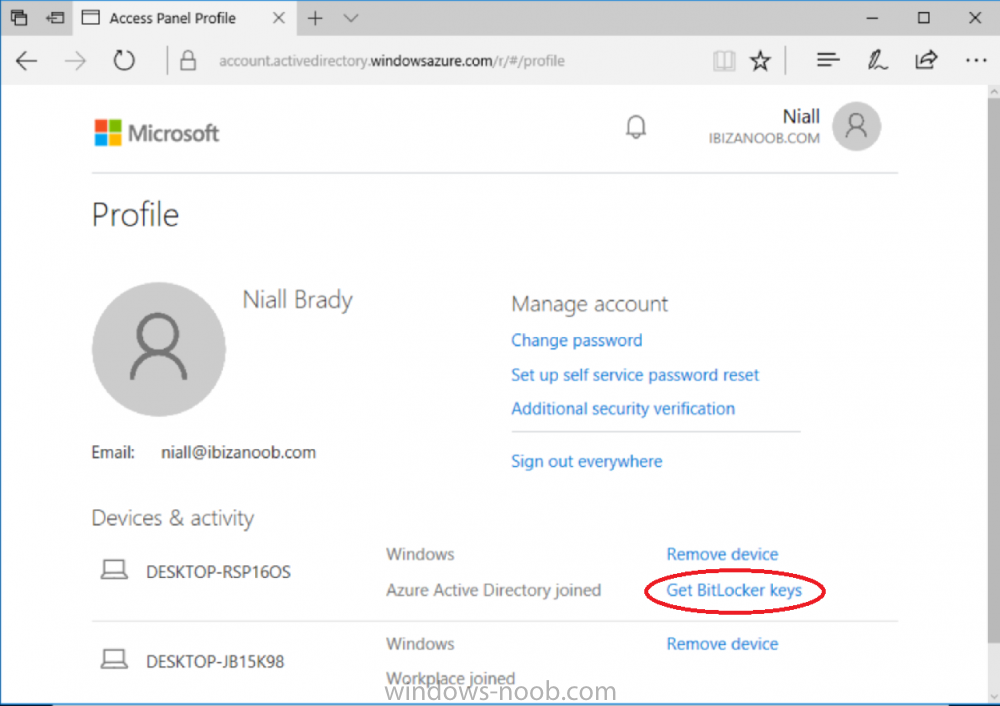
 Introduction Security is a big focus for many companies, especially when it comes to data leakage (company data). Encrypting data on Windows 10 devices using BitLocker means that data is protected ("data at rest") . Microsoft Intune got yet more updates on June 30th, 2017, one of which was the ability to configure BitLocker settings detailed here. This ability was initially raised as a uservoice item. So let's take a look at how it works. Step 1. Create a Device Configuration Profile In the Azure Portal, navigate to Intune, and select Device Configuration, then click on Profiles and then click on Create Profile, and fill in the following details: Name: Configure BitLocker Settings Platform: Windows 10 and later Profile type: Endpoint Protection Note: Endpoint Protection is the profile type for BitLocker configuration, not to be confused with System Center Endpoint Protection. as shown below. Step 2. Configure Settings in the profile Next, in the Windows Encryption pane that appears, make your choices for Windows Settings, Set the Require devices to be encrypted (Desktop only) option to Enable. Make note of the note (the 'i', you can hover over it to see the info it contains), and I've bolded part of that statement below: So by requiring BitLocker encryption, your users will need to confirm the above prior to encryption taking place. Hopefully in the future we'll be able to automate it 100% so that no user interaction is required. For BitLocker base settings, set Configure encryption methods to Enable and then set the desired encryption level via the drop down menus for each drive connected. For BitLocker OS drive settings make your choices after setting Require additional authentication at startup to Enable. Note: For Enable OS drive recovery, although it states that you can Save BitLocker recovery information to AD DS it actually saves the recovery information to Azure AD if you enable the option (and you should). In other words, if you want to be able to retrieve a BitLocker key from an Azure AD and MDM enrolled device, make sure to Enable OS drive recovery and Save BitLocker recovery information to AD DS. For BitLocker fixed data-drive settings, you can deny write access to drives not BitLockered by enabling the option. And for BitLocker removable data-drive settings, make your choices. Once you've finished configuring the settings, click on OK and then click on Create, to Create the device configuration profile. Step 3. Assign the profile to a group Now that you've created the profile, you need to deploy it (assign it) to a Group containing Windows 10 devices. Select the profile created above, and click on Assignments, next click on Select groups to Include. Select a previously created Group (or groups if you wish), I selected one which I previously created called BitLocker Configuration but you can select whichever Group you want, and then click on the Select button at the bottom of that pane, if it's not visible, zoom out (browser zoom). Finally, click on Save to save the changes. If you haven't done so already, add some Windows 10 Device members to the Group. Step 4. Monitor the device configuration on a Windows 10 device Login to a MDM connected (and in this case Azure AD joined) device that is not yet encrypted, and trigger a Sync. To trigger a policy sync, select All Settings Accounts, select Access Work or School, select your MDM account and click on Info. Next, click on Sync Once the sync is done you should see an Encryption Needed notification in the systray. Click on the notification and you'll see the following screen. Select I don't have any other disk encryption before clicking on Yes. and off it goes... And you can open an administrative command prompt to verify the encryption algorithm using the following manage-bde -status As you can see from the above, encryption is in progress and the Encryption method matches the XTS-AES 256 setting selected in the device configuration. After it's done encrypting, you'll be notified. And in Windows File Explorer you can see the BitLocker icon on the operating system drive. Step 5. Verify device is configured with BitLocker in Azure At this point trigger another Sync on the device. After the sync is complete, click on the Device configuration profile, and select Device status as shown below. Devices targeted by the profile will be listed along with the Deployment Status of the configuration profile. If the user has allowed BitLocker to complete the deployment status will be listed as "Succeeded" as shown below. If the user did not start encryption (or if there was some other problem), it will be listed with a Deployment Status of "Error". If the Deployment Status is listed as Error, you can click on the device listed, and it will take you to the devices' properties. From there click on Device configuration and then click on the Device Configuration error on the right side of this screenshot. Here you see that it mentions the user needs to click on Yes to start the encryption, so it's likely (in this case) that the user ignored the notifications which is why an error is reported. To enforce this, or rather to force the user to do what we want (in regards to starting the BitLocker encryption via the notification), please see the comments in the summary at the bottom of this guide. Step 6. Retrieving the BitLocker key as the admin in Azure AD To locate the BitLocker protector key, select the User that enrolled into MDM, and click on Devices. Then select the device in question. The BitLocker key id and BitLocker recovery key will be listed. Which can be double checked against the actual computer using this command (in an administrative command prompt on the client computer that is BitLocker encrypted) manage-bde -protectors -get c: Note: If the user un-enrolls the device, the BitLocker recovery keys will be removed from Azure AD. Step 7. Retrieving the BitLocker key as the user The user can also check their BitLocker keys on any of their enrolled devices by clicking on Settings, Accounts, Access work or school, highlight the connection, and select Manage your account or by going to https://myapps.microsoft.com in a web browser and clicking on their username, and then clicking on Profile, select the device and then click on Get BitLocker Keys. From there they can click select the device in question, and click on Get BitLocker Keys and the BitLocker keys will be listed Note: If you want to automate this and remove user choice then use the windows-noob.com custom MSI in Part 2. Recommended reading https://docs.microsoft.com/en-us/intune/endpoint-protection-windows-10 https://docs.microsoft.com/en-us/windows/device-security/bitlocker/bitlocker-management-for-enterprises https://en.wikipedia.org/wiki/Data_at_rest https://docs.microsoft.com/en-us/azure/active-directory/active-directory-conditional-access https://nhogarth.net/2017/07/17/intune-denying-access-to-windows-10-without-bitlocker-enabled/ https://blogs.technet.microsoft.com/home_is_where_i_lay_my_head/2017/06/07/hardware-independent-automatic-bitlocker-encryption-using-aadmdm/ Summary It's great that we've finally got the ability to enable BitLocker in Intune but forcing encryption is not that straight forward. To force your users to be compliant you can either use Conditional Access (1) to deny those machines access to email and associated office applications unless they are encrypted, to do that you'll need to configure a Device Compliance policy (2) to verify that the device is encrypted, and based on that the user can access the applications specified. Or, you can automate the encryption like I do in Part 2 of this series of blog posts about BitLocker in Intune. (1) Thanks Jan Ketil Skanke (2) Thanks Nick


-
Hi All, Wondering how others are forcing existing Exchange ActiveSync users to enroll in Intune. I've setup Intune integrated into our SCCM Current Branch (1602) environment and configured the Exchange Server Connector to sync devices from our On-Premise Exchange 2013 environment. All EAS devices are syncing into SCCM and I've successfully deployed Exchange On-Prem Conditional Access to a targeted user collection. For users in the targeted collection that have devices connecting to EAS via the native iOS or Android mail client things seem to work as expected. These users receive the CA email notification which provides instruction on how to enroll. Once they enroll, their device is then able to resume using EAS to send/receive email. This all works great. Here is where I'm running into an issue. We have a high percentage of users who are using the Outlook mobile app for both iOS and Android instead of the native mail client on their devices to connect to Exchange. The Exchange connector is syncing these devices into SCCM. They show up as Name=Username_Outlook and Device Type=Outlook. However users with an "Outlook" device are some how not being effected by the CA policy that is being deployed to them. Because of this I am not able to force their devices to enroll in Intune. So with all of that background can anyone tell me how I can deploy CA to users with devices using the Outlook App and force them to enroll their devices? I have found some documentation on deploying CA for Outlook mobile but it all seems to be related to 0365 and Exchange Online policy settings. We are not running 0365 and do not have a cloud based Exchange, everything is on-prem. Thanks in advanced for any help on this. Justin
- 1 reply
-
- 1
-

-
- Conditional Access
- EAS
- (and 1 more)
-
Hi guys, The Microsoft documentation on this is looking pretty sparse on these topics. Does anyone know if it is possible to provision conditional access for mail when InTune is integrated with ConfigMgr? If so, is the process different at all from setting up conditional access when doing Intune standalone? Also, it seems like the documentation is actually empty for configuring mail profiles using ConfigMgr!!!! Anyone have a good walkthrough on the topic? Thanks! Stephen