Search the Community
Showing results for tags 'mam'.
Found 1 result
-
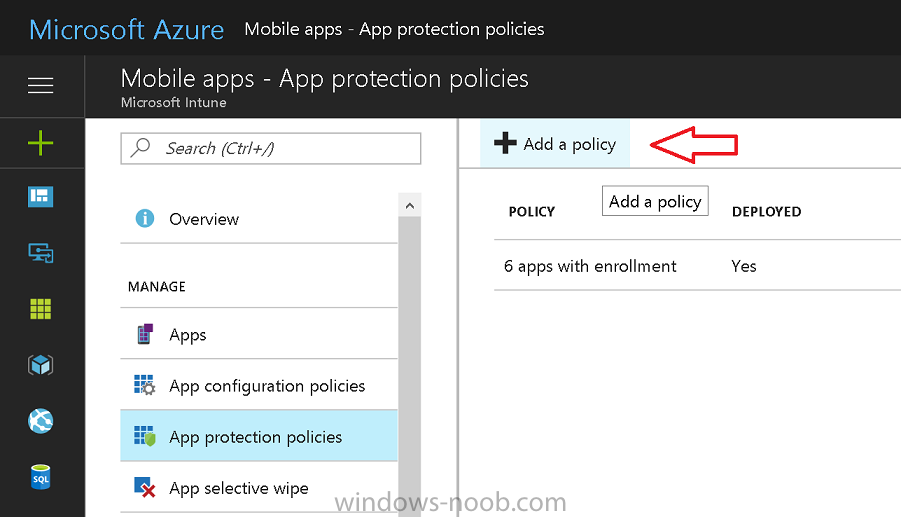
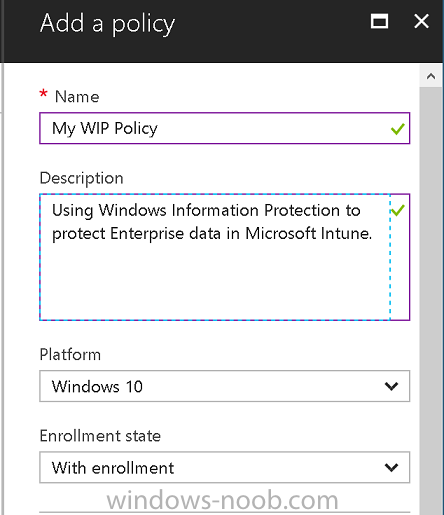
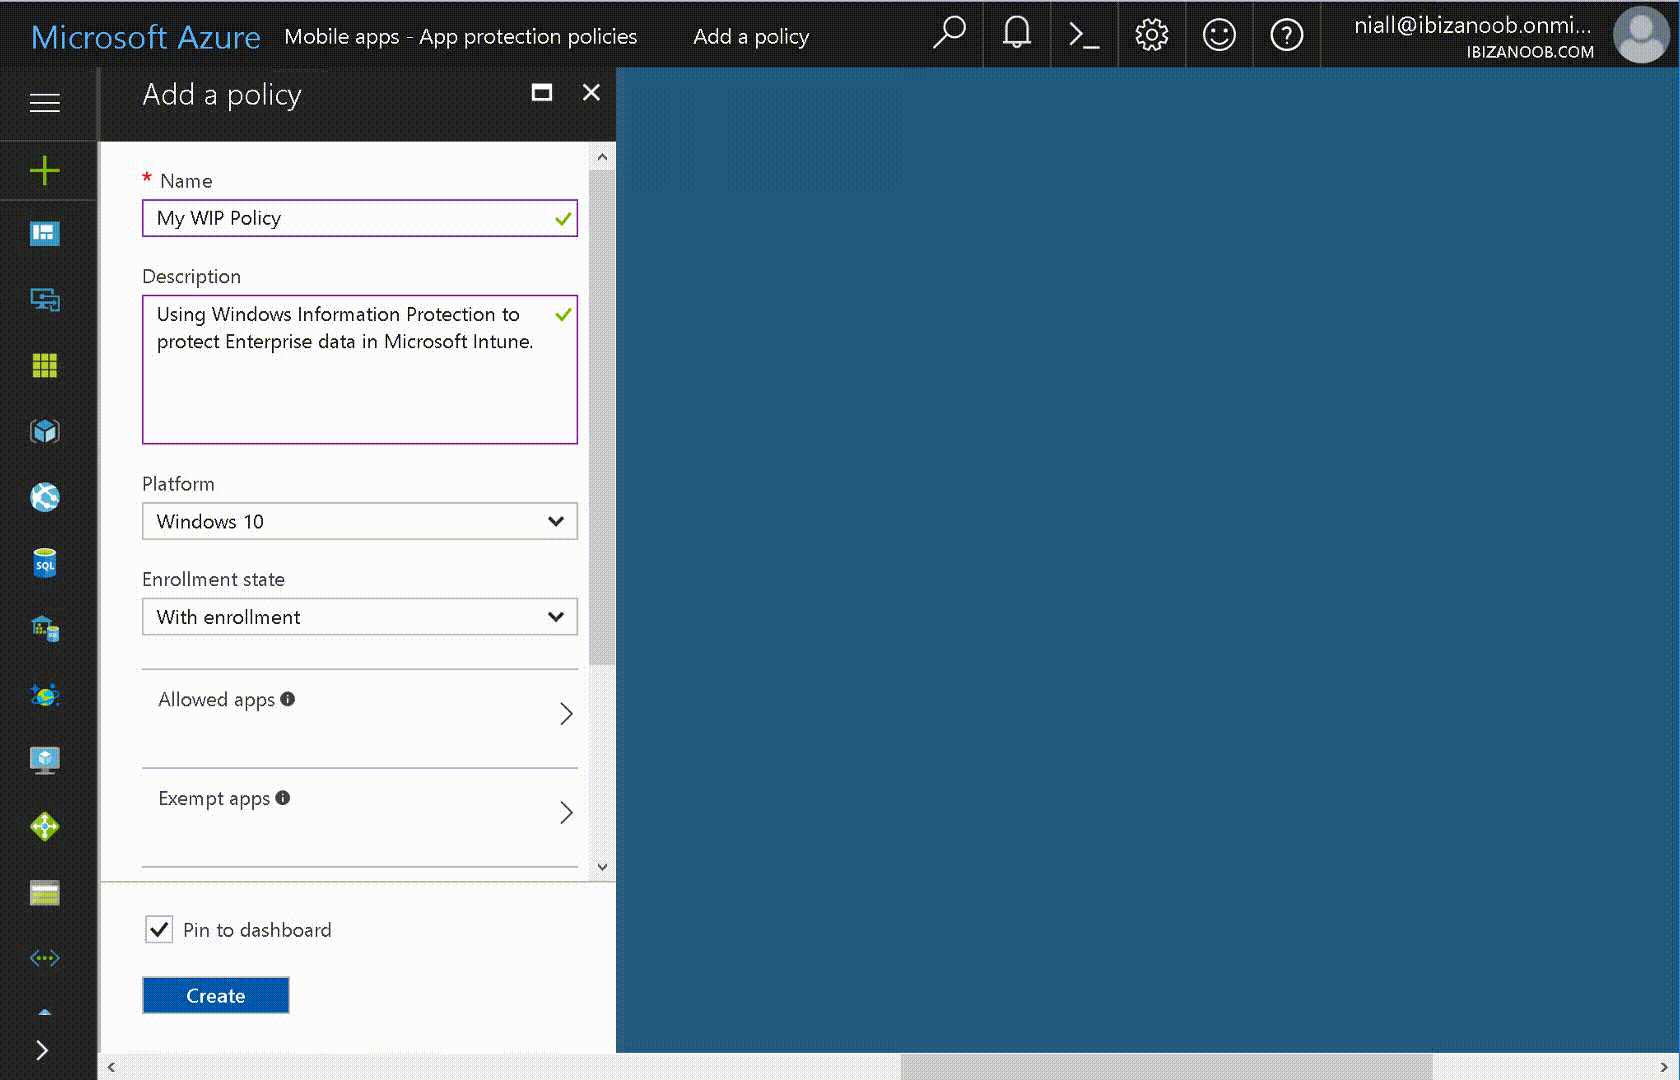
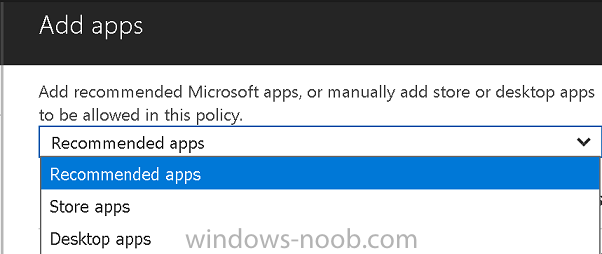
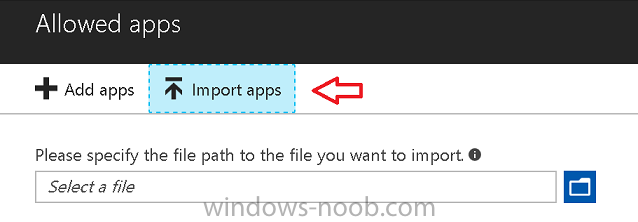
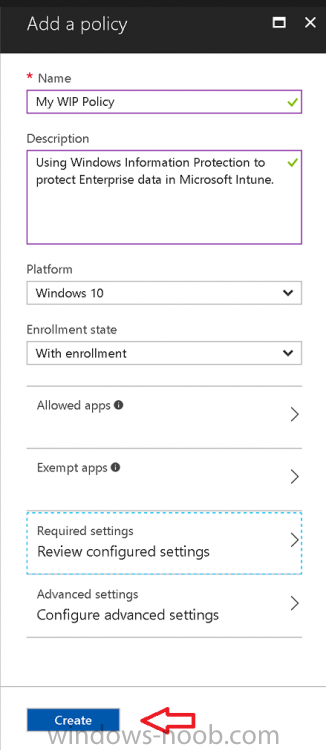
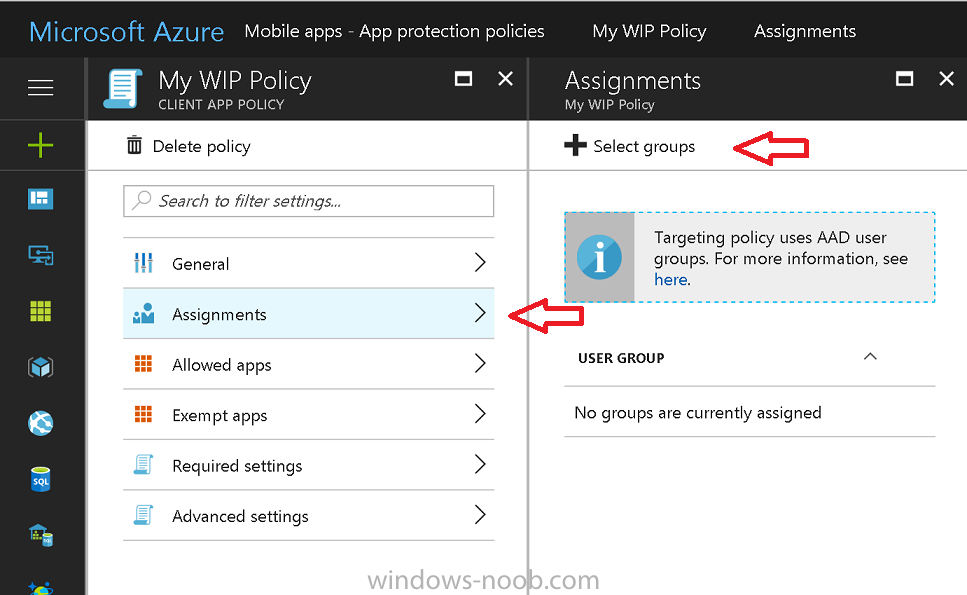
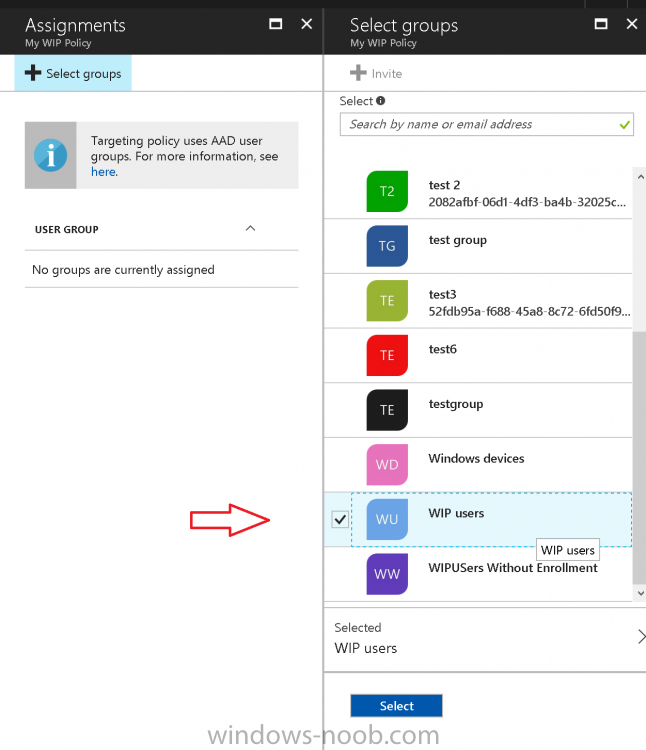
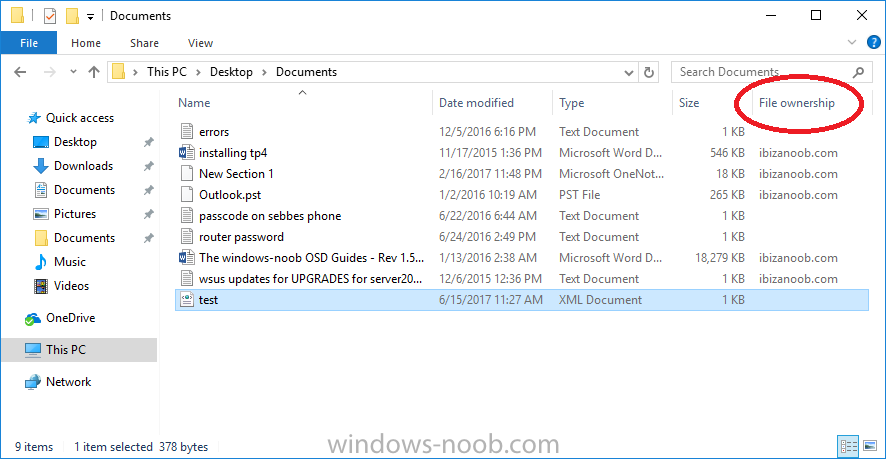
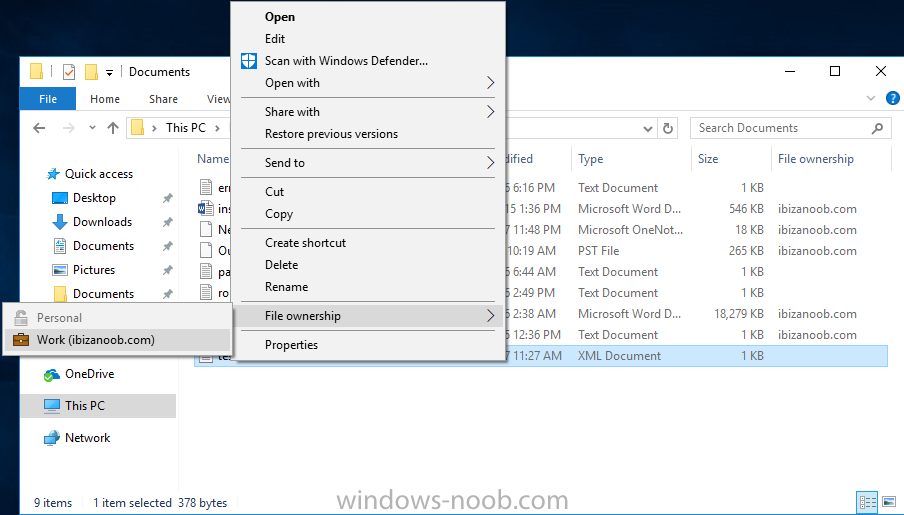
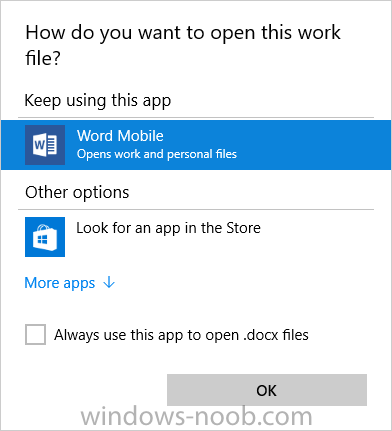
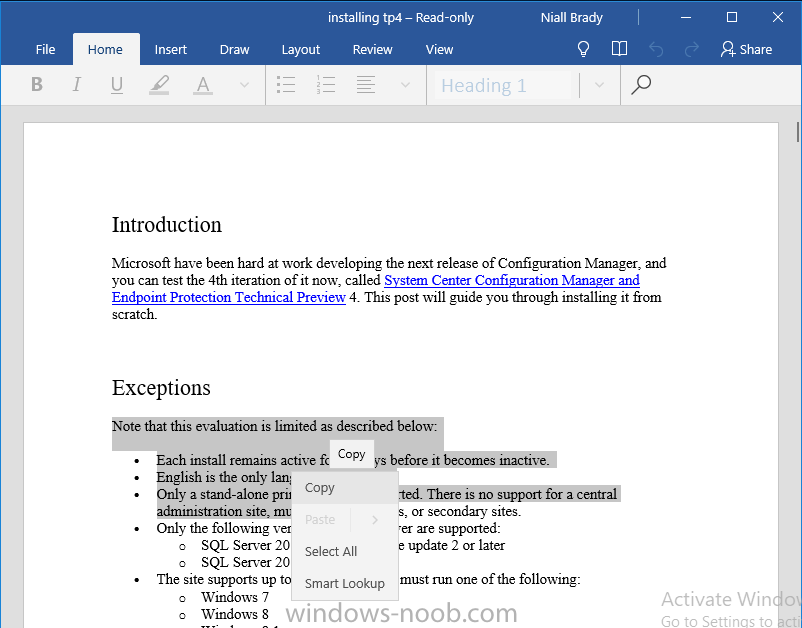
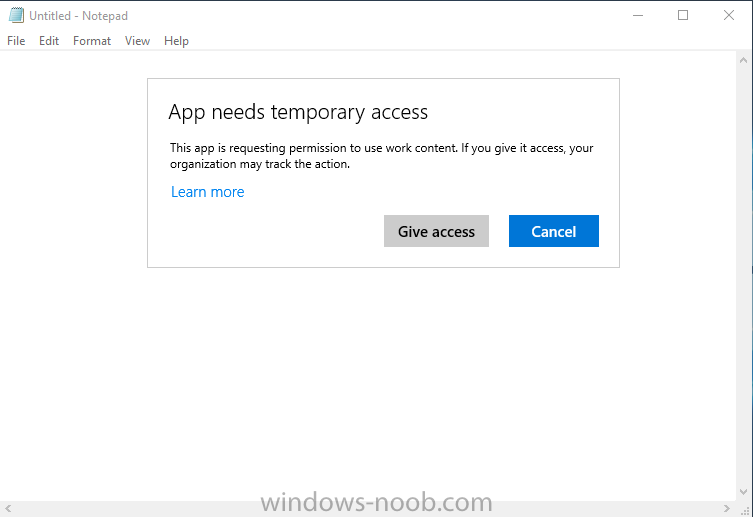
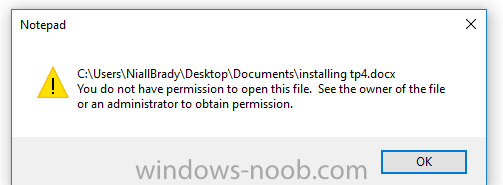
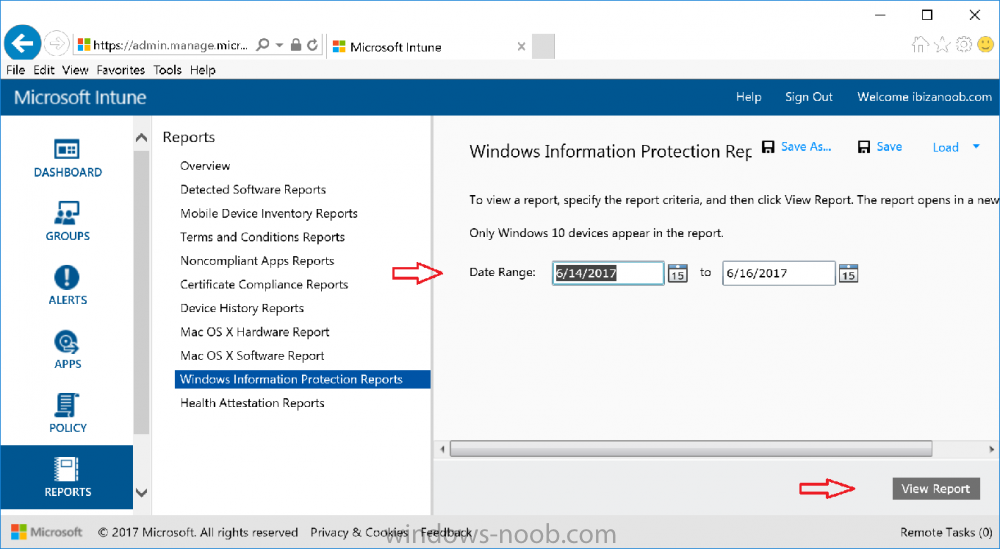
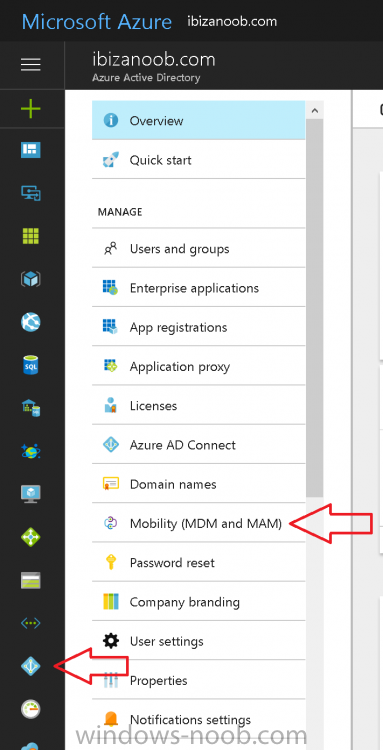
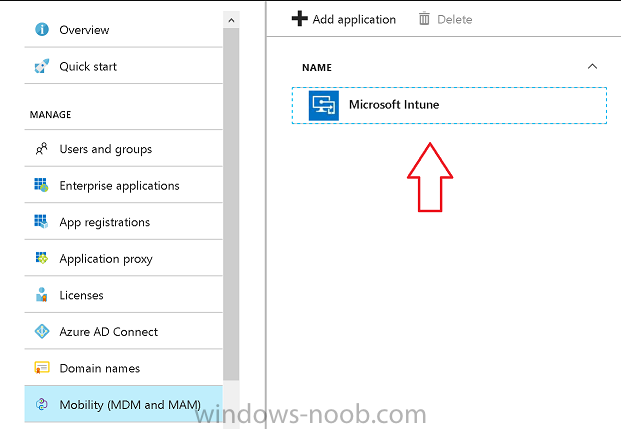
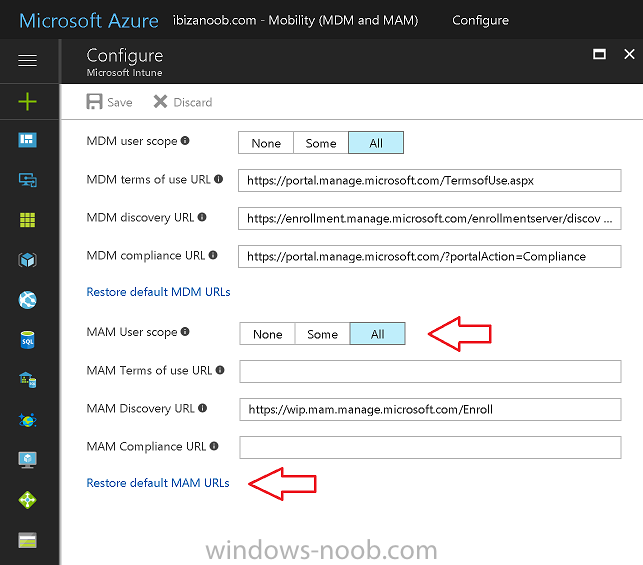
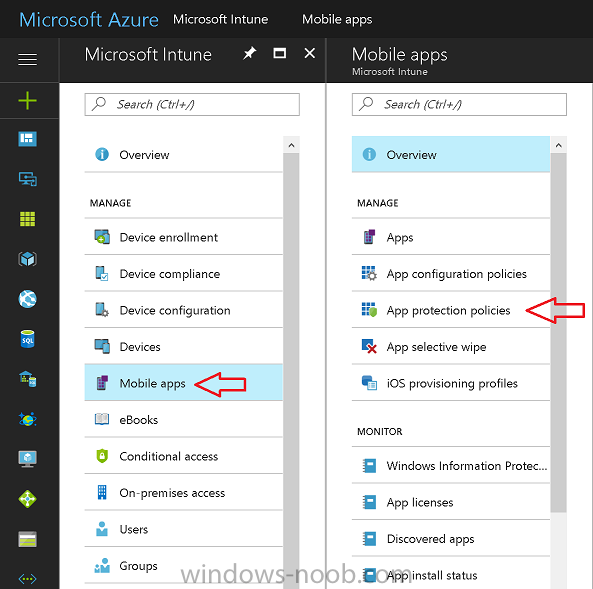
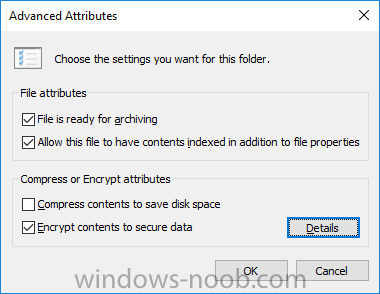
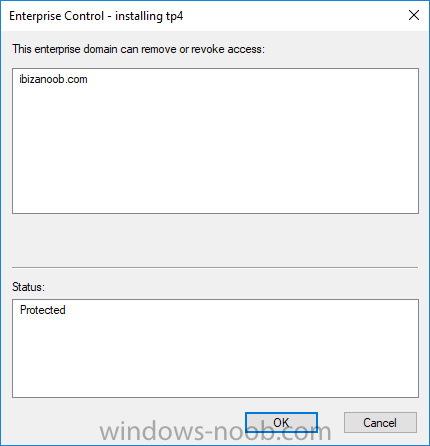
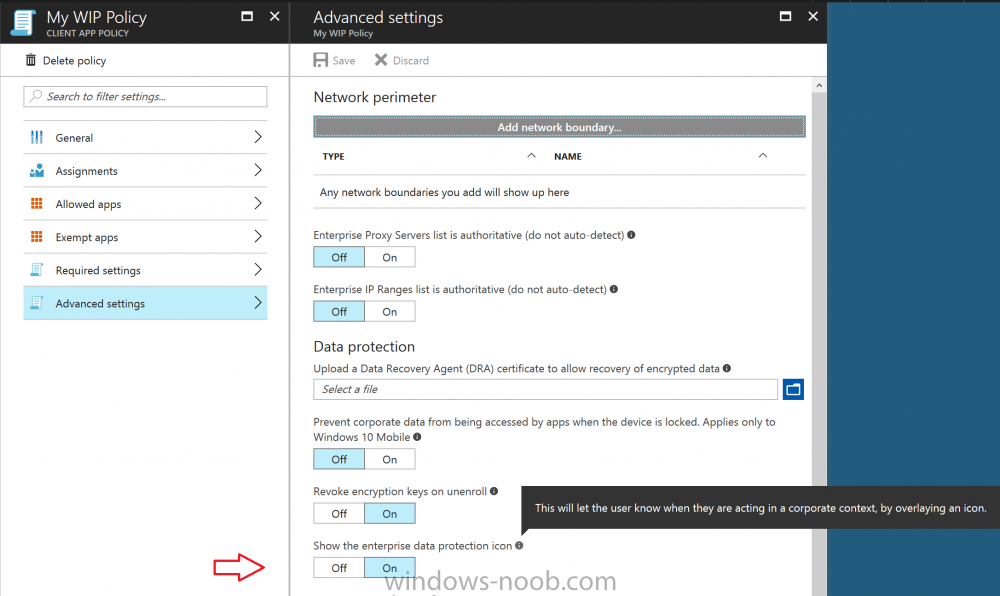
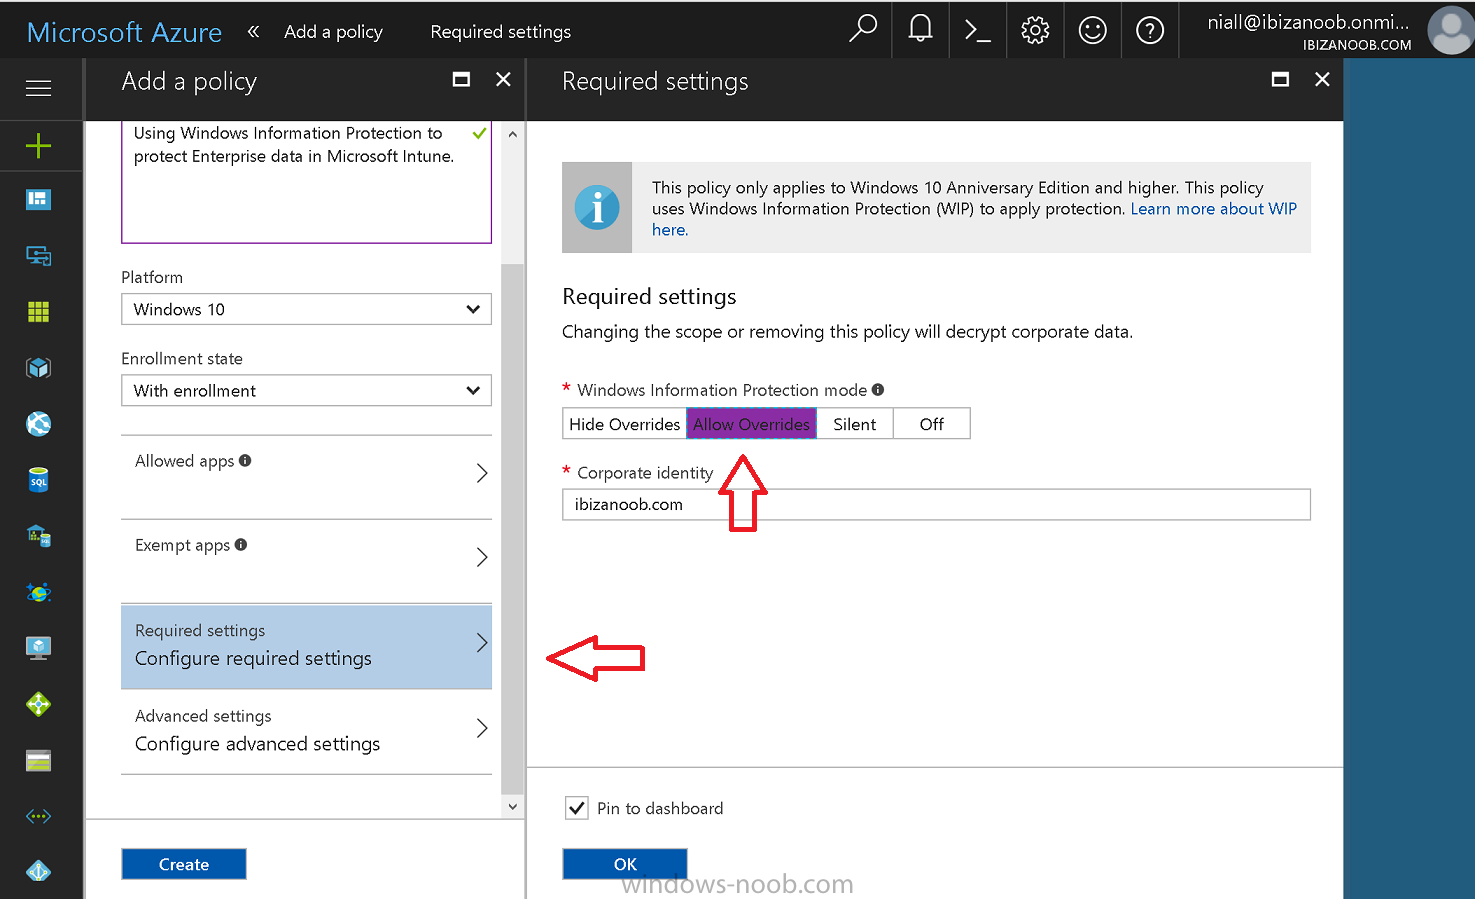
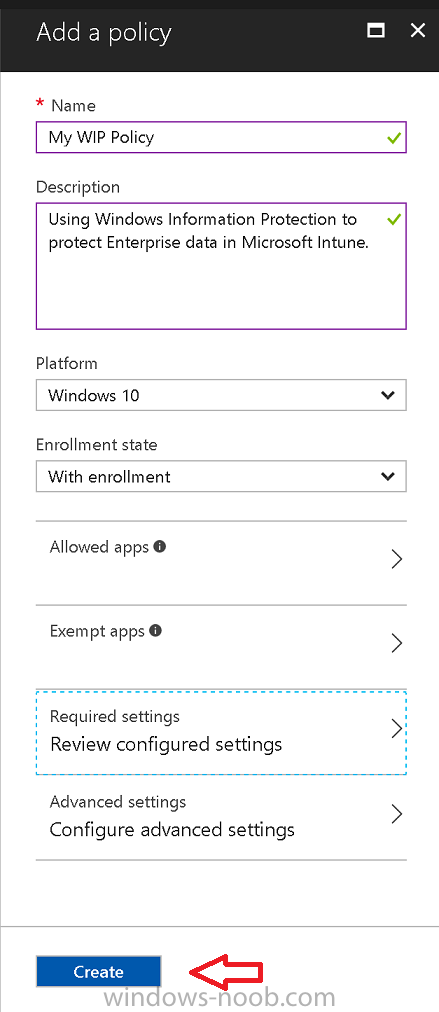
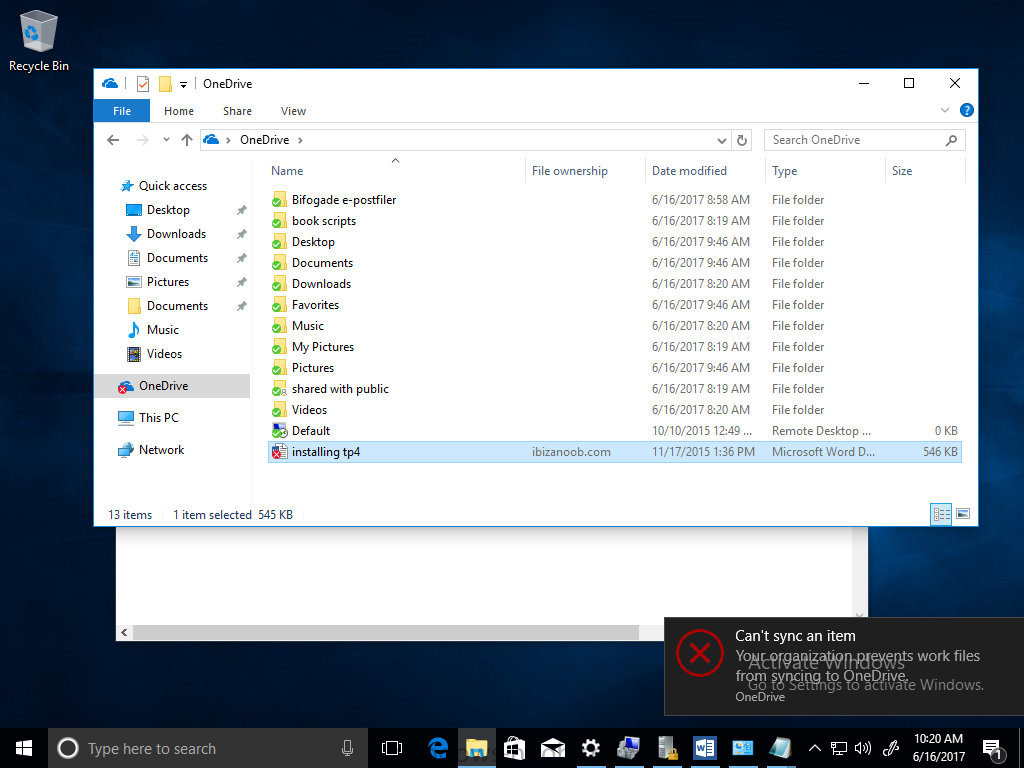
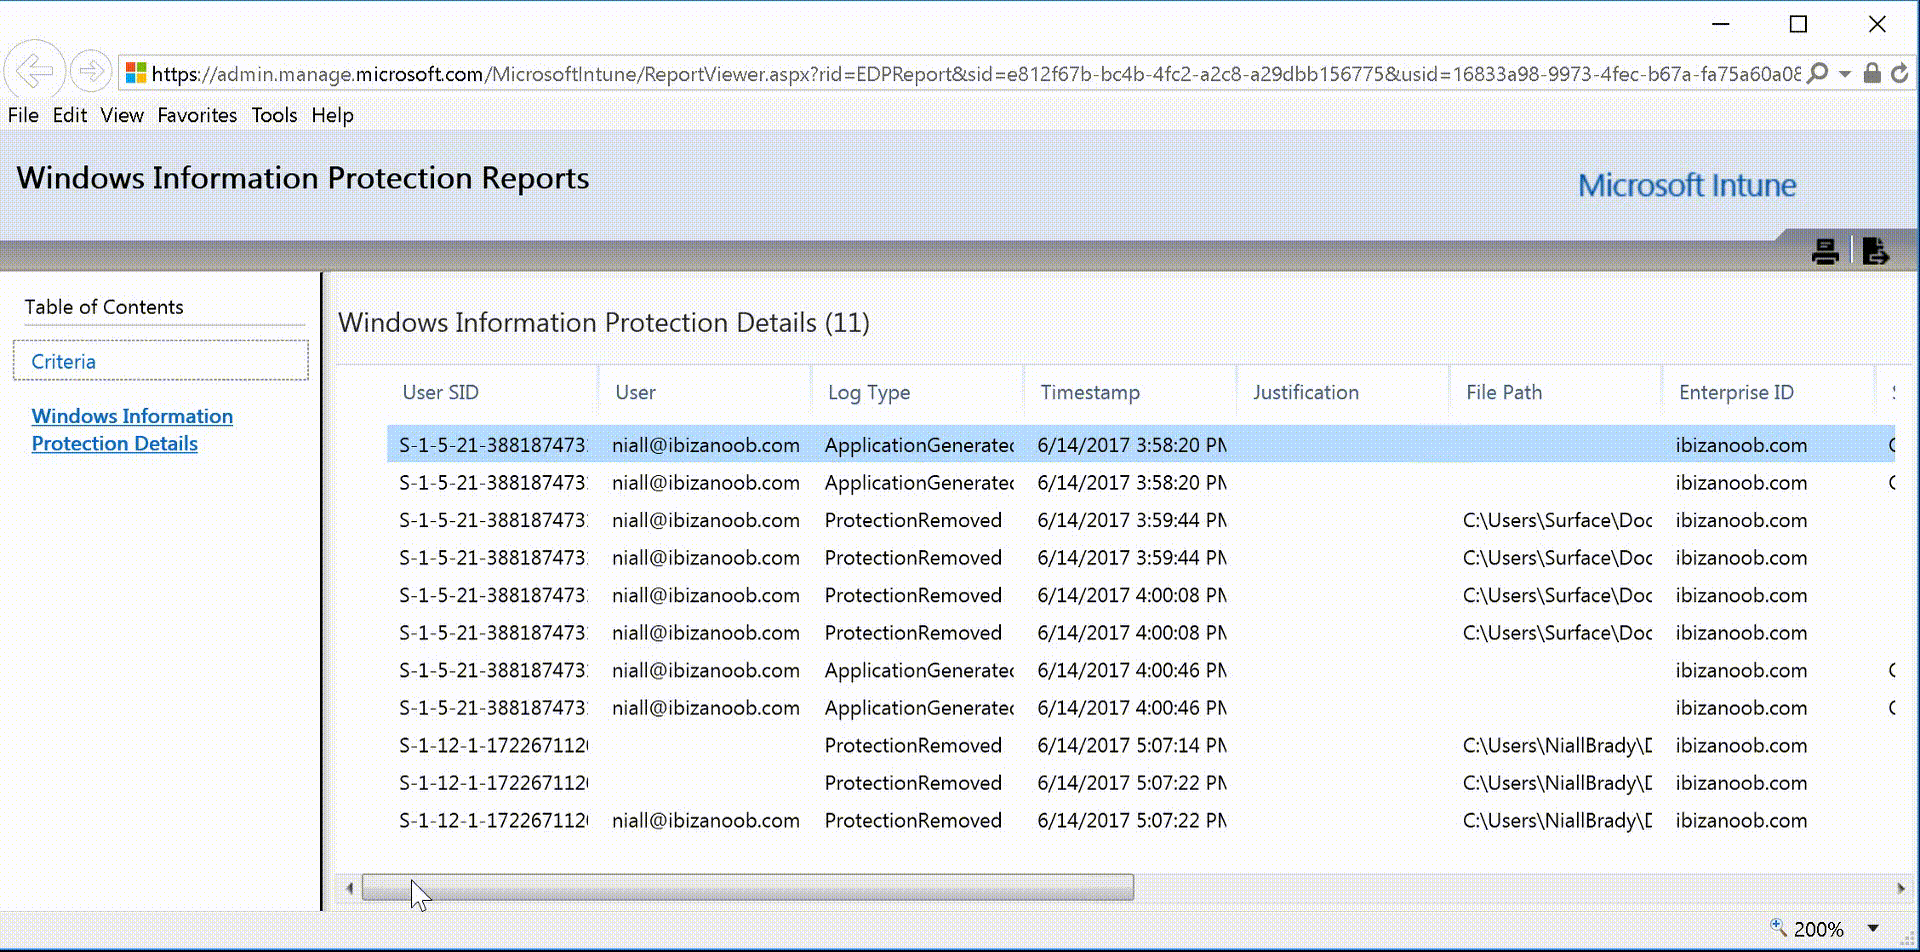
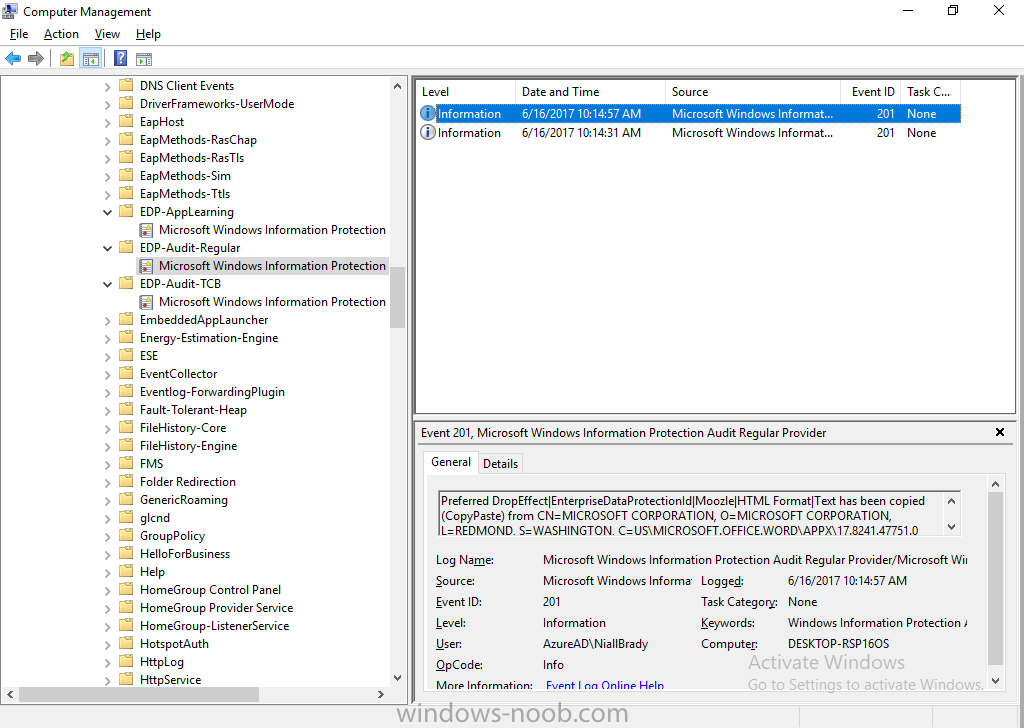
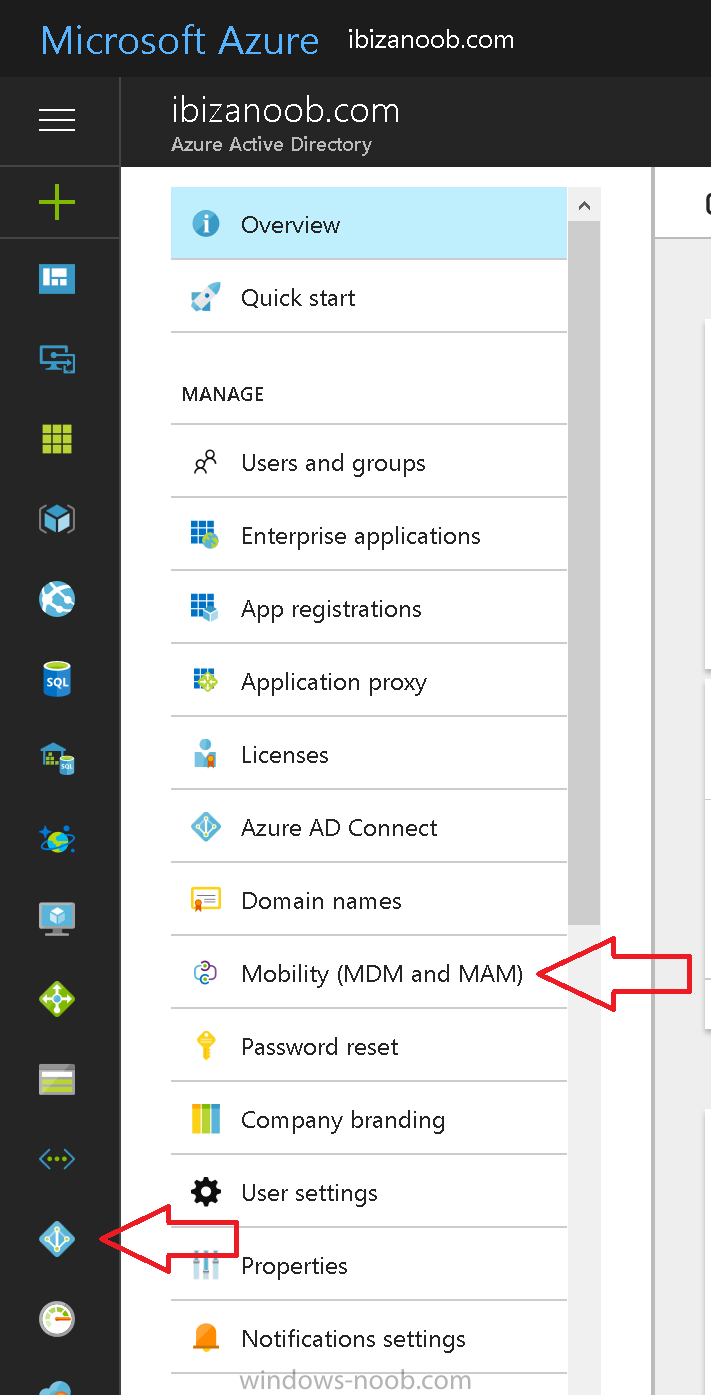
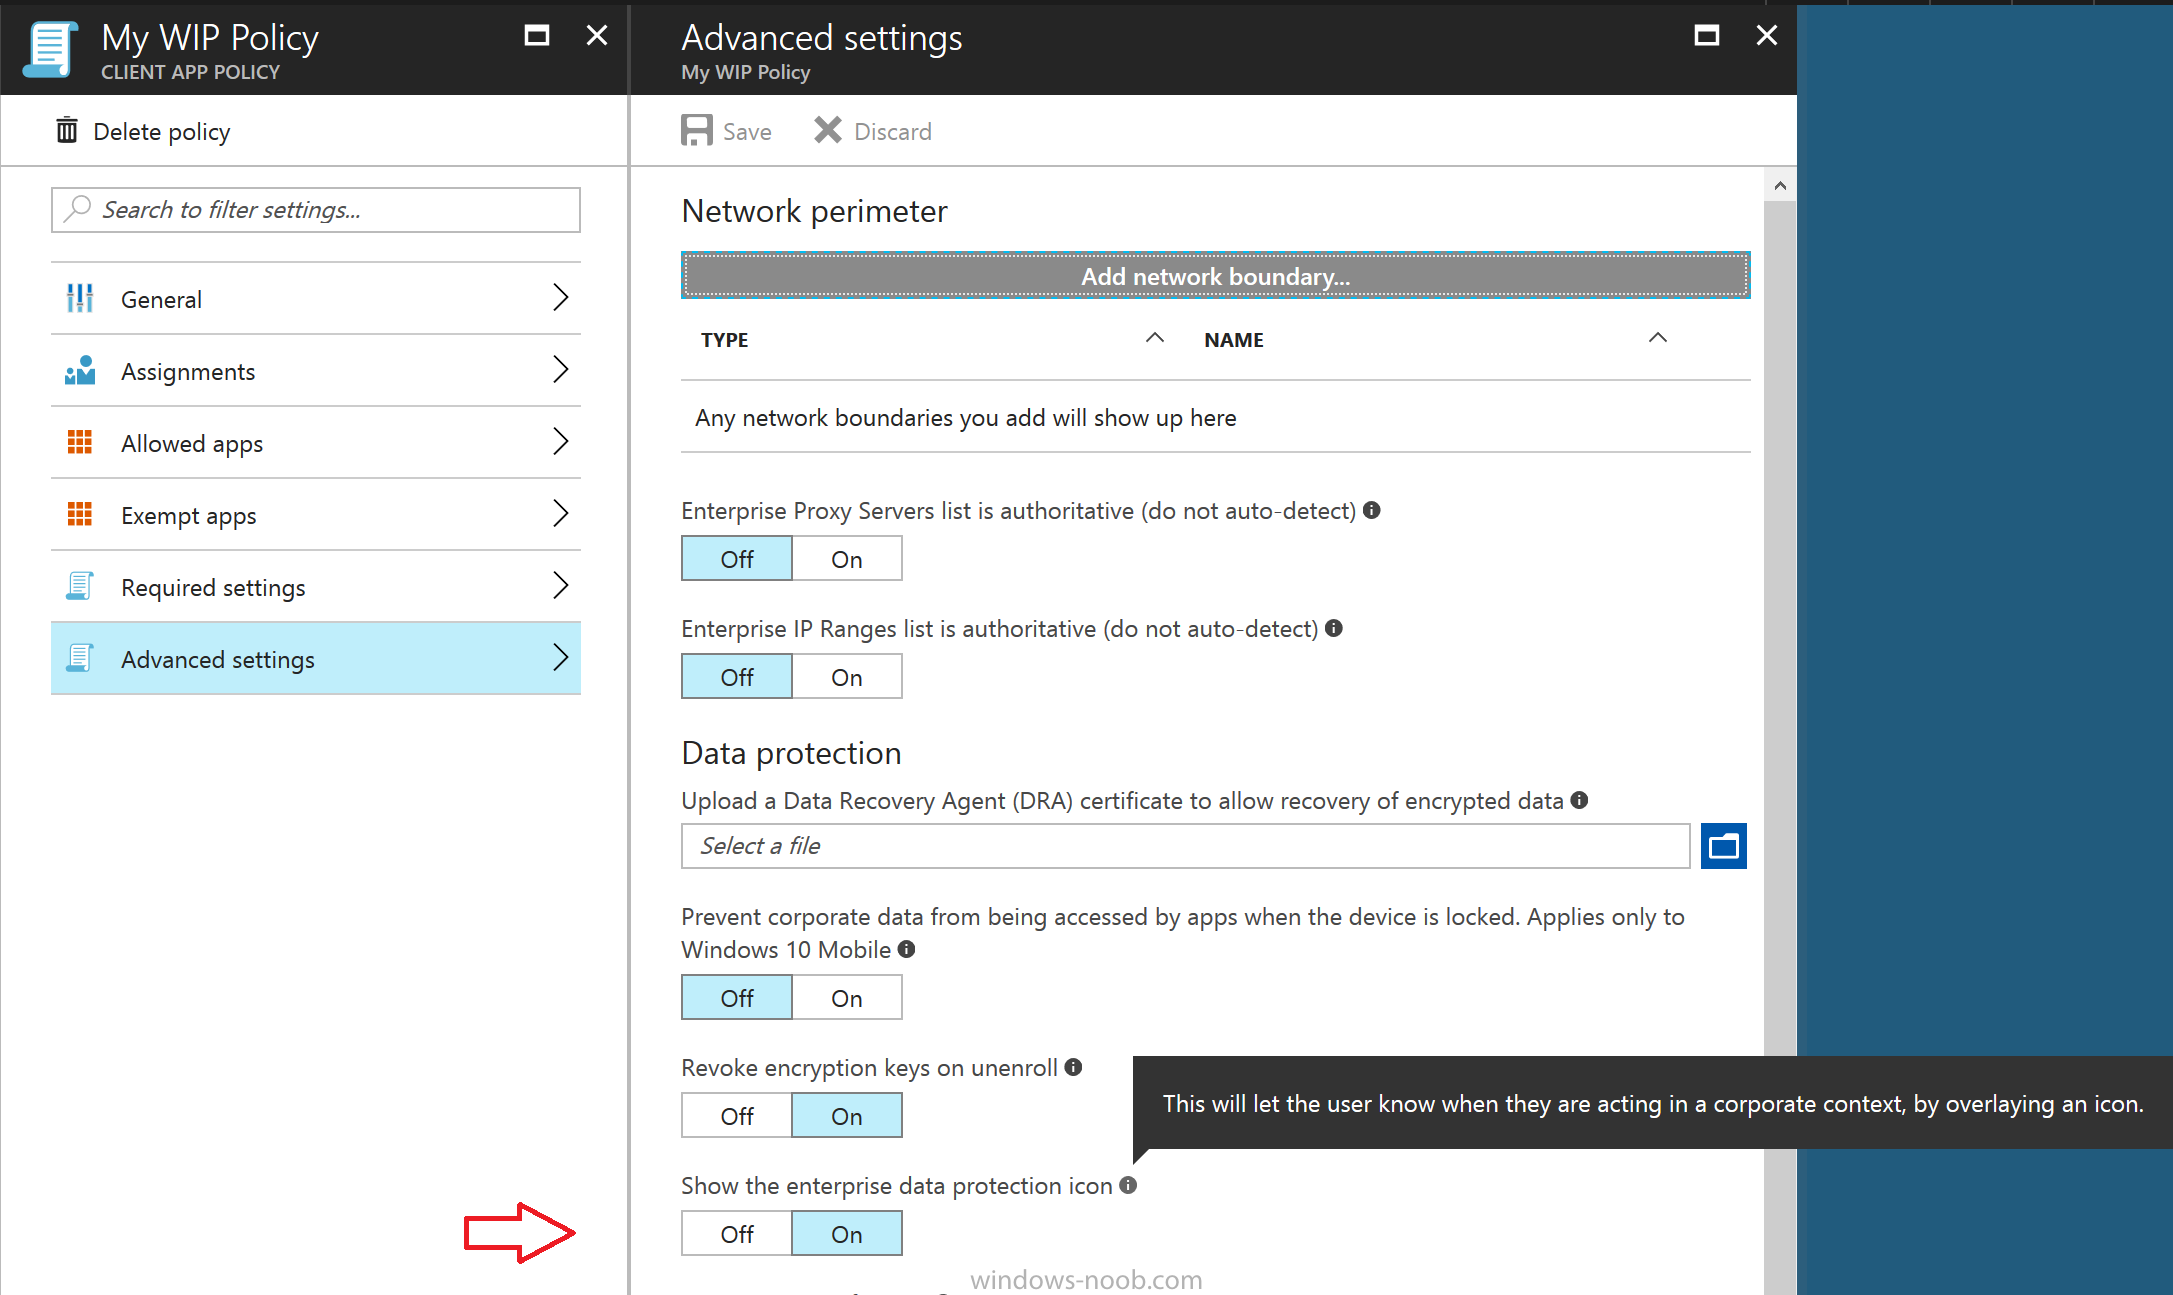
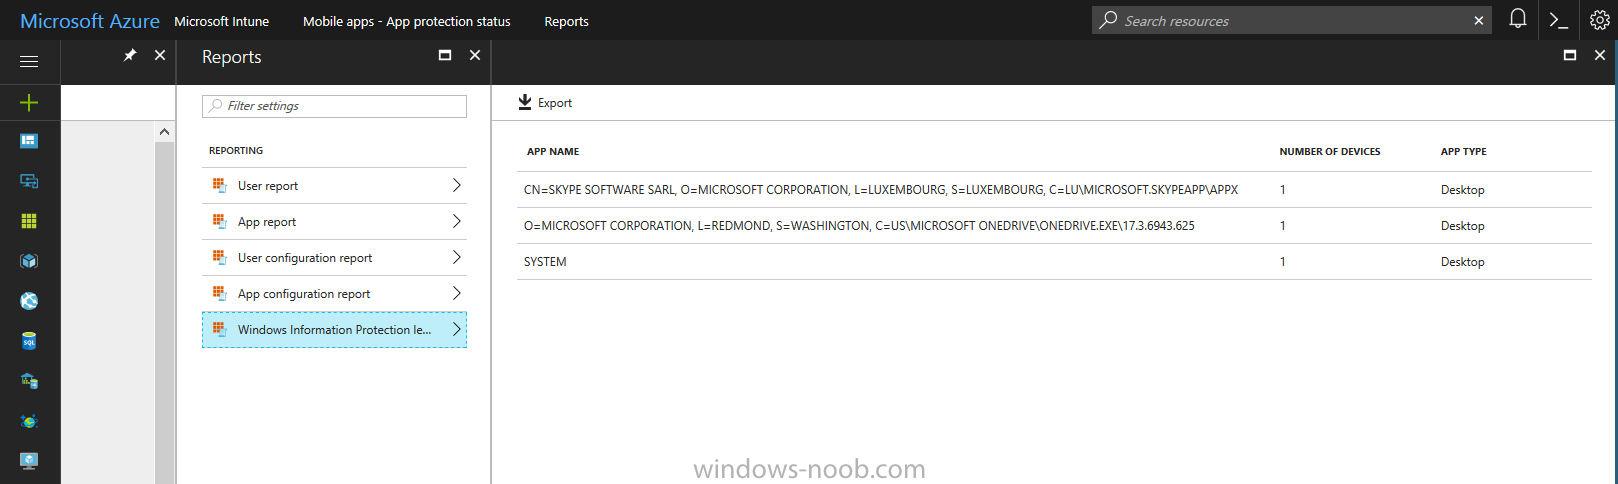
 Introduction Windows Information Protection or WIP (formally known as Enterprise Data Protection or EDP) is explained nicely in Microsoft's own words and i've included a quote of that below:- In other words, you can use WIP to protect enterprise data from leaving the enterprise. The prerequisites for WIP are as follows, you'll need a Windows 10 operating system (that is version 1607 or later) and you'll need a management solution such as Intune or SCCM or a 3rd party MDM solution. in addition, you'll need a license for Azure AD Premium. To gain access to the latest capabilities in Intune you should use Windows 10 Creators Update (version 1703). In this article I'm going to show you how to set this up with Intune (in Azure) and I'll give some examples of how enterprise protected data acts when in different scenarios, in addition, I'll explain how you can audit or review logs about this and have a quick glance at the reporting capabilities in Intune. I've already configured Azure for Automatic Enrollment but it's up to you whether you want to use that option (or not). In this guide I assume you've already got an Azure subscription (trial or otherwise) and Intune. If you don't have one you can sign up for a 30 day free Intune trial here. I used Enterprise Mobility + Security E3 licenses for the users in this lab. Making sure Azure is ready for WIP In Azure, select Azure Active Directory from Services and click on Mobility (MDM and MAM). Next Click on Microsoft Intune From the choices listed, choose Restore default MAM URLs and then select the scope. You can add your own urls too (for the MAM Terms of use URL and MAM Compliance URL) if you wish but in this example I did not. Save your settings when done. Create a WIP Policy Now that you've configured MAM in Azure, it's time to create your first WIP policy. To do that, in the Microsoft Intune service in Azure, select Mobile Apps then click on App protection policies. And click on Add a policy. Give the policy a descriptive name, and optionally a description of what it does, in the Platform drop down select Windows 10 from the choices available. Next choose your enrollment option for Enrollment State, select With Enrollment for this guide. In a later guide I will cover Without Enrollment where you can protect data in Enterprise apps (such as outlook) without being MDM enrolled. Next, there are two sections related to Apps. Allowed apps - These are the apps that must adhere to the policy Exempt apps - These apps are exempt from the policy and can access enterprise data freely. Note: Apps can be enlightened or unenlightened. Enlightened apps can differentiate between corporate and personal data, correctly determining which to protect, based on your policies. Unenlightened apps consider all data corporate and encrypt everything. For a list of Enlightened apps see here. Click on Allowed apps and then click on Add apps to add one or more apps that you want to adhere to the policy. There's a drop down with Recommended apps selected as default and those apps are listed below the drop down. If you want to add your own Store apps or Desktop apps manually then you'll need to select the appropriate option and fill in the blanks. Recommended apps: a pre-populated list of (mostly Microsoft Office) apps that allow admins easily import into policy. Store apps: Admin can add any app from the Windows store to policy. Windows desktop apps: Admin can add any traditional Windows desktop apps to the policy (e.g. exe, dll, etc.) To get information about how to generate the info needed for manually adding Store and Windows desktop apps see this post. You can also import apps from an XML file generated in AppLocker by clicking on Import Apps. But before doing so you'll need to create an AppLocker policy and then export the policy. To create an AppLocker policy follow this advice. To export an AppLocker policy to an XML file do as follows: Click Start, type secpol.msc in the Search programs and files box, and then press ENTER. In the console tree, expand Application Control Policies, right-click AppLocker, and then click Export Policy. Browse to the location where you want to save the XML file. Below you can see the process of selecting some apps from the list of the Recommended apps. Next you might want to exempt some apps from this WIP policy, to do so click on Exempt apps and add apps the same way as you did above except this time select those apps that you do NOT want the WIP policy to apply to. After adding apps to your WIP policy, you need to configure required settings, so click on Required Settings. In this guide I selected Allow Overrides which means that the user will be prompted when they try to relocate data from a protected to a non-protected app. Corporate identify should be auto-populated. You can add more domains by separating them using the | symbol. The 4 available Windows Information Protection mode settings are listed below. Hide Overrides WIP looks for inappropriate data sharing practices and stops the user from completing the action. This can include sharing info across non-corporate-protected apps, and sharing corporate data between other people and devices outside of your organization. Allow Overrides WIP looks for inappropriate data sharing, warning users if they do something deemed potentially unsafe. However, this mode lets the user override the policy and share the data, logging the action to your audit log. Silent WIP runs silently, logging inappropriate data sharing, without blocking anything that would’ve been prompted for employee interaction while in Allow Override mode. Unallowed actions, like apps inappropriately trying to access a network resource or WIP-protected data, are still stopped. Off (not recommended) WIP is turned off and doesn't help to protect or audit your data. After you turn off WIP, an attempt is made to decrypt any WIP-tagged files on the locally attached drives. Be aware that your previous decryption and policy info isn’t automatically reapplied if you turn WIP protection back on. After configuring the Required Settings, click on Create to Create the WIP Policy. Note: There are also Advanced settings that you can configure which control things like Network Boundary, IP ranges, DRA certificate and other options such as the ability to show the Enterprise data protection icon, however I am not using any of these settings in this blog post. Deploying the policy Now that you've created your WIP policy, it needs to be deployed (assigned) to a group of users that you intend to target with this policy. To deploy the policy, select it and then click on Assignments. Next click on Select Groups to select a previously created Azure Group containing one or more users. Select a User Group containing the users you want to target this policy to and then click on Select. The policy is now deployed. Review how WIP works Logon to a device as a user that is a member of the WIP Users user group (the user group that you deployed the WIP policy to). In this example I am reviewing how WIP works on an Azure AD registered device that is auto-MDM enrolled into Intune. Using Windows File Explorer, browse a bunch of documents. If the File Ownership column is not present you can add it. In this example, You can see that some files are marked with the Enterprise name, and some or not. Those that are not are considered personal documents. You can right click any file and change file ownership from Enterprise (work) to Personal or vice versa. Here we are making a document 'Work' owned. The other option will always be greyed out. Now that we have a mix of Personal and Work documents, let's see what happens when the user attempts to copy Enterprise data from Word Mobile to Notepad. Right click on a protected document and choose Open with, select Word Mobile. As we can see, this application opens both Work and Personal files as we have assigned the WIP policy to it. Mark some text and right click, choose Copy. Next open Notepad. Right click in a new document and choose Paste. Thanks to WIP, and the Required Settings you configured, the user is prompted about pasting this data. In this case, clicking on Give access allows you to copy the data but the action will be logged and can be reported on. If you attempt to open the same protected document with Notepad directly you'll see this. Next, try copying a protected document to somewhere personal, such as OneDrive personal. You'll be informed that OneDrive can't sync the file. If you look at a protected files' Properties (right click the file), and then click on Advanced in the General tab, you should see that the file is encrypted. Clicking on the Details button will give you more info. What about reporting ? Currently (as of August 2017) only Intune SA (Standalone) has reporting for WIP, but hopefully that will change soon. In Intune Standalone you can review the built in WIP report in Reports, Windows Information Protection reports, View Report. and you'll see something like this: Note: You'll need to wait about 24 hours before WIP data shows up. Windows Information Protection Learning. Windows Information Protection Learning allows you to gather data in Intune in Azure, to review what applications your users are using, maybe you want to add or remove access to those apps. To review WIP Learning, select Mobile Apps, and in the Monitor section select App Protection Status, then click on Reports and finally select Windows Information Protection learning. Note: There is an App Protection status node that contains reports for users and apps but it is currently only applicable to iOS and Android. To get more data on the clients, you can peruse event viewer logs in the Applications and Services logs, see below. EDP-Applearning EDP-Audit-Regular EDP-Audit-TCP Well that's it, I hope this gives you a good overview of WIP in Intune. Until next time, adios. Recommended reading 30 day Intune trial Protect Enterprise data with WIP Enlightened apps versus unenlightened apps Enterprise Mobility and Security Blog Set up Windows device management with Microsoft Intune Windows Information Protection Policy create How to setup MAM for Windows 10 1703 Windows 10 MAM Without Enrollment and Office Desktop Apps Windows 10 and MAM-WE – Part 1: Configuration