Search the Community
Showing results for tags 'unable to find suitable recovery service mp. marking policy as non-compliant'.
Found 1 result
-
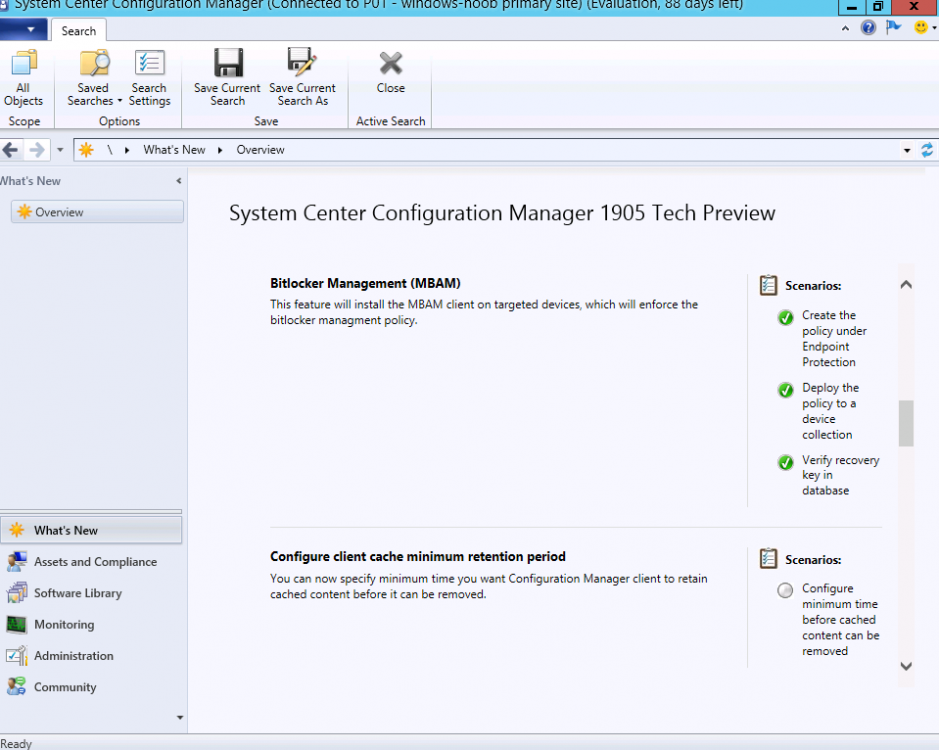
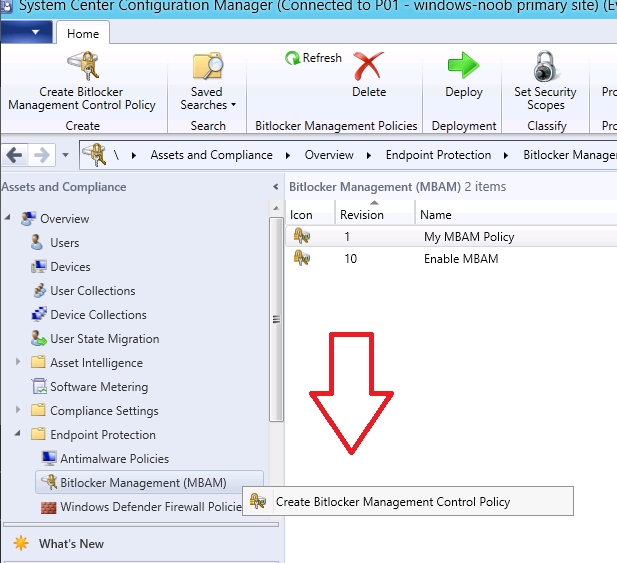
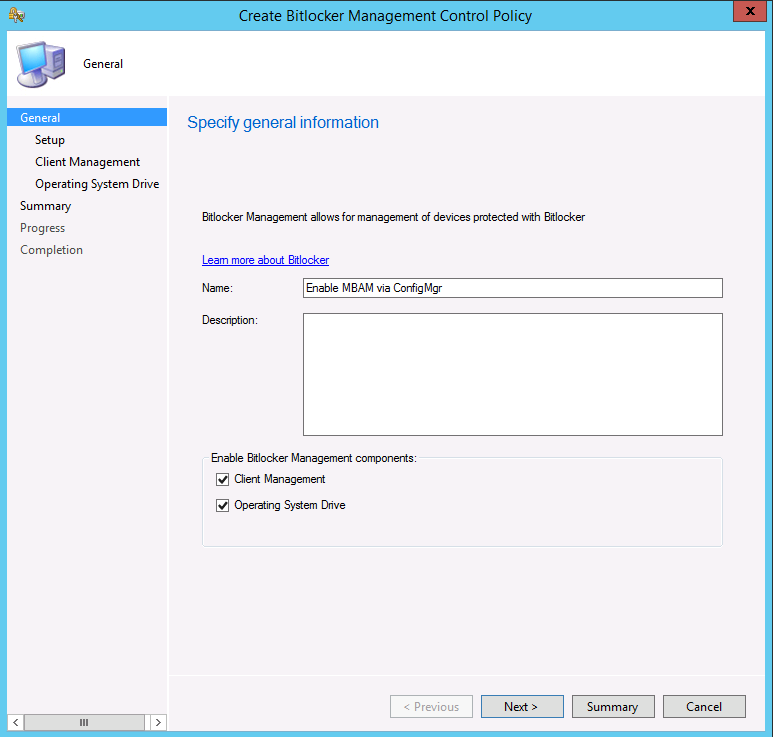
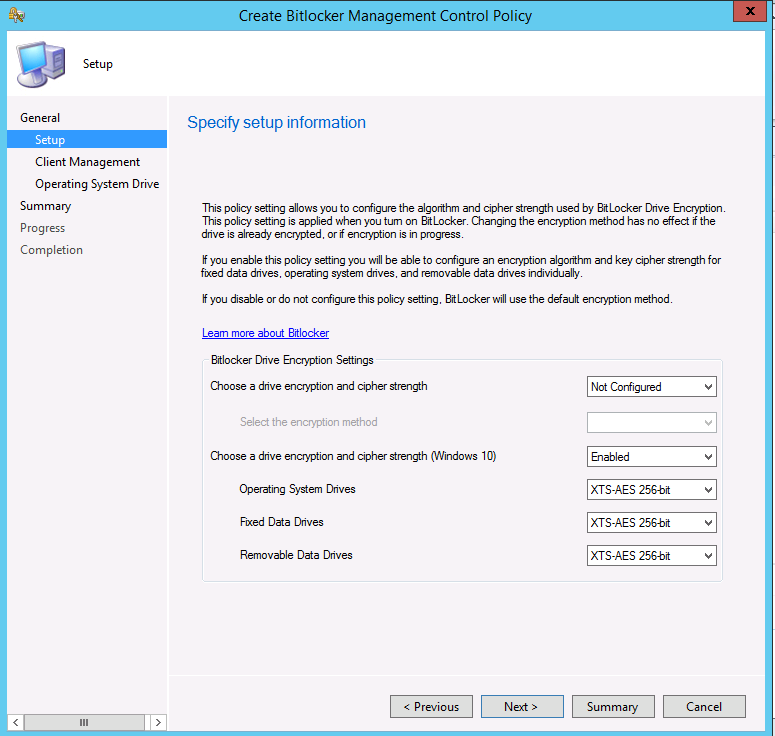
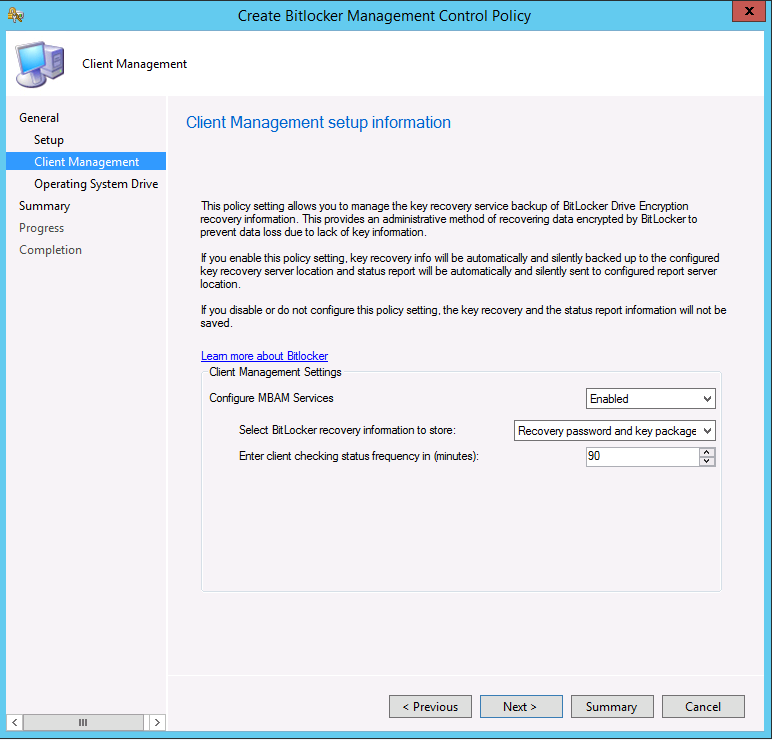
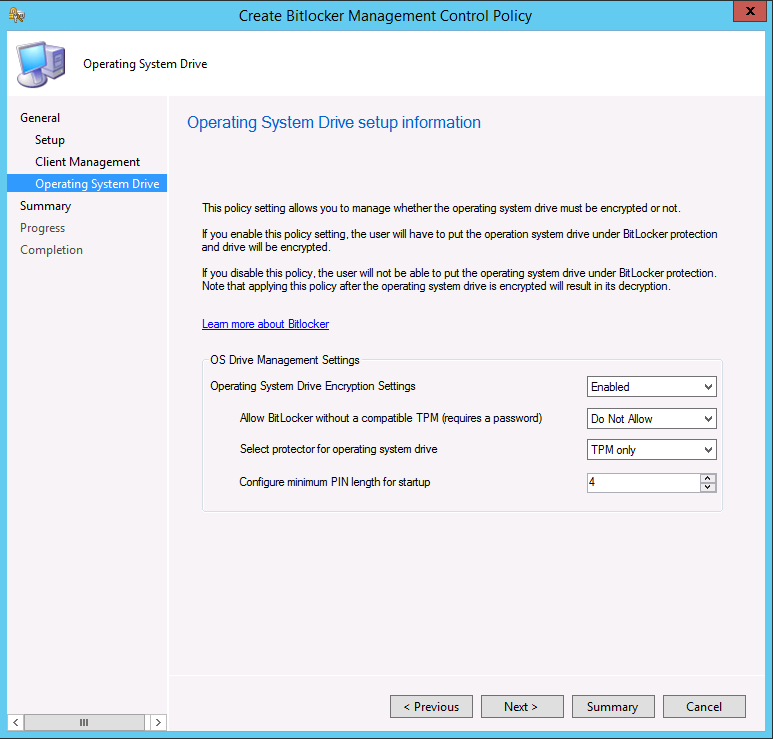
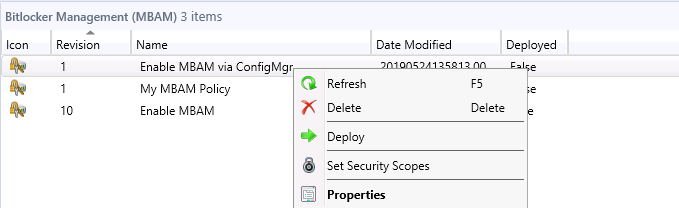
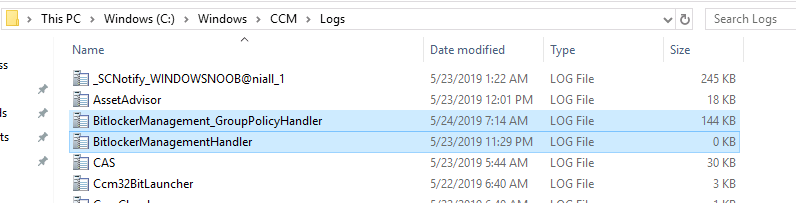
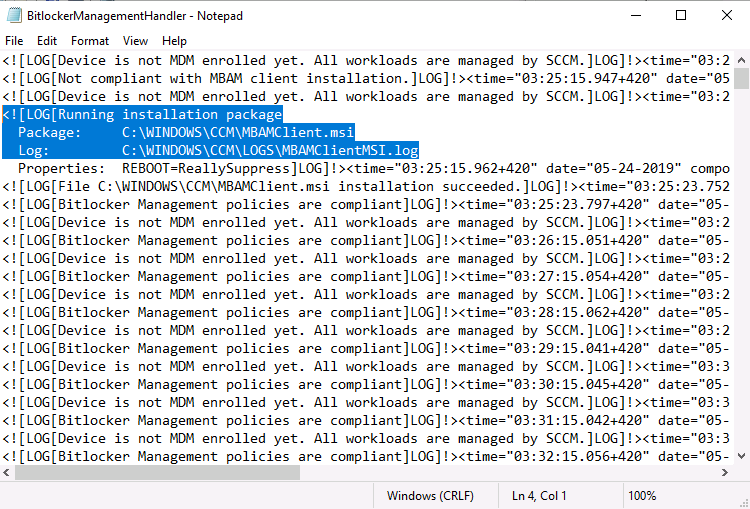
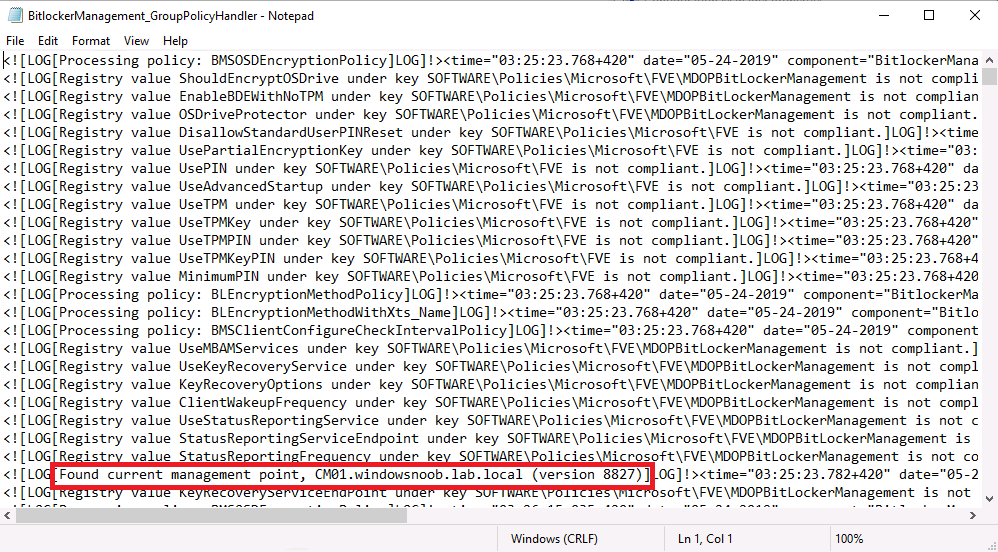
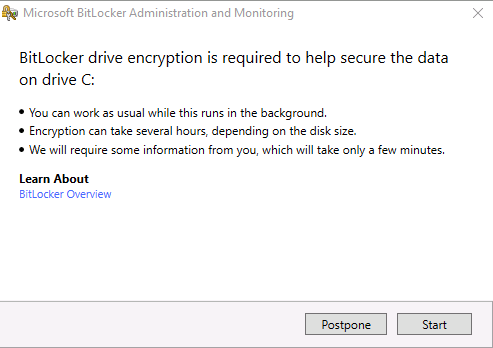
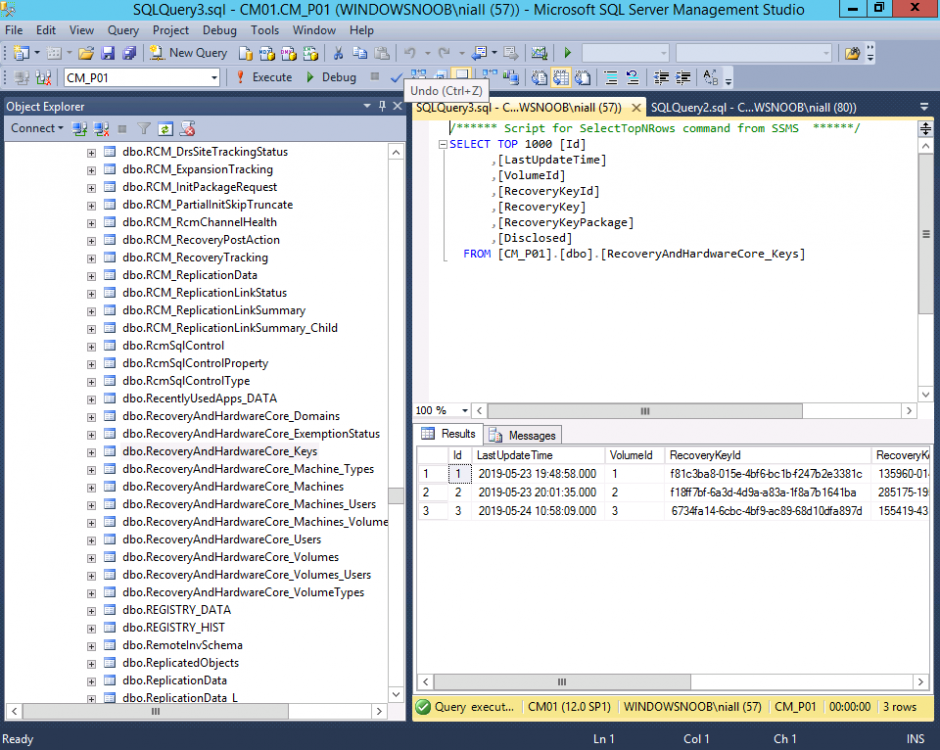
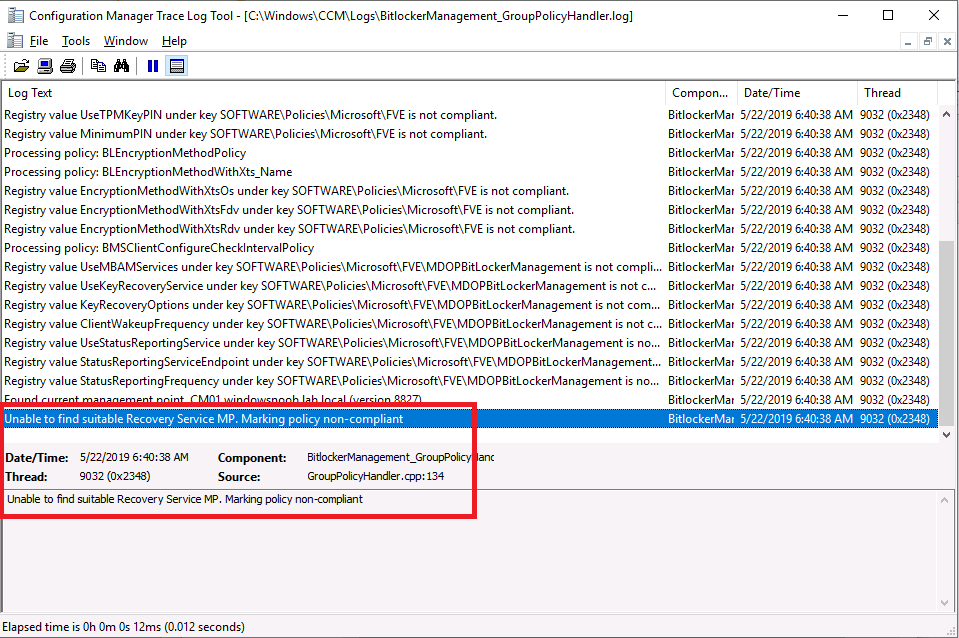
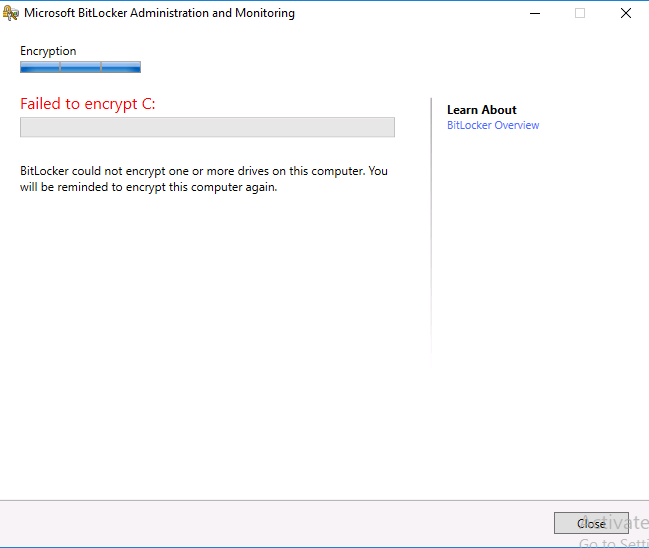
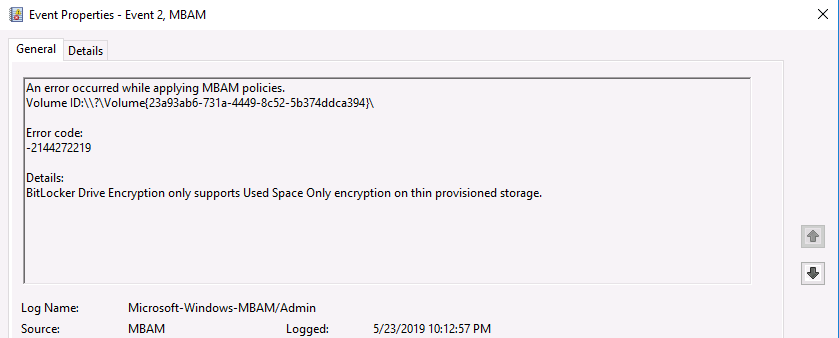
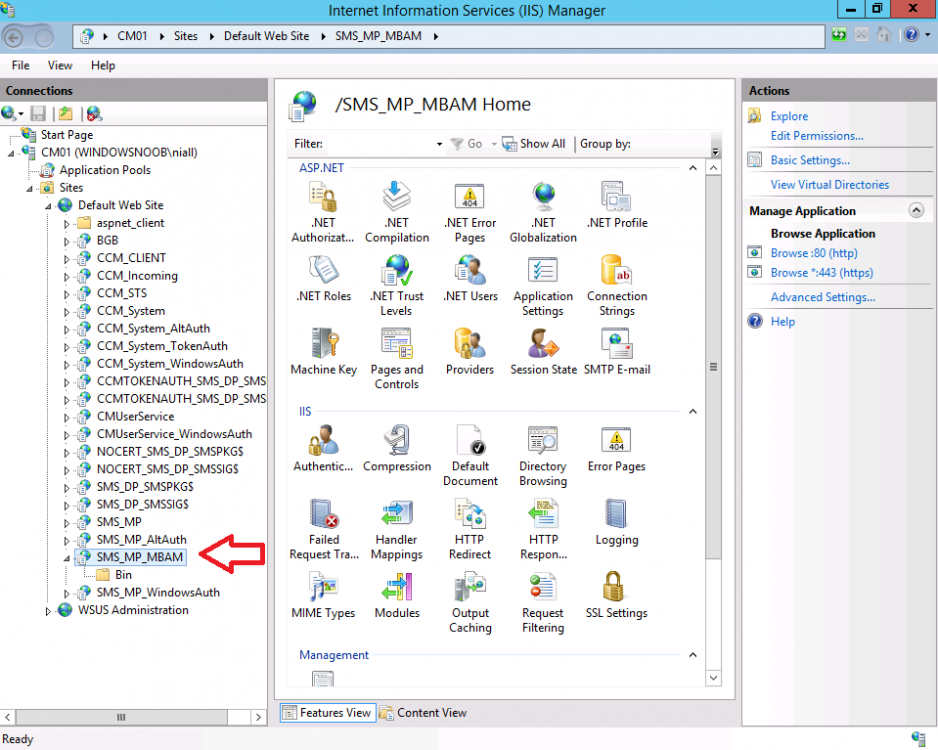
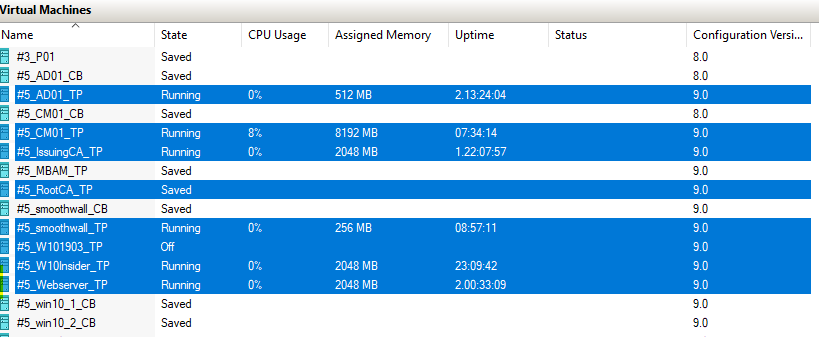
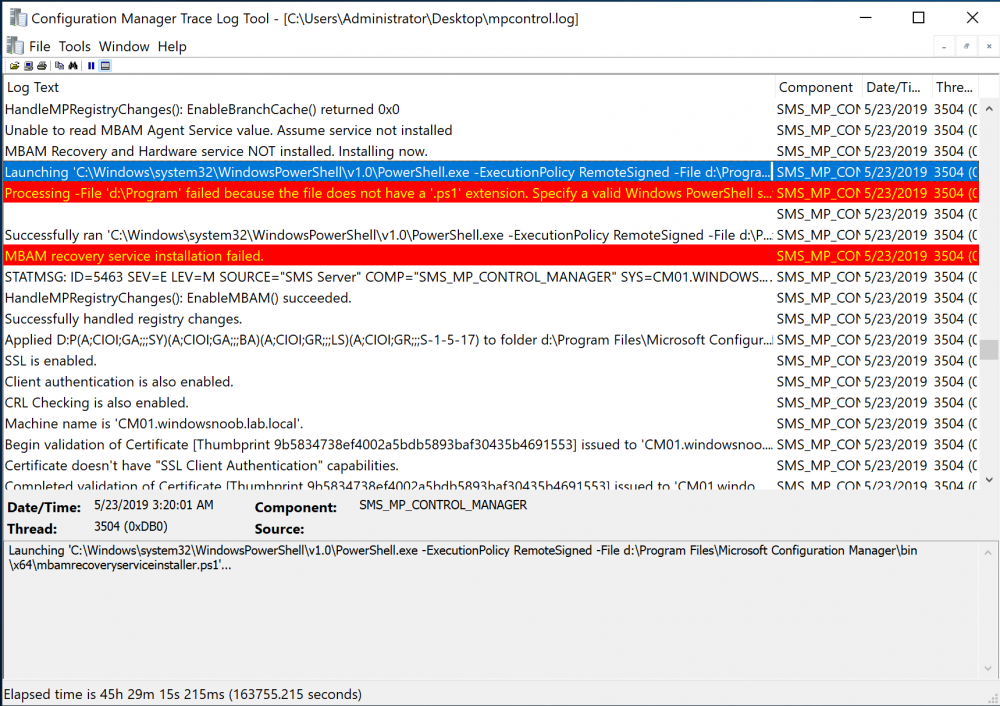
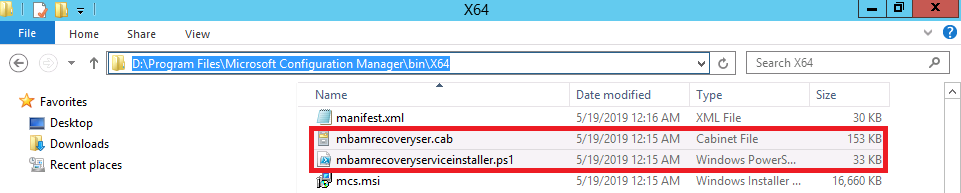
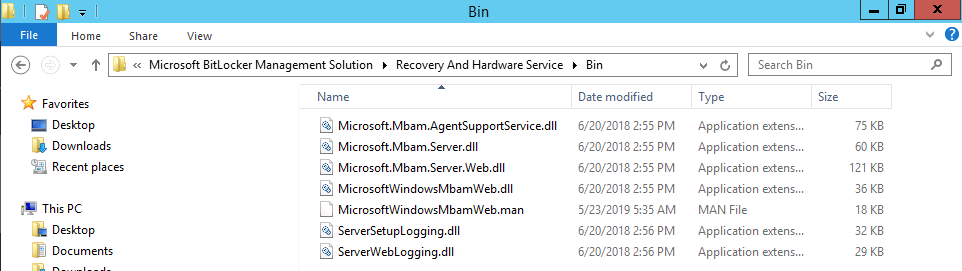
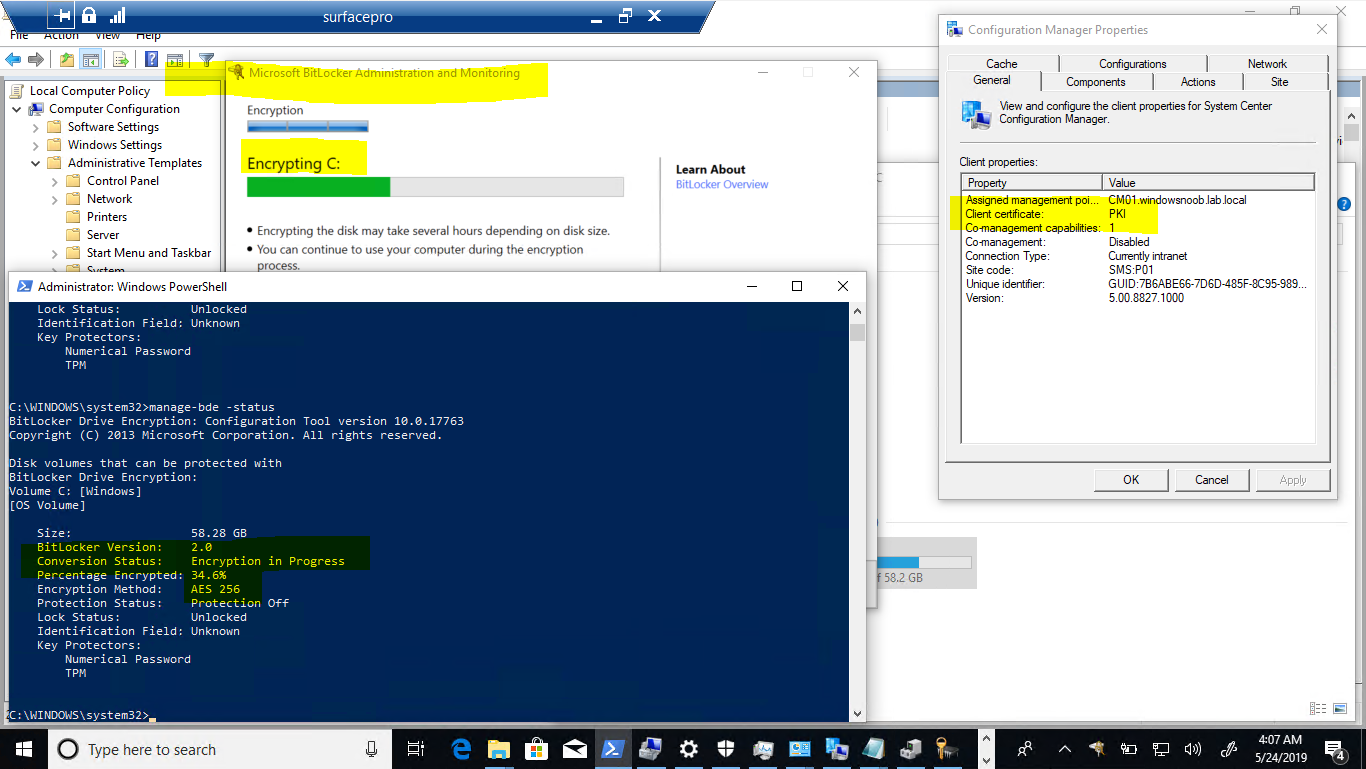
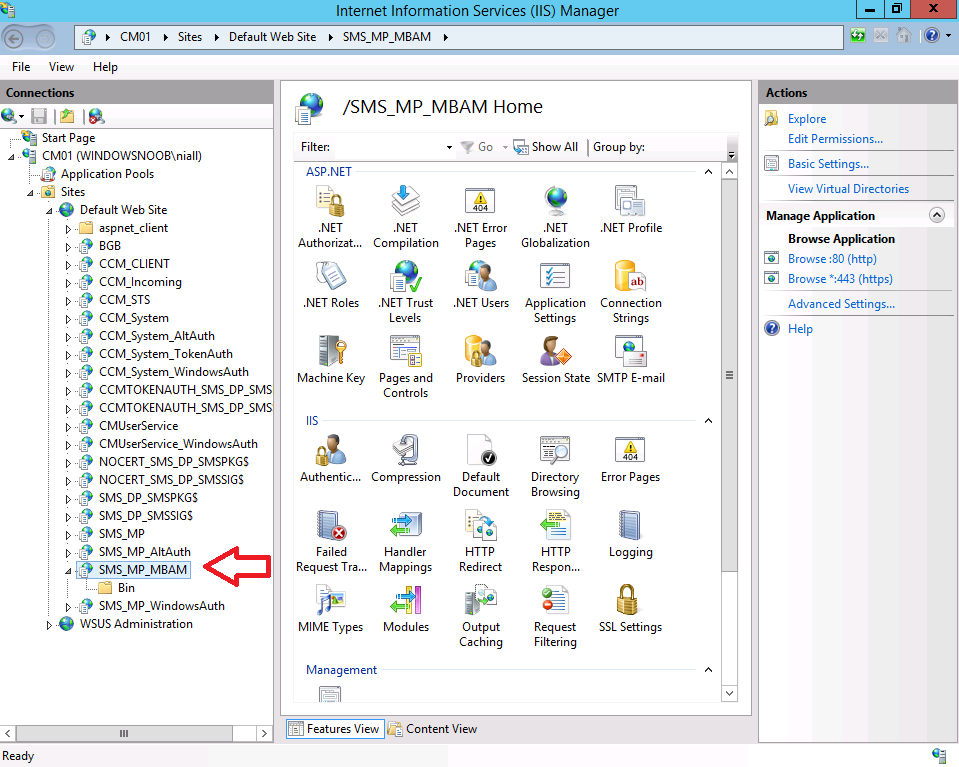
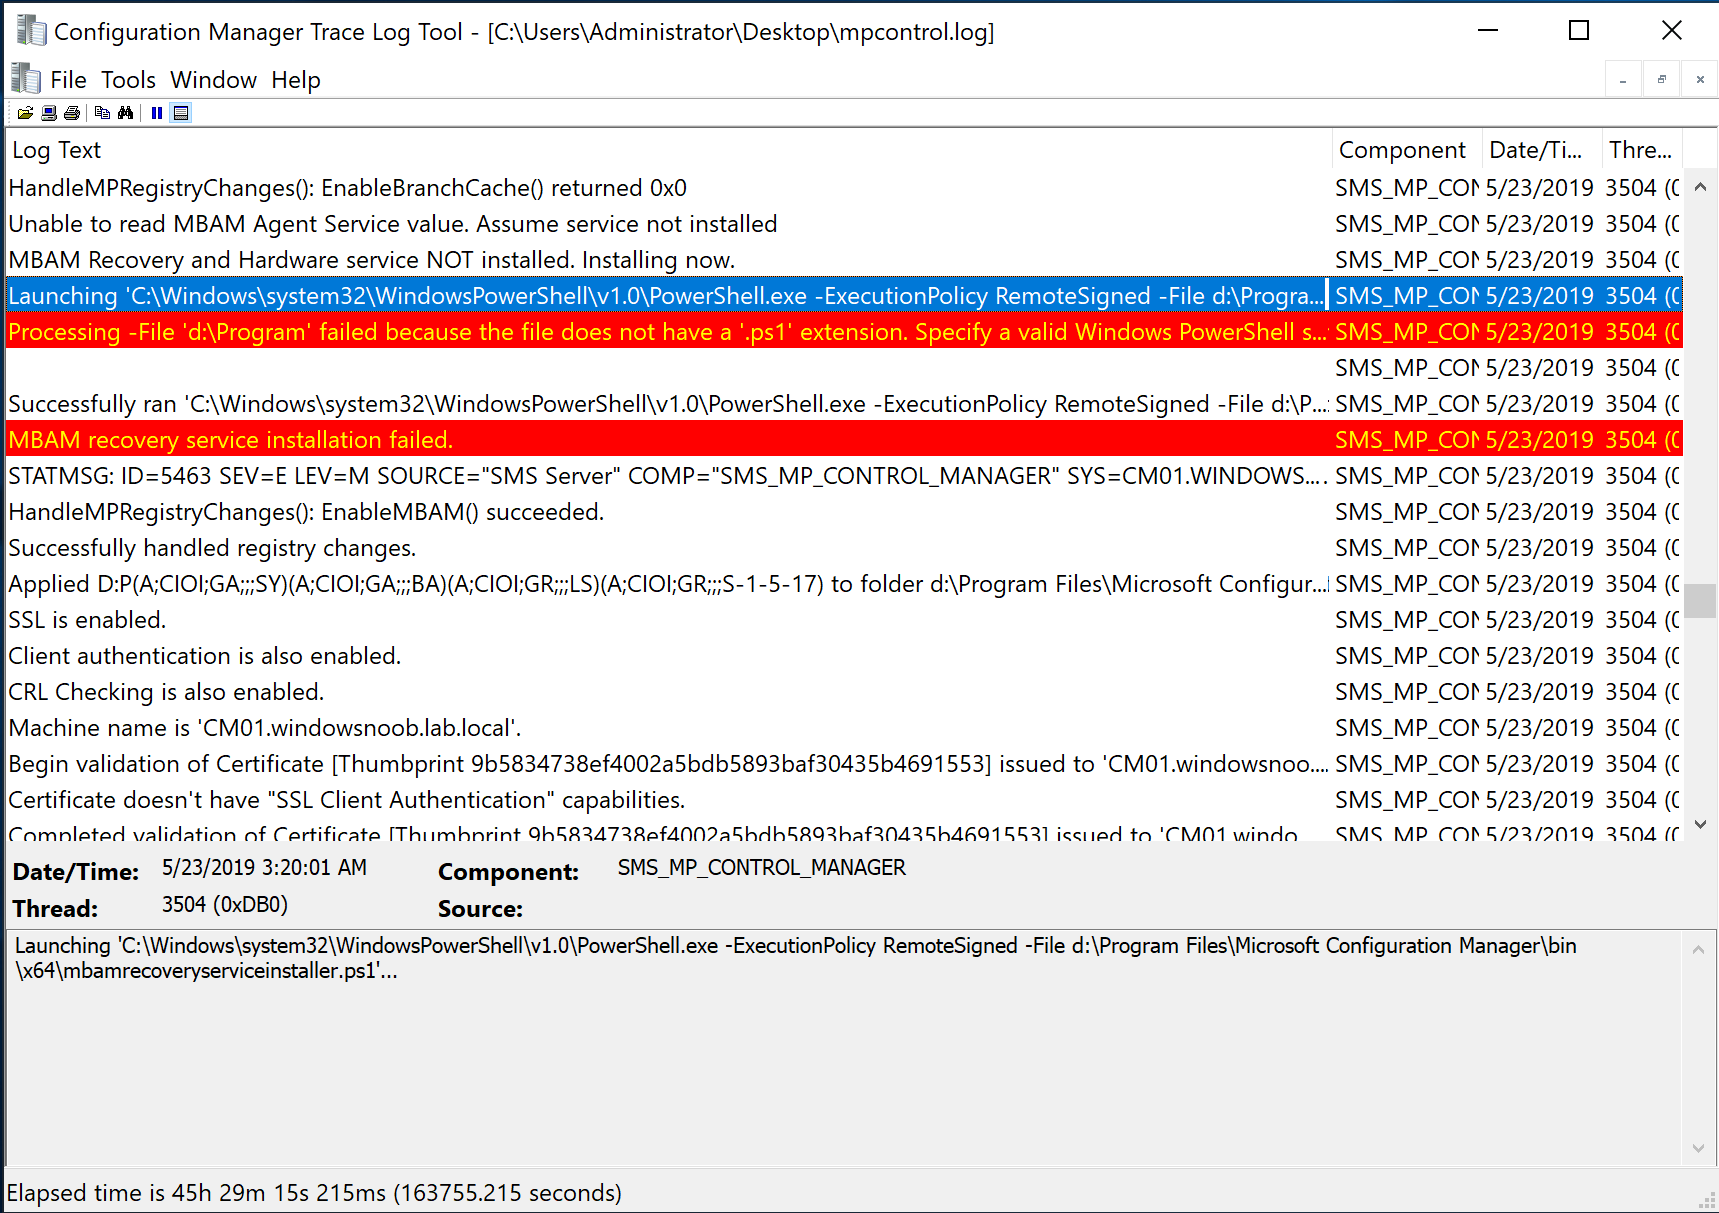
 Update: December 2019. This guide was originally written when Microsoft were still developing Bitlocker Management integration. They have now released Microsoft Endpoint Manager Configuration Manager version 1910, with the Bitlocker Management feature integrated, I cover that in detail here. Videos BitLocker management – Part 1 Initial setup BitLocker management – Part 2 Deploy portals BitLocker management – Part 3 Customize portals BitLocker management – Part 4 Force encryption with no user action BitLocker management – Part 5 key rotation BitLocker management – Part 6 Force decryption with no user action BitLocker management – Part 7 Reporting and compliance BitLocker management – Part 8 Migration BitLocker management – Part 9 Group Policy settings BitLocker management – Part 10 Troubleshooting Microsoft released SCCM TP 1905 and it has to be one of their finest ConfigMgr releases yet, with so many new features it was hard to decide which would get my focus, but On-premises BitLocker Management was there so I focused on that. For those that don't know Microsoft BitLocker Administration and Monitoring (MBAM) is an ability to have a client agent (the MDOP MBAM agent) on your Windows devices (7,8 10) to enforce BitLocker encryption and to store the recovery keys in your database. This is something that has been around for quite some years now and is working great, however, MBAM is currently it's own separate solution. The following blog post from Microsoft details their future direction with regard to BitLocker Management and is a must read. https://techcommunity.microsoft.com/t5/Enterprise-Mobility-Security/Microsoft-expands-BitLocker-management-capabilities-for-the/ba-p/544329 In that blog post they detail 3 options for BitLocker management based on your needs, and I'm going to focus on the second option: Option 2 – On-premises BitLocker management using System Center Configuration Manager And I quote... This is the new capability we now see in TP1905, native BitLocker Management within SCCM. So let's get started. But first keep in mind that this is the first instance of this capability and it will no doubt get better and with more features based on customer demand and needs. Step 1. Enable PKI/HTTPS mode Update: Initially PKI/HTTPS was required (in TP1905) for BitLocker Management in SCCM, however from Technical version 1909 it was no longer required, and became optional (but recommended). But in CM1910 it was again, required. For more info see this blog post. I'm including the important note from that text below. In order to get MBAM functionality working with SCCM Technical Preview 1905, you need to be in HTTPS mode (Secure PKI) both on the client and in ConfigMgr itself. This is to ensure that back up encryption keys which protect the data on managed workstations are sent securely to the management point. Why is that ? well, data sent over HTTPS is secure, but data sent over HTTP can be sniffed and read, and therefore be compromised. Converting to HTTPS (PKI) is no easy task, I won't go into details but I did as follows: converted my lab from HTTP to HTTPS by first adding PKI to the lab by following this set of blog posts converted SCCM TP 1905 from HTTP to HTTPS by doing this. To add PKI and convert to HTTPS took me approx 4 hours in total but it was worth it. My Technical Preview lab is shown below, all the computers with _TP at the end are in the TP lab, and it's got a 2 tier PKI infrastructure also. This lab is one of many hosted on my Lenovo P1. Step 2. Create an MBAM Policy In the SCCM console, select Assets and Compliance, expand Endpoint Protection and select BitLocker Management (MBAM), right click and choose Create BitLocker Management Control Policy When the wizard appears, give the policy a name and select the two options if necessary On the next screen, you'll see two drop downs for enabling BitLocker Drive Encryption Settings, the first is for Windows 8, Windows 8.1 and the second is for Windows 10. On the next screen you have Client Management setup information settings, the client policy retrieval is set here, and the default period is every 90 minutes, in a lab you can bring that down to every minute but keep in mind that it will popup regularly until you are compliant. Note: If you enable Configure MBAM Services, key recovery info is automatically and silently backed up to the Configuration Manager site. On the OS Drive Management settings screen, configure it as appropriate for your environment. Continue through the wizard to completion. Step 3. Deploy the policy Right click on your newly created policy and deploy it to a collection containing your target computers. Step 4. Verify things on a client On a client computer, verify that it has received the policy, you'll know it has the policy when it generates two BitLocker related logs in the C:\Windows\CCM\Logs folder, shown below. The BitLockerManagementHandler.log will record installation of the MDOP MBAM client agent and the BitLockerManageMent_GroupPolicyHandler.log records details about communication with the SCCM Management Point to retrieve policy (which it then set's on the client) as a local group policy effectively. In Programs and Features you should see the client agent installed. And you can review the logs in Event Viewer in Applications and Services Logs, Microsoft, Windows, MBAM as shown below. Step 5. Review the MBAM Client agent prompting for encryption On a computer that has the policy you'll see the MBAM Client Agent popup (provided that you are NOT connected via RDP). Click Start to start the process, after a while you'll see the drive is getting encrypted ! Step 6. Getting keys from the Database The recovery keys are stored in the SCCM DataBase in the following location, dbo.RecoveryAndHardwareCore_Keys You can use SQL queries as i detail here to retrieve the data you need from there just as you do today with your existing MBAM infrastructure. I've checked Reports in TP1905 and didn't see any MBAM specific reports yet. Troubleshooting When testing in the TP1905 release make sure your client agent is using the TP1905 version, and that it's in PKI mode. You'll be alerted to this in the log file as shown below, note that it states Unable to find suitable Recovery Service MP. Converting your Management Point to HTTPS solves that error. Secondly, you may need to use real hardware to verify the encryption settings, results vary on virtual machines (at least they did for me in my TP1905 testing, in ConfigMgr 1910 where this was released, and with virtual machines using Windows 10 version 1809 or later, it works just fine !). Below is a typical error on a virtual machine after attempting to encrypt. The error will be visible in the event viewer. Details: BitLocker Drive Encryption only supports Used Space Only Encryption on thin provisioned storage. Note: If you see the error above, try using a Virtual machine running Windows 10 version 1809 or later. Verify that you have the sms_mp_mbam component installed in IIS If it's not there, review the MPControl.log to review why...below you can see why the MBAM installer initially failed on my lab, this was due to the PowerShell script that installs the service didn't check for spaces in the path. To resolve this I had to manually extract the files in the mbamrecoveryser.cab CAB file and keep running the mbamrecoveryserviceinstaller.ps1 PowerShell script until I got it to run without error. Once successful, it should be extracted to the SMS_CCM folder as shown below. With the following files present in the Bin folder... See it in action Please review my video below to see MBAM in action, both on the client and server side, great job from Microsoft ! Update: This guide was originally written when Microsoft were still developing this new MBAM integration. They have now released Microsoft Endpoint Manager Configuration Manager version 1910, with the MBAM feature integrated, I cover that in detail here (scroll down to the videos). Recommended reading https://docs.microsoft.com/en-us/sccm/core/get-started/2019/technical-preview-1905#bkmk_bitlocker https://techcommunity.microsoft.com/t5/Enterprise-Mobility-Security/Microsoft-expands-BitLocker-management-capabilities-for-the/ba-p/544329 https://docs.microsoft.com/en-us/windows/security/information-protection/bitlocker/bitlocker-management-for-enterprises Related reading https://docs.microsoft.com/en-us/microsoft-desktop-optimization-pack/mbam-v25/index