Clamb
-
Posts
9 -
Joined
-
Last visited
Everything posted by Clamb
-
Since I started the original topic the issue I was having was resolved with CU3. I can now boot 64bit machines and get the correct architecture. I still have to separate the x86 and x64 collections and I can't advertise to Unknown Computers. However I assumed that would be the case which is how this whole thread started in the first place. Up until CU3 even with the separate collections, and 64bit UEFI machine was identifying itself as an x86 platform first. Now it identifies itself as an x64 bit system. This makes it select the 64 bit boot image. This is exactly the functionality I was trying to get. The unfortunate downside is any unknown machine can't be re imaged until it runs collection tasks which add it to another Collection I have advertised the task sequence to. This happens from time to time when we have a system fail during imaging. Our solution, for now, is to just delete the machine record and therefore make it unknown again. -Chris
-
Setting Default Backgrounds and Resolution During OSD
Clamb replied to Clamb's topic in Configuration Manager 2012
It appears that it actually is working as it should. I applied the image to a physical machine and everything worked as it should. The Gen1 Hyper-V machine also works as it should. Looks like Gen2 Hyper-V machines are the ones giving me troubles. Of course, this is the machine I have been banging my head with trying to get the darn thing working. I'm going to test a few more physical machines to be sure. -
Setting Default Backgrounds and Resolution During OSD
Clamb replied to Clamb's topic in Configuration Manager 2012
The correct resolution is set at login screen so it's installed prior to the login immediately after the final reboot. -
Setting Default Backgrounds and Resolution During OSD
Clamb replied to Clamb's topic in Configuration Manager 2012
Everything I had read indicates the drivers are loaded at this point. The script runs right before the last reboot step. After Windows Updates. -
Setting Default Backgrounds and Resolution During OSD
Clamb replied to Clamb's topic in Configuration Manager 2012
It already is after the driver install. The complete OS is installed. It has even rebooted the machine once and run through the complete OS setup. I can post a pic of the Task Sequence if you like. -
I am working on a new golden image for our department. I have gotten almost everything working with lock screens and colors and such for Windows 8.1 as well as Windows 7. I am having one small issue which I haven't found a solution yet. That is setting the correct default background image. In my task sequence I am applying the OS Branding step following the Setup Windows and Configuration Manager step. This step runs a Powershell script which sets permissions on the various Windows\Web folders, copies the OEM image files, and sets a few registry keys. Part of this script also determines the current screen resolution and then copies the appropriate file to the Windows\Screen\Wallpaper folder. I have several different files that it selects from based upon the current ratio of the screen. So it will copy Background1024x768 or Background1920x1200 as appropriate depending on the current resolution. The problem I running into is no matter what I do, the resolution of the machine will always be 1024x768 at this step in the Task Sequence. I have tried adding VResoution=1 and XResolution=1 variables to force it to change the resolution (a tip from a Google search). I have also tried setting the resolutions to 1 in the Display settings in both the Specialize section and the OOBE section of the UNATTEND.XML file. Neither of these seems to work. When the task sequence finishes, the fully imaged machine does indeed boot with the Recommended resolution. However, because it isn't set to the proper resolution during the task sequence, my background is not the correct resolution. I did try putting in the machine specific settings in via the Display setting in the OOBE section with an UNATTEND.XML file, the script works like a champ. This would be great if all of my machines had the same resolution, which of course they do not. Any thoughts on how I can get this to work. I am at the point where I am considering setting up an Autologon and RunOnce at the end of the OSD task sequence to accomplish the task, but I am trying to avoid this if possible.
-
I usually just log in to the imaged machine and use BCDEDIT /enum all to list the entries. I then use BCDEDIT /delete to remove the entries. Be careful though, you can remove the network adapter in the process.
-
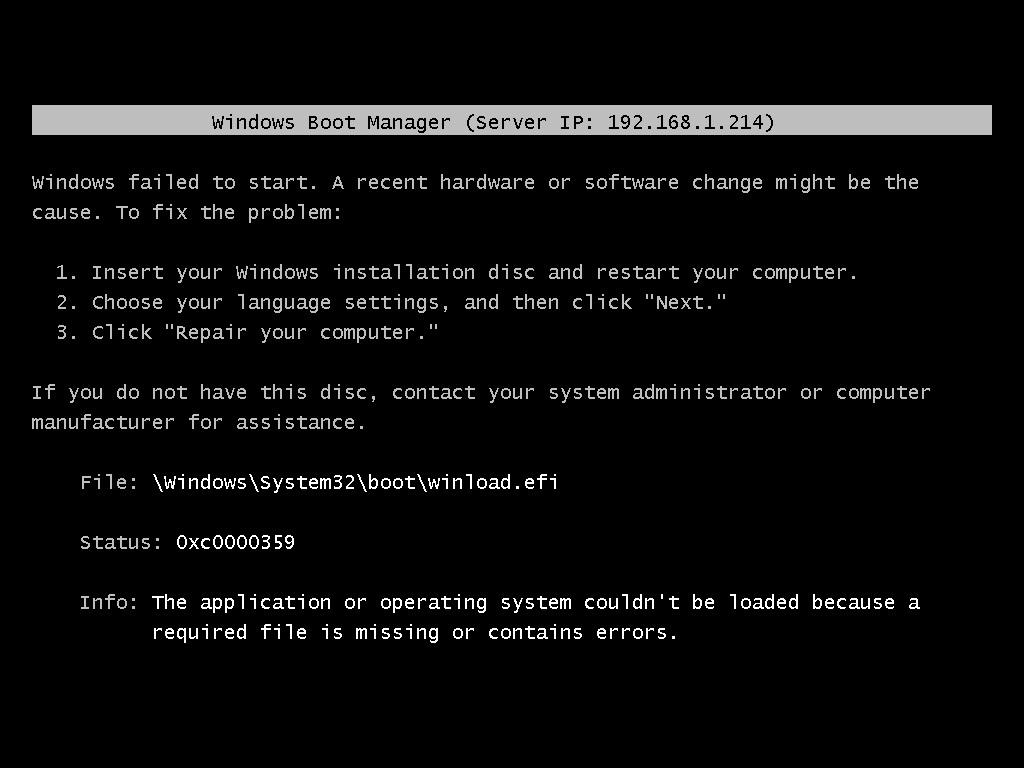
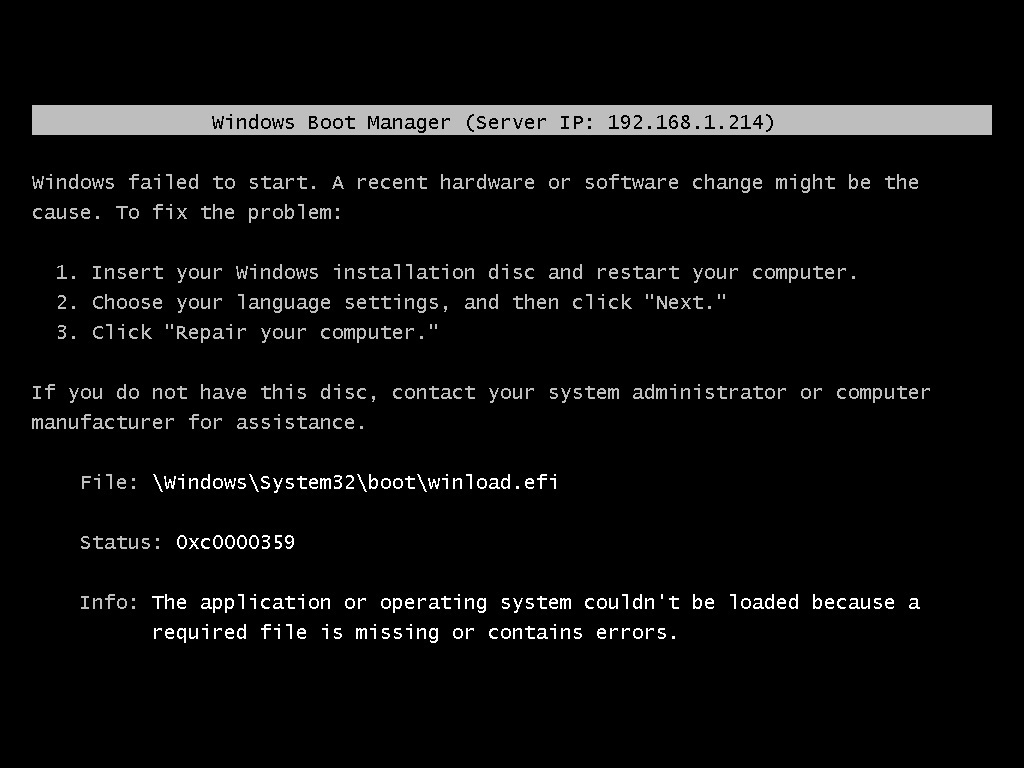
SCCM OSD to UEFI laptop with PXE boot crashes - winload.efi
Clamb replied to gleep52's topic in Configuration Manager 2012
I have a similar post on this same subject. The only way I have found to make it work with 32bit and 64but UEFI is to import the machines into SCCM and create a specific collection which is targeted by the task sequence. My experience is the same, it appears as if 32-bit is offered first by SCCM even though the machine is 64-bit. This makes sense in a weird way as 64-bit machine is both a 32bit and 64bit capable machine. However, I find it odd that SCCM doesn't first offer 64 bit since it's UEFI and you can't boot with a 32bit boot image. -
I have to apologize for the length of the post right up front. I am having an issue with PXE boot while using SCCM 2012 R2. The issue is only with 64-Bit machines using UEFI. All others are working correctly. This is running in a test lab so it's a pretty simple setup at this time. I have two boot images (x86 and x64), both are distributed to the DP's and Unknown Computer support is enabled. I have two Task Sequences that I am testing. One is a Windows 7 x86 sequence - using the x86 Boot Image.The other is a Windows 8.1 sequence - using the x64 Boot Image. No applications or anything special in the task sequence, just standard OS installation. I was initially deploying both the x86 and x64 task sequences to the "All Unknown Computers" group. However, this caused issues as SCCM was selecting the initial PXE boot image based upon the last deployment. Therefore it would not always boot the correct architecture. I know I can boot the x86 image and deploy a 64 Bit OS. However, UEFI breaks all of this. When you attempt to PXE boot in UEFI mode, the architecture of the boot image must match the architecture of the machine. I have a mixture of x86 (Latitude 10 tablets) as well as newer x64 UEFI machines. There are also both x86 and x64 non UEFI capable machines. So I need to be able to support Non-UEFI as well as UEFI PXE booting for both the x86 and x64 architectures. To get around the issue with publishing multiple task sequences to Unknown computers, I have created two Collections to try to separate the x86 Unknown Computers and x64 computers. The collections each contain 1 member, the "x64 Unknown Computer" and "x86 Unknown Computer", respectively. I then modified the Windows 7 x86 task sequence to deploy to the "Unknown x86 Computers" collection. I also modified the Windows 8.1 task sequence to use the "Unknown x64 Computers" collection. I can now successfully boot an x86 NON-UEFI machine, an x64 NON-UEFI machine, as well as a UEFI x86 machine. They all pick up the correct boot image and run the task sequence just fine. The issue I am having is specifically with the UEFI 64-Bit machines. They PXE boot just fine, however when they do, they boot from the x86 Boot Image. Of course this doesn't work because of the UEFI mode. I get the following error: I have attached the SMSPXE.log file in case this helps. Now, here is the interesting part..... If I import the UEFI 64 Bit test machine via either the MAC address or GUID and add this to a collection and then deploy the Windows 8.1 Task Sequence to this collection, the machine boots the correct x64 Boot Image and runs the task sequence just fine. Anyone have any ideas how I can specifically target UEFI 64-Bit machines through a collection? -Chris SMSPXE.log