Search the Community
Showing results for tags 'Sharepoint'.
Found 2 results
-
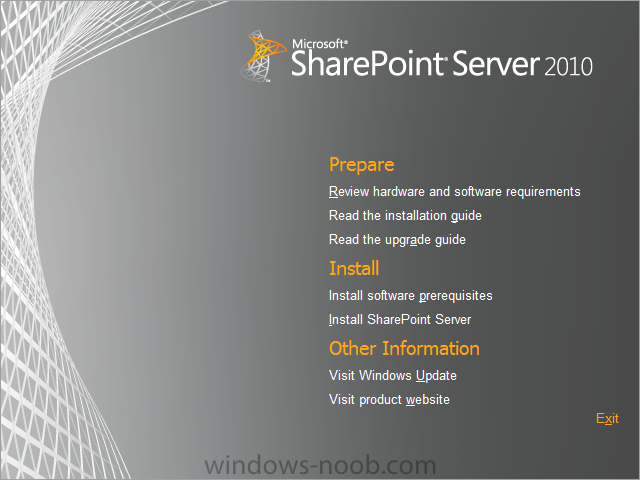
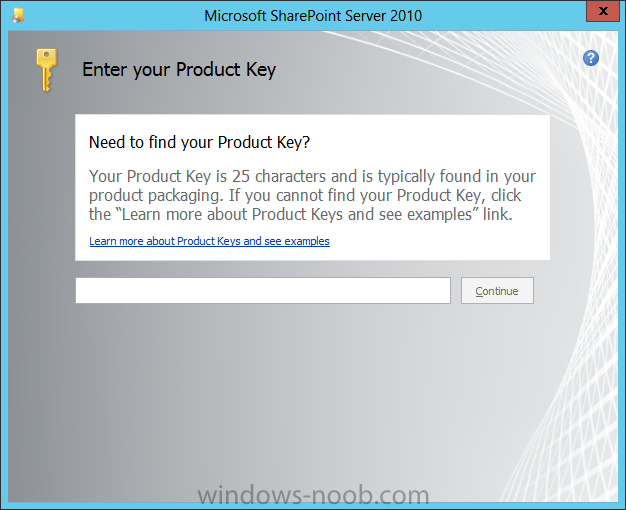
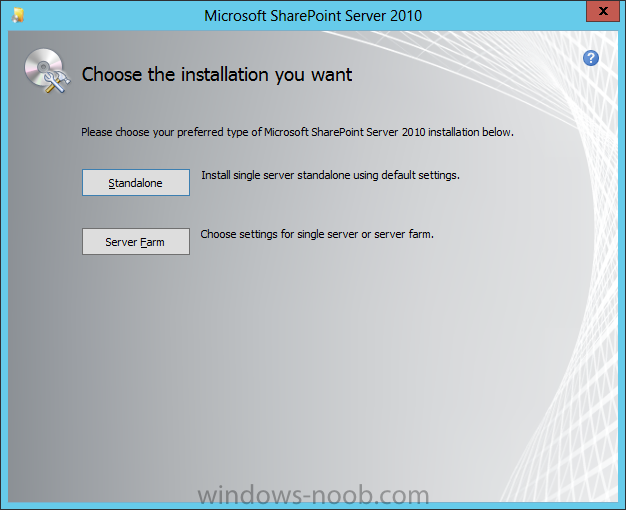
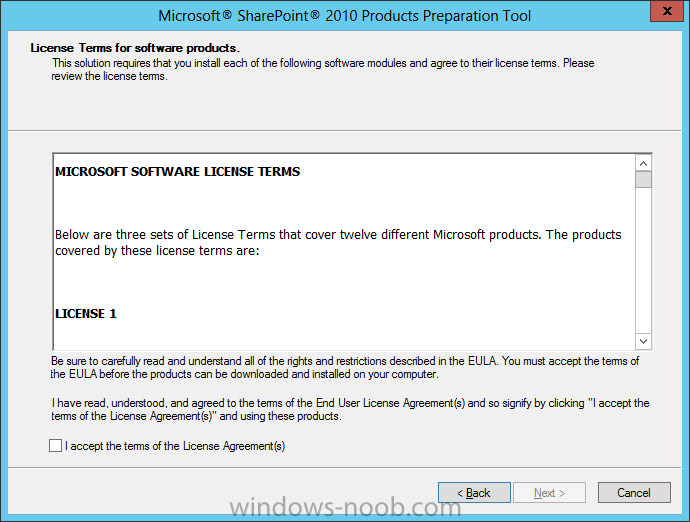
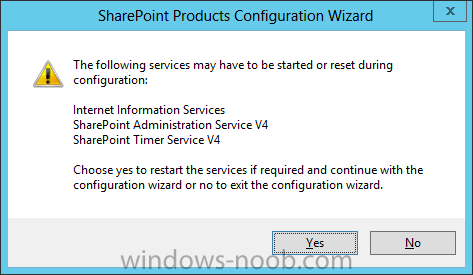
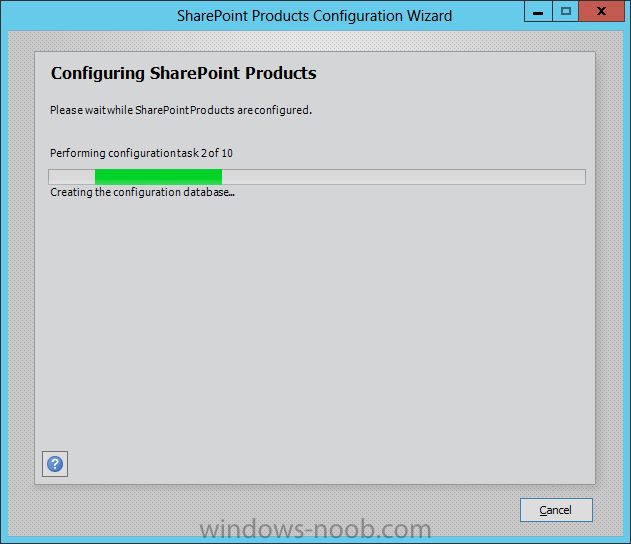
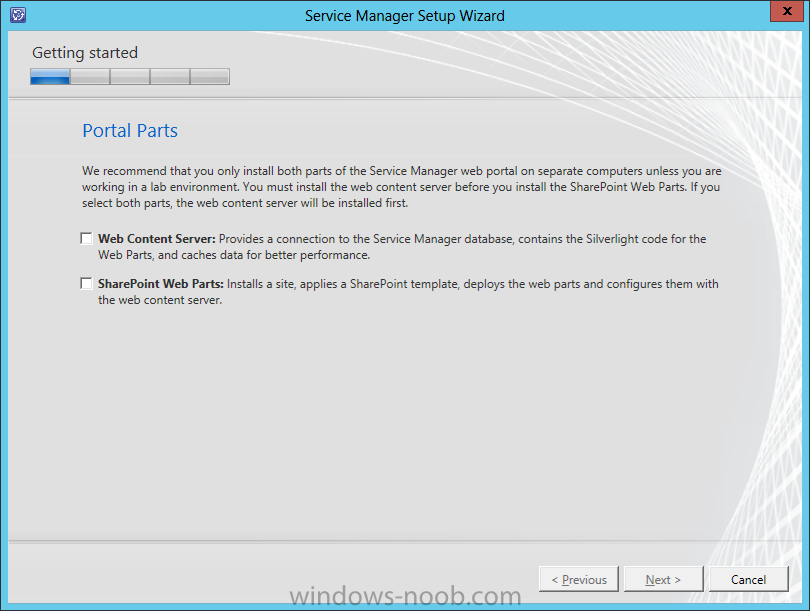
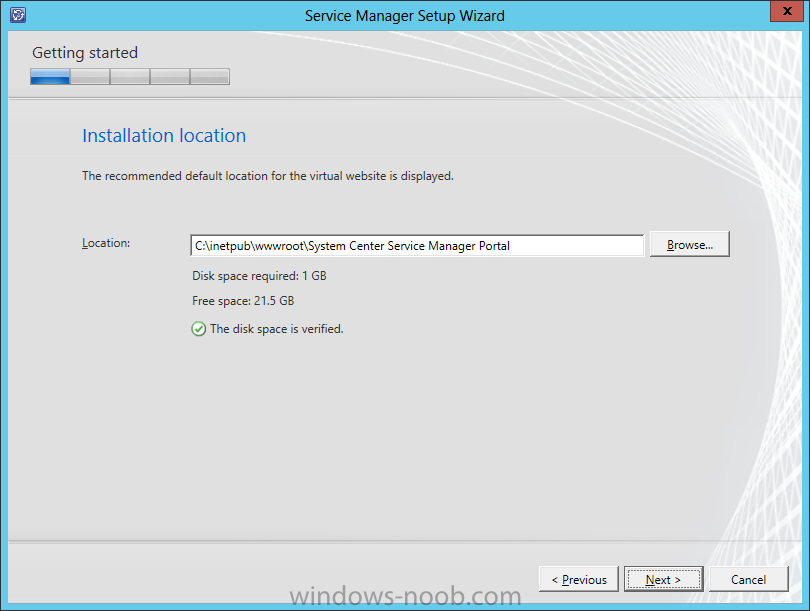
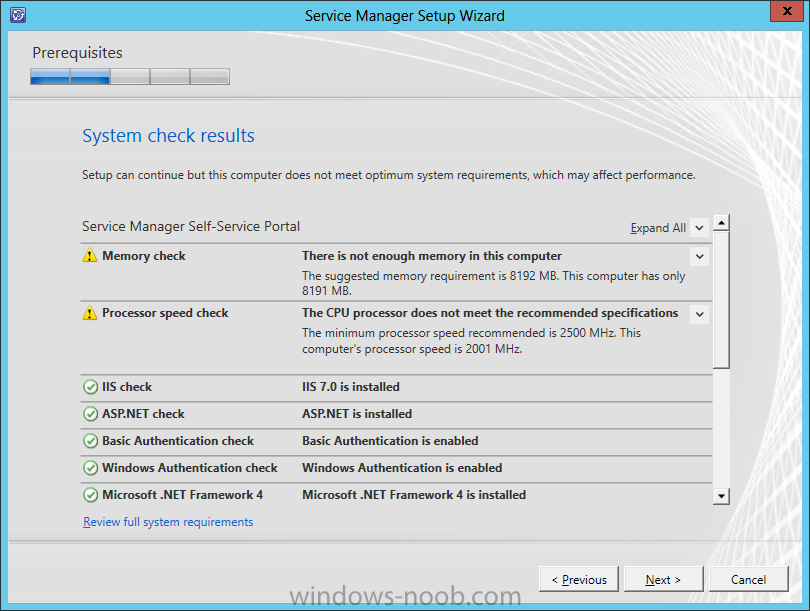
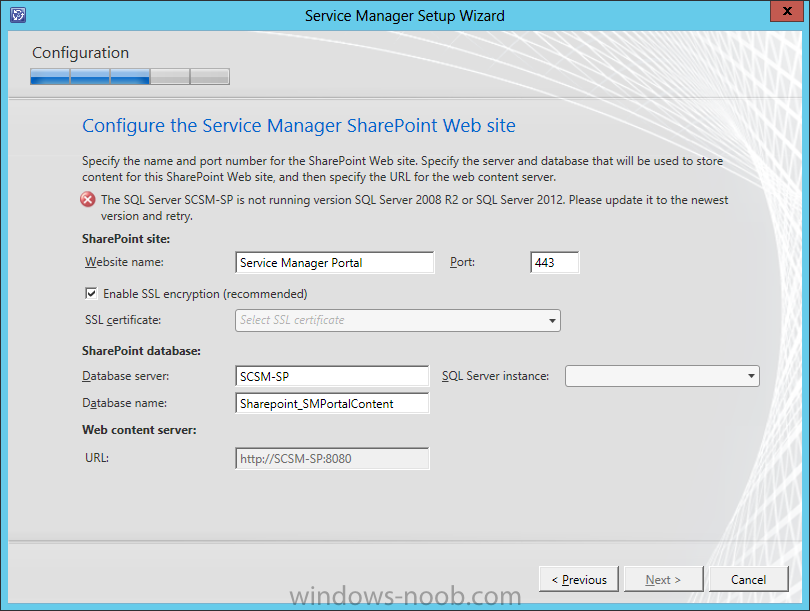
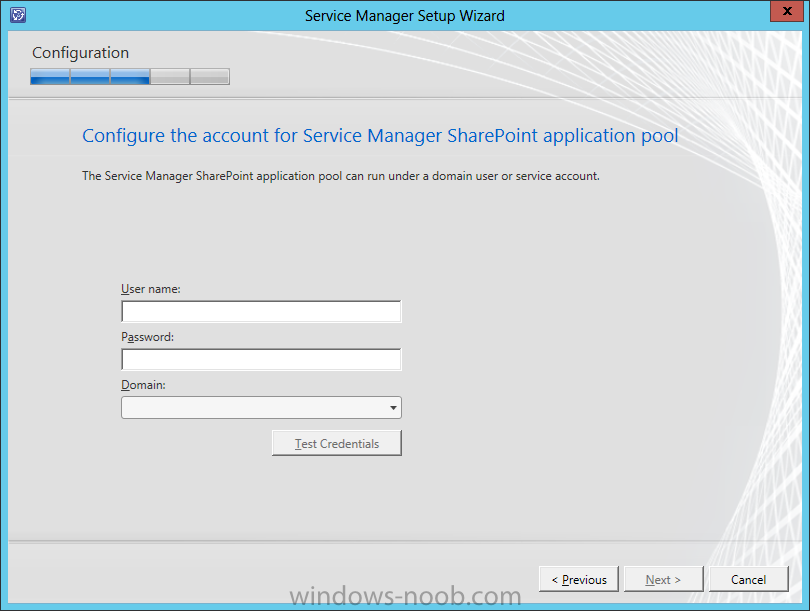
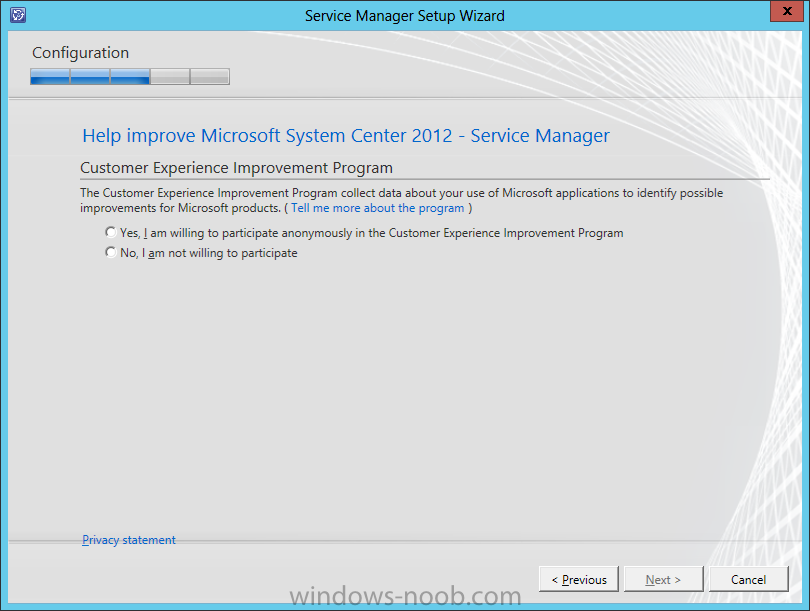
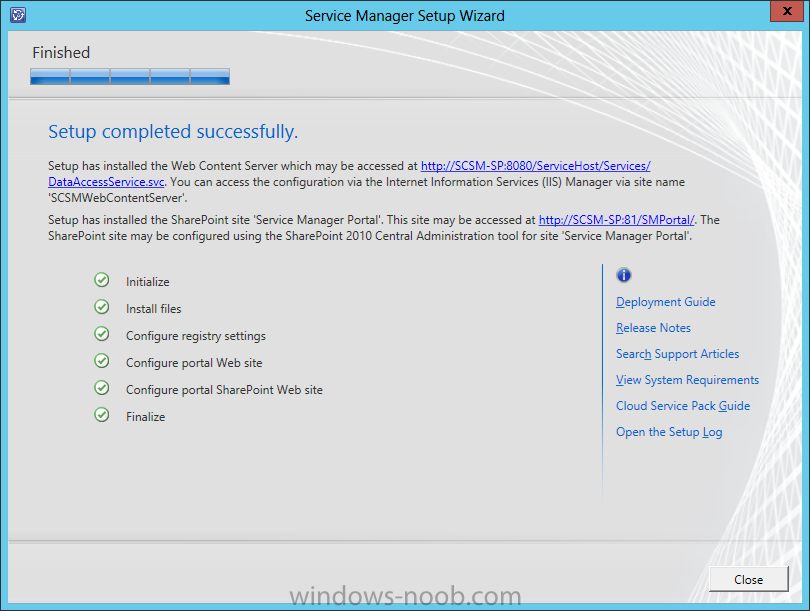
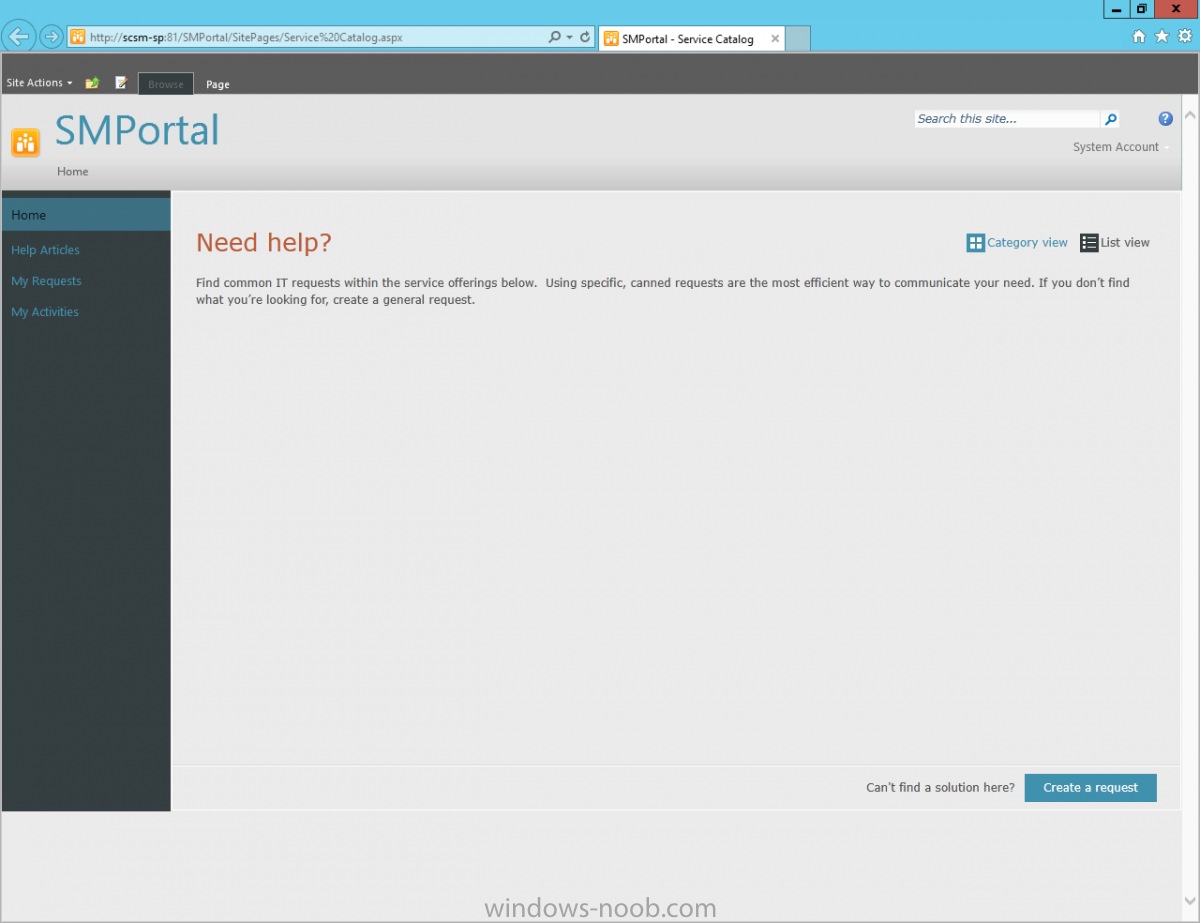
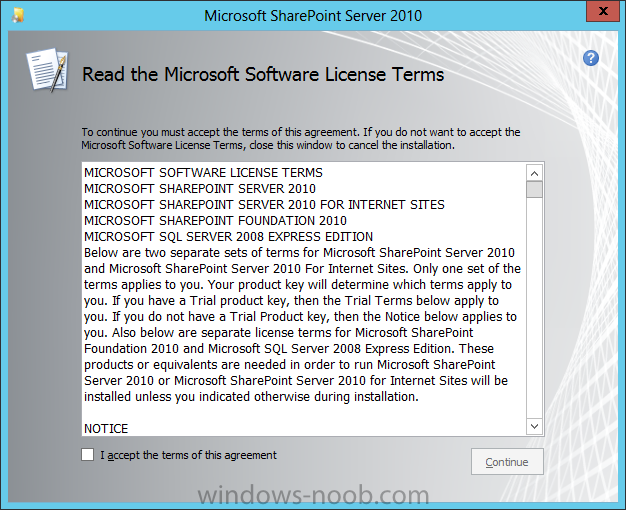
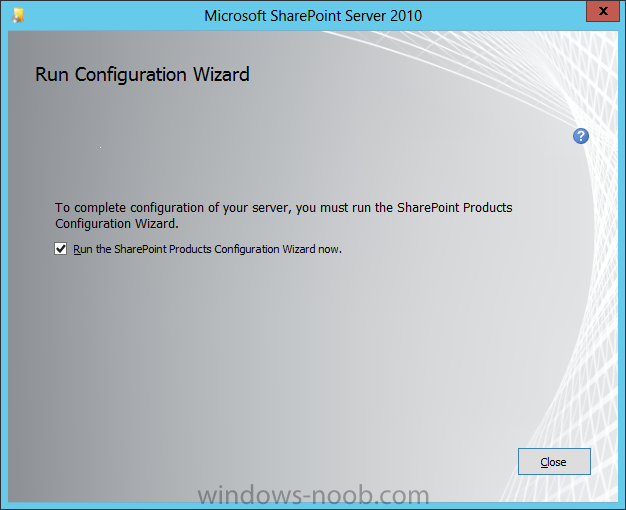
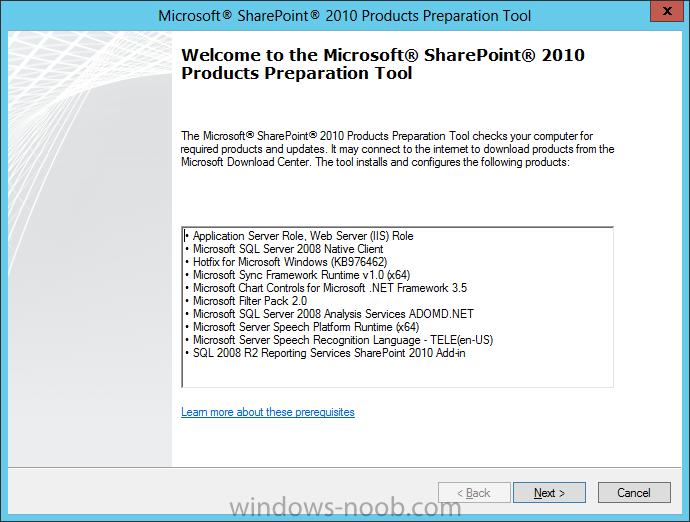
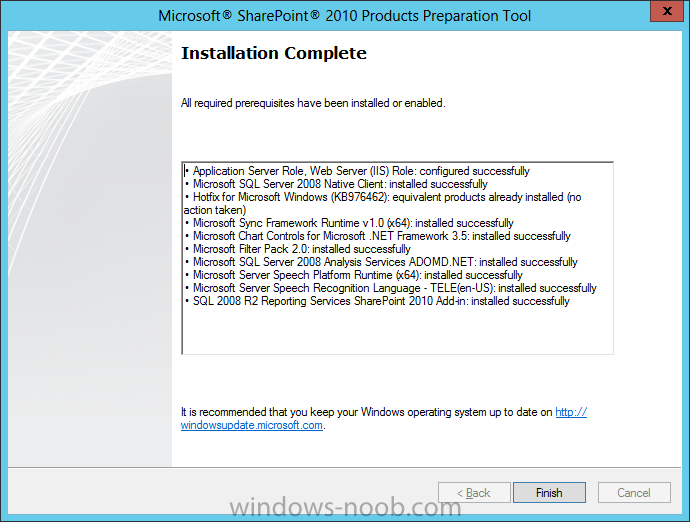
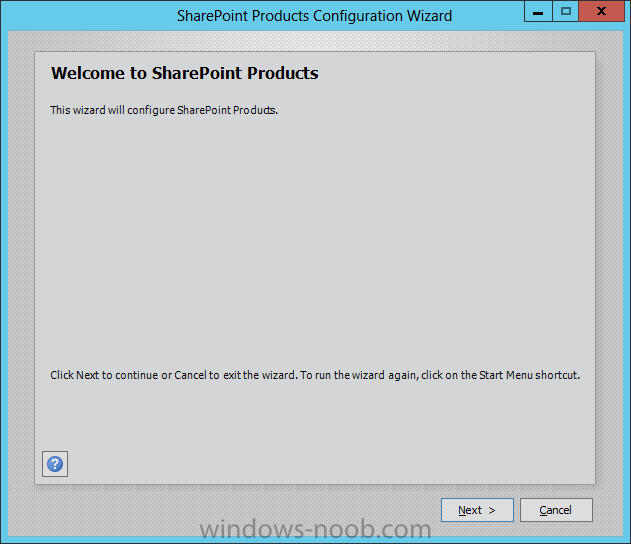
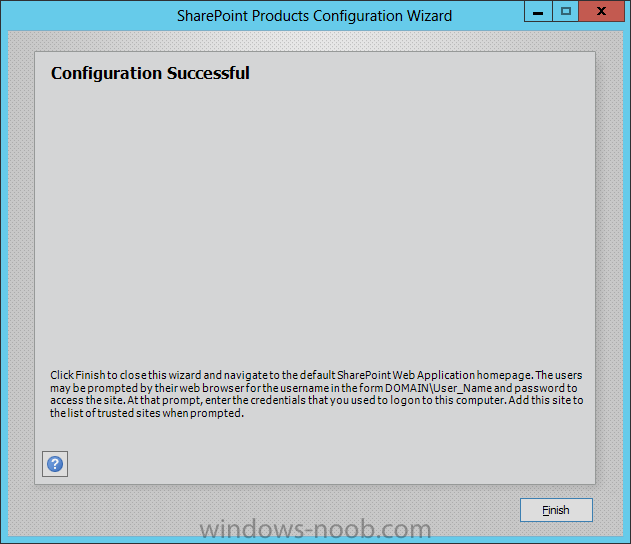
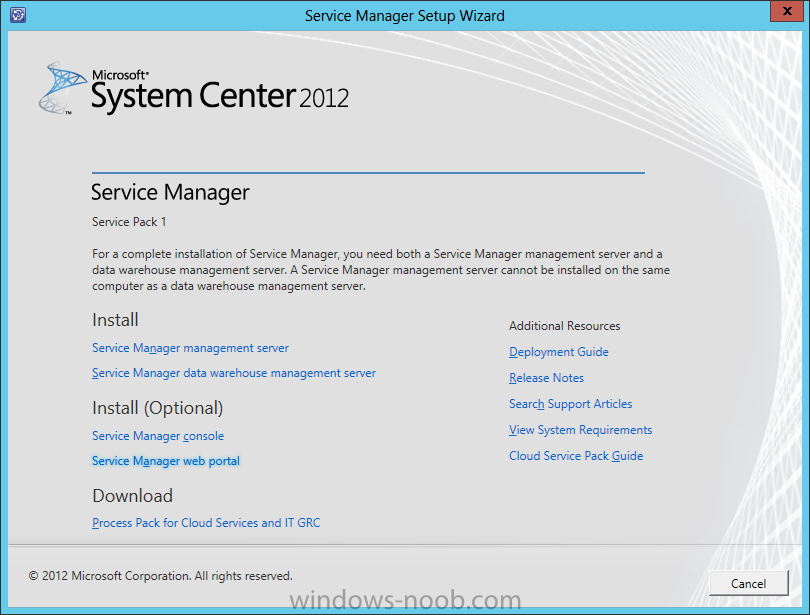
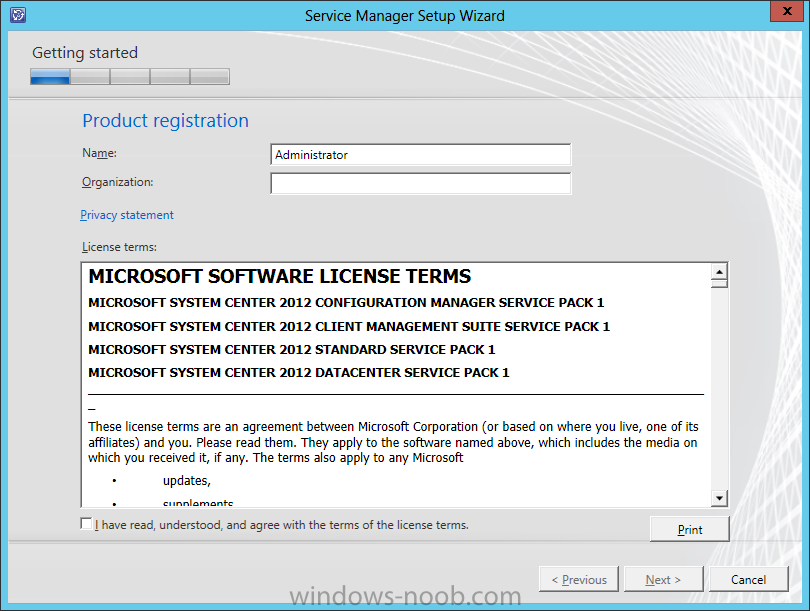
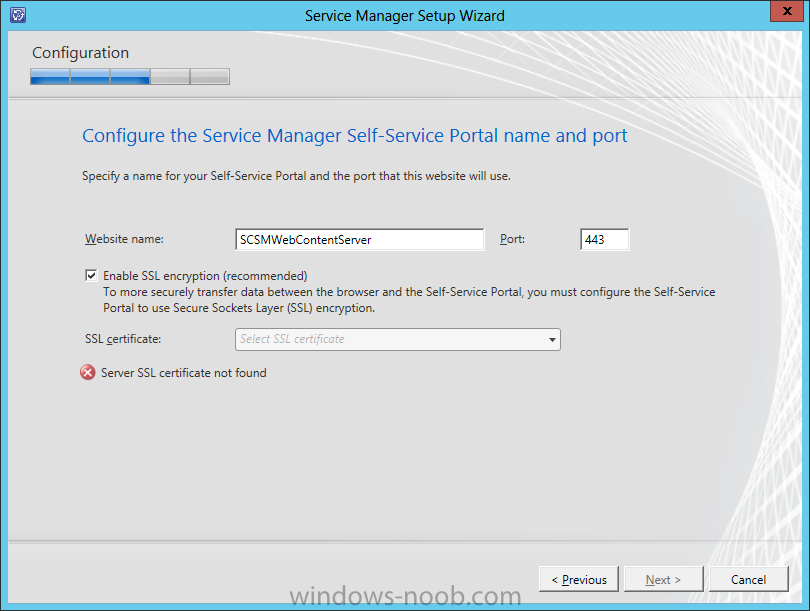
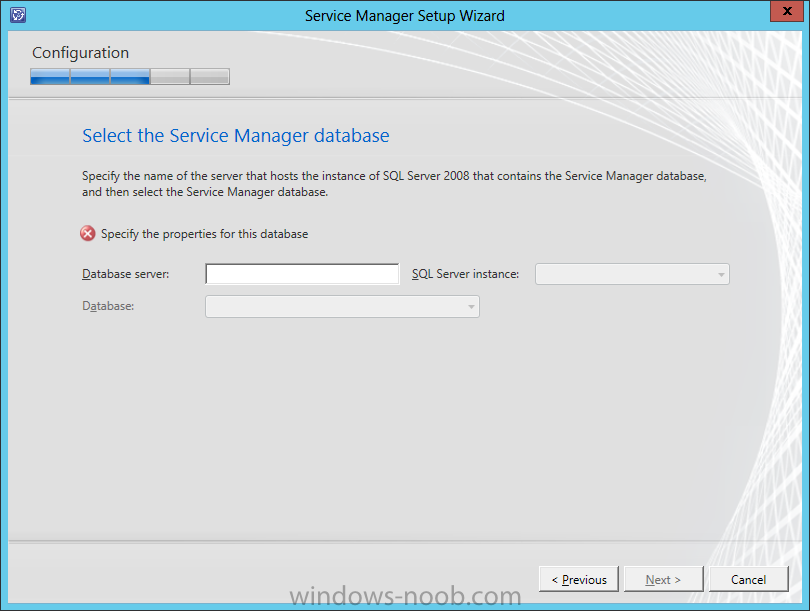
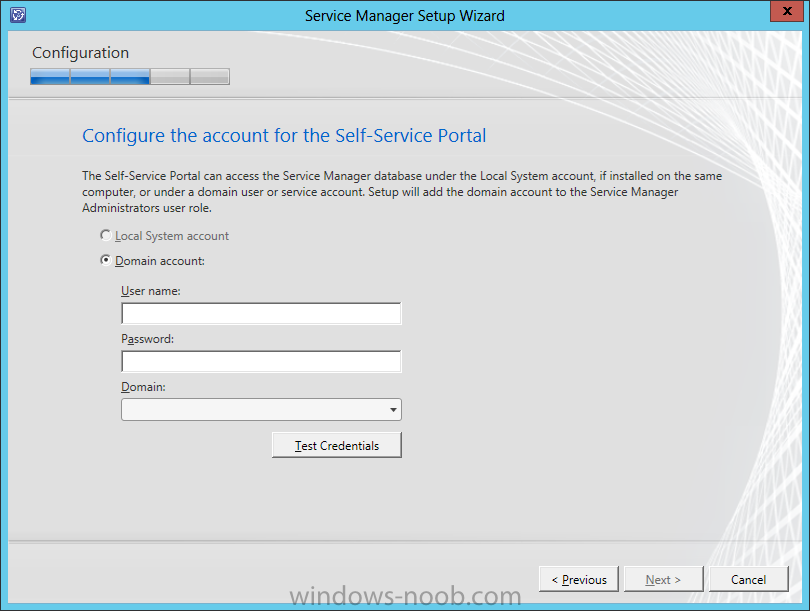
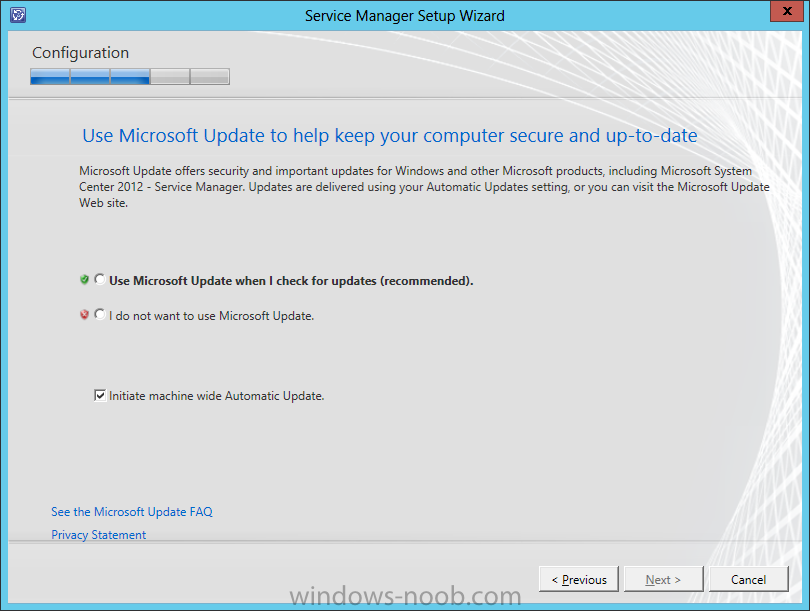
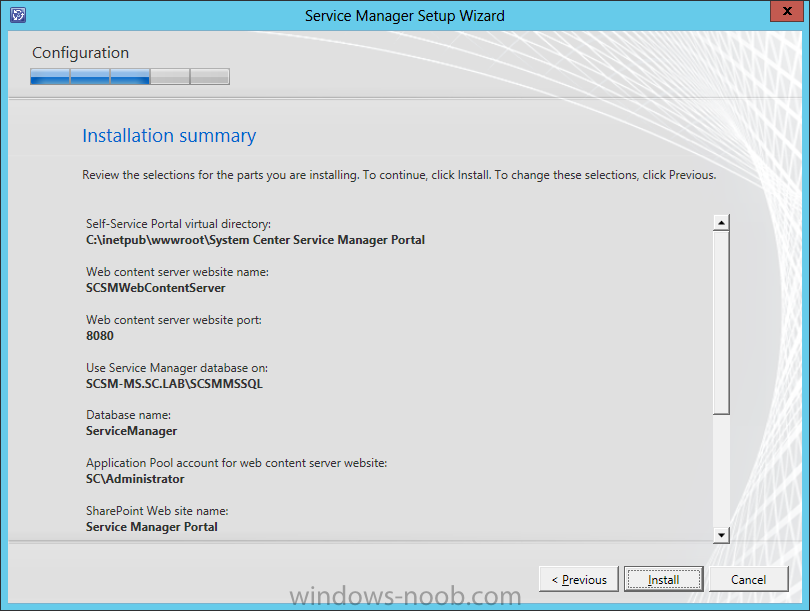
 Now that we have the Service Manager Management Server, and the Warehouse Server installed, the last piece we need to install is SharePoint for the Self-Service Portal. Install PrerequisitesTo start, before we will actually be able to install Service Manager Self-Service Portal, we don’t actually have to install any prerequisites, because by installing SharePoint, this will install all prerequisites required. As a reference, here are the requirements for the Self-Service Portal: § IIS 7.0 o Basic Authentication o Windows Authentication § ASP.NET § .NET Framework 4.0 § SharePoint Server 2010 o Language Pack for SharePoint Server 2010 or SharePoint Foundation 2010 – English § WCF Service HTTP Install SharePointStart by either mounting or extracting the ISO (en_sharepoint_server_2010_with_service_pack_2_x64_dvd_2581604.iso) and running the splash.hta. On the splashscreen, first click on the link ‘Install Software Prerequisites’. SharePoint Prerequisites On the Welcome page, click Next. Note that if you don’t have the roles/features, and elements that are listed installed, the setup will install/add them for you automatically. On the License Terms page, read the information presented, check the ‘I accept the terms of the License Agreement(s)’ checkbox, and click Next. Once the prerequisites have been installed, click Finish. Now that the prerequisites are installed, let’s continue with the installation of SharePoint. SharePoint Install ContinuedOn the splashscreen, click the ‘Install SharePoint Server’ link. You will be prompted to enter your Product Key before the installation will continue. Read the License Terms, click the ‘I accept’ checkbox, then click Continue. Next we need to choose the Installation we want. For this purpose, in a lab environment, we will choose Standalone. Once the installation completes (which should be quick because we already have the prereqs installed), ensure that the ‘Run the SharePoint Products Configuration Wizard now’ checkbox is selected. Then click Close. SharePoint Configuration WizardThe SharePoint Configuration Wizard will launch. Click Next. When you click Next, you will encounter the following Warning message. Click Yes. The Configuring process may take a little while, so you will have to be patient. Once the configuration is complete, click Finish. This will cause the default website to open in a browser. The default SharePoint site will launch. For now, just close the browser. We need to install the Service Manager self-service elements. Install Service Manager Self-Service PortalNow that we have SharePoint installed, we can now install the Self-Service Portal. Start by either extracting the DVD contents, or mounting the ISO (the TechNet ISO is currently labelled as mu_system_center_2012_service_manager_with_sp1_x64_dvd_1348926). Start by opening your DVD drive, navigating to the corresponding architecture (i.e. x86 or amd64), and run the Setup.exe. On the splash screen click the Service Manager Web Portal install link. On the Portal Parts screen, select the part(s) you want to install. Note that if you want to install both parts, you need to select them both at this point. You will not be able to come back and install the other part. Since we are in a lab environment, then we will install both parts on the same server. Select both Portal Parts and then click Next. On the Product Registration page, read the License Terms, accept them, and then click Next. On the Installation Location page, you can change the location if you desire, then click Next. The Prerequisites checker will run automatically. Correct any issues that are reported, until you are able to continue with the installation. Then click Next. Next you have to configure the Portal name and port. You can choose to use SSL or not, but it is selected by default. Make your appropriate modifications, and then click Next. Now you need to like the portal to the Service Manager database. Provide the database server, instance, and database name for the Service Manager database (not the warehouse). Then click Next. You also need to provide an account for the Portal to use when accessing the database. Provide the required information and click Test Credentials. You will not be able to continue with the installation without successfully testing the credentials. Then click Next. Next we need to configure the SharePoint website. You need to provide a name, port, SSL certificate, as well as a location for the SharePoint database. Then click Next. You also need to provide an account for the SharePoint Application Pool. You need to test the credentials successfully. Then click Next. Now you can choose if you want to join the CEIP program. Then click next. New to System Center 2012, you can choose to include the product in Microsoft Updates. Make your selection and then click Next. Finally, review the selections/information on the Summary page, and then click Install. Once the installation is complete, click Close. You can also click on the link provided to test the Service Manager Portal. When you launch the Service Manager Portal for the first time, you may be prompted for credentials, and you may also get a message about Silverlight. If you don’t already have Silverlight installed, you will not be able to use the portal. Congratulations, you now have Service Manager, complete with the Self-Service Portal installed.


- 3 replies
-
- 1
-

-
- Service Manager
- System Center 2012
- (and 2 more)
-
If you haven’t seen it already, the whole Wave 15 has reached RTM state, which means that the code is ready. This means that Office 2013, Lync 2013, Exchange 2013 and Sharepoint 2013 is now code completed. The software will be available for download in mid November. More information can be found on Exchange Team blog. Another update regarding Exchange is that Microsoft re-released the Update Rollups. Exchange 2010 UR4 for SP2 was re-released as UR4 v2, more info/download. Exchange 2010 UR7 for SP1 was re-released as UR7 v2, more info/download. Exchange 2007 UR8 for SP3 was re-released as UR8 v2, more info/download. Since my last post I’ve had a great time attending MEC in Orlando, lots of great contents and met a lot of inspiring people. In the upcoming weeks I will try to publish the next post, regarding load balancing for Exchange 2013 Preview. (It will be updated when the RTM is downloadable if there are any changes).