Search the Community
Showing results for tags 'baseline version'.
Found 1 result
-
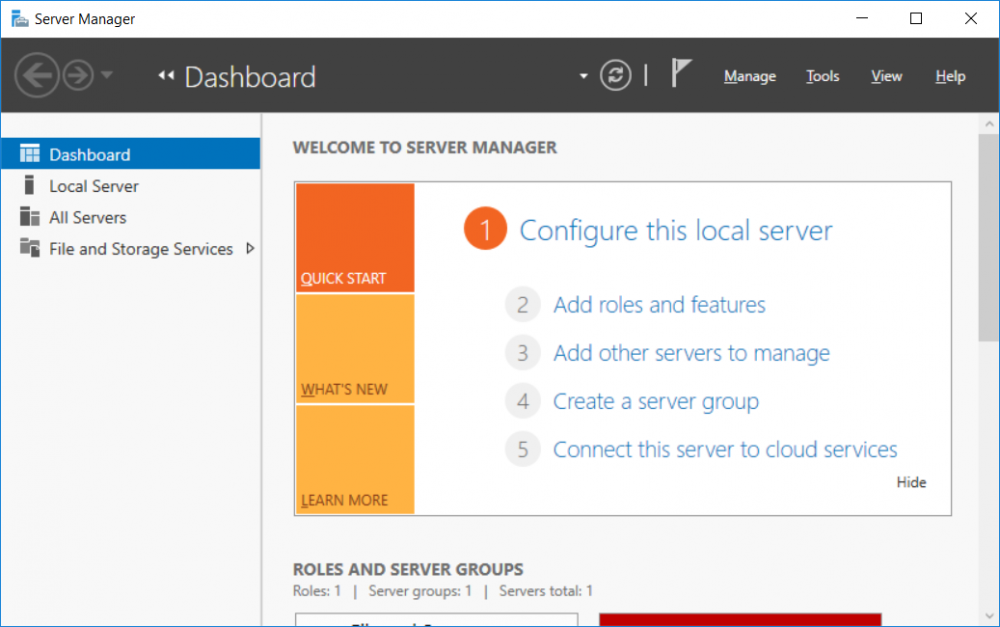
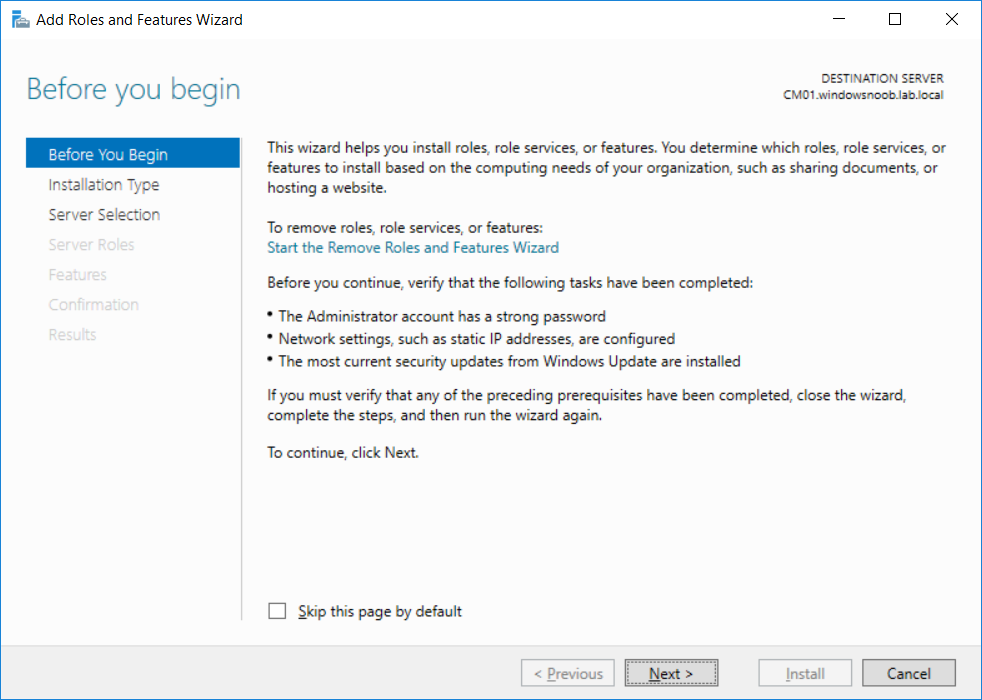
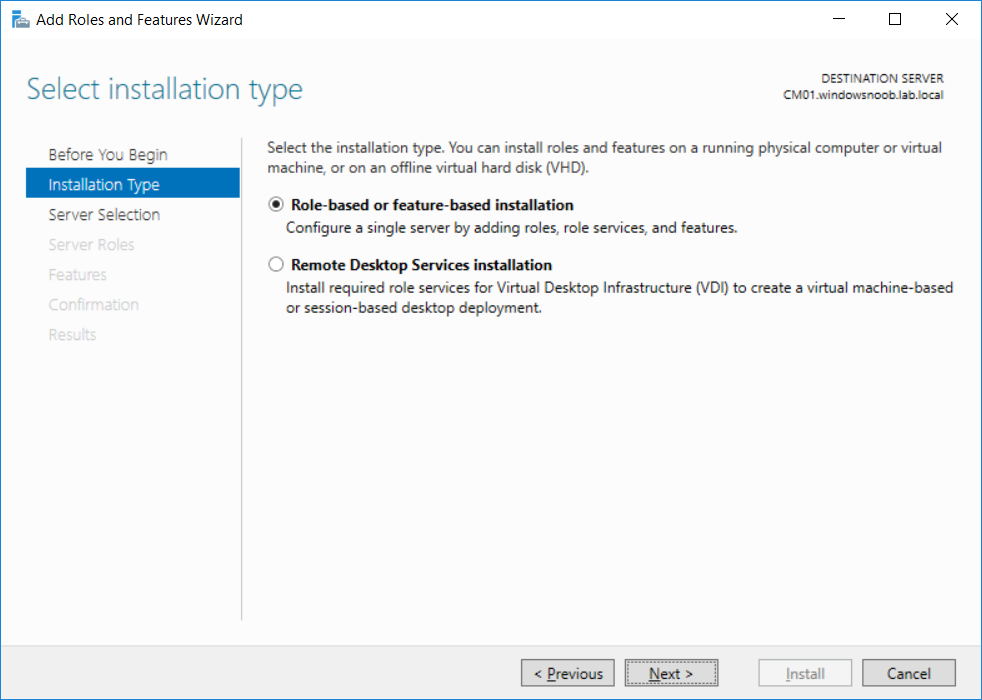
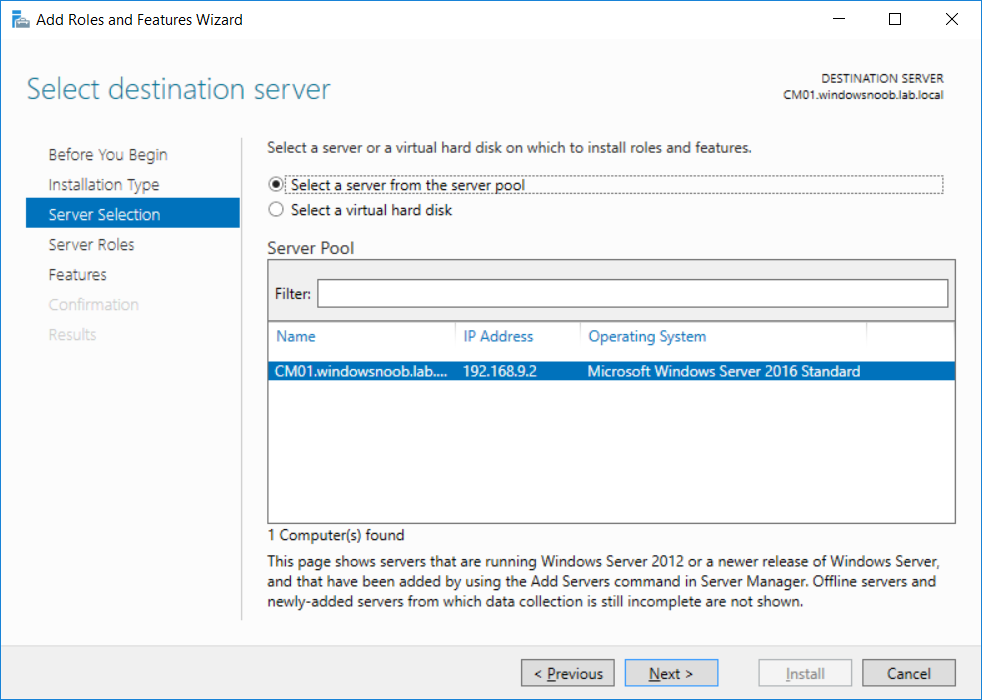
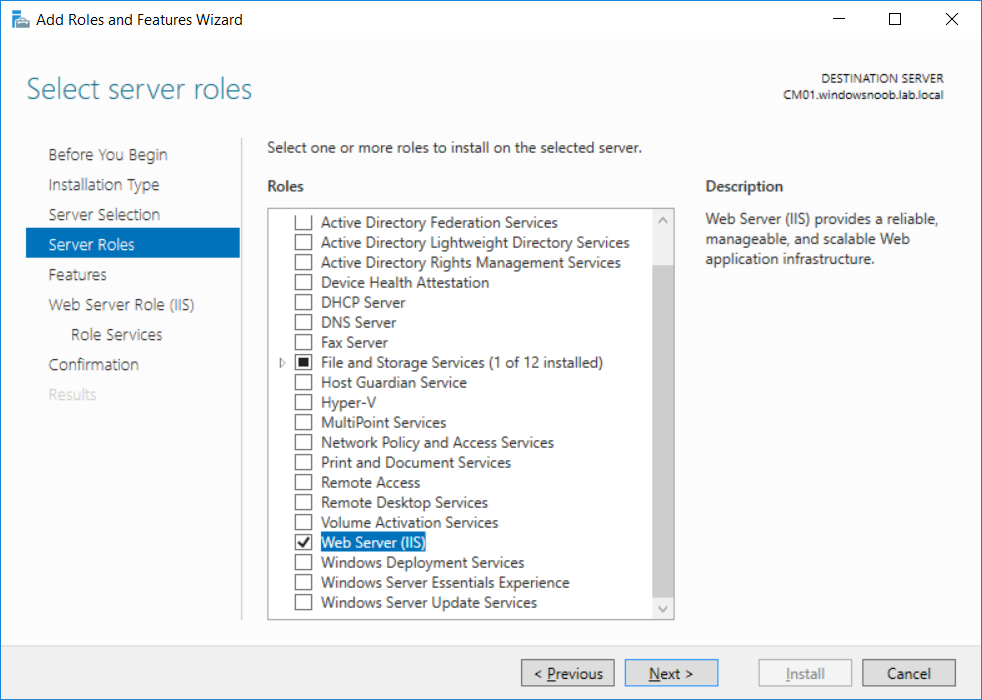
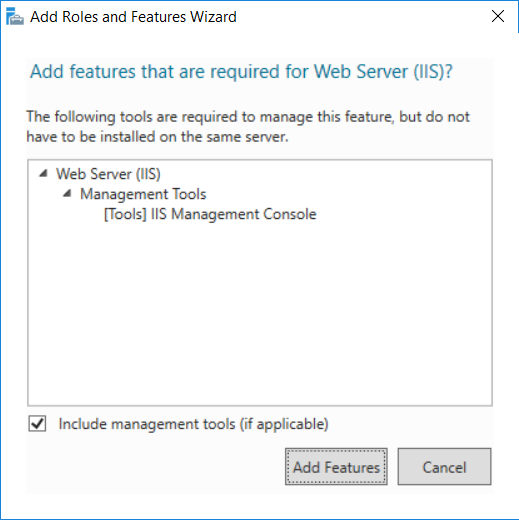
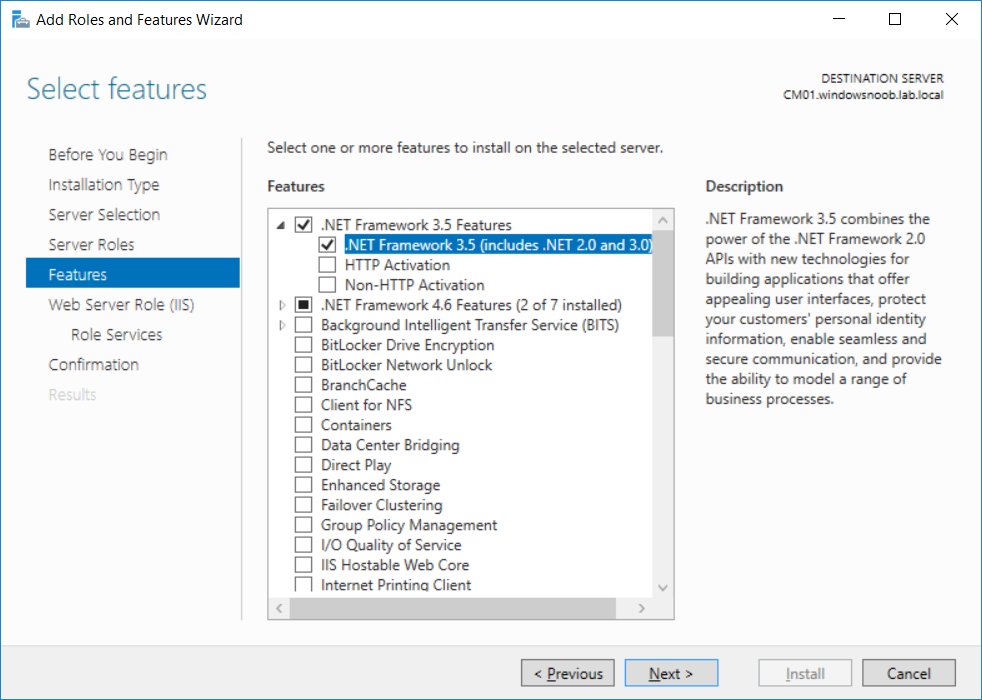
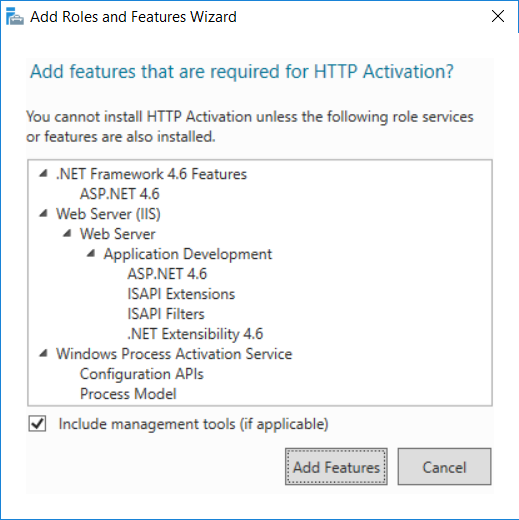
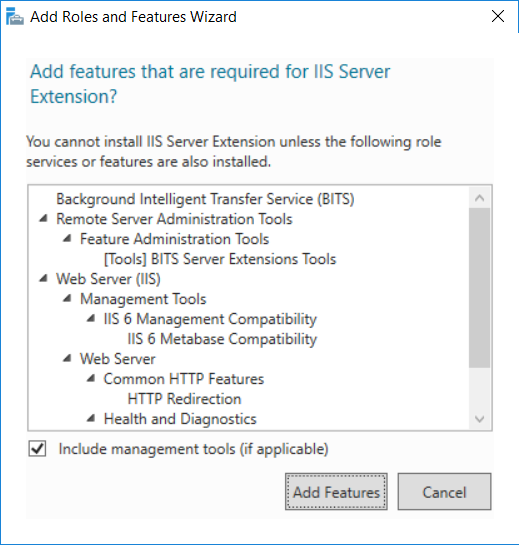
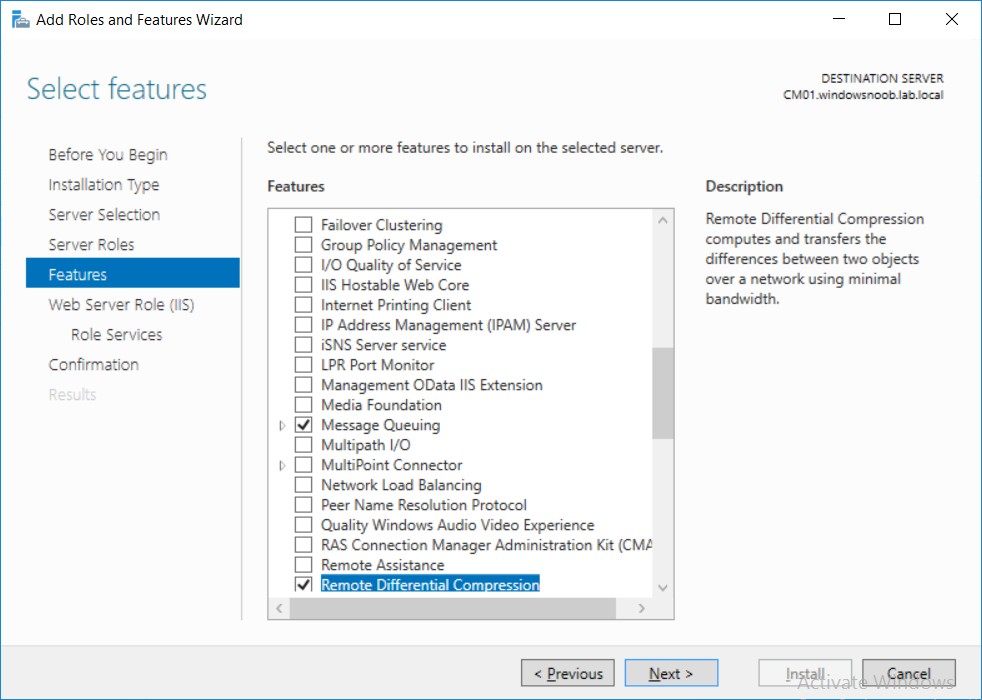
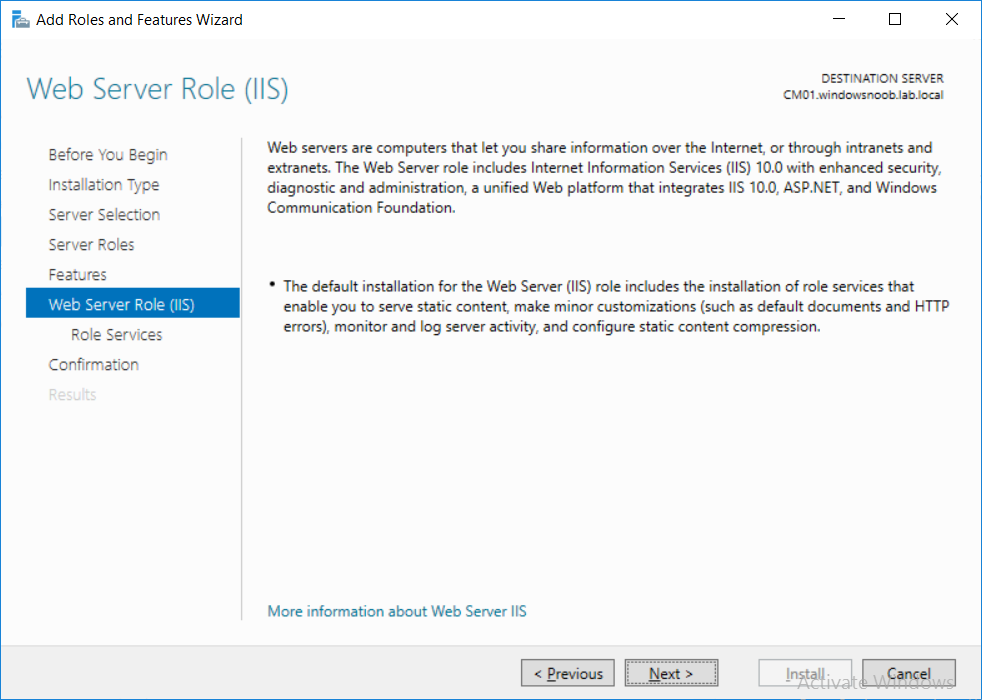
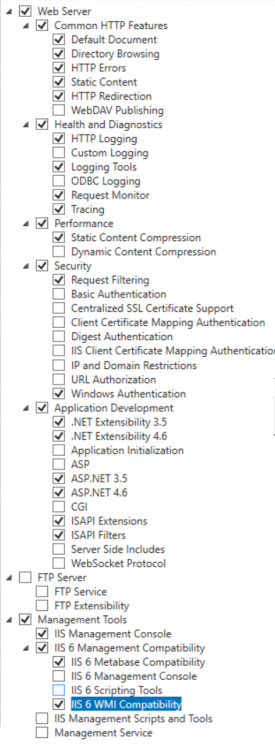
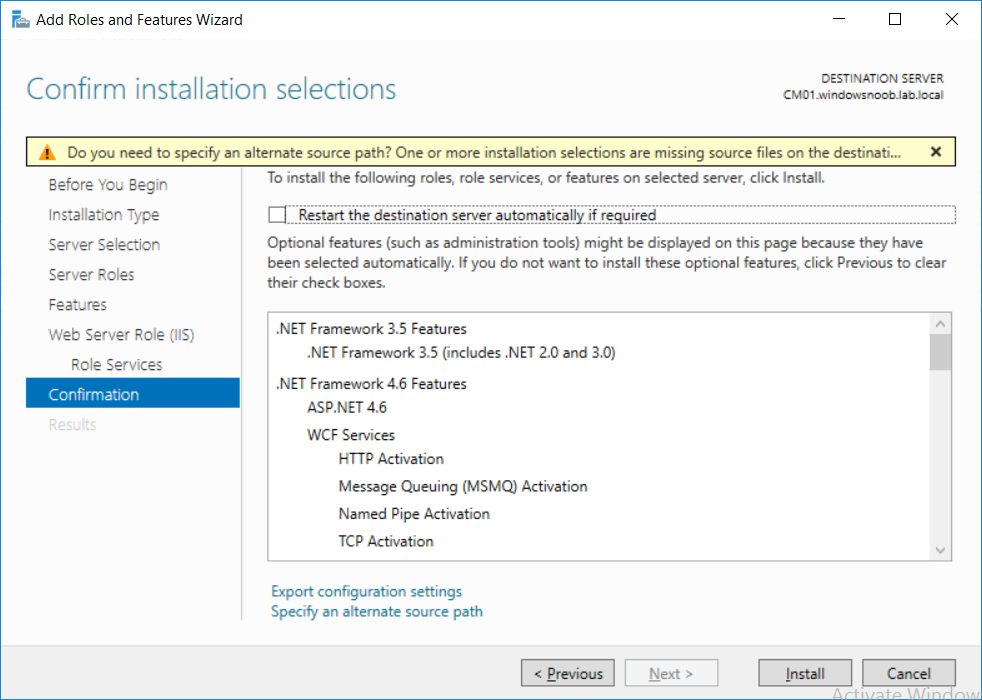
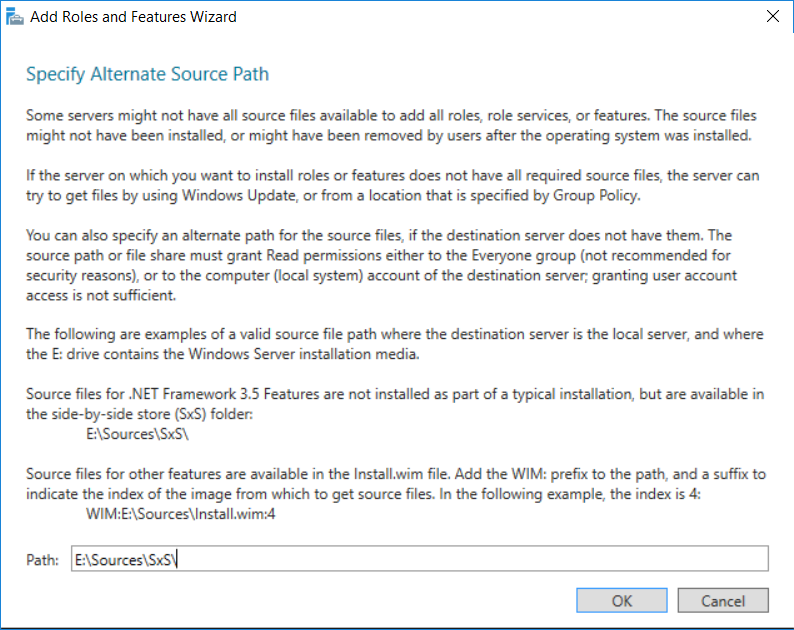
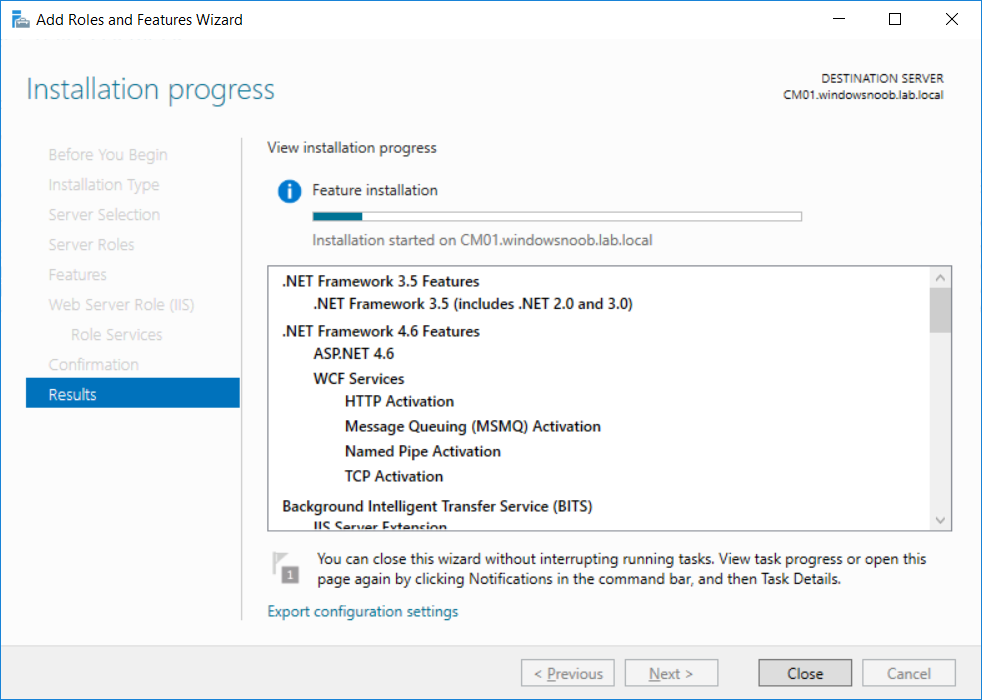
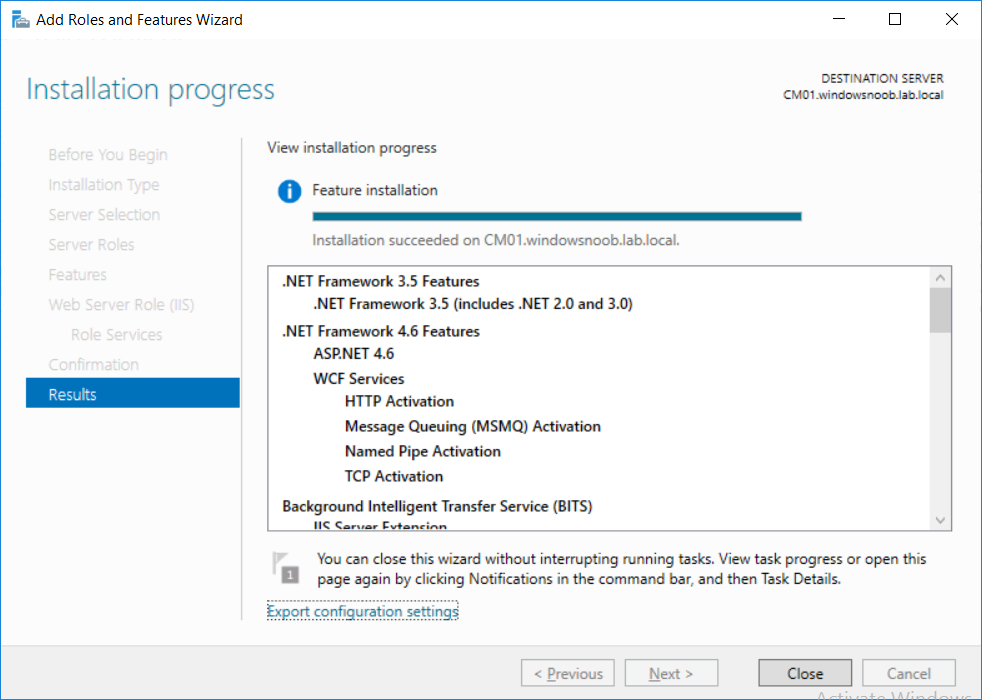
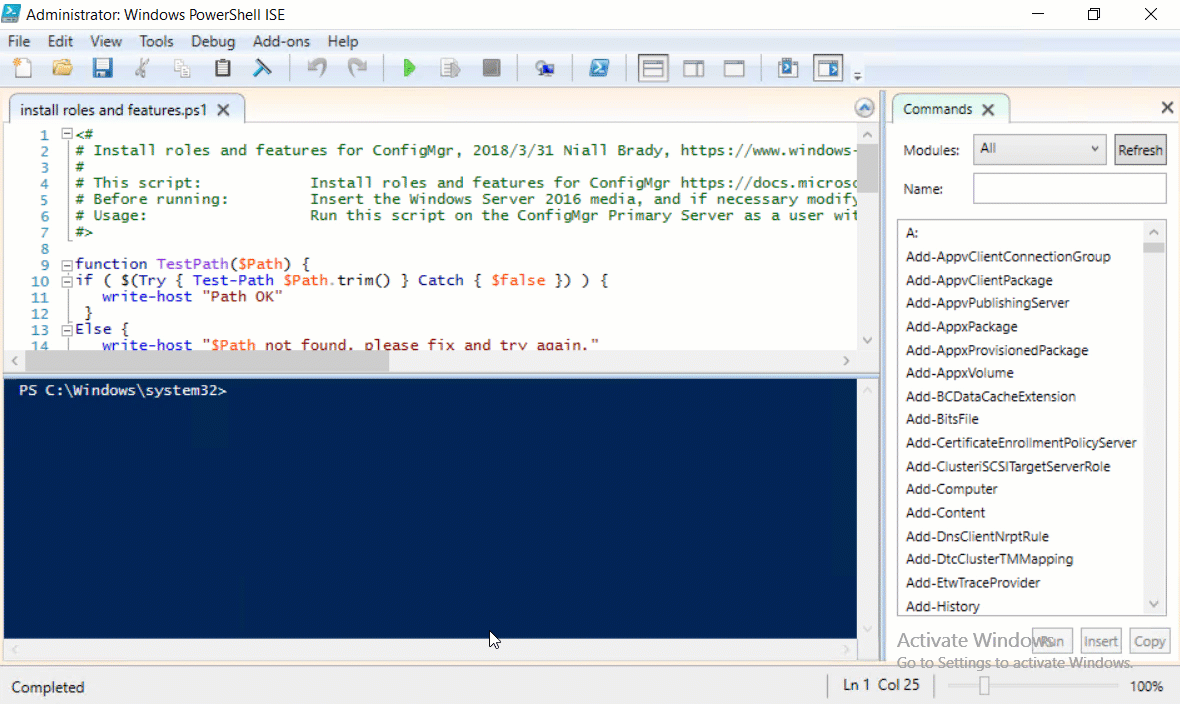
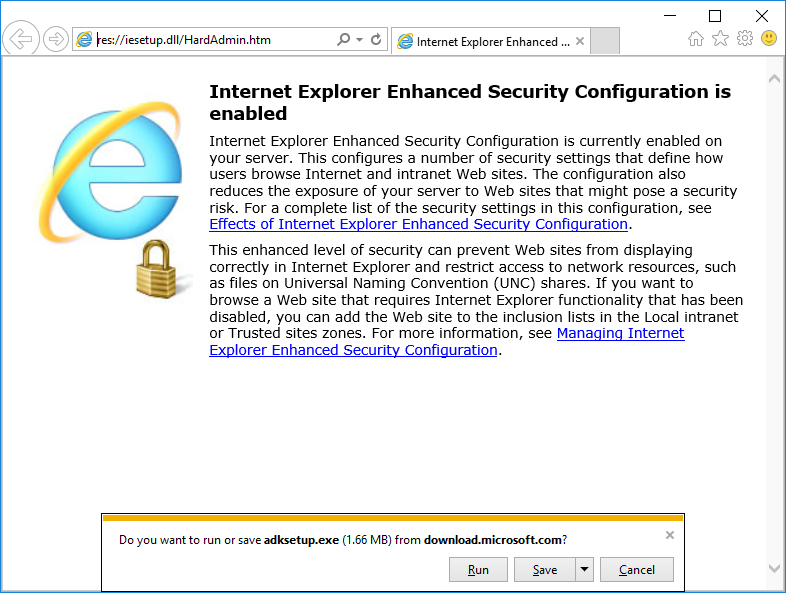
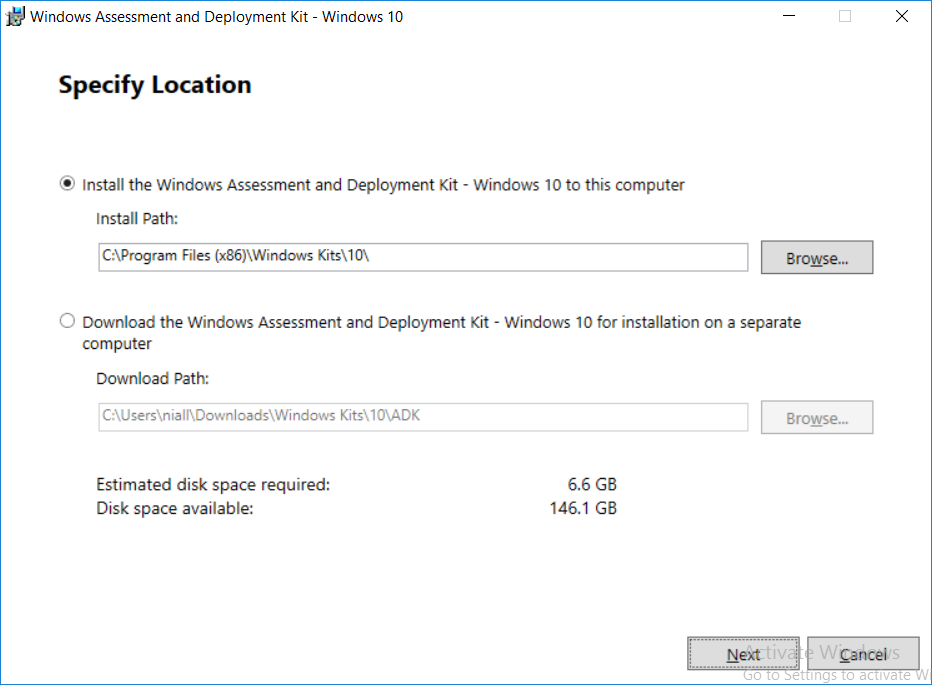
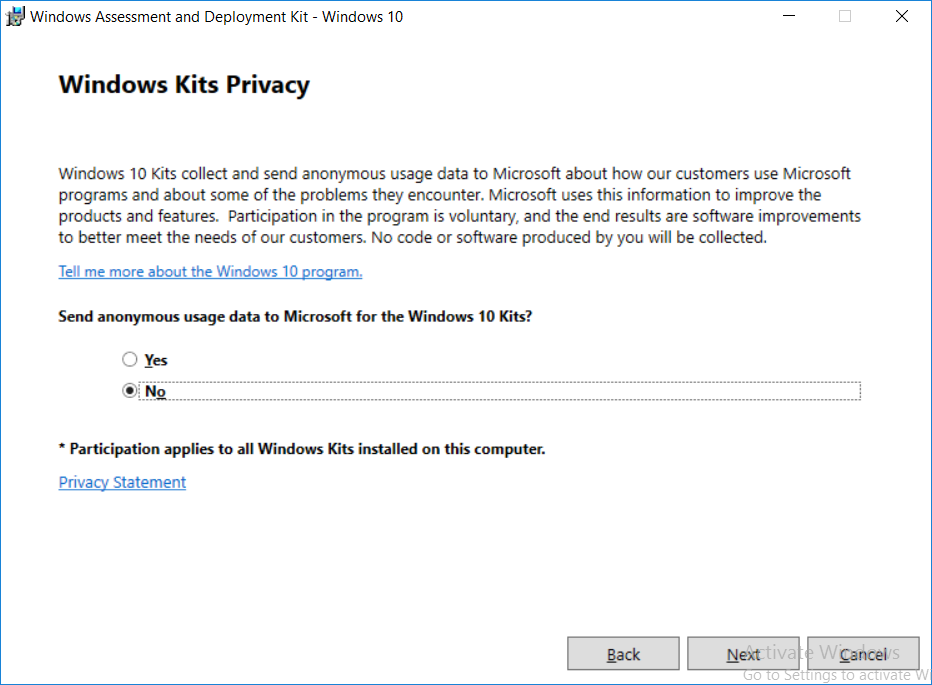
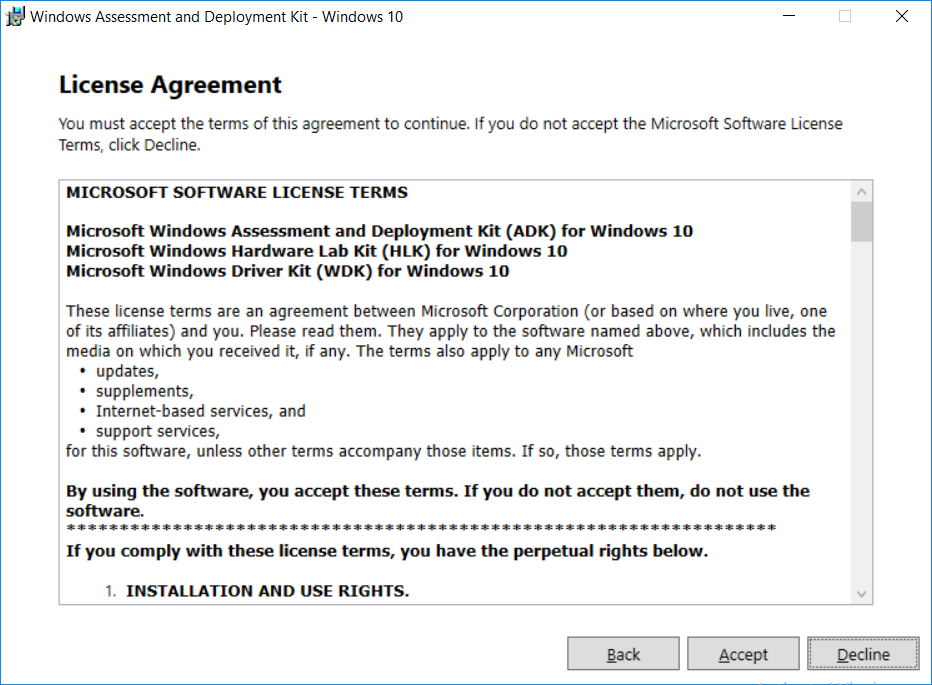
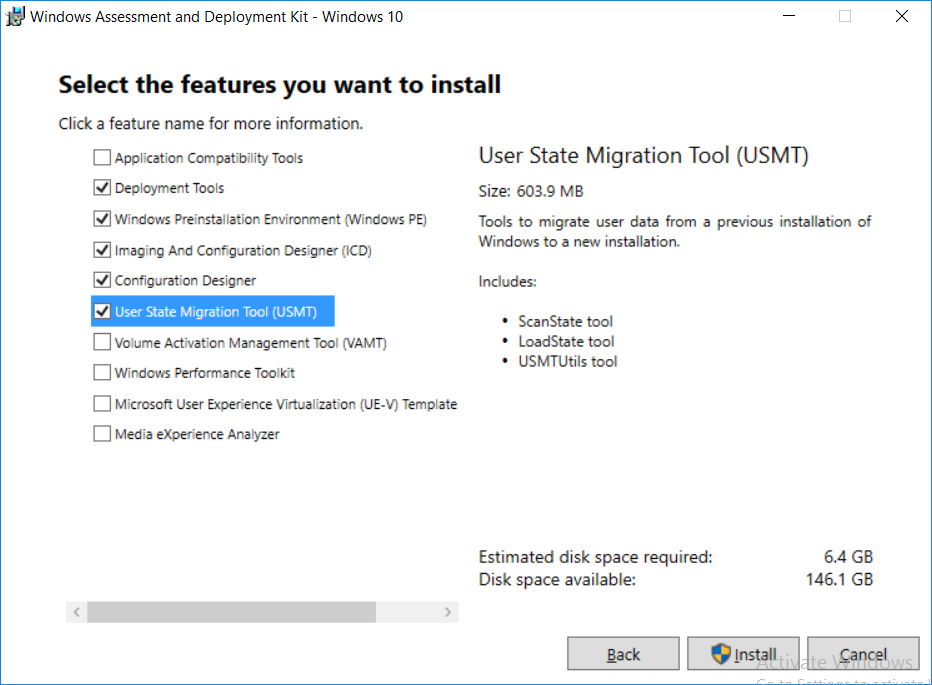
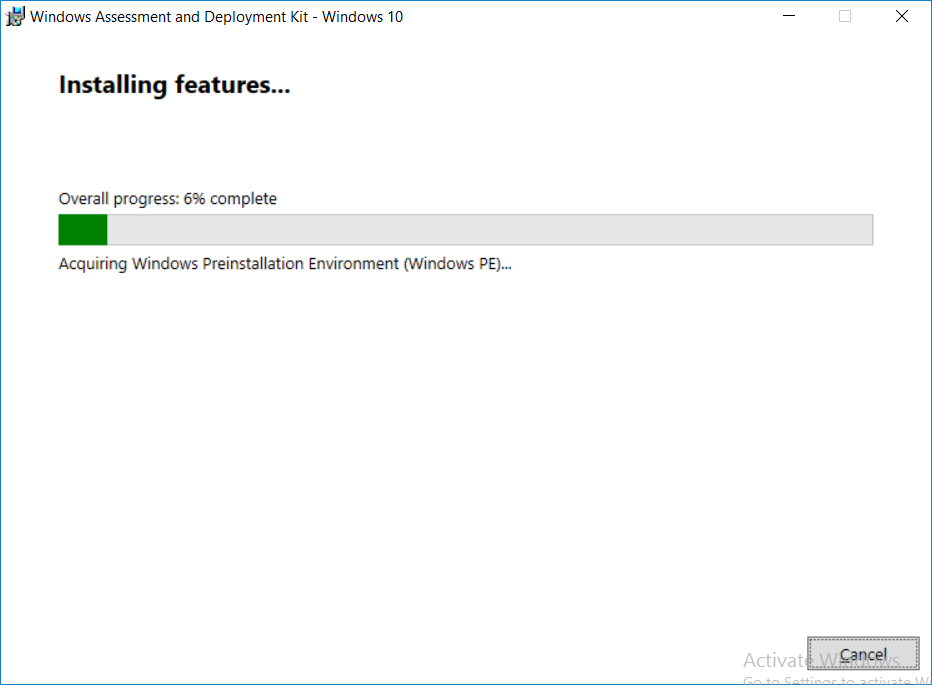
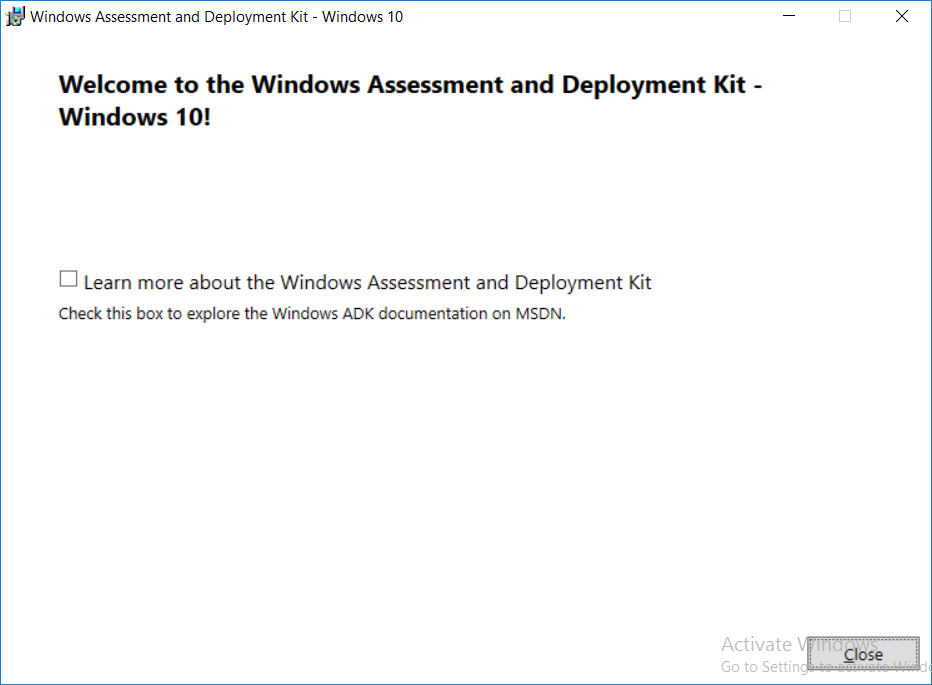
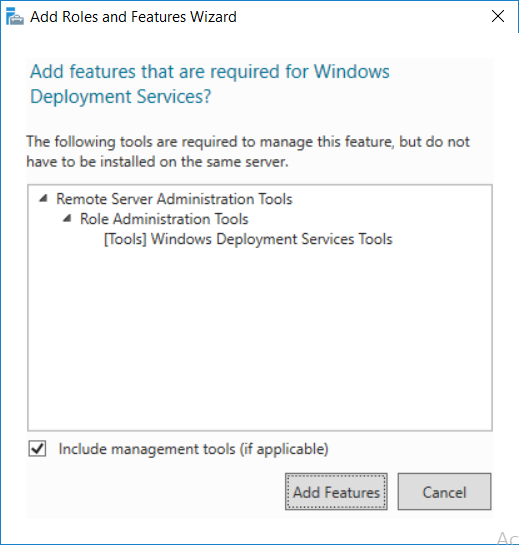
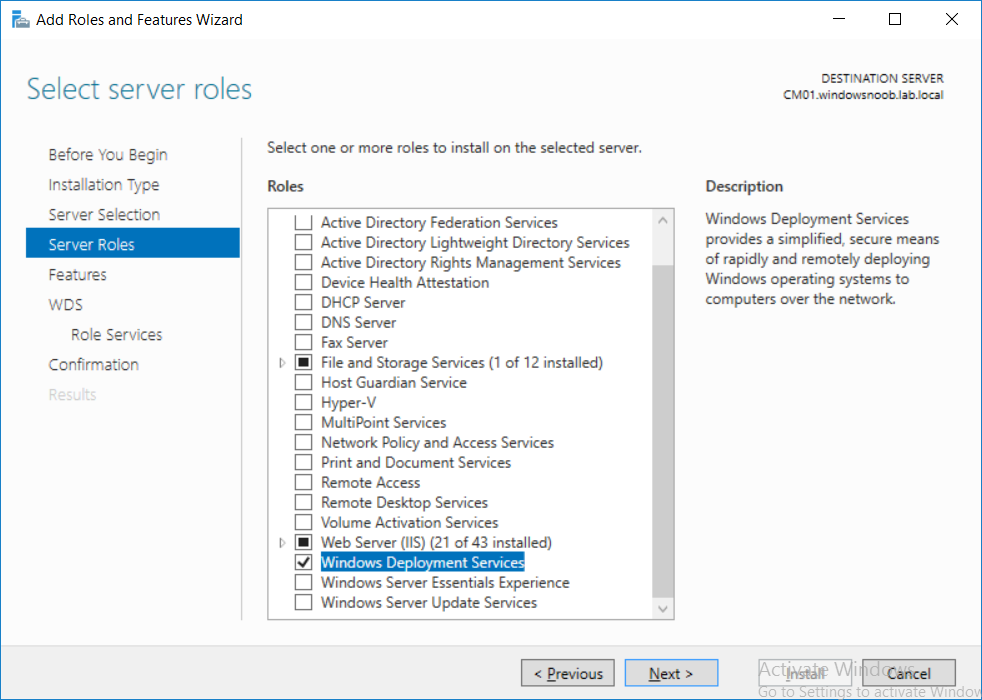
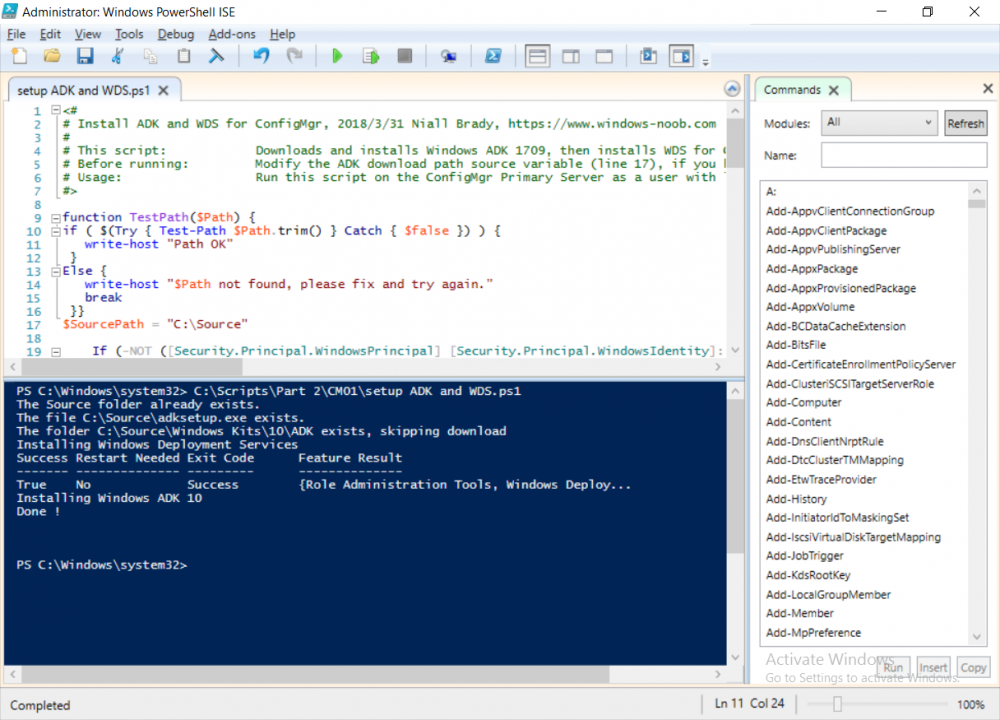
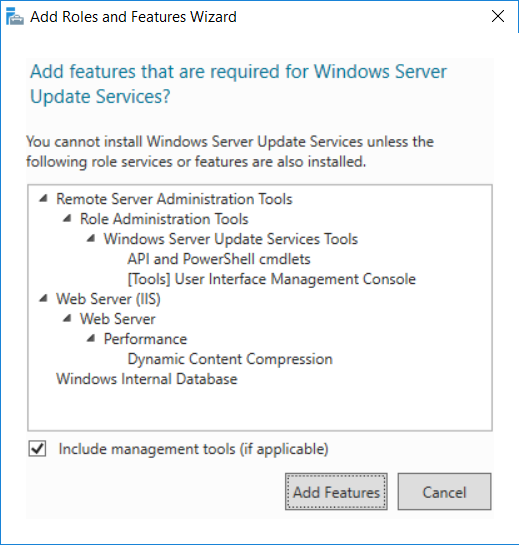
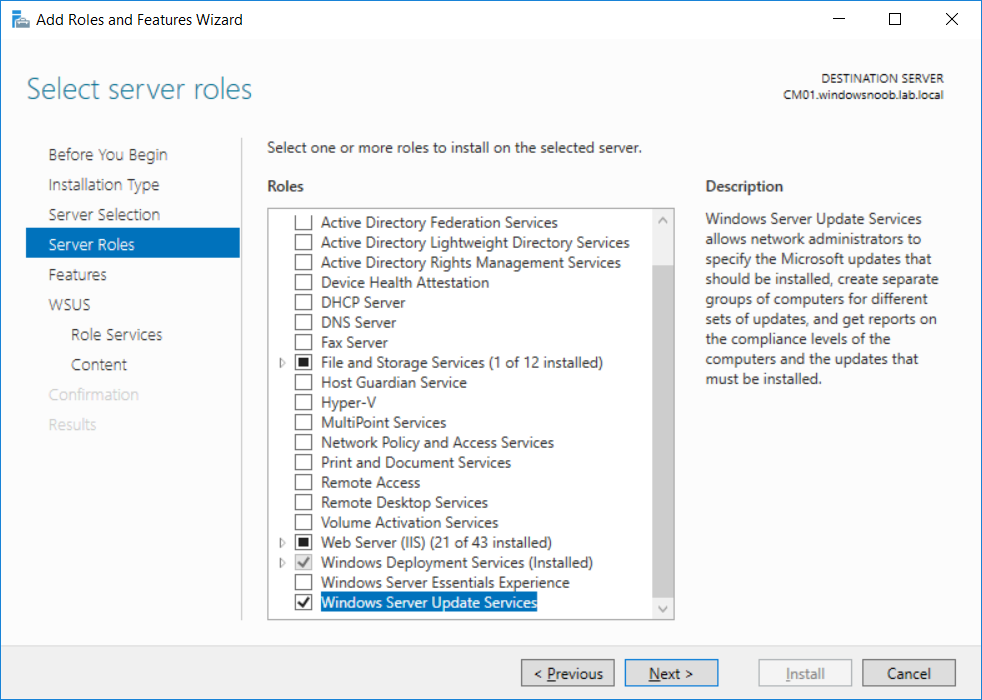
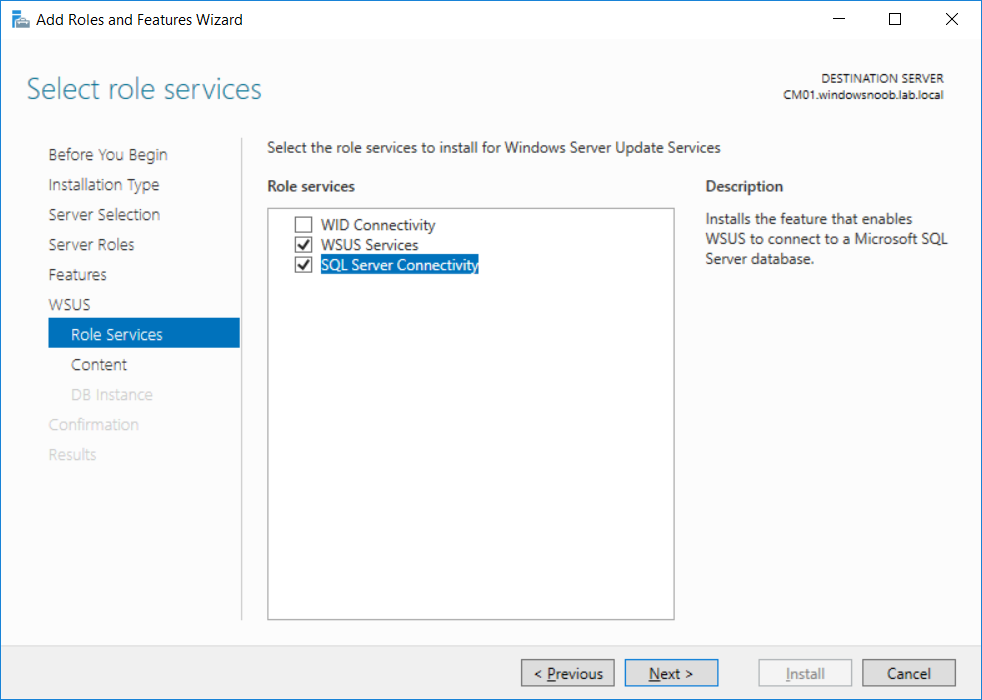
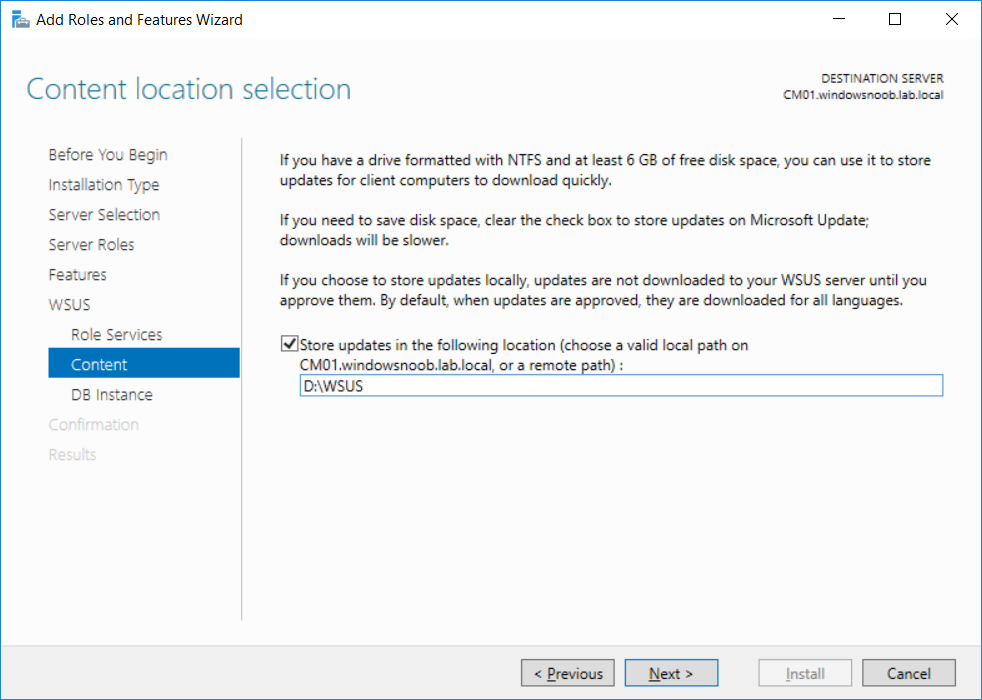
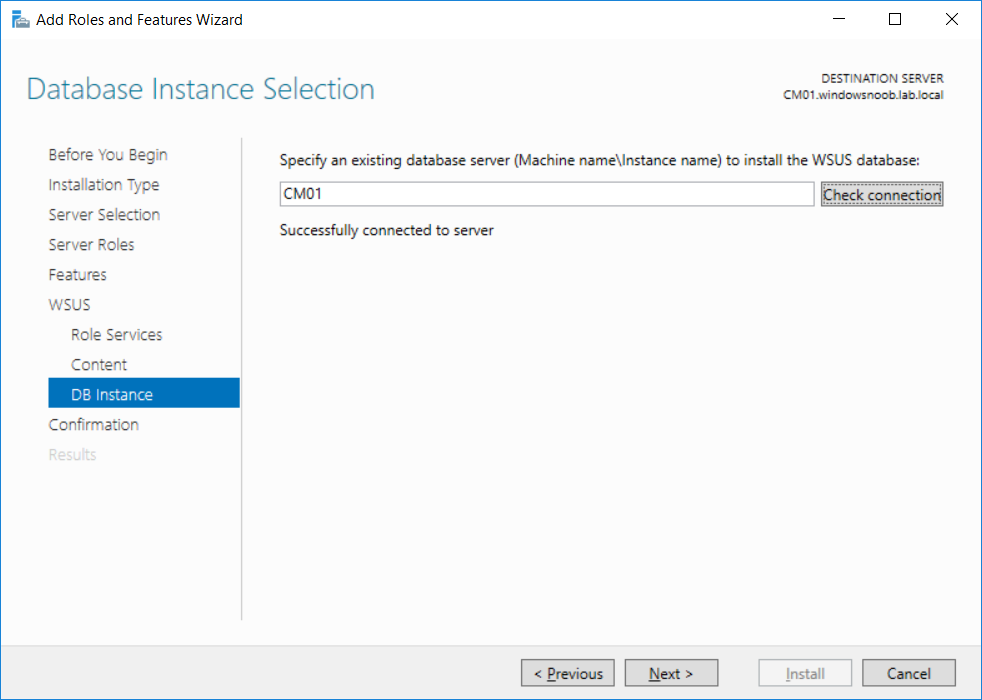
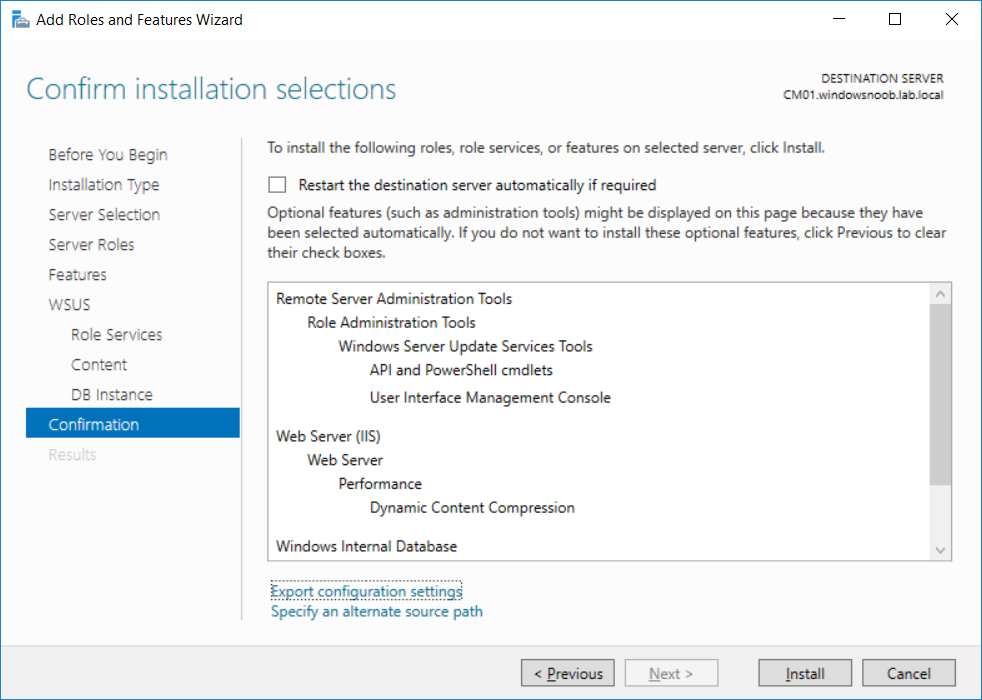
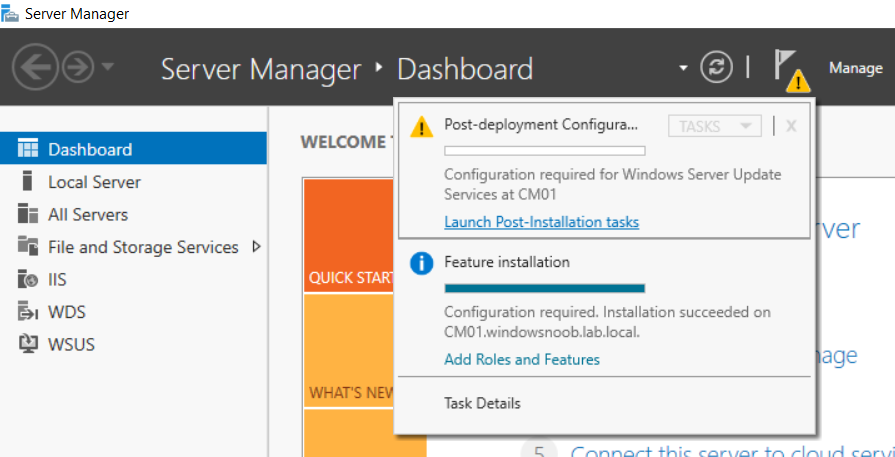
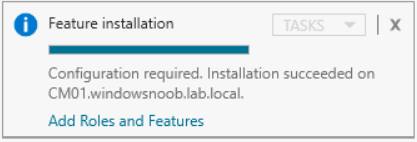
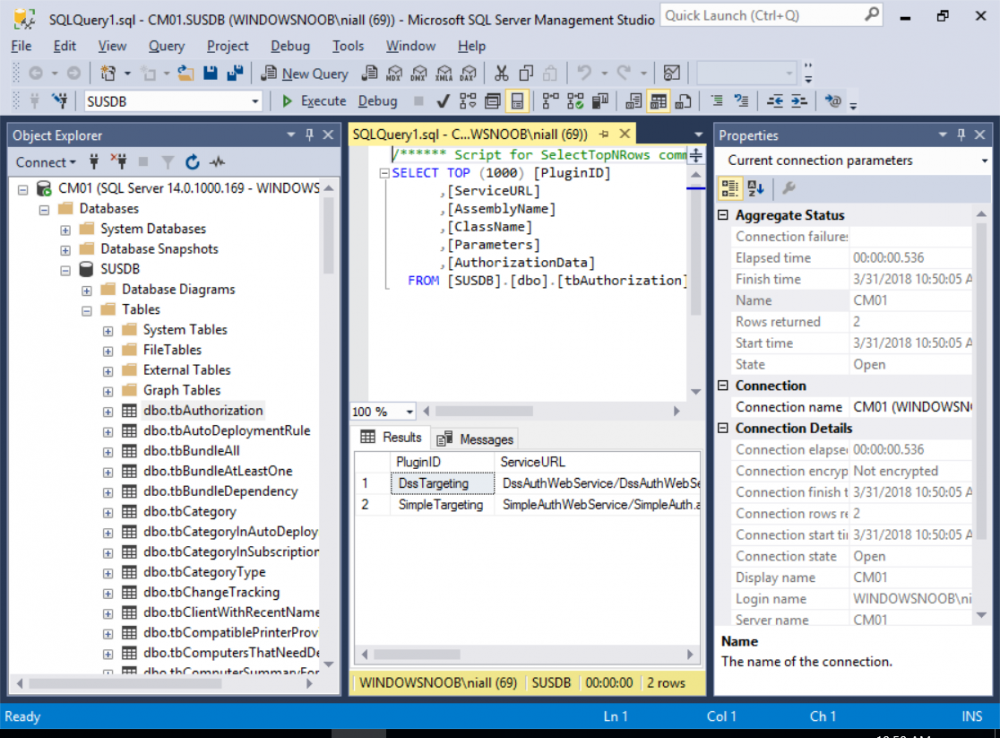
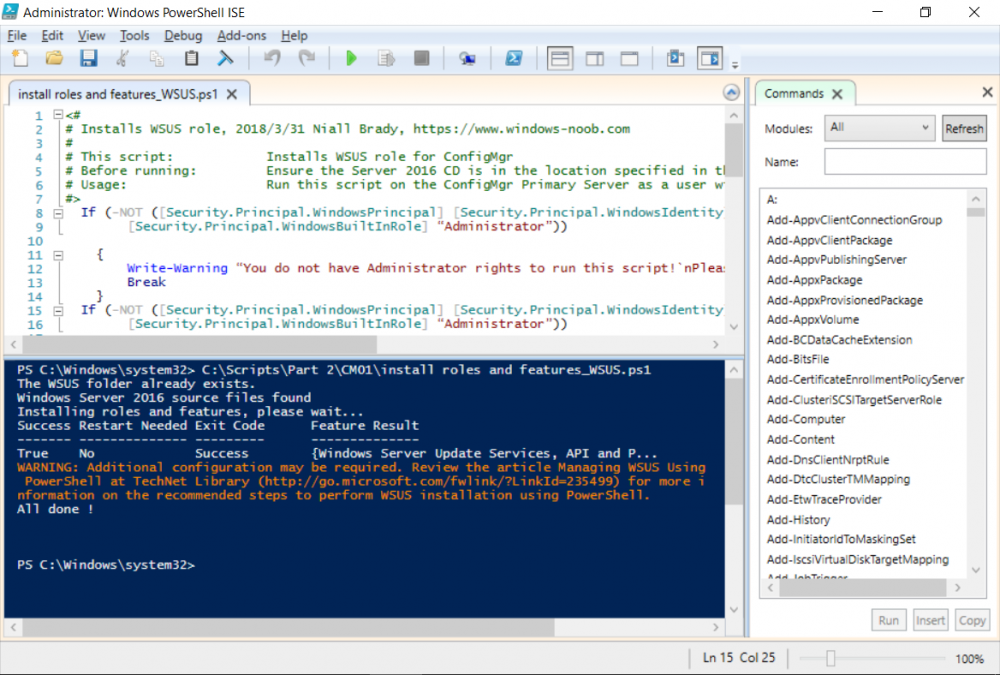
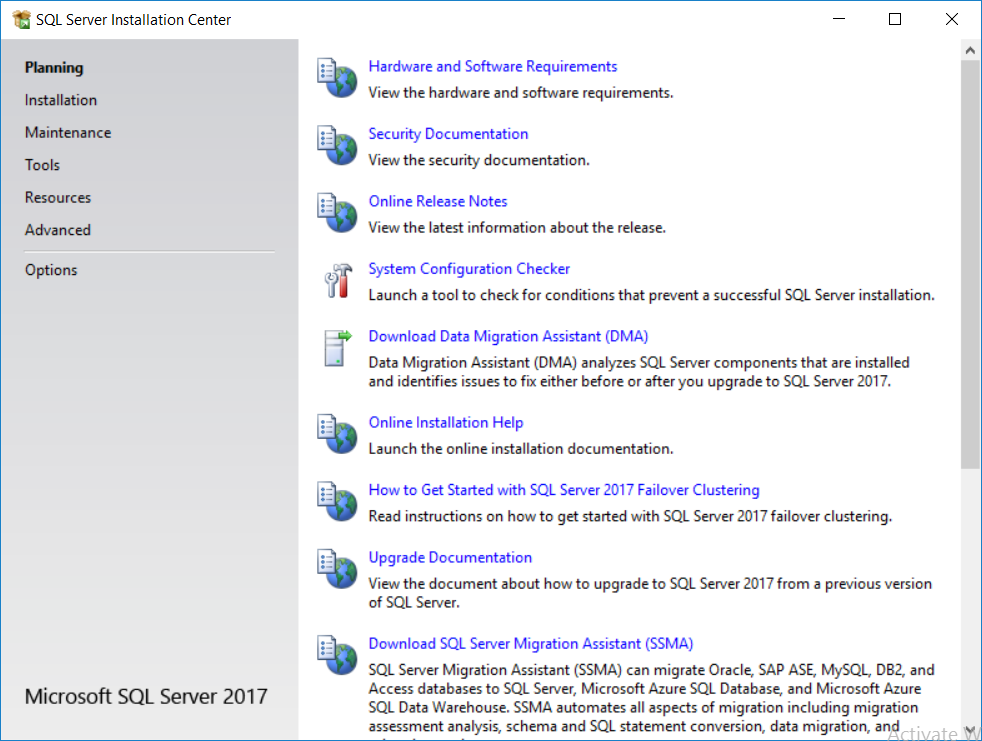
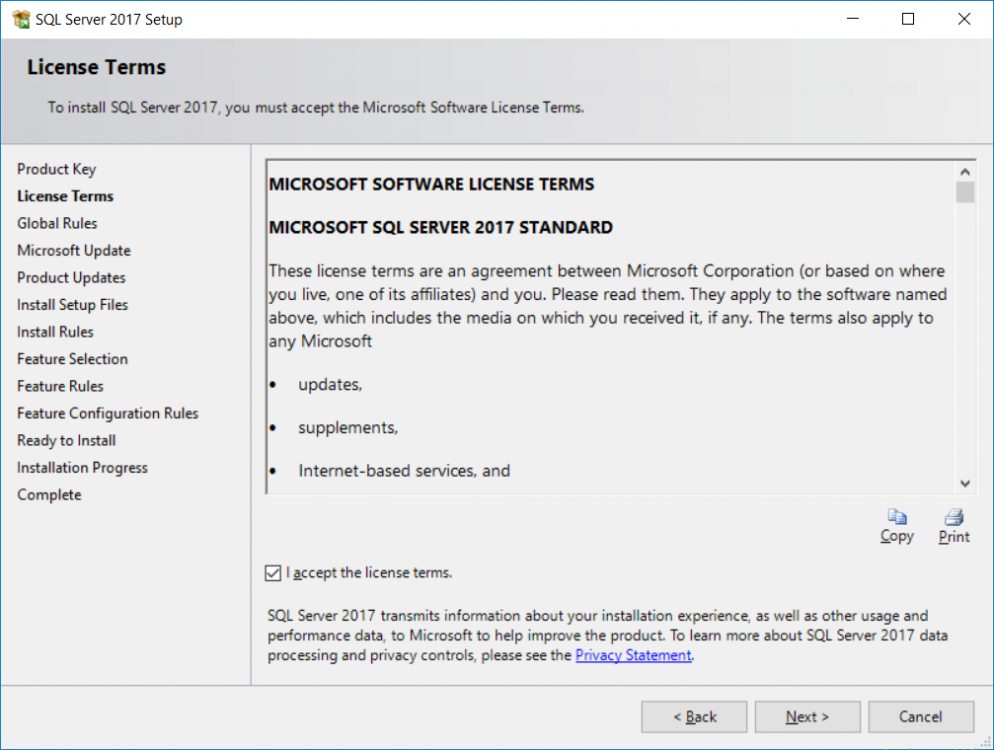
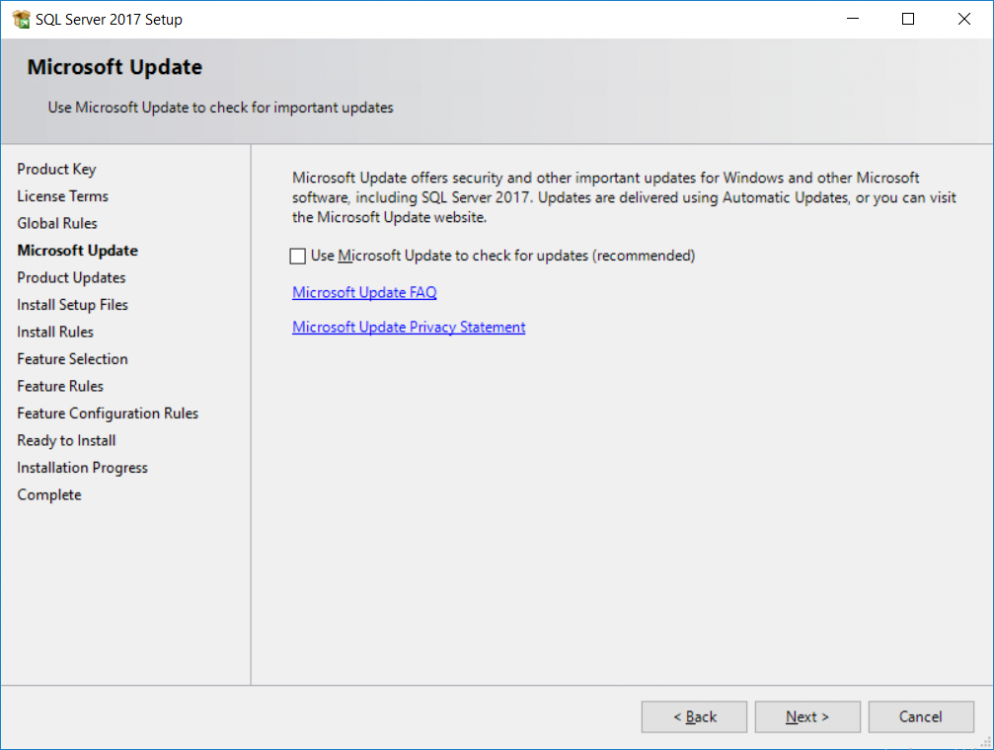
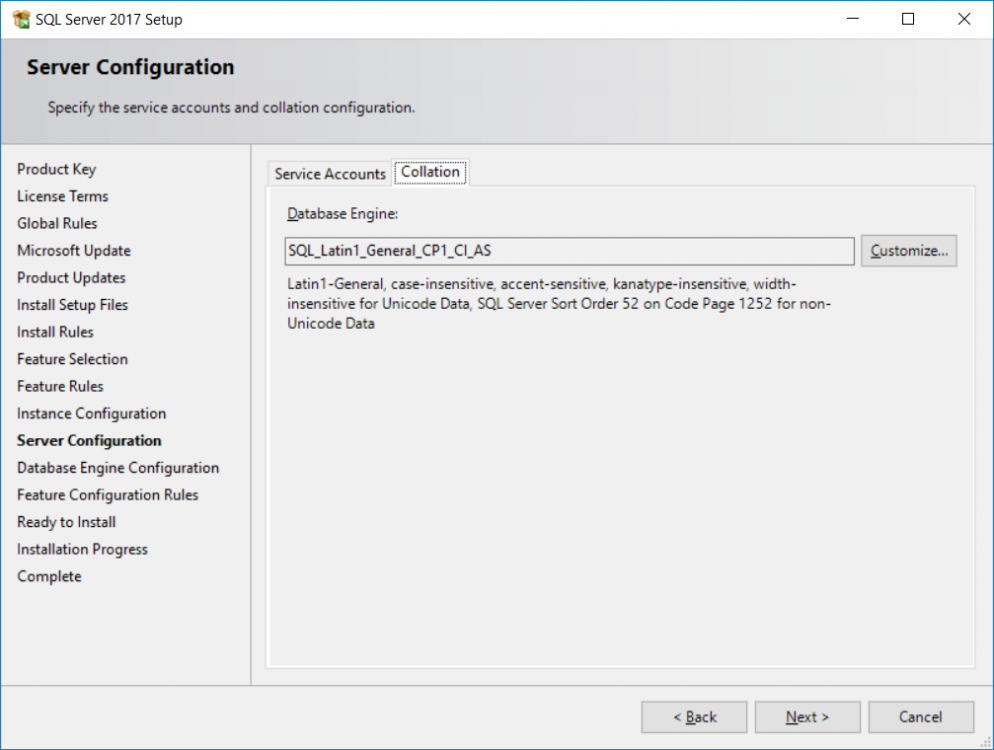
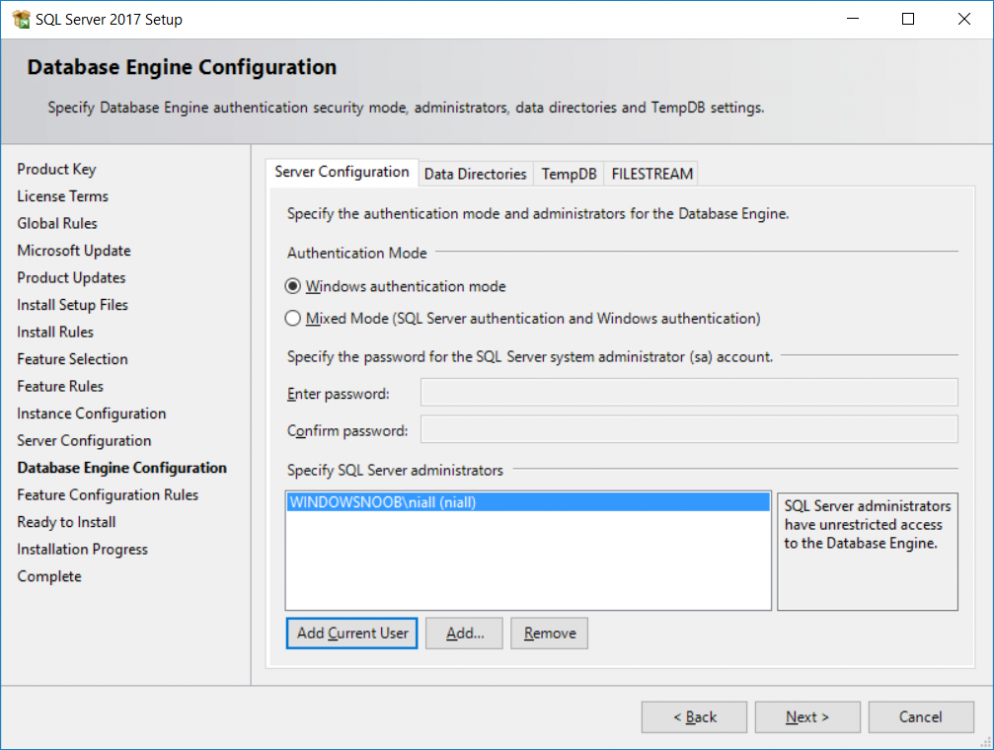
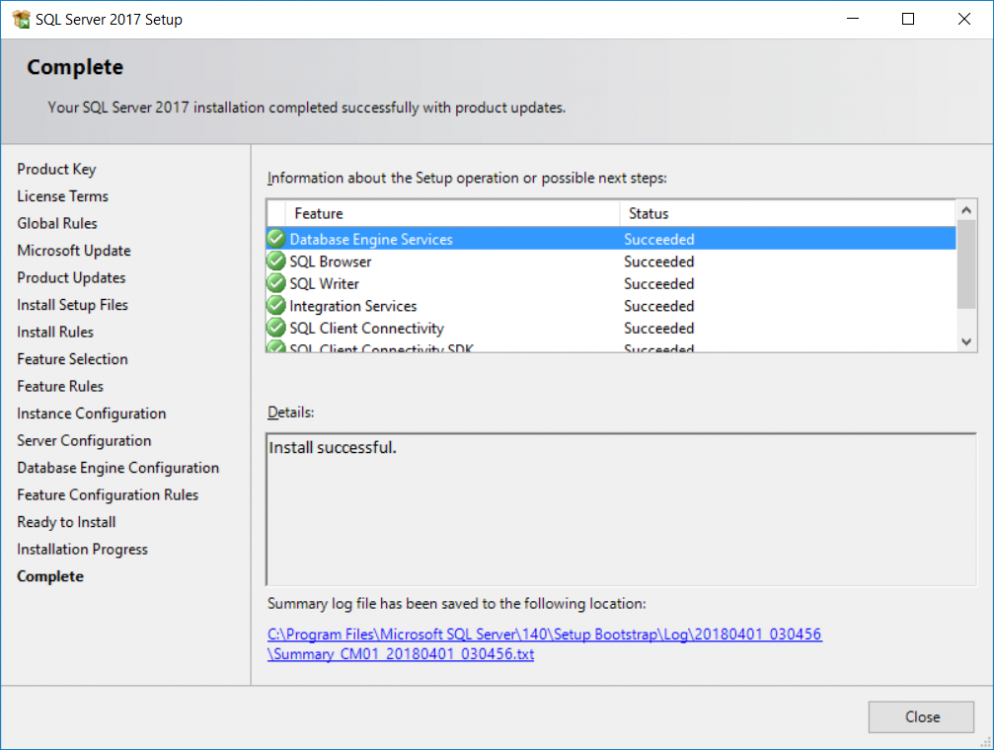
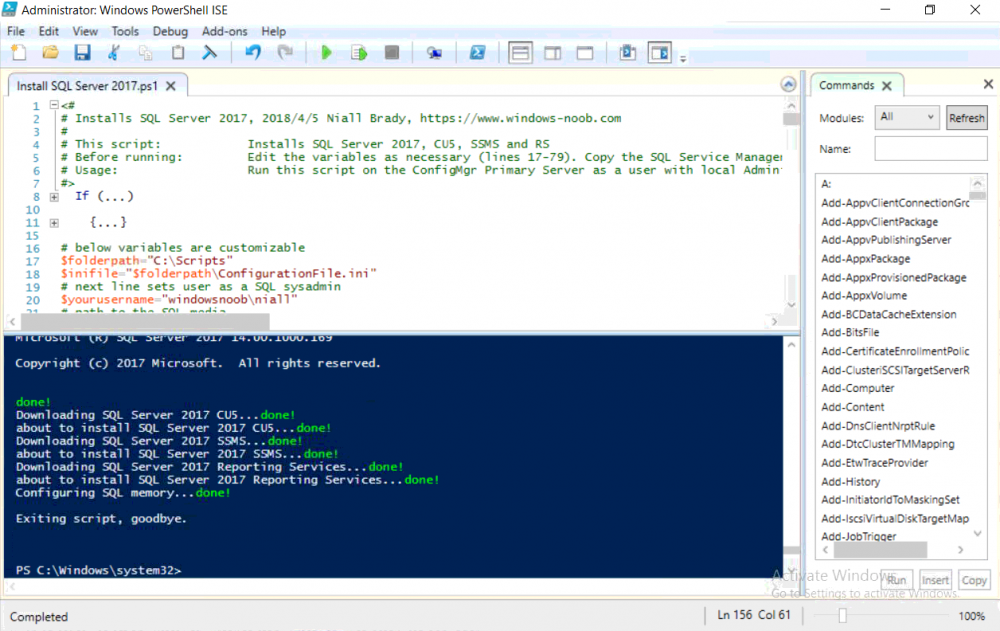
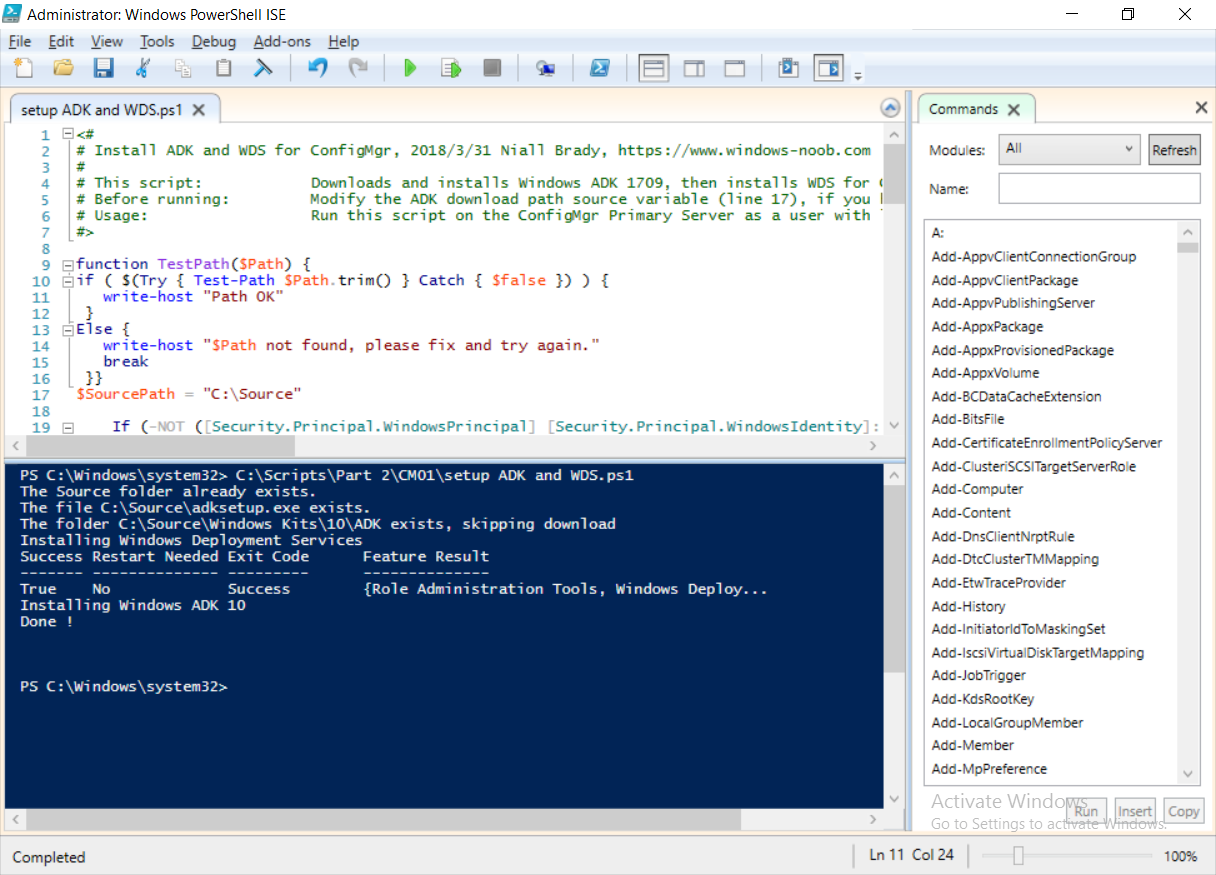
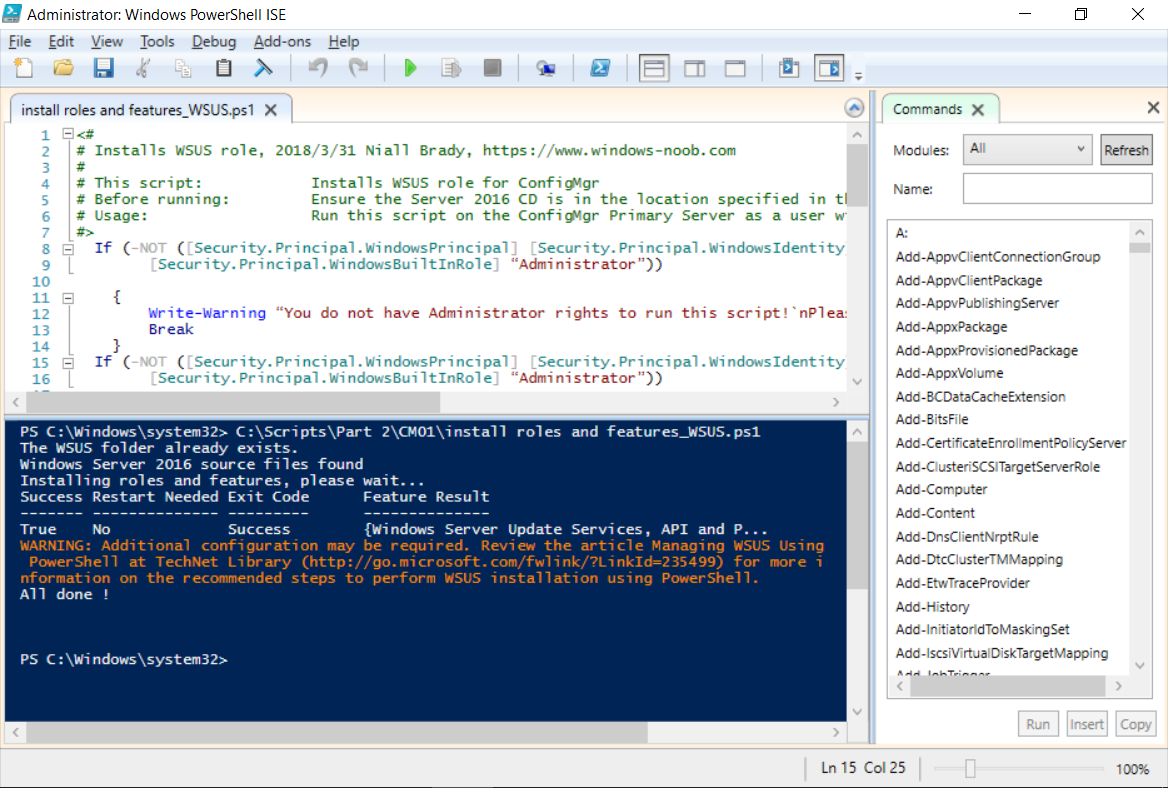
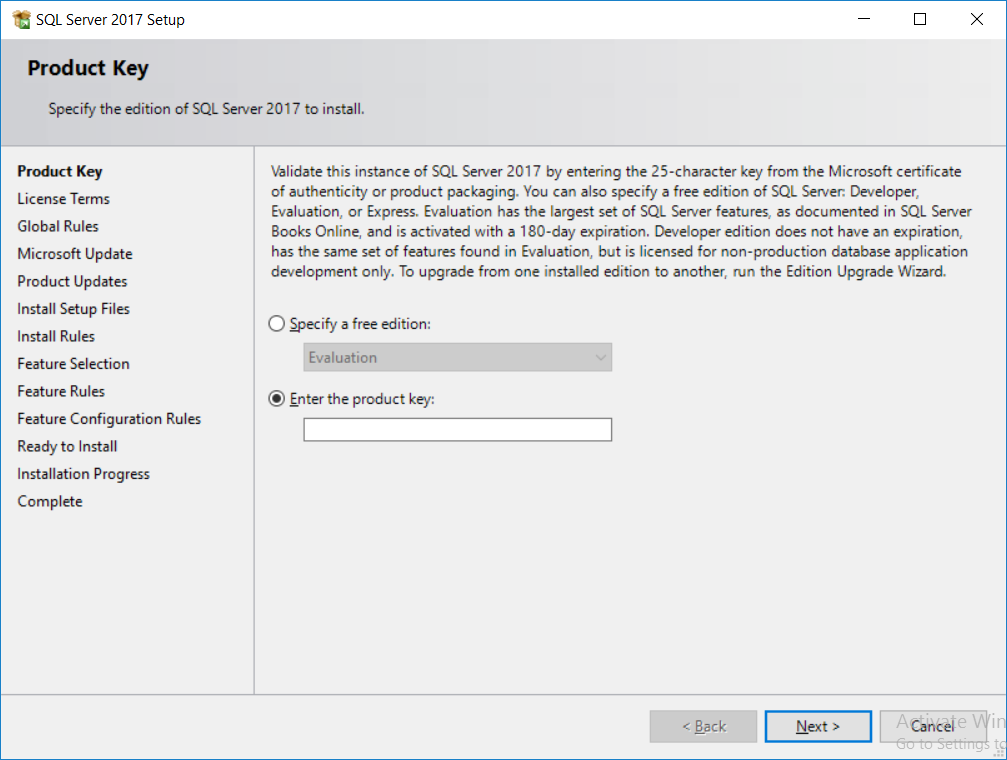
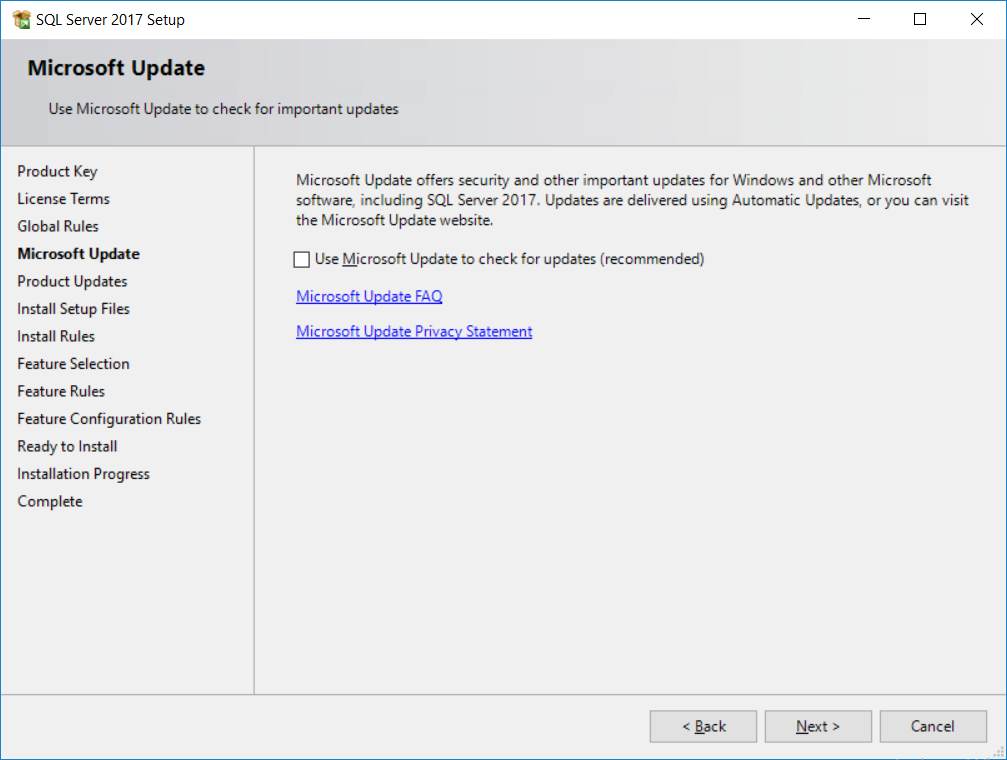
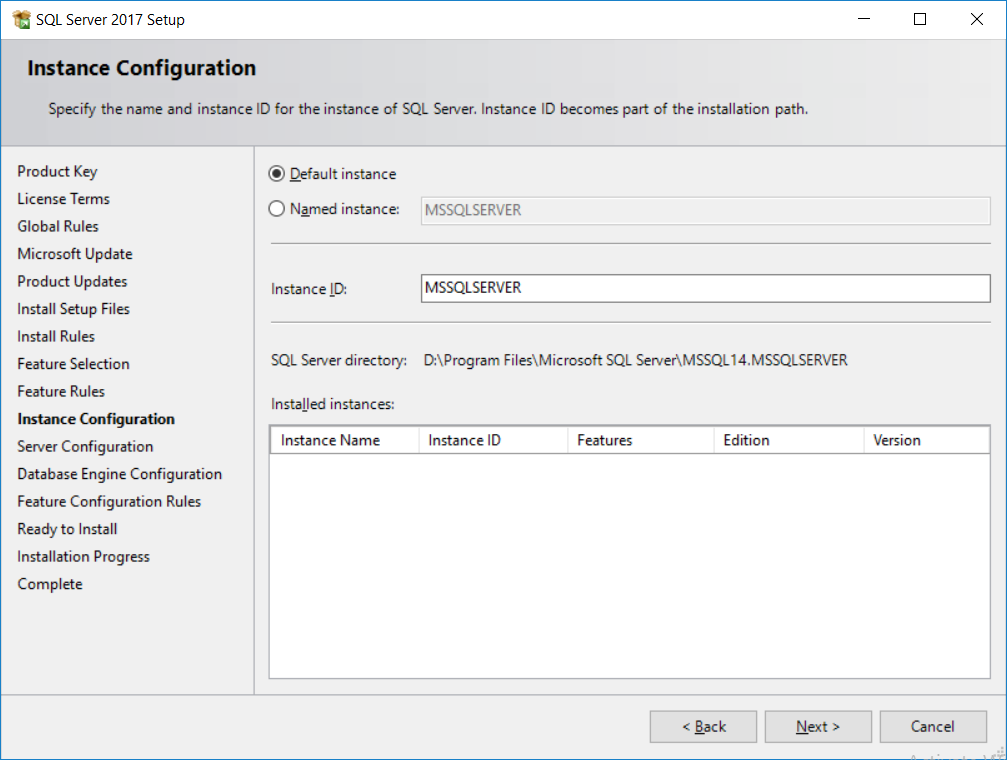
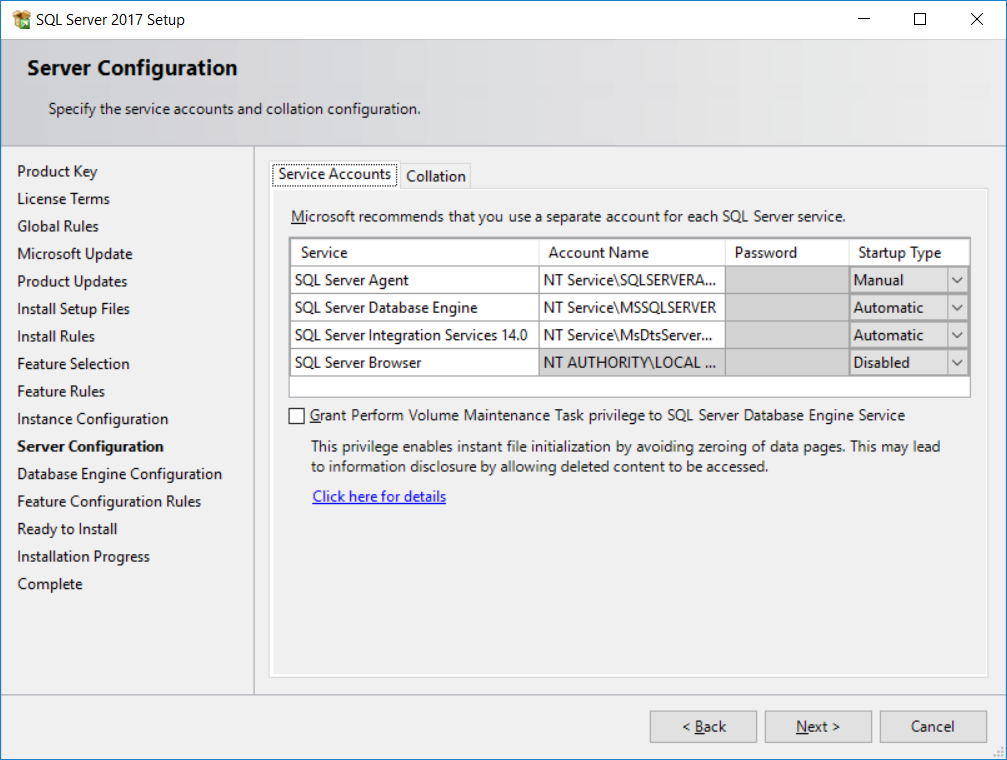
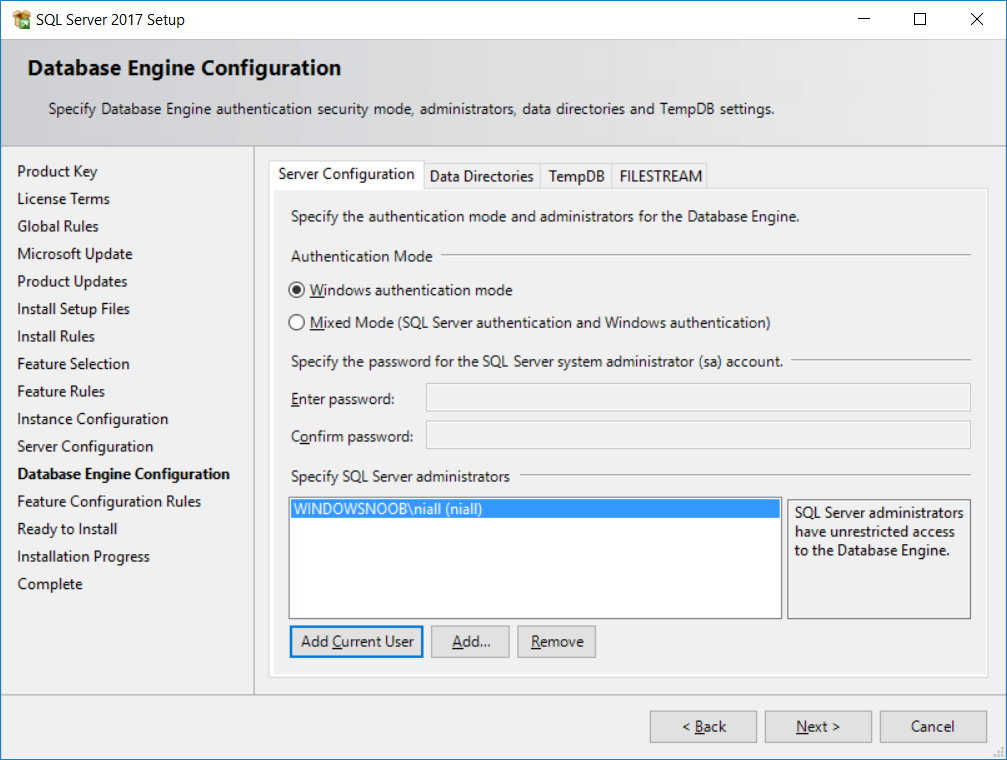
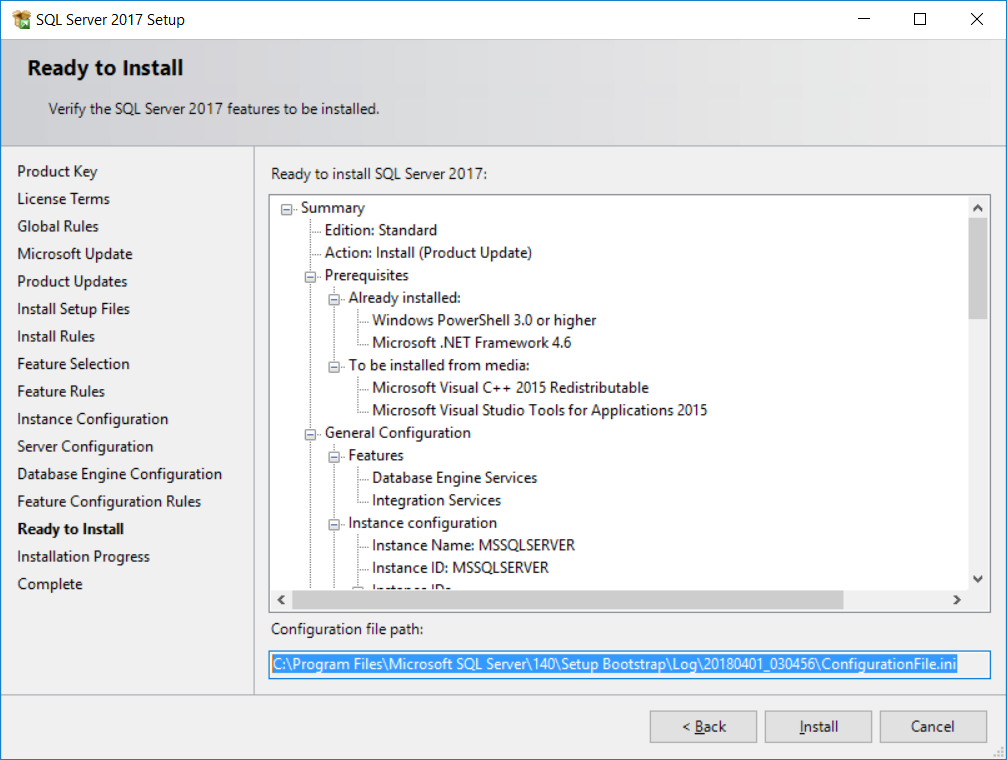
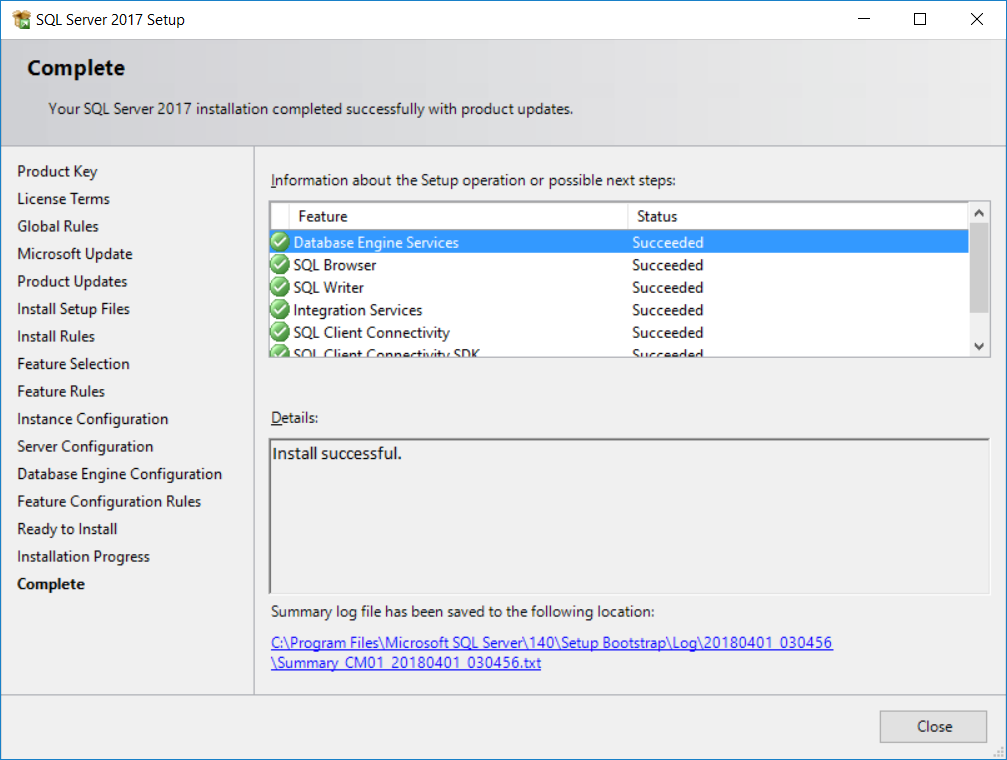
 This multi-part guide will show you how to install the latest baseline version of Configuration Manager from Microsoft. The latest available baseline version is System Center Configuration Manager (Current Branch) version 1802 as of March 29th 2018. How can I install System Center Configuration Manager (Current Branch) version 1802 on Windows Server 2016 with SQL Server 2017 – Part 1 How can I install System Center Configuration Manager (Current Branch) version 1802 on Windows Server 2016 with SQL Server 2017 – Part 2 How can I install System Center Configuration Manager (Current Branch) version 1802 on Windows Server 2016 with SQL Server 2017 – Part 3 How can I install System Center Configuration Manager (Current Branch) version 1802 on Windows Server 2016 with SQL Server 2017 – Part 4 You can use this multi-part guide to get a hierarchy up and running on Windows Server 2016 using SQL Server 2017. The concept behind this is to guide you through all the steps necessary to get a working Configuration Manager Primary site installed (for lab use) using manual methods or automated using PowerShell. This gives you the power to automate the bits that you want to automate, while allowing you to manually do other tasks when needed. You decide which path to take. PowerShell knowledge is desired and dare I say required if you are in any way serious about Configuration Manager. I will show you how to do most steps via two methods shown below, it’s up to you to choose which method suits you best but I highly recommend automating everything that you can, using PowerShell. Method #1 – Do it manually Method #2 – Automate it with PowerShell In Part 1, you configured Active Directory Domain Services (ADDS) on AD01, then joined the Configuration Manager server (CM01) to the newly created domain. You then created users, usergroups and OU's in Active Directory and created the System Management Container. Finally you delegated permission to the Configuration Manager server to the System Management container. Step 1. Install Roles and Features on CM01 Note: Perform the following on the Configuration Manager server (CM01) as a Local Administrator To support various features in System Center Configuration Manager, the setup wizard requires some server roles and features preinstalled. On CM01, login as the username you added to the Local Administrators group and start Server Manager. Method #1 - Do it manually The role and feature requirements for ConfigMgr are listed here https://docs.microsoft.com/en-us/sccm/core/plan-design/configs/site-and-site-system-prerequisites. On CM01, login as a user with administrative permissions on the server. Start Server Manager. Click on Add roles and features, on the Before you begin page click Next Choose Role-based or feature-based installation In the Server Selection screen verify CM01.windowsnoob.lab.local is selected and click Next On the Server Roles screen select Web Service (IIS) and when prompted to add features for Web Server (IIS) click on Add Features Click Next and on the Features screen select the .NET Framework 3.5 (includes .NET 2.0 and 3.0) feature Expand the .NET Framework 4.6 Features and select HTTP Activation under WCF Services, answer Add Features when prompted. Select Message Queuing (MSMQ) Activation and when prompted select Add Features Select Named Pipe Activation and TCP Activation and under Background Intelligent Transfer Service (BITS) select IIS Server Extension when prompted to add features click on Add Features Scroll down and select Remote Differential Compression Click Next and on the Web Server Role (IIS) screen click Next on the Select Role Services verify that the following are selected Click Next and point to the Installation Source by clicking on Specify an alternate source path Enter the path to the media eg: E:\Sources\SxS Click Install when ready, at this point you could export configuration settings for later automation Click on Close when the feature installation has succeeded. Method #2 - Automate it with PowerShell Note: Make sure your Server 2016 media is in the drive specified in the script or edit the script to point to the new location of the media. To install the roles and features needed, start Windows Powershell ISE as a user with administrative permissions on the server, edit the variables as appropriate and run the install roles and features.ps1 script. The script will automatically stop and prompt you to correct things, if it cannot find the XML file or the Windows Server 2016 installation media. 1. Extract the scripts to C:\Scripts on CM01 and load the install roles and features.ps1script located in C:\Scripts\Part 2\CM01 2. Edit the variables (lines 18-19) as desired before running. 3. Start Windows PowerShell ISE as Administrator and run the script by clicking on the green triangle. Step 2. Download and install Windows ADK and install WDS Note: Perform the following on the Configuration Manager server (CM01) as a Local Administrator When you deploy operating systems with Configuration Manager, the Windows ADK is an external dependency that is required. The ConfigMgr prerequisite checker will check for various things, including ADK components such as USMT and Windows Preinstallation Environment (among others), therefore you need to install Windows ADK on your server. System Center Configuration Manager version 1802 supports Windows ADK 1709 as I've explained here. Method #1 - Do it manually Go to this link and download ADK 1709. You'll be prompted to save or run ADKSETUP.EXE, select Run. When prompted for the path, accept the defaults...(or change it to something else if you wish) Select your privacy settings Accept the ADK EULA Make sure to have selected at least the following ADK features Deployment Tools Windows Preinstallation Environment (Windows PE) Imaging and Configuration Designer (ICD) Configuration Designer User State Migration tool (USMT) and click Install to start the download and Installation of the Windows ADK, version 1709. Once the ADK installation is complete, click Close. To install WDS, open Server Manager, select Add roles and features and select the Windows Deployment Services role. When prompted click on Add Features to include management tools. and click through the wizard until completion, close the wizard when done. Method #2 - Automate it with PowerShell To download and then install Windows ADK 10 version 1709 with the components needed for ConfigMgr, start Windows Powershell ISE as Administrator and run the setup ADK and WDS.ps1 script. This script not only downloads and installs ADK 1709, but it installs the Windows Deployment Services role. Tip: If you've already downloaded ADK 1709 and want to save yourself some time, copy the Windows Kits folder and all files/folders within to the source folder (eg: C:\Source\Windows Kits) and the script will skip the download. 1. Extract the scripts to C:\Scripts on CM01 and load the setup ADK and WDS.ps1 script located in C:\Scripts\Part 2\CM01 2. Edit the variable (line 17) as desired before running. 3. Start Windows PowerShell ISE as Administrator and run the script by clicking on the green triangle. Step 3. Install SQL Server 2017 Note: Perform the following on the Configuration Manager server (CM01) as a Local Administrator Method #1 - Do it manually Configure the firewall as described in https://go.microsoft.com/fwlink/?linkid=94001. After configuring the firewall, browse to the drive where the SQL Server 2017 media is, and run setup.exe. The SQL Server Installation Center wizard will appear. Click on Installation and then choose New SQL Server standalone installation or add features to an existing installation. Enter the Product Key or use the evaluation version if that's what you want to use. The product key will be automatically filled in for licensed media downloaded from Microsoft Volume Licensing Service Center. Accept the EULA Make your Microsoft Update choices and review your Install rules, select the SQL server instance features you need and if necessary change the drive letter where you intend to install it And configure the Instance Configuration or just leave it as default Verify the Service Accounts settings and for Collation, make sure the collation is set to SQL_Latin1_General_CP1_CI_AS For Server Configuration, click on Add Current User After configuring Data Directories, TempDB and Filestream settings you are Ready to Install Click on Install to start the installation of SQL Server 2017, and once it's completed, click Close. After installing SQL Server 2017, download SQL Server 2017 SSMS from here and install it. Method #2 - Automate it with PowerShell Note: Make sure your SQL Server 2017 media is in the drive specified in the script or edit the script to point to the new location of the media. The script and accompanying INI file have the path pointing at D:\Program Files, please change the variables as appropriate. To install SQL Server 2017 use the Install SQL Server 2017.ps1 script. The script will create a ConfigurationFile.ini used to automate the installation of SQL Server 2017, and after it's installed the script will download the SSMS executable (Management Studio) and install it. Then it will download Reporting Services and install it. If either of the EXE's are in the download folder, it will skip the download and just install. SQL Server no longer comes with the Management Studio or Reporting Services built in, and they are offered as separate downloads, don't worry though, my PowerShell script takes care of that for you. 1. Extract the scripts to C:\Scripts on CM01 and load the Install SQL Server 2017.ps1 script located in C:\Scripts\Part 2\CM01 2. Edit the variables [lines 17-76] as desired before running. 3. Start Windows PowerShell ISE as Administrator and run the script by clicking on the green triangle. Step 4. Restart the Configuration Manager Primary Server Note: Perform the following on the Configuration Manager server (CM01) as a Local Administrator Open an administrative command prompt and issue the following command: shutdown /r Step 5. Install the WSUS role Note: Perform the following on the Configuration Manager server (CM01) as a Local Administrator Now that SQL server is installed, we can utilize SQL Server for the WSUS database. To install WSUS and configure it to use the SQL server database instead of the Windows Internal Database, do as follows: Method #1 - Do it manually Using Roles and Features in Server Manager, add the Windows Server Update Services role. When prompted to add features for the WSUS role, click on Add features. When prompted for the Role Services, uncheck WID Connectivity and add SQL Server Connectivity instead. When prompted for Content location, enter a valid path When prompted for Database Instance Selection, enter the server name and click on Check Connection On the Confirm Installation Selections screen, click on Install. and finally click close. After installing the WSUS role, in Server Manager, click on the yellow exclamation mark and choose Launch Post Installation Tasks. When the tasks are completed Optional: The WSUS database (SUSDB) can be observed using SQL Server SSMS. Method #2 - Automate it with PowerShell Browse to the location where you extracted the scripts, C:\scripts. Start Windows PowerShell ISE as administrator, open the Install roles and features_WSUS.ps1 script, edit the $servername variable and replace CM01 with the ServerName your are installing ConfigMgr on (SQL server). Note: Make sure to have your Windows Server 2016 media in the path referred to by $Sourcefiles. 1. Extract the scripts to C:\Scripts on CM01 and load the Install roles and features_WSUS.ps1 script located in C:\Scripts\Part 2\CM01 2. Edit the variables [lines 22-25] as desired before running. 3. Start Windows PowerShell ISE as Administrator and run the script by clicking on the green triangle. Downloads The scripts used in this guide are available for download here. Unzip to C:\Scripts on both servers. The scripts are placed in the corresponding folder (Part 1, Part 2 etc) and sorted into which server you should run the script on (AD01 or CM01). Scripts.zip Summary Using PowerShell to automate things leaves more time for yourself and it's fun. Please join me in Part 3 of this multi-part guide when you will install System Center Configuration Manager version 1802 (Current Branch).