Search the Community
Showing results for tags 'current branch'.
-
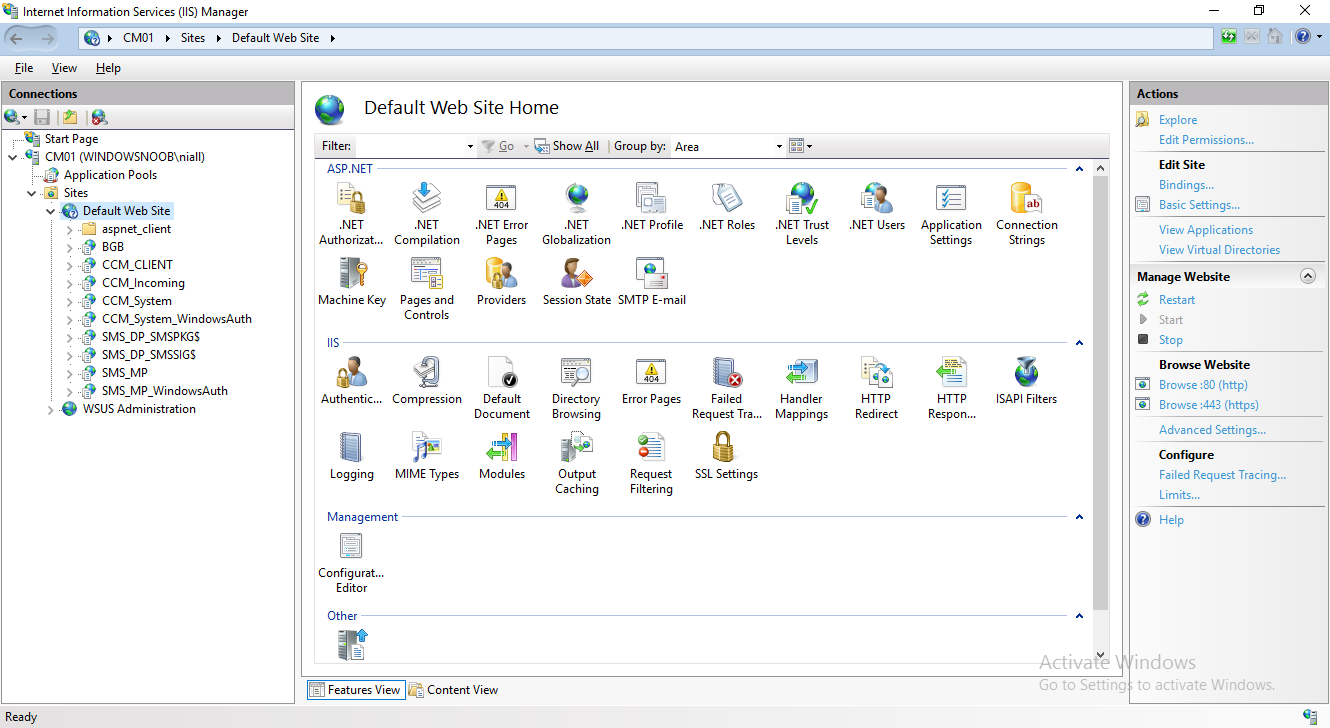
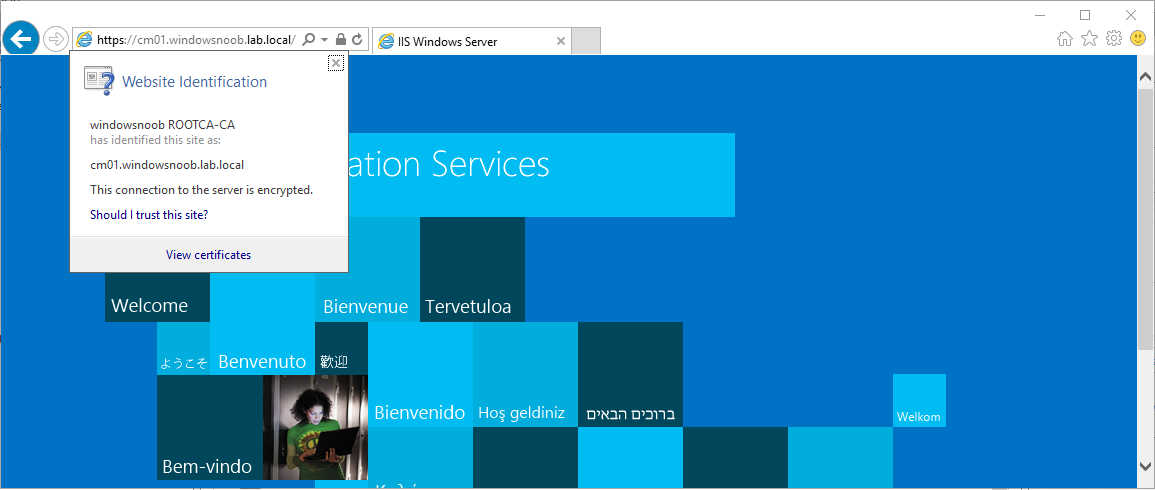
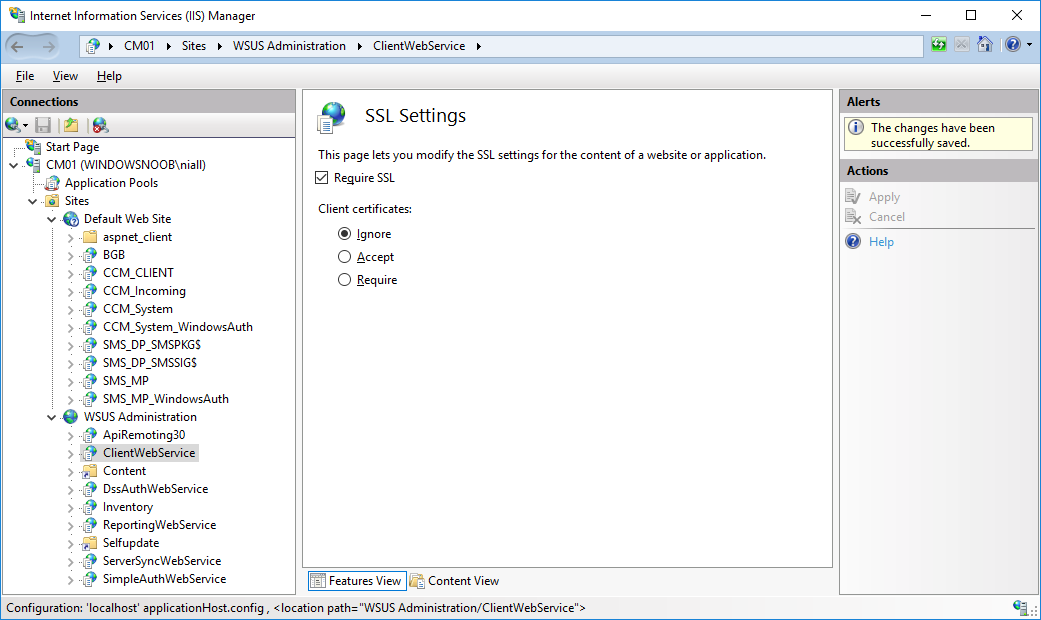
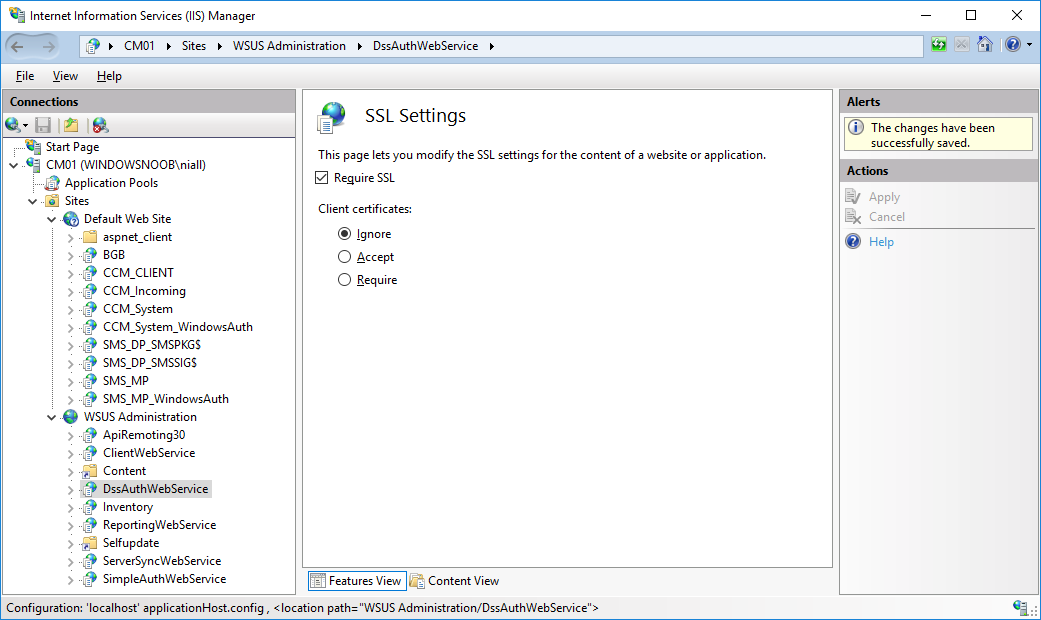
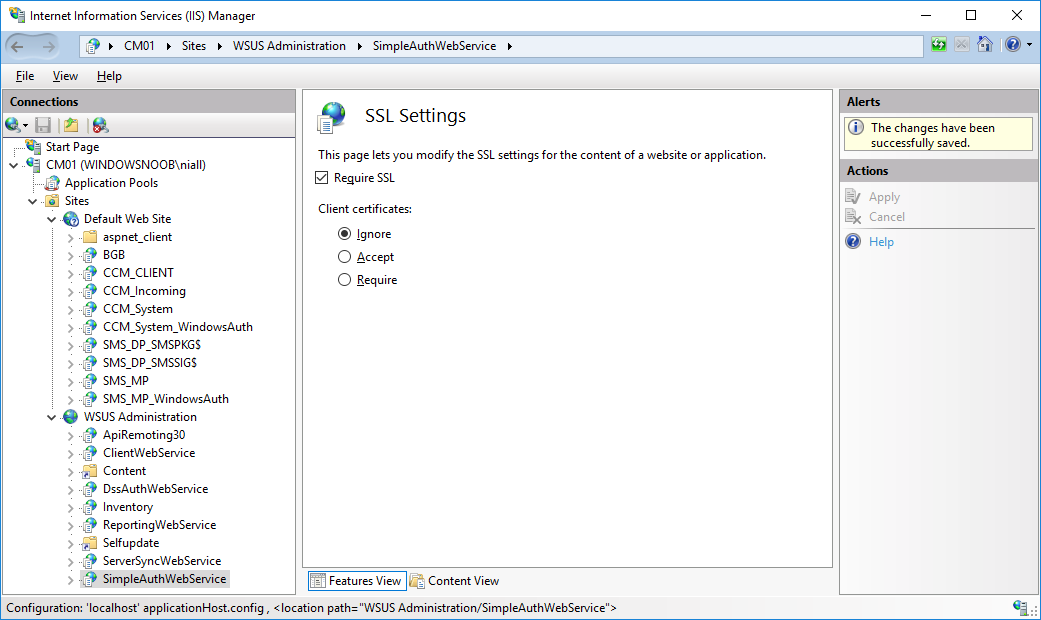
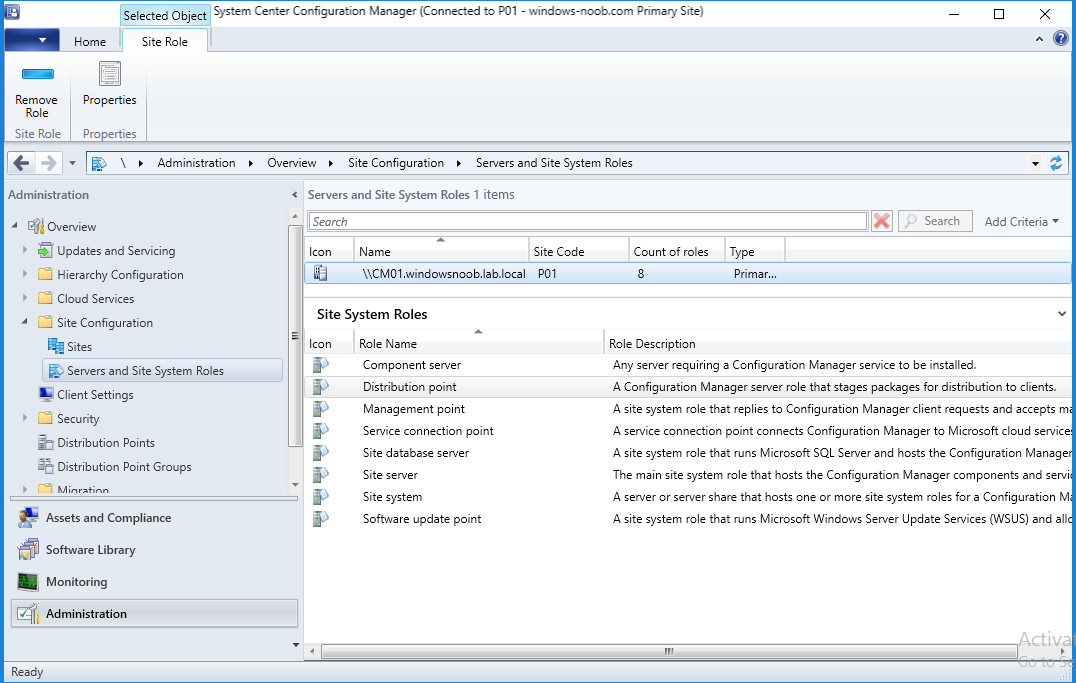
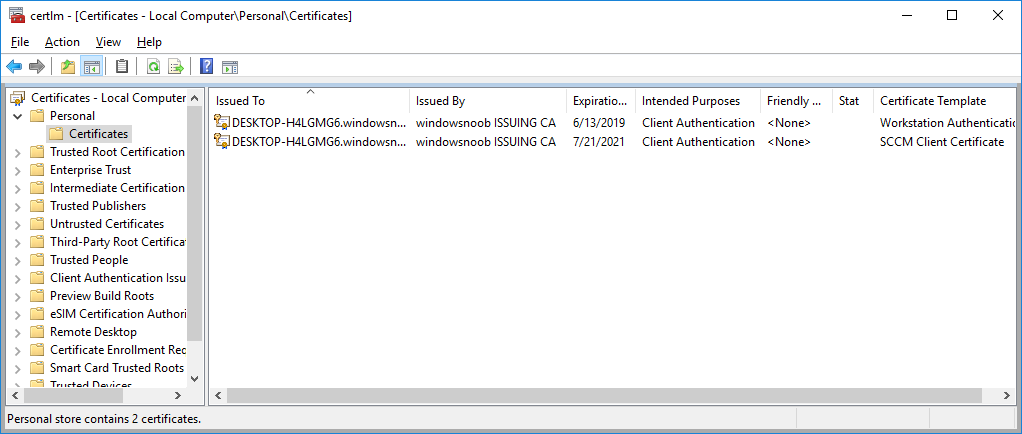
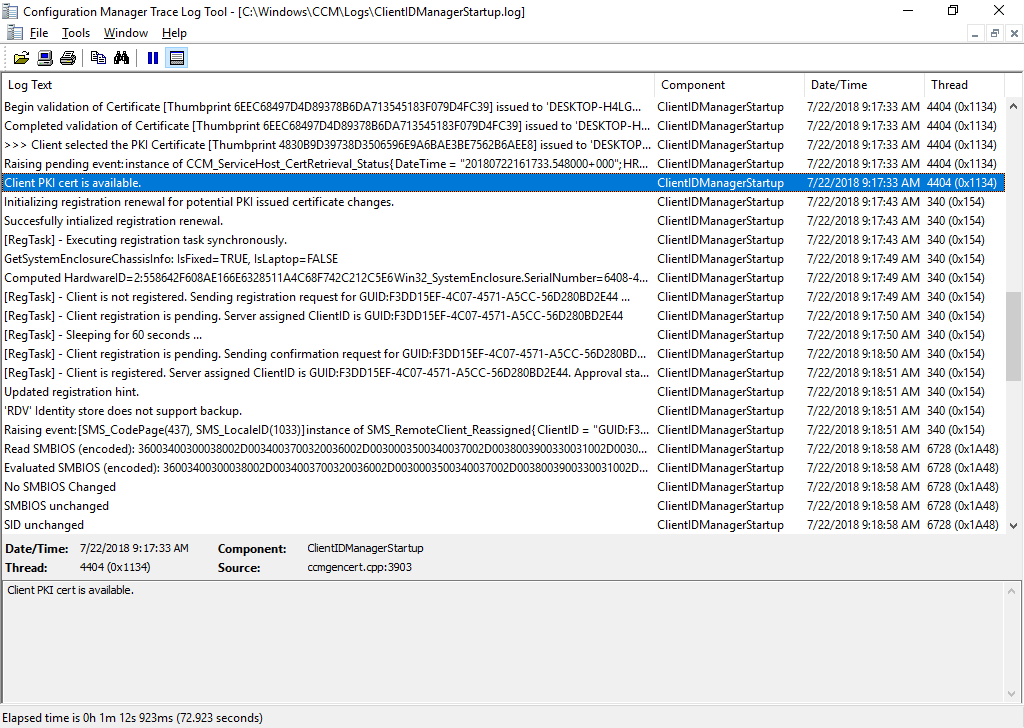
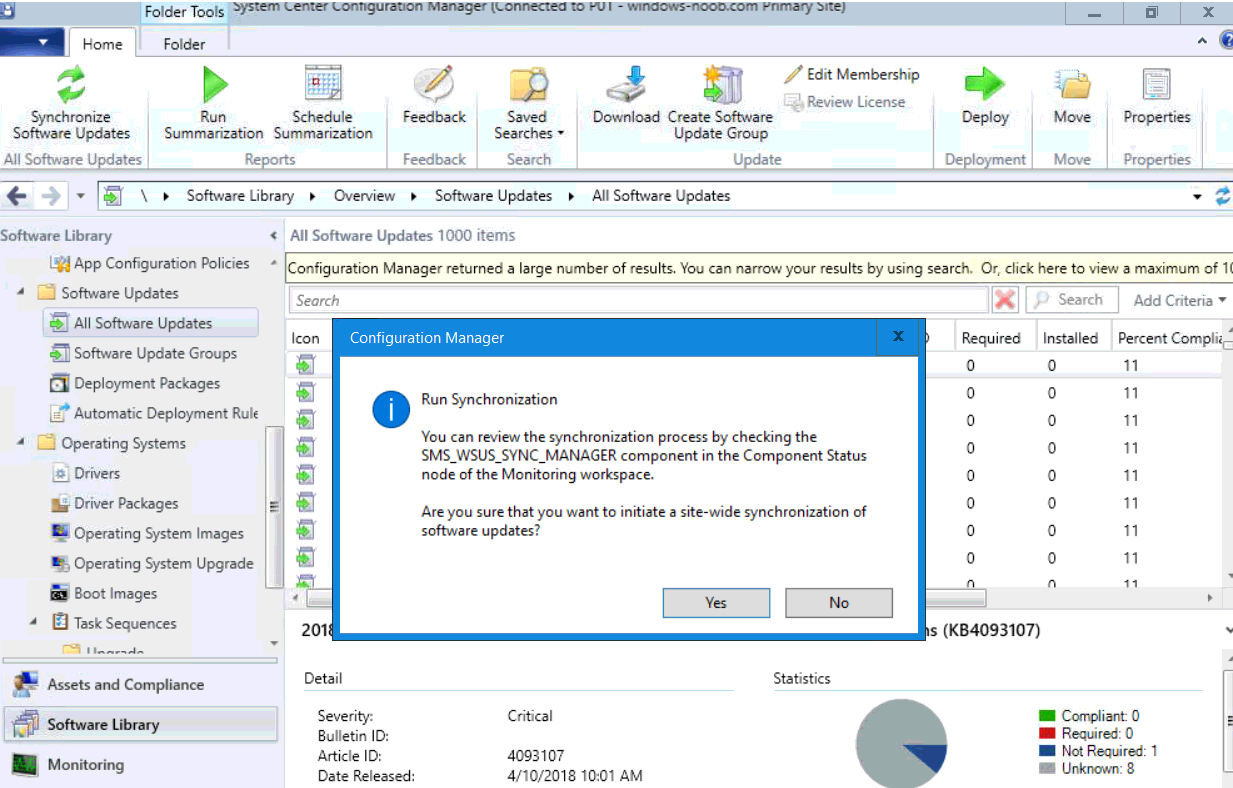
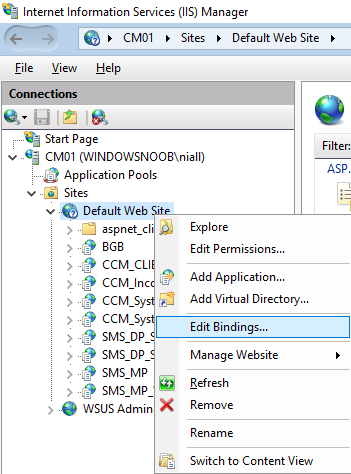
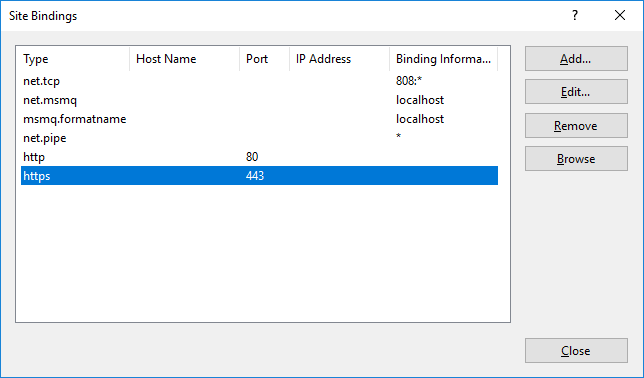
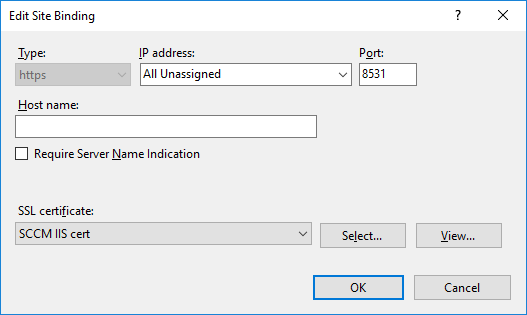
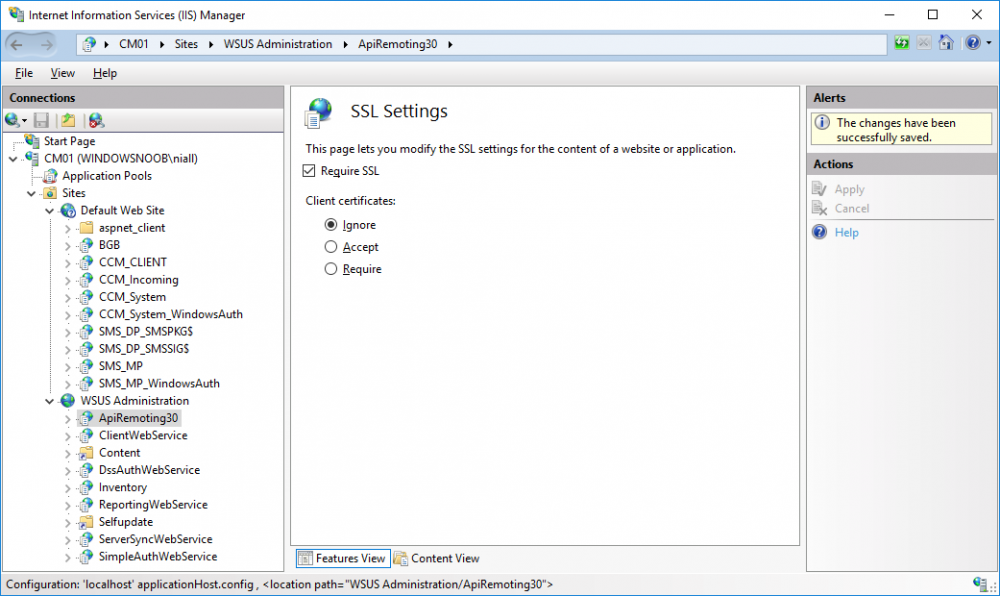
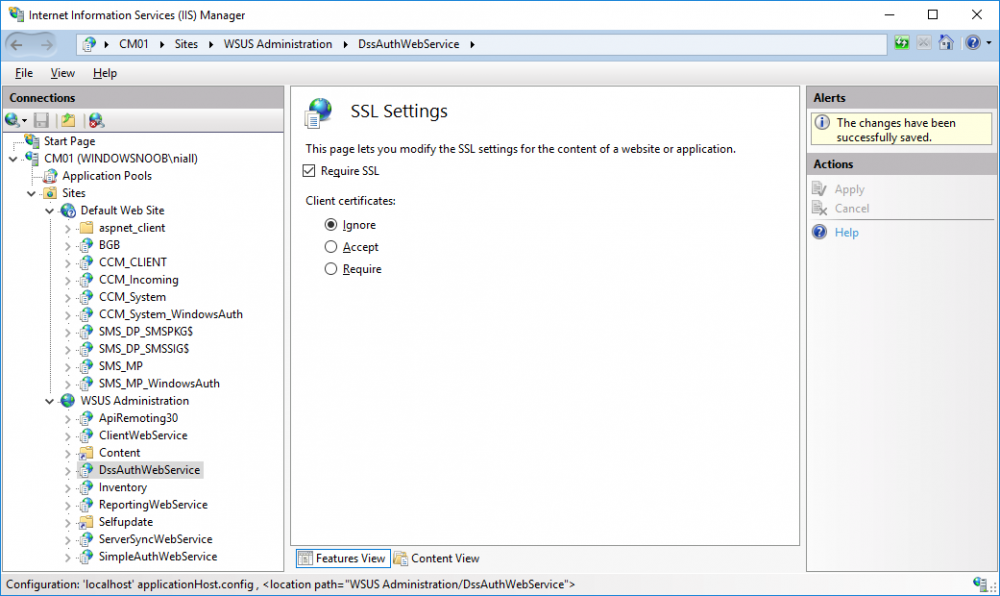
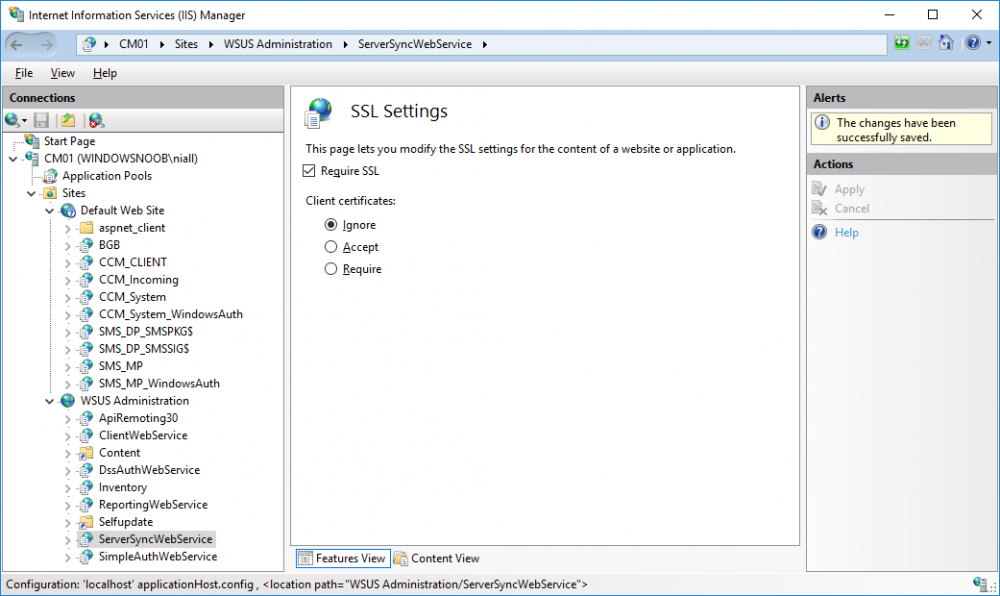
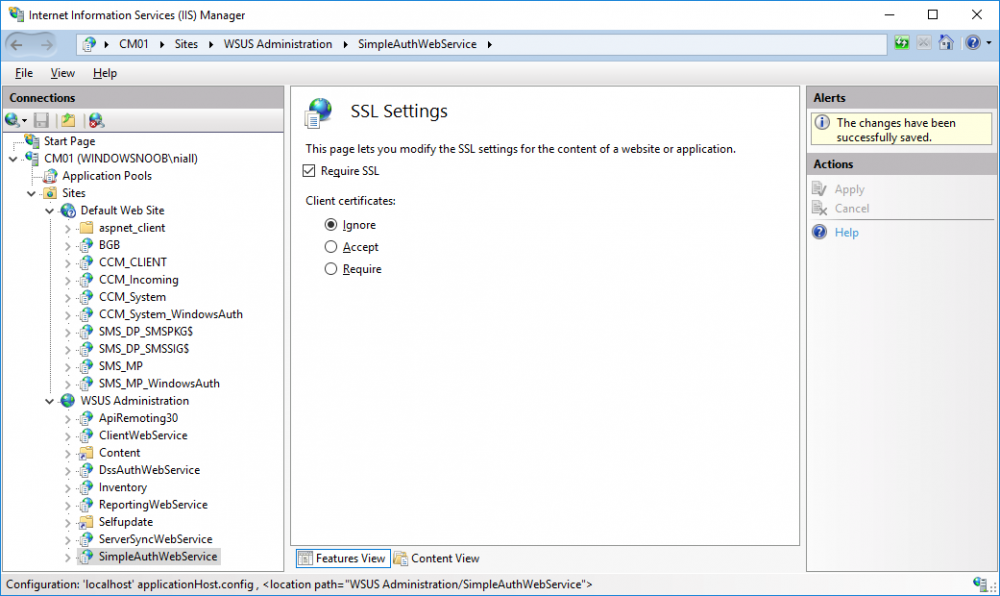
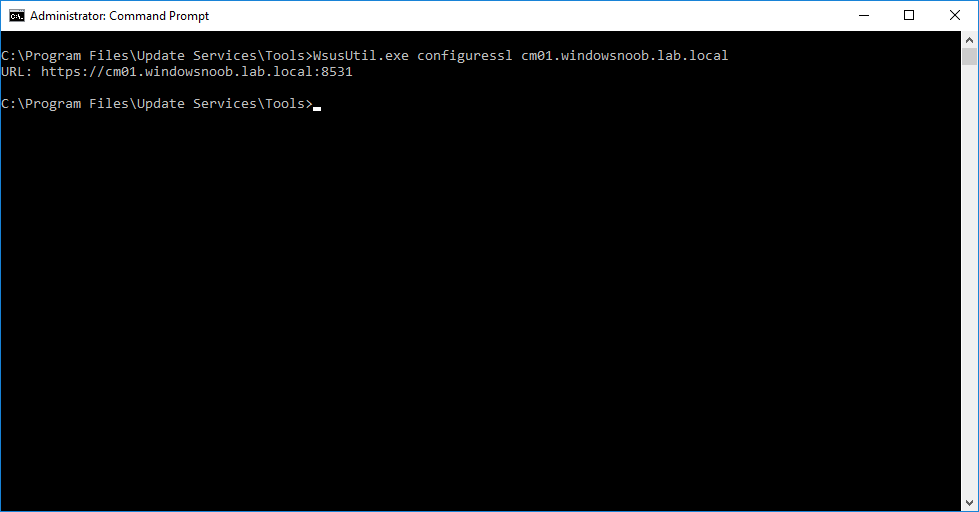
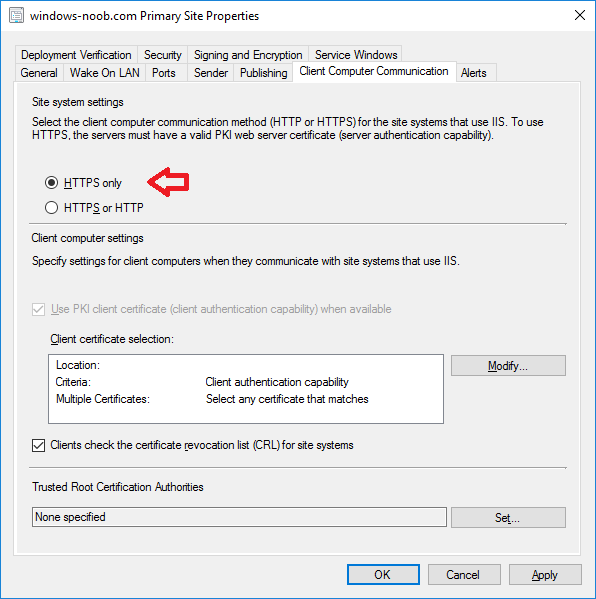
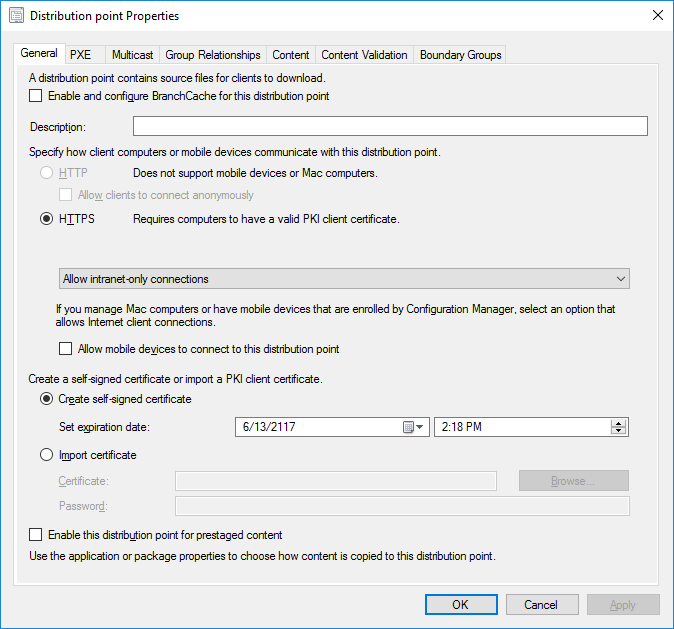
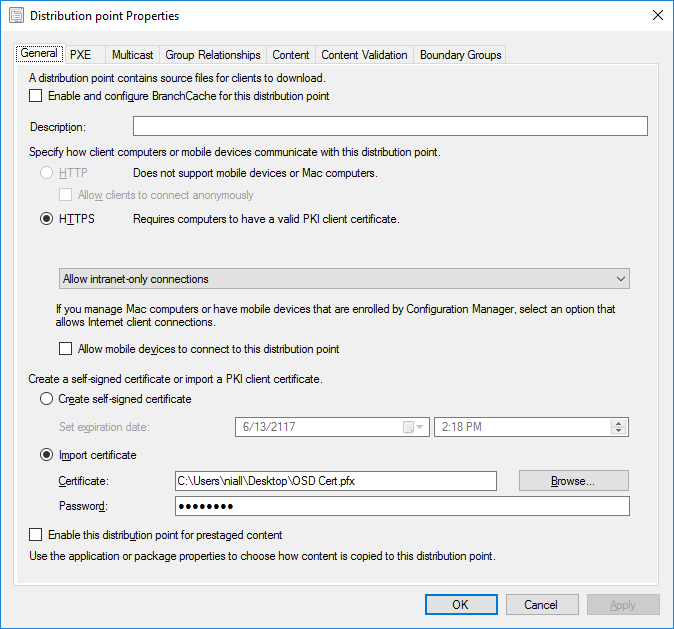
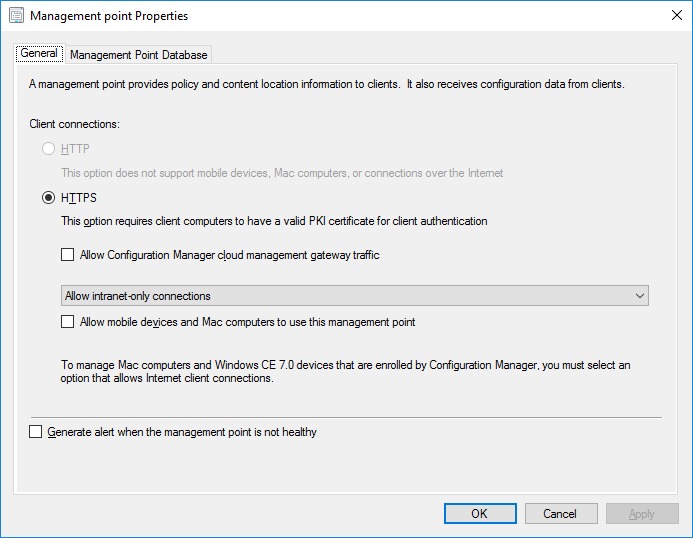
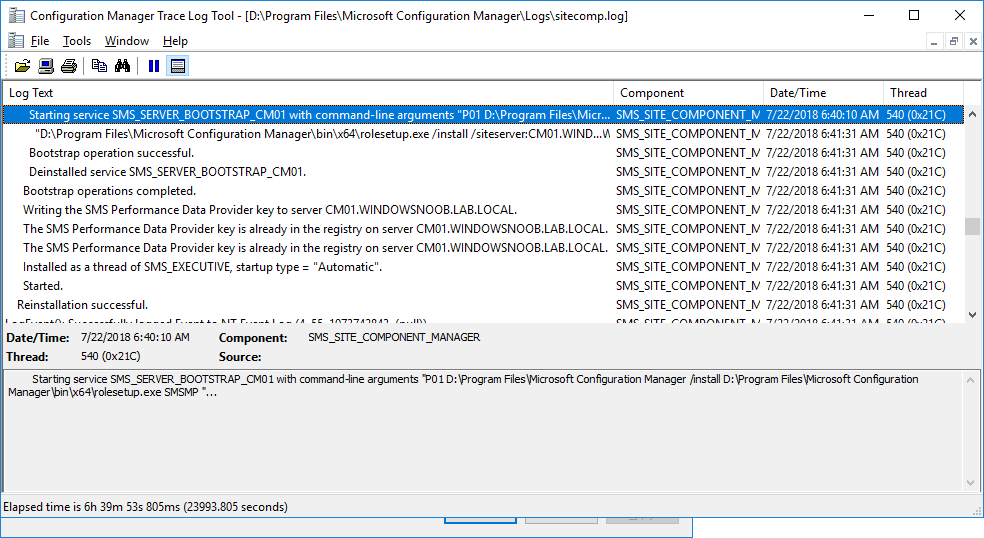
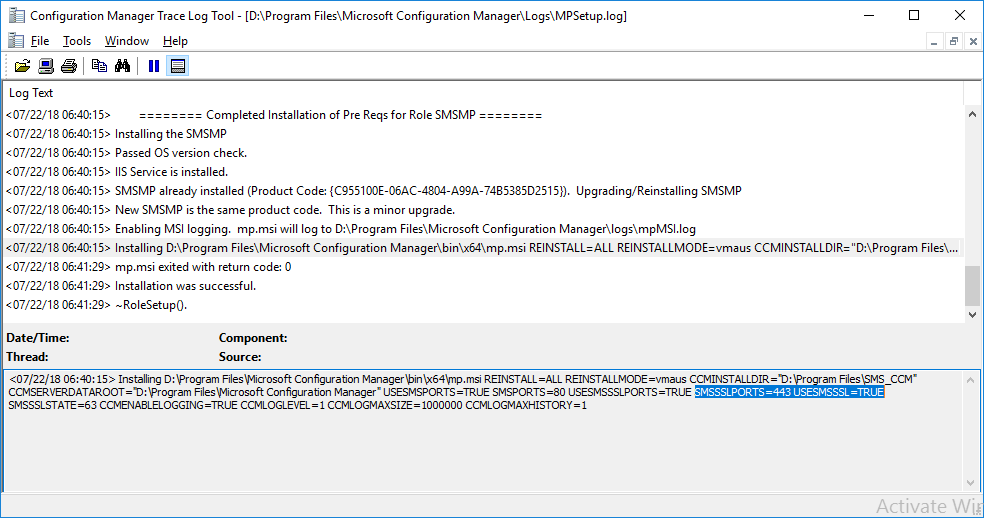
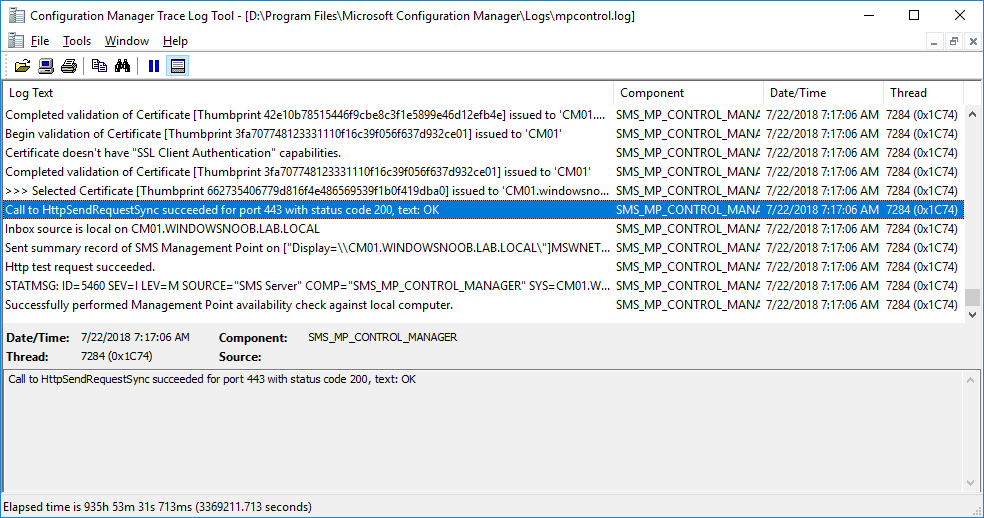
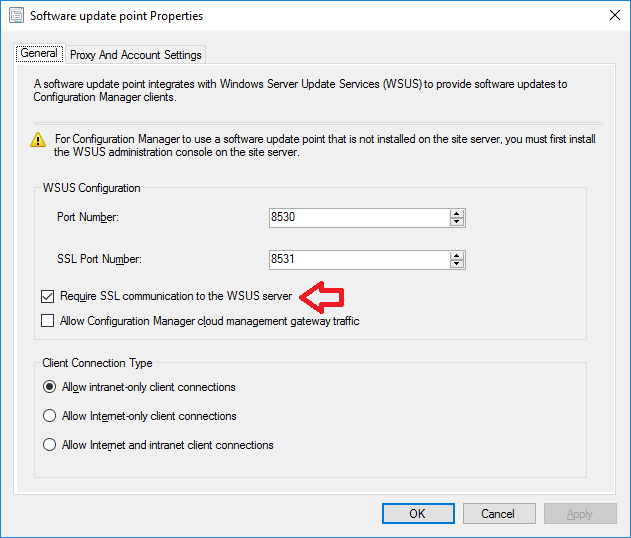
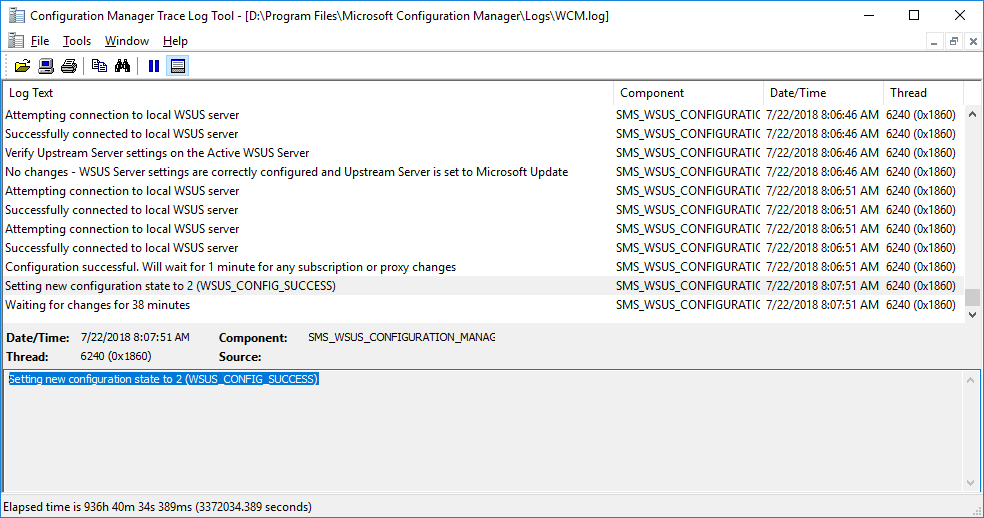
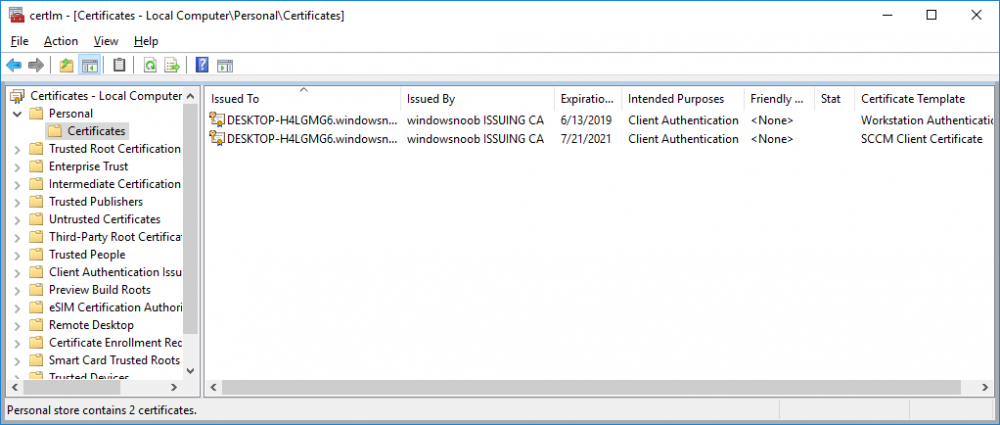
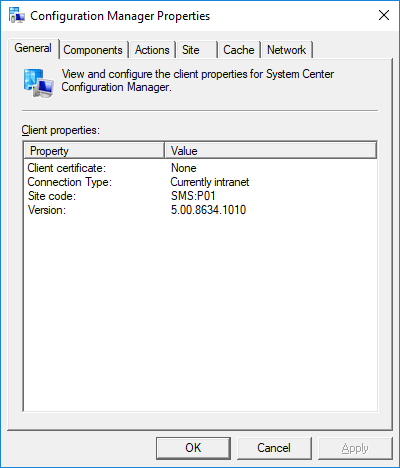
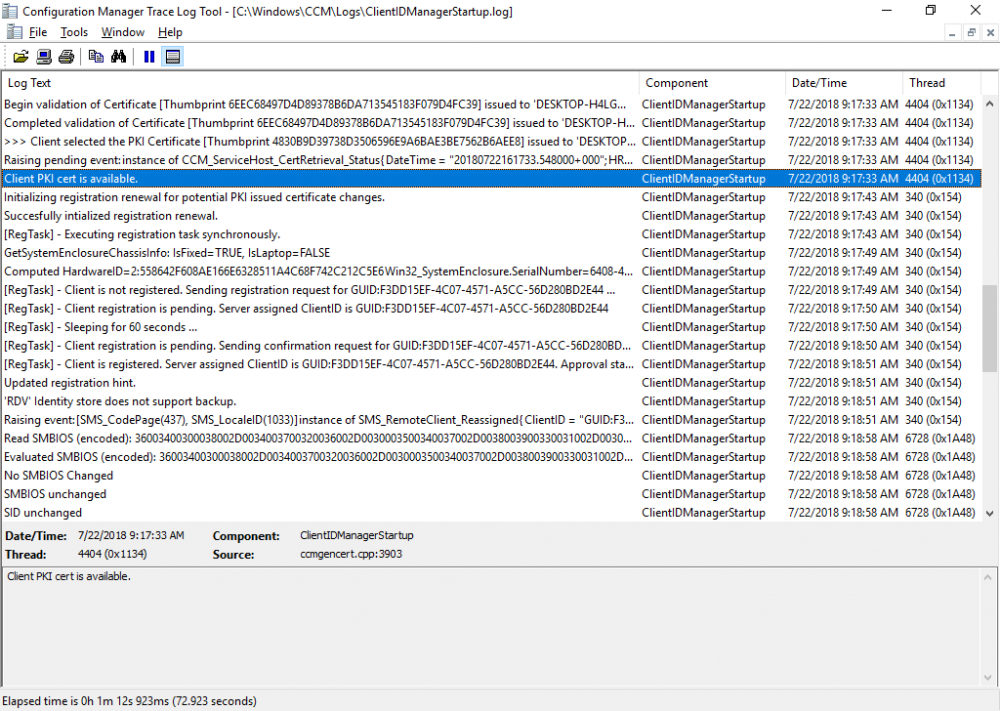
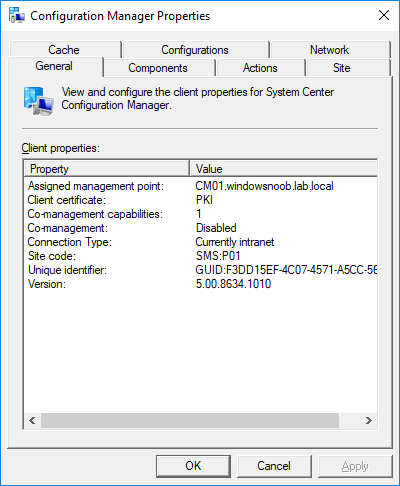
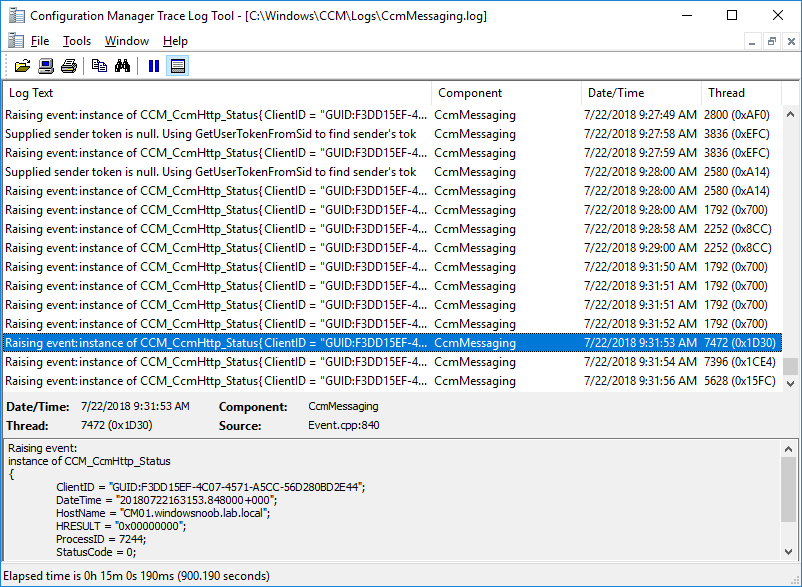
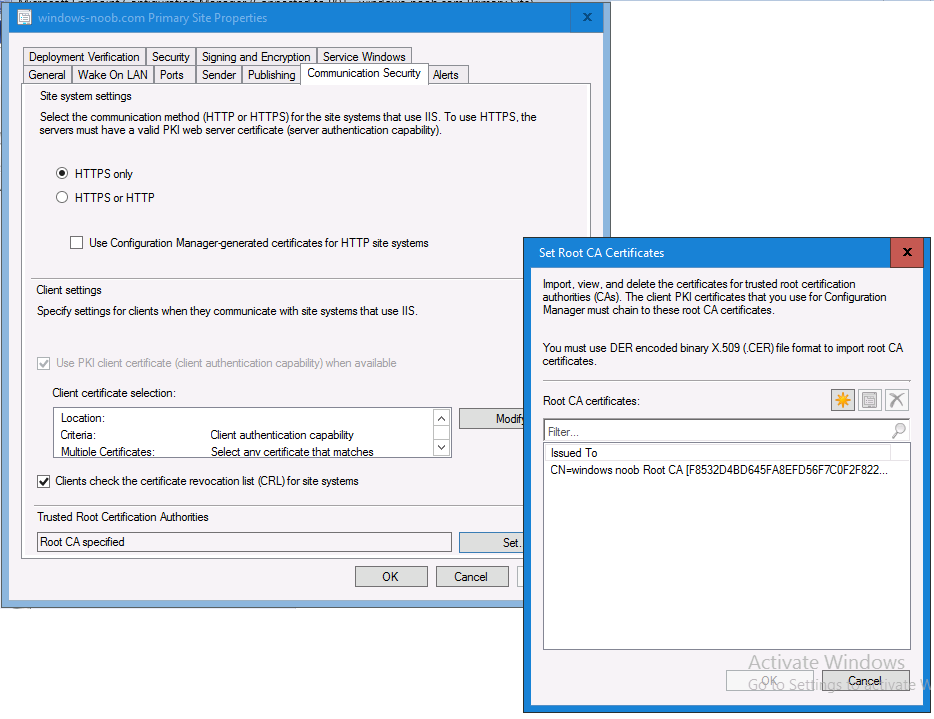
 In a previous series of guides I showed you how to configure PKI in a lab on Windows Server 2016. In another series, I also showed you how to install System Center Configuration Manager (Current Branch) version 1802 on Windows Server 2016 with SQL Server 2017. In this lab, I will show you how to configure SCCM to utilize that PKI environment. This series is based upon an excellent video by the talented former Microsoft Premier Field Engineer Justin Chalfant here. If you haven't seen it yet, do check it out. The intention here is that after you've completed this PKI enabled SCCM lab you can then use this in future guides, and to dig deeper into new technologies from Microsoft, for example enabling a Cloud Management Gateway and/or Cloud Distribution Point and using later on, using Co-Management. Note: To complete this lab you must first complete the PKI Lab series (8 parts) and then install a new virtual machine within that PKI lab running System Center Configuration Manager (Current Branch) version 1802 utilizing this series (4 parts), that installation of Configuration Manager will be in HTTP mode. In addition, you must configure the Software Update Point role (in HTTP mode) on CM01 See this guide (step 2 onward) for details. For details how to configure that, see this post. It will take some time to setup but you'll be glad you did. Also, don't do this in production without consulting with a PKI Expert. I don't claim to be one, I'm just helping you get it up and running in a lab. This is intended for use in a lab only. In part 1 of this series you created an Active Directory Security Group to contain your SCCM servers that host IIS based roles such as Distribution Point, Management Point and Software Update Point, you then rebooted that server after adding it (CM01) to the group. You then created 3 certificate templates for SCCM on the Issuing CA server (IssuingCA) and issued them so that they could be available to applicable computers. You verified that you had a GPO in place for AutoEnrollment before requesting the IIS and DP/OSD Certificates on the IIS Site System (CM01) using certlm.msc. Step 1. Edit bindings in IIS for the Default Web Site and WSUS Administration Websites On the SCCM server (CM01), start Internet Information Services (IIS) Manager, expand Sites so that you can see the Default Web Site and the WSUS Administration websites listed. Select the Default Web Site, this web site is where the management point, distribution point and other SCCM roles such as Application Catalog can be found (if they are installed). Edit bindings on the Default Web Site Right click on the Default Web Site and choose Edit Bindings from the options available. In the window that appears, select the https section (port 443) and choose Edit. In the SSL certificate dropdown menu, select SCCM IIS Cert. Click OK and then click Close. Verify changes made Once done, you can open up Internet Explorer and verify that it's reporting back in HTTPS mode for the default web site by browsing to the following addresses to verify the Netbios name and FQDN resolve in HTTPS mode. Click on the Lock in the address bar to get info about the connection. https://cm01 https://cm01.windowsnoob.lab.local/ Edit bindings on the WSUS Administration Web Site Repeat the above operation, on the WSUS Administration website (note that it uses port 8531 for https mode). click OK and Close when done. Step 2. Modify WSUS Administration SSL Settings WSUS itself requires some additional changes documented here (1) that we need to configure to allow WSUS to use HTTPS. In the Internet Information Services (IIS) Manager, expand sites and selct WSUS Administration. Select ApiRemoting30 under the WSUS Administration web site, in the right pane, click on SSL Settings and select Require SSL and verify that Ignore is selected before clicking Apply. Next, select ClientWebService under the WSUS Administration web site, in the right pane, click on SSL Settings and select Require SSL and verify that Ignore is selected before clicking Apply. Next, select DSSAuthWebService under the WSUS Administration web site, in the right pane, click on SSL Settings and select Require SSL and verify that Ignore is selected before clicking Apply. Next, select ServerSyncWebService under the WSUS Administration web site, in the right pane, click on SSL Settings and select Require SSL and verify that Ignore is selected before clicking Apply. Finally, select SimpleAuthWebService under the WSUS Administration web site, in the right pane, click on SSL Settings and select Require SSL and verify that Ignore is selected before clicking Apply. Step 3. Configure WSUS to require SSL In an administrative command prompt on CM01, browse to the location of WSUS installation files. cd C:\Program Files\Update Services\Tools Next issue the following command where CM01.windowsnoob.lab.local is the Fully qualified domain name of your ConfigMgr server hosting WSUS. WsusUtil.exe configuressl cm01.windowsnoob.lab.local The results are shown below: Step 4. Configure SCCM to use HTTPS In this step you will configure SCCM to operate in HTTPS mode. To do that, first bring up the site properties in the SCCM Console on CM01. To bring up the site properties, select the Administration workspace, select Site Configuration, select your site and in the ribbon choose Properties. Next, click on Client Computer Configuration, select HTTPS only from the options and then select Apply. Note: If you have both HTTP and HTTPS site systems in your environment, keep the second box checked (HTTPS or HTTP) and enable the Use PKI client certificate (client authentication capability) when available check box. Step 5. Configure Trusted Root Certification Authorities Note: If you fail to add the Root CA (ROOTCA_windows noob Root CA.crt) specified here, PXE boot will fail to download policy after entering the PXE password. In the site properties screen, click on Communication Security and then click on Set beside Trusted Root Certification Authorities, and click on the yellow star to add your Root CA, in this case, the Root CA for your lab (from the offline root ca), in other words point it to the ROOTCA_windows noob Root CA.crt file which is the Trusted Root Certificate for this site (the Root CA cert). Step 6. Verify that the Distribution Point, Management Point and Software Update Point are using SSL Next you need to verify the DP (and perform some additional configuration), MP and SUP roles are using SSL. To do this, select the Administration workspace in the console, click Site Configuration, select Servers and Site System roles, and select the Distribution Point role. Right click it and choose Properties to bring up the Distribution Point role properties. You should see that it is already configured for HTTPS. Next you need to add the certificate used by clients being imaged by operating system deployment in WinPE or for WorkGroup based clients, to do so, click on Import Certificate and select Browse, browse to the location where you saved the OSD Cert.pfx file (which you created in Step 5 of part 1 here), enter the password you specified, and click Apply. Click OK to close the Distribution Point role properties. For more info on the DP Cert requirements see - https://docs.microsoft.com/en-us/sccm/core/plan-design/network/pki-certificate-requirements Next, select the Management Point role properties, they are shown below, again, HTTPS is selected by default as you set it site wide with the HTTPS only option. When you selected HTTPS Only in the Client Computer Communication of the site properties, this initiated the Management Point to reinstall itself with the new settings, as you can see here in the sitecomp.log. In addition in the mpsetup.log you can see that it's configured for SSL Finally you can check mpcontrol.log this log logs the status of your Management Point, and in there you can verify that the Management Point is up and running and communicating OK in HTTPS mode and that it has successfully performed Management Point availability checks. Next, double click the Software Update Point role to review it's properties. Place a check in the Require SSL communication to the WSUS Server check box. Click Apply and click OK to close the Software Update Point properties. At this point open the WCM.log and look for a line that reads Step 7. Verify Client Received Client Certificate and SCCM Client Changes to SSL Logon to the Windows 10 1803 client and start and administrative command prompt, from there launch certlm.msc to bring up Certificates on the Local Machine. Browse to Personal and Certificates, and you should see the SCCM Client Certificate listed. Note: I assume you've already installed the ConfigMgr client agent using whatever method your prefer on the Windows 10 1803 virtual machine. Next, open the Control Panel and locate the Configuration Manager client agent in System and Security, and open it. If the client was just installed the Client Certificate will probably state Self-Signed (or None if you have just installed the client..). After a couple of minutes, close and then reopen the client and you should see that the Client Certificate states PKI. At this point, open the ClientIDManagerStartup.log in C:\Windows\CCM\Logs and you can see Client PKI cert is available. You can also verify client communication to the Management Point in the CCMMessaging.log and we can see it's successful in that communication. Job done ! You've successfully converted SCCM from HTTP to HTTPS using your PKI lab, and you've verified that the client is operating in HTTPS mode. In the next parts we'll look at the Cloud Management Gateway and Cloud Distribution Point. Recommended reading (1) - https://technet.microsoft.com/en-us/library/bb633246.aspx https://docs.microsoft.com/en-us/sccm/core/plan-design/network/pki-certificate-requirements https://www.enhansoft.com/how-to-setup-ssrs-to-use-https-part-1/


-

Endpoint protection manager fails after installation
AndreasM posted a question in Endpoint Protection
Hello, we have a test environment and a productive environment. In the test environment we could install and configure an end point protection manager. In the production environment we get errors as these: Cannot find path for destination inbox Notification Manager on server REGISTRY. The current component is possibly not installed. Cannot connect to the inbox source, sleep 30 seconds and try again. [Software Inventory Processor (Site Trusted)] cannot update environment so skiping outbox processing. Cannot find path for destination inbox Distribution Manager (incoming) on server registry. ~~ same goes for: Software Metering Processor Usage (Site), Success Policy Requests / Discovery Data Manager, etc. [Notification Manager] cannot update environment so skiping outbox processing. [Distribution Manager (Incoming)] halting execution. Remote site is in pull-mode. Coult not read registy key HKEY_LOCAL_MACHINE\Software\Microsoft\SMS\MPFDM\INboxes\ on the server. The operating system reported error 2: cannot find the file We have no clue how to resolve this. We opened a case with MS, but so far nothing. It seems during the installation stuff from the new epp-server should be pushed onto the siteserver (and stuff should also be written in the registry of the site server,) but this fails. The SiteServer is admin on the new Site System (we tried to install using the site servers computer account as well as the install service account - both failed). The service RemoteRegistry runs on both systems. Thank you for ideas. Sincerely Andreas -
 Hi, I would appreciate if anyone can point me in the right direction (own experience, guides, blogs etc) on which steps need to be carried out to do a successful side-by-side migration from SCCM 2012 R2 SP1 (CU4) to CB 1710. We are going to start our Windows 10 deployment project in our company this spring and are currently managing our clients running/deploying Windows 8.1 from our SCCM 2012 R2 site. The reason for considering to do a side-by-side migration (as opposed to an in place upgrade) is that I will be responsible for OS Deployment of Windows 10 in SCCM (with MDT integration) and I am just starting out with MDT/OS Deploy, I lack some experience and am learning the tools now. On the SCCM 2012 we are using now to deploy our 8.1 clients the MDT integration is "half working" so to speak, to understand how it´s been setup would require a lot of reverse engineering and it all feels a bit overwhelming since it´s not been well documented. I'm basically afraid I will "break" the OS deploy on the 2012 server since part of the upgrade procedure is uninstalling ADK for Windows 8,1 and install ADK for Windows 10 (may cause problems with boot images/drivers etc.) It feels tempting to setup a fresh CM server on 2016 and setup everything from scratch and migrate clients from the 2012 site to the CB site in a controlled fashion. It would also be benifical from a learning aspect and to be able to document the installation. Description of current SCCM environment: -One Primary Site Server (also running 11 other roles) -12 servers running DP and Site System Roles -Boundaries and Boundary Groups for each of the servers above -Approx 750 managed devices (all running Windows 8.1) I know there are alot of considerations to be made but find it difficult to find recent information on how to do a side-by-side migration from SCCM 2012 R2 to CB, In the case of 2012 SP1 most people seem to recommend an in-place-upgrade Thanks for reading and hope you can help!
 -
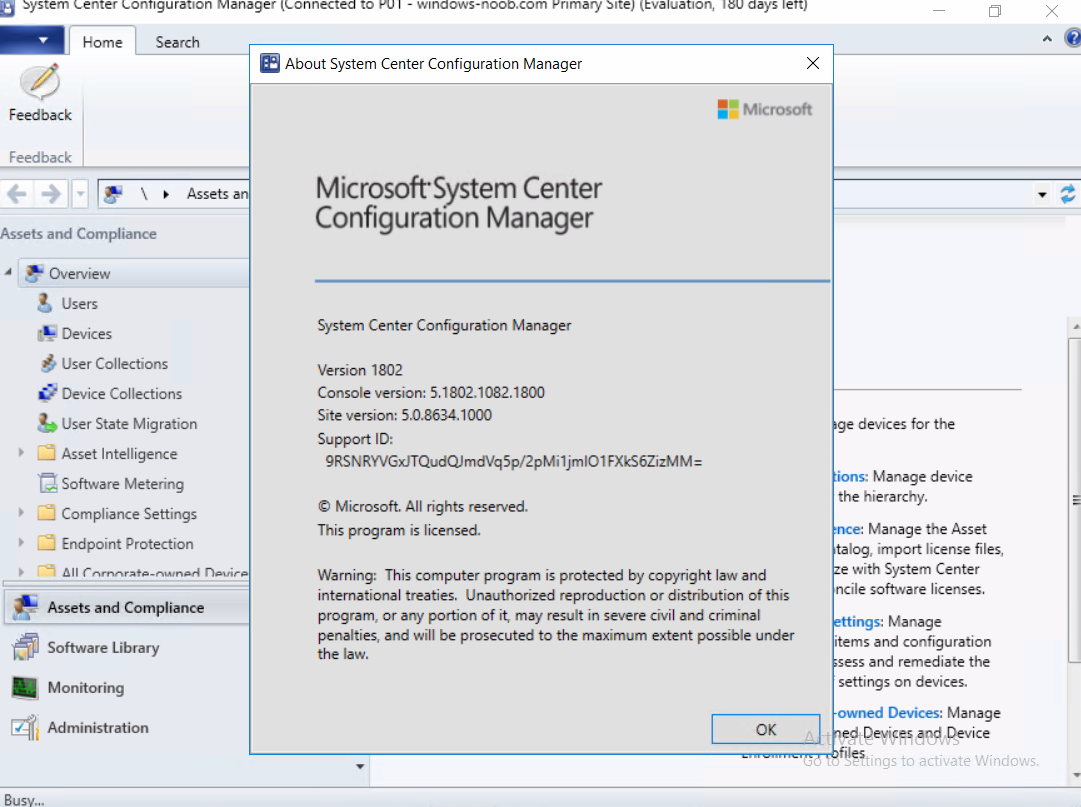
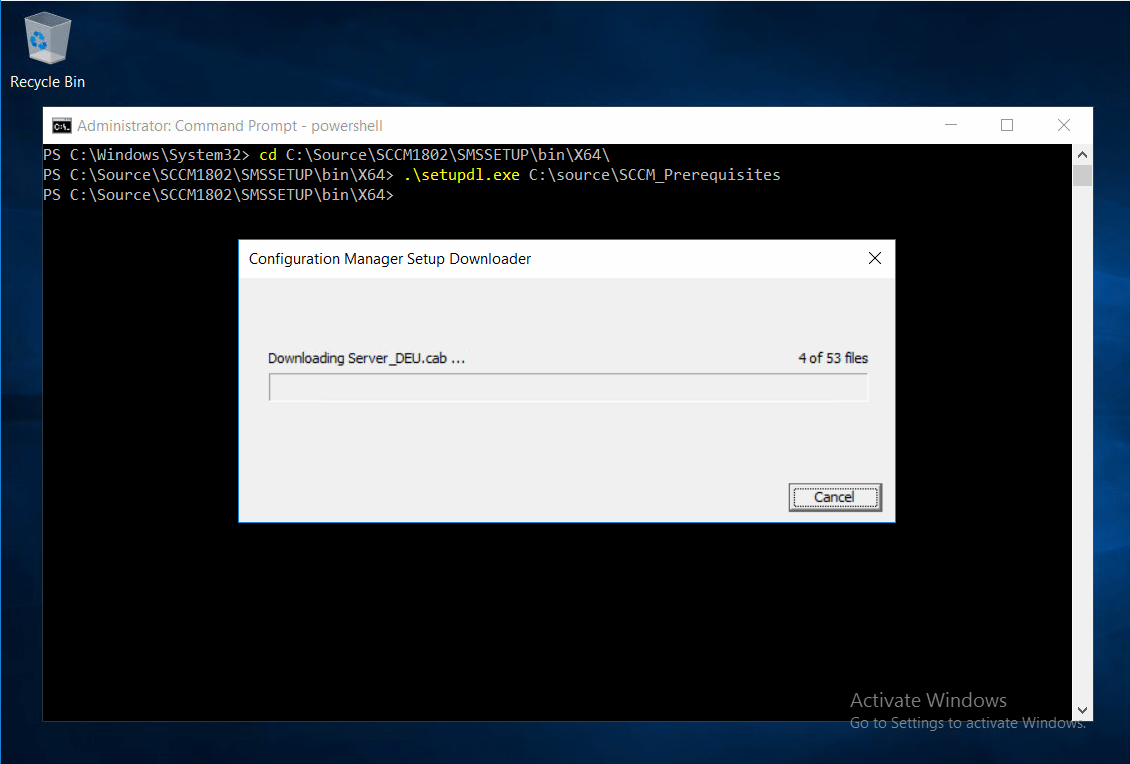
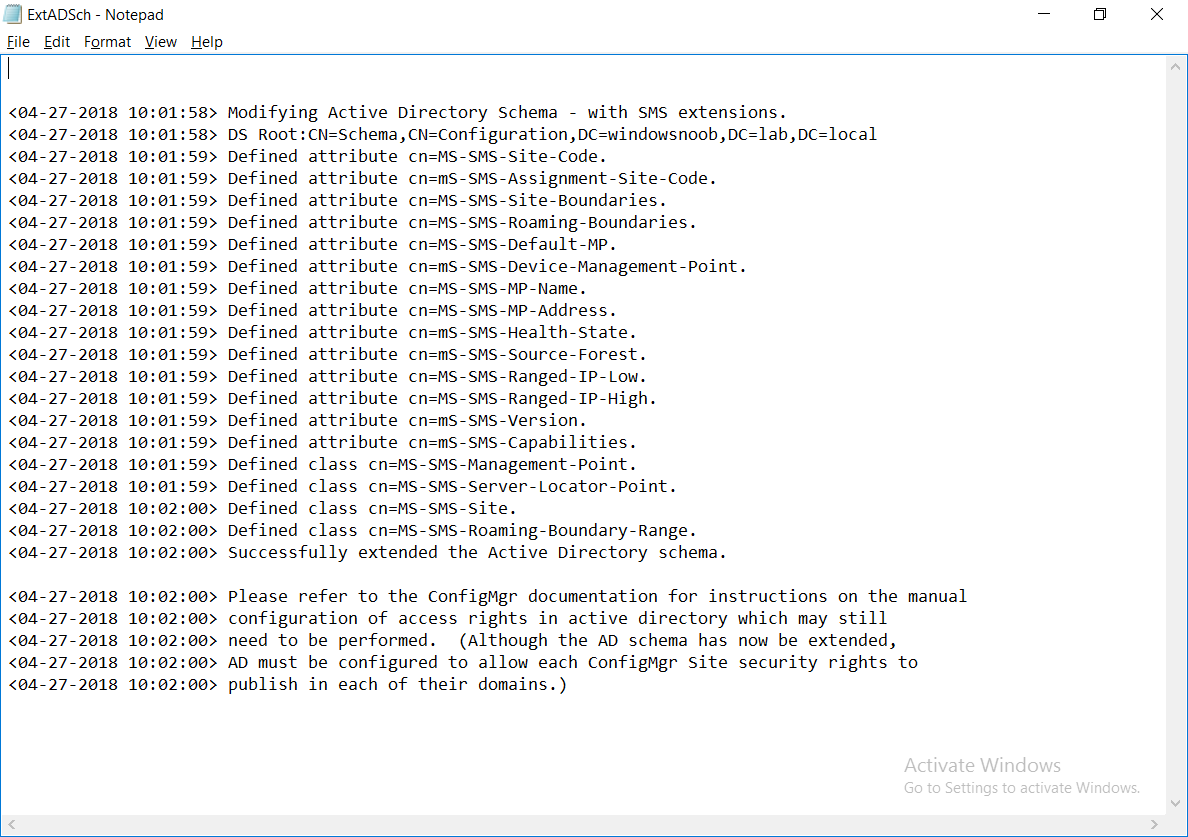
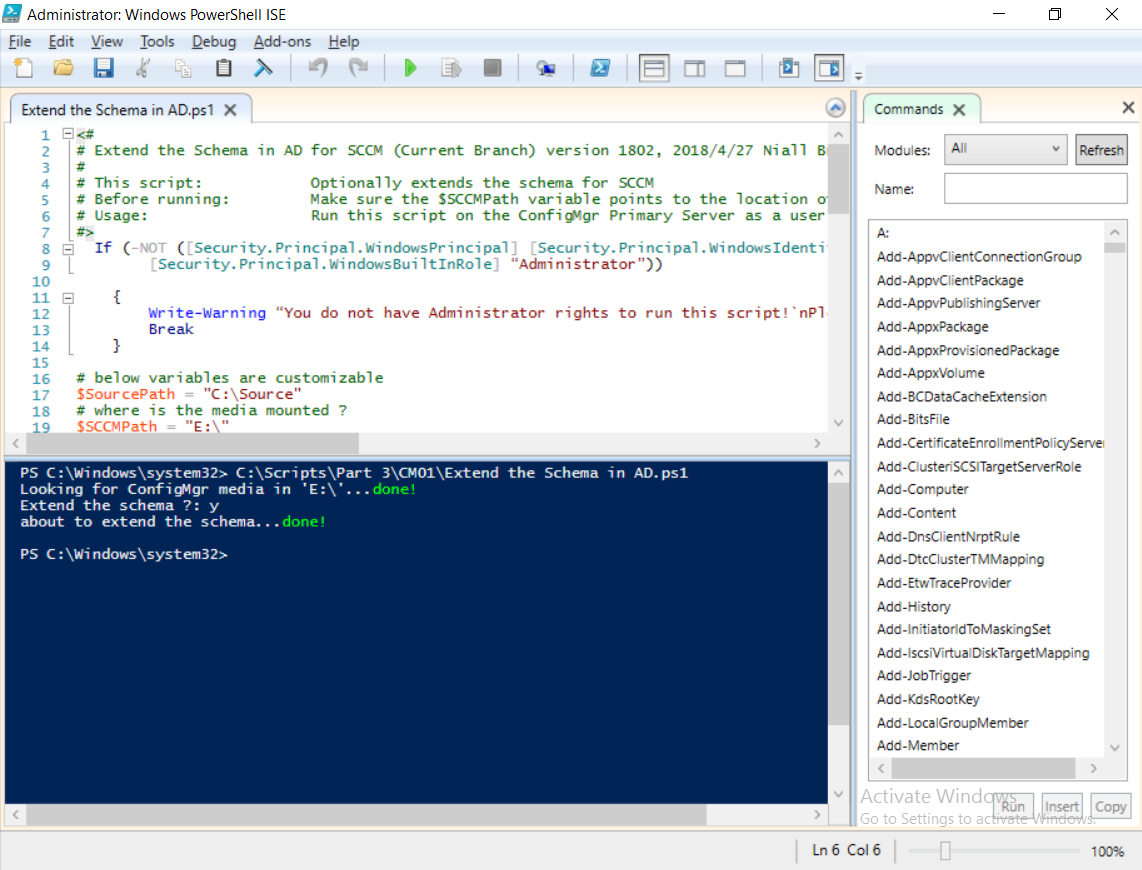
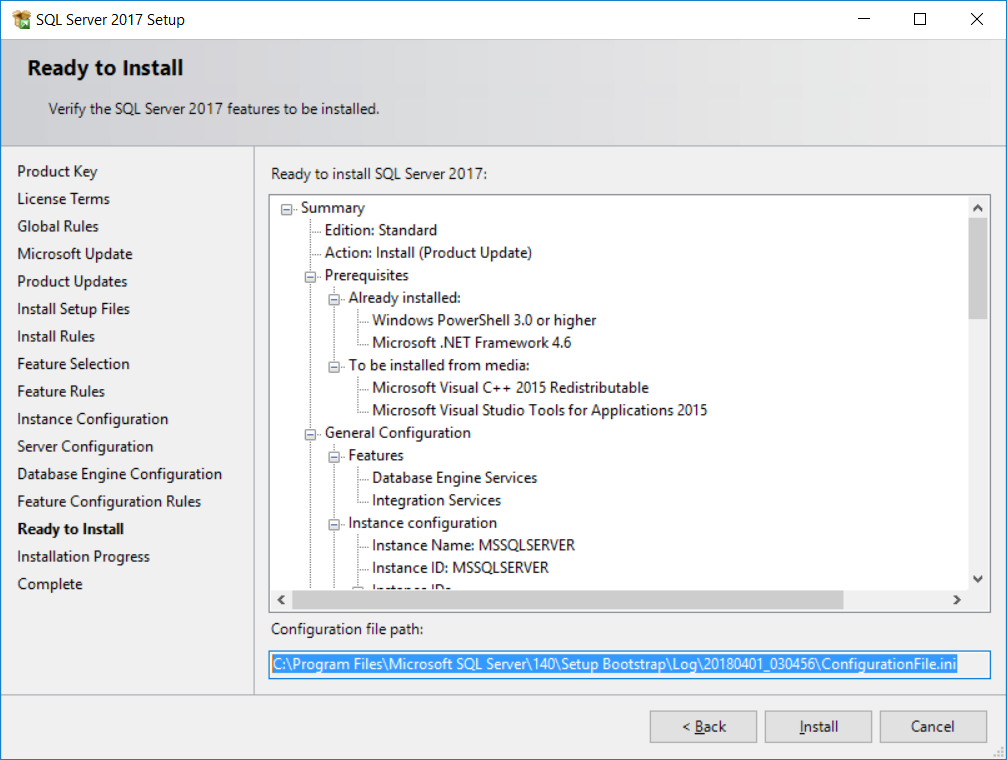
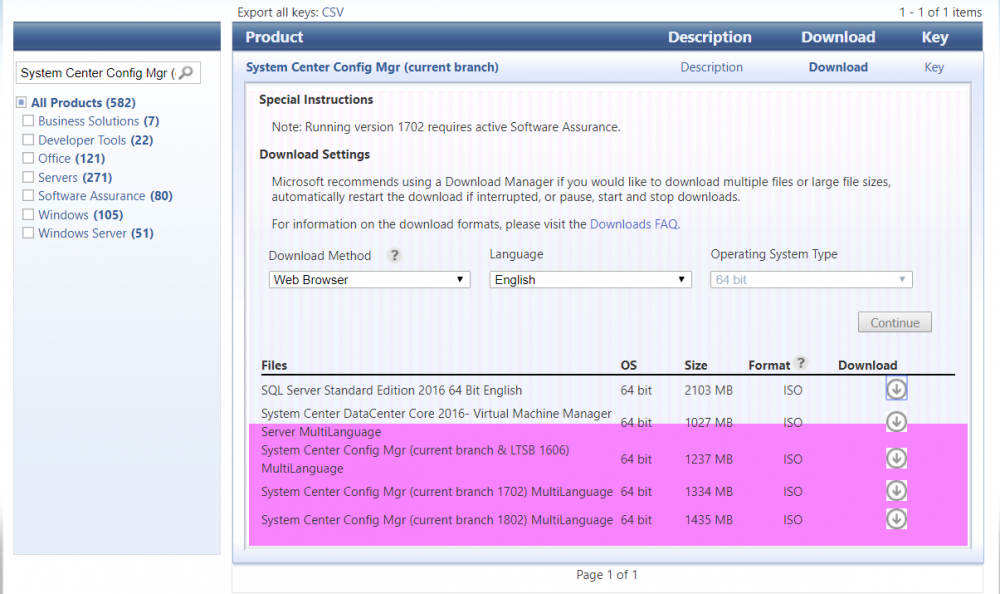
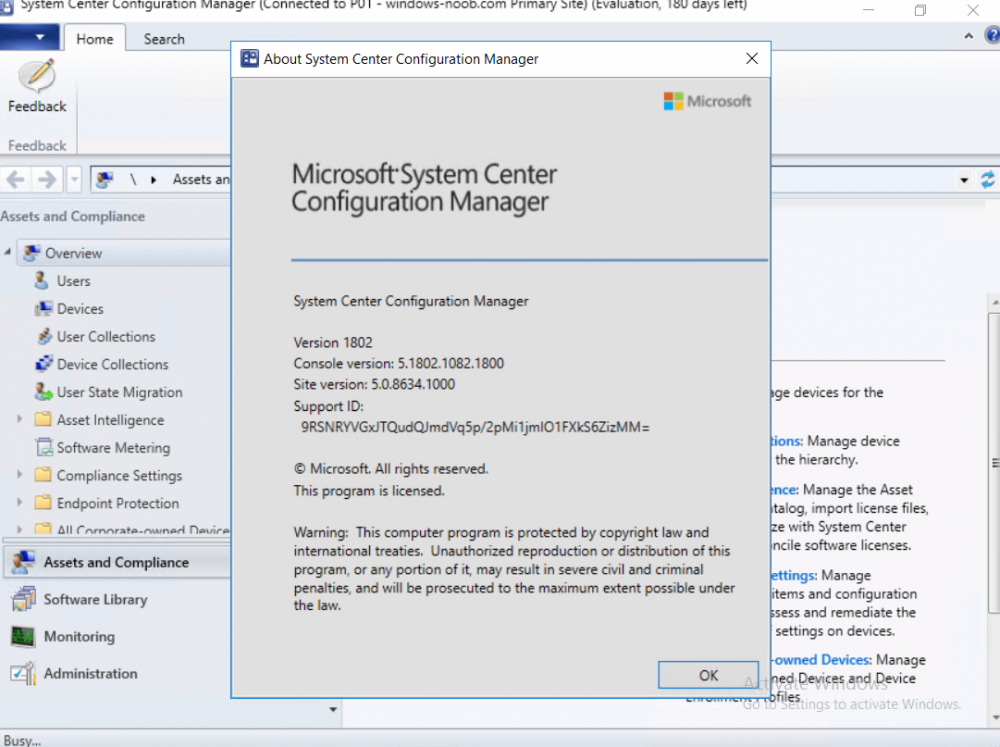
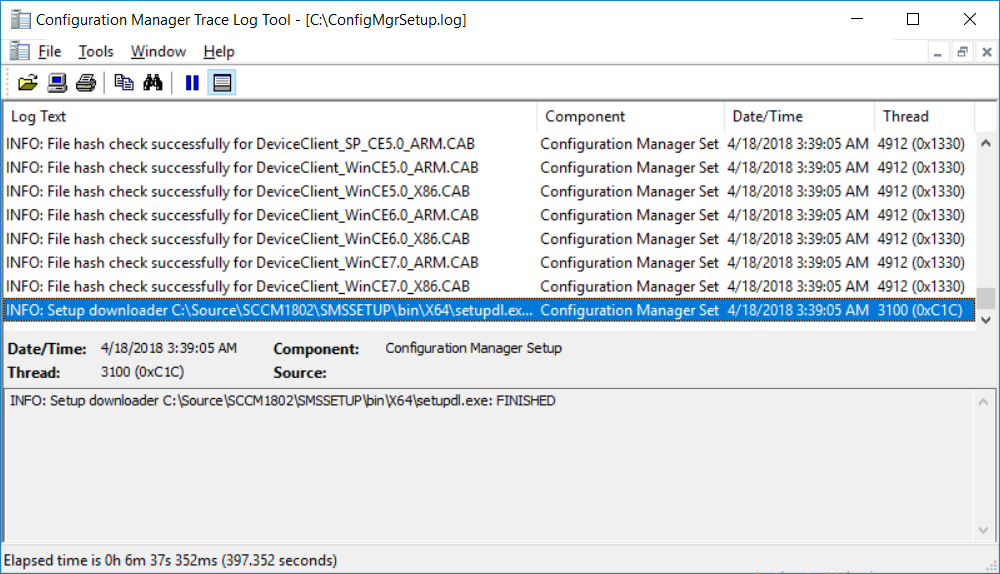
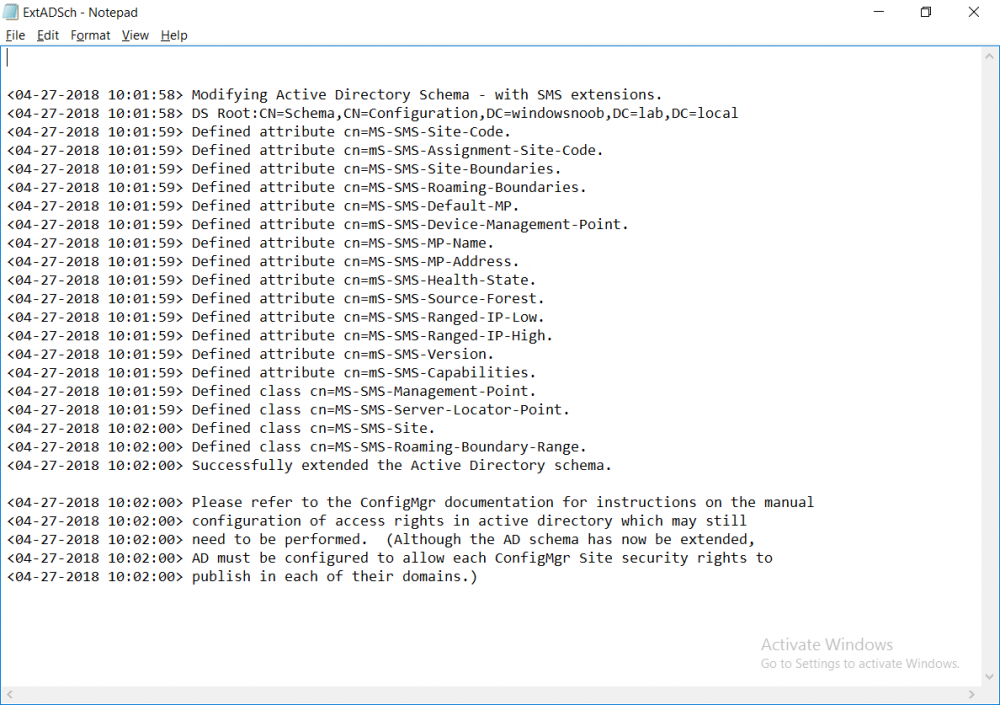
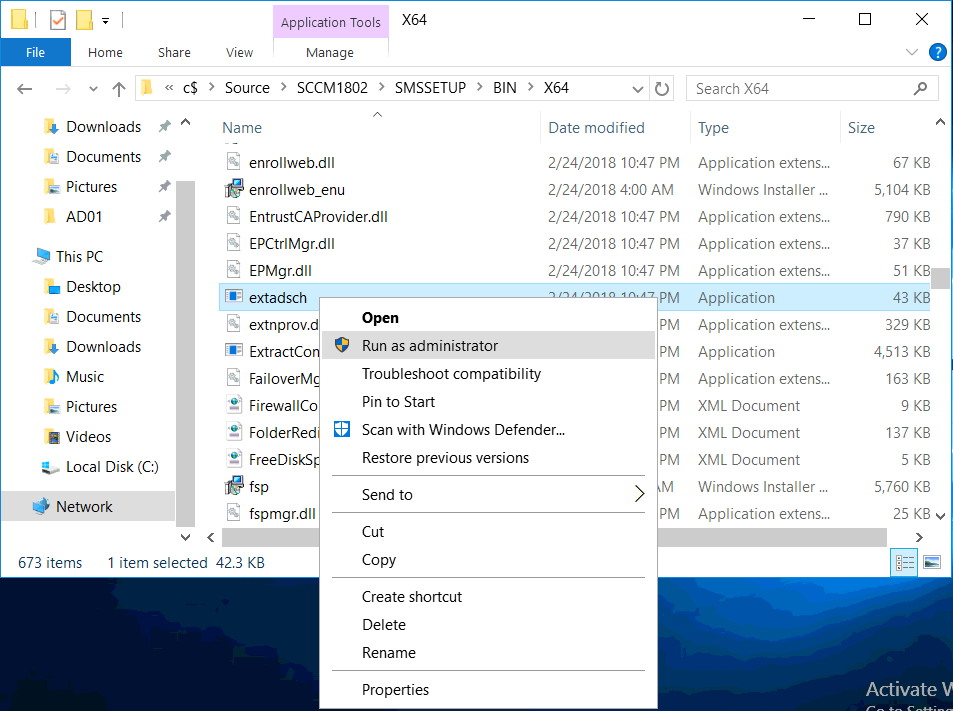
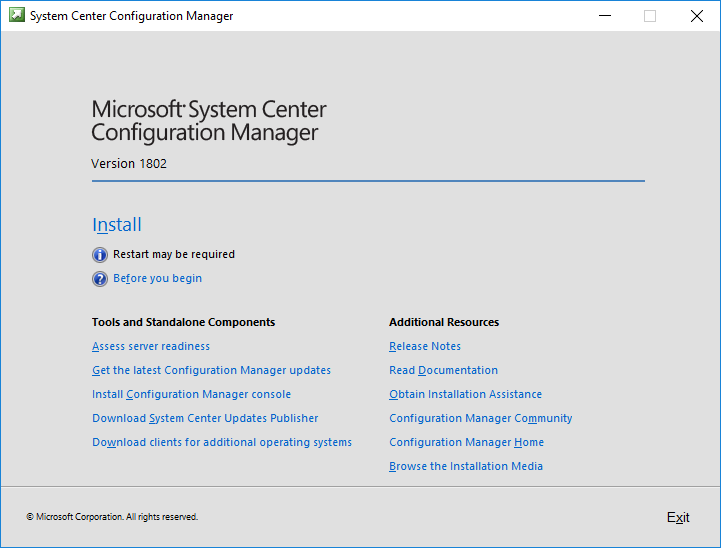
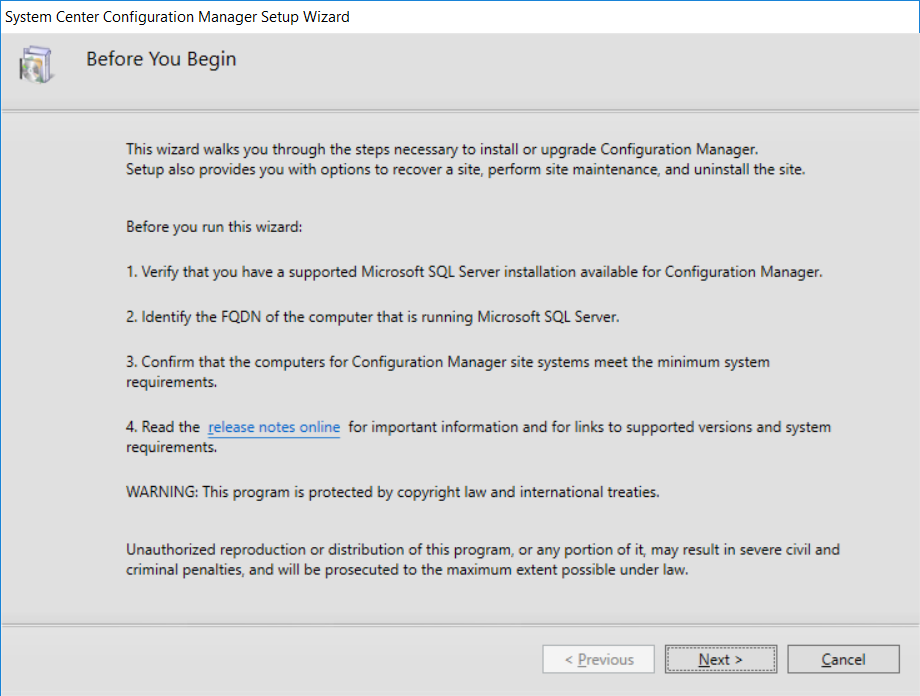
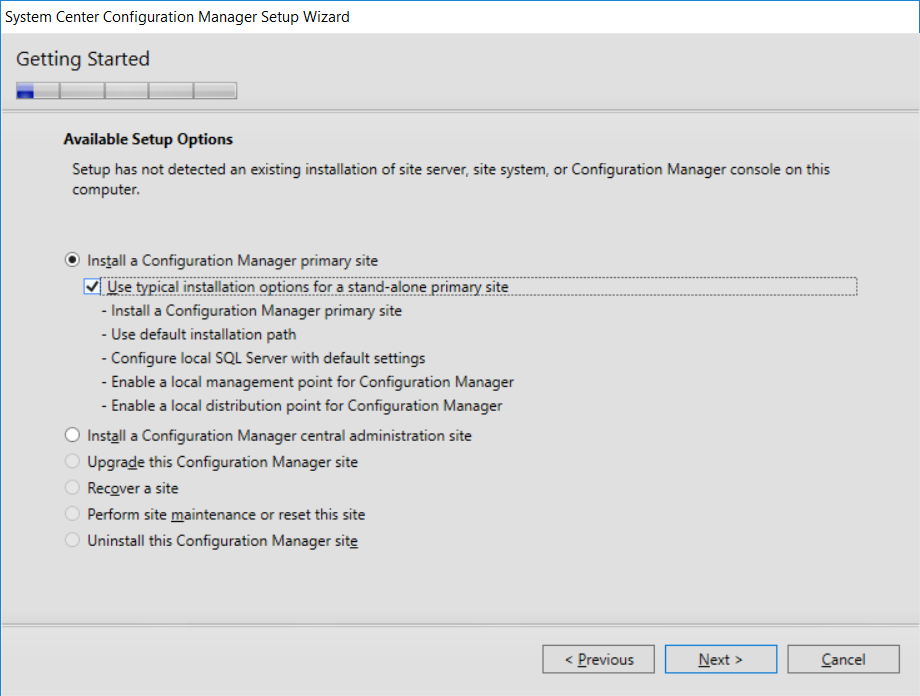
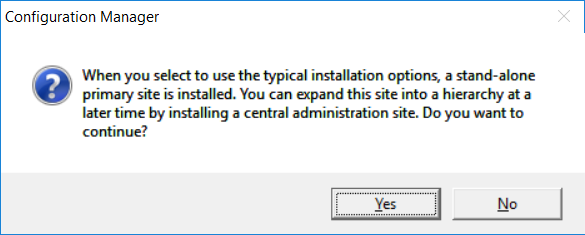
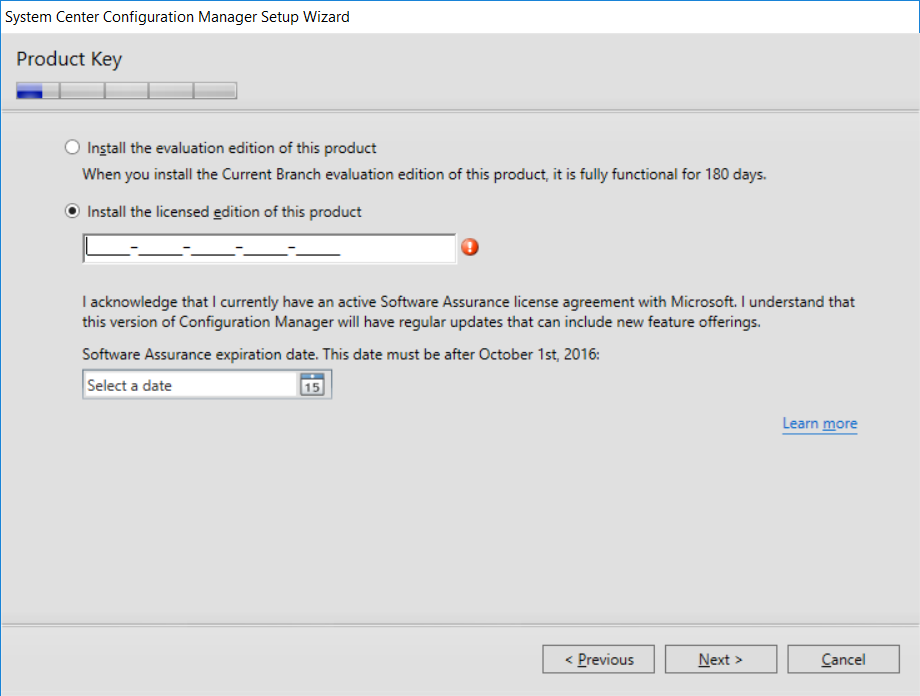
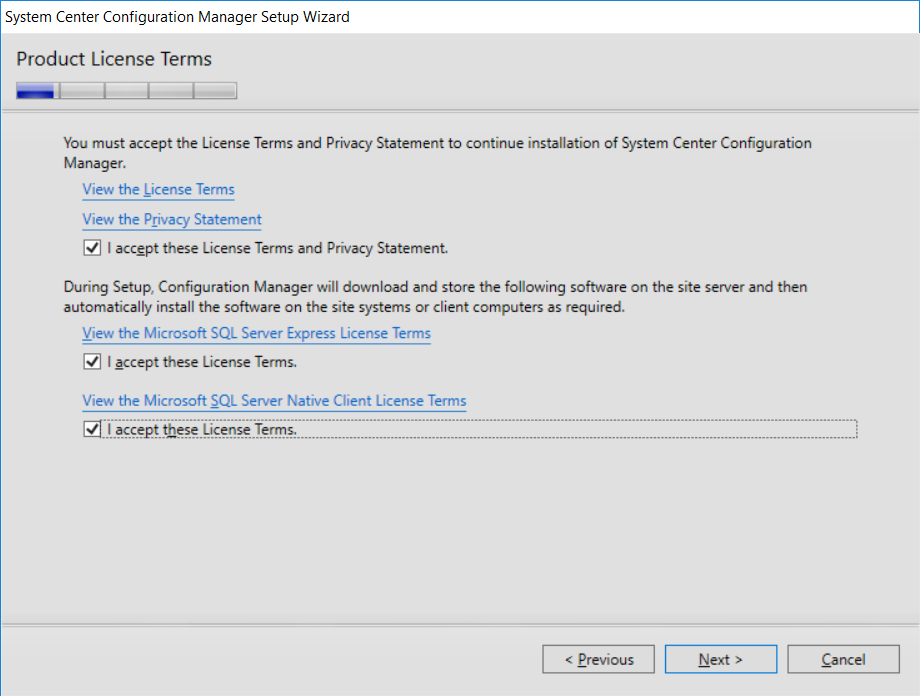
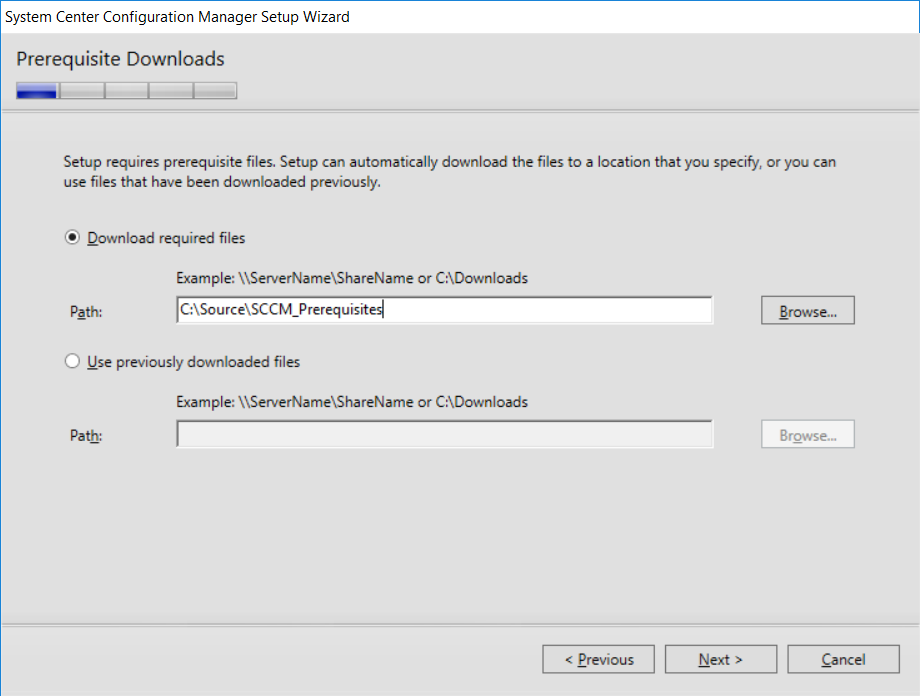
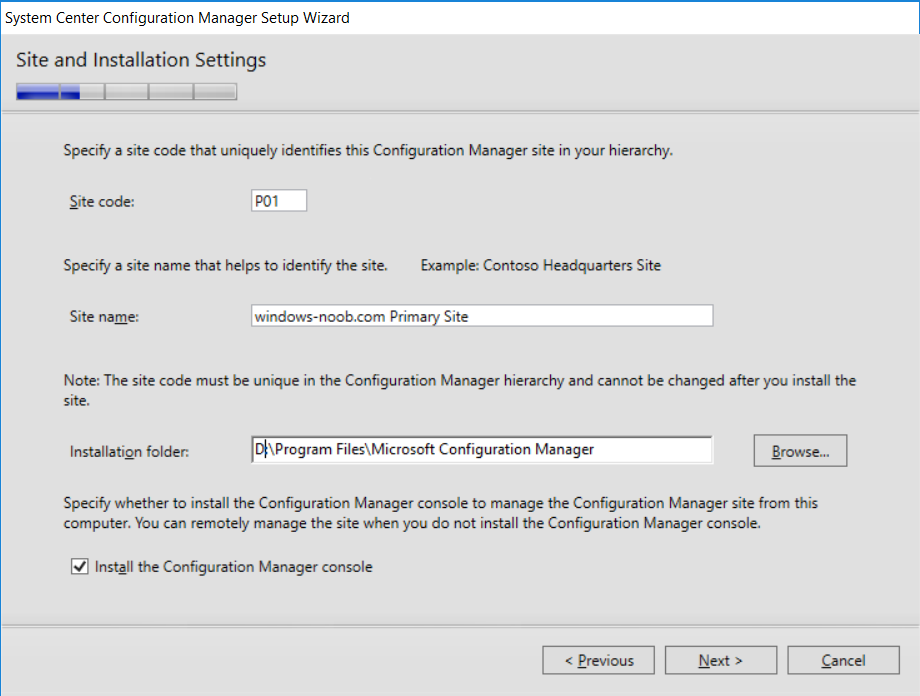
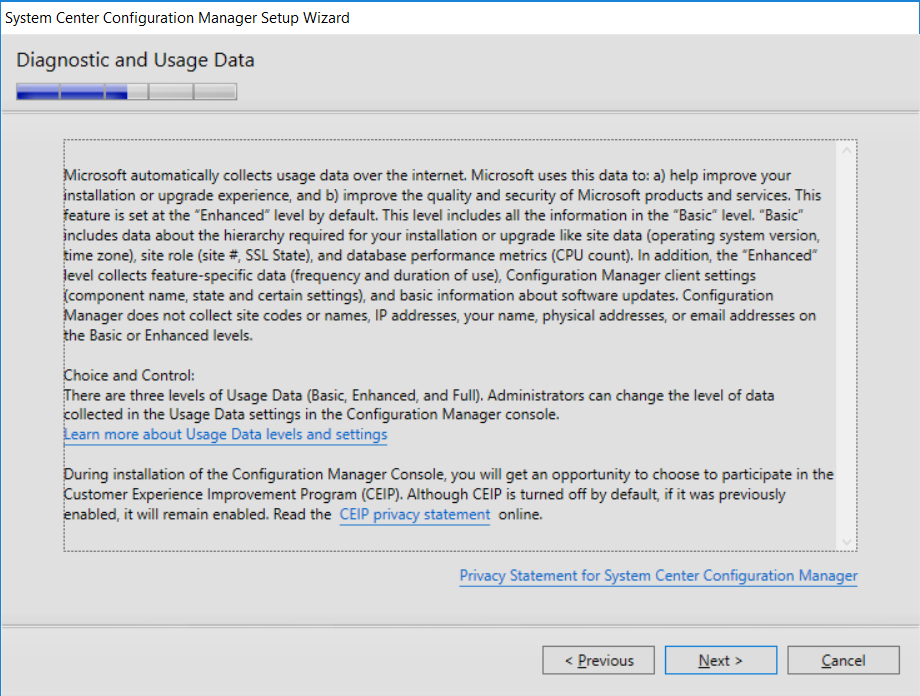
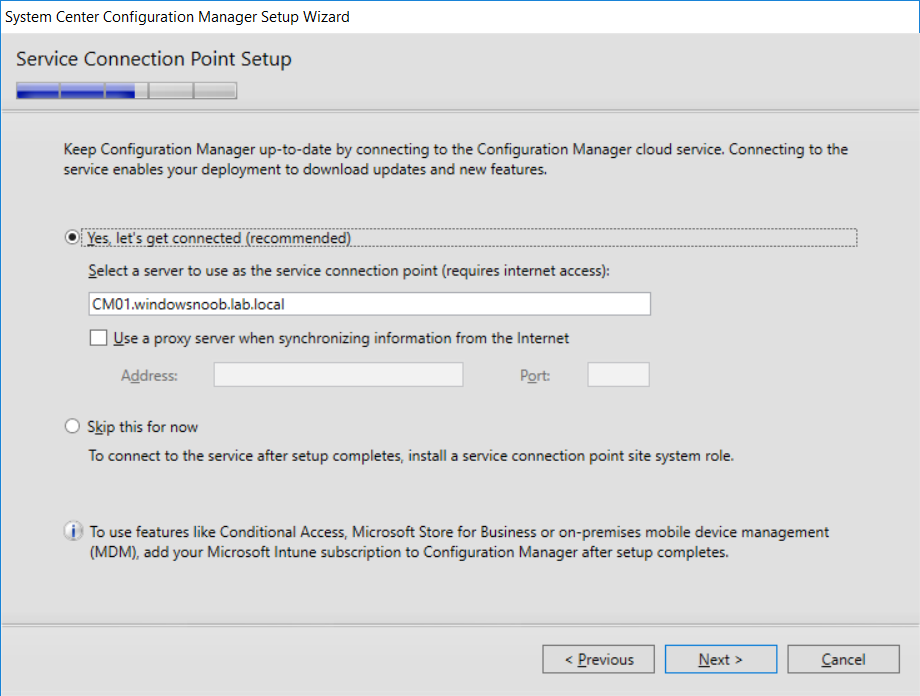
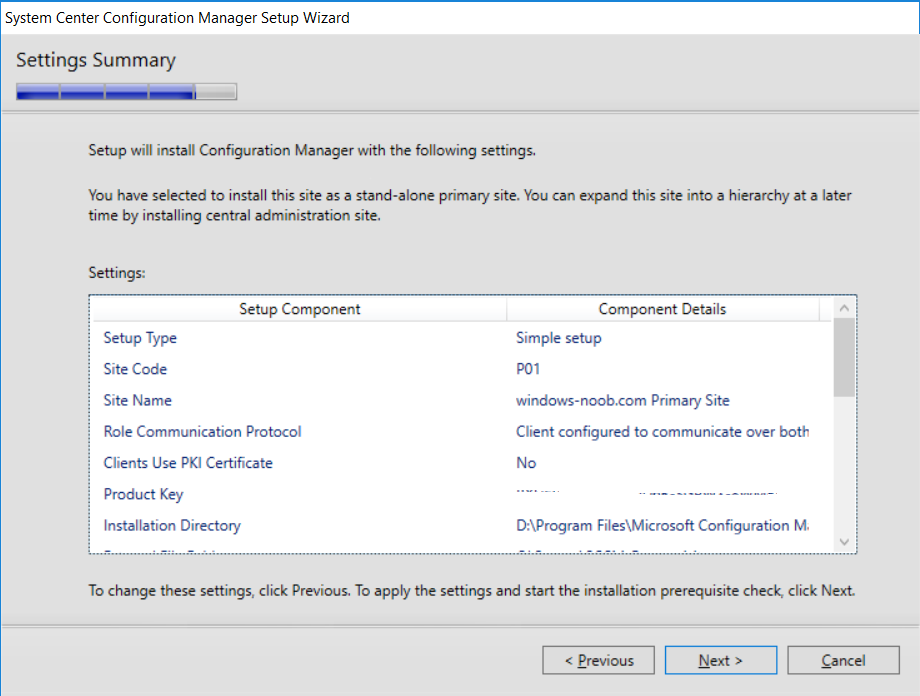
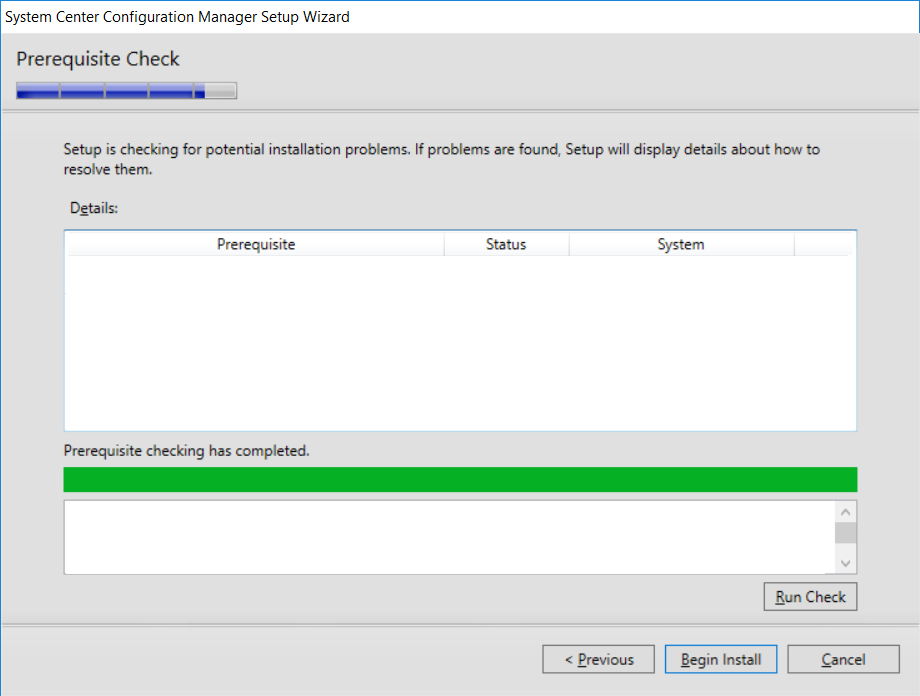
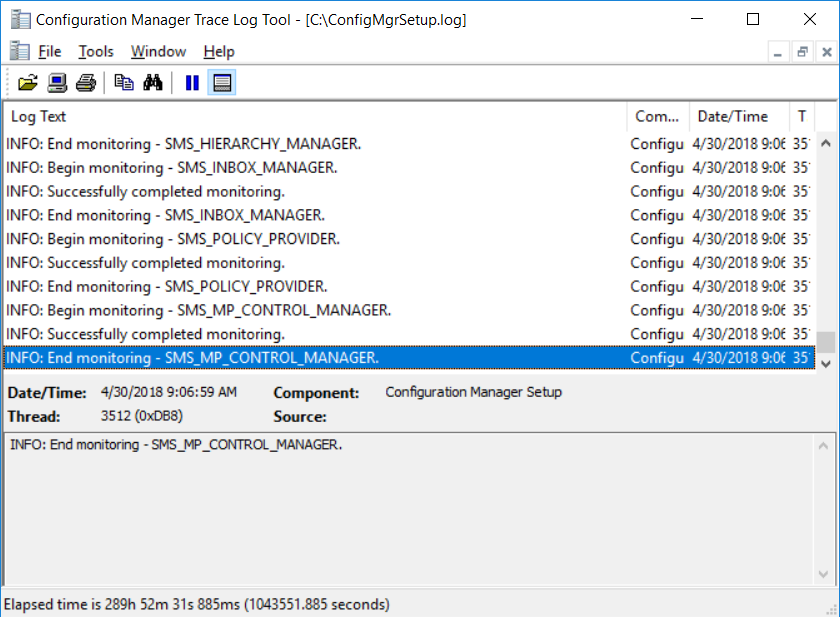
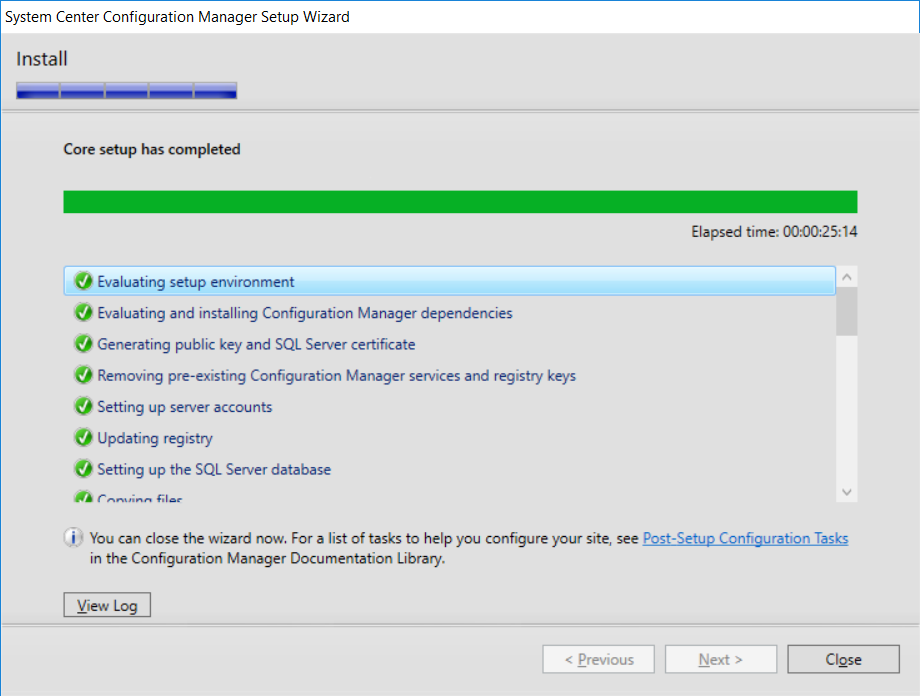
This multi-part guide will show you how to install the latest baseline version of Configuration Manager from Microsoft. The latest available baseline version is System Center Configuration Manager (Current Branch) version 1802 as of March 29th 2018. How can I install System Center Configuration Manager (Current Branch) version 1802 on Windows Server 2016 with SQL Server 2017 – Part 1 How can I install System Center Configuration Manager (Current Branch) version 1802 on Windows Server 2016 with SQL Server 2017 – Part 2 How can I install System Center Configuration Manager (Current Branch) version 1802 on Windows Server 2016 with SQL Server 2017 – Part 3 How can I install System Center Configuration Manager (Current Branch) version 1802 on Windows Server 2016 with SQL Server 2017 – Part 4 You can use this multi-part guide to get a hierarchy up and running on Windows Server 2016 using SQL Server 2017. The concept behind this is to guide you through all the steps necessary to get a working Configuration Manager Primary site installed using manual methods or automating it by using PowerShell. This gives you the power to automate the bits that you want to automate, while allowing you to manually do other tasks when needed. You decide which path to take. PowerShell knowledge is desired and dare I say required if you are in any way serious about Configuration Manager. I will show you how to do most steps via two methods shown below, it’s up to you to choose which method suits you best but I highly recommend automating everything that you can (if possible), using PowerShell. Method #1 – Do it manually Method #2 – Automate it with PowerShell In Part 1, you configured Active Directory Domain Services (ADDS) on AD01, then joined the Configuration Manager primary server (CM01) to the newly created domain. You then created users, usergroups and OU's in Active Directory and created the System Management Container. Finally you delegated permission to the Configuration Manager server to the System Management container. In Part 2, you configured Windows Server 2016 roles and features on the Configuration Manager primary server (CM01) and then you downloaded and installed Windows ADK 1709. Next you installed SQL Server 2017 CU5 with SQL Server Management Studio (SSMS) and Reporting Services before installing the WSUS role which uses SQL to store the SUSDB instead of the Windows Internal Database (WID). In this Part, you will download and extract the ConfigMgr content, you'll download the ConfigMgr prerequisites and then you'll extend the Active Directory schema before installing System Center Configuration Manager (Current Branch) version 1802. Step 1. Download and extract the ConfigMgr content Before installing System Center Configuration Manager version 1802 you'll need to download the content as it is a baseline version. You can download baseline versions of the ConfigMgr media from Microsoft's Volume licensing Service Center (VLSC) site for use in production or from MSDN (or the Microsoft Evaluation site) for use in a lab. The VLSC download can be found be searching for Config and then selecting System Center Config Mgr (current branch and LTSB) as shown below. Once you've downloaded the ISO, mount it using Windows File Explorer and copy the contents to somewhere useful like C:\Source\SCCM1802 on the Configuration Manager server. Step 2. Download the ConfigMgr Prerequisites Note: Perform the following on the Configuration Manager server (CM01) as a Local Administrator You can download the prerequisites during ConfigMgr setup or in advance. As you'll probably want to install more than one copy of ConfigMgr (one lab, one production) it's nice to have the prerequisites downloaded in advance. Method #1 – Do it manually To do that, open an administrative PowerShell command prompt and navigate to the following folder: C:\Source\SCCM1802\smssetup\bin\X64 Run the following line .\SetupDL.exe C:\Source\SCCM_Prerequisites Once the process is complete you can open C:\ConfigMgrSetup.log with CMTrace (or notepad) to verify the status of the download. Note: You can find the CMTrace executable in the SMSSetup Tools folder in the location that you extracted the ConfigMgr media, eg: C:\Source\SCCM1802\SMSSETUP\TOOLS. Method #2 – Automate it with PowerShell To automate the download of the prerequisites simply follow the instructions and run the Install SCCM Current Branch version 1802.ps1 Powershell script in Step 4 or use the Download SCCM prerequisite files.ps1. Step 3. Extend the Schema Note: Perform the following on the Domain controller server (AD01) as Administrator. You do not have to extend the Active Directory schema if it was already extended for Configuration Manager previously. Method #1 – Do it manually To do that, on the Active Directory domain controller (AD01), open Windows File Explorer and browse to the network path of the ConfigMgr server where you've copied the SCCM source, eg: \\cm01\c$\Source\SCCM1802\SMSSETUP\BIN\X64 In that folder, locate extadsch.exe and right click, choose Run as Administrator. After the schema has been extended for SCCM, you can open C:\ExtAdsch.log on the root of C:\ on the server you are performing this on, and review the success or failure of that action. Method #2 – Automate it with PowerShell To automate extending the schema, use the Extend the Schema in AD.ps1 PowerShell script. Run the script on the CM01 server using credentials that have the ability to extend the schema. Step 4. Install SCCM Current Branch (version 1802) Note: Perform the following on the ConfigMgr server (CM01) as Administrator. Method #1 – Do it manually To do that, on the Configuration Manager server (CM01), open Windows File Explorer and browse to the network path of the ConfigMgr server where you've copied the SCCM source, eg: C:\Source\SCCM1802\ In that folder, double click on splash.hta. The Installer appears, click on Install. At the Before You Begin screen click Next. In the Available Setup Options screen, place a checkbox in "Use typical Installation options for a stand alone primary site" When prompted if you want to continue click Yes. On the Product Key screen enter your Key (or choose the eval option), and set the Software Assurance Date (optional) On the Product License Terms screen, select the 3 available options and click Next. On the Prerequisite Downloads screen, select the first option and specify C:\Source\SCCM_Prerequisites as the folder to download the prerequisite files. Click Next to start the download. On the Site and Installation Settings screen, enter your chosen site code (eg: P01), your site name and the path where you want to install ConfigMgr. On the Diagnostics and Usage data screen, click Next. On the Service Connection Point Setup screen, enter your choices and click Next. On the Settings Summary, review your choices and when happy with them click Next. On the Prerequisite Check screen click Begin Install when ready. During the installation, click on View Log (opens C:\ConfigmgrSetup.log) to review the installation progress using CMTrace and when the installation is done, click Close. Method #2 – Automate it with PowerShell To automate the installation of ConfigMgr 1802 (including all the previous steps above), simply run the Install SCCM Current Branch version 1802.ps1 PowerShell script. Run the script on the CM01 server and when prompted to extend the schema, enter your choice (yes or no) and if you choose to extend the schema, provide suitable credentials when prompted. Once done with the schema extension, the installation will continue (as shown below). and once installed you can launch the console. Success ! Summary In this 3 part guide you used quite a bit of PowerShell to automate pretty much most of Installing System Center Configuration Manager Current Branch (version 1802), including installing and configuring SQL Server 2017 on Windows Server 2016. Doing it with PowerShell means you can safely say that you've got a handle on Automation using PowerShell. I hope you learned a lot from doing it this way, and until next time, adios ! Downloads The scripts used in this guide are available for download here. Unzip to C:\Scripts on both servers. The scripts are placed in the corresponding folder (Part 1, Part 2 etc) and sorted into which server you should run the script on (AD01 or CM01). Scripts.zip


-
 Microsoft SCCM is an exemplary tool for managing Microsoft applications. But handling third-party applications isn't yet its game. Join our free webinar with Anoop C. Nair, Microsoft MVP, to learn why patching third-party applications is essential and how it can be streamlined in SCCM. Please register here: https://www.manageengine.com/third-party-patching-webinar-with-MVP-Anoop
-
Patch Connect Plus, a third-party add-on for SCCM, brings two new features - Application Management, and Admin Tools to make your SCCM experience comprehensive. Application Management: 1. Select your desired application that needs to be created in SCCM from a vast repository of applications 2. Customize the application deployment with custom scripts and pre-defined application templates Admin Tools: 1. Access 25 of the most essential client management tools from SCCM console 2. Perform a wide range of functions like on-demand client operation, client troubleshooting, and system management actions You can try the fully functional version free for 30 days! Drop a comment should you have any query.
-
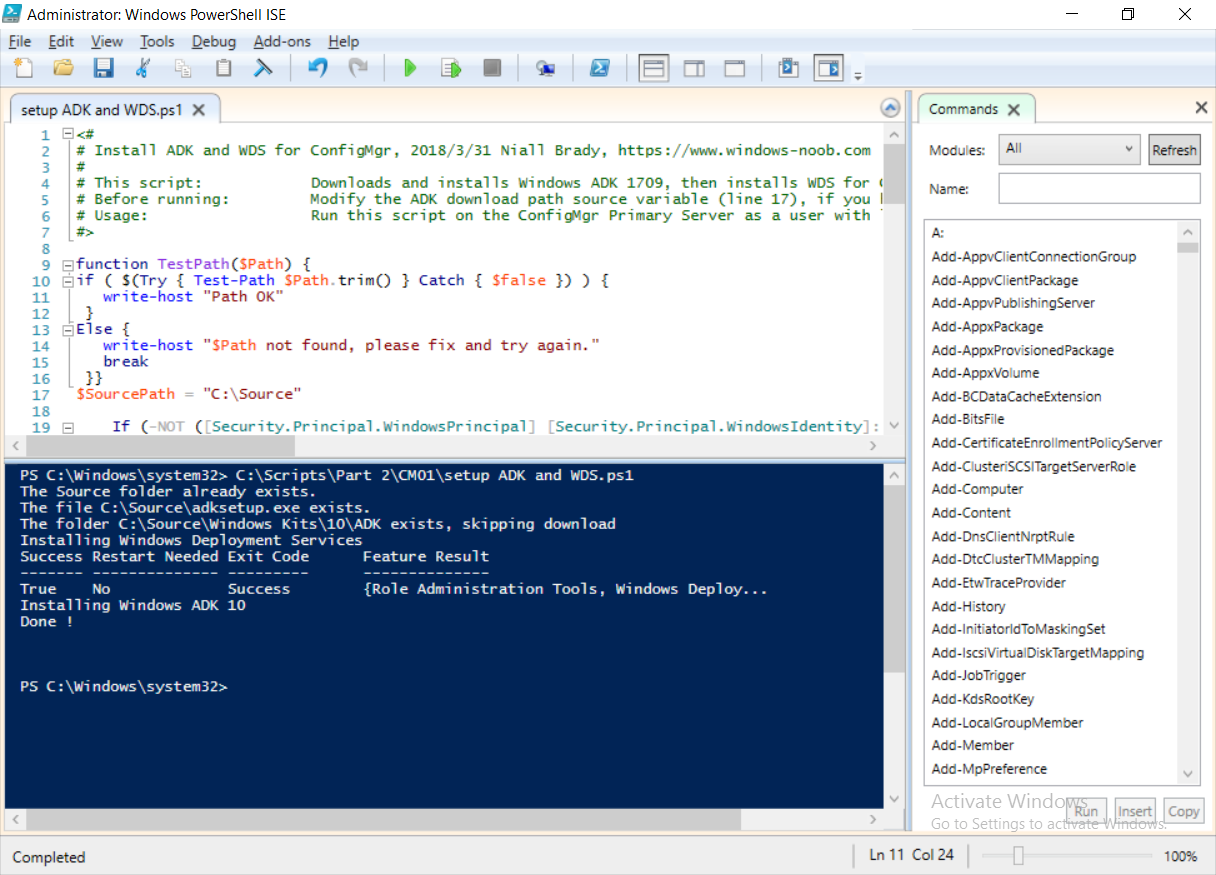
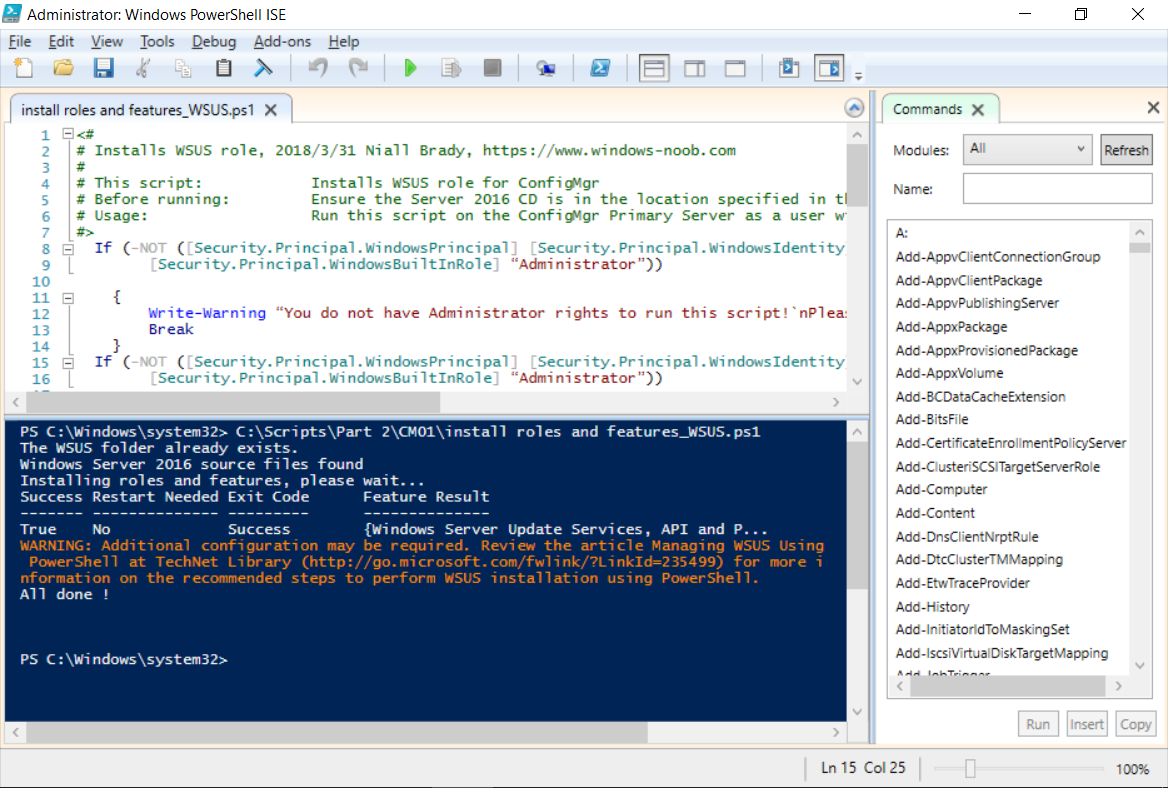
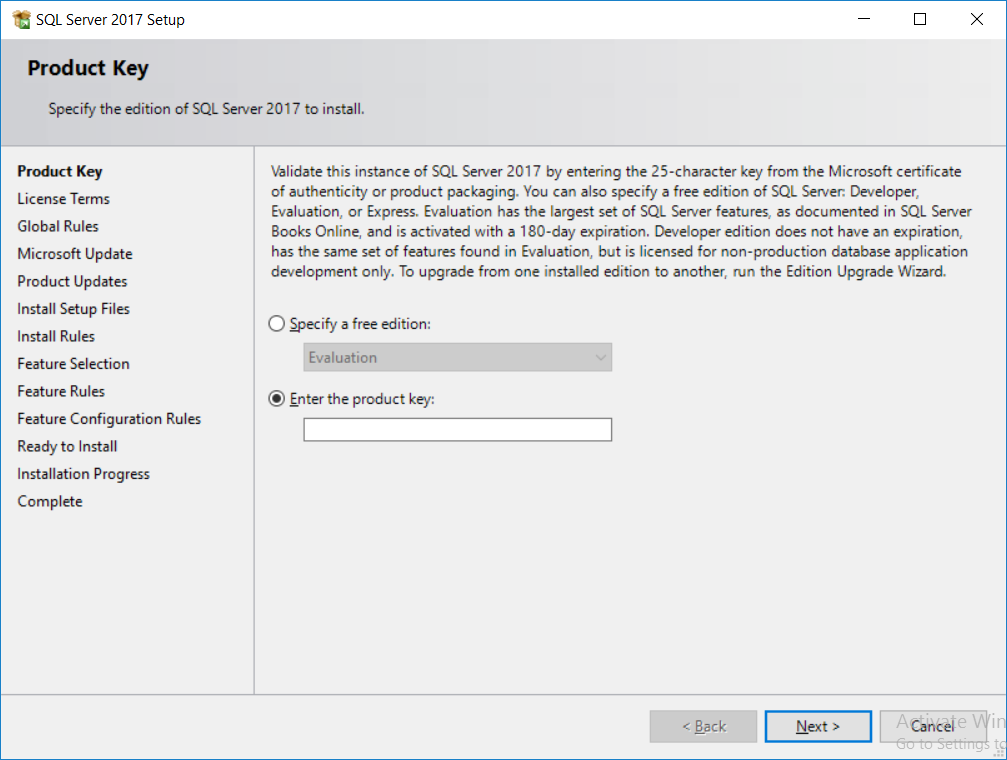
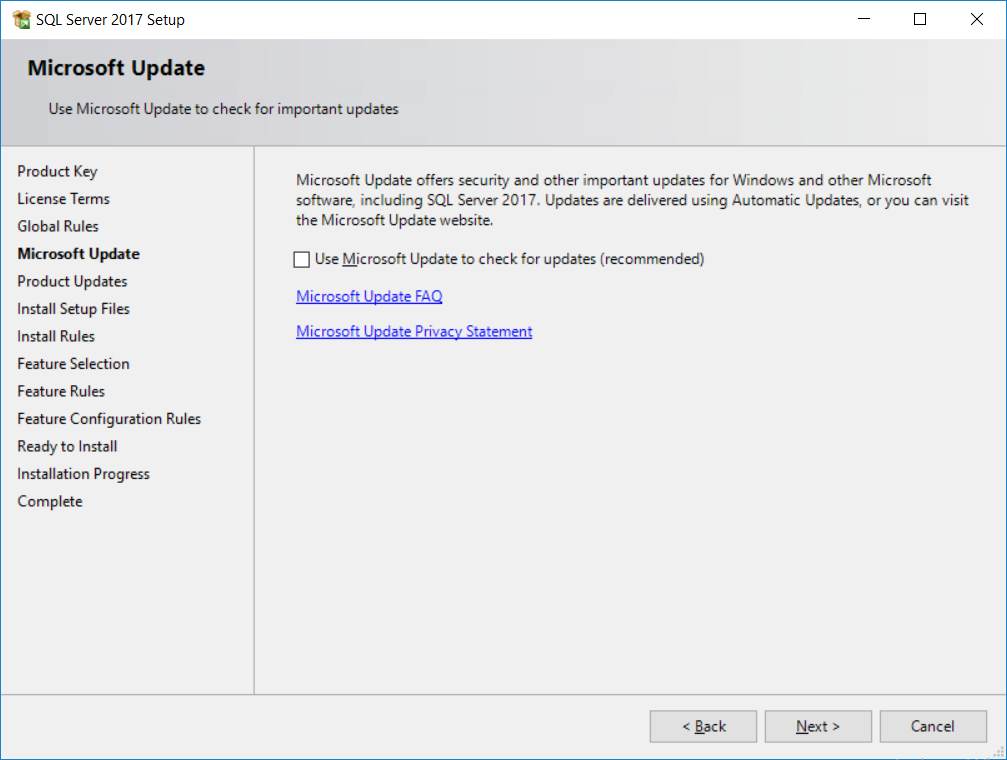
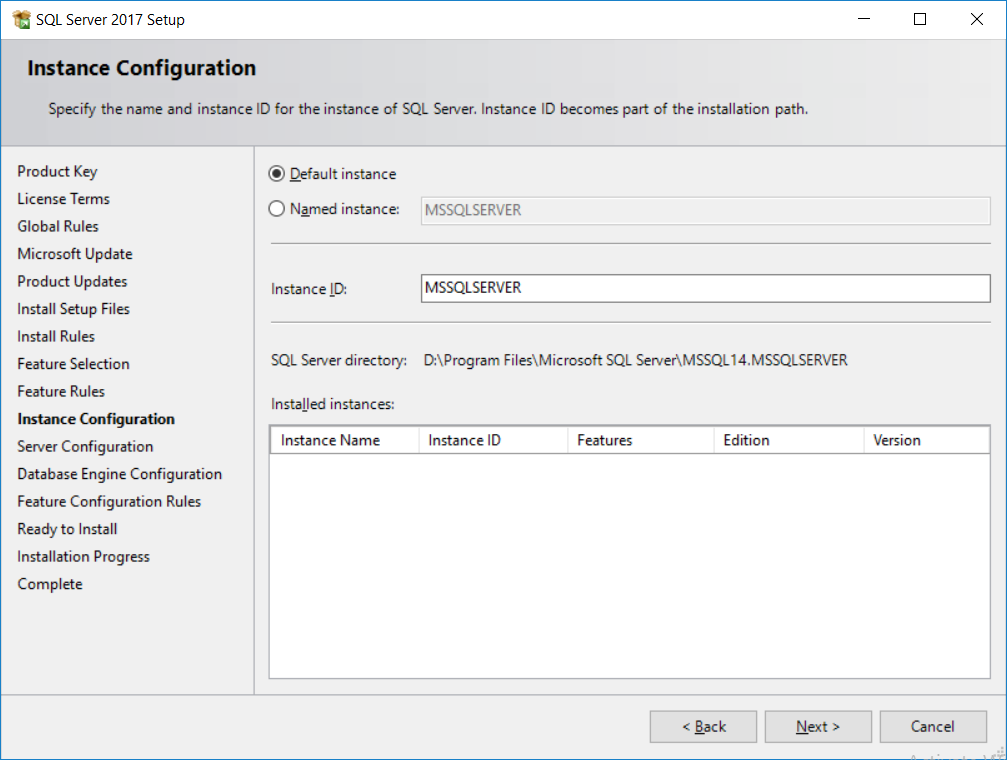
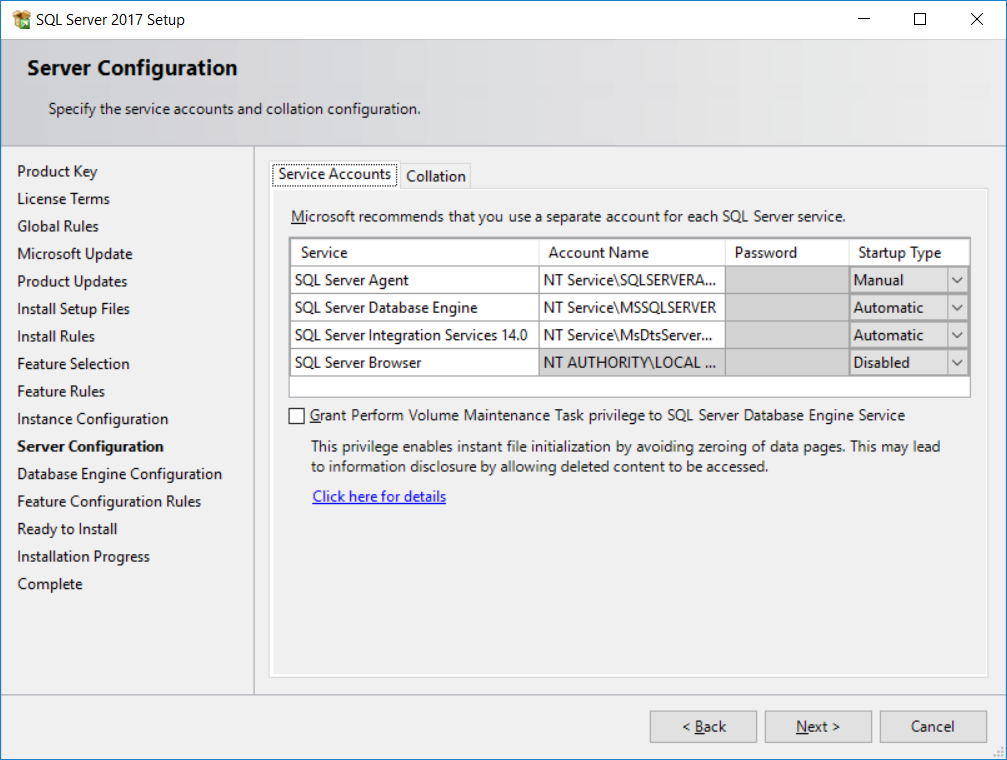
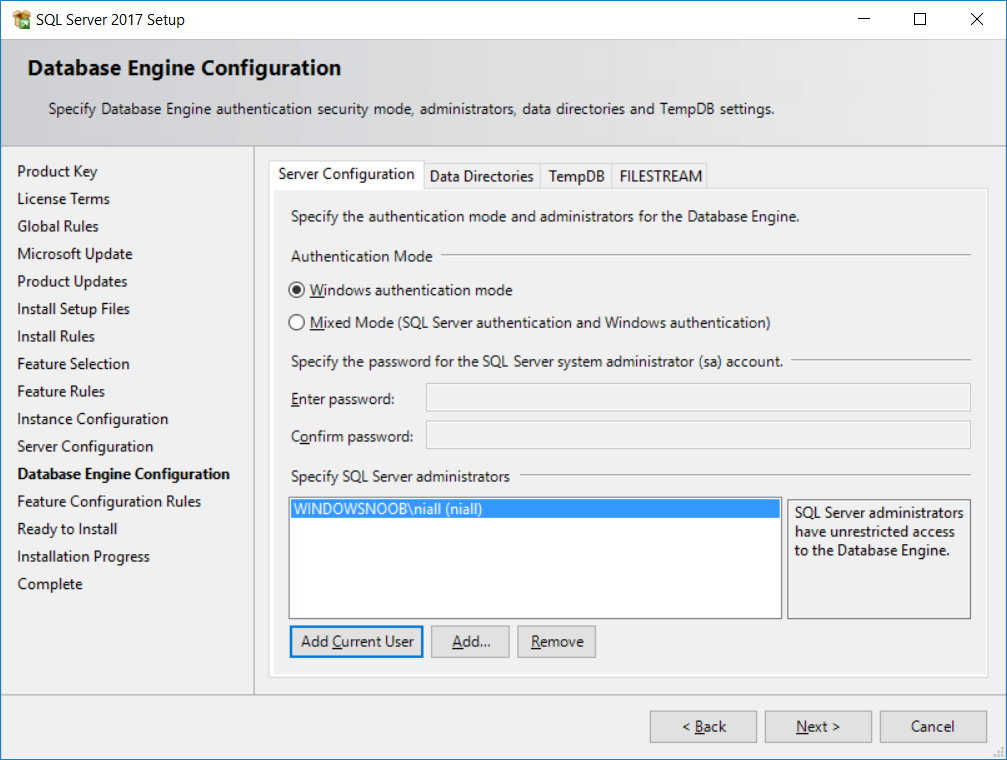
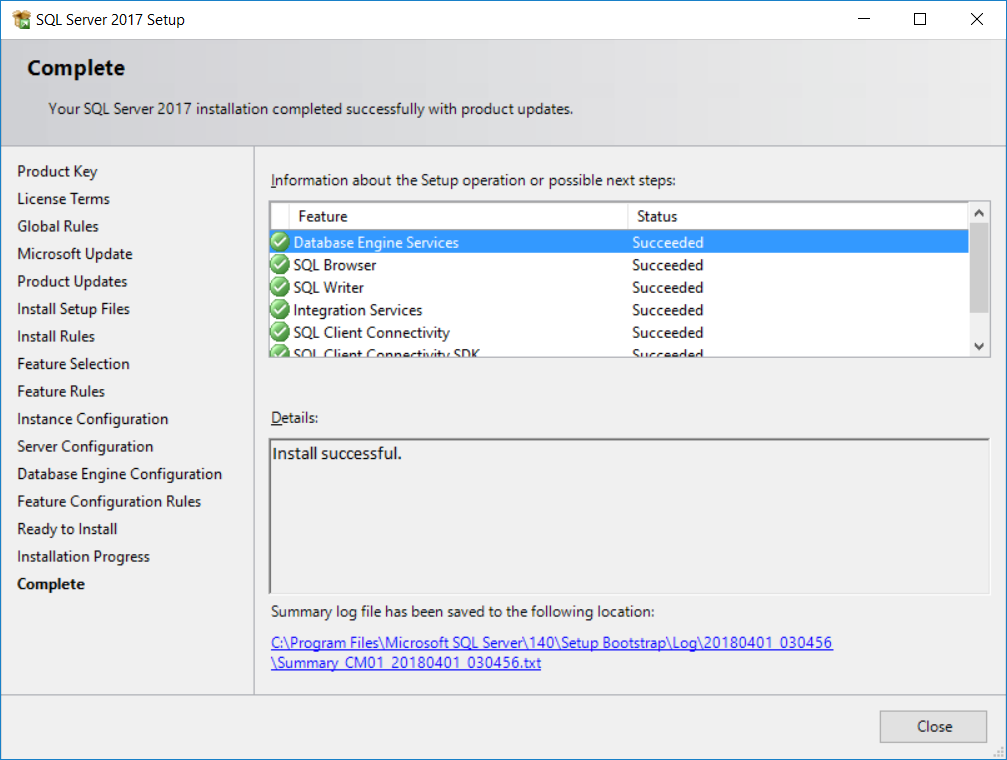
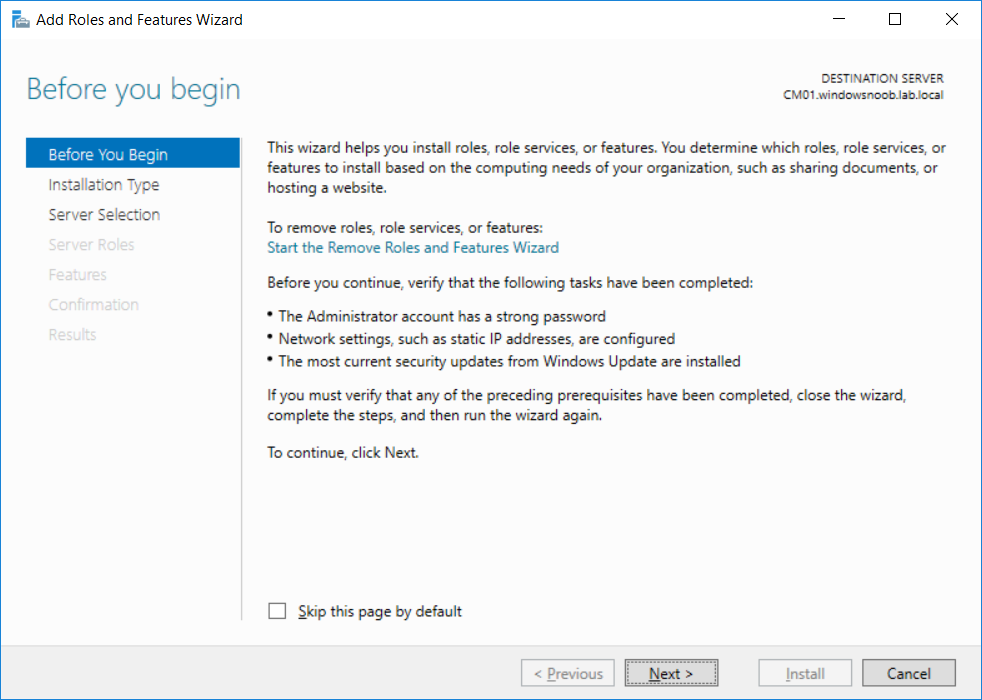
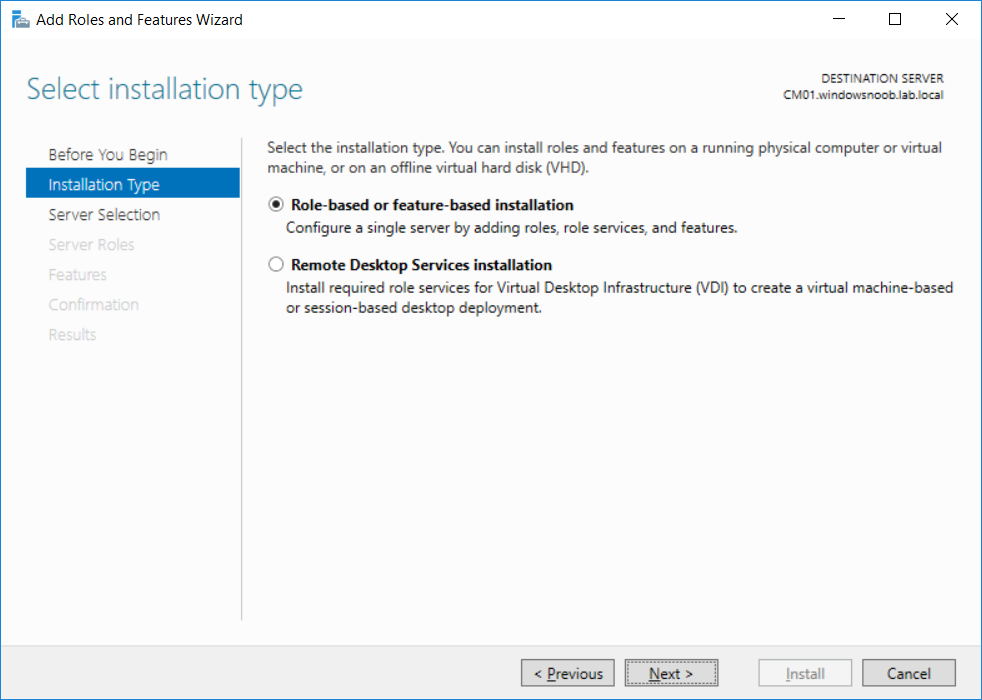
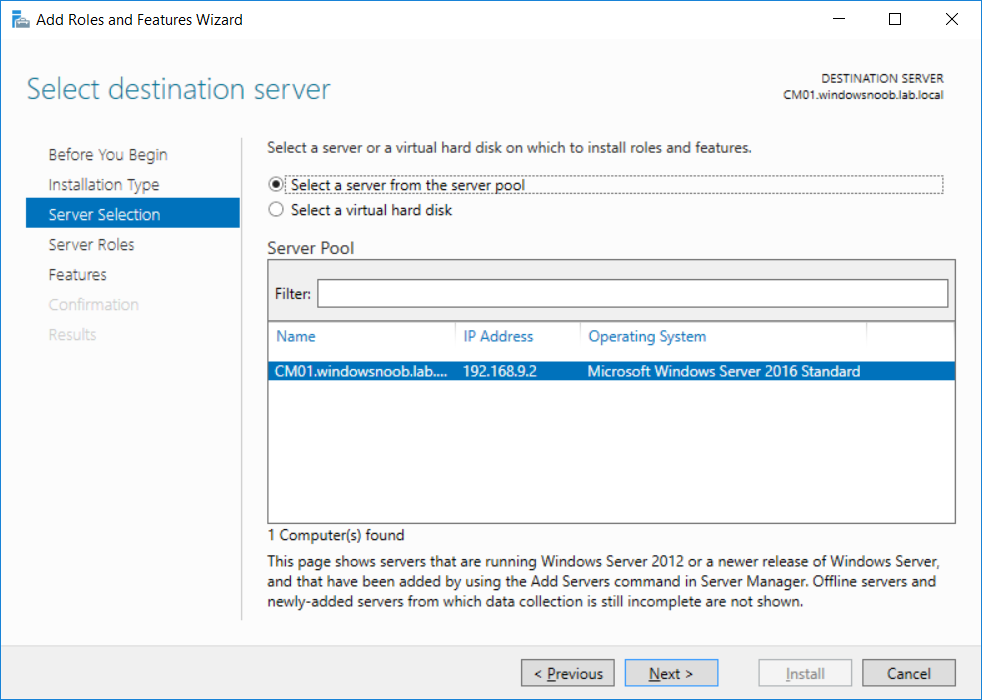
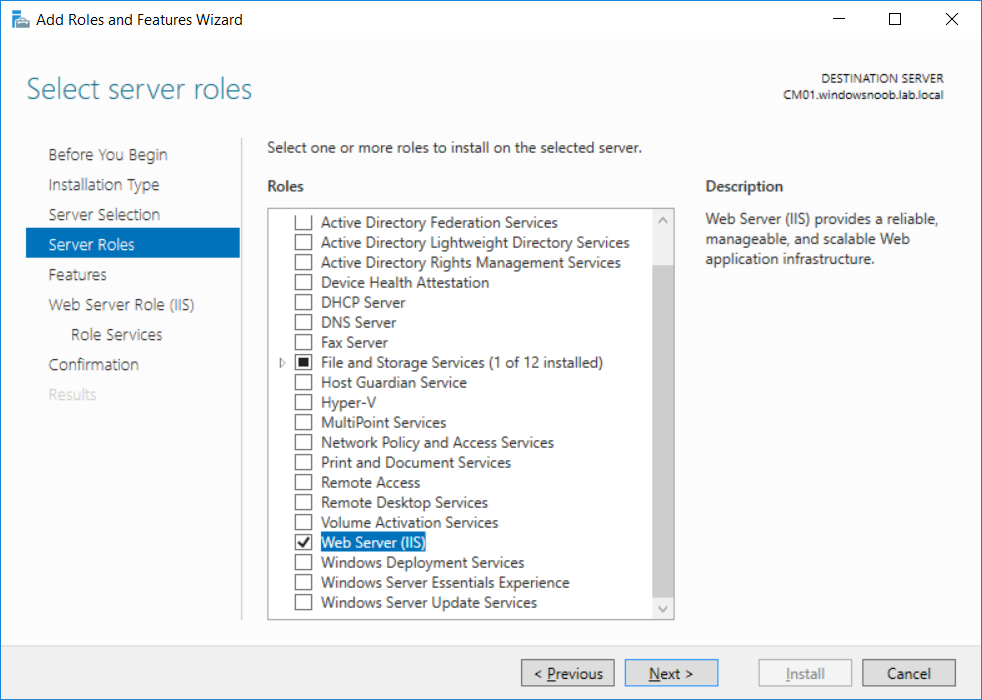
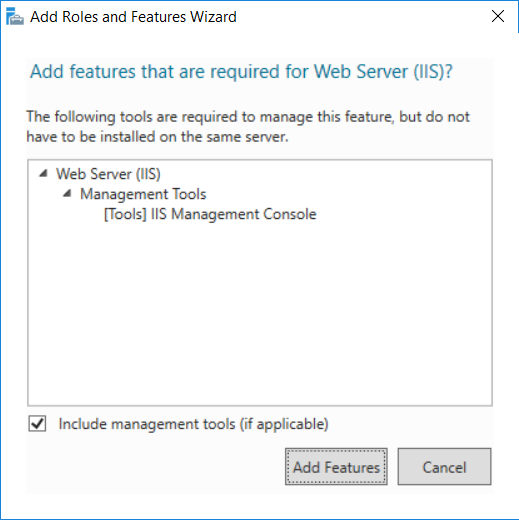
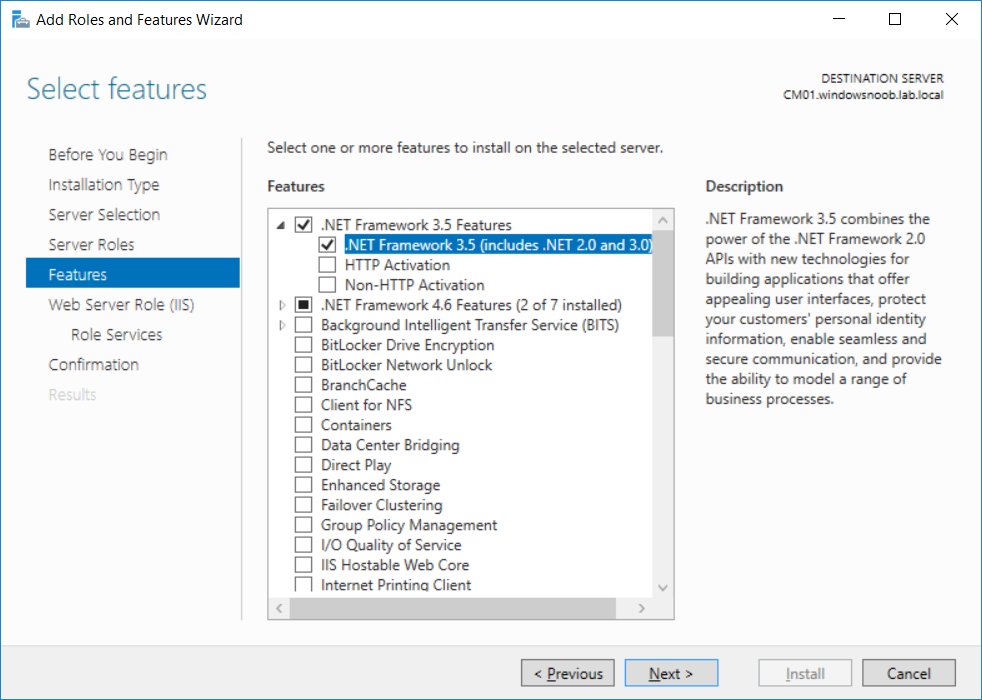
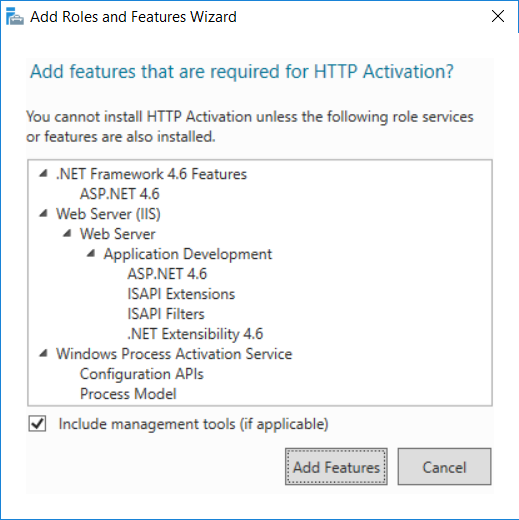
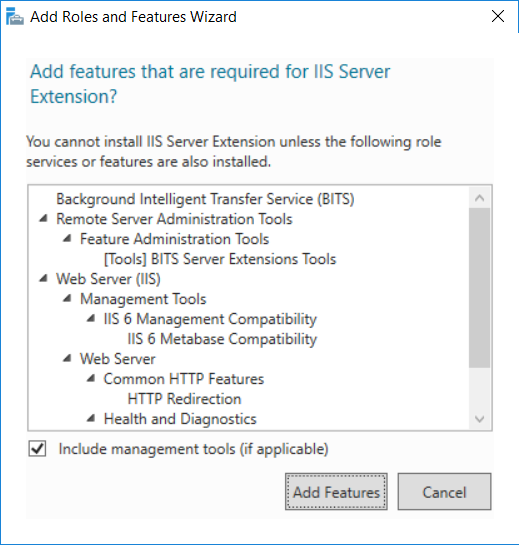
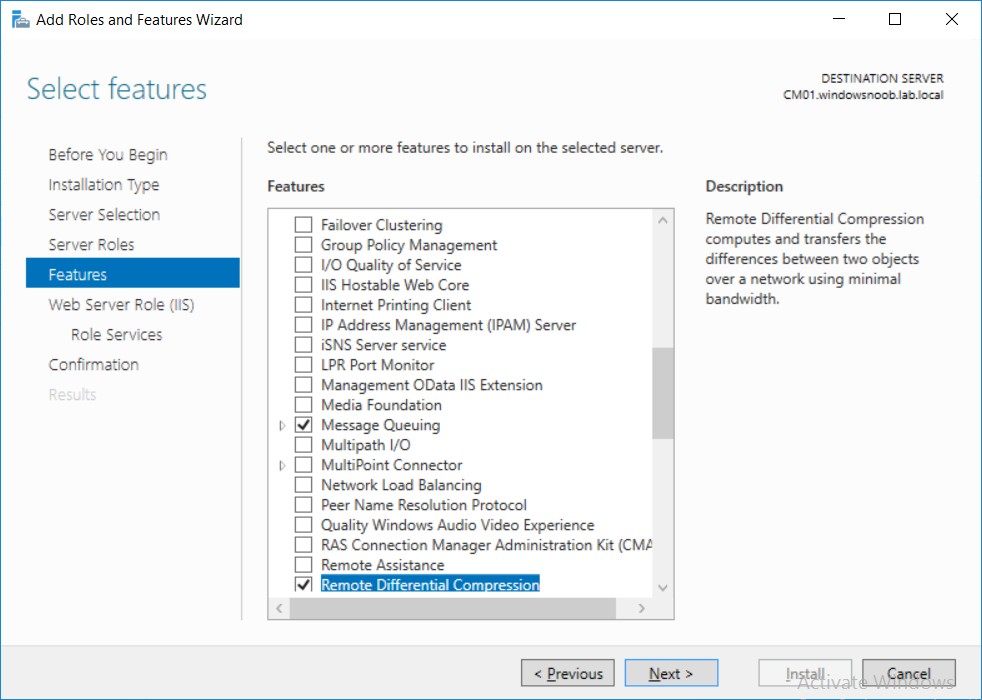
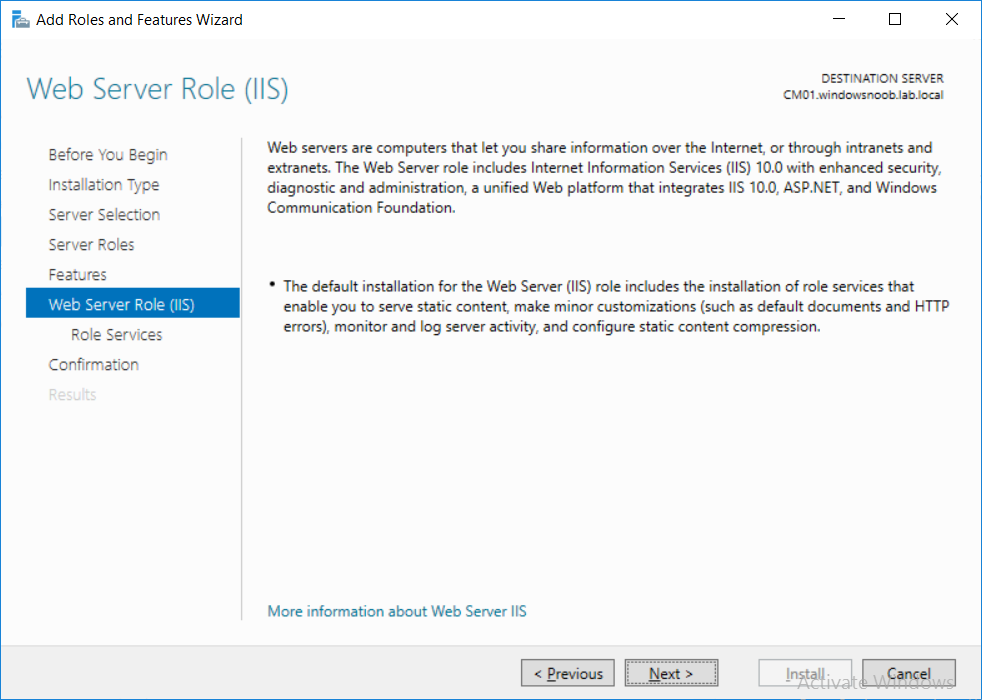
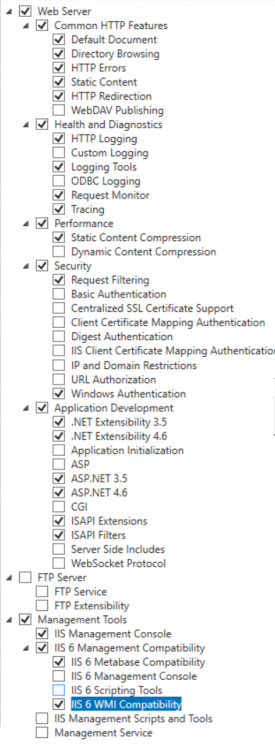
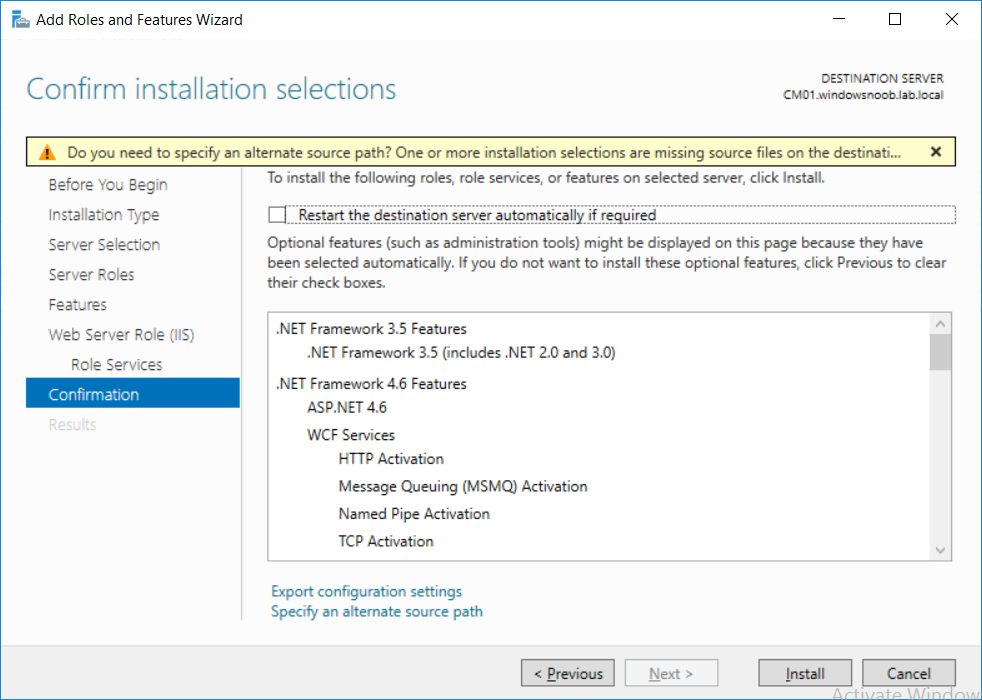
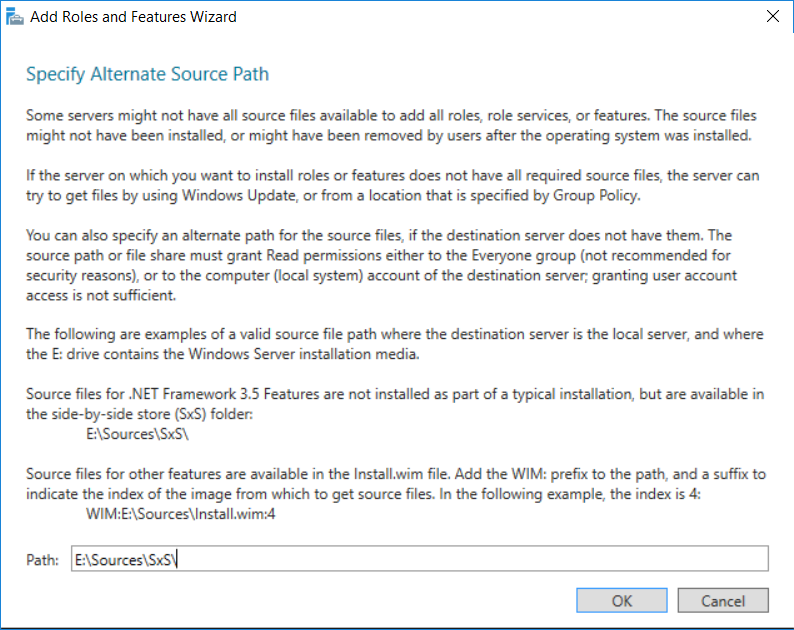
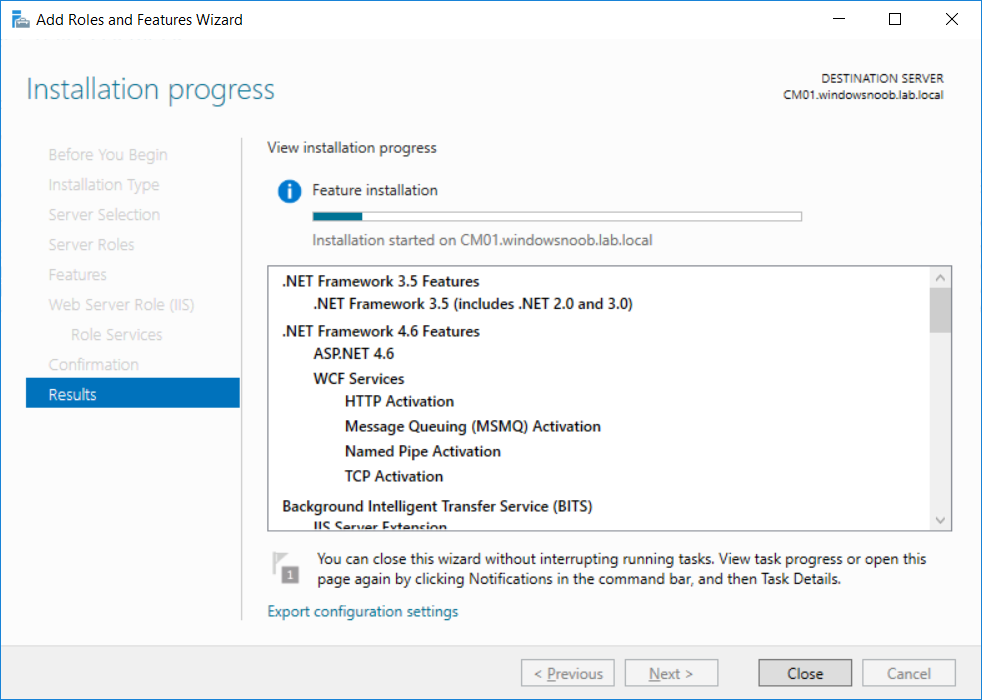
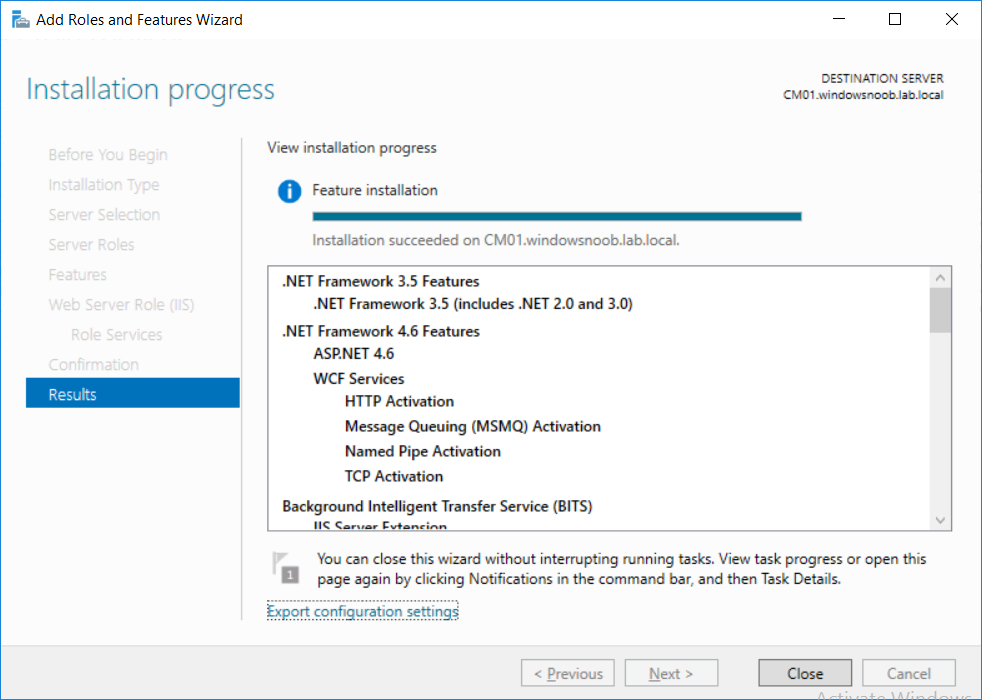
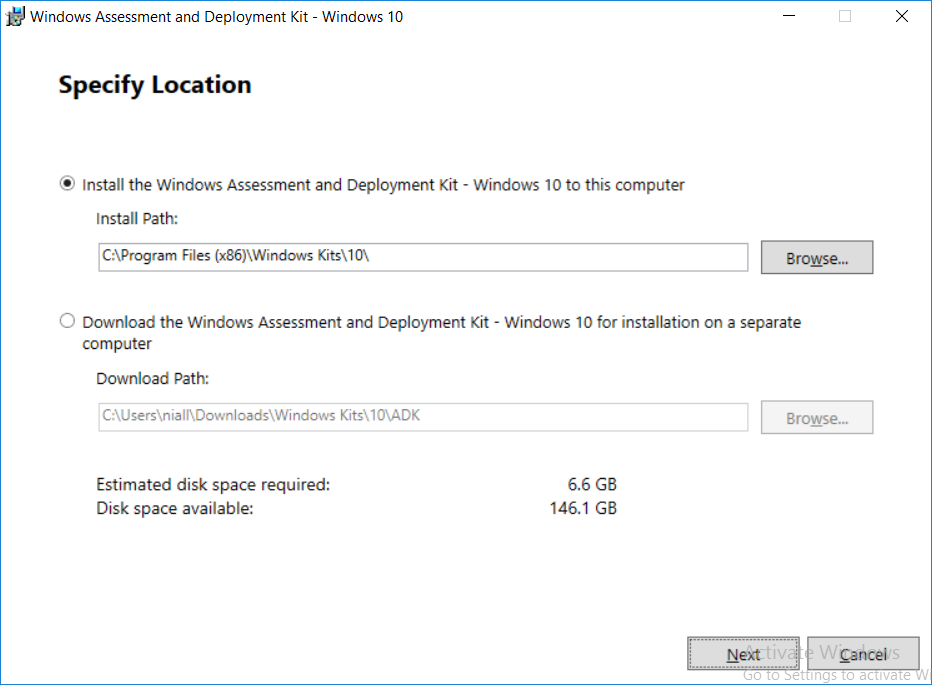
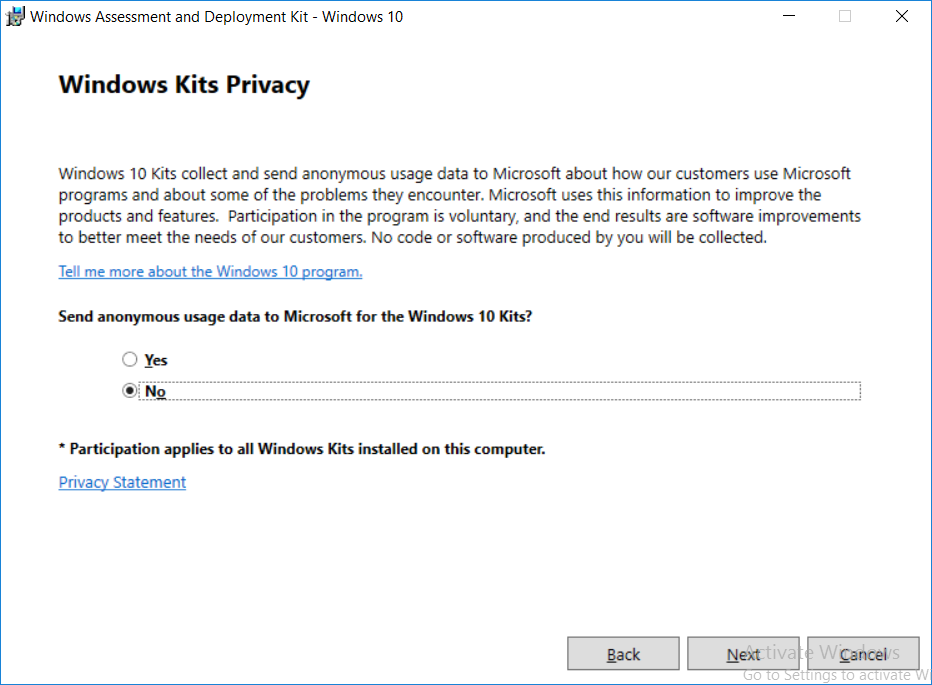
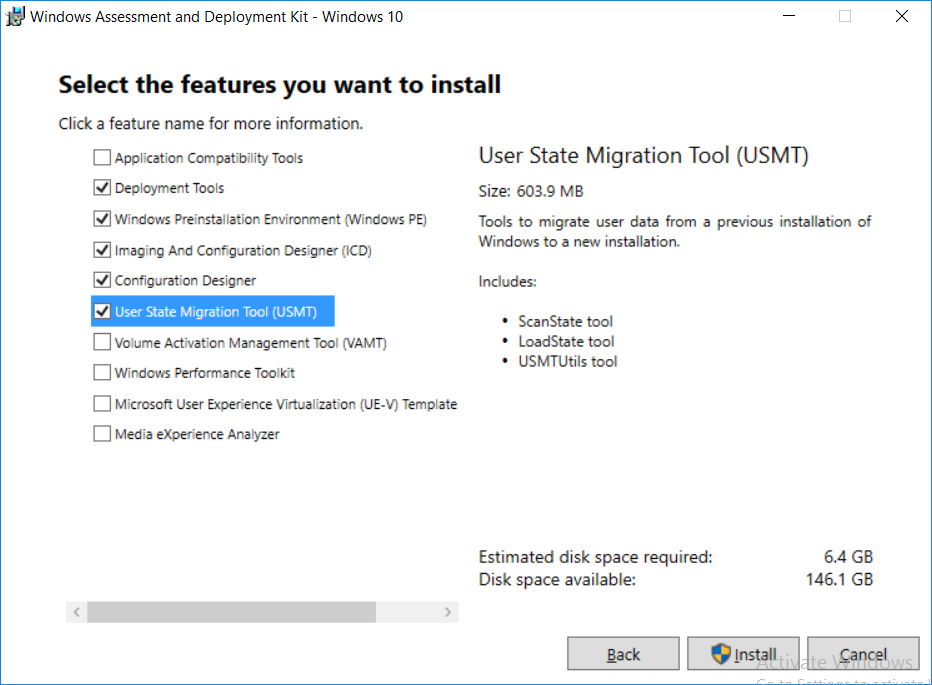
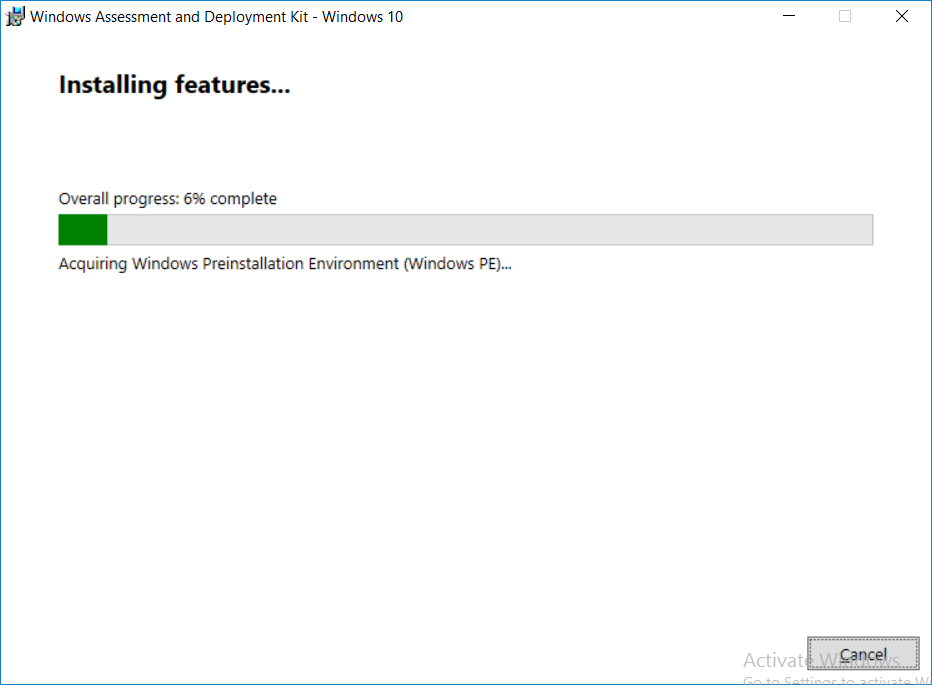
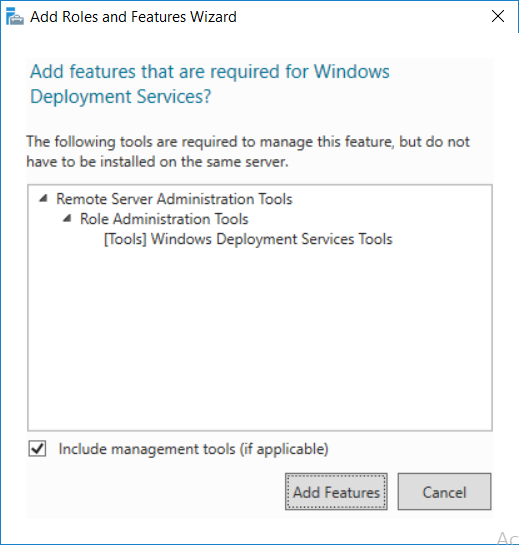
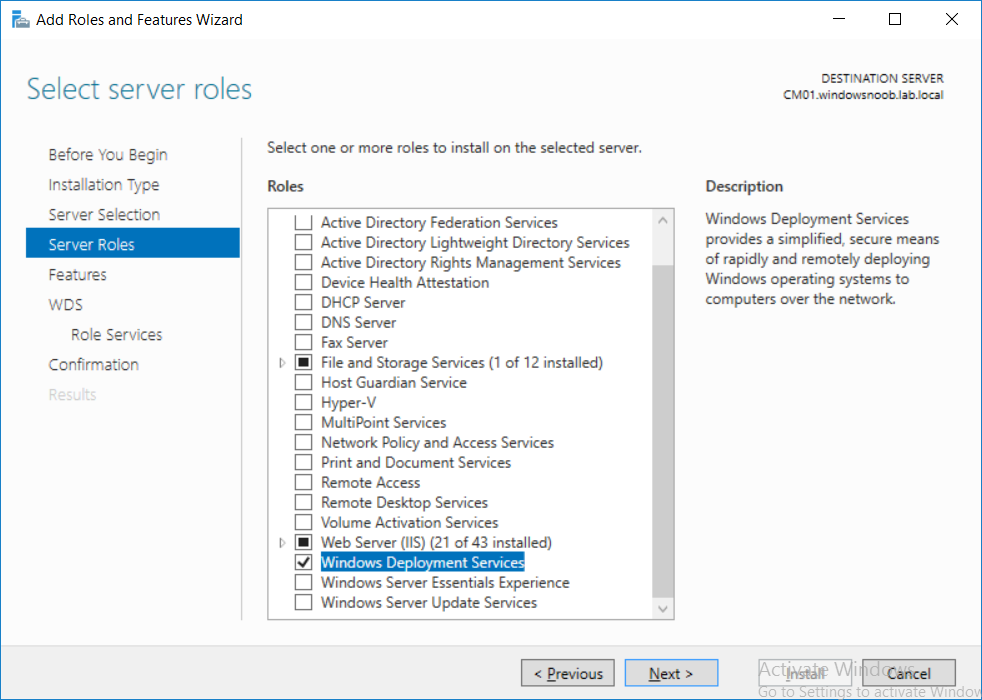
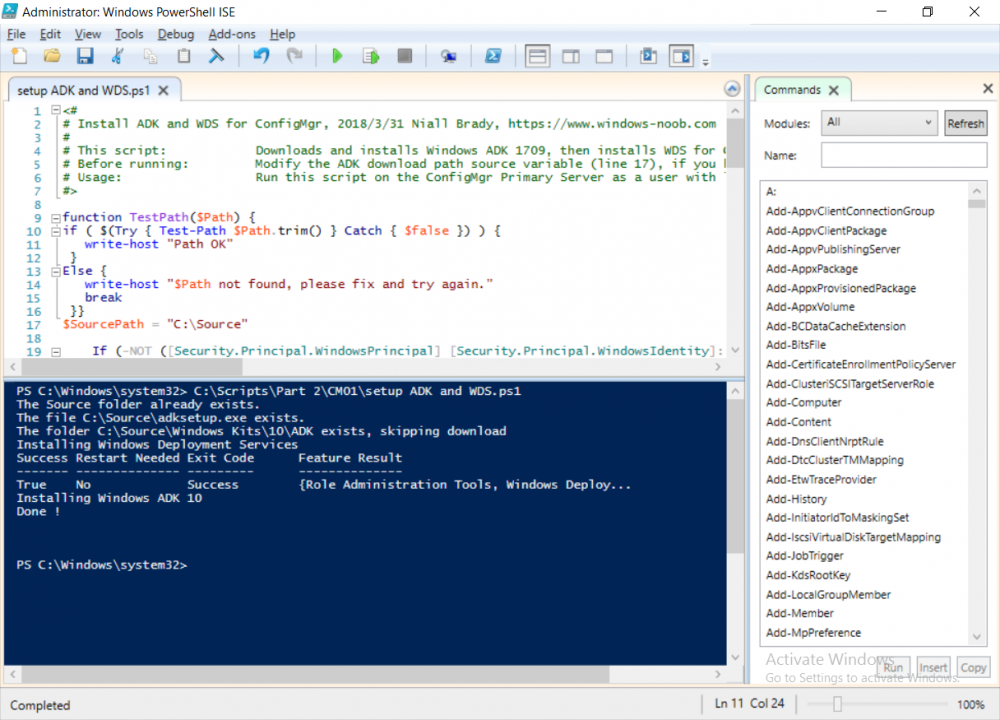
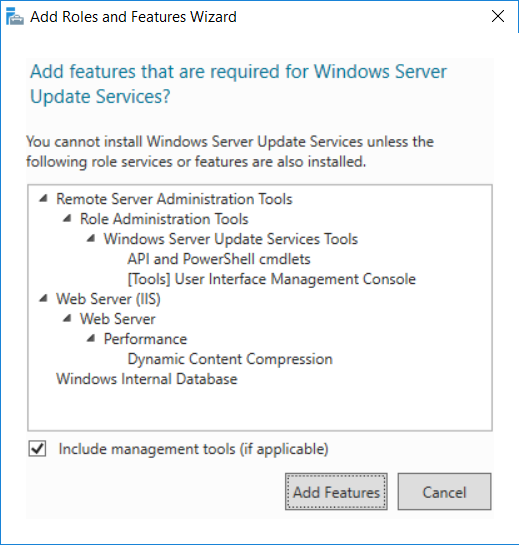
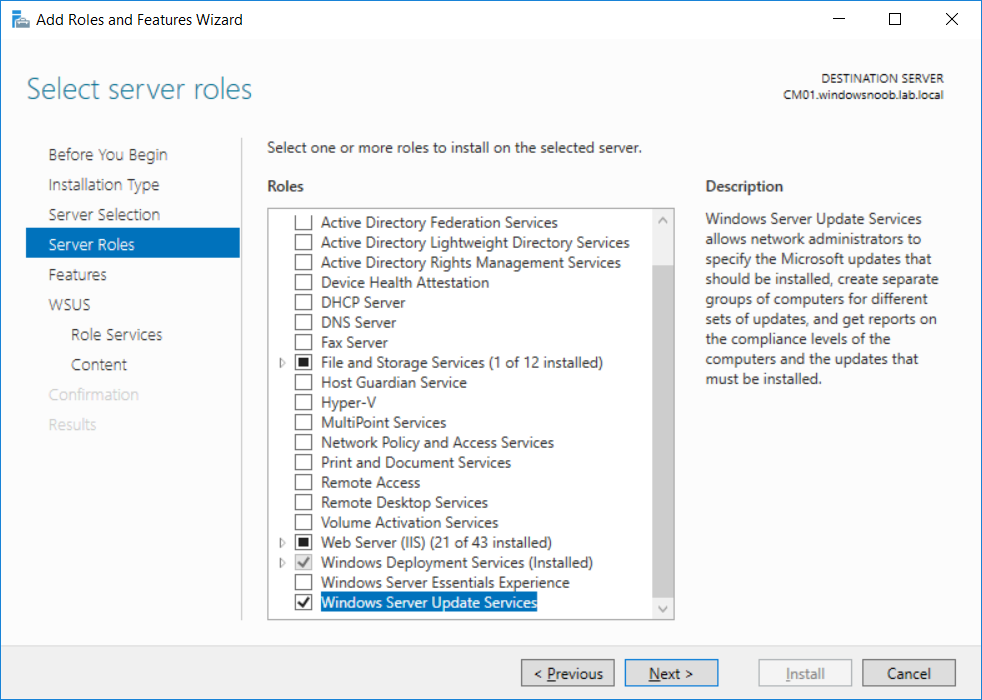
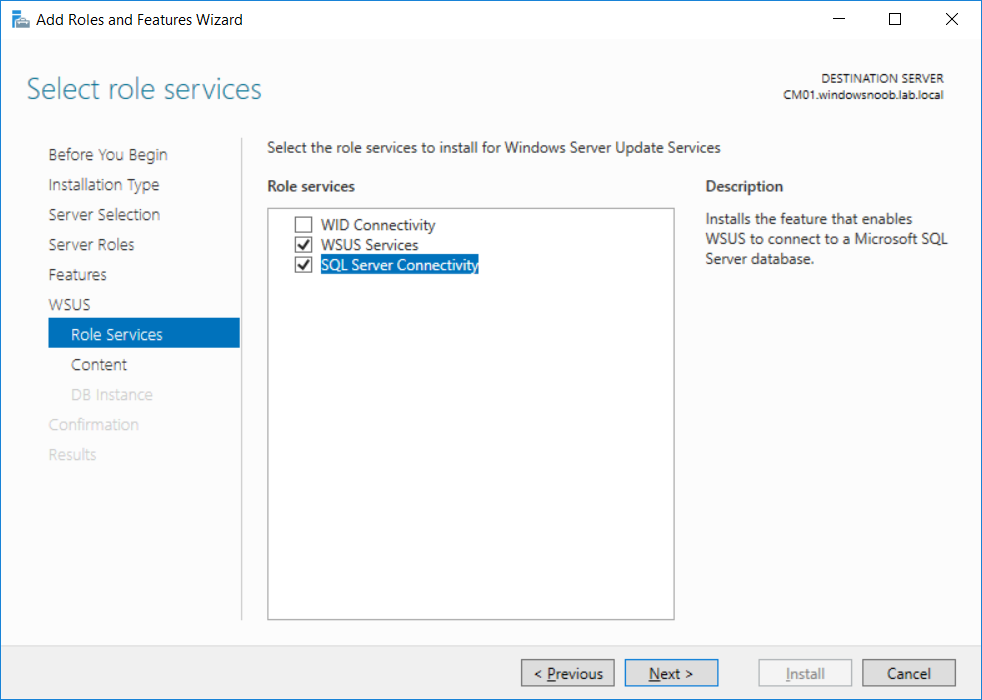
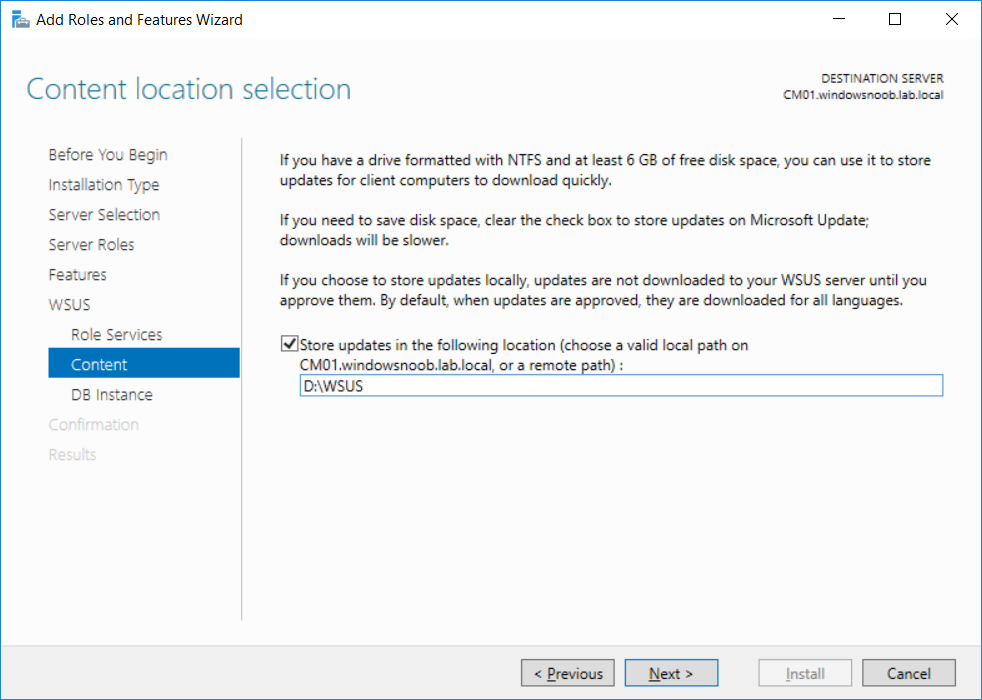
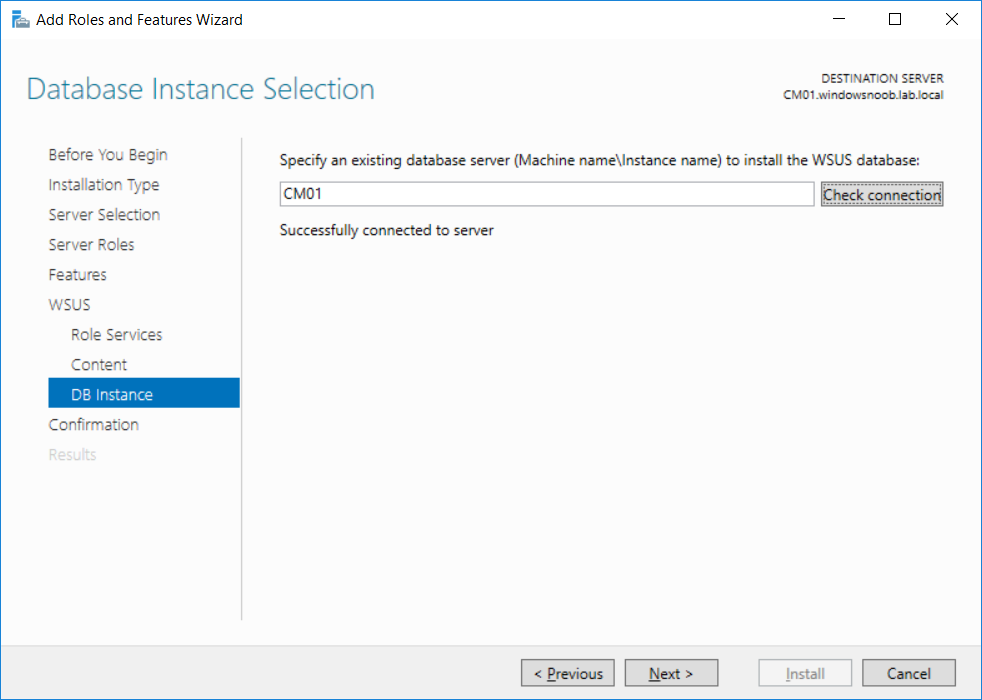
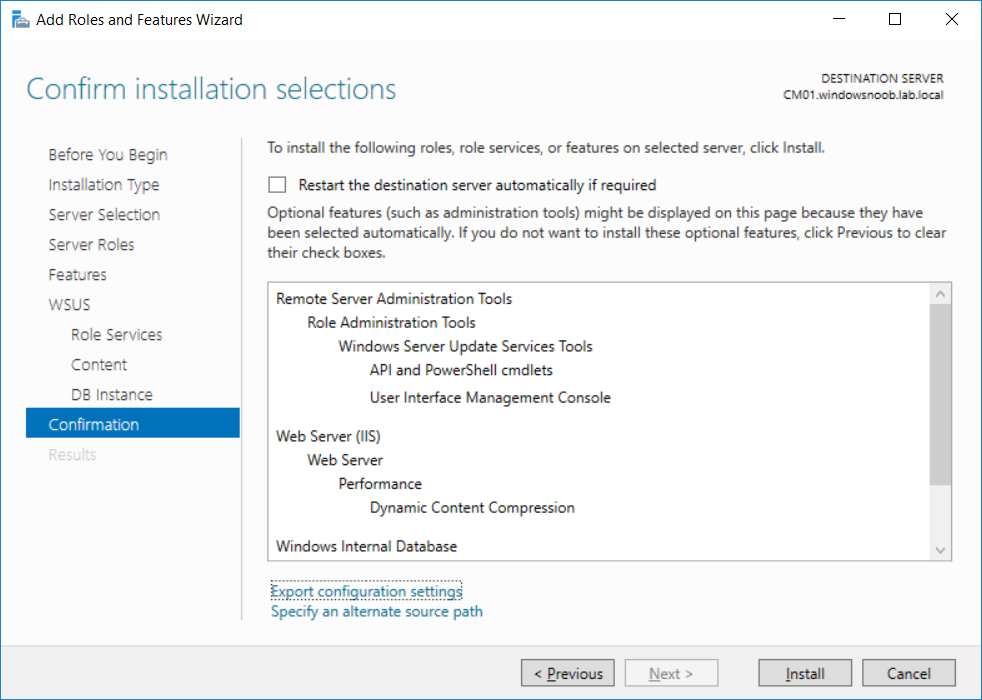
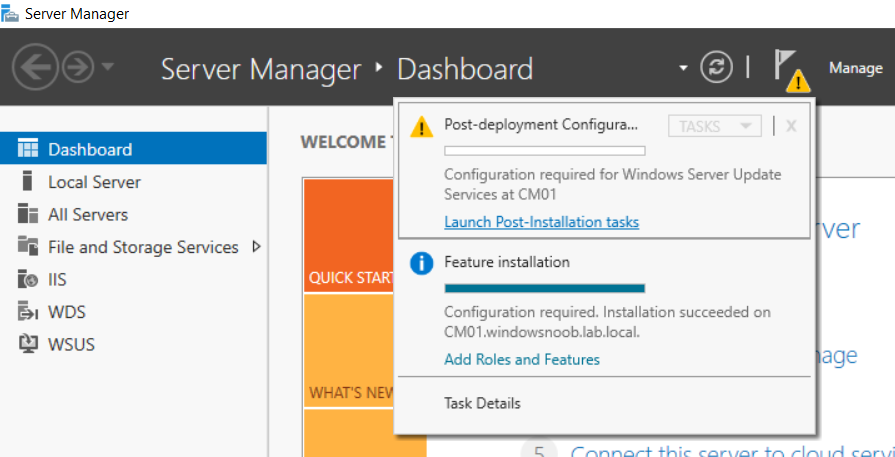
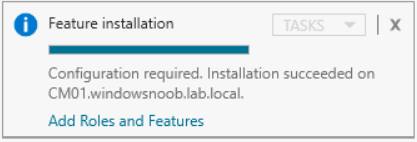
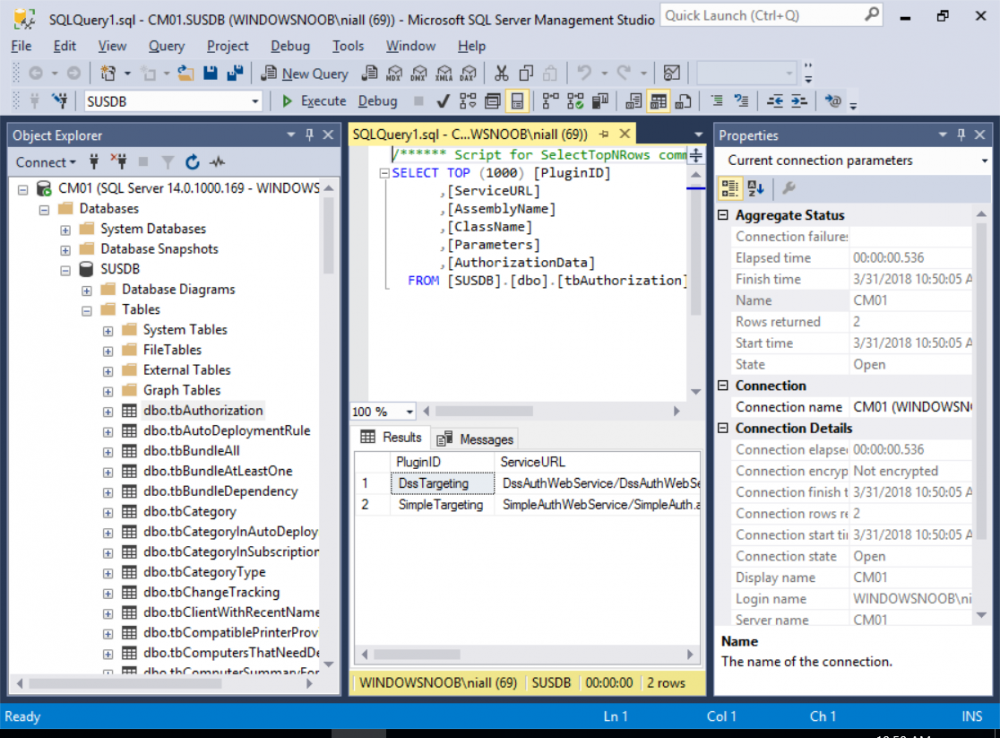
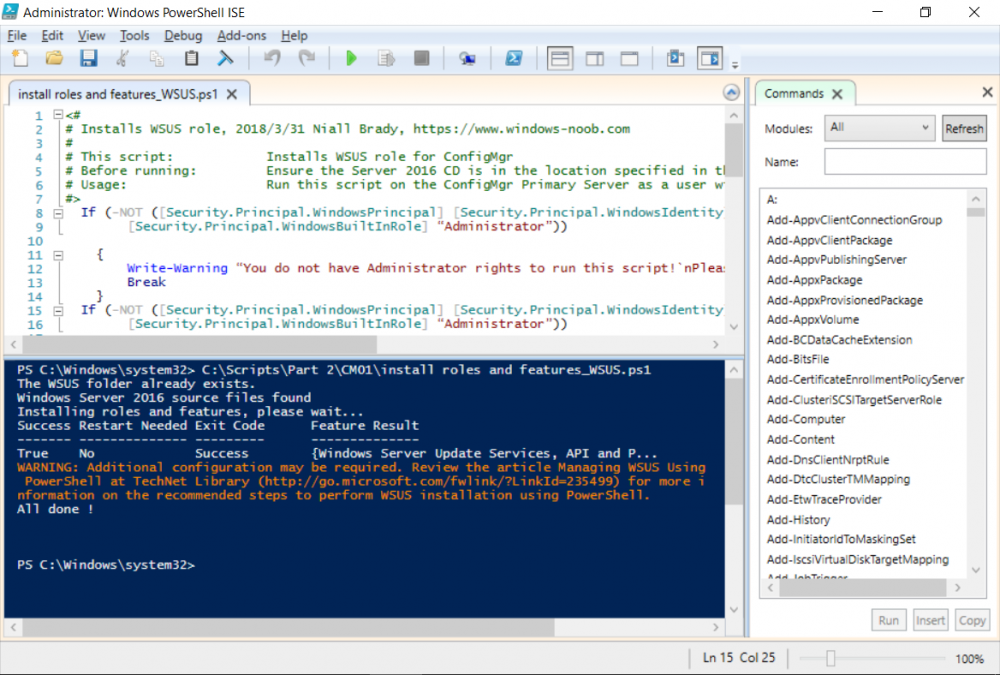
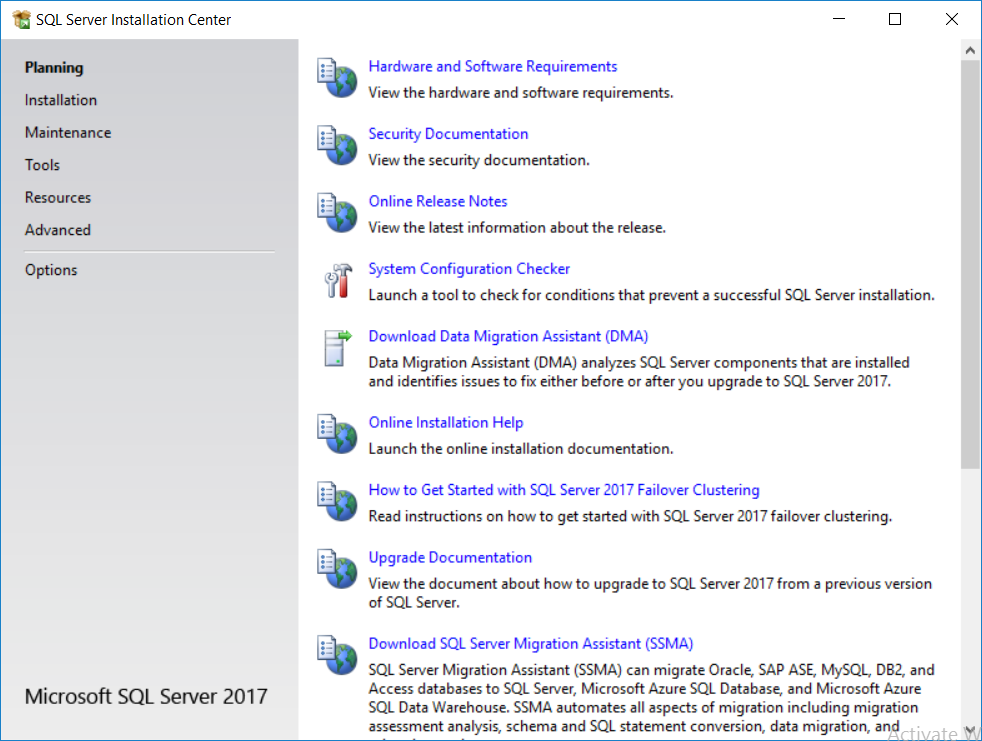
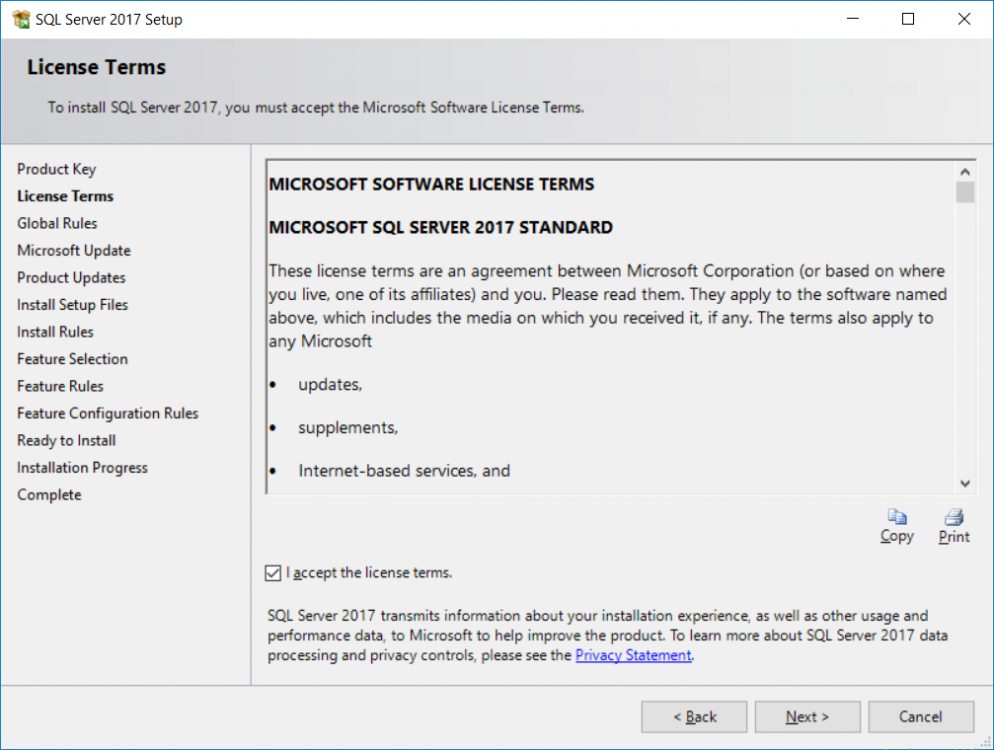
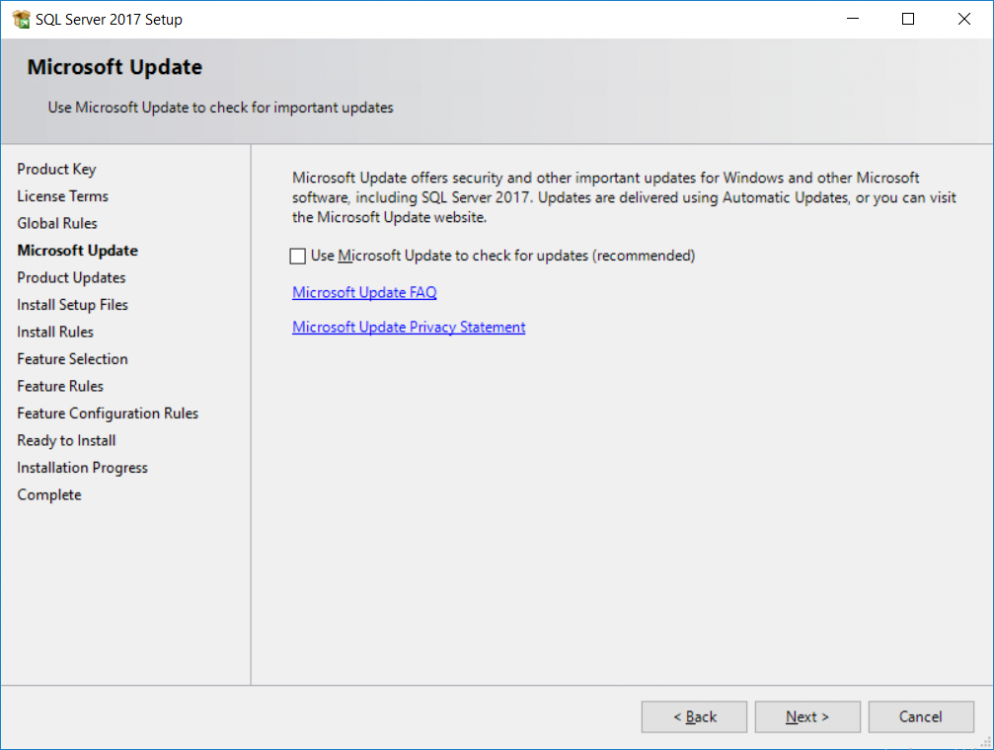
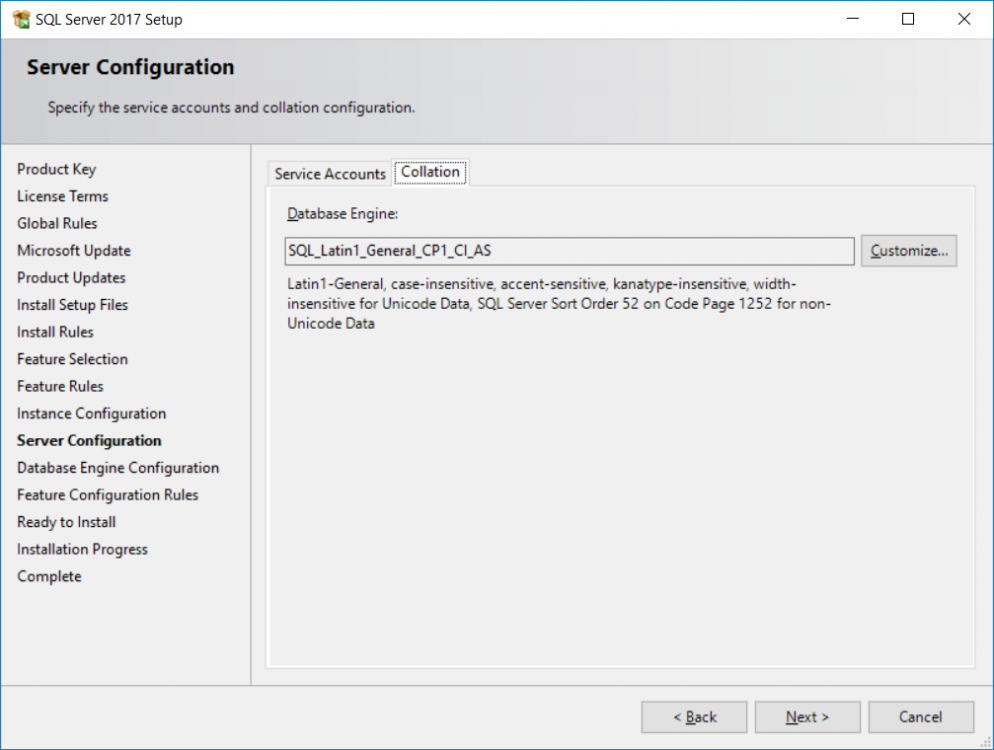
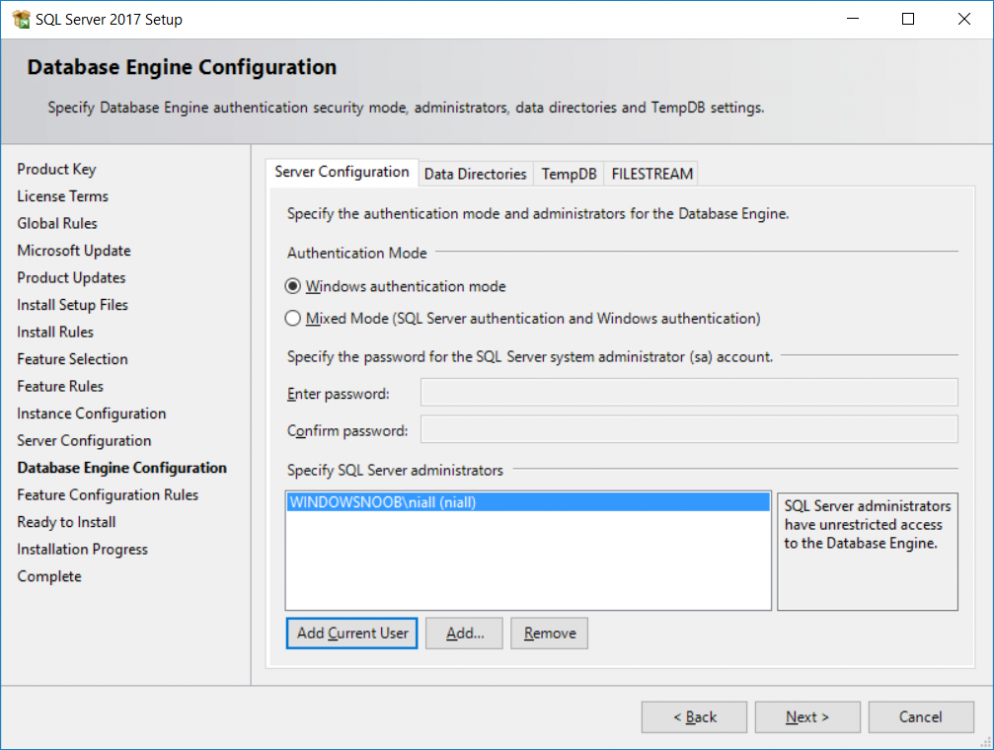
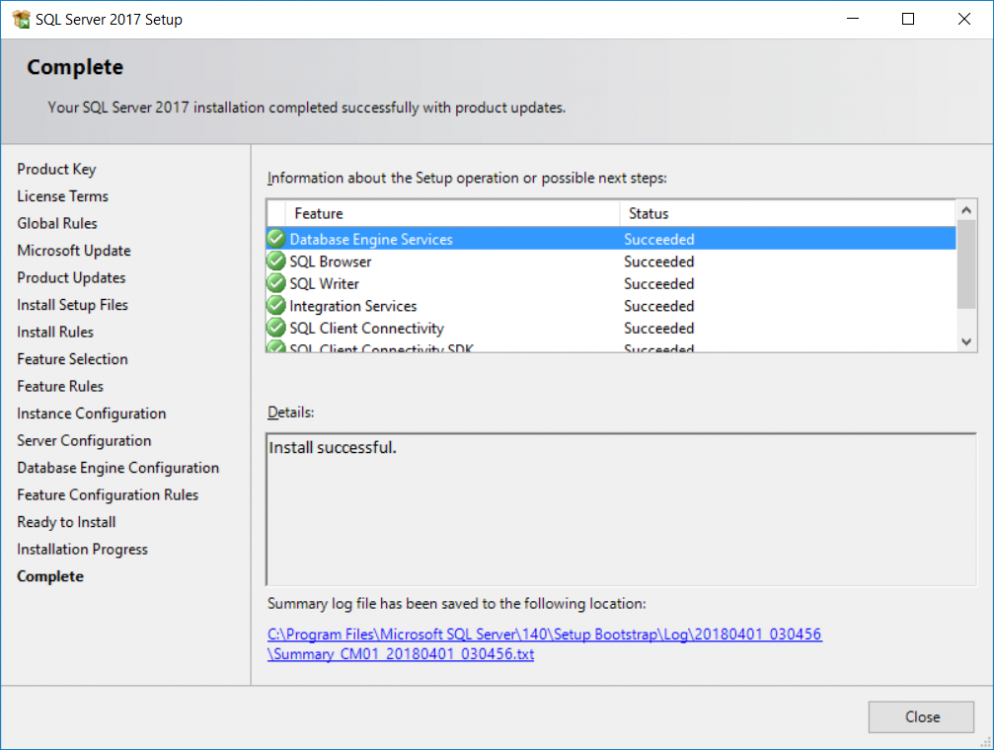
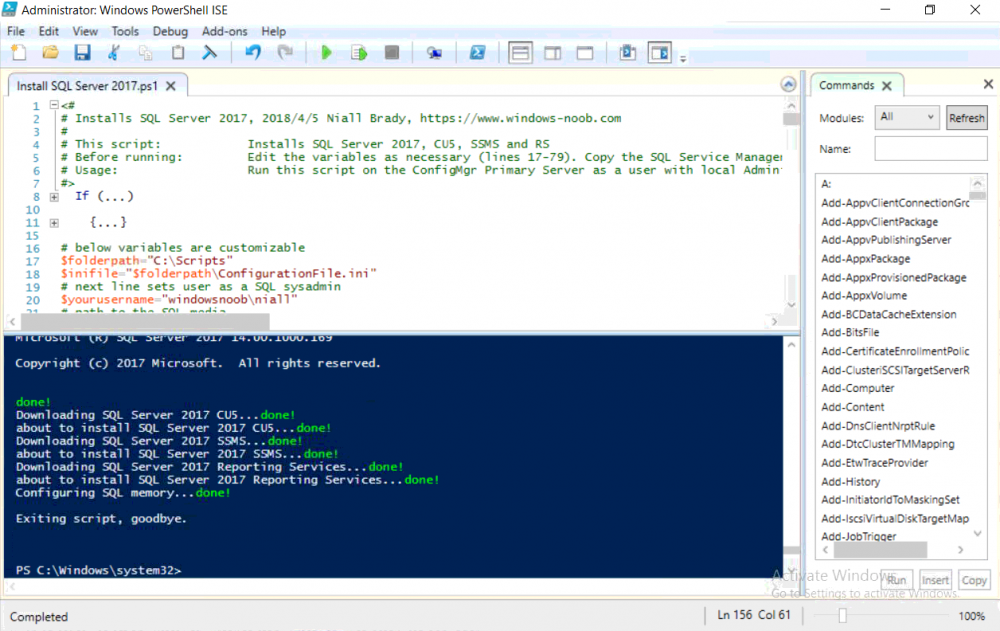
This multi-part guide will show you how to install the latest baseline version of Configuration Manager from Microsoft. The latest available baseline version is System Center Configuration Manager (Current Branch) version 1802 as of March 29th 2018. How can I install System Center Configuration Manager (Current Branch) version 1802 on Windows Server 2016 with SQL Server 2017 – Part 1 How can I install System Center Configuration Manager (Current Branch) version 1802 on Windows Server 2016 with SQL Server 2017 – Part 2 How can I install System Center Configuration Manager (Current Branch) version 1802 on Windows Server 2016 with SQL Server 2017 – Part 3 How can I install System Center Configuration Manager (Current Branch) version 1802 on Windows Server 2016 with SQL Server 2017 – Part 4 You can use this multi-part guide to get a hierarchy up and running on Windows Server 2016 using SQL Server 2017. The concept behind this is to guide you through all the steps necessary to get a working Configuration Manager Primary site installed (for lab use) using manual methods or automated using PowerShell. This gives you the power to automate the bits that you want to automate, while allowing you to manually do other tasks when needed. You decide which path to take. PowerShell knowledge is desired and dare I say required if you are in any way serious about Configuration Manager. I will show you how to do most steps via two methods shown below, it’s up to you to choose which method suits you best but I highly recommend automating everything that you can, using PowerShell. Method #1 – Do it manually Method #2 – Automate it with PowerShell In Part 1, you configured Active Directory Domain Services (ADDS) on AD01, then joined the Configuration Manager server (CM01) to the newly created domain. You then created users, usergroups and OU's in Active Directory and created the System Management Container. Finally you delegated permission to the Configuration Manager server to the System Management container. Step 1. Install Roles and Features on CM01 Note: Perform the following on the Configuration Manager server (CM01) as a Local Administrator To support various features in System Center Configuration Manager, the setup wizard requires some server roles and features preinstalled. On CM01, login as the username you added to the Local Administrators group and start Server Manager. Method #1 - Do it manually The role and feature requirements for ConfigMgr are listed here https://docs.microsoft.com/en-us/sccm/core/plan-design/configs/site-and-site-system-prerequisites. On CM01, login as a user with administrative permissions on the server. Start Server Manager. Click on Add roles and features, on the Before you begin page click Next Choose Role-based or feature-based installation In the Server Selection screen verify CM01.windowsnoob.lab.local is selected and click Next On the Server Roles screen select Web Service (IIS) and when prompted to add features for Web Server (IIS) click on Add Features Click Next and on the Features screen select the .NET Framework 3.5 (includes .NET 2.0 and 3.0) feature Expand the .NET Framework 4.6 Features and select HTTP Activation under WCF Services, answer Add Features when prompted. Select Message Queuing (MSMQ) Activation and when prompted select Add Features Select Named Pipe Activation and TCP Activation and under Background Intelligent Transfer Service (BITS) select IIS Server Extension when prompted to add features click on Add Features Scroll down and select Remote Differential Compression Click Next and on the Web Server Role (IIS) screen click Next on the Select Role Services verify that the following are selected Click Next and point to the Installation Source by clicking on Specify an alternate source path Enter the path to the media eg: E:\Sources\SxS Click Install when ready, at this point you could export configuration settings for later automation Click on Close when the feature installation has succeeded. Method #2 - Automate it with PowerShell Note: Make sure your Server 2016 media is in the drive specified in the script or edit the script to point to the new location of the media. To install the roles and features needed, start Windows Powershell ISE as a user with administrative permissions on the server, edit the variables as appropriate and run the install roles and features.ps1 script. The script will automatically stop and prompt you to correct things, if it cannot find the XML file or the Windows Server 2016 installation media. 1. Extract the scripts to C:\Scripts on CM01 and load the install roles and features.ps1script located in C:\Scripts\Part 2\CM01 2. Edit the variables (lines 18-19) as desired before running. 3. Start Windows PowerShell ISE as Administrator and run the script by clicking on the green triangle. Step 2. Download and install Windows ADK and install WDS Note: Perform the following on the Configuration Manager server (CM01) as a Local Administrator When you deploy operating systems with Configuration Manager, the Windows ADK is an external dependency that is required. The ConfigMgr prerequisite checker will check for various things, including ADK components such as USMT and Windows Preinstallation Environment (among others), therefore you need to install Windows ADK on your server. System Center Configuration Manager version 1802 supports Windows ADK 1709 as I've explained here. Method #1 - Do it manually Go to this link and download ADK 1709. You'll be prompted to save or run ADKSETUP.EXE, select Run. When prompted for the path, accept the defaults...(or change it to something else if you wish) Select your privacy settings Accept the ADK EULA Make sure to have selected at least the following ADK features Deployment Tools Windows Preinstallation Environment (Windows PE) Imaging and Configuration Designer (ICD) Configuration Designer User State Migration tool (USMT) and click Install to start the download and Installation of the Windows ADK, version 1709. Once the ADK installation is complete, click Close. To install WDS, open Server Manager, select Add roles and features and select the Windows Deployment Services role. When prompted click on Add Features to include management tools. and click through the wizard until completion, close the wizard when done. Method #2 - Automate it with PowerShell To download and then install Windows ADK 10 version 1709 with the components needed for ConfigMgr, start Windows Powershell ISE as Administrator and run the setup ADK and WDS.ps1 script. This script not only downloads and installs ADK 1709, but it installs the Windows Deployment Services role. Tip: If you've already downloaded ADK 1709 and want to save yourself some time, copy the Windows Kits folder and all files/folders within to the source folder (eg: C:\Source\Windows Kits) and the script will skip the download. 1. Extract the scripts to C:\Scripts on CM01 and load the setup ADK and WDS.ps1 script located in C:\Scripts\Part 2\CM01 2. Edit the variable (line 17) as desired before running. 3. Start Windows PowerShell ISE as Administrator and run the script by clicking on the green triangle. Step 3. Install SQL Server 2017 Note: Perform the following on the Configuration Manager server (CM01) as a Local Administrator Method #1 - Do it manually Configure the firewall as described in https://go.microsoft.com/fwlink/?linkid=94001. After configuring the firewall, browse to the drive where the SQL Server 2017 media is, and run setup.exe. The SQL Server Installation Center wizard will appear. Click on Installation and then choose New SQL Server standalone installation or add features to an existing installation. Enter the Product Key or use the evaluation version if that's what you want to use. The product key will be automatically filled in for licensed media downloaded from Microsoft Volume Licensing Service Center. Accept the EULA Make your Microsoft Update choices and review your Install rules, select the SQL server instance features you need and if necessary change the drive letter where you intend to install it And configure the Instance Configuration or just leave it as default Verify the Service Accounts settings and for Collation, make sure the collation is set to SQL_Latin1_General_CP1_CI_AS For Server Configuration, click on Add Current User After configuring Data Directories, TempDB and Filestream settings you are Ready to Install Click on Install to start the installation of SQL Server 2017, and once it's completed, click Close. After installing SQL Server 2017, download SQL Server 2017 SSMS from here and install it. Method #2 - Automate it with PowerShell Note: Make sure your SQL Server 2017 media is in the drive specified in the script or edit the script to point to the new location of the media. The script and accompanying INI file have the path pointing at D:\Program Files, please change the variables as appropriate. To install SQL Server 2017 use the Install SQL Server 2017.ps1 script. The script will create a ConfigurationFile.ini used to automate the installation of SQL Server 2017, and after it's installed the script will download the SSMS executable (Management Studio) and install it. Then it will download Reporting Services and install it. If either of the EXE's are in the download folder, it will skip the download and just install. SQL Server no longer comes with the Management Studio or Reporting Services built in, and they are offered as separate downloads, don't worry though, my PowerShell script takes care of that for you. 1. Extract the scripts to C:\Scripts on CM01 and load the Install SQL Server 2017.ps1 script located in C:\Scripts\Part 2\CM01 2. Edit the variables [lines 17-76] as desired before running. 3. Start Windows PowerShell ISE as Administrator and run the script by clicking on the green triangle. Step 4. Restart the Configuration Manager Primary Server Note: Perform the following on the Configuration Manager server (CM01) as a Local Administrator Open an administrative command prompt and issue the following command: shutdown /r Step 5. Install the WSUS role Note: Perform the following on the Configuration Manager server (CM01) as a Local Administrator Now that SQL server is installed, we can utilize SQL Server for the WSUS database. To install WSUS and configure it to use the SQL server database instead of the Windows Internal Database, do as follows: Method #1 - Do it manually Using Roles and Features in Server Manager, add the Windows Server Update Services role. When prompted to add features for the WSUS role, click on Add features. When prompted for the Role Services, uncheck WID Connectivity and add SQL Server Connectivity instead. When prompted for Content location, enter a valid path When prompted for Database Instance Selection, enter the server name and click on Check Connection On the Confirm Installation Selections screen, click on Install. and finally click close. After installing the WSUS role, in Server Manager, click on the yellow exclamation mark and choose Launch Post Installation Tasks. When the tasks are completed Optional: The WSUS database (SUSDB) can be observed using SQL Server SSMS. Method #2 - Automate it with PowerShell Browse to the location where you extracted the scripts, C:\scripts. Start Windows PowerShell ISE as administrator, open the Install roles and features_WSUS.ps1 script, edit the $servername variable and replace CM01 with the ServerName your are installing ConfigMgr on (SQL server). Note: Make sure to have your Windows Server 2016 media in the path referred to by $Sourcefiles. 1. Extract the scripts to C:\Scripts on CM01 and load the Install roles and features_WSUS.ps1 script located in C:\Scripts\Part 2\CM01 2. Edit the variables [lines 22-25] as desired before running. 3. Start Windows PowerShell ISE as Administrator and run the script by clicking on the green triangle. Downloads The scripts used in this guide are available for download here. Unzip to C:\Scripts on both servers. The scripts are placed in the corresponding folder (Part 1, Part 2 etc) and sorted into which server you should run the script on (AD01 or CM01). Scripts.zip Summary Using PowerShell to automate things leaves more time for yourself and it's fun. Please join me in Part 3 of this multi-part guide when you will install System Center Configuration Manager version 1802 (Current Branch).


-
Hi Everyone,
I'm a new Level 2 Technician as i was previously Level 1 technician and my main role was helping users troubleshoot issues on their Computer and recently had a few colleagues from Level 3 started helping me get into SCCM environment were i flourishing from their Wisdom, so found your site and started to visit this site to learn a few things and decided to register.
Thank you for visiting my page
-
 Hi Experts, I am currently designing a Current Branch implementation for a customer who continues to ask for a Microsoft best practice evidence/ documentation. From whatever I have gathered over my past years of experience, i have never really come across a single "best practice rulebook" as one size can never fit all. In any case, could you guys direct me to any such guide which has design decisions/ used cases documented? other than these https://docs.microsoft.com/en-us/sccm/core/plan-design/configs/supported-configurations https://docs.microsoft.com/en-us/sccm/core/plan-design/hierarchy/design-a-hierarchy-of-sites Meanwhile, just to get an idea i am planning an implementation for ~ 7K clients and below is what I have proposed - Single Primary at one of the Datacentre ( 8 Core, 48GB RAM) - Management server holding client facing roles in another Datacentre (4 Core, 32GB RAM) - Dedicated server for SQL (I was all for co-hosting the SQL on the same server as the primary but due to reasons more political in nature had to go with a dedicated SQL server) (4 Core, 16GB RAM) - 2x Secondary sites at remote sites (4 Core, 16GB RAM) - Distribution points (across various sites spread across the globe) - No CAS ( Future expansion possible) Let me know what you think, thanks in advance
- 11 replies
-
- 1
-

-
- best pratice
- current branch
- (and 1 more)
-
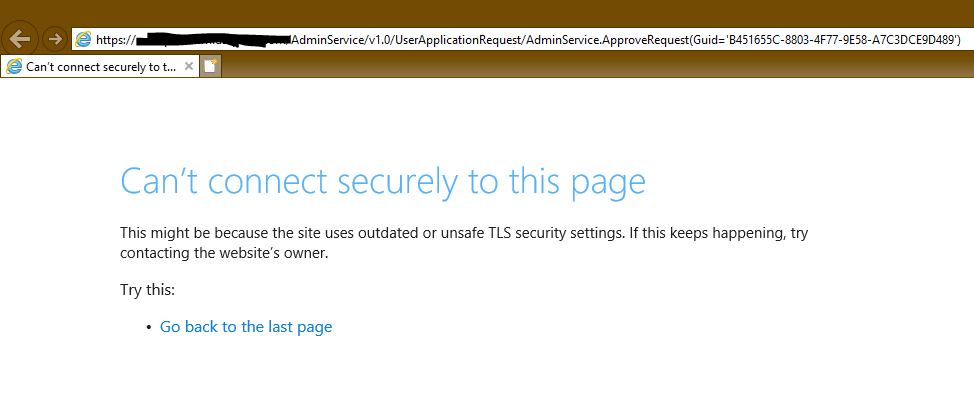
 Been checking out the new email approval feature for application requests in CB1810, however, I am running into an issue and can't seem to figure it out. To start, I can successfully request an application and SCCM triggers the alert and I successfully receive an email. However, when I attempt to approve or deny the request, I get a website security error and can't proceed. I am not using Azure integration and I am attempting this on my local intranet. Any ideas? (Sensitive information removed) Thanks! Mark
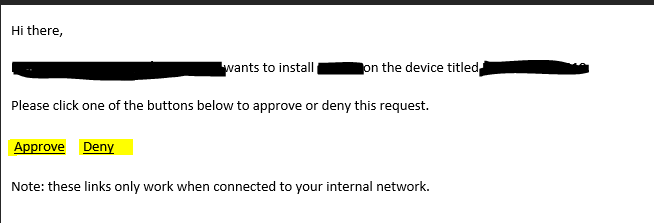
-
Hi, I'm in the process of deploying Windows 10 (x64 Enterprise Build 1809) at a customer site using Configuration Manager Current Branch (1806 + Hotfix). Office 365 Click-to-Run is a Tier 1 application that I am installing during deployment of the OS to the endpoint machine. In order to ensure the O365 C2R content is the latest "Semi-Annual Channel" version (client is bound by regulation to patch applications, so testing this with Office) I've setup the following: "Content" for the Application in CM is JUST setup.exe plus XML files for the install. Two XML files for install for two different locations (one of which is on at a low-speed WAN site). Each XML refers to source content in an open share on the Distribution Point servers - one of which is at the low-speed WAN site. Two deployment types in the Application - one for each XML. Setup a Scheduled Task on the Distribution Point servers to update the share (not the Application content) on a regular basis So my plan was then to use a "Requirement" on the application using a custom Global Condition that determines the Active Directory site (created using PowerShell). The idea then being that during deployment, the application installs using the latest available SAC version and administrators don't need to worry about the Application content being updated. And of course, the XML file then tells it to grab the content from the local site, which is highly connected. Works wonderfully well in Software Center in my testing. BUT, doesn't seem to work in OSD Task Sequence ☹️. If I am reading error logs right, it seems as though the PowerShell in the Global Condition is not being allowed to run (even when I set Execution Policy to "Bypass" earlier in the Task Sequence. So, perhaps I am making things more complex than they should be. Simplest thing to do would be to create two separate applications using the same method (i.e. not just two deployment types) and use a Dynamic Variable in the Task Sequence that installs one or the other dependent upon gateway IP. However, throwing it out there for some thoughts on how I could do this using the multiple deployment methods on the single app. Thanks, Matt
-
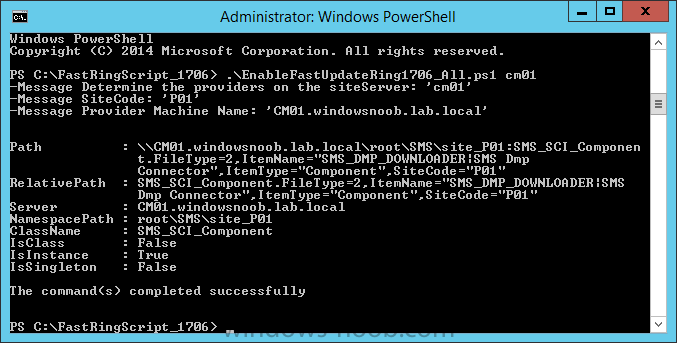
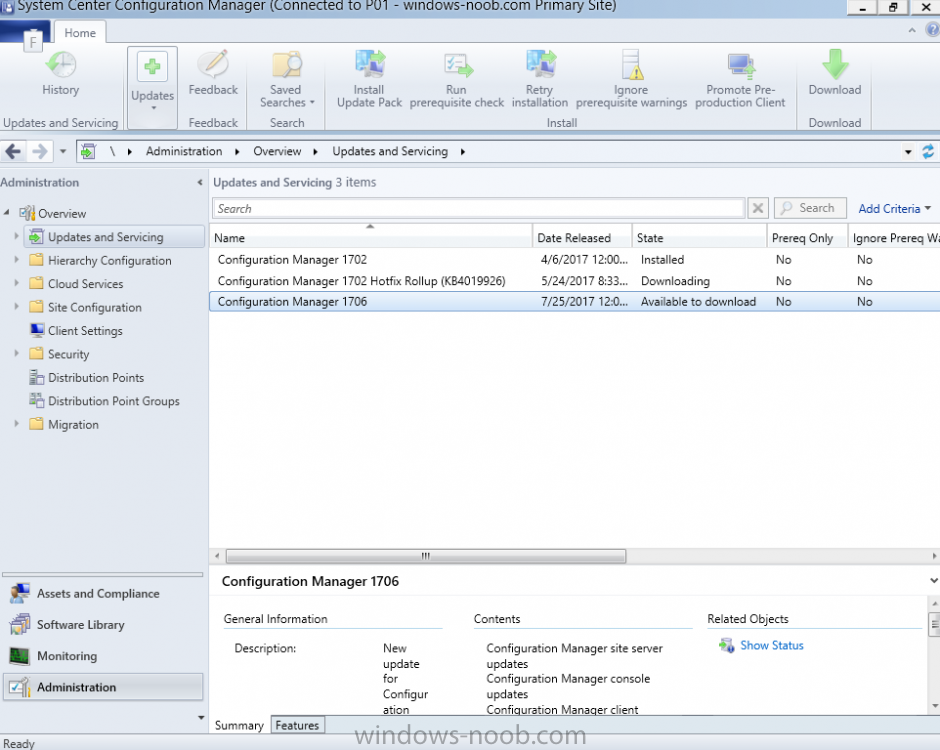
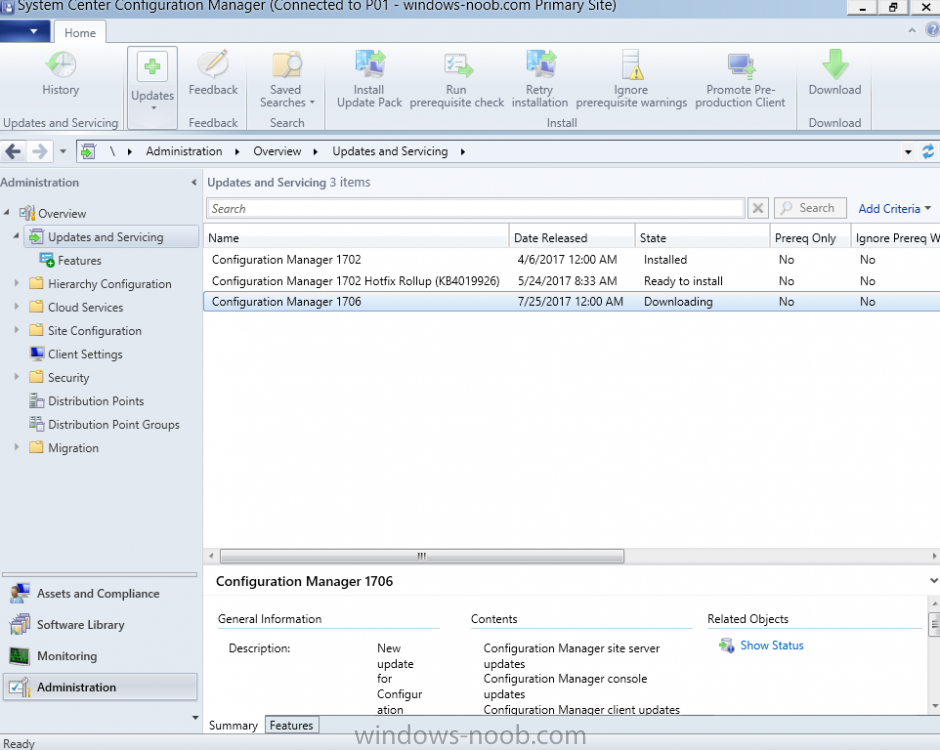
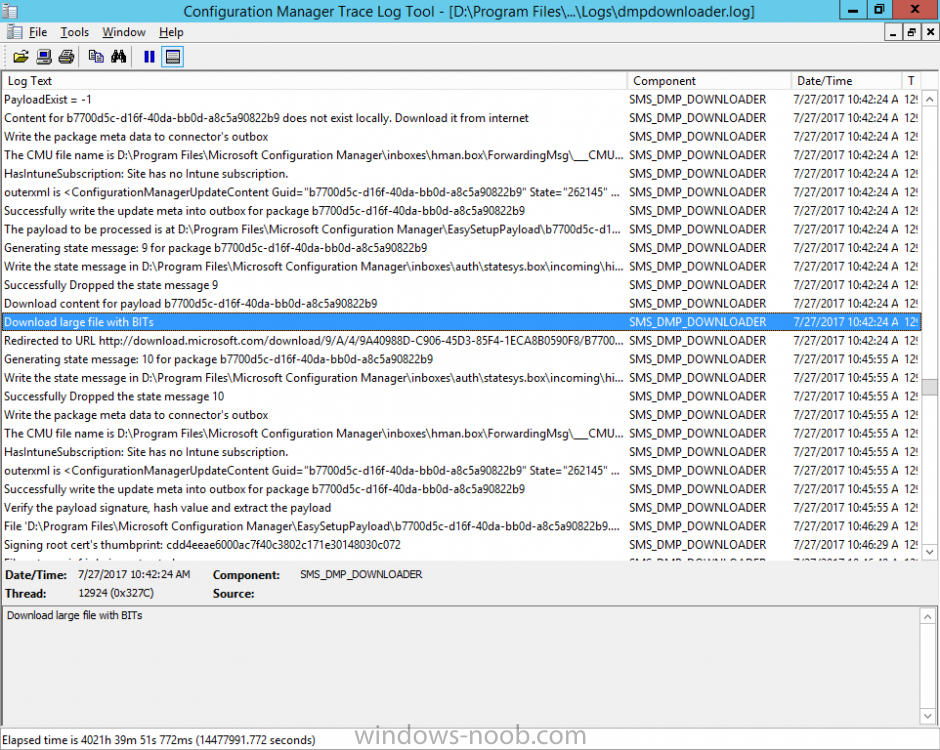
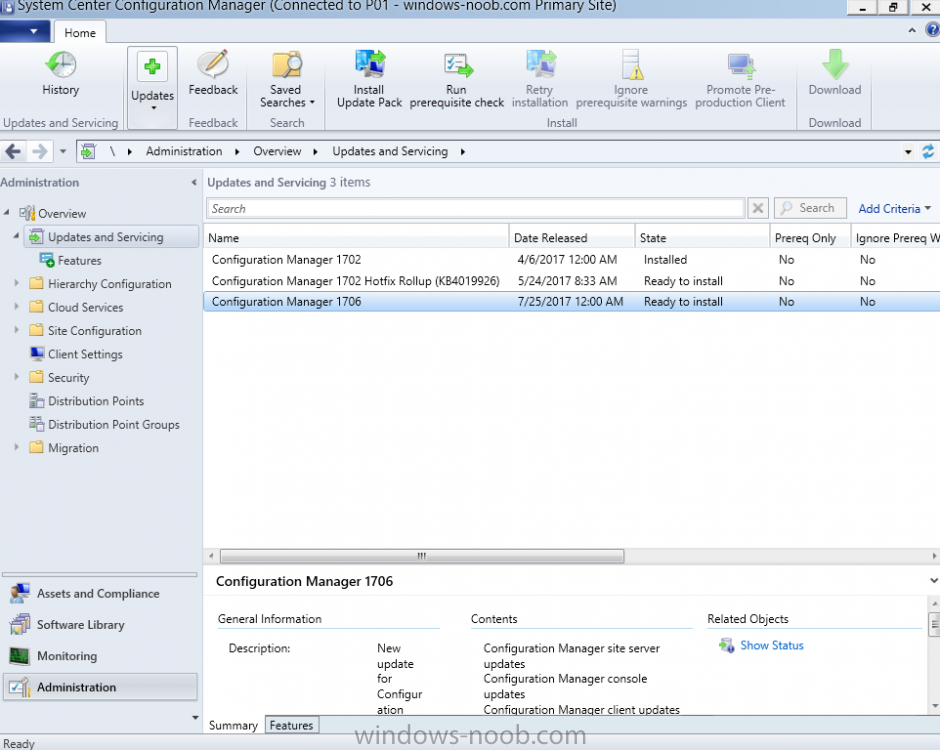
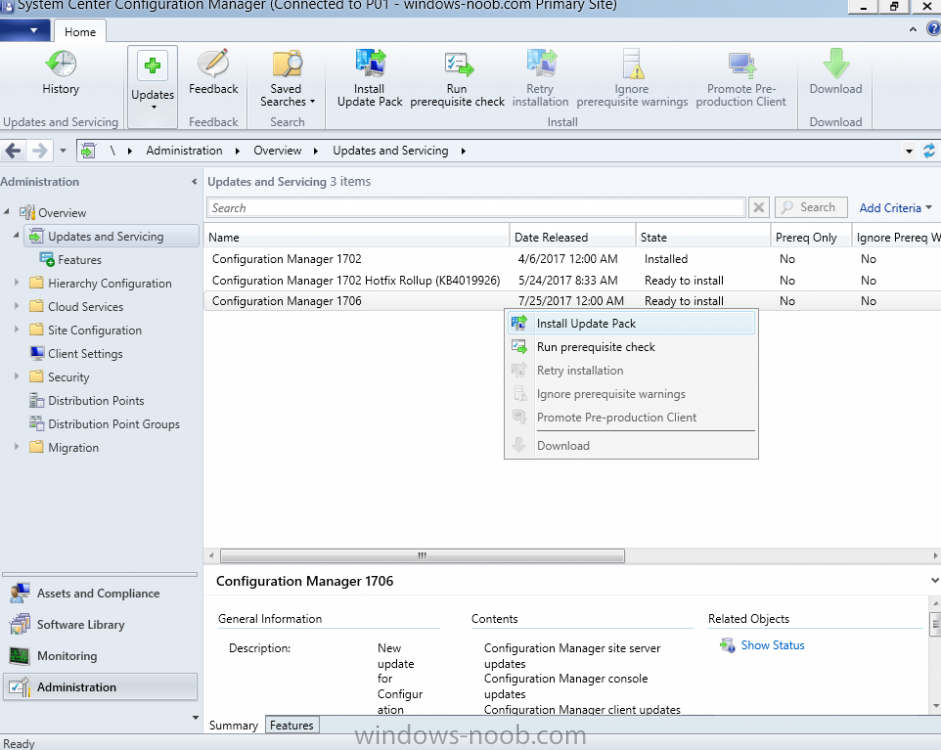
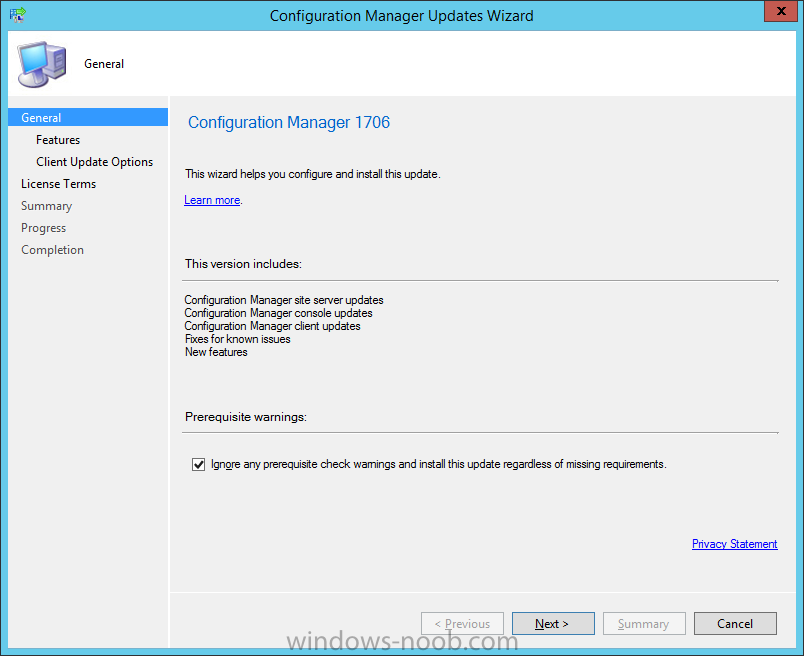
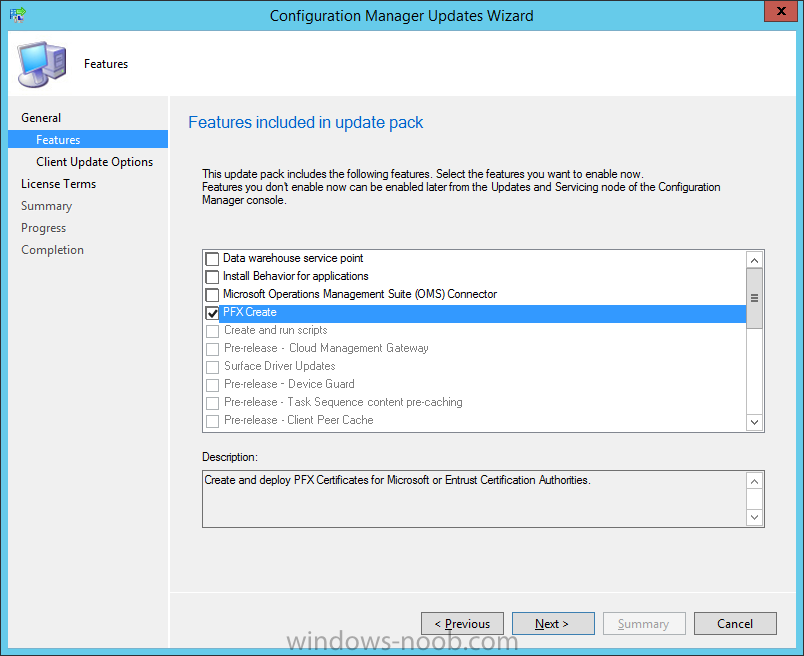
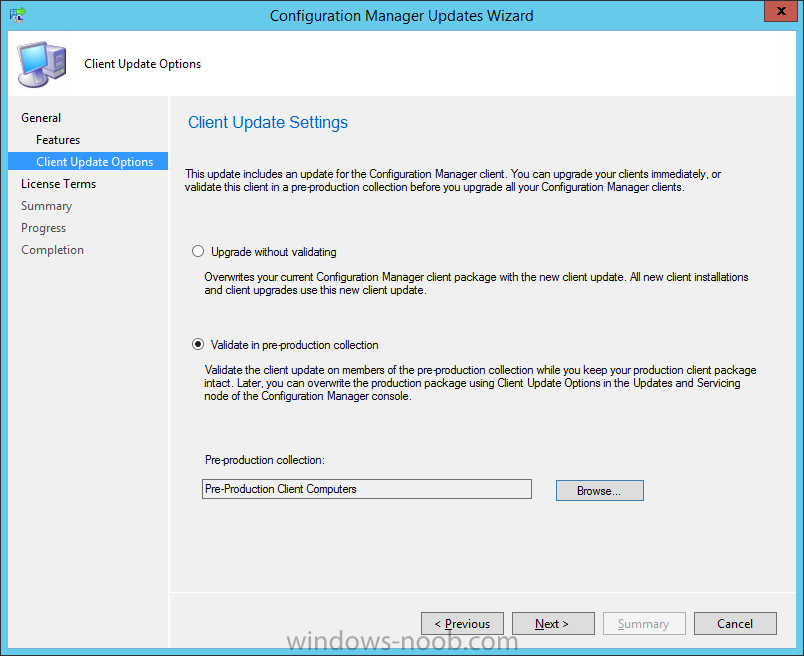
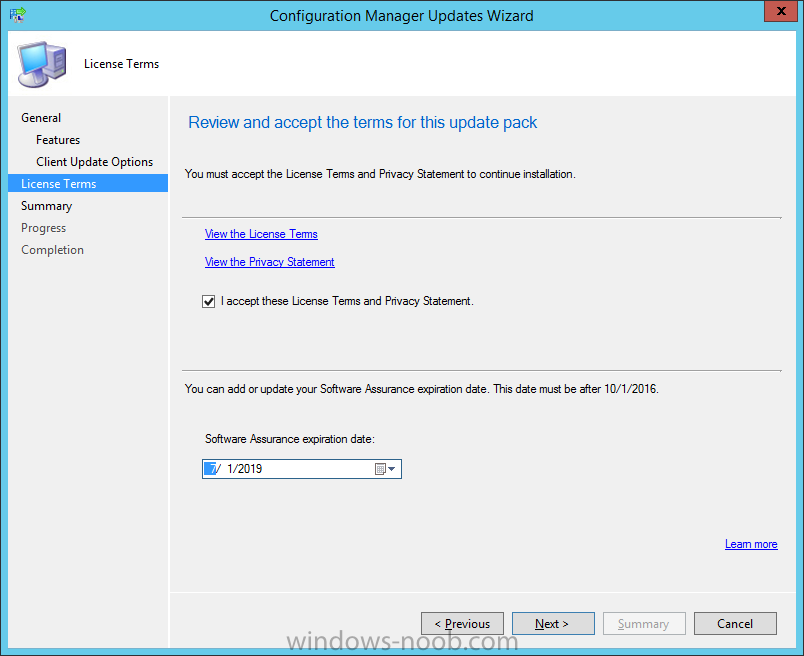
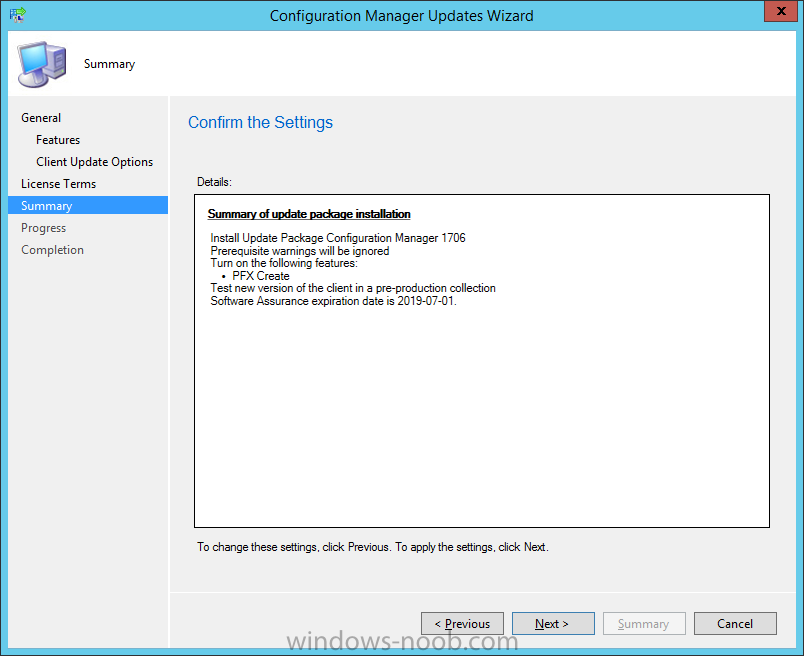
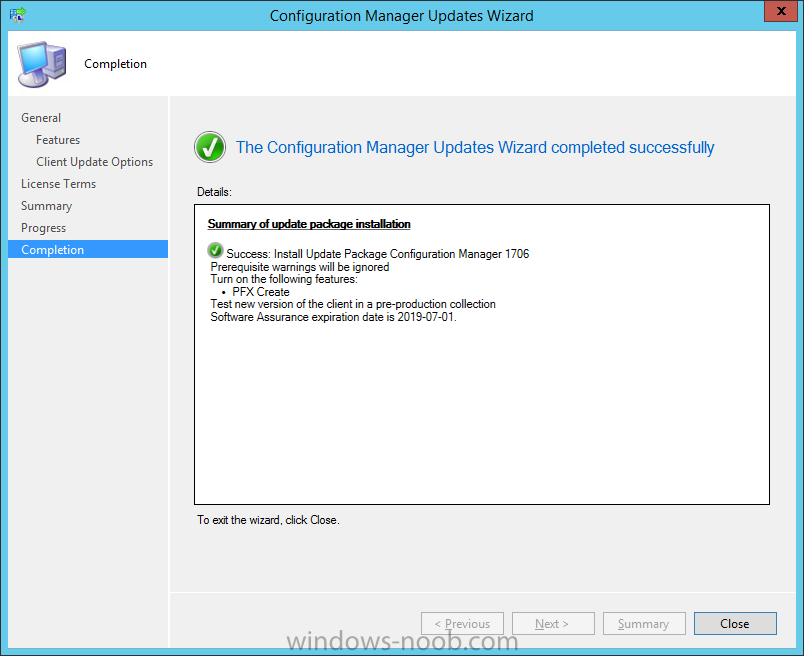
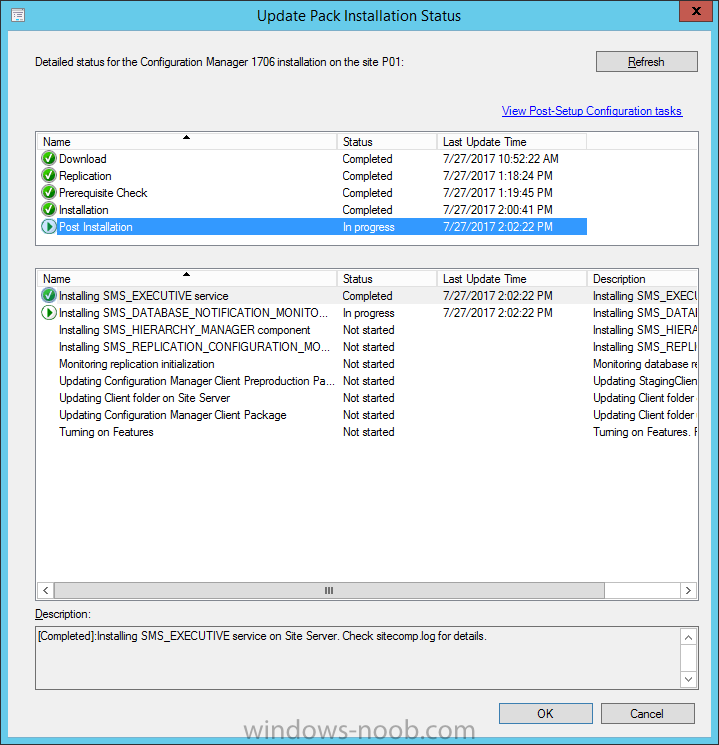
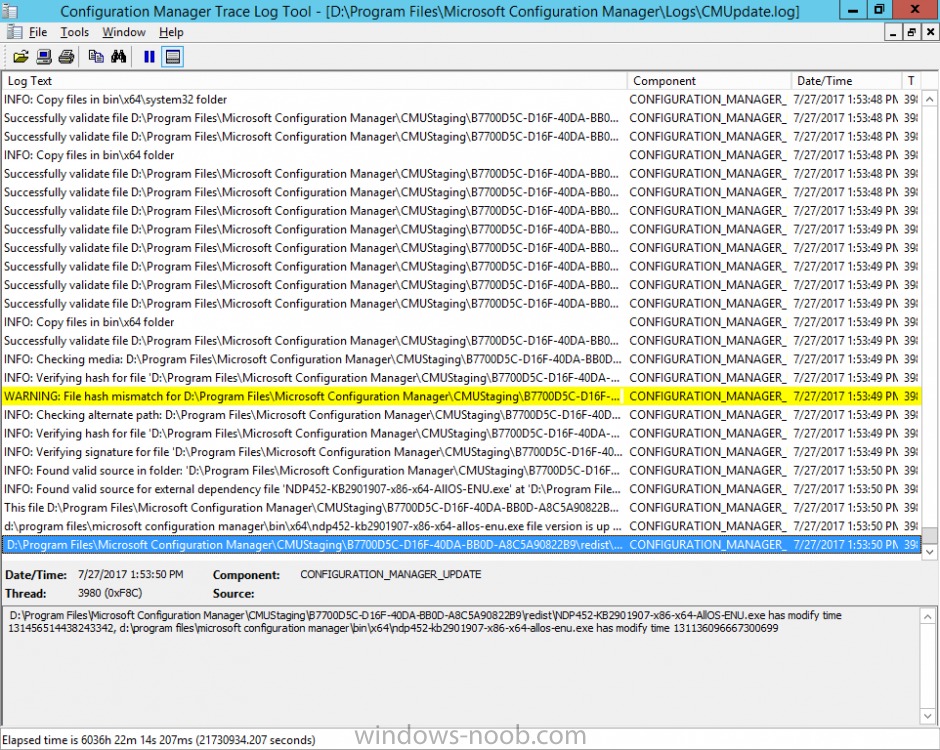
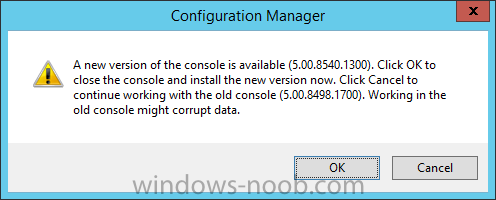
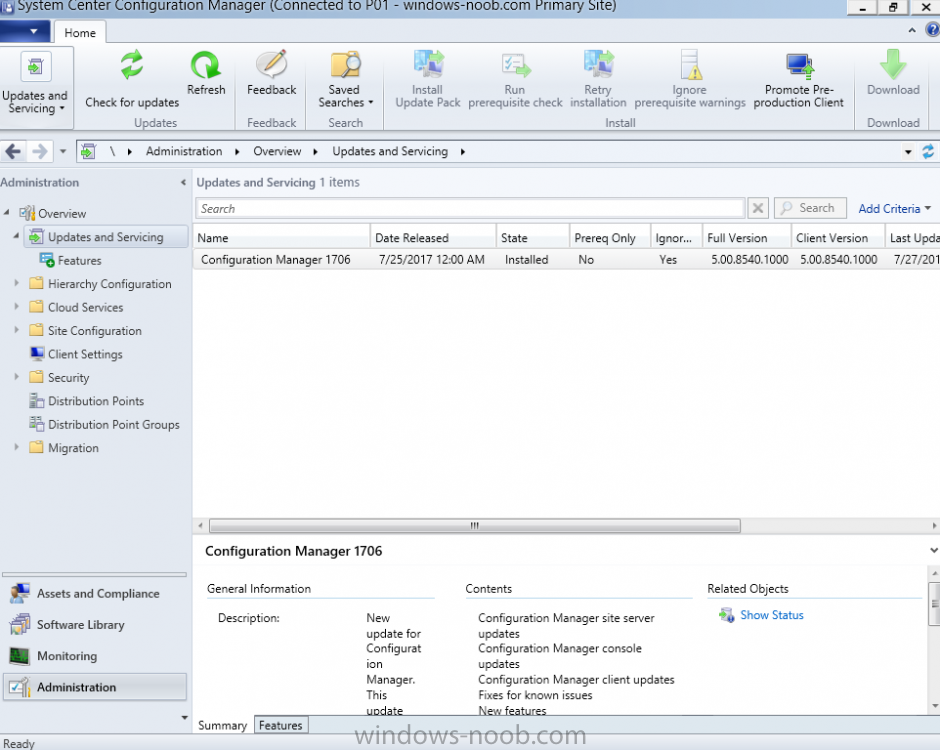
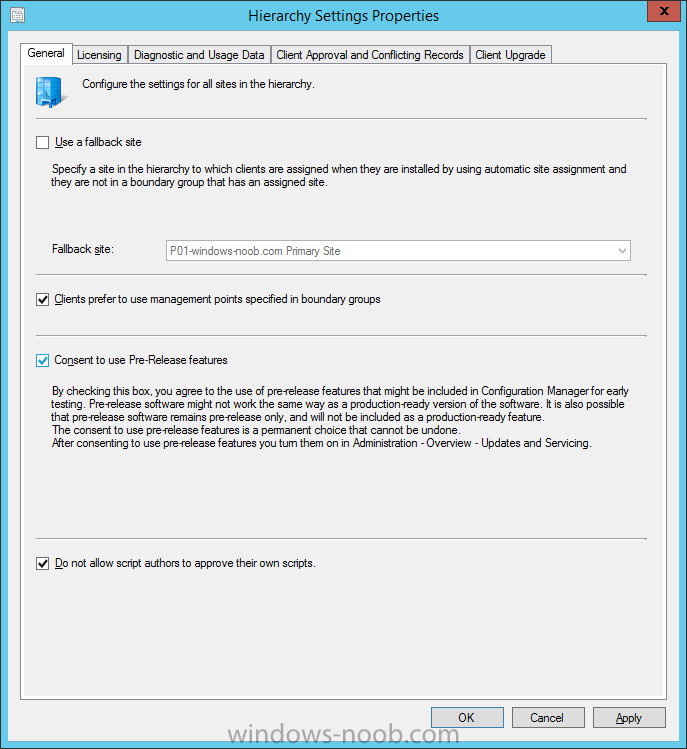
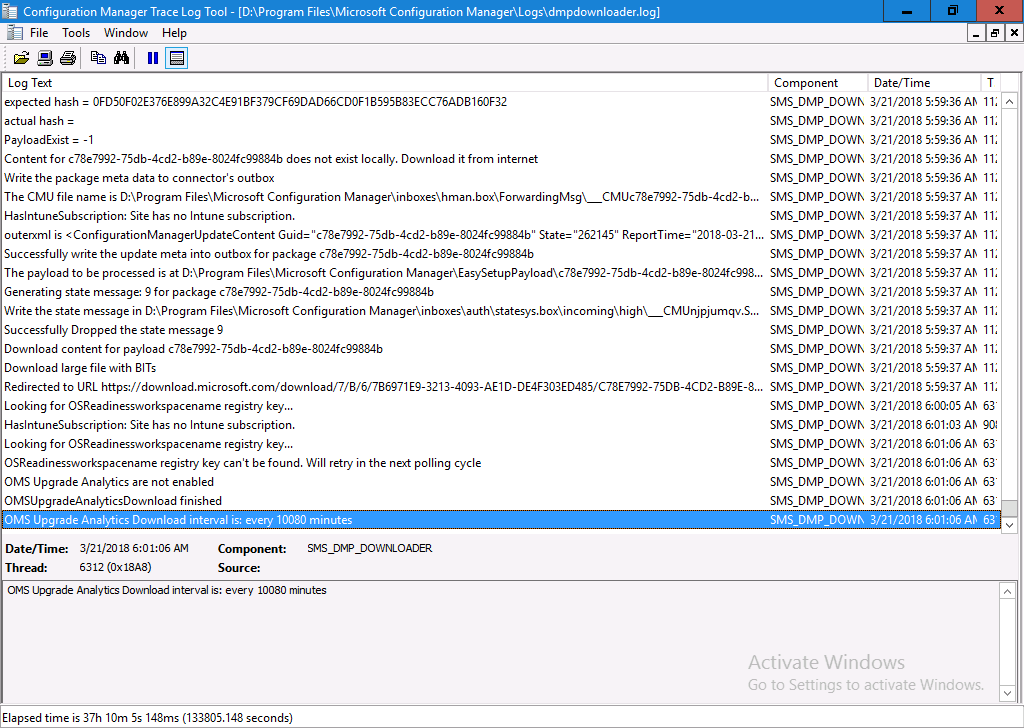
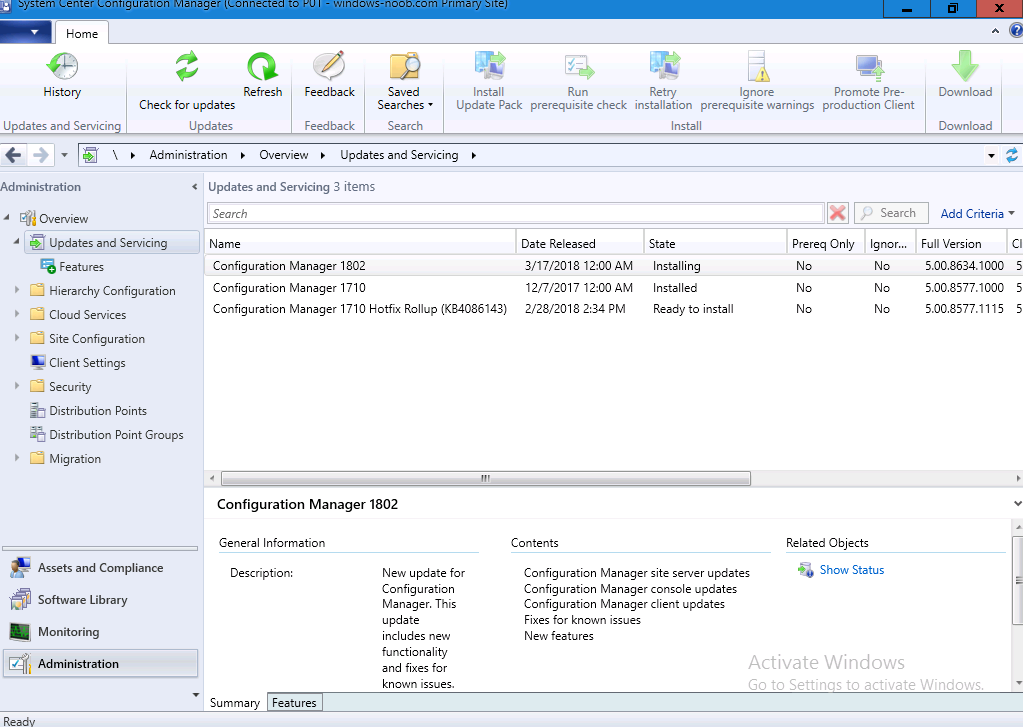
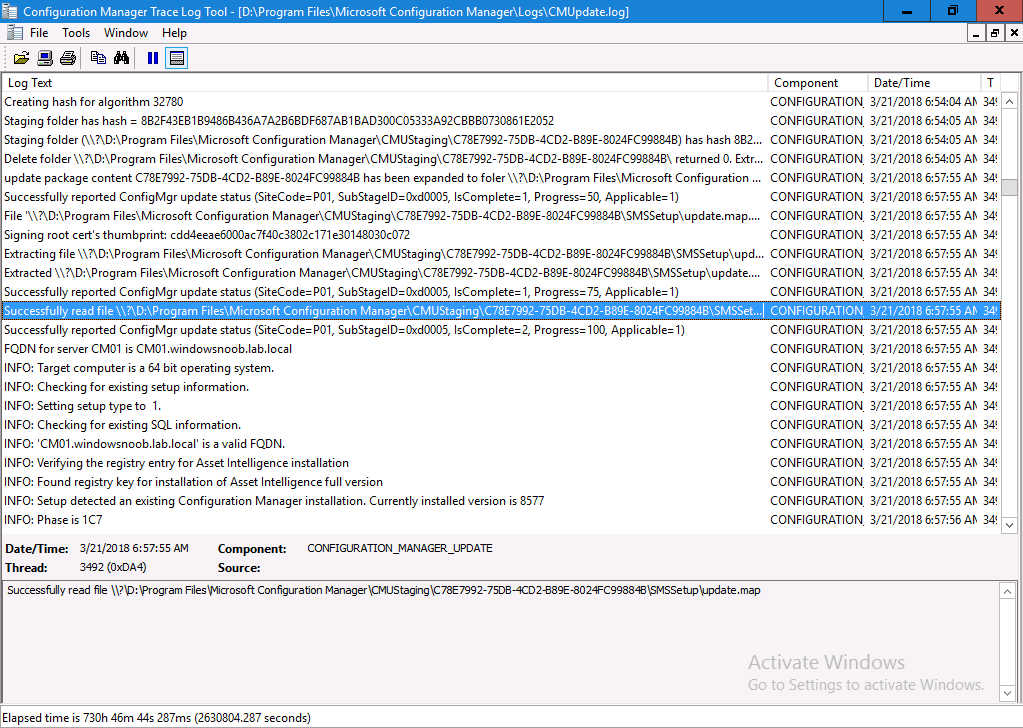
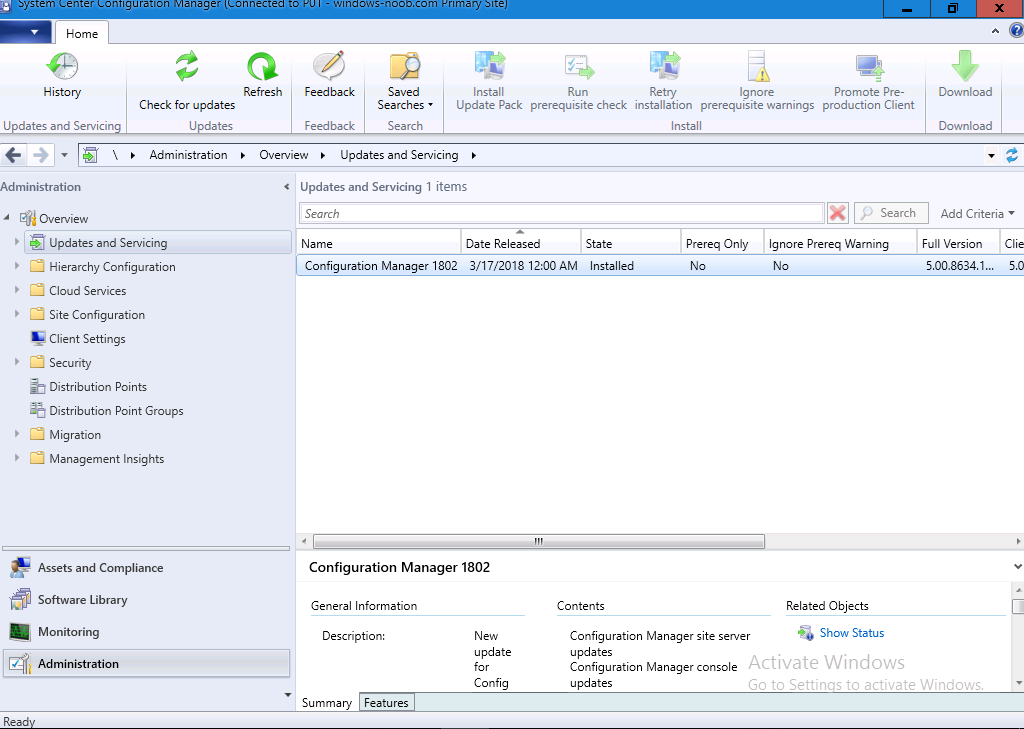
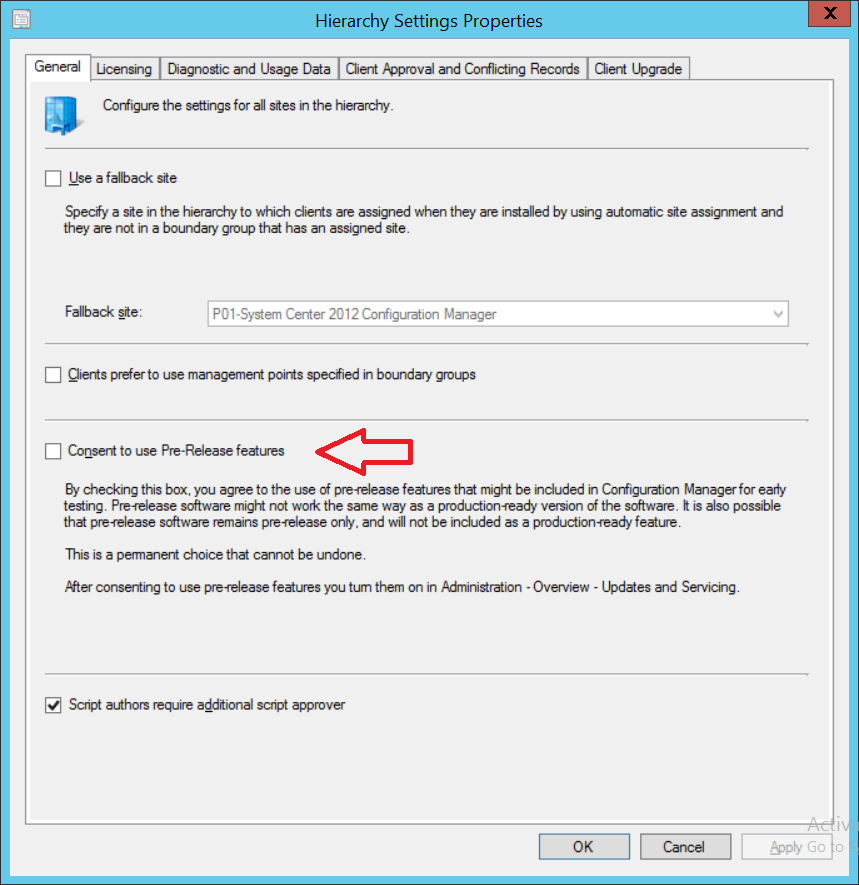
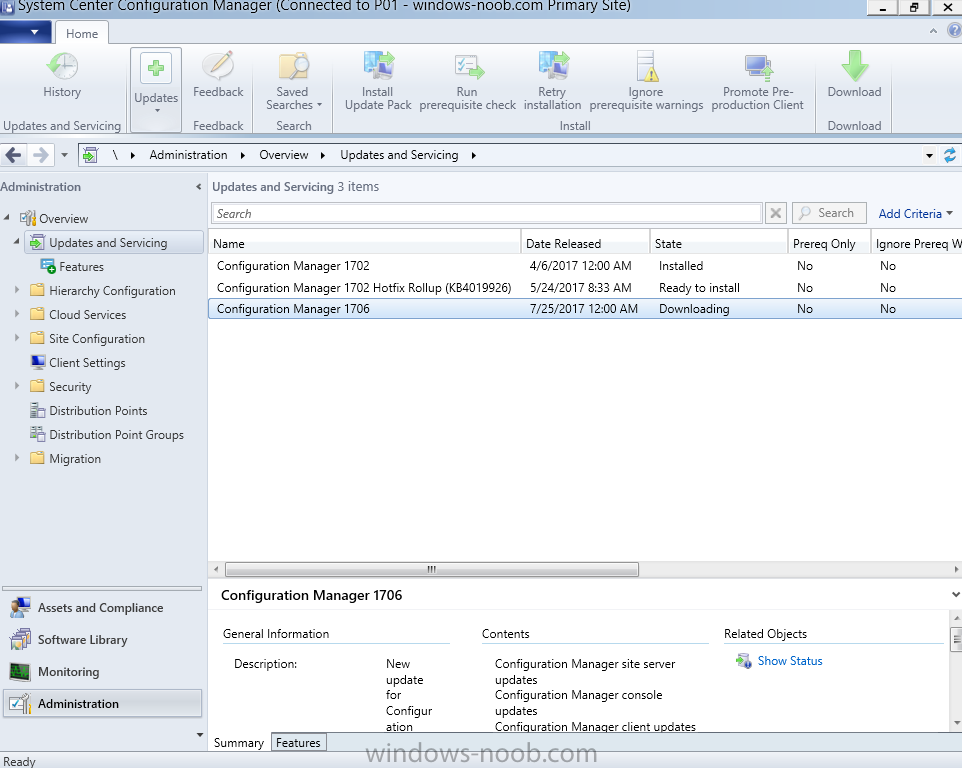
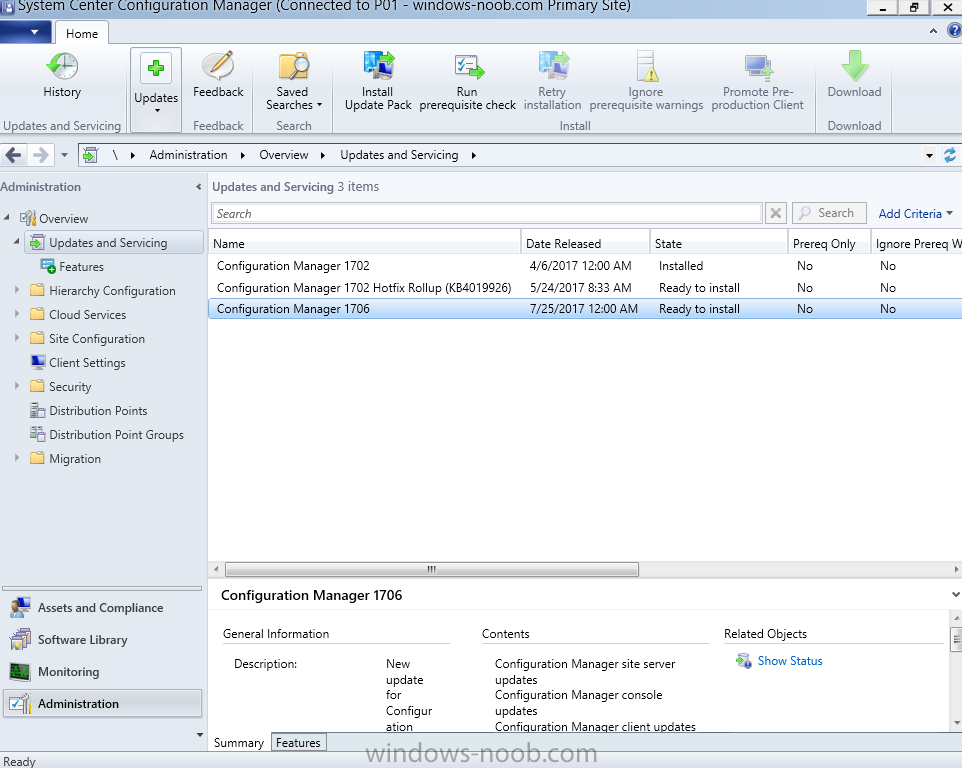
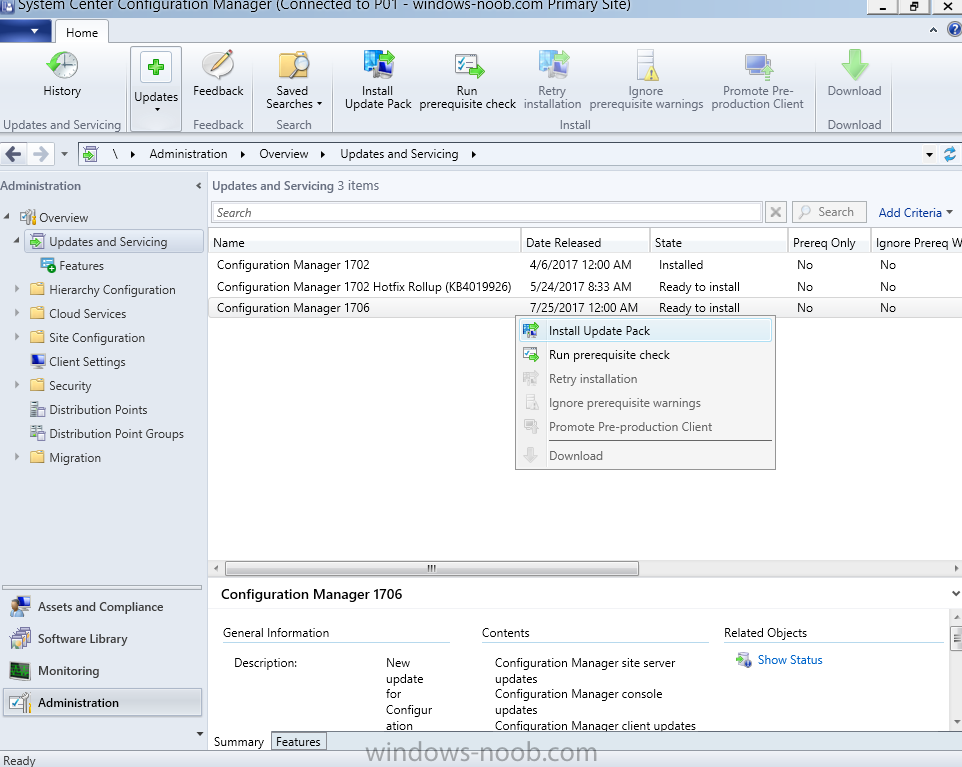
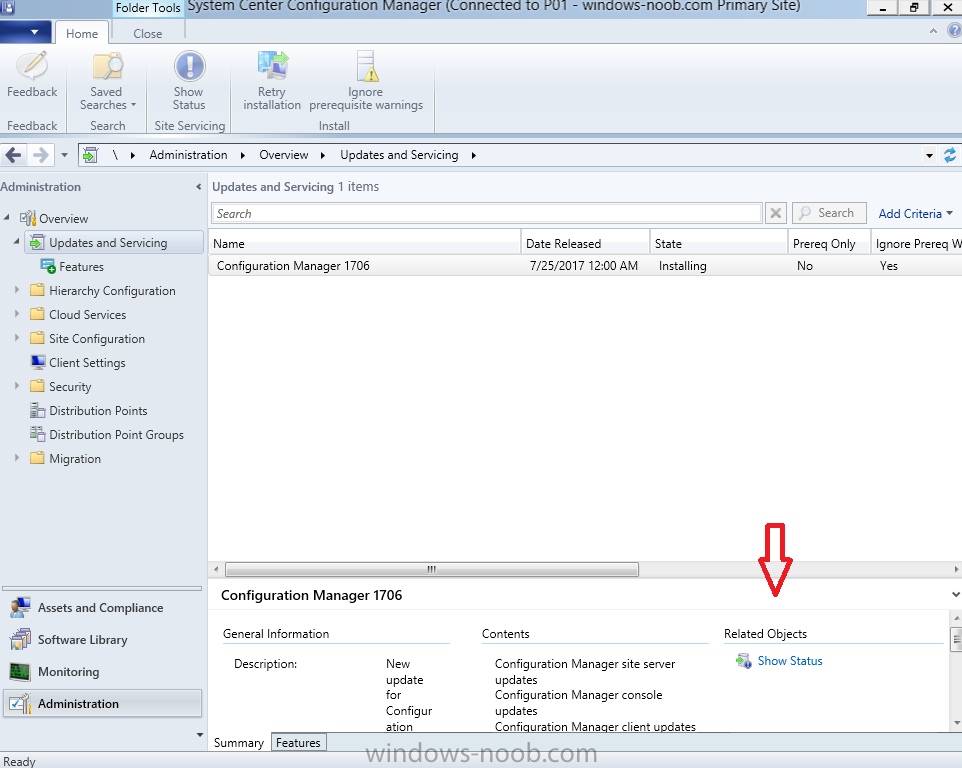
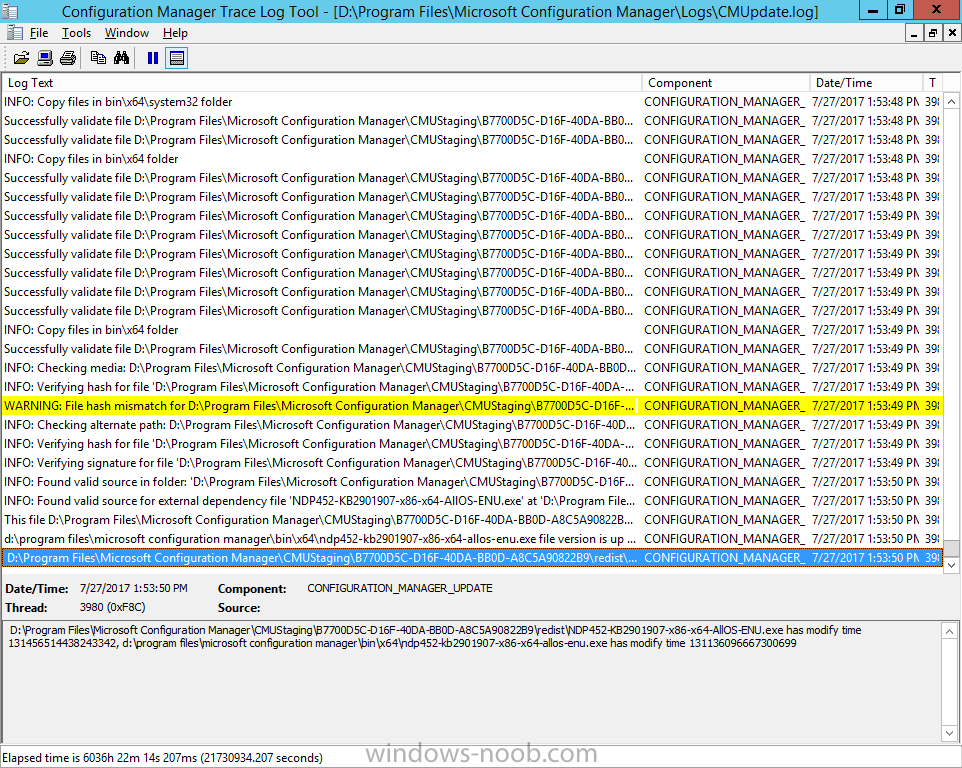
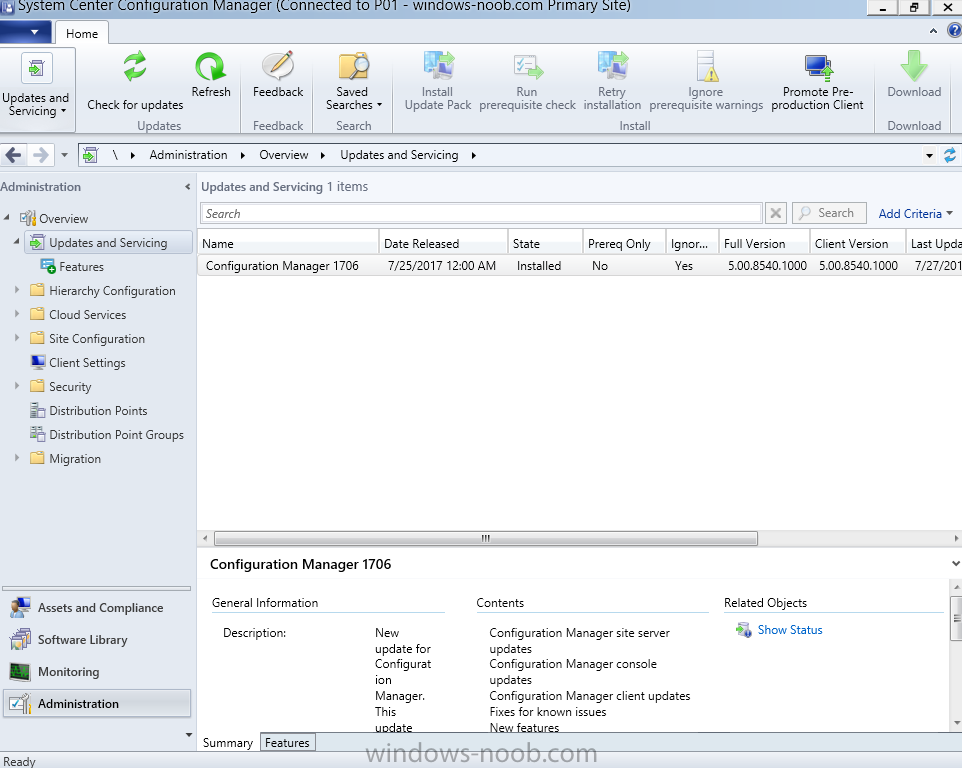
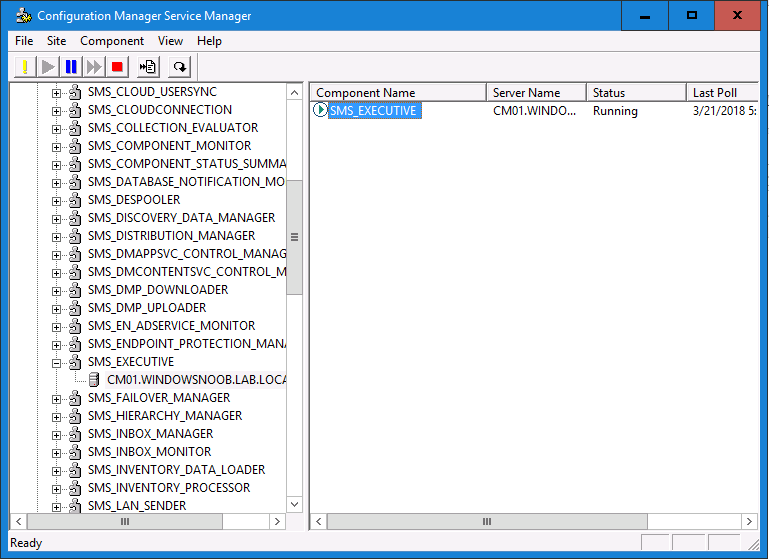
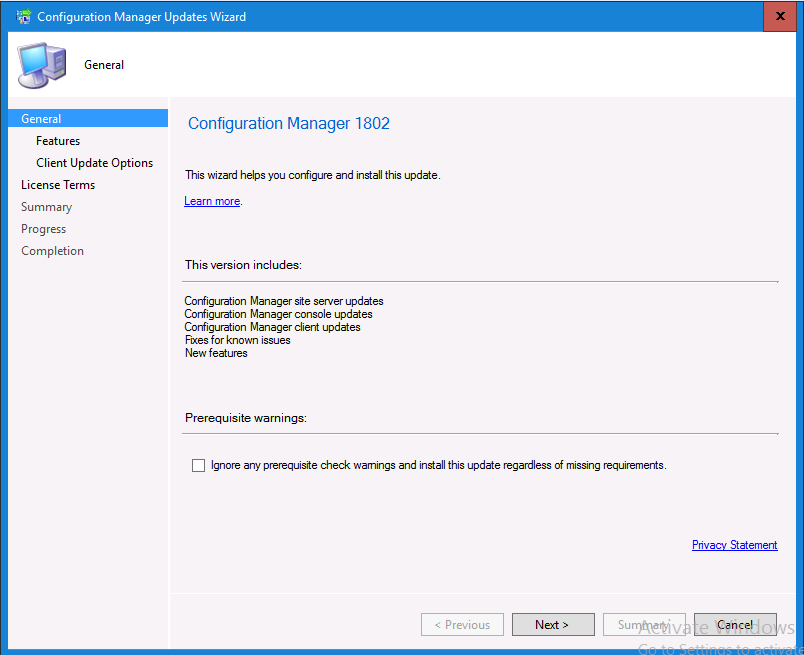
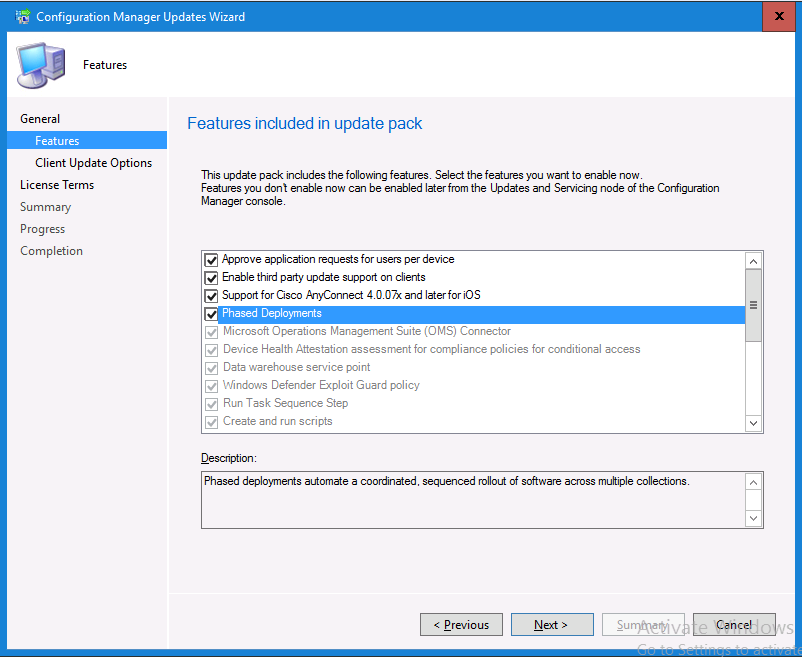
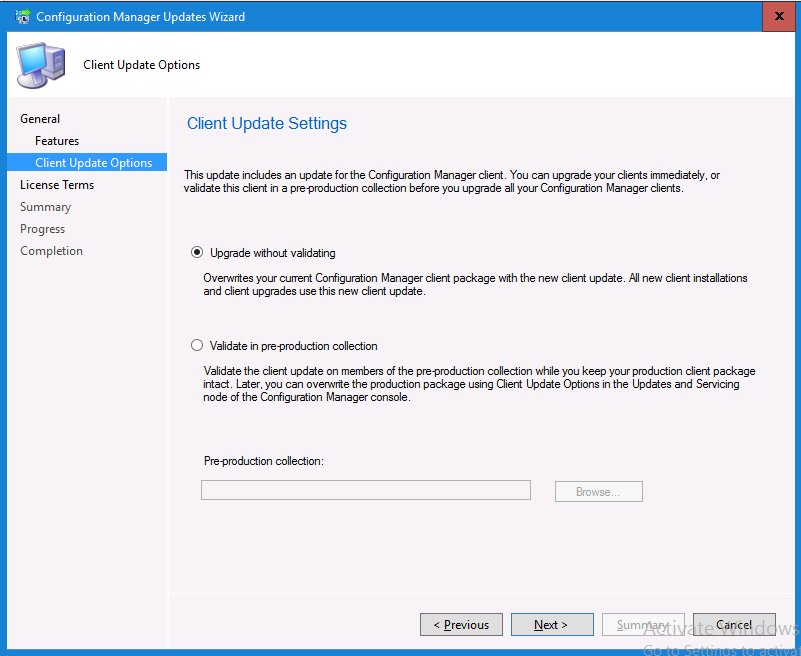
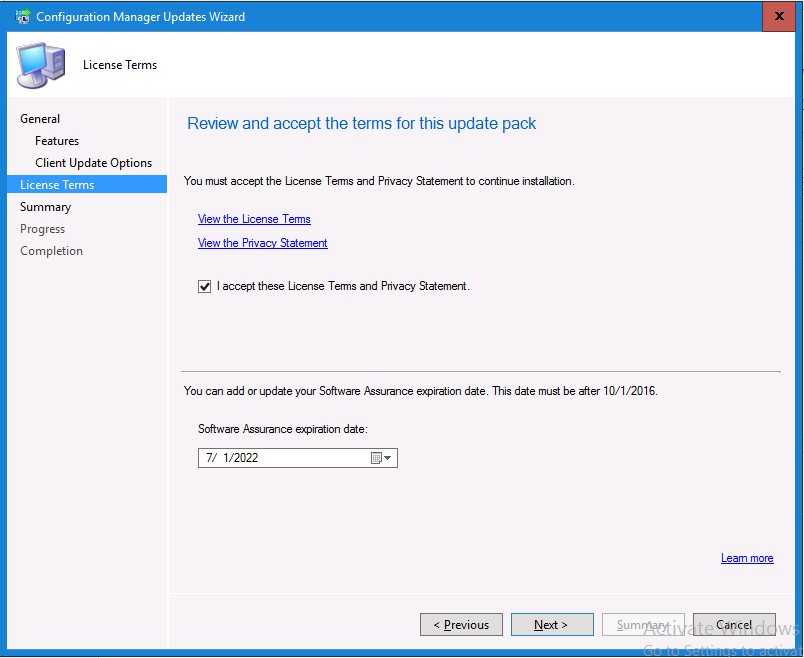
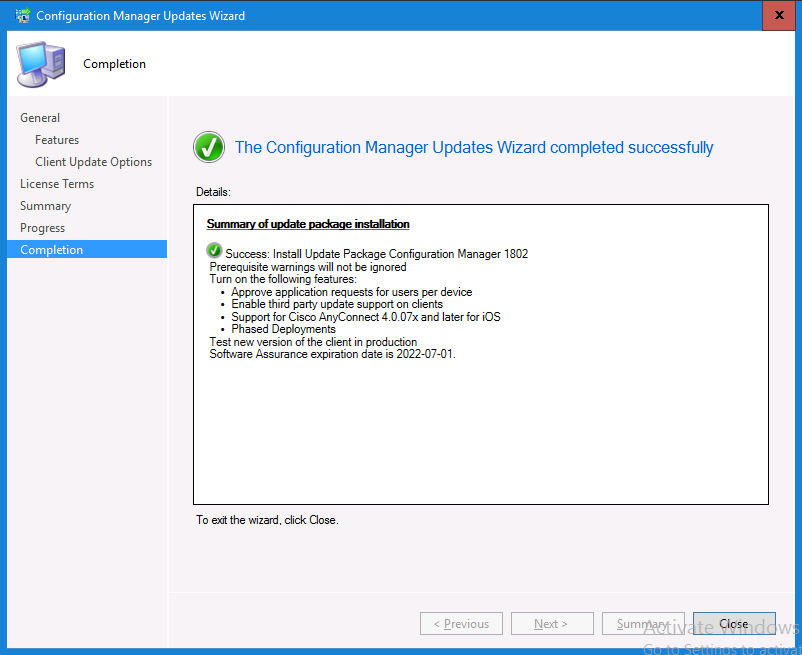
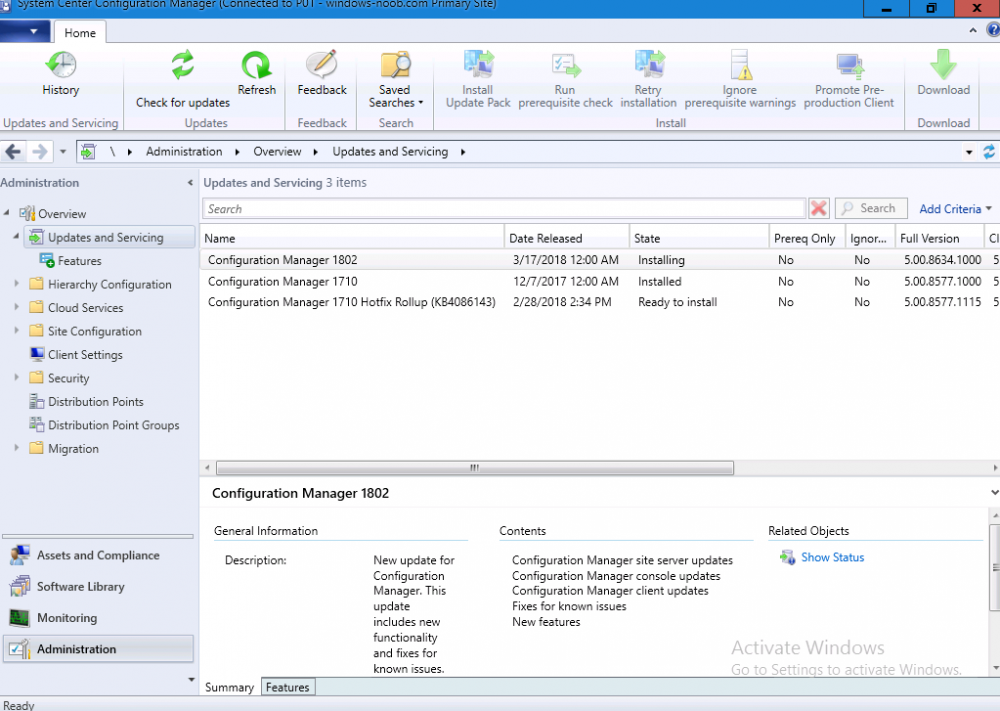
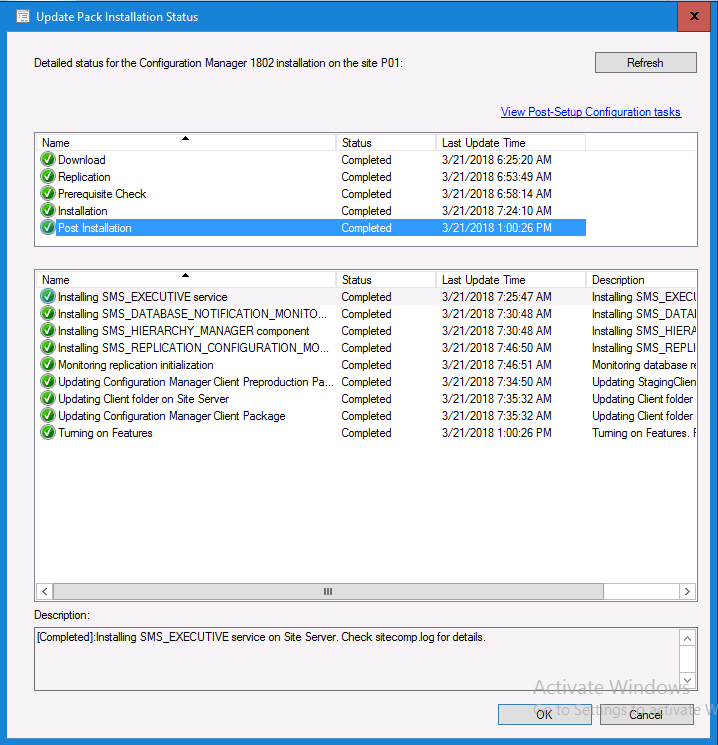
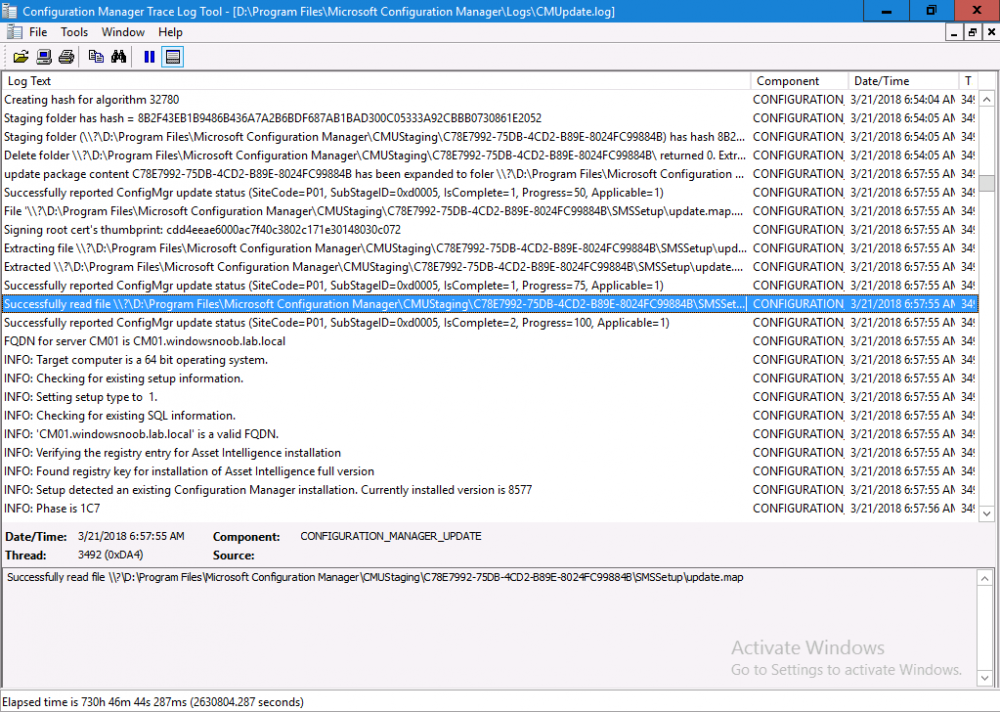
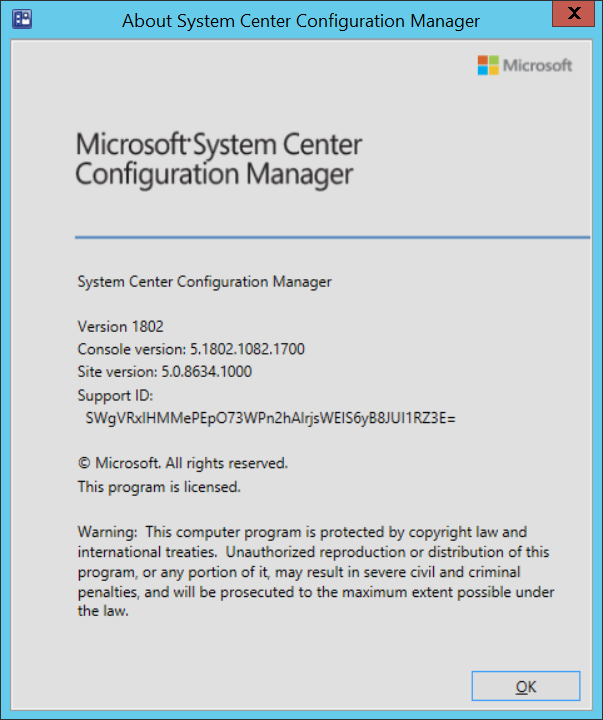
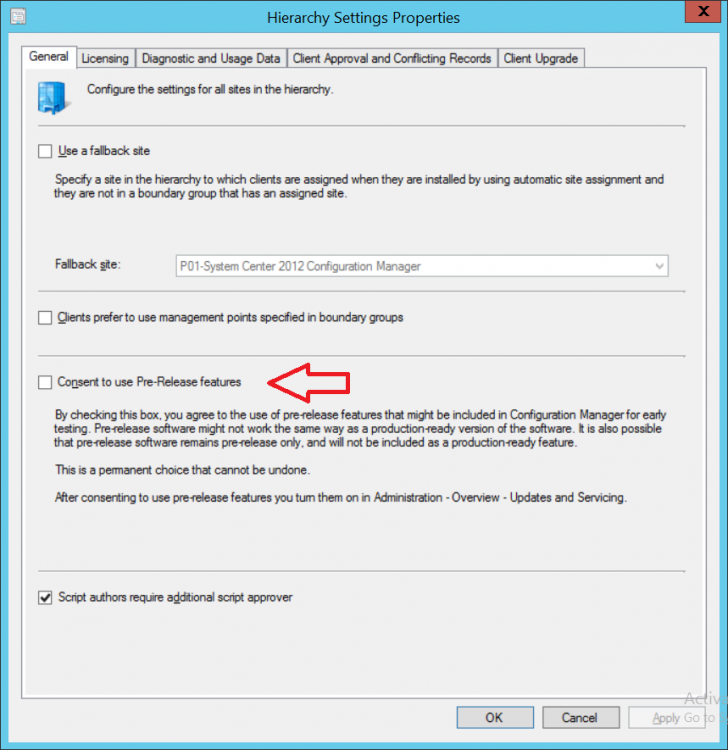
Introduction Today (in Seattle WA) Thursday the 22nd of March, 2018, System Center Configuration Manager (Current Branch) version 1802 was released. You can read the official announcement here and for a detailed list of what's new, please see the following blog post. The white elephant above is based upon an original graphic which I found here, thanks Djam ! Understanding the different SCCM releases There are two main branches of Configuration Manager currently available, Current Branch and Technical Preview. System Center Configuration Manager (Current Branch) is designed for use in production environments, for managing anything from relatively small to very very large Enterprises, whereas System Center Configuration Manager (Technical Preview) is for lab testing environments only and is limited to 10 clients. The Technical Preview releases are released monthly, and contain the latest and greatest features that are being trialed in the product, and usually these new features are the result of feedback from uservoice. Current Branch releases on the other hand are released only a few times per year and contain stable, tested features that are mature enough to release into production environments. Note: You cannot upgrade from a Current Branch to Technical Preview or vice versa, they are two distinct different branches. The following versions have been previously released since Microsoft moved to the Current Branch release cadence for Configuration Manager: Source Microsoft. A note about Baseline versions Baseline versions are versions of Configuration Manager that you can use to perform a clean install of Configuration Manager or when upgrading a supported version of System Center Configuration Manager 2012 hierarchy to Current Branch. Baseline versions are available for download in the Microsoft Volume License Service Center. As System Center Configuration Manager (Current Branch) version 1802 is now the new Baseline, you should it for all new installs (or applicable upgrades) until the next Baseline version is released. Note: Even though 1802 is listed as a baseline version here, it is not yet available for download on MVLS (as of 2018/3/25). Usually it takes a few weeks to get the new build media in place, so until that happens you can continue to use the 1702 baseline media for new installs and supported upgrades. Upgrading to 1802 Current Branch In a previous post you used PowerShell scripts to install System Center Configuration Manager (Current Branch) version 1702. This post will focus on upgrading from one current branch version to version 1802. This post assumes you are running a minimum version of 1702 of System Center Configuration Manager (Current Branch). If you have a hierarchy containing a CAS and one or more Primaries, then you must upgrade the CAS first before upgrading the Primary site servers. Note: Before upgrading, please review the following checklist to verify you are ready for the update. Fast ring versus Slow ring Do you want it now or later ? If you want it right now then you have the choice of getting the release immediately using a method called the fast ring. The fast ring method uses a PowerShell script which you download from Microsoft. After running the PowerShell script, the upgrade will show up in the ConfigMgr console. Note: The fast ring method is usually only available for the first 2 weeks after a Current Branch release is released. If however you decide to wait a couple of weeks after the release is publicly available, then the upgrade will be released to the slow ring and at that point it will show up in the ConfigMgr console for all Current Branch hierarchies without the need for running any PowerShell script. If you want to use the Fast Ring, download the PowerShell script and run it to self-extract to FastRingScript_1802. Once extracted, start an Administrative PowerShell command prompt in that folder and from there use the following command (where CM01 is the <SiteServer_Name | SiteServer_IP> of your CAS or standalone Primary site server). .\EnableFastUpdateRing1802.ps1 CM01 Next, open the ConfigMgr console and find Updates and servicing in the Administration node. Click on Check for Updates in the ribbon, followed by Refresh. After a few minutes you should see that Configuration Manager 1802 is listed with a state of Available to download as shown below. Note: If the upgrade does not show up in the console even after refreshing the view, you can restart the SMS_Executive component in Configuration Manager Service Manager in the Monitoring node of the console or alternatively restart the Configuration Manager server. After some time the update will automatically start downloading at which point you can open the dmpdownloader.log using CMtrace to keep track of things. Once it has completed downloading, the update pack will be listed in the ConfigMgr console with a state of Ready to Install. You may need to click refresh in the ConfigMgr console to update the view. Installing the Update pack Right click on the update and choose Install Update Pack. when the Wizard appears, make your choice for pre-requisites and click next. review the features included in this update pack , and make selections if you wish, you can always add them later in the Console. Note: You'll also notice lots of Pre-Release features that are greyed out, to turn them on see the steps after upgrading the console the bottom of this guide. Before clicking next at the Client update settings please see this post accept the EULA and configure the software assurance expiration date and continue through until the wizard is complete. Monitoring the update In the console, the update pack state will change to Installing (refresh the console view to see this). Clicking on Show Status will give you detailed info about the state the Installation is in, there are 5 distinct phases in the top pane: Download Replication Prerequisite Check Installation Post Installation Selecting a phase will highlight what state the update is in, including what (if any) problems it has. Logs, logs and more logs. During the upgrade you should monitor the following log files available in <drvletter>:\Program Files\Microsoft Configuration Manager\Logs, you can use CMTrace to do so. CMUpdate.log Hman.log These logs will detail the installation of the update pack. you should also pay close attention to the following log files present in the root of C:\. CompMgrProv.Log ConfigMgrPrereq.log ConfigMgrSetup.log After the update is complete, click Refresh in the console and you'll be reminded to update the ConfigMgr Console via a popup, the new version is 5.1802.1082.1700. Make sure to update your console as you cannot use the new features until you do. The observant among you will notice a change to the Console versioning. The new console version is 5.1802.1082.1700 versus the old console version (in my lab) which was 5.00.8577.1100. The new Console versioning works as follows: Major Minor Build Revision So that translates to... Major = 5 Minor = 1802 Build = 1082 Revision = 1700 Click OK to upgrade your ConfigMgr console, and after all is done you’ll see the 1802 version listed in the console. and clicking on about shows you Enabling Pre-release features If you want to use the Pre-Release features, then select the Administration node, select Site Configuration, Sites, Hierarchy Settings, and place a check mark in Consent to use Pre-Release features. After that, select Updates and Servicing, click on the Update Pack, select Features and in the right pane of the ConfigMgr console you'll be able to turn pre-release features on or off by right clicking and choosing Turn on or Turn off. Summary This release is packed with great features and new functionality and proves that the SCCM as a Service (SAAS) model is working. Not only is it working but quick adoption by Enterprises large and small is proof indeed that they like and trust the direction that ConfigMgr is evolving towards. If you are not on Twitter yet then get on it, and Tweet a thank you to David James (@Djammmer) and his Team for the amazing work they do. Recommended reading System Center: Configuration Manager - https://blogs.technet.microsoft.com/configurationmgr/ Checklist for updating to SCCM 1802 - https://docs.microsoft.com/en-us/sccm/core/servers/manage/checklist-for-installing-update-1802 What's new In System Center Configuration Manager (Current Branch) 1802 - https://docs.microsoft.com/en-us/sccm/core/plan-design/changes/whats-new-in-version-1802 Co-Management for Windows 10 devices - https://docs.microsoft.com/en-us/sccm/core/clients/manage/co-management-overview Log files in System Center Configuration Manager - https://docs.microsoft.com/en-us/sccm/core/plan-design/hierarchy/log-files


-
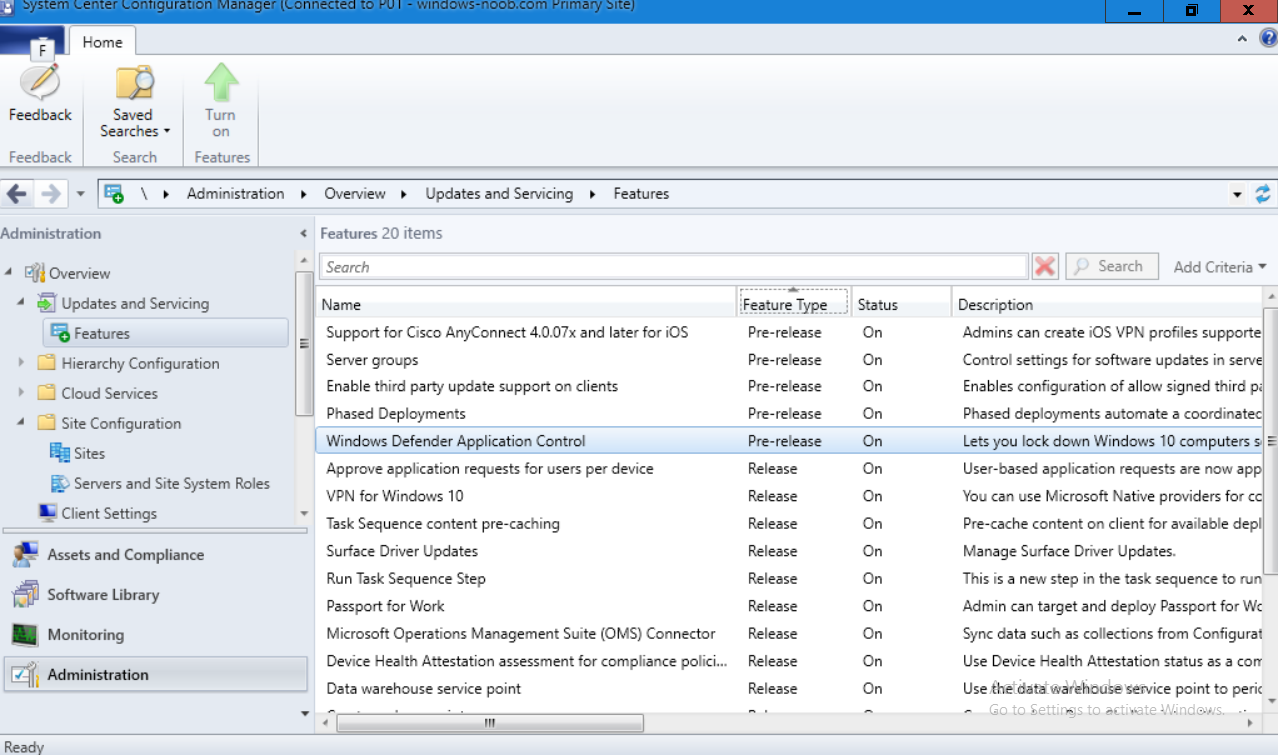
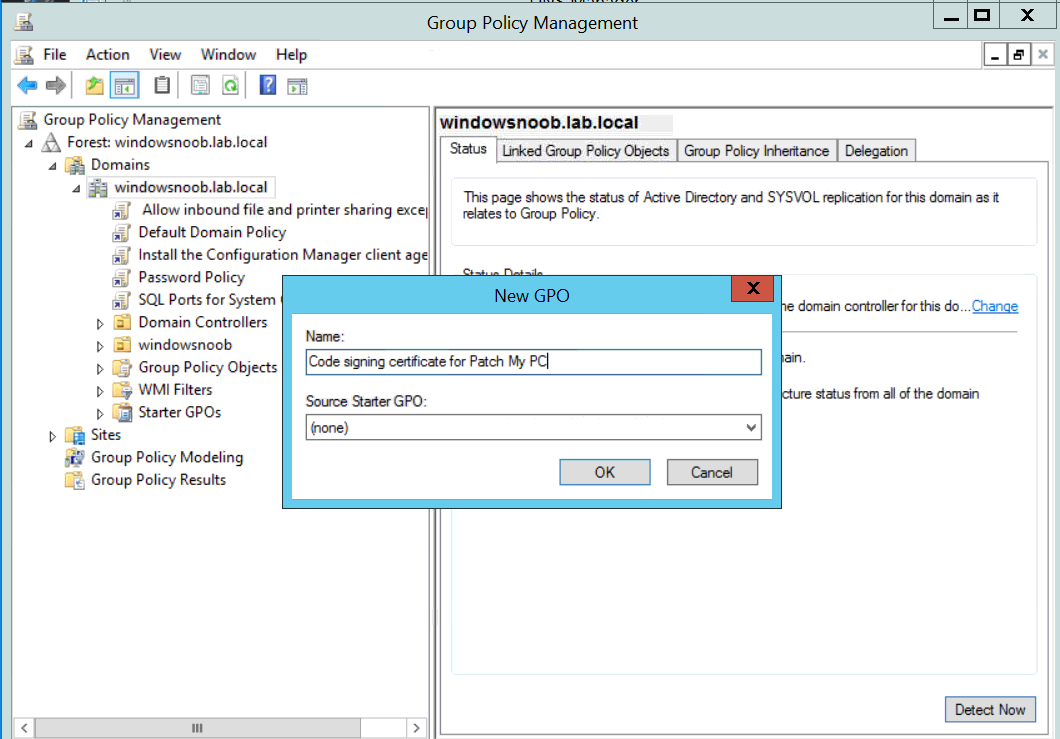
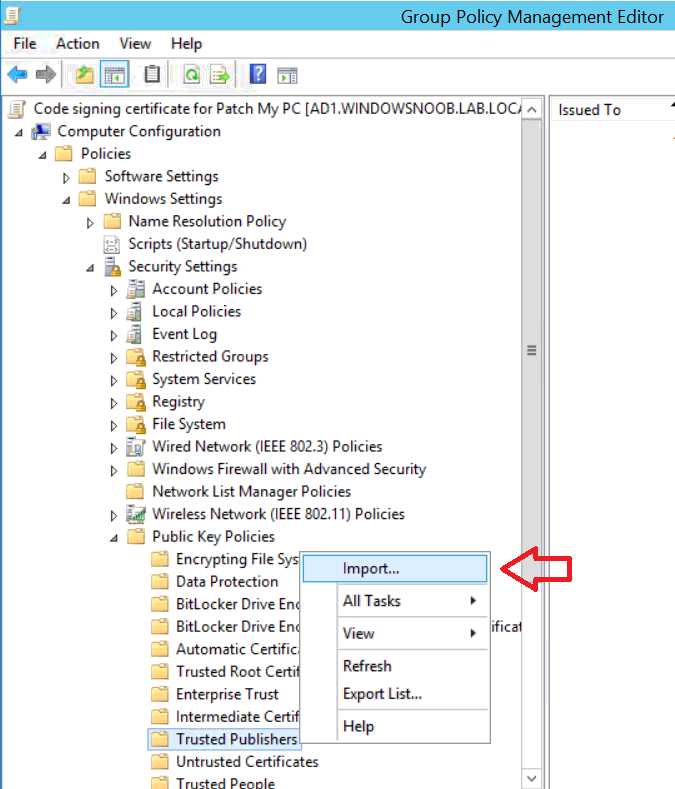
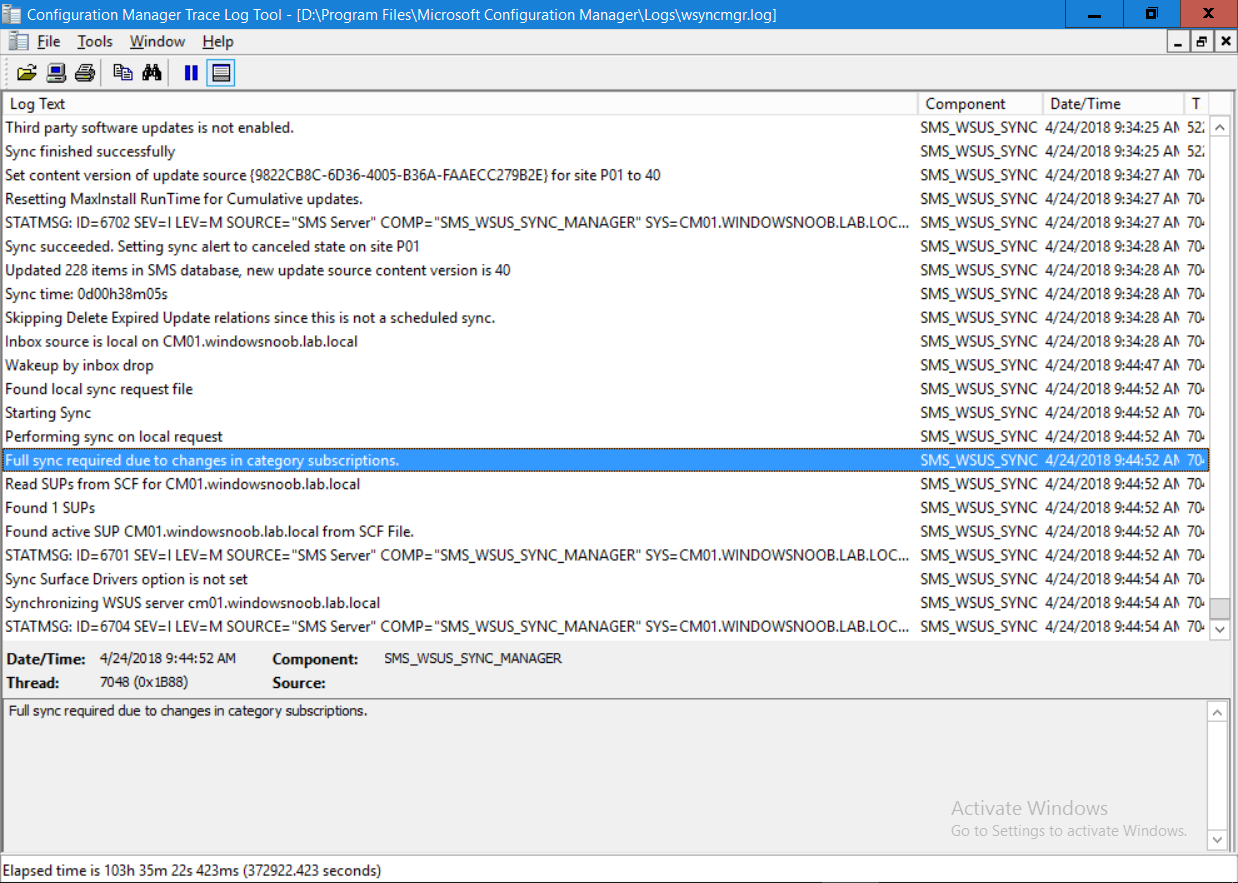
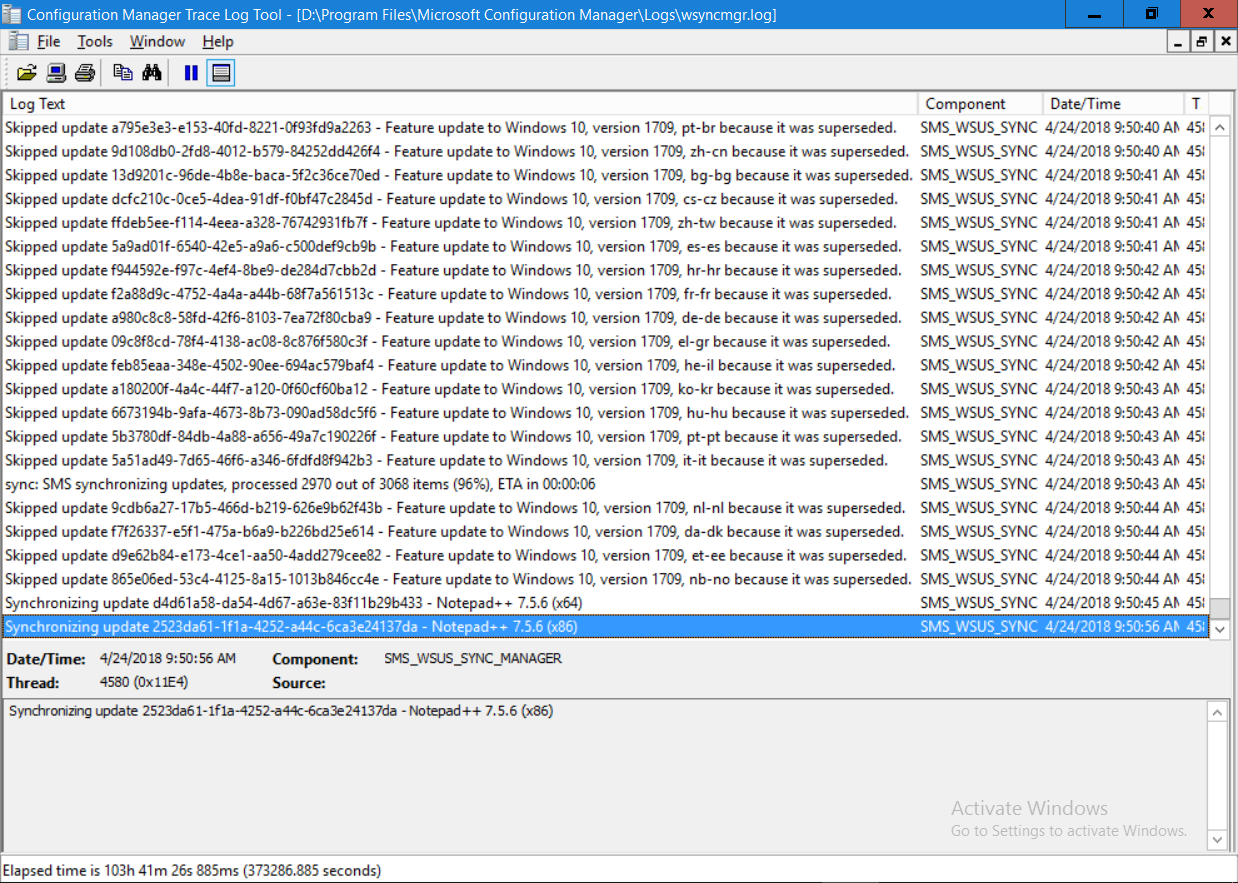
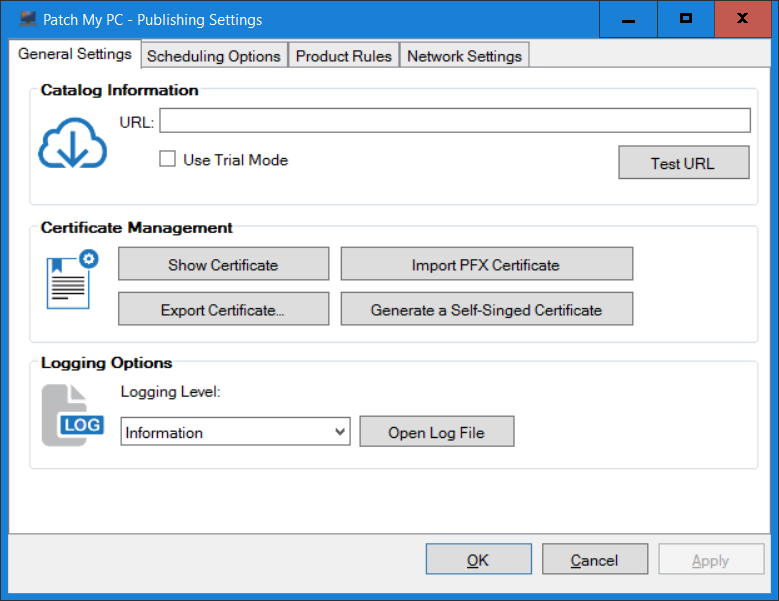
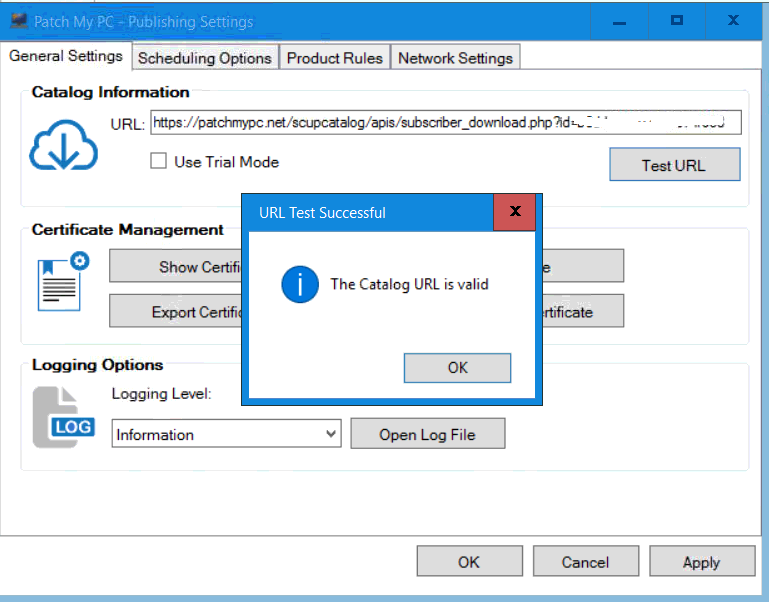
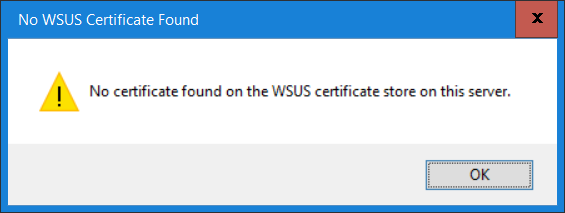
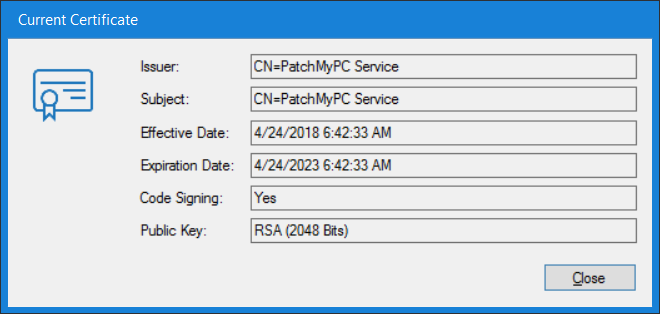
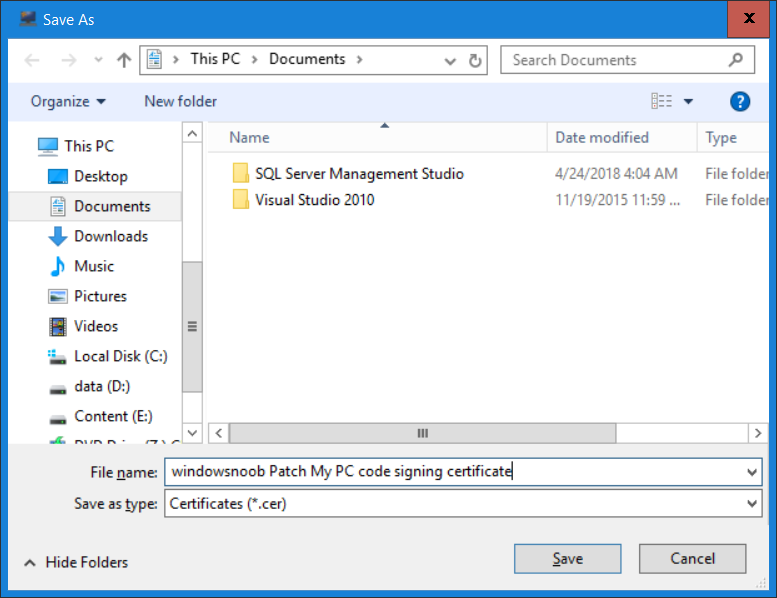
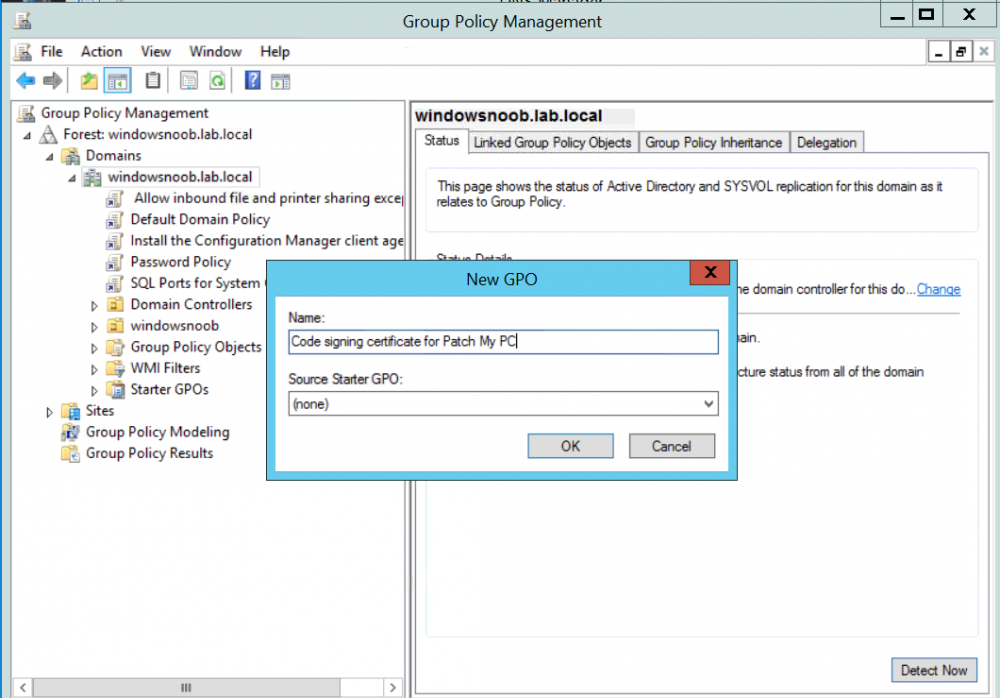
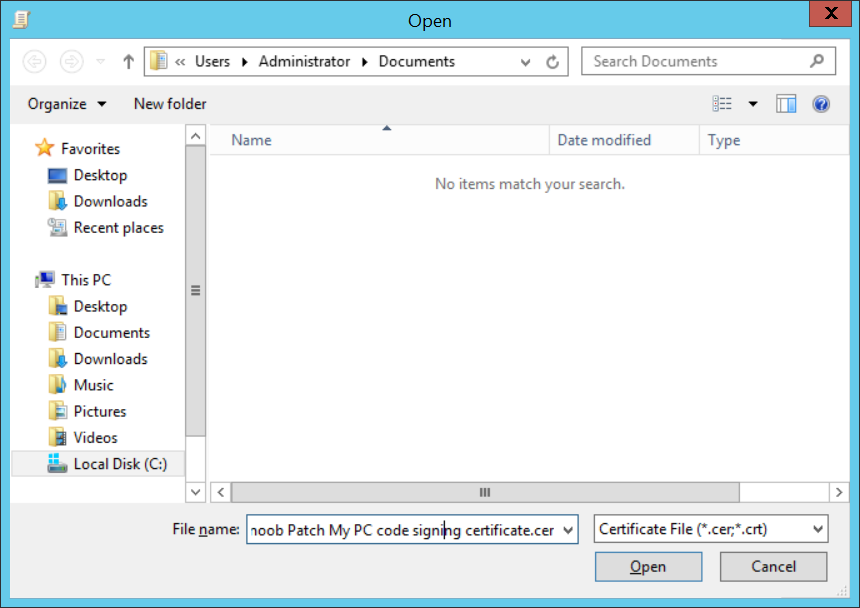
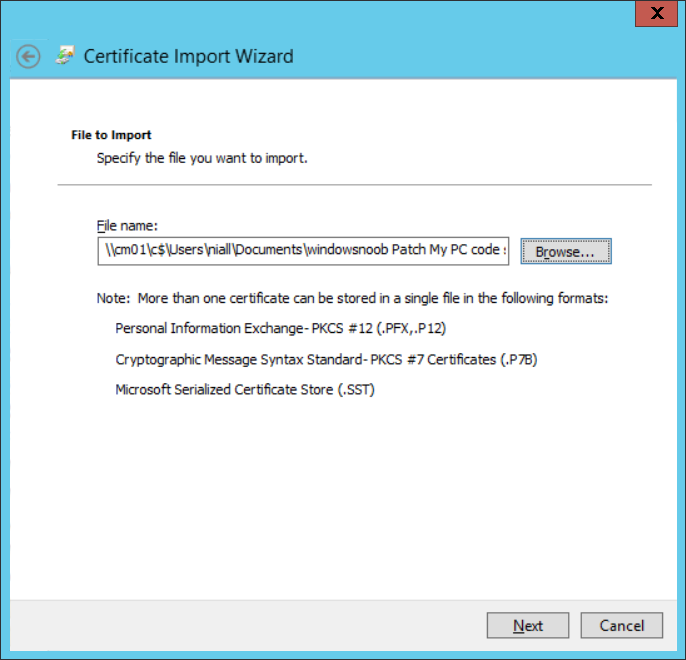
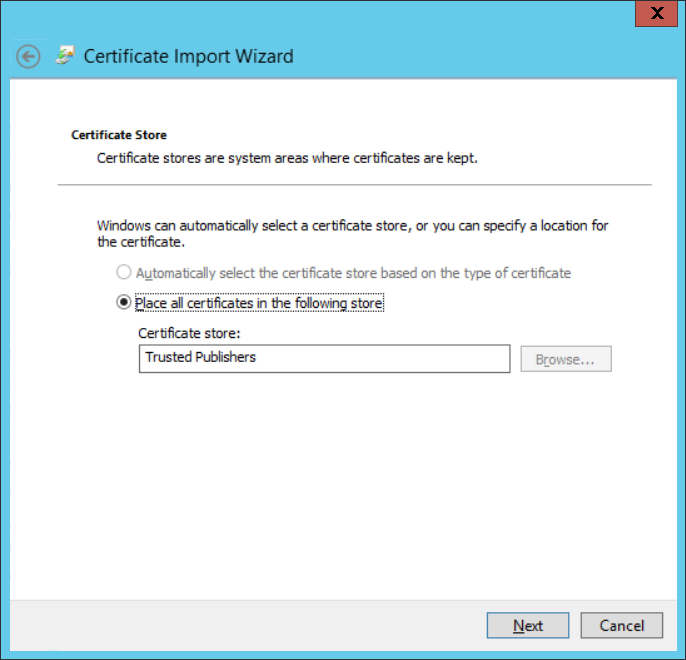
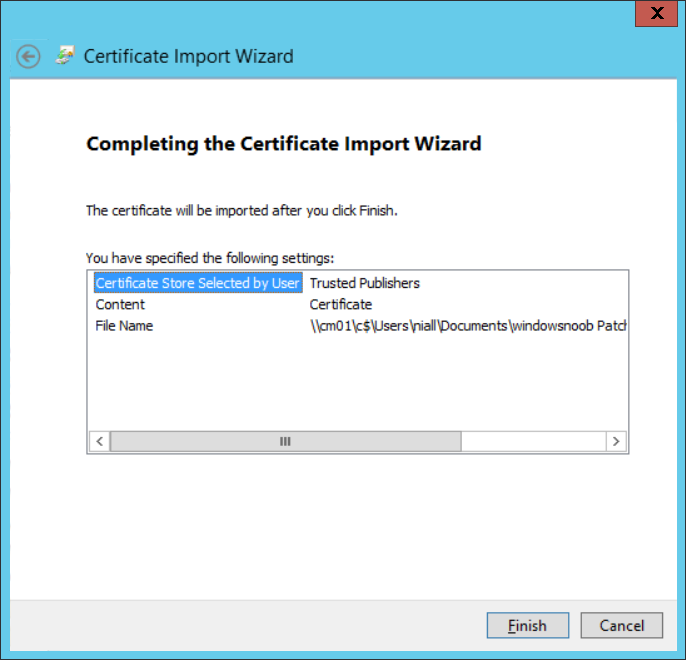
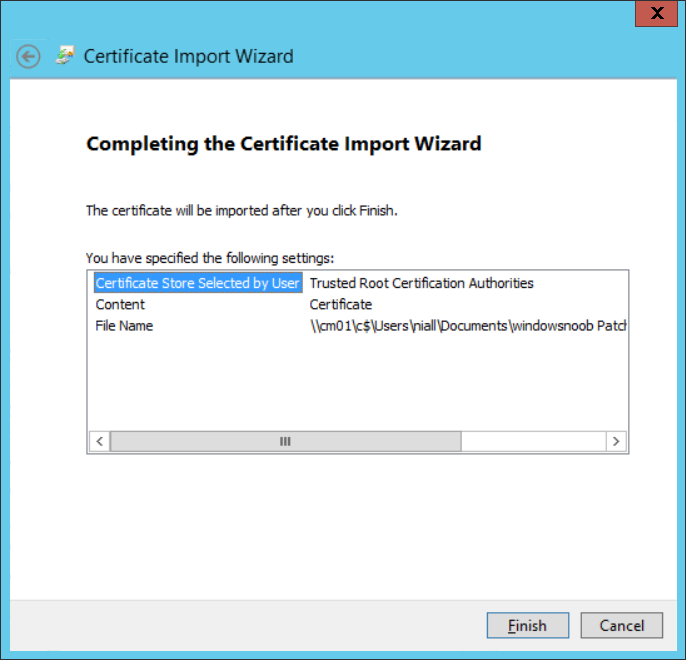
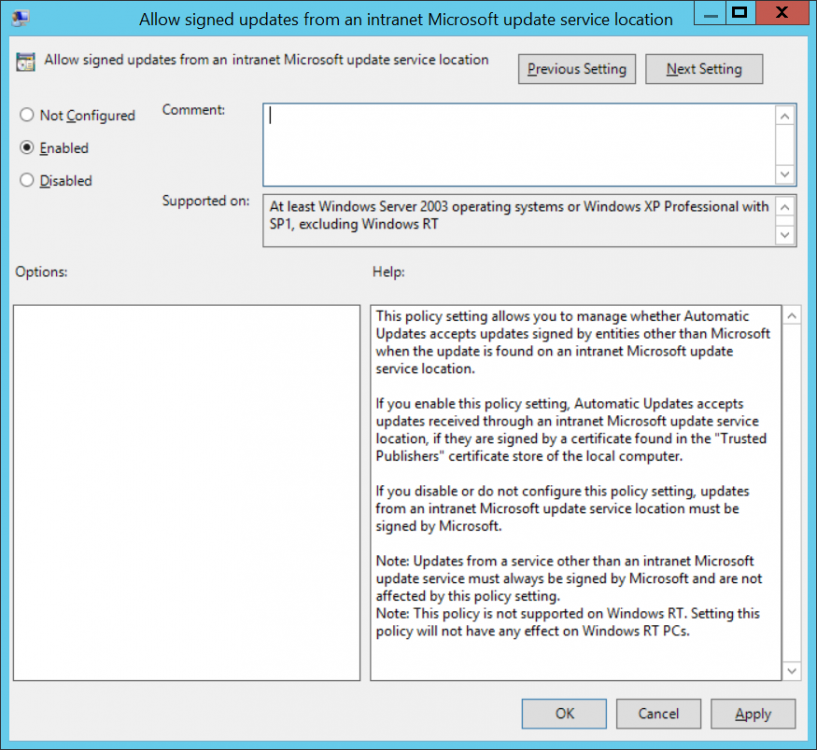
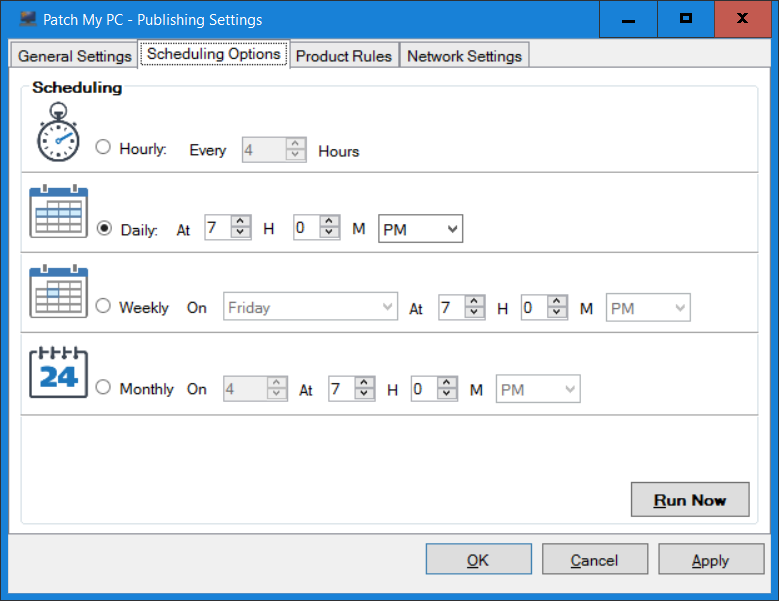
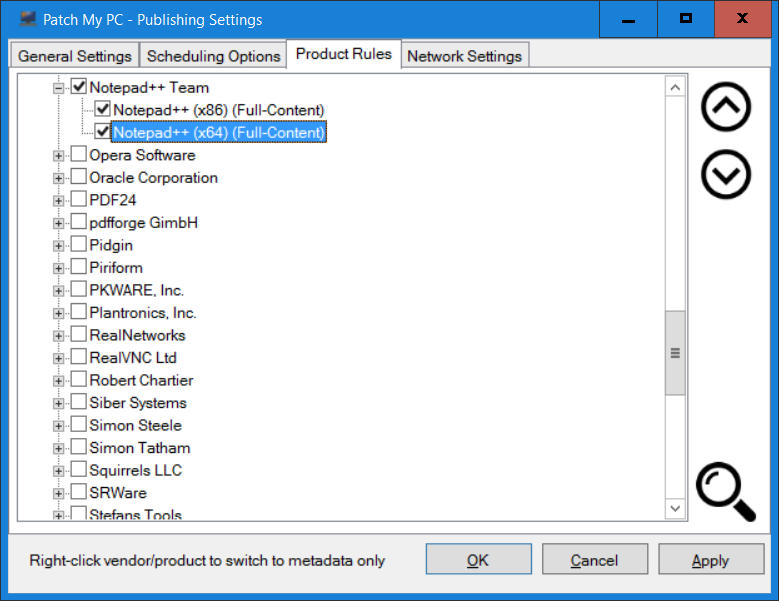
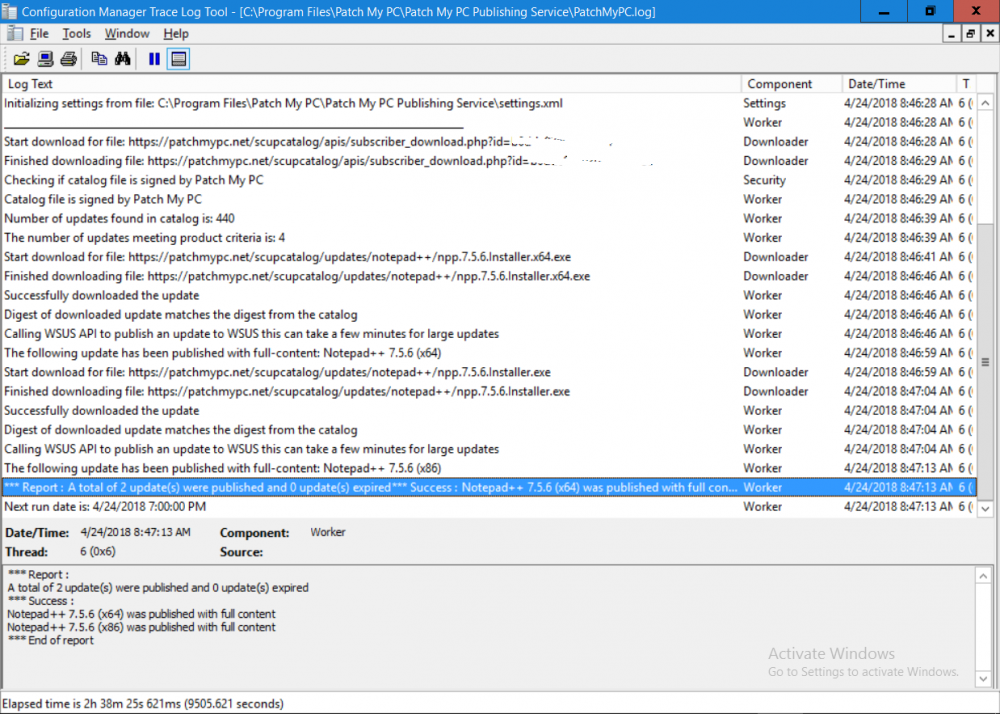
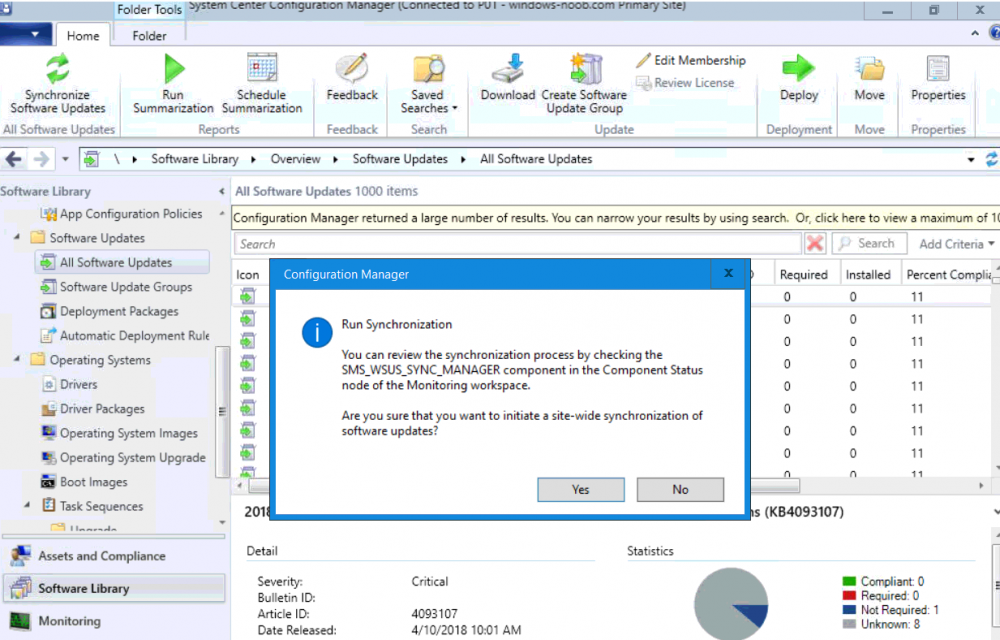
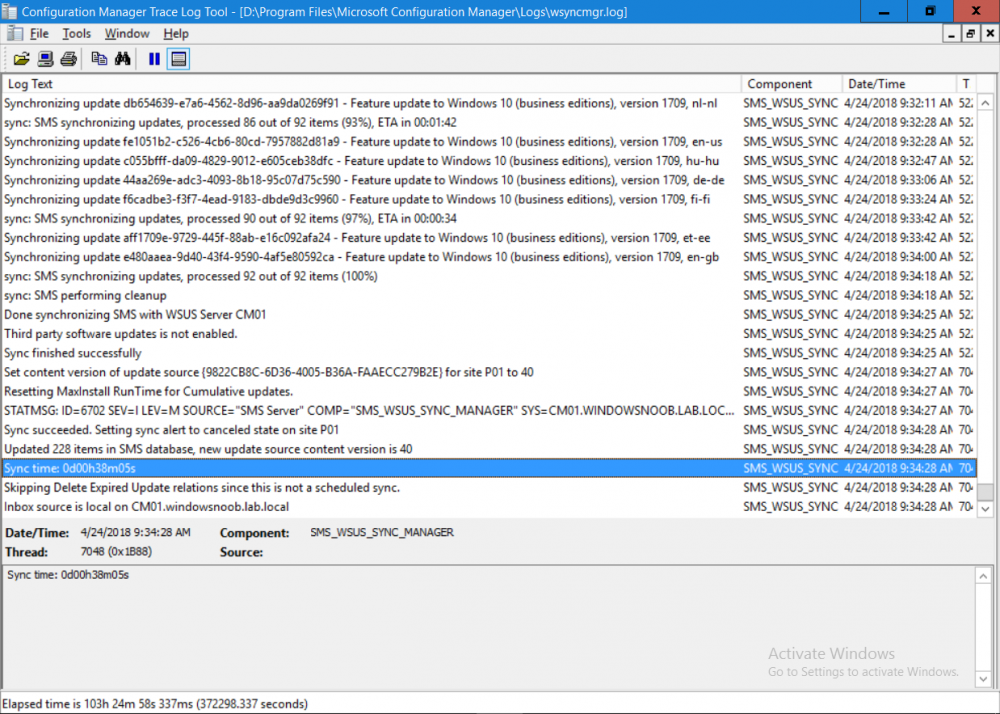
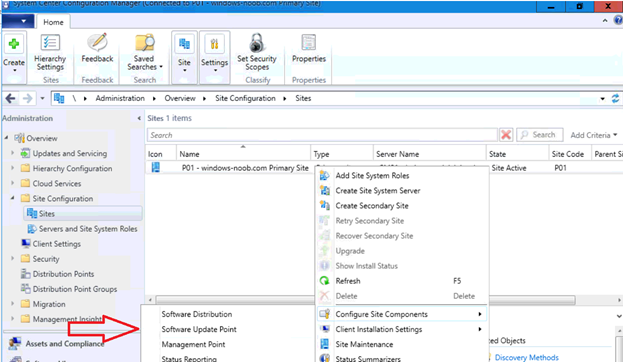
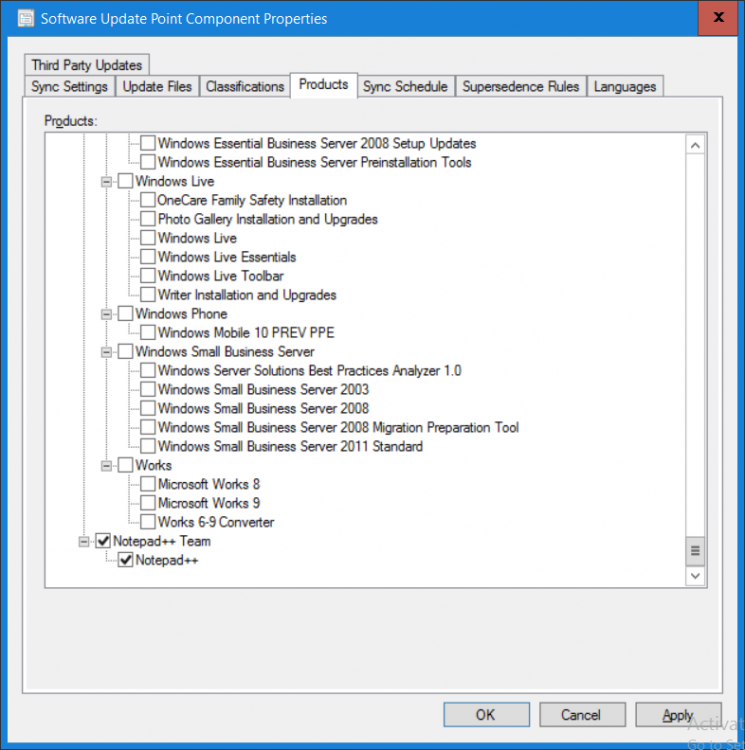
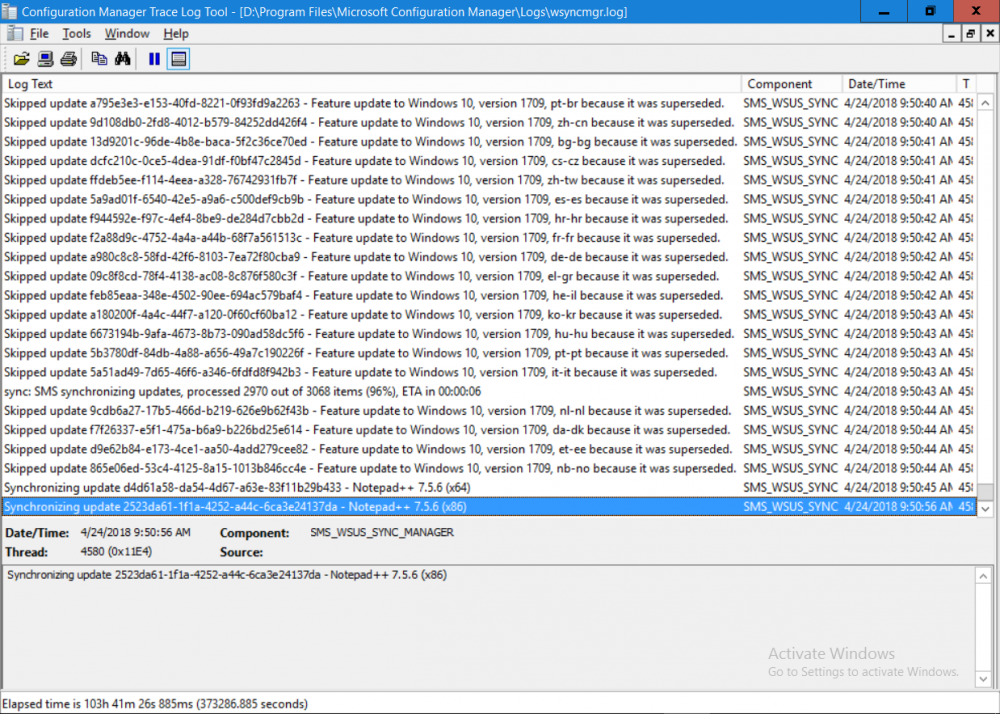
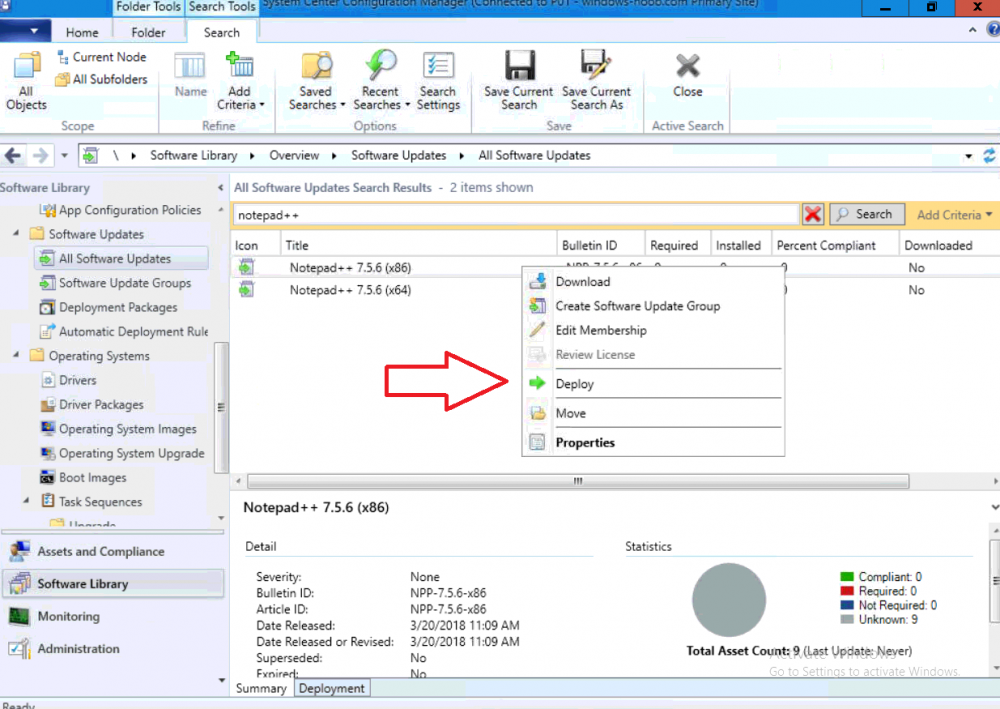
Introduction Security is a bigger focus today than ever before, and rightly so. As part of that focus ongoing patching is a requirement, both of the operating system (quality updates and feature updates) and the application layer too. Microsoft provides updates for their supported operating systems and applications that can be downloaded manually or automatically on the client via Microsoft Update, or deployed using on premise infrastructures like WSUS or SCCM or even via cloud based technology such as Microsoft Intune and Windows Update for Business. But what about on-premise patching of 3rd party applications (applications that come from vendors other than Microsoft), those vendors usually provide their own patches to help secure their products, but because they are 3rd party, they are not natively trusted by WSUS. Getting those patches into WSUS requires some outside help and there are several companies offering applications to help you with that task, one of which is called Patch My PC. Patch My PC is recommended because it’s lean, easy to use and competitively priced and it was developed by former Premier Field Engineers at Microsoft. Step 1. Download the Patch My PC Publishing Service Setup file Note: This guide was completed using SCCM version 1802 (Current Branch) running on Server 2016. To install that version of SCCM yourself, follow this link. Download the Patch My PC Publishing Service Setup file (MSI format) from the link below: https://patchmypc.net/publishing-service-download You should install it on the computer hosting your Software Update Point. Note: The MSI only supports WSUS 4.0 (Windows Server 2012 & 2016). Once the software is installed you can choose to launch it, the Settings UI appears. Step 2. Adding the catalog URL in the service After installing the software, you need to enter your individual catalog URL (if you are subscribed to the service) or enable trial mode to test the software. To do this, paste the unique download ID supplied in the email you received when you signed up for the service into the field provided. Click on Test URL to verify the catalog URL is correct. Using your unique catalog URL gives you access to all the supported applications in the catalog whereas when using the trial mode you only get access to a small subset (12) of those supported applications. Step 3. Creating a self-signed or importing a PFX based certificate In order to publish updates to WSUS, you need to setup a code-signing certificate. Certificates are used by the Patch My PC Publishing Service to sign the 3rd party updates so that WSUS can use them. There are two options available: · Self-signed certificate · PFX based certificate (3rd party or internal certificate authority) Note: Clicking on Show Certificate will show if any existing certificate is in place, for example if you’ve migrated from System Center Updates Publisher (SCUP). If like me you haven’t set this up yet, clicking on Show Certificate will not find any certificate in the WSUS certificate store. A self-signed certificate is the easiest way to get started with this tool and it’s free, however it does not provide security focused features such as revocation (cancellation of the certificate for all computers using CRL’s). For the purpose of this guide however, you’ll create a self-signed certificate using the tool. To create a self-signed certificate, click on the Generate a Self-Signed Certificate button in Certificate Management. Click OK to the Certificate Created Successfully message and then click on Show Certificate again, to see details about the newly created self-signed certificate. Step 4. Exporting the code-signing certificate In order for clients to install third-party updates, they must trust the code-signing certificate. To do this you can export the certificate and deploy it using group policy. Click on Export Certificate and give the .CER file a suitable name so you know what it is for. Click OK to the Certificate Export Successful popup. Step 5. Deploy the code signing certificate to clients using Group Policy On the domain controller, open Group Policy Management and create or edit an existing GPO. Edit the GPO settings and navigate to Computer Configuration, Policies, Windows Settings, Security Settings and select Public Key Policies. Right Click on Trusted Publishers and click on Import. In the wizard that appears, click Next and then browse to the location where you saved the code-signing certificate, select it and click on Open. The certificate will be displayed, click Next. Click Next again and click Finish to complete the wizard. Click OK to the Import was successful message. Note: If you used a self-signed certificate, you must also import the exported .CER file to the Trusted Root Certificate Authorities certificate store. Right-click on Trusted Root Certification Authorities and select Import, follow the same process as above to import the exported .CER file. Once done, click OK to the Import was successful message. Step 6. Enabling the group policy object for allowing third-party updates to be used on clients In order that clients will allow 3rd party updates to be installed, you need to configure the Allow signed updates from an intranet Microsoft update service location policy to Enabled. To do so, select the GPO created above and navigate to Computer Configuration, Administrative Templates, Windows Components, then choose Windows Update, select the Allow signed updates from an intranet Microsoft update service location policy and set it to Enabled as shown below. Step 7. Setting the schedule for the publishing service If you need to configure the Patch My PC tool scheduling service to check for updates, then click on the scheduling options tab, the default options are displayed and should be adequate. Step 8. Enabling the product you want to include for automatic publishing Next on the Product Rules tab, select the Product (or Products) that you want to include for automatic publishing. In this guide you will select Notepad++. You can scroll up and down to find the vendor, or use the search magnifying glass to search. Right clicking on a product will change from Full-Content to metadata, and this allows you to report on compliance information for a large number of updates prior to deciding if you need to patch computers with a particular 3rd party update. Once done, click on Apply. Step 9. Trigger the initial publishing of updates To trigger the initial publishing of updates available from selected vendors, click on the scheduling options tab and select Run Now. You’ll get a popup informing you to check the log. The Log in question (PatchMyPC.log) can be found in the General Settings tab by clicking on Open Log File and is best viewed with CMTrace. As you can see below it’s found some updates for Notepad++. Step 10. Synchronize Software Updates in ConfigMgr In SCCM, select Software Library, Software Updates All Software Updates and click on Synchronize Software Updates. You can monitor the progress of that operation via the wsyncmgr.log available in the SCCM logs folder. And once the sync is complete you’ll see a line like Sync time:…. Step 11. Configure Products in ConfigMgr Once the sync is complete, select the Administration workspace, select site configuration, sites, right click on your site and configure site components, select Software Update Point as shown below. Next, select the Products you had previously selected in the Patch My PC tool. Click Apply and then OK. Next, trigger another Synchronize Software Updates in the SCCM console to synchronize the newly selected product(s). You’ll note that a full sync is required due to a change in categories. And you can see that NotePad++ updates are found And after a successful sync, they show up in the ConfigMgr console (refresh the console view), and can be deployed using whatever method you prefer, create an ADR (Automatic Deployment Rule) or Software Update or Software Update Group. Summary When using Patch My PC and System Center Configuration Manager (Current Branch), it’s never been easier to patch your computers with applicable 3rd party patches.


-
 I'm attempting to run a software inventory report to find a specific file and version on our devices. The problem is when I run the report, I get no results. I've verified in the default client settings that software inventory is setup. What could I be missing? Hardware Inventory is also enabled as I read that plays a part in Software inventory also.

-
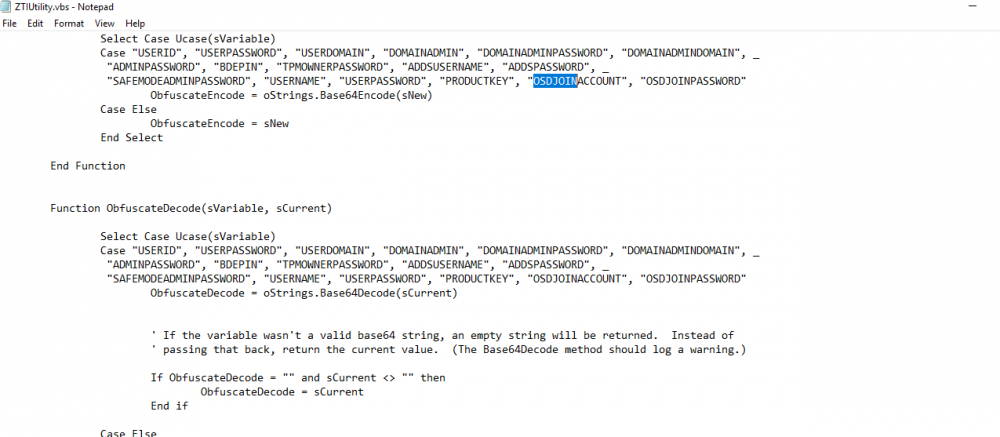
 I'm using a UDI\MDT taskseqence and encoding the OSDJoinaccount . I enclosed a a sample Custom.ini with dummy password I'm also using a VB script to decode placing the decode script before configure but getting a domain join error if any sees what i might be doing wrong . Apply Network setting is Joining a workgroup just above that but this seems normal because the Domain join is being controlled by the MDT\UDI variables . The Goal is the obfuscation of the OSDdomainjoin password in Codebase64 then decode it to clear text just before its Configured. I'm getting a domain join error at the end which telling me is drivers this on a VM which i don't think is because i have built to servers with no problem in Hydration. So i think I'm missing something possibly in the Decode script when I'm calling ZTIutility or possibly in customsetting.ini ENCLOSED PICTURES Can some one give some some pointers on what I'm doing wrong.


-
 Hello, We are planning a Win10 migration in the next few months, we have about 1300 endpoints. The management team wants to split the migration on 2 weenkends. Here is our SCCM infrastructure Architecure : 1 Site server \MP 7 DPs with SMP role (one for each location on different timezones) 1 SUP server. My question is, would you think that we should scale up our architecture? what changes you may want to make to adjust to the migration? Thanks,
 -
 Dear Experts, I Would like to get some inputs from you Please. My Data Center is located in 2 Regions. This data center is supplying the services (Windows Server, Network., etc) At Present we are planning to perform SCCM CB Implementation with High Availability for SCCM Client Roles. In fact not for SQL (Due to Commercial items) Single Standalone Primary Site is fair enough for the environment. However, We would like to reduce the usage of SQL Server, and make the Client facing roles with HA. Hence your inputs would be helpful for us Data Center Region A: Server 1 - SCCM Site Server - A Primary Site with Roles (Component Server, Site Server, Site System, Reporting Service Point, Other Non Client Facing Roles) Server 2 - SCCM Site System - Client Facing Roles (Management Point, Software Update Point/WSUS, Distribution Point (With WDS/PXE OSD Capabilties) Data Center Region B: Server 3 - SCCM Site System - Client Facing Roles (Management Point, Software Update Point/WSUS, Distribution Point (WithOut WDS/PXE OSD Capabilties) So all Client facing role, will be working with HA Option. However, PXE Boot for OSD will work only with SERVER 2 from WDS (Which respond to the Client during the OS Imaging) - To make this happen I need to mention the IP Details of WDS Server (Server 2 from Region A) in the DHCP Scope. Am I correct? The reason, I do not preferred to give the SERVER 3 (From Region B)as WDS Role with PXE, which we do not need to give the multiple entries with DHCP Scope (Option 66, 67) for OSD Please suggest, if this is looks good for an organization. The Ultimate goal is to reduce the SQL CPU Utilization.
 -
Dear Experts, I Would like to take an advice from you all for ADK are talking about ADK: Would like to get few points here At Present, I am having SCCM 2012 SP2 with Windows 7 with ADK *10.0.0.26624* Assume the Site Code : ABC Now the Plan is to do side by Side migration with SCCM CB V1702 and Upgrade to SCCM CB V1710 and this is to support Windows 10. Site Code : DEF Before I install windows 10, I will be moving all the clients from Site Code : ABC to DEF I will be having all my Existing Client move from *Windows 7 Machines* to DEF Site In the New Environment, Will be Managing both windows 7 and windows 10 1. Application Management (Windows 7 and Windows 10) 2. Patch Management *Windows 7, 10* 3. OS Imaging *Windows 7, Windows 10* I Would like to make my environment to be stable with both OS. Please let me know which ADK Version is needed in my Environment for Windows 10 Operating System I Will be having 1. Windows 10 LTSB 2. Windows 10 Enterprise With Version 1803 3. Also Windows 7 SP1 Which ADK Version, I Should have in my Environment *DEF Site Code* After all successful, Migration will be moving out completely from the Site Code : ABC
-
Dear Experts, Very Shortly - I will be having SCCM CB in my environment. I would like to get an advice/inputs from you to perform the Windows 10 Deployment Scenario's. Would like to get an advice, what are the topics - I should cover for Windows 10 Readiness with SCCM CB Environment My Organization preferred to perform the Management in the same way which I am doing for Windows 7. However, I would like to give some value added proposal's Any recommendations from you Experts?
-
Dear Experts, Currently Managing the infra with 5600 End Points (1 Primary, 22 DP's) with Windows 7 Management. We are looking to upgrade to Current Branch 1702 and So on. Prior to the Deployment, Preferred to Create 1 Test Environment. We have already 1 PROD Environment. SYS Management Container is given with Permission (Full Control) for Primary Site server (Host name) of the Machine. If we grant the access for System Management Container with Full Control (For TEST Environment) server. It will be creating automatically with New Container (Right below to SMS-MP) right? Also, Preferred to get advice from you, about there will not be any impact with existing Containers. For added safer side, Shall I create another folder right below to System Management (Container) as TEST to progress further. Please share your advice
-
Dear Experts, I would like to get an advice from you Please. You may see multiple forums from me – As my Environment is bit complicated. Environment implemented by 3rd party and handover to us as part of transformation – Which we are struggling to upgrade or proceed further. Current Infrastructure: SCCM 2012 SP2 with Windows 7 Clients (Managing – Application, Patch, Operating System Deployment) This is running on Windows Server 2008 with SQL 2008 Required Infrastructure: It is required to Manage Windows 10 Clients, Windows 7 Operating System (Application, Patch, OS Deployment) After being and hearing more responses from our Engineer’s/Experts. It is planned to progress the Green Field Implementation 1. Windows Server 2016 2. SQL Server 2014 or SQL Server 2016 3. Windows 10 ADK with Version ADK 1709 - 10.1.16299 4. System Center Configuration Manager V1710 New Implementation along with Distribution Point 5. Making the Environment with Complete Readiness for all Application Source, OSD Task Sequences, Software Updates., etc., This New Infra will be completely ready with supporting all contents. IP Assignment: We are already having the Boundary Groups, which is based on the IP Range with Region wise in the OLD Environment. New Environment – Client Movement from Old Infrastructure: Let us consider we have the IP Range called 192.168.1.1 to 192.168.1.254 is active and supplying the service with Windows 7 Client OS on Old Infrastructure (SCCM 2012 SP2) Now, the New Infrastructure is ready with all sources (SCCM CB V1710) – If the Client IP Range, Boundary Settings for Site assignment is getting moved from Old Infra to New Infra By Using Automatic Site Client Push Installation 1. SCCM Agent Will get install/upgrade with Version CBV1710 2. Since the IP Range, Boundary Group is allocated with New Environment All the Deployments will get started to run on new Environment. By performing this activity 1. All Windows 7 Clients will be running with SCCM CBV1710 Agent Version 2. All Windows 7 Clients will be reporting to SCCM CBV1710 Infrastructure 3. Slowly, I can prepare myself for Windows 10 Upgrade Projects. Hence, it is require to have 2 Environments in the Same System Management Container (SCCM 2012 SP2, and SCCM CB V1710). If I hold the 2 Environment with Different Site code and host name, Will that be Okay.. Please Advice!! My Sincere apologize to have separate post. Earlier was discussed for the Migration (With in the same server)., but now we preferred to install the SCCM CB V1710 Infra with new server *Windows 2016 & SQL 2016 * and move all the Clients to the new Infrastructure.
-
Dear Admin, My Apologize - I feel to raise this Question separately to make myself clarity on asking question and getting answer, As per the previous post, Phase I : Upgrade from SCCM 2012 SP2 to SCCM CB V1606 At Present, the Environment is having as below and mentioned with To - BE State After Successful, Completion with Phase I - Progressing Phase II as follows (As-IS and To-BE Infra) Please Validate if the As-IS to Phase I, II (To-BE) is Okay / Please suggest if any changes Kindly suggest me, My Sincere sorry if there is any repeated questions. I feel to get some added advice from you for MDT, ADK. At Present, We are using AS-IS Infra (SCCM 2012 SP2) with Operating System Windows 7 SP1 1. Application Deployment 2. Patch Deployment 3. OS Deployment *With Windows 7 SP1* We Continue with the same for all 3 above, and added to that Windows 10 OS as well with New Infra (Phase II SCCM CB V1710) Looking for your response and mentorship Regards, Veera
-

sccm Manage Blades with ESXi SO via SCCM
DiegoShadow posted a question in Troubleshooting, Tools, Hints and Tips
Good night friends ! Is it possible for SCCM to include HP Blades with ESXi operating system in hardware inventory? Is this type of management possible? -
 Setup: OS: Windows Server 2016 SQL 2016 SCCM Current Branch (1702) Memory: 64GB Disk: 700GB HDD Type: Virtual Machine on a Hyper-V Failover Cluster -------------------------------- I installed ADK v10 then installed SCCM and during the installation process it fails to import the default boot images. Now I have tried to import the boot images but that fails as well, see attachment. There is no AV on this machine as it is a new installation with basic configuration and I have searched this issue but I cannot get an answer for current branch. Could anyone have suggestions to help me out here? I even made sure my account had full permissions on the parent folder down to the file level and I still get the same error. Thank you! ERROR: INFO: Adding Boot Image Packages, this may take some time... Configuration Manager Setup 8/15/2017 2:07:53 PM 6432 (0x1920) INFO: Attempting to export x86 boot image from ADK installation source Configuration Manager Setup 8/15/2017 2:07:53 PM 6432 (0x1920) ERROR: Failed to call method ExportDefaultBootImage. Error 0x80041001 Configuration Manager Setup 8/15/2017 2:07:54 PM 6432 (0x1920) ERROR: Failed to export x86 default boot image from ADK Configuration Manager Setup 8/15/2017 2:07:54 PM 6432 (0x1920) INFO: Attempting to export x64 boot image from ADK installation source Configuration Manager Setup 8/15/2017 2:07:54 PM 6432 (0x1920) ERROR: Failed to call method ExportDefaultBootImage. Error 0x80041001 Configuration Manager Setup 8/15/2017 2:08:04 PM 6432 (0x1920) ERROR: Failed to export x64 default boot image from ADK Configuration Manager Setup 8/15/2017 2:08:04 PM 6432 (0x1920) WARN: Setup does not upgrade customized boot image package. Please update it manually. Configuration Manager Setup 8/15/2017 2:08:04 PM 6432 (0x1920)
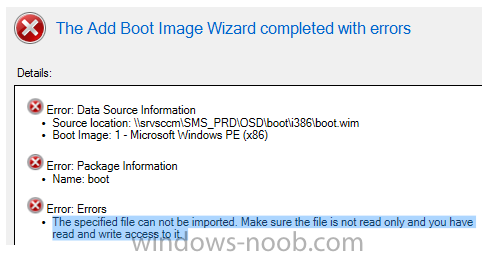
-
In a previous post you used PowerShell scripts to quickly install System Center Configuration Manager (Current Branch) version 1702. As of today (2017/7/29) System Center Configuration Manager (Current Branch) version 1702 is still the current baseline for the Current Branch releases. This post will focus on upgrading from one baseline version to the new release. Making sense of the different releases There are two main branches (of Configuration Manager) available, Current Branch and Technical Preview: System Center Configuration Manager (Current Branch) System Center Configuration Manager (Technical Preview) System Center Configuration Manager (Current Branch) is designed for use in production environments, for managing anything from small to very large Enterprises, whereas System Center Configuration Manager (Technical Preview) is for lab testing environments only and is limited to 10 clients. The Technical Preview releases are released monthly, and contain the latest and greatest features being trialed in the product, and usually these new features are the result of feedback from uservoice. Current Branch releases on the other hand are released only a few times per year and contain stable, tested features that are mature enough to release into production environments. Note: You cannot upgrade from a Current Branch to Technical Preview or vice versa, they are two distinct different branches. Microsoft have released the latest Current Branch offering known as System Center Configuration Manager (Current Branch) version 1706 so it's time to upgrade again. This release offers many new features, some of which are listed below. Windows 10 and Office 365 Manage Microsoft Surface driver updates – You can now use Configuration Manager to manage Microsoft Surface driver updates. Windows Analytics Commercial ID and Windows telemetry levels – You can now specify the Windows Analytics Commercial ID and configure telemetry, commercial data, and Internet Explorer data collection settings in Client Settings for use with Upgrade Readiness. Improved user experience for Office 365 updates – Improvements have been made to leverage the Office Click-to-Run user experience when a client installs an Office 365 update. This includes pop-up and in-app notifications, and a countdown experience. Windows 10 Security SecureBoot and TPM inventory data – Hardware inventory can now determine whether the device has SecureBoot enabled and various properties of the TPM (enabled by default). Windows Defender Device Guard – You can now include trust for specific files and folder paths in Device Guard policies. Modern Management Azure AD-enabled Cloud Management – You can now onboard the site to Azure AD via Cloud Services. Additionally, you can install the client on the Internet. Windows Update for Business enhancements – There is a new dedicated experience to configure and deploy deferral settings for easy discoverability. Streamlined Infrastructure Cloud services consolidation – There is now common experience for OMS Connector, Upgrade Readiness, Windows Store for Business, and Cloud Management. Reload boot images with latest WinPE version – During the “Update Distribution Points” wizard on a boot image, you can now reload the version of Windows PE in the selected boot image. Boundary Group improvements – Boundary groups now support configuring the time for fallback for software update points. Configuration Manager Update Reset Tool – We have added new tool to reset and restart in-console updates when they have problems downloading or replicating. Accessibility – Screen reader improvements and improved keyboard navigation in and out of the ribbon in the Configuration Manager console. Configuration Manager connected with Microsoft Intune Entrust as certificate authority for PFX Certificates – Entrust can now be used as the certificate authority for PFX certificates. Additional Android for Work features – You can now configure app configuration policies for Android for Work and support for available apps. Additional Compliance Policy settings – We added additional compliance policy settings that were previously available only in Intune standalone. Enrollment restriction conditions – Admin can now prevent enrollment for iOS or Android devices marked as personal. Cisco IPSec VPN support for iOS – Cisco IPsec will be a new connection type option for VPN profiles for iOS. Windows Edition Upgrade policy – This policy allows admins to set a policy to upgrade Windows 10 to Enterprise editions. Additional MAM settings – We added new settings such as block screen capture (Android only), disable contact sync, and disable printing. Windows configuration settings – We added new Windows configuration item settings that were previously only available in Intune standalone. Customer Feedback Create and run PowerShell scripts – You can now create and run scripts with parameters to devices and collections. Task Sequence improvements – You can now easily toggle when the task sequence progress is or is not displayed to the end user, on a granular step-by-step basis. Additionally, groups in the task sequence editor can be collapsed or expanded. Share an application from Software Center – You can copy a direct link to an application in Software Center using the new Share button in the Application Details view. Upgrading to 1706 Note: Before updating, please review the following checklist to verify you are ready for the update. When new Current Branch releases are made public, you have the choice of getting it immediately using a fast ring PowerShell script, or to wait a couple of weeks after which it is made available to the slow ring (and then show up in the ConfigMgr console). To use the fast ring PowerShell script, download it, and run it to self-extract to C:\FastRingScript_1706. Once extracted, start an administrative PowerShell cmd prompt in that folder and from there use the following command (where CM01 is the <SiteServer_Name | SiteServer_IP> of your CAS or standalone Primary site server). .\EnableFastUpdateRing1706_All.ps1 cm01 As per this screenshot To start the upgrade open the ConfigMgr console and find the Updates and servicing node as shown here. Click on Check for Updates in the ribbon, after a few moments you should see that Configuration Manager 1706 is available for download. Note: In the screenshot above you'll see that the Downloading arrow is greyed out, if you find yourself in this state you can do two things, wait until it automatically starts downloading, or click on the Check for Updates button again which will kick off the download. And the download starts... at which point you can open the dmpdownloader.log using Cmtrace to keep track of things. Once it has completed downloading it will be listed as a state of Ready to Install You need to click refresh in the ConfigMgr console to update the view. Installing the Update Right click on the update and choose Install Update Pack. when the Wizard appears, make your choice for pre-reqs and click next. review the features included in this update pack , and make selections if you wish, you can always add them later in the Console. Note: You'll also notice lots of Pre-Release features that are greyed out, to turn them on see the steps after upgrading the console the bottom of this guide. Before clicking next at the Client update settings please see this post accept the EULA and configure the software assurance expiration date and click through to the summary and then the wizard is complete. Monitor the update In the console, the state will change to Installing. You can click on Show Status to get status of what part of the upgrade it is doing. Which brings up this detailed pane that you can click through to get more information. In addition, I'd recommend you open the CMUpdate.log to review what's happening in real time. After the update is complete, click refresh in the console and you'll be reminded to update the ConfigMgr Console via a popup, the new version is 5.00.8498.1700. Make sure to update your console as you cannot use the new features until you do. Click OK to upgrade your ConfigMgr console, and after all is done you’ll see the 1706 version listed in the console. After upgrading the site Tip: If you want to gain access to the Pre-Release features, then select Site Configuration, Sites, Hierarchy Settings, and place a check mark in Consent to use Pre-Release features. And you can then turn on (or off) many of the pre-release features released in the 1706 update. Summary This is a huge release packed with features and new functionality and goes to prove the SCCM as a Service is working, David James and Team have done an exceptional job ! Here's to the continued development and refinement from the Engineering team @ Microsoft so that hopefully in 5 years time, we'll see SCCM 2206 Current Branch Recommended reading Checklist for updating to System Center Configuration Manager (Current Branch) 1706 - https://docs.microsoft.com/en-us/sccm/core/servers/manage/checklist-for-installing-update-1706 What's new In System Center Configuration Manager (Current Branch) 1706 - https://docs.microsoft.com/en-us/sccm/core/plan-design/changes/whats-new-in-version-1706 Hybrid features in 1706 - https://ems.world/2017/07/29/new-hybrid-features-in-configuration-manager-1706/ Create and run PowerShell scripts from the configuration manager console - https://docs.microsoft.com/en-us/sccm/apps/deploy-use/create-deploy-scripts