Search the Community
Showing results for tags 'baseline'.
Found 2 results
-
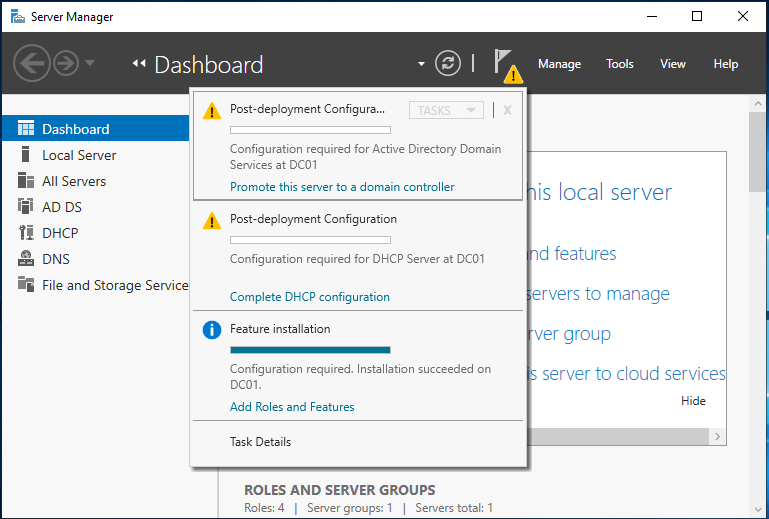
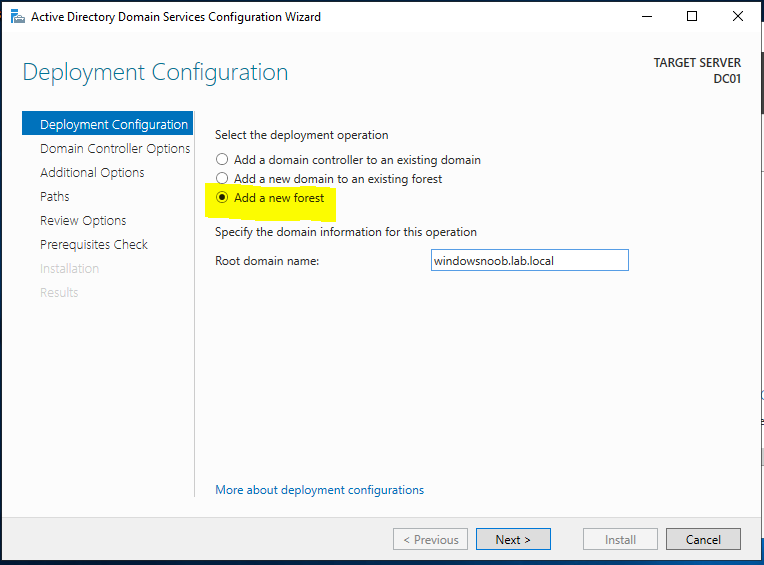
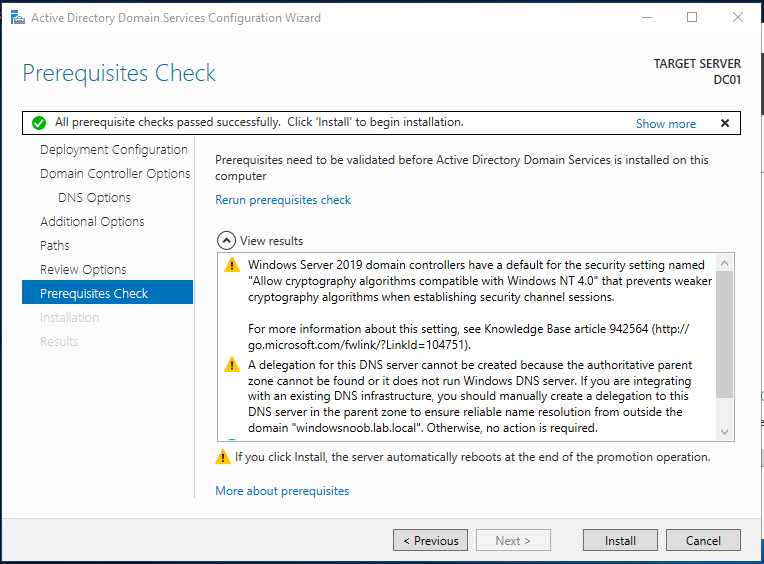
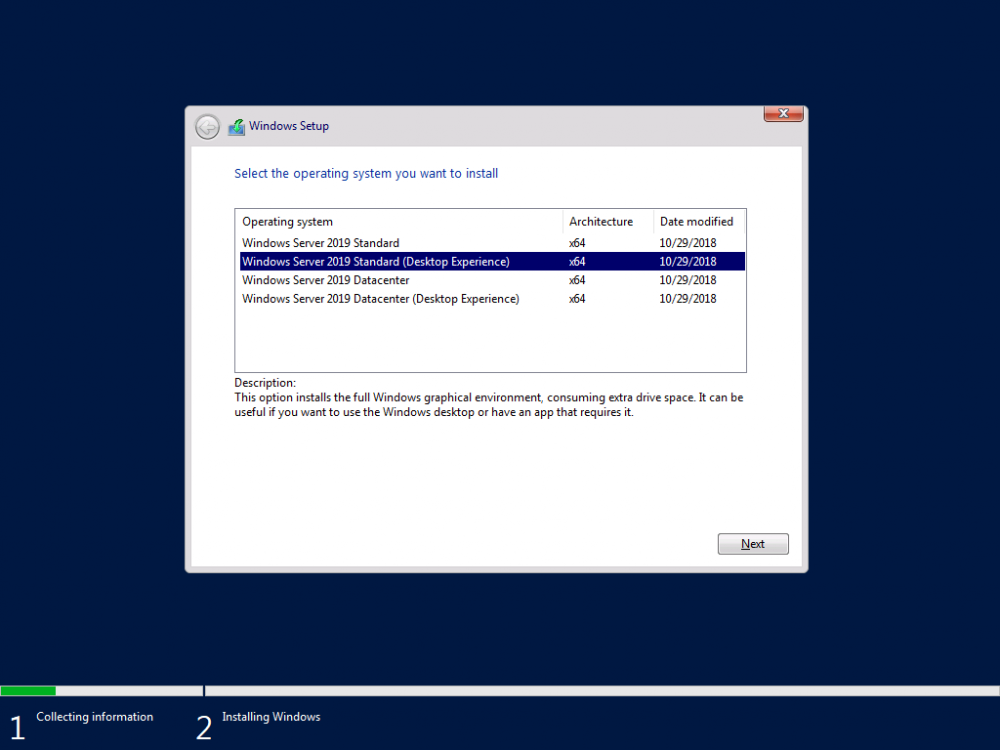
 Introduction This multi-part guide will show you how to install the latest baseline version of Configuration Manager from Microsoft. The latest available baseline version at the time of writing is System Center Configuration Manager (Current Branch) version 1902. SCCM 1902 is the latest baseline version and contains many bugfixes (and quality fixes) as detailed here. I blogged how to upgrade to 1902 here. Baseline media is used to install new ConfigMgr sites or to upgrade from supported versions. For more information about what baseline versions are and why you need them, I'd recommend you read my blog post here. This guide is aimed a new installations of SCCM. This lab is one of many hosted on my new hyper-v host, which is a very nice Lenovo P1 running Windows Server 2019 with data deduplication to make storage amazing. Note: The SCCM 1902 Current Branch media is available on MSDN or VLSC. If you don't have access to either of those you can download the baseline media ISO from the Microsoft evaluation site here. This is the same media that is on MSDN and VLSC. Once downloaded, extract the media to C:\Source\SCCM1902. This series is broken down into the following parts:- Part 1 - Get the lab ready, configure ADDS (this part) Part 2 - Join CM01 to Domain, add users, create the Systems Management container, delegate permission Part 3 - Role and Feature installation, installation of WDS and ADK Part 4 - Configure and install SQL Server 2017 Part 5 - Configure and install SCCM 1902 Current Branch Part 6 - Create device collections Part 7 - Configuring discovery Part 8 - Configuring boundaries You can use this multi-part guide to get a hierarchy up and running on Windows Server 2019 using SQL Server 2017. The concept behind this is to guide you through all the steps necessary to get a working Configuration Manager Primary site installed (for lab use) using manual methods or automated using PowerShell. This gives you the power to automate the bits that you want to automate, while allowing you to manually do other tasks when needed. You decide which path to take. PowerShell knowledge is desired and dare I say required if you are in any way serious about Configuration Manager. I will show you how to do most steps via two methods shown below, it's up to you to choose which method suits you best but I highly recommend automating everything that you can, using PowerShell. Method #1 - Do it manually Method #2 - Automate it with PowerShell Downloads The scripts used in this part of the guide are available for download here. Unzip to C:\Scripts. The scripts are placed in the corresponding folder (Part 1, Part 2 etc) and sorted into which server you should run the script on (DC01 or CM01). Scripts.zip Step 1. Get your lab ready In this guide I assume you have already installed two WorkGroup joined servers with Windows Server 2019 Standard (Desktop Experience) installed. You can install the operating system on those servers in whatever way you want. If you want a PowerShell script to help you create hyper-v virtual machines you can use this one. Please configure the servers used in this guide as listed below, the SmoothWall (Linux firewall) is optional. Server function: Domain Controller Server name: DC01 Server info: Workgroup joined IPv4 Address: 192.168.9.1 Subnet Mask: 255.255.255.0 Default Gateway: 192.168.9.199 DNS: 192.168.9.1 Server function: Configuration Manager Primary site Server Name: CM01 Server info: Workgroup joined IPv4 Address: 192.168.9.2 Subnet Mask: 255.255.255.0 Default Gateway: 192.168.9.199 DNS: 192.168.9.1 Server function: (optional) Linux firewall Server name: smoothwall Server info: Uses 2 legacy nics eth0: 192.168.9.199 eth1: x.x.x.x (internet facing ip) You will also need the following media. Windows Server 2019 Standard SQL Server 2017 System Center Configuration Manager 1902 Current Branch Step 2. Configure Active Directory Domain Services (ADDS) To setup Active Directory Domain Services you could manually click your way through the appropriate wizard in Server Manager or automate it using PowerShell. For your benefit I'll show you both methods below, all you have to do is choose which one suits you. Method #1 - Do it manually On the DC01, open Server Manager. Click on Add roles and features On the Before You Begin screen click Next. For Installation Type select Role-based or Feature-based installation For Server Selection select Select a server from the server pool and choose DC01 For Server Roles select Active Directory Domain Services, when prompted to add features that are required for Active Directory Domain Services select Add Features select DHCP Server,when prompted to add features that are required for DHCP Server, accept the changes by clicking on Add Features Select DNS Server, when prompted to add features that are required for DNS Server, accept the changes by clicking on Add Features Continue the the wizard by clicking Next On the Features screen click Next On the AD DS screen click Next On the DHCP server screen, click Next On the DNS Server screen click Next On the Confirmation screen click Install and then click on Close Configure Post Deployment Configuration After it's finished, perform the Post Deployment Configuration by clicking on Promote this server to a domain controller select the Add a new forest option, give it a root domain name such as windowsnoob.lab.local Next, depending on your requirements set the Forest functional level and Domain functional level, I've selected the default options below however you may want to configure it differently for your hierarchy, For the password field use P@ssw0rd, Click Next when ready, for DNS options, click Next, Next verify the NetBIOS name and click Next To specify the location of the AD DS database, log files and so forth, either accept the defaults, or change them to something that suits your hierarchy and click Next. Next you can review the options (clicking view script will save your actions to a PowerShell script for use later if you wish). Click Next when done. Next, click Install to begin Once it is complete making the changes it will automatically reboot the server After the reboot, open Server Manager again to do the Post-deployment Configuration for DHCP Server. Click on Complete DHCP Configuration use the defaults for DHCP Server Authorization Click on Commit, Click Close when done. That's how to configure ADDS and DHCP manually. Method #2 - Automate it with PowerShell To configure ADDS, DNS and DHCP automatically, use the ConfigureADDS.ps1 PowerShell script. Note: I'd recommend that you reboot the server before running the script in case any pending operations like Windows Update are in progress as it may effect the results of the script below - I have not (yet) added in any detection for pending operations. 1. Copy the script to C:\scripts on DC01 2. Edit the variables in lines 17-32 as desired before running. 3. Start Windows PowerShell ISE as Administrator and run the script by clicking on the green triangle. Once the script is run, it will automatically reboot the server, and after you logon, it will complete the DHCP server installation. Summary Using PowerShell to automate things is the proper way to do things as a server admin. Please join me in Part 2 of this multi-part guide where you will continue setting up your new Windows Server 2019 lab with SCCM 1902 Current Branch.


-
 Hi, trying out some compliance settings in our environment. Seems to work fine for a majority of my clients, but around 50 will not report back. Trying to find out why. Any ideas?