Search the Community
Showing results for tags 'windows 10 fall creators update'.
Found 1 result
-
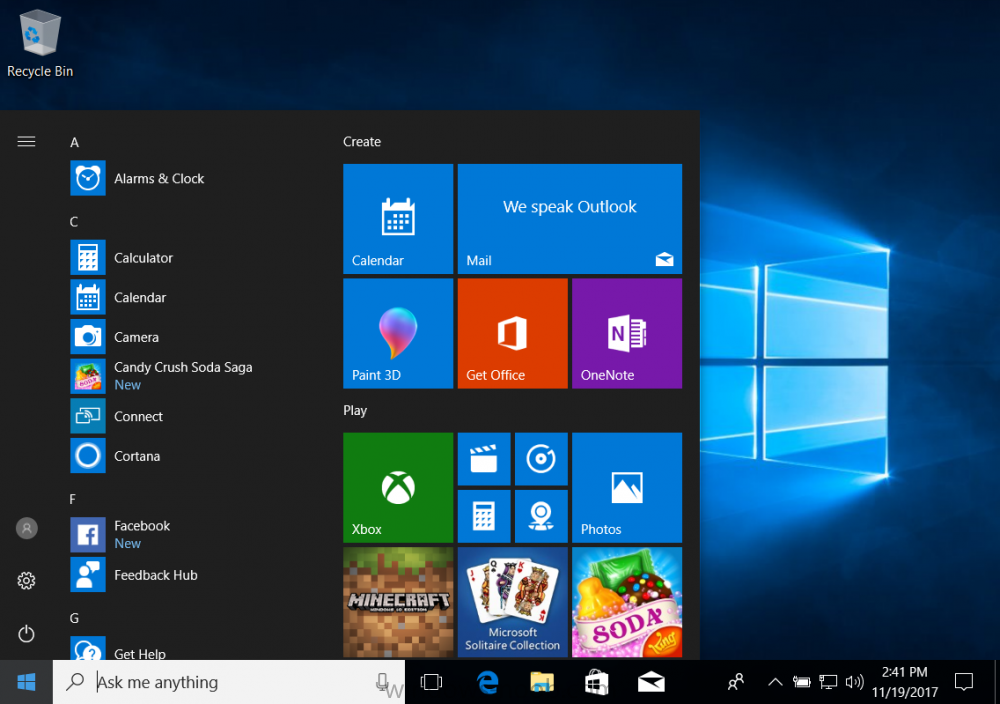
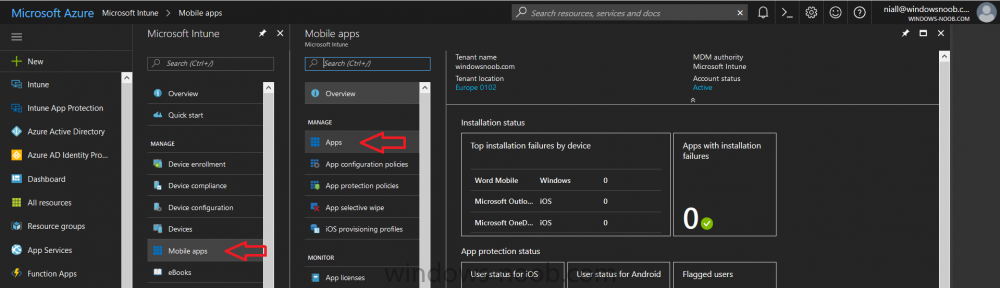
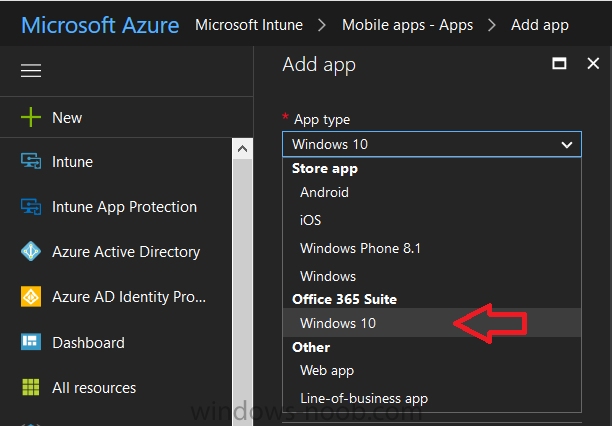
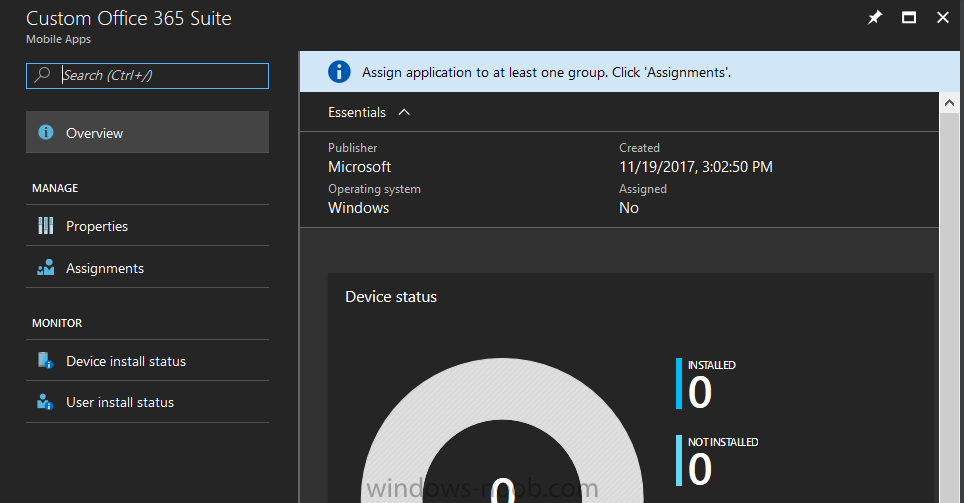
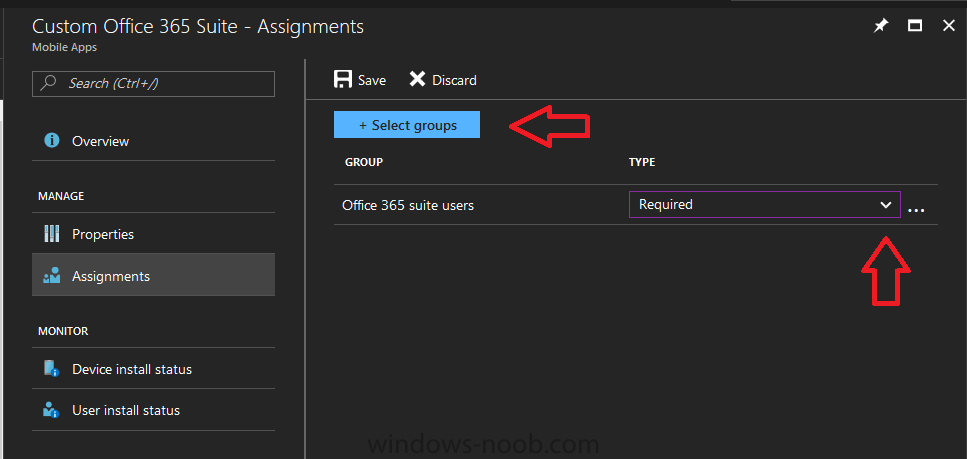
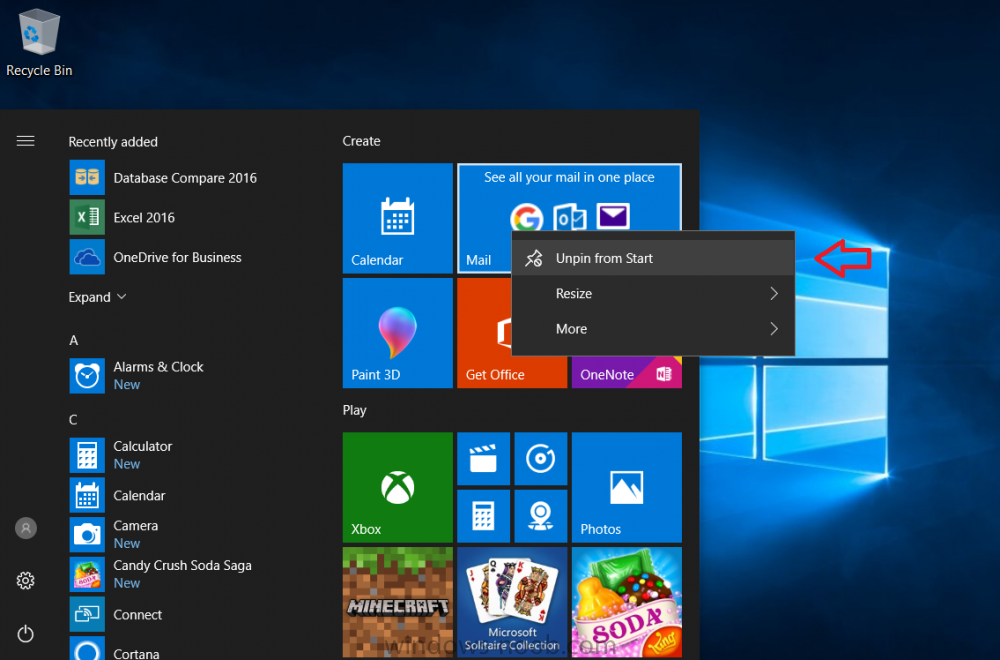
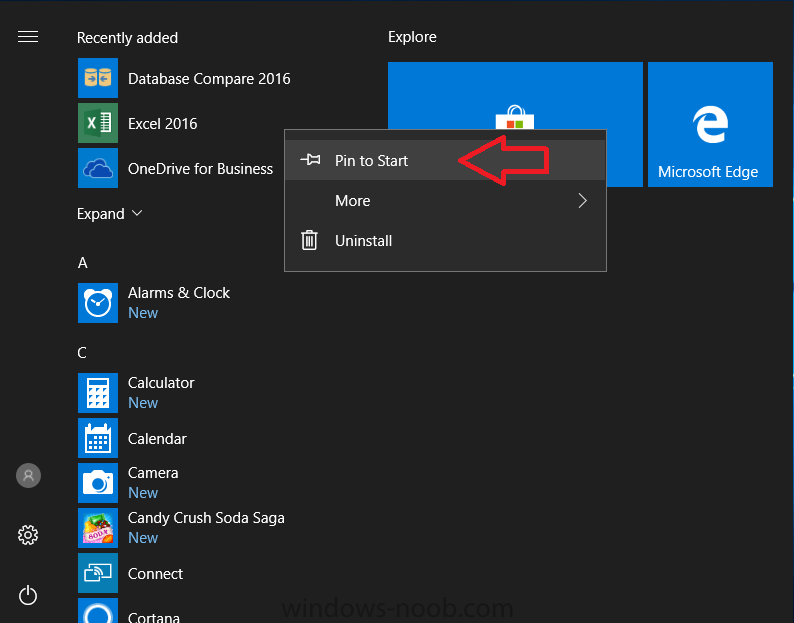
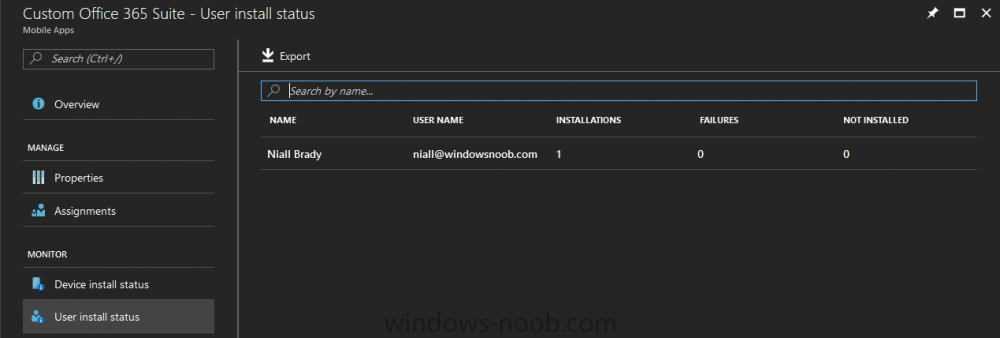
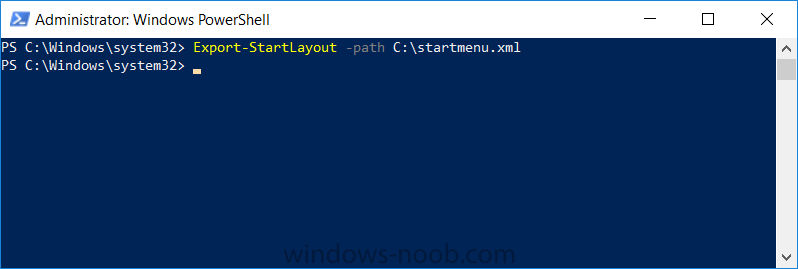
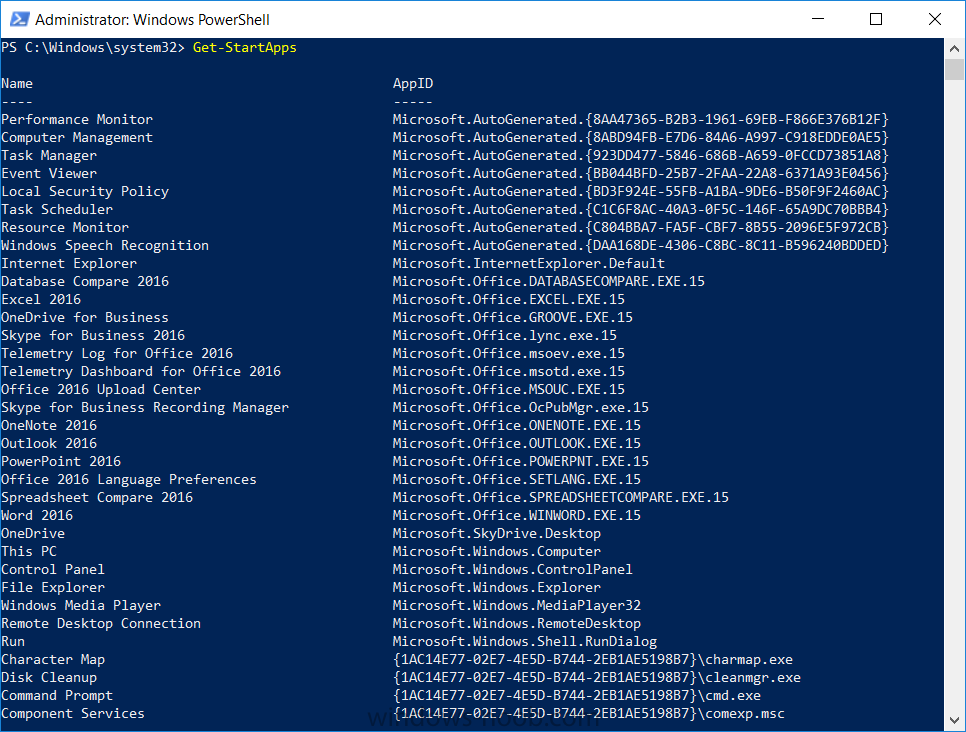
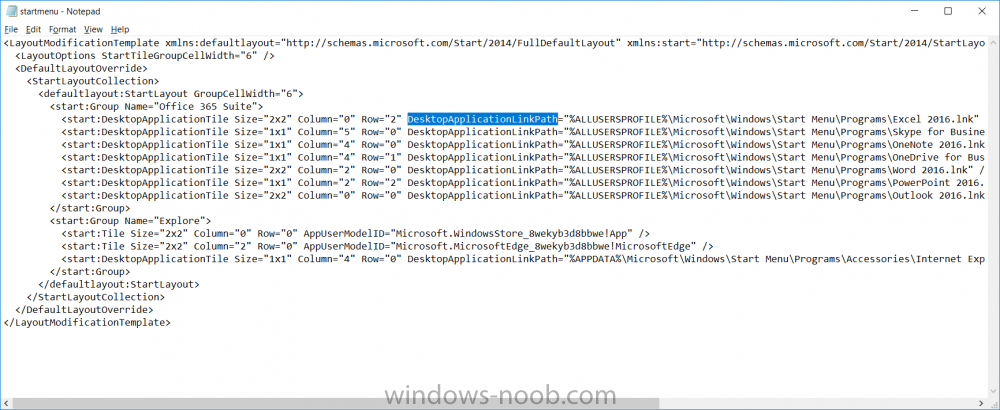
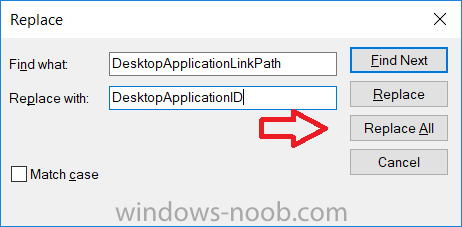
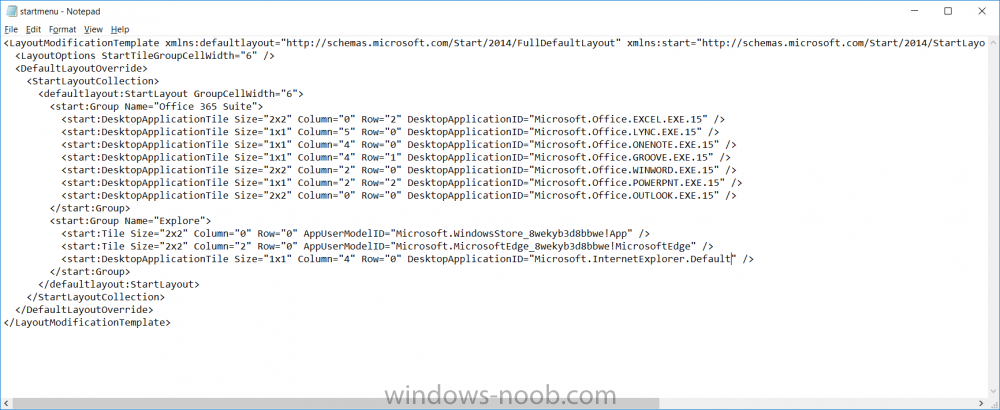
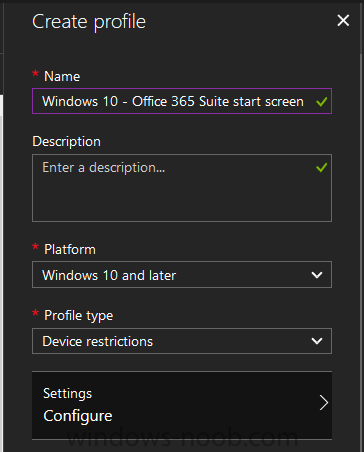
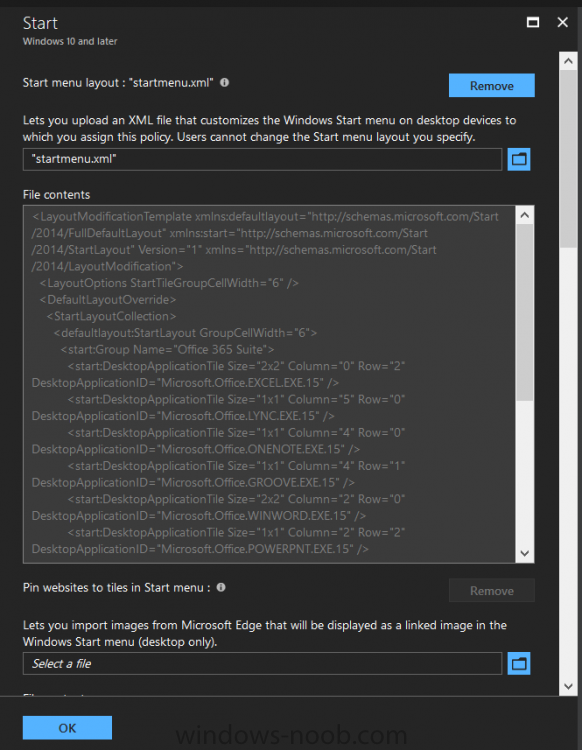
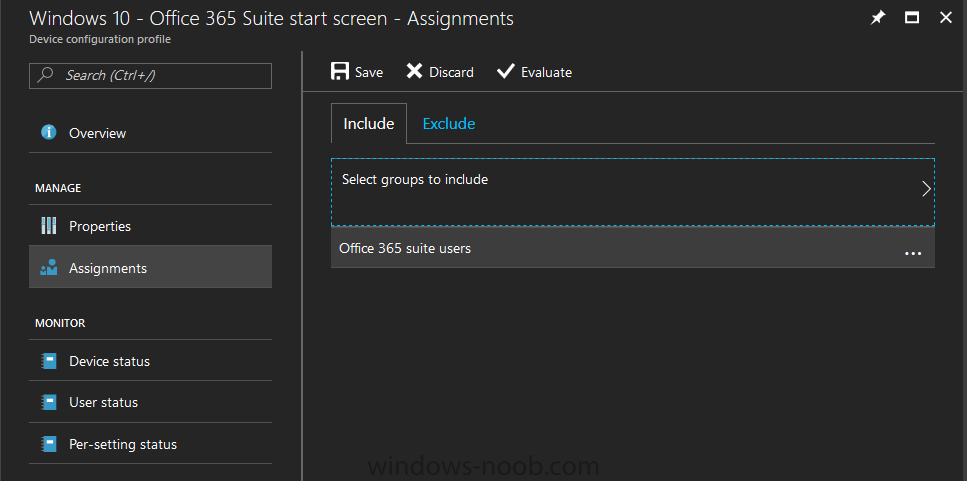
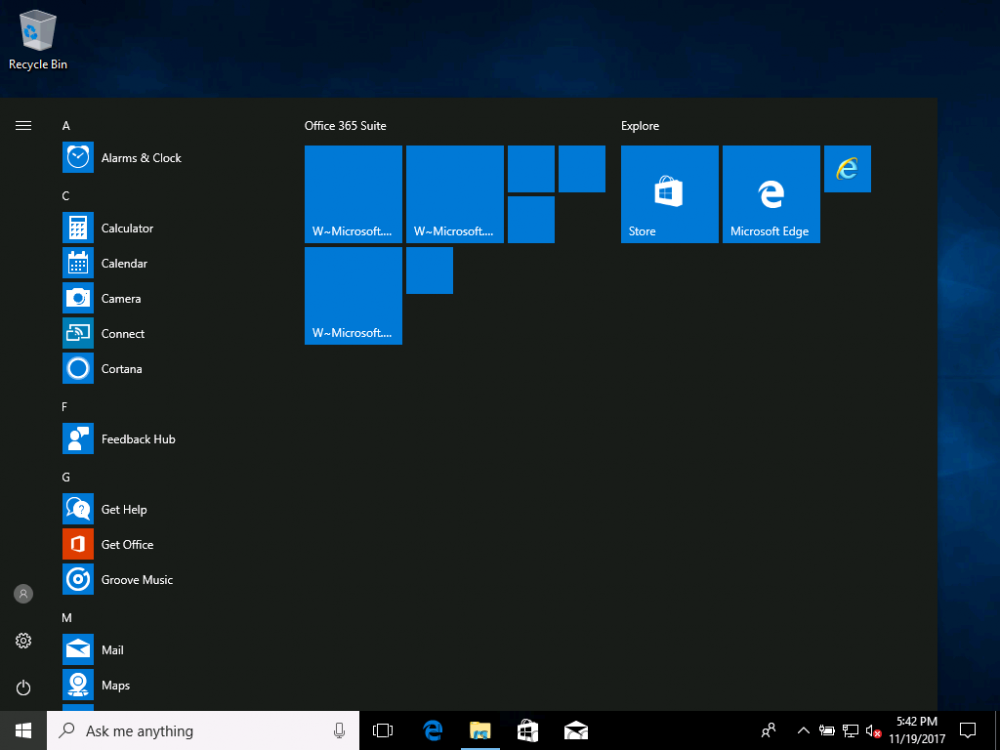
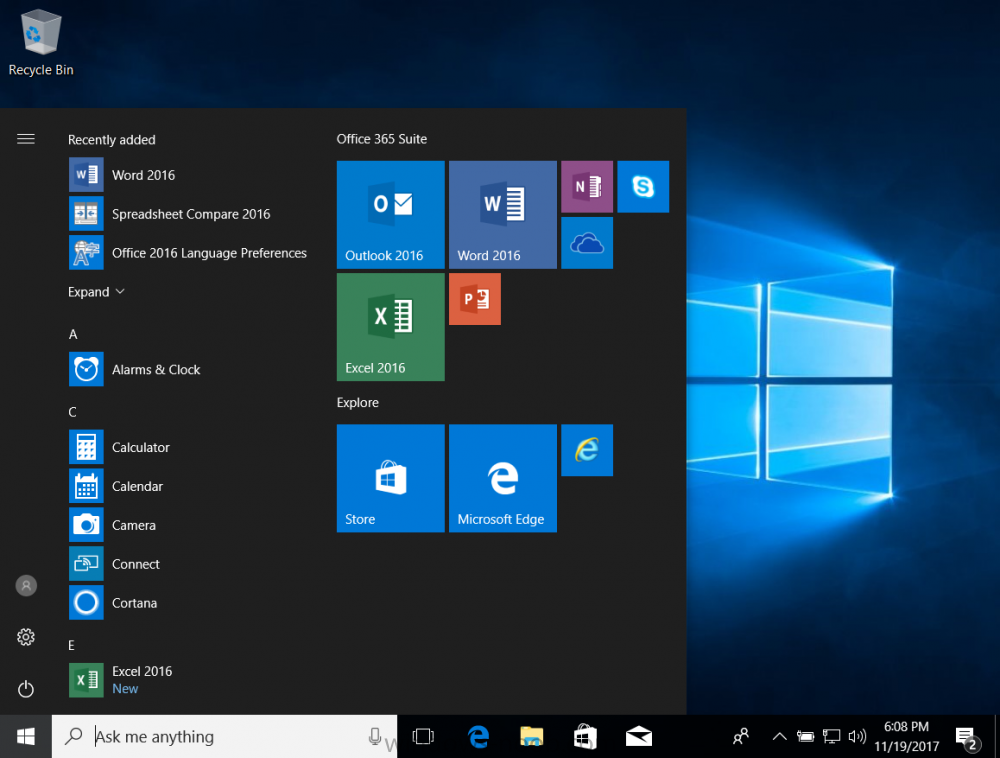
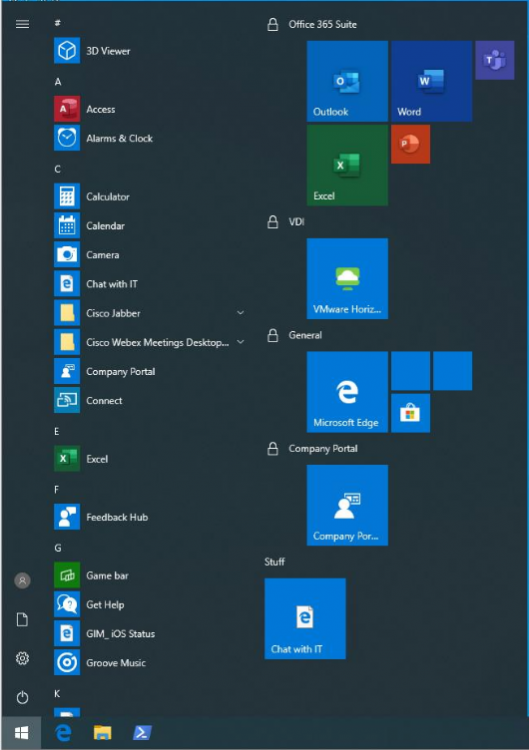
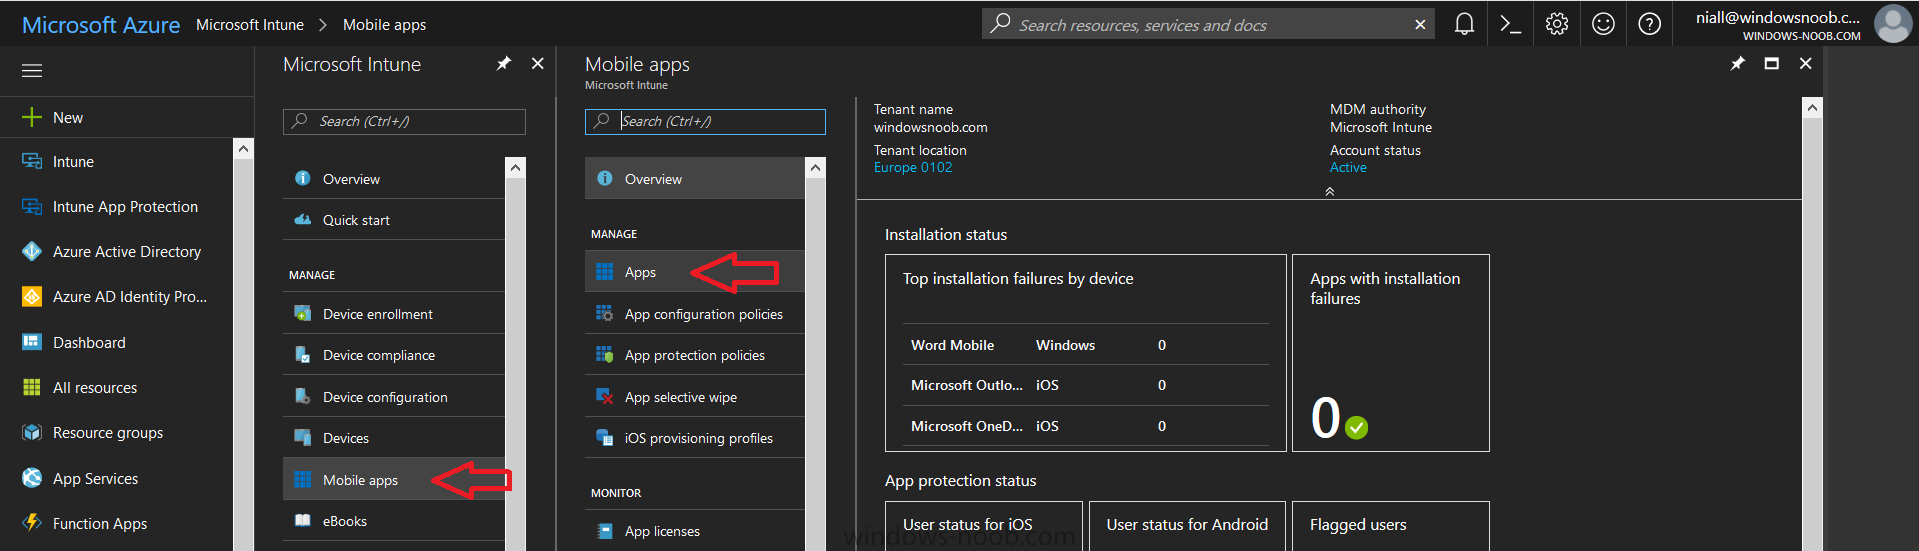
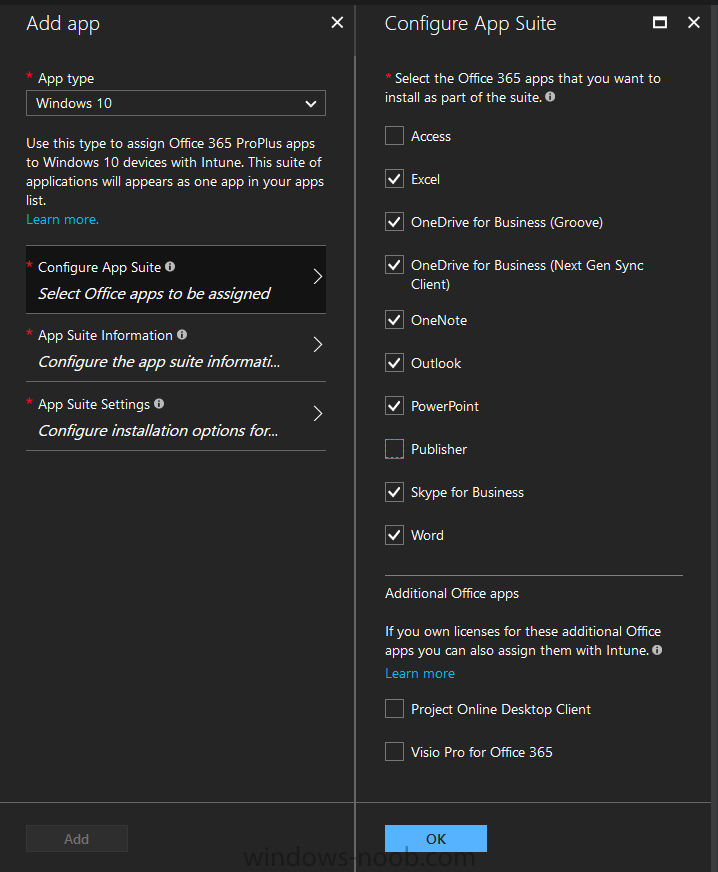
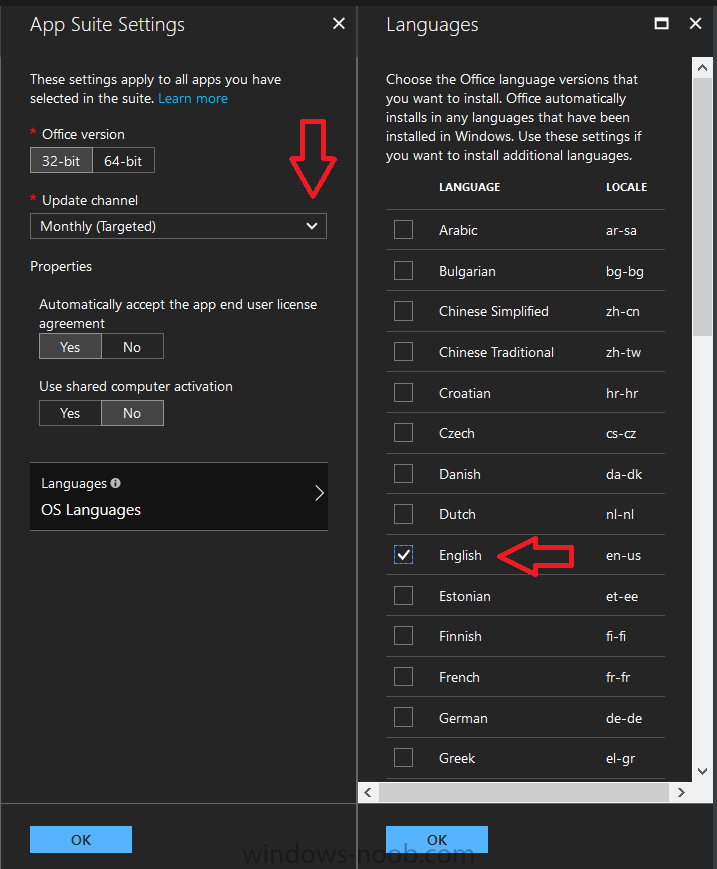
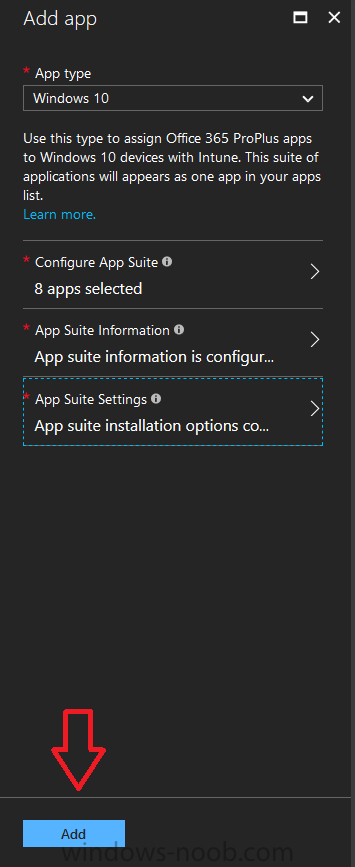
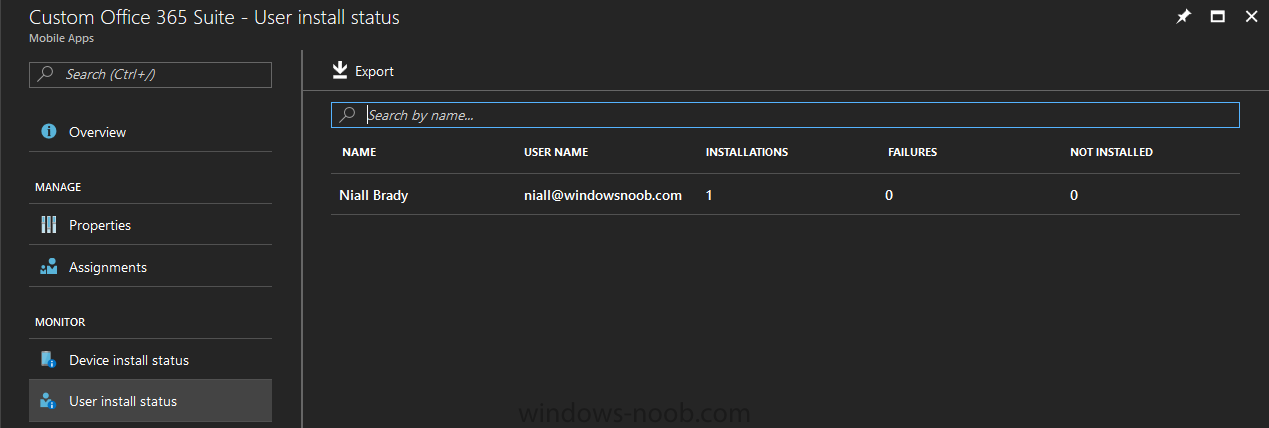
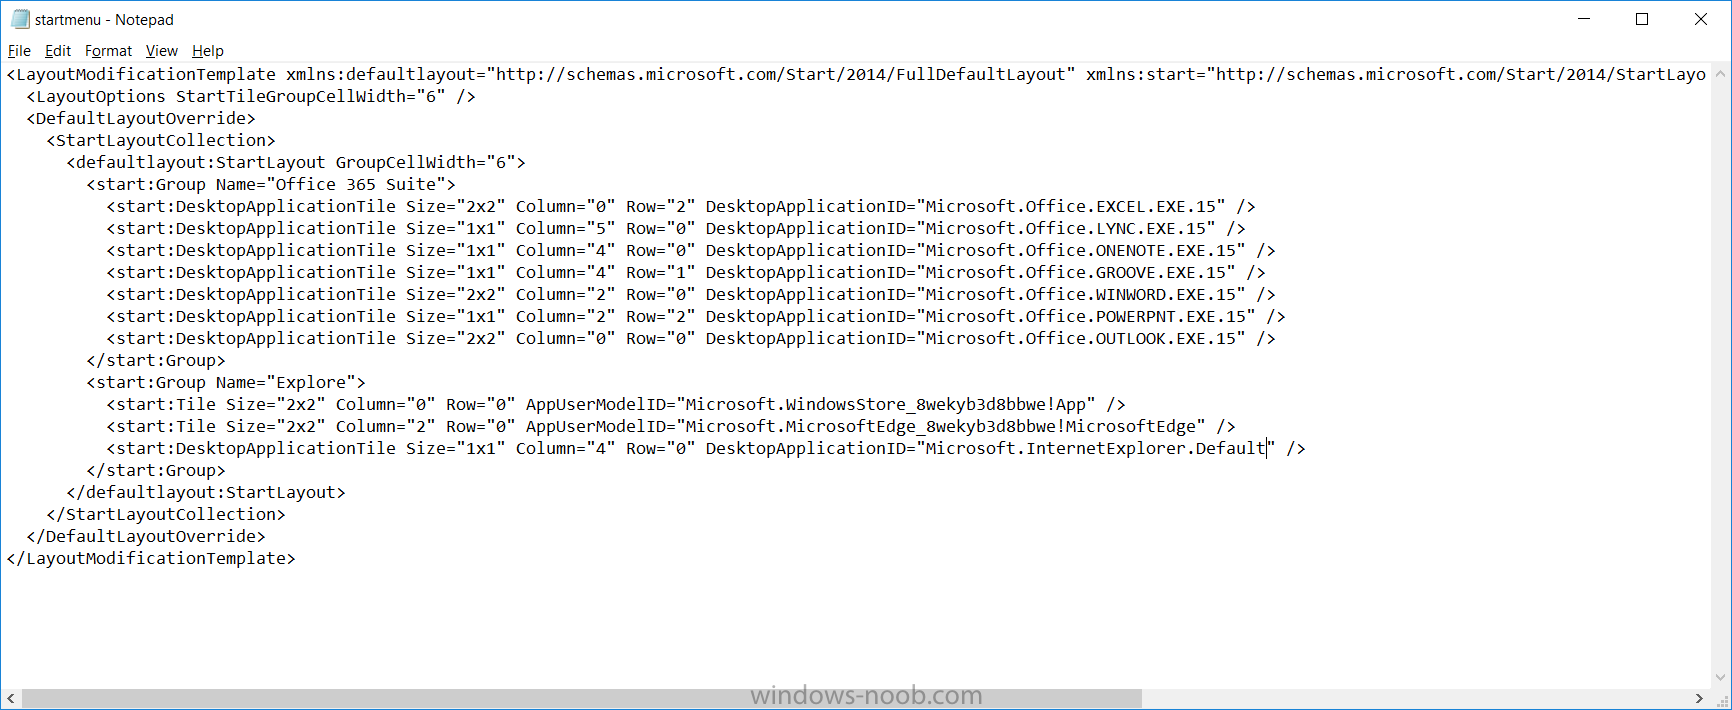
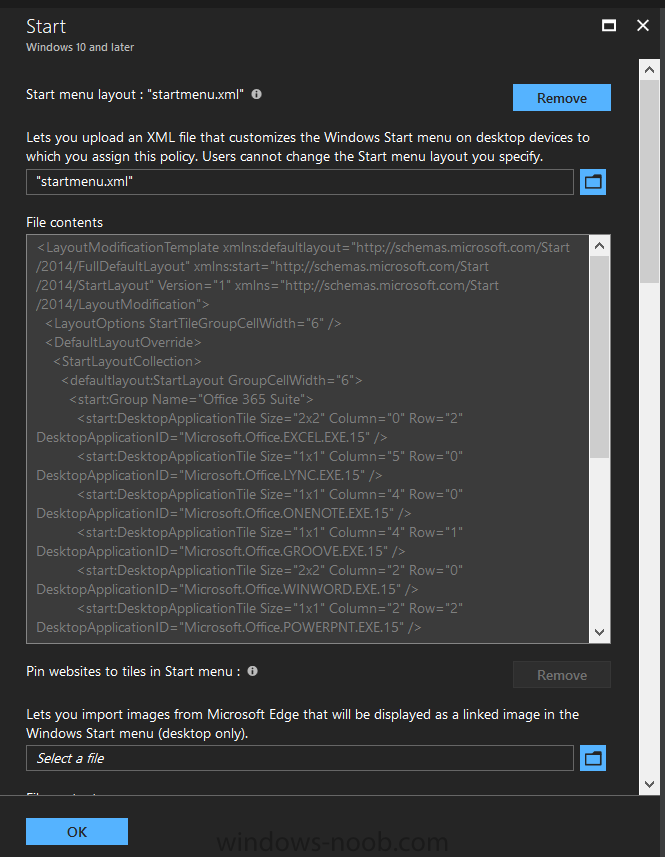
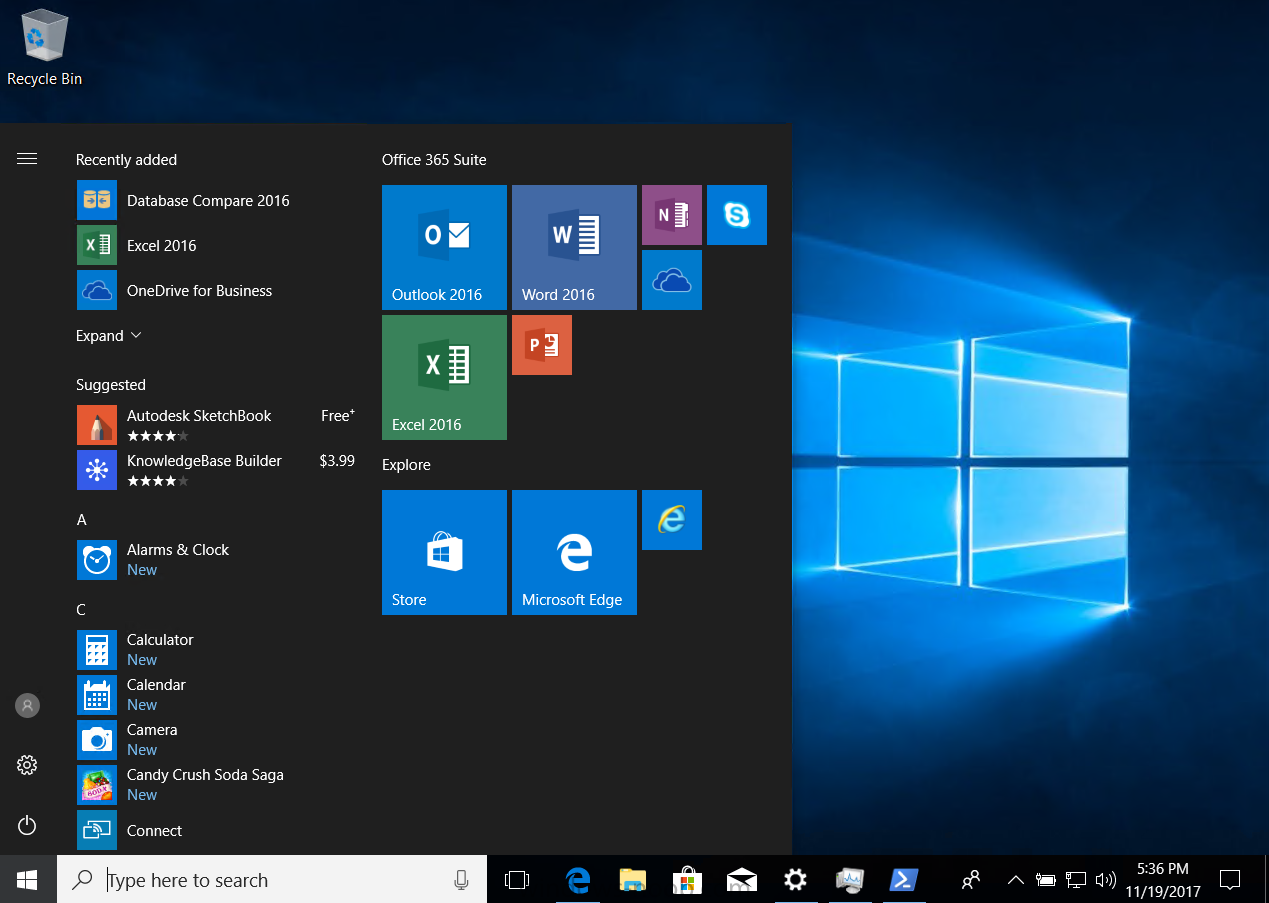
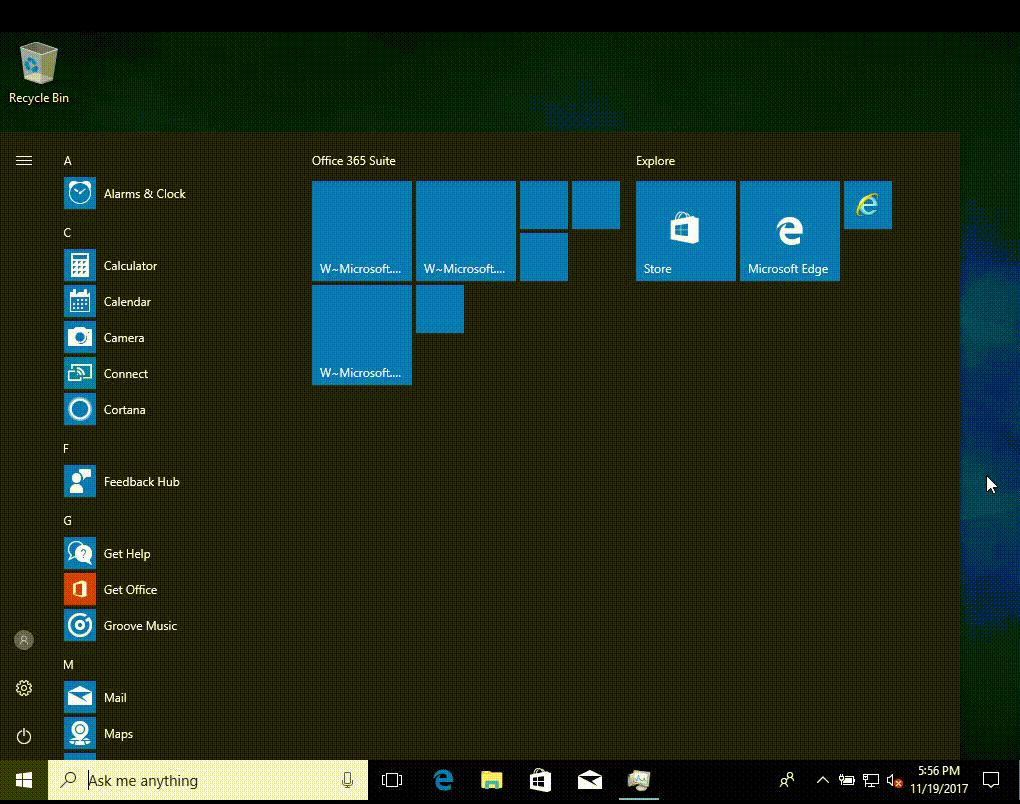
 Introduction I've been doing a lot of testing with Windows AutoPilot recently (blog post coming soon), and as part of that testing, I wanted my Windows 10 version 1709 (Fall Creators update) devices to have a customized start screen (or start menu as people often refer to it) with some Office applications and device configuration profiles installed. The ability to customize the start menu in Windows 10 is nothing new but I ran into some issues with the process, as I was using a 32 bit version of the Office Suite so I thought I'd document the fix here. The issue I observed was that after creating the XML file, importing it into Intune and deploying it out to Windows 10 devices, instead of getting the Office icons in the start screen, they got blank boxes, and those boxes never populated with icons even after Office was installed. Some internet searching and digging found the answer but it wasn't that clear what you had to do, hence this guide. A newly installed Windows 10 version 1709 start menu can look quite a consumer oriented mess, such as the one shown below. This is definitely not what you want to see in your Enterprise. In this post you will deploy the Office 365 suite to Windows 10 version 1709 devices and then customize the start menu before capturing it to an XML file, editing the XML file and then deploying it using Intune. Note: When a full Start layout is applied with this method, the users cannot pin, unpin, or uninstall apps from Start. Users can view and open all apps in the All Apps view, but they cannot pin any apps to Start. When a partial Start layout is applied, the contents of the specified tile groups cannot be changed, but users can move those groups, and can also create and customize their own groups. Step 1. Configure the Office 365 suite in Intune (optional) Customizing a start menu makes sense in an Office environment particularly when your users expect their Office apps are easy to reach. But before you can do that you'll configure Office to install on some Windows 10 devices. In the Intune service in Azure, click on Mobile Apps, and then select Apps. Click on + Add and then select Office 365 Suite and Windows 10. Click on Configure App Suite, make your selections and click OK Next click on App Suite Information, fill in the information and click ok. and next click on App Suite Settings, make your choices for Servicing (Office Updates) and Language options and click on OK then OK again. As I like to use WIP I have selected Monthly (targeted) to get the latest versions of office quickly. Note: When choosing whether you want to assign the 32-bit, or 64-bit version of Office. You can install the 32-bit version on both 32-bit, and 64-bit devices, but you can only install the 64-bit version on 64-bit devices. When done configuring click on Add. Next you need to Assign (deploy) the Office Suite to a group of users by clicking on Assignments. After clicking on Assignments, select a Group of users, then select the type of assignment, in this case I choose Required so that it is automatically installed. Click on Save when done. For more info on Configuring the Office 365 Suite in Intune see https://docs.microsoft.com/en-us/intune/apps-add-office365 Step 2. Customize the start menu on a Windows 10 device On an enrolled Windows 10 device, login as a user that is targeted with the Office 365 Suite assignment created in Step 1, and wait until the Office 365 suite has deployed. You can verify this in Intune using the App install status for the user (or device) by selecting the app in Monitor, App Install Status. Once the Office 365 Suite is installed, start customizing the Start menu by unpinning unwanted apps by right clicking on an app you want to remove, and choosing Unpin from Start. After you've unpinned all the apps you want removed, it's time to pin your Office apps, to do that, highlight an Office app, right click and choose Pin to Start. repeat the above until you have all the apps you want to appear on the start screen, in the size and location of your choice. Give the Office group a name by typing text above it. After you are done you'll have a finished start screen something like this one. Step 3. Export the start screen Start PowerShell as Administrator on the device with the customized start screen. Export the start screen using the following command Export-StartLayout -path C:\startmenu.xml Note: If the Start layout that you export contains tiles for desktop (Win32) apps or .url links, Export-StartLayout will use DesktopApplicationLinkPath in the resulting file. Use a text or XML editor to change DesktopApplicationLinkPath to DesktopApplicationID. See Specify Start tiles for details on using the app ID in place of the link path. As you selected Office 365 Suite with 32 bit architecture, you'll need to modify the XML file otherwise no Icons will appear on the users start screen. But before doing that you'll need to identify the DesktopApplicationID for each Office App in the start screen. To do that, list the start apps using Get-StartApps cmdlet. Now that you have the info needed, you can modify the XML file. Using notepad or an XML editor, open the file C:\StartMenu.xml Replace all instances of DesktopApplicationLinkPath with DesktopApplicationID. Next, replace the DesktopApplicationLinkPath text eg: "%ALLUSERSPROFILE%\Microsoft\Windows\Start Menu\Programs\Excel 2016.lnk" for each office app, with the correspoonding AppID from the Get-StartApps cmdlet eg: "Microsoft.Office.EXCEL.EXE.15" Here you can see the modified xml file. Save the modified file to your Desktop. Here is a copy of the modified file for your information. startmenu.xml Step 4. Create a device configuration profile in Intune In Intune in Azure, click on Device Configuration, click on Profiles and then click on + Create Profile. In the Create Profile blade, give it a suitable name such as Windows 10 - Office 365 suite start screen (so you can easily search for it later) and choose Windows 10 and later as the platform and then select Device restrictions. For Settings, click on Start (from the options available, scroll down) and then select the previously created XML file. There are many more settings which you can configure in the Start settings, but for now, this is all you will configure. Click on OK when done, then click OK again, and finally click Create. Next, you need to Assign the device restriction, so click on Assignments and assign it to the User Group that you deployed Office to, in this case, the Office 365 suite users group. Click on Save when done. Step 5. Review the end result On a Windows 10 version 1709 device sign in with credentials of a user that is in the Office 365 Suite users Group. If you login immediately after enrolling, then the Office 365 suite will not yet be installed, but it will have pulled down the policies including the custom start screen, it will look like so... This is expected behavior and all the user has to do is wait until Office 365 get's installed (12 minutes or so). The icons will automatically appear as soon as each app is installed. And here it is, job done ! Note: This method leaves a custom start menu but the user cannot change the tiles or add to the start menu, if you want them to have that ability then change <DefaultLayoutOverride> to <DefaultLayoutOverride LayoutCustomizationRestrictionType="OnlySpecifiedGroups"> Notice how the pinned items that you've defined will have a lock on them but the user can add/remove other items. Recommended reading https://docs.microsoft.com/en-us/intune/apps-add-office365 https://docs.microsoft.com/en-us/windows/configuration/customize-windows-10-start-screens-by-using-mobile-device-management https://docs.microsoft.com/en-us/windows/configuration/customize-and-export-start-layout#customize-the-start-screen-on-your-test-computer https://docs.microsoft.com/en-us/windows/configuration/start-layout-xml-desktop#specify-start-tiles https://www.windows-noob.com/forums/topic/15773-how-can-i-enable-mdm-auto-enrollment-for-microsoft-intune-in-azure/