Search the Community
Showing results for tags 'intune'.
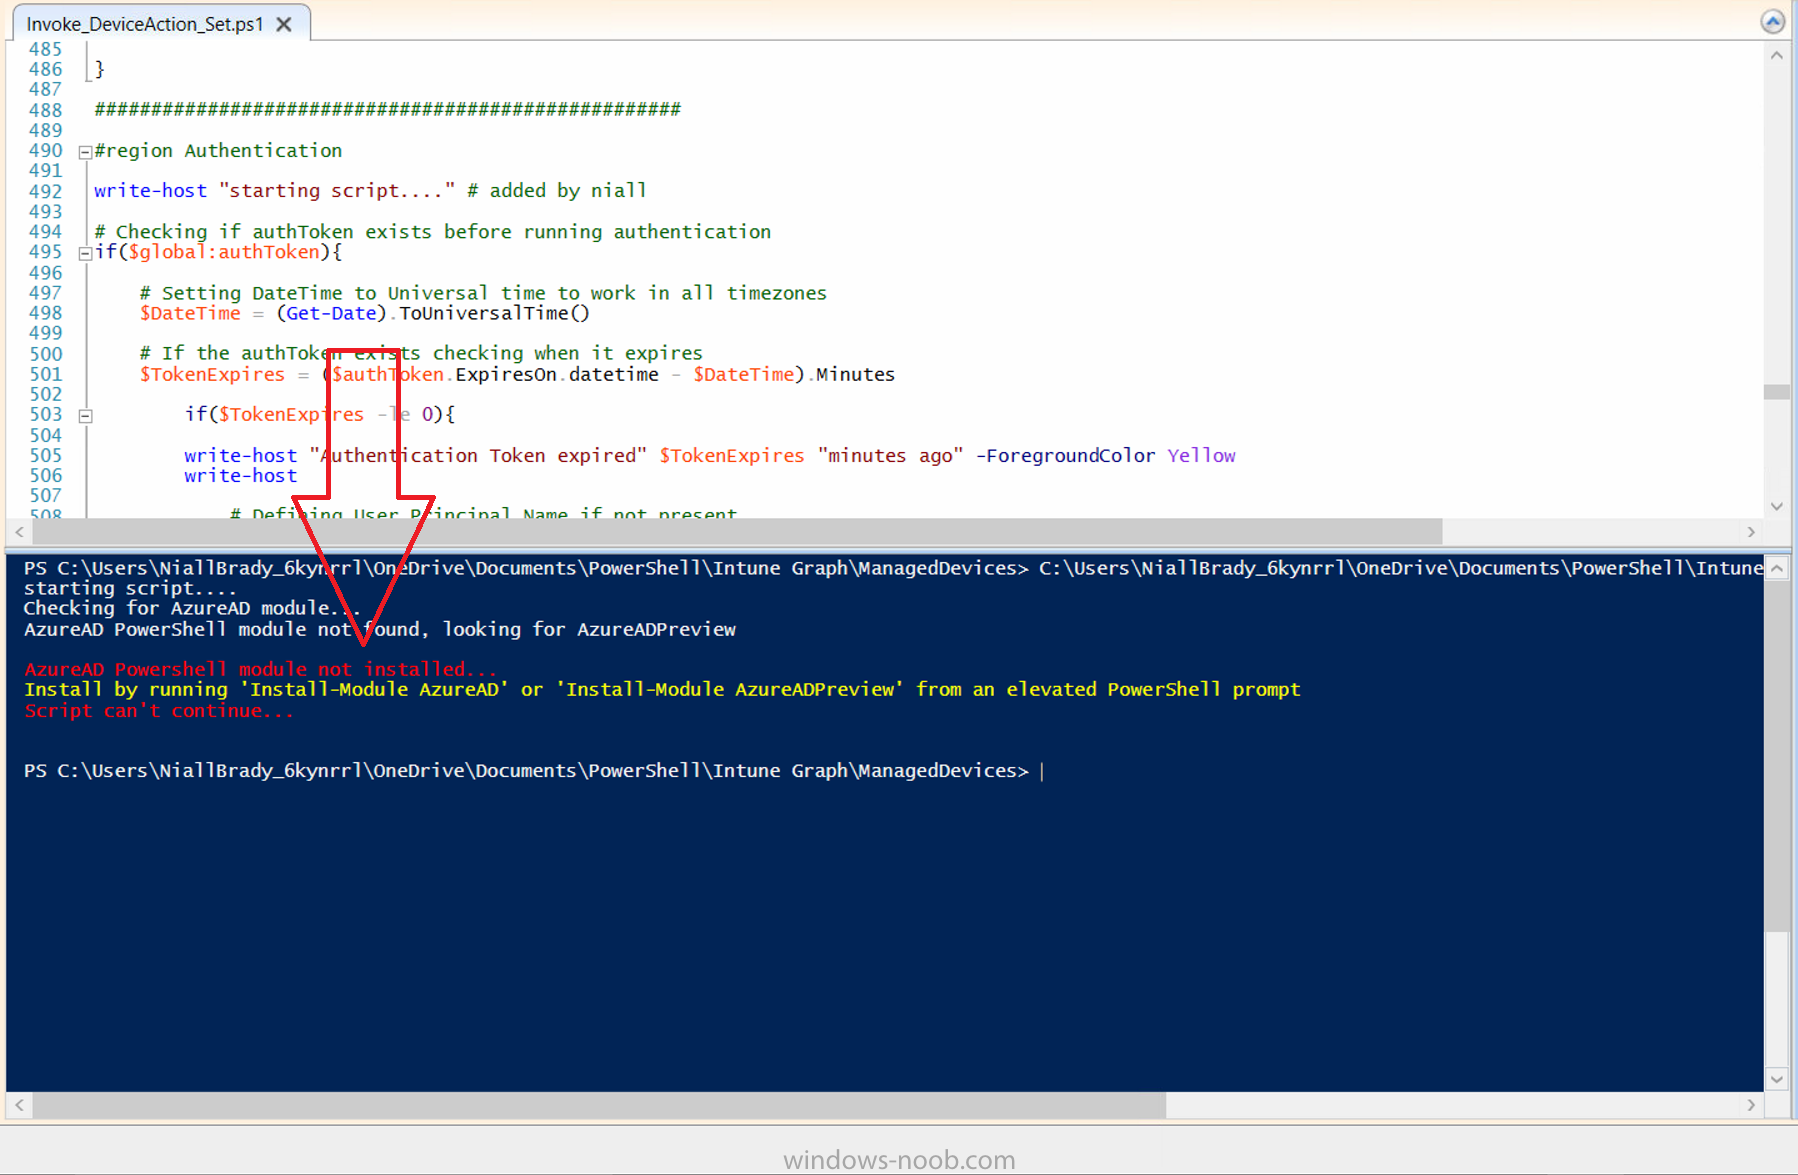
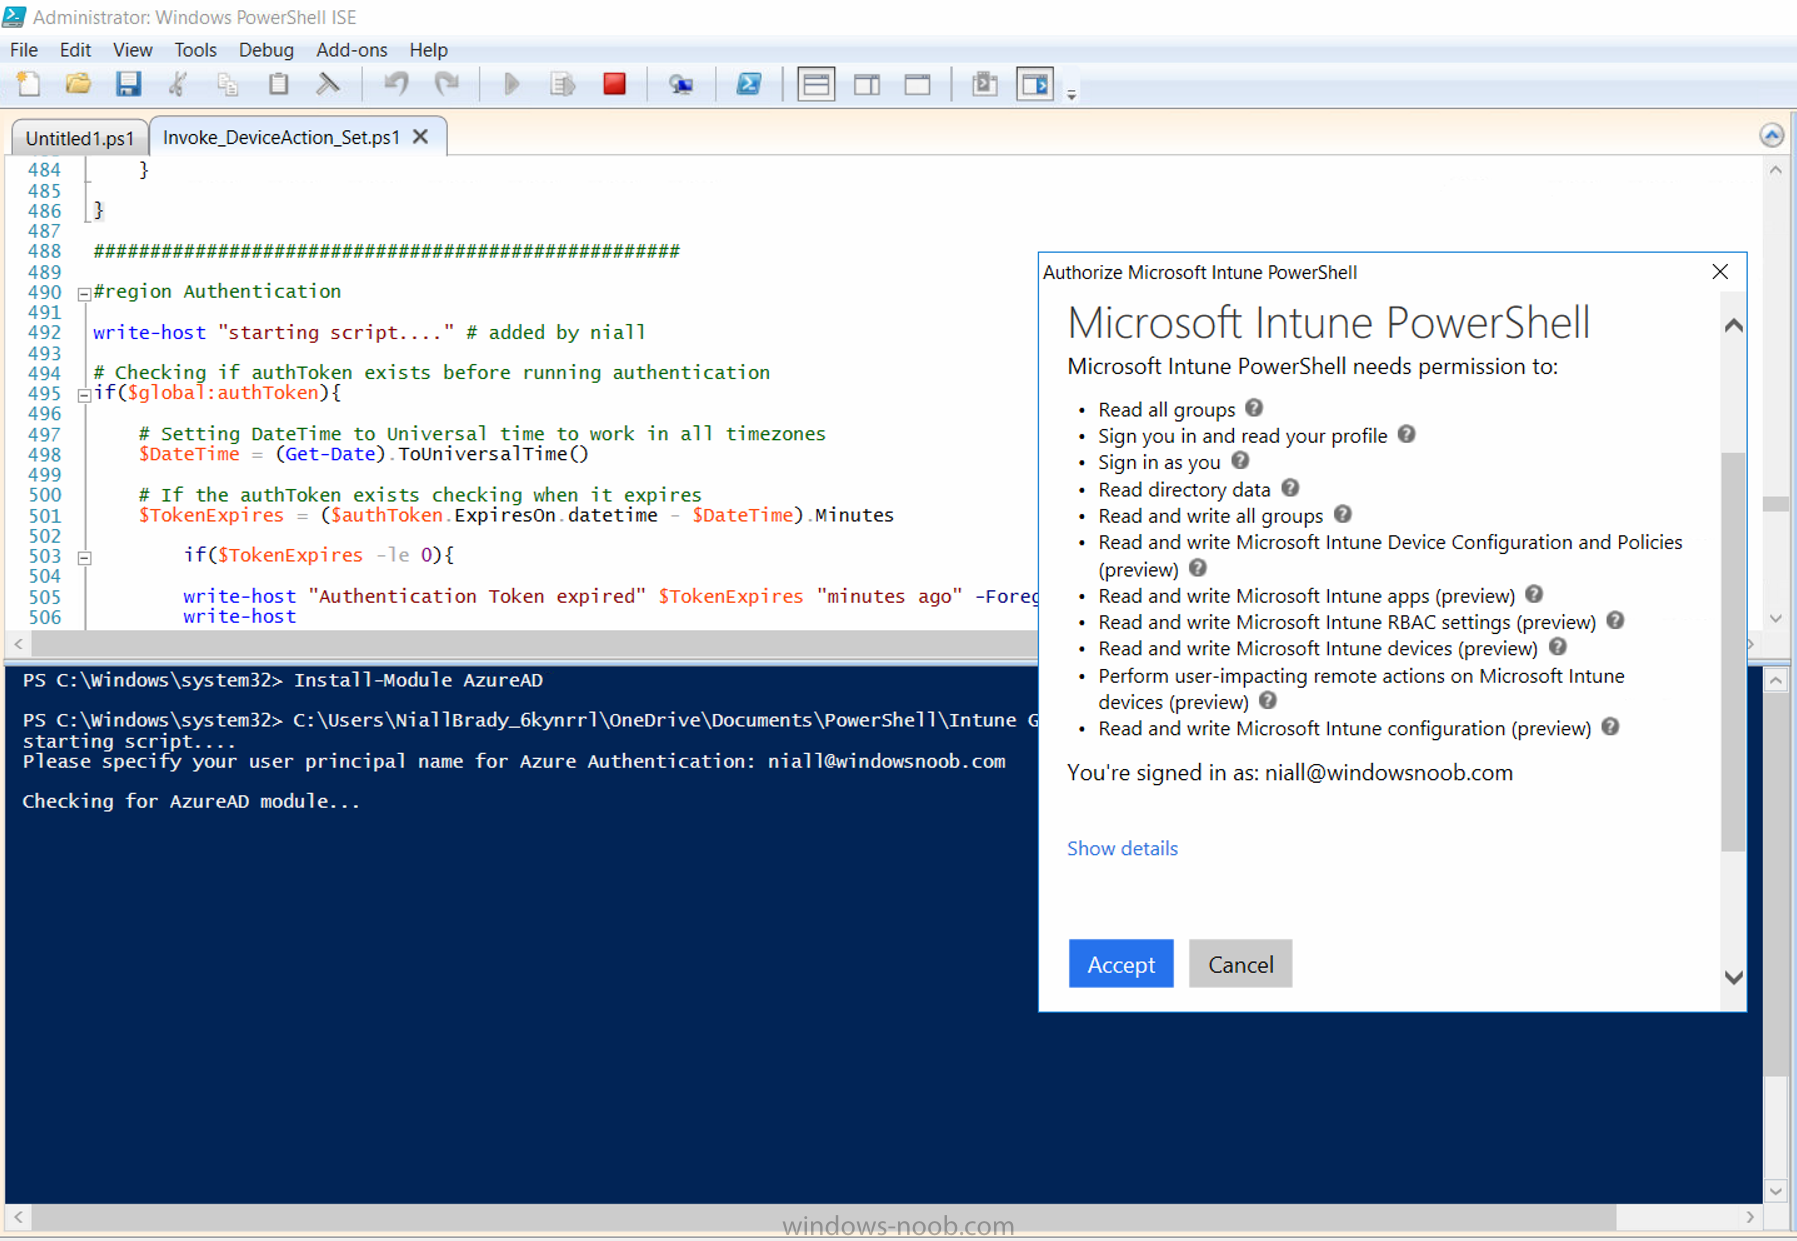
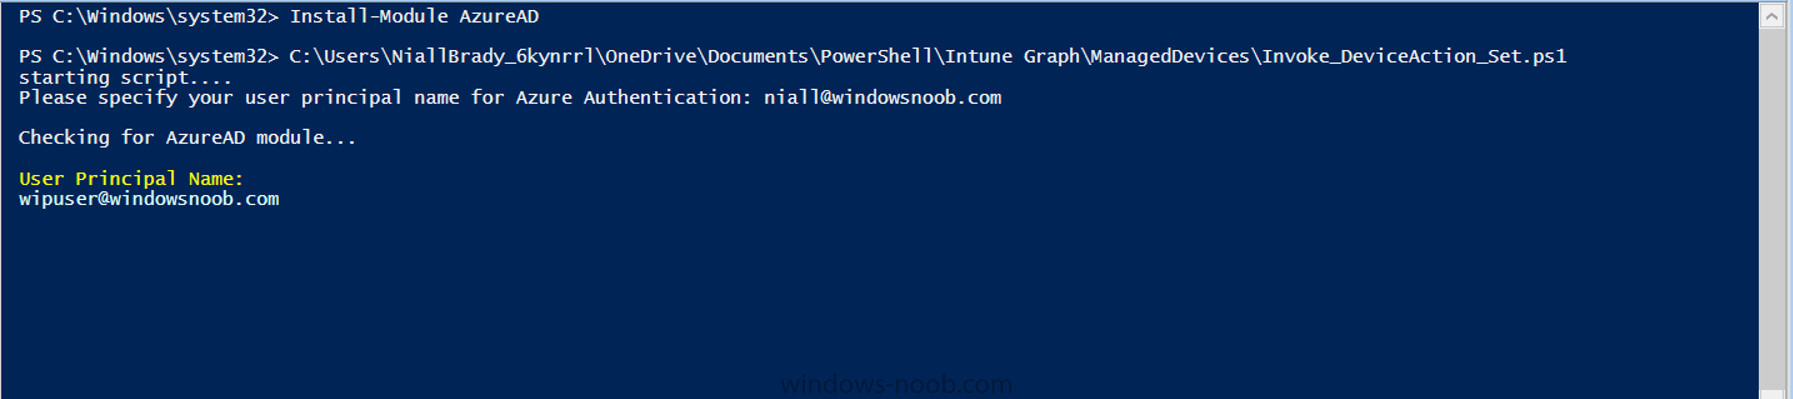
-
Hi all, my first question and certainly not my last. I am currently testing to get my first local devices into the AAD. So far everything has worked, the join and the policies are assigned, under autopilot is my test device as assigned too. However, I have no assigned devices under my deployment profile. This apparently has the effect that my user is administrator, although the profile is set to standarduser and also the device name is not taken from the profile. Need help ;) Thanks a lot!
-
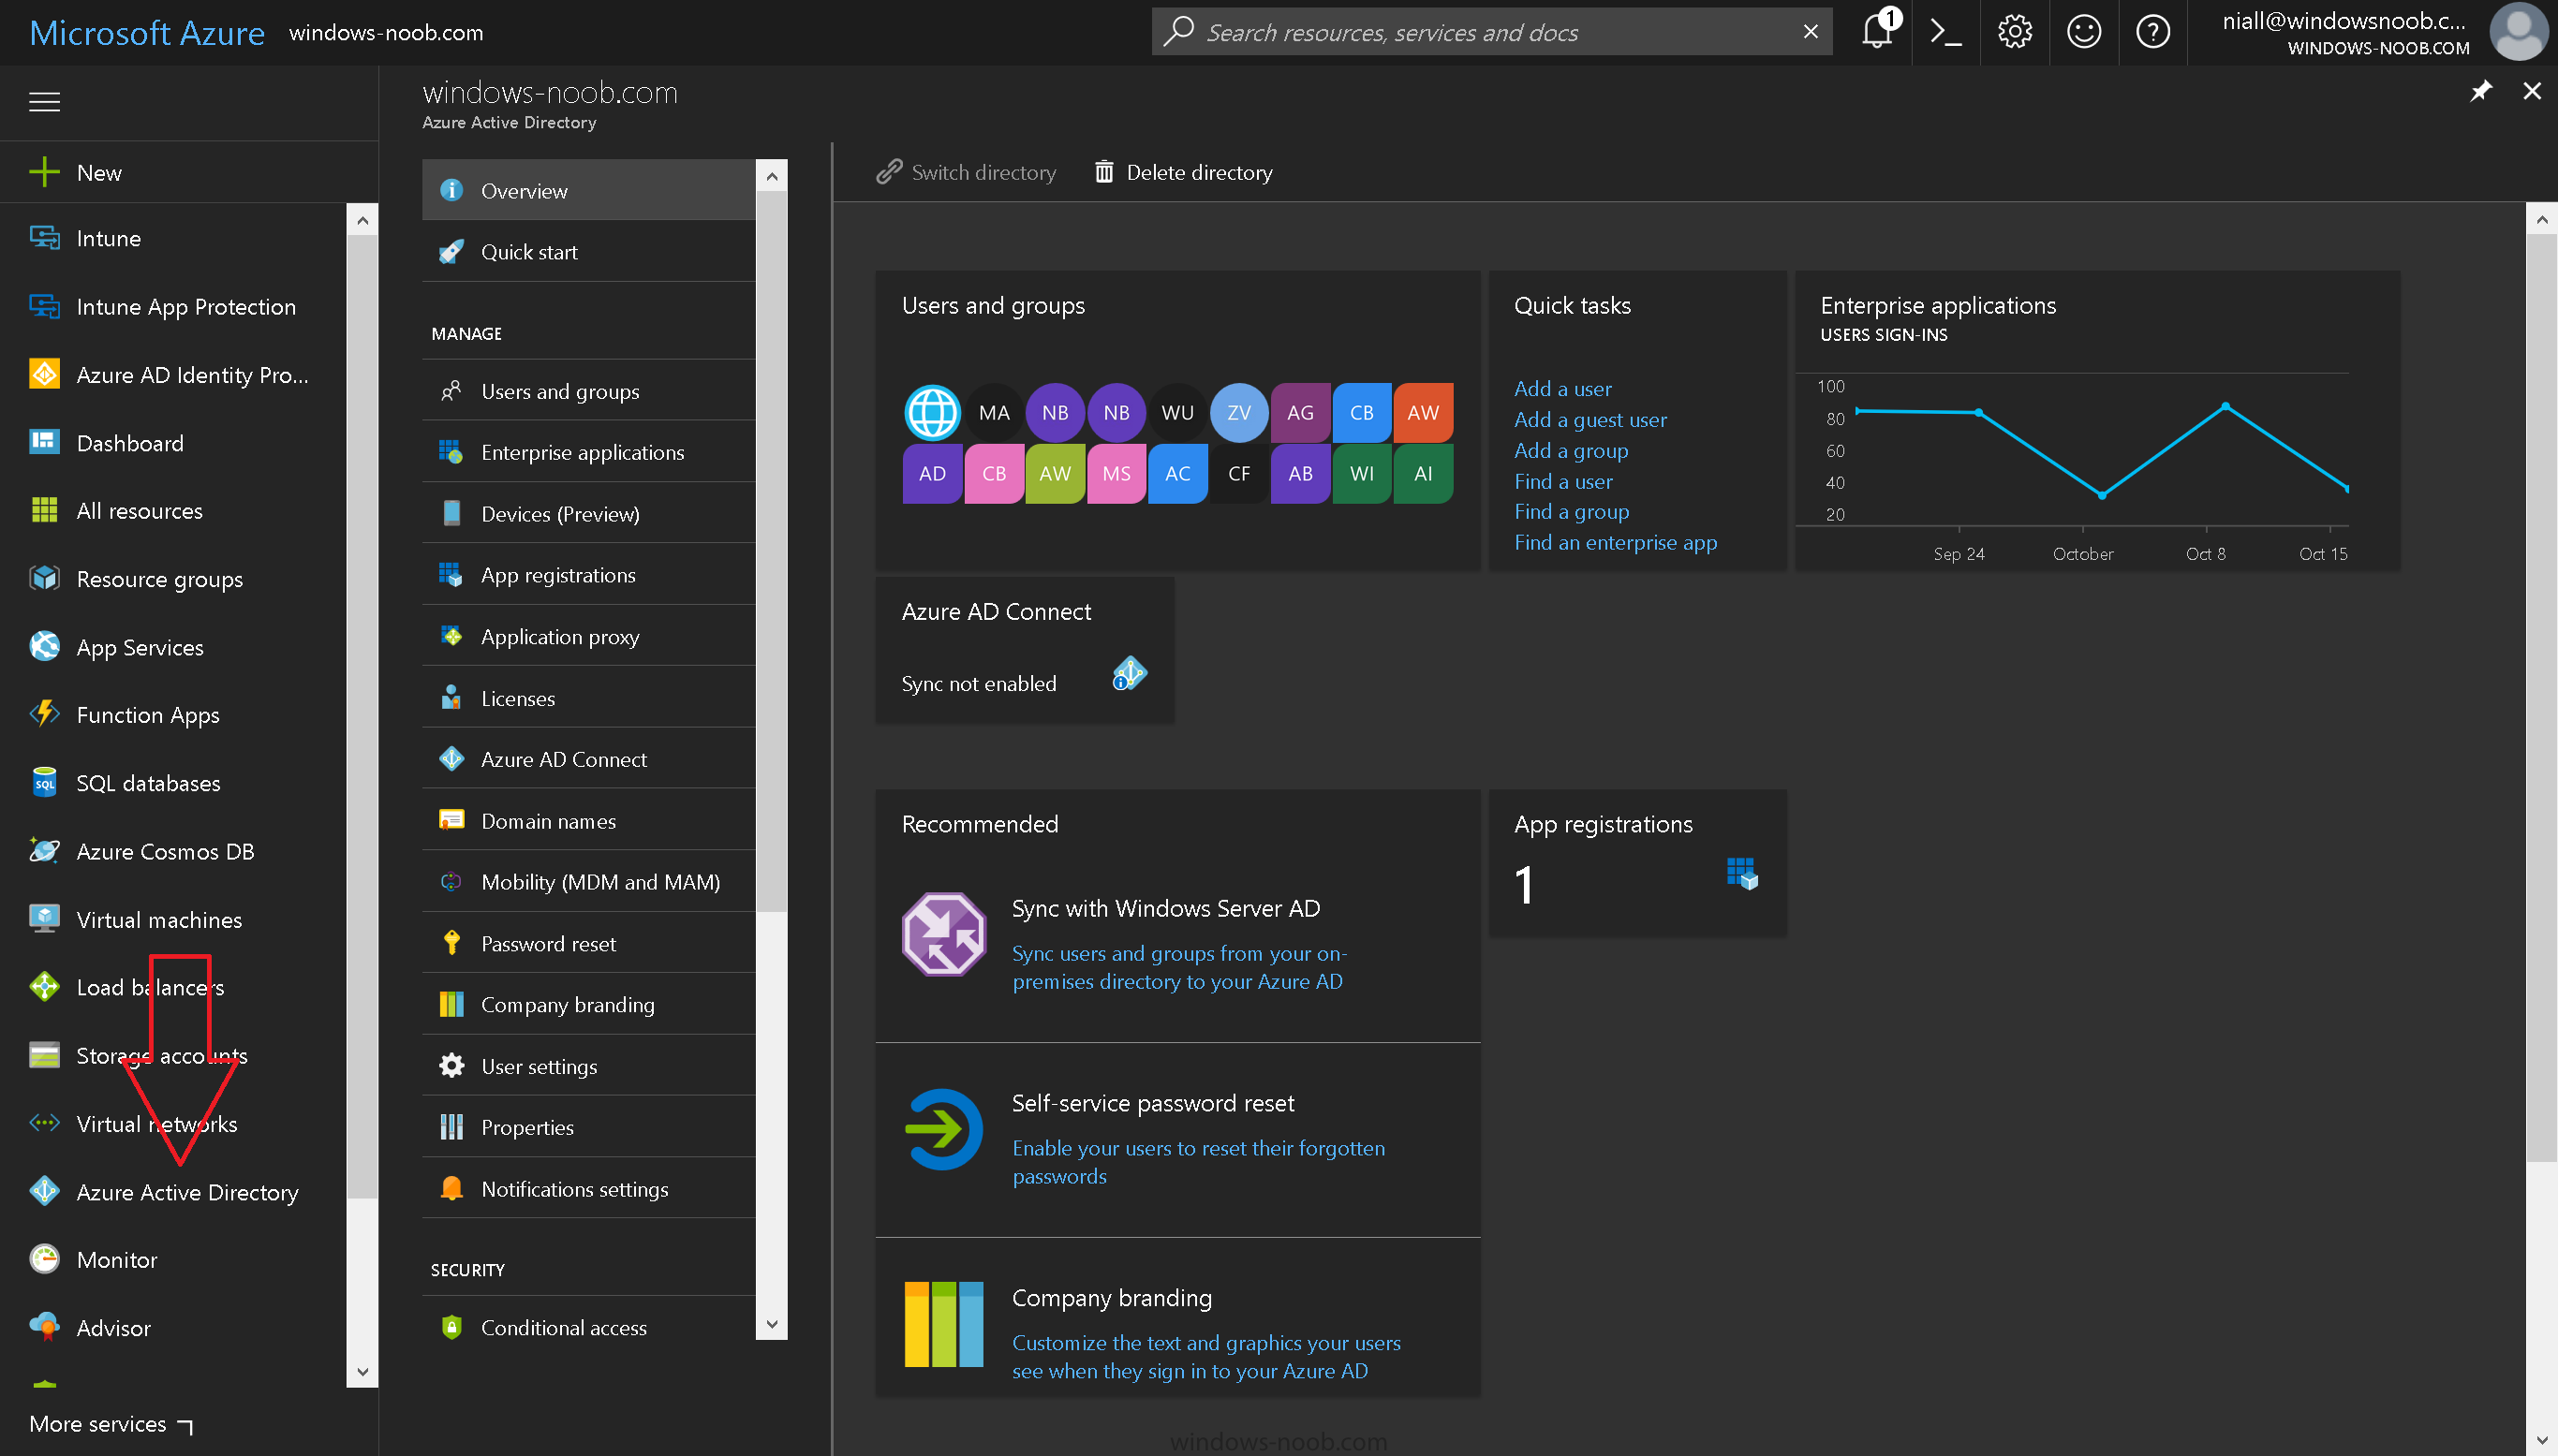
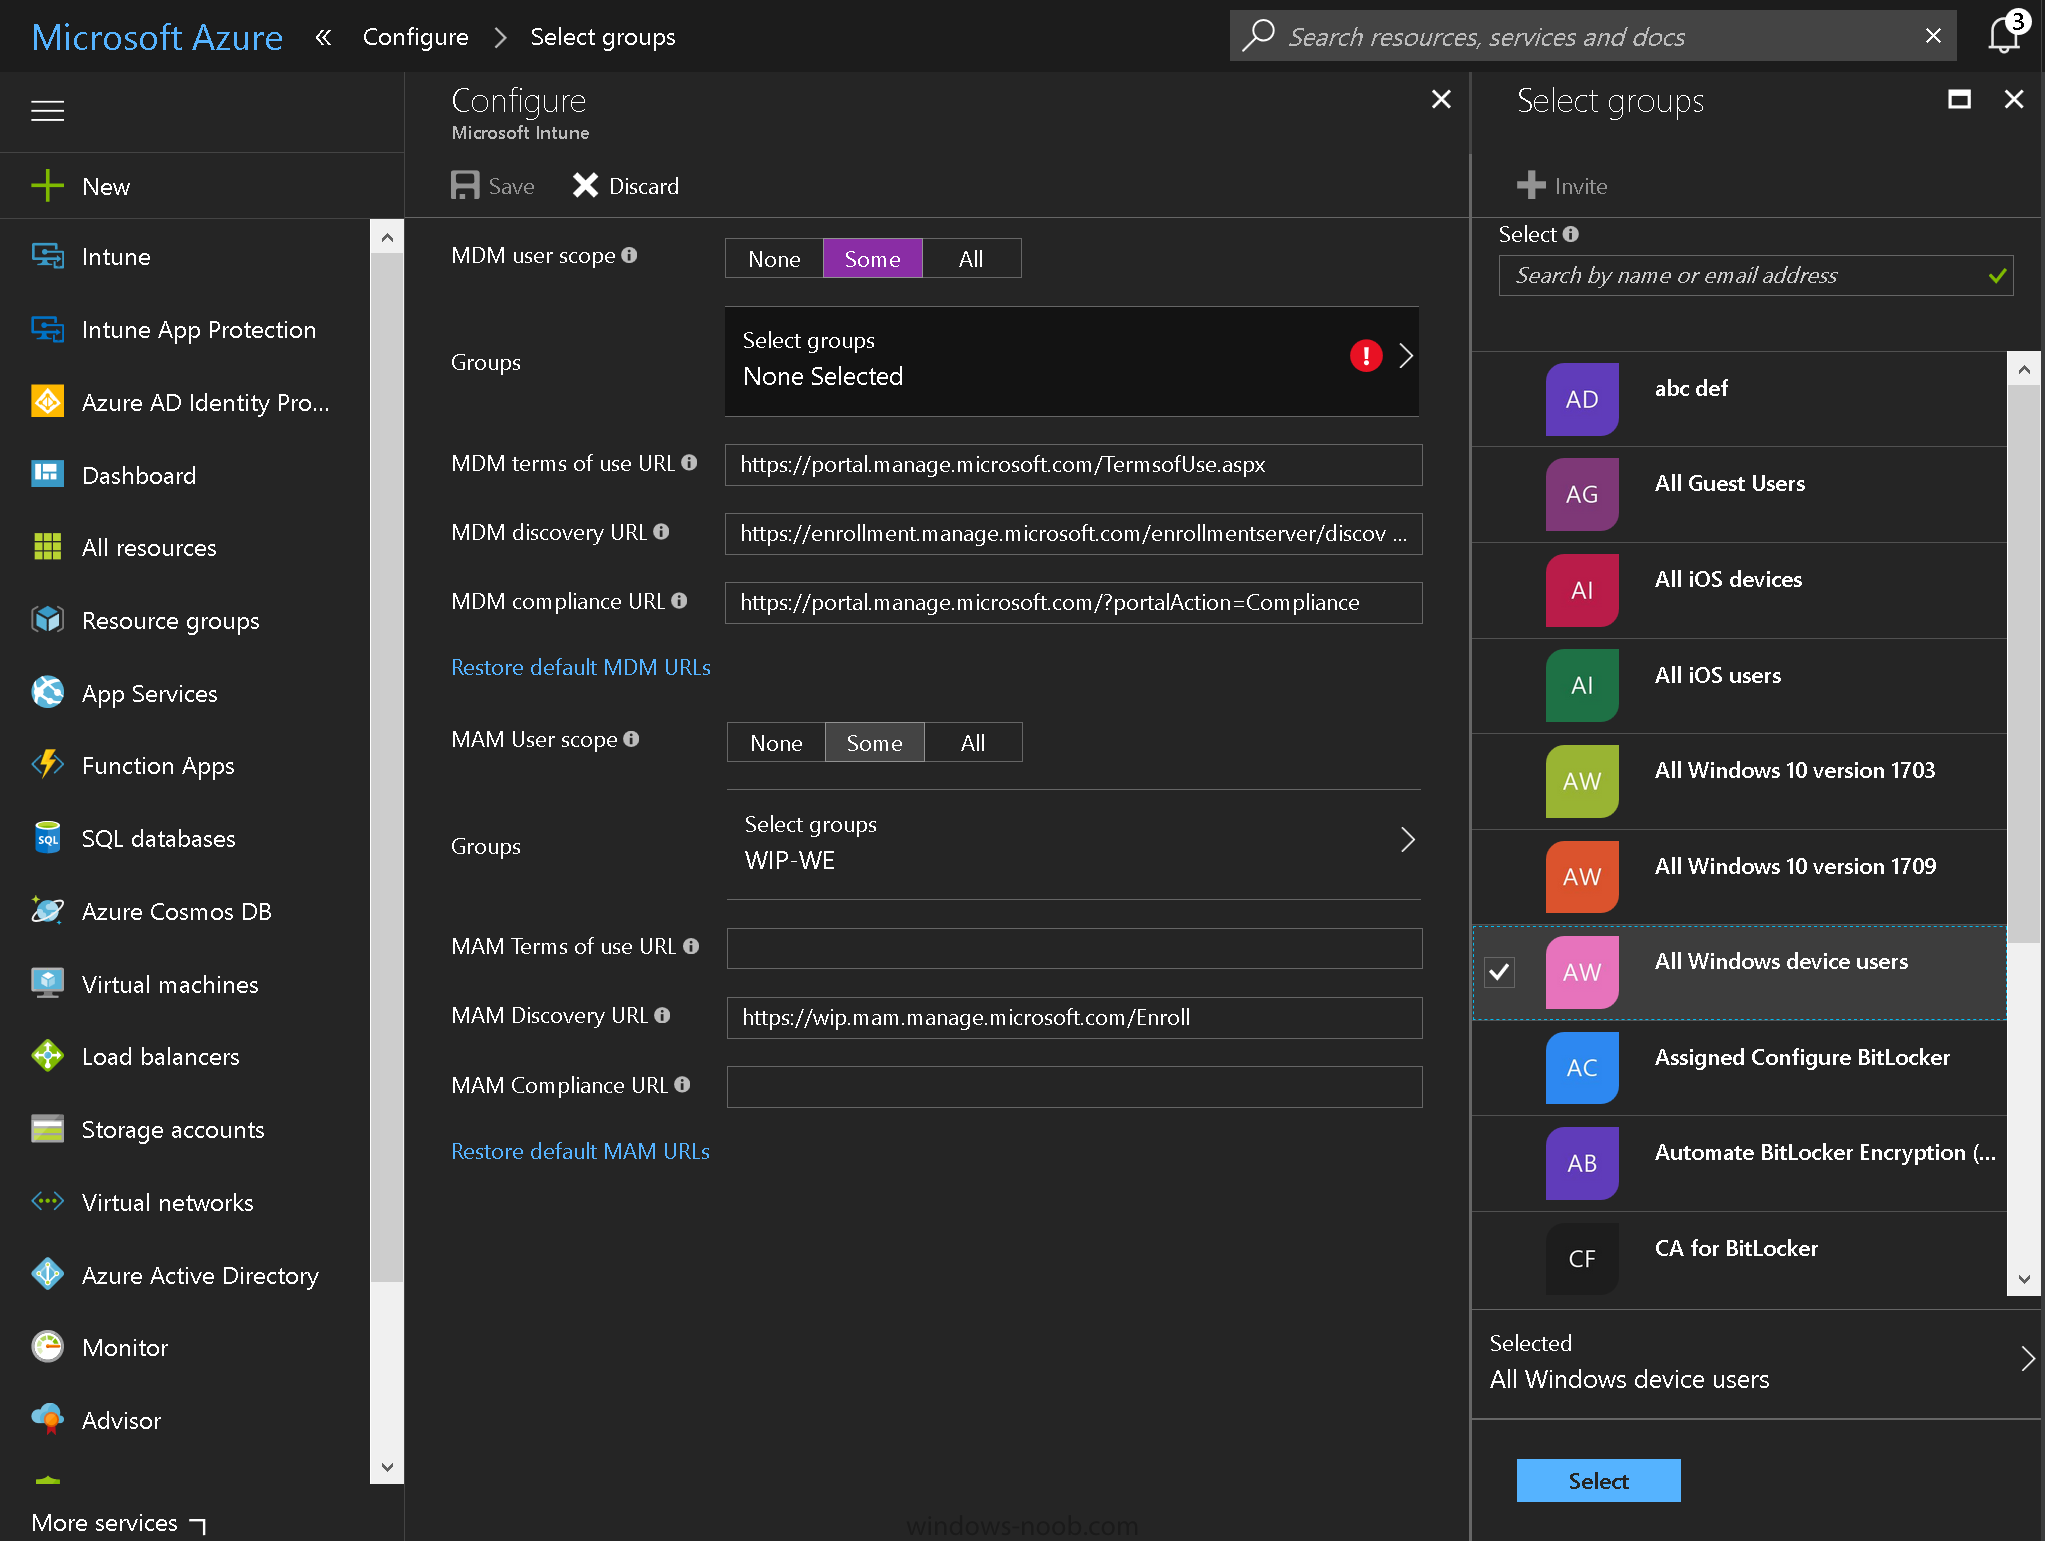
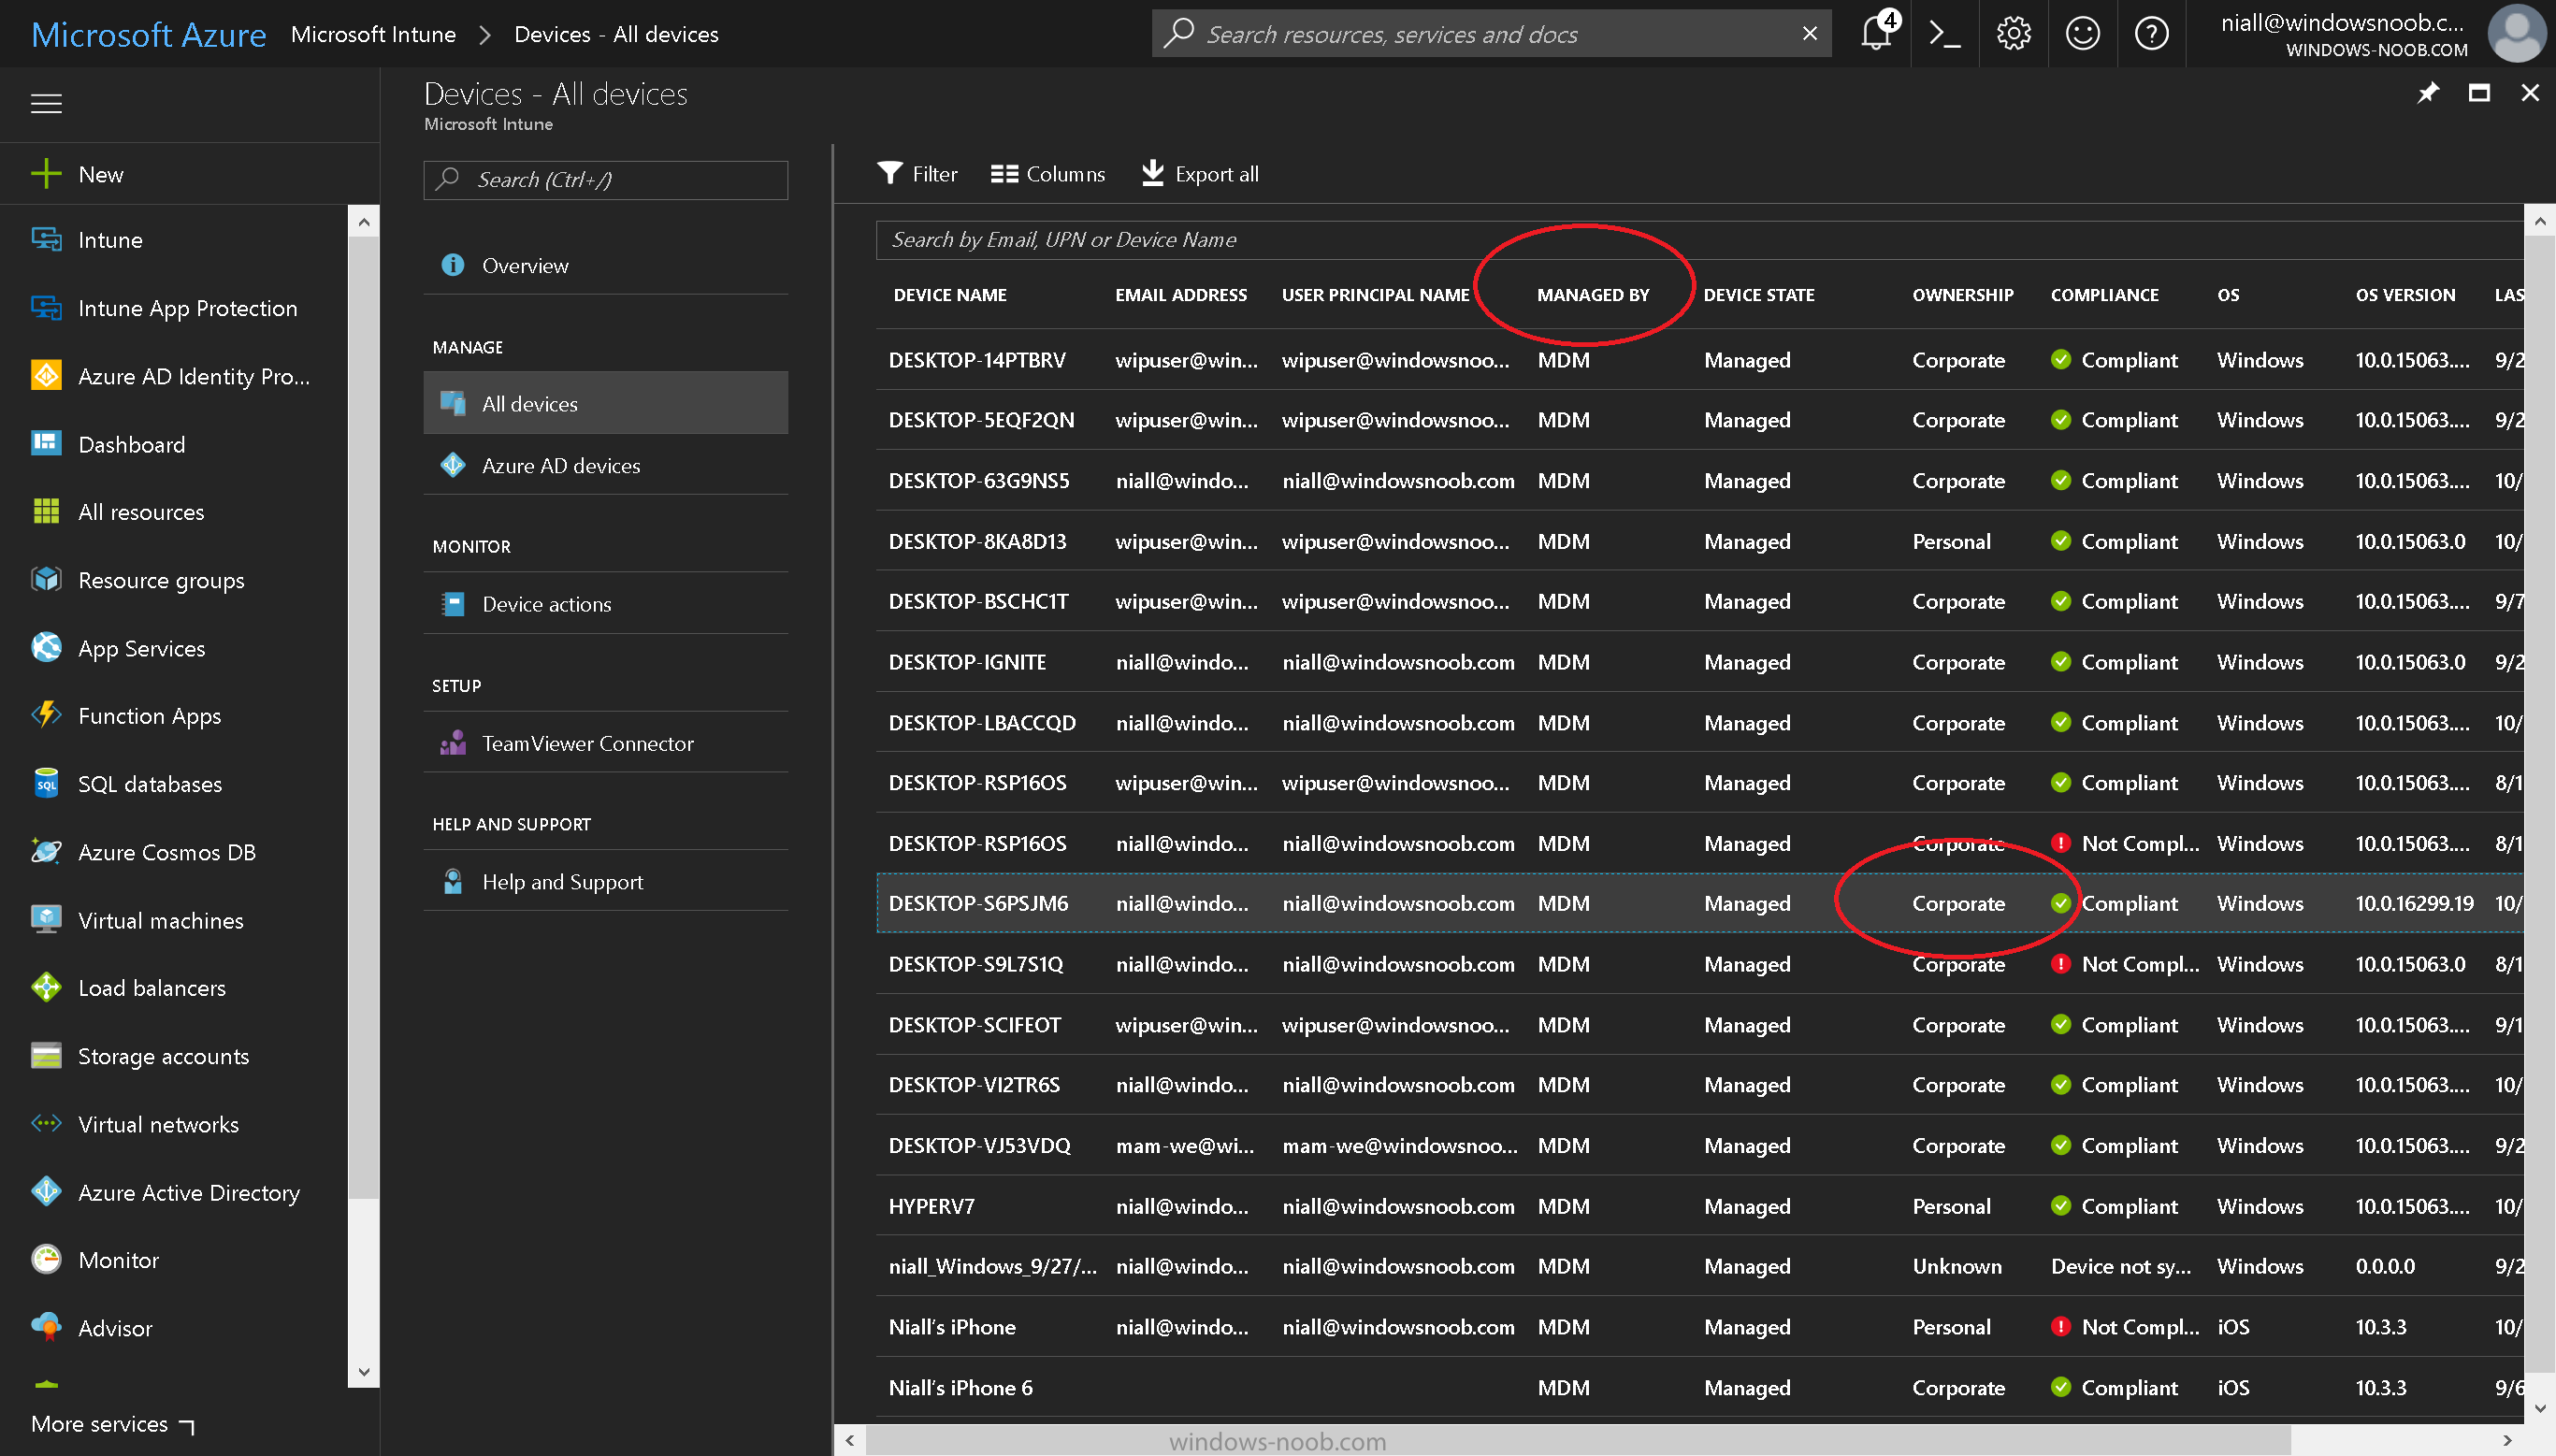
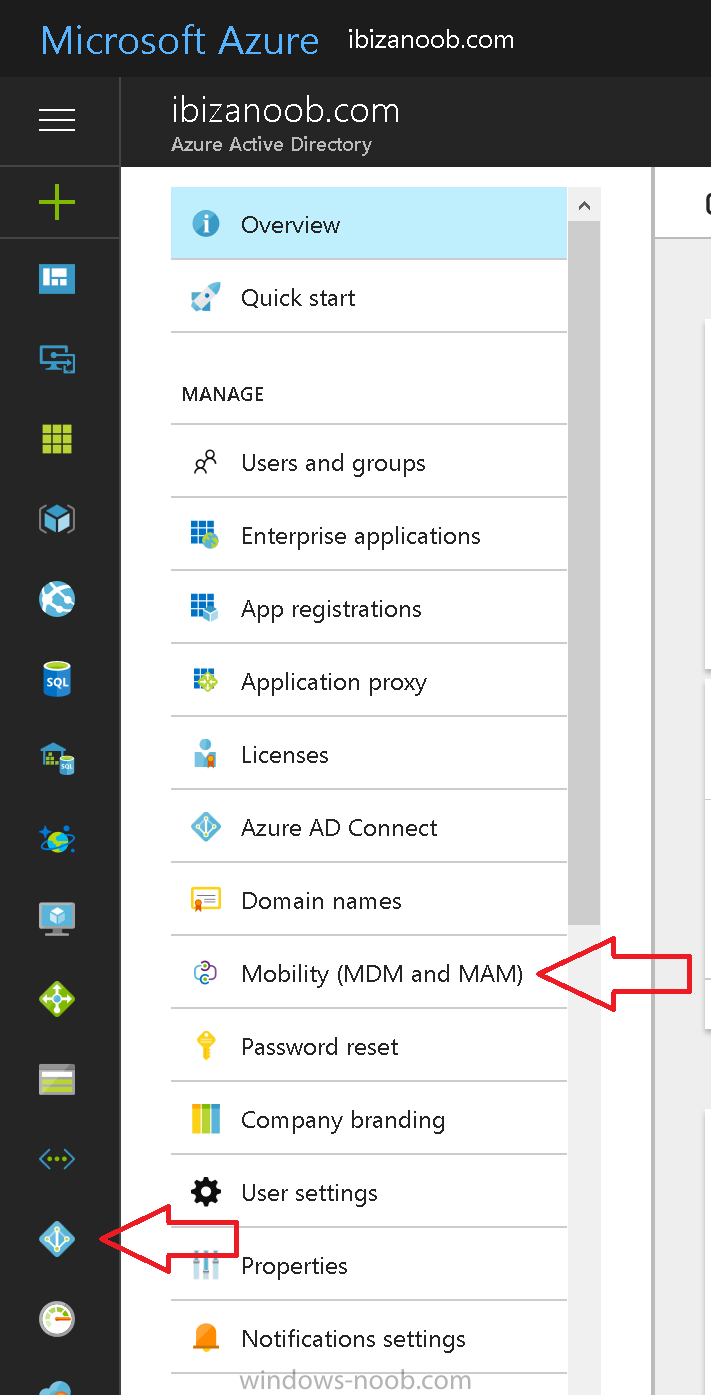
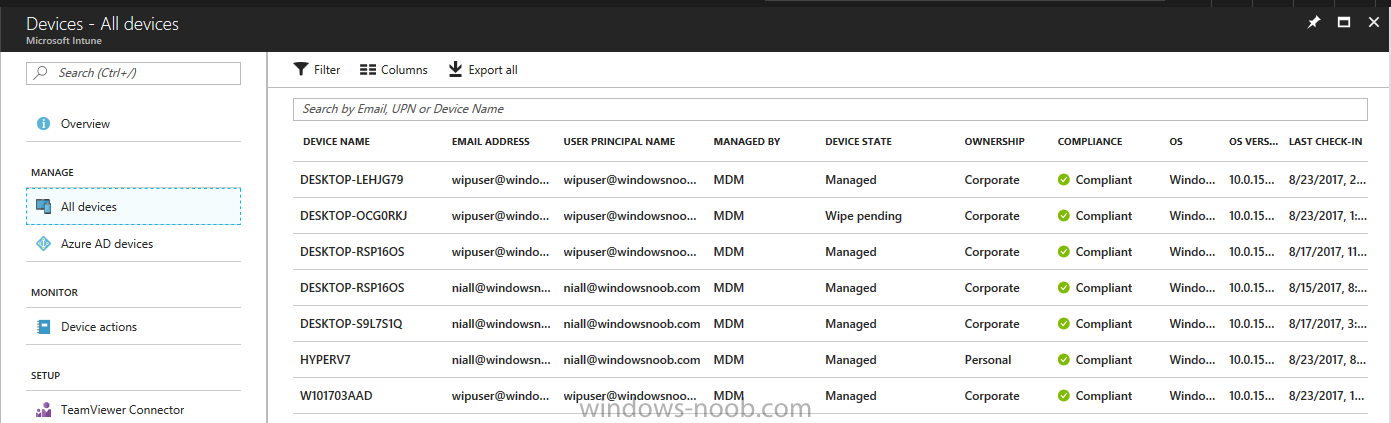
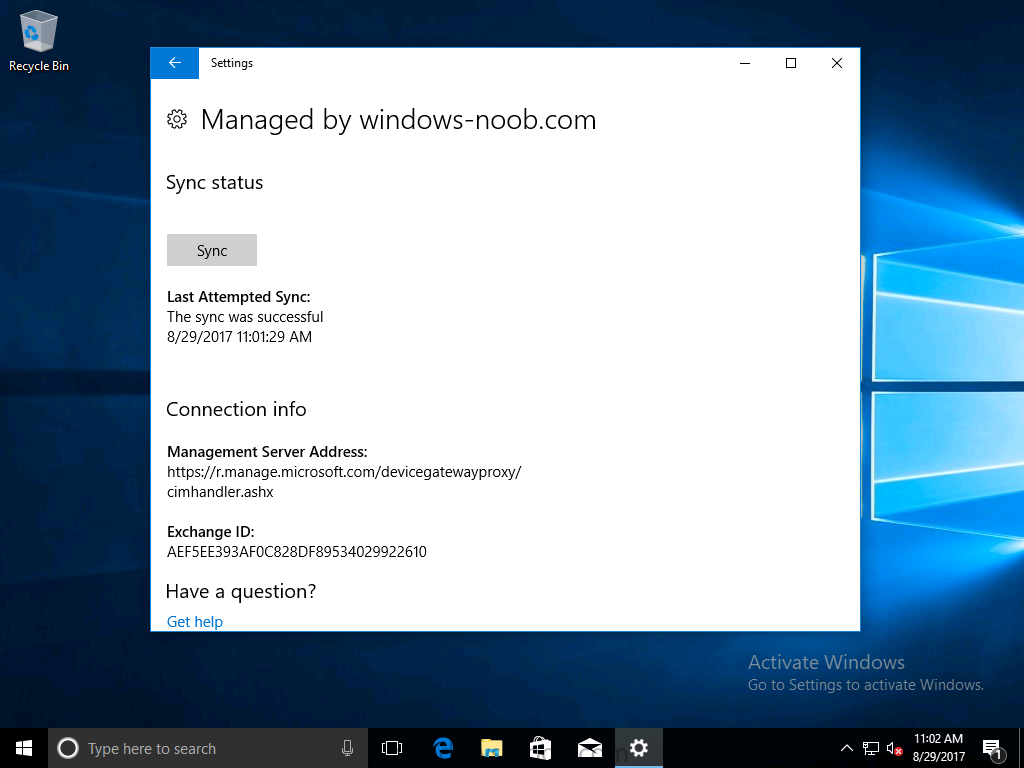
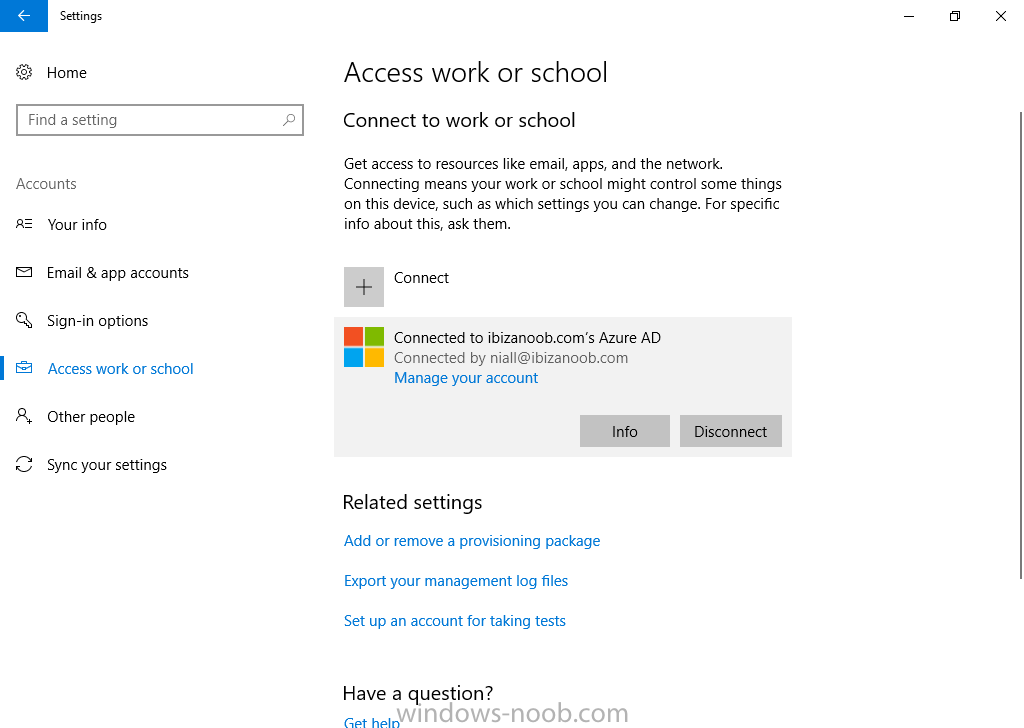
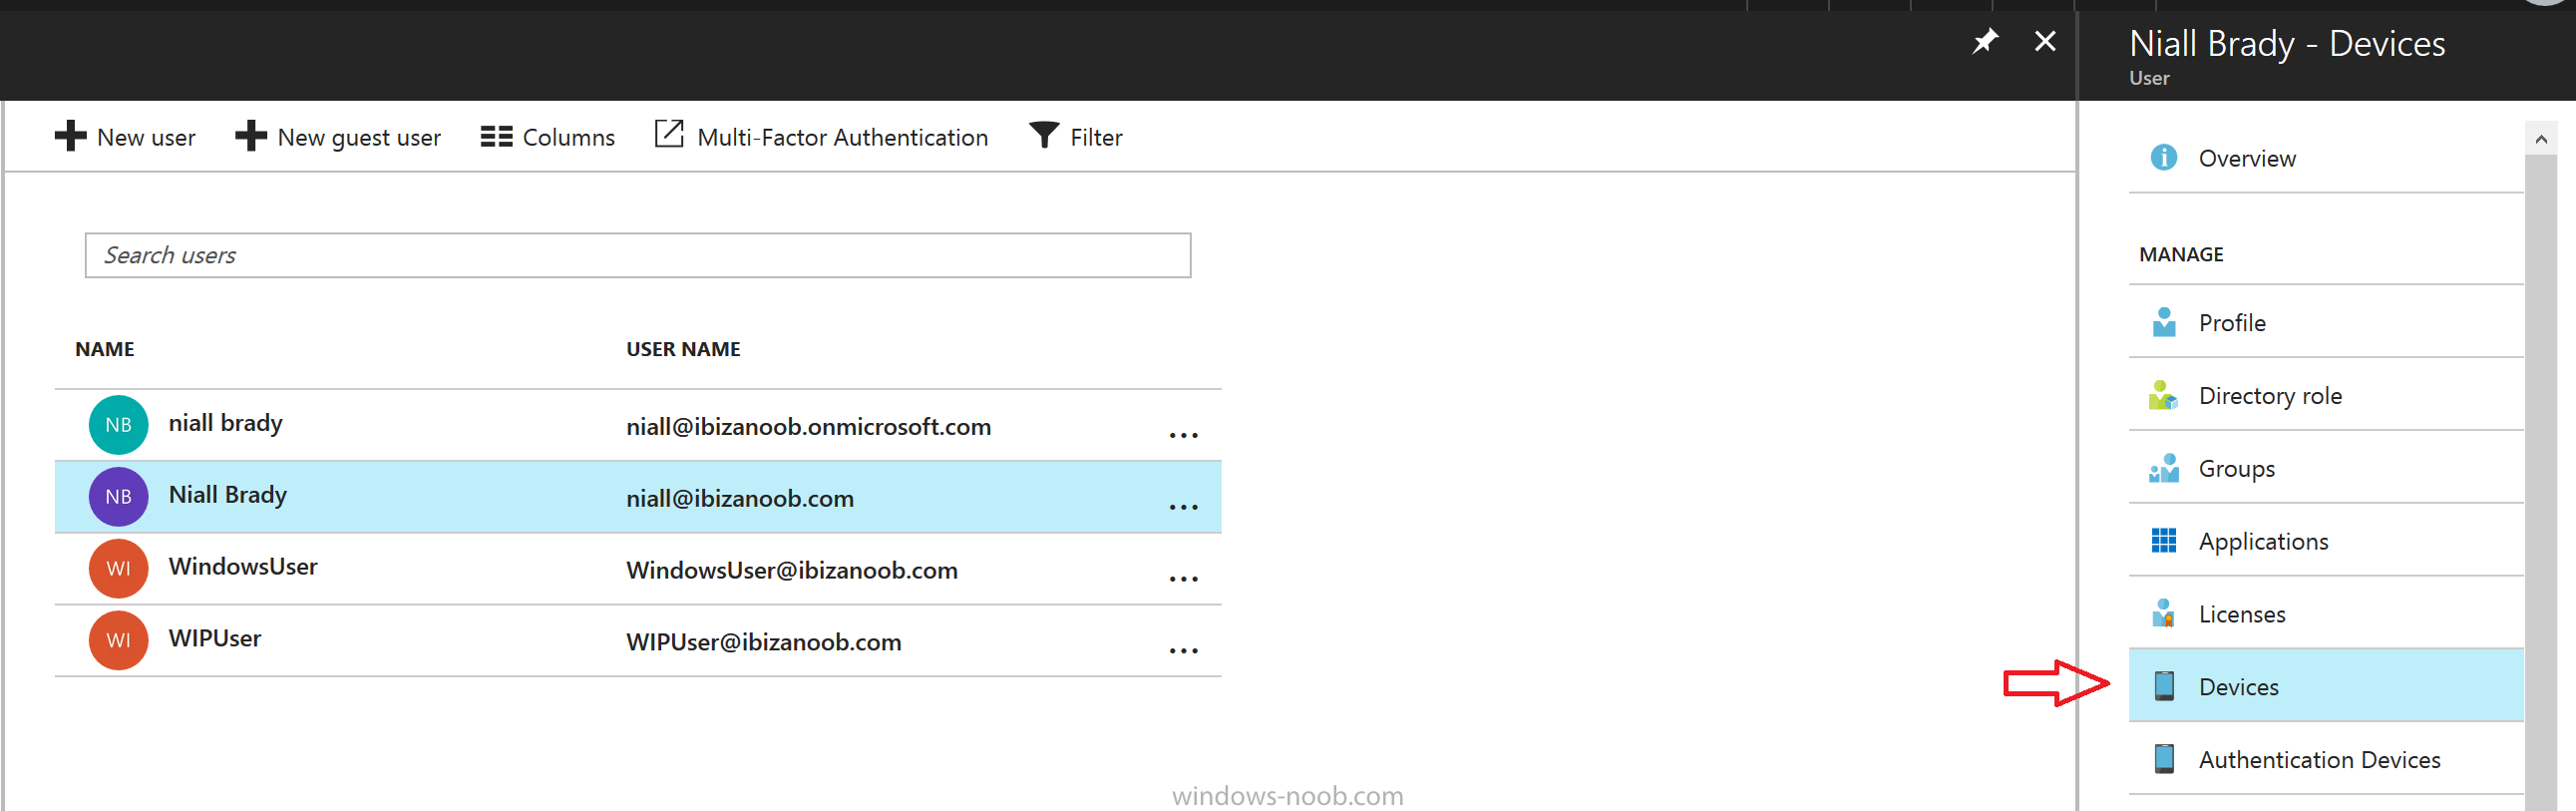
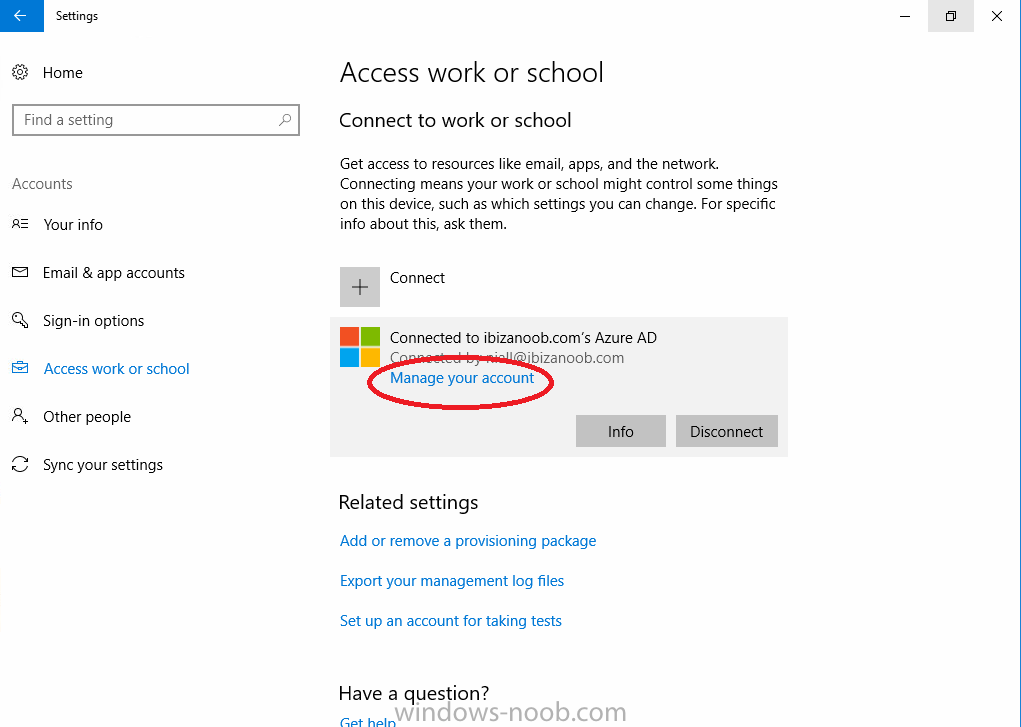
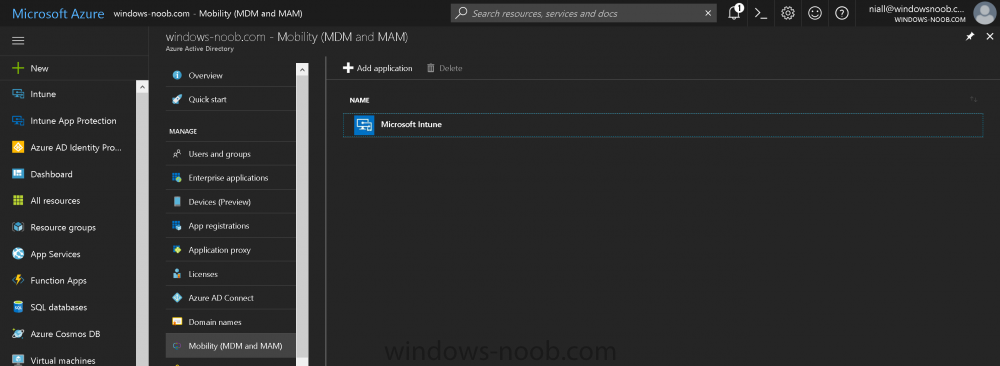
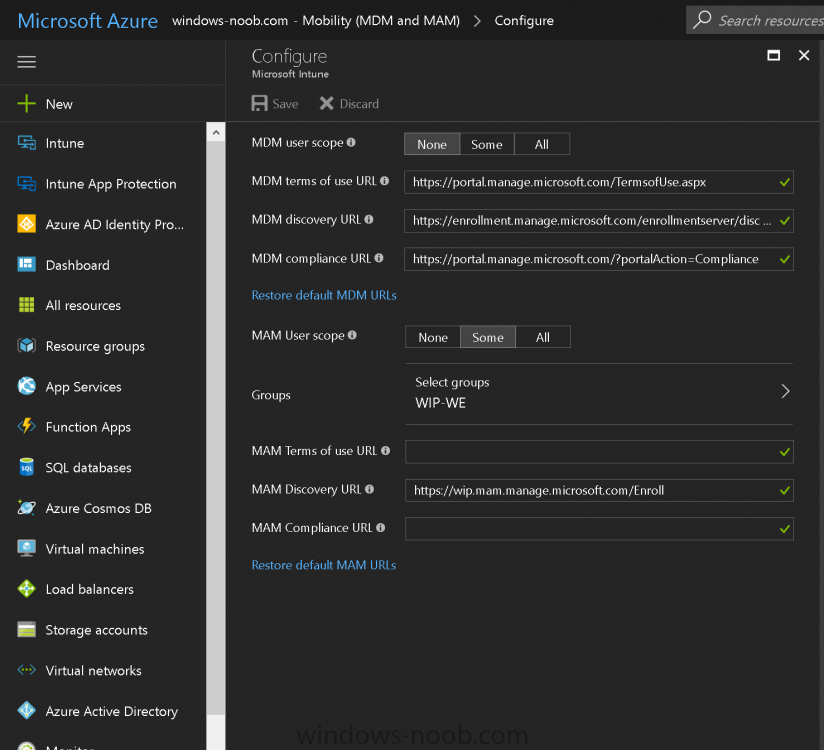
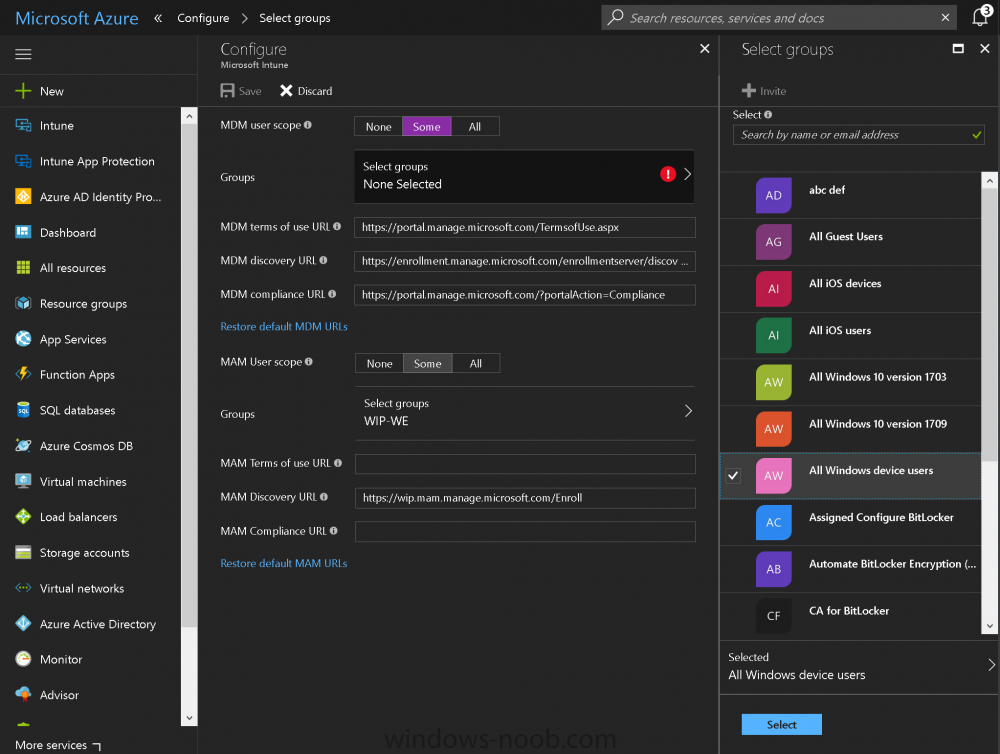
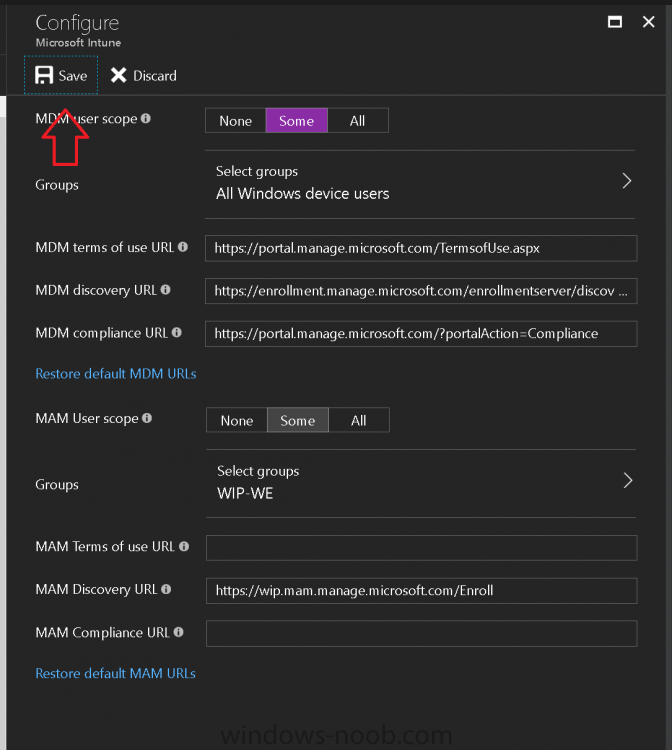
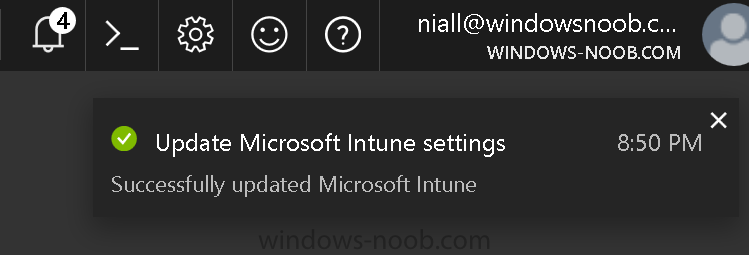
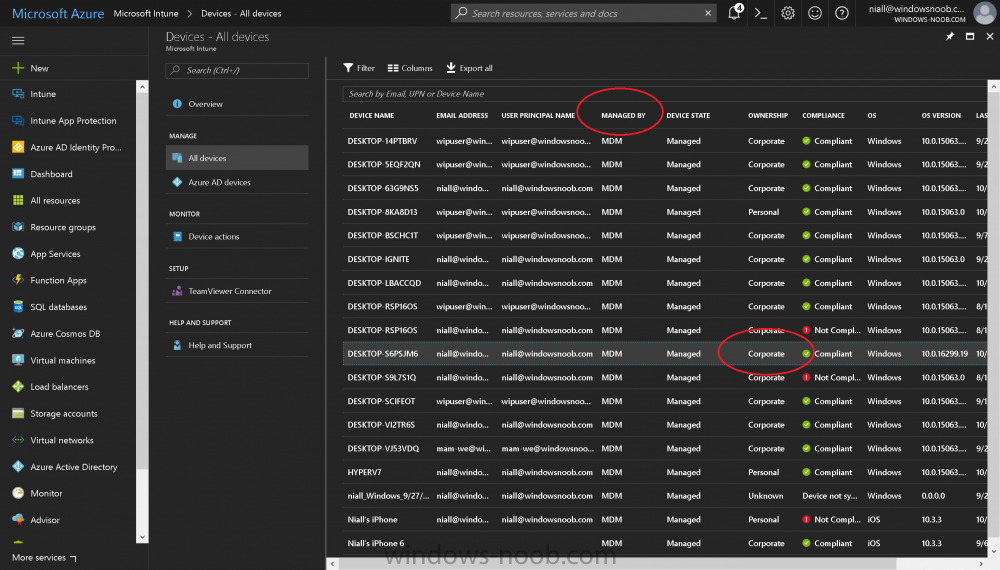
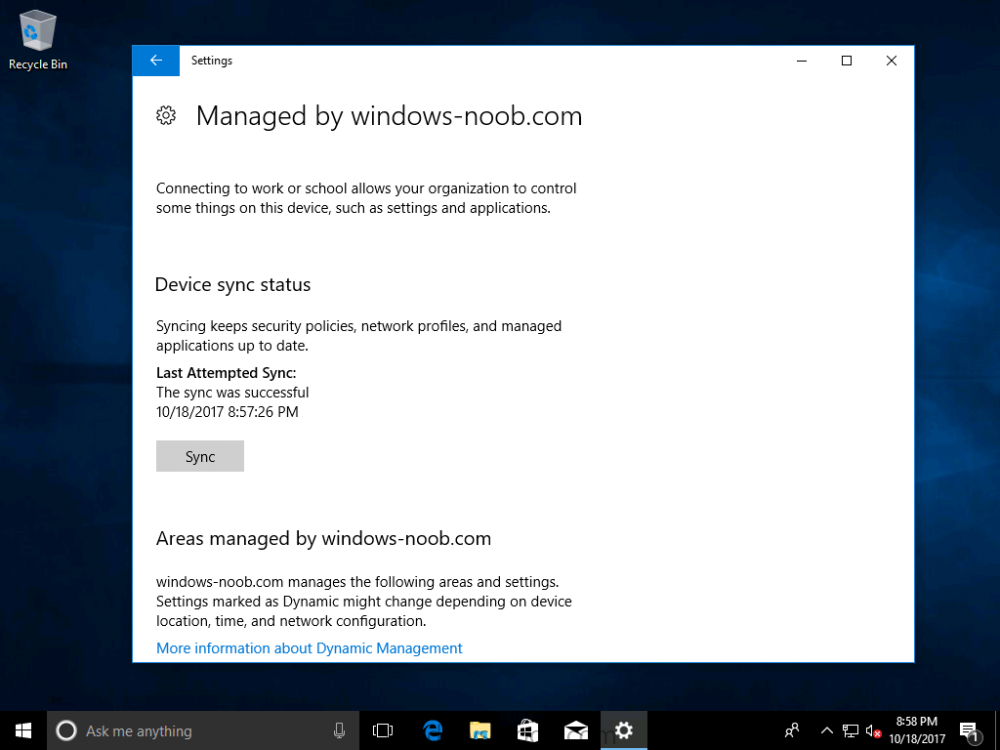
 Introduction Devices can be enrolled into Microsoft Intune in many ways, the user can download the Microsoft Company Portal, and enroll the device using the wizard contained within that app, this would then mean the device shows up as Personal owned. Or, the admin can use Bulk Enrollment methods such as Apple Device Enrollment Program or Apple Configurator (which requires an Apple Mac to run the program) or for Windows devices, use Windows AutoPilot. Keep in mind that bulk enrollment is generally for new devices and not devices that have already been deployed. When you join new Windows desktop, mobile, holographic or Surface devices into Azure AD (Azure AD join as part of OOBE or Windows AutoPilot or via the options in the operating system) you can avail of a new MDM auto-enrollment capability which means that not only is the device Azure AD joined, but it will automatically become enrolled (and managed) by Microsoft Intune. This also means that the device will show up as Corporate owned and has the distinct advantage of not needing the end user (or admin) to have to download and use the Company Portal to enroll the device. To setup MDM auto-enrollment in Azure is fairly easy, and here's how to do it. You do need to have both Azure Active Directory Premium subscription and a Microsoft Intune tenant configured before doing this. Step 1. Login to Azure As a user with administrative permissions in Azure Active Directory, login to https://portal.azure.com and select the Azure Active Directory service highlighted here with the red arrow. Step 2. Configure MDM auto-enrollment Click on Mobility (MDM and MAM) and then select Microsoft Intune from the applications listed. The Configure Microsoft Intune blade opens. Notice the following text (by clicking on the information 'i' beside MDM User scope, which explains the capabilities. Use MDM auto-enrollment to manage enterprise data on your employees' Windows devices. MDM auto-enrollment will be configured for AAD joined devices and bring your own device scenarios. Click on Restore default MDM URLs and then select Some (to select one or more user groups you want to enable for MDM auto-enrollment), or All to apply to all users. In this example you will add a User Group (previously created, containing one or more Windows device users), so select Some, and then click on Select Groups to select the User groups you want this MDM auto-enrollment capability to apply to. When you are done with your selection, click on Select. Next click on Save to save your changes. You'll be notified in the top right corner of the success or failure of this action. That's it, job done, now go and Azure AD join a Windows device, using a user that is a member of the group you specified above. After joining Azure AD, it will also become MDM auto-enrolled by Microsoft Intune. You can verify this by going into Microsoft Intune service in Azure, and selecting Devices then All Devices, the device you just joined into Azure AD will now also be MDM Managed by Microsoft Intune (due to MDM auto-enrollment) and listed as a Corporate owned device. And on the device itself you can verify in All Settings, Accounts, Access work or school, and click on the username. For more info about this read https://docs.microsoft.com/en-us/intune/windows-enroll#enable-windows-10-automatic-enrollment
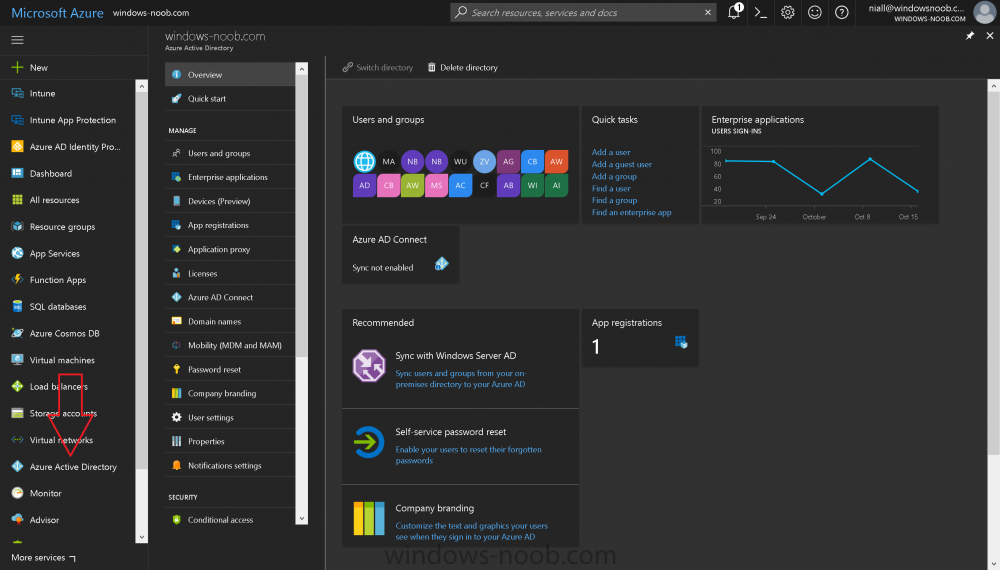


-
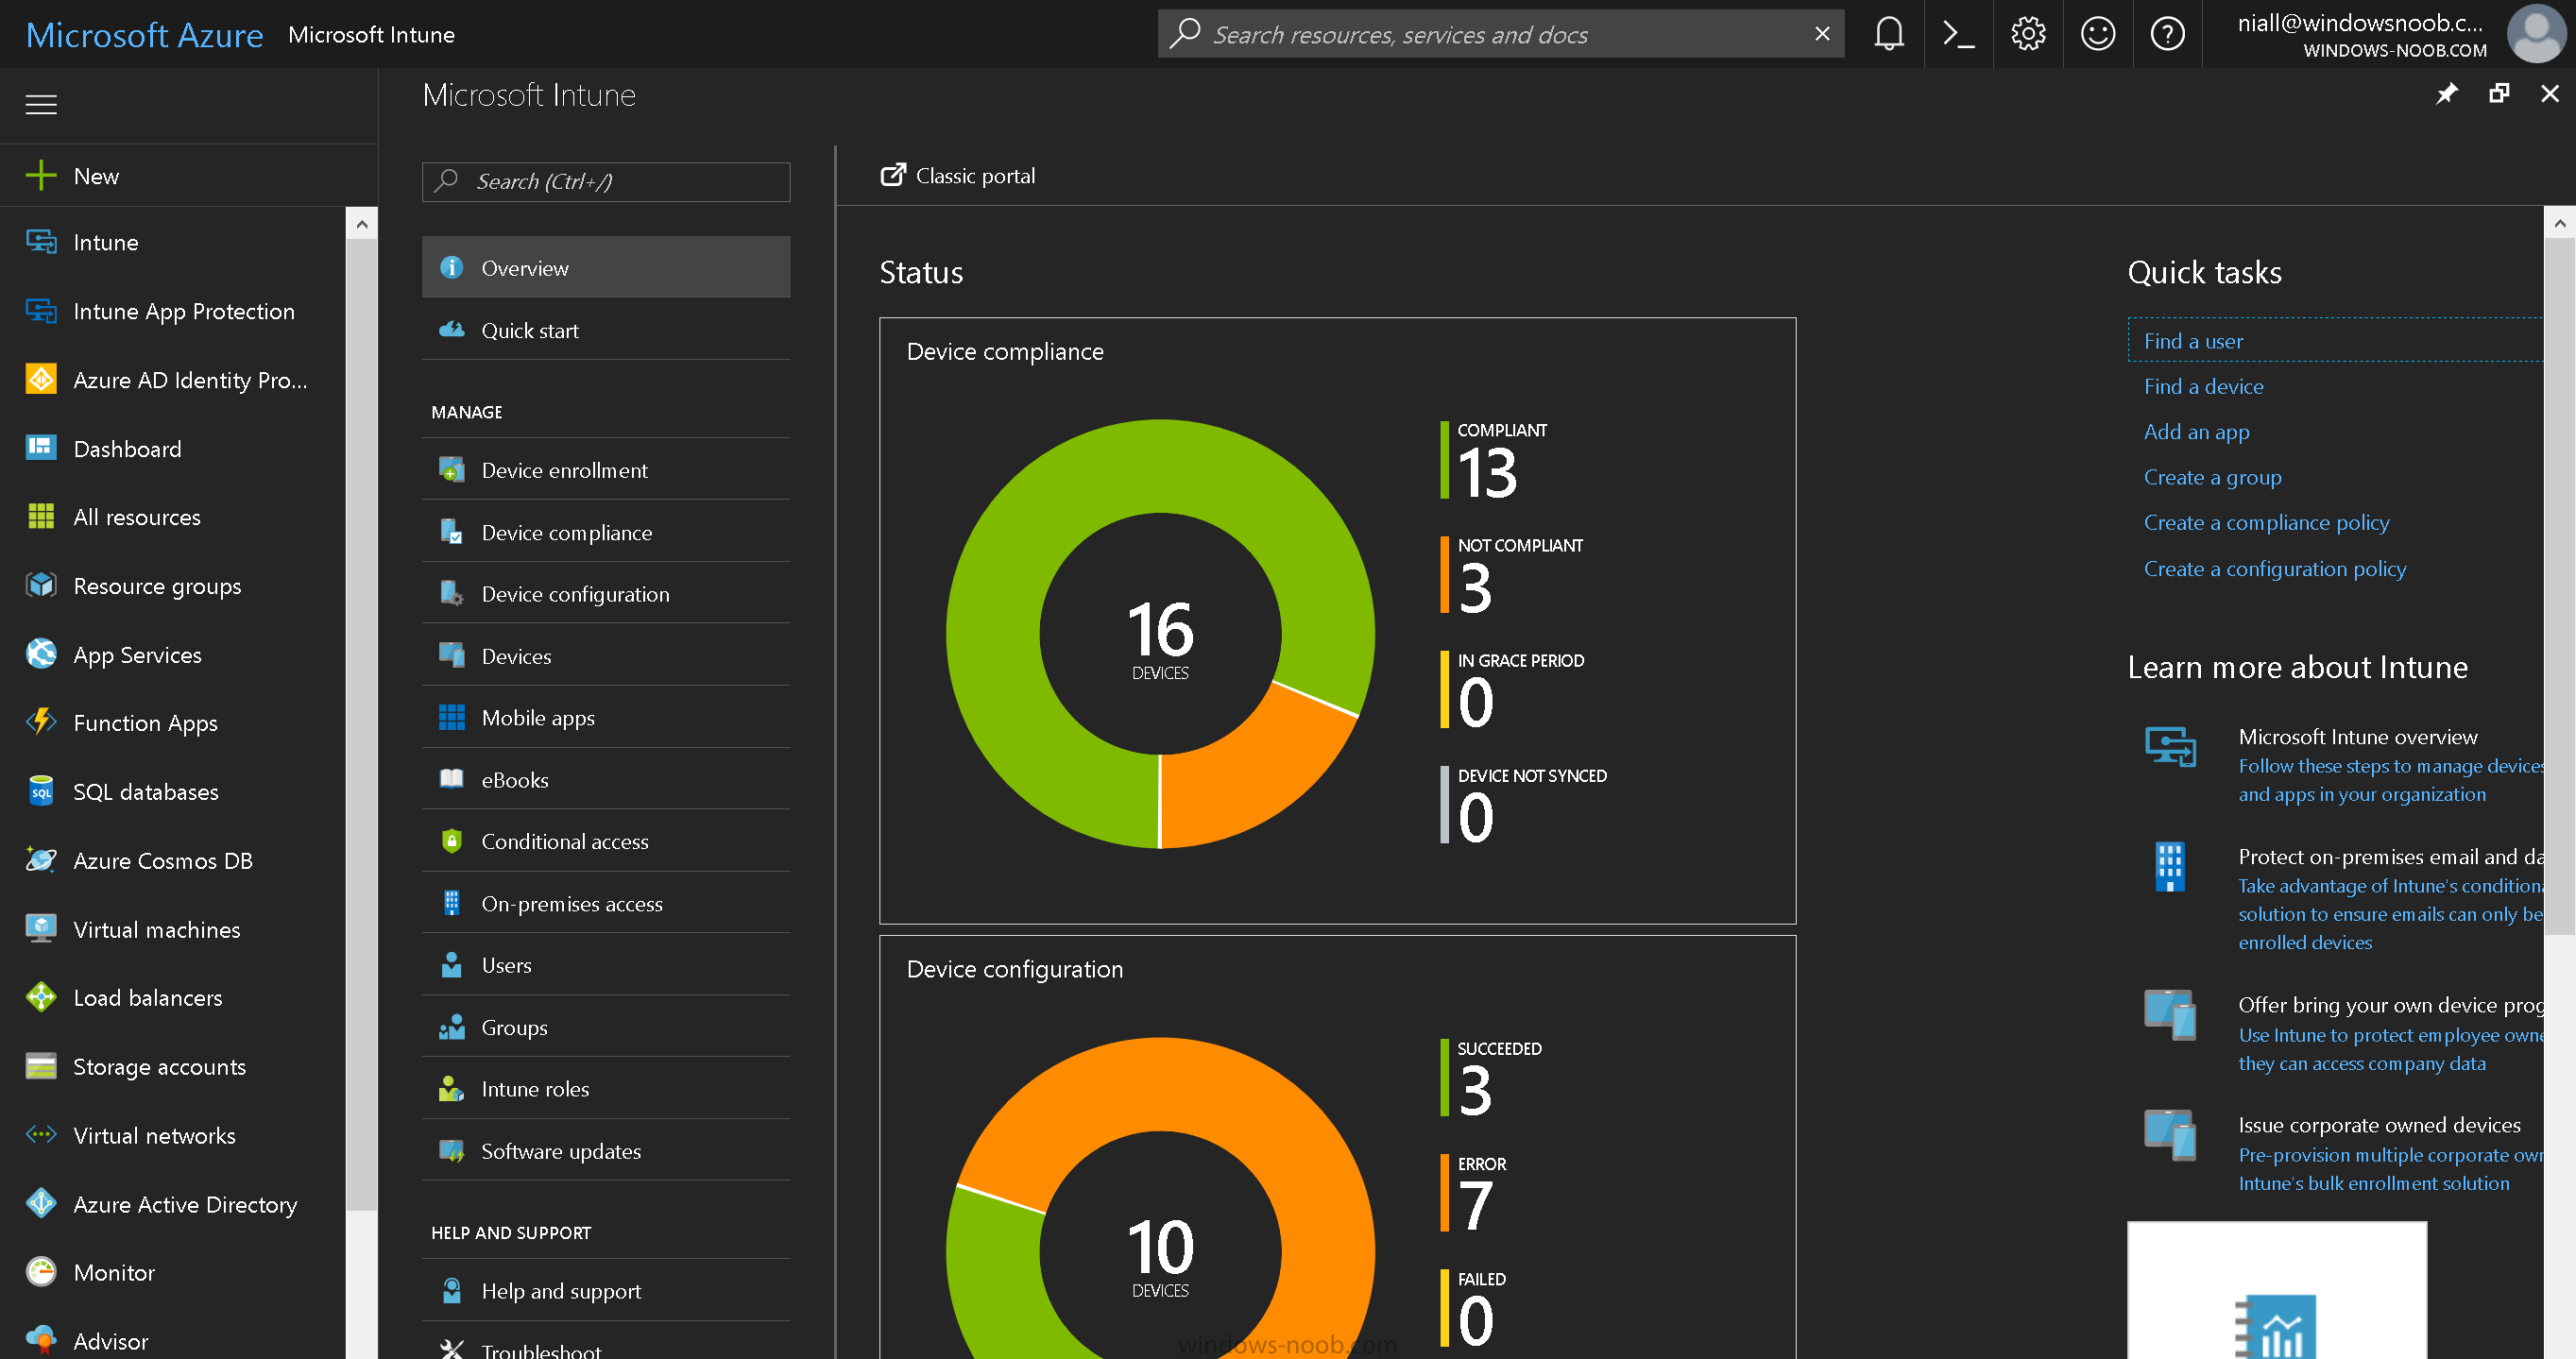
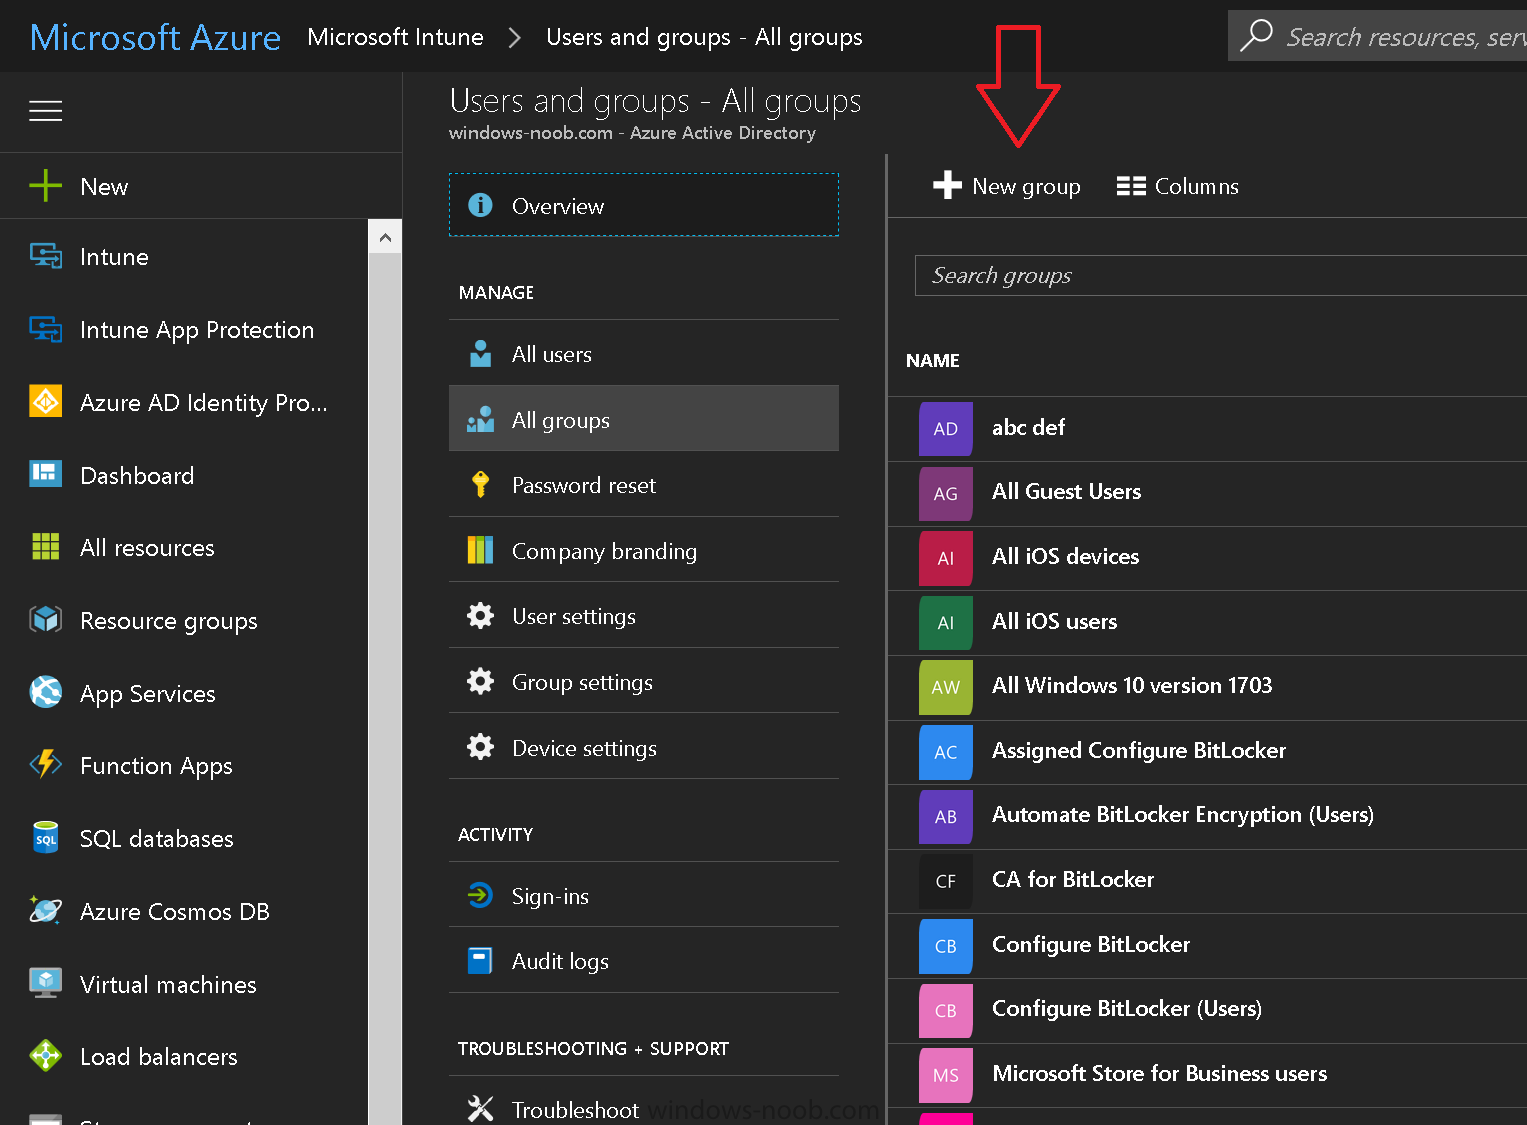
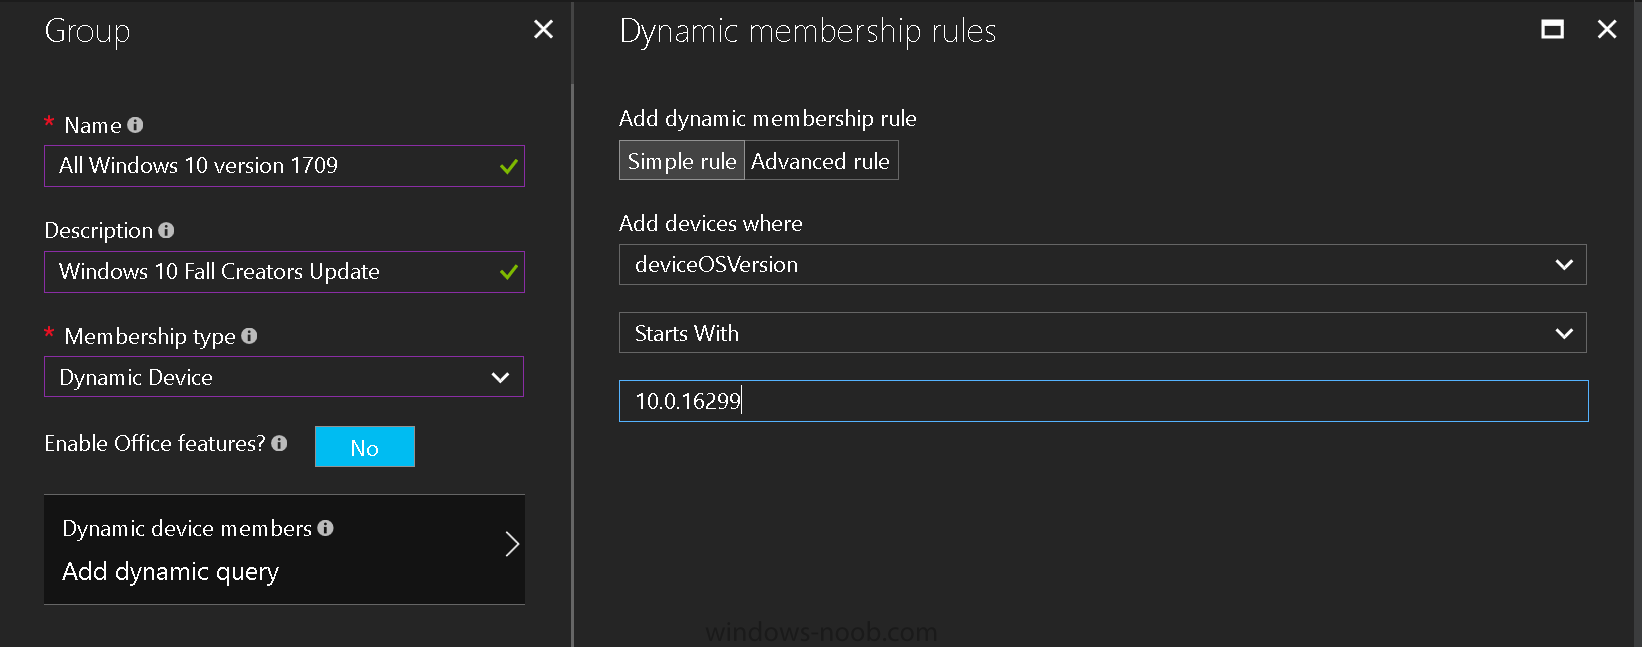
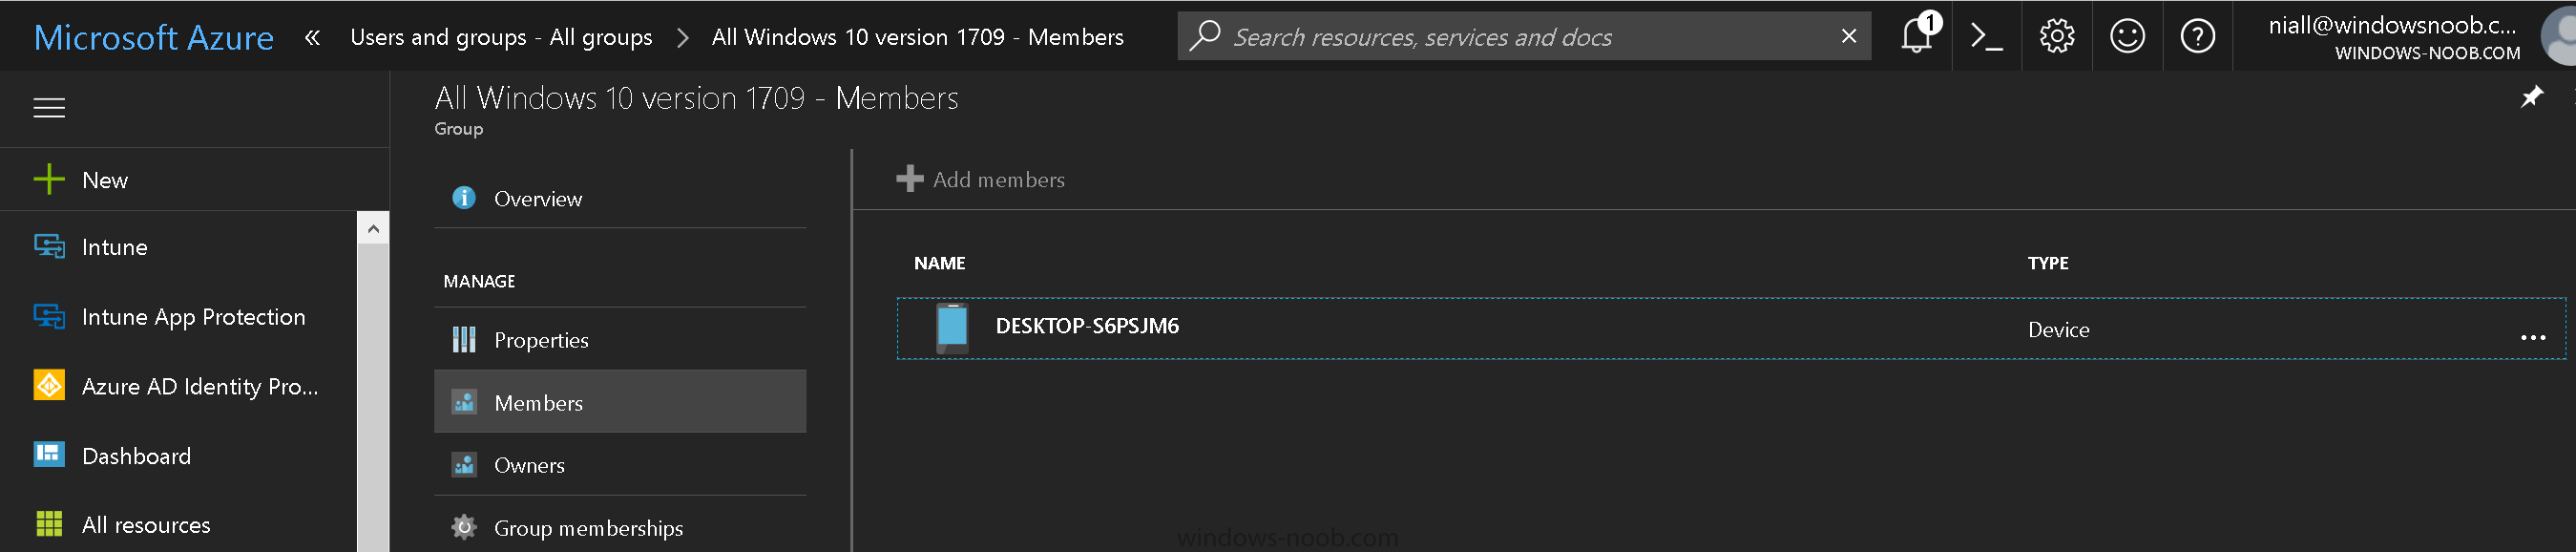
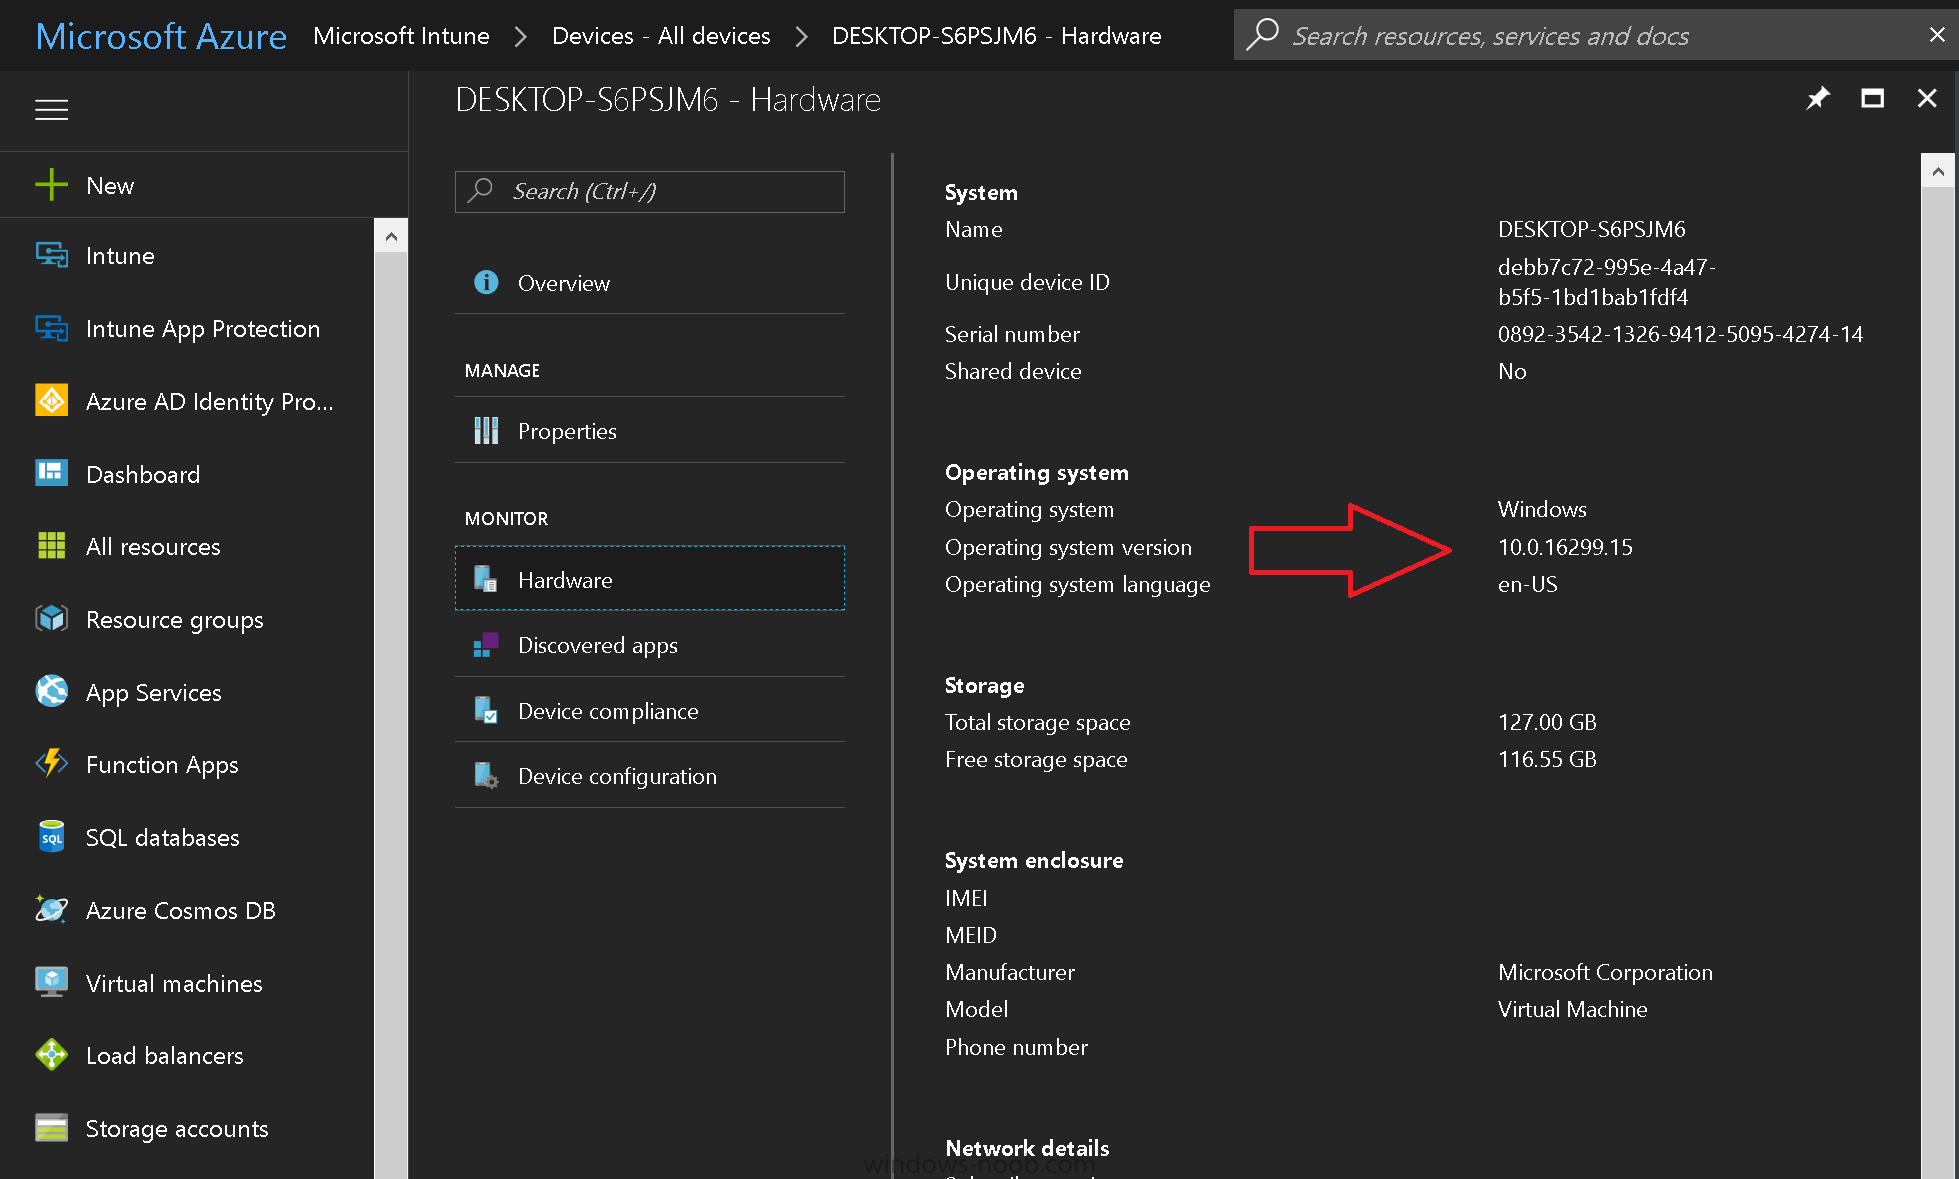
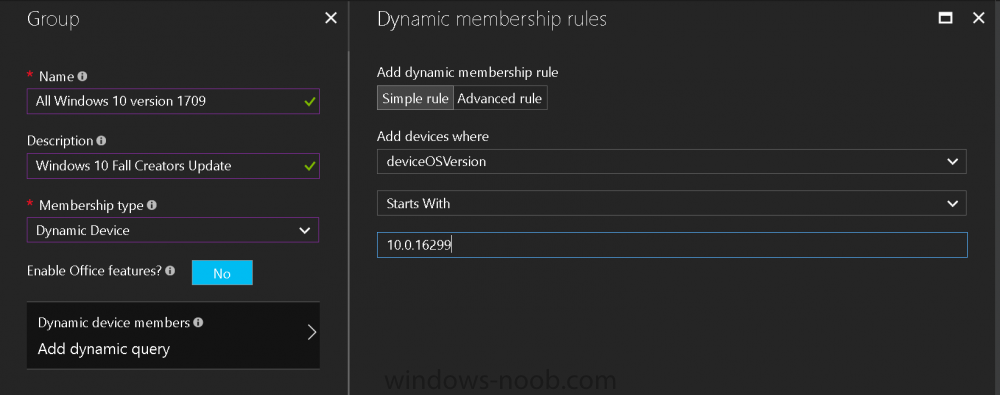
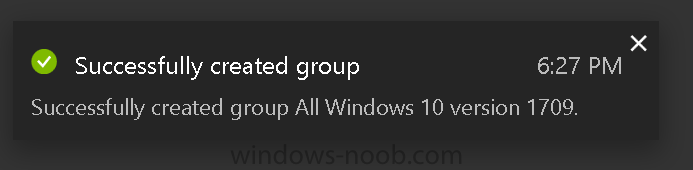
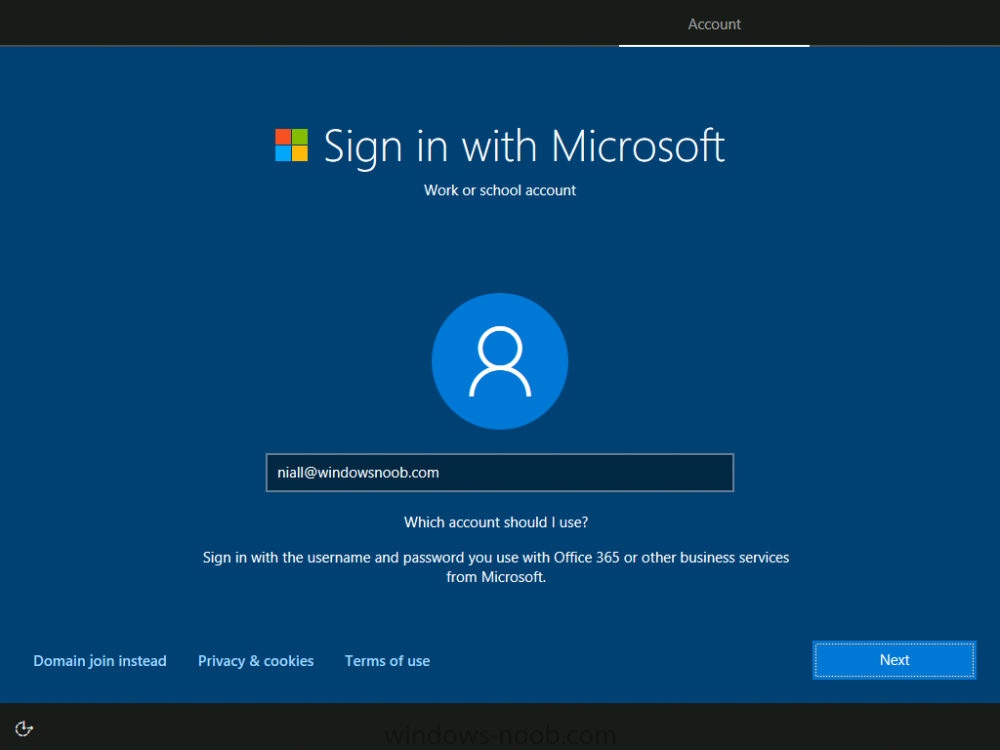
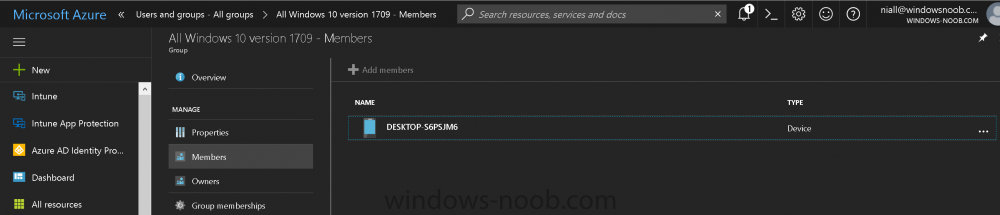
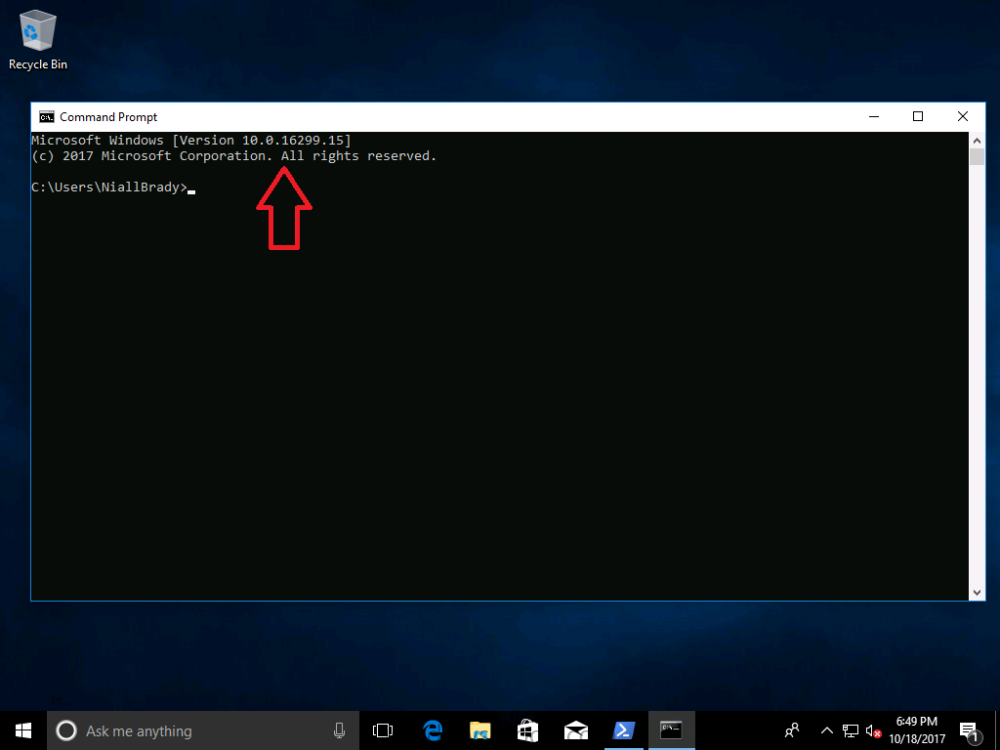
Introduction Microsoft released Windows 10 version 1709 to VLSC and MSDN yesterday, so of course people are deploying it and testing it in their environments. If you want to create a dynamic Group (that auto populates) of Windows 10 version 1709 in Microsoft Intune then do as follows. Note: In this blog post I assume you have configured MDM auto-enrollment in Azure. This isn't mandatory but makes enrollment into Microsoft Intune for Windows devices much easier. To see how to enable that functionality, click here. Step 1. Login to Azure Login to https://portal.azure.com and select the Intune service. Step 2. Create a dynamic devices group Click on Groups. Select New Group (highlighted with the Red Arrow). In the New Group blade, use the following options Name: All Windows 10 version 1709 Description: Windows 10 Fall Creators Update Membership Type: Dynamic Device In the Dynamic Device members Add Dynamic Query option, enter the following Add device membership rule: SimpleRule Add devices where DeviceOsVersion StartsWith 10.0.16299 Next, click on Add Query Followed by Create. You'll get a notification in the top right that the group was successfully created. Step 3. AzureAD join a Windows 10 version 1709 device Go through OOBE on a Windows 10 version 1709 device, at the account screen enter your Azure AD credentials. and after the device has joined Azure AD, it'll show up in Intune soon after in the correct Group. Job done ! You can verify the build number on a Windows 10 version 1709 device by opening a command prompt, in this screenshot it's 10.0.16299.15, the .15 at the end will increase as new cumulative updates are installed on this base build number. and that full string can be seen in Intune in Devices, select All Devices, select the device in question and click on Hardware. Note: If you'd like to create a collection in SCCM for Windows 10 version 1709 please see the following blog post. For a list of deployment resources for Windows 10 version 1709 please see here.


-
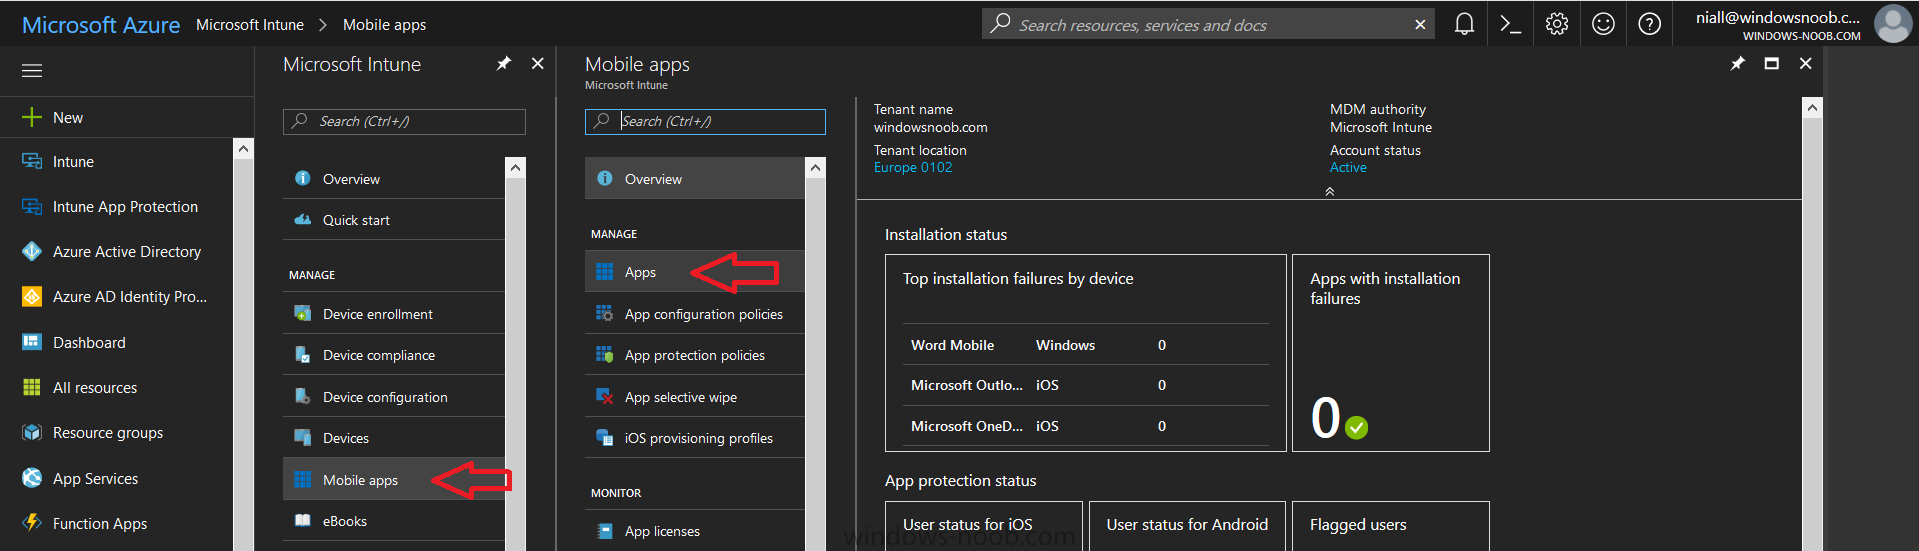
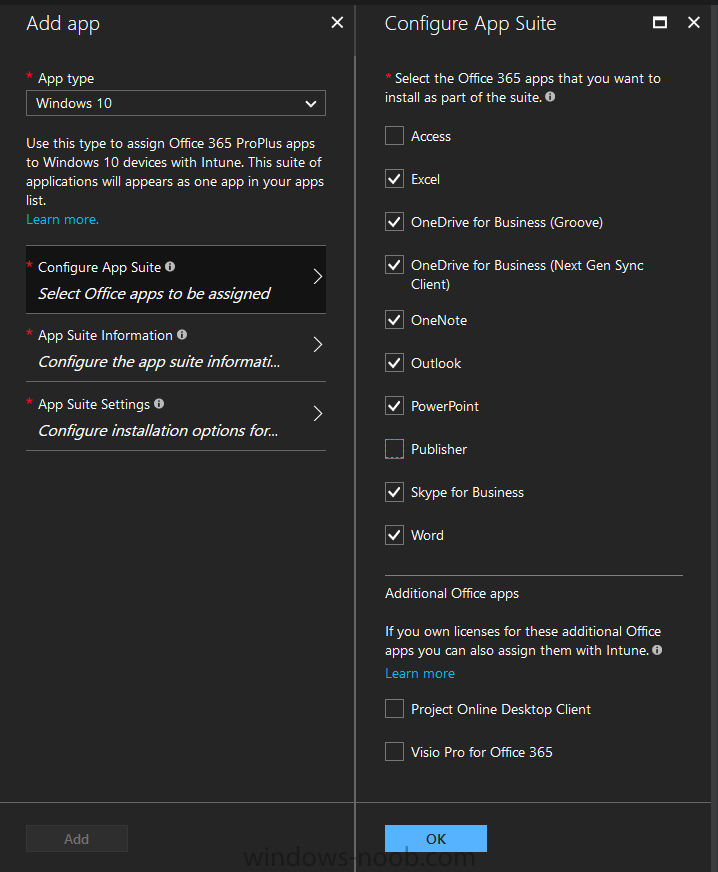
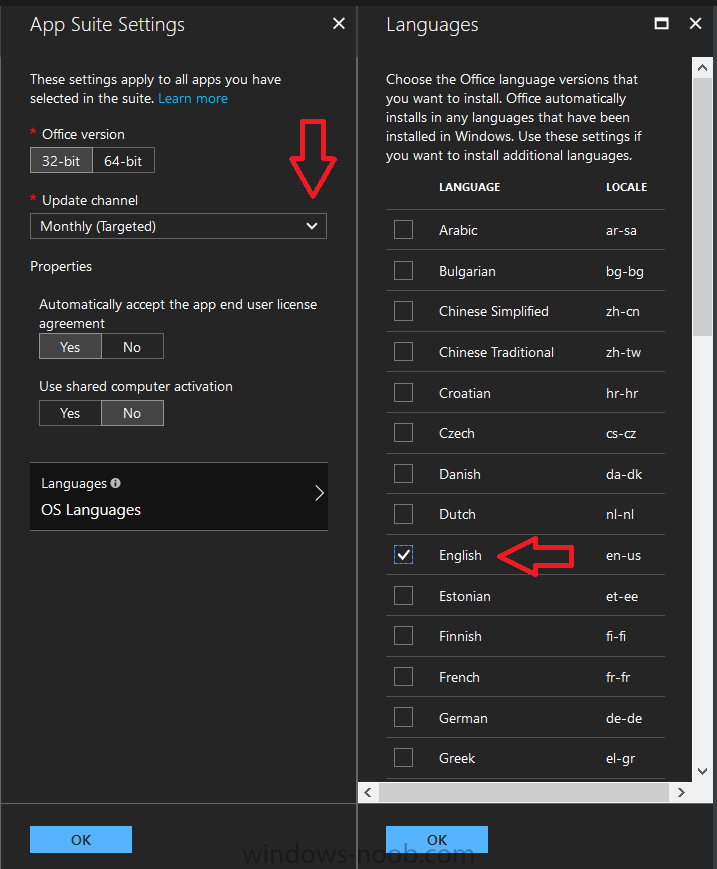
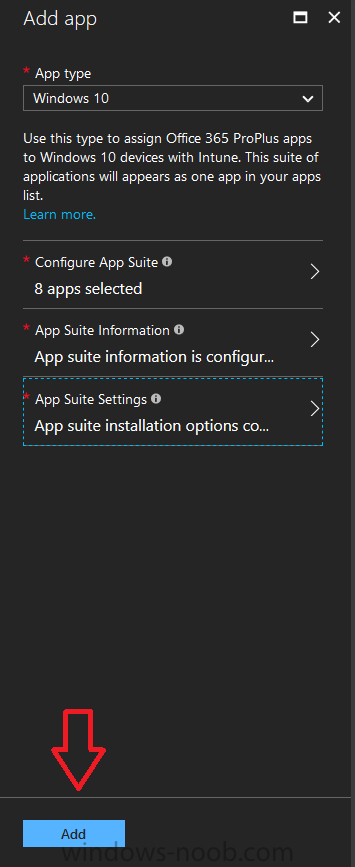
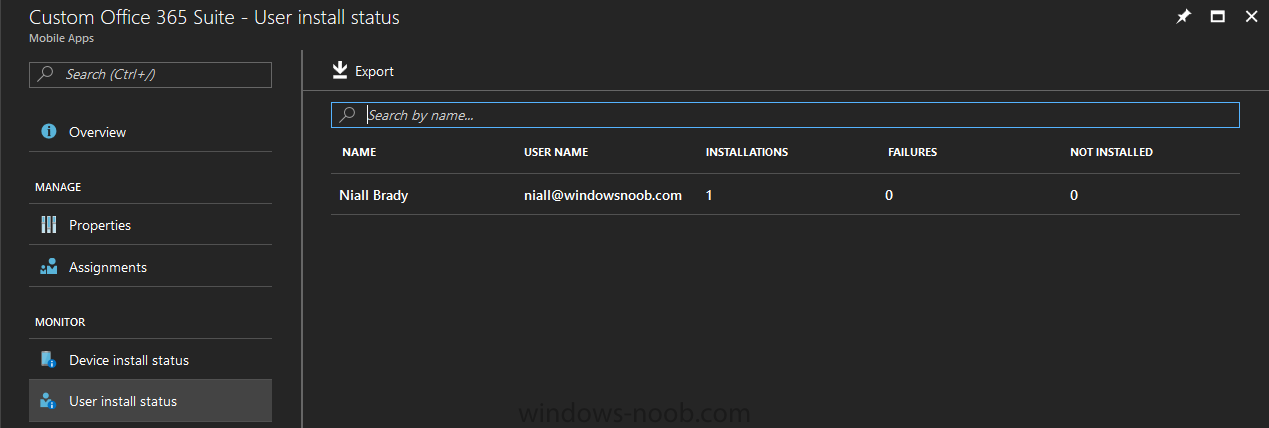
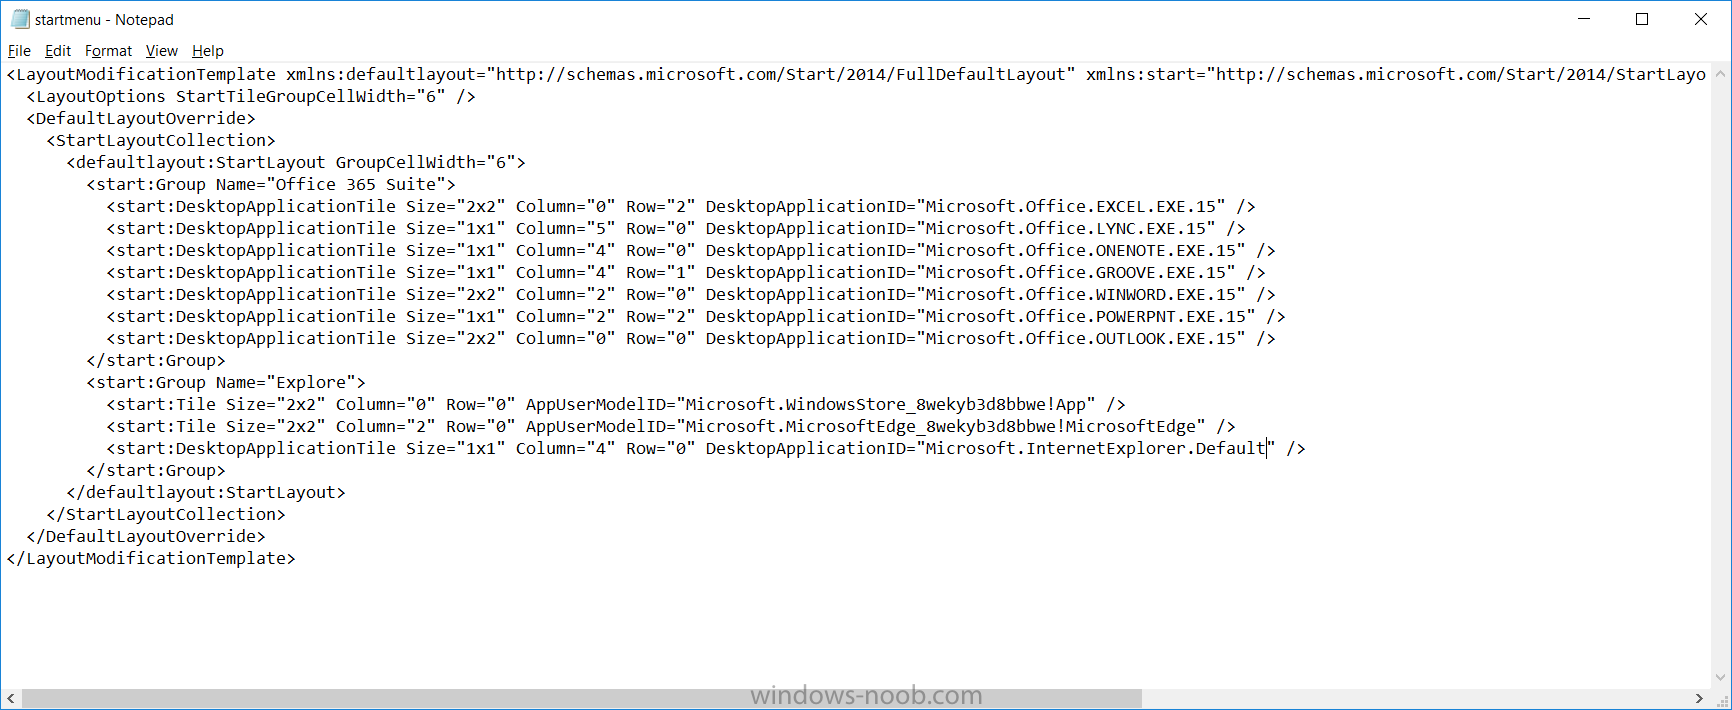
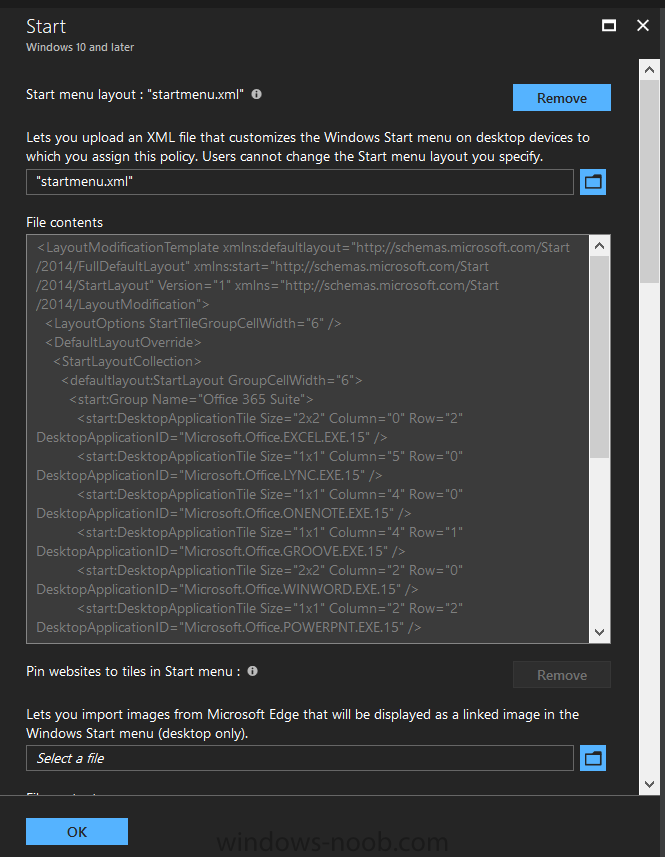
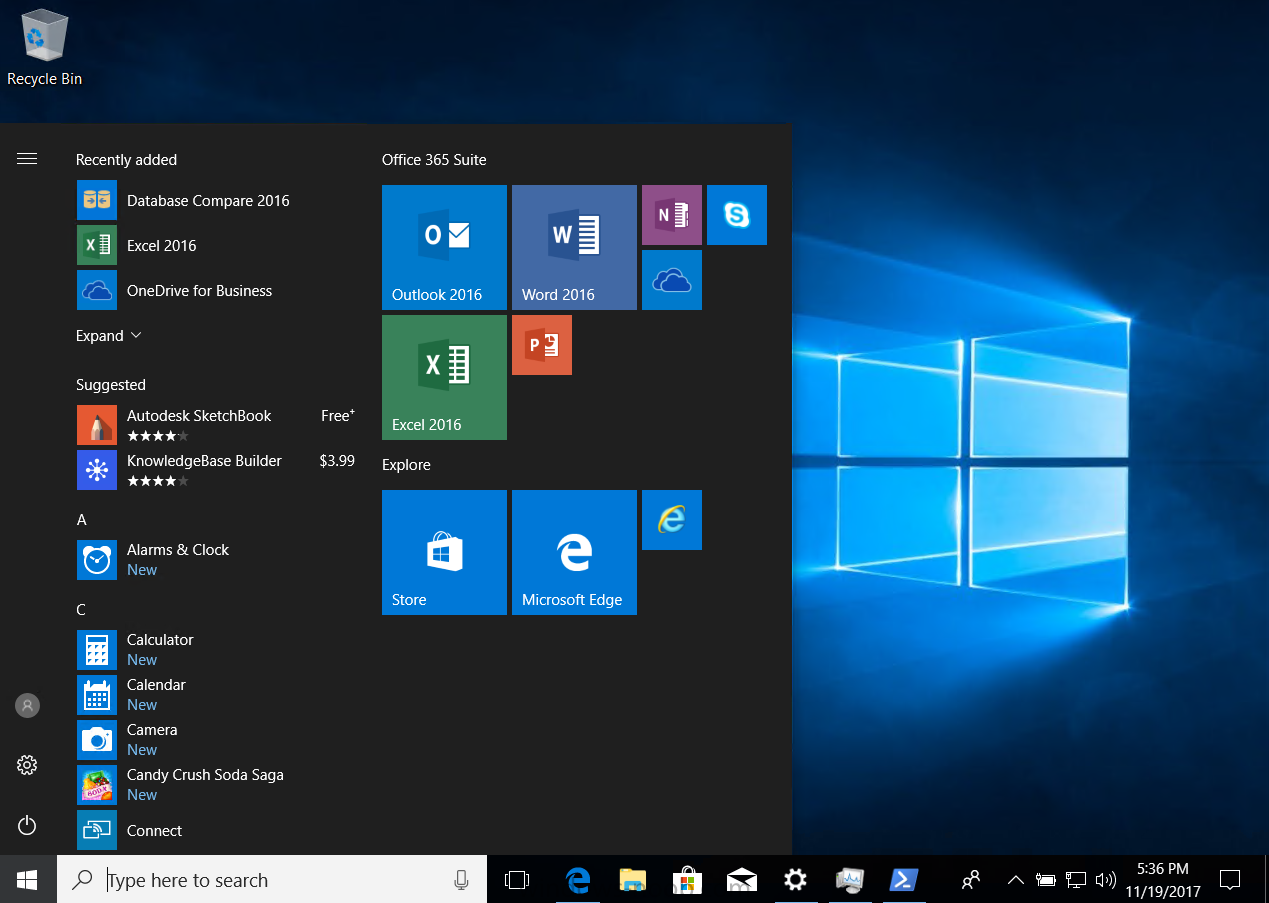
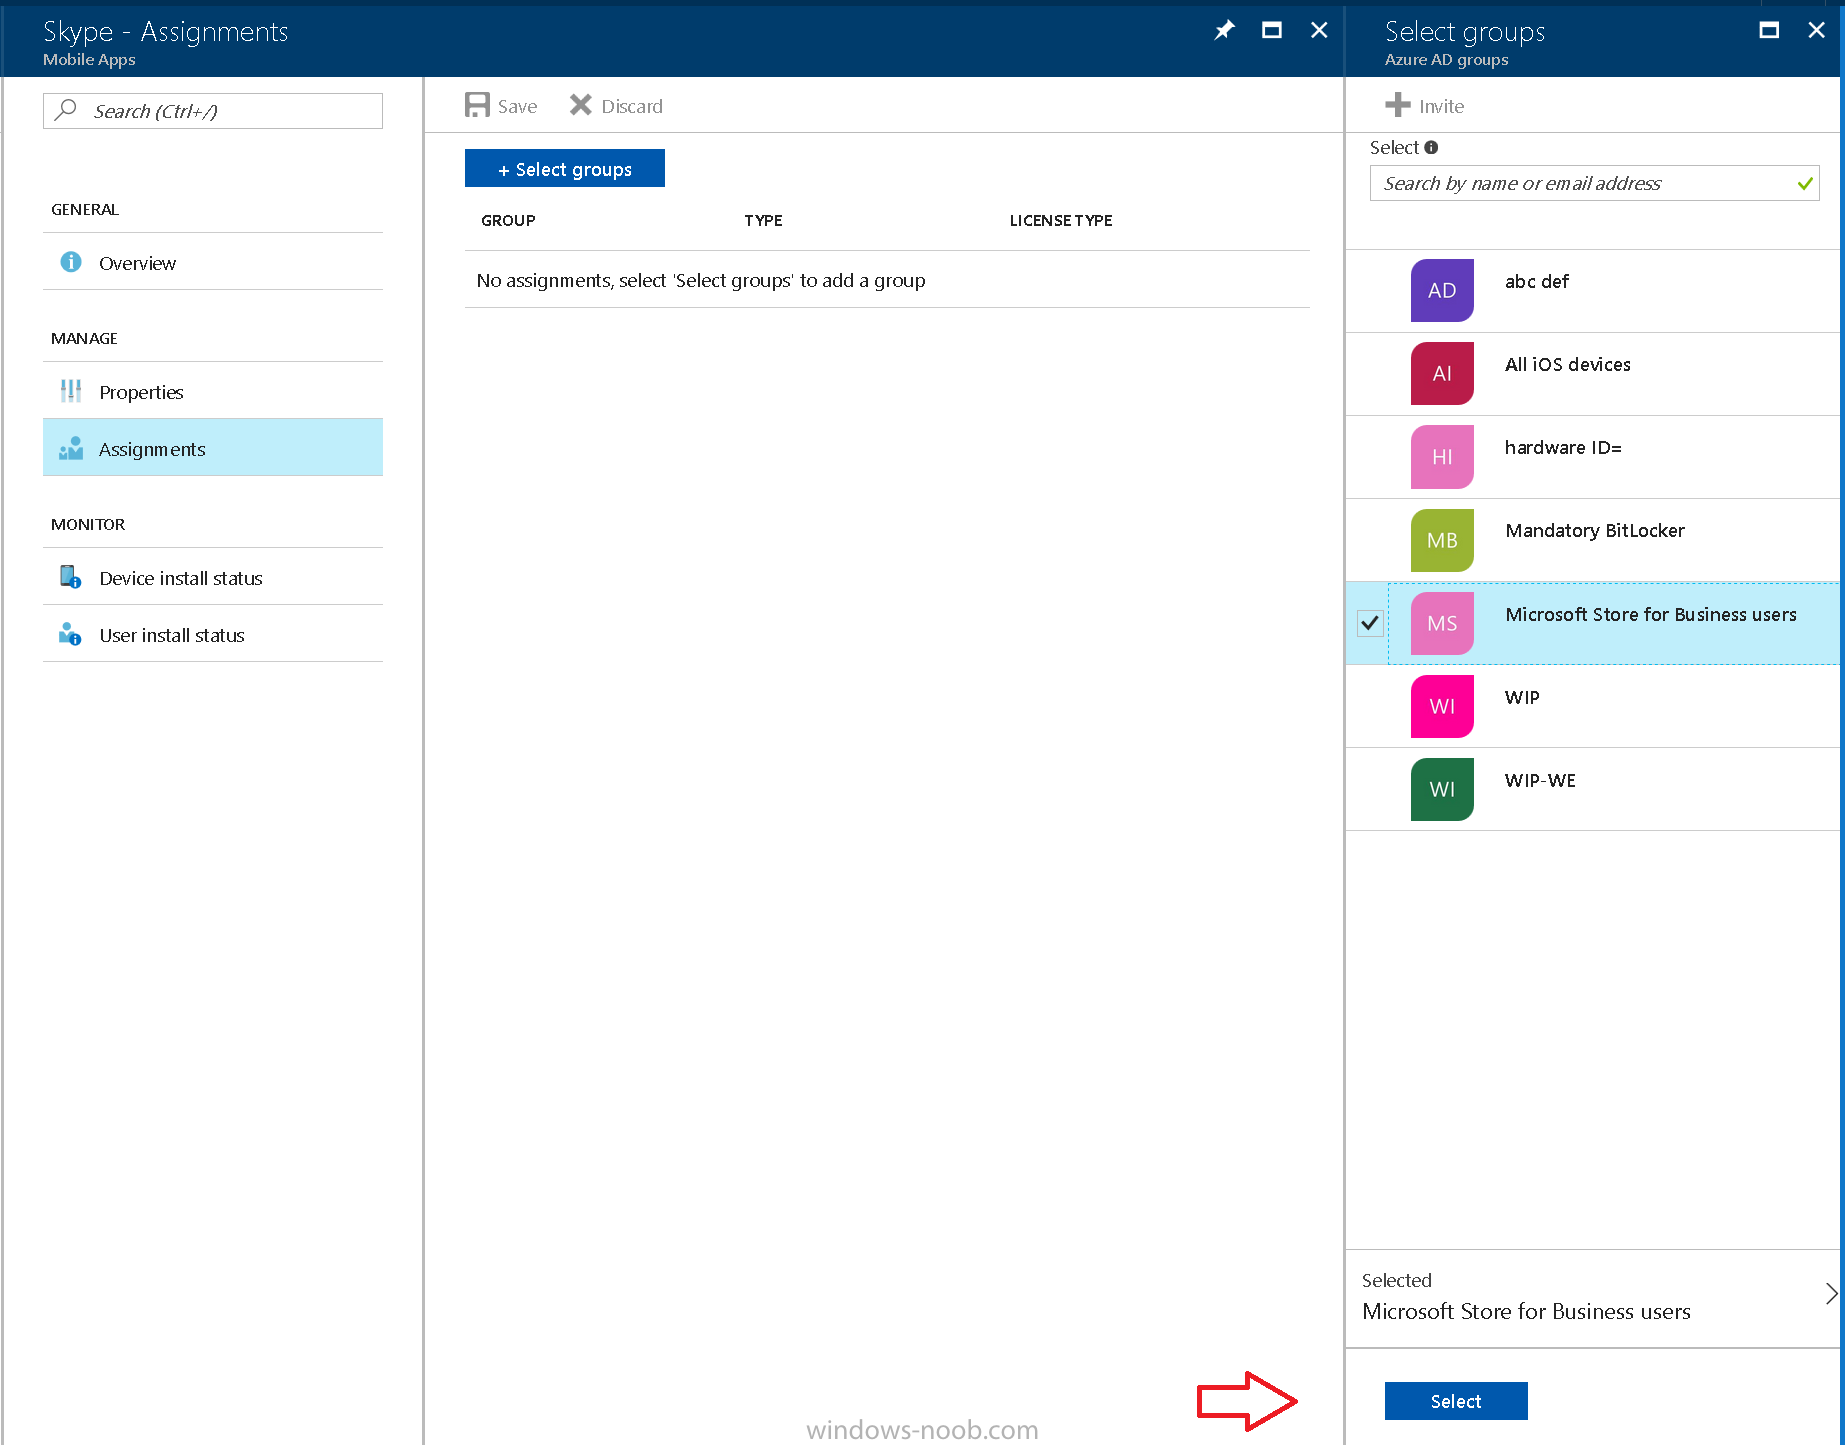
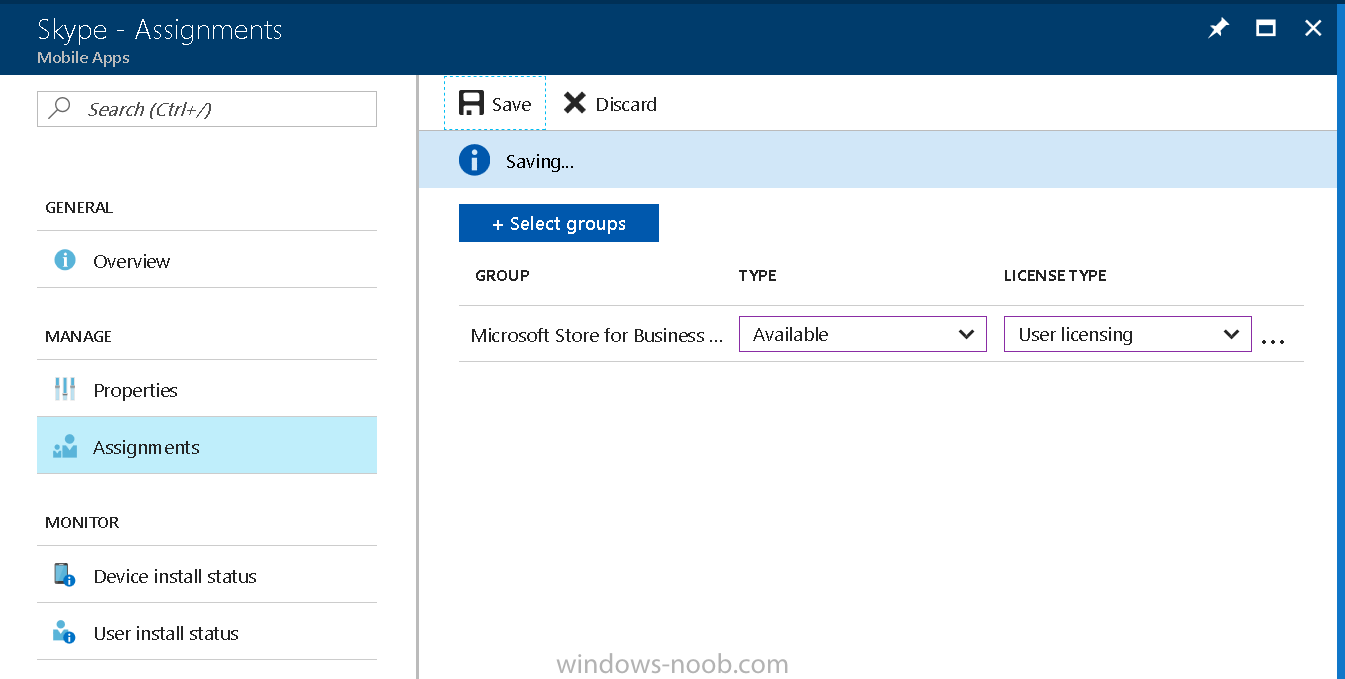
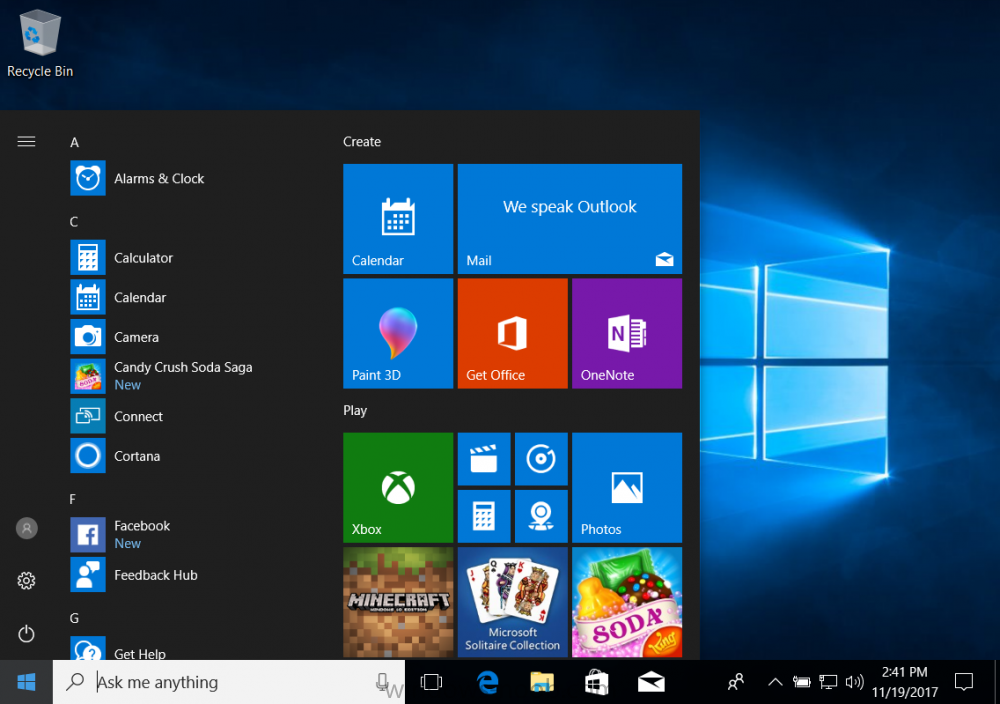
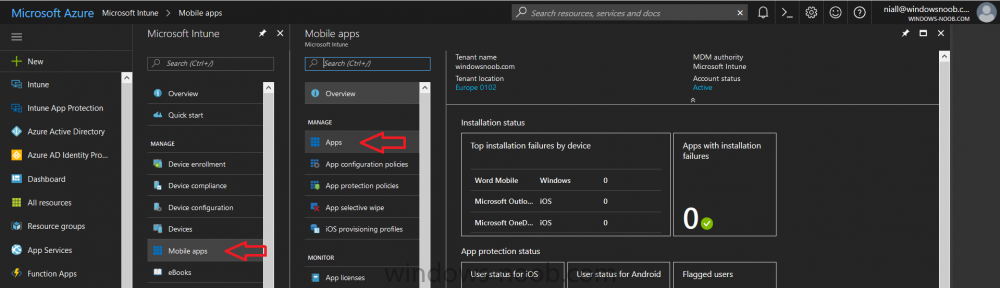
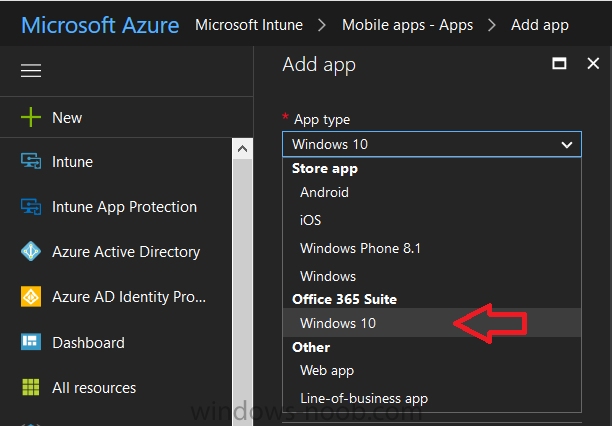
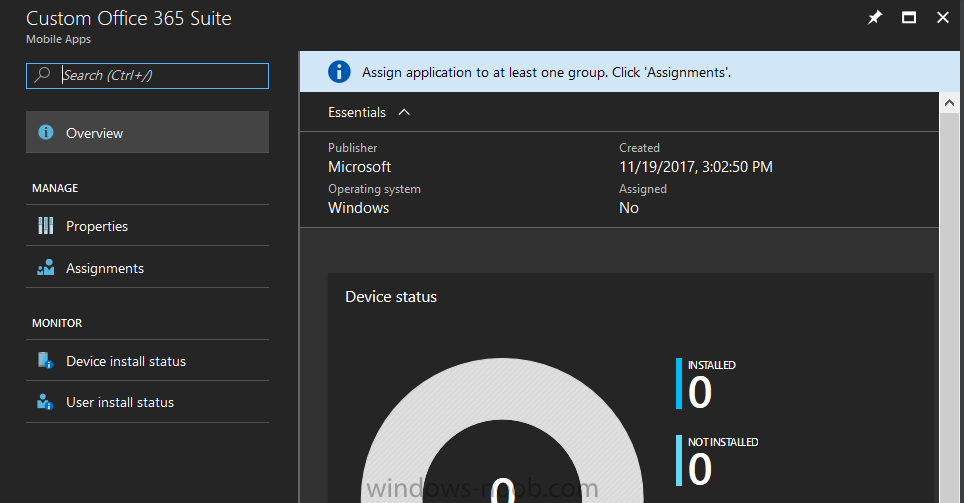
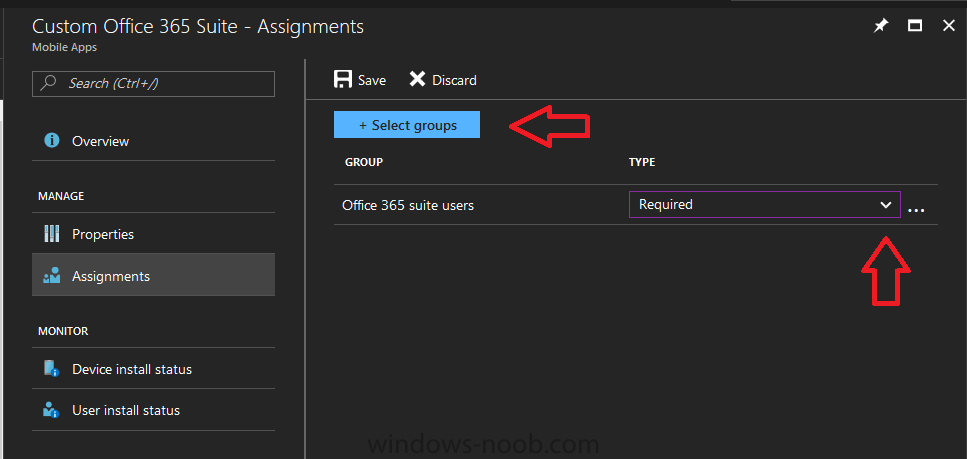
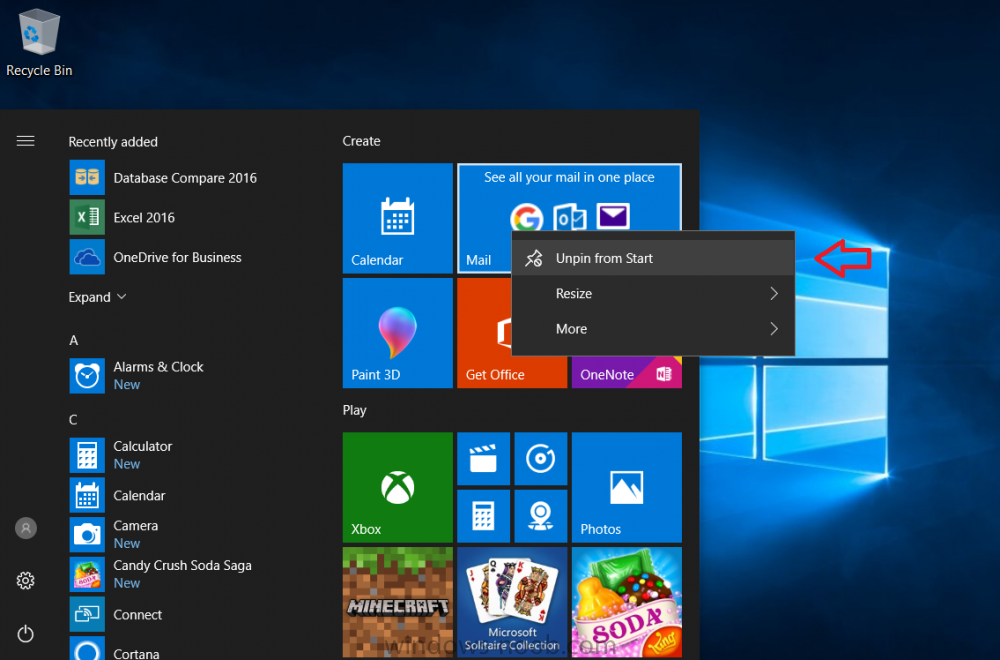
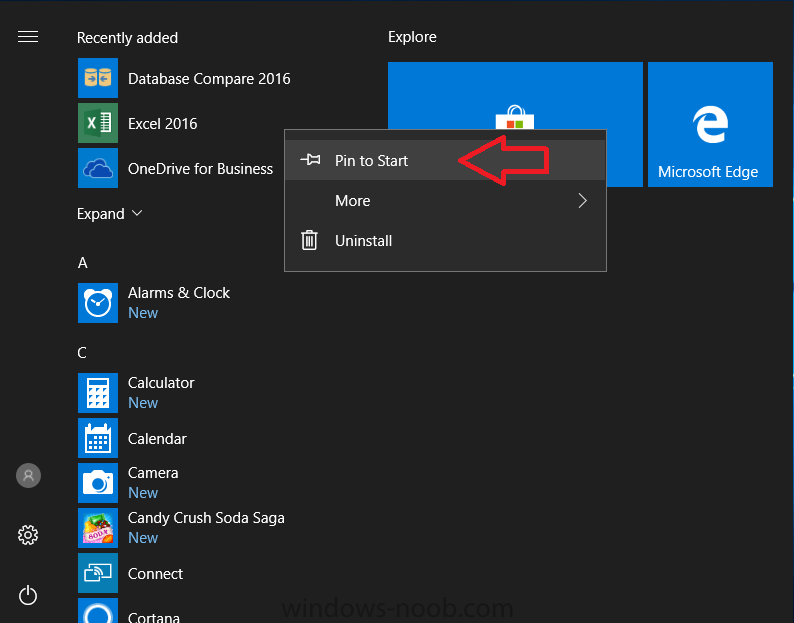
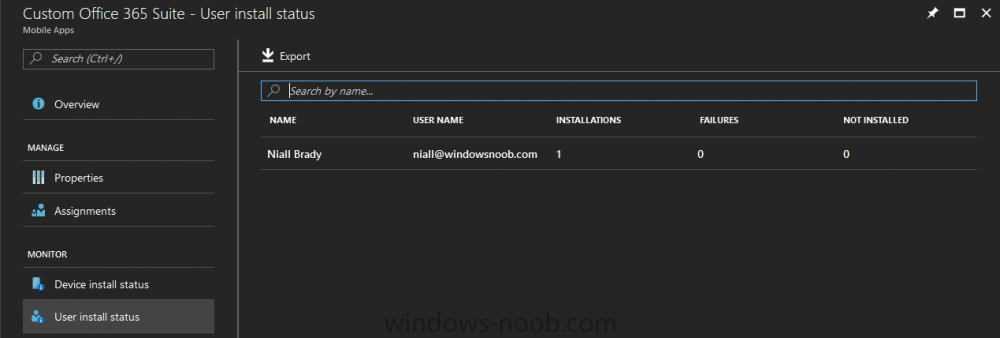
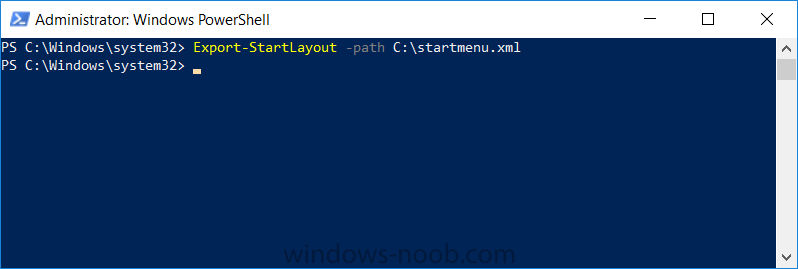
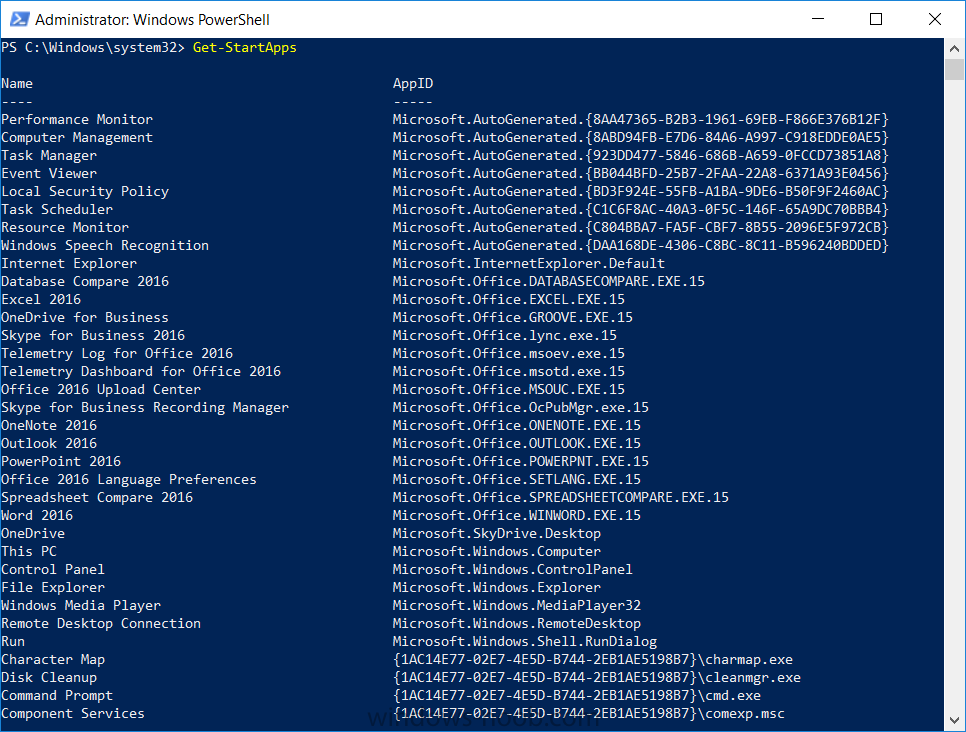
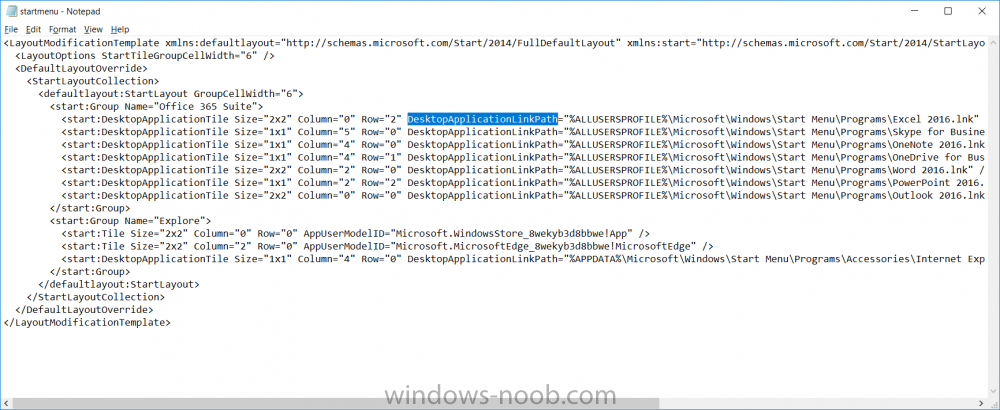
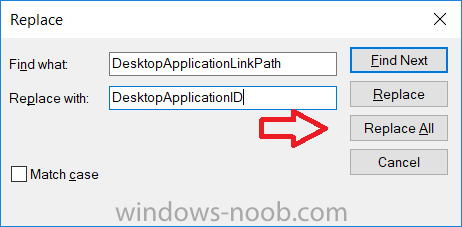
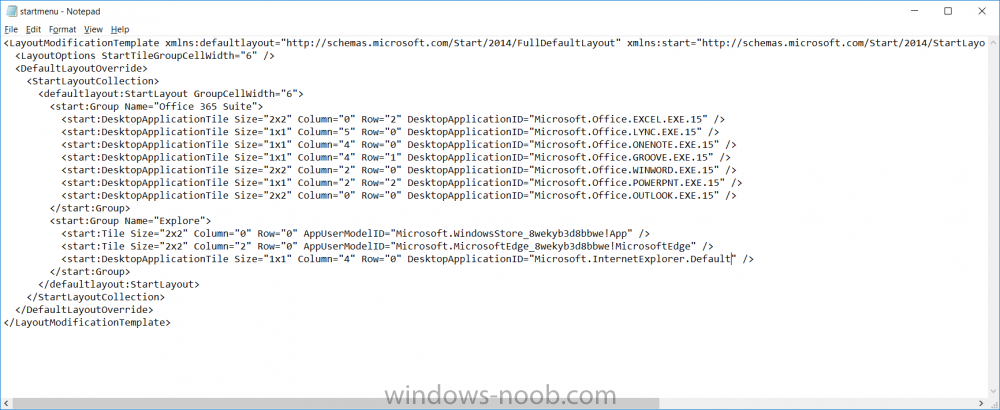
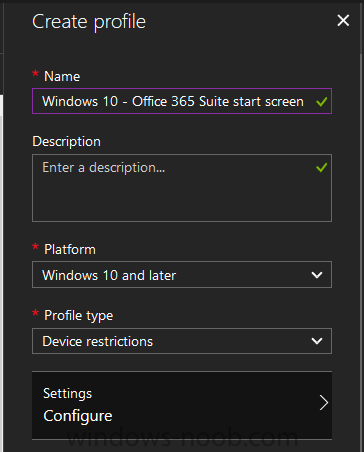
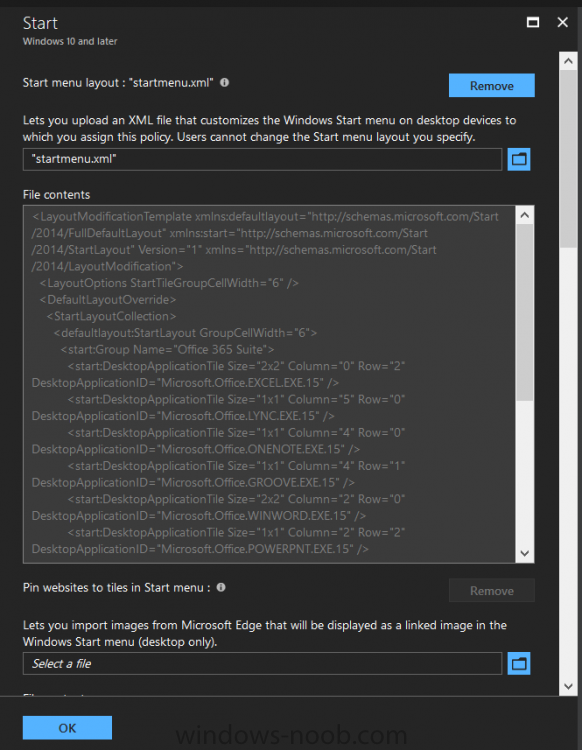
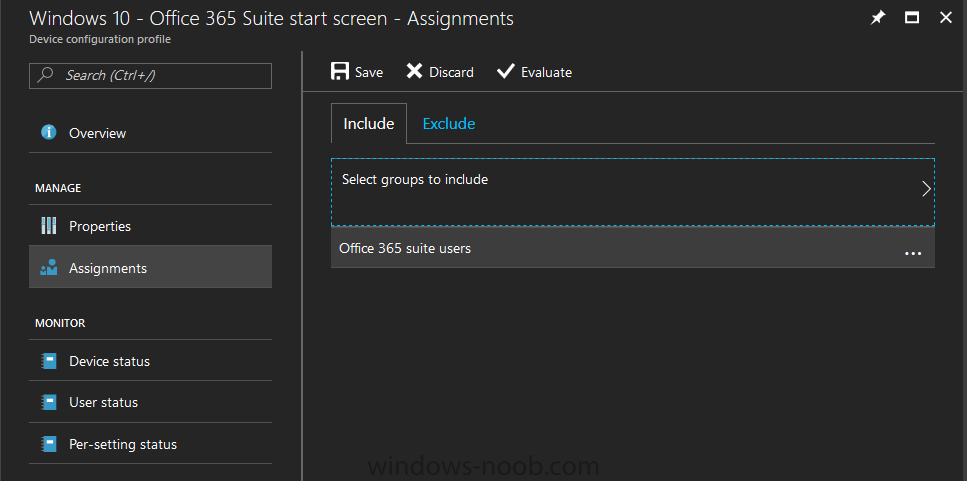
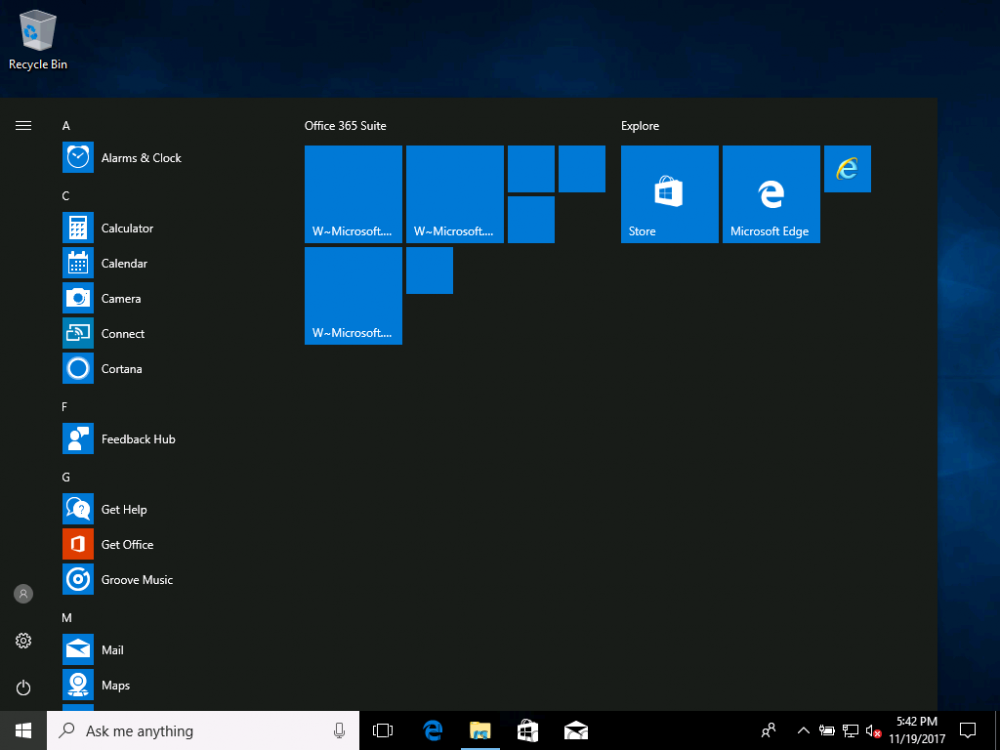
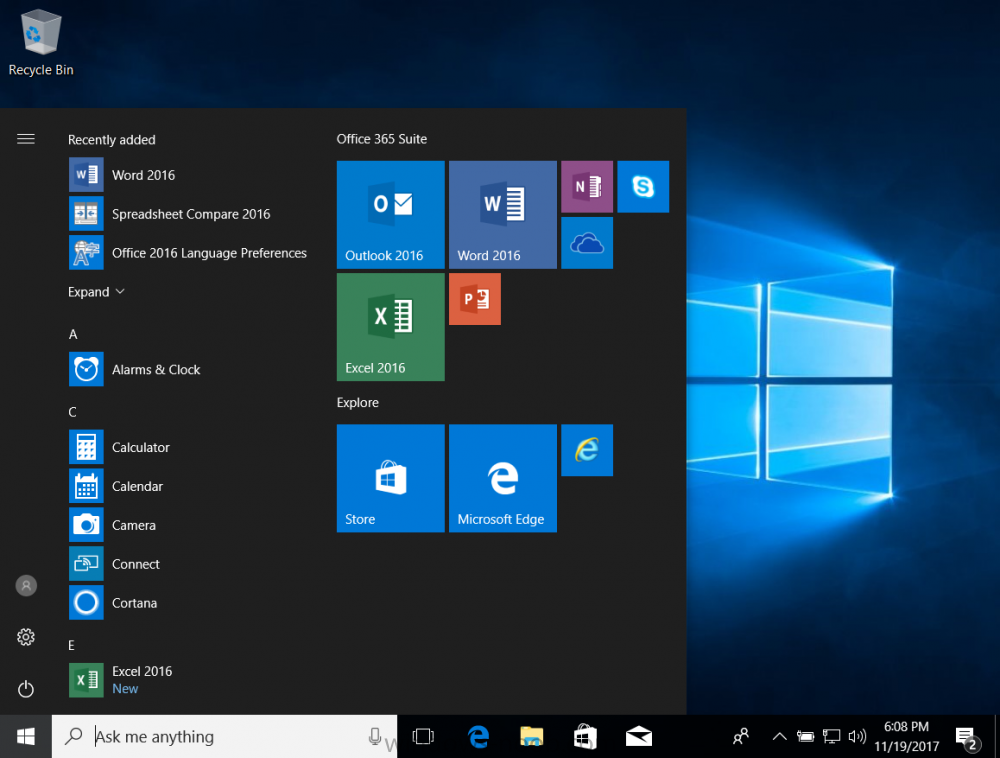
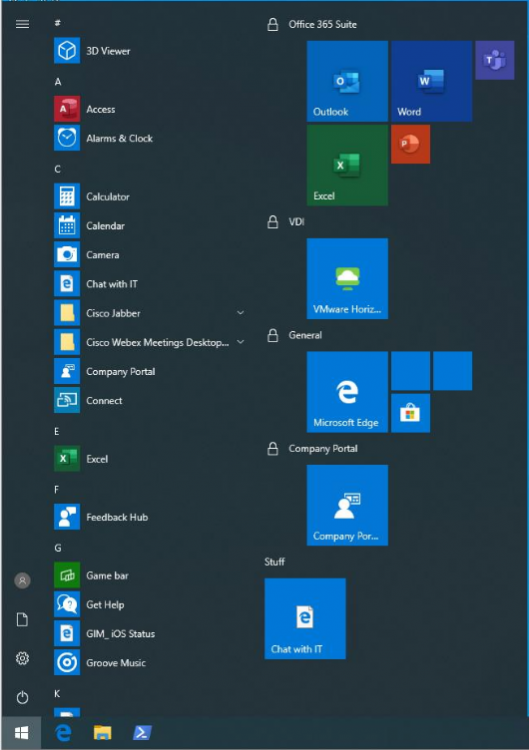
Introduction I've been doing a lot of testing with Windows AutoPilot recently (blog post coming soon), and as part of that testing, I wanted my Windows 10 version 1709 (Fall Creators update) devices to have a customized start screen (or start menu as people often refer to it) with some Office applications and device configuration profiles installed. The ability to customize the start menu in Windows 10 is nothing new but I ran into some issues with the process, as I was using a 32 bit version of the Office Suite so I thought I'd document the fix here. The issue I observed was that after creating the XML file, importing it into Intune and deploying it out to Windows 10 devices, instead of getting the Office icons in the start screen, they got blank boxes, and those boxes never populated with icons even after Office was installed. Some internet searching and digging found the answer but it wasn't that clear what you had to do, hence this guide. A newly installed Windows 10 version 1709 start menu can look quite a consumer oriented mess, such as the one shown below. This is definitely not what you want to see in your Enterprise. In this post you will deploy the Office 365 suite to Windows 10 version 1709 devices and then customize the start menu before capturing it to an XML file, editing the XML file and then deploying it using Intune. Note: When a full Start layout is applied with this method, the users cannot pin, unpin, or uninstall apps from Start. Users can view and open all apps in the All Apps view, but they cannot pin any apps to Start. When a partial Start layout is applied, the contents of the specified tile groups cannot be changed, but users can move those groups, and can also create and customize their own groups. Step 1. Configure the Office 365 suite in Intune (optional) Customizing a start menu makes sense in an Office environment particularly when your users expect their Office apps are easy to reach. But before you can do that you'll configure Office to install on some Windows 10 devices. In the Intune service in Azure, click on Mobile Apps, and then select Apps. Click on + Add and then select Office 365 Suite and Windows 10. Click on Configure App Suite, make your selections and click OK Next click on App Suite Information, fill in the information and click ok. and next click on App Suite Settings, make your choices for Servicing (Office Updates) and Language options and click on OK then OK again. As I like to use WIP I have selected Monthly (targeted) to get the latest versions of office quickly. Note: When choosing whether you want to assign the 32-bit, or 64-bit version of Office. You can install the 32-bit version on both 32-bit, and 64-bit devices, but you can only install the 64-bit version on 64-bit devices. When done configuring click on Add. Next you need to Assign (deploy) the Office Suite to a group of users by clicking on Assignments. After clicking on Assignments, select a Group of users, then select the type of assignment, in this case I choose Required so that it is automatically installed. Click on Save when done. For more info on Configuring the Office 365 Suite in Intune see https://docs.microsoft.com/en-us/intune/apps-add-office365 Step 2. Customize the start menu on a Windows 10 device On an enrolled Windows 10 device, login as a user that is targeted with the Office 365 Suite assignment created in Step 1, and wait until the Office 365 suite has deployed. You can verify this in Intune using the App install status for the user (or device) by selecting the app in Monitor, App Install Status. Once the Office 365 Suite is installed, start customizing the Start menu by unpinning unwanted apps by right clicking on an app you want to remove, and choosing Unpin from Start. After you've unpinned all the apps you want removed, it's time to pin your Office apps, to do that, highlight an Office app, right click and choose Pin to Start. repeat the above until you have all the apps you want to appear on the start screen, in the size and location of your choice. Give the Office group a name by typing text above it. After you are done you'll have a finished start screen something like this one. Step 3. Export the start screen Start PowerShell as Administrator on the device with the customized start screen. Export the start screen using the following command Export-StartLayout -path C:\startmenu.xml Note: If the Start layout that you export contains tiles for desktop (Win32) apps or .url links, Export-StartLayout will use DesktopApplicationLinkPath in the resulting file. Use a text or XML editor to change DesktopApplicationLinkPath to DesktopApplicationID. See Specify Start tiles for details on using the app ID in place of the link path. As you selected Office 365 Suite with 32 bit architecture, you'll need to modify the XML file otherwise no Icons will appear on the users start screen. But before doing that you'll need to identify the DesktopApplicationID for each Office App in the start screen. To do that, list the start apps using Get-StartApps cmdlet. Now that you have the info needed, you can modify the XML file. Using notepad or an XML editor, open the file C:\StartMenu.xml Replace all instances of DesktopApplicationLinkPath with DesktopApplicationID. Next, replace the DesktopApplicationLinkPath text eg: "%ALLUSERSPROFILE%\Microsoft\Windows\Start Menu\Programs\Excel 2016.lnk" for each office app, with the correspoonding AppID from the Get-StartApps cmdlet eg: "Microsoft.Office.EXCEL.EXE.15" Here you can see the modified xml file. Save the modified file to your Desktop. Here is a copy of the modified file for your information. startmenu.xml Step 4. Create a device configuration profile in Intune In Intune in Azure, click on Device Configuration, click on Profiles and then click on + Create Profile. In the Create Profile blade, give it a suitable name such as Windows 10 - Office 365 suite start screen (so you can easily search for it later) and choose Windows 10 and later as the platform and then select Device restrictions. For Settings, click on Start (from the options available, scroll down) and then select the previously created XML file. There are many more settings which you can configure in the Start settings, but for now, this is all you will configure. Click on OK when done, then click OK again, and finally click Create. Next, you need to Assign the device restriction, so click on Assignments and assign it to the User Group that you deployed Office to, in this case, the Office 365 suite users group. Click on Save when done. Step 5. Review the end result On a Windows 10 version 1709 device sign in with credentials of a user that is in the Office 365 Suite users Group. If you login immediately after enrolling, then the Office 365 suite will not yet be installed, but it will have pulled down the policies including the custom start screen, it will look like so... This is expected behavior and all the user has to do is wait until Office 365 get's installed (12 minutes or so). The icons will automatically appear as soon as each app is installed. And here it is, job done ! Note: This method leaves a custom start menu but the user cannot change the tiles or add to the start menu, if you want them to have that ability then change <DefaultLayoutOverride> to <DefaultLayoutOverride LayoutCustomizationRestrictionType="OnlySpecifiedGroups"> Notice how the pinned items that you've defined will have a lock on them but the user can add/remove other items. Recommended reading https://docs.microsoft.com/en-us/intune/apps-add-office365 https://docs.microsoft.com/en-us/windows/configuration/customize-windows-10-start-screens-by-using-mobile-device-management https://docs.microsoft.com/en-us/windows/configuration/customize-and-export-start-layout#customize-the-start-screen-on-your-test-computer https://docs.microsoft.com/en-us/windows/configuration/start-layout-xml-desktop#specify-start-tiles https://www.windows-noob.com/forums/topic/15773-how-can-i-enable-mdm-auto-enrollment-for-microsoft-intune-in-azure/


-
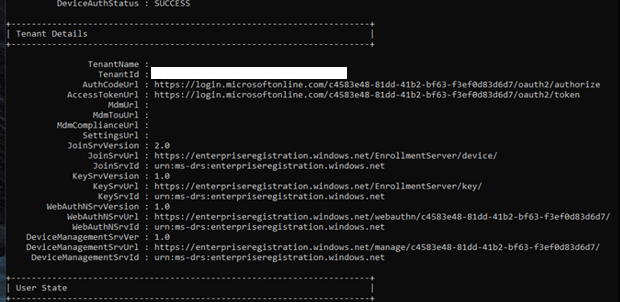
Hi everyone, I tried searching for this before posting, but didn't see any. So, here we go... Issue: Trying to have domain devices enroll into intune (hybrid join). What I am not seeing when I look at "dsregcmd / status" are the mdmURL's that should be displayed in there. ======================== What has been checked: Configuration side: Windows Enrollment for MDM user scope is set for "All" and MAM user scope is none. Azure AD Connect is synced to the OU with particular Devices Created GPO and enabled "enabled automatic enrollment using default Azure AD credentials" and have User Credentials set. GPO is linked to the particular OU Users are licensed with MSFT E3 Device side: Confirmed device receiving GPO Seeing error event ID 76 in the event log dsregcmd /status does show Domain joined: Yes and Azure Joined: Yes ======================== Question / statement: Am I missing anything? One thing to note, that i'm not sure makes a difference is that the environment does have SCCM / co-managed. I don't see if that makes a difference. To me, i'm leaning towards something with users... because the MDM User scope is what should bring the URL, if I am thinking correctly. Thanks,
-
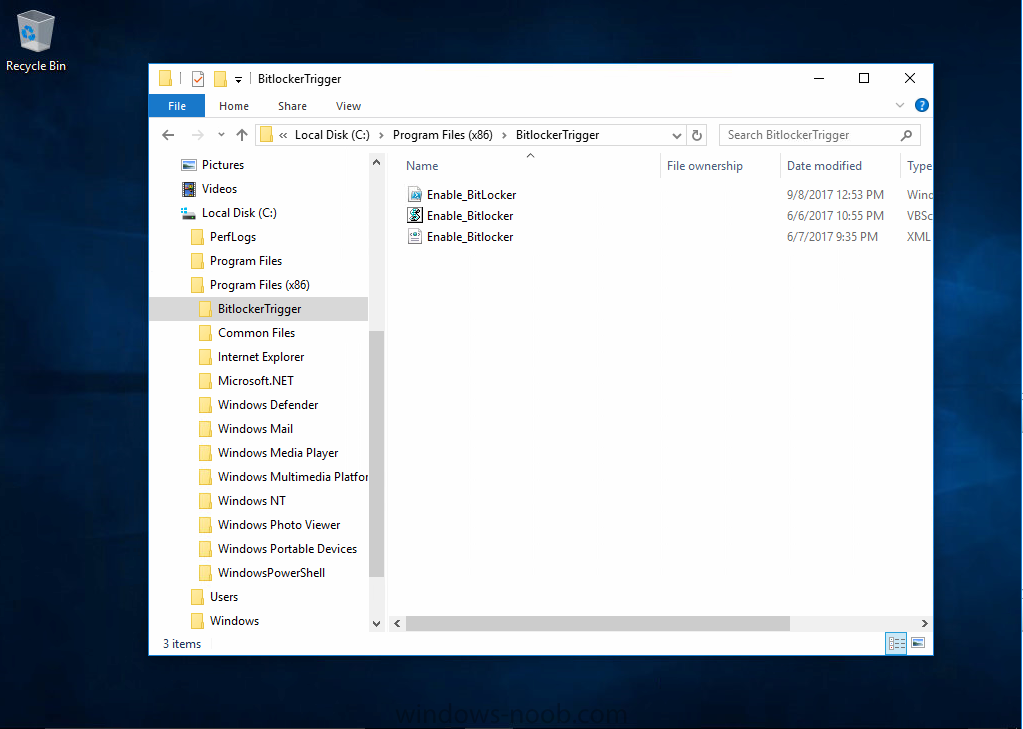
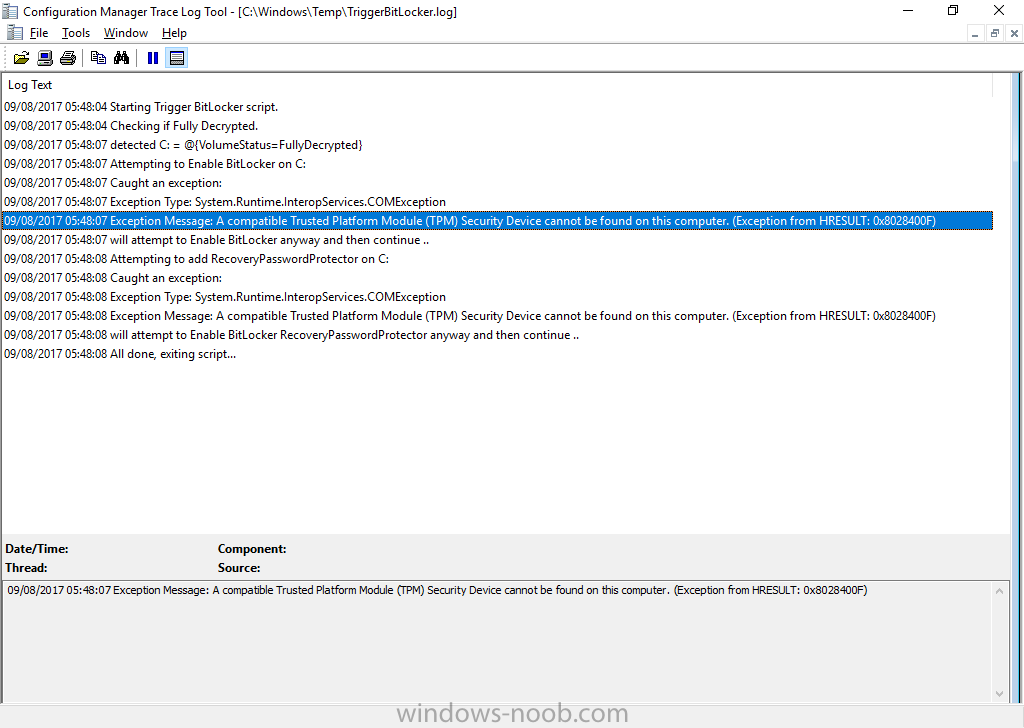
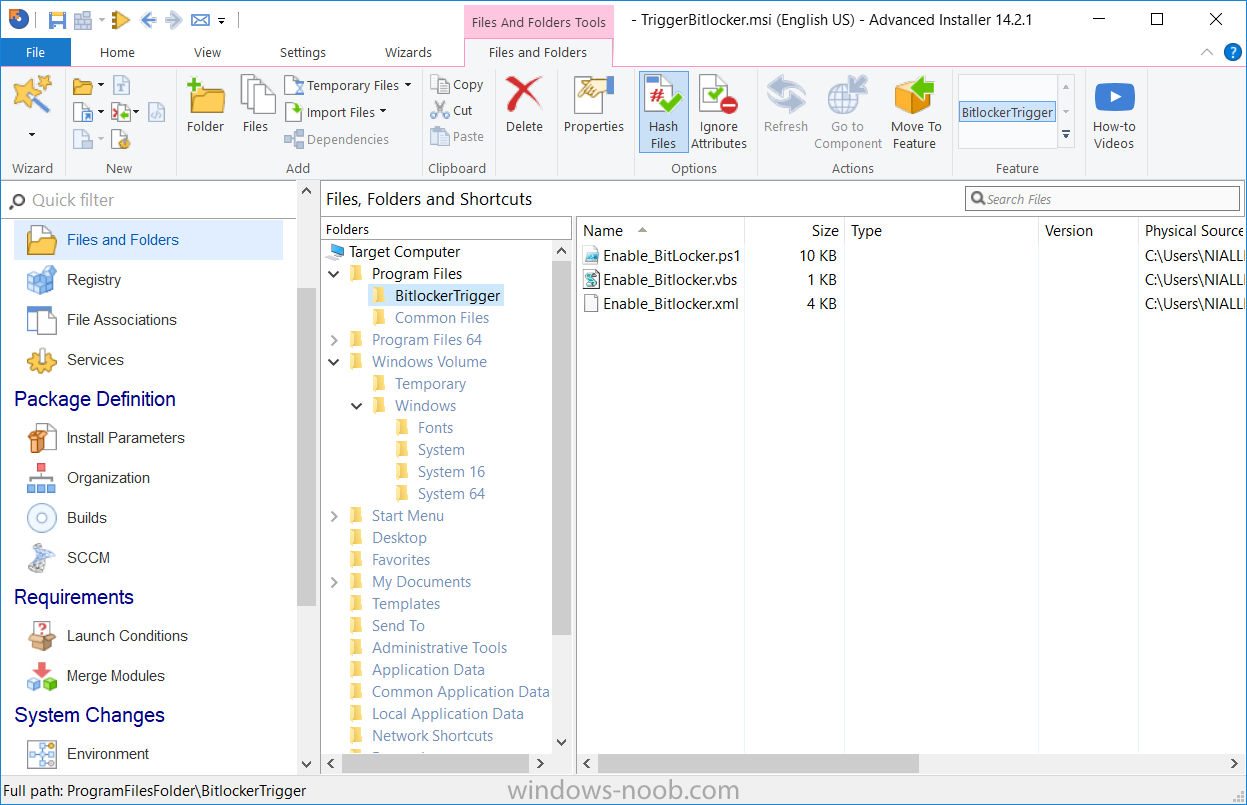
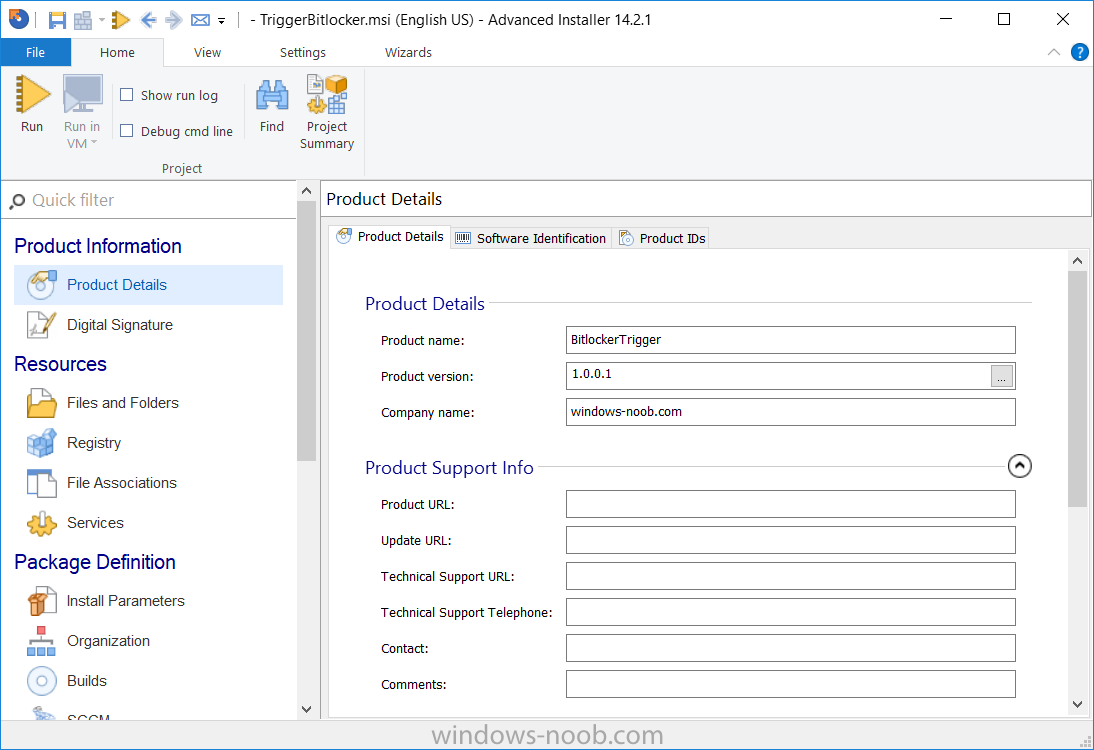
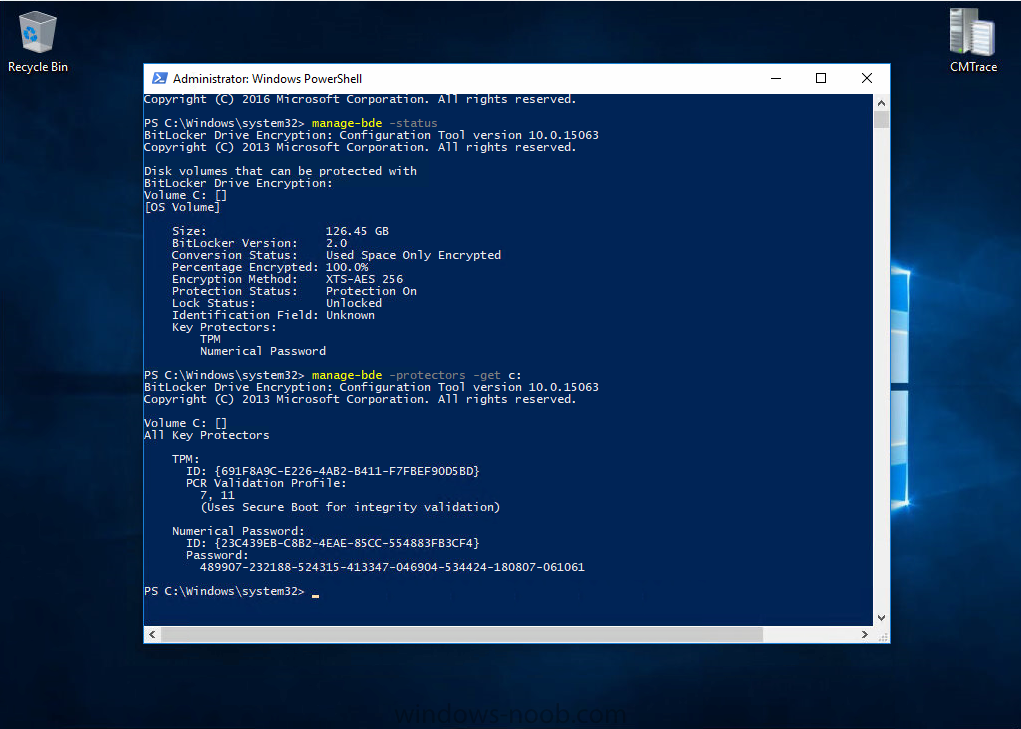
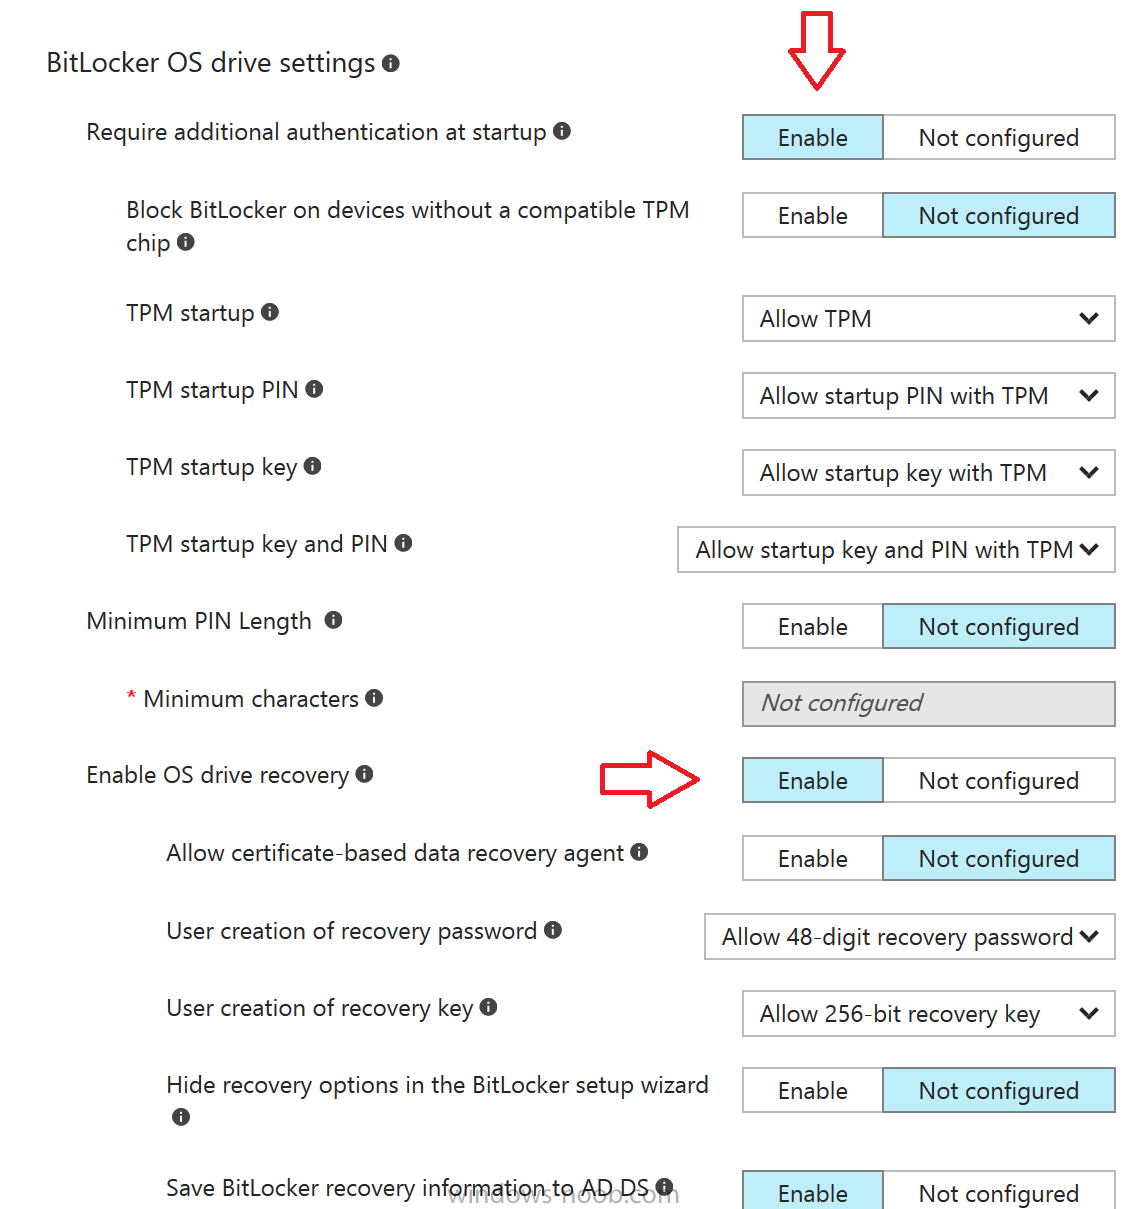
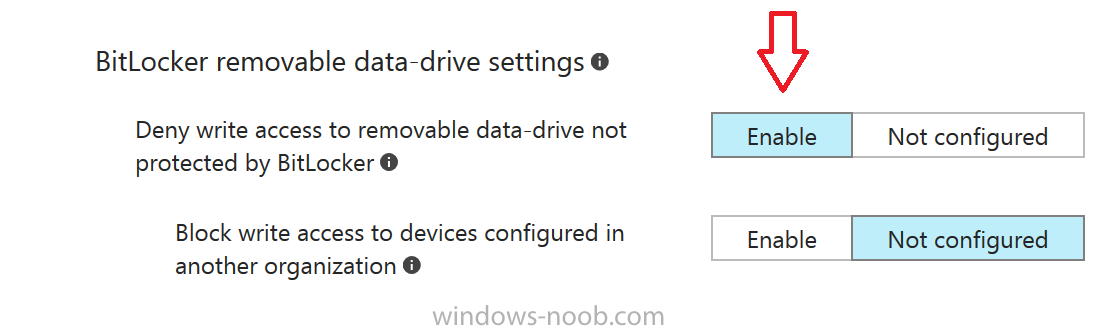
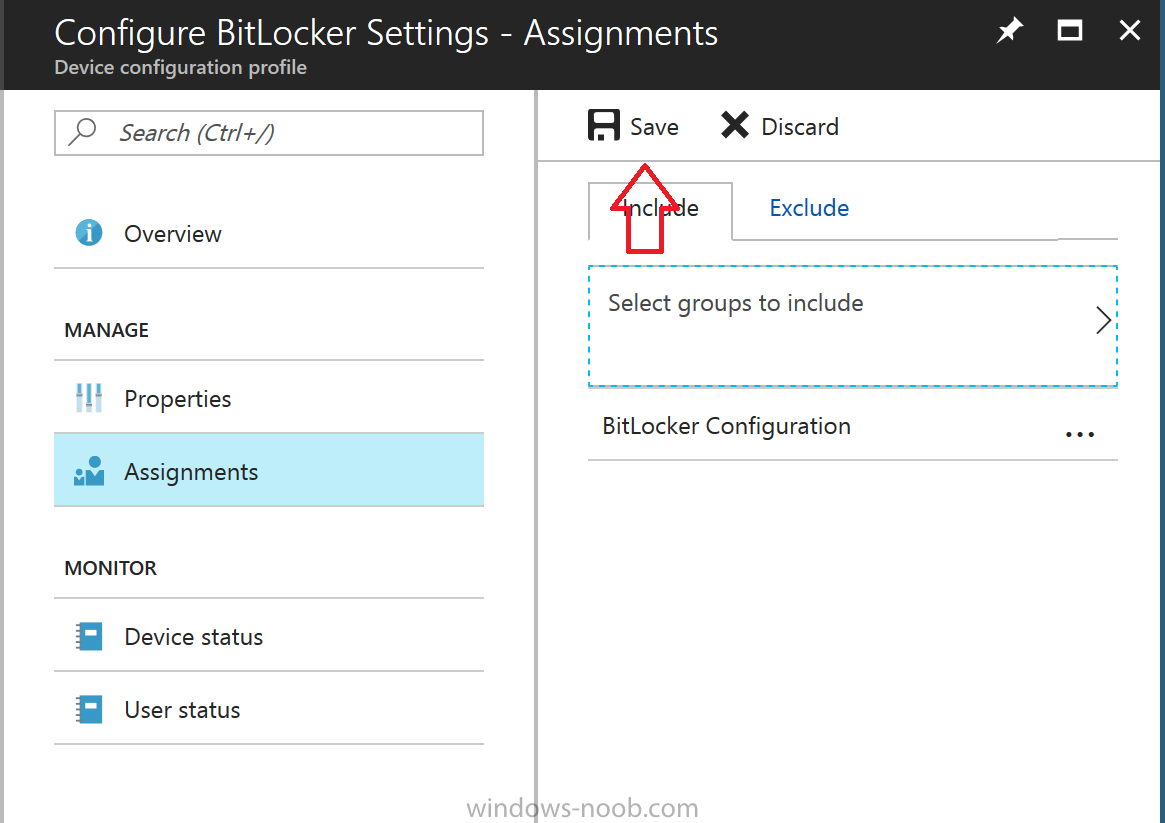
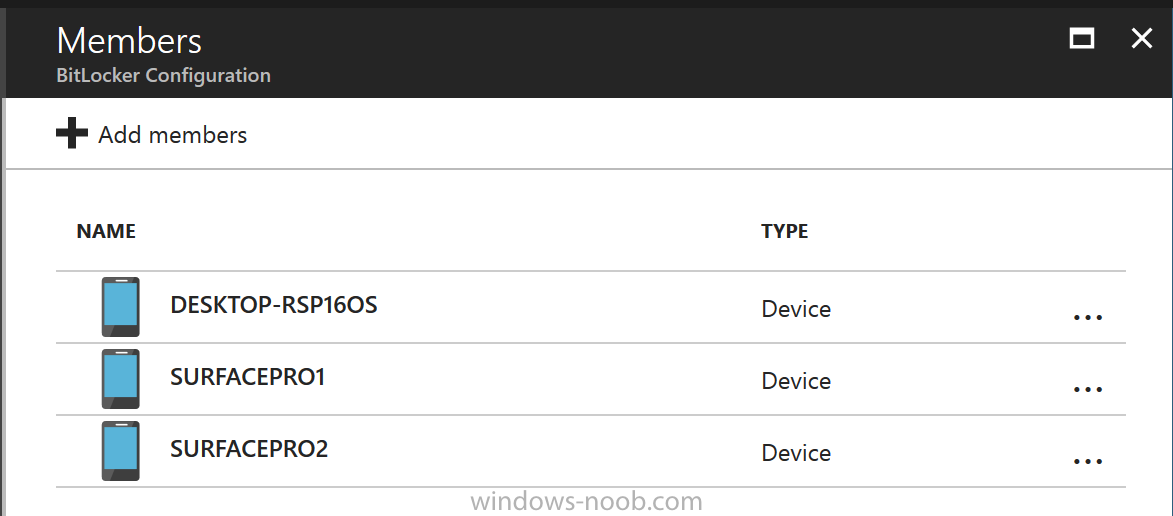
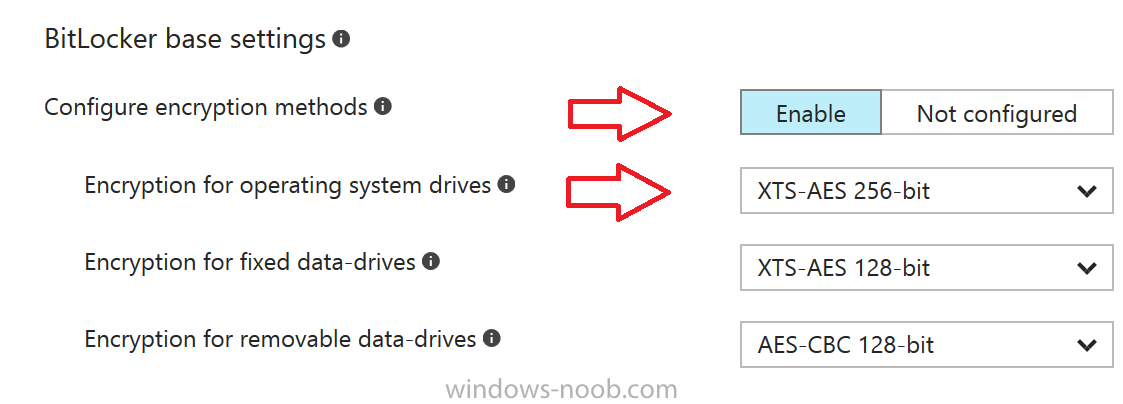
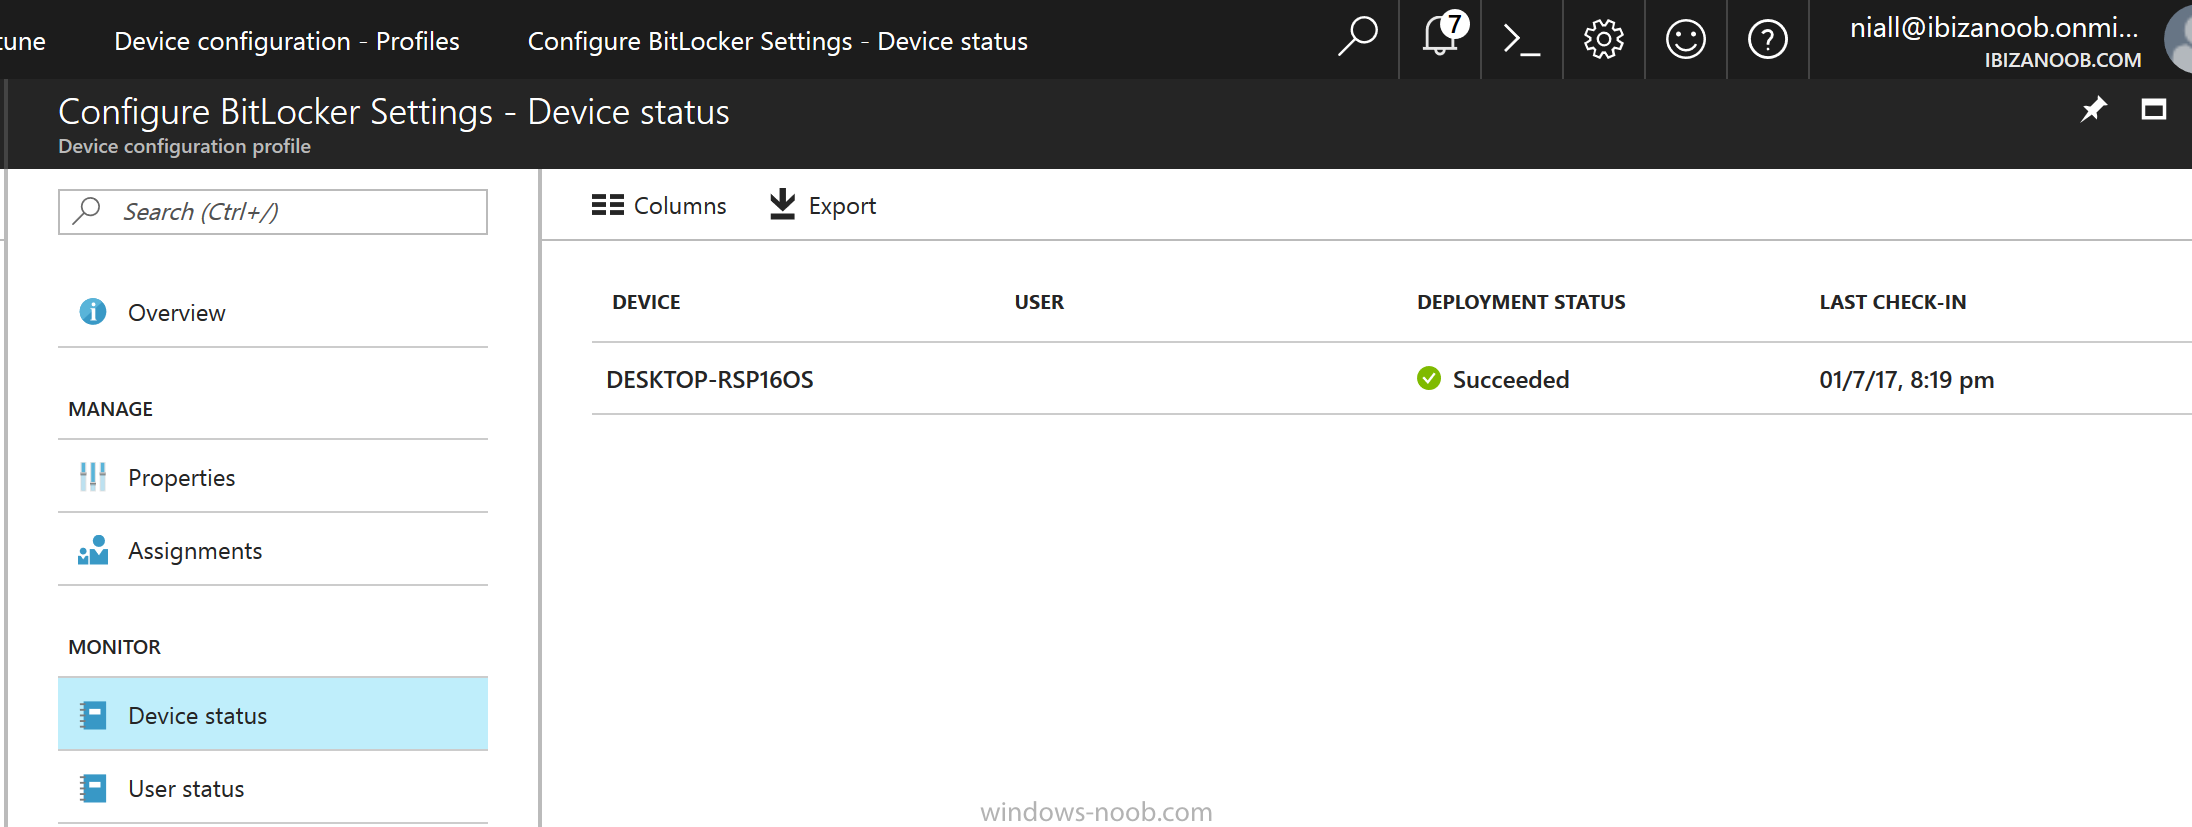
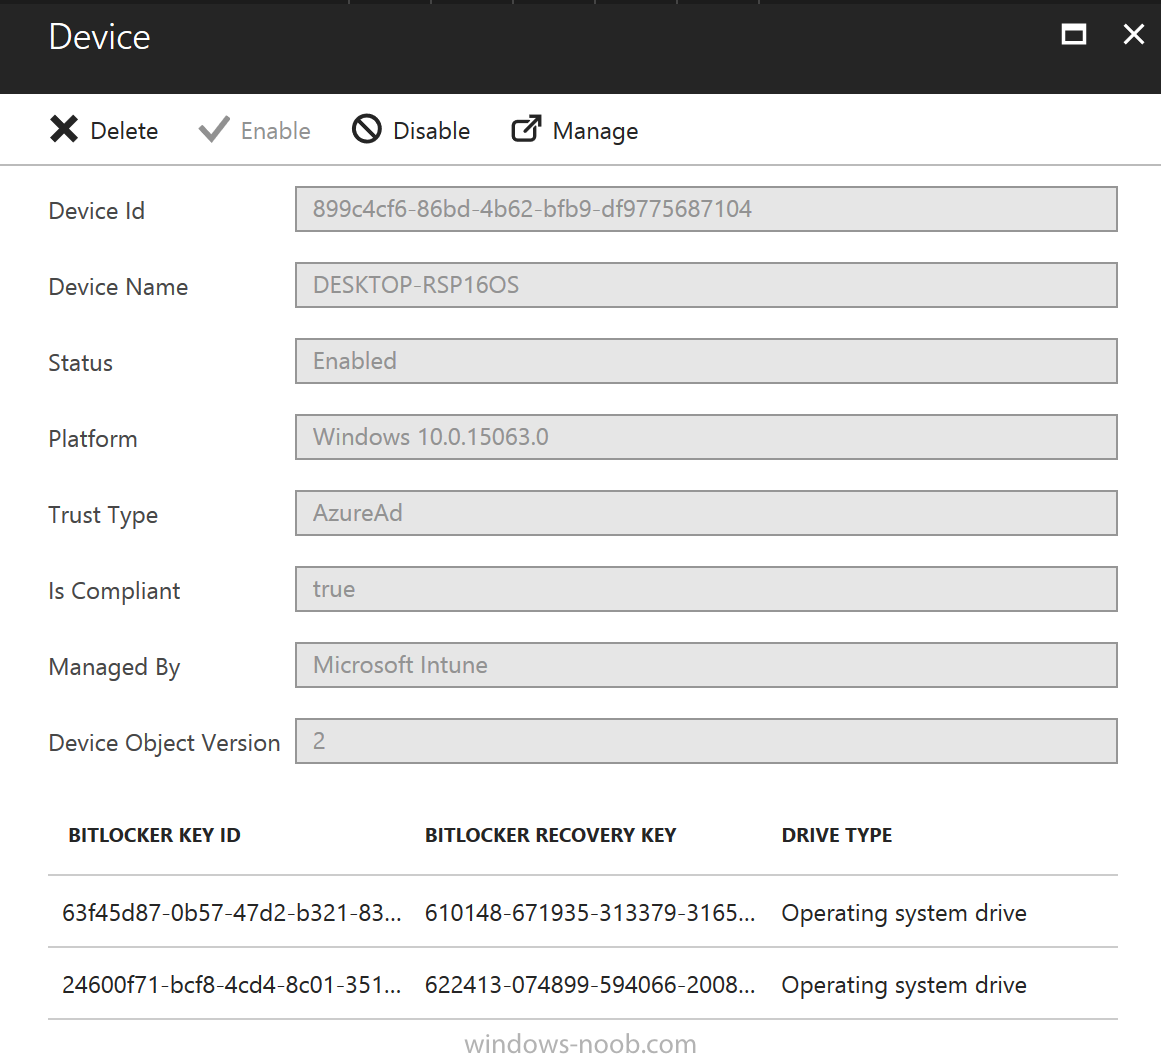
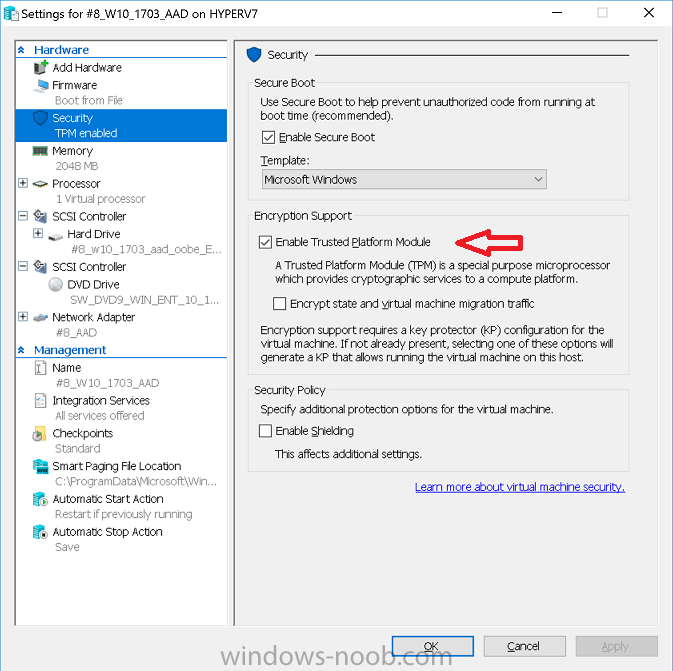
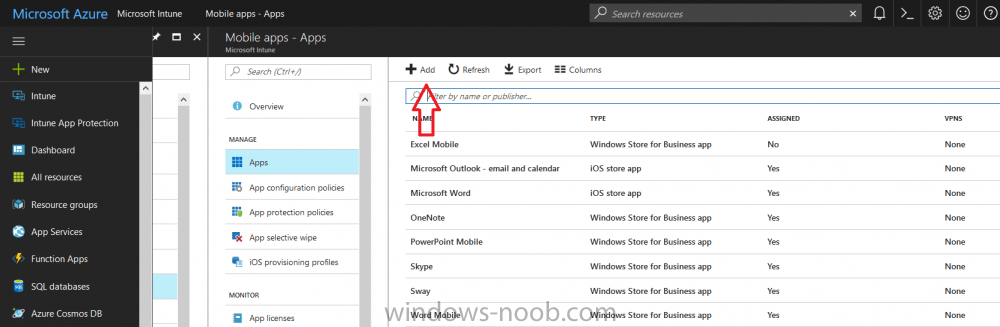
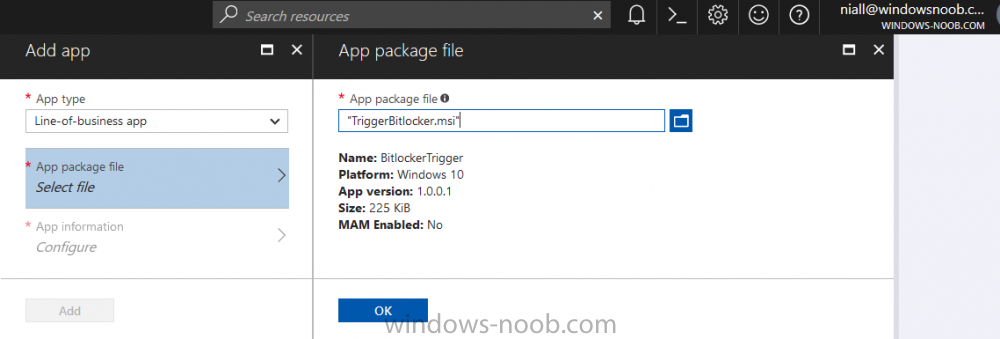
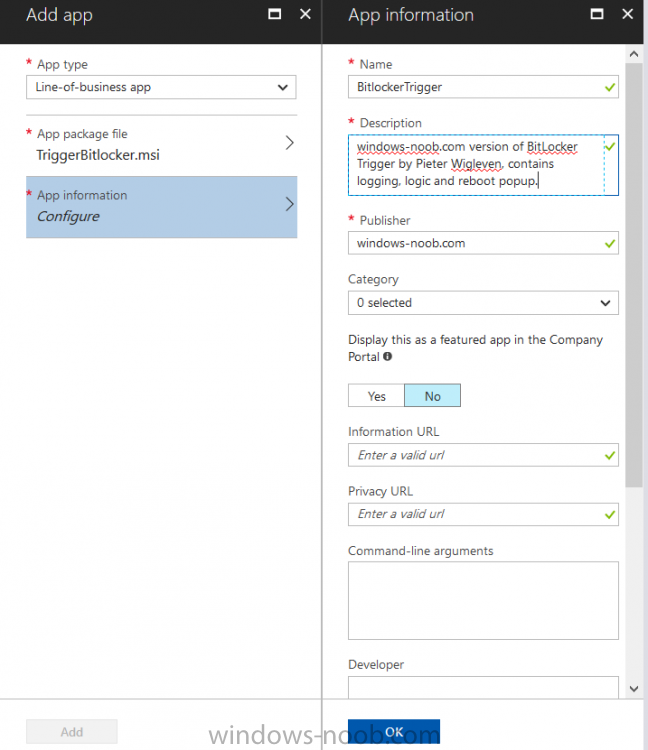
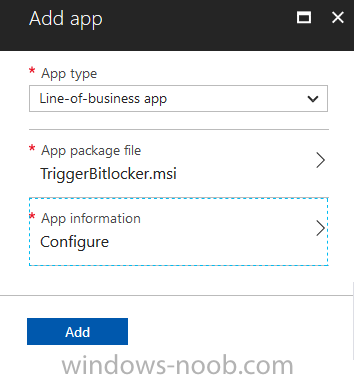
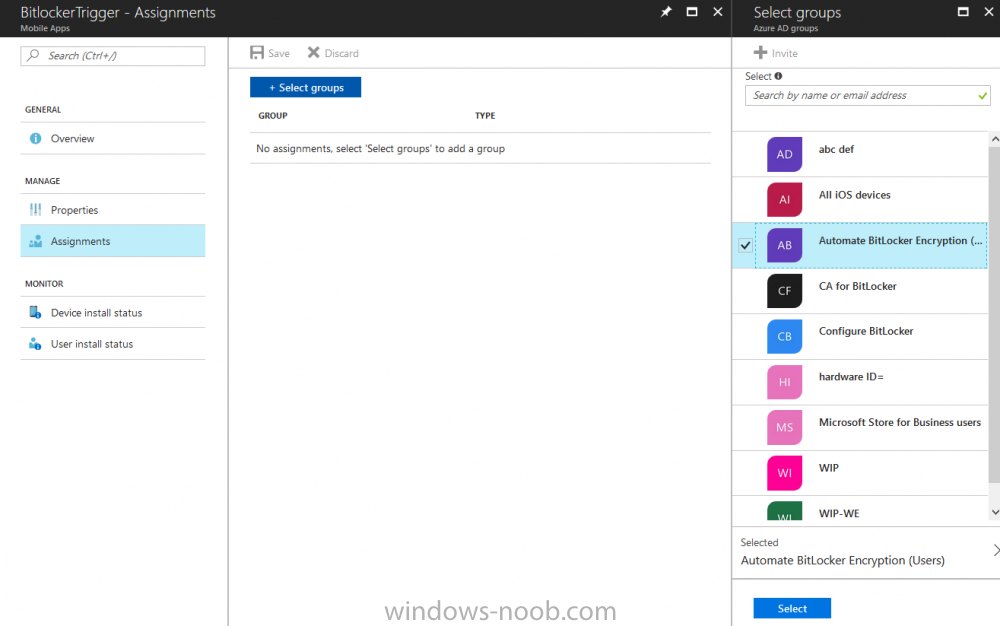
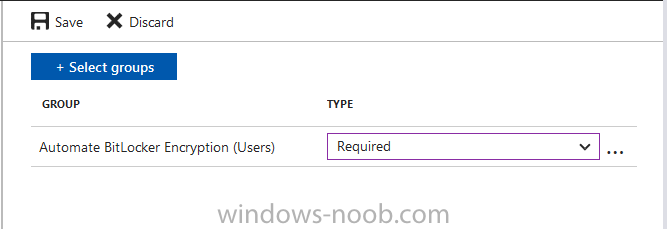
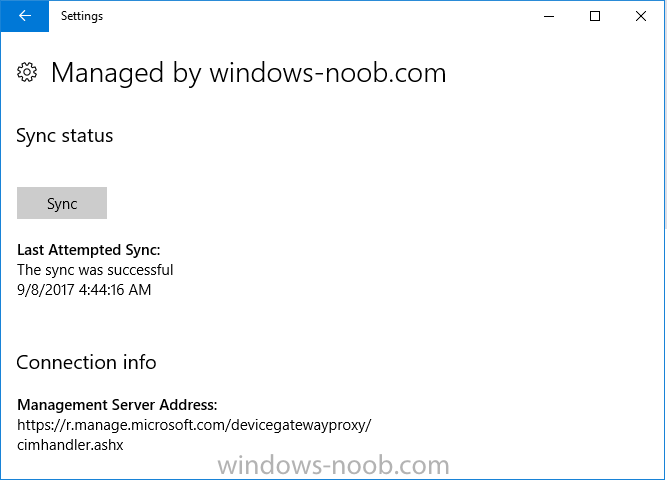
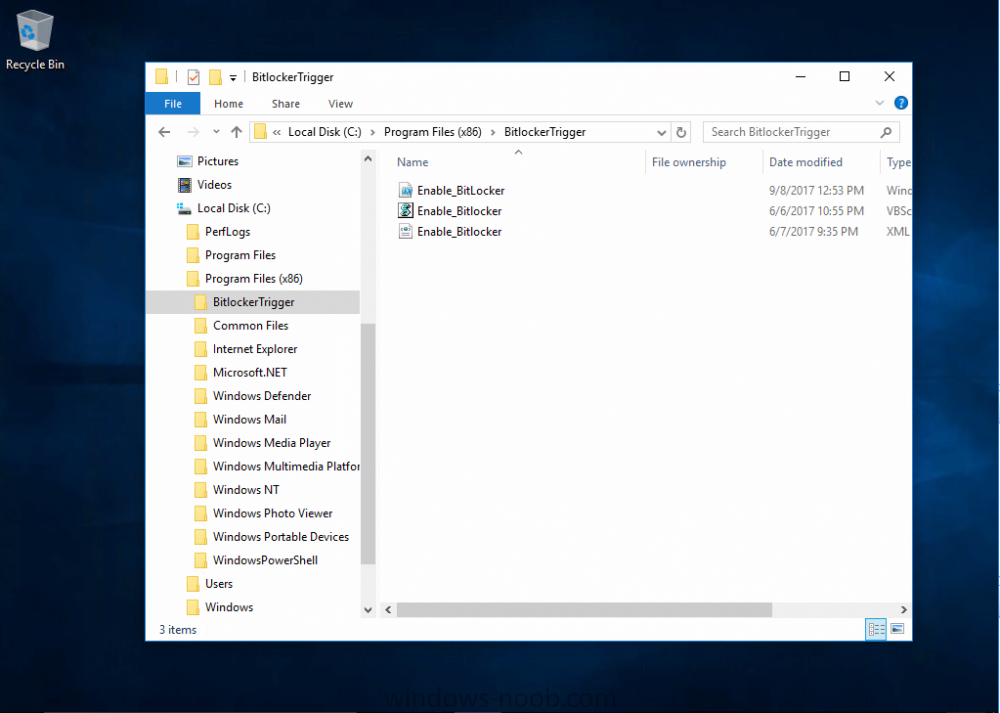
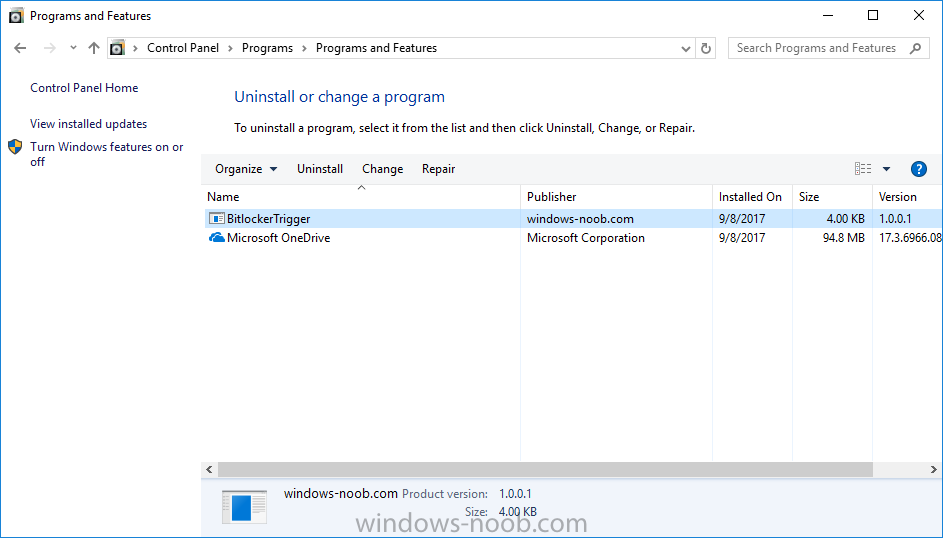
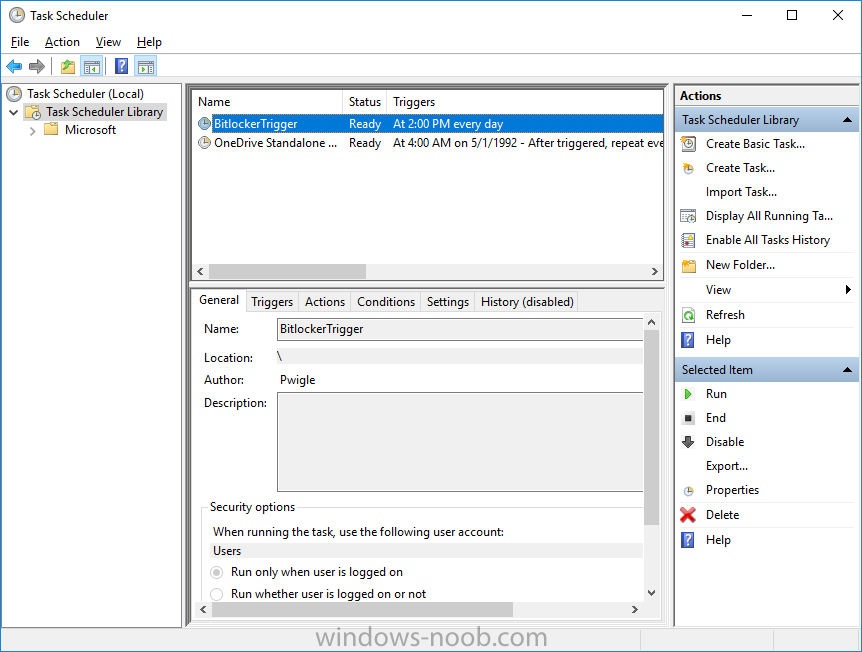
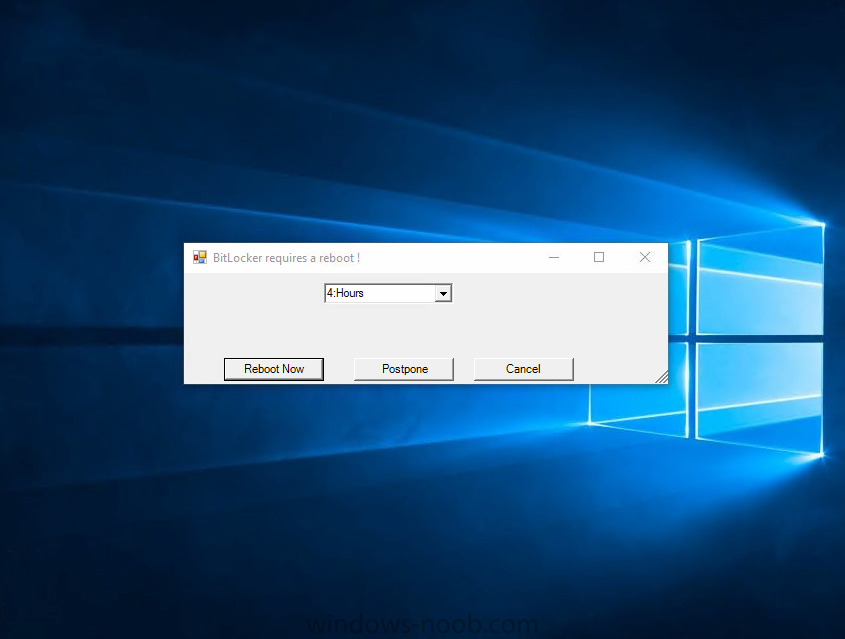
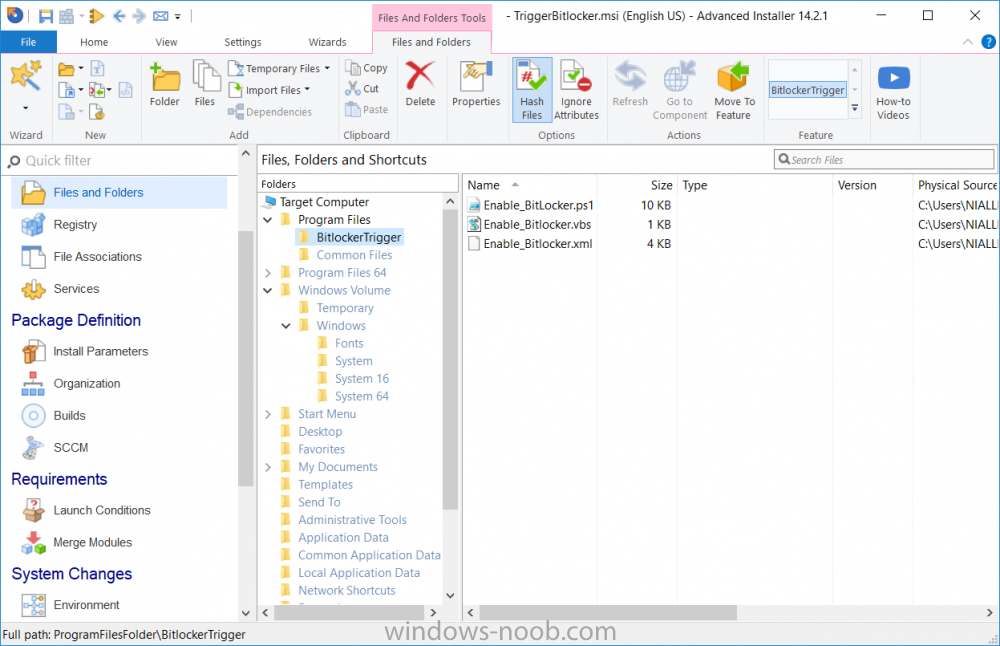
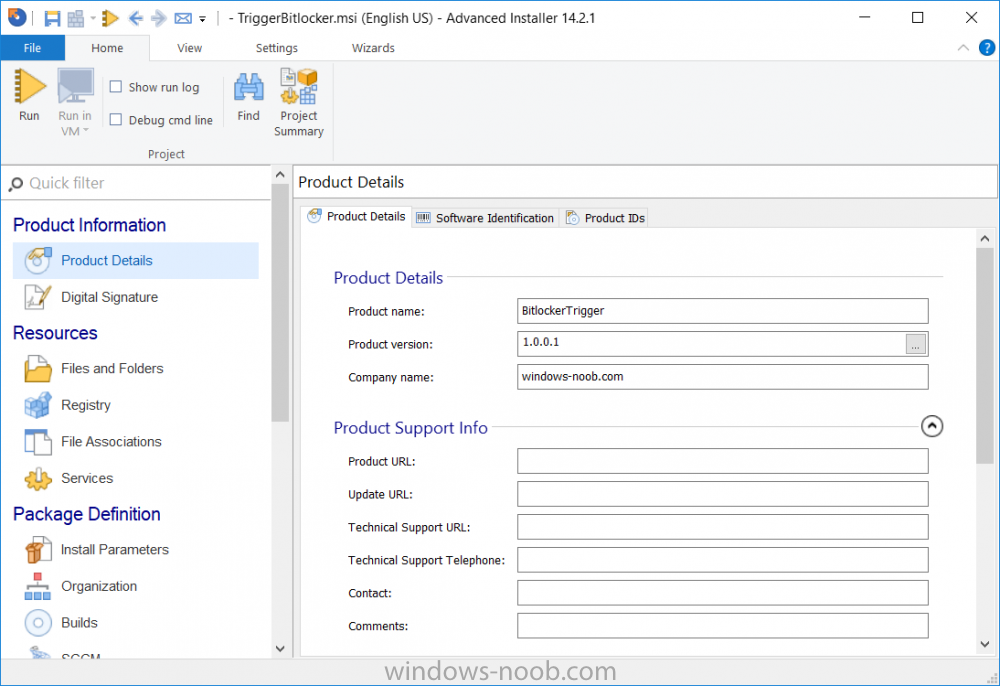
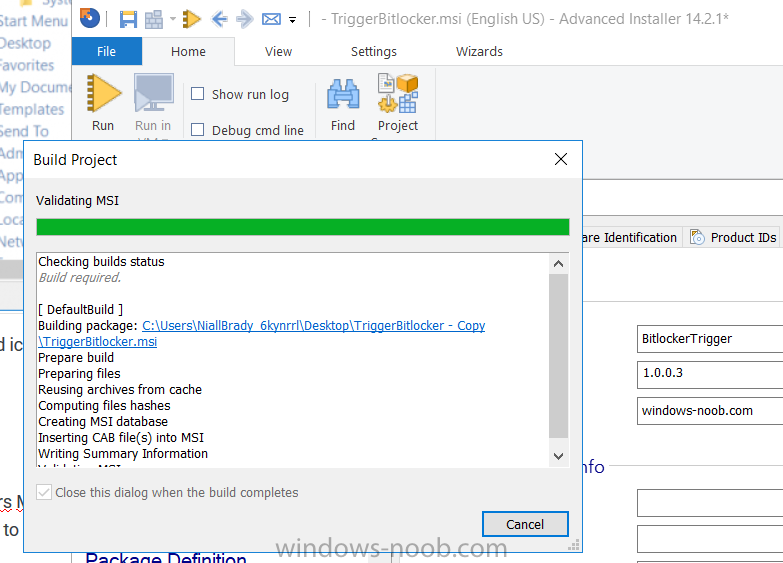
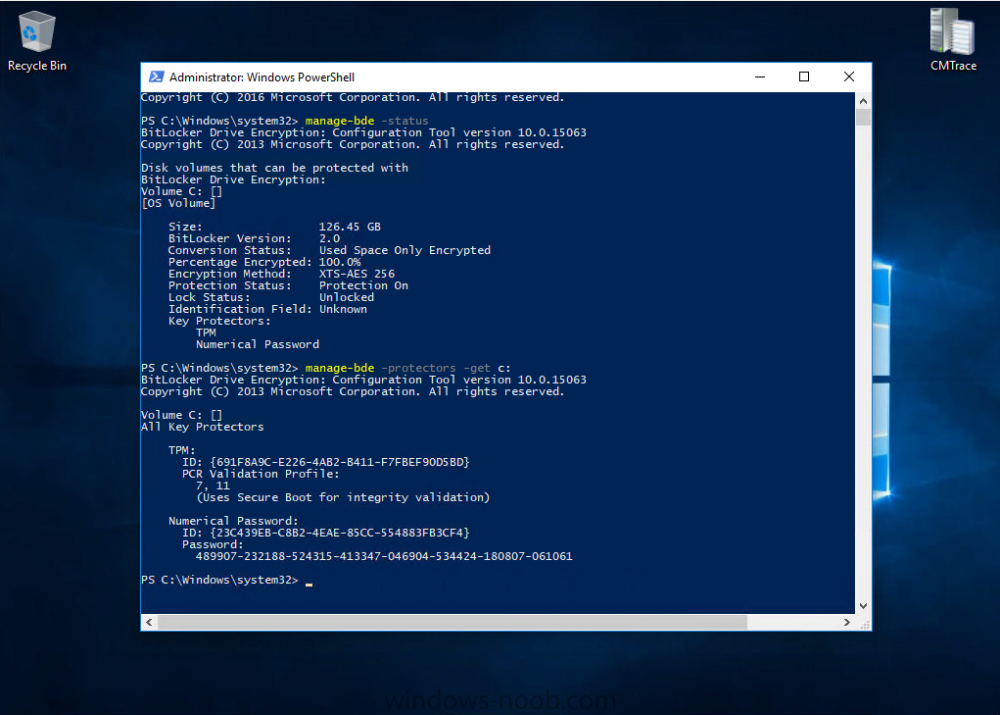
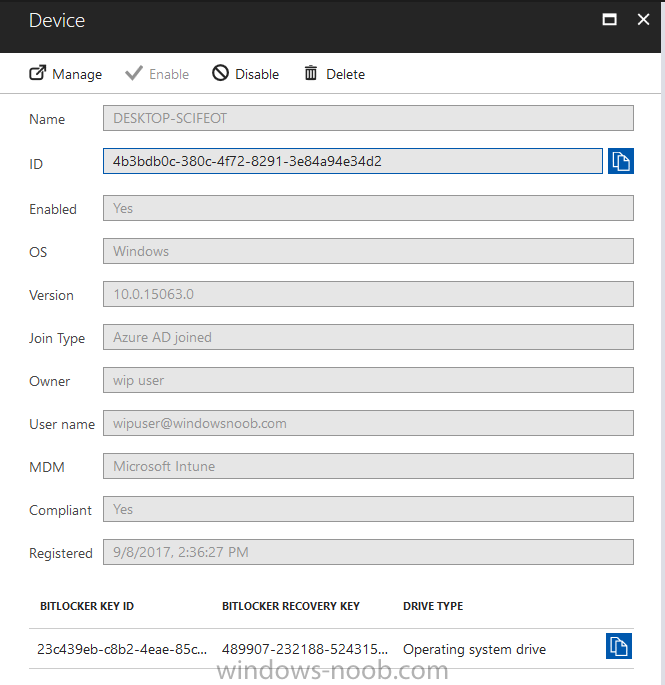
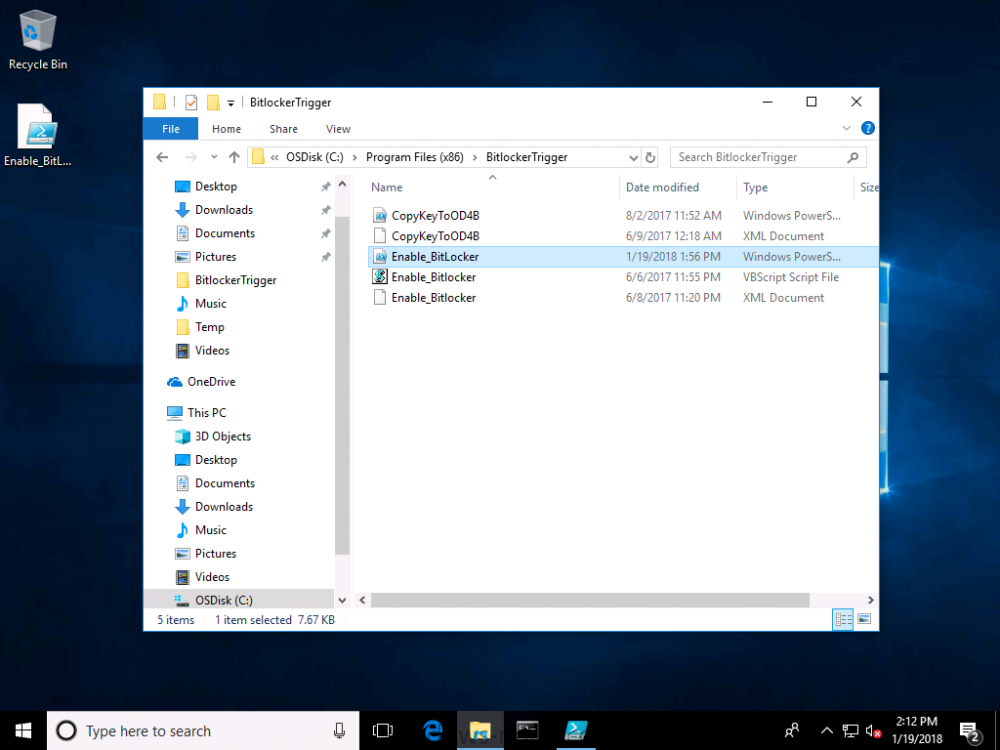
Introduction In Part 1 I showed you how you can configure BitLocker on Windows 10 devices using Microsoft Intune, but that method relies on the end user actually clicking on the notification in Windows and then continuing through the wizard until completion. In this post I'll show you how you can automate that part of the process, using an MSI that is based upon an MSI that was originally created by Pieter WigLeven. That MSI creates a scheduled task to run daily until the drive is encrypted. Pieter's solution was great but lacked some key features that I wanted such as logging (so that you can view errors which may occur during the encryption phase), logic and a user facing reboot prompt. Therefore, I decided to rewrite the PowerShell script included in the MSI and then re-package it for your benefit. Note: I'd recommend you test this solution in a lab environment, I used Windows 10 version 1703 Hyper-v based virtual machines (Generation 2) with a Virtual TPM enabled. Also to note, this MSI (and Pieters) does not check for the existance of a third party encryption tool, if you want that functionality then you'll need to modify the PowerShell script accordingly and then repackage it as described in Step 5. Enabling a Virtual TPM If you use Hyper-v VM's without a Virtual TPM enabled then the PowerShell script will exit logging errors and will not start the encryption. You can enable the Virtual TPM in the Security settings of your virtual machine (shown in the screenshot below) by placing a check mark in Enable Trusted Platform Module. Step 1. Download the MSI Note: In this guide I've used the windows-noob.com version of the MSI. I've modified the MSI as described in Step 5 and made it available in the Downloads section of this Guide, it includes new features such as Detailed logging Logic to check if encryption was enabled Reboot notification for end users Automatically remove the scheduled task once encryption is enabled You can get the the windows-noob.com version of the MSI in the Downloads section of this guide (scroll down....) or you can get the original MSI from Pieter. Keep in mind that if you are doing Azure AD join, that the user is automatically an Administrator, if however you are using Windows Autopilot then the user will not be an Administrator. The windows-noob.com version of the tool is based on the user being an Administrator. Step 2. Add the MSI as a LOB app in Intune Now that you have the MSI available, it's time to upload it into Intune. In the Intune service in Azure, select Mobile Apps, then Apps, then click on + Add to add an App. Select Line of Business app in the drop down, then select Select file and point it to the downloaded MSI file before clicking on OK. Next click on App Configuration and fill in some details about the application before clicking on OK finally click on Add. Step 3. Assign the app as Required to a User Group Next you will deploy the application (Assign) to a group of Users. In this guide I've created an Assigned User Group called Automate BitLocker Encryption (Users) which contains users that I want to target with this policy. Click on Assignment, then click on Select Groups, select the User Group you created previously and then click on Select. For Type, click on the dropdown and select Required and then click on Save. This will mean that any users in this User Group will be targeted by this required application and it will automatically download and run. Step 4. Verify the experience On a Windows 10 computer that is not yet BitLockered (and not encrypted by any third party encryption), Logon as a user that is a member of the above User Group. Keep in mind that they also need to have received the BitLocker Configuration created in Part 1 of this guide. That policy will set the BitLocker Configuration options (such as Encryption Algorithm), but it will not start encryption automatically. Trigger a Sync using the appropriate button. This will pull down the new policy and start the download and installation of the MSI which in turn will copy some files, and create a scheduled task. Once policy is received, you can see that the application is installed in Control Panel And three files are present in the File System at C:\Program Files (x86)\BitLockerTrigger. Note: The VBS kicks off the PowerShell script and the XML file is used in the creation of the Task Scheduler task. You can also check Task Scheduler to see the task is added, and that it is scheduled to run at 2pm. Tip: By default Windows Task Scheduler has the History tab disabled by default, to enable it you must start Task Scheduler as Administrator (Run as Administrator) and then click on Enable All Tasks History in the right pane. This will give you some details about the running task and whether it did run or not, but for more details about the task review the TriggerBitLocker.log file as described below. Running the Task You can wait until 2pm for the scheduled task to run or right click on the task and choose Run to run it now. after it has run, if everything was ok it will popup a reboot to the user, if things don't go according to plan use CMTrace.exe and navigate to C:\Windows\Temp and open the generated log file C:\Windows\Temp\TriggerBitLocker.log The log file should reveal any problems that occur. In the example below you can see what happens when you try to run the task on a computer without a TPM. The key takeaway here is that logging is now included with the MSI and the PowerShell logic will avoid popping up a reboot message to the end user in the event that it has not succeeded to enable Encryption. On a computer that meets the specifications (TPM), the PowerShell script enables encryption and the user will see the popup, they can delay for a few hours or accept the reality that they are getting Encrypted with BitLocker. and if they choose Reboot Now they'll see something like this After the reboot we can verify BitLocker encryption status and the recovery key is in Intune in Azure. job done ! Note: After successfully enabling BitLocker the script deletes the Scheduled Task so that it no longer re-runs. Step 5. (Optional) Edit the MSI with Advanced Installer If you'd like to update the MSI yourself, you can install the MSI on a vm, and pull the scripts from the folder shown above, then load it using Advanced Installer. Edit what you want in the package and edit the PowerShell script to suit your needs, once done copy the replacement scripts back into the MSI in the Files and Folders section below Once done, to build the package click on the Save icon in the ribbon. And use that compiled MSI in the guide above. Downloads Below is the windows-noob.com version of Pieters MSI, this version was compiled using Advanced Installer 14.2.1 (great product !) and contains improvements to the PowerShell script such as logic handling, logging to help with troubleshooting and a Reboot computer popup at the end of the script which only appears if encryption is enabled. windows-noob.com TriggerBitlocker.msi (version 1.0.0.2) - TriggerBitlocker.msi windows-noob.com TriggerBitLockerUser.msi (version 1.0.0.2TriggerBitlockerUser.msi Recommended reading Hardware independent automatic Bitlocker encryption using AAD/MDM https://blogs.technet.microsoft.com/home_is_where_i_lay_my_head/2017/06/07/hardware-independent-automatic-bitlocker-encryption-using-aadmdm/#comment-26696 Configuring BitLocker in Intune - Part 1. Configuring BitLocker https://www.windows-noob.com/forums/topic/15514-configuring-bitlocker-in-intune-part-1-configuring-bitlocker/ Download Advanced Installer http://www.advancedinstaller.com/download.html

-
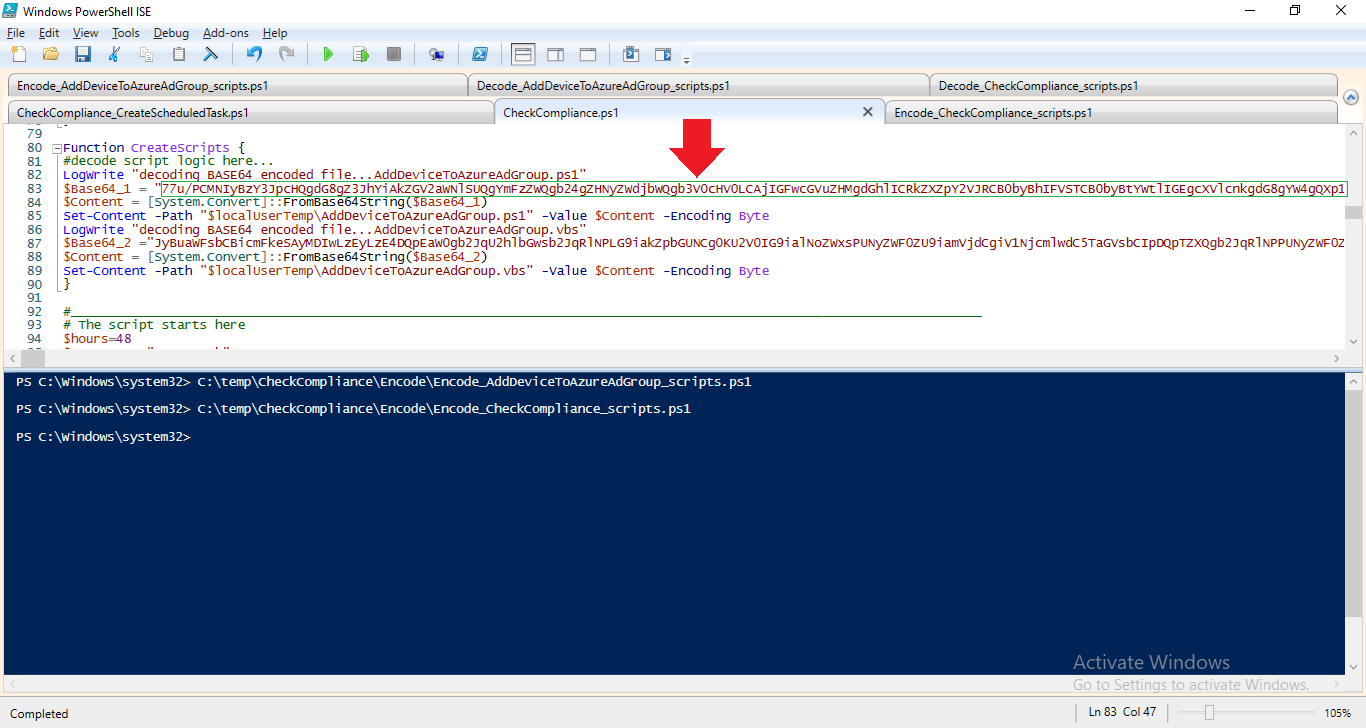
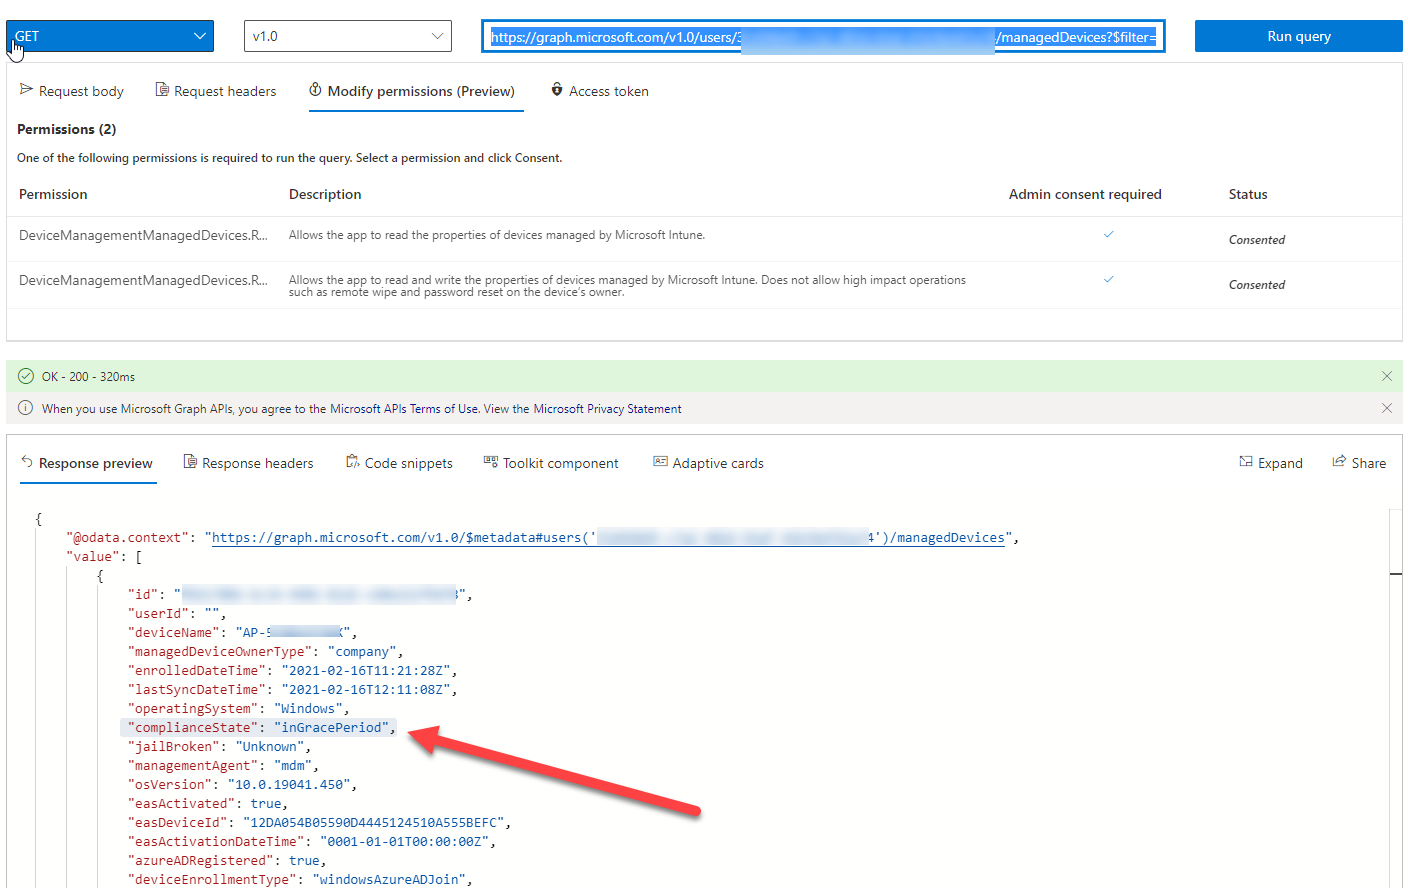
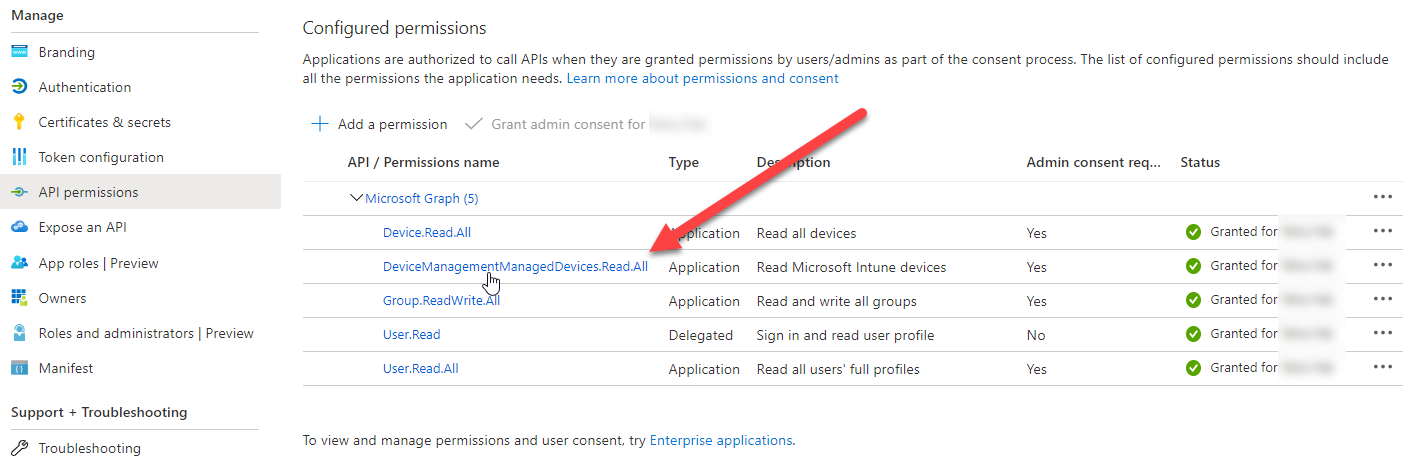
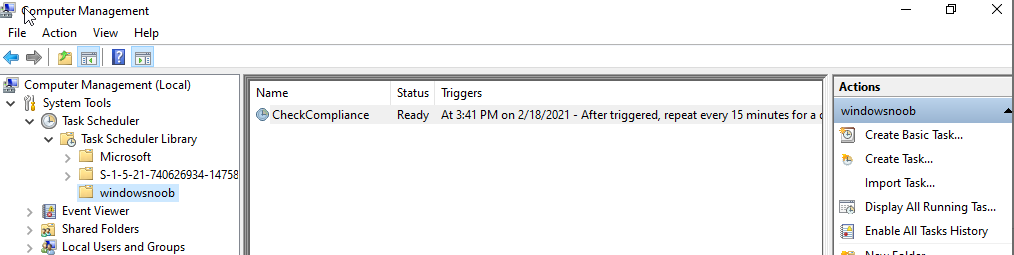
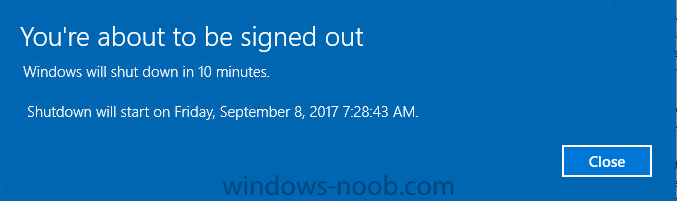
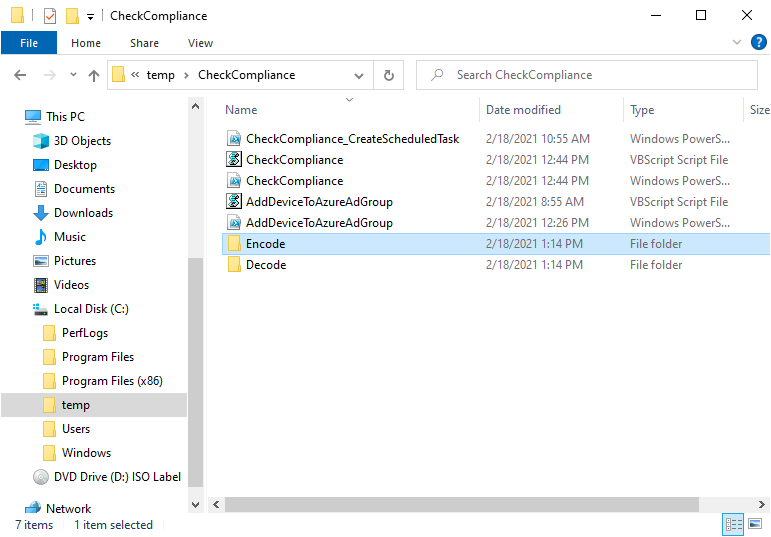
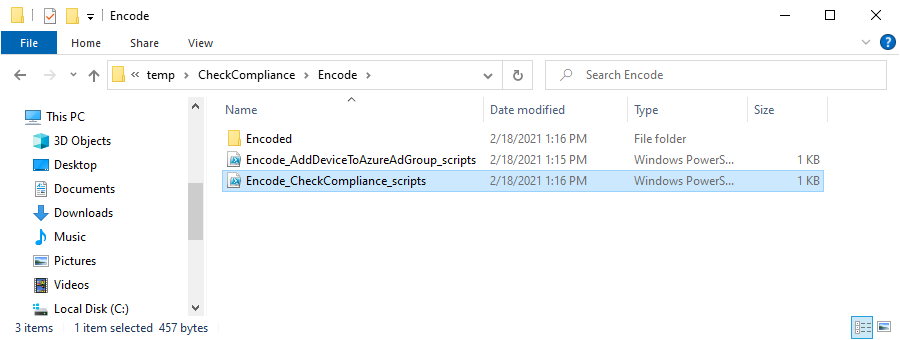
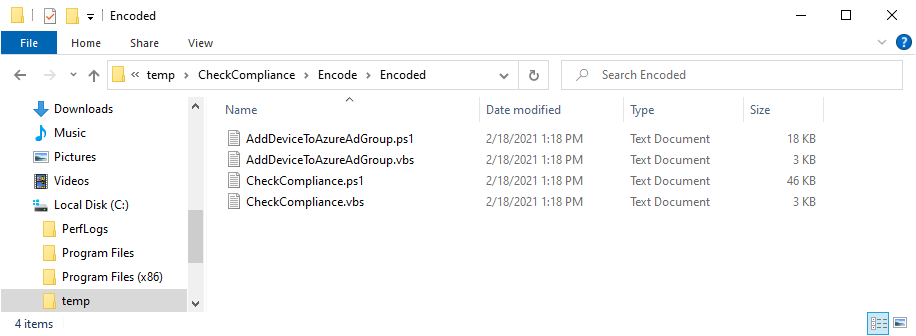
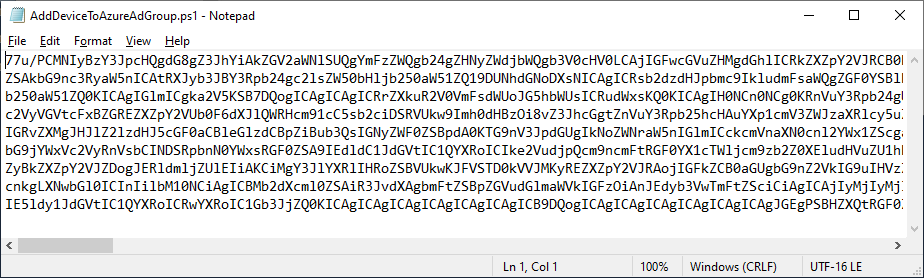
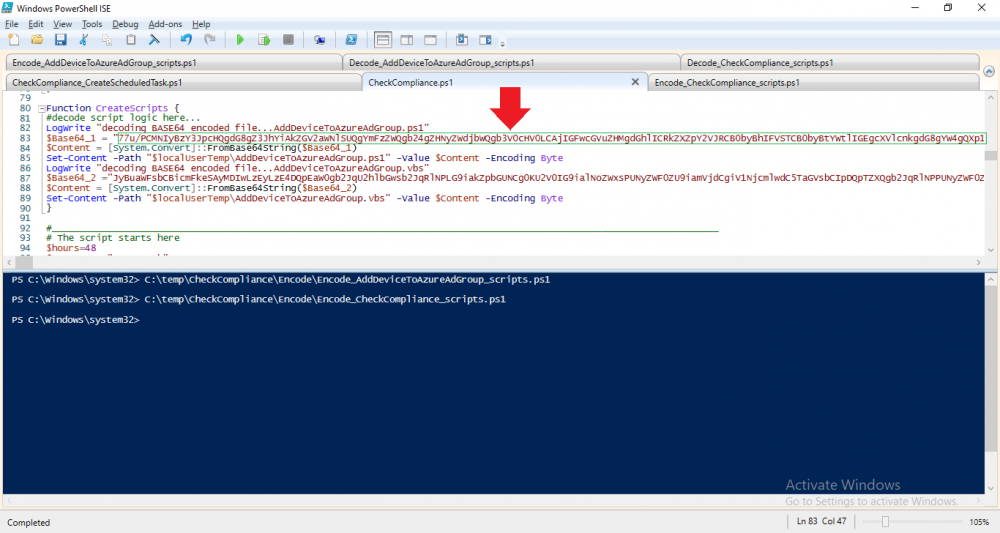
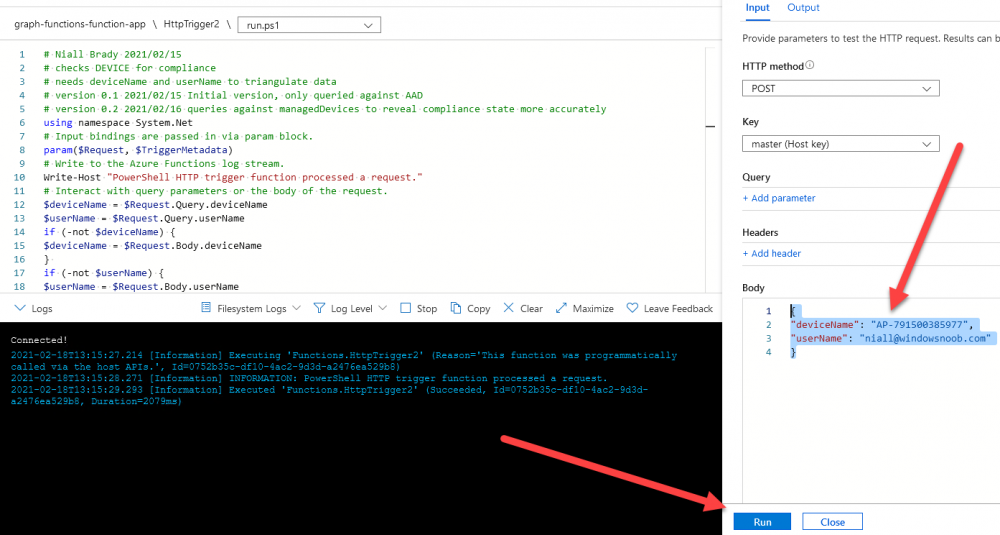
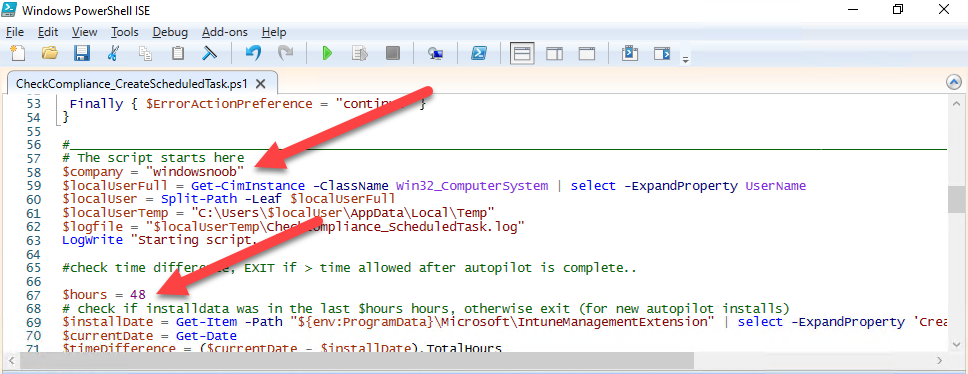
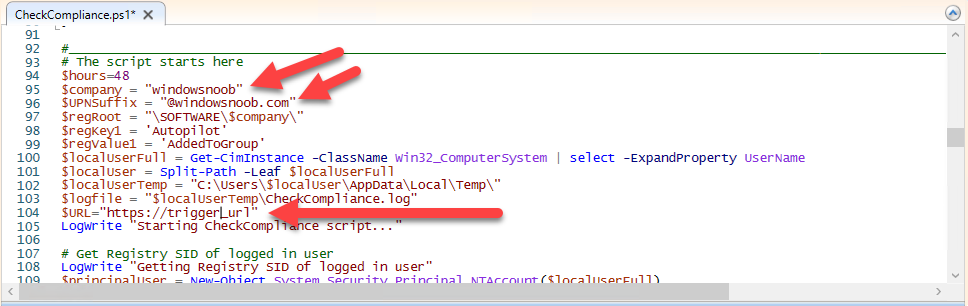
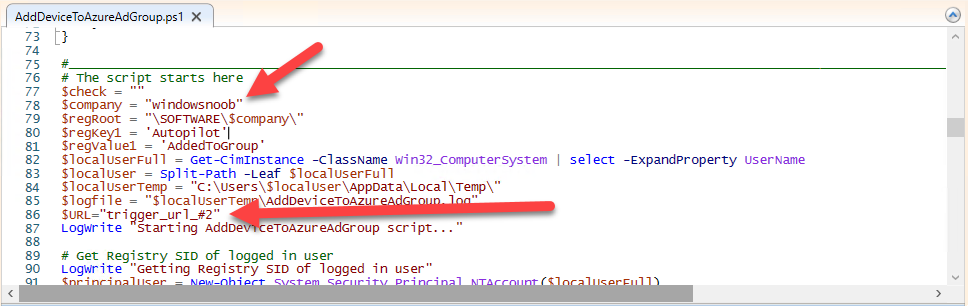
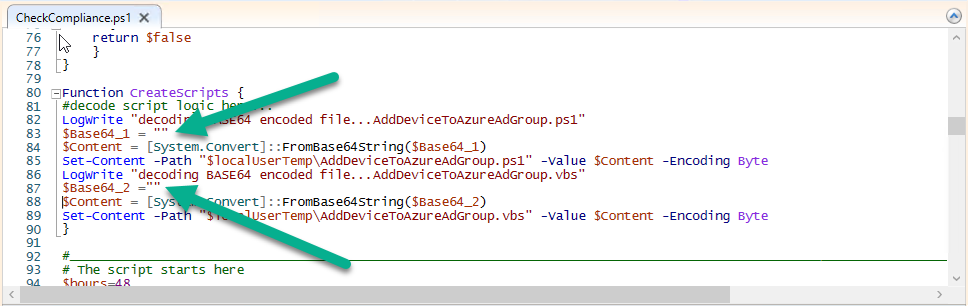
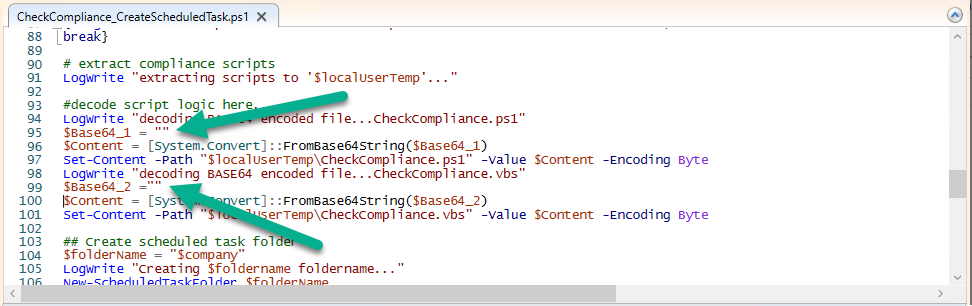
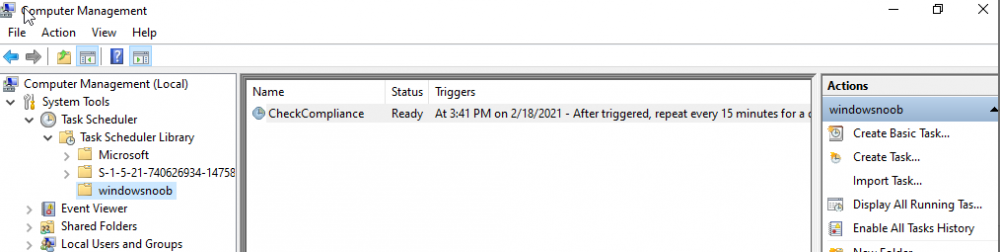
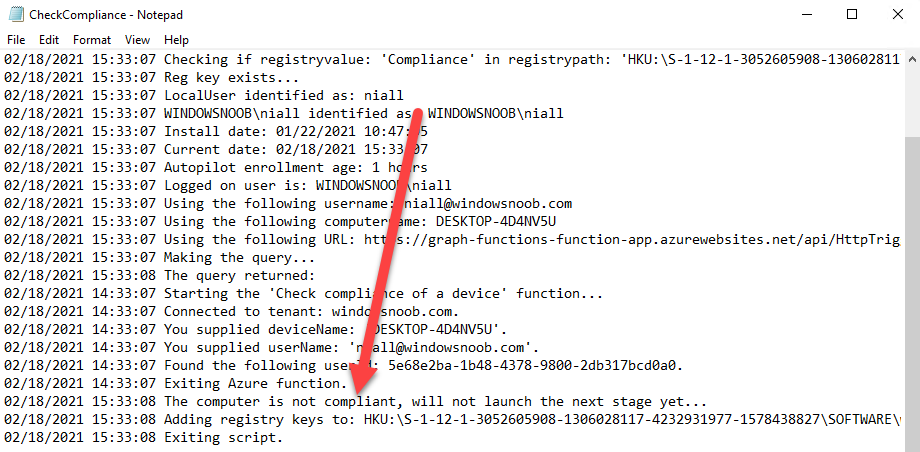
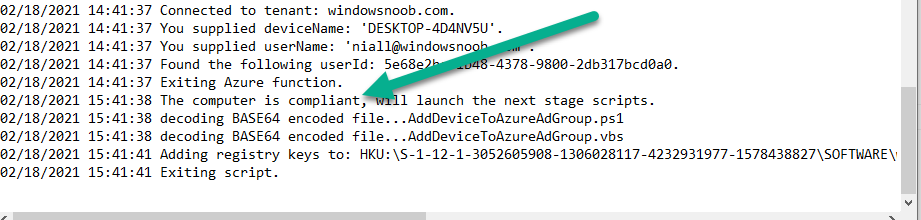
Introduction I've touched on this subject before where I used http triggers to add devices or users to an Azure AD group after Windows Autopilot was completed, however that solution did not check the compliance of the device prior to adding it to that Azure AD group, and you may have assigned profiles to that Azure AD group which depend on a compliant state. After Windows Autopilot is complete the compliance state of a device a can vary between any of the following states depending on various factors (usually time, and the number of compliance policies deployed and how they are configured). Compliant Not Compliant In grace period See ConfigMgr Not Evaluated The initial compliace state can eventually change to a state of compliant can take from a couple of minutes to some hours depending on what compliance policies you have configured. Refer to this docs post for more information about device compliance. Let's imagine you've configured a few compliance policies that check for the status of BitLocker Encryption of a device and Windows Defender anti malware definition updates. If the detected state of those polices don't match the configured policy then the device will be in a state of non compliance or even in something called in grace period. This post should help you solve the problem of adding devices (or users) to an Azure AD group after Windows Autopilot is complete, but only when they are in a state of Compliance that you want, in this case, Compliant. However it is complex, so before you start, please familiarize yourself with the following 2 posts, in fact I'd suggest you get the below working before proceeding as it will prepare you for this solution nicely. Adding devices to an Azure AD group after Windows Autopilot is complete - part 1 Adding devices to an Azure AD group after Windows Autopilot is complete - part 2 Understanding the solution So how does this all work ? The solution is actually made up of several scripts (and a trigger) listed below. CheckCompliance_CreateScheduledTask.ps1 The CheckCompliance_CreateScheduledTask.ps1 script will exit without doing anything if it detects that Autopilot was completed more than 48 hours ago. This script creates a scheduled task called CheckCompliance to run every 15 minutes. The scheduled task runs a CheckCompliance.vbs script which in turn runs a CheckCompliance.ps1 powershell script. Note: Both the CheckCompliance.vbs and CheckCompliance.ps1 scripts are embedded (base64 encoded) within the CheckCompliance_CreateScheduledTask.ps1 script. CheckCompliance.vbs This script is used to launch CheckCompliance.ps1 in hidden mode. CheckCompliance.ps1 This script does the actual call to the http trigger and provides the following data dynamically to the trigger: deviceName userName If the device is determined to be compliant it will then extract two more embedded scripts, then it runs AddDeviceToAzureAdGroup.vbs before finally deleting the scheduled task. Note: Both the AddDeviceToAzureAdGroup.vbs and AddDeviceToAzureAdGroup.ps1 scripts are embedded (base64 encoded) within the CheckCompliance.ps1 script. AddDeviceToAzureAdGroup.vbs This script simply runs the AddDeviceToAzureAdGroup.ps1 script in hidden mode. AddDeviceToAzureAdGroup.ps1 This script gathers the deviceId and userName and adds both items to an Azure AD Group. This uses the methodology of this blog post. httptrigger The http trigger itself uses the data delivered to it via the URL to determine compliance based on the data in managed Devices in Intune. How is compliance determined ? On a high level, compliance state is determined via queries in Microsoft Graph which you can test using Microsoft Graph Explorer. You can experiment yourself using a query such as the following. https://graph.microsoft.com/v1.0/users/USERID/managedDevices?$filter=deviceName eq 'ComputerName' Note: To manually test this you'll need to find valid UserID and ComputerName valuesfrom Intune and the results of this query would look something like below. Keep in mind that the UserID is reported as the id in Intune. The Scripted solution does the hard work for you, using Graph Explorer is where you start to test queries before creating the http trigger or back end scripts. Note that you'll need the following permissions granted in Graph Explorer to read this data (in addition to those listed in the previous blog post). Encoding/Decoding base64 scripts Included in the download are PowerShell scripts to encode/decode scripts. You can then edit them to your needs before re-encoding and adding the new base64 string to the appropriate variables. to set everything up please download the following scripts and extract to C:\Temp CheckCompliance.zip Make modifications as necessary to the CheckCompliance.ps1 and AddDeviceToAzureAdGroup.ps1 scripts before re-encoding. Save edited scripts to C:\Temp\CheckCompliance. To encode scripts simply run the relevant script shown below. There are two scripts, one for generating the base64 encoded scripts for the AddDeviceToAzureAdGroup and the other for the CheckCompliance scripts. The newly encoded scripts will be in the Encoded folder. Opening any of those 4 scripts will reveal the Base64 encoding data. Mark it all (Ctrl+a) and Copy it (Ctrl+c). Paste the Base 64 into the corresponding variable in the selected script. So to make changes to the AddDeviceToAzureAdGroup.ps1 script, simply edit the original Powershell script, then encode it, then copy the Base64 code into the corresponding section of the CheckCompliance.ps1 powershell script as shown below. Note that this is only an example, there are 4 embedded scripts in total, you'll get the hang of it soon enough. Decoding is the reverse process, and there are scripts available for you to do that also. Ok by now you should have all the above understood and working, time to deal with the solution. Step 1. Create a new http trigger I will assume you've already created a functionapp as per Step 4 of this blog post. If not, go ahead and create one and then return to this step. Next add the following code to your new http trigger. # Niall Brady 2021/02/15 # checks DEVICE for compliance # needs deviceName and userName to triangulate data # version 0.1 2021/02/15 Initial version, only queried against Azure AD devices # version 0.2 2021/02/17 queries against managedDevices to reveal compliance state more accurately using namespace System.Net # Input bindings are passed in via param block. param($Request, $TriggerMetadata) # Write to the Azure Functions log stream. Write-Host "PowerShell HTTP trigger function processed a request." # Interact with query parameters or the body of the request. $deviceName = $Request.Query.deviceName $userName = $Request.Query.userName if (-not $deviceName) { $deviceName = $Request.Body.deviceName } if (-not $userName) { $userName = $Request.Body.userName } # define the following variables $ApplicationID = "" # this is the id of the app you created in app registrations $TenantDomainName = "" # your tenant name $AccessSecret = "" # this is the secret of the app you create in app registrations # create the body $Body = @{ Grant_Type = "client_credentials" Scope = "https://graph.microsoft.com/.default" client_Id = $ApplicationID Client_Secret = $AccessSecret } # make initial connection to Graph $ConnectGraph = Invoke-RestMethod -Uri "https://login.microsoftonline.com/$TenantDomainName/oauth2/v2.0/token" -Method POST -Body $Body # get the token $token = $ConnectGraph.access_token # to improve logging... $triggerName = "Check compliance of a device" $a = Get-Date $body = " `n" $body = $body + "$a Starting the '$triggerName' function...`n" $body = $body + "$a Connected to tenant: $TenantDomainName.`n" # if $deviceName and $userName are provided do stuff.... if ($deviceName -and $userName) { $body = $body + "$a You supplied deviceName: '$deviceName'" + ".`n" $body = $body + "$a You supplied userName: '$userName'" + ".`n" # Start FinduserId $FinduserId = Invoke-RestMethod -Method Get -uri "https://graph.microsoft.com/v1.0/users/?`$filter=userPrincipalName eq '$UserName'" -Headers @{Authorization = "Bearer $token"} | Select-Object -ExpandProperty Value if ($FinduserId.userPrincipalName){ $FinduserId = Invoke-RestMethod -Method Get -uri "https://graph.microsoft.com/v1.0/users/?`$filter=userPrincipalName eq '$UserName'" -Headers @{Authorization = "Bearer $token"} | Select-Object -ExpandProperty Value | %{ $userId=$($_.Id) $body = $body + "$a Found the following userId: $userId"+ ".`n" } } else { Write-Host -ForegroundColor Green "$a UPN not found, FATAL." $body = $body + "$a UPN not found, FATAL." + ".`n" } # end $FinduserId # start FindmanagedDevice $FindmanagedDevice = Invoke-RestMethod -Method Get -uri "https://graph.microsoft.com/v1.0/users/$userId/managedDevices?`$filter=deviceName eq '$deviceName'" -Headers @{Authorization = "Bearer $token"} | Select-Object -ExpandProperty Value | %{ $complianceState=$($_.complianceState ) $body = $body + "$a Found the following complianceState: $complianceState"+ ".`n" } # end FindmanagedDevice # wrap things up... } $body = $body + "$a Exiting Azure function." # Associate values to output bindings by calling 'Push-OutputBinding'. Push-OutputBinding -Name Response -Value ([HttpResponseContext]@{ StatusCode = [HttpStatusCode]::OK Body = $body }) Note. Make sure to add in the missing details (application name, tenant, secret) as per step 8 (no need for a groupID in this one). Step 2. Assign API permissions This httptrigger requires more permissions than previously, namely it must be able to read managedDevices. Below are the permissions I've configured. Step 3. Test the solution in Azure In Azure, paste the following into the Input field of the httptrigger, obviously replace the deviceName and userName fields with valid data from your enterprise. { "deviceName": "AP-791500385977", "userName": "niall@windowsnoob.com" } Click on Run when ready If everything went well the compliance state will be returned. The http trigger is working ! Step 4. Customise the scripts After you've downloaded the scripts it's time to customize them somewhat. In the CheckCompliance_CreateScheduledTask.ps1 change the company name and if you want more time to become compliant, increase (or decrease) the hours from the default value of 48 hours. In the CheckCompliance.ps1 script edit the following lines, make sure to paste in the httptrigger url from your environment in here. In the AddDeviceToAzureAdGroup.ps1 script edit the following variables, use the httptrigger to Add devices (and users) url which you created in this blog post Next, save the changes, re-encode the scripts and add the newly encoded base64 changes to the following scripts. Start with the CheckCompliance.ps1 script, paste in your encoded text here (in between the "") And do the same for the CheckCompliance_CreateScheduledTask Save the changes. Step 5. Deploy the solution In Intune, deploy the CheckCompliance_CreateScheduledTask.ps1 to one or more users as required. That script should contain all the other scripts above embedded if you followed the instructions correctly. Step 6. Verify solution Enroll a new Autopilot device and after logging in for the first time you should see a new Scheduled task appear shortly after you login. There is a corresponding log file for this scheduled task creation stored in the C:\Users\<USERNAME>\AppData\Local\Temp Note: In the screenshot above the time difference has been manually set to 1 hour, even though the install date is a month previous, this is just for testing purposes. This process also extracts the CheckCompliance scripts..into the users Temp folder And when 15 minutes has passed the CheckCompliance powershell script will be triggered by the scheduled task. and in this particular example we can see the computer is not compliant yet, therefore it won't kick off the other actions, which extracts scripts and then runs a script to join Azure AD based on a trigger as per this blog post the scheduled task will keep checking for compliance every 15 minutes (you can edit the script to change that) until the device is compliant, and once it is, the final payload will trigger. Below you can see the device is now reported as Compliant from Intune... and as a result it decodes the AddDeviceToAzureAdGroup scripts and then runs them, finally it deletes the scheduled task and the solution is nearly complete. Those scripts are extracted to the users Temp folder and when run create a AddDeviceToAzureAdGroup.log file. The remaining actions are up to you, you can deploy policy or whatever to that Azure AD group and your device/users will magically end up in this Group and receive policy after Windows Autopilot is complete as long as they have become compliant first. That's it ! job done ?


-
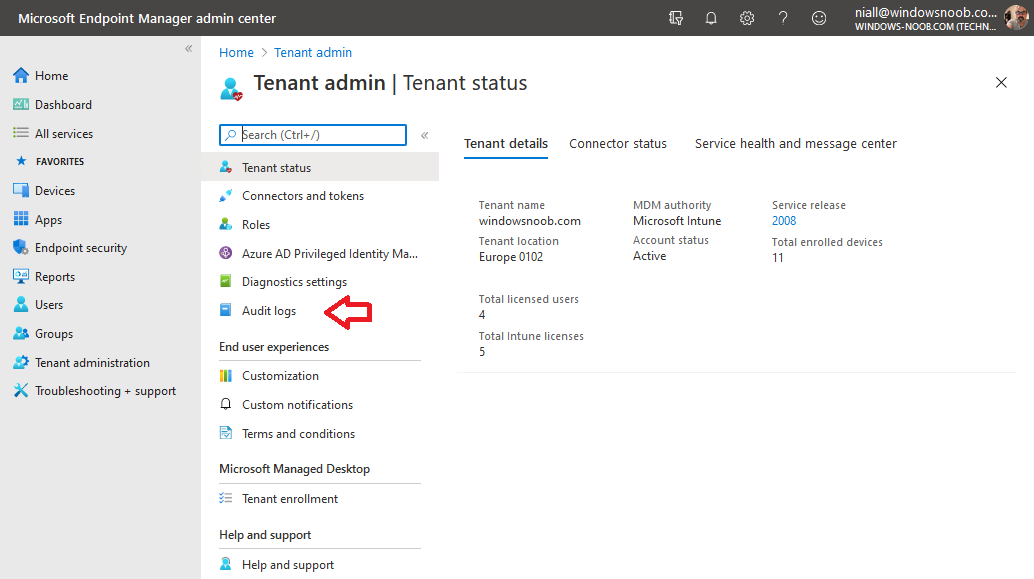
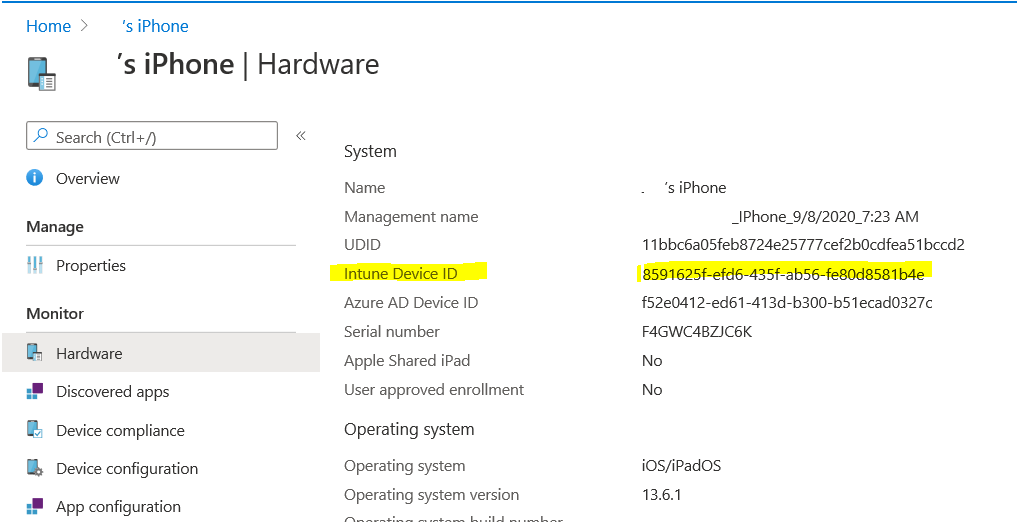
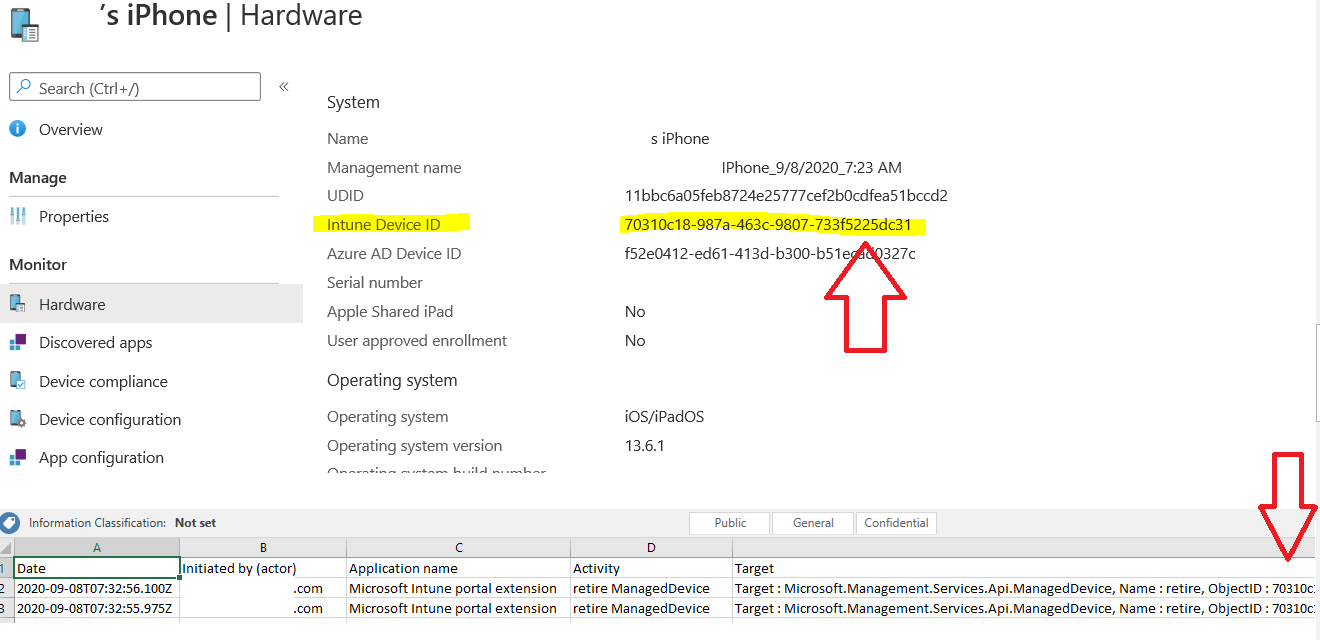
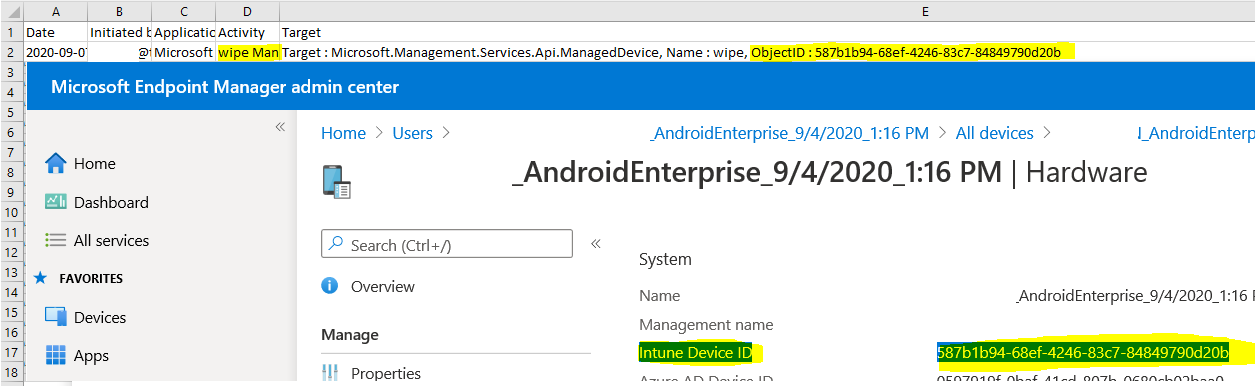
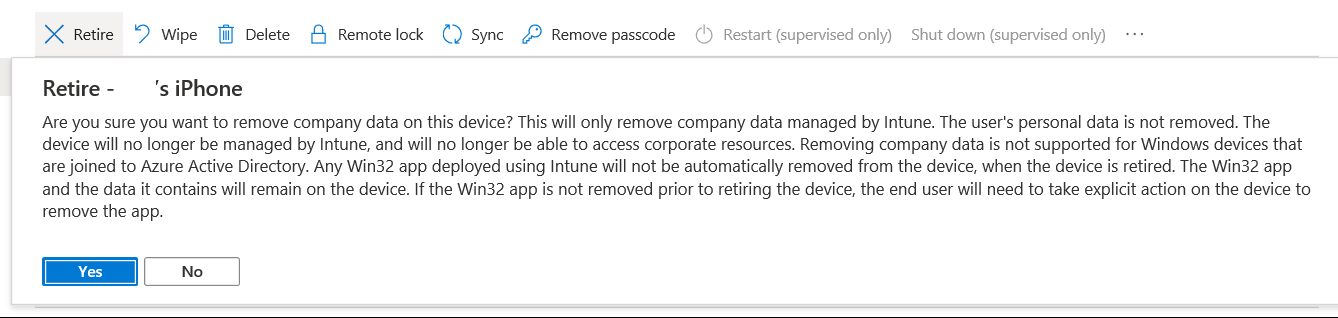
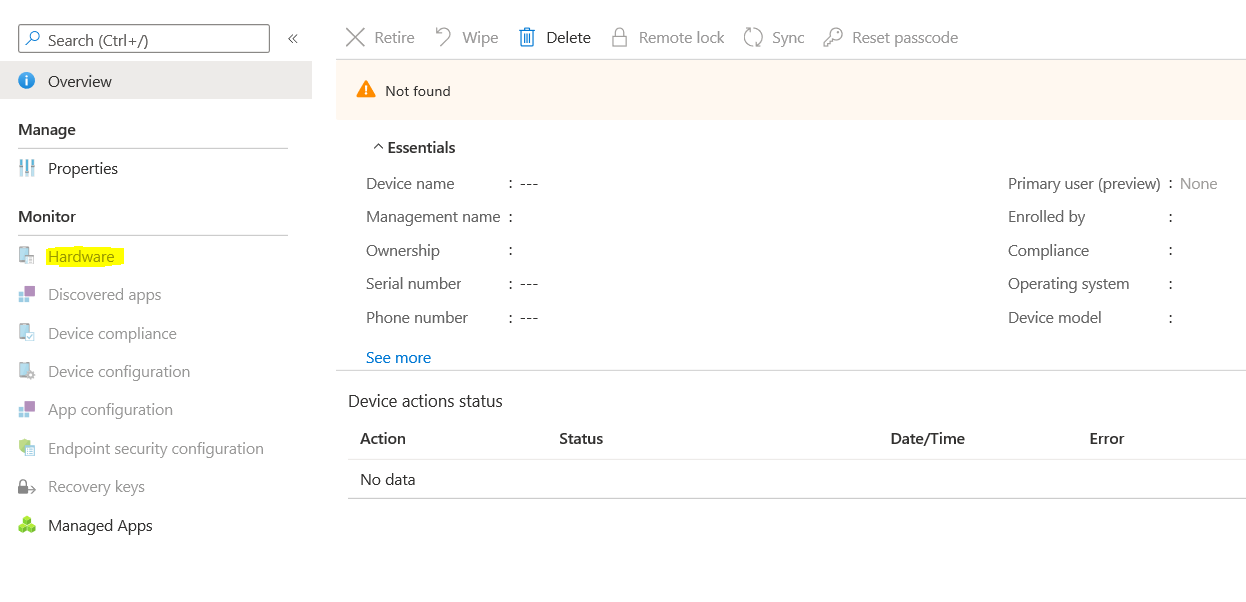
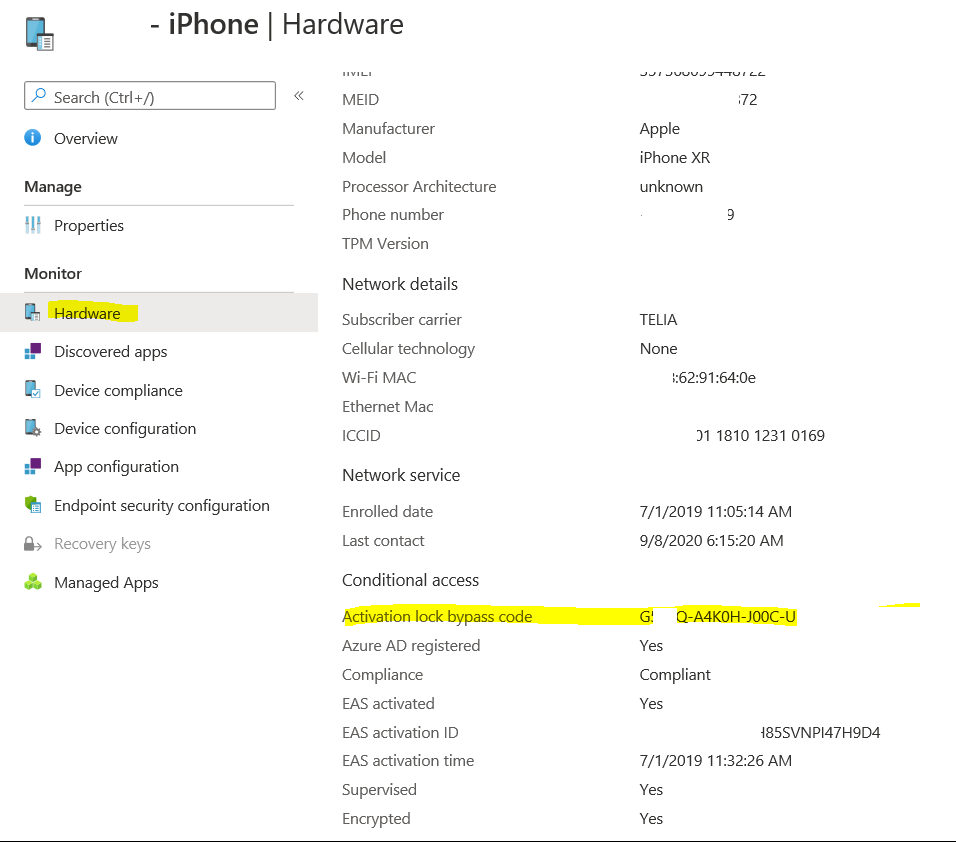
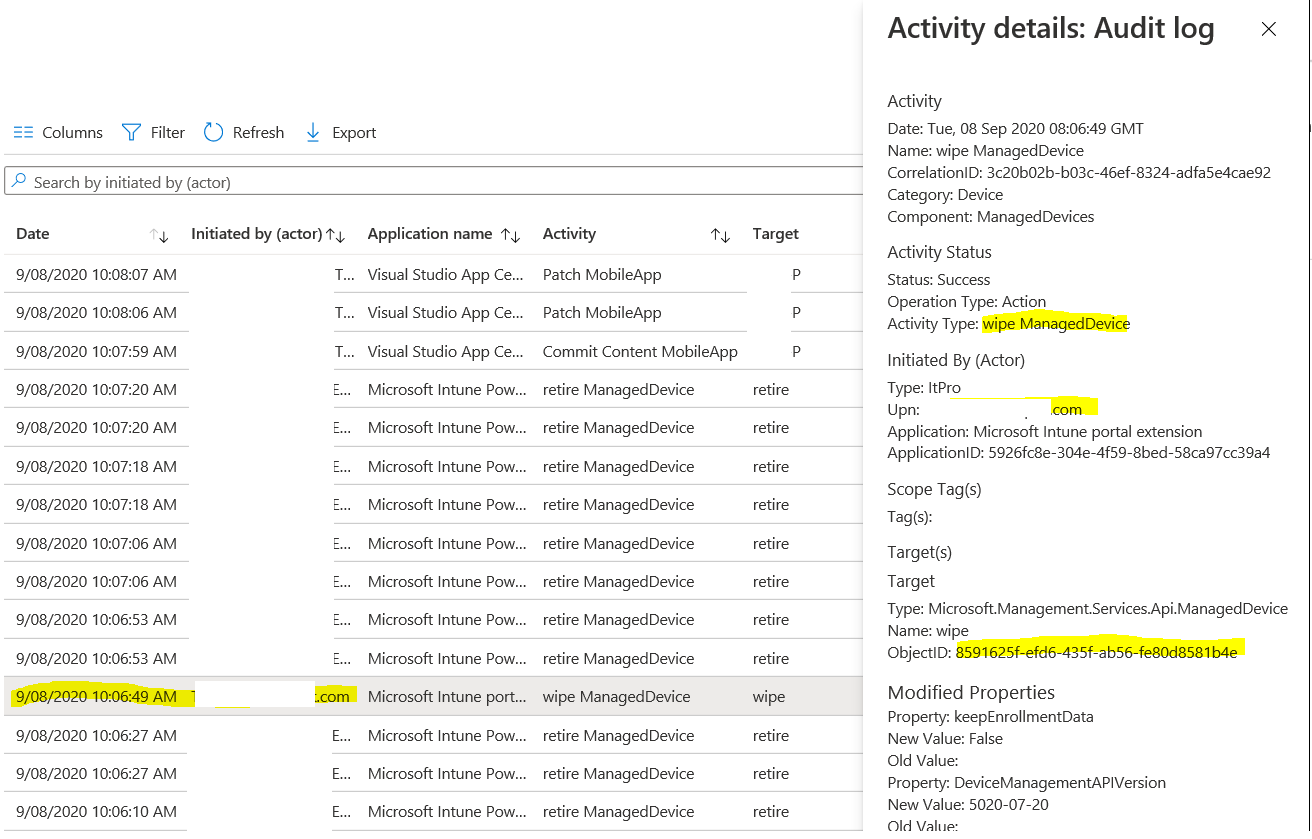
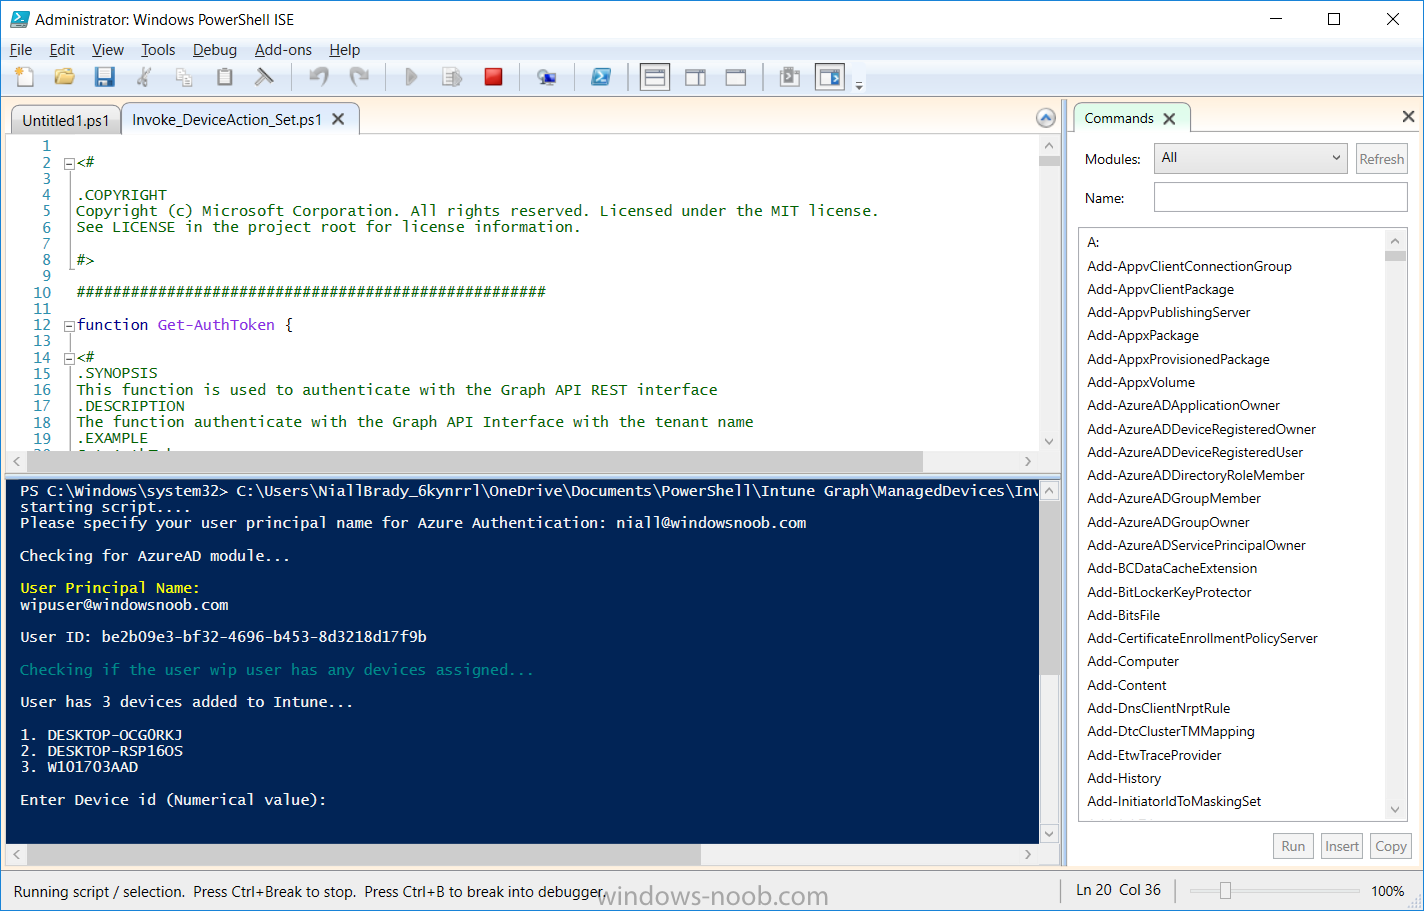
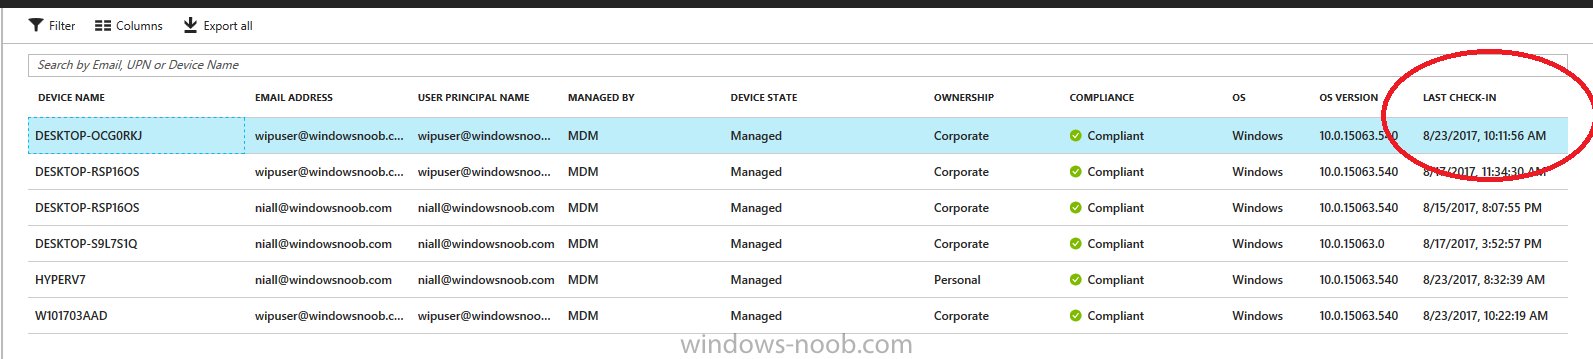
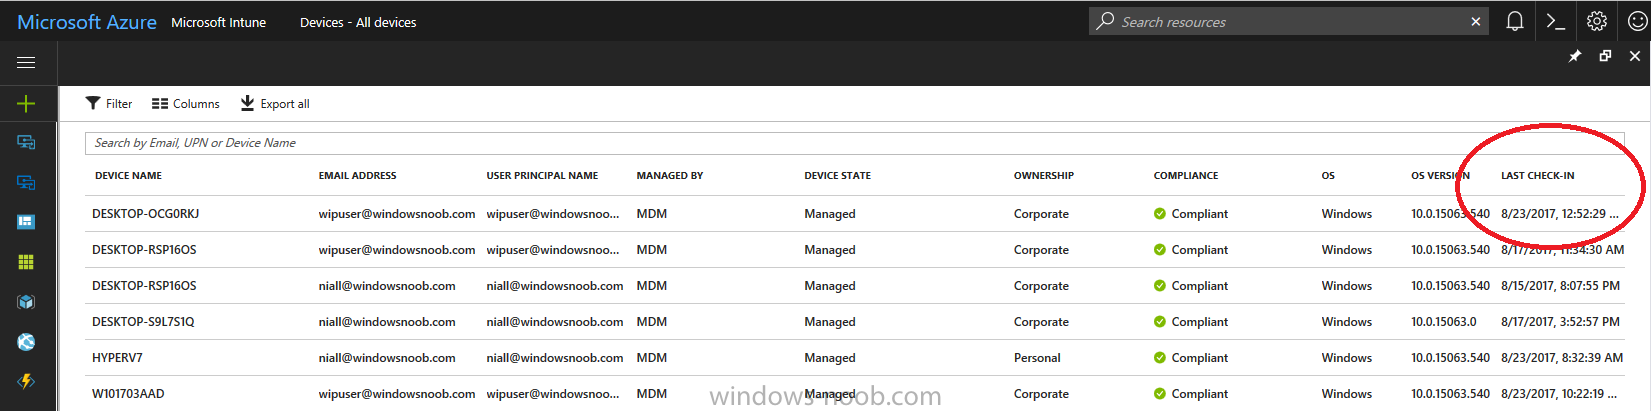
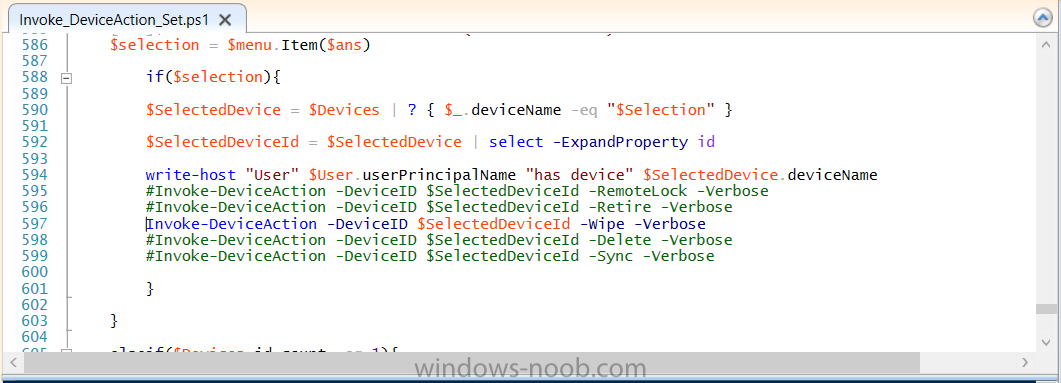
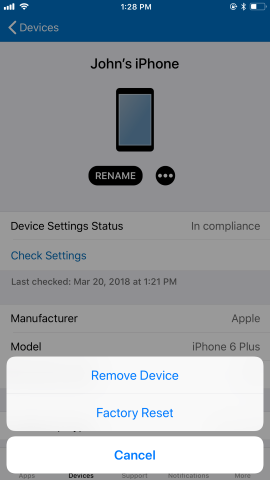
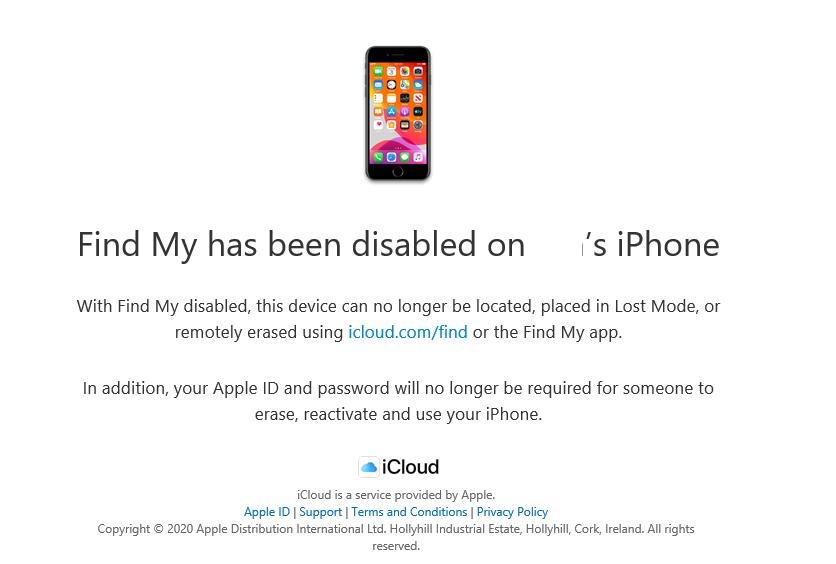
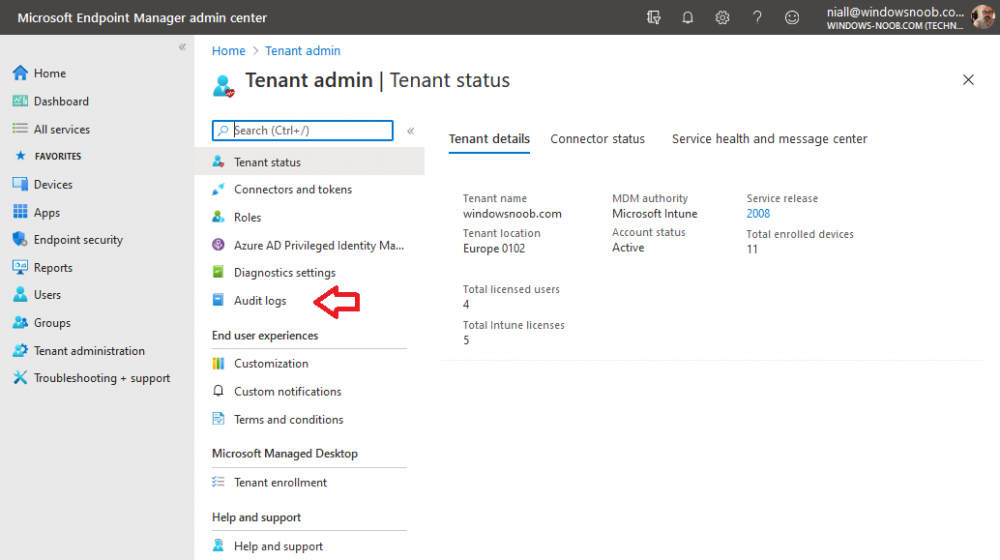
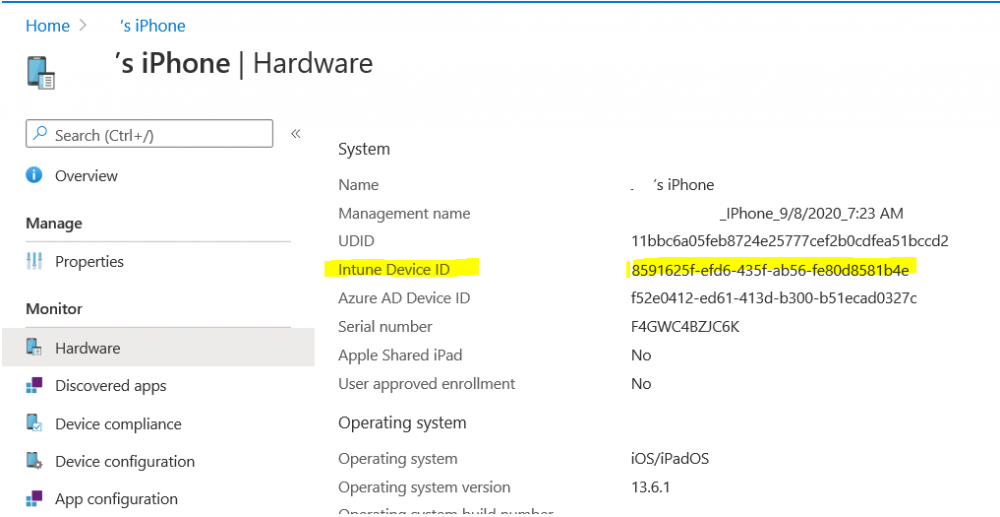
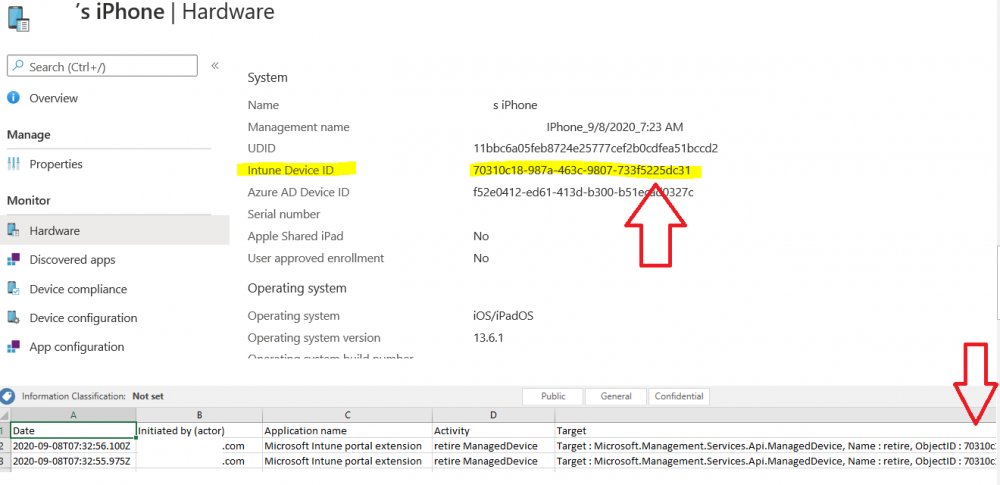
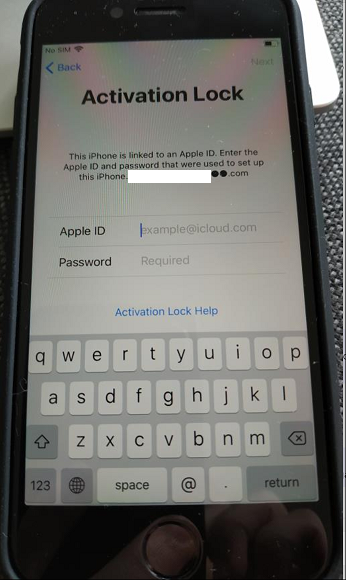
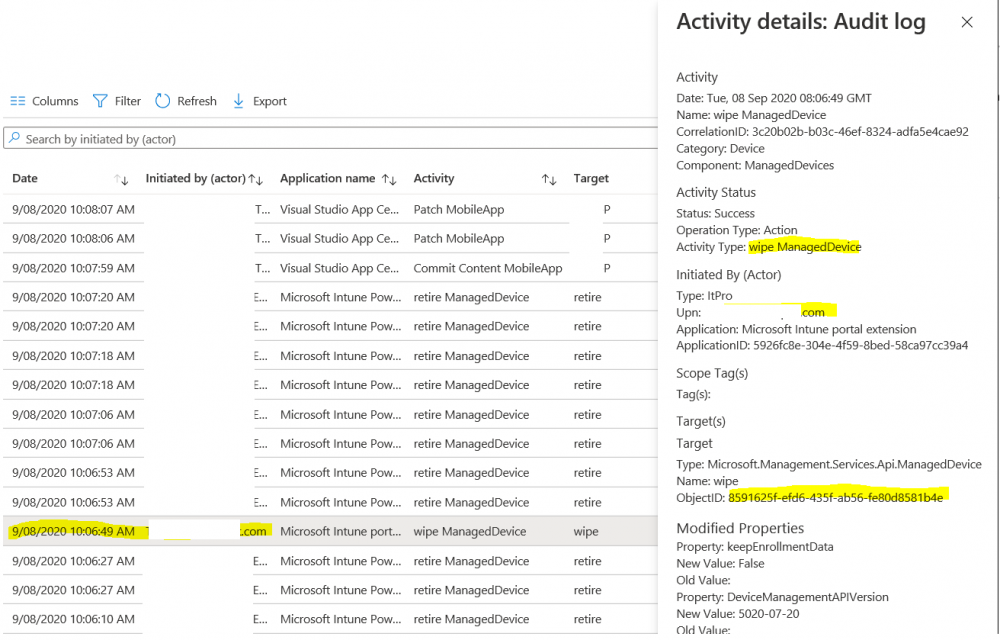
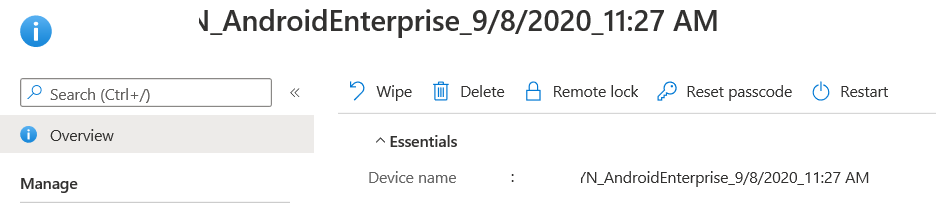
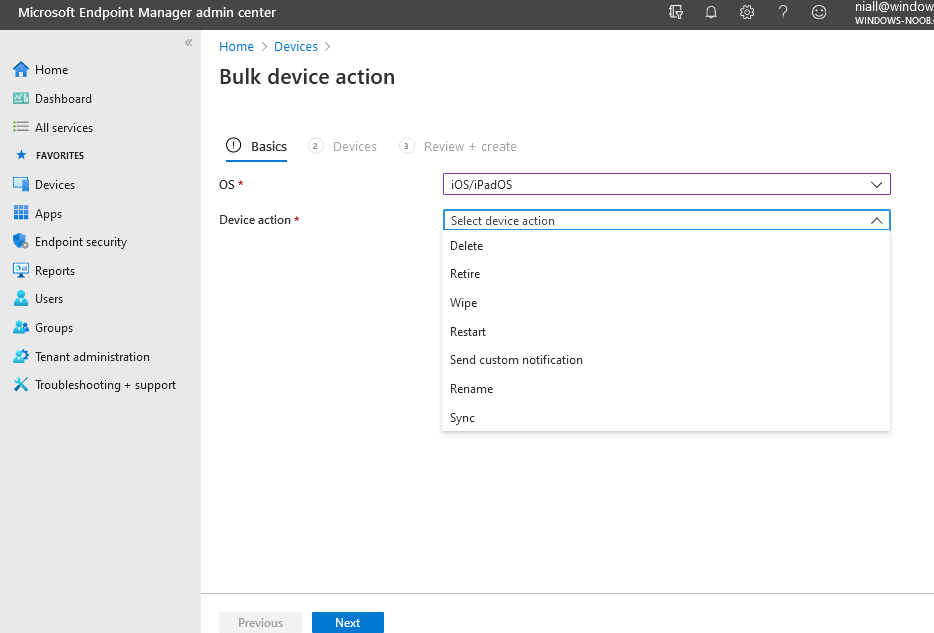
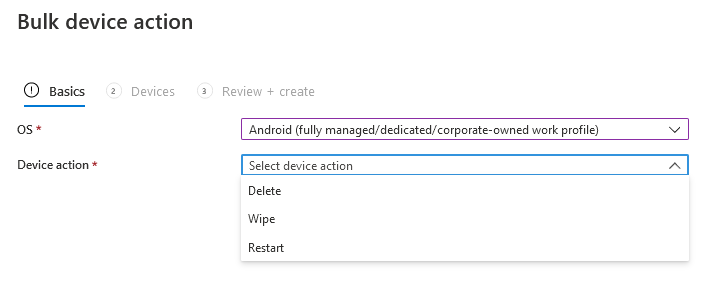
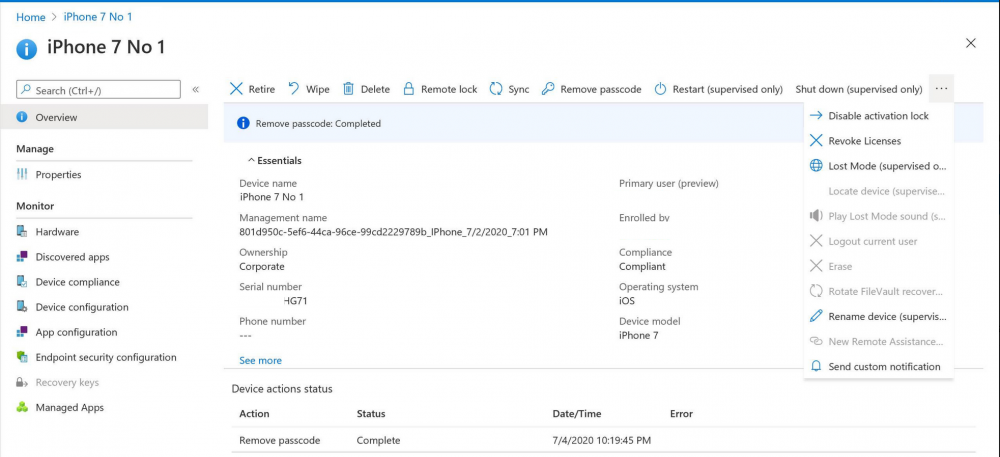
Introduction I wanted to better understand the options available for removing company data from phones enrolled within Endpoint Manager (formally known as Intune) so some research and testing was in order and that's exactly what me and my colleague did, additionally I wanted to get proof of the actions via the Auditing ability within Endpoint Manager. The phones involved in the testing were Company Owned iPhone and Android Fully Managed devices. There were a number of ways of removing company data shown below, and in this blog post I'll focus on the first two options, if you'd like to automate it with PowerShell then see my 2 links at the bottom of this blog post for information on how you can do that. User Actions on the phone itself Remote actions from within Endpoint Manager Remote actions using PowerShell via Graph User actions on the phone On the phone itself (iPhone) the user has a number of options available. They can open the Company Portal app, select the device from the list of devices and click on the 3 dots (elipse) to see actions available and those include Remove Device Factory Reset When you unenroll your device from Intune by selecting Remove Device, here's what happens: Your device won't appear in the Company Portal anymore. You can't install apps from the Company Portal anymore. Any settings that were changed on your device when you added it (for example, disabling the camera, or requiring a certain password length) will no longer apply. You might not have access to some company resources, such as file shares or internal web sites, on your device anymore. You can't use company apps and company data on your device anymore. You might not be able to connect to your company network using Wi-Fi or a virtual private network (VPN) anymore. Company email profiles are removed from the device. Devices that are configured for email only won't appear in the Company Portal app or website anymore. Apps are uninstalled. Company app data is removed. The process above is described here for iOS devices. https://docs.microsoft.com/en-us/mem/intune/user-help/unenroll-your-device-from-intune-ios Choosing the Factory Reset option prompts you to use the factory reset option within the iPhone settings app, and the result is that the phone is factory reset, company data is wiped, in fact everything is wiped including personal data, settings, etc, but the device is not immediately removed from Intune. Choosing this method should also prompt the end user for their icloud password to confirm that they were going to reset the phone, in addition they would receive an email from Apple indicating that 'find my' Iphone has been disabled. As regards Intune auditing of the events above, nothing was recorded as the phone was reset from the phone side and not via the Intune side (which reports on actions related to wipe, delete, retire performed via the console or via a PowerShell script). Removing the device management profile In addition, we tried removing device management, via Settings, General, Device Management and removed the MDM device management profile, this did not reset the phone but removed access to company resources and removed all apps associated with the company. The users personal data remained unchanged. The device (shortly after) showed as non-compliant in Intune/Endpoint Manager and could be automatically removed via the device cleanup ability. Using this method again did not record anything in Auditing. Note: Device cleanup rules aren't available for Android Enterprise scenarios like Fully Managed, Dedicated, and Corporate-Owned with Work Profile. Using actions from within the Endpoint Manager console In Microsoft Endpoint Manager, you have additional options to remove company data from enrolled phones, and these are as follows: Wipe Retire Delete Let's look at each action to see how it relates to the device in question. Wipe This option completely factory resets the phone, does NOT prompt for the users icloud password and all user data and company data is removed. The phone reboots as part of the process. Below is a typical display of what you'd see when you initiate the Wipe action from within Endpoint Manager. As this action took place from within Endpoint Manager, it will be recorded in the Audit Logs. You can find these logs in Tenant Administration, Audit Logs as shown below. After a Wipe is performed in Endpoint Manager, the action (and more details) are recorded in the Audit logs as shown here. You can click an individual action to get a details pane. In the screenshot above, the Activity details refers to an ObjectID and that is actually the Intune Device ID as shown here. So if you want to trace a phones removal from Endpoint Manager, then make sure you've a backup of this information so you can co-relate the Intune Device ID with the ObjectID listed in the audit log. Here you can see the same info relating to the Intune Device ID in the console and the Object ID in the exported CSV file for an Android phone when it's Wiped. You can export the audit log (up to a months data in the console or 1 year via PowerShell Graph) to a CSV file. Remember, take note of the Intune Device ID before you Wipe a phone as once it's wiped the data will also be removed from Intune. In the screenshot below you can see the details remaining for a phone that was just wiped, notice how it states 'not found' and the Hardware node is greyed out, in the hardware node you'd normally find the Intune Device ID but now that the device is wiped, the data is gone. Retire The Retire option removes company data, keeps personal data and does not reboot the device. Below is the prompt received when you select to Retire an iPhone. And below you can see how the Retire option is audited (via the exported CSV file), and again i'm pointing out the Intune Device ID in the console as it's the Object ID in the audit log. Interesting to note that the Intune Device ID (object ID in the audit log) changes every time you enroll the device. In the console itself the device is removed as soon as the next device check in occurs. Note: If you are using Fully Managed for your Android devices then you won't see a Retire option at all. Delete Selecting Delete will prompt the admin with something similar to below for iPhone. and the delete action is audited also. However when I did the Delete action for an Android Fully Managed device, it reset the phone (factory reset) which goes against the popup prior to the action. Bulk Device Actions There is one other way of doing this but it's more risky as it applies to all devices, and that is the ability to choose the available actions (thanks @JeffGilb ) which is available in Bulk Device Actions You can then select the type of device and the action available, here are the options available for iOS/iPadOS and below are the actions for Android (Fully Managed) Summary Deciding which path to take should be based on your security needs and the ultimate destination of the phones after they go EOL. If your company phones are all iPhone based, you may want to choose either Retire or Delete from the Endpoint Manager console (or using a PowerShell script to connect to Intune using the Graph API), as these actions will be logged in the Audit logs (which can be exported for up to one year), and both of these actions are least disruptive to the users phone, as the users data (photos/apps/etc) will remain on the phone but all company data will be removed. This would be suitable in a scenario such as where personnel are giving the option to buy back the company device after it's EOL. Take note however that the Delete option on Android Fully Managed phones also factory resets the device (all data personal and company is removed). That is not expected based on the popup shown to the admin. If for security reasons you want to remove all company data and all personal data AND remove corporate logon details then you should choose the Wipe option as this does a factory reset on both iphone and Android (fully managed) phones, and this will be audited in the audit logs. This method however will not prompt iphone end users to sign out of icloud meaning that after the reset, the phone will be locked to the apple ID of the previous user (as shown below). To resolve this problem you could ask the user to sign out of icloud prior to Wiping the phone (not ideal) or use Apple Business Manager (DEP) to manage the phone, that way you'll get an Activation Bypass lock code which you can use to bypass this activation lock. Below is how that code would appear for a device (obfuscated details) in Intune. Of course this also means that you'll need a script to pull the Activation lock bypass code from Intune regularly (scheduled task) so that you have the data before it gets removed from Intune. Speaking of ABM enabled iPhones, once they are added into ABM you'll see additional options displayed in Intune such as those shown here, the additional options include (and more depending on the device and capabilities): Disable activation lock Lost mode (supervisor only) Rename device (supervisor only) Restart (supervisor only) Finally, if you get your users to remove the device management or factory reset their phones using options available on the phone itself, then there will be no record of that action in Intune so you won't be able to report on it. I hope this helps you understand the options available today in Endpoint Manager for removing company data on enrolled phones. Recommended Reading https://docs.microsoft.com/en-us/mem/intune/user-help/unenroll-your-device-from-intune-ios https://docs.microsoft.com/en-us/mem/intune/remote-actions/devices-wipe https://support.apple.com/en-us/HT202804 https://www.niallbrady.com/2017/08/23/getting-started-with-microsoft-graph-and-using-powershell-to-automate-things-in-intune/ https://www.niallbrady.com/2018/10/10/learn-how-to-leverage-intune-support-for-microsoft-graph-and-powershell-to-enable-powerful-automation-and-it-security-my-notes/ cheers niall


-
Does anyone know of a way to create a report that shows a list of Windows 10 Pro devices that are configured with BitLocker from Intune? Since they are using Pro Edition, Endpoint Protection Policies don't work so I am using the default Windows Device Restriction Policy that includes device encryption in the Azure AD Join process. The only type of reporting option I found was using Intune Data Warehouse in conjunction with PowerBI. So far, I set it to show "osCaption", "deviceName", and "encryptionState". The problem is that the data that comes out of the "encryptionState" is very confusing.
-
Hi All, This is about to make me crazy. I want to have (atleast) two deployment profiles (Autopilot) for student computers. One profile for computers With a primary user device and a profile for computers where there are multiple users. I have made two AAD Device (Security) Groups. One Group that adds all the Devices that are autopilot imported. This Group adds all Devices that are single user Devices. And should Excludes second group Second Group should include Devices that have multiple users - based on OrderID. I have made a Dynamic Membership rule "(device.devicePhysicalIds -any _ -eq "[OrderID]:Elev-Felles")" . Added "OrderID" in the imported Autopilot.csv file, With "Elev-Felles" behind the hardwareID sting. (The Autopilot import files looks like: Device Serial Number,Windows Product ID,Hardware Hash,OrderID and last part of the hardwareID is ,Elev-Felles) But I cant get the imported Devices to "join" second Group. I am getting the Deployement profile made for first Group. I've tried both OrderID, Purchase ID, Group Tag. Cant get non of them to work. Any tips on what I should try? or what I am doing wrong?
-
 Hi all, May I ask your opinion about Intune Enrollment. My companies just purchase EMS E5 from Microsoft and wants to use Intune for manage my companies mobile devices (both iOS and Android). Before doing global deployment, I need to run a test environment. I have created a test user for this occasion. My main goal is to make sure that only the testing user receive email notification when they try to add their work email into their mobile device. At the moment, my company currently using Ms Exchange 2010 SP2 on-Premises. Please advise what should I do to achieve my goals. Thanks.
 -
 Hi, We have a hibrid SCCM + Intune scenario and i got an alert on SMS_CLOUD_USERSYNC component. In cloudusersync.log reports that are a duplicated object and it can't remove the license: ERROR: RemoveLicensedUsers exception Microsoft.Management.Services.Common.InvalidParameterException: Duplicate object key found in request: Id: 'guid'219c3d11-feed-4291-b251-c84b782ed7b4''~~ at Microsoft.Management.Services.DistributedQuery.DistributedQuery`1.CheckBatchForDuplicateItems(IEnumerable`1 items)~~ at Microsoft.Management.Services.DistributedQuery.DistributedQuery`1.<DeleteAsync>d__33.MoveNext() SMS_CLOUD_USERSYNC 28/03/2018 15:34:09 41440 (0xA1E0) I don't know how to "unlock" this situation, what can i do? it's trying to synchronize every 5 minutes Any suggestions?
 -
You may have already seen Part 2 of this series where you can automate BitLocker encryption in Intune using supplied MSI's, which contain logging, reboot prompt and other features. I've put together this video to show you how you can test the PowerShell scripts contained within the two MSI's here. This allows you to test the scripts outside of Intune, and when you are happy with the results you can re-package them and deploy the MSI via Intune. The video shows you how to use Psexec to start a process (in this example it's CMD.EXE) as SYSTEM. psexec.exe /s /i cmd.exe After starting the cmd prompt as SYSTEM, you can launch powershell. Next, browse to the folder where the scripts are, by default it's C:\Program Files (x86)\BitLockerTrigger and launch Enable_BitLocker.ps1. After the TriggerBitlocker msi is installed by Intune on a Windows AutoPilot enrolled device, the PowerShell script will run via the Scheduled Task as SYSTEM, so this method of testing is a valid way to verify any changes you add to the PowerShell script before repackaging it as an MSI. To see the video click below, have a look and happy troubleshooting. cheers niall
-
Hi, I have a hibrid SCCM (CB 1702) + Intune scenario. When i enroll a mobile device it doesn't appear in SCCM console, so any application or configuration it will deployed but it is correctly created in Azure AD . It occurs randomly during last year and i don't why. any suggestions? Thanks
-
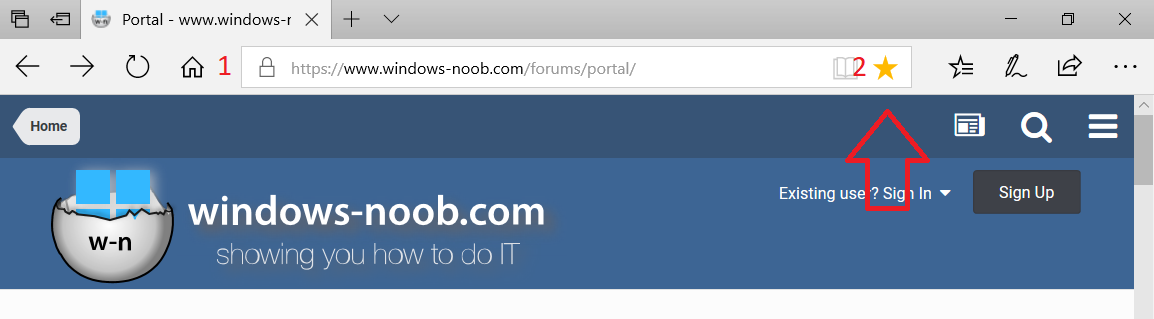
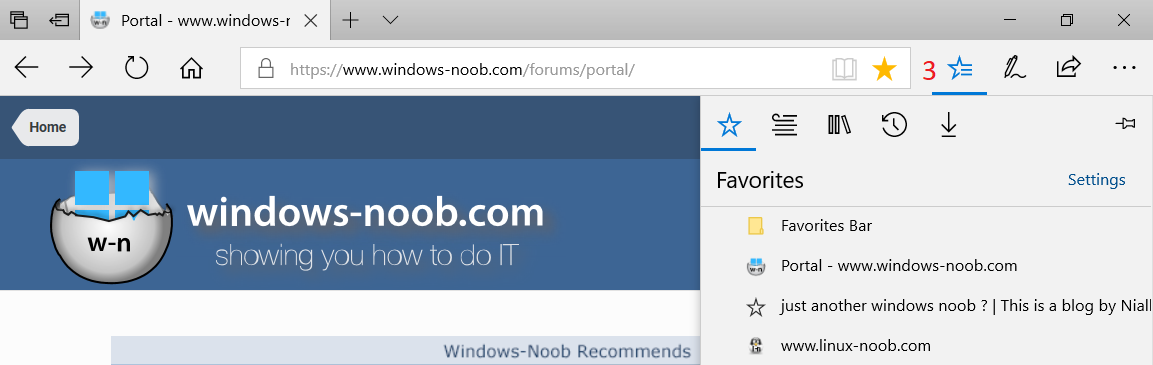
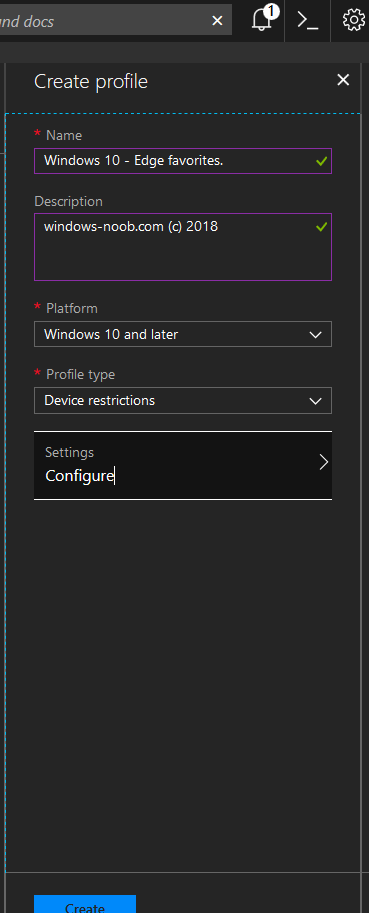
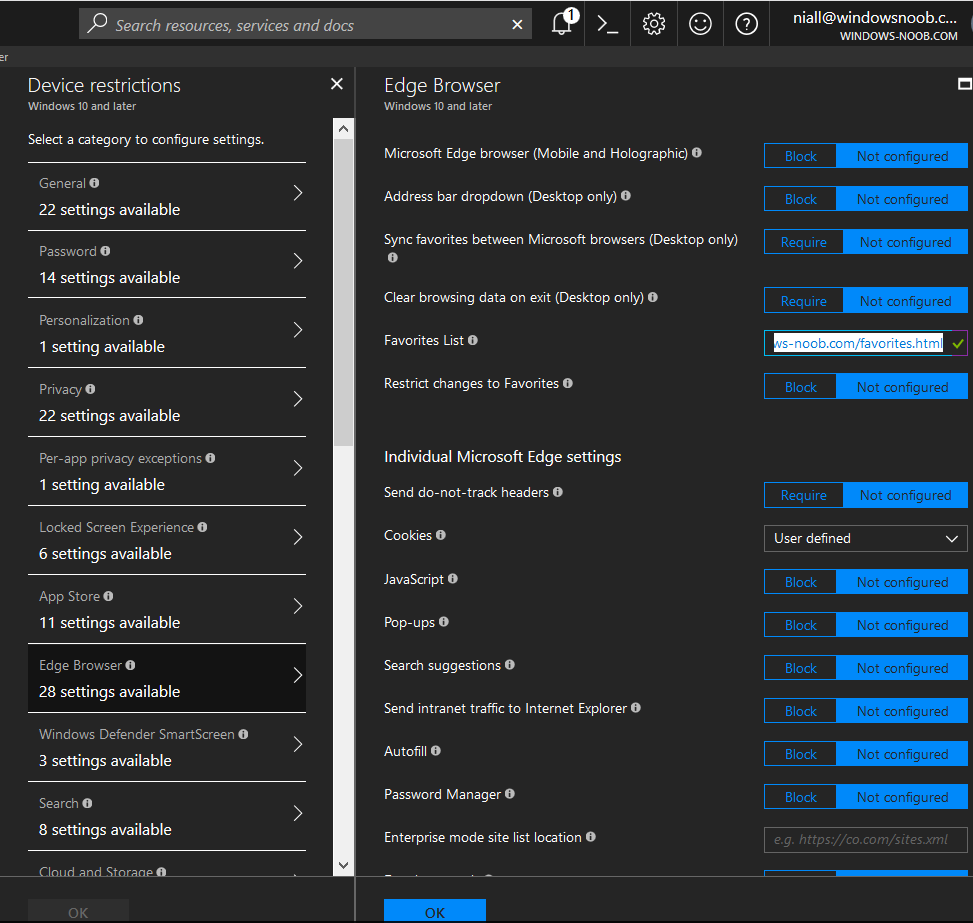
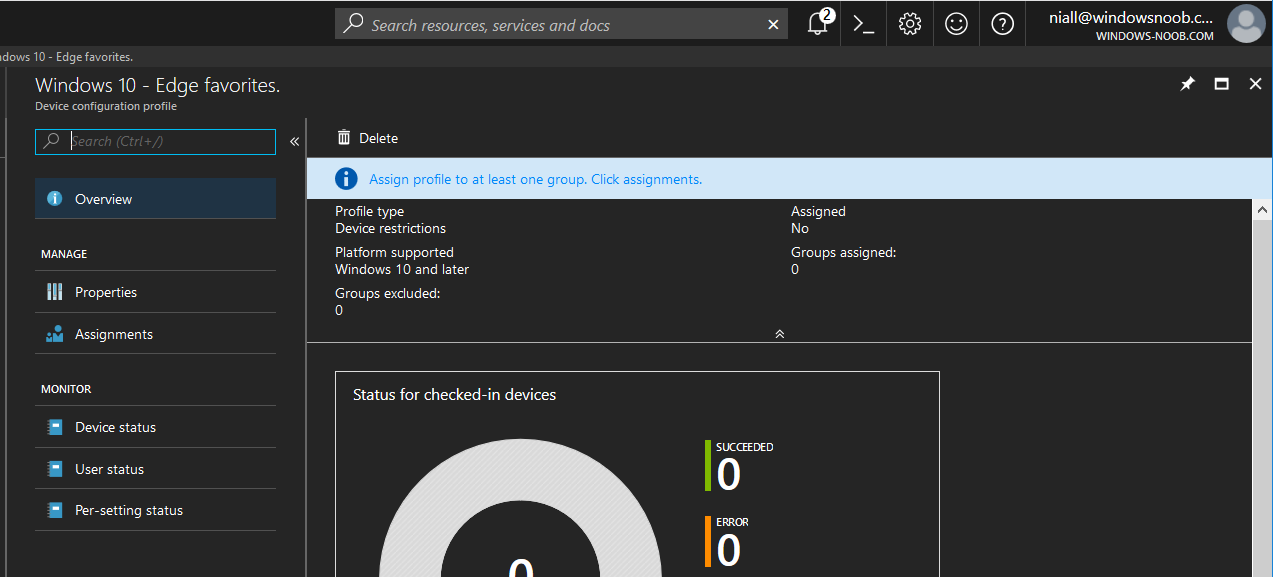
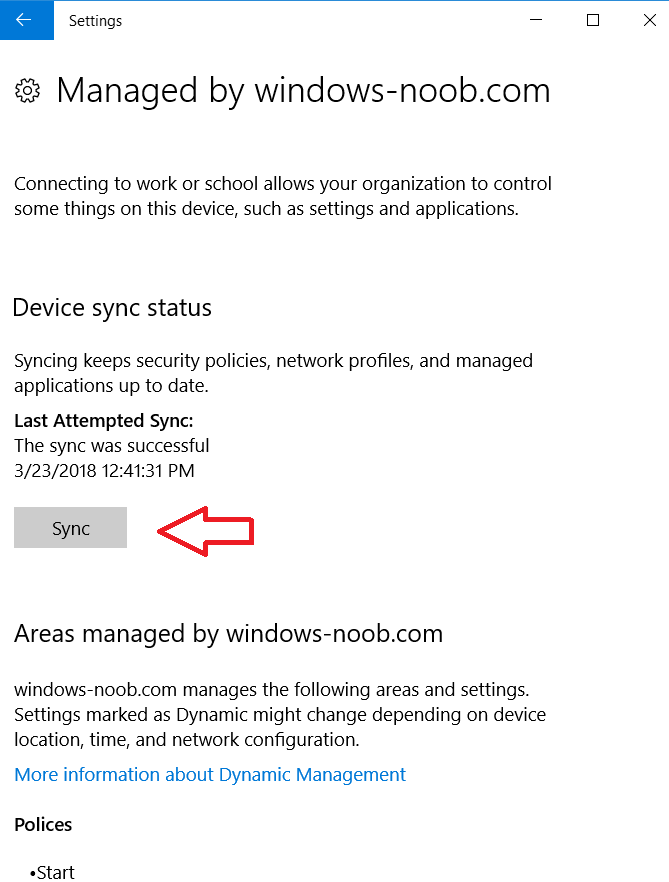
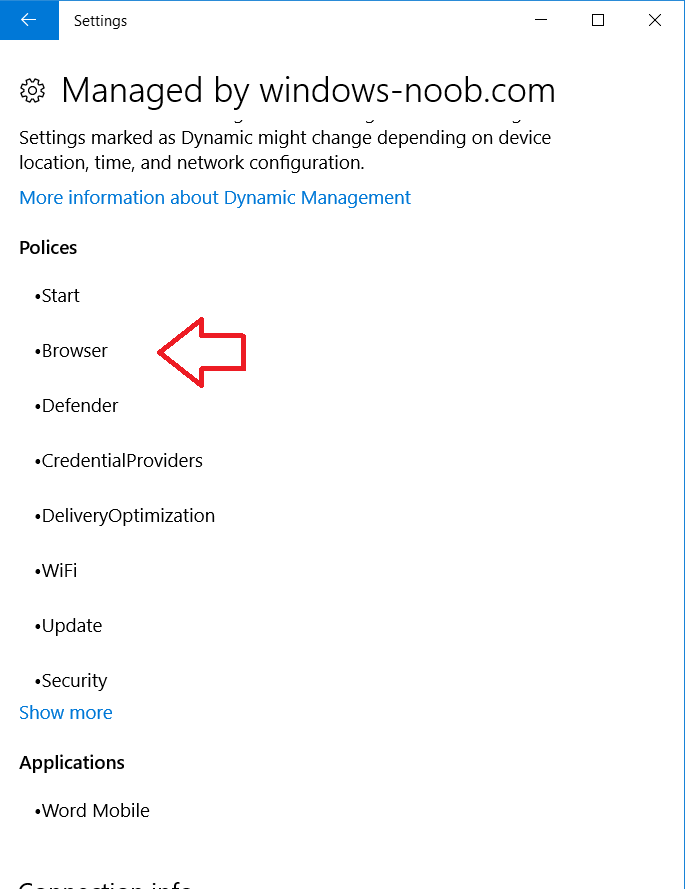
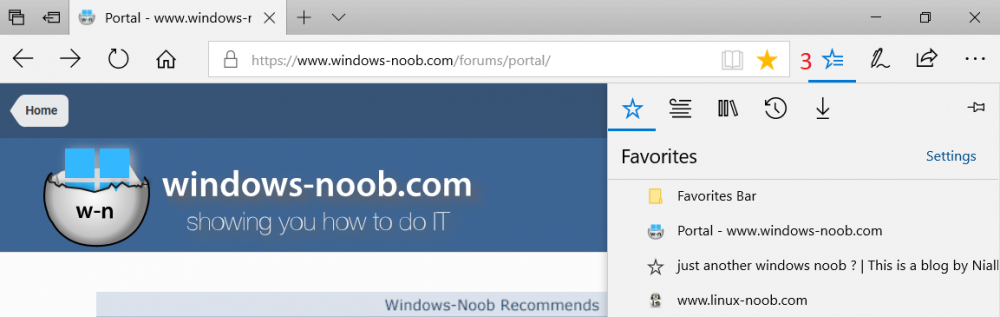
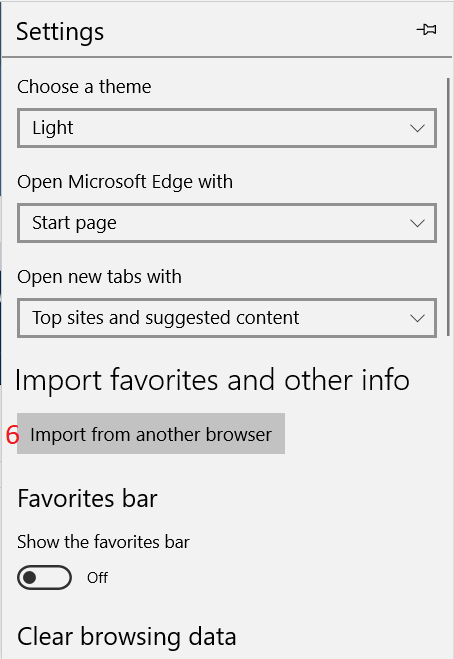
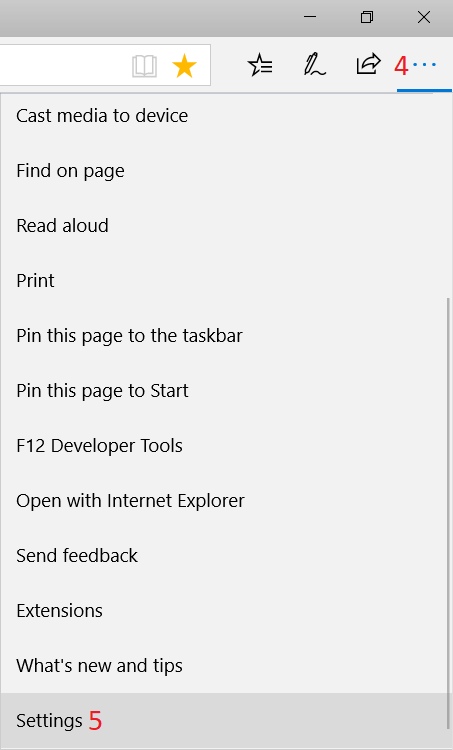
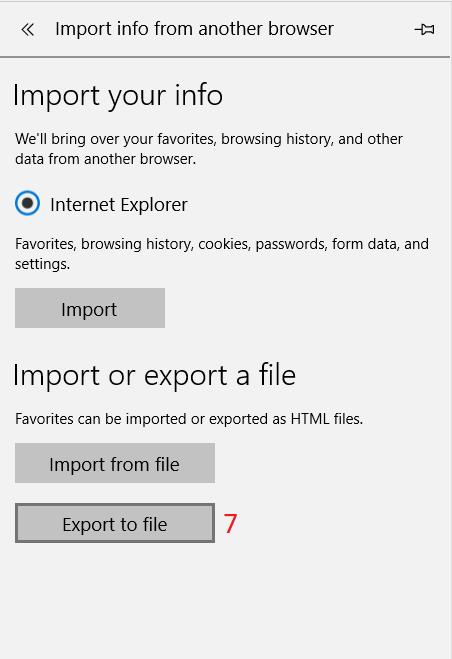
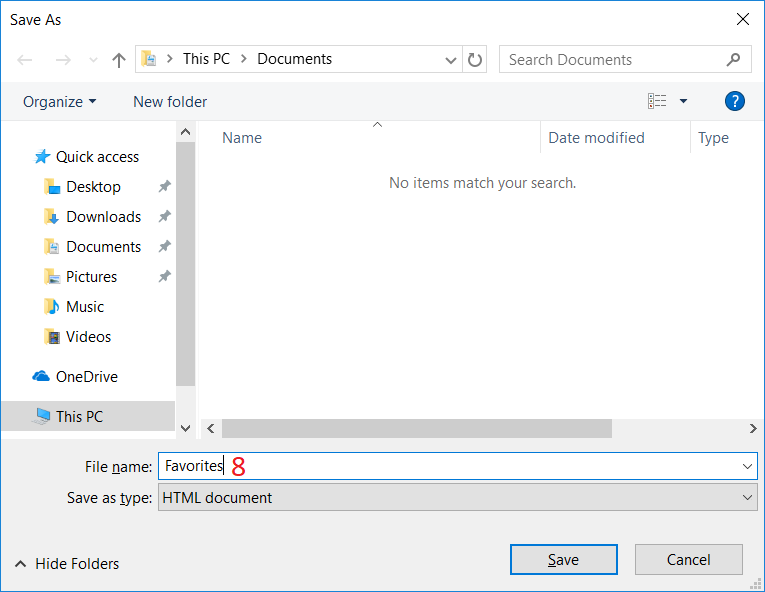
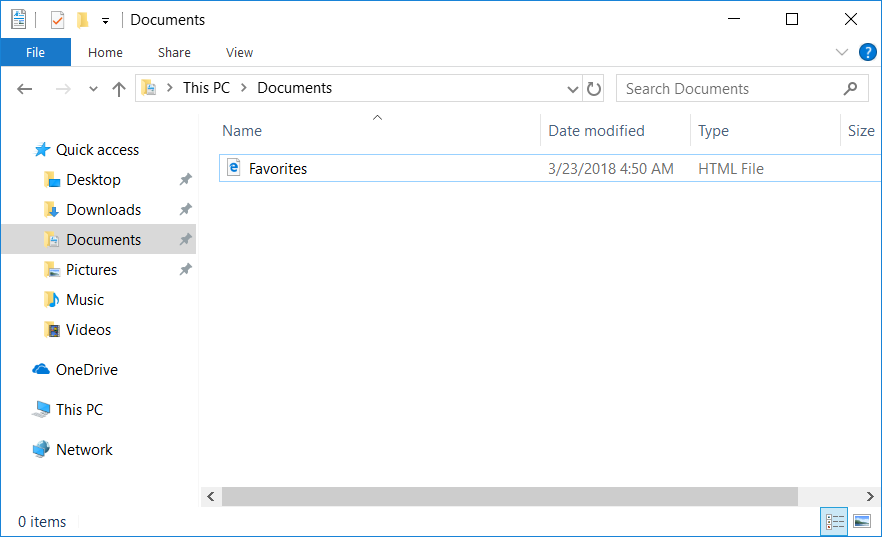
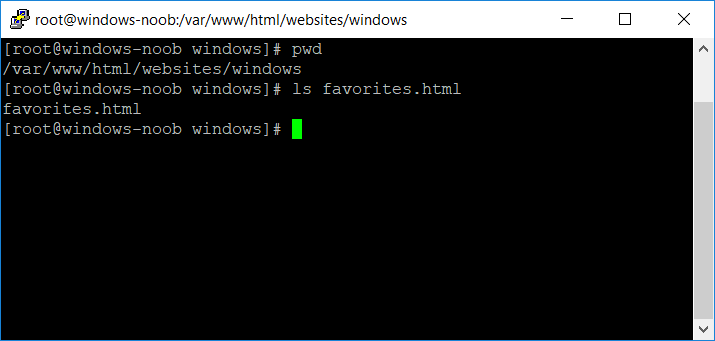
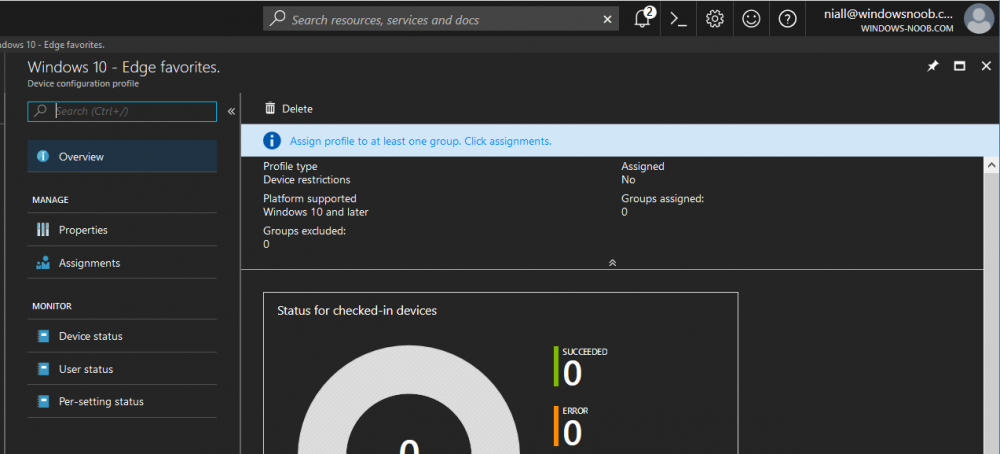
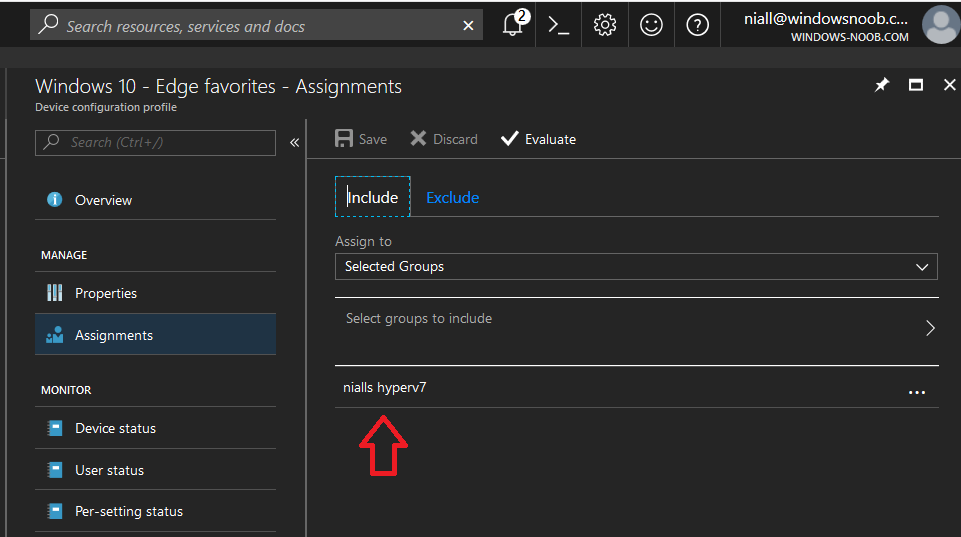
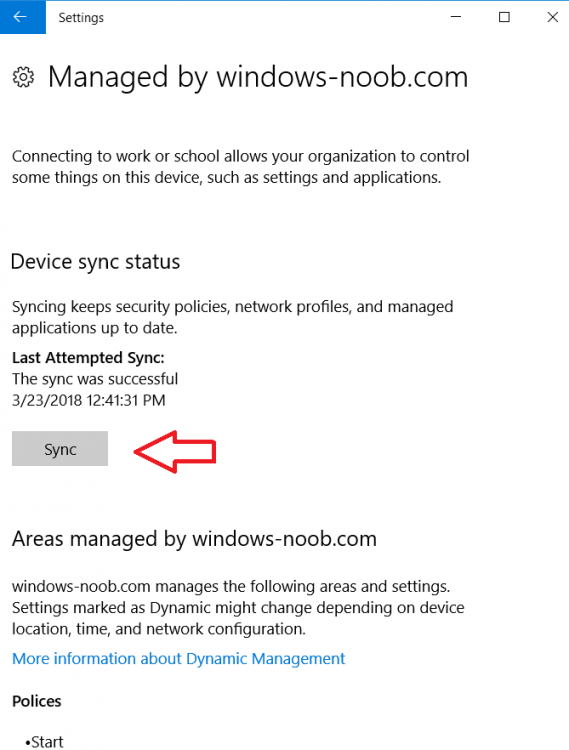
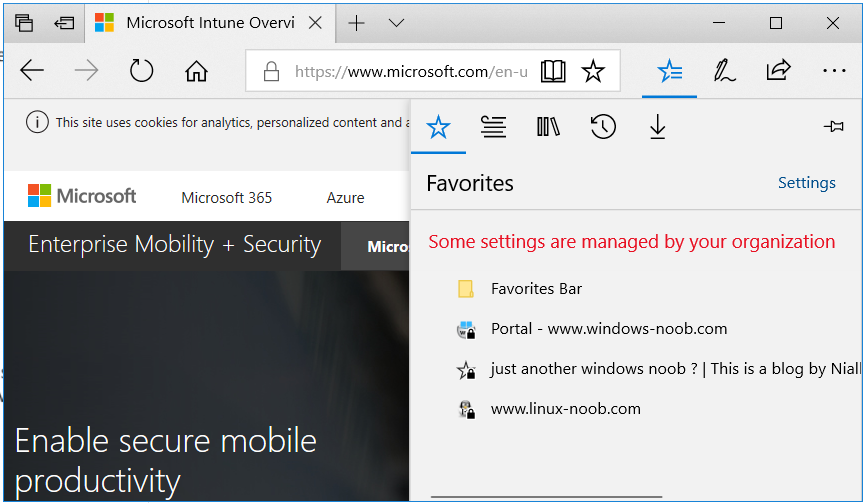
Introduction Managing Windows 10 computers using Microsoft Intune is getting easier and easier. To customize the experience for your Windows 10 users so that they have favorites pre-loaded in Microsoft Edge, you can configure favorites in Edge using Microsoft Intune, and here's how to do it step-by-step. Step 1. Configure some favorites On a Windows 10 virtual machine (don't have one ? create one with this PowerShell script), start up Microsoft Edge, browse to a website (1) by entering it's URL in the address field and then add it as a favorite (2) by clicking on the star. Repeat for as many site's as you want in your favorites. After you've added some favorites you can review the list of saved favorites by clicking on the favorites icon (3) Step 2. Export the custom favorites On the Windows 10 virtual machine, click on the Settings elipse in Microsoft Edge (4) and scroll down to Settings (5) Choose Import from another browser (6) and choose Export to file (7) change the name from Microsoft_Edge_03_23_2018 (the current date) to Favorites (8) The exported favorites are saved as Favorites.html in the Documents folder on the virtual machine. Step 3. Copy the Favorites file to your web server Using whatever method you choose, copy the Favorites.html file to your intranet (or extranet) web server, in the example below I've copied the file to my webserver which hosts this web site, and it just happens to be running on Linux. The file must be readable by the devices you intend to deploy it to, for example my favorites.html file is publicly readable at the following address https://www.windows-noob.com/favorites.html Step 4. Create a Configuration Profile in Intune In Microsoft Intune (in Azure), click on Device Configuration, select Profiles, then create a new profile by clicking on Create Profile. Fill in the following details: Name: Windows 10 - Edge favorites Description: windows-noob.com (c) 2018 Platform: Windows 10 and later Profile type: Device restrictions For Settings, select Edge Browser on the right and for Favorites List enter the URL that you verified above which contains your favorites.html file eg: https://www.windows-noob.com/favorites.html Click on OK when done, and OK again and finally click on Create to create the Configuration Profile. Finally, Assign the profile to a Device group containing Windows 10 devices that you want to target with this policy. Here you can see the profile is assigned to a Group which I've previously created and populated with a Windows 10 device Step 5. Verify the policy on the target device(s) Using a licensed Intune user, logon to one of the devices targeted with the policy and trigger a policy sync (optional, you could just wait an hour or so....) After the device has synced, you should see Browser under Policies. open Microsoft Edge and click on the Favorites icon. It should state "Some settings are managed by your organization" and your previously defined favorites should be listed. Success ! The favorites you defined will have a lock symbol on them so cannot be changed by the user, however the user can add/remove additional favorites of their own and those favorites will not have a lock symbol on them. Related reading How to configure device restriction settings in Microsoft Intune - https://docs.microsoft.com/en-us/intune/device-restrictions-configure Device restrictions Windows 10 - https://docs.microsoft.com/en-us/intune/device-restrictions-windows-10 Summary So there you have it, with Microsoft Intune, you can easily customize Microsoft Edge favorites and deploy them to your Windows 10 devices. cheers niall


-
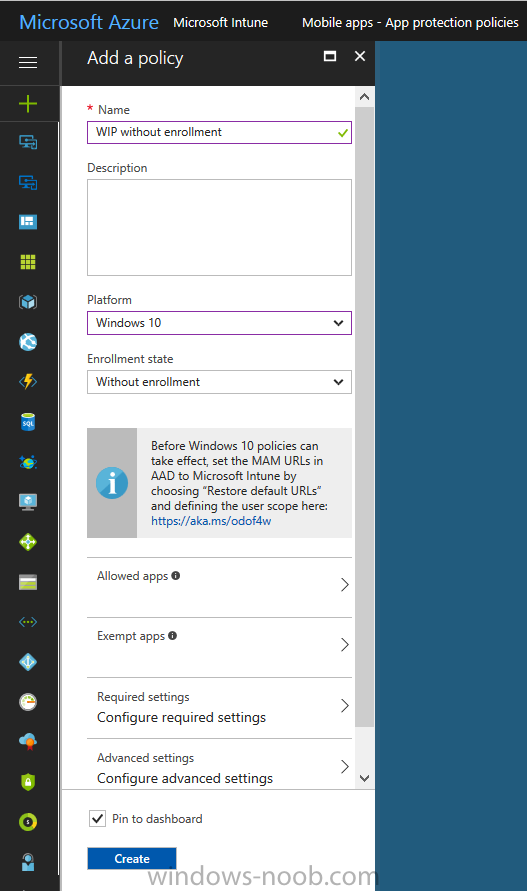
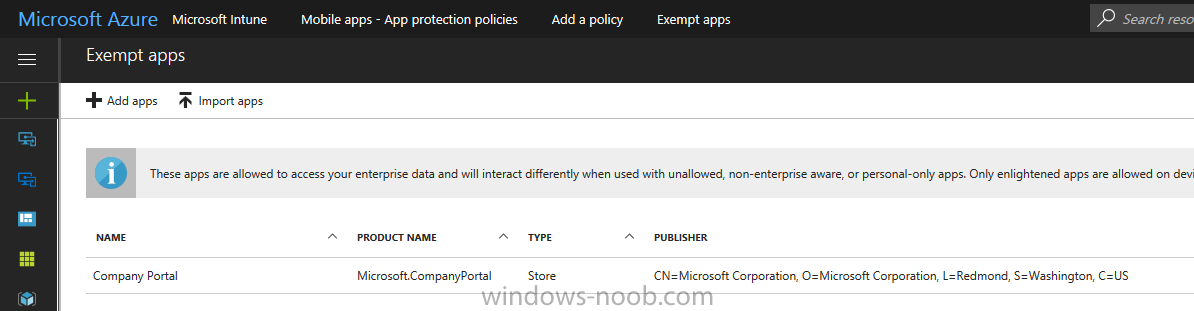
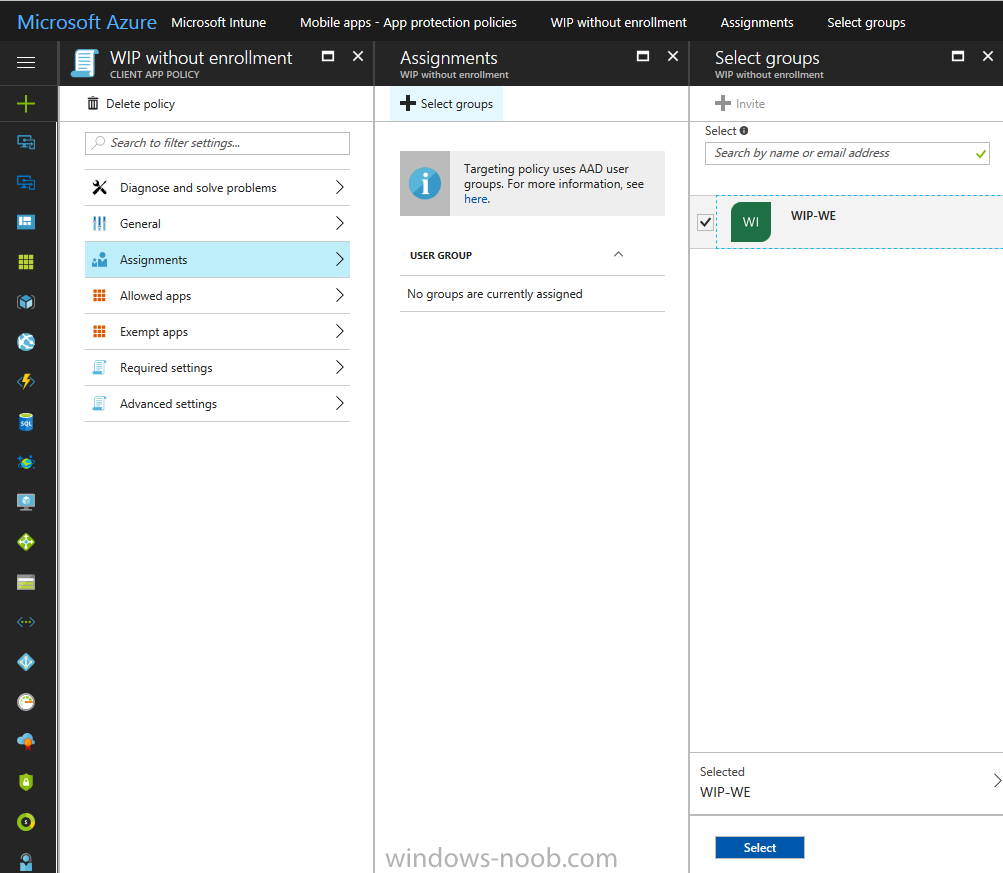
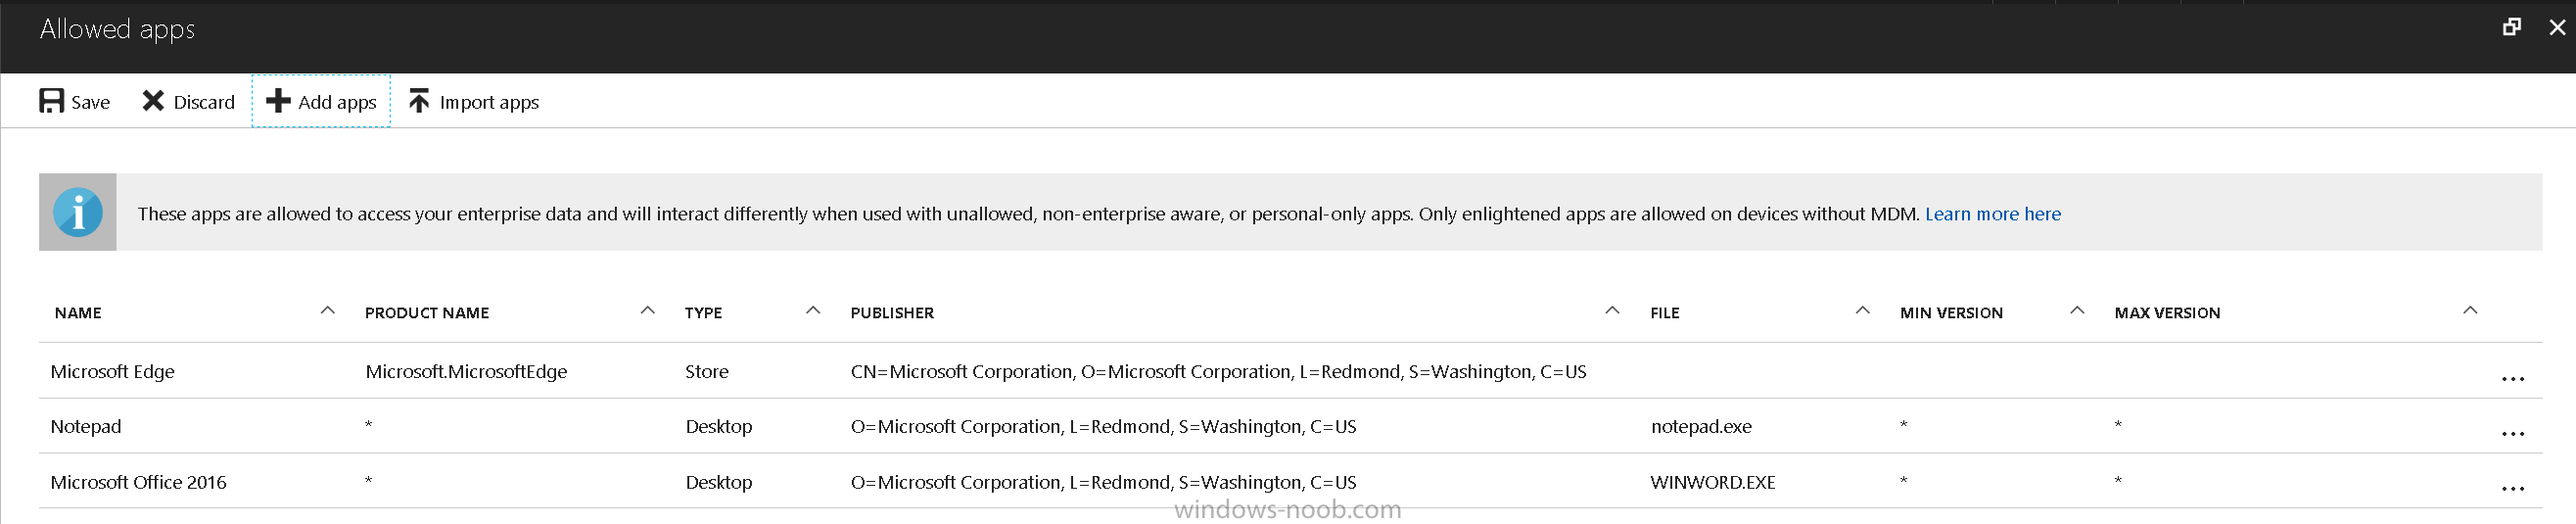
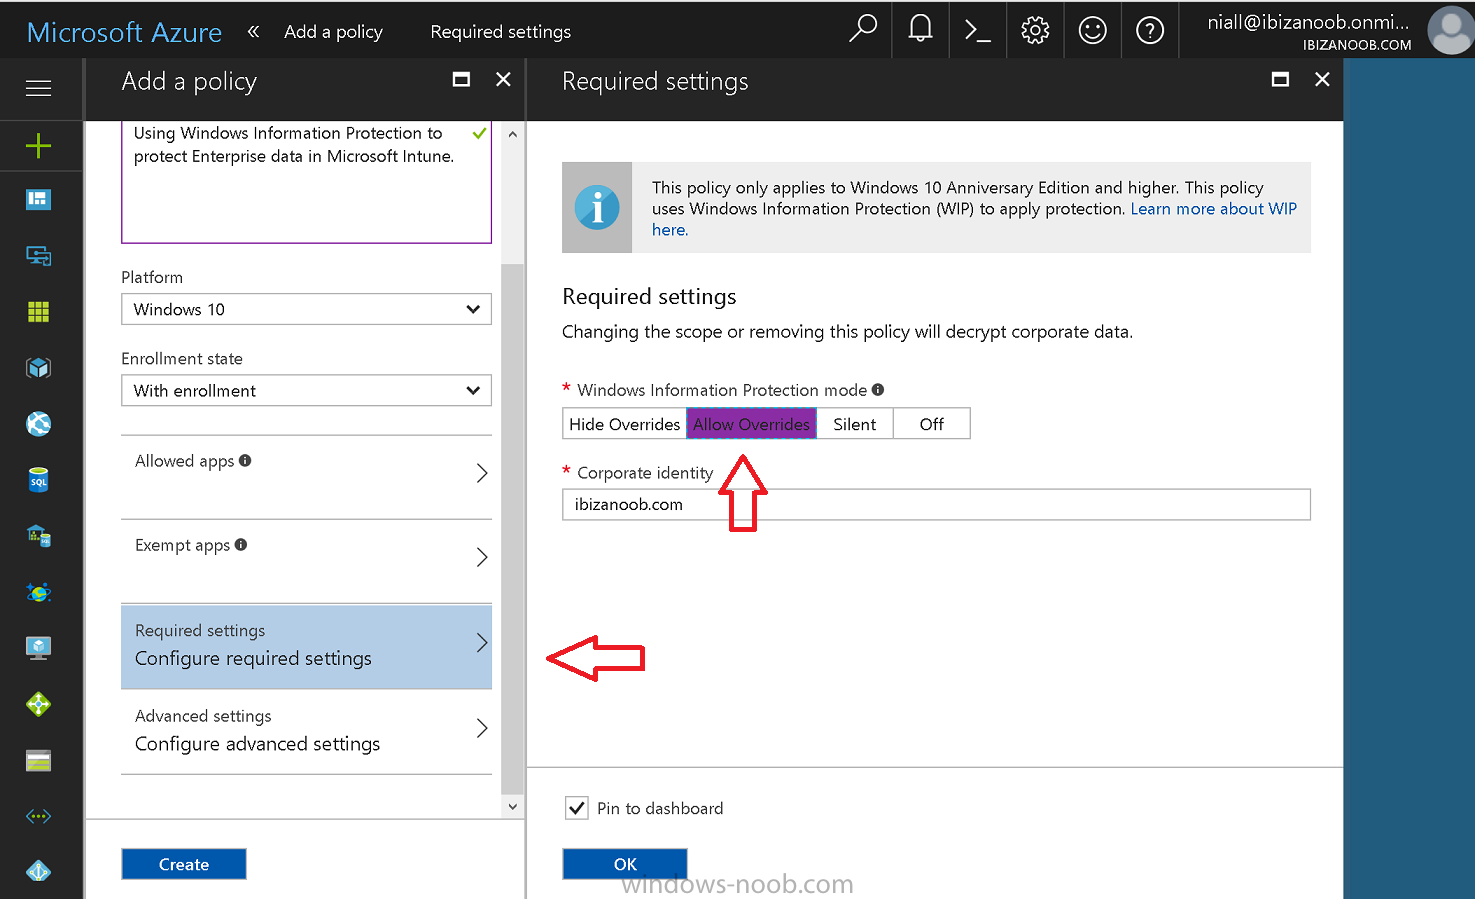
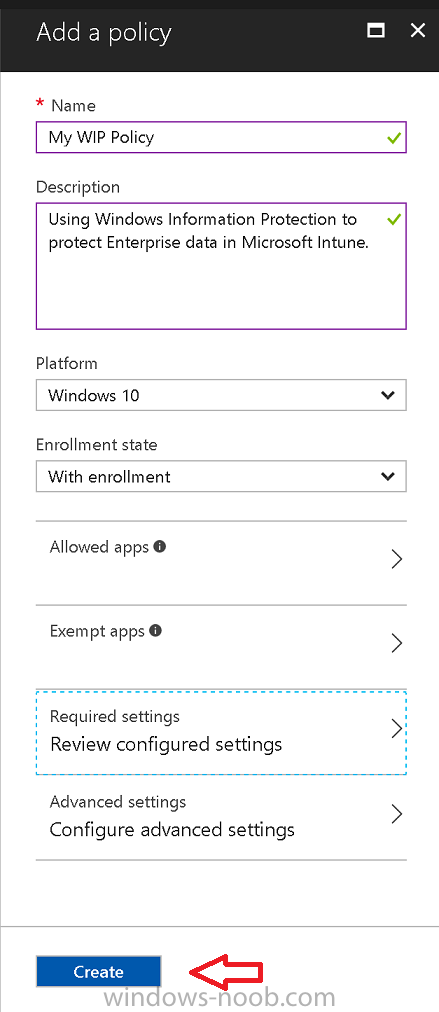
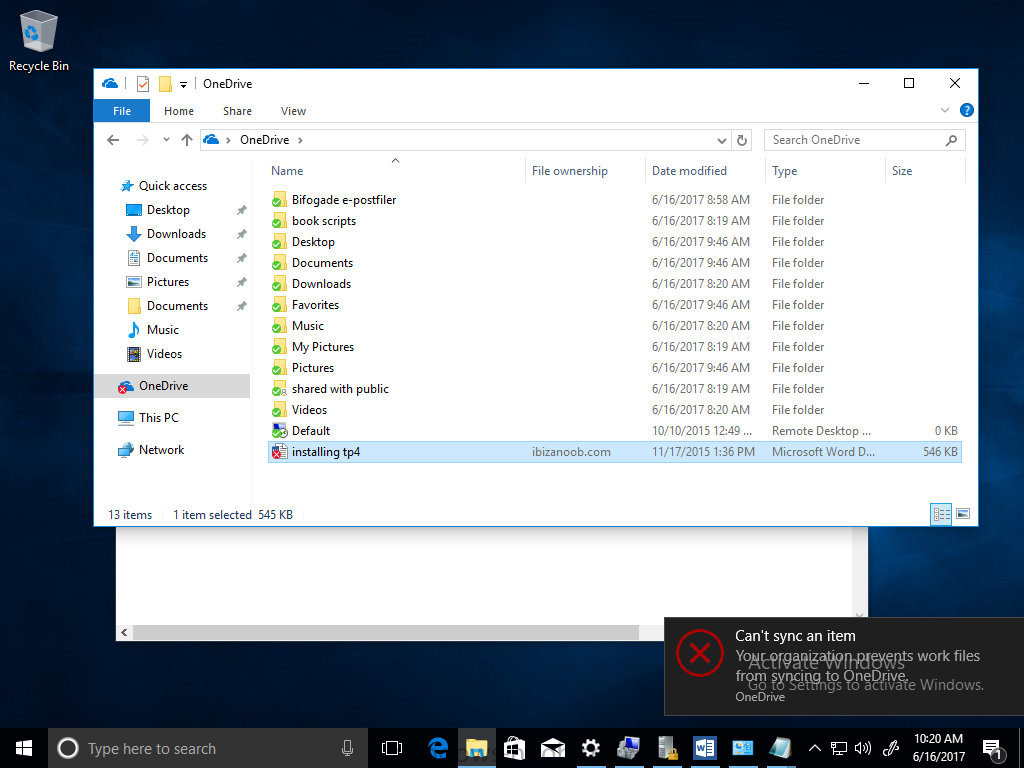
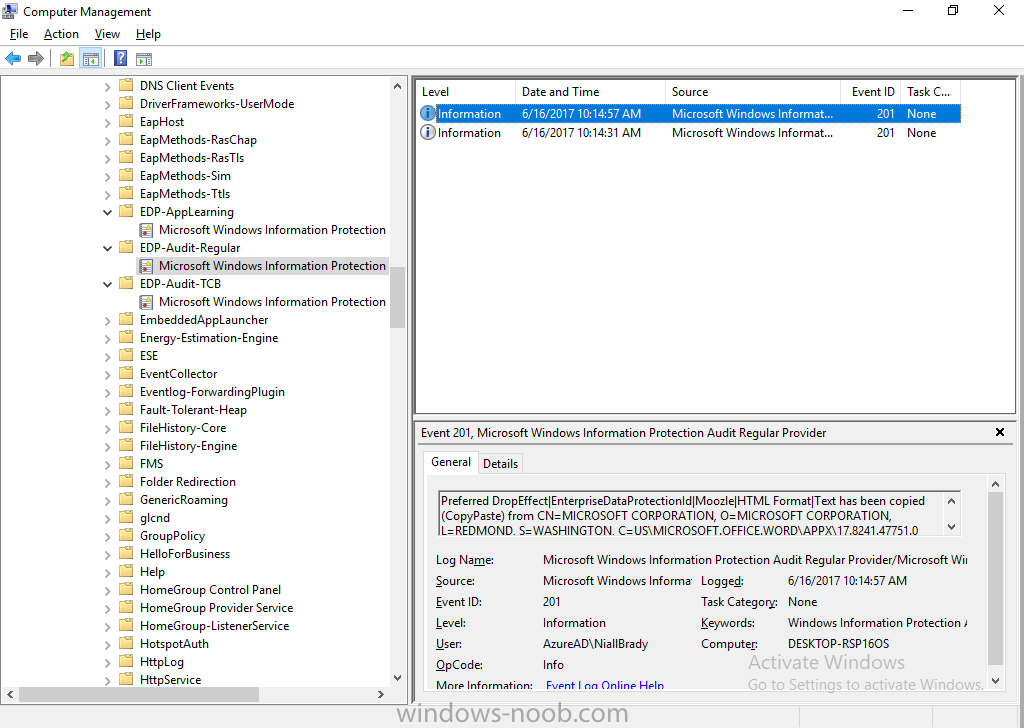
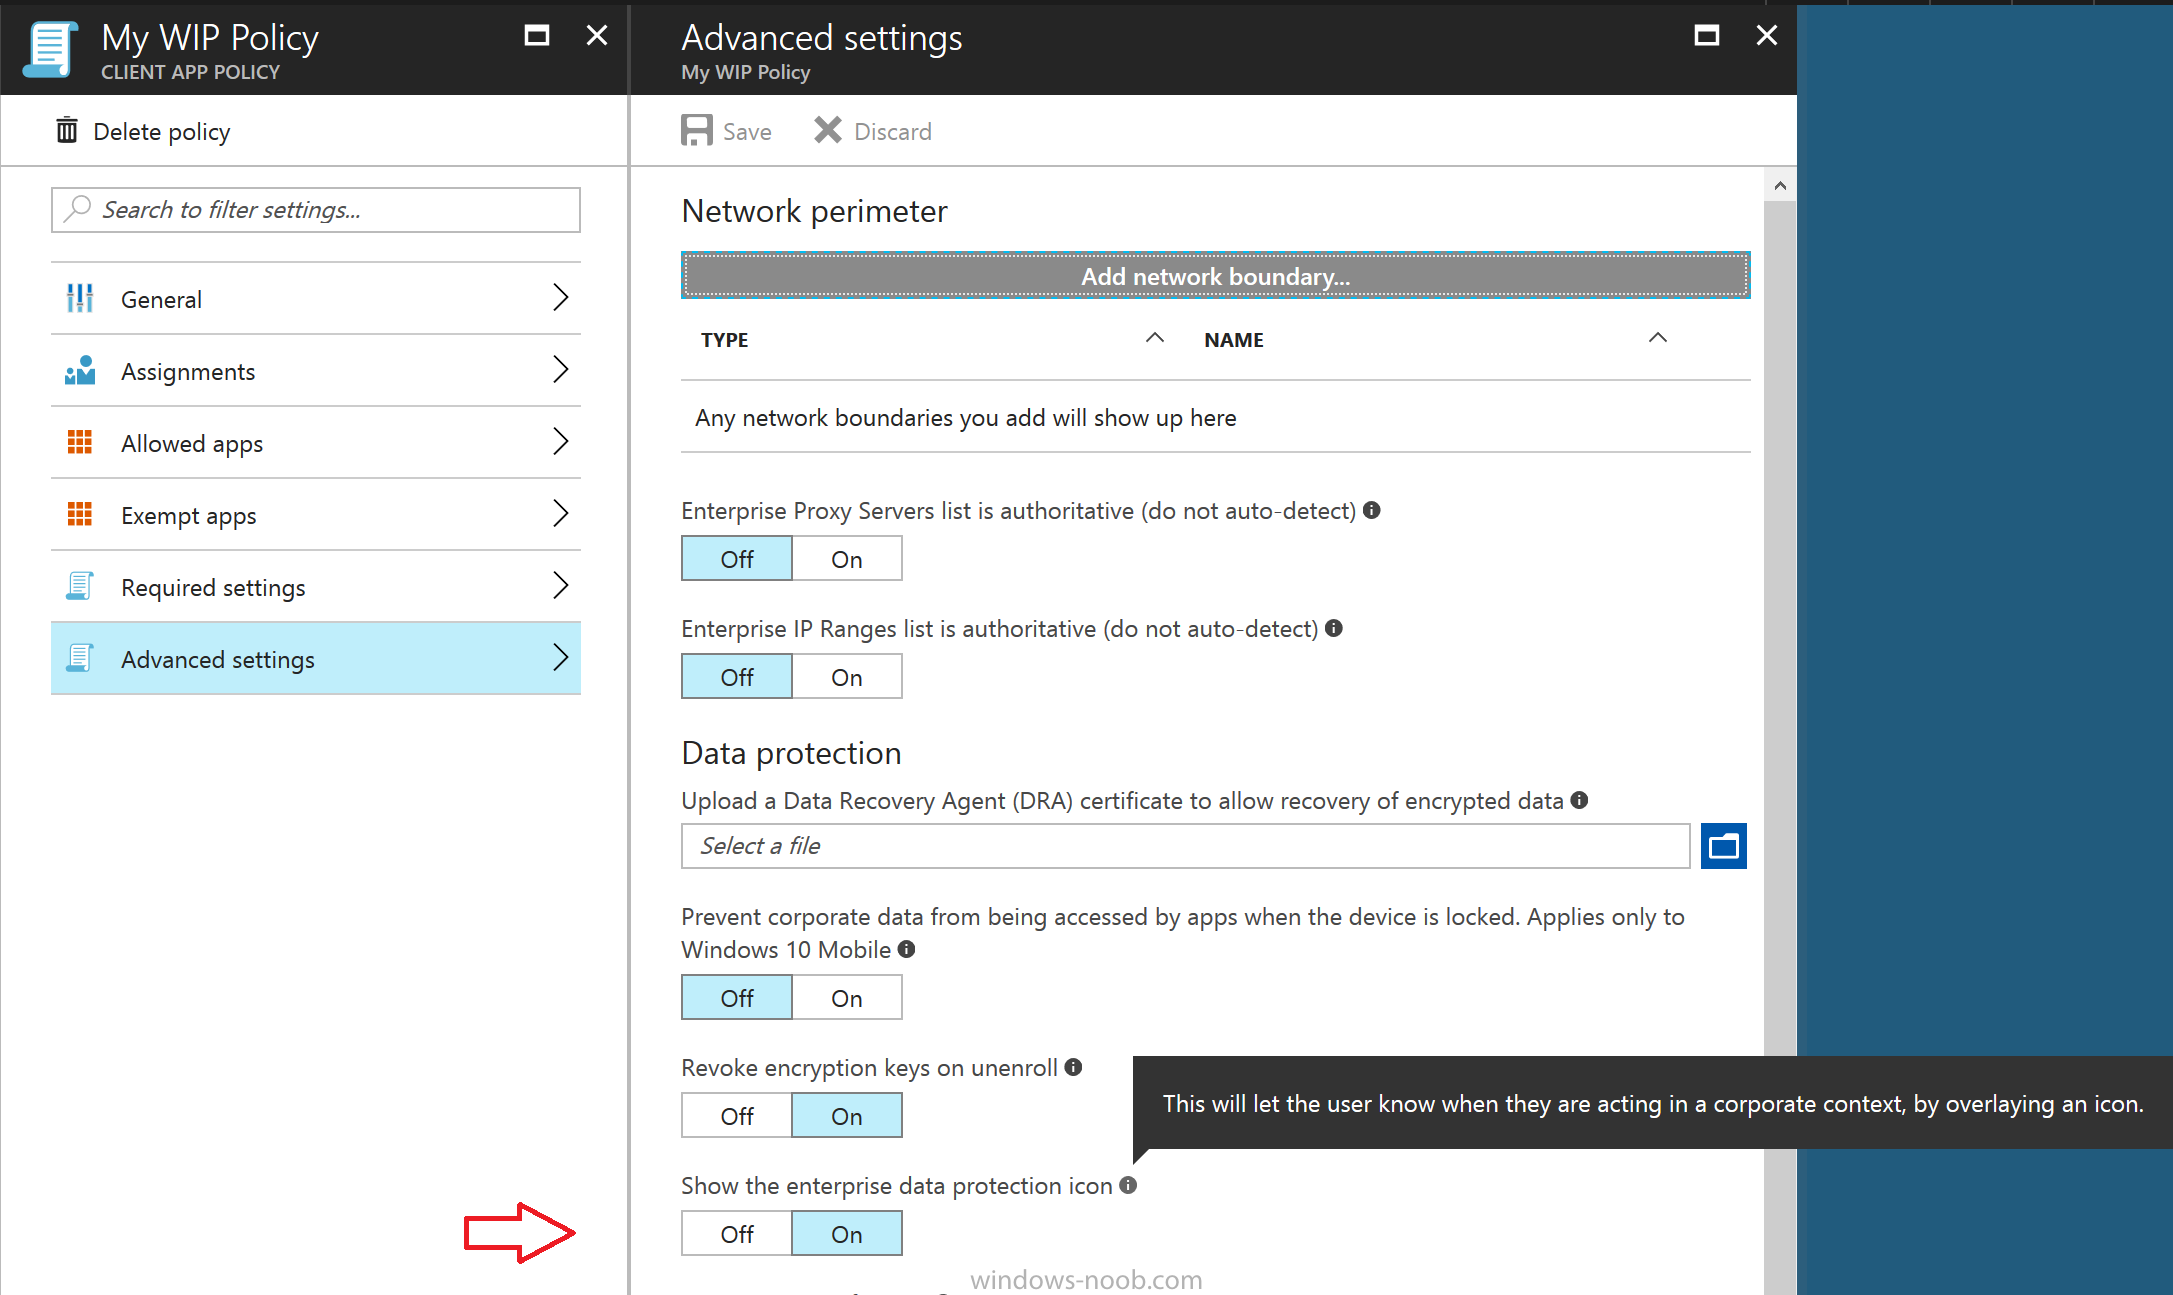
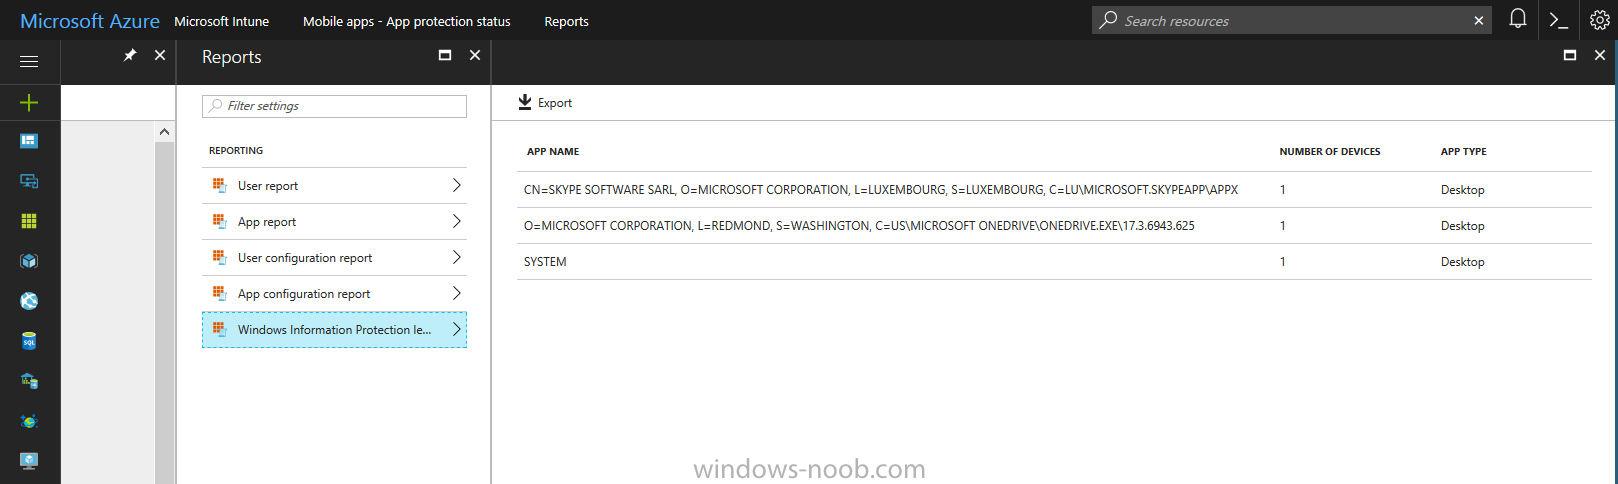
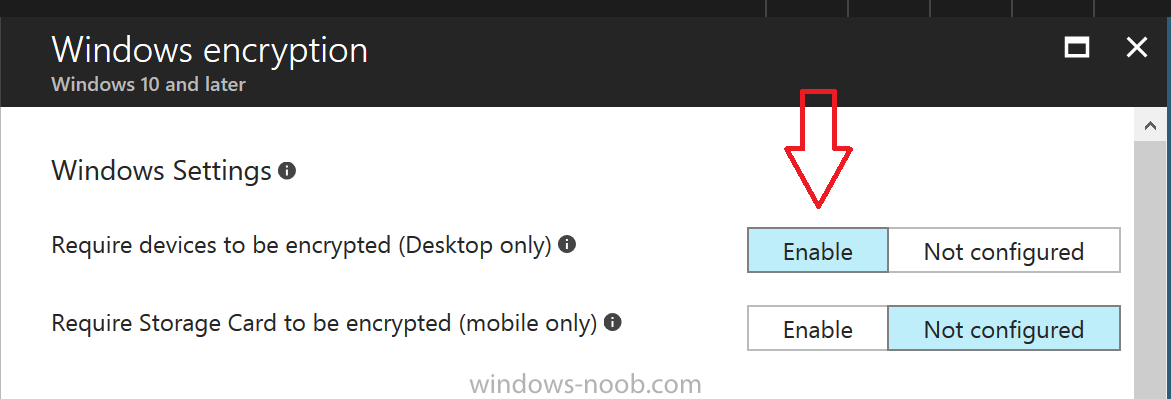
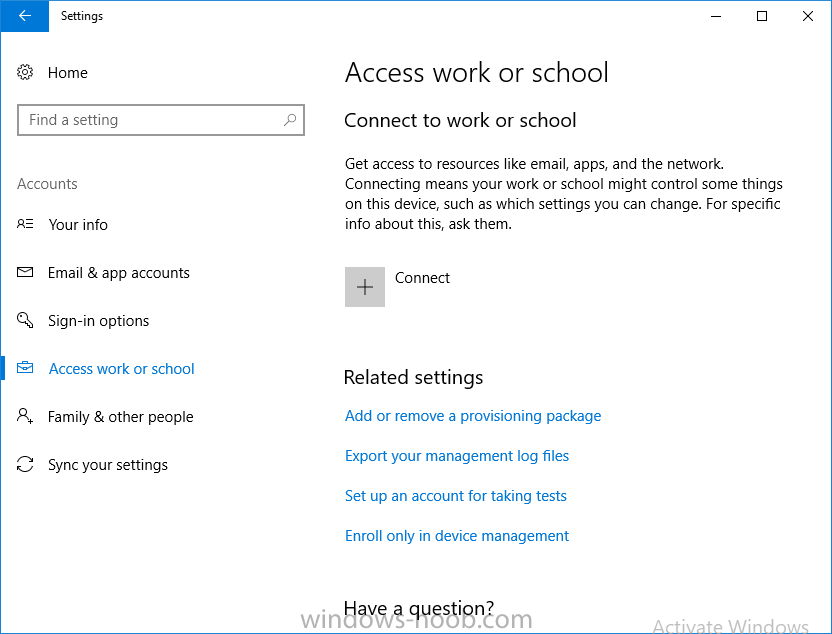
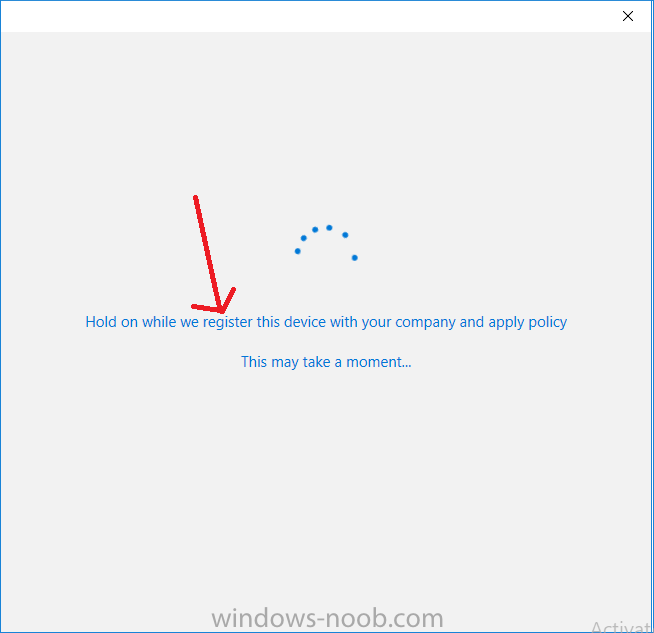
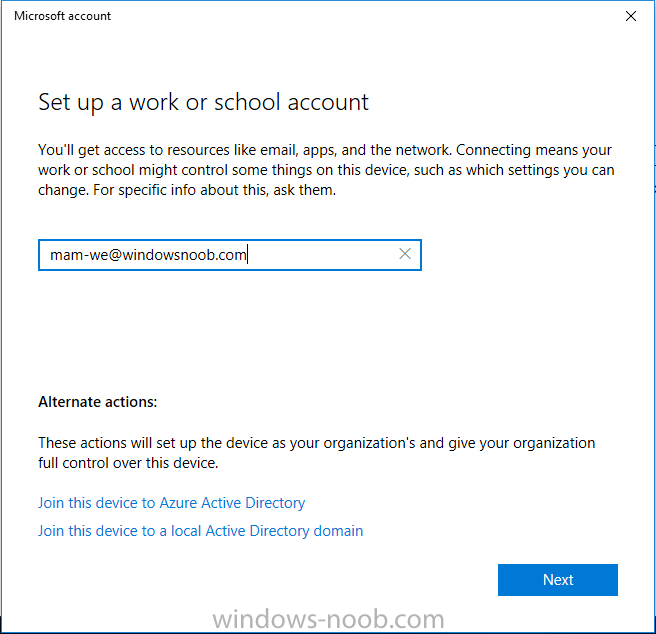
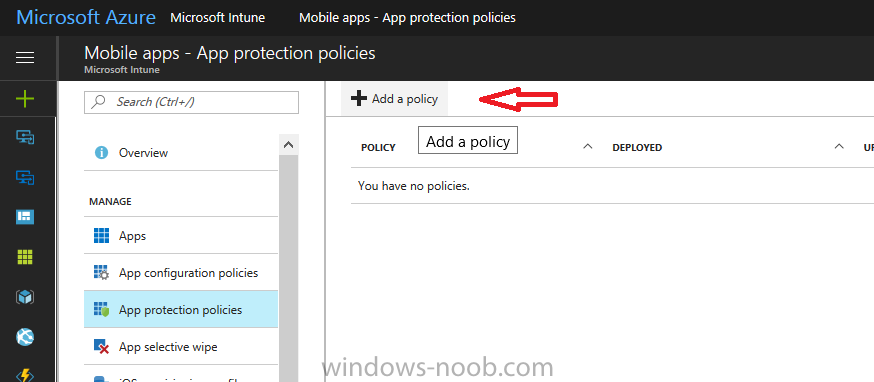
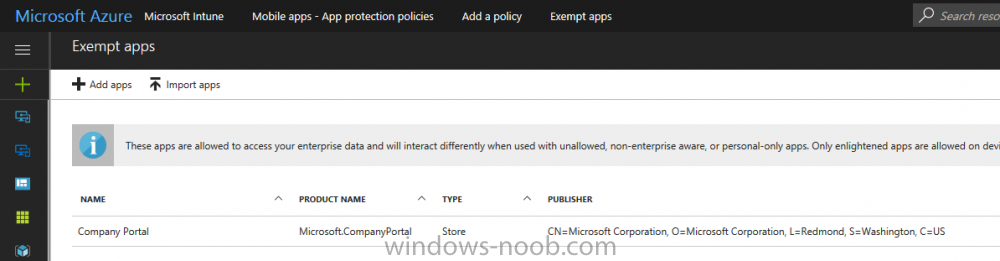
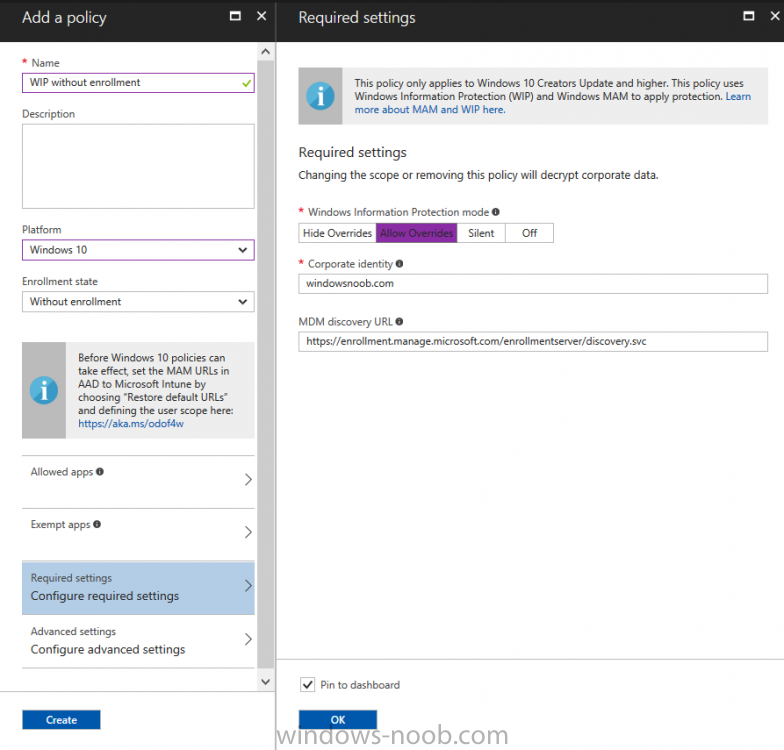
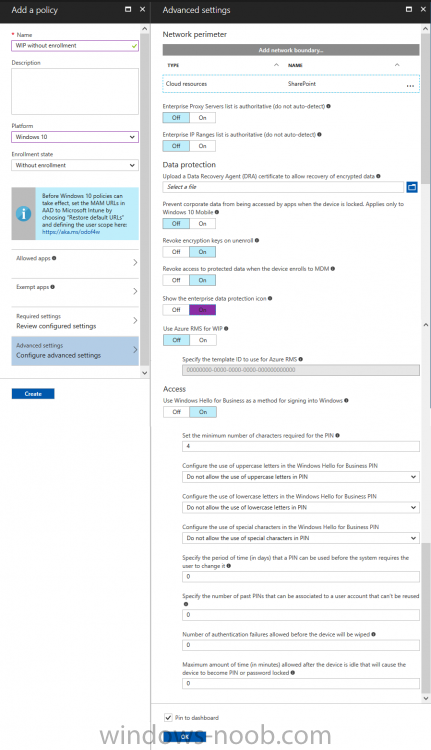
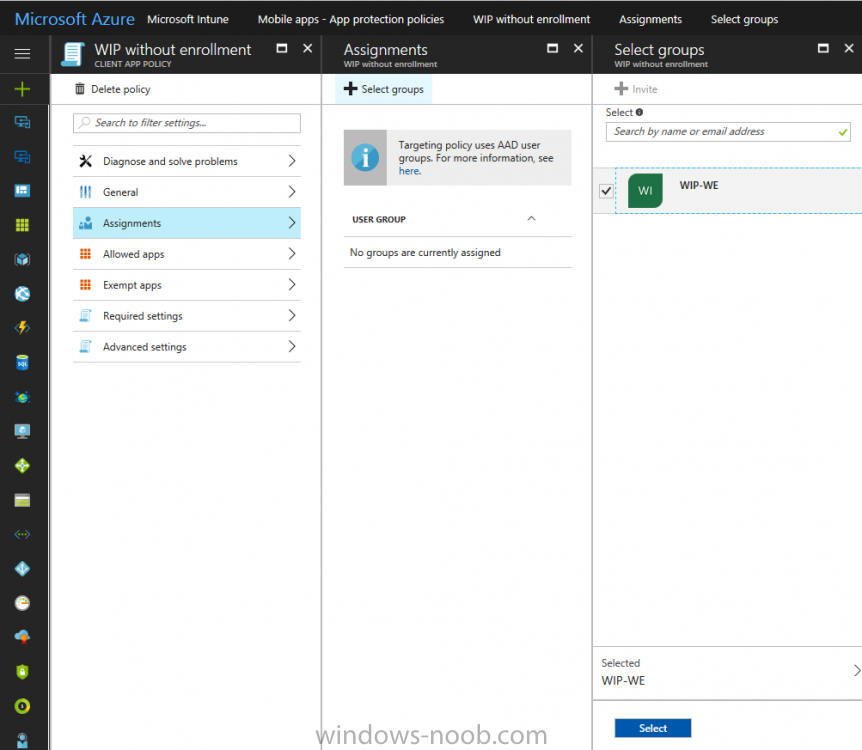
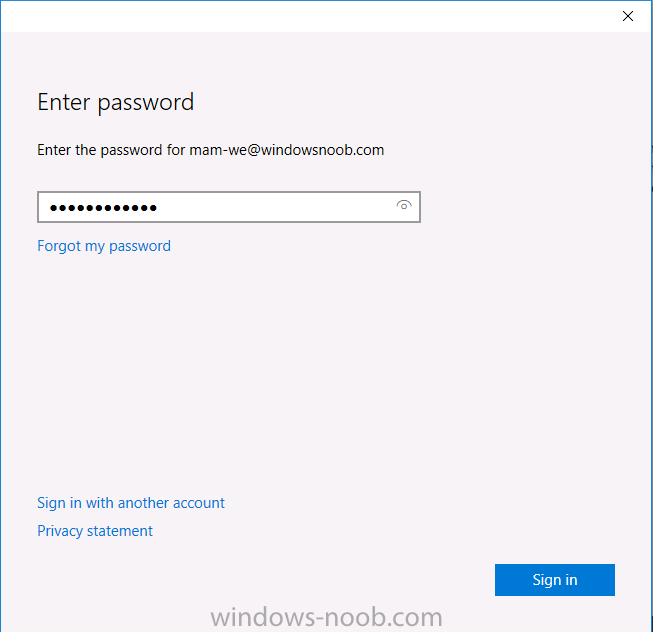
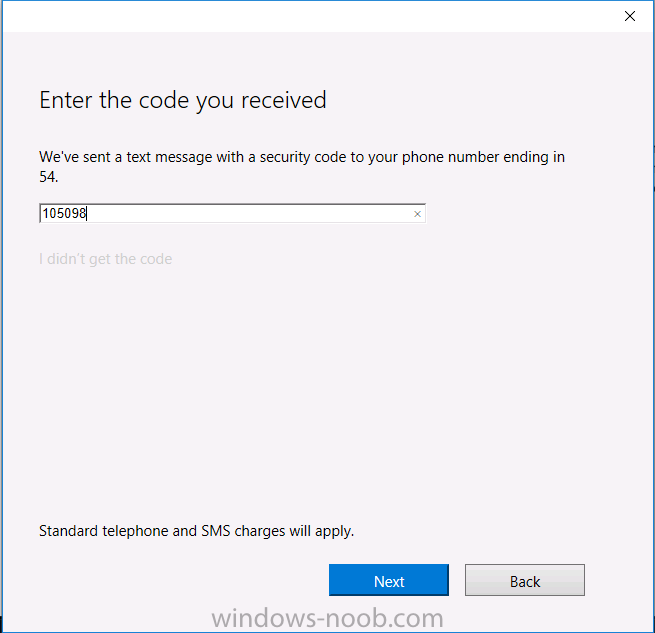
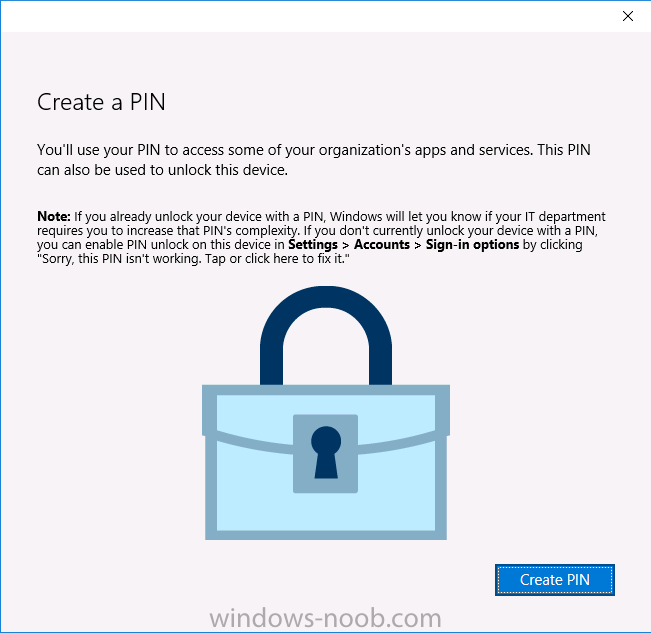
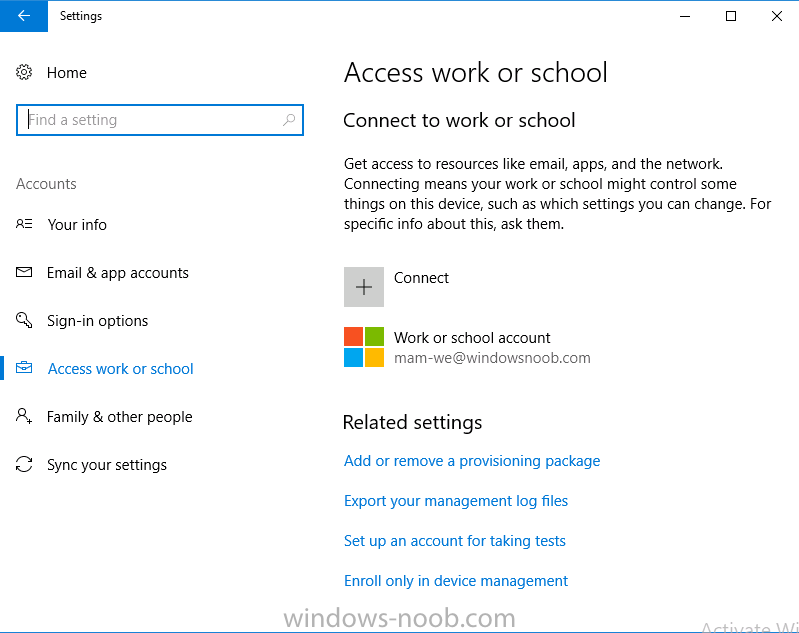
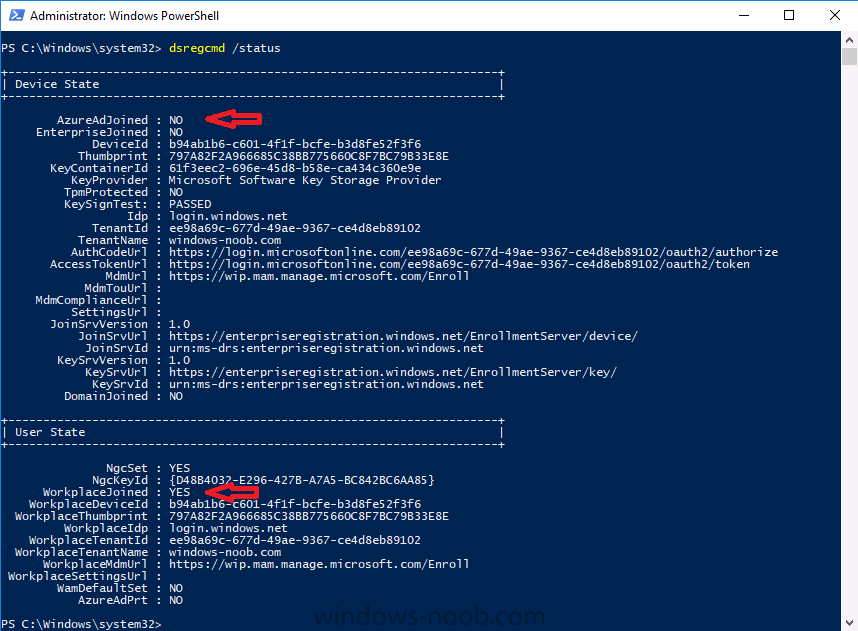
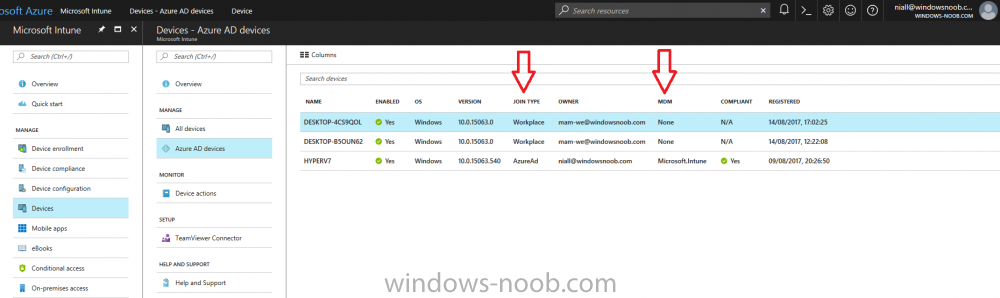
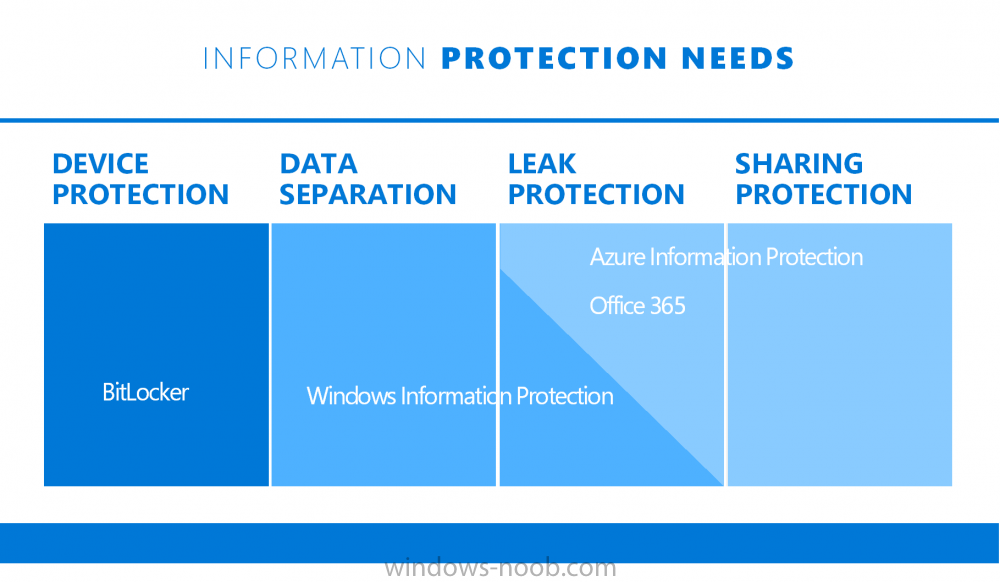
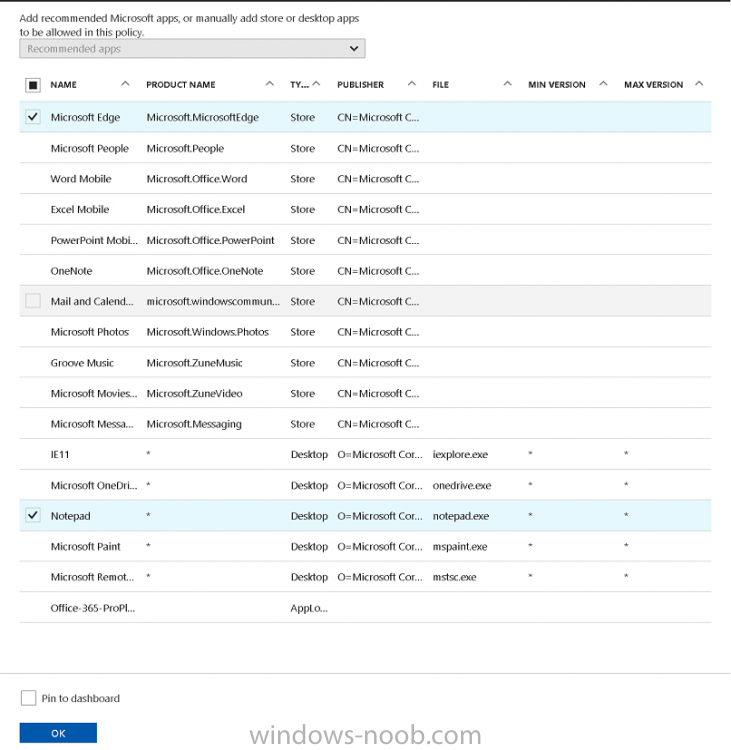
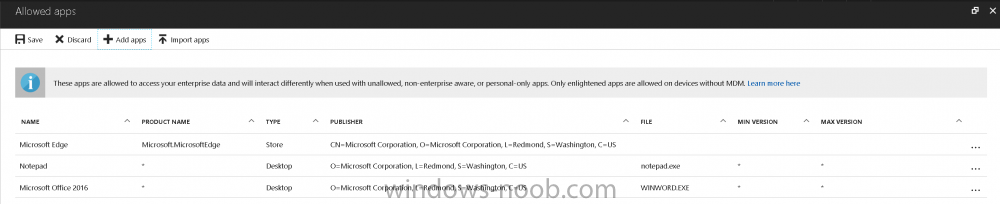
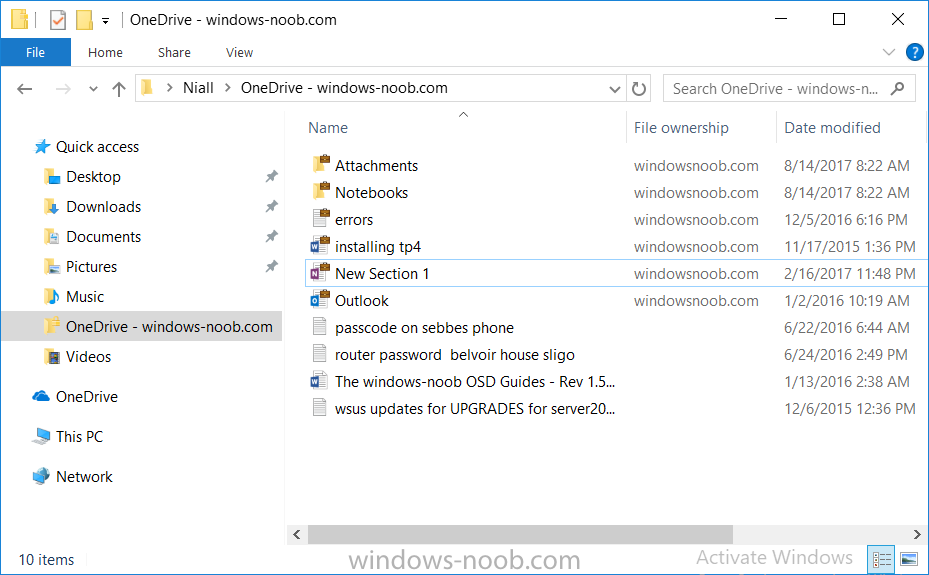
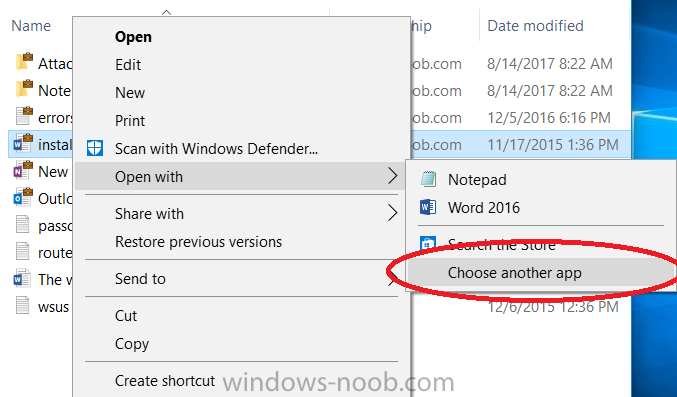
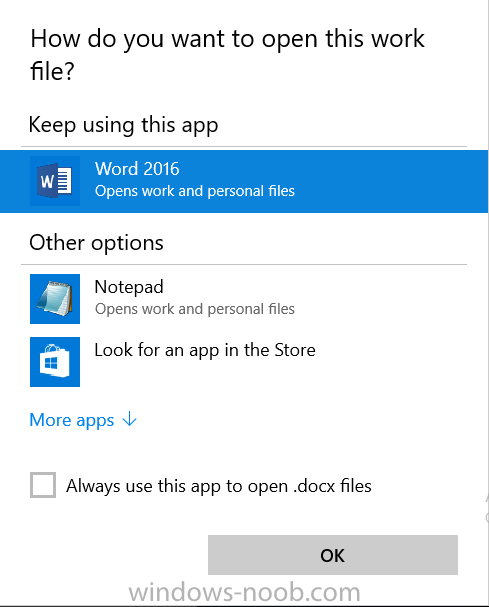
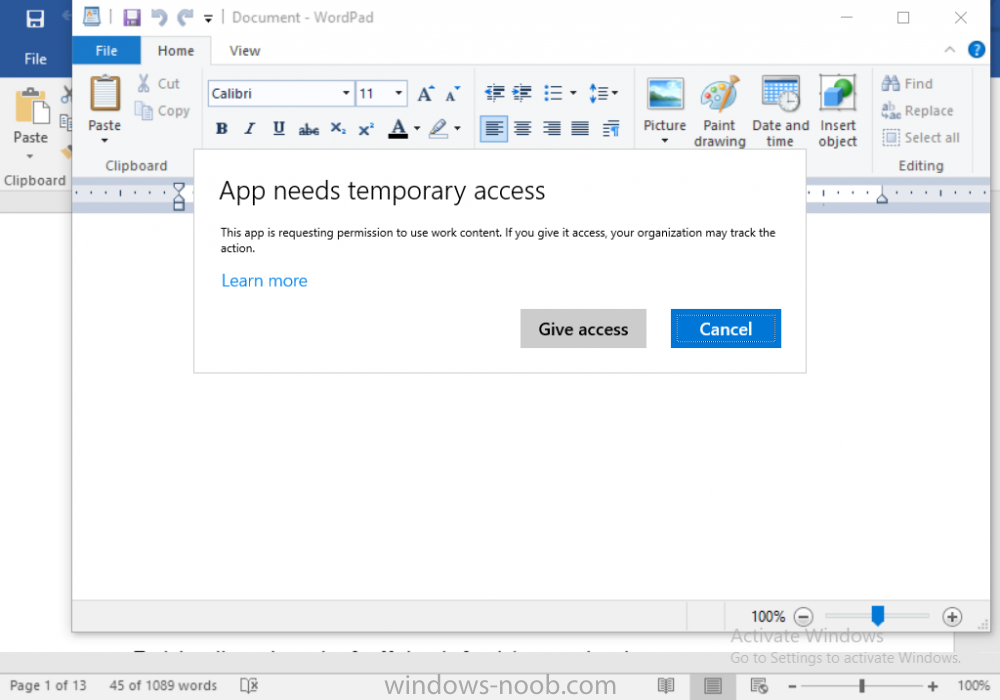
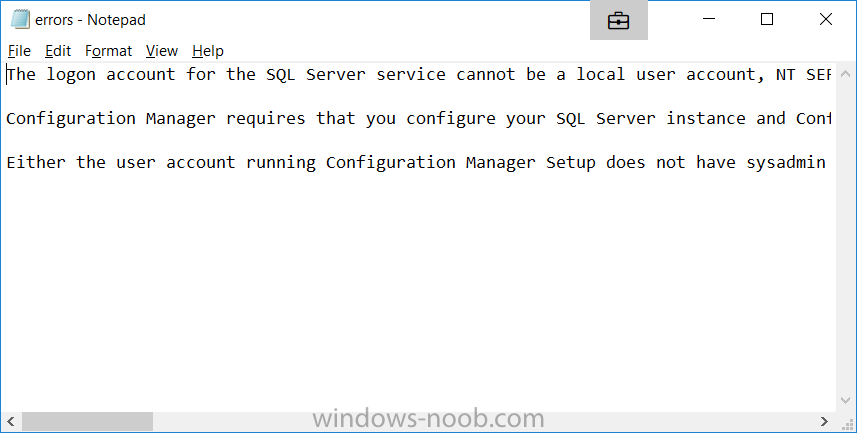
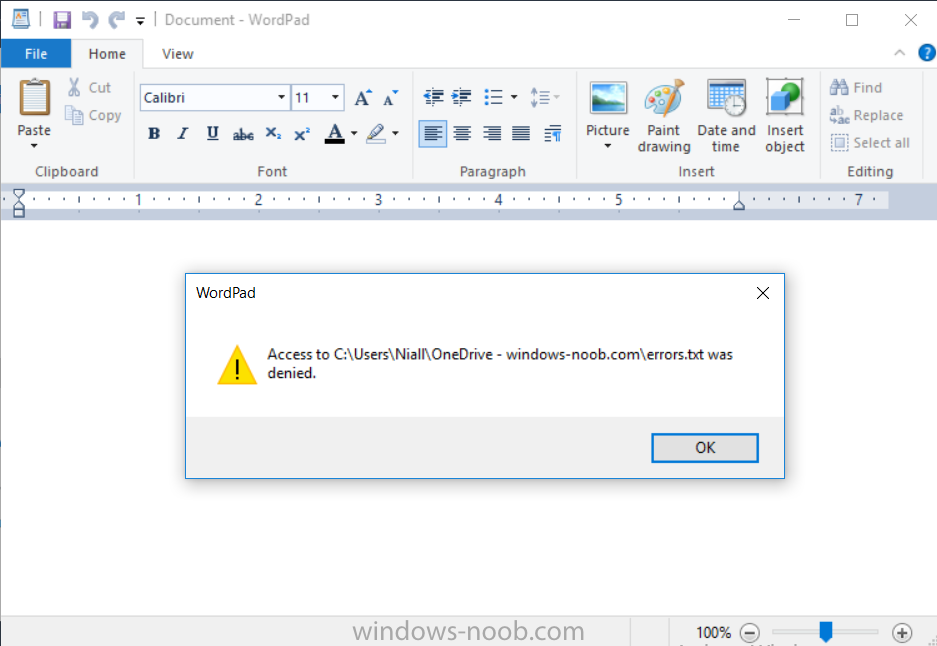
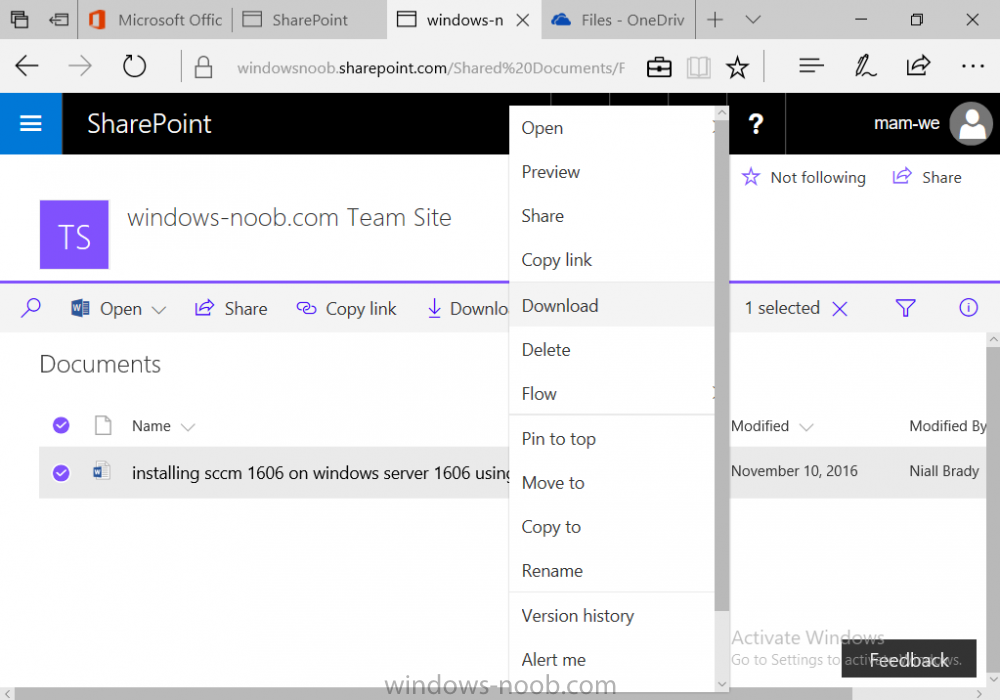
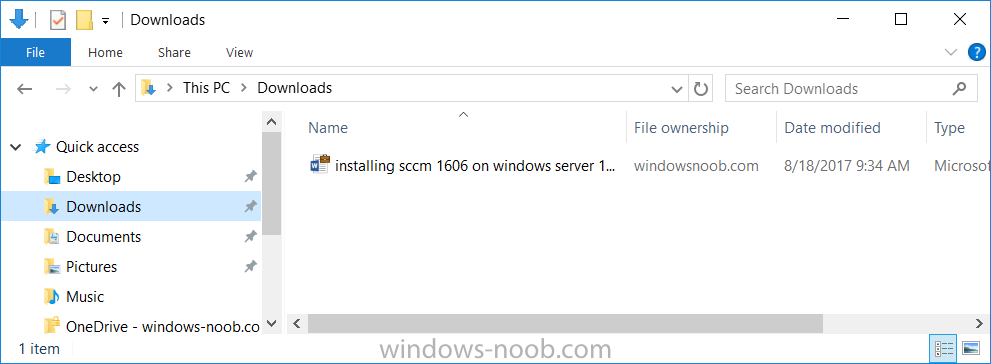
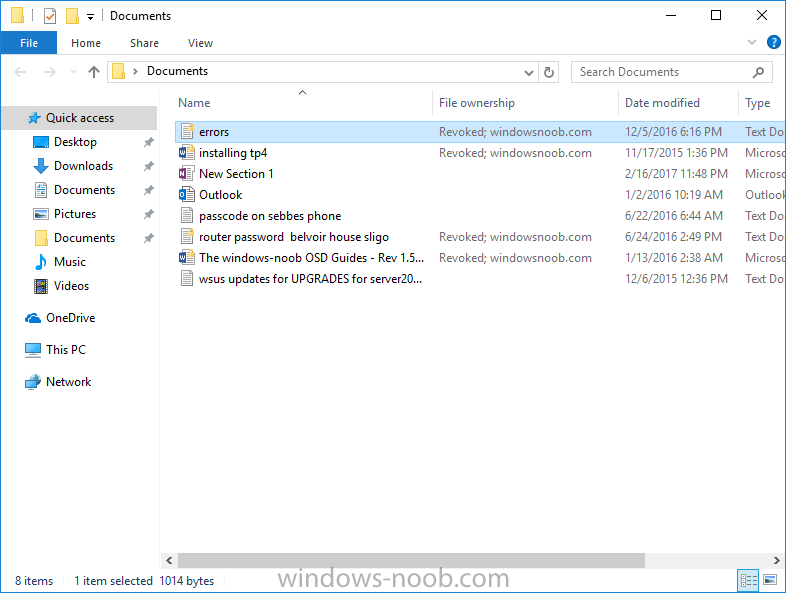
Introduction In a previous post you reviewed what Windows Information Protection (WIP) is and how you can configure Intune to use it, you then deployed a WIP policy to a group of users and verified the end result on a Azure AD joined (with Auto-MDM enrollment) Windows 10 version 1703 device. If you are still not familiar with WIP then I'd recommend you review this blog post from Microsoft, it covers it really well. The graphic below also gives you a nice indication of where WIP fit's in to your information protection needs and how it fits neatly into the Data Separation and Leak Protection space. In this post, you will see how WIP works on a Windows 10 version 1703 device that is Azure AD registered and not enrolled into MDM (MAM-WE). This is a typical Bring Your Own Device (BYOD) scenario. Create a WIP policy for Windows 10 devices without enrollment In a previous post you configured MAM in Azure, and now you will create a WIP policy for Windows 10 devices that are not enrolled into MDM, this will give you additional options to configure in the advanced section of the WIP Policy. To create the WIP Policy in the Microsoft Intune service in Azure, select Mobile Apps then click on App protection policies. Next click on Add a Policy. Give the policy a descriptive name, and optionally a description of what it does, in the Platform drop down select Windows 10 from the choices available. Next choose your enrollment option for Enrollment State, select Without Enrollment. Note, if you select the wrong enrollment option you cannot change it later, you'll have to recreate the policy with the correct enrollment option. Next, there are two sections in the Create Policy wizard related to Apps. Allowed apps - These are the apps that must adhere to the policy Exempt apps - These apps are exempt from the policy and can access enterprise data freely. Note: Apps can be enlightened or unenlightened. Enlightened apps can differentiate between corporate and personal data, correctly determining which to protect, based on your policies. Unenlightened apps consider all data corporate and encrypt everything. For a list of Enlightened apps see here. Adding Allowed Apps Click on Allowed apps and then click on Add apps to add one or more apps that you want to adhere to the policy. There's a drop down with Recommended apps selected by default and those apps are listed below the drop down. Recommended apps: a pre-populated list of (mostly Microsoft Office) apps that allow admins easily import into policy. Store apps: Admin can add any app from the Windows store to policy. Windows desktop apps: Admin can add any traditional Windows desktop apps to the policy (e.g. exe, dll, etc.) If you want to add your own Store apps or Desktop apps manually then you'll need to select the appropriate option and fill in the blanks. To get information about how to generate the info needed for manually adding Store and Windows desktop apps see this post. To add Allowed apps, click on Add apps, then select Recommended apps and make your selection from those available. For the purposes of this guide select Microsoft Edge and Notepad from the list of apps available. Click OK on the Recommended apps page, then click on OK on the Add apps page, next you will add an additional desktop app such as Microsoft Word 2016, to do so use the following method. Click on Add apps, and from the drop down choose Desktop Apps. Fill in the following information in the blanks. Name: Microsoft Office 2016 Product Name: * Type: Desktop Publisher: O=Microsoft Corporation, L=Redmond, S=Washington, C=US File: winword.exe Min Version: * Max Version: * Note: if you get the Publisher information above wrong, for example a missing letter, or misplaced comma or a missing space, then the policy (for Microsoft Word) will fail to apply and it won't work. You can pick a built in desktop app like notepad and compare the publisher settings to your app. Here is a copy of the data used above: NAME PRODUCT NAME TYPE PUBLISHER FILE MIN VERSION MAX VERSION Microsoft Office 2016 * Desktop O=Microsoft Corporation, L=Redmond, S=Washington, C=US WINWORD.EXE * * And below is what it looks like after you've added it correct, compare the Notepad desktop app with the one you just added, the Publisher line must match exactly. Adding Exempt Apps Next click on Exempt apps, and add the Company Portal to allow the app to properly function. To do so, add the following Store app to the list of Exempt apps: Name: Company Portal Publisher: CN=Microsoft Corporation, O=Microsoft Corporation, L=Redmond, S=Washington, C=US Product Name: Microsoft.CompanyPortal as shown here Click OK when done. Next click on Required settings and configure the protection mode, in this example set it to Allow Overrides, remove Pin to Dashboard and click on OK. Note: Allow Overrides lets the user override the policy and share the data, logging the action to your audit log. The 4 available Windows Information Protection mode settings are listed below. Hide Overrides - WIP looks for inappropriate data sharing practices and stops the user from completing the action. This can include sharing info across non-corporate-protected apps, and sharing corporate data between other people and devices outside of your organization. Allow Overrides - WIP looks for inappropriate data sharing, warning users if they do something deemed potentially unsafe. However, this mode lets the user override the policy and share the data, logging the action to your audit log. Silent - WIP runs silently, logging inappropriate data sharing, without blocking anything that would’ve been prompted for employee interaction while in Allow Override mode. Unallowed actions, like apps inappropriately trying to access a network resource or WIP-protected data, are still stopped. Off (not recommended) - WIP is turned off and doesn't help to protect or audit your data. After you turn off WIP, an attempt is made to decrypt any WIP-tagged files on the locally attached drives. Be aware that your previous decryption and policy info isn’t automatically reapplied if you turn WIP protection back on. Configuring advanced settings Next click on Advanced settings, to configure advanced settings. Notice how you can configure Windows Hello for Business options in the policy. These Windows Hello for Business options can by targeted to a User group of your choosing (essentially the same User group that you assign the WIP policy to), which is useful if you don't like the default Windows Enrollment option for enabling Windows Hello for Business (which applies to All Users). Once you are done configuring it, click on OK and then Create to create the WIP policy. Deploying the policy Now that you've created your WIP policy, it needs to be deployed (assigned) to a group of users that you intend to target with this policy. To deploy the policy, select it and then click on Assignments. Next click on Select Groups to select a previously created Azure Group containing one or more users. After selecting a suitable user group, click on Select. The policy is now deployed. Registering a device in Azure AD (workplace join) Let's look at a Windows 10 device that is not joined to Active Directory or Azure AD, it is only work group joined (this is a typical state for BYOD devices). Using an Administrative PowerShell cmd prompt, issue the following command dsregcmd /status Output similar to the below should appear As you can see from the output, the Windows 10 device is not joined to AAD, not Domain Joined and also not Enterprise joined (some future option from Microsoft ?). AzureADJoined: No EnterpriseJoined: No DomainJoined: No To Azure AD register the device (workplace joined) do as follows: Click on All Settings, Accounts, Access work or school. Then click on Connect and enter your Intune user credentials, note that their are options to join Azure AD and an on premise Domain but you will not select either as this device will be AAD registered only. When prompted enter the password and click on Sign-in. you'll be informed about what is happening, note the 'while we register this device' text. If any additional authentication is configured (Windows Hello for Business), you'll be prompted to enter it. after the text message is sent to your phone... Click Next and then Setup a PIN click next and then Done to close the wizard. Note: The User name used to register the device is listed with a Windows icon beside it. At this point, once again issue the dsregcmd /status command in an Administrative PowerShell cmd prompt. From the output you can see that the device is NOT Azure AD Joined and it is Workplace Joined, which is another way of saying it is Azure AD registered. You can verify that the device is not MDM enrolled and that it is Workplace joined and Azure AD Registered by clicking on Azure AD devices in the Intune portal. Review WIP policy on a Windows 10 device So now that our Windows 10 device is Azure AD registered, let's verify how the WIP policy applies. To do so logon to the Windows 10 device used above. In the example below there are some documents, some are marked as Work (they have a suitcase icon on them and File Ownership is listed as the windowsnoob.com Enterprise.) and some are Personal. Right click on a protected Word document and choose Open With, next select Choose another App. if your policy is applied correctly you'll see the following (that Word 2016 can open both Work and Personal files), if not, sync the policy again and try again. Once the document is open in Word, copy some text and attempt to paste it into WordPad (which is not an allowed app.) If everything went well you'll be prompted to either Give Access or Cancel. Note: If you do not get the desired result, for example if the data simply pastes in, then you should verify the version of Office application you are using is up to date. For example, Office 365 may be on the Deferred Channel (now called Semi Annual Channel) meaning that it's version is 1701.(xxxx.xxxx) and that may mean that it cannot process the WIP policy correctly. Once you've updated Office 365 to the Current Channel (now known as Monthly) you'll get the desired result. Tip: You can review your software download settings for Office 365 by going to https://portal.office.com and, clicking on Software Download Settings on the main screen. In there, by default it will be set to the Semi Annual Channel which as of when I tested it in this guide, won't work correctly with WIP. In the screenshot below you can see that Office is configured for the Semi Annual Channel. As time goes on this will auto-correct itself, but if you see issues such as I've described then select Monthly Channel, update the office software on the client, and try again. Next, open a protected (work) txt document with Notepad. Notice the suitcase icon in the banner area. If you click on the suitcase, it will say Managed by your company. Try opening the same document with an app this is not allowed, and you'll see this. And next browse a work site (such as Sharepoint) in Microsoft Edge and you'll again see the suitcase icon, notifying you that Edge realizes this is a Work network resource. Downloading a document from Sharepoint automatically marks it as a Work document, and that means it's protected. as you can see here. Once the BYOD project comes to an end, have the user disconnect the work or school account in Account settings, and any Enterprise data left on the device will be revoked and can no longer be read or used. Hopefully this post helps you understand WIP capability on Windows 10 version 1703 devices (and later) that are not enrolled into MDM (MAM-WE) using policy created in Intune in Azure. I think we'll see more happening in this space in the coming months, hopefully with native reporting in Azure along with selective wipe. Until next time, adios. Recommend reading Introducing Windows Information Protection https://blogs.technet.microsoft.com/windowsitpro/2016/06/29/introducing-windows-information-protection/ Windows Information Protection explained https://blogs.technet.microsoft.com/cbernier/2017/05/19/windows-information-protection-explained-windows-10-creators-update/ App behaviour with WIP https://docs.microsoft.com/en-us/windows/threat-protection/windows-information-protection/app-behavior-with-wip Protect your enterprise data using Windows Information Protection (WIP) https://docs.microsoft.com/en-us/windows/threat-protection/windows-information-protection/protect-enterprise-data-using-wip Limitations using WIP https://docs.microsoft.com/en-us/windows/threat-protection/windows-information-protection/limitations-with-wip Create and Assign WIP application protection policies https://docs.microsoft.com/en-us/intune/windows-information-protection-policy-create Enlightened apps and WIP https://docs.microsoft.com/en-us/windows/threat-protection/windows-information-protection/enlightened-microsoft-apps-and-wip Walkthrough: Workplace Join with a Windows Device https://docs.microsoft.com/en-us/windows-server/identity/ad-fs/operations/walkthrough--workplace-join-with-a-windows-device How to configure hybrid Azure Active Directory joined devices https://docs.microsoft.com/en-us/azure/active-directory/active-directory-conditional-access-automatic-device-registration-setup New to Office 365 https://blogs.office.com/en-us/2017/06/23/new-to-office-365-in-june-classroom-experiences-in-microsoft-teams-and-more/ Manage Windows Information Protection work and personal files https://support.microsoft.com/en-us/help/4012985/windows-10-manage-windows-information-protection-work-personal-files General guidance and best practices for Windows Information Protection (WIP) https://docs.microsoft.com/en-us/windows/threat-protection/windows-information-protection/guidance-and-best-practices-wip


-
Introduction Windows Information Protection or WIP (formally known as Enterprise Data Protection or EDP) is explained nicely in Microsoft's own words and i've included a quote of that below:- In other words, you can use WIP to protect enterprise data from leaving the enterprise. The prerequisites for WIP are as follows, you'll need a Windows 10 operating system (that is version 1607 or later) and you'll need a management solution such as Intune or SCCM or a 3rd party MDM solution. in addition, you'll need a license for Azure AD Premium. To gain access to the latest capabilities in Intune you should use Windows 10 Creators Update (version 1703). In this article I'm going to show you how to set this up with Intune (in Azure) and I'll give some examples of how enterprise protected data acts when in different scenarios, in addition, I'll explain how you can audit or review logs about this and have a quick glance at the reporting capabilities in Intune. I've already configured Azure for Automatic Enrollment but it's up to you whether you want to use that option (or not). In this guide I assume you've already got an Azure subscription (trial or otherwise) and Intune. If you don't have one you can sign up for a 30 day free Intune trial here. I used Enterprise Mobility + Security E3 licenses for the users in this lab. Making sure Azure is ready for WIP In Azure, select Azure Active Directory from Services and click on Mobility (MDM and MAM). Next Click on Microsoft Intune From the choices listed, choose Restore default MAM URLs and then select the scope. You can add your own urls too (for the MAM Terms of use URL and MAM Compliance URL) if you wish but in this example I did not. Save your settings when done. Create a WIP Policy Now that you've configured MAM in Azure, it's time to create your first WIP policy. To do that, in the Microsoft Intune service in Azure, select Mobile Apps then click on App protection policies. And click on Add a policy. Give the policy a descriptive name, and optionally a description of what it does, in the Platform drop down select Windows 10 from the choices available. Next choose your enrollment option for Enrollment State, select With Enrollment for this guide. In a later guide I will cover Without Enrollment where you can protect data in Enterprise apps (such as outlook) without being MDM enrolled. Next, there are two sections related to Apps. Allowed apps - These are the apps that must adhere to the policy Exempt apps - These apps are exempt from the policy and can access enterprise data freely. Note: Apps can be enlightened or unenlightened. Enlightened apps can differentiate between corporate and personal data, correctly determining which to protect, based on your policies. Unenlightened apps consider all data corporate and encrypt everything. For a list of Enlightened apps see here. Click on Allowed apps and then click on Add apps to add one or more apps that you want to adhere to the policy. There's a drop down with Recommended apps selected as default and those apps are listed below the drop down. If you want to add your own Store apps or Desktop apps manually then you'll need to select the appropriate option and fill in the blanks. Recommended apps: a pre-populated list of (mostly Microsoft Office) apps that allow admins easily import into policy. Store apps: Admin can add any app from the Windows store to policy. Windows desktop apps: Admin can add any traditional Windows desktop apps to the policy (e.g. exe, dll, etc.) To get information about how to generate the info needed for manually adding Store and Windows desktop apps see this post. You can also import apps from an XML file generated in AppLocker by clicking on Import Apps. But before doing so you'll need to create an AppLocker policy and then export the policy. To create an AppLocker policy follow this advice. To export an AppLocker policy to an XML file do as follows: Click Start, type secpol.msc in the Search programs and files box, and then press ENTER. In the console tree, expand Application Control Policies, right-click AppLocker, and then click Export Policy. Browse to the location where you want to save the XML file. Below you can see the process of selecting some apps from the list of the Recommended apps. Next you might want to exempt some apps from this WIP policy, to do so click on Exempt apps and add apps the same way as you did above except this time select those apps that you do NOT want the WIP policy to apply to. After adding apps to your WIP policy, you need to configure required settings, so click on Required Settings. In this guide I selected Allow Overrides which means that the user will be prompted when they try to relocate data from a protected to a non-protected app. Corporate identify should be auto-populated. You can add more domains by separating them using the | symbol. The 4 available Windows Information Protection mode settings are listed below. Hide Overrides WIP looks for inappropriate data sharing practices and stops the user from completing the action. This can include sharing info across non-corporate-protected apps, and sharing corporate data between other people and devices outside of your organization. Allow Overrides WIP looks for inappropriate data sharing, warning users if they do something deemed potentially unsafe. However, this mode lets the user override the policy and share the data, logging the action to your audit log. Silent WIP runs silently, logging inappropriate data sharing, without blocking anything that would’ve been prompted for employee interaction while in Allow Override mode. Unallowed actions, like apps inappropriately trying to access a network resource or WIP-protected data, are still stopped. Off (not recommended) WIP is turned off and doesn't help to protect or audit your data. After you turn off WIP, an attempt is made to decrypt any WIP-tagged files on the locally attached drives. Be aware that your previous decryption and policy info isn’t automatically reapplied if you turn WIP protection back on. After configuring the Required Settings, click on Create to Create the WIP Policy. Note: There are also Advanced settings that you can configure which control things like Network Boundary, IP ranges, DRA certificate and other options such as the ability to show the Enterprise data protection icon, however I am not using any of these settings in this blog post. Deploying the policy Now that you've created your WIP policy, it needs to be deployed (assigned) to a group of users that you intend to target with this policy. To deploy the policy, select it and then click on Assignments. Next click on Select Groups to select a previously created Azure Group containing one or more users. Select a User Group containing the users you want to target this policy to and then click on Select. The policy is now deployed. Review how WIP works Logon to a device as a user that is a member of the WIP Users user group (the user group that you deployed the WIP policy to). In this example I am reviewing how WIP works on an Azure AD registered device that is auto-MDM enrolled into Intune. Using Windows File Explorer, browse a bunch of documents. If the File Ownership column is not present you can add it. In this example, You can see that some files are marked with the Enterprise name, and some or not. Those that are not are considered personal documents. You can right click any file and change file ownership from Enterprise (work) to Personal or vice versa. Here we are making a document 'Work' owned. The other option will always be greyed out. Now that we have a mix of Personal and Work documents, let's see what happens when the user attempts to copy Enterprise data from Word Mobile to Notepad. Right click on a protected document and choose Open with, select Word Mobile. As we can see, this application opens both Work and Personal files as we have assigned the WIP policy to it. Mark some text and right click, choose Copy. Next open Notepad. Right click in a new document and choose Paste. Thanks to WIP, and the Required Settings you configured, the user is prompted about pasting this data. In this case, clicking on Give access allows you to copy the data but the action will be logged and can be reported on. If you attempt to open the same protected document with Notepad directly you'll see this. Next, try copying a protected document to somewhere personal, such as OneDrive personal. You'll be informed that OneDrive can't sync the file. If you look at a protected files' Properties (right click the file), and then click on Advanced in the General tab, you should see that the file is encrypted. Clicking on the Details button will give you more info. What about reporting ? Currently (as of August 2017) only Intune SA (Standalone) has reporting for WIP, but hopefully that will change soon. In Intune Standalone you can review the built in WIP report in Reports, Windows Information Protection reports, View Report. and you'll see something like this: Note: You'll need to wait about 24 hours before WIP data shows up. Windows Information Protection Learning. Windows Information Protection Learning allows you to gather data in Intune in Azure, to review what applications your users are using, maybe you want to add or remove access to those apps. To review WIP Learning, select Mobile Apps, and in the Monitor section select App Protection Status, then click on Reports and finally select Windows Information Protection learning. Note: There is an App Protection status node that contains reports for users and apps but it is currently only applicable to iOS and Android. To get more data on the clients, you can peruse event viewer logs in the Applications and Services logs, see below. EDP-Applearning EDP-Audit-Regular EDP-Audit-TCP Well that's it, I hope this gives you a good overview of WIP in Intune. Until next time, adios. Recommended reading 30 day Intune trial Protect Enterprise data with WIP Enlightened apps versus unenlightened apps Enterprise Mobility and Security Blog Set up Windows device management with Microsoft Intune Windows Information Protection Policy create How to setup MAM for Windows 10 1703 Windows 10 MAM Without Enrollment and Office Desktop Apps Windows 10 and MAM-WE – Part 1: Configuration
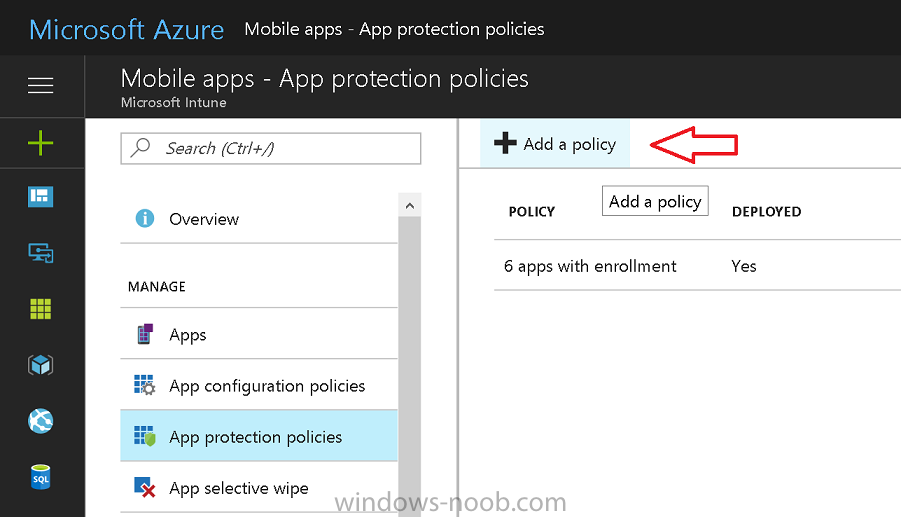
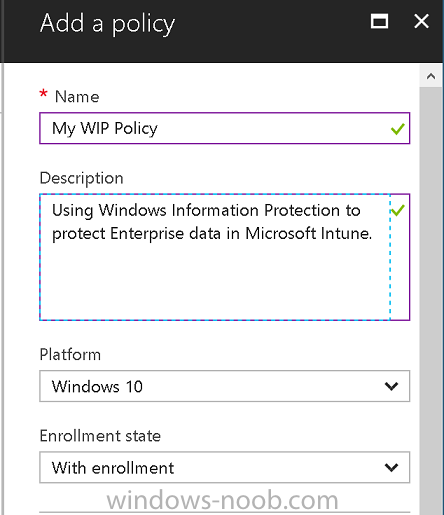
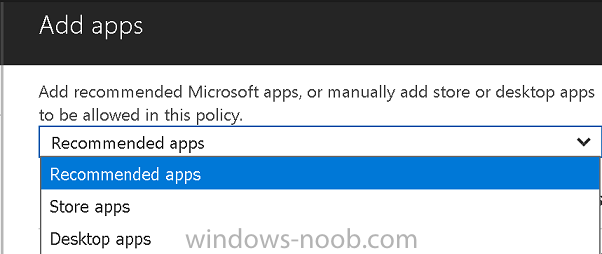
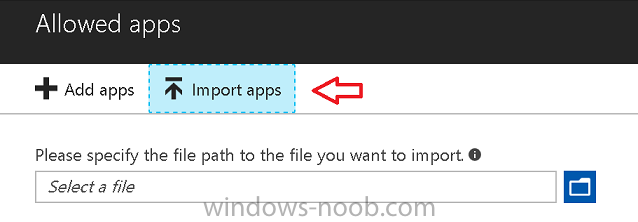

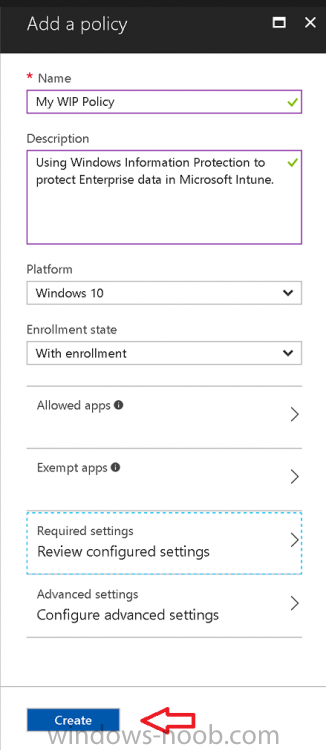
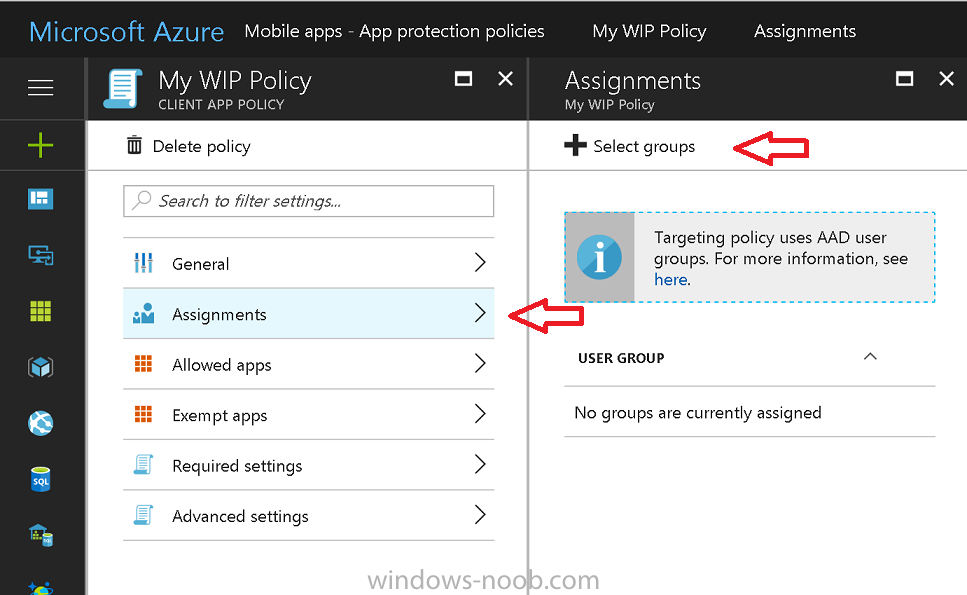
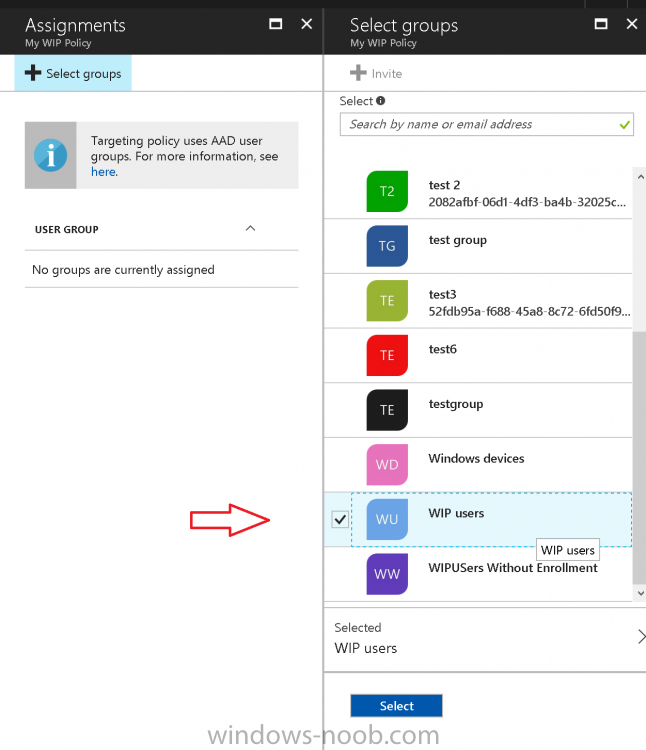
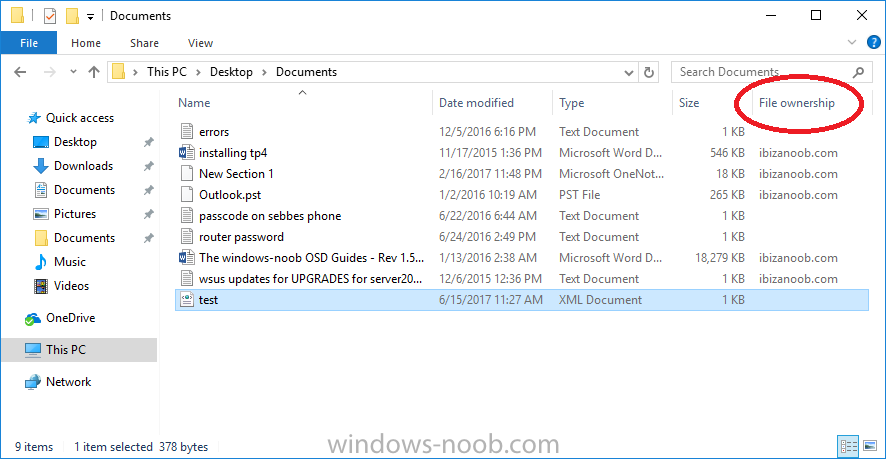
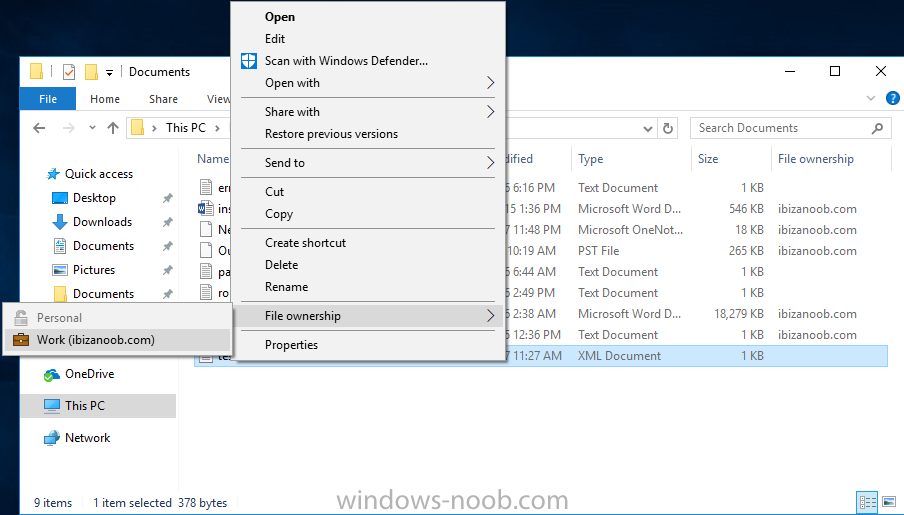
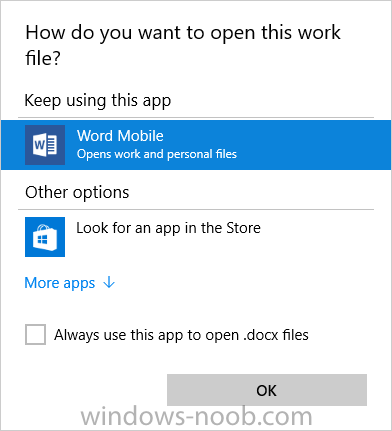
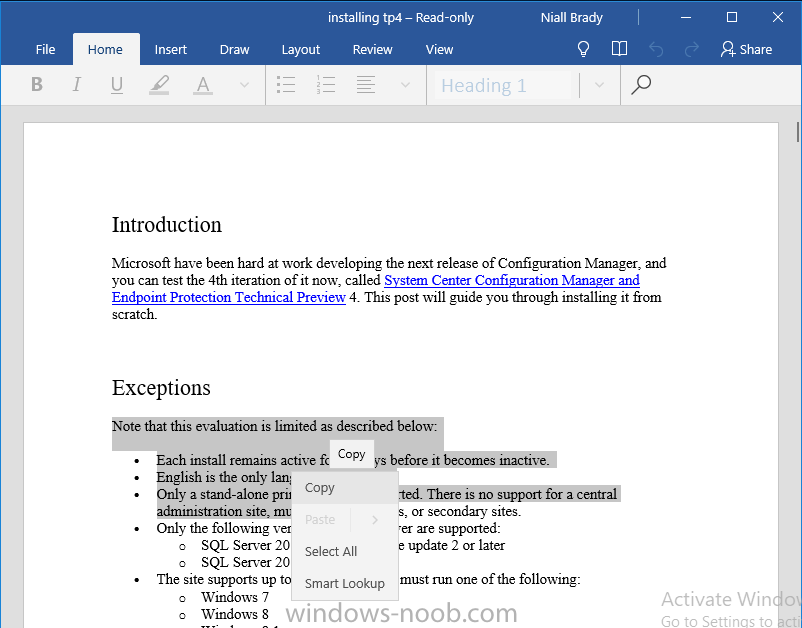
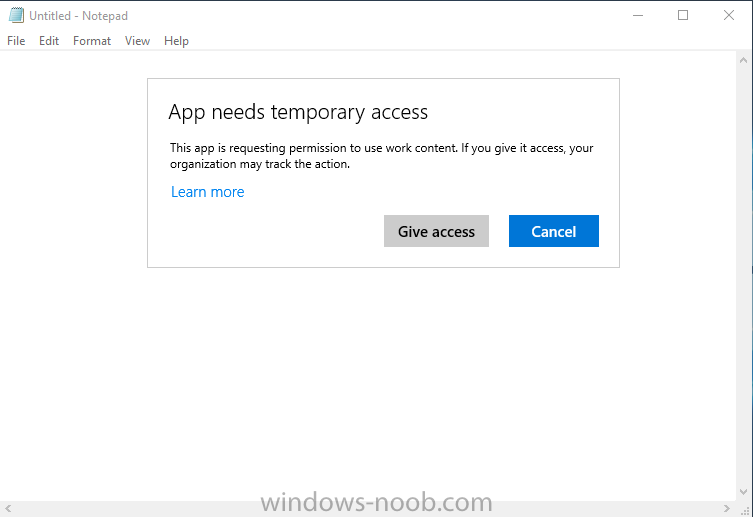
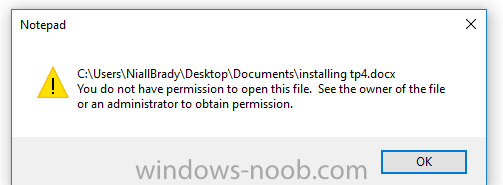

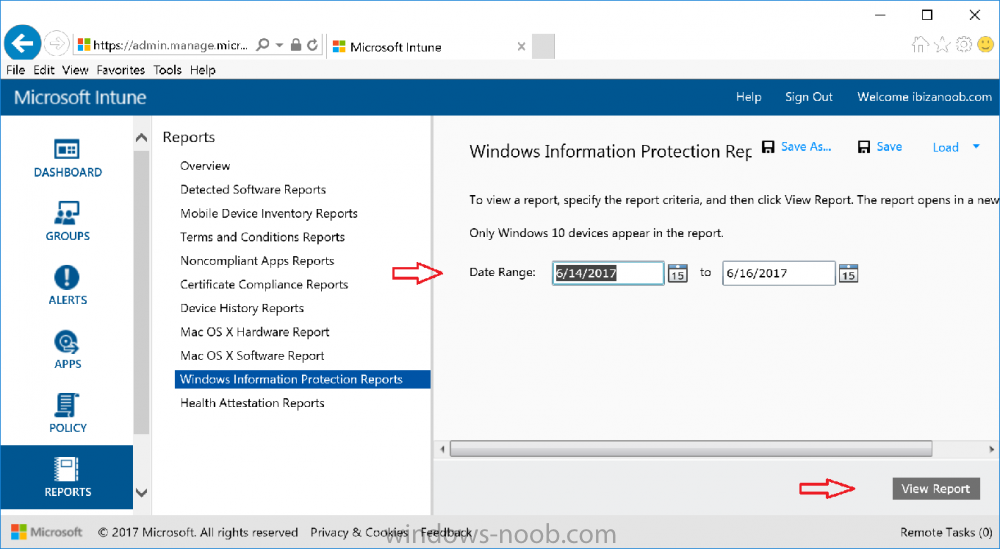


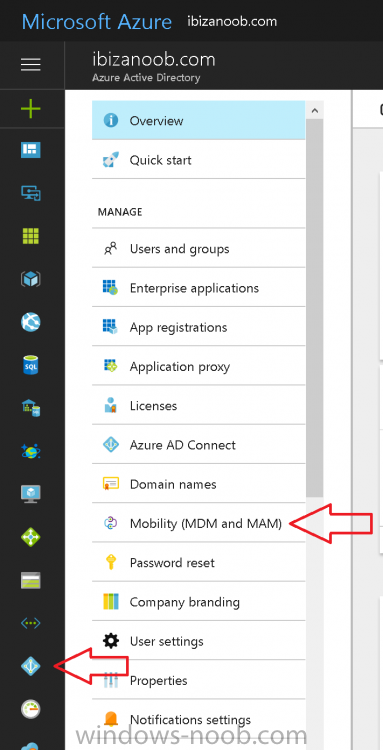
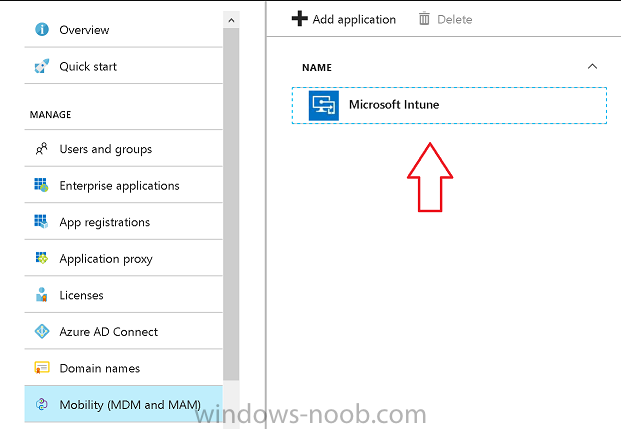
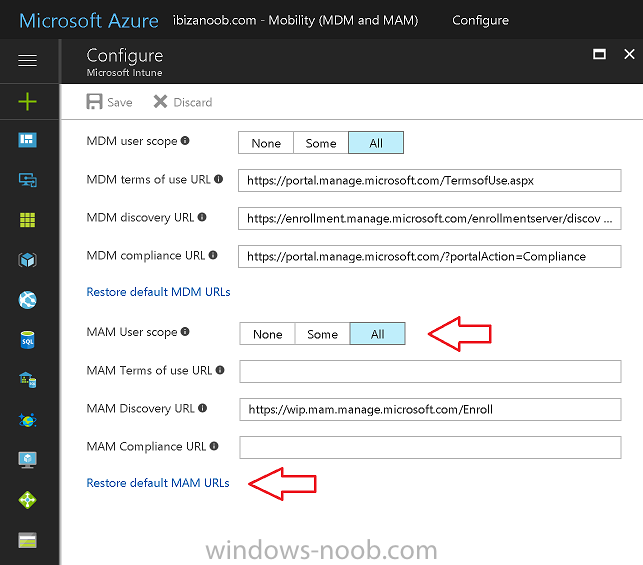
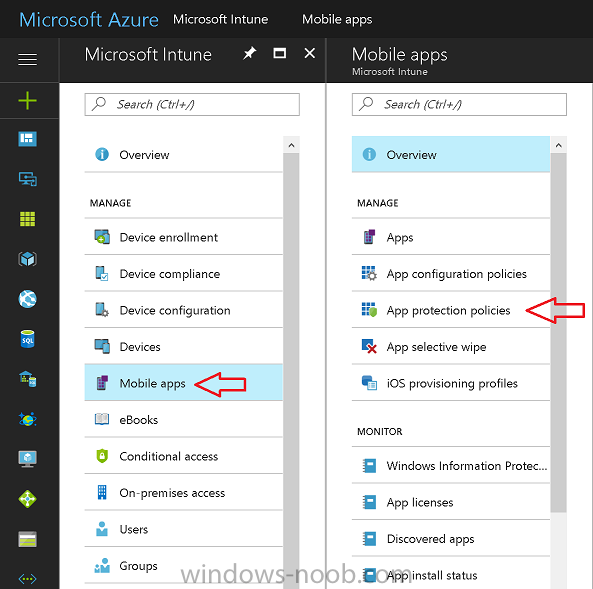
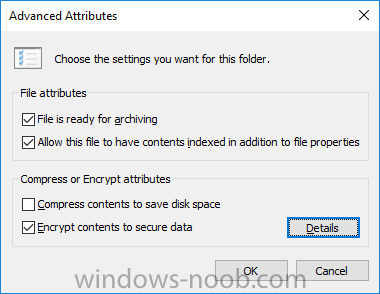
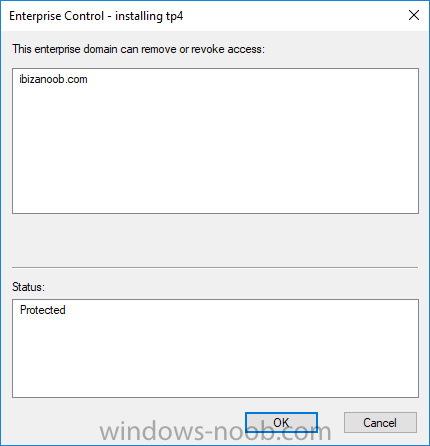
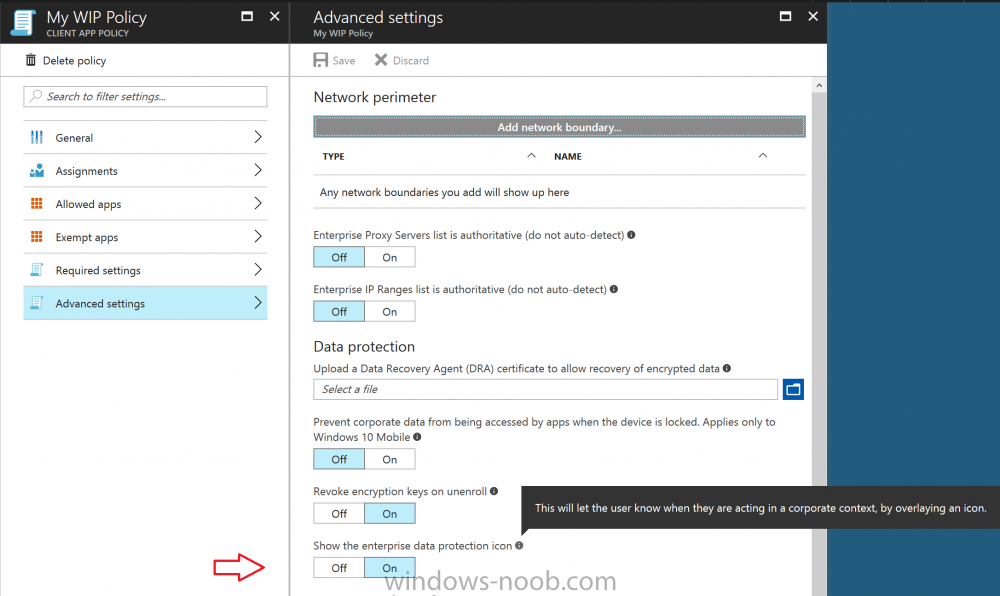

-
Introduction Here’s some links with videos of all the Microsoft Intune and Configuration Manager, Windows 10 & Office 365 ProPlus content @ Microsoft Ignite in Florida last month. Intune/ConfigMgr: Mobile device and app management overview with Microsoft Intune System Center Configuration Manager overview and roadmap Conduct a successful pilot deployment of Microsoft Intune Manage and secure Android, iOS, and MacOS devices and apps with Microsoft Intune Learn how to use Microsoft Intune with the new admin console and Microsoft Graph API Secure access to Office 365, SaaS and on-premises apps with EMS Manage and protect Office 365 mobile apps with Microsoft Intune Deploying and using Outlook mobile in the Enterprise Manage mobile productivity with EMS Windows 10 & Office 365 ProPlus: Microsoft 365: Modern management and deployment (general session with Brad and Rob) Overview: Modern Windows 10 and Office 365 ProPlus management with EMS Transition to cloud-based management of Windows 10 and Office 365 ProPlus with EMS Modernize deployment & servicing of Windows 10 & Office 365 ProPlus with EMS Secure Windows 10 with Intune, Azure AD and System Center Configuration Manager
-
Are you planning to deploy Microsoft Intune and looking for straightforward technical guidance to help you accelerate this effort? Please join us as we share our deployment experience working with customers from all over the world, covering Intune pilot planning, deployment and management. At the end of this session, you will have a solid foundation to deliver a successful Intune pilot deployment in your organization. The above is a session I did with Peter Daalmans @ Microsoft Ignite on Friday 29th of September 2017, please check it out especially if you are interested in Microsoft Intune. cheers niall
-
Introduction According to Microsoft, Microsoft Graph is: …your entry to automate things in the cloud via the Microsoft Graph API. This API gives you access to AzureAD, Excel, Intune, Outlook, OneDrive, OneNote, SharePoint, and more. Microsoft Graph is a RESTful web API that enables you to access Microsoft Cloud service resources. After you register your app and get authentication tokens for a user or service, you can make requests to the Microsoft Graph API. This API uses the following HTTP methods: Get Post Patch Put Delete For example, here is a Post action to RemoteLock a device: POST https://graph.microsoft.com/Beta/managedDevices/fd3e81ec-a7d0-4f35-af7c-1478213f56c7/remoteLock If you’d like to play with it right now then you can also check out Graph Explorer, which is a web based (web browser) gui for controlling Graph and it’s available here. OK that’s already a bit complicated for some people, so what does this mean in real terms for a Microsoft Intune admin that wants to automate things using PowerShell. In this guide I’ll show you step-by-step how to get up and running with Graph for Intune and how to begin automating actions using PowerShell. This is not for the feint hearted but I encourage you to take the time and effort to try this for yourself, you’ll be glad you did ! Note: In this guide I assume that you already have a Microsoft test Intune tenant setup and configured and that you have some PowerShell knowledge. At the time of writing (August 2017), Graph for Intune is still in Beta and is subject to change. Use of these APIs in production applications is not supported by Microsoft. Step 1. Download the sample PowerShell scripts Before you get started, you’ll need to download the PowerShell sample scripts. You can download the Graph PowerShell Intune samples from Github at the following address: https://github.com/microsoftgraph/powershell-intune-samples Make sure you have the latest scripts If you have the latest scripts, then skip this section. The scripts are updated from time to time, so if you downloaded them in the past, go to Github again and download the latest copy of the scripts, chances are that the scripts have been updated and that can mean bugs are fixed or behavior has changed. For example The following script Invoke_DeviceActionSet.ps1 had this content in June 2017 in the ManagedDevices section param ( [switch]$RemoteLock, [switch]$ResetPasscode, [switch]$Wipe, [switch]$Retire, [Parameter(Mandatory=$true,HelpMessage=”DeviceId (guid) for the Device you want to take action on must be specified:”)] $DeviceID ) The same script in August 2017 has been updated to include more ability param ( [switch]$RemoteLock, [switch]$ResetPasscode, [switch]$Wipe, [switch]$Retire, [switch]$Delete, [switch]$Sync, [Parameter(Mandatory=$true,HelpMessage=”DeviceId (guid) for the Device you want to take action on must be specified:”)] $DeviceID ) In addition there can be behavior changes within the script, for example in the below section (from June 2017) it invokes a RemoteLock action by default write-host “User” $User.userPrincipalName “has device” $Device.deviceName Invoke-DeviceAction -DeviceID $Device.id -RemoteLock -Verbose #Invoke-DeviceAction -DeviceID $Device.id -Retire -Verbose #Invoke-DeviceAction -DeviceID $Device.id -Wipe -Verbose The same script in August 2017 does not do any action by default, you’d need to un- comment the appropriate line if you want it to perform a specific action or just edit the script to your liking. write-host “User” $User.userPrincipalName “has device” $SelectedDevice.deviceName #Invoke-DeviceAction -DeviceID $SelectedDeviceId -RemoteLock -Verbose #Invoke-DeviceAction -DeviceID $SelectedDeviceId -Retire -Verbose #Invoke-DeviceAction -DeviceID $SelectedDeviceId -Wipe -Verbose #Invoke-DeviceAction -DeviceID $SelectedDeviceId -Delete -Verbose #Invoke-DeviceAction -DeviceID $SelectedDeviceId -Sync -Verbose What’s in the script samples ? The script samples are neatly organized into 15 different sections listed below: AppleEnrollment Applications AppProtectionPolicy Authentication CheckStatus CompanyPortalBranding CompliancePolicy DeviceConfiguration EnrollmentRestrictions ManagedDevices Paging RBAC RemoteActionAudit TermsAndConditions UserPolicyReport Within each section you’ll find one or more sample PowerShell scripts and there is a readme.md file included in each section which gives more details about what functions are contained in the scripts and what the scripts actually do. Step 2. Install the AzureAD PowerShell module The first time you attempt to run one of the scripts, a function within the script will check for the AzureAD PowerShell module and if not found it will prompt the user to install the module and it will then exit from the script. To avoid this, start PowerShell ISE as administrator, then issue the following command: Install-Module AzureAD After entering that command, you’ll get one or more popups asking if it’s OK to download and install NuGet, answer yes to all. and then it will start installing the module. You are now ready to test the scripts. Step 3. AzureAD admin versus target user When you run one of the sample scripts (for the first time, after installing the AzureAD module) you’ll get prompted for AzureAd credentials to access Intune resources, these are the credentials that you’d normally use to do administrative work in the Intune service in Azure. In this example you’ll use the Invoke_DeviceAction_set.ps1 script in the ManagedDevices section, open that script using PowerShell ISE as administrator. Click on the green triangle to Run the script. As you can see it prompts for the user principal name for Azure authentication. For this blogpost, I’m connecting to Azure using a user that has a Directory role of a Global Administrator. Tip: You can verify the directory role a user has in Intune, by selecting Users and groups – all users, user, Directory role. Global administrators have full control over all directory resources, if that’s not what you want you can customize the permissions using Limited Administrator and selecting the various options available. After entering the AzureAD user principal name, you’ll see a popup requesting permission to access various Intune resources, click Accept. The currently available actions in the Invoke_DeviceAction_Set.ps1 script are • RemoteLock • Retire • Wipe • Delete • Sync To use any of those actions on a device you’ll need to identify a target user (and their associated devices). To do this, enter the user principle name of that target user when prompted. This user is a regular user in Intune and not a Limited or Global Administrator. Step 4. Perform a Sync action Once entered, you’ll see any devices registered to that user, in this example, the specified user has 3 devices assigned. Press a number matching the device and… nothing will happen, the script exits. This is ok as the behavior of the script is modified to perform this way, let’s make a change so that instead of simply exiting, that it will perform a device Sync action. Locate line 599 in the script which contains this text and remove the hash in front of that line. Save the file. Before running the script again, verify the last sync time of the device you want to test automation against. You can verify last sync time by selecting All Devices, find the device in question and look at the Last check-in time column. Run the script again and notice the difference, now you are prompted if you want to sync the device. Go back into Intune and verify the Last Check-in time. It will have changed for that device. Success ! You’ve accomplished your first automation using PowerShell in Intune. Step 5. Perform a device Wipe Note: A Wipe will reset a device and remove all apps and data on the device, both Personal and Company owned data. Next, let’s try another action and one that would be very useful to Automate, that is the ability to remove data on a device. In PowerShell ISE, place a # infront of the Sync line again, and remove the # from the Wipe line. Save the changes. Run the script again, notice that you are prompted if you want to to wipe the device this time. and look what happens next ! and in the Intune service in Azure you can see this (Wipe Pending) Note: Just because you can see actions in a script does not necessarily mean that those actions will apply to your scenario, and they may infact generate an error, an example of that is the RemoteLock functionality which is not supported on Windows 10 desktop. Step 5. Perform a device Retire Note: a Retire action will un-enroll a device from Intune, and remove company data, meaning it is un-managed. All personal apps, data, photos on the device will remain untouched. In the screenshot below, you can see the Company Portal app installed on an Iphone. And below you can see the Retire action on that same iPhone. In this GIF you can see the line used for the Retire action, and then the fact that the iphone shows up as a device for the user. After running the action it no longer appears in the device list for that user as it has been removed from device management and is no longer enrolled. Summary In this blog post you learned a bit about Microsoft Graph, and how you can use it to automate the management of Intune using PowerShell. Awesome, really awesome. Recommended reading Sign up for Intune trial https://docs.microsoft.com/en-us/intune/free-trial-sign-up Get Intune PowerShell samples for Intune https://blogs.technet.microsoft.com/enterprisemobility/2017/05/15/get-intune-powershell-samples-for-microsoft-graph-api/ Download the scripts https://github.com/microsoftgraph/powershell-intune-samples Working with Azure Active directory Graph API from PowerShell https://blogs.technet.microsoft.com/paulomarques/2016/03/21/working-with-azure-active-directory-graph-api-from-powershell/
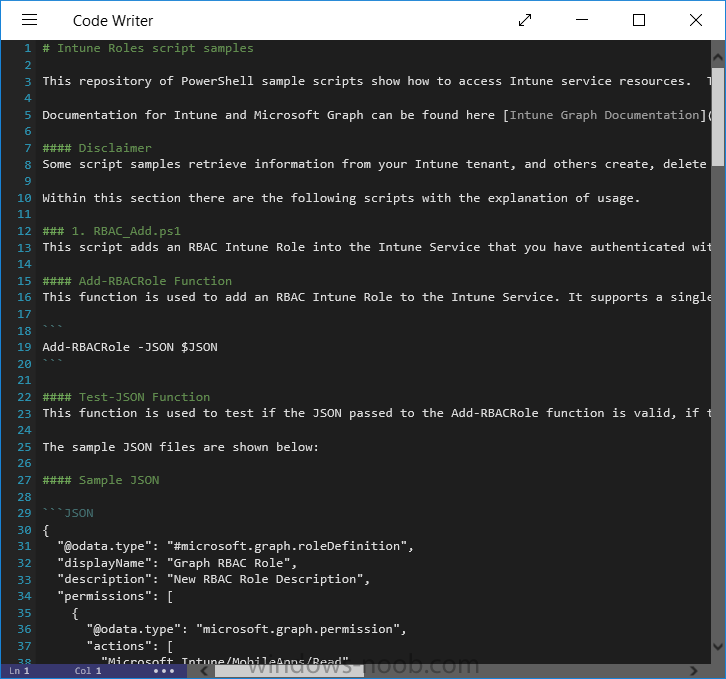

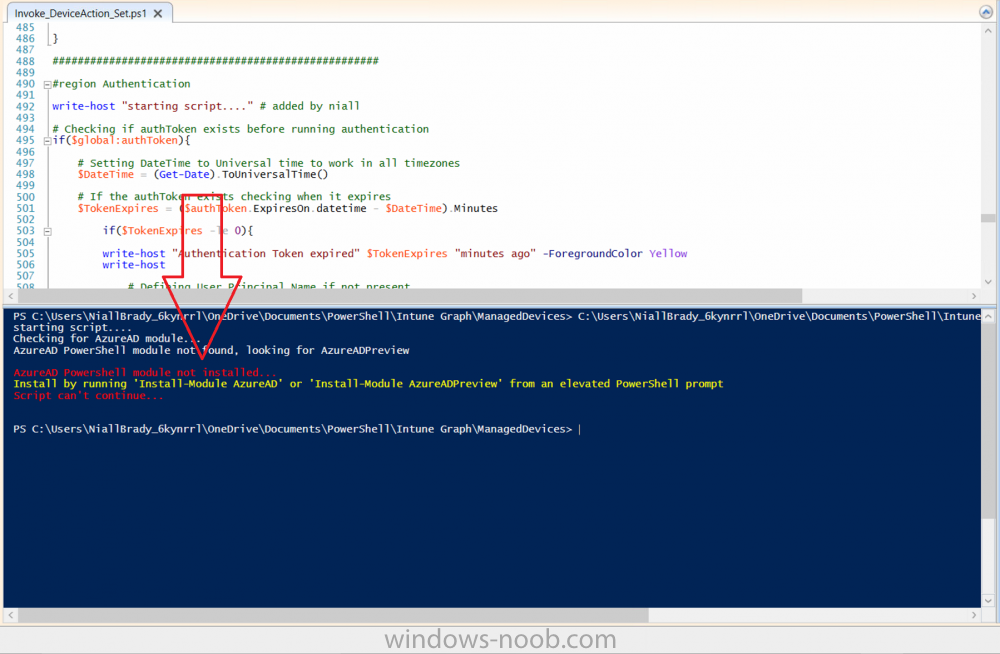
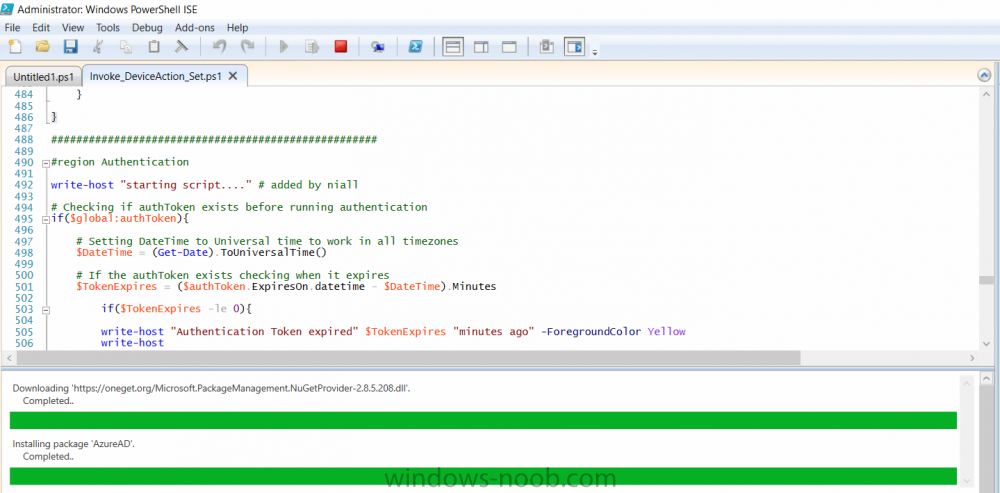

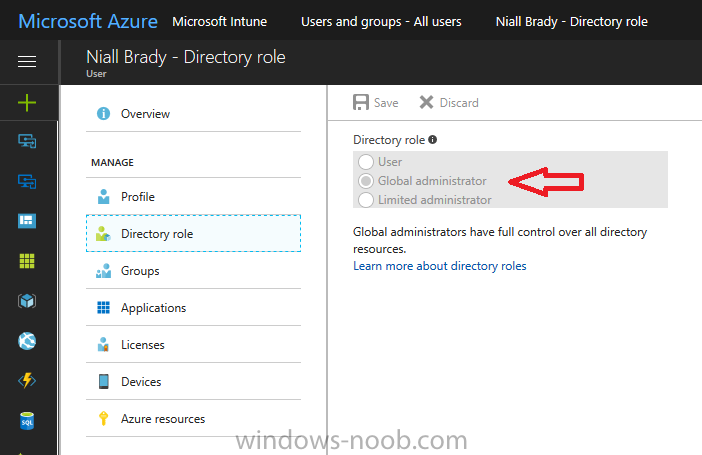

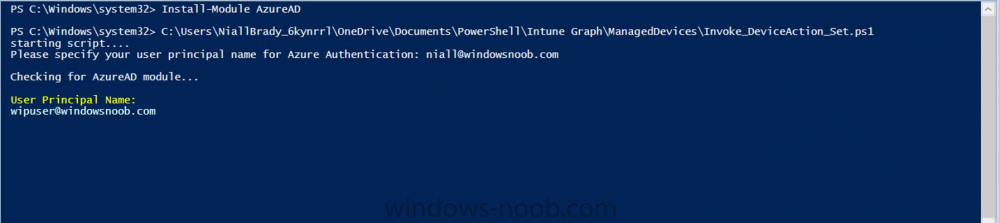
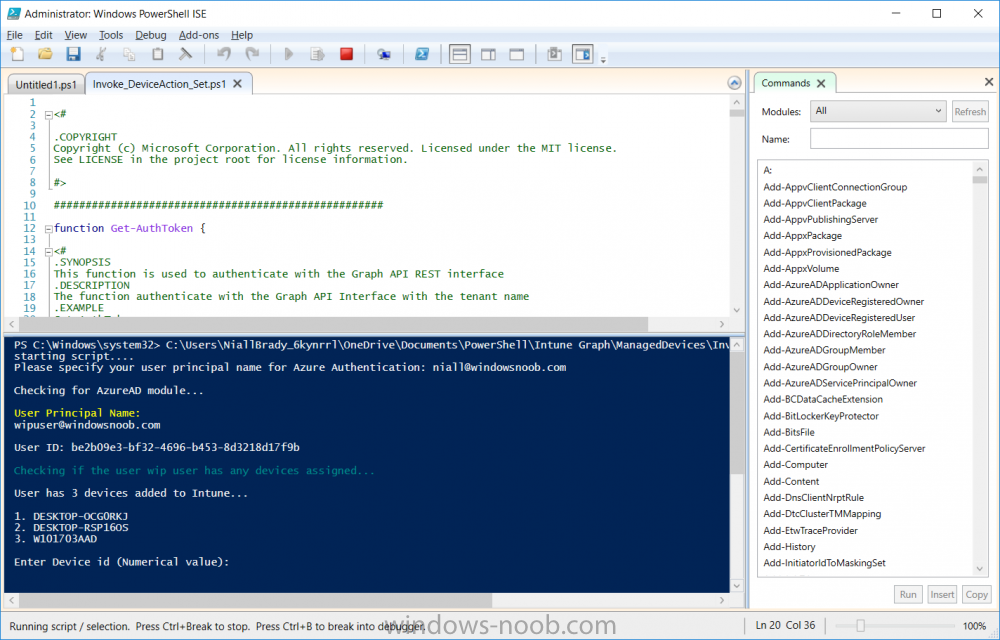
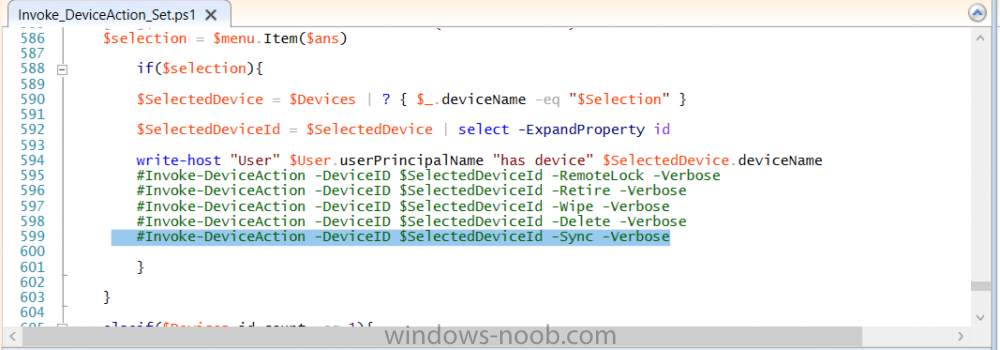
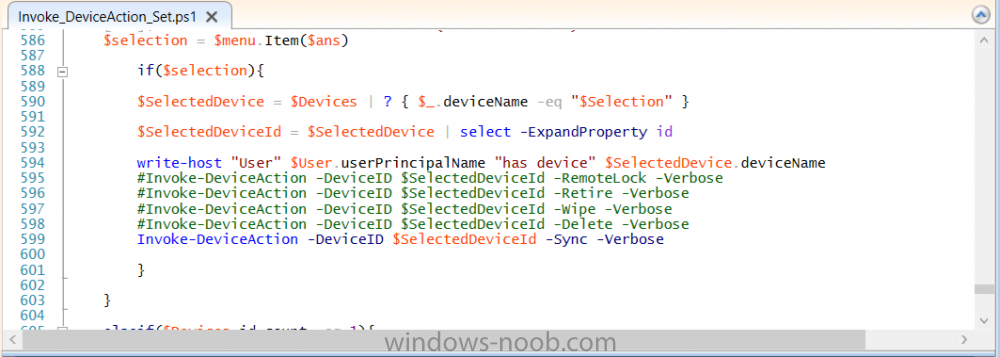
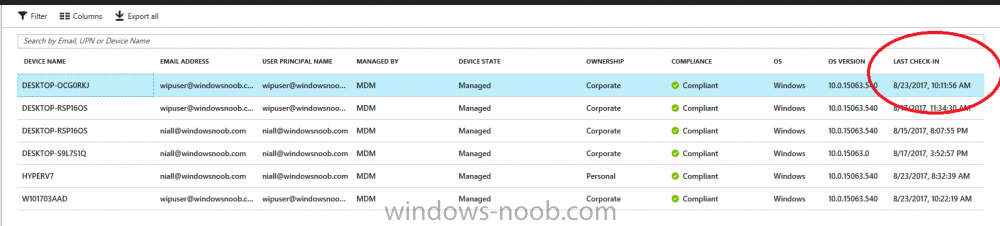
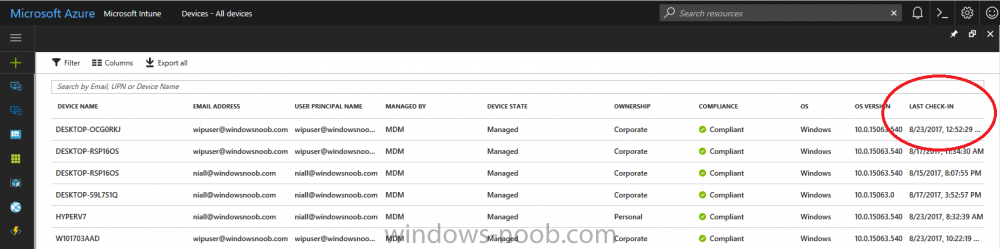

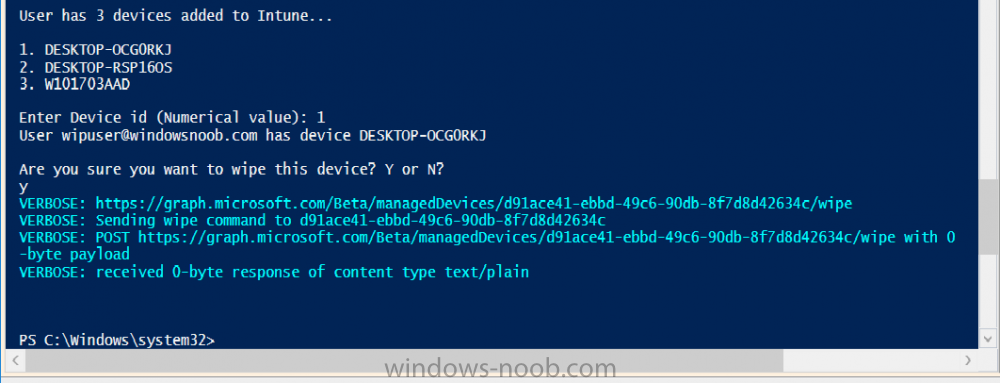

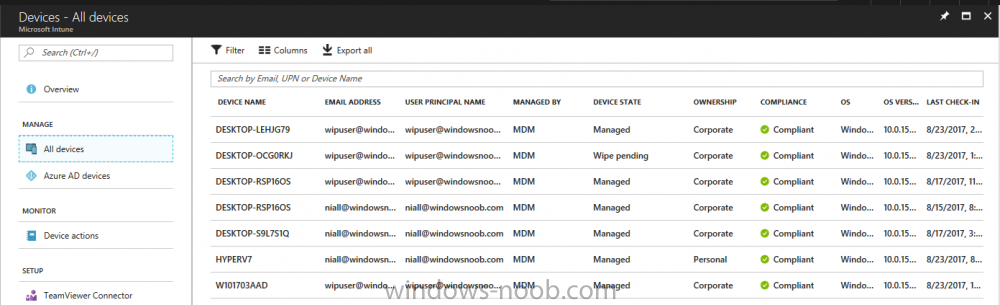


-
Introduction Windows users are used to seeing the familiar Windows Store icon on their Windows 10 devices, this gives them access to download free Windows store apps without credentials (for example the Microsoft Company Portal), or download paid apps using Microsoft live credentials. Microsoft Store for Business (formally known as Windows Store for Business) leverages the Windows Store concept and adds a new tab to that user experience to show apps to your users (that have been approved for use in your business) without the need for using an external Microsoft live account. Microsoft refers to the stores as follows: In this post I'll show you what you need to do to integrate MSFB into Intune in Azure and how to deploy MSFB apps to your users. Before you start though, be aware of the following: You must configure Intune as the mobile device management authority for your organization. You must have signed up for an account on the Microsoft Store for Business. Once you have associated a Business Store account with Intune, you cannot change to a different account in the future. Apps purchased from the store cannot be manually added to or deleted from Intune. They can only be synchronized with the Microsoft Store for Business. Intune synchronizes only online licensed apps you have purchased from the Microsoft Store for Business. Devices must be joined to Active Directory Domain Services, or workplace-joined, to use this capability. Enrolled devices must be using the 1511 release of Windows 10 (or later), in this guide I'm using Windows 10 Enterprise version 1703. Step 1. Login to the business store Login to the Microsoft Store for Business by signing in using the same tenant account you use to sign into Intune. If it's your first time there, you'll have an EULA to read and accept, it will look something like this. Your tenant name will be listed in the Microsoft Store for Business. Step 2. Associate your Microsoft Store for Business account with Intune In the Microsoft Store for Business, click on Manage (to the right of your tenant name), and in the new page that opens, click on Settings, then click on Distribute. Under Management Tools, you'll see Microsoft Intune listed and to the right. To activate MSFB with Intune, click on the Activate action. After activation, it will appear like so with a status of Active. Step 3. Configure Synchronization In this step, login to https://portal.azure.com and click on the Intune service. In Intune, click on Mobile apps, select Windows Store for Business (even though this is Microsoft Store for Business), and then click on the Enable (1), next click on Save (2), finally click on the Sync (3) button. You will get a notification that the sync has started and that it will take some time. Step 4. Synchronize Apps In the Microsoft Store for Business, you need to select some apps to sync otherwise no Microsoft Store for Business apps will appear in Intune. To do this, in the search field on the right side of the Microsoft Store for Business web portal, enter the name of an app (for example Skype) and press enter. The Search for Skype results will appear. In the list of search results displayed, select your chosen app. Info about the application will be displayed. Click on the Get the app button. Next click on the … beside the app, and choose add to private store. You'll be informed that the app is being added to your private store and that it can take up to 24 hours. After adding apps, you can review them in the Products and Services link under Manage and their status will be listed. Note: Even though the website states "Adding to private store (allow 24 hours to process)" it can actually take longer for those apps to appear in your private store, but be patient they will. After the apps appear in your private store it will look something like this. You can select an app, and you now have options to Manage or Remove from Private store. And any licenses associated with your Private Store apps can be reviewed in the Intune service, under Mobile Apps, App Licenses. Step 5. Assign apps in Intune Now that you've synced some apps from Microsoft Store for Business into Intune, you are ready to deploy (assign) some apps to users. To do so, login to https://portal.azure.com and click on the Intune service. In Intune, click on Mobile apps, select Apps. After sync has completed you'll see some pre-populated Microsoft Store for Business apps in addition to the apps you selected in the store. You can see these apps denoted with the Type field (Windows Store for Business app). Select your chosen app and that apps overview will be displayed. Click on Assignments to assign the app to a group of users then click on Select Groups and point it to a group of one or more users and then click on Select at the bottom of that blade. Next in the Group you selected, there are two drop down's as shown here, select your Assignment type (Available, Not applicable, Required, Uninstall) and License type (User licensing, device licensing) and click on Save. In this example you will make the Assignment type Available which gives the end user a choice in terms of installation, if you want to forcefully install it select Required. Step 6. Review the store on a Windows 10 device As a user that is in the Azure Group targeted with this assignment, login to a Windows 10 device. To ensure you have an up to date policy, trigger a sync with Intune via All Settings, Accounts, Access Work or School, Info, then Sync. Start the Windows Store by clicking on the Windows Store icon. Click on the hamburger icon and select your tenant (shown with a red arrow), note that the user you logged on to the Windows 10 device will be listed below that and you are not prompted for credentials in the Microsoft Store for Business. If your screen resolution is high, you won't see the hamburger icon but will instead see your tenant listed as a tab. And the apps you've made available are displayed, including their status (installed). Note: It may take up to 24 hours for your apps to appear (after you added them to the Private Store). Recommended reading https://docs.microsoft.com/en-us/intune-classic/deploy-use/manage-apps-you-purchased-from-the-windows-store-for-business-with-microsoft-intune https://docs.microsoft.com/en-us/microsoft-store/distribute-apps-to-your-employees-windows-store-for-business
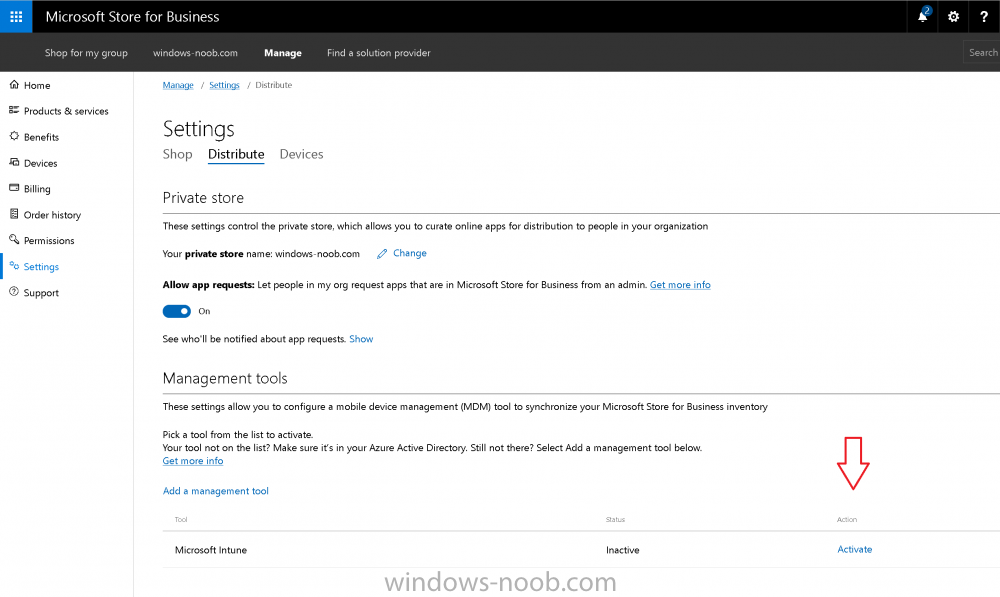
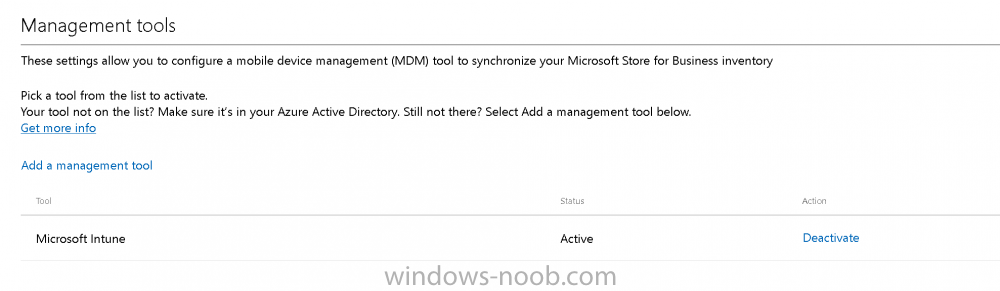
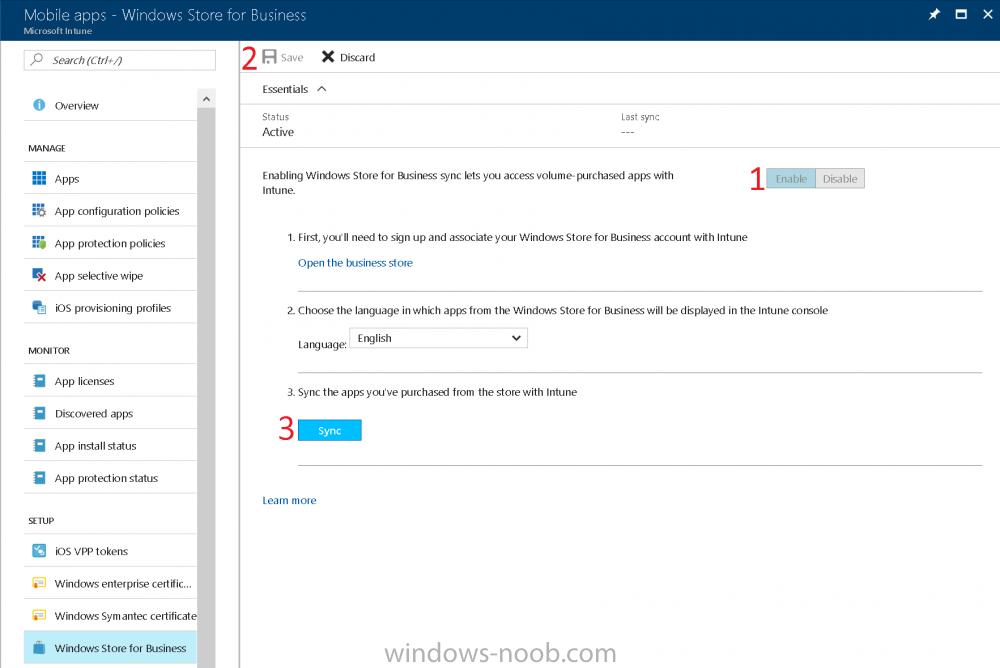
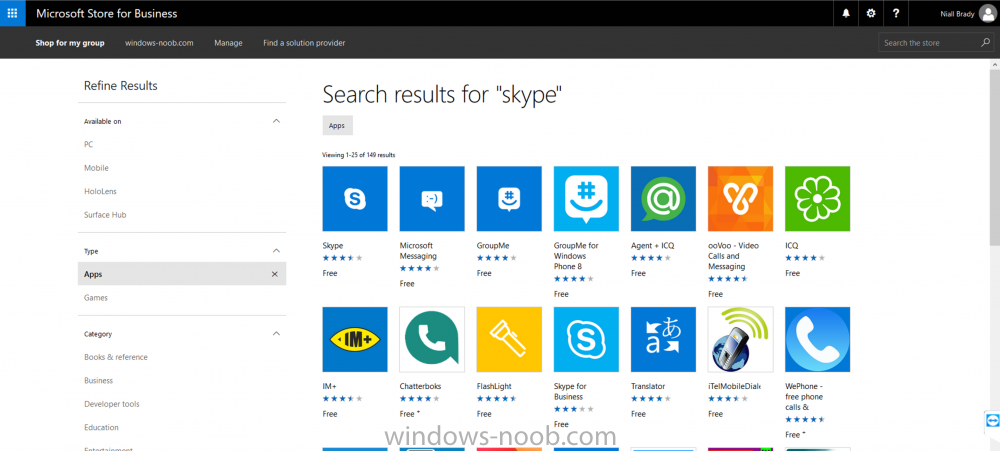
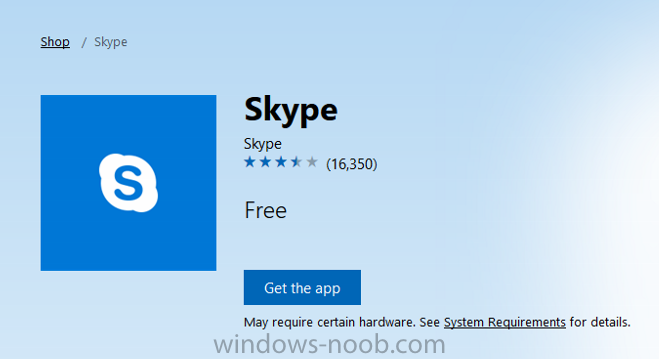
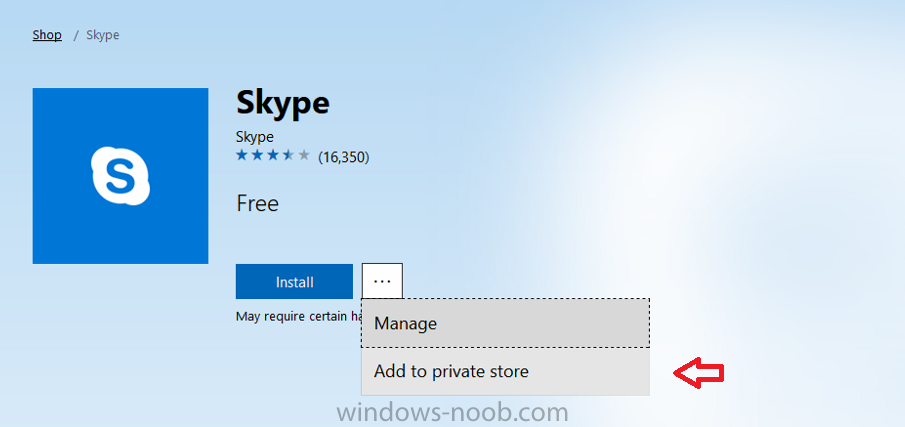
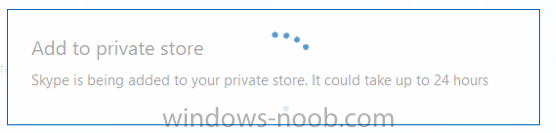
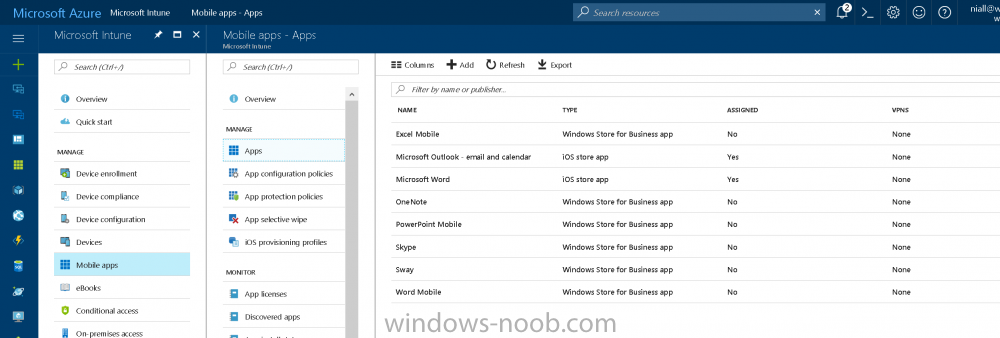

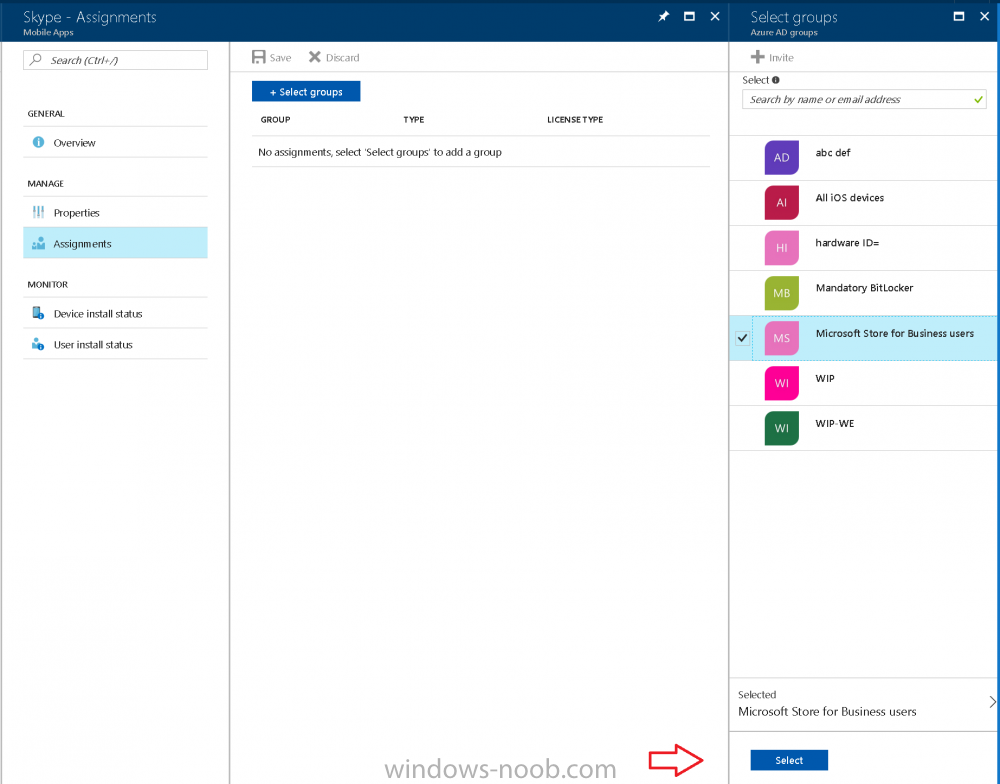
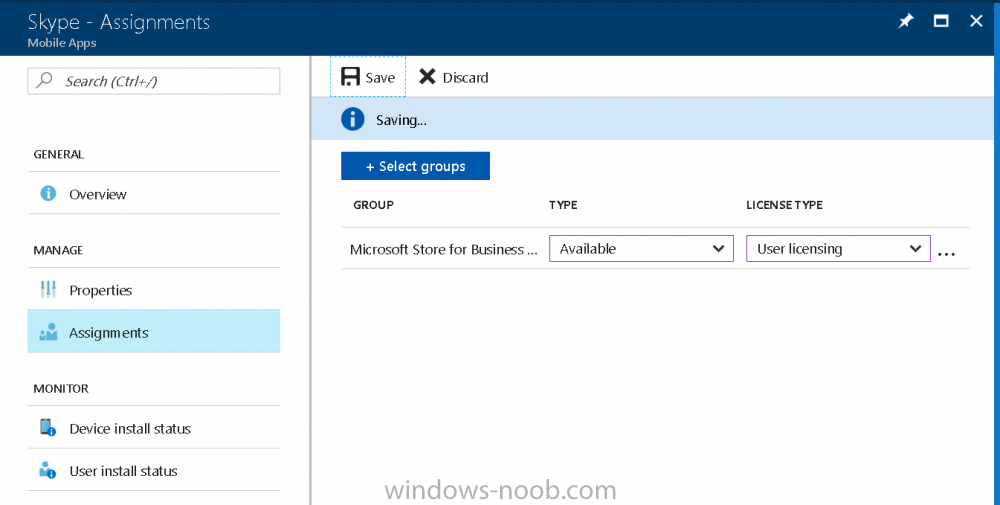
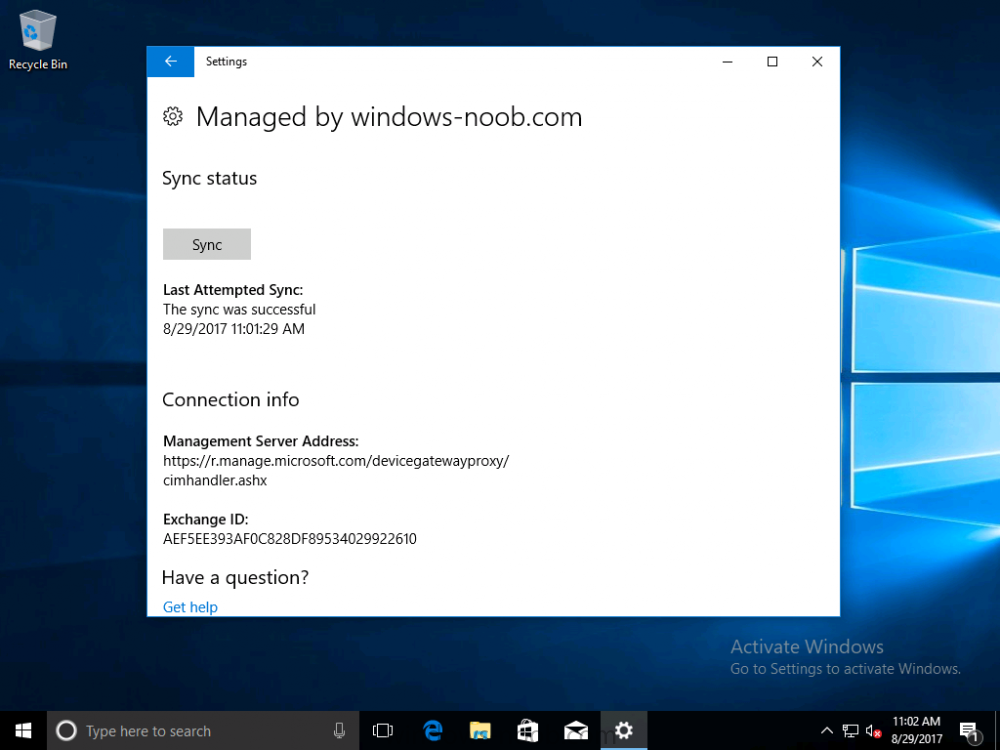

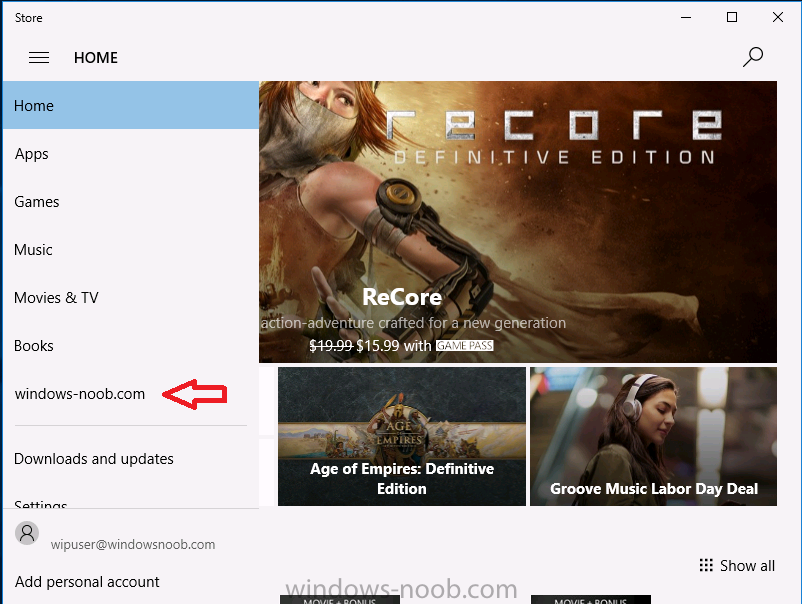
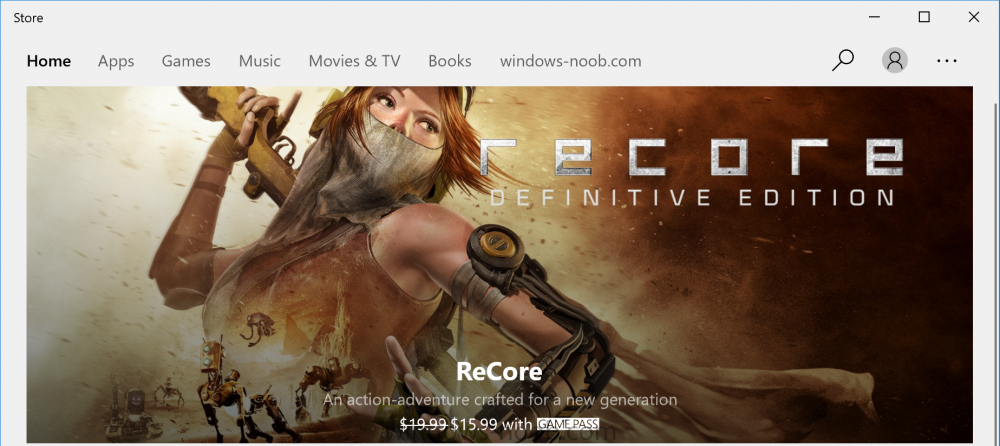
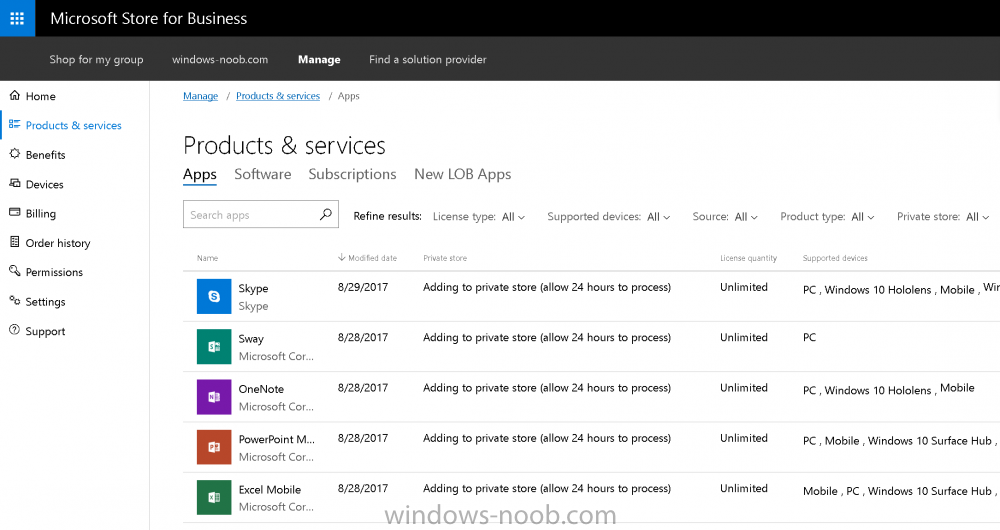
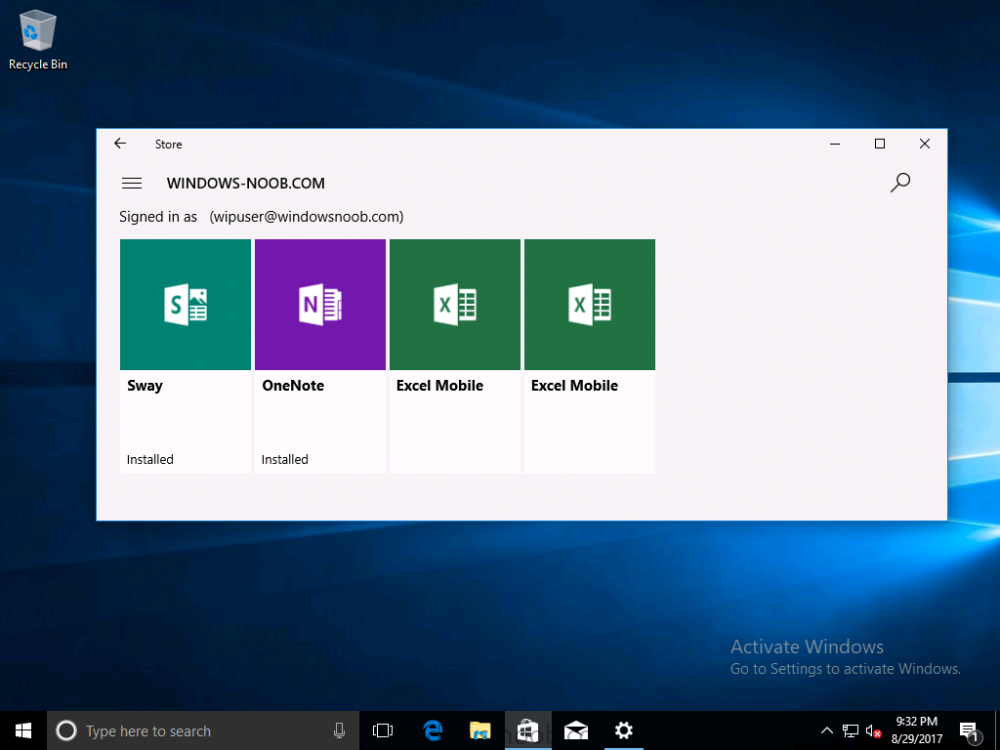
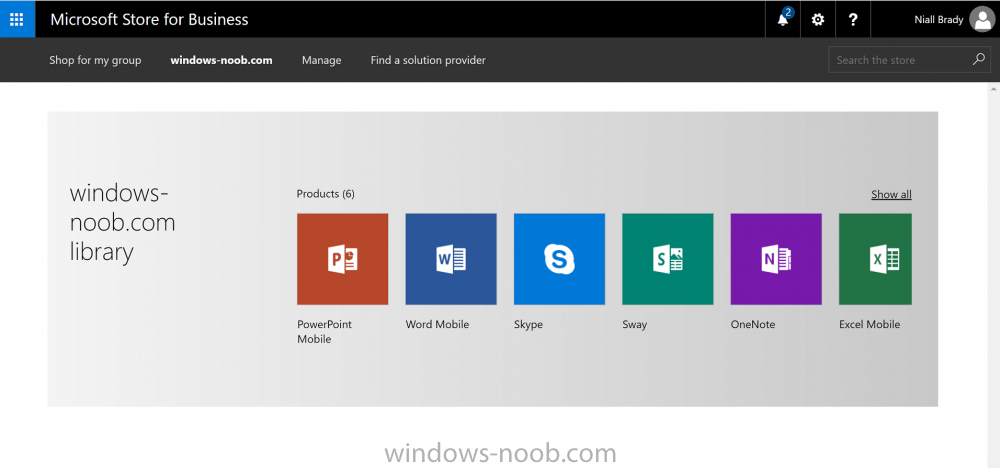

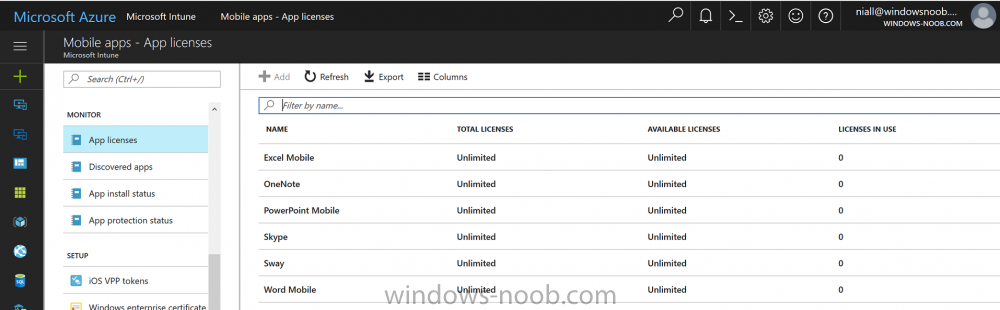
-
Please refer to this link from this point forward.
-
Introduction Security is a big focus for many companies, especially when it comes to data leakage (company data). Encrypting data on Windows 10 devices using BitLocker means that data is protected ("data at rest") . Microsoft Intune got yet more updates on June 30th, 2017, one of which was the ability to configure BitLocker settings detailed here. This ability was initially raised as a uservoice item. So let's take a look at how it works. Step 1. Create a Device Configuration Profile In the Azure Portal, navigate to Intune, and select Device Configuration, then click on Profiles and then click on Create Profile, and fill in the following details: Name: Configure BitLocker Settings Platform: Windows 10 and later Profile type: Endpoint Protection Note: Endpoint Protection is the profile type for BitLocker configuration, not to be confused with System Center Endpoint Protection. as shown below. Step 2. Configure Settings in the profile Next, in the Windows Encryption pane that appears, make your choices for Windows Settings, Set the Require devices to be encrypted (Desktop only) option to Enable. Make note of the note (the 'i', you can hover over it to see the info it contains), and I've bolded part of that statement below: So by requiring BitLocker encryption, your users will need to confirm the above prior to encryption taking place. Hopefully in the future we'll be able to automate it 100% so that no user interaction is required. For BitLocker base settings, set Configure encryption methods to Enable and then set the desired encryption level via the drop down menus for each drive connected. For BitLocker OS drive settings make your choices after setting Require additional authentication at startup to Enable. Note: For Enable OS drive recovery, although it states that you can Save BitLocker recovery information to AD DS it actually saves the recovery information to Azure AD if you enable the option (and you should). In other words, if you want to be able to retrieve a BitLocker key from an Azure AD and MDM enrolled device, make sure to Enable OS drive recovery and Save BitLocker recovery information to AD DS. For BitLocker fixed data-drive settings, you can deny write access to drives not BitLockered by enabling the option. And for BitLocker removable data-drive settings, make your choices. Once you've finished configuring the settings, click on OK and then click on Create, to Create the device configuration profile. Step 3. Assign the profile to a group Now that you've created the profile, you need to deploy it (assign it) to a Group containing Windows 10 devices. Select the profile created above, and click on Assignments, next click on Select groups to Include. Select a previously created Group (or groups if you wish), I selected one which I previously created called BitLocker Configuration but you can select whichever Group you want, and then click on the Select button at the bottom of that pane, if it's not visible, zoom out (browser zoom). Finally, click on Save to save the changes. If you haven't done so already, add some Windows 10 Device members to the Group. Step 4. Monitor the device configuration on a Windows 10 device Login to a MDM connected (and in this case Azure AD joined) device that is not yet encrypted, and trigger a Sync. To trigger a policy sync, select All Settings Accounts, select Access Work or School, select your MDM account and click on Info. Next, click on Sync Once the sync is done you should see an Encryption Needed notification in the systray. Click on the notification and you'll see the following screen. Select I don't have any other disk encryption before clicking on Yes. and off it goes... And you can open an administrative command prompt to verify the encryption algorithm using the following manage-bde -status As you can see from the above, encryption is in progress and the Encryption method matches the XTS-AES 256 setting selected in the device configuration. After it's done encrypting, you'll be notified. And in Windows File Explorer you can see the BitLocker icon on the operating system drive. Step 5. Verify device is configured with BitLocker in Azure At this point trigger another Sync on the device. After the sync is complete, click on the Device configuration profile, and select Device status as shown below. Devices targeted by the profile will be listed along with the Deployment Status of the configuration profile. If the user has allowed BitLocker to complete the deployment status will be listed as "Succeeded" as shown below. If the user did not start encryption (or if there was some other problem), it will be listed with a Deployment Status of "Error". If the Deployment Status is listed as Error, you can click on the device listed, and it will take you to the devices' properties. From there click on Device configuration and then click on the Device Configuration error on the right side of this screenshot. Here you see that it mentions the user needs to click on Yes to start the encryption, so it's likely (in this case) that the user ignored the notifications which is why an error is reported. To enforce this, or rather to force the user to do what we want (in regards to starting the BitLocker encryption via the notification), please see the comments in the summary at the bottom of this guide. Step 6. Retrieving the BitLocker key as the admin in Azure AD To locate the BitLocker protector key, select the User that enrolled into MDM, and click on Devices. Then select the device in question. The BitLocker key id and BitLocker recovery key will be listed. Which can be double checked against the actual computer using this command (in an administrative command prompt on the client computer that is BitLocker encrypted) manage-bde -protectors -get c: Note: If the user un-enrolls the device, the BitLocker recovery keys will be removed from Azure AD. Step 7. Retrieving the BitLocker key as the user The user can also check their BitLocker keys on any of their enrolled devices by clicking on Settings, Accounts, Access work or school, highlight the connection, and select Manage your account or by going to https://myapps.microsoft.com in a web browser and clicking on their username, and then clicking on Profile, select the device and then click on Get BitLocker Keys. From there they can click select the device in question, and click on Get BitLocker Keys and the BitLocker keys will be listed Note: If you want to automate this and remove user choice then use the windows-noob.com custom MSI in Part 2. Recommended reading https://docs.microsoft.com/en-us/intune/endpoint-protection-windows-10 https://docs.microsoft.com/en-us/windows/device-security/bitlocker/bitlocker-management-for-enterprises https://en.wikipedia.org/wiki/Data_at_rest https://docs.microsoft.com/en-us/azure/active-directory/active-directory-conditional-access https://nhogarth.net/2017/07/17/intune-denying-access-to-windows-10-without-bitlocker-enabled/ https://blogs.technet.microsoft.com/home_is_where_i_lay_my_head/2017/06/07/hardware-independent-automatic-bitlocker-encryption-using-aadmdm/ Summary It's great that we've finally got the ability to enable BitLocker in Intune but forcing encryption is not that straight forward. To force your users to be compliant you can either use Conditional Access (1) to deny those machines access to email and associated office applications unless they are encrypted, to do that you'll need to configure a Device Compliance policy (2) to verify that the device is encrypted, and based on that the user can access the applications specified. Or, you can automate the encryption like I do in Part 2 of this series of blog posts about BitLocker in Intune. (1) Thanks Jan Ketil Skanke (2) Thanks Nick

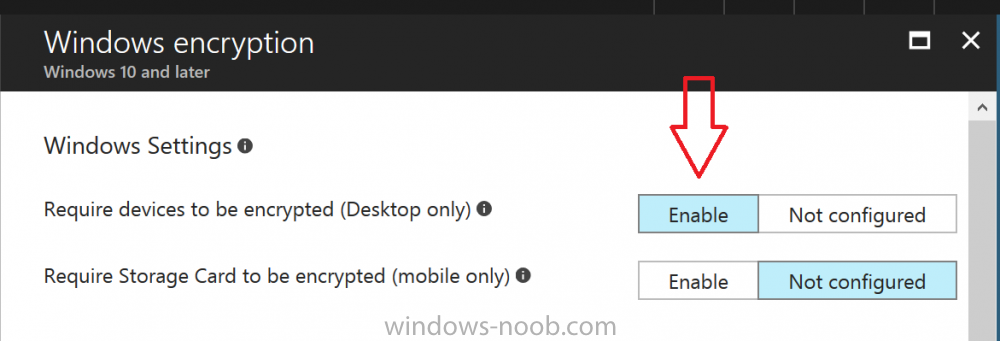
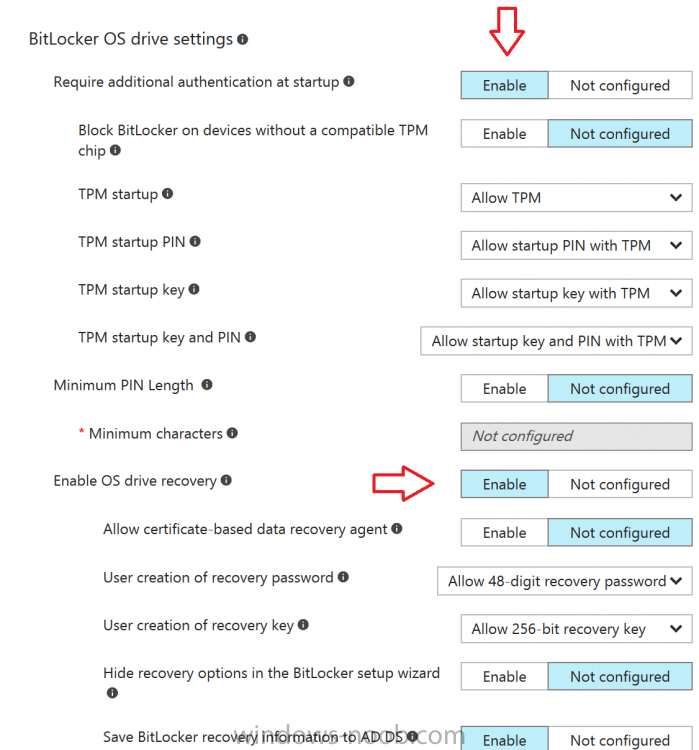
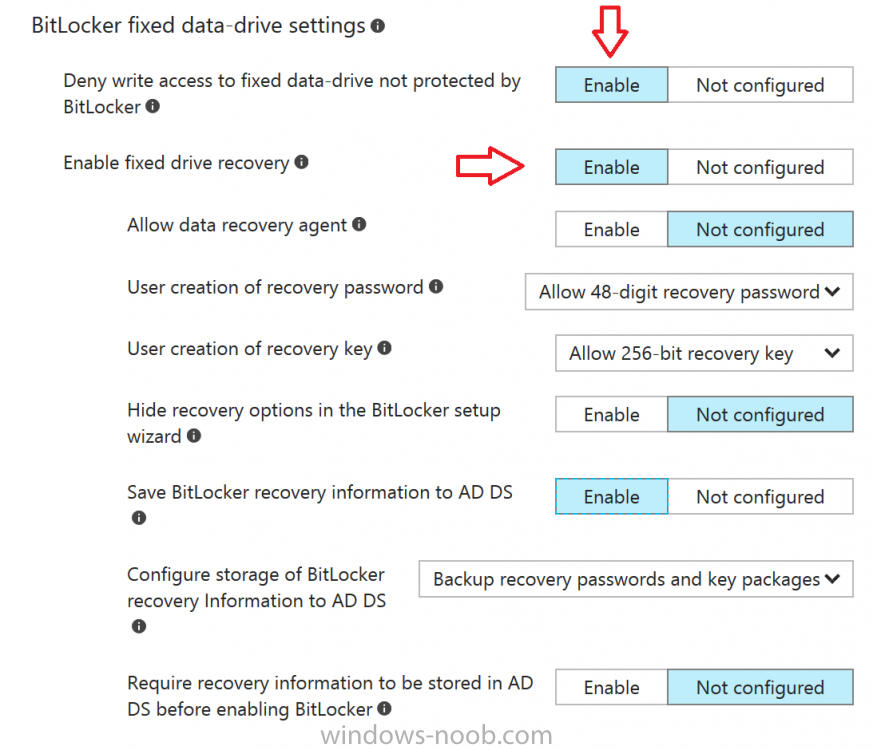

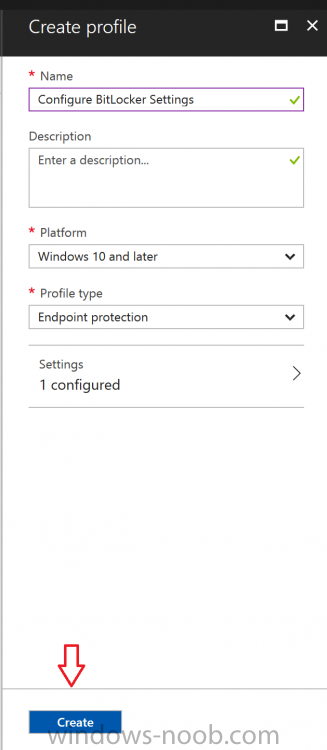
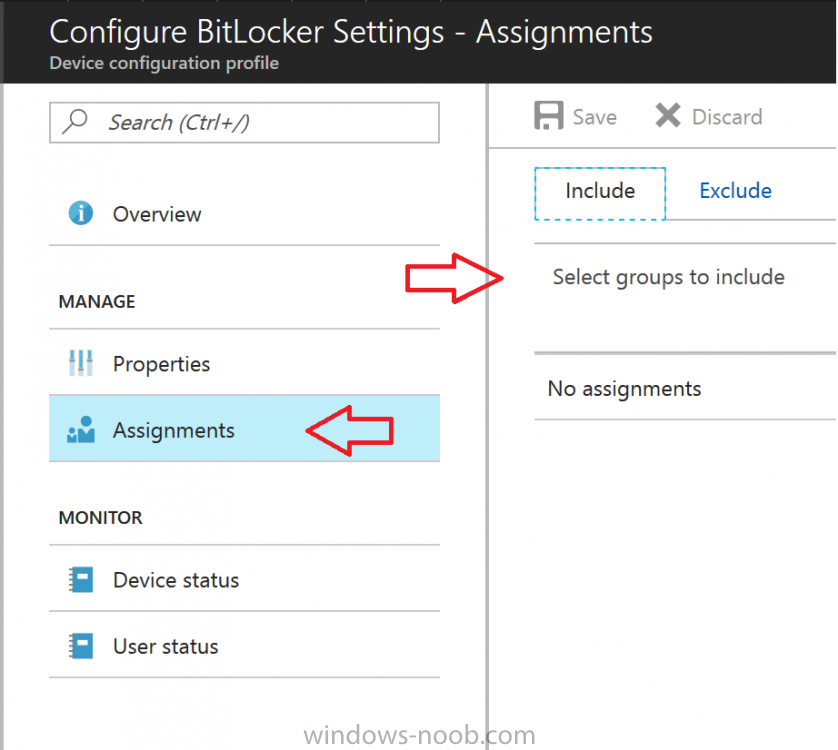
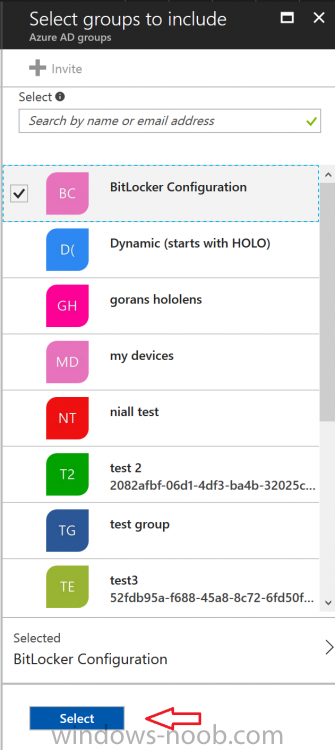

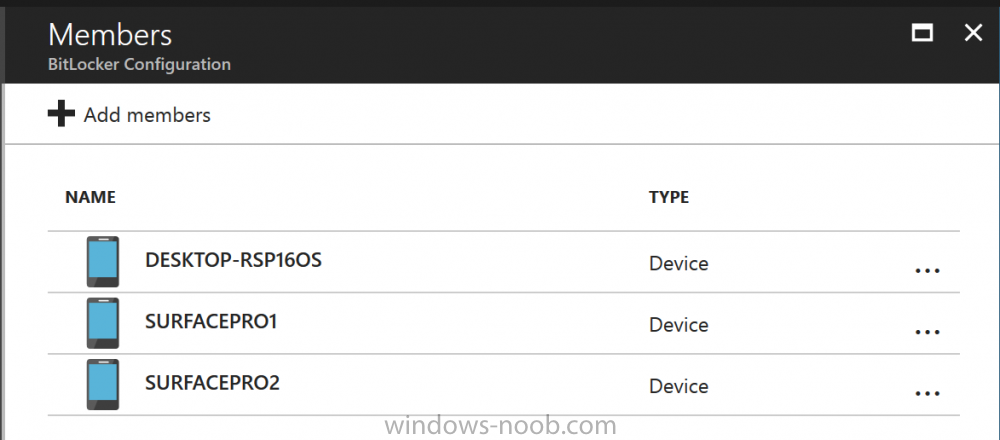
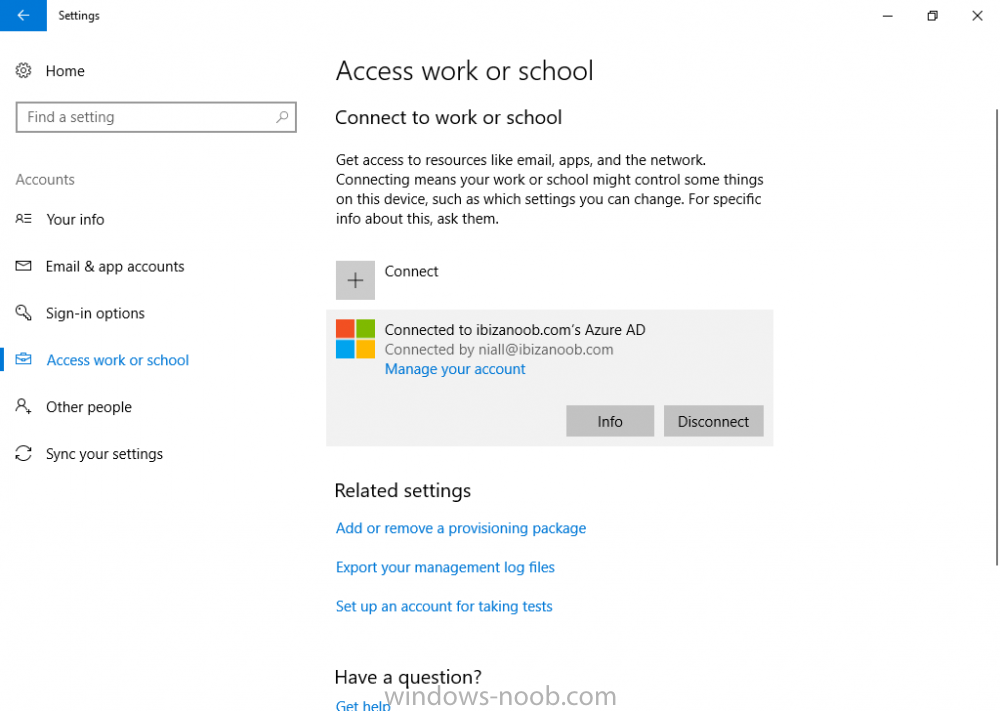
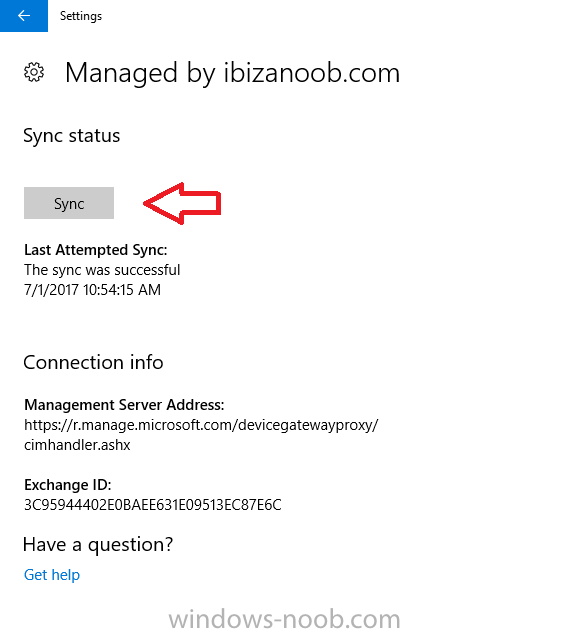
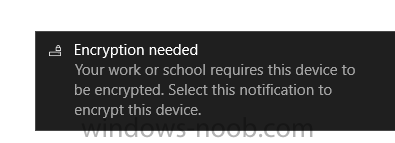

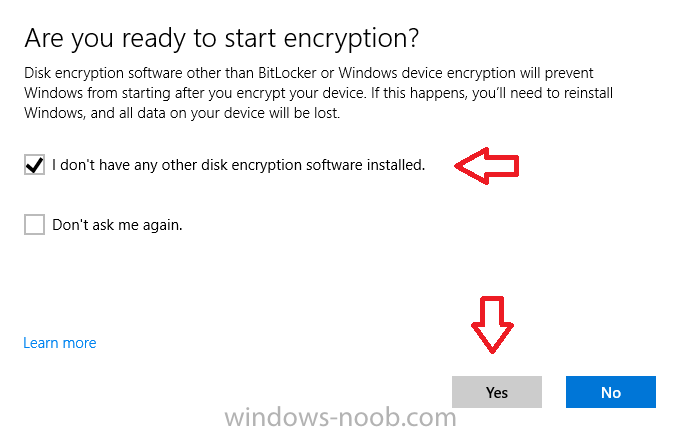
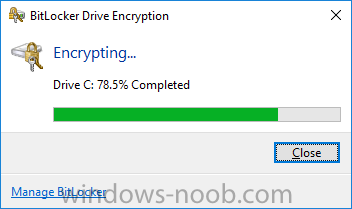

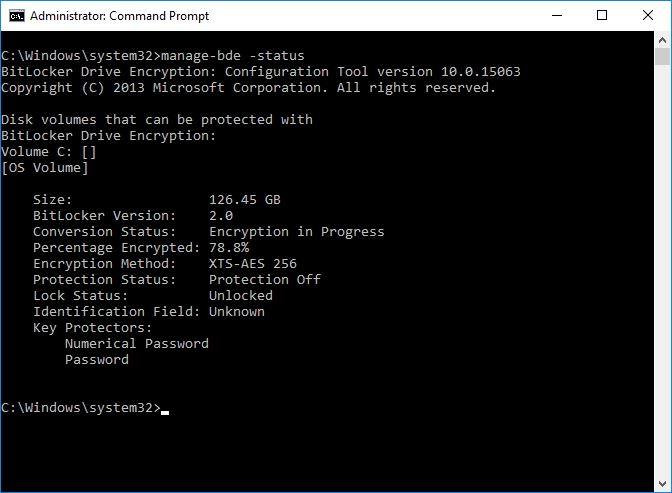
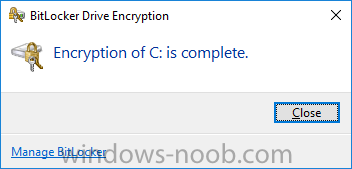
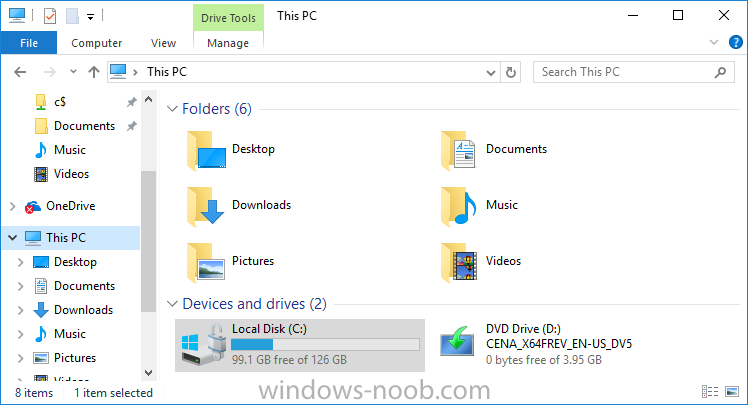
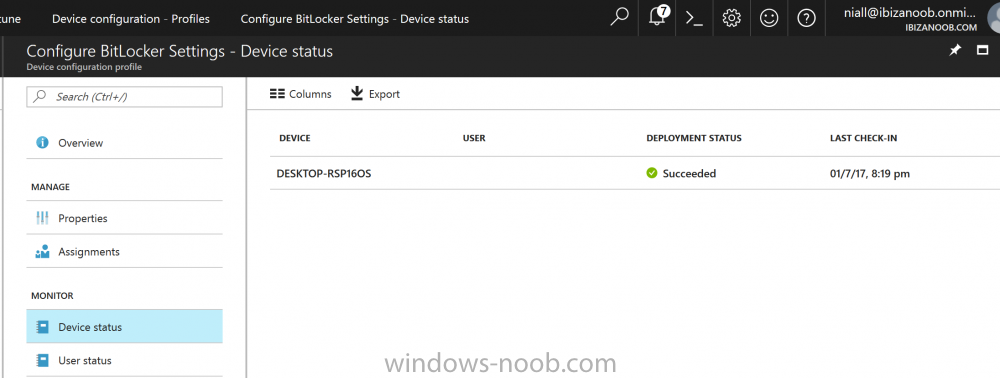
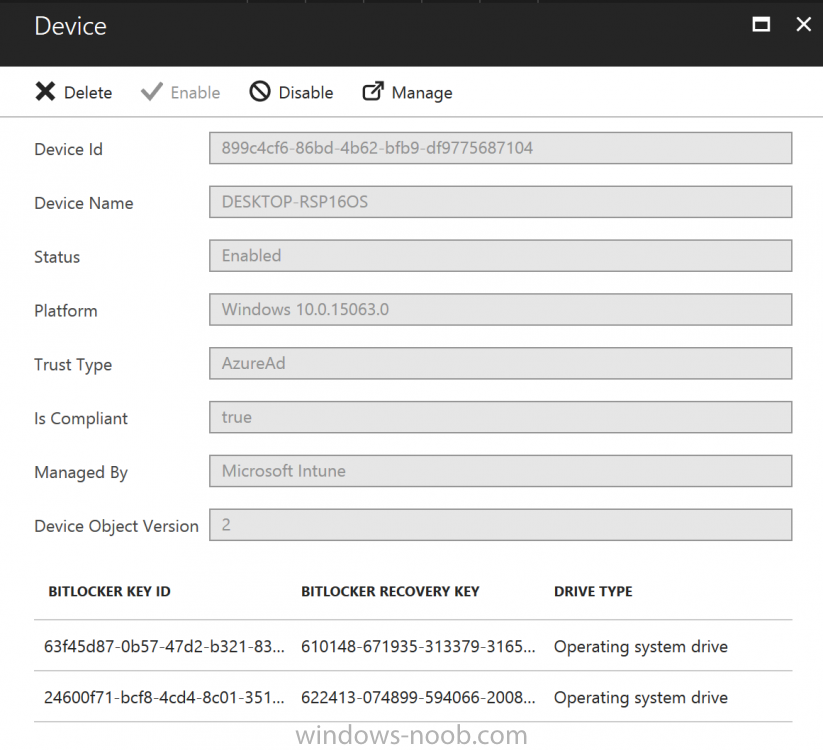
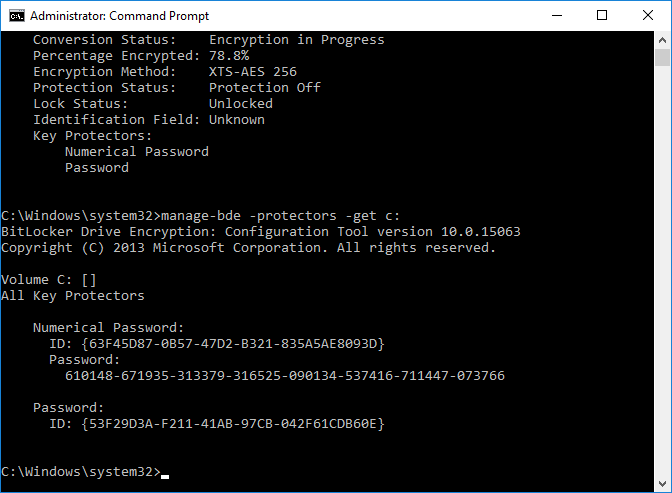
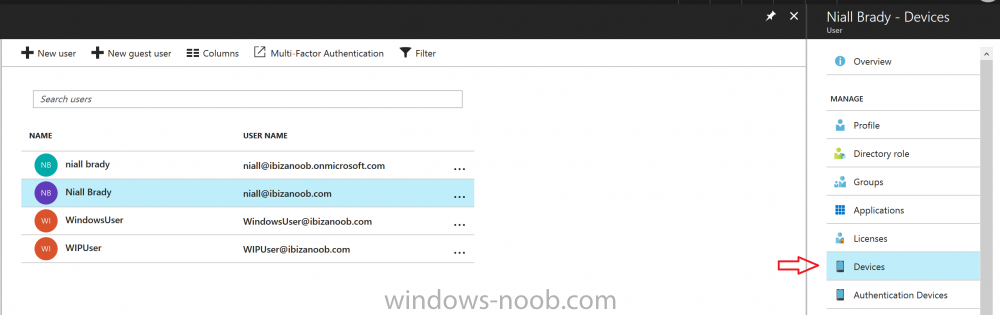
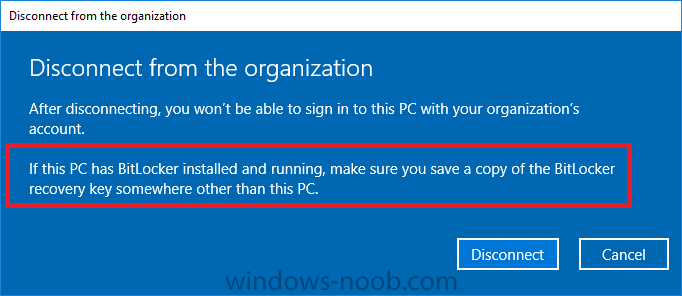
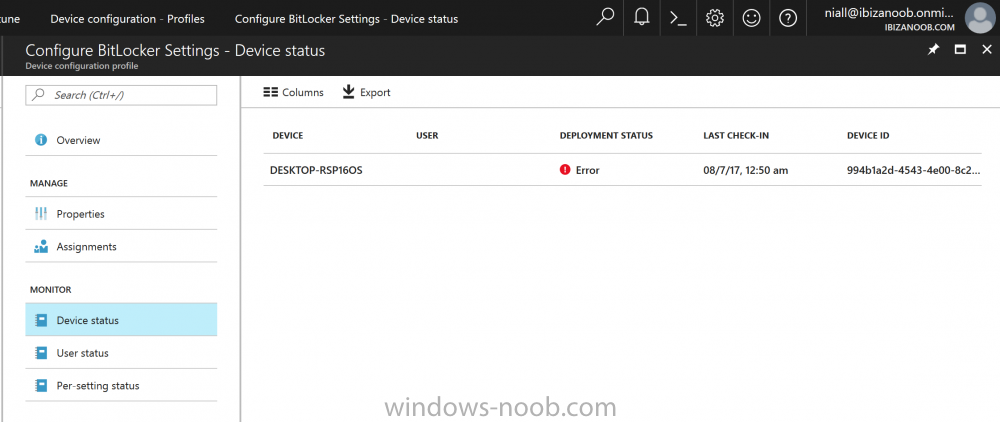


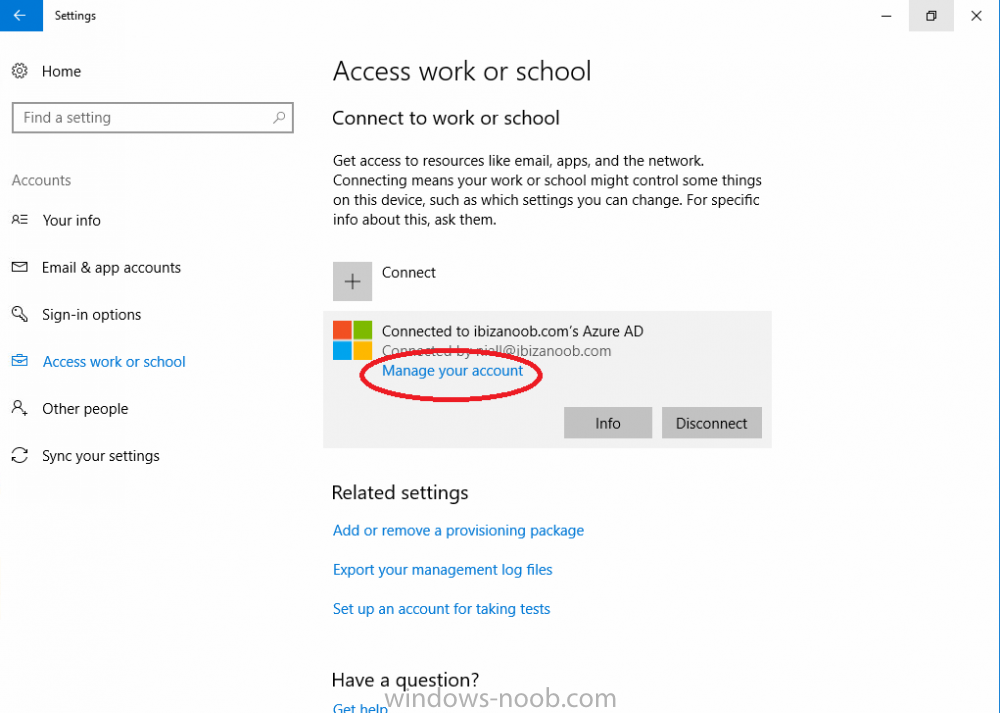
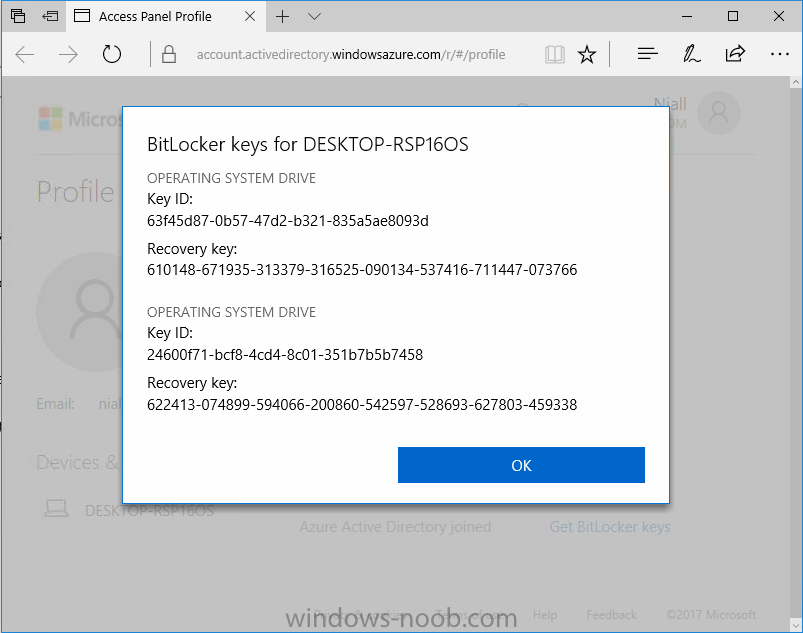
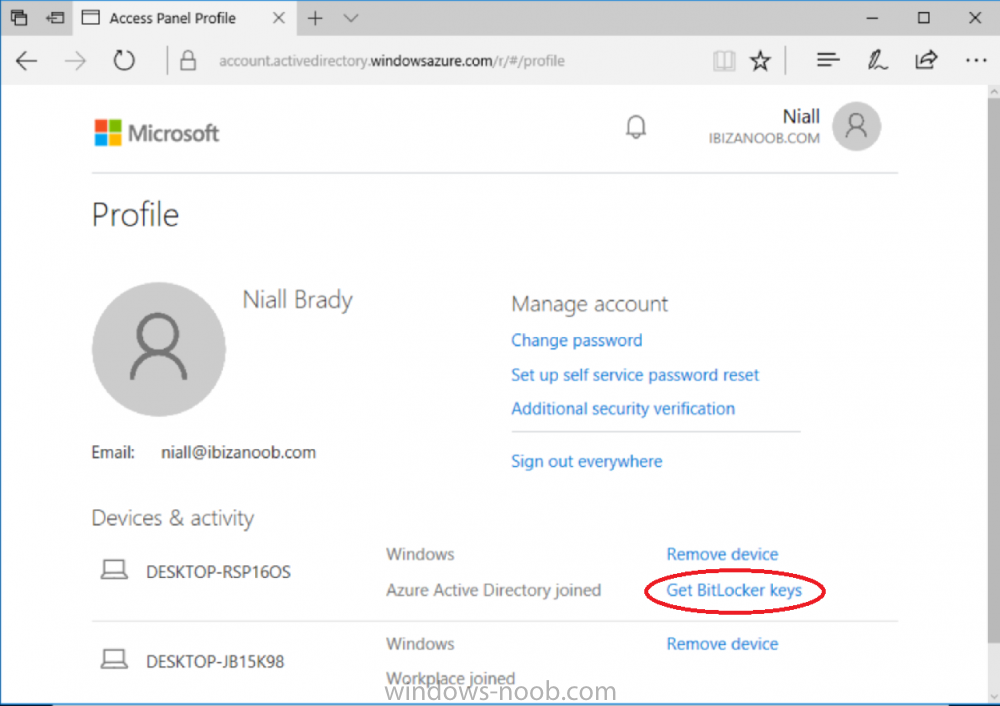
-
 Good day everyone, I would like to pick the brain of the proverbial community think-tank here on the forums. The product We are looking at purchasing a number of (what I am calling) WInBooks for students (Dell 3180's, Lenovo N22, etc). These are basically Windows 10 versions of their ChromeBook counterparts. 11" screens, Celeron/Pentium procs, 4GB RAM with 64/128GB SSD's...and wireless only. The IDEAL solution Generally speaking, I think the solution to provisioning these would be using InTune, but that is not on the table due to budgetary reasons. As such, I do not have CM setup as an MDM. The more likely solution Use WICD and create a provisioning package that we apply when the new laptops are first turned on...apply SharedPC settings, wireless profile, domain join, etc. The concerns/problems We like to image things that come in for a number of reasons...cleans off bloatware from the mfg's, install organizational specific software, customize other settings, etc...however, with most of these devices only having wireless cards and no dedicated NIC, it takes a couple more hoops to jump through in order to image them (currently just using a USB drive). Using WICD to create a provisioning package that we apply at first boot is the simplest solution, but it leaves all the mfg's software installed, as well as trial software that gets in the way. Using a USB drive for OSD gives us a clean laptop and software we want installed, but still leaves us needing to do something about the wireless profile and domain join. Theorycrafting My initial thought was to use DISM to apply a provisioning package(s) at various steps in the TS in order to try and automate the process via TS. For example, first apply a package with the wireless profile immediately after the image is applied, and then during the software installs, apply another package with the domain join (no idea if this would work yet, as I have yet to test it)...this would be contingent upon the wireless profile being applied first, and actually connecting to the network during the Install Applications portion of the TS...and I have no idea if that would work. What else should I take into consideration? Has anyone else dealt with something similar? Perhaps there is a more simple solution that I am missing (can't see the forest for the trees)? All input is appreciated! Thanks!
 -
Recently setup Intune with SCCM integration. Now I would like to setup device collections based what division of the company that the device works for. Looking for some help on creating a query to sort the devices registered in Intune into device collections based on an ad group that the device owner is a member of. Example. User A is a member of AD Group - Company A. User's A's mobile device should be in collection A User B is a member of AD Group - Company B. User's B's mobile device should be in collection B