Search the Community
Showing results for tags 'SCAC'.
Found 8 results
-
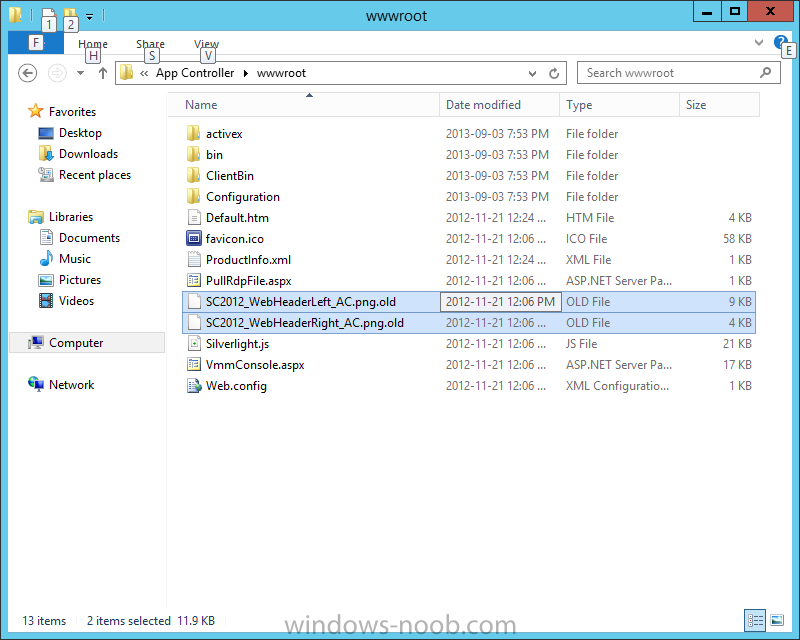
 Customize the Organization LogoYou can customize the organization logo of the App Controller console. To customize the organization logoNavigate to the website root of the App Controller installation directory. By default, this is %PROGRAMFILES%\Microsoft System Center 2012\App Controller\wwwroot. Create a backup of the default organization logos by renaming the files as follows: a. Rename SC2012_WebHeaderLeft_AC.png to SC2012_WebHeaderLeft_AC.png.old b. Rename SC2012_WebHeaderRight_AC.png to SC2012_WebHeaderRight_AC.png.old Copy your logo into the wwwroot folder. The images must meet the following requirements: Location: Top Left Image Name: SC2012_WebHeaderLeft_AC.png Size: 287x44 Location: Top Right Image Name: SC2012_WebHeaderRight_AC.png Size: 108-16 The logos that you can change appear at the top of the App Controller site. SC2012_WebHeaderLeft_AC.png SC2012_WebHeaderRight_AC.png
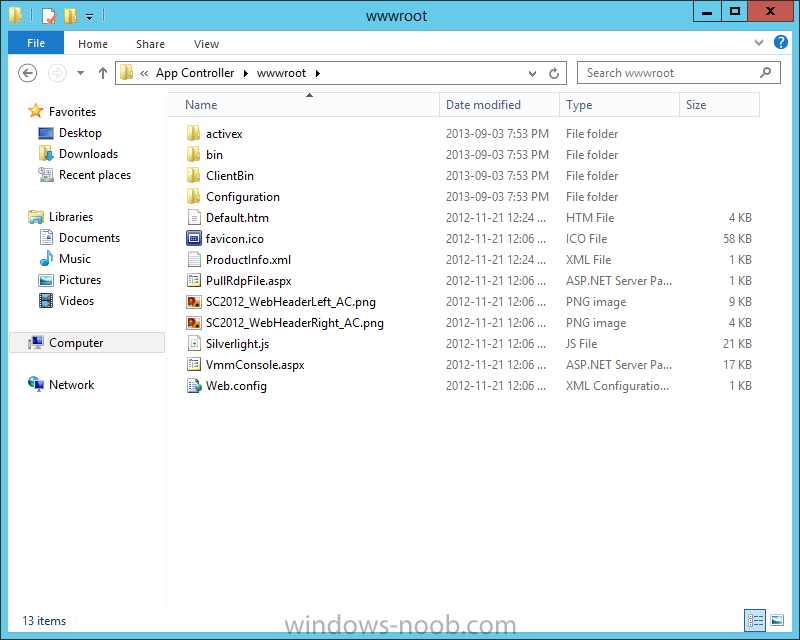


-
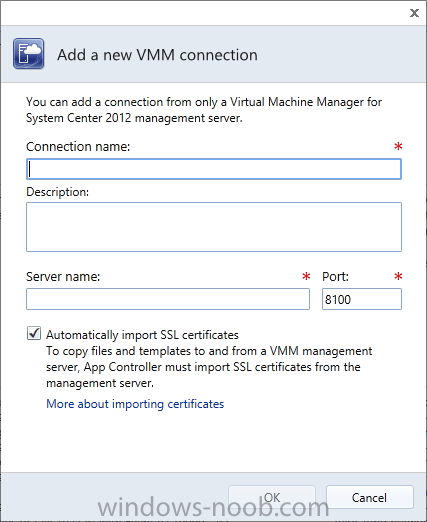
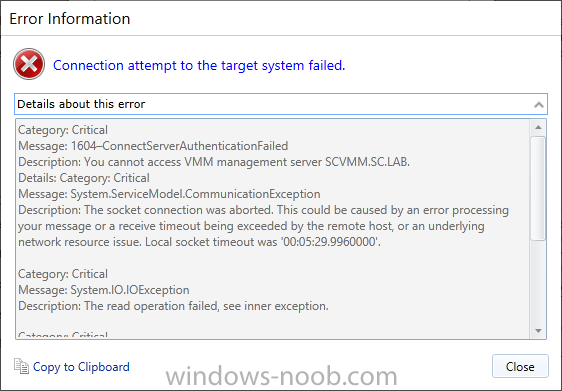
Connect App Controller to A VMM Management ServerOn the App Controller server, open a browser and navigate to the app controller site (in this lab example my site URL is https://SCSM.SC.LAB). Click on the ‘Connect a Virtual Machine Manager server and…’ link. In the Connect dialog box, enter a name for this connection. This name is displayed in the Name column of Clouds page. Add an optional description in the Description text box. In the Server name text box, enter the fully qualified domain name (FQDN) of the VMM management server. In the Port field, enter a port number that matches the port used by the VMM management server (default: 8100). Check Automatically import SSL certificates if you plan to copy files and templates to and from VMM cloud libraries. NOTE: SSL certificates must be imported to the App Controller server in order to copy files or templates to and from VMM cloud libraries. In order for the import to succeed, users need to be part of all of the following roles: the local administrator of the App Controller server, local administrator of the VMM server, and VMM administrator. Click OK to create the connection. You may then be asked to select which VMM user role to use from the new VMM server connection for the current session. NOTE: You may encounter the following error. See the following TechNet thread: http://social.technet.microsoft.com/Forums/en-US/047ba638-81de-4870-a3fd-6f2390633685/app-controller-2012-sp1-rtm-connection-failed-with-virtual-machine-manager-2012-sp1-rtm. Excerpt: “If System Center App Controller and the VMM Server are installed on separate servers, single sign-on does not work when App Controller is used. So, in UR1 for SC 2012 issue was fixed, but in SP1 present again. Solution is to disable SSO and use Basic Authentication or install App Controller on VMM server, but be aware 443 port VMM used for BITS.”

-
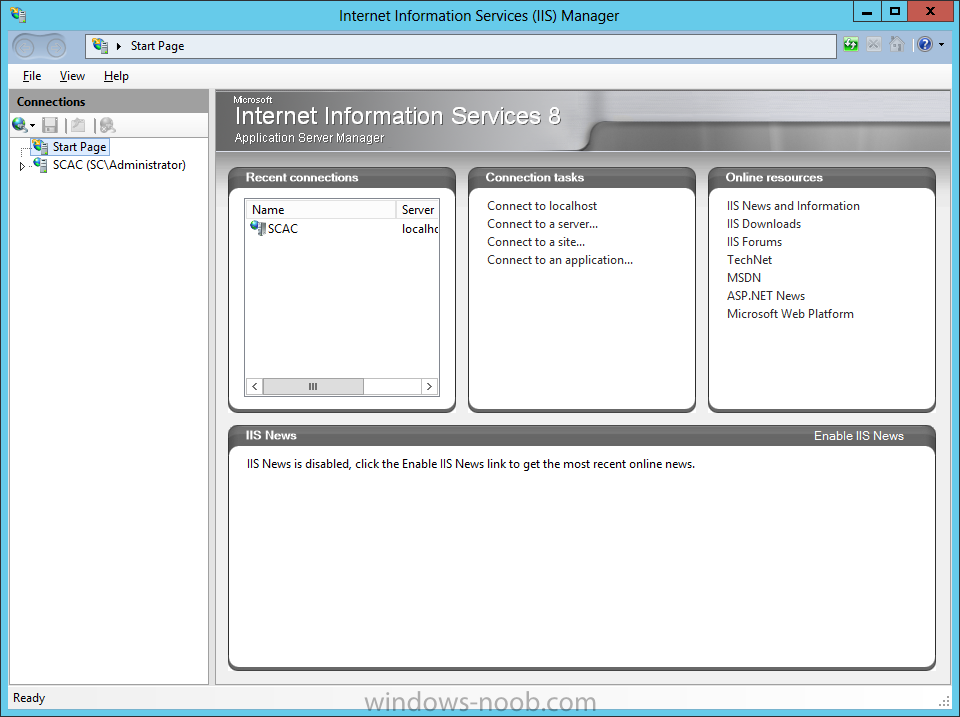
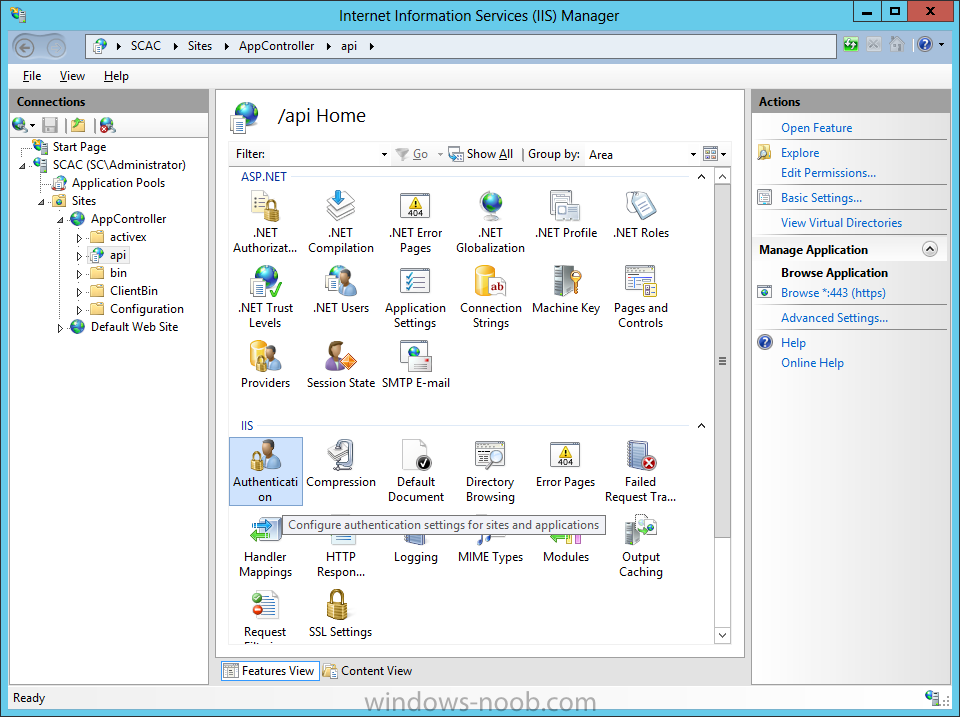
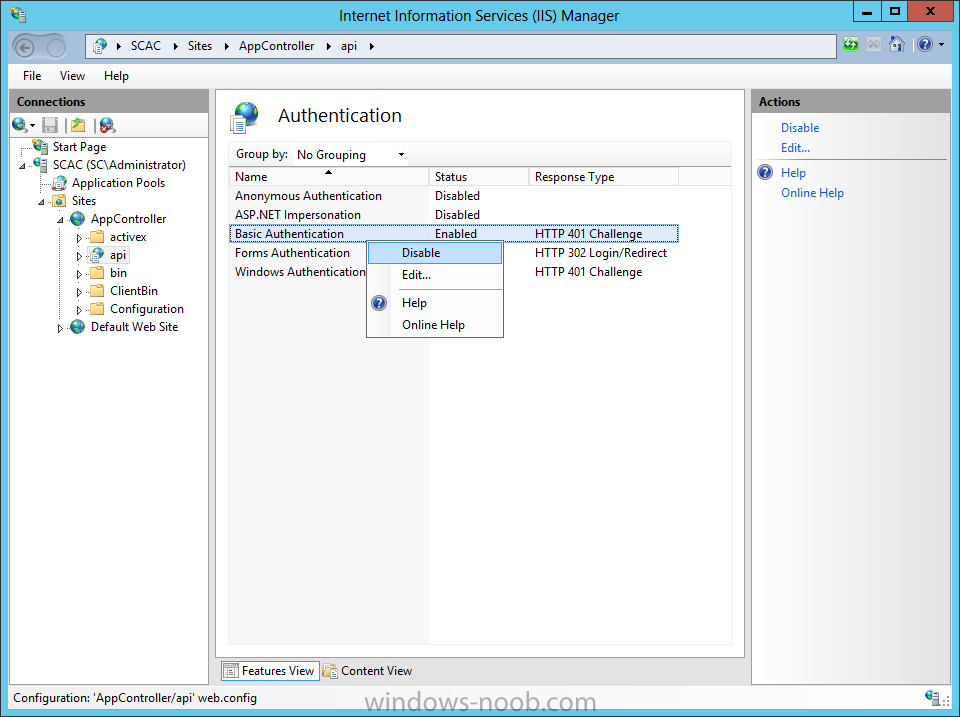
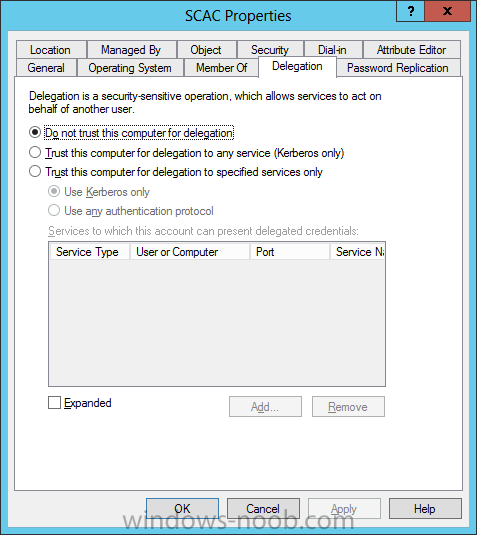
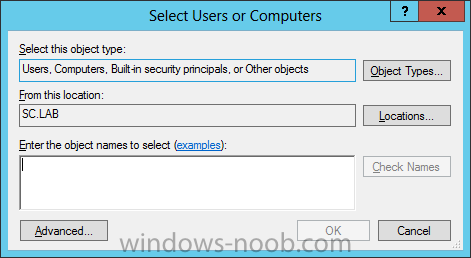
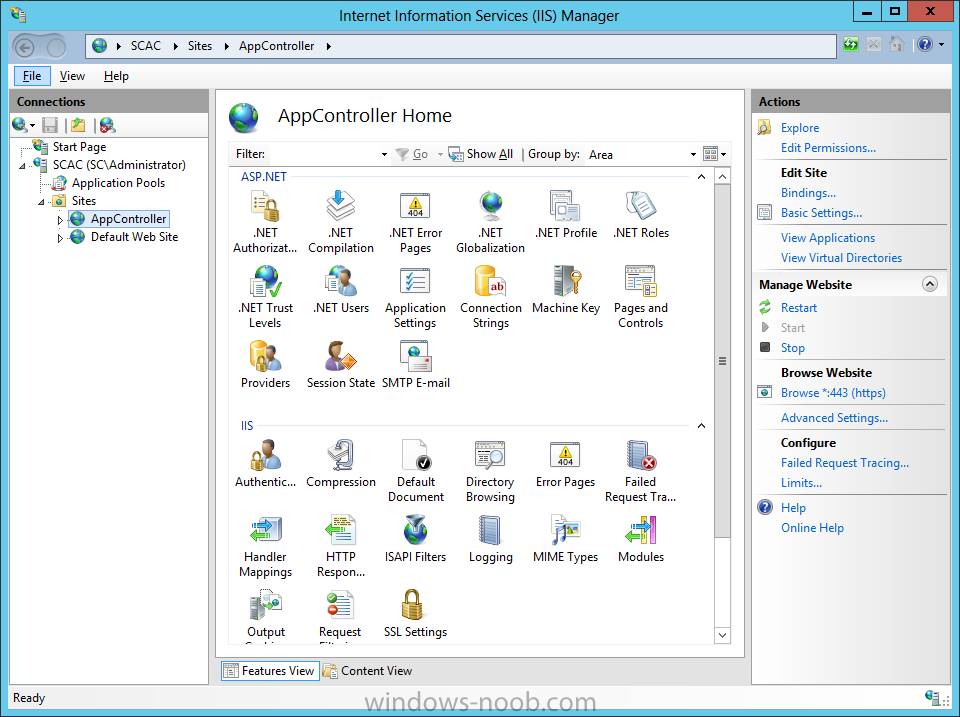
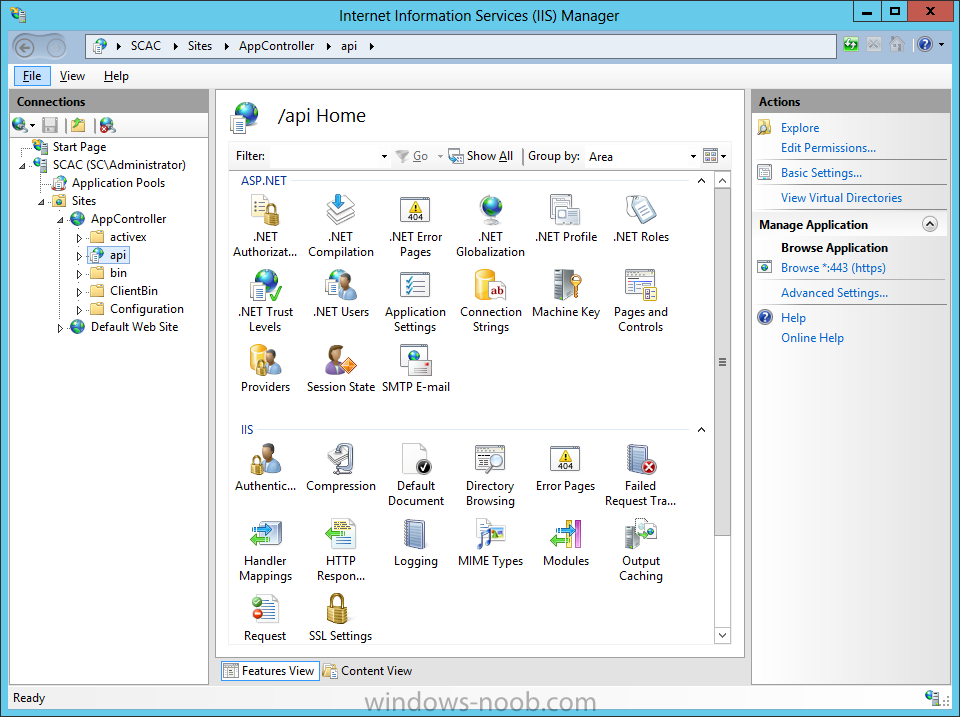
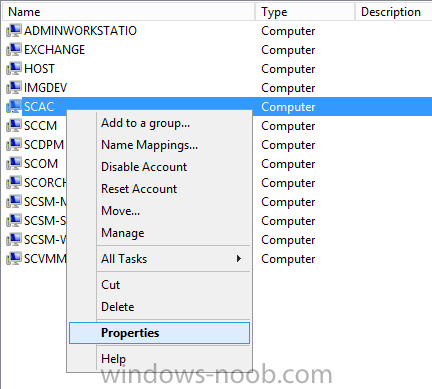
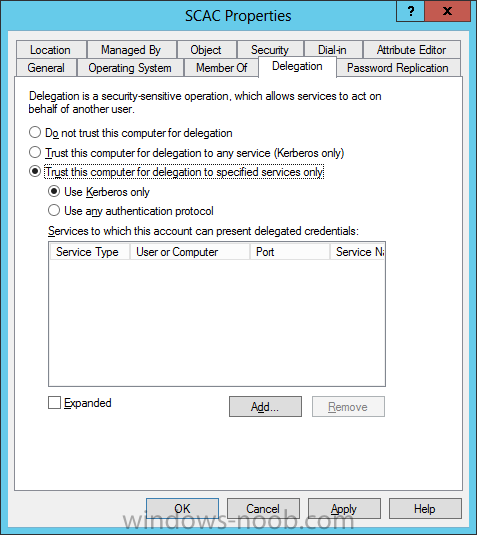
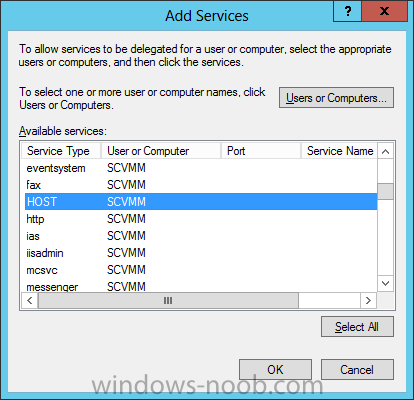
Enable Single Sign-On How to Enable Single Sign-On for App ControllerBy default, App Controller is enabled to prompt users to sign in by entering their Active Directory user name and password. The following procedures describe how to configure App Controller to use the user’s current Windows credentials to automatically sign on. To verify or change the authentication methodOpen IIS manager on the App Controller server. Select the App Controller website. Expand the website and select the /api node. Click Authentication. Enable Windows Integrated Authentication. Disable Basic Authentication. To turn on constrained delegationLog on using an account that has OU Administrator privileges in Active Directory Domain Services. Ensure that this account is also granted the SeEnableDelegationPrivilege user right (for example, a domain administrator could run the command ntrights -u domain\user +r SeEnableDelegationPrivilege on a domain controller, where domain/user represent the domain and account name for the account). In Active Directory Users and Computers, right-click the App Controller system and click Properties. Click the Delegation tab. Select the Trust this computer for delegation to specified services only option. Select the Use any authentication protocol option. Click Add and then do one of the following: a. If the VMM management server is running under the Local System account, enter the name of the VMM management server and select HOST, and then click OK. b. If the VMM management server is running under a domain account, enter the name of domain account and select SCVMM, and then click OK. Restart the App Controller management server.


-
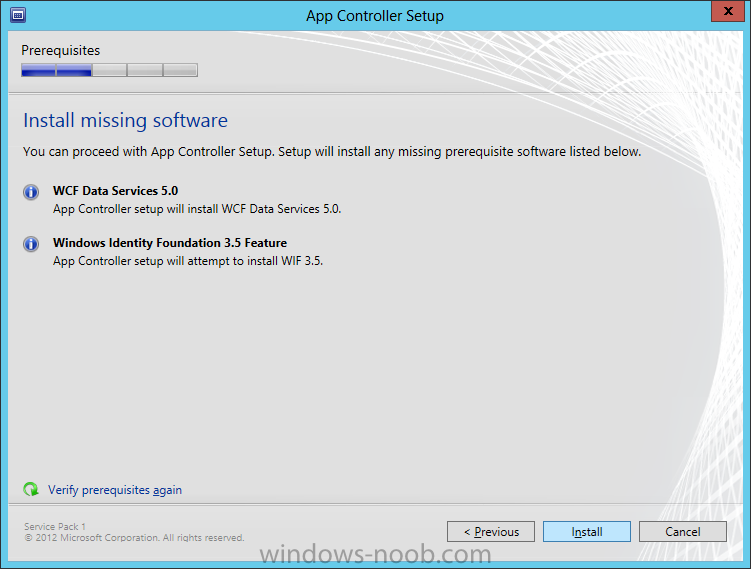
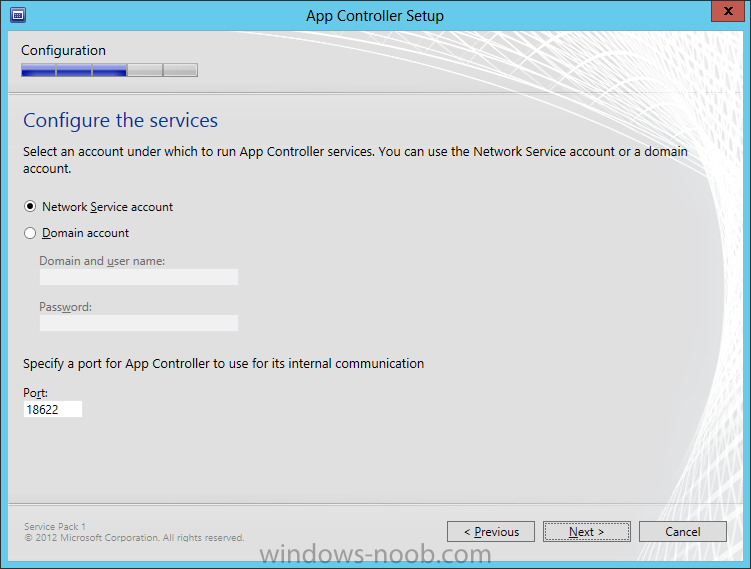
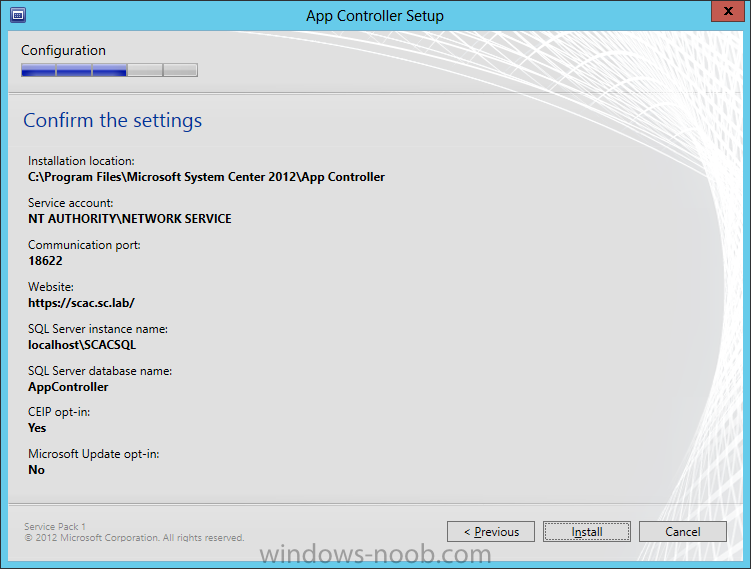
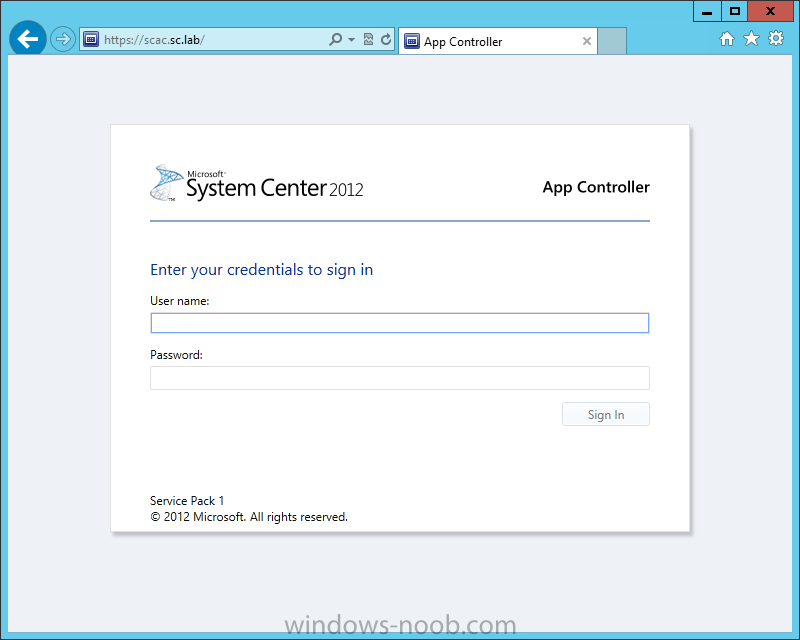
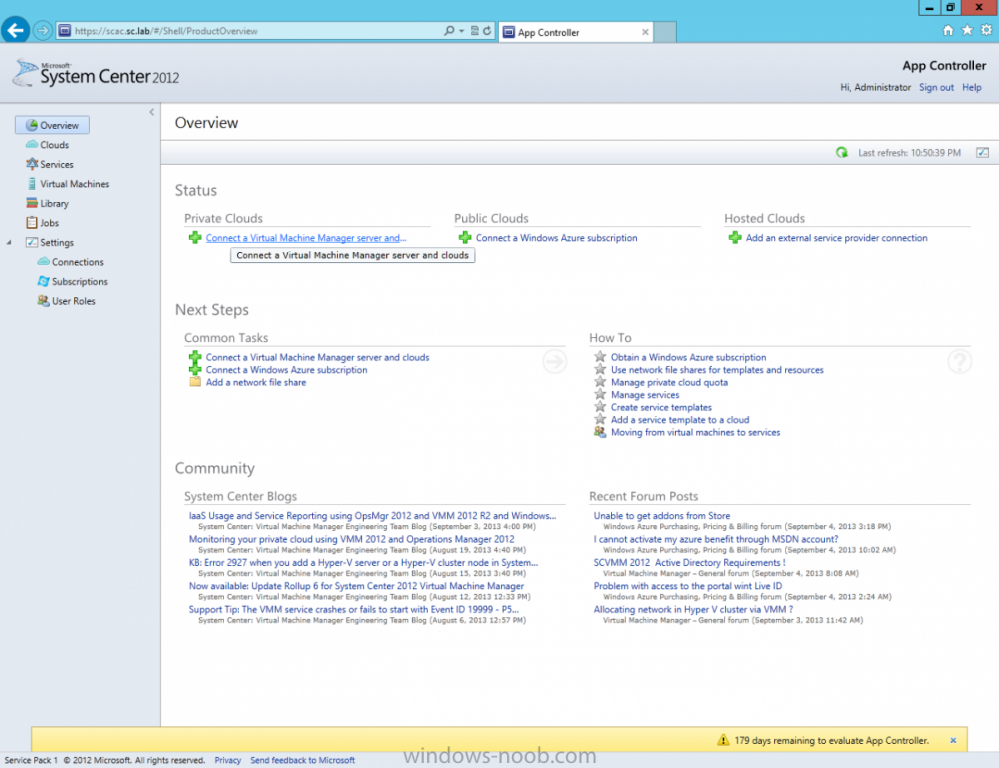
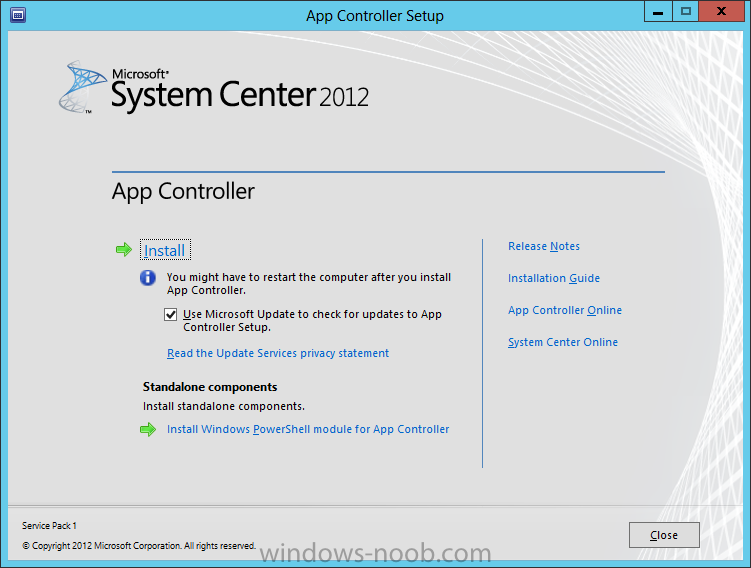
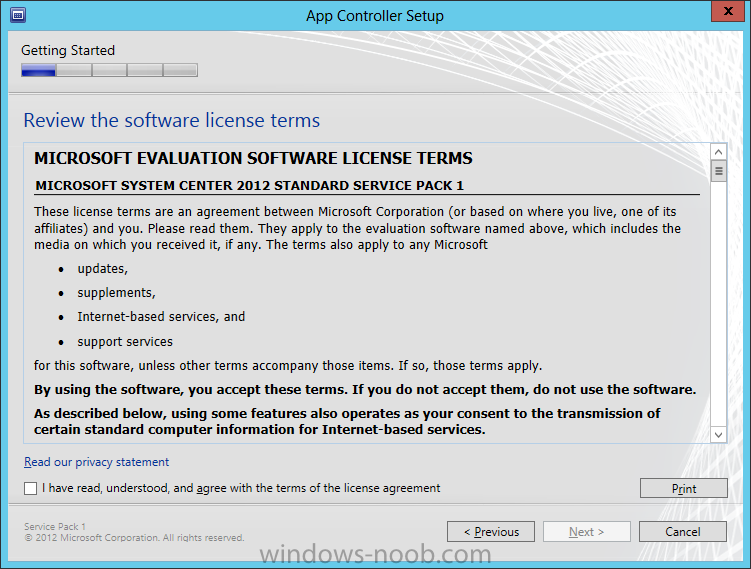
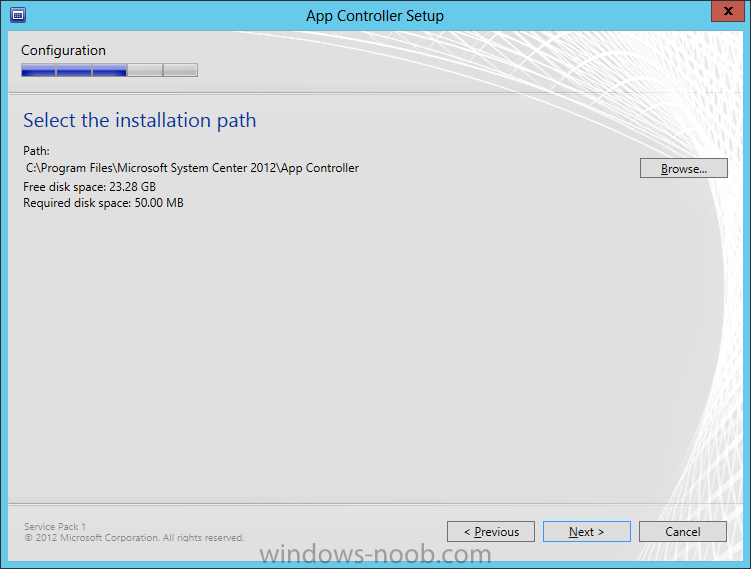
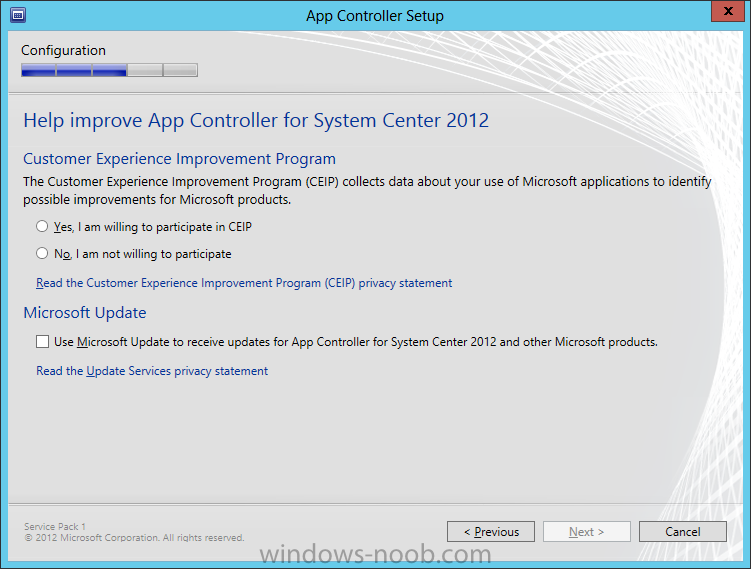
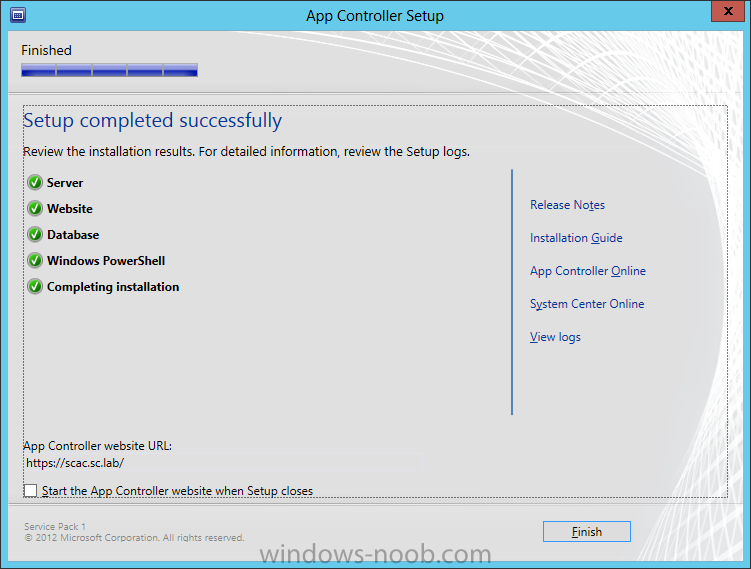
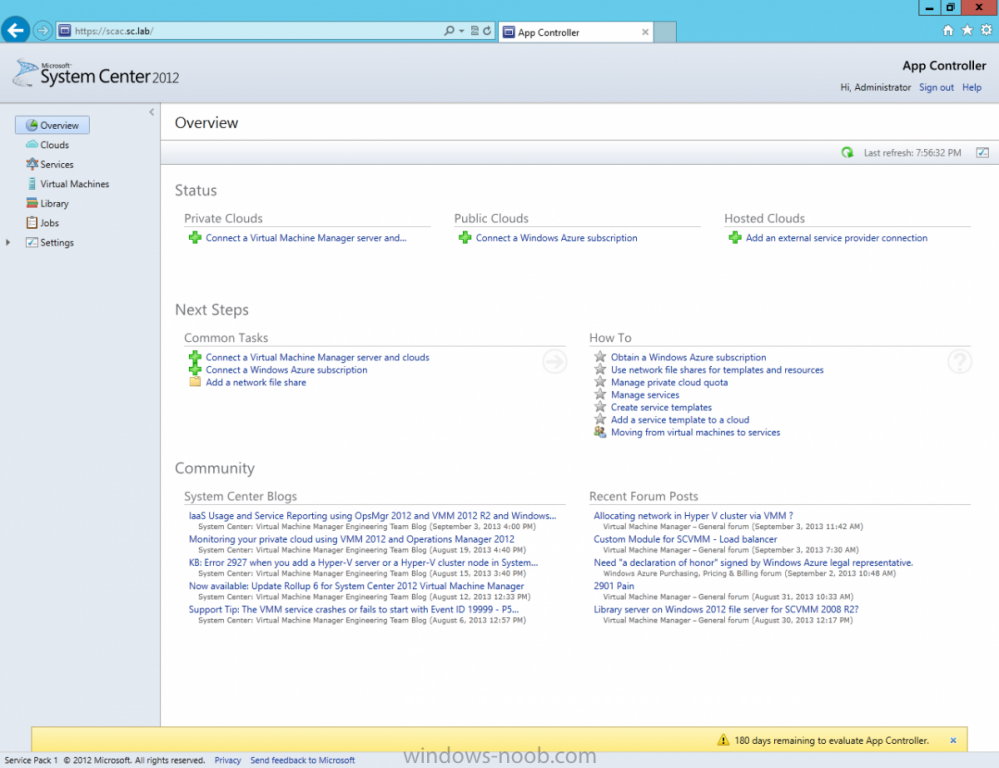
Install System Center App ControllerWe are now finally ready to install SCAC. Install PrerequisitesTo start, before we will actually be able to install SCAC, we have to install a few prerequisites. § .NET Framework 3.5 SP1 § .NET Framework 4.0 § IIS (Web Server role) o Static Content o Default Document o Directory Browsing o HTTP Errors o ASP.NET o .NET Extensibility o ISAPI Extensions o ISAPI Filters o HTTP Logging o Request Monitor o Tracing o Basic Authentication o Windows Authentication o Request Filtering o Static Content Compression o IIS Management Console § VMM Console Install SCACStart by either extracting the DVD contents, or mounting the ISO (the TechNet ISO is currently labelled as mu_system_center_2012_app_controller_with_sp1_x64_dvd_1345042.iso). Start by running the Setup.exe. On the splash screen click the Install link. On the Product Registration page, enter your Product Key and press Next. Read and accept the License Terms, then press Next. The Prerequisite checker will run and indicate if there is any missing components. You will note that you can still press Install, as the setup will install any missing prerequisites for you. The installation will install any missing pieces. On the Configuration page, you can change the Installation Path if you need to, then press Next. Next you need to configure the Services that App Controller will use. You can choose either a Network Service Account or a Domain Account. Make an appropriate selection and then click Next. Next you have to configure the website by specifying an IP Address, along with a Certificate. Since I don’t have a Certificate Authority in my lab, I chose ‘Generate self-signed certificate’. Then click Next. Now setup the configuration required for the database connection. In this lab example since I have SQL Server installed on the same server as App Controller, I am using LocalHost. Fill in your appropriate SQL Server information, and then click Next. Now you can decide if you want to join the CEIP program or not, and then click Next. On the Summary page, review the selections made and then click Install. Once the setup is complete, click Finish. You can opt to check the ‘Start the App Controller website when Setup closes’ if you want to launch the site right away. Else, you will have to enter the appropriate URL in your browser. When you launch the website, you will be presented with a login screen. This is because the site is not setup for single sign-on (we will cover this in a Configuration Guide later). Enter your credentials and click Sign In. Once you sign in, you will see the App Controller site, similar as follows.


-
Install SQL Server At this point, since we will be installing SQL Server on the same server that we will be installing App Controller, it is expected that you have the VM created, the OS is installed, the appropriate networking has been configured, and it is joined to your lab domain. To avoid a specific installation error (see the end of the Install SQL Server section), you have to install the .NET Framework 3.5. So we’re going to complete this first before we start the installation of SQL. .NET Framework Installation To install the specific version of .NET that we require (version 3.5 in this case), start by launching the Server Manager, and selecting Manager > Add Roles and Features. On the Add Roles and Features Wizard, read the information on the Before You Begin screen, and then click Next. On the Installation Type screen, select ‘Role-based or feature-based installation’, and click Next. On the Server Selection screen, since we are installing SQL on the same server as Orchestrator, ensure that it is selected, and then click Next. On the Server Roles screen, we are not installing a Role, but rather a Feature, so just click Next. On the Features screen, select .NET Framework 3.5 Features, and click Next. Since in Windows Server 2012 the .NET Framework 4.x is the main framework, the OS installation does not contain the source files for this installation. Therefore, you will need to click on the ‘Specify an alternate source path’ link at the bottom of the dialog. You will need to provide the path to where the source files are. This is found within the installation media of Windows Server 2012. If you insert a DVD or mount an ISO, specify the path to the SxS folder (i.e. D:\Sources\SxS), and then press OK. Click Install, and once it has completed, click Close. SQL Installation Start by either extracting or mounting the SQL Server ISO, and run the setup.exe. In this example, we are installing SQL Server 2012 SP1. On the main installation screen, click on the Installation link on the left pane. From the Installation screen, click the ‘New SQL Server stand-along installation or add features to an existing installation’ link. This is initiate the installation. First, the Setup Support Rules will check for any issues. As long as there isn’t any ‘Failed’ issues, click OK to continue with the installation. Next, enter your product key or select the evaluation copy to install, and press Next. Accept the License Terms and choose if you will send usage data to Microsoft, then press Next. If you have an Internet connection, the installer will check if there are any applicable updates to the installation, and will download the updates to use during the install. Click Next. The Setup will perform another Setup Support Rules check. As long as there are no Failures, you can click Next. Next is the Setup Role. For our needs, we will choose ‘SQL Server Feature Installation’, then press Next. For the Feature Selection, select the following, and then press Next. § Database Engine Services § Management Tools – Basic and Complete (for running queries and configuring SQL services) The Installation Rules will run to determine if anything will block the SQL installation. If there are no Failures, click Next. Next we will configure the instance. You can choose either to use a Default instance, or a Named instance. In this example, I will use a named instance, so as to not get this installation of SQL mixed up with any other I will have in my lab. Make your applicable choice, and click Next. The setup will check and confirm there is enough space on the drive for the installation. If everything is reported as OK, click Next. You next have to configure the server, which includes the Service Accounts and Collation. In Production, it is best practice to have a separate account for each of the services. In our lab, we will leave everything at defaults, with the exception of changing the ‘SQL Server Agent’ startup type from ‘Manual’ to ‘Automatic’. After you have completed this, don’t click Next, but rather click on the Collation tab. On the Collation tab, you will need to click the Customize button to be able to change it appropriately. On the Customize dialog, select ‘SQL collation, used for backwards compatibility’. Within the list, find ‘SQL_Latin1_General_CP1_CI_AS’ and select it, then click OK. You will be back on the Server Configuration dialog, click Next. On the Database Engine Configuration screen, leave the Authentication Mode at ‘Windows authentication mode’. What do have to change is to add SQL Server Administrators. Click the Add button. On the next dialog, you will need to add either the user(s) or security group(s) you want to have administrator access to SQL. At a bare minimum, add the current user account, so that you can log into SQL Server. Add the user(s)/security group(s), and click OK. You will be back on the Database Engine Configuration screen, and your accounts will now be present. In my example, I have an Active Directory Security Group I specifically created for SQL Administrators. Then click Next. You can choose to send Error Reporting information to Microsoft. Make your choice, and click Next. The setup will now re-check the configuration rules, based on the selections and information that has been supplied. If it passes, click Next. Review the information on the Ready To Install screen, and then click Install. Note: during the installation, you may encounter the following error message. This is due to not having the .NET Framework 3.5 installed prior to attempting to install SQL Server. If you encounter this, cancel the SQL server installation, and install the .NET Framework 3.5 (which is an available feature within Roles and Features). You may have to wait a while for the Installation Progress to complete. On the Complete screen, click Close. Congratulations, you now have SQL Server installed and are finally ready to install System Center App Controller (SCAC).
-
Install Active Directory Domain Services Now that we have the VMs created, and the OS installed on both, we need to first install/setup Active Directory (AD). When you log into a new installation of Server 2012, Server Manager will auto launch. From Server Manager, click on Manage, and choose ‘Add Roles and Features’. On the Add Roles and Features Wizard, read the information on the Before You Begin dialog, and then click Next. On the Installation Type screen, select ‘Role-based on feature-based installation’ and then click Next. On the ‘Server Selection’ screen, since we are installed Active Directory on this local system, ensure that it is selected, and click Next. Side note: Windows Server 2012 has a new feature that allows you to remotely install Roles and Features on other systems. On the Server Roles screen, select ‘Active Directory Domain Services’. When you select ‘Active Directory Domain Services’, immediately you will be presented with the following dialog. Click Add Features. On the Features screen, accept what has already been selected by default, and click Next. On the AD DS screen, read the information presented, and click Next. On the Confirmation screen, check the ‘Restart the destination server automatically if required’ checkbox, and then click Install. Note: You are not required to check the ‘restart’ checkbox, however, you’re going to have to restart the system anyways after the installation, so you might as well let the system do it for you. Note: When you check off the ‘Restart the destination server automatically if required’ checkbox, you will immediately be prompted with the following dialog. Click Yes. On the Results screen, click Close. After the system restarts, and Server Manager launches, you will have to promote the server as a domain controller. This is because Active Directory has been installed, but that process does not automatically promote the server. Click on the ‘Promote this server to a domain controller’ link. On the Deployment Configuration screen, select ‘Add a new forest’ since this is the first domain controller in our lab. Then enter a root domain name, and click Next. In my example I am using “SC.LAB” for System Center Lab (since I will be installing all other System Center products in my lab eventually). For the Domain Controller Options, select the appropriate Forest functional level, and Domain functional level. This is more applicable if you already have an existing domain and are adding a new domain controller. But since this is the first domain controller in our new domain, then we’ll use the highest level, that of Windows Server 2012. Also, don’t forget to create the Directory Service Restore Mode password. Then press Next. On the DNS Options screen, you can ignore this warning message and click Next. On the Additional Options screen, click Next. On the Paths screen, normally you would change the location for the database, log files, and SYSVOL, but since we are just in a lab environment, we’ll leave it at the defaults and click Next. On the Review Options scree, review what you have entered/selected, and click Next. The Prerequisites Check screen will check and confirm that everything passes before promoting the system as a domain controller. You will notice in my screenshot, that I have 1 warning because I didn’t set a static IP for the server yet. After installation completes, the system will automatically restart. You will then be presented with the login screen. Something to note here, that because we were originally logged in with a local account, the first time you want to log on using a domain account you will have to type the domain\username; in my example SC\Administrator. When you login, you will then see in the Server Manager, that AD DS is now listed, along with DNS. Now all that you need to do is assign a static IP to your domain controller. To do this, in Server Manager, select Local Server from the panel on the left. From there, click on the Ethernet link labelled ‘IPv4 address assigned by DHCP, IPv6 enabled’. This will cause the Networks Connections explorer to open. From here, right click on the Ethernet network that is displayed. This is in fact the network connection that we configured when we first created the VM. On the Ethernet Properties dialog, select ‘Internet Protocol Version 4 (TCP/IPv4)’ and click the Properties button. Within the Internet Protocol Version 4 (TCP/IPv4) Properties dialog, enter a static IP, gateway, and DNS that is applicable to your network. Once all the items have been entered, click OK. You will also have to click Close on the Ethernet Properties dialog as well. Congratulations, you now have a domain setup in your lab environment. Add Systems to Your Domain Now that you have your domain setup, you need to add your other VM (the one that we will use for DPM) to the domain before being able to install DPM. Log into the system you want to add to the domain. To do this in Server 2012, launch Server Manager, and click on Local Server. Then click on the computer name. This will launch the System Properties dialog. From this dialog, click the Change button. From this dialog, select the Domain option for ‘Member of’, and enter the domain name you want to join and press OK. After pressing OK, you are immediately presented with a Windows Security dialog, in which you need to enter the credentials of an account that has Domain Admin rights. Enter the credentials and click OK. Once the system is successfully joined to the domain, you will receive the following Welcome message. Press OK. After you press OK to the Welcome message, you will receive a second prompt, indicating that you need to restart the system for the changes to take effect. You will be back on the System Properties dialog. Press Close. When you press Close, you will receive yet another prompt about restarting the system. You can choose to Restart Now or Restart Later, but you won’t be able to install App Controller without the VM being added to the domain. After the system restarts, you will then be presented with the login screen. Something to note here, that because we were originally logged in with a local account, the first time you want to log on using a domain account you will have to type the domain\username; in my example SC\Administrator. Now we have our Active Directory server setup and ready, and the VM we will be installing App Controller on is joined to the domain.
-
Install the Operating System Now that we have created the VMs for our lab, we can install the Operating System (OS). Start by connecting to one of the VMs, either by double clicking on the VM in Hyper-V Manager, right click the VM and choose Connect, or click on Connect from the Action pane/menu. When you have the VM connection up, and an ISO mounted, power the VM on. On the Windows Setup screen, select the Language, Time/Currency Format, and Keyboard Method appropriate, and click Next. All you have to do now is click Install Now. Next you have to choose the Operating System and version you want to install. In our lab example, I will choose Windows Server 2012 Standard (Server with a GUI). Make your selection and then click Next. You will have to accept the license terms, and then click Next. For the Installation Type, since we don’t already have an OS installed, we will choose the ‘Custom: Install Windows only (advanced)’ option. Now select the hard drive that you want to install the OS to. Since we only created one hard drive when setting up the VM, we only have one to choose from. Select it, and click Next. Now all you have to do is wait for the installation to finish. Once the installation is complete, you will be prompted to enter a password for the local administrator account. This is different from a domain-based local administrator account. Enter a password and click Finish. After some final quick configuration, you will then be presented with the login screen. Now repeat these steps for the other VMs in the lab. NOTE: After you install an OS, you will need to rename the computer within the OS. To do this in Server 2012, launch Server Manager, and click on Local Server. Then click on the computer name. This will launch the System Properties dialog. From this dialog, click the Change button. From this dialog, enter the name you want to call the computer. In my lab, I called the Active Directory computer “AD”, and the App Controller computer “SCAC”. Press OK after entering the name. You will encounter the following prompt. Click OK. Then click Close on the System Properties dialog. You can choose to either Restart Now or Restart Later, but the name change will not take effect until you do so.
-
Introduction: I use Hyper-V in my LAB and that's what all these virtual machines will be running on. In my lab, I have Windows Server 2012 Datacenter installed as the server OS on the host machine. All other virtual machines will be running Windows Server 2012 Standard edition, with the graphical user interface (GUI). My hardware consists of the following: § Intel Xeon E5-2620 § Asus P90X79 WS § 64 GB G.Skill Ripjaws Z Series § 2 x 256 GB / 1 x 512 GB Samsung 840 Pro Series SSD § 1 x 150 GB HDD, and 1 x 250 GB HDD High Level Plan Here is a high level of what we are going to complete in this initial part of the series. 1. Create the Lab Environment 2. Install the Operating System 3. Install Active Directory Domain Services 4. Install SQL Server 5. Install System Center App Controller So now let’s start with the first part, system requirements and creating the lab environment. System Requirements Note: The following page on TechNet describes the requirements for deploying AppController. Server§ OS: Windows Server 2008 R2 or Windows Server 2012 § CPU: Dual-Processor, Dual-Core, 2.8 GHz (x64) or greater § RAM: 1 gigabyte (GB) of RAM minimum, 4 GB or more recommended § HDD: 1 gigabyte (GB) of available hard disk space § Software: o Microsoft SQL Server 2008 R2 or Microsoft SQL Server 2012: § Database Engine Service § SQL_Latin1_General_CP1_CI_AS collation o Microsoft .NET Framework 4.0 o Web Server (IIS): § Static Content § Default Document § Directory Browsing § HTTP Errors § ASP.NET § .NET Extensibility § ISAPI Extensions § ISAPI Filters § HTTP Logging § Request Monitor § Tracing § Basic Authentication § Windows Authentication § Request Filtering § Static Content Compression § IIS Management Console o VMM Console Create the Lab Environment: Hyper-V Configuration As mentioned, my environment uses Hyper-V. So, we’re going to start by configuring Hyper-V for our needs, and creating the Virtual Machines (VMs) required for our lab. The first thing we need to do is setup a Virtual Switch for the VMs to connect through. Launch Server Manager, click on Tools, and select Hyper-V Manager. When Hyper-V loads, it will have nothing in it. Even if we were to create a VM, it wouldn’t have a network connection to use. So we’ll start with creating a Virtual Switch. As you can from my screenshot, I have 2 LAN ports on my host. One of them has a connection to my home network and the Internet. In the Hyper-V Manager, click the Virtual Switch Manager from the Actions pane. Now, click on the Create Virtual Switch button. From here, you now need to configure the virtual switch that your VMs will use. Give it a name to clearly identify it (in my case I called it ‘External Network’), and choose the connection type. For more information about virtual networks, see the following TechNet article: http://technet.microsoft.com/en-us/library/cc816585(v=ws.10).aspx. Here is an excerpt from the article: External virtual networks. Use this type when you want to provide virtual machines with access to a physical network to communicate with externally located servers and clients. This type of virtual network also allows virtual machines on the same virtualization server to communicate with each other. This type of network may also be available for use by the management operating system, depending on how you configure the networking. (The management operating system runs the Hyper-V role.) For more information, see “A closer look at external virtual networks” later in this topic. Internal virtual networks. Use this type when you want to allow communication between virtual machines on the same virtualization server and between virtual machines and the management operating system. This type of virtual network is commonly used to build a test environment in which you need to connect to the virtual machines from the management operating system. An internal virtual network is not bound to a physical network adapter. As a result, an internal virtual network is isolated from all external network traffic. Private virtual networks. Use this type when you want to allow communication only between virtual machines on the same virtualization server. A private virtual network is not bound to a physical network adapter. A private virtual network is isolated from all external network traffic on the virtualization server, as well any network traffic between the management operating system and the external network. This type of network is useful when you need to create an isolated networking environment, such as an isolated test domain. For our demonstration, we are going to use an External Network so that the VMs can communicate with the Host system. Make all the appropriate selections and so forth, and then press OK. You may encounter the following warning message. This is because we are remotely connecting to the Host machine using the same network connection that we are about to setup as a Virtual Switch (hence selecting the ‘Allow management operating system to share this network adapter’ checkbox). Press ‘Yes’ to the dialog. Now that we have the virtual switch setup, we can start creating VMs for our lab. Create the Virtual Machines Let’s now create the VM’s we will need for the lab, specifically one for Active Directory, and another for App Controller (since we are install all roles within the same server). In Hyper-V Manager, from the Actions pane, click on New and choose Virtual Machine. On the New Virtual Machine wizard beginning screen, click read the information presented and then click Next. Enter a name for the VM. Note that this is NOT the name the VM will have within the Operating System (unless you name it the same), but rather, used as an identifier in Hyper-V Manager. After you have entered a name, click Next. Now assign the amount of memory you want your VM to have, and then press Next. This is the screen where you connect your VM to the network that we created, then press Next. This is the screen where you configure how large a hard drive the VM will have. Make the appropriate customizations and click Next. For the Installation Options, choose if you will install an OS later, or if you want to use an ISO, then click Next. On the Summary screen, review your selections and entries, and click Finish. Once the VM is created, it will appear in the Hyper-V Manager. If you want to configure further settings, like the number of CPUs and mounting an OS ISO, right click on the VM and choose Settings or click on Settings from the Actions pane. Repeat these steps for each VM you need to create, in our case one for Active Directory and another for App Controller. Here are the settings I have used for each of the VM’s: Active Directory: § Virtual Machine Name: AD § Memory: 2048 MB o NOTE: Active Directory doesn’t need 2 GB of RAM, it will run fine with 512 MB. I just increased the RAM so that the OS would install/respond faster during setup. § CPUs: 2 § OS: Windows Server 2012 SCAC: § Virtual Machine Name: SCAC § Memory: 4096 MB § CPUs: 2 § OS: Windows Server 2012