Search the Community
Showing results for tags 'cdp'.
Found 2 results
-
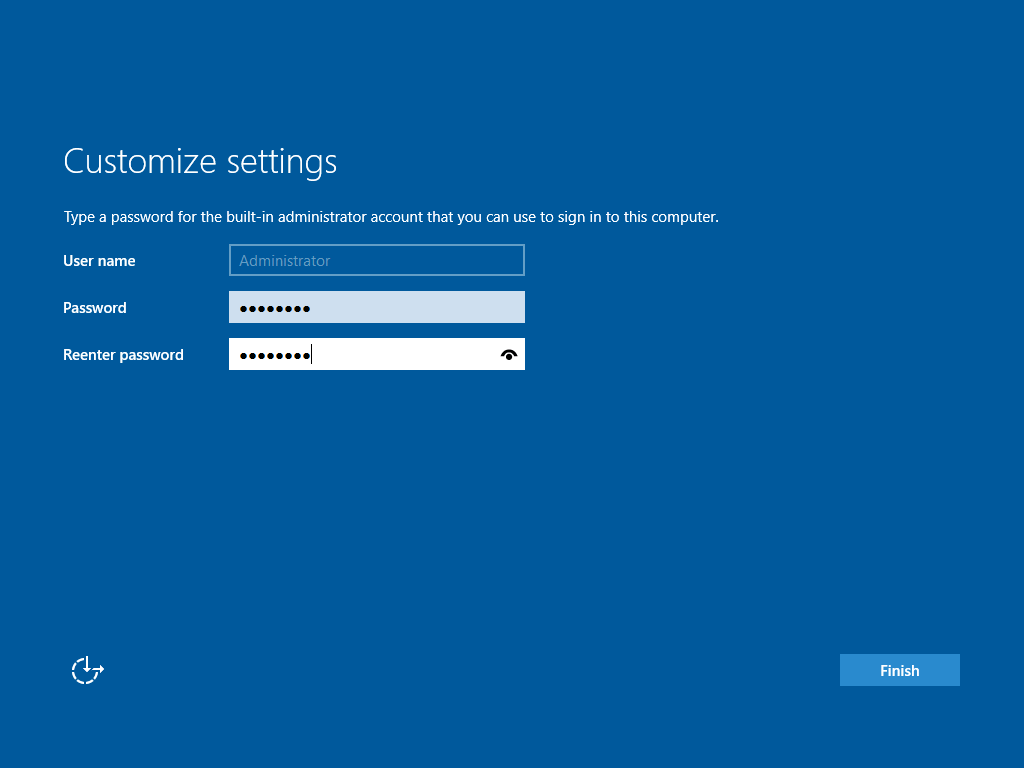
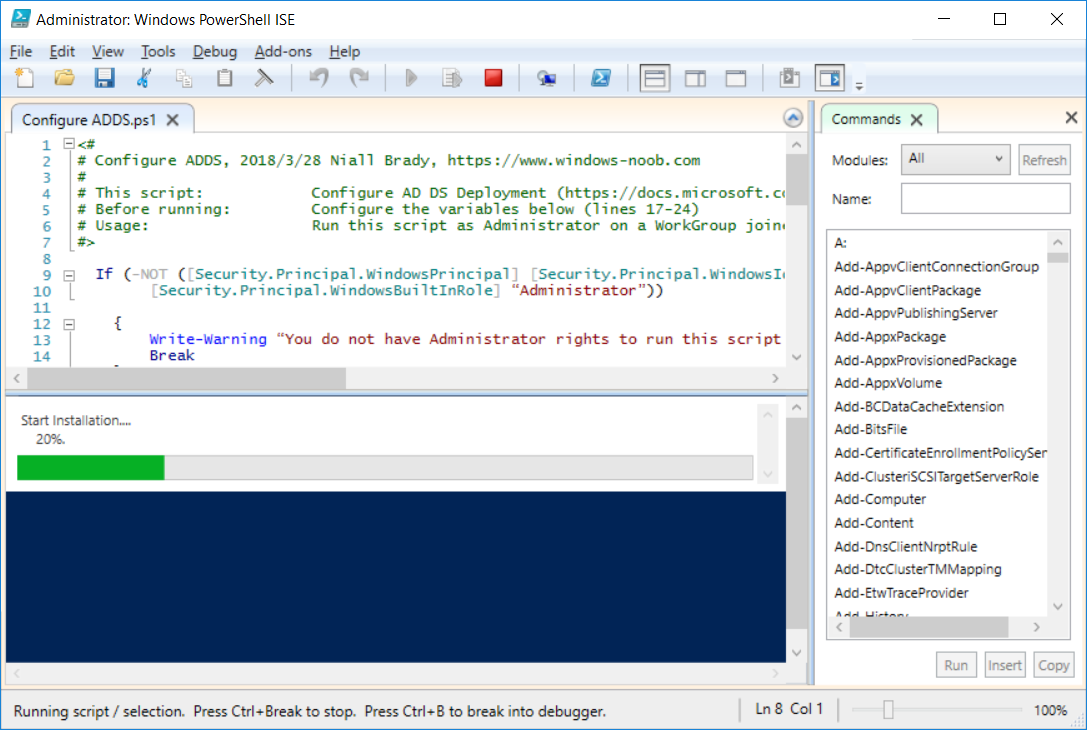
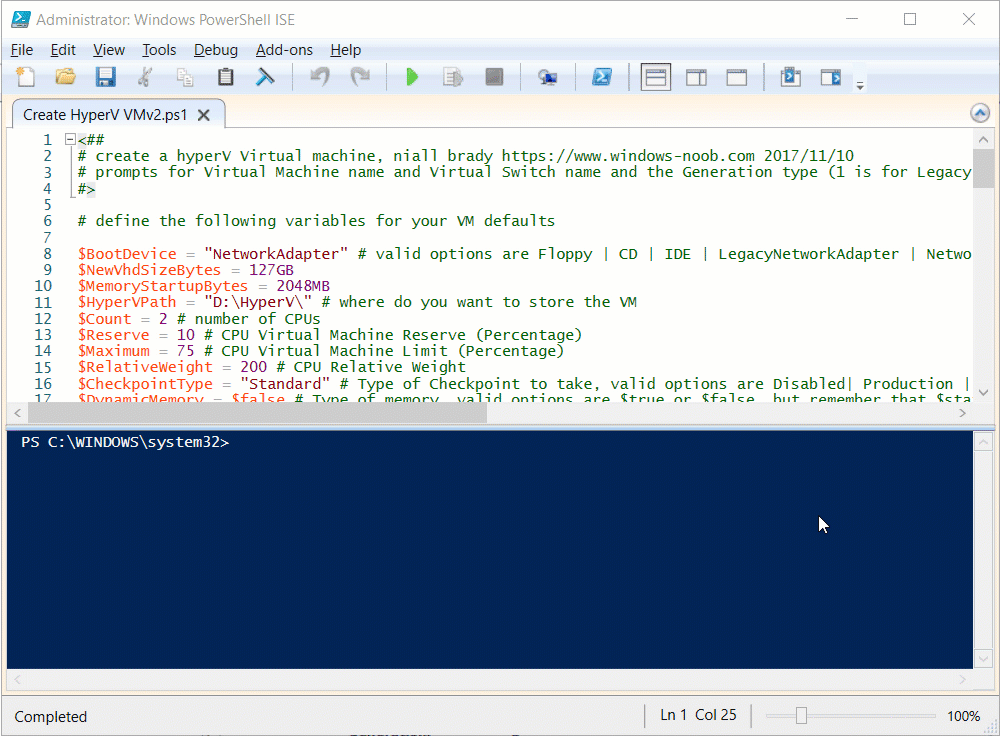
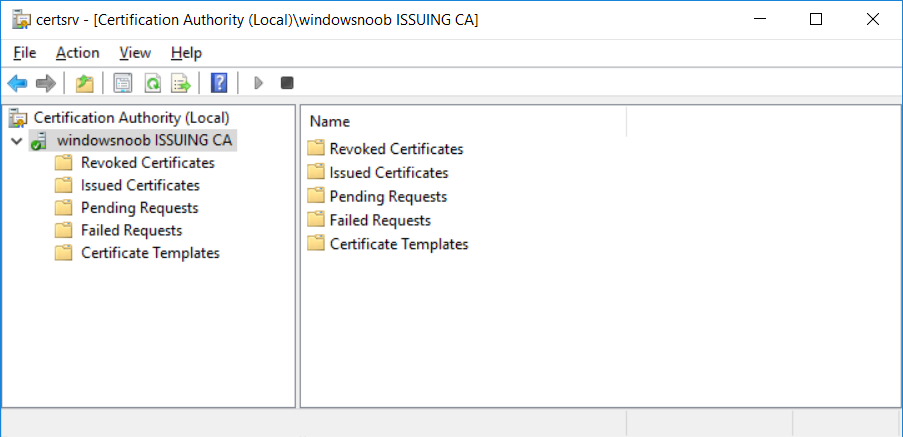
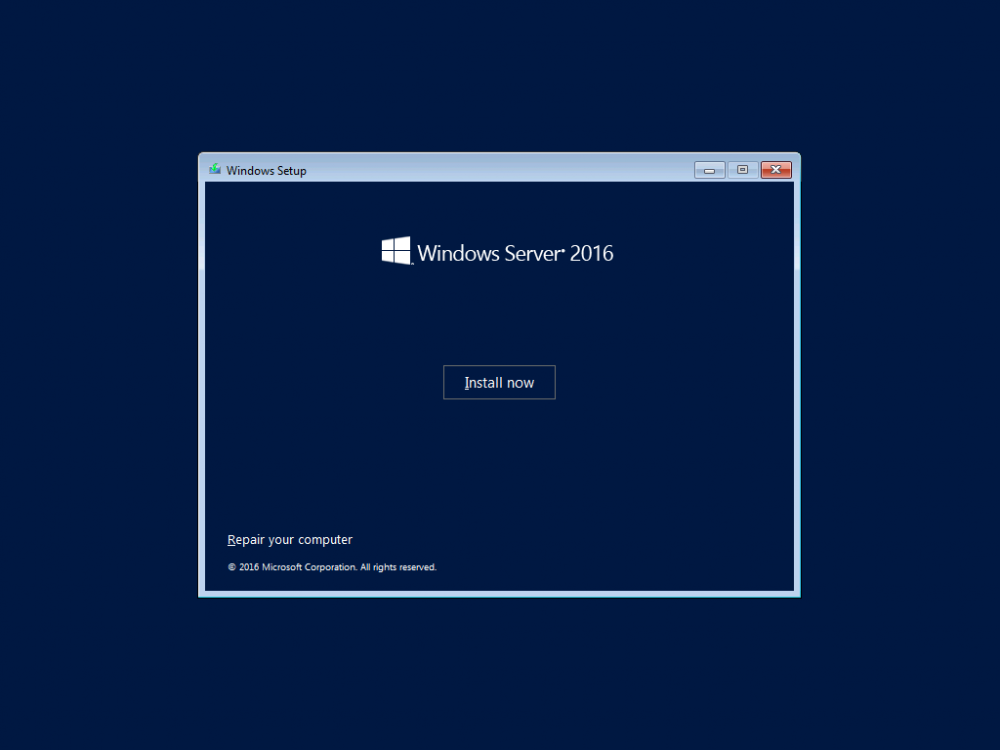
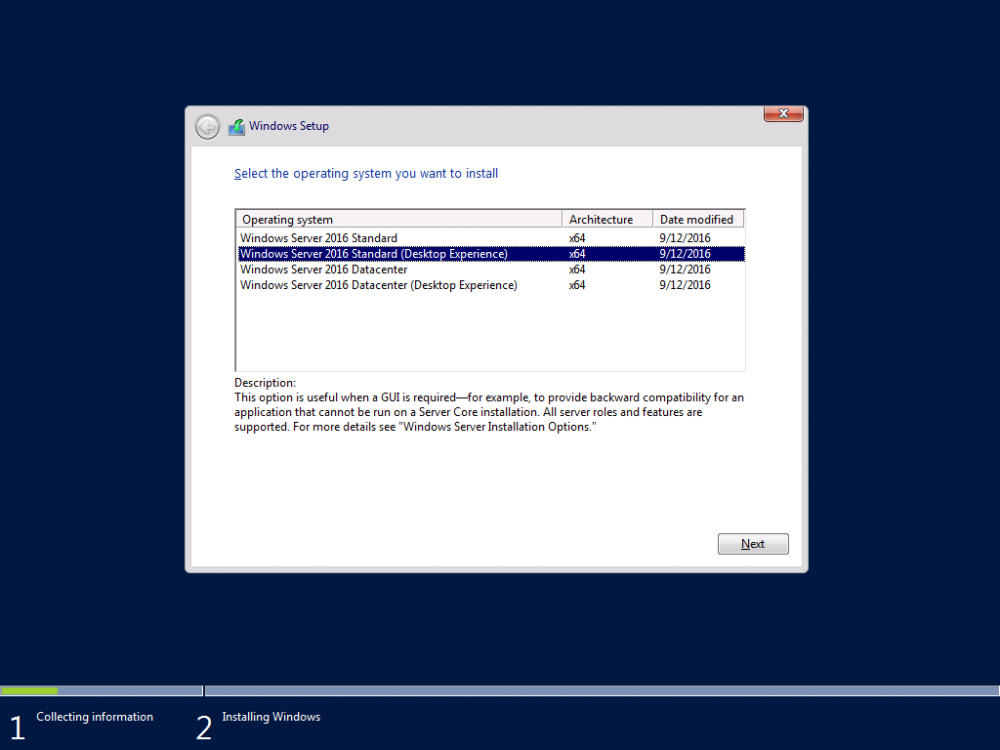
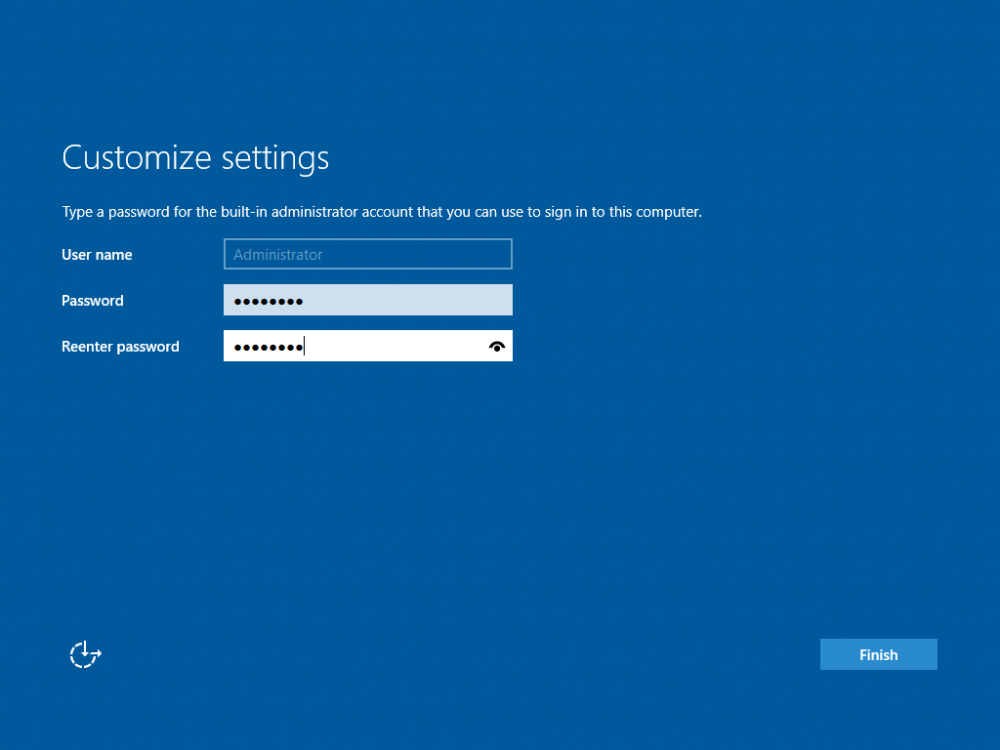
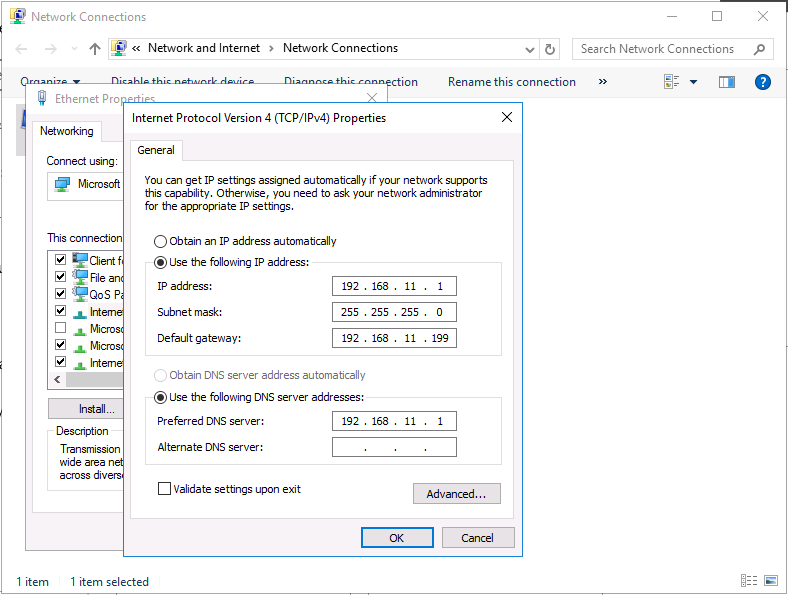
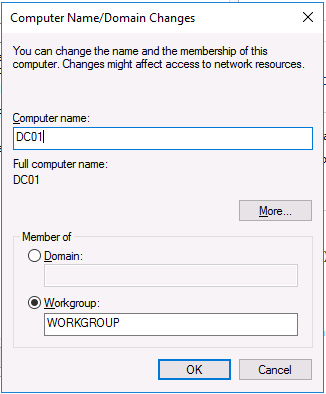
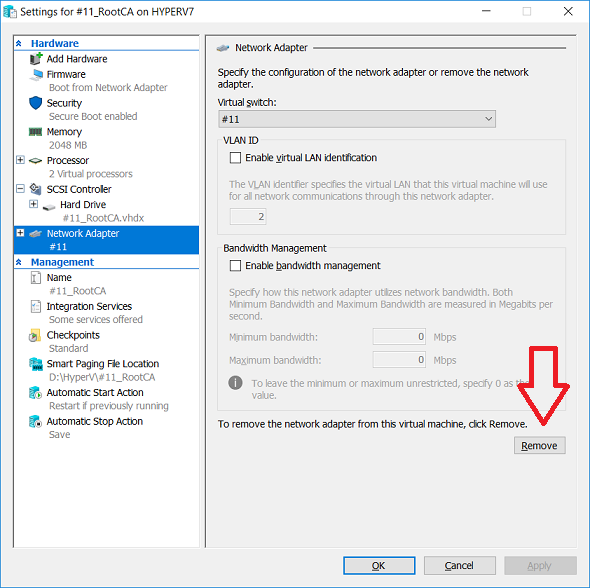
This series is comprised of different parts, listed below. Part 1 - Introduction and server setup (this part) Part 2 - Install and do initial configuration on the Standalone Offline Root CA Part 3 - Prepare the HTTP Web server for CDP and AIA Publication Part 4 - Post configuration on the Standalone Offline Root CA Part 5 - Installing the Enterprise Issuing CA Part 6 - Perform post installation tasks on the Issuing CA Part 7 - Install and configure the OCSP Responder role service Part 8 - Configure AutoEnroll and Verify PKI health Introduction Security is everywhere, and a core component of security is certificates. Public key infrastructure (PKI) is a set of roles, policies, and procedures needed to create, manage, distribute, use, store, and revoke digital certificates and manage public-key encryption (1). In this series of guides I will show you how to set up a 2 tier PKI hierarchy running on Windows Server 2016 and you can use this to set up your own LAB so that you can learn about PKI and later use it for related System Center Configuration Manager roles such as Co-Management (3). Note: I don't claim to be an expert on PKI and would absolutely advise you to consult with a PKI expert if you plan on setting up PKI in production. This guide is designed to help you setup your LAB, it's based on a Windows Server 2012 R2 PKI guide on Technet from here and kudos to those guys for writing it (2). The difference here is you'll be using Windows Server 2016 (or later) and you'll see more screenshots and hints to guide you through the experience. I'd highly recommend you go through this entire series at least twice, just to get a feel for how PKI works and to become familiar with the terms involved. The first time you complete this series will probably feel laborious, however the second time you do it things will start to make sense and you'll have a better understanding of why you are doing it. This series will be tough to wrap your head around especially if you are new to PKI, but take it one part at a time, one step at a time, methodically. If in any doubt, about any of the content then please ask your questions here by starting a new thread. Please note, Microsoft released a new updated PKI guide of their own, here June 2025. By the end of this series of guides you'll have the following setup and running in your windowsnoob.lab.local PKI LAB. Domain Controller (Windows Server 2016) - 192.168.11.1 Issuing CA (Windows Server 2016) - 192.168.11.2 Webserver (Windows Server 2016) - 192.168.11.3 Offline Root CA (Windows Server 2016) Windows 10 (Windows 10 Enterprise, version 1803) - 192.168.11.4 (Optional) Smoothwall NAT (linux) - 192.168.11.199 and MMC based applications like this screenshot from the Enterprise Issuing CA will become familiar to you Before we start the series let's list some of the terms you'll see popping up over and over. I will try to explain them as we move through the guide. PKI - Public Key Infrastructure AIA - Authority Information Access CDP - Certificate revocation list Distribution Point CRL - Certificate Revocation List OCSP - Online certificate status protocol CA - Certificate Authority Note: I'd recommend that you snapshot (checkpoint) the Virtual Machines at the end of each part of this series, so if you make a mistake, you can always back track to a known good state. Step 1. Create the Virtual Machines I use Hyper-V for my labs, as it's a role built into Windows Server 2016 (and even Windows 10), so as long as your computer is relatively new and the hardware supports virtualization, you can use it (simply enable the role, reboot, and start using it). You should have at least 16GB of ram and 500GB of SSD storage to set this lab up comfortably. To quickly create the virtual machines I use a PowerShell script which I wrote, you can download it here. Download the script - Create HyperV VMv2.ps1 Virtual Machine Names For this LAB, please use the following naming convention for your virtual machines (note this is not the computer name but the virtual machine name). #11_DC01 #11_IssuingCA #11_RootCA #11_W10_1803 #11_Webserver #11_Smoothwall Note: The #11 prefix is simply a method I use in Hyper-V to separate my labs visually in Hyper-v manager, so #11 is one lab, and #10 is another (and so on). You don't have to use the same convention as I do, but it would make it easier for you to follow the entire series. I use the Smoothwall linux based NAT to provide Port Forwarding capability and to share internet into my various LABs. Virtual Machine Roles The Virtual Machines created will have the following functions #11_DC01 Roles: DC, DNS, LDAP CDP,AIA #11_IssuingCA Roles: Enterprise Issuing CA #11_RootCA Roles: Standalone Offline Root CA #11_W10_1803 Roles: A Windows client #11_Webserver Roles: Webserver HTTP CDP, AIA #11_Smoothwall Roles: Port Forward, Internet sharing Note: When prompted for a network switch, create a unique one (#11) for the first VM created, and use the same one for each of the other vm's (we will remove the network from the Offline Root CA). For generation type, use Gen 2. Below is how I created the virtual machines listed above. Note: After creating the virtual machines and before installing Windows Server 2016 on the Offline Root CA, you must remove the Network Card for the Offline Root CA virtual machine as it should not be connected to any network. Step 2. Install the virtual machines Install Server 2016 On DC01, RootCA, IssuingCA and Webserver, install Windows Server 2016. It's up to you how to do this, you can use an Automated MDT PowerShell script, or install them manually. To install all Windows Server 2016 on all 4 servers as WorkGroup joined computers do as follows.. Choose Windows Server 2016 Standard (Desktop Experience) Continue through the installation wizard until prompted for a password, use P@ssw0rd as the Administrator password Click Finish. And then logon using the Administrator username and password configured above. Once Windows is installed, set the IP address for each virtual machine as shown below. Note: Below are the Computer Name and IP addresses used in this guide. For the Offline Root CA, you must remove the Network card in the Hyper-V virtual machine settings. Computer Name: DC01, IP address: 192.168.11.1, Subnet mask 255.255.255.0, Default gateway: 192.168.11.199, Preferred DNS server: 192.168.11.1 Computer Name: IssuingCA, IP address: 192.168.11.2, Subnet mask 255.255.255.0, Default gateway: 192.168.11.199, Preferred DNS server: 192.168.11.1 Computer Name: Webserver, IP address: 192.168.11.3, Subnet mask 255.255.255.0, Default gateway: 192.168.11.199, Preferred DNS server: 192.168.11.1 Computer Name: RootCA, IP: <NO NETWORK> Computer Name: W101803, IP address: 192.168.11.4, Subnet mask 255.255.255.0, Default gateway: 192.168.11.199, Preferred DNS server: 192.168.11.1 Computer Name: smoothwall11, IP address: (Green, static) 192.168.11.199 (Red, DHCP internet IP) x.x.x.x Here's how you can set the IP address for DC01. And configure the Computer Name as per the list (in this example it's for the Domain Controller) Reboot when prompted. Install Windows 10 Enterprise version 1803 Install Windows 10 Enterprise, version 1803 on the remaining virtual machine (#11_W10_1803). Configure the Computer Name and IP address as specified. Leave it WorkGroup joined. Optionally install Smoothwall To learn how to setup Smoothwall express as a firewall see this blog post. Step 3. Configure ADDS on DC01 Now that you've installed the servers, it's time to make DC01 a domain controller, to do that we'll install Active Directory Domain Services (ADDS) and to do that we'll use this PowerShell script, simply run the script as Administrator in Windows PowerShell ISE on DC01. Download the script -Configure ADDS.ps1 After running the script, DC01 is prompted to a Domain Controller and is ready for the next part of this series. Note: Please only run this script on the DC01 virtual machine. After running the script, the Domain Controller is ready for Part 2 (configured as dc01.windowsnoob.lab.local) and internet is working (via the Smoothwall) To continue with Part 2 of this series, click here. Recommended reading (1) - https://en.wikipedia.org/wiki/Public_key_infrastructure (2) - https://social.technet.microsoft.com/wiki/contents/articles/15037.ad-cs-step-by-step-guide-two-tier-pki-hierarchy-deployment.aspx (3) - https://docs.microsoft.com/en-us/sccm/core/clients/manage/co-management-overview


- 2 replies
-
- 2
-

-
- co-mangement
- ca
- (and 12 more)
-
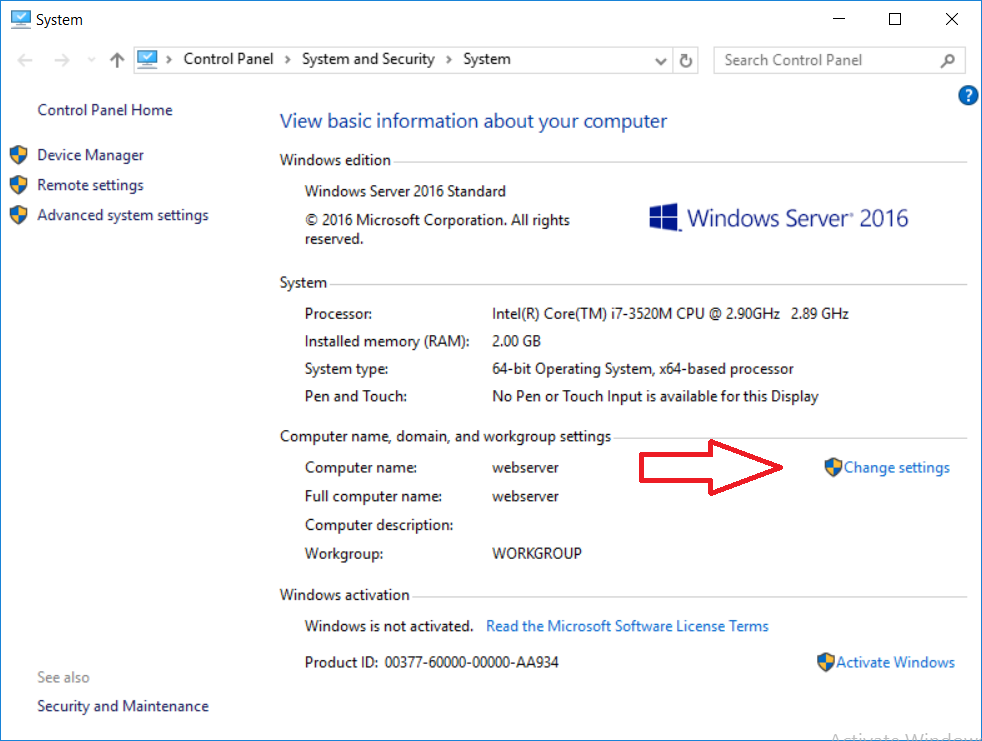
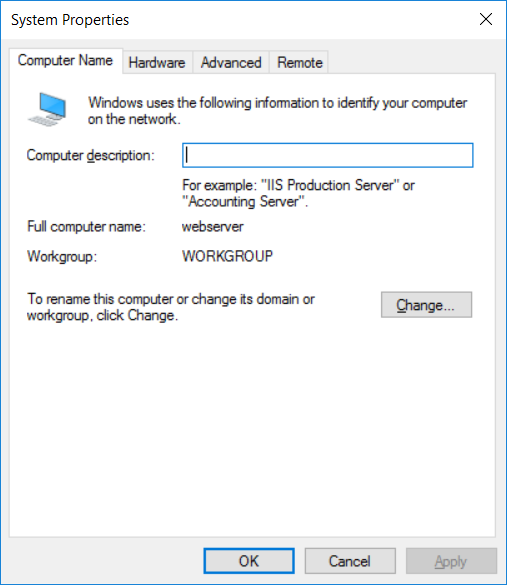
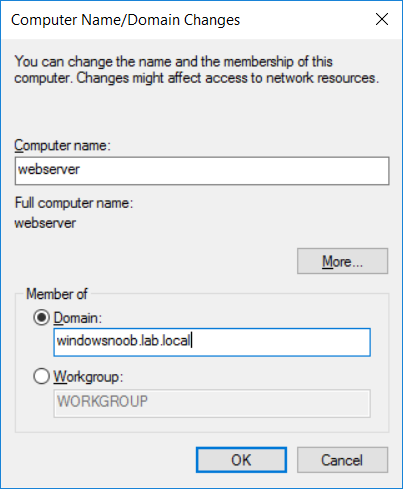
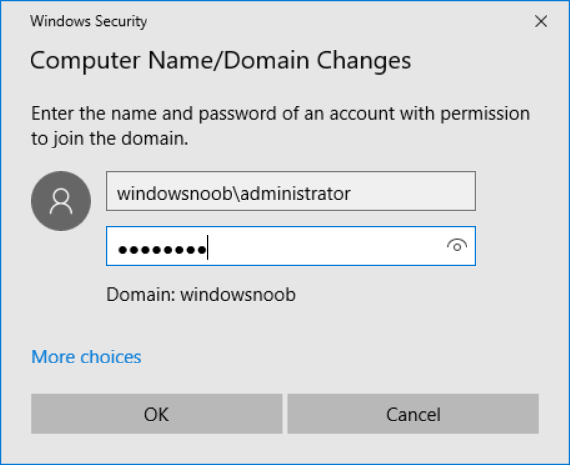
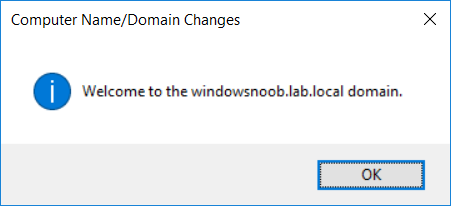
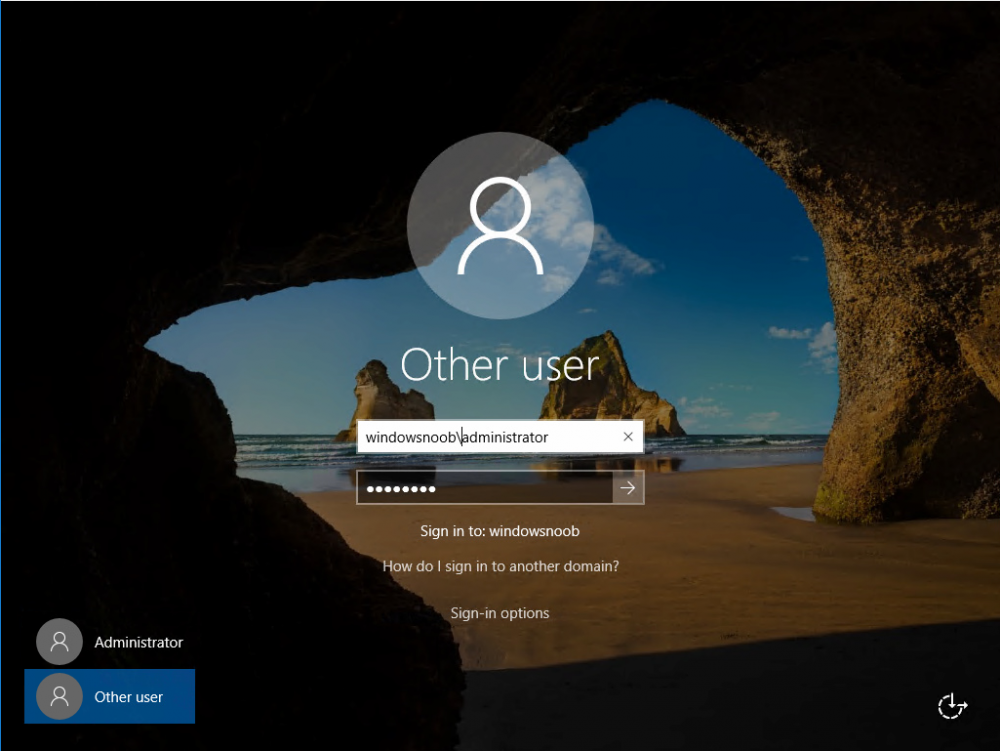
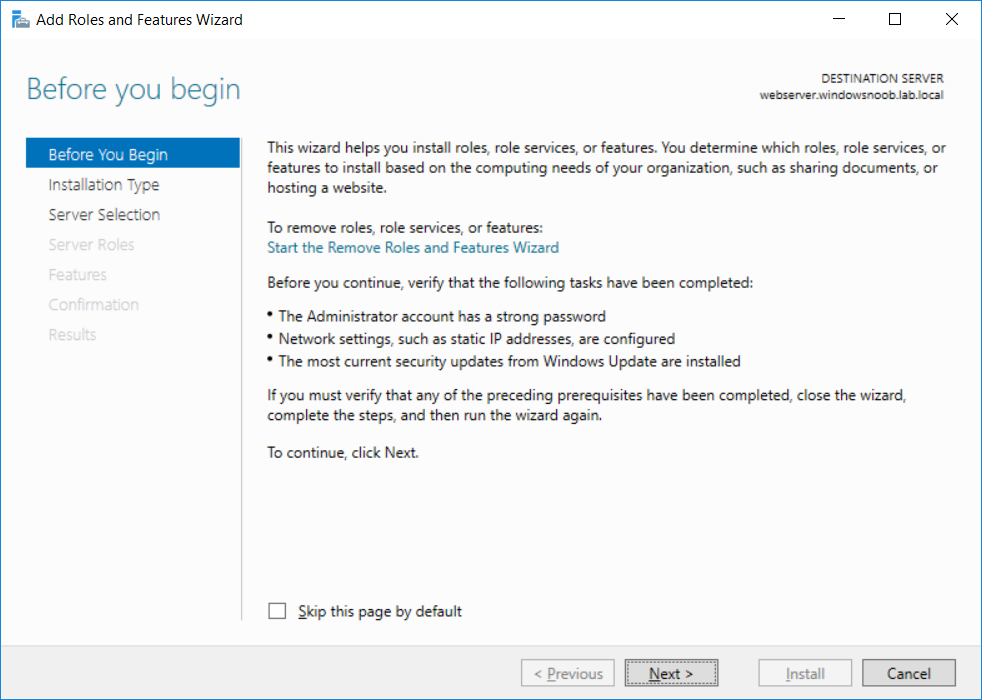
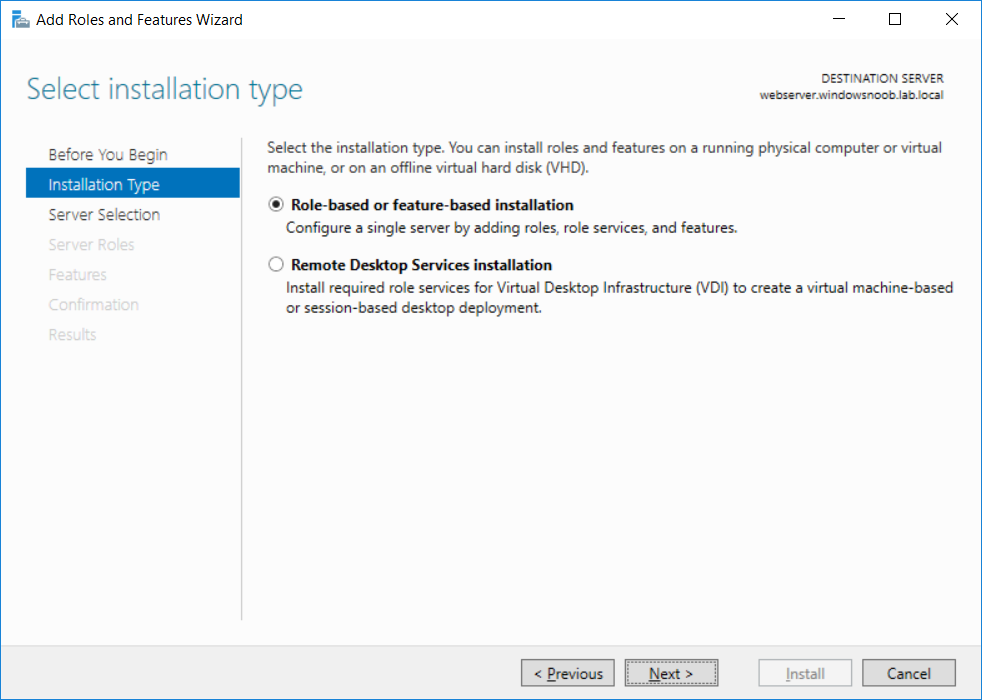
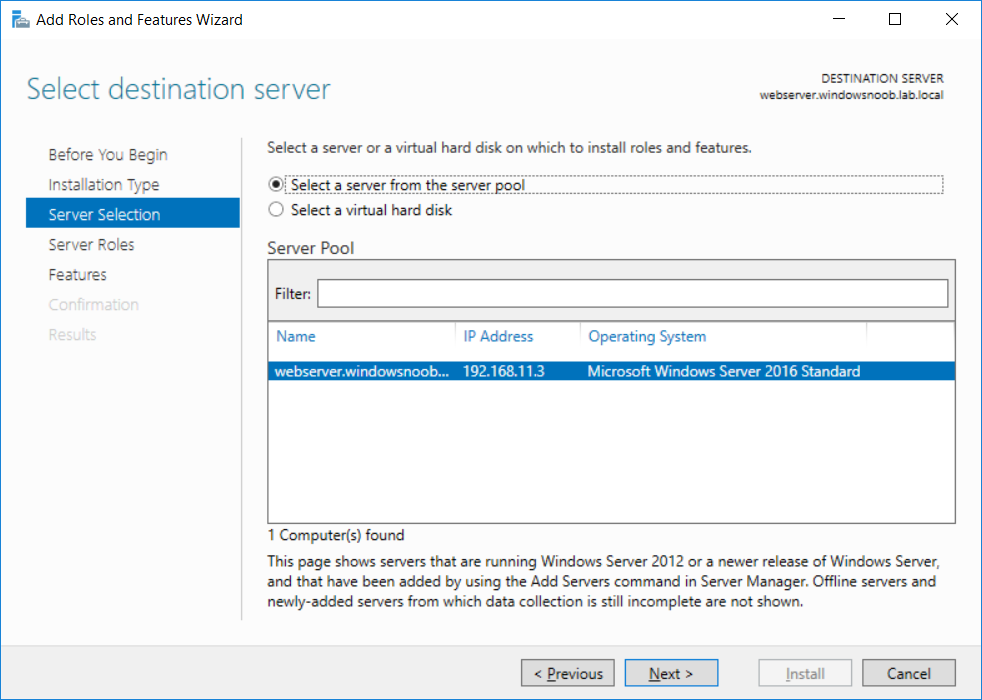
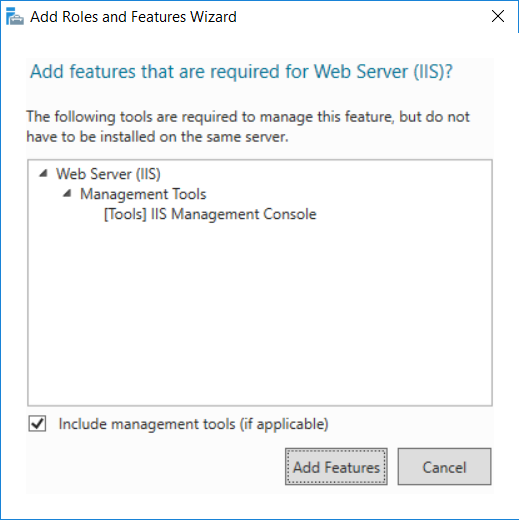
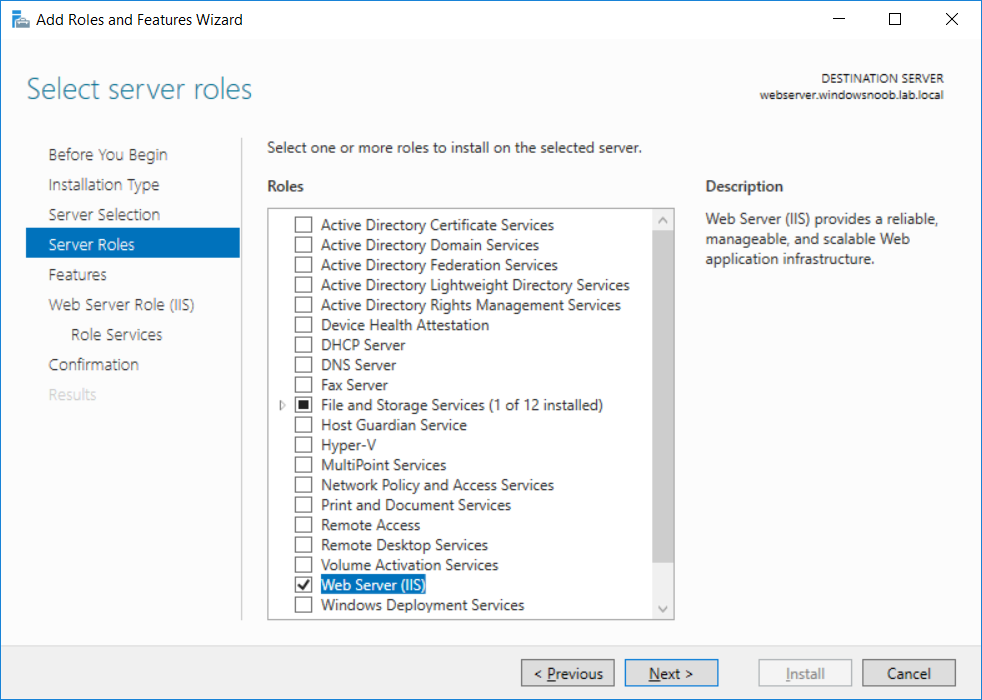
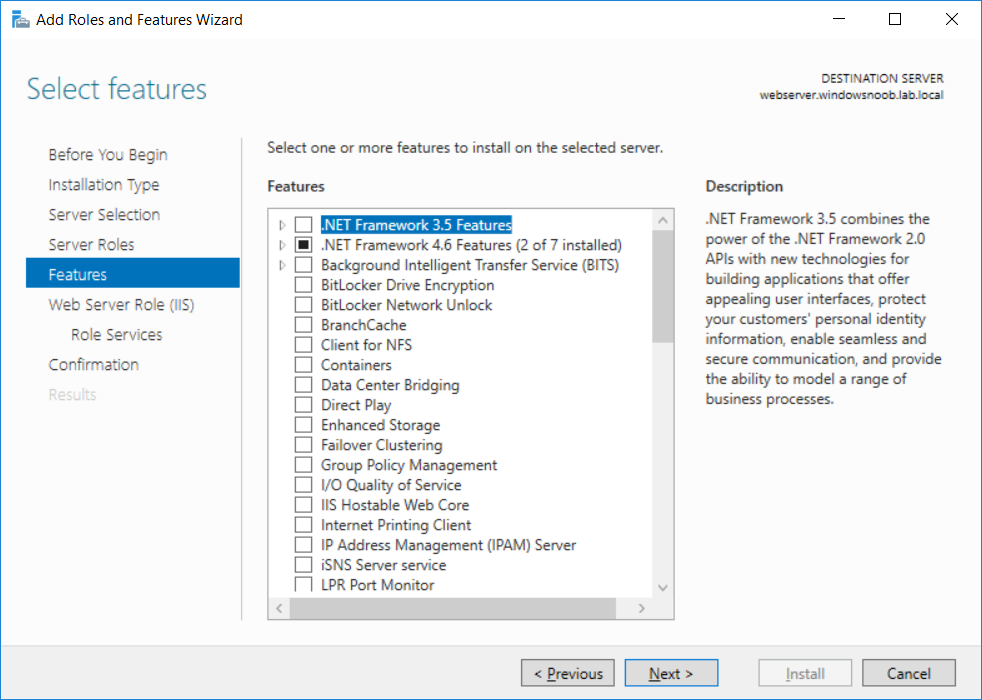
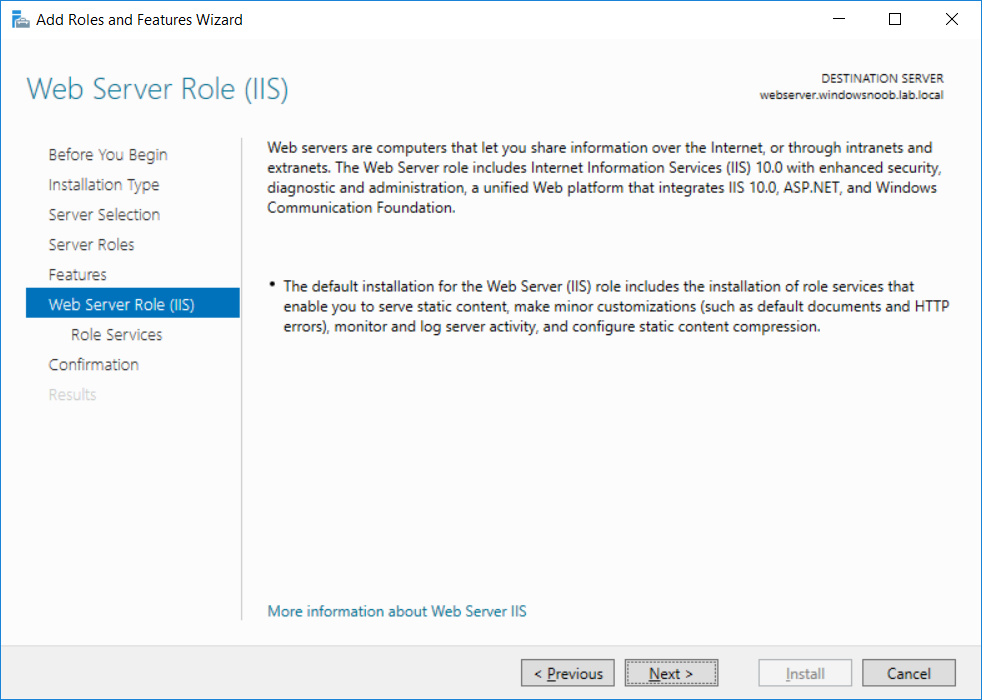
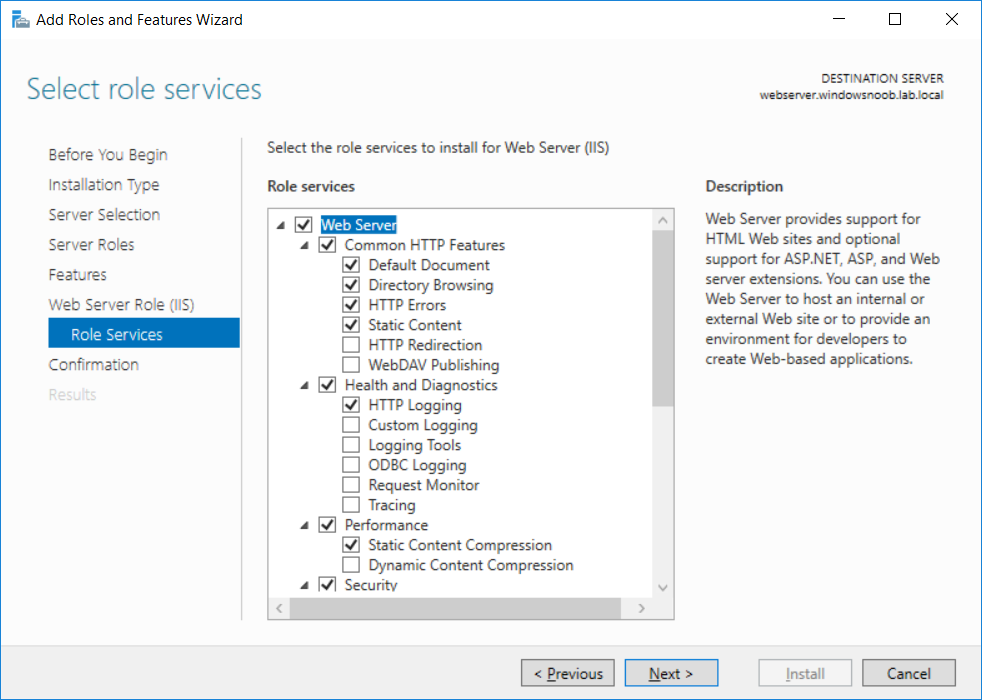
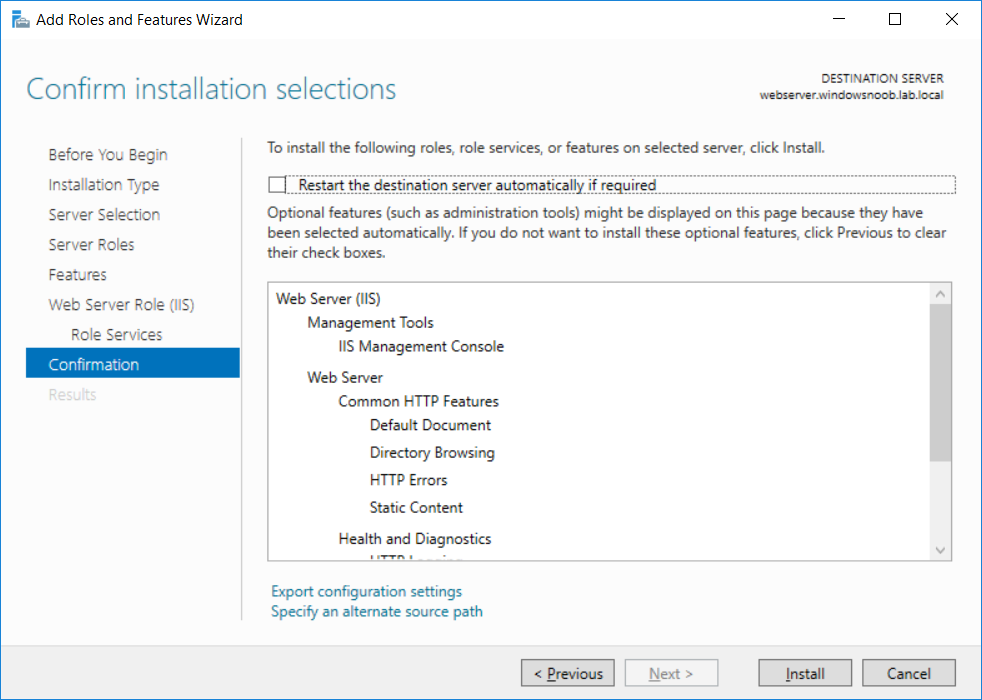
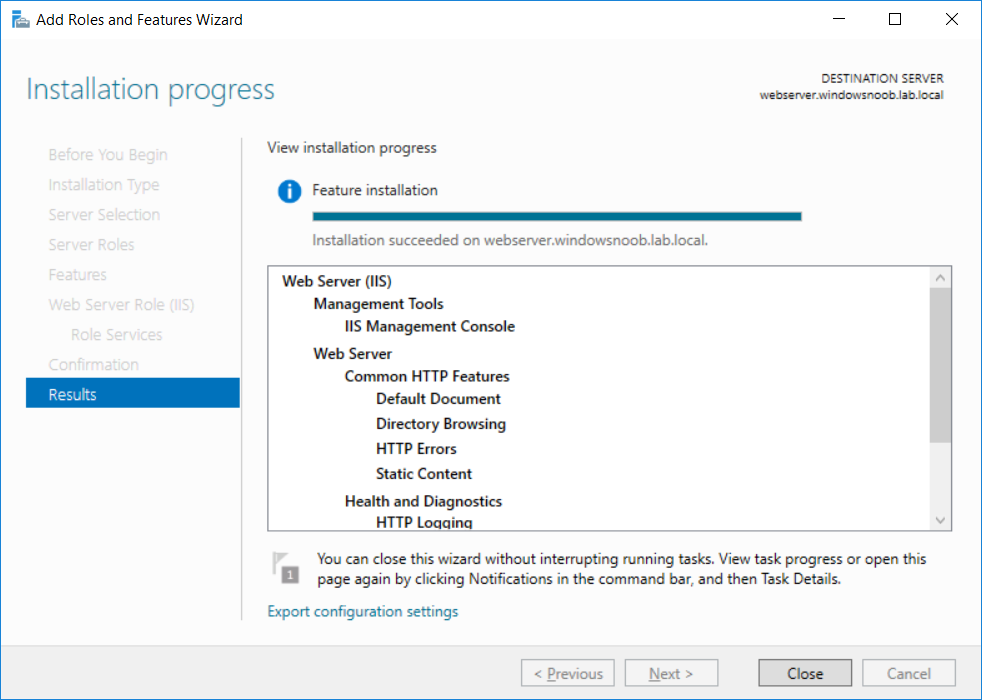
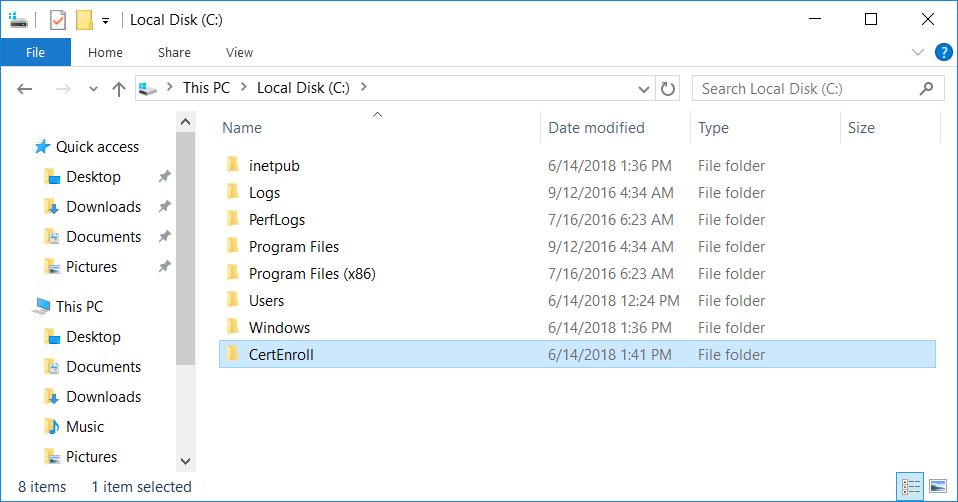
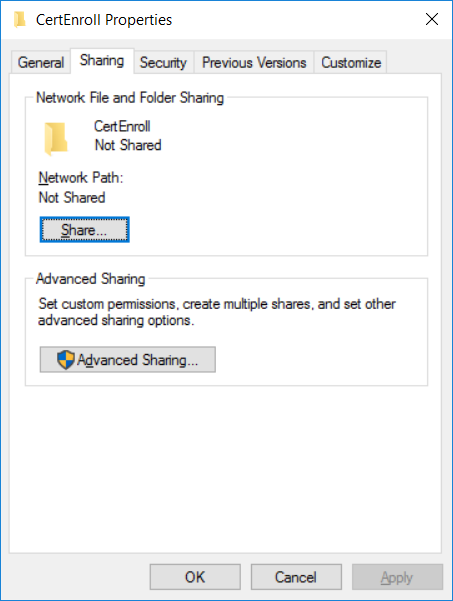
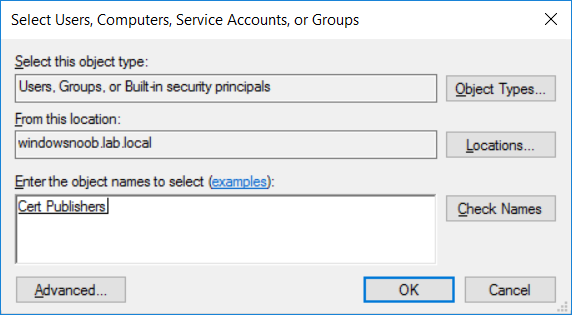
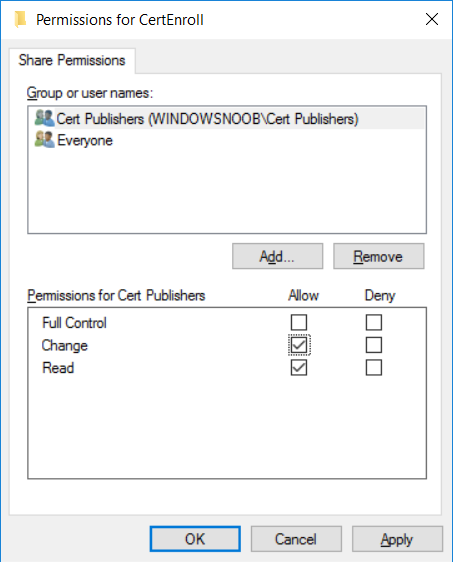
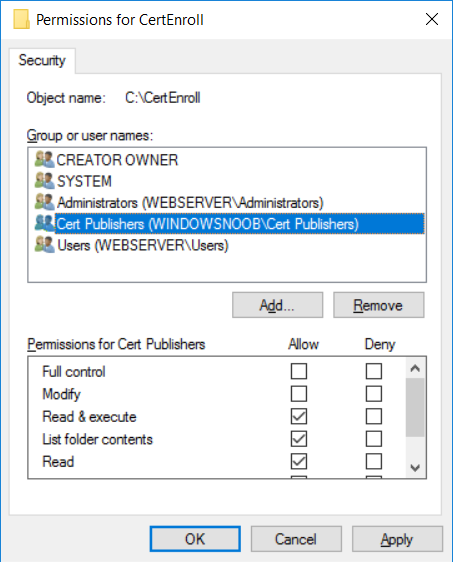
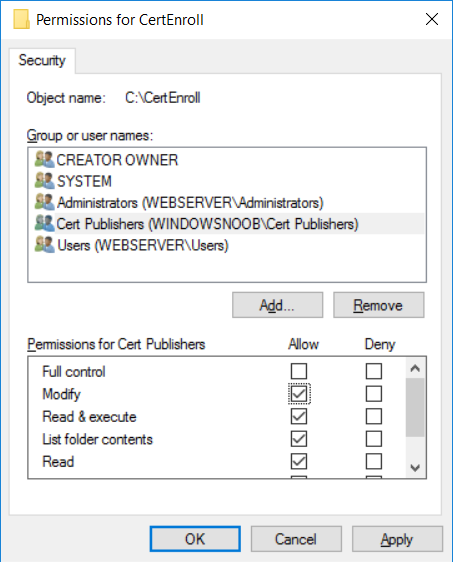
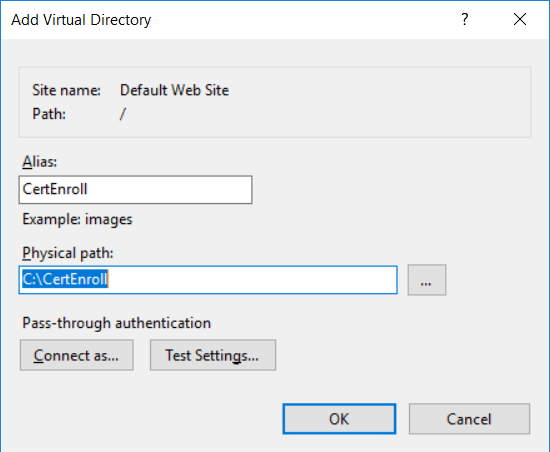
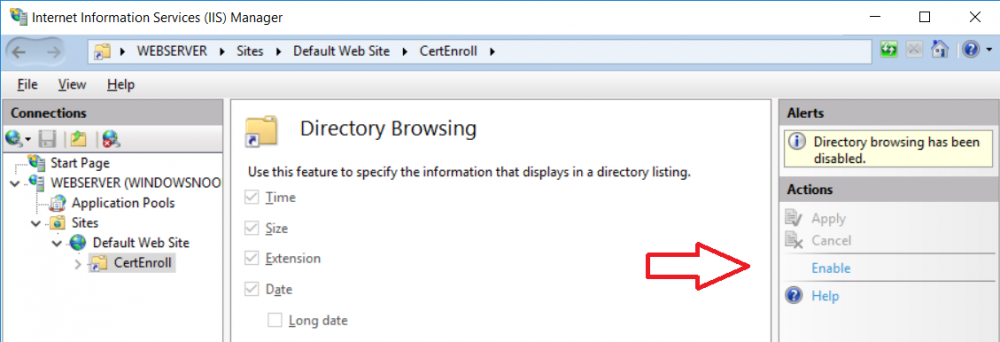
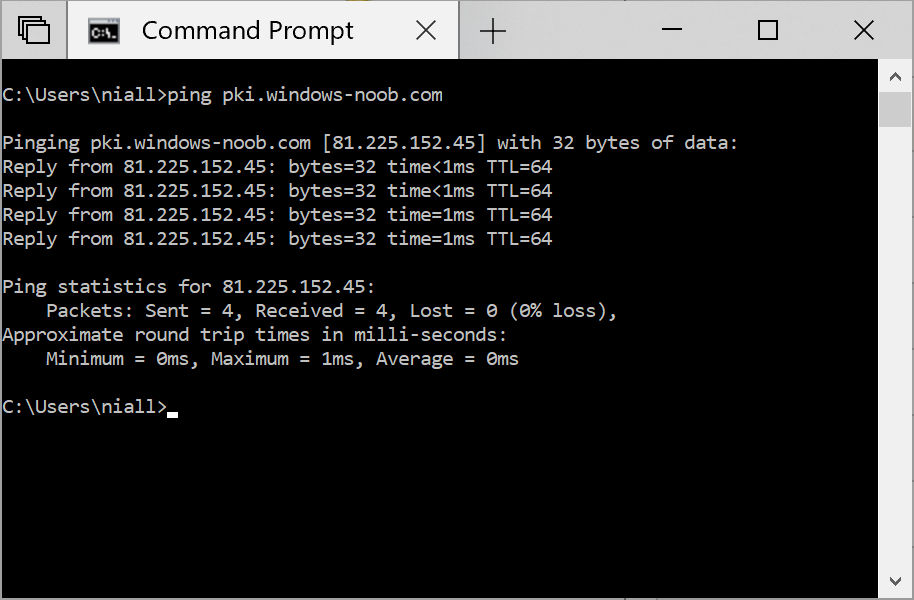
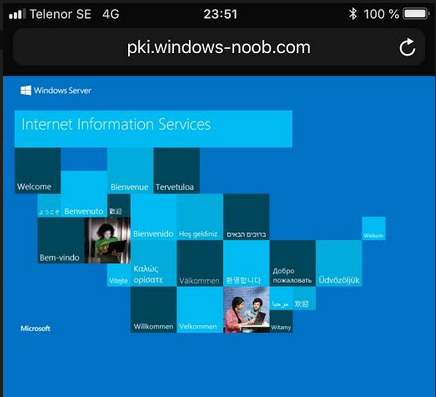
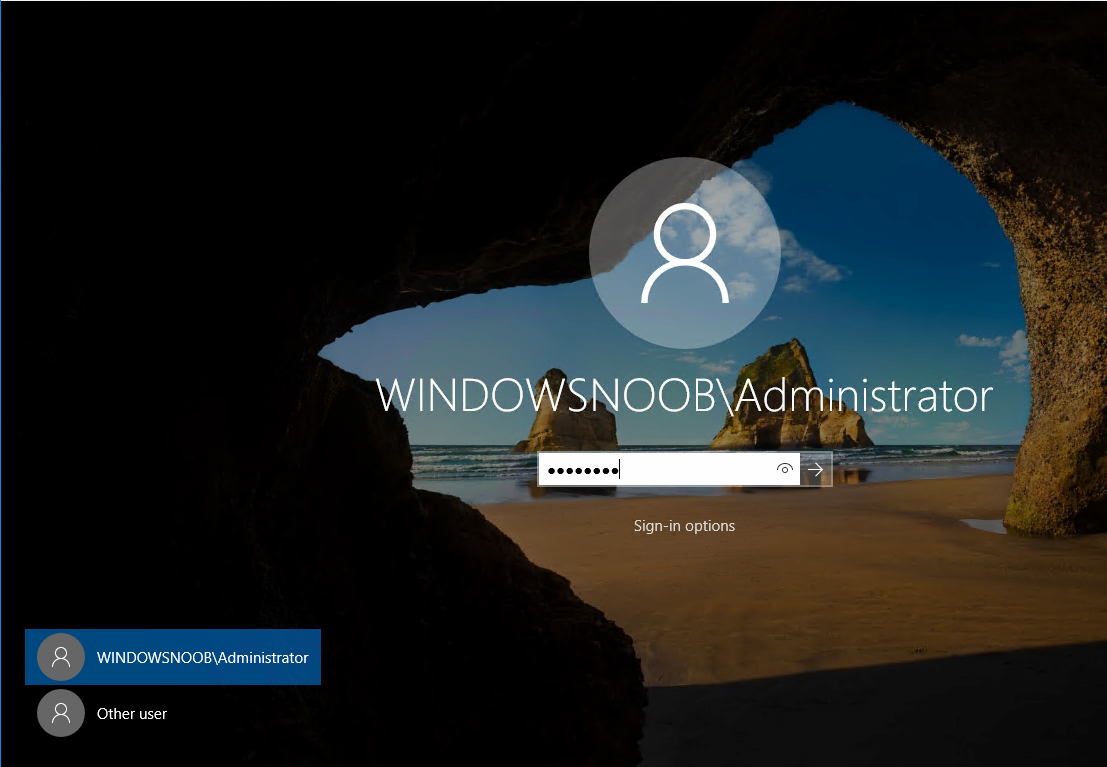
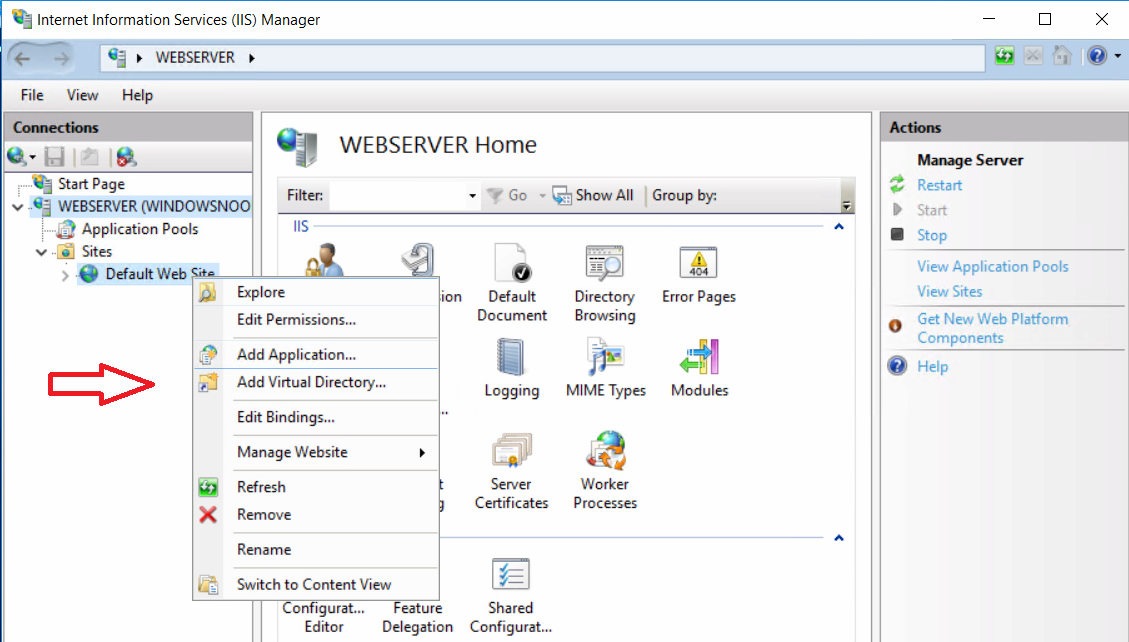
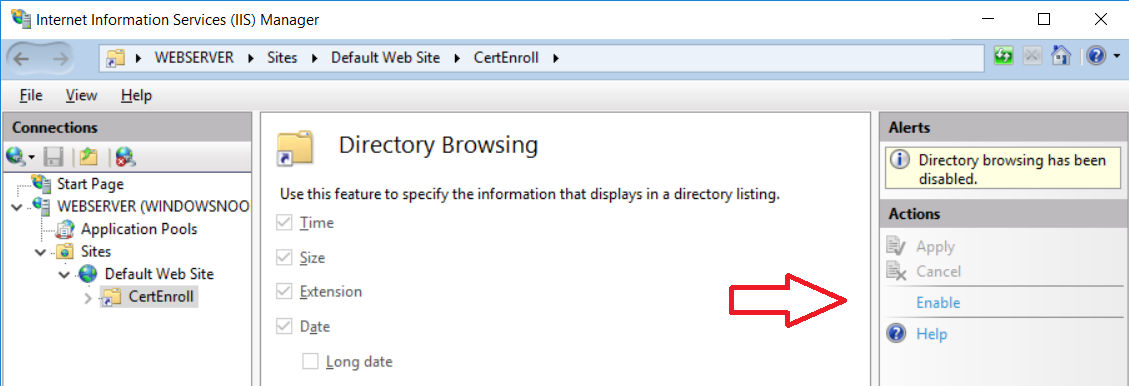
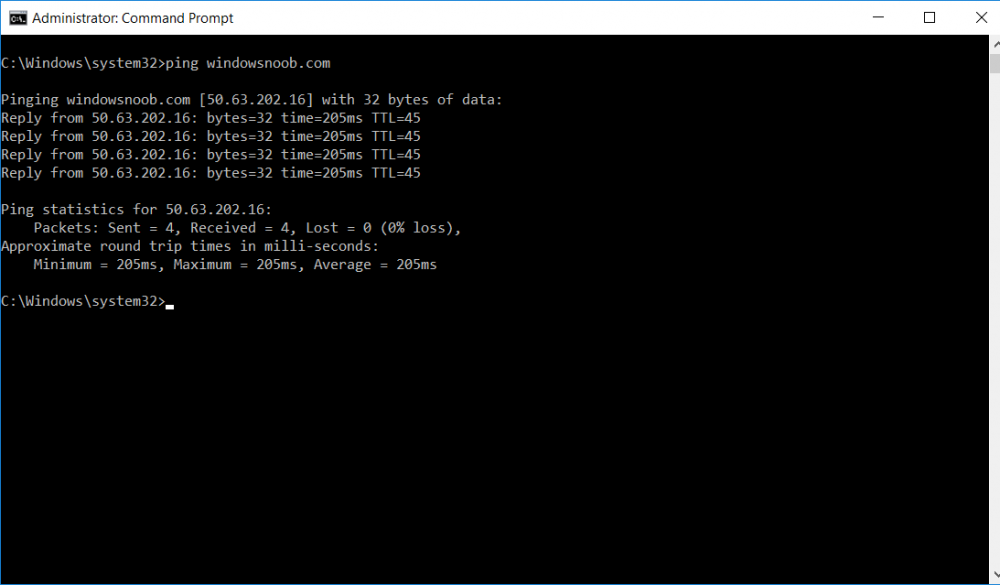
This series is comprised of different parts, listed below. Part 1 - Introduction and server setup Part 2 - Install and do initial configuration on the Standalone Offline Root CA Part 3 - Prepare the HTTP Web server for CDP and AIA Publication (this part) Part 4 - Post configuration on the Standalone Offline Root CA Part 5 - Installing the Enterprise Issuing CA Part 6 - Perform post installation tasks on the Issuing CA Part 7 - Install and configure the OCSP Responder role service Part 8 - Configure AutoEnroll and Verify PKI health In part 1 of this series, you configured your LAB for a 2 tier PKI hierarchy running on Windows Server 2016. You used PowerShell to create some virtual machines, and then installed Windows Server 2016, Windows 10 Enterprise version 1803 and optionally Smoothwall 3.1 before configuring the IP address scheme and Computer Names on the virtual machines. Finally you configured ADDS on DC01 so that you have a working Domain Controller for the rest of this LAB. In part 2 you installed and did the initial configuration on the Standalone Offline Root CA. In this part you will prepare the HTTP Web Server for CDP and AIA Publication. But before you get started with that, please have a read below of what a CDP and AIA actually are. What is a CDP ? A CDP (CRL Distribution Point) is an extension that contains links to the CRL of the issuer of the certificate which is being verified (1). What is an AIA ? An AIA (Authority Information Access) is an extension that contains links to the certificate of the issuer of the certificate which is being verified. Step 1. Join the web server computer to the domain When you installed the web server virtual machine (#11_Webserver) in part 1, it was workgroup joined. To join the domain do as follows. Logon to the web server virtual machine as Administrator. In Windows File Explorer, right click on This PC and choose Properties. Click on Change Settings beside Computer name, domain and workgroup settings. In the System Properties screen, click on Change. In the Member of field select Domain and enter the domain name you configured in part 1. enter credentials required for Domain join membership (eg: windowsnoob\administrator) click OK and click OK again when prompted with the welcome click OK Click OK, click Close then click Restart Now. After the reboot login to the domain as windowsnoob\administrator Alternatively, to join the domain automatically, use the joindomain.ps1 PowerShell script which you can download from here. JoinDomain.ps1 1. Copy the script to C:\Scripts on the webserver. 2. Edit the variables (lines 16-18) as desired before running. 3. Start Windows PowerShell ISE as Administrator and run the script by clicking on the green triangle. Step 2. Install the Web Server (IIS) Role Logon to the web server as windowsnoob\administrator and open Server Manager, select Add Roles and Features. In the wizard that appears click Next. Click Next and select Role-based or feature-based installation. Click Next and Select Select a server from the server pool, ensure that webserver.windowsnoob.lab.local is selected. Click Next and select Web Server(IIS) from the choices available on the Select server roles page, if prompted to Add features that are required for Active Directory Certificate Services, click Add features. Here you can see the Web Server (IIS) role selected. On Select features click Next. In the introduction to Web Server (IIS) screen, select Next. Accept the defaults and click Next. on the Confirm Installation Selections screen click Install. Click Close when the installation succeeds. Step 3. Create a CertEnroll Folder and grant Share & NTFS Permissions to the Cert Publishers group Create the CertEnroll Folder Now you need to create a shared folder where certificates and delta certificates can be stored from the PKI infrastructure. Open Windows File Explorer and then browse to the C:\ drive, Create a folder called CertEnroll at the root of the drive. Share the CertEnroll folder Right-click on the CertEnroll folder and select Properties. On the CertEnroll Properties page select the Sharing tab to configure share permissions. Click on the Advanced Sharing option and then select Share this folder. Click on Permissions and then click Add, on the Select Users or Groups page, in the Enter the object names to select, type windowsnoob\Cert Publishers and then click OK. On Permissions for CertEnroll dialog box, select the Cert Publishers group and then in the Allow column select Change permission. Click OK twice to go back to the CertEnroll Properties page. Edit NTFS permissions on the CertEnroll folder Select the Security tab and click Edit to configure NTFS permissions. On Permissions for CertEnroll page click Add. On the Select Users or Groups page, under the Enter the object names to select, enter windowsnoob\Cert Publishers and then click OK. On the Permissions for CertEnroll page highlight the Cert Publishers group and then under the Allow column select the Modify permission and then click OK. On the Permissions for CertEnroll page, click OK to close the window and click OK again to close CertEnrolls properties page. Step 4. Create a Virtual Directory in IIS Ensure you are logged on to webserver as windowsnoob\Administrator. Click Start, select Administrative Tools and then select Internet Information Services (IIS) Manager. In the Connections pane, expand WEBSERVER and then expand Sites. Right-click on Default Web Site and select Add Virtual Directory. On the Add Virtual Directory page, in Alias, type CertEnroll and for Physical path, type C:\Certenroll, and then click OK. In the Connections pane, under the Default Web Site, ensure the CertEnroll virtual directory is selected then in the CertEnroll Home pane, double-click on Directory Browsing. In the Actions pane click Enable. Step 4. Enable Double Escaping on the IIS Server Allowing double escaping makes it possible for the web server to host Delta CRLs. For more information about this see KB Article 942076 (3). Ensure you are logged on to the webserver as windowsnoob\Administrator. Open an Administrative Command Prompt. Then enter the following cd %windir%\system32\inetsrv\ and press ENTER. Type following command and press Enter. Appcmd set config "Default Web Site" /section:system.webServer/Security/requestFiltering -allowDoubleEscaping:True Type the following to restart IIS. iisreset and press ENTER. Step 5. Create a DNS record for externally accessible website address To answer requests for OCSP and CRL, AIA via a publicly available URL, login to your DNS provider and create a new DNS record for your chosen public URL, eg: http://pki.windows-noob.com Note: http://pki.windows-noob.com is a website address that I own and use, and I'm using it in this guide to show you what you need to do, obviously you need to use your own website address, for example http://pki.yourdomain.com. This should point to the IP address of your internet connection that is being shared via the smoothwall. Once it's setup, you can verify pinging the URL Lastly, you need to configure your Smoothwall (or use another method) to port forward port 80 (http) internet requests to the webserver. To do that, login to https://192.168.11.199:441 (the Smoothwall IP address) via the Internet Explorer Web browser on the WebServer. Note that you may have to disable IE enhanced security information temporarily to allow access. Once connected, login as Admin/password, which you defined when you installed the Smoothwall. Below you can see the Port Forward I've configured for port 80 requests. After doing so, anyone can browse to http://pki.windows-noob.com using a web browser which means they'll be able to retrieve CRL's when they are published to http://pki.windows-noob.com/certenroll Join me in part 4 to further configure the Standalone Offline Root CA. Recommended reading (1) - https://www.sysadmins.lv/blog-en/root-certification-authority-ca-cdp-and-aia-extension-question.aspx (2) - https://blogs.technet.microsoft.com/nexthop/2012/12/17/updated-creating-a-certificate-revocation-list-distribution-point-for-your-internal-certification-authority/ (3) - http://support.microsoft.com/kb/942076