anyweb
-
Posts
9277 -
Joined
-
Last visited
-
Days Won
371
Everything posted by anyweb
-

Not able to reach WDS Server to capture image
anyweb replied to MrEclipseguy's question in Windows Deployment Services (WDS)
no that's not enough, you must import the wim into WDS by choosing 'add boot image' in the WDS gui in addition i think we've been using the wrong INF's all along, instead of using the windows xp ones we should be using the vista ones for windows PE.... so i've updated the WIM one last time to include the correct infs (i hope) sorry about this, but as I don't have an Optiplex 755 it's hard for me to test the theory please download this new WIM and test it, i'm very hopeful that it'll work here's what I did to put it together, C:\>"c:\Program Files\Windows AIK\Tools\PETools\copype.cmd" x86 c:\windowspe-x86 C:\windowspe-x86>Imagex /info "D:\remoteinstall\boot\x86\images\windows-noob_capture-(2).WIM" C:\windowspe-x86>Imagex /mountrw D:\remoteinstall\boot\x86\images\windows-noob_c apture-(2).WIM 1 c:\mount C:\windowspe-x86>peimg /inf="C:\dell\drivers\R162323\Vista32\*.inf" c:\mount C:\windowspe-x86>imagex /unmount /commit c:\mount the most important line above is this one C:\windowspe-x86>peimg /inf="C:\dell\drivers\R162323\Vista32\*.inf" c:\mount ok ? cheers anyweb -
Not able to reach WDS Server to capture image
anyweb replied to MrEclipseguy's question in Windows Deployment Services (WDS)
ok can you confirm thhat you disabled the wim in wds, then imported mine, then re-enabled it then pxe booted the optiplex 755 what happened then ? -
Microsoft has finally pumped out Vista service pack one (SP1) in the remaining 31 languages as a manual download via its Windows Update site. Swedish download > http://www.microsoft.com/downloads/details...;displaylang=sv Bulgarian download > http://www.microsoft.com/downloads/details...4a-09146a0ba746 Danish download > http://www.microsoft.com/downloads/details...4a-09146a0ba746
-
Not able to reach WDS Server to capture image
anyweb replied to MrEclipseguy's question in Windows Deployment Services (WDS)
hi Mike, did you get a chance to test it yet ? cheers anyweb -
Not able to reach WDS Server to capture image
anyweb replied to MrEclipseguy's question in Windows Deployment Services (WDS)
ok i've added the other inf to the wim, and here it is again to test please test it and let me know are we getting anywhere... cheers anyweb -
Not able to reach WDS Server to capture image
anyweb replied to MrEclipseguy's question in Windows Deployment Services (WDS)
no problem, at least we know which inf doesnt work now, i'll add the other inf and re upload the wim for you to test ok ? -
Not able to reach WDS Server to capture image
anyweb replied to MrEclipseguy's question in Windows Deployment Services (WDS)
have you tried to import the image into WDS boot images ? (hint, right click and choose add boot image) -
Not able to reach WDS Server to capture image
anyweb replied to MrEclipseguy's question in Windows Deployment Services (WDS)
hi Mike i've now updated my wim file (the capture wim) with the driver for Dell Optiplex 755, please download it, add it into your WDS boot images and then tell me does it work for you, if it does work, then I will also make these changes to the deploy wim file. Please download the updated WIM from here (121mb in size) For your reference here are the commands I used to add the driver after disabling the WIM in WDS. -
Not able to reach WDS Server to capture image
anyweb replied to MrEclipseguy's question in Windows Deployment Services (WDS)
hi Mike the driver is correct, please let me try to update my boot.wim with the driver and supply you with that boot.wim file, i'd be very interested to see if that works as soon as i get the time to do this i will (soon) cheers anyweb -
Not able to reach WDS Server to capture image
anyweb replied to MrEclipseguy's question in Windows Deployment Services (WDS)
does your optiplex have a vpro sticker on the chassis ? if not maybe you need to be using the broadcom driver s can you check that please.. or verify what the nic is called in device manager cheers -
Not able to reach WDS Server to capture image
anyweb replied to MrEclipseguy's question in Windows Deployment Services (WDS)
the optiplex 755 came in a few different versions (vpro or not) so it could have an intel or broadcom nic, is yours an Optiplex 755 vpro ? what is the nic listed as in the device manager ? what driver did you attempt to update windows PE with ? the vista or xp version ? if i had one i'd test it here but i dont sorry. -
Not able to reach WDS Server to capture image
anyweb replied to MrEclipseguy's question in Windows Deployment Services (WDS)
ok mike i'll try and do a howto on adding drivers to a wds boot.wim used for DEPLOYING images, as i think this is where you have made a mistake if you can capture the image but cannot deploy the same image then we must update boot.wim for the DEPLOYMENT boot.wim if you are willing I can do a remote desktop session with you (time willing) if you want to try this then let me know cheers anyweb -
Microsoft plans to make a key Internet Explorer default change to thwart attackers trying to hack into its Web browser. The software maker will enable DEP/NX by default in IE 8 when the browser is running on Windows Vista and Windows Server 2008, a major tweak aimed at mitigating browser-based vulnerabilities. DEP/NX (Data Execution Prevention/No Execute) is already available in IE 7, but it's turned off by default because of compatibility issues. via osnews.com
-
Not able to reach WDS Server to capture image
anyweb replied to MrEclipseguy's question in Windows Deployment Services (WDS)
hi Mike i've tested capturing an XP pro sp2 image using WDS and in the process completely re-read (and slightly edited) the WDS capture guide I wrote. It successfully captures the image and stores it on my WDS server, I can then PXE boot the client back to the server and I can see the windows PE menu with options that are as follows:- if i then choose to deploy the image it will list the XP image I captured earlier, is this where your's fails, if not please specify... cheers anyweb -
how can I DEPLOY an image captured using WDS ?
anyweb replied to anyweb's question in Windows Deployment Services (WDS)
hi Ben i've tested this and it works fine for me (both XP images and Vista) cheers anyweb -
Not able to reach WDS Server to capture image
anyweb replied to MrEclipseguy's question in Windows Deployment Services (WDS)
ok you are obviously not injecting the network drivers properly do you have a link to a howto somewhere that you followed ? -
Not able to reach WDS Server to capture image
anyweb replied to MrEclipseguy's question in Windows Deployment Services (WDS)
hi Mike I wonder could this be related to your issue > http://forums.microsoft.com/TechNet/ShowPo...2&SiteID=17 -
via > engadget
-
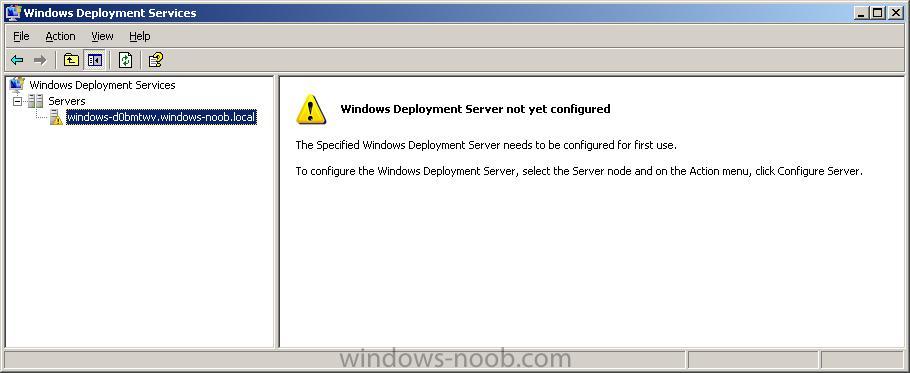
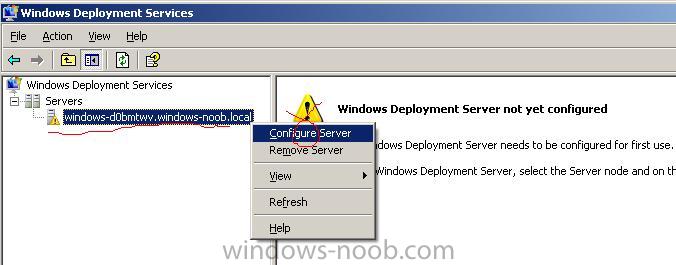
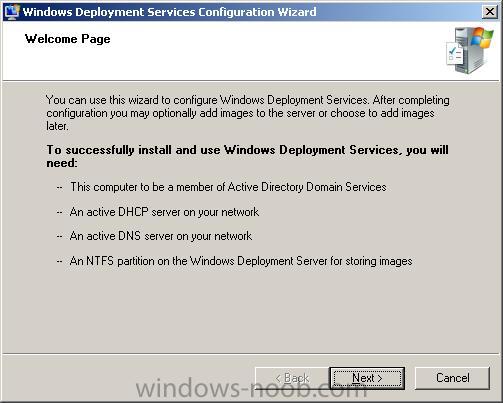
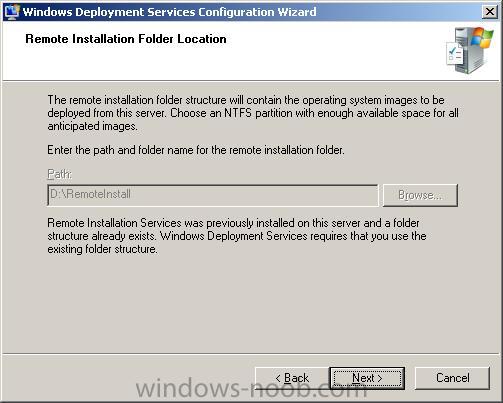
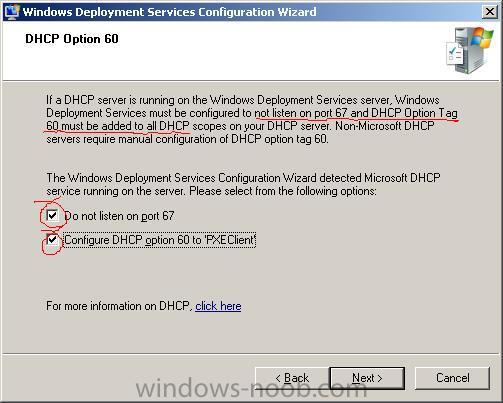
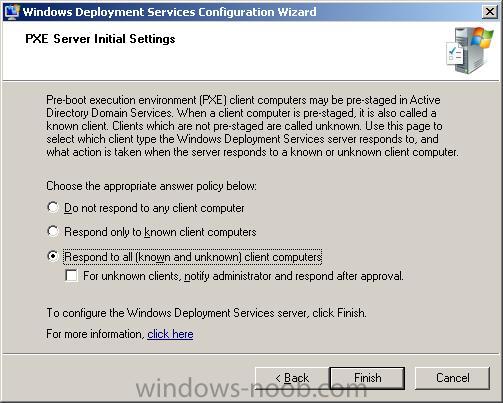
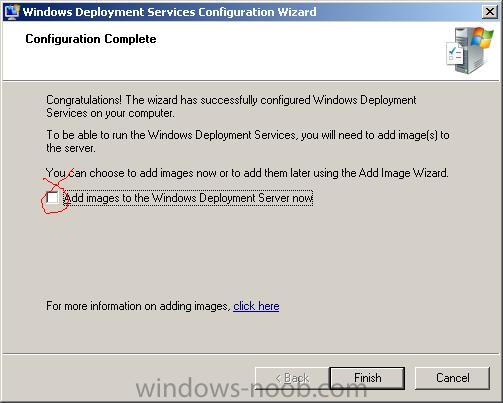
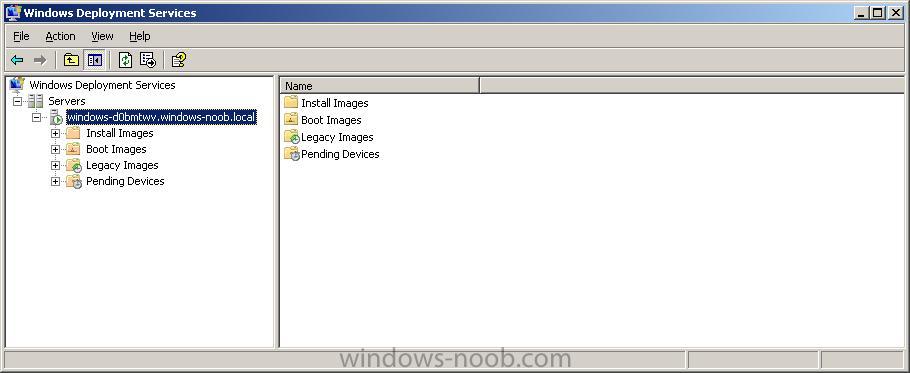
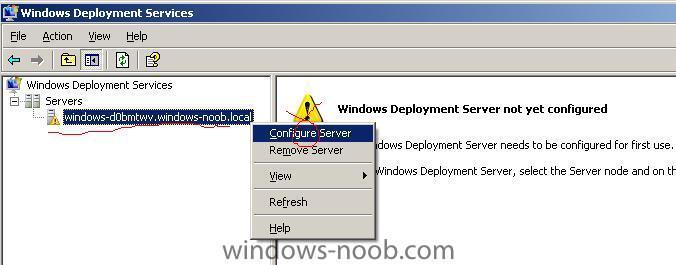
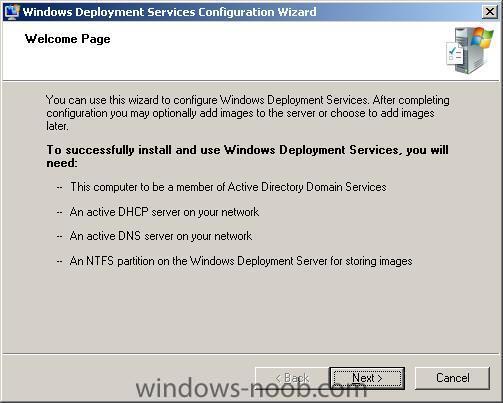
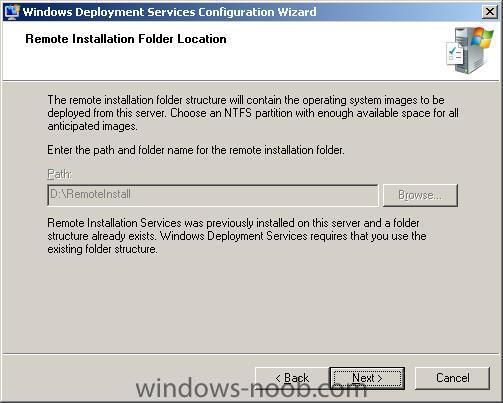
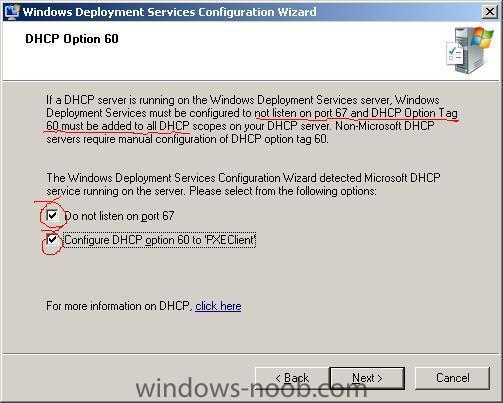
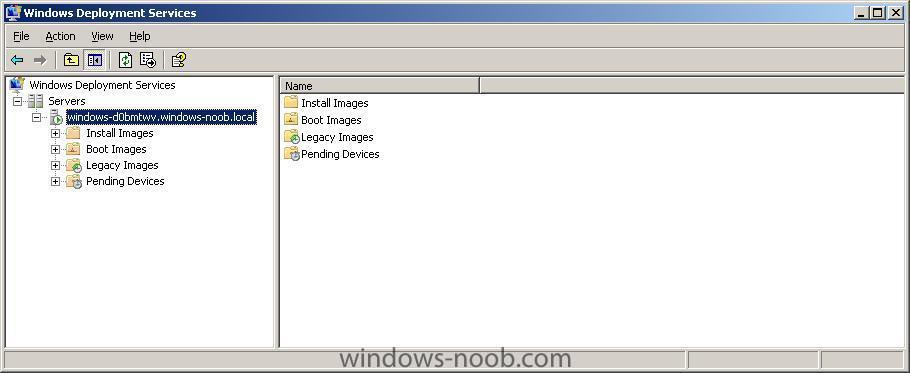
if you have just installed WDS via the WAIK then you will need to configure the WDS server. To do so you can click on Start/All Programs/Administrative Tools/Windows Deployment Services. You will most likely see the following screen To configure it using the wizard select your server in the left pane and right click it, choose configure server. a wizard will appear it may ask for the path of your RemoteInstall (previous RIS installation) The next screen is typically confusing, it says 'Windows Deployment Services must be configured to not listen on port 67 and DHCP option tag 60 (i've added bold)., so select the two unselected options before clicking next. Select your response type (I went with the default) and then click Finish. I then deselected 'add images' and clicked on finish again. once complete it should look like this (this is a mixed mode WDS server, running Windows 2003 sp1)


-
- 1
-

-
there are currently two main releases of the WAIK (Windows Automated Installation Kit) the first version was released in conjunction with Windows Vista to aid in its' deployment, and the WAIK is used for the following (source, microsoft) the file details for the first version are vista_6000.16386.061101-2205-LRMAIK_EN.img from 13/2/2007. A year or so later a newer version of the WAIK was released to support Windows Vista Service Pack 1 and Windows Server 2008, the file details for that release are 6001.18000.080118-1840-kb3aik_en.iso from 6/3/2008. If you are planning on deploying Windows Vista, use the first version if you already have it, or if you are deploying Windows Vista SP1 then use the second release. In addition, if you plan on deploying Windows Server 2008, you'll need the second release. Before installing the WAIK you'll need to install MSXML 6.0. MSXML 6.0 is available on the latest WAIK iso download (and the .NET 2.0 Framework is also included) cheers anyweb
-
Not able to reach WDS Server to capture image
anyweb replied to MrEclipseguy's question in Windows Deployment Services (WDS)
hi Mike i will setup a wds server today and see if i can figure out where you are going wrong, please be patient as I set it up cheers anyweb -
Not able to reach WDS Server to capture image
anyweb replied to MrEclipseguy's question in Windows Deployment Services (WDS)
good info, does the dell optiplex 745 still work using the process you have set up already ? ie: is the problem only affecting your new hardware ? -
welcome to the forums mike !
-
After months of development Windows Vista SP1 is finally available for download Windows Vista Service Pack 1 Five Language Standalone (KB936330) File Name: Windows6.0-KB936330-X86-wave0.exe Version: 936330 Knowledge Base (KB) Articles: KB936330 Date Published: 3/18/2008 Language: English Download Size: 434.5 MB
-
Microsoft Deployment Toolkit (MDT) 2008
anyweb posted a question in Microsoft Deployment Toolkit (MDT)
Microsoft Deployment Toolkit 2008 is the next version of Business Desktop Deployment (BDD) 2007. It is the recommended process and toolset to automate desktop and server deployment. This release includes updates to support Windows Vista SP1 and Windows Server 2008 in addition to previously supported platforms. You can download it here