


anyweb
-
Posts
9,110 -
Joined
-
Last visited
-
Days Won
363
Posts posted by anyweb
-
-
you cannot restart the RIS (remote installation service) service once you have got the WDS service installed, the WDS service REPLACES the RIS service, so you must disable the RIS service and enable the WDS service,
once you have started the WDS service instead of the RIS service, all your normal RIS fucntions will work again,
have you tested PXE booting to the ris server ?
-
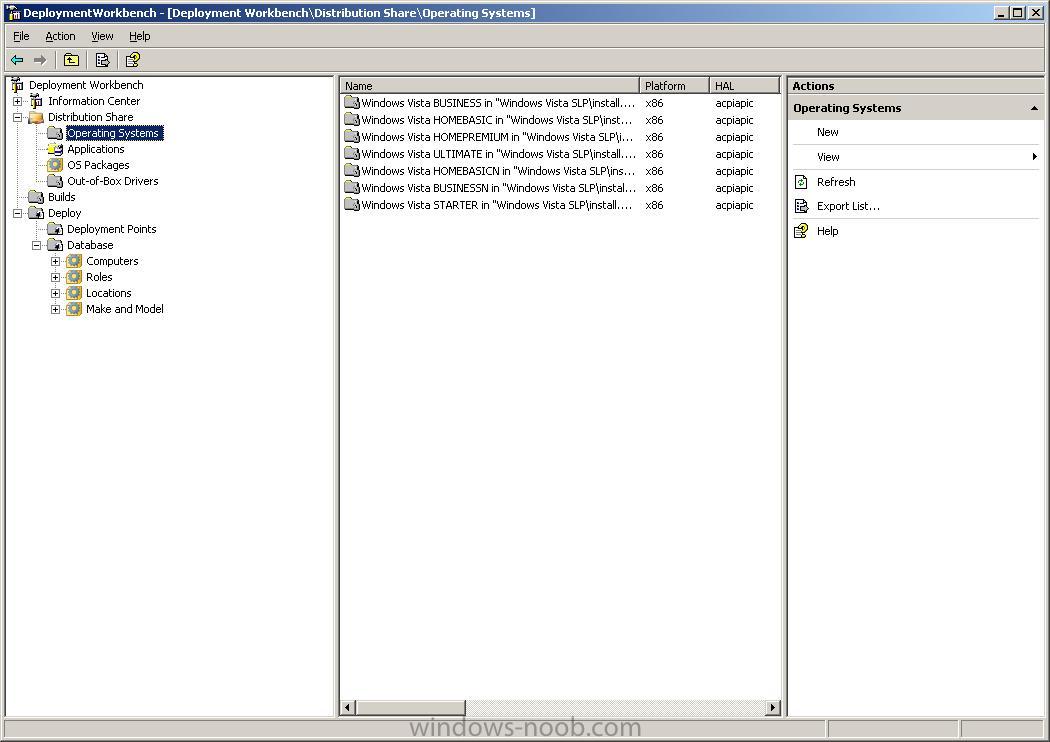
to find out what versions of Windows Vista are on your Vista DVD, simply insert it into your dvdrom drive and browse to the /sources/ folder,
in there, locate the .CLG (catalog) files such as below
install_Windows Vista BUSINESS.clginstall_Windows Vista BUSINESSN.clg
install_Windows Vista HOMEBASIC.clg
install_Windows Vista HOMEBASICN.clg
install_Windows Vista HOMEPREMIUM.clg
install_Windows Vista STARTER.clg
install_Windows Vista ULTIMATE.clg
from the above, we can determine that the DVD supports the installation (based on the product key) of
Windows Vista Business, Business N, HomeBasic, HomeBasic N, HomePremium, Starter and Ultimate editions.
cheers
anyweb
-
If you try to install an application in BDD 2007 such as the one in this example and it fails to install, and in addition, you note that any autologin you added to unattend.xml or user accounts were not created then the reason could be down to the media you are using.
If you are using an OEM Windows Vista DVD then it is SLP (system locked protection) media and contains some additional files/folders that are not found on the MSDN or VLK/Enterprise media.
On an OEM DVD you'll find a folder called $OEM$ in the SOURCES folder, and it contains files and sub directories of it's own. When you initially copied the operating system to your BDD 2007 distribution operating systems share, it copies everything including the OEM specific files. And it's those files that cause BDD to fail to do what you want it to do.
to resolve the problem, simply MOVE or CUT the contents of the $OEM$ folder to somewhere else (effectively removing them from the BDD distribution share. Once done, PXE boot to your BDD server again, and you'll now see a difference, the application(s) should install and your other unattend.xml settings should magically work.
cheers
anyweb
-
Microsoft has delayed the upcoming release of Windows Server 2008. "Windows Server 2008, which we have been saying would Release to Manufacturing by the end of the calendar year, is now slated to RTM in the first quarter of calendar year 2008. Why? Well, as you know, Microsoft's first priority is to deliver a great product to our customers and partners, and while we're very happy with the feedback we're getting and the overall quality of the latest product builds, we would rather spend a little more time to meet the high quality bar that our customers and partners deserve and expect."
via osnews.com
-
Microsoft is finally talking about the much-anticipated first service pack for Windows Vista and will release the first beta to a select group of about 15,000 customer and partner testers within the next few weeks. The software maker will release the beta for Windows XP Service Pack 3 at the same time. Microsoft acknowledged Aug. 29 that it has already shared beta previews of Windows XP SP3 and Vista SP1 with small group of testers, a fact it refused to admit until recently despite numerous leaks on the Internet.
via osnews.com
-
so which is better in your mind ? xp/vista/linux/mac or other ?
let us know
cheers
anyweb
-
ok, you've already upgraded your Windows 2003 RIS server from Sp1 to Sp2., and all of a sudden pxe boot to the RIS server doesnt work anymore.
No problem, read this post first.
If you are now using WDS in mixed mode after doing the above, then you'll most likely need to configure it.
To do that click on start/all programs/administrative tools/windows deployment services.
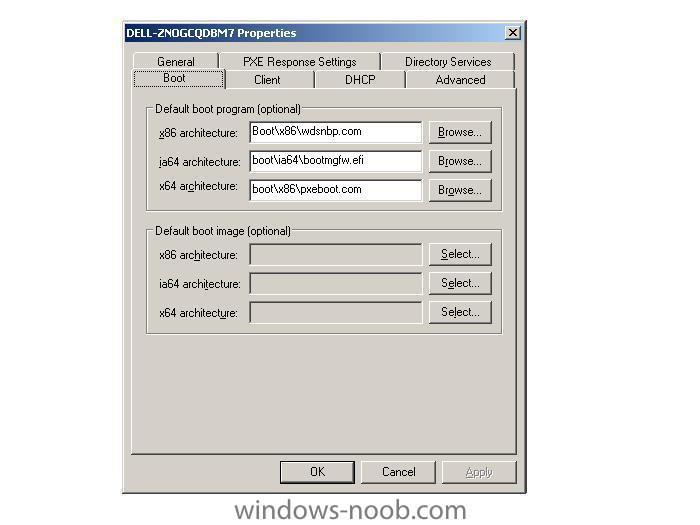
Make sure to right click the server properties and choose the boot menu option, (screenshot below). By default it's set to pxeboot.com (which doesnt exist in that dir) click browse and insert wdsnbp.com instead.
Once done, right click on 'boot images' in the wds mmc and choose 'add boot image'. Browse to your BDD 2007 distribution share, in there you'll find a boot folder, and in there you'll find your LiteTouchPE_x86.wim file (if you chose to 'update' your deployment in BDD 2007, read here for details about that.)
Once you are finished, click finish and attempt to PXE boot the client again.
You may need to run
risetup -check
to verify that the WDS service is started and there are no errors.
In addition, if you now get a new PXE boot error,
TFTP Download: boot\x64\pxeboot.comand you are only using x86, then simply change the pxeboot.com file for that to the x86 folder eg:
change
boot\x64\pxeboot.com
to
boot\x86\pxeboot.com
apply your changes and now PXE test again, this time it should work and you should be presented with a mixed mode screen (remote installation services and lite touch windows pe)
cheers
anyweb
-
Now that you have BDD 2007 installed and WAIK installed, you are ready for the next steps, listed below:-
Configure the distribution share.
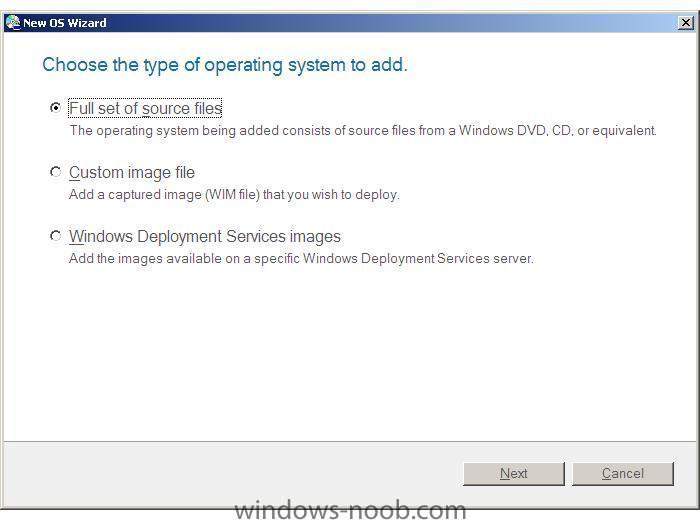
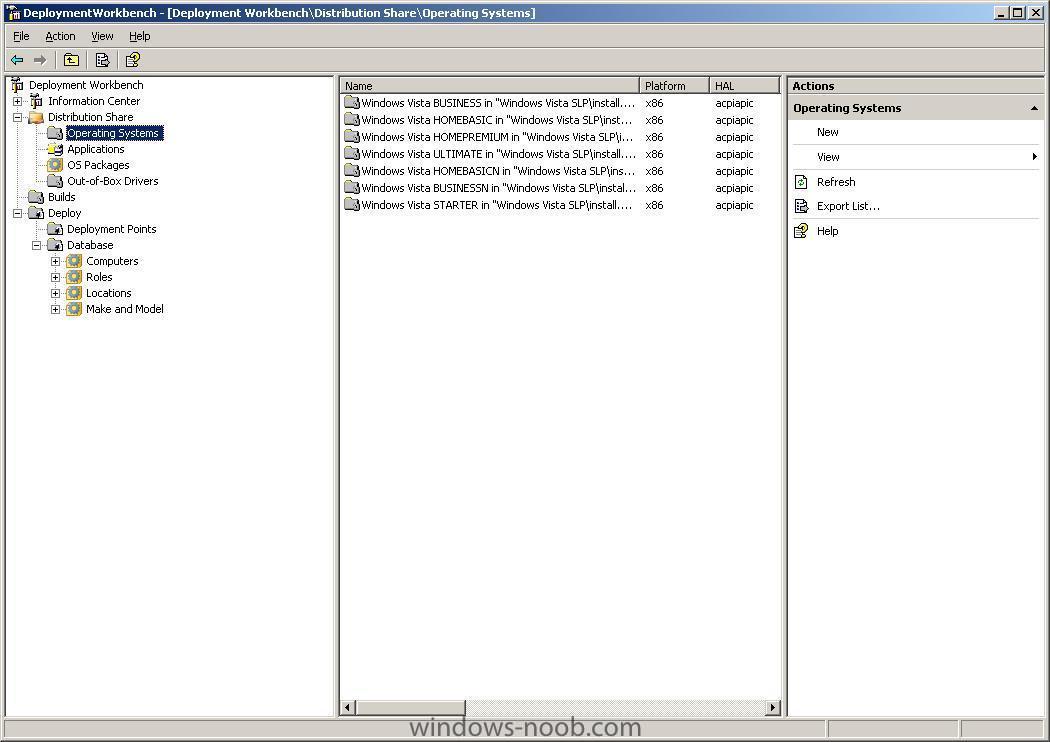
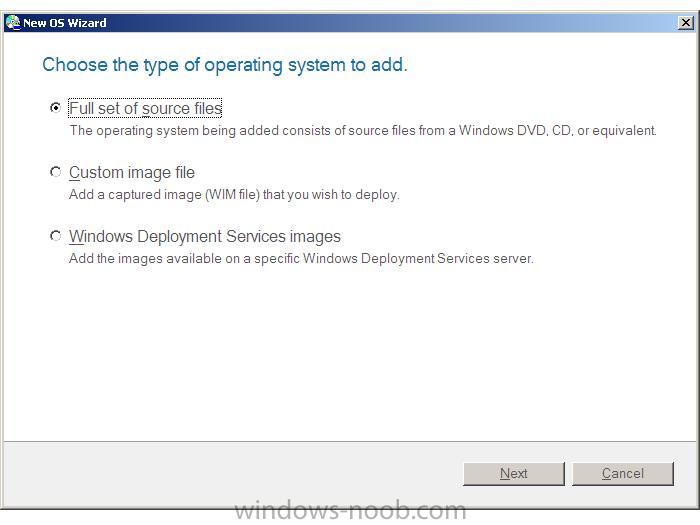
Expand the distribution share, and right click on Operating Systems. In this example, we are going to add Windows Vista Ultimate (from the DVD).
Select 'New' and choose 'Full set of source files', click next and point the installer to where the source files are located, click next, you have the option of moving the files to the distribution point instead of copying them, choose whichever is appropriate to you. Once done, your OS(s) will appear in the column to the right as in the screenshot.
Create a build.
To create a new build, right-click Builds, and then click New to start the New Build Wizard. After creating a build, right-click it in the details pane, and then click Properties to configure it. The build will define what we want installed with an answer file.
Create a Deployment Point
Deployment points are methods for distributing and providing access to the distribution share’s source files and builds. To create a new deployment point, right-click Deployment Points and then click New to start the BDD Deployment wizard. Deployment Points is under Deploy. After creating a new deployment point, right-click it in the details pane, and then click Properties to configure it.
Update the deployment Point
Updating a deployment point generates boot image files (.wim and .iso) files that provide access to it. To update a deployment point, right-click it in the details pane, and then click Update. The boot image files for lab deployment points are in the \Boot folder of the distribution share. The boot image files for other deployment points are in the location specified in the BDD Deployment Wizard.
To Add (network) drivers to a Vista image you do as follows:
To allow the use of drivers that are not included in Windows Vista in your deployment using BDD, you would need to place them in the Out-of-Box Drivers folder in the Workbench. After creating the Deployment point, you would then need to right-click the Deployment point and select Properties. You would then need to check the checkbox beside "Include all Network Drivers" under Driver Injection on the Windows PE tab.
To Customise a Windows PE image do as follows:
You can customize a Windows PE image by adding custom scripts such as winpeshl.ini and startnet.cmd or using the unattend.xml answer file to customize Windows PE.
winpeshl.ini
startnet.cmd
unattend.xml
Winpeshl.ini is used to start custom applications, startnet.cmd is used to configure custom command-line scripts, and unattend.xml is used to configure settings and actions for Windows PE.
For example if you want a custom message to display when a computer boots using Windows PE, you can create a HTML document and add it to the image. Using the PEIMG command add the following package to accomplish this:
WinPE-HTA-Package
Once this has been installed, you would then edit the startnet.cmd file to include a path to the HTML document. You can find the startnet.cmd file in the %systemroot%\System32 folder of your custom Windows PE image.
-
let's say you need to pull values from the operating system WMI class, in XP you can do as follows:-
open a command prompt and try this
wmic.exe path win32_BaseBoard get /format:htable > win32_BaseBoard_test.html
the above will pull all values for win32_BaseBoard and place the output in a html formatted table which you can view in Internet Explorer (will not display correctly in Firefox).
attached is an example output of the above code.
cheers
anyweb
-
You must have the Windows Automated Installation Kit (WAIK) installed first.
Once done, Open a Command Prompt window and then change to the
C:\Program Files\Windows AIK\Tools\x86
directory.
To mount a WIM file use the following format:-
ImageX /mountrw c:\somedir\someimage.wim 1 c:\somedir\mount
That's it, you can now edit files in c:\somedir\mount and once done you'll have to commit those changes using the unmount switch in imageX to the WIM image using:-
ImageX /unmount /commit c:\somedir\mount
How To inject drivers into an offline WIM image
First use the ImageX /mountrw command-line utility to mount the image file. Then use PKGMGR to inject the new driver into the Windows Image file by using the unattended answer file that you previously created in Windows SIM.
Once done, use the ImageX /unmount /commit command to save the modifications that you have made to the offline image.
fyi.. here is a post describing editing of a WIM file to inject drivers
Note: Any modifications that you have made to the offline image will be disregarded unless you utilize the ImageX /unmount /commit command.
Please note there is a Gui version of imagex available here
cheers
anyweb
-
 1
1
-
-
Sysprep is how you PREPare a SYStem for duplication, and in Windows Vista, it's quite different to the way things were in Windows XP.
This post can always be found on www.windows-noob.com
Note: If you are testing SYSPREP that you should limit the total number of syspreps to 3 times maximum otherwise you may experience unusual problems.
To Sysprep a Vista Machine:
Open a command prompt and enter the following command to prepare the
machine for imaging.
c:\windows\system32\sysprep\sysprep.exe /quiet /generalize /shutdown /oobe
Note At this point SYSPREP.EXE will now prepare the machine for imaging
and then shut it down when it has completed the process.
The /generalize switch is used to remove the unique information from the machine.
The /oobe switch is used to launch the mini-setup wizard the next time the machine reboots.
If you want it to automatically reboot after running sysprep, then change the code to this
c:\windows\system32\sysprep\sysprep.exe /quiet /generalize /reboot/oobe
Sysprep can also be run in two predefined scenarios for system builders (cloning systems using imageX or Ghost or some other cloning software).
Those two scenarios are called BTP (Build To Plan) and BTO (Build To Order).
The BTP scenario allows you to create a sysprepped image to be used on identical hardware throughout a business/organisation, and to enable it do as follows:-
Install Vista, install any drivers and applications, then sysprep using the following:-
sysprep /oobe /generalize
Once the computer shuts down, clone it using your favorite cloning software solution or use Microsoft's own imageX to create a wim file, or alternatively capture the image to your own WDS server using PXE boot or a boot CD.
The BTO scenario allows you to customise an Vista image for one computer using a reference image (such as the one above). To use BTO simply get a Vista image installed on the box, then after it's installed run the following:-
sysprep /audit /generalize /shutdown
Once done, you can clone the image, and then test it. If you are happy with the applications/drivers/customisations then re-sysprep the image with
sysprep /oobe /shutdown
Note:
If you install Windows images by using sysprep /generalize /oobe, be aware that the user experience will not be ideal. On the next reboot after running sysprep /generalize /oobe, Windows will run the specialize pass, Plug and Play, and other Setup tasks before launching Windows Welcome. This process can take additional time and can delay a customer's first logon.
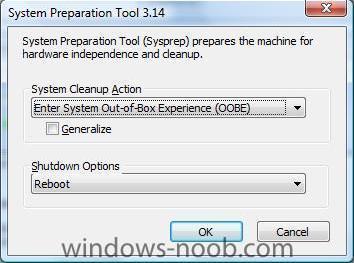
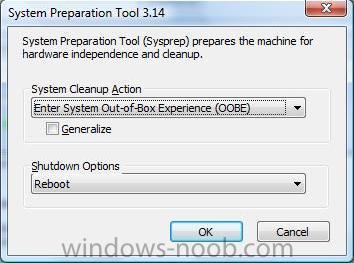
If you want to use the sysprep GUI, then click on start, and paste "c:\windows\system32\sysprep\sysprep.exe" into the Start Search input box.
Unattended Windows Setup Answer File
The unattended Windows Setup answer file, typically called Unattend.xml, is the answer file for Windows Setup that is created by using Windows System Image Manager (Windows SIM). The answer file enables the configuration of default Windows settings, as well as the addition of drivers, software updates, and other applications. The answer file enables OEMs and corporations to customize Windows Setup tasks, for example, specifying disk configuration, changing the default values for Internet Explorer, and installing additional drivers.
Note:
The single answer file replaces all the answer files that were used in previous versions of Windows (Unattend.txt, Winbom.ini, Oobeinfo.ini, and Sysprep.inf).
Windows System Image Manager
Windows System Image Manager (Windows SIM) provides you with the ability to customize Windows images. Windows SIM enables you to customize the settings in a Windows image. Based on your configurations, you can create an unattended Windows Setup answer file, typically called Unattend.xml. This answer file is used during Windows Setup to apply your configurations to Windows. In the answer file, you can specify changes to default operating system components and add additional software, such as out-of-box drivers or product updates.
Limitations of Sysprep
Sysprep has the following limitations:
* You must use only the version of Sysprep that is installed with the Windows image that you intend to configure. Sysprep is installed with every version of Windows and must always be run from the %WINDIR%\system32\sysprep directory.
* Sysprep must not be used on upgrade installation types. Run Sysprep only on clean installations.
* If you plan to use the imagex /apply command to apply a Windows image to a computer, the partition layout on the reference and destination computers must be identical. For example, if you capture a customized Windows image on drive D, you must always deploy that image onto drive D of the destination computer. The following list describes the partition settings that must be identical across the reference and destination computers when you use the imagex /apply command.
o The partition number where Windows Vista is installed must match.
o The partition type (primary, extended, or logical) must match.
o If the partition is set to active on the reference computer, the destination computer must also be set to active.
o If you have another active partition for Bootmgr and BCD stores on the reference system, you must also capture this partition and apply it to the same partition on the destination computer.
This limitation applies only to the imagex /apply command. If you run Setup and reinstall Windows, you can change the drive letters where Windows is installed.
noteNote
In some cases, customized applications that are installed before the Windows image is recaptured might require a consistent drive letter. Some applications store paths that include the drive letter of the system. Uninstallation, servicing, and repair scenarios might not function appropriately if the drive letter of the system does not match the drive letter specified in the application. Deploying customized Windows images to different drive letters is not supported.
The recommended practice is, if you are installing customized applications, to deploy your Windows image to the same drive letter.
* When you copy Windows images between computers, the reference and destination computers do not need to have compatible hardware abstraction layers (HALs). The /detecthal option in the Boot Configuration Data (BCD) will enable a system that has already run Sysprep to install the correct HAL.
* The Plug and Play devices on the reference and destination computers, such as modems, sound cards, network adapters, and video cards, do not have to be from the same manufacturer. However, the drivers for these devices must be included in the installation.
* You cannot automate the running of Sysprep by using a RunSynchronous command in auditUser configuration pass. You can automate the running of Sysprep only by using a FirstLogonCommand in the oobeSystem pass.
* The clock for activation begins its countdown the first time Windows starts. You can use Sysprep for a maximum of three times to reset the clock for Windows Product Activation. After the third time you run Sysprep, the clock can no longer be reset.
* ImageX, third-party disk-imaging software, or disk-duplicating hardware devices are required for image-based Setup. These products create binary images of a computer's hard disk and either duplicates the image to another hard disk or stores the image in a file on a separate disk.
* Sysprep runs only if the computer is a member of a workgroup, not a domain. If the computer is joined to a domain, Sysprep removes the computer from the domain.
* If you run Sysprep on an NTFS file system partition that contains encrypted files or folders, the data in those folders becomes completely unreadable and unrecoverable.
* Sysprep converts the %COMPUTERNAME% environment variable to uppercase characters. However, the actual name of the computer does not change.
* Running Sysprep will cause Windows Welcome to prompt you for a product key. You can use an answer file with Sysprep to prevent Windows Welcome from prompting you for a product key. If you specify a valid product key in the ProductKey setting of the Microsoft-Windows-Shell-Setup component during the specialize pass, then Windows Welcome will not prompt you for a product key.
For more info about sysprep in Windows Vista please look here and for details about what is different between sysprep in Windows XP and Vista click here.
Here's another good bit of info about sysprepping Vista.
This post can always be found on www.windows-noob.com
-
I just ghosted my windows 2003 server (40GB) using ghost 8 using disc>disc to an 80GB target hdd, after completion, I then removed the 40gb and booted the 80GB hdd. At the login screen a popup error appeared stating:-
LSASS.EXE - System Error, security accounts manager initialization failed because of the following error: Directory Services cannot start. Error status 0xc00002e1.Please click OK to shutdown this system and reboot into directory services restore mode, check the event log for more detailed information.
Pressing OK and booting into directory services restore mode (press F8 at boot time and select it) boots Windows 2003 into safe mode, but as soon as you login, it logs out again. Very useful indeed (not). I guess I forgot to logon using the directory restore mode password, either way Microsoft recommends the following as a fix > http://support.microsoft.com/kb/258062
however, I found a much quicker and easier fix.
Simply power off, insert the original hdd and boot up Ghost. In ghost options make sure to select the following option
'-ID' copy entire disk including unpartitioned space' (image disk).
I selected that option and ghosted disc>disc again, this time when all was done I could boot no problem into Windows 2003 with my new bigger hdd, and I now had a new unpartitioned 40gb of free space, marvellous. I chose to format that as another primary partition and will proceed to free up space on the other 3 partitions by moving data to the new partition.
cheers
anyweb
-
Microsoft showed its new 'Softgrid' technology today that allows apps to run as if they were inside a second copy of Windows. But unlike traditional virtualisation apps, there's no second Windows desktop getting in the way. For example, Microsoft showed Office 2003 and Office 2007 running side-by-side, even though they can't actually be installed on the same copy of Windows. Initially, the technology is for corporate users only, but it has huge obvious benefits for home users as well. First steps towards this?
via osnews.com
-
In a move that will likely only further confuse the situation surrounding Vista Service Pack 1, Microsoft has posted for public download two updates that were released to beta testers last month. The patches improve Vista performance and reliability, along with the operating system's compatibility with drivers and hardware. Some of the changes include better file copy performance, faster boot times, improved compatibility with newer graphics cards, and better performance in games with advanced visuals.
more info > http://www.betanews.com/article/Microsoft_...blic/1186593846
via osnews.com
-
Microsoft has quietly begun testing a series of patches for Windows Vista that promise to dramatically increase the performance of the system in various ways. The patches, which could see a public release on Microsoft's regularly-scheduled August Patch Tuesday, address such things as copy or moving large amounts of data, video card compatibility and reliability, and improvements related to Sleep mode.
"This update resolves a number of individual issues which may be affecting some computers running Windows Vista," the documentation for one patch reads." These issues have been reported by customers using the Error Reporting service, product support, or other means. Installing this update will improve the performance and responsiveness for some scenarios and improves reliability of Windows Vista in a variety of scenarios."
While Vista performance is generally excellent, a number of users have reported issues with copying and moving large amounts of data with the system and report that it does so more slowly than did Windows XP. One of these patches appears to fix this and other related issues, while others seem to be dedicated to reliability and compatibility fixes. The patches are all available in separate 32-bit and 64-bit versions.
more info > http://www.windowsitpro.com/windowspaulthu...rott_96671.html
-
Contact Us: Hotfix Request Web Submission Form
Hotfix Information
A Hotfix is a single package that includes one or more files that is used to address a very specific customer problem with a product. A supported Hotfix is now available from Microsoft, but it is only intended to correct the problem that is described in the previous mentioned article. Only apply it to systems that are experiencing this specific problem. This Hotfix may receive additional testing. Therefore, if you are not severely affected by this problem, we recommend that you wait for the next service pack that contains this Hotfix.
Warning: These Hotfixes have not gone through full Microsoft regression testing. Specifically, these Hotfixes have had targeted testing which does not include testing in combination with other Hotfixes. You are encouraged to only install the specific Hotfixes needed to address the problem you have. Please carefully review the associated KB article for each Hotfix you install to verify that this is the fix you need and that there are no known compatibility or installation issues. NOTE: If additional troubleshooting or issues arise, you may need to create a separate service request. The usual support costs will apply to additional support questions and issues that do not qualify for the specific update in question.
To obtain this Hotfix, please submit your request via this form to Microsoft Online Customer Service and Support – you should expect to receive a download link via email from Microsoft within 8 business hours.
https://support.microsoft.com/contactus2/em...0&WS=hotfix
if the above link doesn't work then try this one instead
-
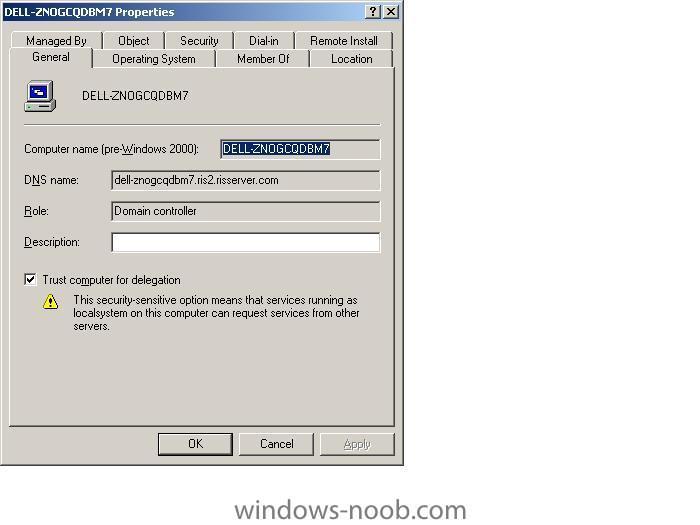
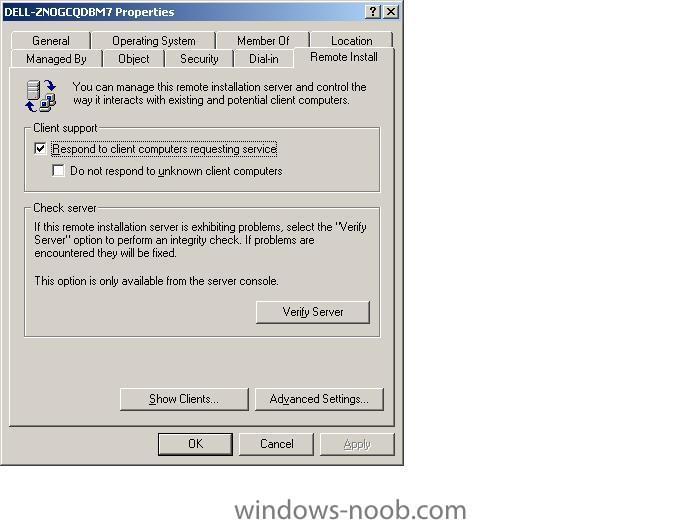
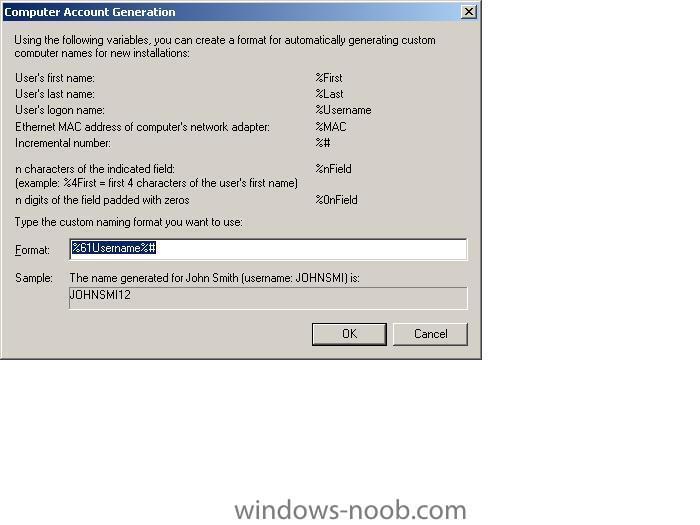
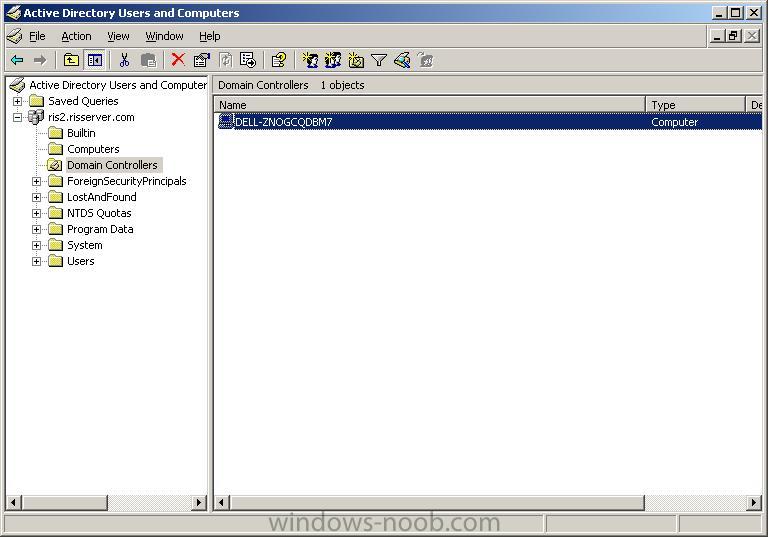
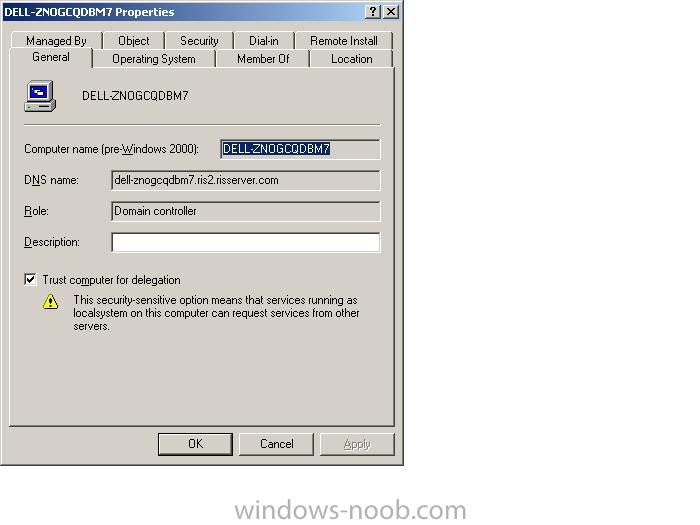
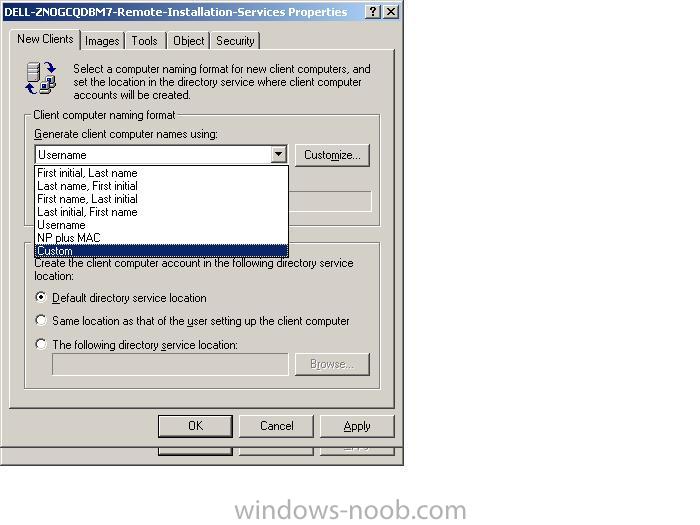
if you want to change how RIS names your computers during an install, click on Active Directory Users and Computers, select Domain Controllers, highlight your RIS server and right click it, choose 'properties'.
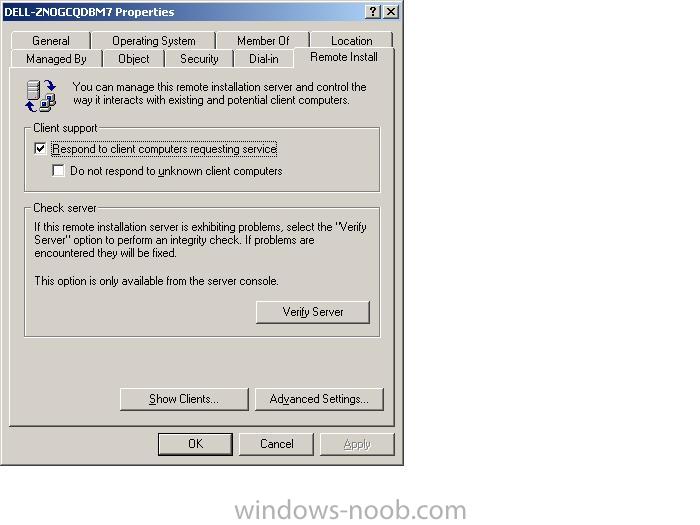
Click on the 'Remote Install' tab, then 'Advanced Settings'.
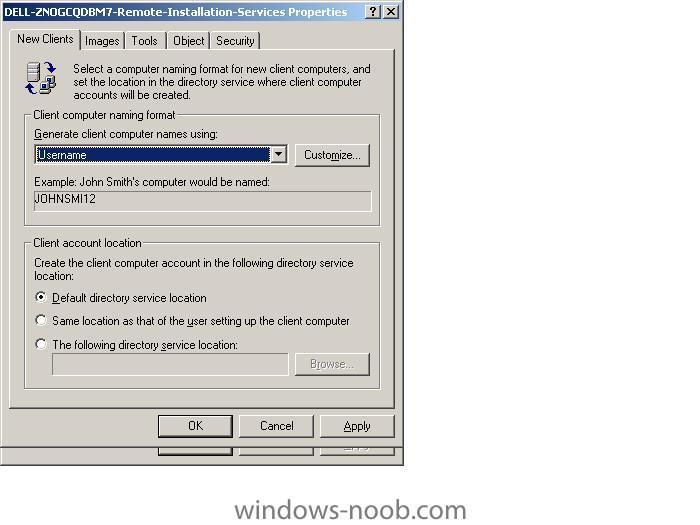
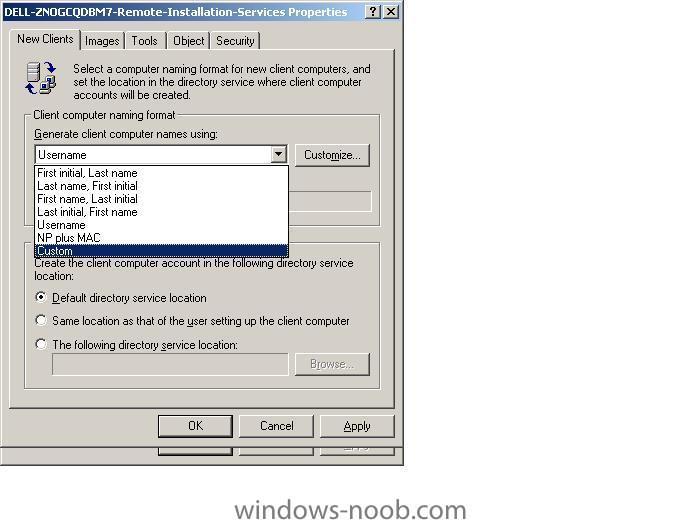
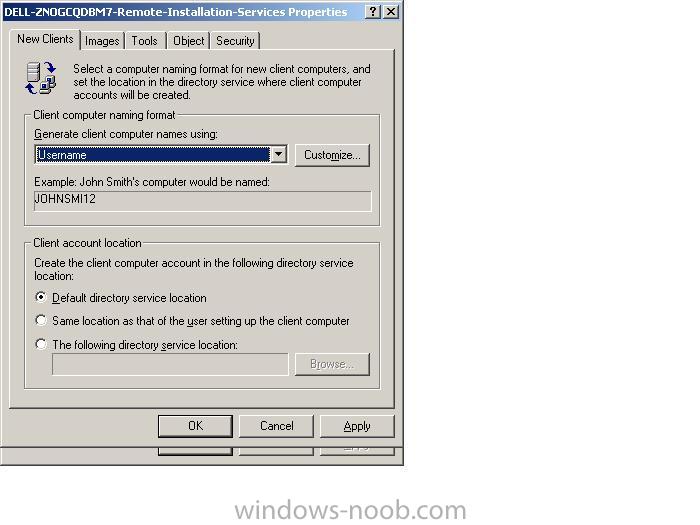
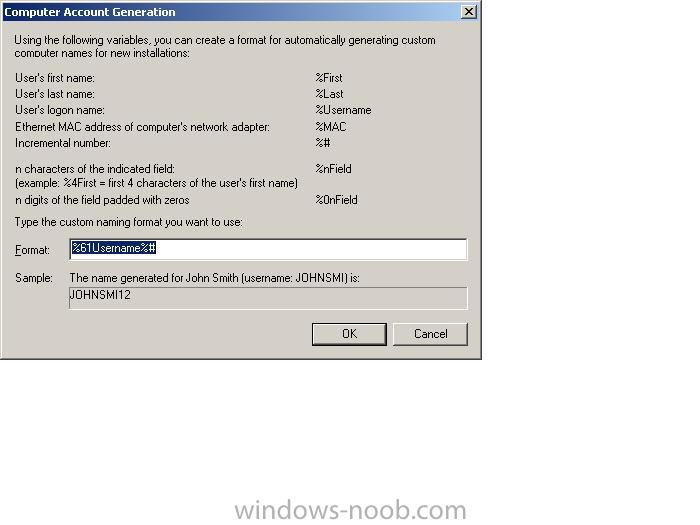
In Advanced settings you can click on the drop down menu and select Custom and customize it to your fancy, then click apply and restart the RIS service. Please note this is for New Clients, so if you want it implemented on existing machines then you have to do two things,
delete their current computer name from AD then do a new RIS install on each one indivually.
Test it by RIS installing a new computer.
screenshots below
cheers
anyweb

-
replace WINNT with WINDOWS (or whatever you called the windows directory) above, otherwise you'll get an error message. Restart the SQL service after making any changes.
cheers
anyweb
-
Right on schedule, Microsoft announced that its Windows Home Server software is off to the presses. This clears the way for HP, Gateway, LaCie, Medion, and now Iomega and Fujitsu Siemens, (both also announced today, the latter in Europe only) to begin selling their Home Server-powered hardware later this quarter.
more info > http://news.com.com/8301-10784_3-9744971-7.html
via osnews.com
-
can't connect to your SQL 2005 server ?
check the tcp/ip options
sql 2005 express edition that is secure out of the box. In sql 2005, the tcp/ip stack is disabled and remote connections are not allowed. Thats by default. So you first have to configure the sql 2005 express edition correctly, and take it from there.
Try bringing up the SQL server configuration tool. You don't have the icon, so run
C:\WINNT\system32\mmc.exe /32 "C:\WINNT\system32\SQLServerManager.msc"
Select the client protocols option and enable TCP/IP
-
"Today at the Worldwide Partner Conference in San Francisco, Microsoft's chief operating officer, Kevin Turner, announced that Windows Server 2008 (previously known as Longhorn), Microsoft SQL Server 2008, and Visual Studio 2008 will be officially launched on February 27, 2008. This may come as a surprise to those following the Windows 2008 Server news closely, since most sources at Microsoft have been insisting that the next version of its server operating system will released at the very end of 2007. Apparently in Redmond there is a difference between releasing the OS and the extravagant product launches, which are more of a pep rally for the product then a technical presentation."
more info > http://arstechnica.com/news.ars/post/20070...008-launch.html
via osnews.com
-
If you have installed and setup BDD 2007 you can try out the functionality contained within BDD 2007 to support Lite Touch scenarios.
Their are four high level steps to describe the Lite Touch process.
1. Deploy the LTI (lite touch installation) infrastructure:-
Several server roles are required to support the lite touch deployment process. These server roles may include the following:-
* Build server - The source for customer deployment images, including out-of-box drivers, service packs and language packs.
* Data Server - Used to store machine backups and User State Migration data (USMT)
* Application installation server - Used to store the source files for core and supplemental application installations.
* Microsoft Windows Deployment Services (WDS) server - The WDS server stores both boot and installation images for deployment and provides support for bare metal installations. This role is optional, if you prefer to use Windows Preinstallation Environment you wil not need WDS servers.
2. Configure the LTI servers - Each server role requires the following specific configuration tasks to be completed:
* Build server - when planning the requirments for the deployment server, consider the amount of space required for the images used for the deployment.
* Data server - installing the data server is a simple process of creating a network folder share and folder structures.
* Application installation server - Creating the application installation server role involves the creation of another series of folders and network shares.
* WDS server - This service was previously called the Remote Installation Service (RIS). WDS runs on Microsoft Windows Server 2003. In windows server 2003 service pack 1, it is delivered as an update through either the WAIK or Windows Server 2003 R2 (or via service pack 2 upgrade for Windows 2003 Server). It is available as a native server role in the latest version of Windows Server 2003.
3. Create the Windows PE and Windows Vista images - after the LTI infrastructure is in place, you can then use the deployment workbench to manage the images to be deployed.
4. Deploy the operating system images to the client computers - deploying the operating system to a client computer is a matter of having a user with administrative rights run the deployment wizard.
-
Microsoft is simplifying the processes via which its PC-maker partners will be able to provide 'downgrade' rights from Windows Vista to Windows XP for their customers. Microsoft will implement the first of the policy changes for its Gold Certified (top-tier) OEM partners within the next couple of weeks. The company will streamline downgrade-rights policies and procedures for the broader channel somewhat later, said John Ball, general manager of Microsoft's US Systems Group.
more info > http://blogs.zdnet.com/microsoft/?p=543
via osnews.com
-
"Microsoft has unveiled a new touch-sensitive coffee table-shaped computer called 'Surface'. Designed to do away with the need for a traditional mouse and keyboard, users can instead use their fingers to operate the computer. Also designed to interact with mobile phones placed on the surface, Microsoft says it will initially sell the unit to corporate customers. These will include hotels, casinos, phone stores and restaurants." Instant update: More details and a video.
more info > http://osnews.com/story.php/17995/Microsof...erface-Computer
source > http://news.bbc.co.uk/1/hi/business/6703249.stm
the video > http://crave.cnet.com/8301-1_105-9723647-1...l?tag=cnetfd.mt

could not start remote installation service on local computer
in Remote Installation Services (RIS)
Posted
what os are you installing on these computers ?
more details please in order to determine the issue
cheers
niall