


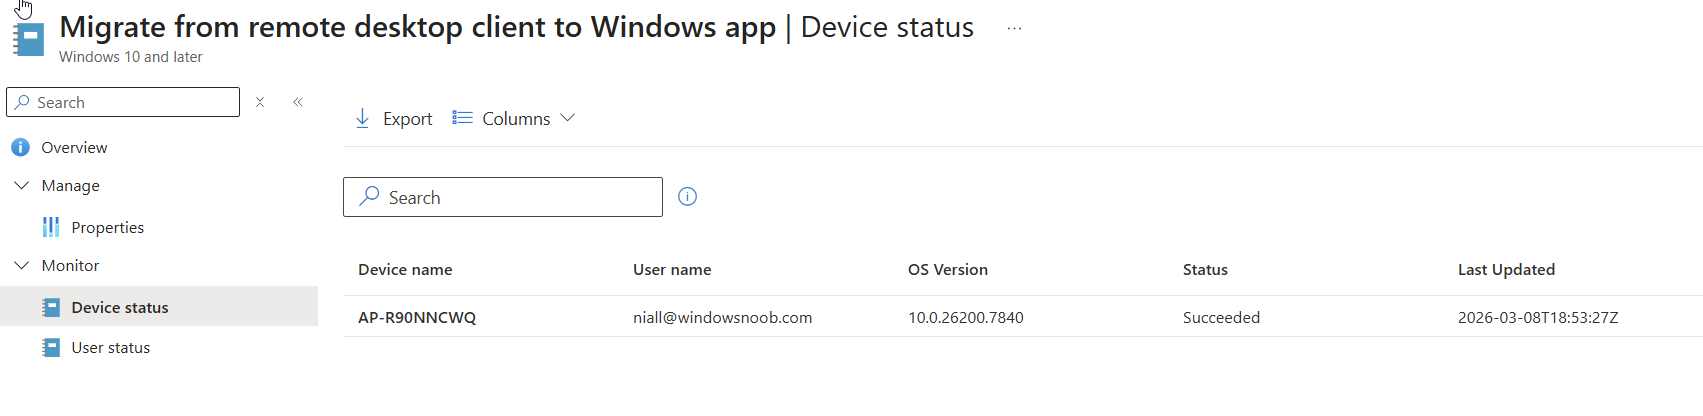
 of one or more targets to migrate from the Remote desktop client agent to the Windows app. You could also exclude a group containing devices that already have the Windows app.
Introduction
Windows 365 User Experience Sync (UES) is a cloud‑native capability designed to give users a seamless, consistent, and personalised Windows experience across Windows 365 Cloud PCs and Windows 365 Cloud Apps. Without UES in place on Frontline Shared devices, Windows personalisation, user settings, application settings, and application data are retained on logoff/logon which can be frustrating for end users who need to reauthenticate or reconfigure to set up their device how they need to use it, only to have to do this each time they log on to the Cloud PC.
Instead of relying on traditional profile‑management tools, UES automatically preserves the settings every time the user signs in. Microsoft manages the UES infrastructure, vastly decreasing the implementation complexity and cost compared to other profile based solutions.
At the core of User Experience Sync is dedicated, cloud‑hosted user storage that follows each user from session to session. When a user signs in, their individual storage is dynamically attached, providing immediate access to their personal settings and app data. As the user signs out, the profile is detached and stored securely ready for the next session.
In this blog post myself and fellow MVP buddy Niall Brady overview this new feature and show you how you can set this up for Windows 365 Frontline Shared Cloud PCs and Cloud Apps. Myself and Niall were part of the private preview for the solution and were heavily involved at that stage. The feature was made generally available in November and we will be interested to see that changes have been made to the solution, based on our feedback, in that time.
Requirements
The following requirements are needed at present.
- Windows 365 Frontline license
- Access to required Windows 365 and Microsoft 365 endpoints
- Intune management permissions
Setting it up
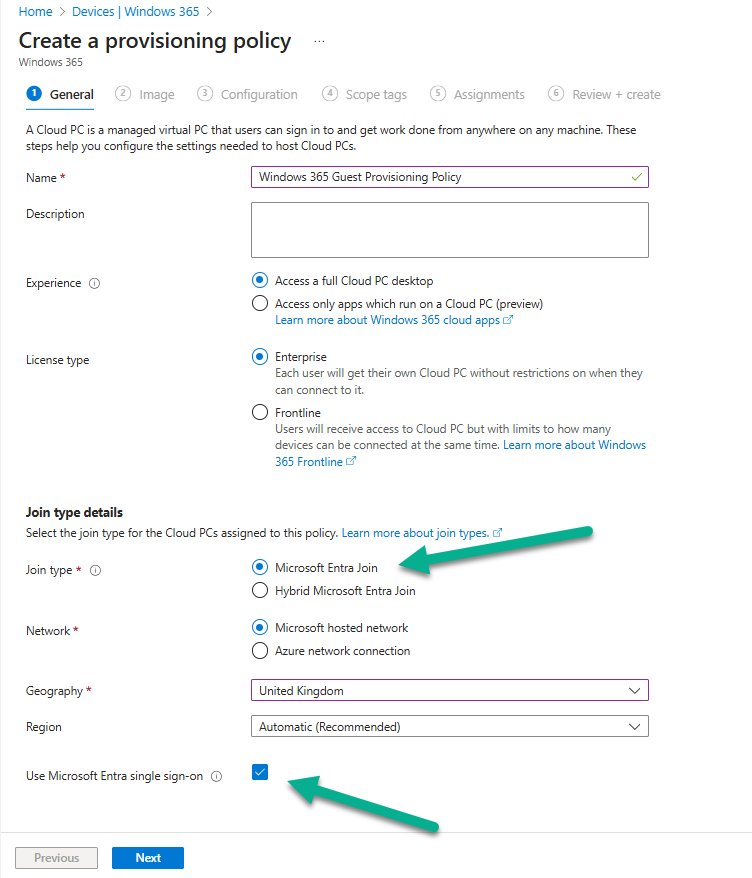
When it comes to setting up the Windows 365 User Experience Sync, the enablement of the feature is achieved in the configuration of the Frontline Shared Provisioning Policy. This can be done when creating a new policy, or an existing policy can be modified to add or remove the feature. Let’s focus initially on creating a policy and enabling the UES solution.
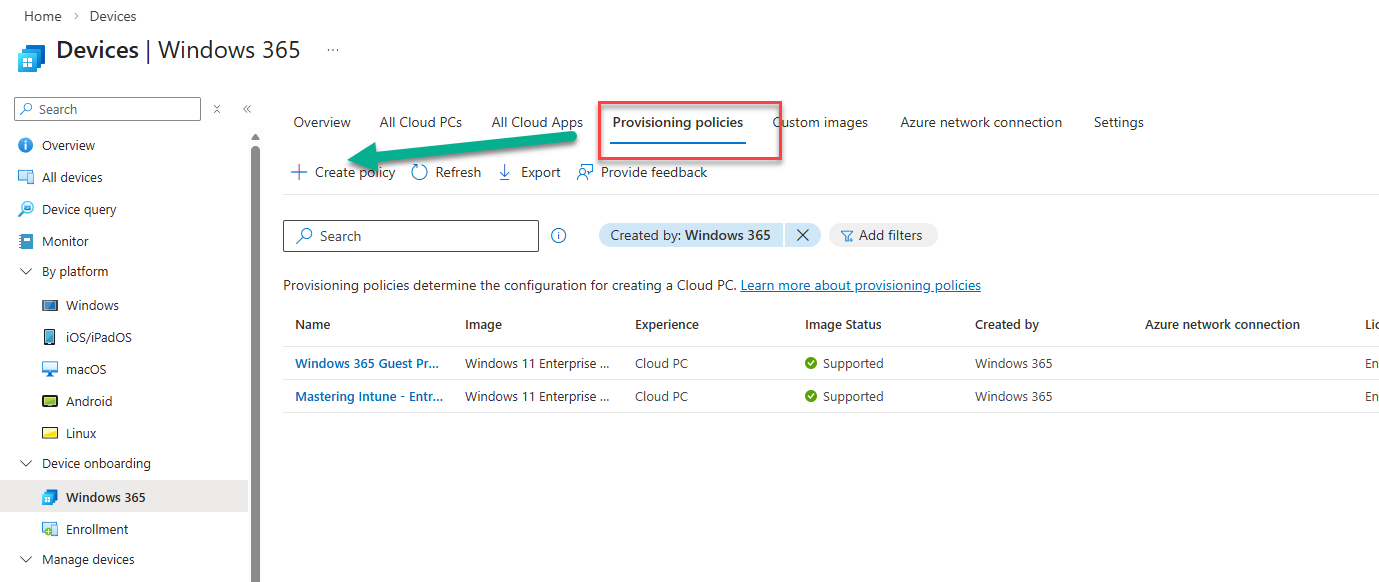
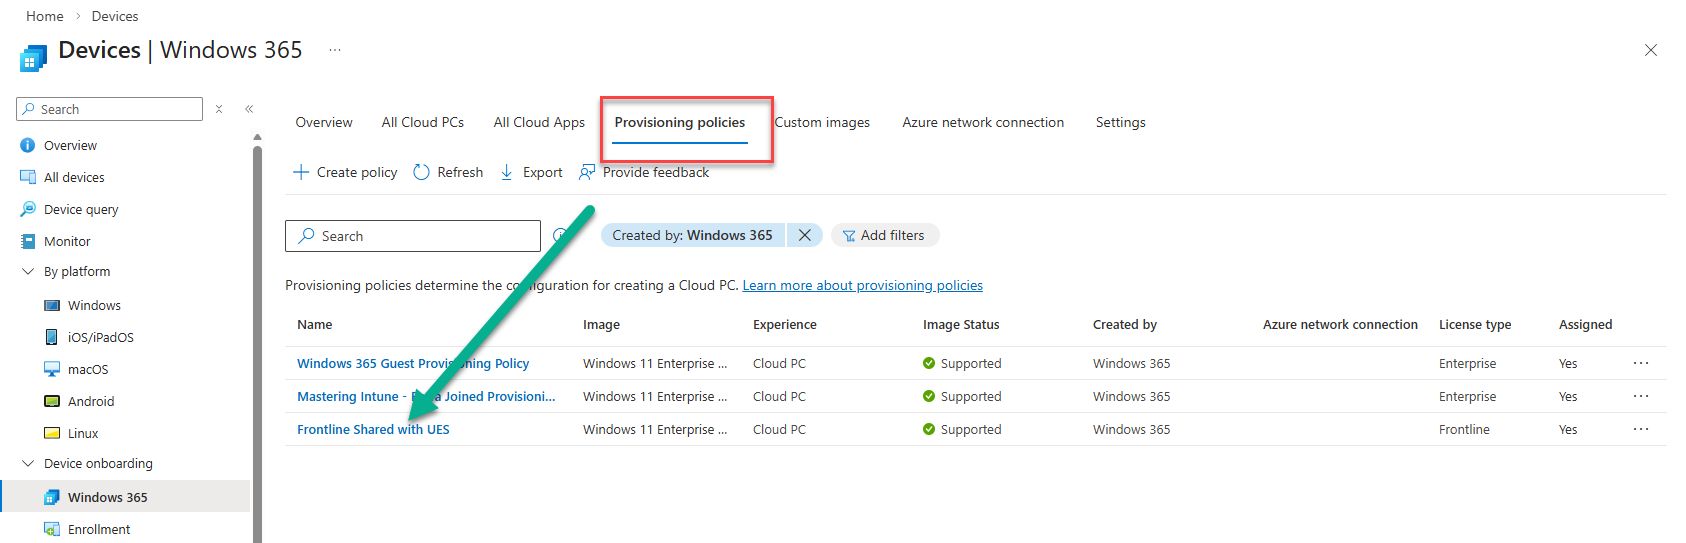
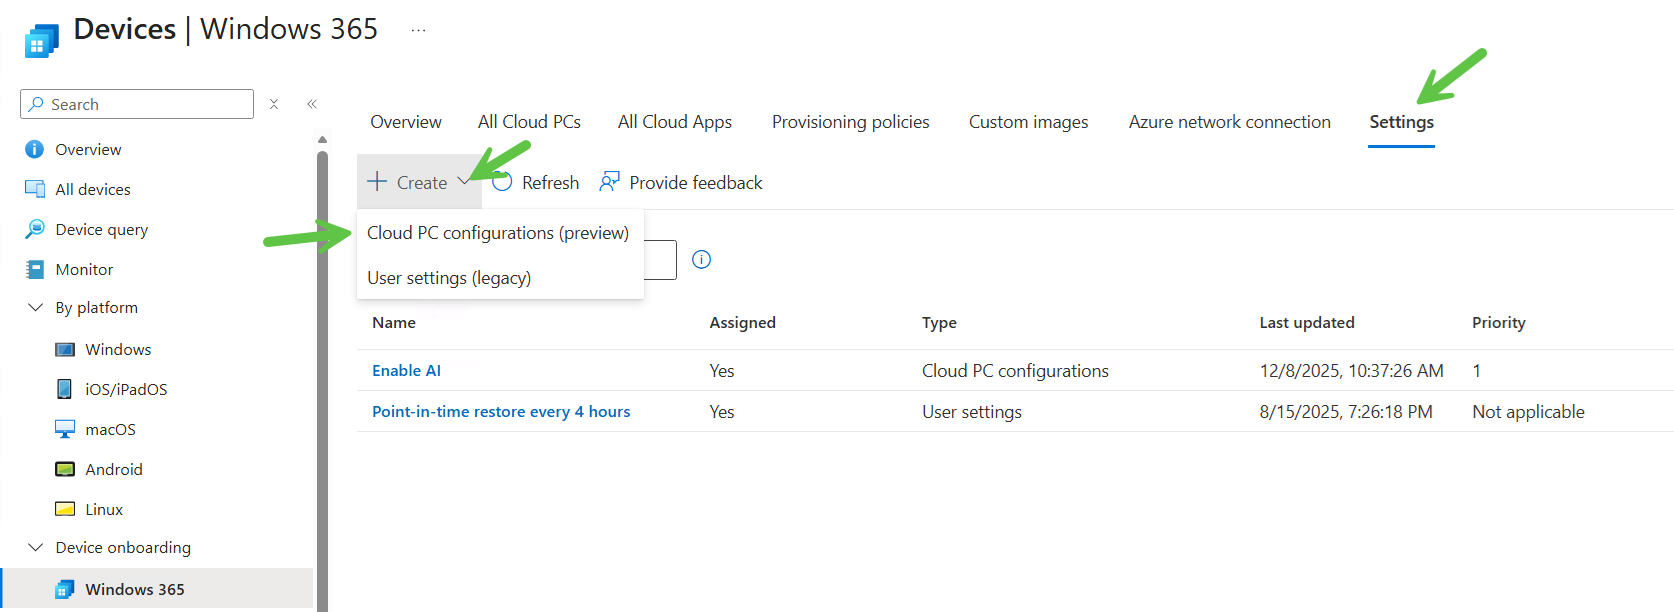
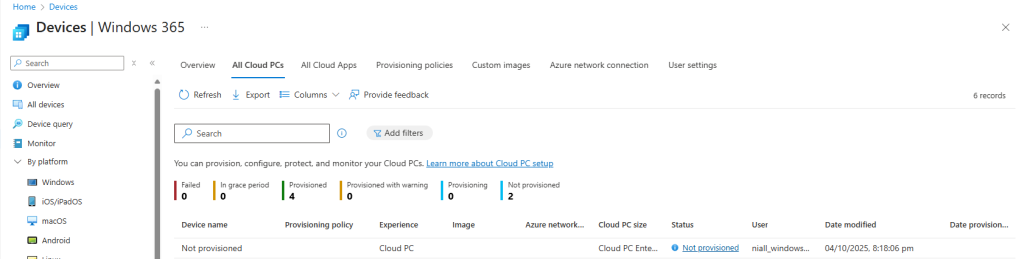
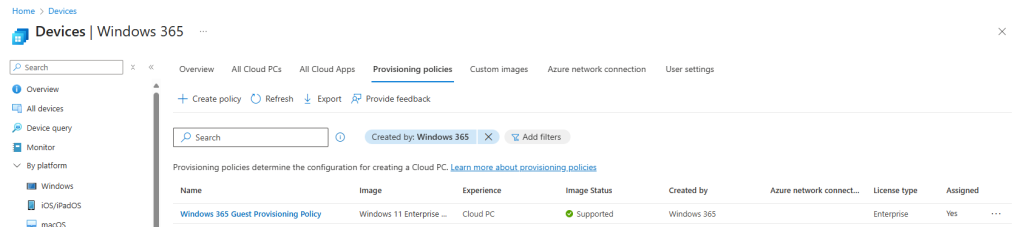
In the Intune admin center, navigate to Devices | Device onboarding | Windows 365. Select Provisioning policies from the menu and choose Create Policy.
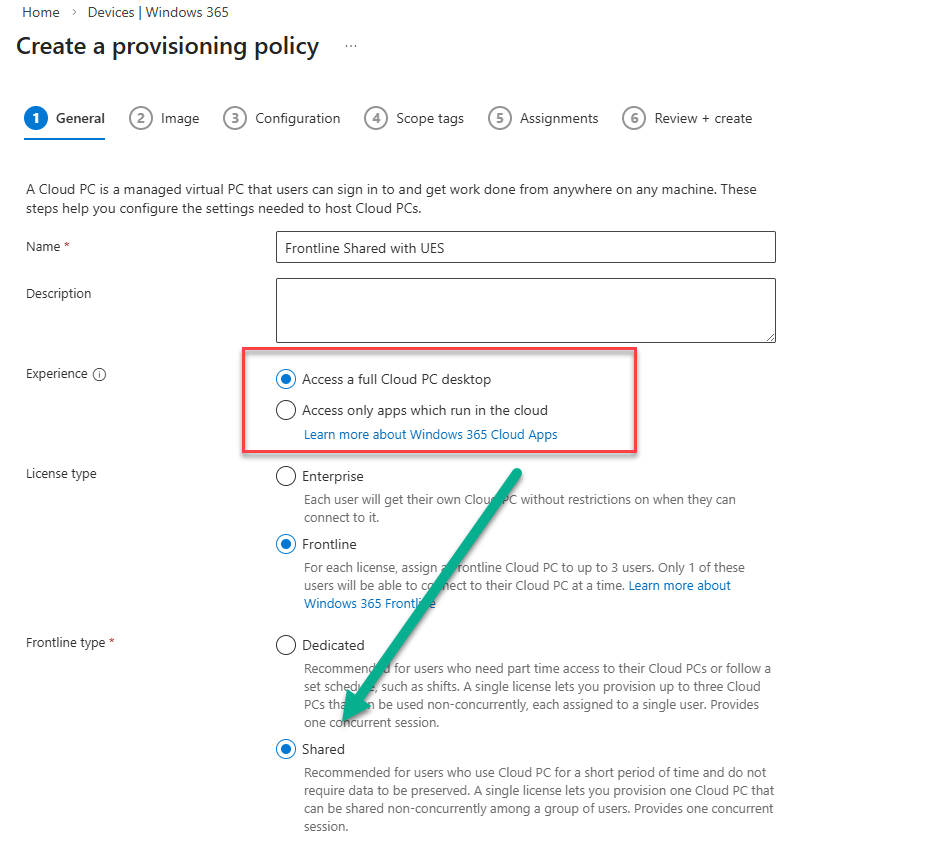
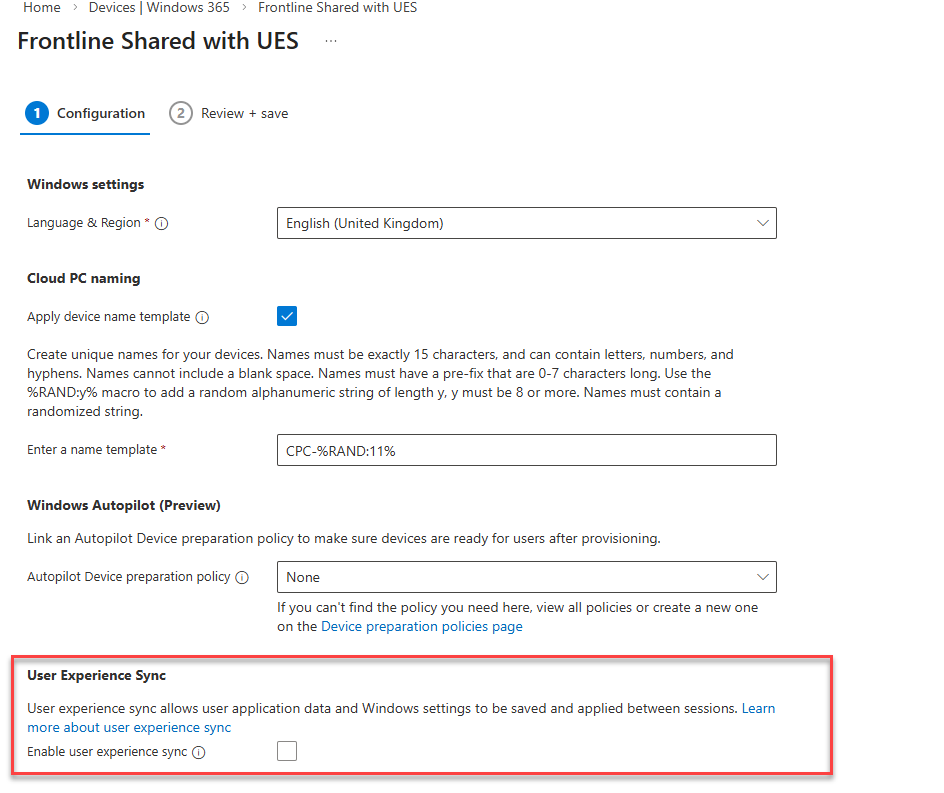
When creating the provisioning policy, ensure that you select Frontline as the License type and enable Shared from the Frontline type choice. For Experience, you can choose either Access a full Cloud PC desktop, or Access only apps which run in the cloud, since both Cloud PCs and Cloud Apps support UES.
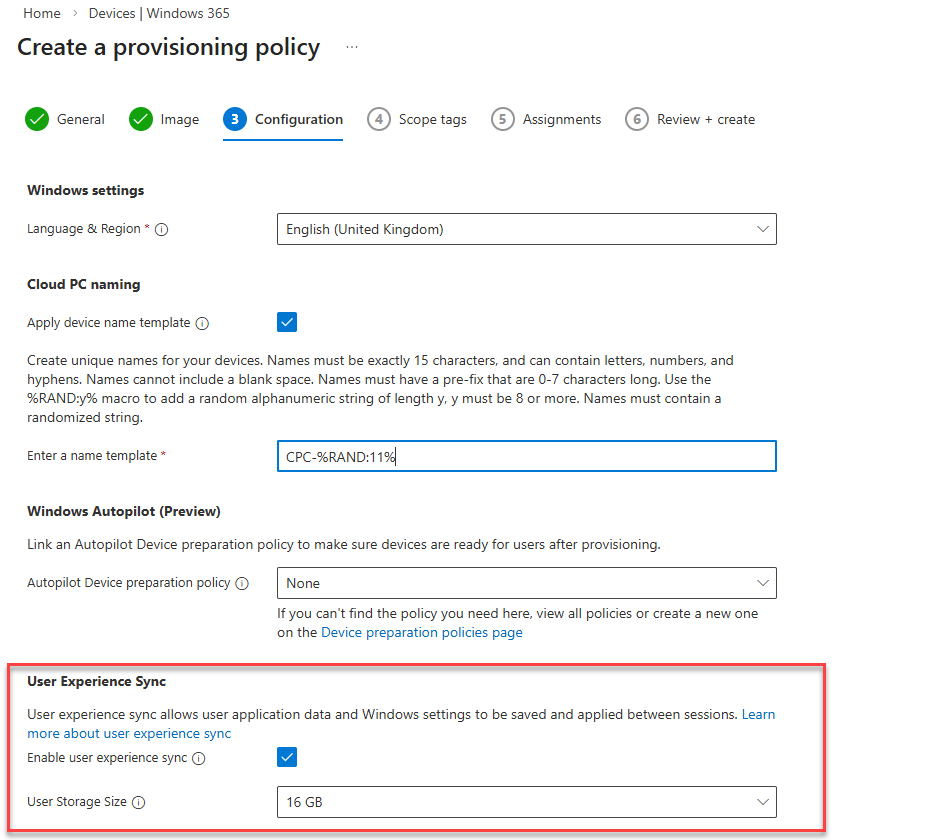
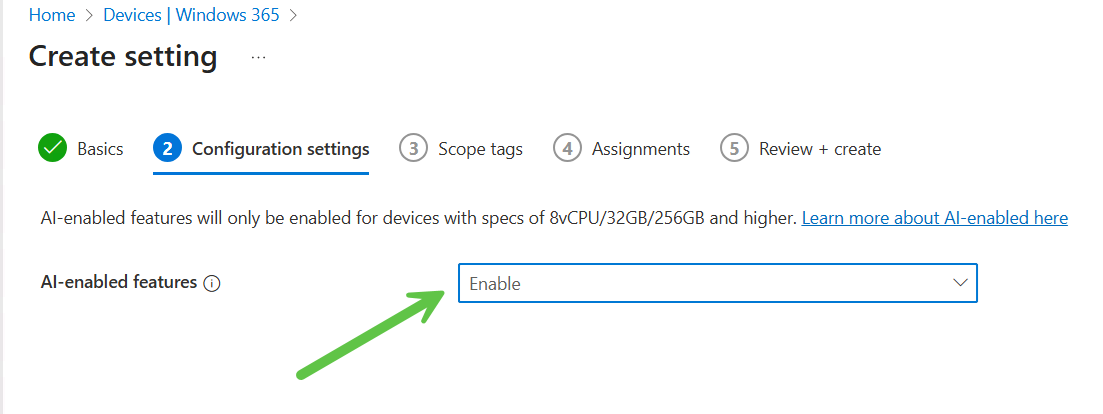
The Configuration section of the provisioning policy wizard is where we configure the UES solution. We have two choices to make; Enable user experience sync and User Storage Size. Check Enable user experience sync to turn on the feature.
Managing the UES storage
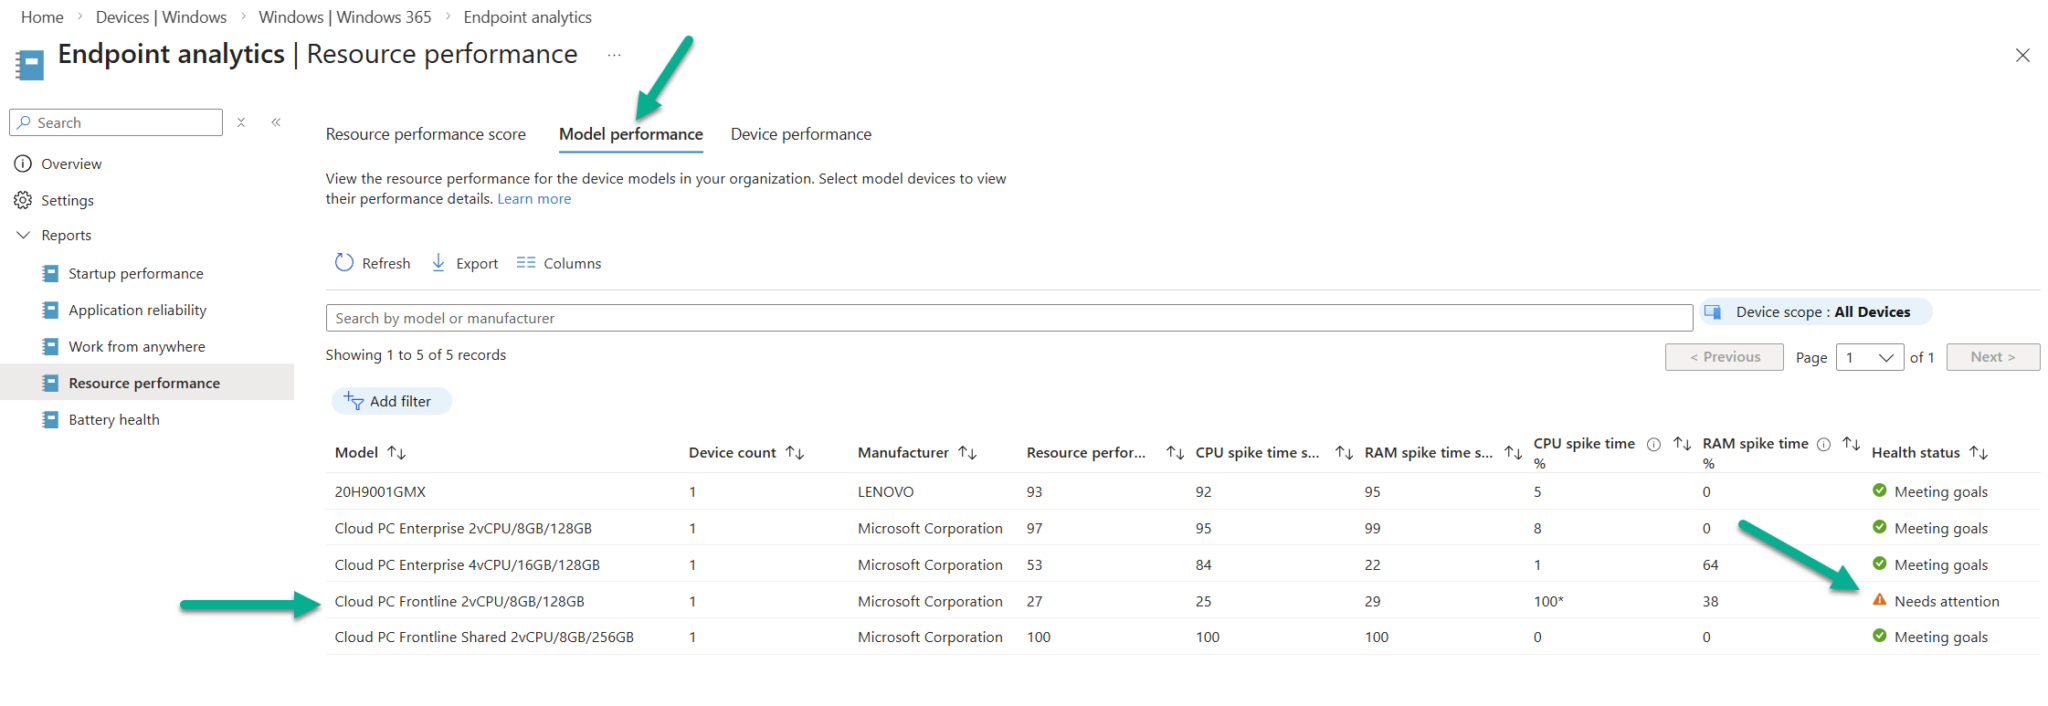
For the User Storage Size, Microsoft offer a predefined pool of user storage that comes included with your Frontline licence. The total available storage is determined by the Cloud PC’s OS disk size and is scaled based on the number of Cloud PCs assigned within the policy.
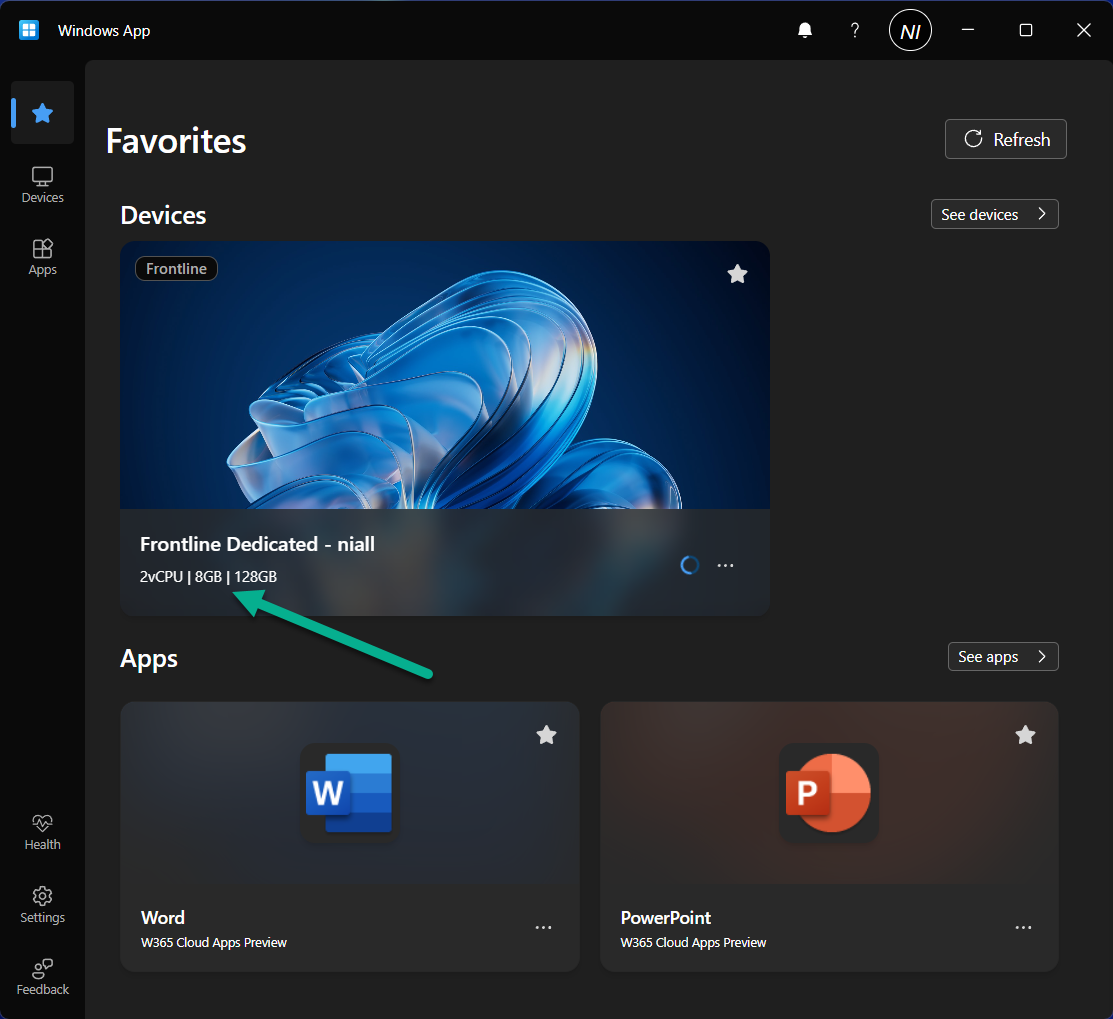
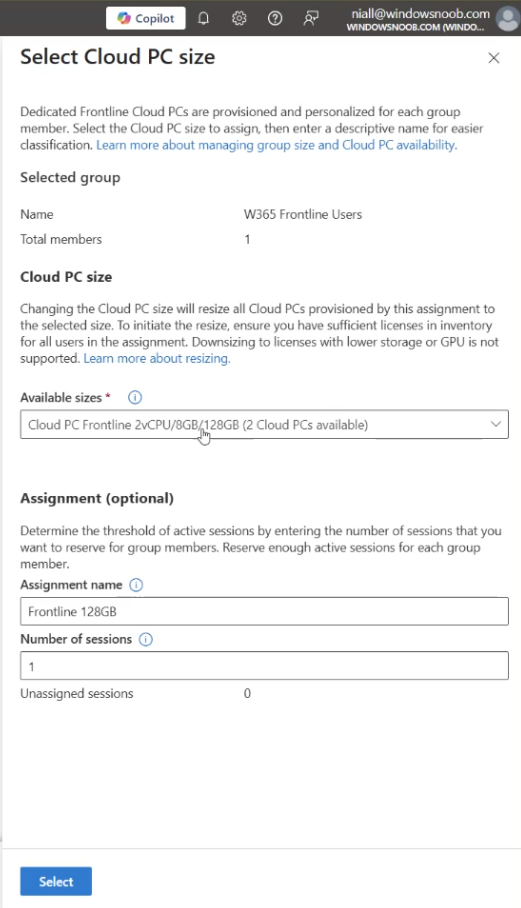
For our Frontline model, we have a Cloud PC Frontline 2vCPU/8GB/128GB licence and 1 Frontline device, therefore the amount of pooled storage available to us is 128 x 1 or 128GB.
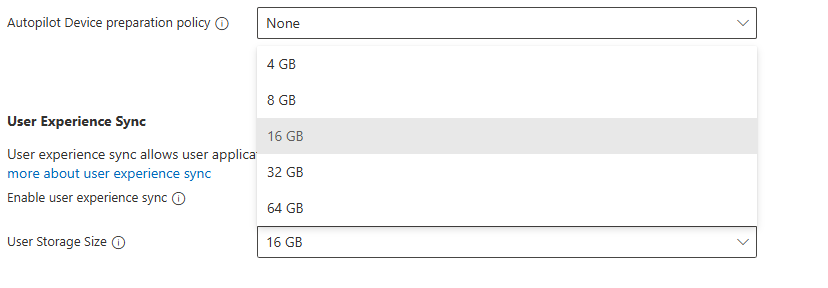
The User Storage Size allows us to assign up to 64GB per user as you can see from the drop-down menu below.
Be aware of the pooled disk space limitations when assigning the the User Storage Size.
- Exceeded limits: When pooled storage runs out, new users can still sign in, but they receive a temporary profile and cannot create their own user storage. Users who already have allocated storage can continue signing in with their full personalised experience.
- Exceeded tolerance period: If the pooled storage limit remains exceeded, a 7‑day tolerance window begins. After this period ends, the system automatically removes individual user storage starting with the one that has the oldest “last attach” timestamp. Once the total storage usage drops back below the limit, the tolerance period resets and won’t start again until storage is exceeded in the future.
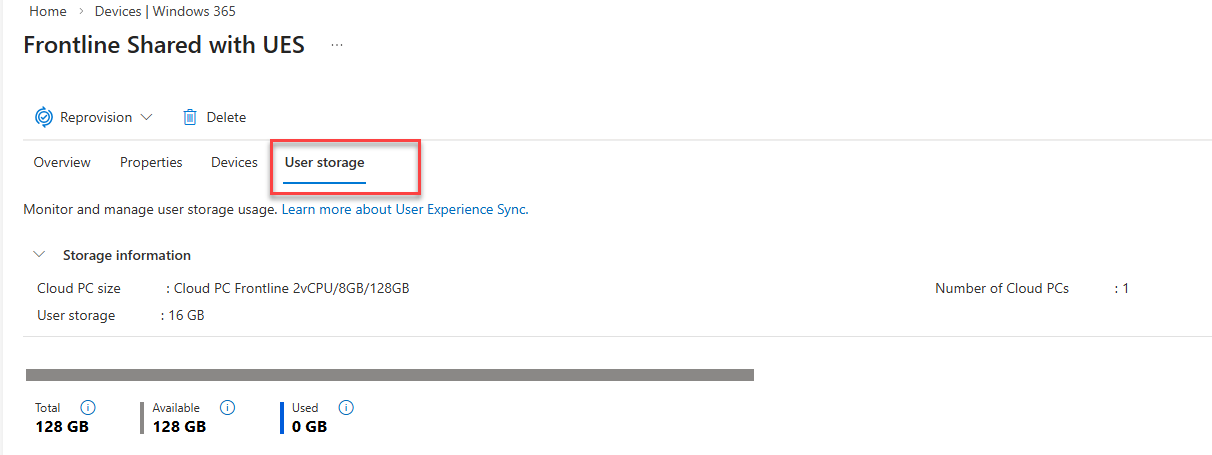
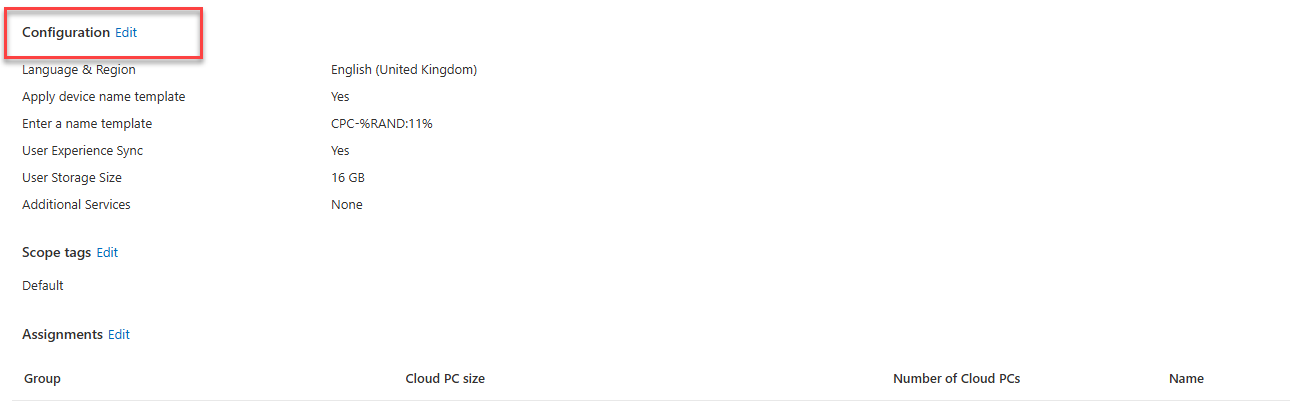
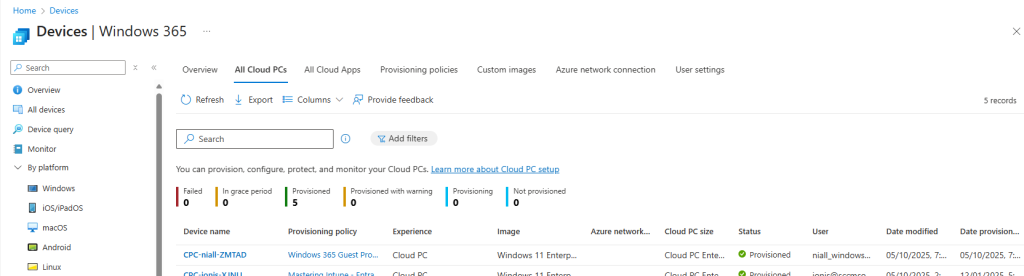
You can manage the user storage by selecting going to Provisioning policies and clicking your newly created policy.
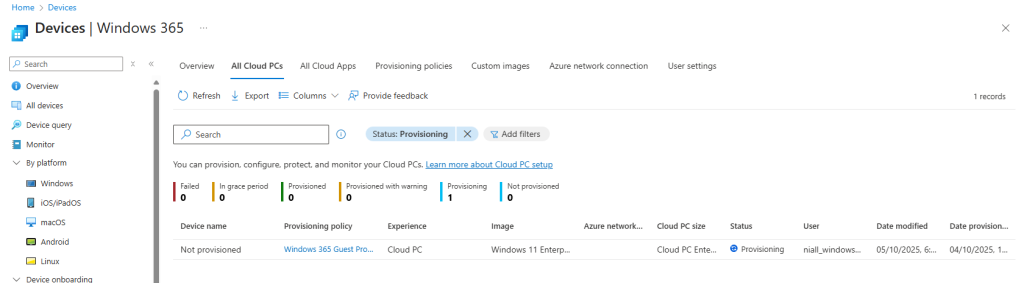
Next, select User storage and you will be presented with a view of the Storage information which includes the Total, Available and Used data. Since we are currently provisioning the devices, nothing will be used.
Some recommendations to assist with UES are to:
- Enable OneDrive redirection
- Manage Edge for cache and temporary data retention
- Deploy Storage Sense to clean up temporary files, delete downloads and cloud backed files (OneDrive)
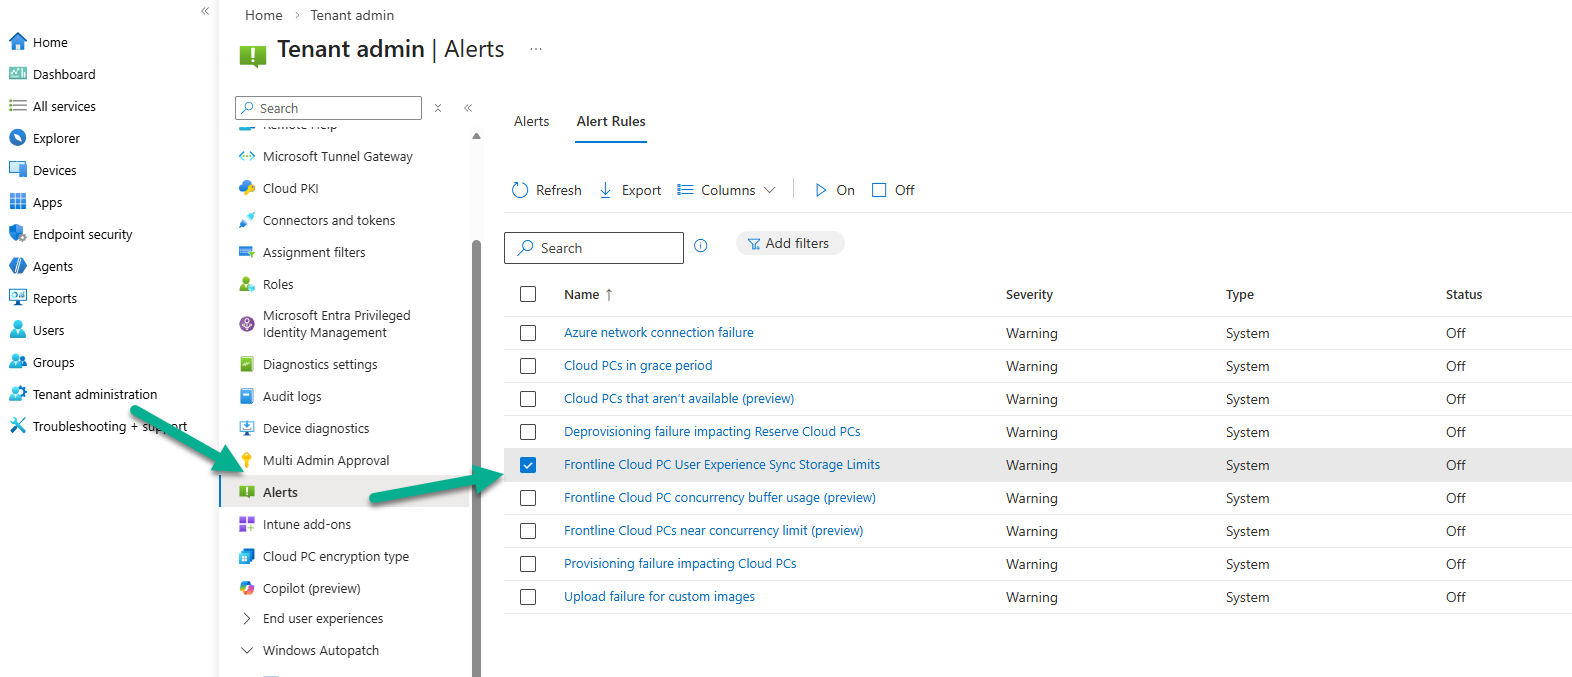
You can set up alert monitoring for the user storage. This is achieved by navigating to Tenant administration | Alerts | Alert Rules and clicking Frontline Cloud PC User Experience Sync Storage Limits.
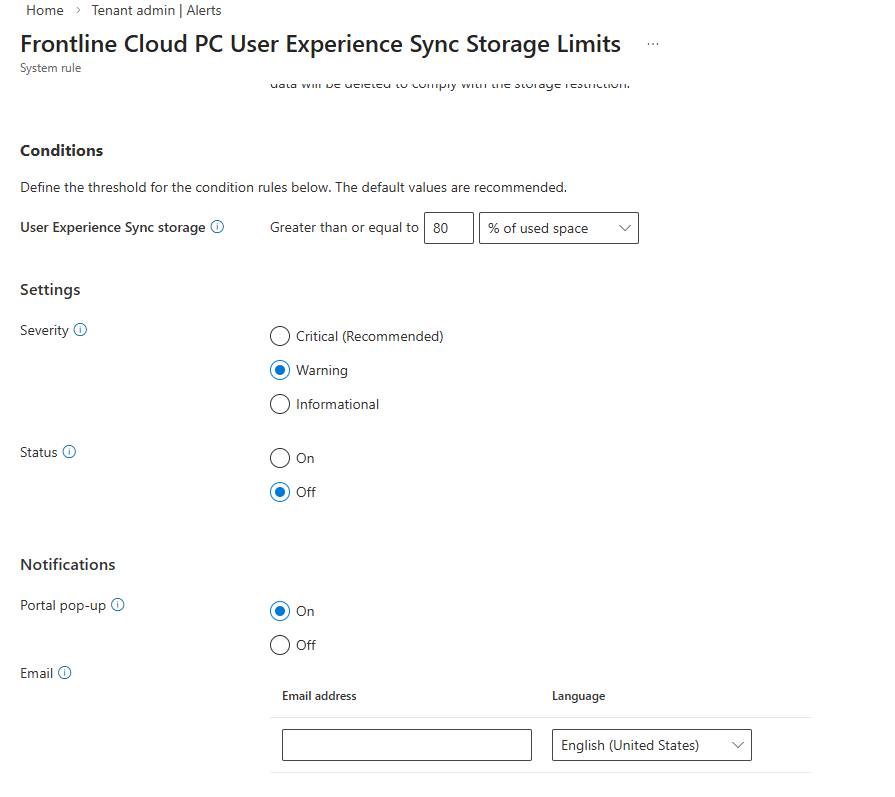
In the System rule view, you can set to alert when used space is Greater then or equal to a certain percentage. You can set a Severity for the alert, if the Status of the rule is On or Off, whether to have a Portal pop-up Notification and if someone should receive an Email alert. You can enter multiple recipients for the email.
What’s Included and Exclude from User Experience Sync (UES)
The following is included in the UES solution:
User storage includes all data from C:\Users%username%, such as:
- User settings and application data
- Registry files, (NTUSER.dat and USRCLASS.dat)
- Personal files and folders
What’s not included:
- Nonroamable application data
- AppData\Local\Packages*\AC
- AppData\Local\Packages*\SystemAppData
- AppData\Local\Packages*\LocalCache
- AppData\Local\Packages*\TempState
- AppData\Local\Packages*\AppDat
Nonroamable identity data
- AppData\Local\Packages\Microsoft.AAD.BrokerPlugin_cw5n1h2txyewy
- AppData\Local\Packages\Microsoft.Windows.CloudExperienceHost_cw5n1h2txyewy
- AppData\Local\Microsoft\TokenBroker
- AppData\Local\Microsoft\OneAuth
- AppData\Local\Microsoft\IdentityCache
The UES Experience
When a user signs on for the first time to a Cloud PC or Cloud App with UES enabled, the personal storage will be created and attached to the session and capture of settings will be automatically enabled and redirected to the storage. On the next login, the UES will be reattached and any saved configuration loaded.
Do bear in mind that UES does not roam or persist user installed applications, only settings and preferences are captured.
On a Frontline Shared UES enabled device, we are loading the store app Sticky Notes for the first time. We are requested to authenticate to use the app on first run.
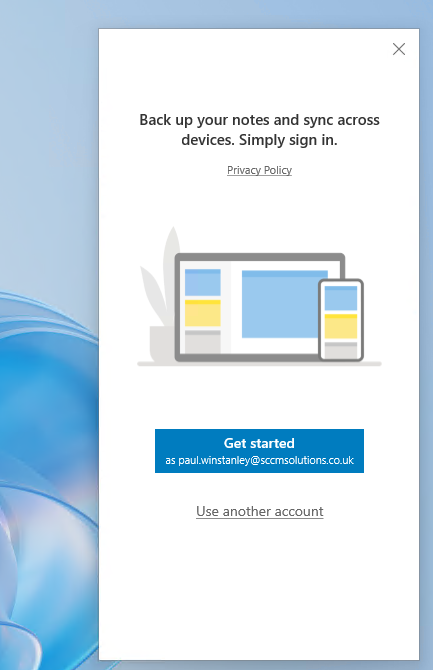
After authenticating, we can create content in the app with the expectation that this is stored within the UES storage and retained for our next session.
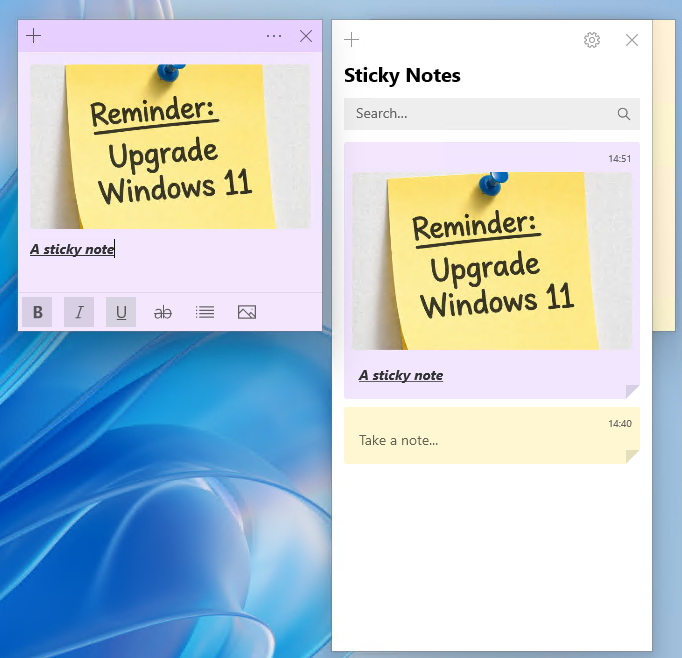
If we do not have Frontline Shared UES enabled, then the end user would need to re-authenticate with the Sticky Notes app on each logon to bring up their personalised notes.
Installing apps
Another thing to note is if the user downloads and installs an app, let’s say Firefox. While this works during the session that the user is logged on to, once they logoff/logon any remnant of that (shortcut, etc) are gone. If you want apps to persist then install them in the base image (custom image).
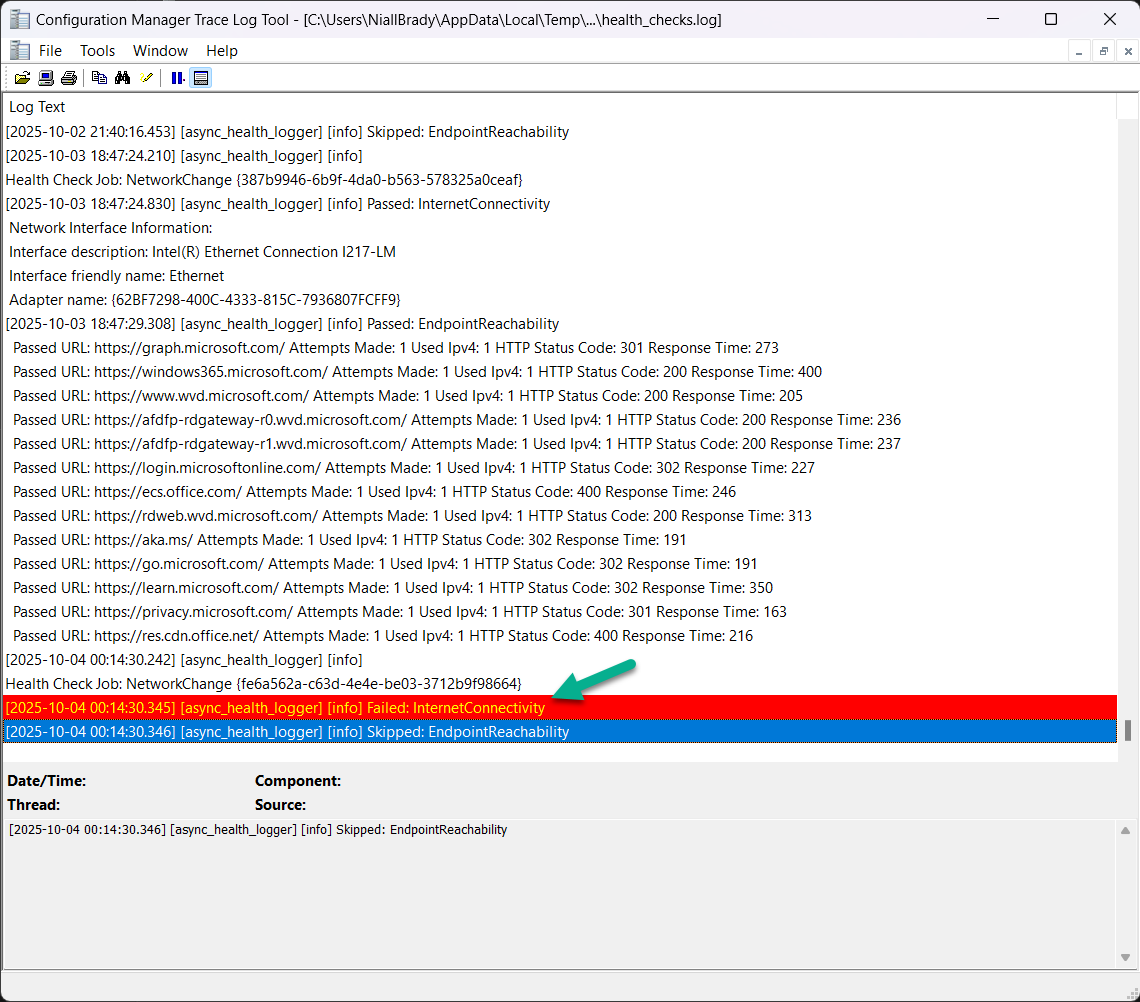
Filling up the storage and reporting on usage
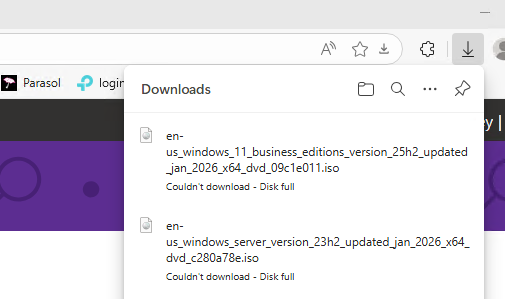
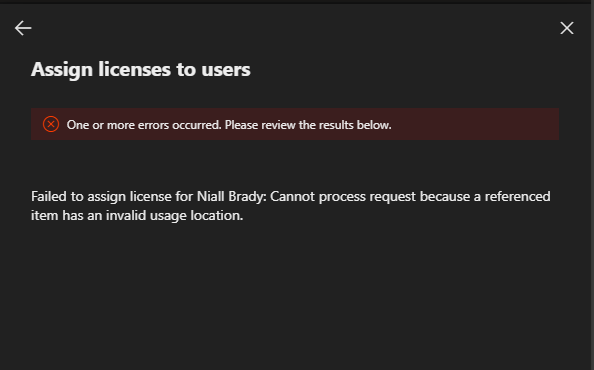
One of the areas we fed back on during the private preview, was the lack of warning or information for the end user when the UES becomes full. In the screenshot below, for example, the user has downloaded too many ISO files and filled up their allocation of 16GB. The only message the end user gets is Couldn’t download – Disk full. This isn’t informative enough for the end user in our opinion. Improvements to the experience should be forthcoming and we hope that this is one which is being taken into account by Microsoft.
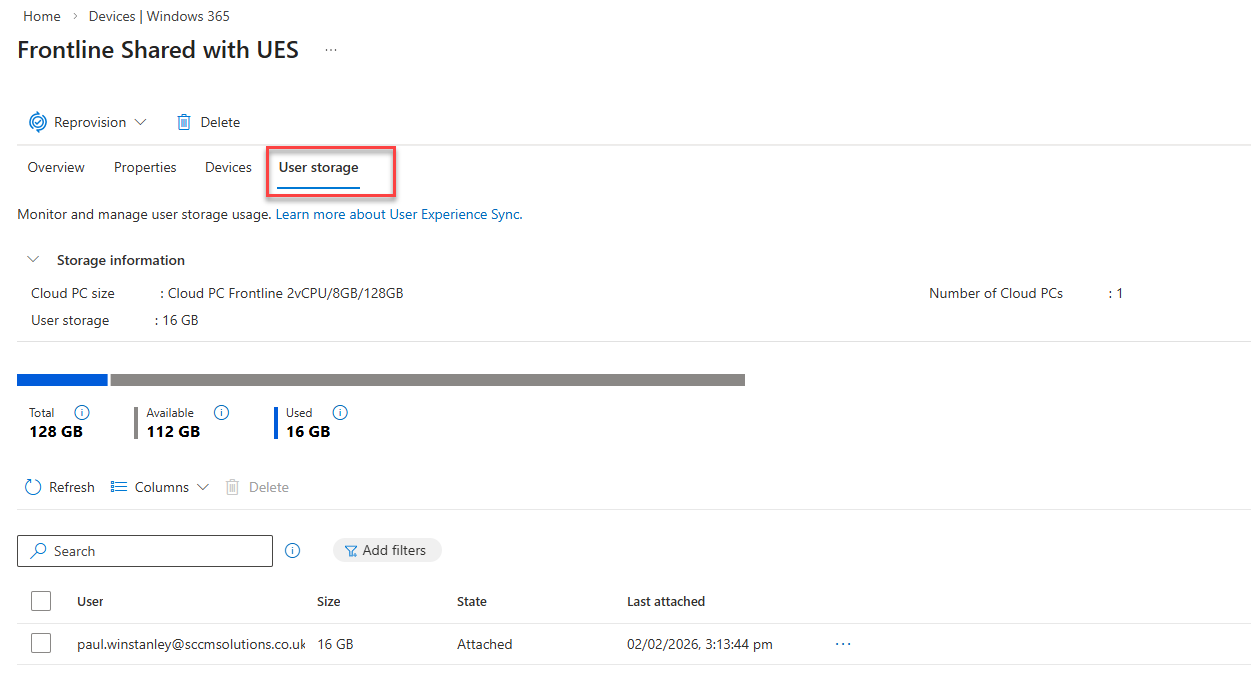
When it comes to usage, the admin can take a look at what allocation of their Total amount is in use in the User storage section of the Provisioning Policy. Remember from earlier, you need to click Provisioning policies and select your policy.
Select User storage to view. We can now see that 16GB from the Total of 128GB has been allocated to a user. These stats do not give us a real time view of what a user has actually used from that 16GB allocation. This is another area that we fed back on that we feel needs improvement.
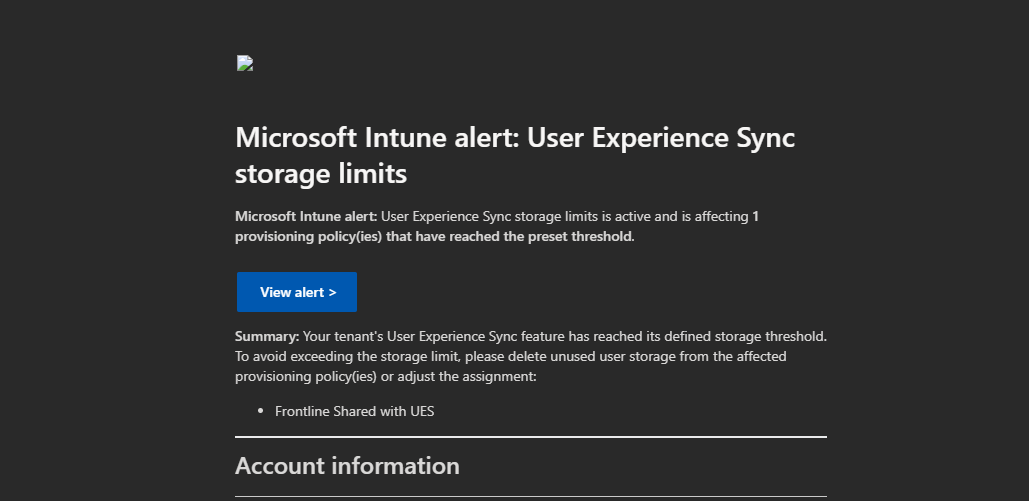
If we have set up alerts and total usage across all UES compromises the percentage stated in the rule, then the recipient of the alert rule will receive an email with details of the provisioning policy where the usage is a concern.
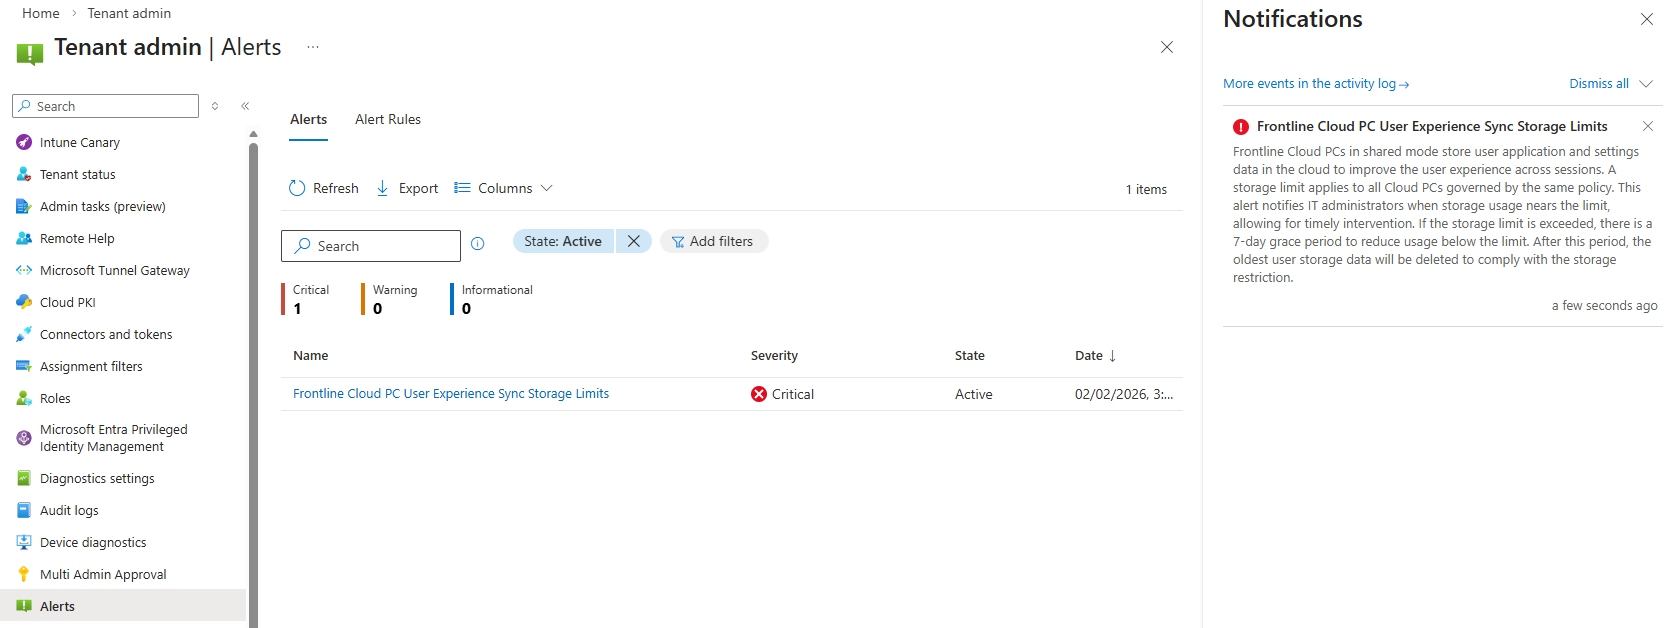
In Tenant administration | Alerts admins will be alerted with the relevant Severity and with a pop-up, if enabled.
Amending an Existing Provisioning Policy
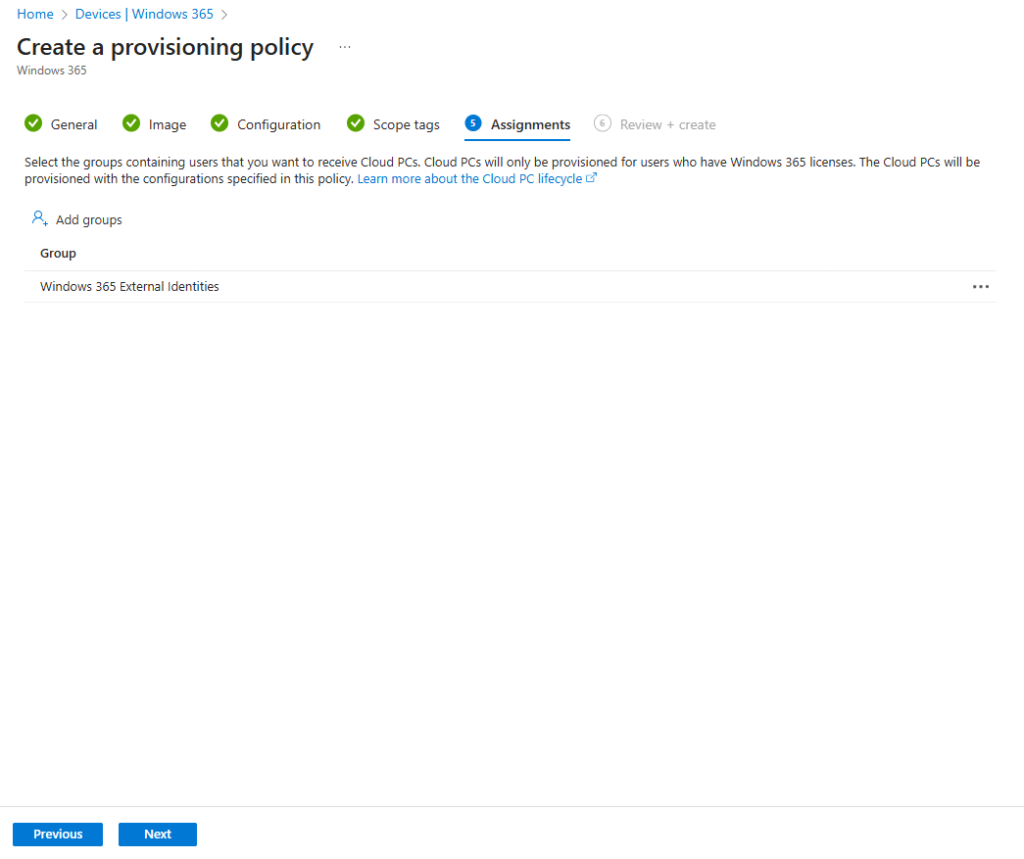
To be able to amend an existing provisioning policy to add or remove UES, you first need to remove the the current group assignment from the policy.
Navigate back to Provisioning policies and select your Frontline shared policy.
Choose Properties.
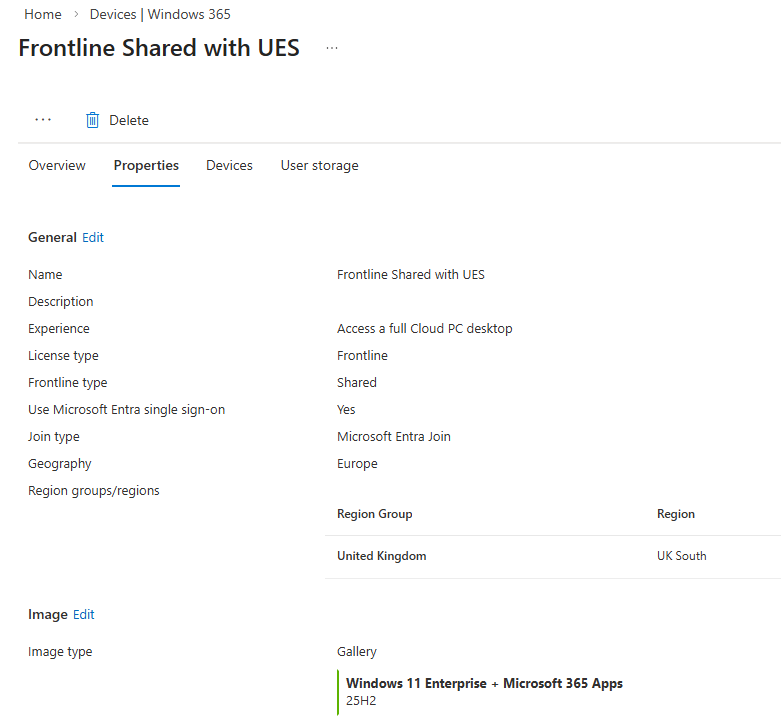
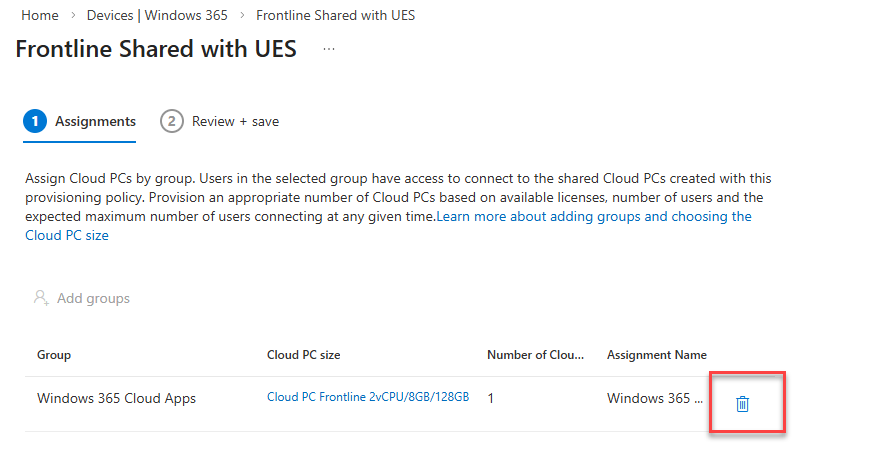
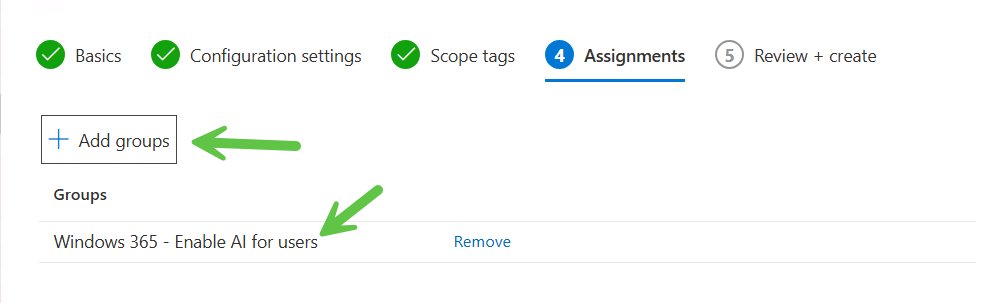
Scroll down to the Assignments and click Edit.

Delete the assignment.
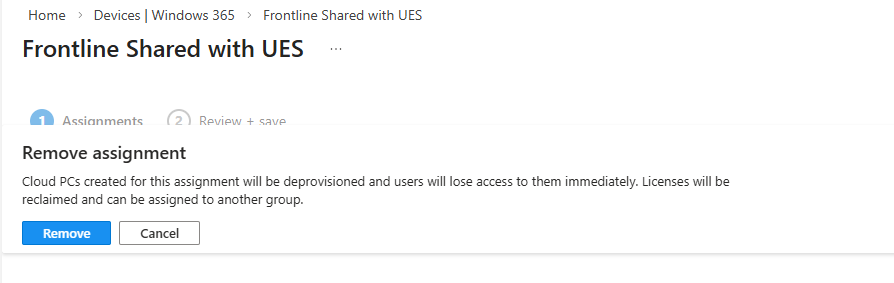
Click Remove to confirm the removal of the assignment. Click through the wizard to Update the policy.
Now Edit the Configuration section of the policy.
This is our UES policy with UES enabled. We can, therefore, remove UES by deselecting the Enable user experience sync checkbox. If this was a policy which never utilised UES, we could go into here and select to use and set a corresponding User Storage Size.
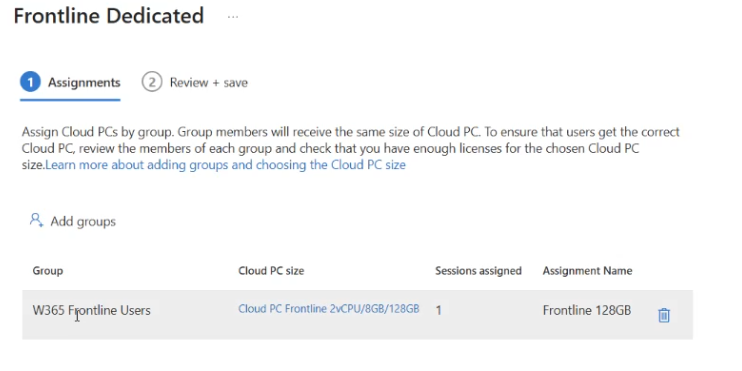
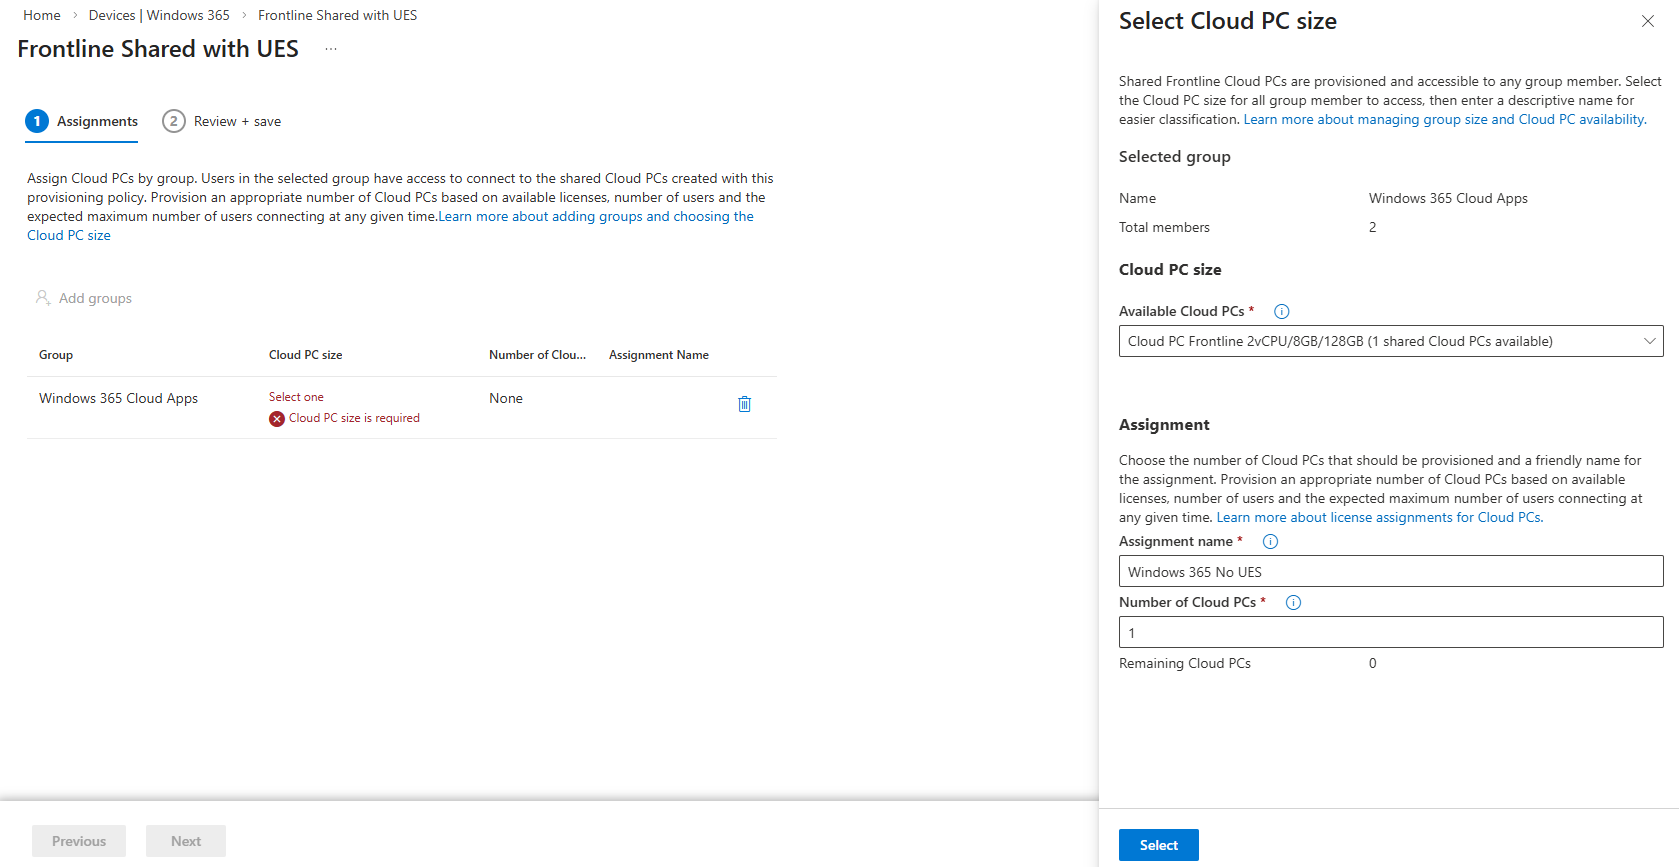
Once amended, Update the policy and head back to Assignments and Edit. Reassign the policy and enter the relevant Cloud PC size, select your Frontline subscription and Assignment details.
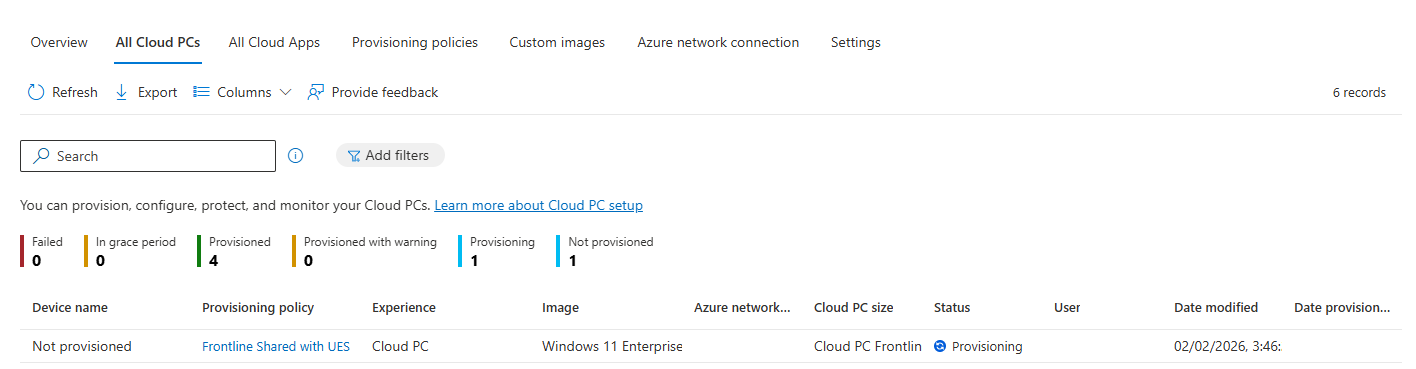
The Frontline shared devices will then be in a Provisioning state as the amended configuration is laid down.
Read more
- User Experience Sync for Windows 365 Frontline in shared mode – https://learn.microsoft.com/en-us/windows-365/enterprise/frontline-user-experience-sync
- Troubleshoot User Experience Sync for Windows 365 Frontline in shared mode – https://learn.microsoft.com/en-us/troubleshoot/windows-365/troubleshoot-user-experience-sync
Summary
Windows 365 User Experience Sync is a welcome feature for Frontline Shared devices which has been on the wish list for some time now. It is very simple to get up and running, without all the complexity of other solutions and provides instant access to storage of settings and application data.
Microsoft is taking into the account the feedback it received during the private preview and we should see some feature changes happening very shortly to improve the end user experience.
We look forward to seeing how this new feature matures and develops over time and we’ll blog about the feature improvements as they are released.


Using a Windows 365 Cloud PC via a USB-C connected iPhone
in Windows 365
Posted
Introduction
Microsoft released an update to Windows 365 recently that allows iPhone users to control the mouse via bluetooth when connected via a USB-C connected iPhone. In this blog post myself and my MVP buddy Paul Winstanley look at the new feature, review it’s capabilities, take it for a spin and give our thoughts.
We previously tested accessing Cloud PC’s from a USB-C connected iPhone docked to a HP E-24M docking station/monitor combo, but the experience was not good as the only mouse support at that time was using the iPhone’s screen as a touchpad. Paired bluetooth mice did not work and neither did USB connected mice. Now however, Microsoft have solved that problem, at least if you use their mouse. This blog post is broken down into the following sections:
So let’s get started!
Prerequisites
As usual there are some prerequisites highlighted below:
Optional extras to make the experience even better include:
Updating the firmware
Once you meet the prerequisites all you need to do is ensure the firmware of your supported Microsoft mouse is updated on a Windows PC to version 2.2 or later before starting.
Download the firmware from here and verify the version of the firmware on a Windows PC via the Surface app. The strange thing about updating the firmware is you must first install the MSI (elevated), restart the computer then pair the mouse to the Windows computer, then wait 10 minutes for it to update. It’s all in the instructions.
To verify the firmware version, install the Microsoft Surface app on that Windows computer, and you’ll see the firmware version in that app. If it doesn’t update, close and then re-open the app.
Pairing bluetooth devices
Now that the Microsoft Arc mouse firmware is up to date, simply pair it with your iPhone. Once done, you can optionally pair a bluetooth keyboard or use a USB keyboard plugged into the HP dock (monitor) and pair your bluetooth headset.
Note: Even when you pair a bluetooth headset to your iPhone, when it’s connected via USB-C to a dock or external monitor it behaves differently and will always want to default to the audio capabilities of the docked monitor via USB-C. What this means in practice is that after you’ve docked to the HP monitor with your iPhone, and playback audio, the audio will come from the speakers in the monitor.
To solve this, from the top right of the iPhone swipe down to show the widgets menu.
Select the audio playback widget (top right of this screen). Click the speaker output option and finally, select your bluetooth headset.
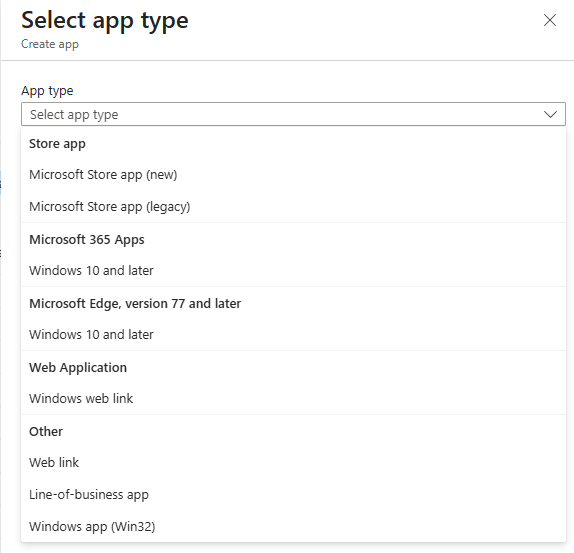
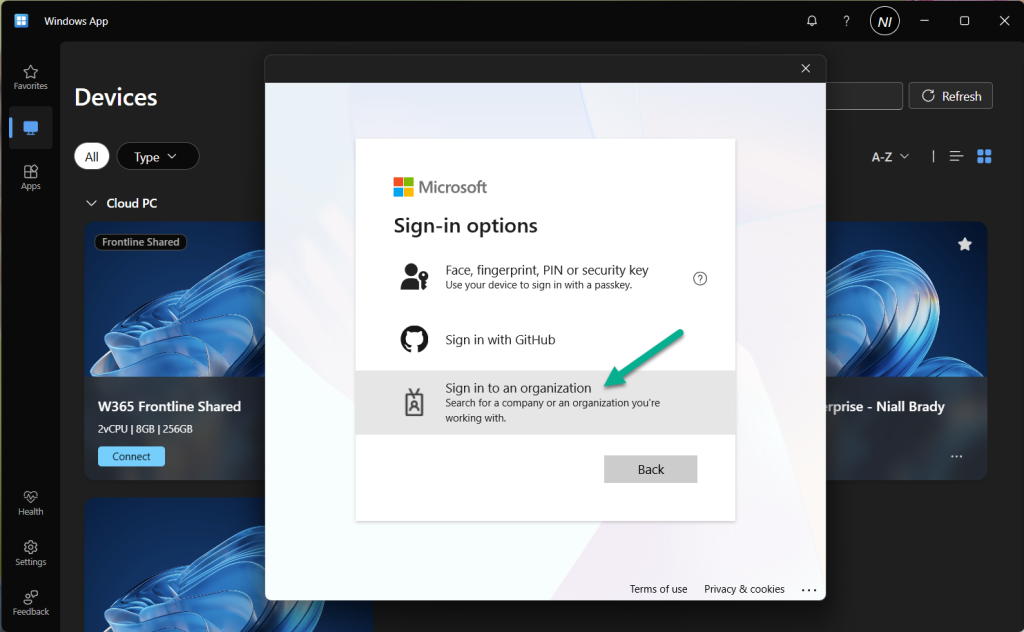
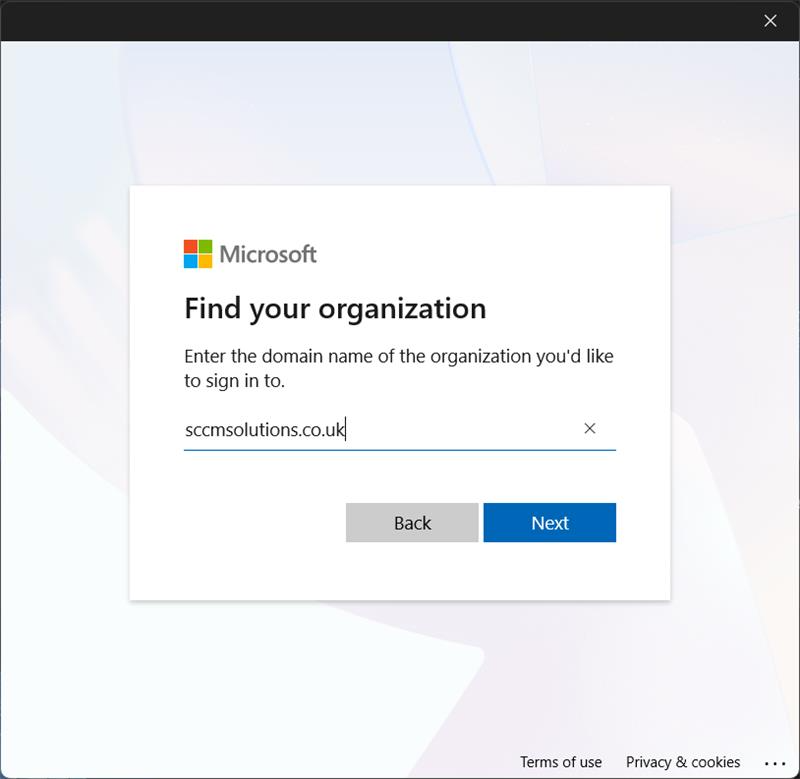
Install the Windows app
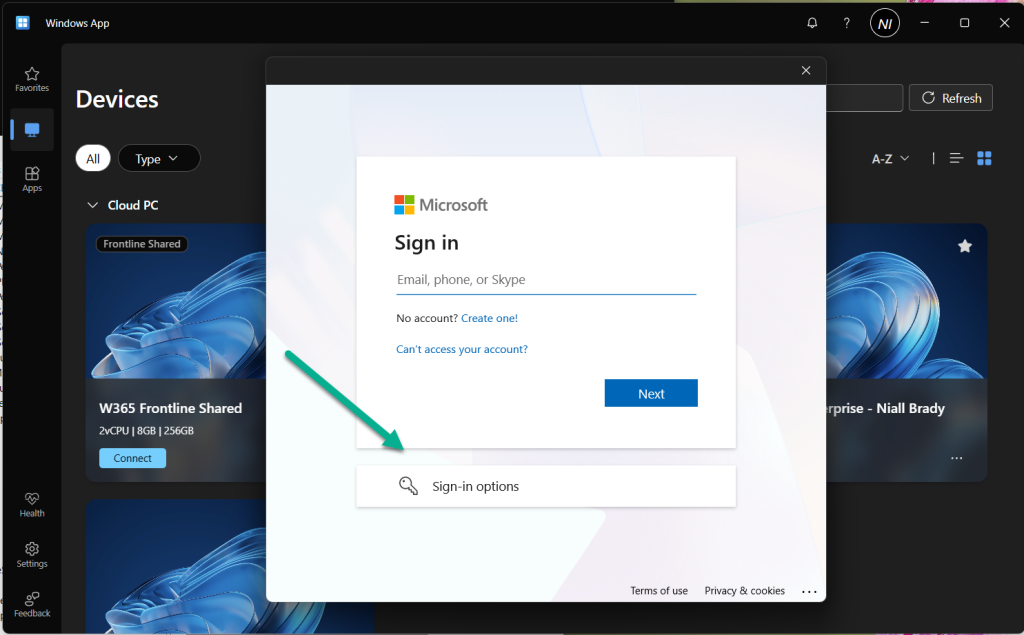
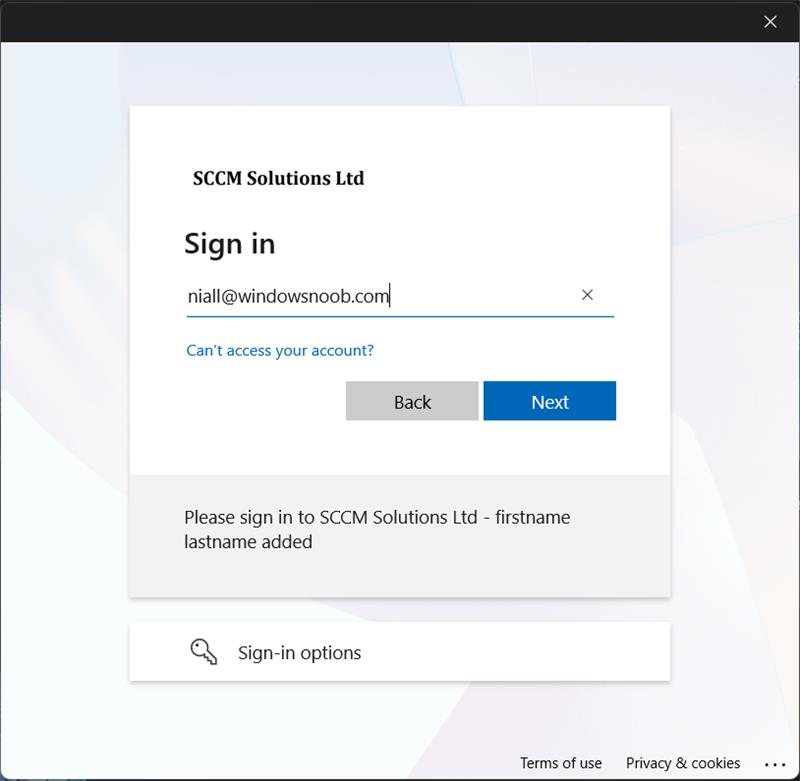
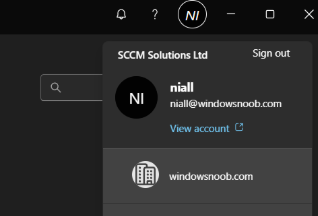
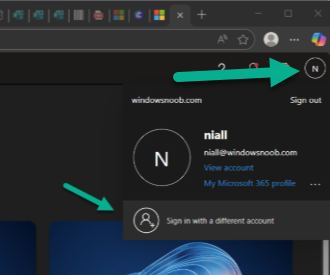
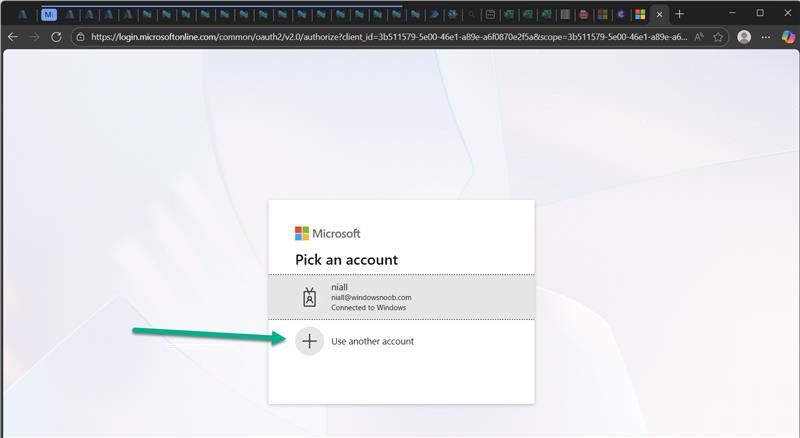
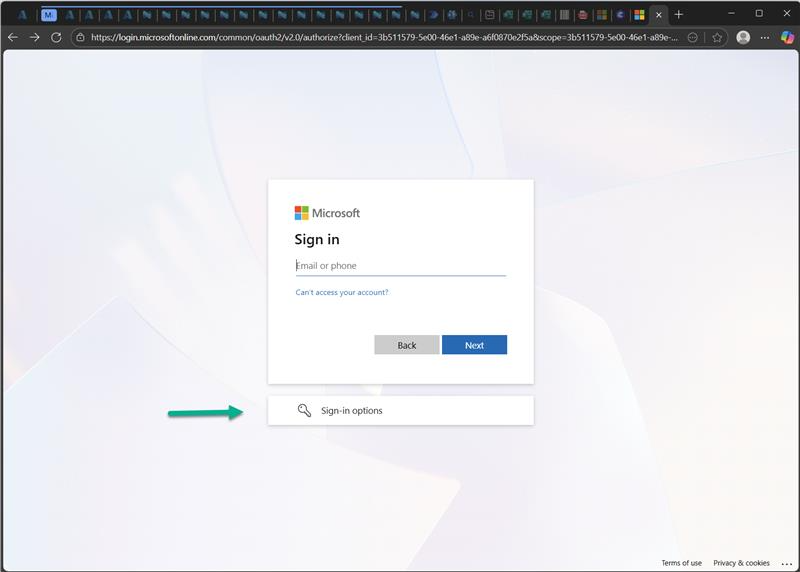
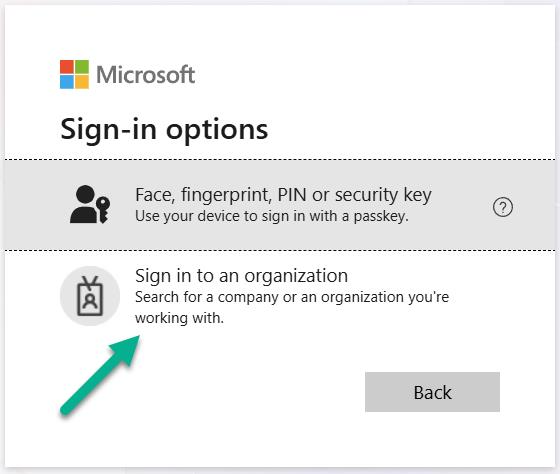
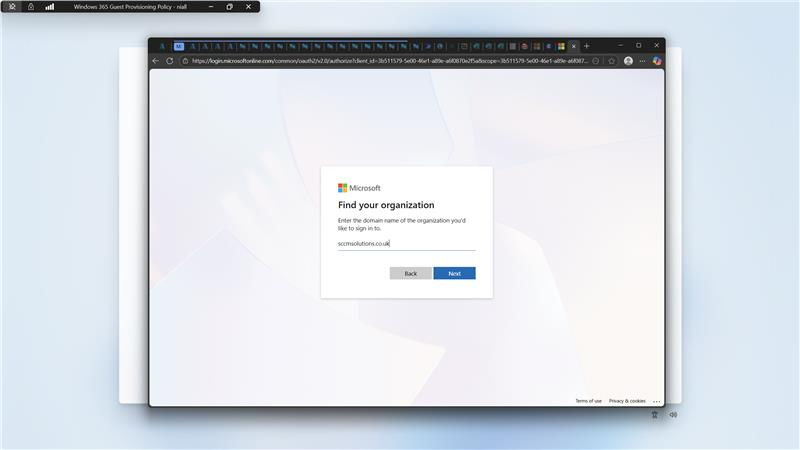
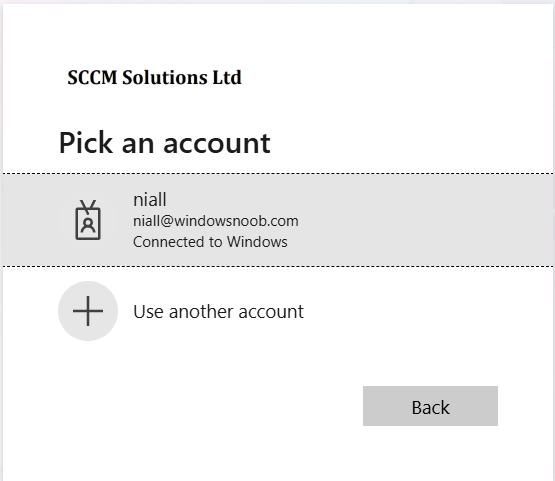
At this point, install the Windows app from the Apple App Store if you haven’t already done so. Once installed click on + in the Windows app to add your work account, that will give you access to any Cloud PC’s provisioned for your account.
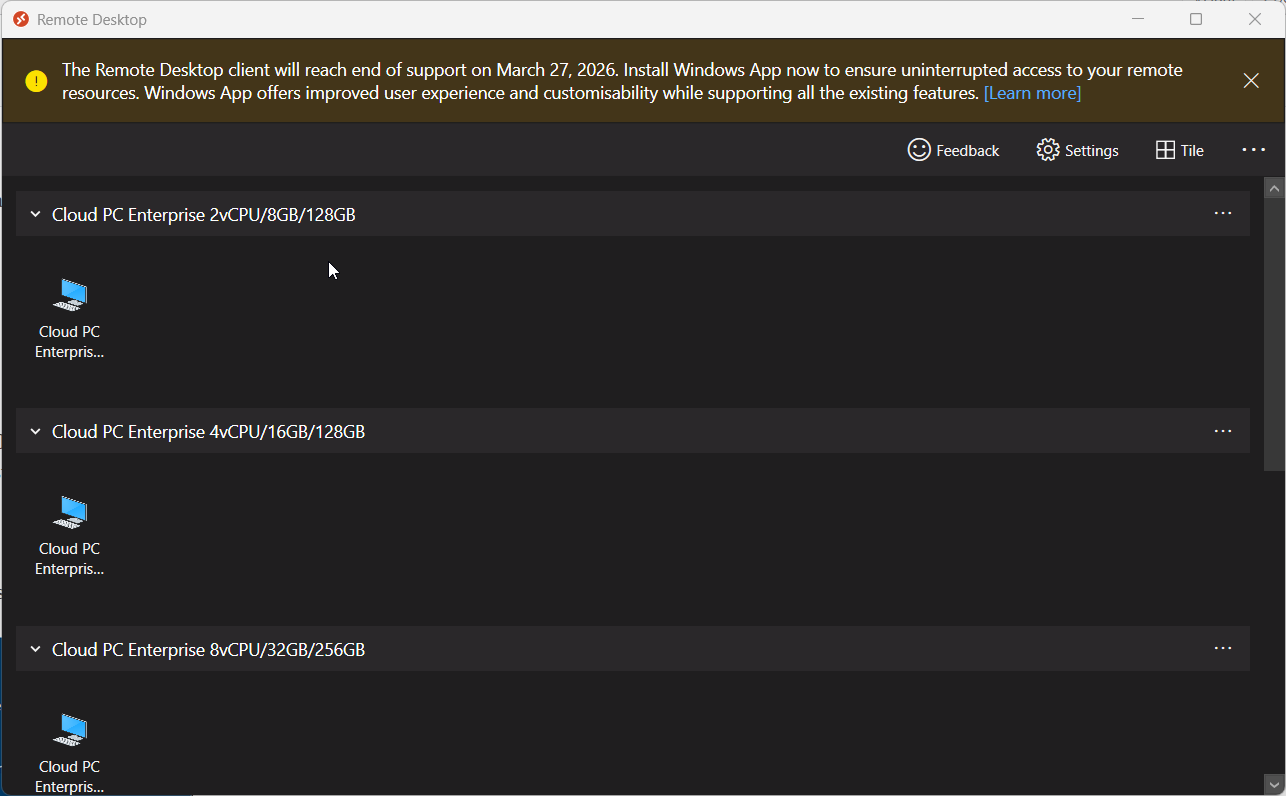
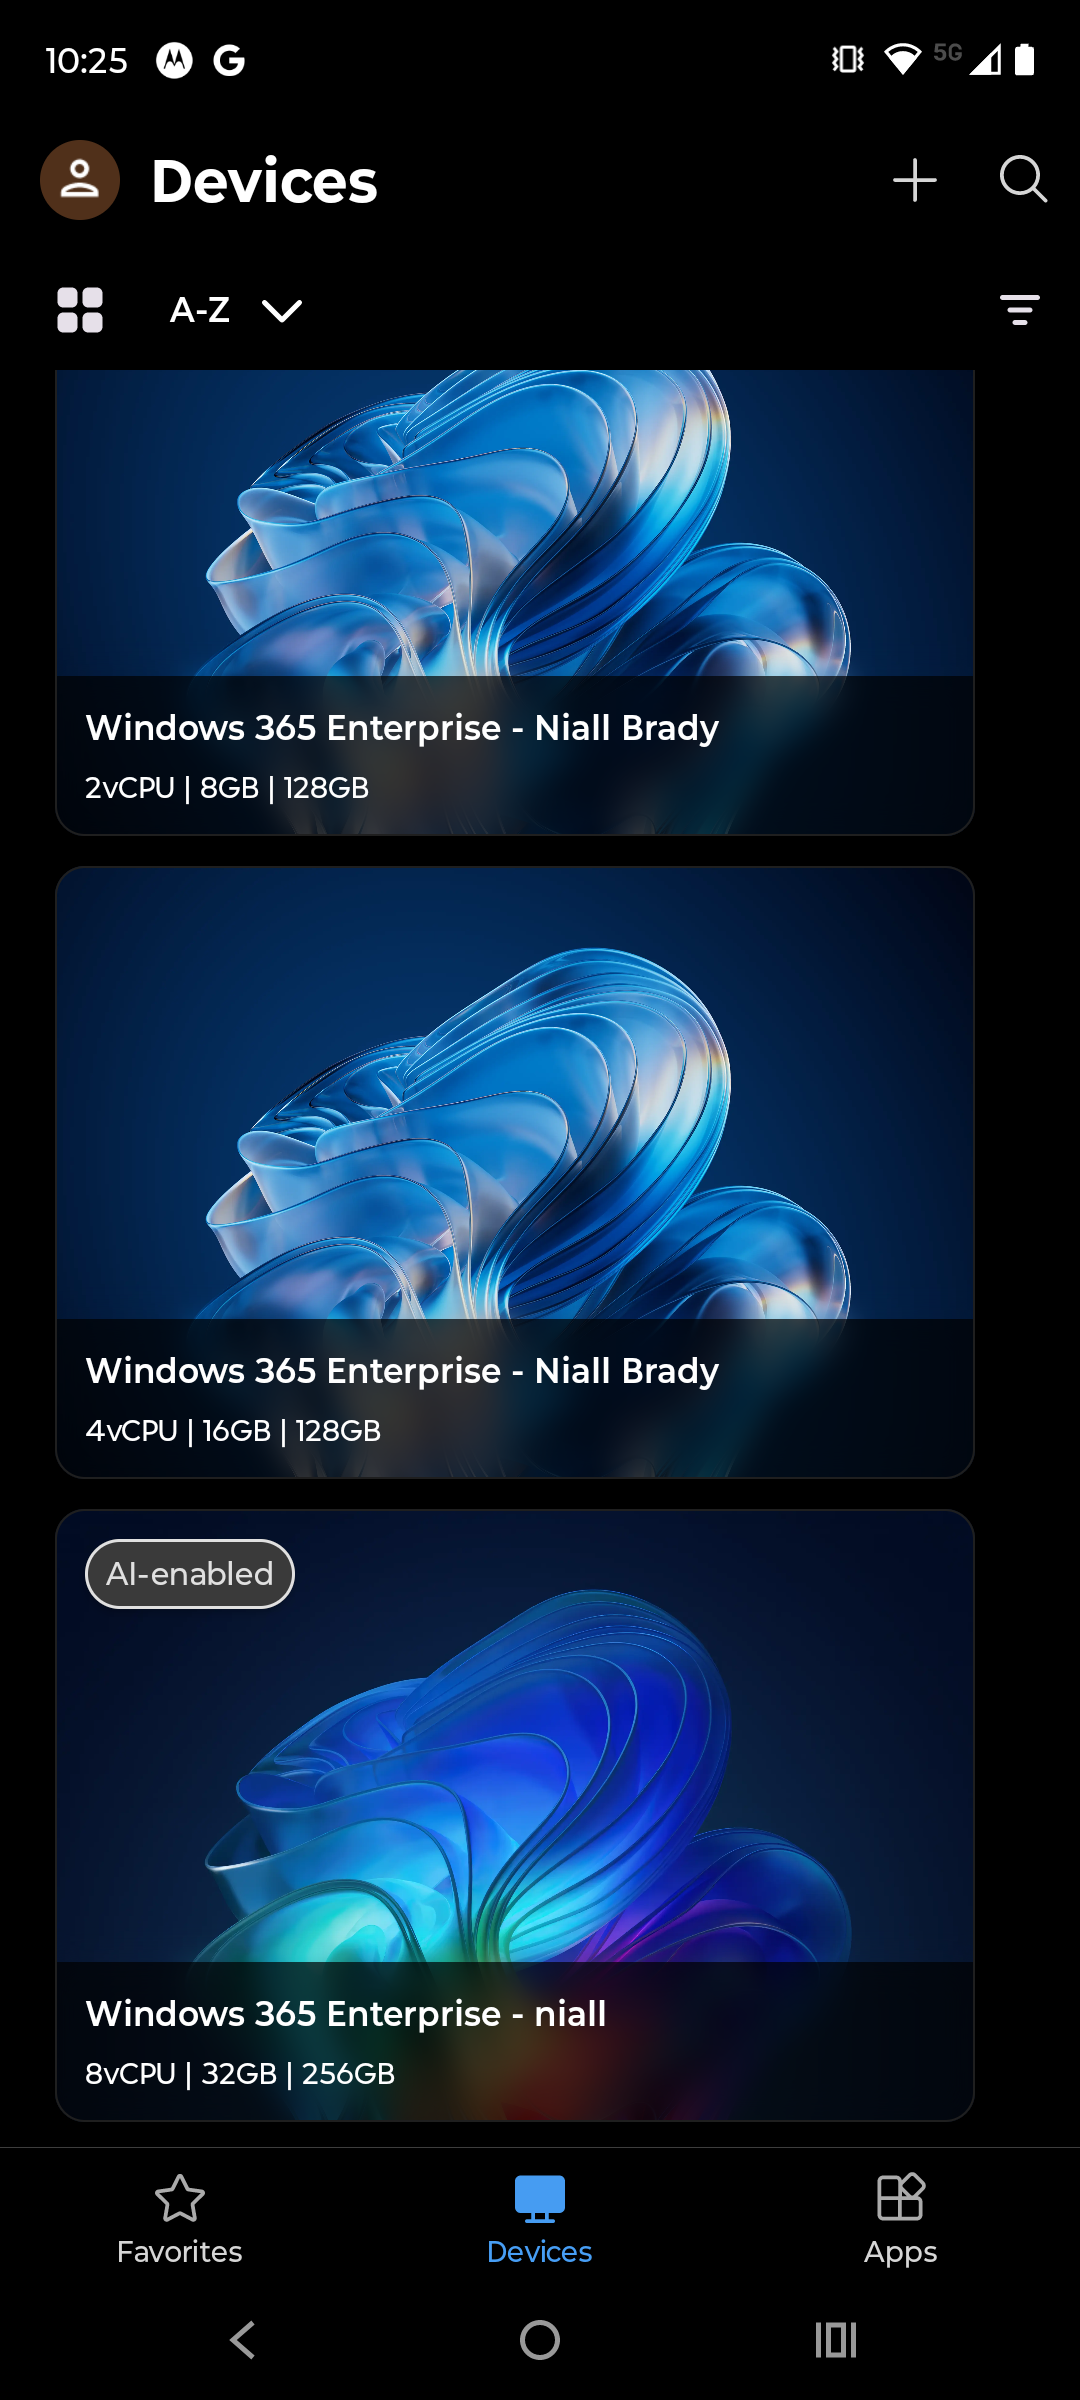
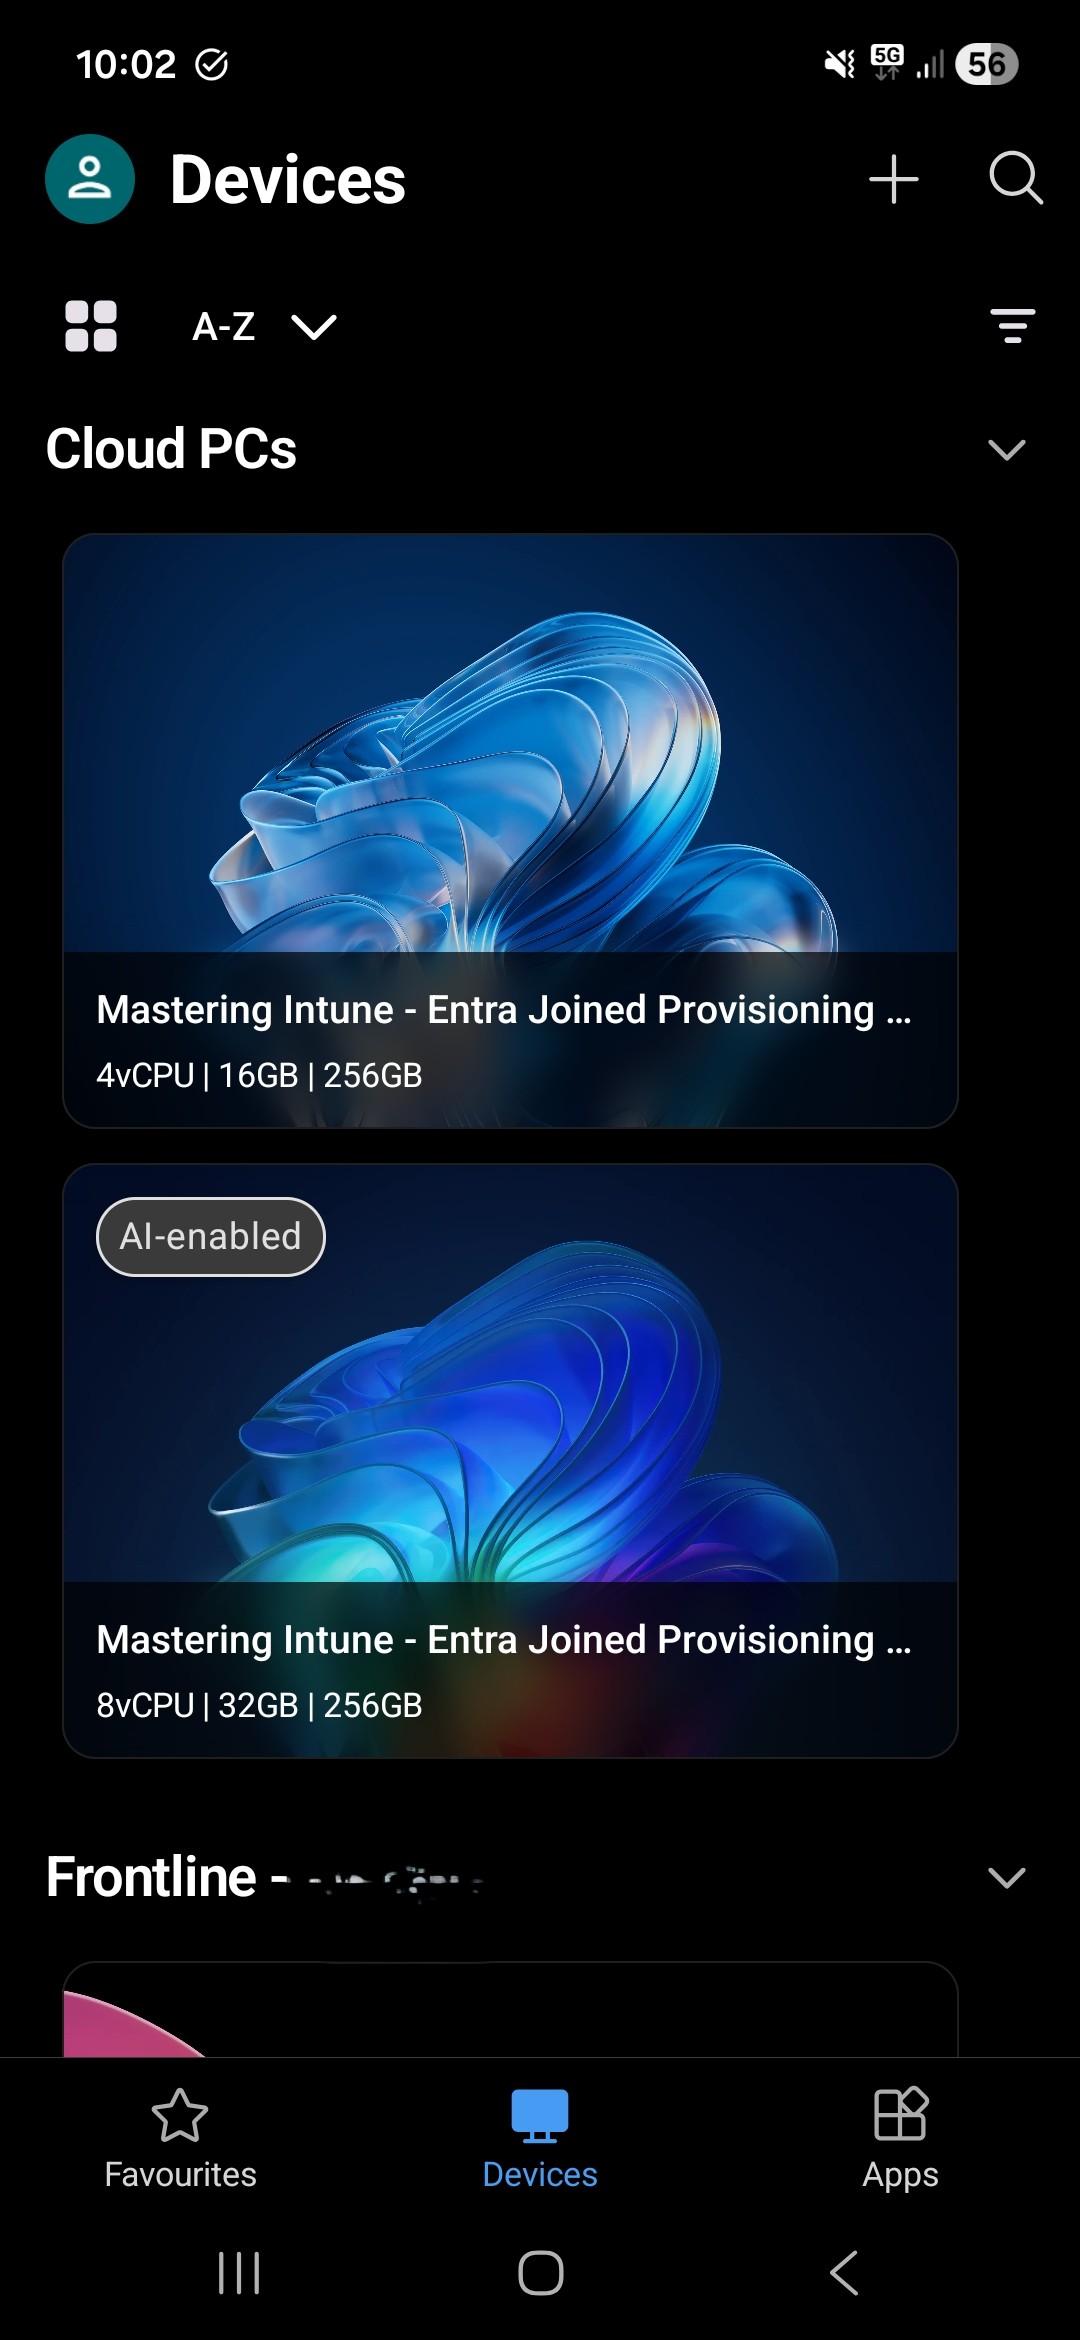
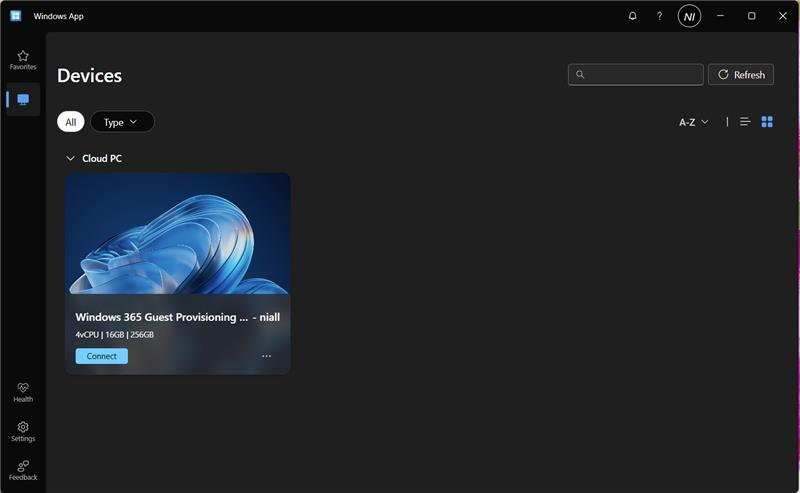
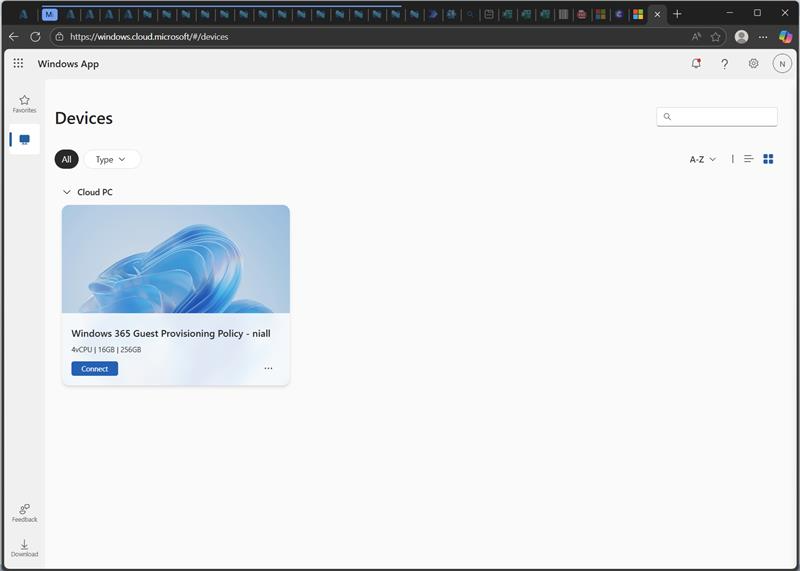
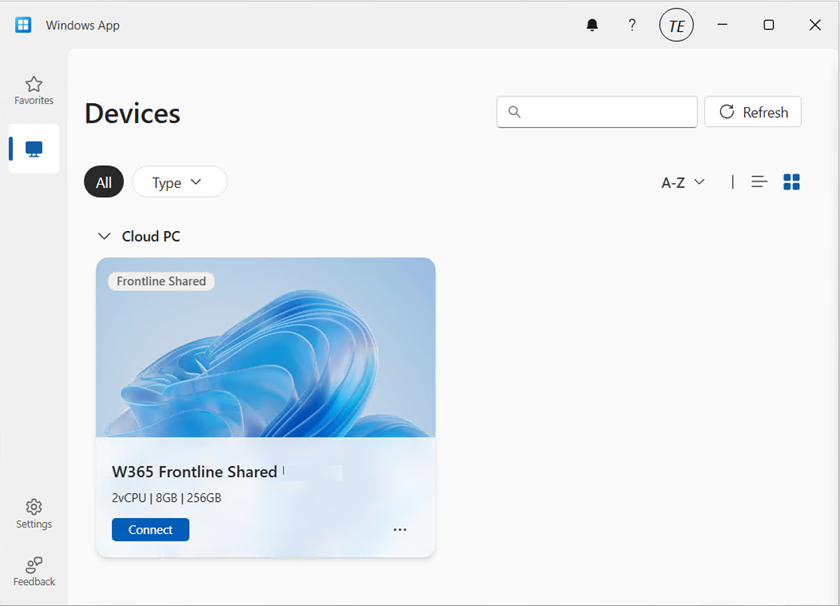
After adding your work account, any Cloud PC’s made available to your account will show in the Windows app.
Note: The notifications icon in the Windows app is useful to keep track of, click on it to see what it’s alerting you to.
Configuring Windows app permissions
In the newly installed Windows app, click on your username photo in the top left and select App permissions, flip the following settings to On.
Configure Auto-lock on the iPhone
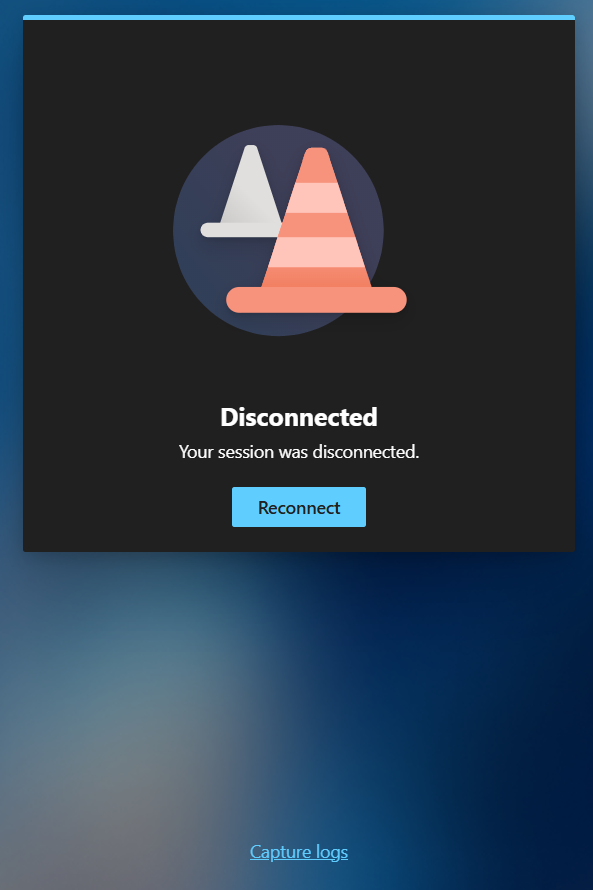
On your phone, you may want to configure screen lock from the default 30 seconds to 5 minutes while using your Cloud PC, otherwise when your iPhone locks the screen you’ll be disconnected from your Cloud PC session.
Below is what you’ll see when the iPhone screen locks.
To configure it, open settings, Display and Brightness and scroll down to Auto-lock.
Set it to your desired timeout and if necessary, but don’t forget to revert it after you are finished with the Cloud PC. For security reasons never leave your phone unattended when this is set this way.
Connecting to your Cloud PC
To connect to your cloud PC, once the above is done, simply plug in the USB-C cable from your docking solution/USB-C monitor.
On your iPhone, open the Windows app, and click on your Cloud PC. It will appear on your HP monitor, but most likely in an incorrect resolution. To use the correct resolution, you’ll need to configure the resolution settings in your Windows app by clicking on the Windows icon and selecting the appropriate resolution, usually 1920×1080, or configure the desired resolution in the Windows app by clicking on your username photo, and selecting the option there.
Video meetings
To have a video meeting in Microsoft Teams, you must use the camera in your iPhone. Camera’s built into monitors or docking monitors are not supported, therefore you’ll probably want a stand to support your iPhone in a suitable location.
Once the phone is placed in a suitable spot, you can use the phone's camera for Teams/Webex/Zoom meetings.
Multimonitor support
This solution only supports one monitor, the monitor that you are currently connected to. Dual monitors are not supported for this scenario. If you require dual or more monitors use a Windows computer with the Windows app, or macOS.
Summary
We were left very impressed, being able to work by simply bringing your iPhone to a desk that has a docking station with the Microsoft Arc mouse is actually a killer feature. You can absolutely work using this setup, and even receive phone calls on your phone while working on the Cloud PC.
But while this is definitely a huge step forward for using your Cloud PC via an iPhone, there are still some gaps that hopefully will be solved in the future. We summarize them below:
We would like to see the ability to use any popular bluetooth mouse (such as the Logitech MX Master) which allow connections from up to 3 different devices. The Microsoft Surface Arc mouse can only connect to one device and it does not feel as professional as the Logitech mice.
We would also like to see better security or options regarding the auto-lock feature of the iPhone screen, in conjunction with the connection to your Cloud PC. Once the screen locks on your iPhone, it instantly disconnects your Windows 365 session which makes working hard/frustrating. Setting the timeout to 5 minutes or never helps, but it’s a security risk in an Enterprise.
Also, why does the iPhone forget your chosen external resolution every time you connect, can’t we set that in the Windows app and make it stick?
Thanks Microsoft for yet another update to Windows 365, this one really is well worth checking out. Highly recommended and a genuine use-case here!
see you in the next one,
Niall & Paul