anyweb
-
Posts
9271 -
Joined
-
Last visited
-
Days Won
371
Everything posted by anyweb
-
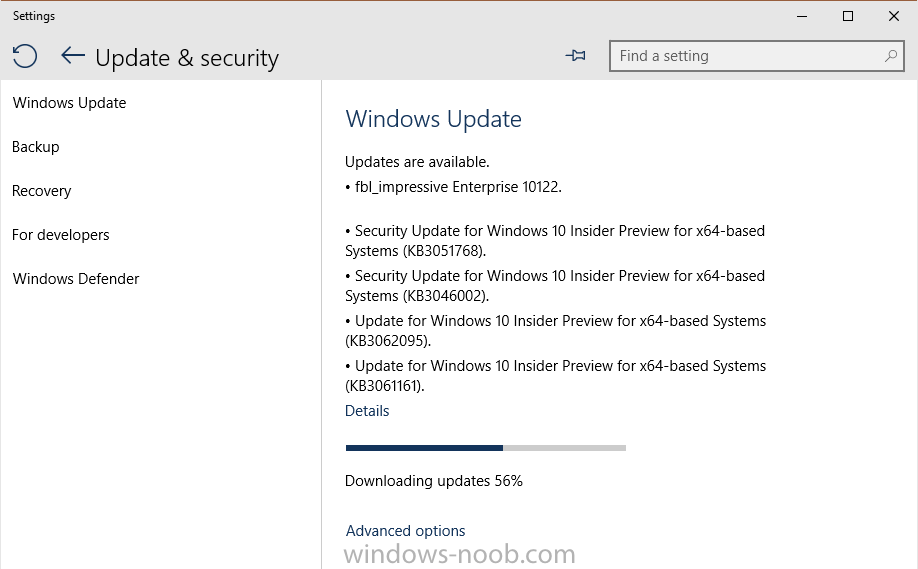
Microsoft have released a new build to the Fast Ring called build 10122, and have blogged about it here. The following things have changed (summary) Start and Continuum improvements Microsoft Edge Changes to how Windows 10 handles default apps Redesigned Insider Hub and below are details of issues fixed and known issues remaining Here are some issues we have fixed We have fixed the visual glitch (“rectangle slivers”) that appears on Live Tiles on the Start menu with the new tile animation. In general, performance of the Start menu should be better in this build. We believe we have fixed a lot of the crashes with Microsoft Edge (Project Spartan) reported by Windows Insiders. Developers – when you go to Settings > Update & Security > For developers – it no longer crashes the Settings app. We fixed the issue some people were seeing where their graphics driver fails to install from Windows Update with error code 80070103. This was happening because WU was trying to re-issue the driver. You should now be able to edit the IPv4 properties of an Ethernet adapter on your PC. We have fixed issues where fonts would render blurry on High DPI displays. We’re cooking up a blog post we plan to publish shortly that talks a little more in depth about our investment with High DPI in Windows 10 so watch for it. We have fixed some keyboard shortcuts in Microsoft Edge. Control + L or Alt + D shortcuts now got to the URL bar more reliably. Here are some known issues for this build See my note above regarding the issue on PCs with AMD GPUs and frequent crashes in Microsoft Edge. Upgrading to this build on certain PCs may fail and roll back to the previously installed build with error 0x80070057 – 0x20007. This is a bug where too many device INFs are being migrated and hitting an internal limit. Possible workaround is to use Disk Cleanup to clean up system files and choose Device driver packages, Previous Windows installations and Temporary Windows installation files. You may also need to remove unnecessary peripherals and remove them from Device Manager and trying the upgrade again. In this build there is a bug that may cause issues with Cortana speech. If you are experiencing problems with speech recognition, or are getting errors when trying to speak to Cortana, please visit this thread on the Windows Insider Program forum for assistance in recovering from this bug.
-
looks good, good luck ! and remember you can always post guides here
-
the beginning part up to where it fails (udi)
-
can you show me a screenshot of your task sequence,
-
according to your log file UEFI: true <- so it's in UEFI mode, which means the disk partitioning above won't work, you need GPT partitioning instead. try my script below to preprare the computer for gpt partitionin it requires Microsoft.BDD.Utility.dll from the mdt toolkit scripts folder test this on a vm before running ! dont run it on your computer ! makeGPT.zip
-
please attach the smsts.log files from a failed attempt above
-
ok if uefi is disabled then it's in legacy mode, if its in legacy mode but the disc is in gpt mode then you have to diskpart it manually to the correct mode diskpart sel disk 0 clean cre par pri format fs=ntfs quick assign exit do the above in winpe before starting any task sequence, then try again does it work ?
-

SCCM PXE Boot - Lenovo ThinkPad Helix Gen 2
anyweb replied to shawn.pederson's question in Deploying Operating Systems
imaging them here just fine, make sure you are using the 64 bit boot image and that the usb 3 lenovo drivers are added to your boot wim- 14 replies
-
- 1
-

-
- SCCM 2012 OSD
- UEFI BIOS
- (and 1 more)
-
hi sligo guy ! i lived there for many years, next time i'm back we should say hello, so you are trying to image the lenovo thinkpad 10 in UEFI mode or LEGACY ?
-
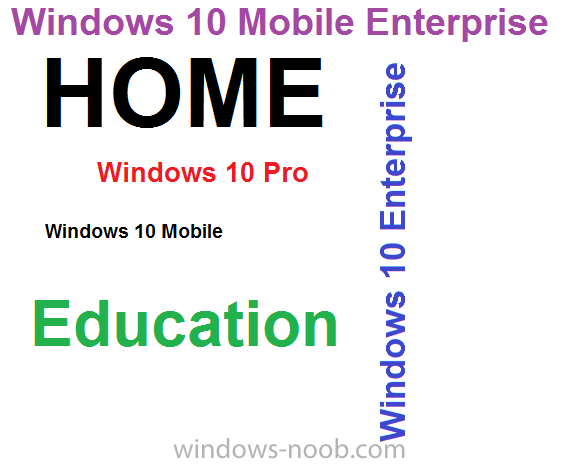
Windows 10 is coming this summer in 190 countries and 111 languages. Today, we are excited to share more details on the Windows 10 Editions. We designed Windows 10 to deliver a more personal computing experience across a range of devices. An experience optimized for each device type, but familiar to all. Windows 10 will power an incredibly broad range of devices – everything from PCs, tablets, phones, Xbox One, Microsoft HoloLens and Surface Hub. It will also power the world around us, core to devices making up the Internet of Things, everything from elevators to ATMs to heart rate monitors to wearables. No matter which Windows 10 device our customers use, the experience will feel comfortable, and there will be a single, universal Windows Store where they can find, try and buy Universal Windows apps. Introducing Windows 10 Editions As in the past, we will offer different Windows editions that are tailored for various device families and uses. These different editions address specific needs of our various customers, from consumers to small businesses to the largest enterprises. Windows 10 Home is the consumer-focused desktop edition. It offers a familiar and personal experience for PCs, tablets and 2-in-1s. Windows 10 Home will help people do great things, both big and small. With it, they will be more productive and have more fun thanks to a long list of new innovations: Cortana, the world’s most personal digital assistant; the new Microsoft Edge web browser; Continuum tablet mode for touch-capable devices; Windows Hello face-recognition, iris and fingerprint login; and right out of the box, a broad range of universal Windows apps like Photos, Maps, Mail, Calendar, Music and Video*. We are also bringing the Xbox gaming experience to Windows 10, giving games and gamers access to the Xbox Live gaming community, enabling the capture and share of gameplay and giving Xbox One owners the ability to play their Xbox One games from any Windows 10 PC in their home. Windows 10 Mobile is designed to deliver the best user experience on smaller, mobile, touch-centric devices like smartphones and small tablets. It boasts the same, new universal Windows apps that are included in Windows 10 Home, as well as the new touch-optimized version of Office. Windows 10 Mobile offers great productivity, security and management capabilities for customers who use their personal devices at work. In addition, Windows 10 Mobile will enable some new devices to take advantage of Continuum for phone, so people can use their phone like a PC when connected to a larger screen. Windows 10 Pro is a desktop edition for PCs, tablets and 2-in-1s. Building upon both the familiar and innovative features of Windows 10 Home, it has many extra features to meet the diverse needs of small businesses. Windows 10 Pro helps to effectively and efficiently manage their devices and apps, protect their sensitive business data, support remote and mobile productivity scenarios and take advantage of cloud technologies. Windows 10 Pro devices are a great choice for organizations supporting Choose Your Own Device (CYOD) programs and prosumer customers. Windows 10 Pro also lets customers take advantage of the new Windows Update for Business, which will reduce management costs, provide controls over update deployment, offer quicker access to security updates and provide access to the latest innovation from Microsoft on an ongoing basis. As we announced earlier this year, for the first time ever, we are offering the full versions of Windows 10 Home, Windows 10 Mobile and Windows 10 Pro as a free and easy upgrade for qualifying Windows 7, Windows 8.1 and Windows Phone 8.1 devices that upgrade in the first year after launch.** Once you upgrade, you have Windows 10 for free on that device. Windows 10 Enterprise builds on Windows 10 Pro, adding advanced features designed to meet the demands of medium and large sized organizations. It provides advanced capabilities to help protect against the ever-growing range of modern security threats targeted at devices, identities, applications and sensitive company information. Windows 10 Enterprise also supports the broadest range of options for operating system deployment and comprehensive device and app management. It will be available to our Volume Licensing customers, so they can take advantage of the latest innovation and security updates on an ongoing basis. At the same time, they will be able to choose the pace at which they adopt new technology, including the option to use the new Windows Update for Business. With Windows 10, Enterprise customers will also have access to the Long Term Servicing Branch as a deployment option for their mission critical devices and environments. And as with prior versions of Windows, Active Software Assurance customers in Volume Licensing can upgrade to Windows 10 Enterprise as part of their existing Software Assurance benefits. Windows 10 Education builds on Windows 10 Enterprise, and is designed to meet the needs of schools – staff, administrators, teachers and students. This edition will be available through academic Volume Licensing, and there will be paths for schools and students using Windows 10 Home and Windows 10 Pro devices to upgrade to Windows 10 Education. Windows 10 Mobile Enterprise is designed to deliver the best customer experience to business customers on smartphones and small tablets. It will be available to our Volume Licensing customers. It offers the great productivity, security and mobile device management capabilities that Windows 10 Mobile provides, and adds flexible ways for businesses to manage updates. In addition, Windows 10 Mobile Enterprise will incorporate the latest security and innovation features as soon as they are available. There will also be versions of Windows 10 Enterprise and Windows 10 Mobile Enterprise for industry devices like ATMs, retail point of sale, handheld terminals and industrial robotics and Windows 10 IoT Core for small footprint, low cost devices like gateways. Moving forwardWe are making strong progress with Windows 10, and we are on track to make it available this summer. And because we have built Windows 10 to be delivered as a service, this milestone is just the beginning of the new generation of Windows. Starting this fall, customers can expect ongoing innovation and security updates for their Windows 10 devices, including more advanced security and management capabilities for businesses. Customers will continue to help us create Windows 10 even after this summer’s initial release, thanks to the 3.9 million and growing Windows Insiders who are helping us build and test Windows 10. We are grateful for this invaluable feedback that is helping us offer the best Windows ever – for businesses and consumers – across all devices. You, too, can join the Windows Insider Program today and begin experiencing Windows 10. We are incredibly excited about the innovation in Windows 10 that will be delivered through these editions. Please watch for more information at Windows.com as we move even closer to launch. Tony * Cortana will be available on Windows 10 at launch in select markets. Windows Hello requires a specialized, illuminated infrared camera for facial recognition or iris detection or a finger print reader which supports the Windows Biometric Framework. Apps and services may vary by market. ** More information about the free upgrade offer can be found at Windows.com. via > http://blogs.windows.com/bloggingwindows/2015/05/13/introducing-windows-10-editions/
-
I was just about to publish something similar, however i'll edit my script and provide the alternative solution also. thanks
-
Windows PE 5.x boot problem
anyweb replied to balubeto's question in Deploying Windows 10, Windows 8.1, Windows 7 and more...
for your uefi devices are you using an architecture boot wim (for example 64bit) that matches the architecture of the device (64 bit) ? -
There's been a lot of comments about what was said at Microsoft Ignite in relation to Windows 10 being the last version of Windows. Why ? perhaps because Microsoft wants to move away from the cycle of pushing out new versions of Windows every 3 or so years, and instead focus on releasing new capabilities that match the development that is underway every day via talented developers around the world. Those developers are what makes Microsoft new vision a reality. I'll never forget Steve Ballmers Developers, Developers, Developers speech, it was just awesome, you cannot deny the energy and focus. That speech underscored the importance of developers and today developers are driving the future at the new Microsoft under Satya. Microsoft's new mantra is Mobile First, Cloud First and how that plays out with Windows 10 is becoming clear. All that development in the cloud can either be put through relentless testing and released as it was previously with a finished legacy product like Windows 7, or Windows 8... or pushed further to the edge of what most consider acceptable. That state, the state of new stuff working/not working is where we are now, it's called Windows 10 Insider Preview. This is not necessarily a bad thing, rather it's a great thing. For once we are seeing Windows develop 'as it's happening'. We are part of the process, we are making it happen. We are contributing like never before via Windows 10 bug submissions and direct contacts with Microsoft, in essence we are driving Windows 10 development without being a developer. Steve must be shaking his head. BBC news published an article here explaining their view on the change and it's a nice overview but what BBC and many other sites don't seem to comment about why this new way of doing things is actually a good thing and how Microsoft will probably profit more from this change. Profit from the cloud ? who would have thought... How can a huge company like Microsoft make more money from cash cow products like Windows ? well the answer might be easy, sell it as a service and that looks like the direction Windows is going. Except, instead of making money by offering new features, they might be making money by letting you use the version you want to use. If that sounds daft, well think about all the companies that stay on older versions of Windows simply because they cannot upgrade to the current version due to lack of support internally for Internet Explorer versions for their SharePoint sites. Yes, it happens. Things are changing faster now than ever. Today, you can install Windows 7, Windows 8.1 in versions that are easily implemented, once done, you are running Windows and you can update it to protect from viruses and malware. However, that initial install of Windows leaves you running the same version of Windows more or less unless of course you upgrade to Windows 10 for free. Upgrade for free, that sounds great, why don't we all do that. Why is Windows 10 so important, and why are so many sites saying that Windows 10 is the last ever version of Windows. Well apart from all the new features, this version of Windows brings you to where Microsoft want's you to be, to be running a version of Windows that actually doesn't matter. The version of Windows that will in effect become the Google Chrome of operating systems. Anyone who uses Chrome knows that the version number of that web browser doesn't matter, it updates, so what. Windows 10 will update in the same way, sometimes with new functionality or sometimes with security related updates when it deems necessary depending on whether you choose the Fast or Slow ring for Windows Updates, and....that updating could move you to a newer version of Windows and you won't even realize it. To most Windows users the idea of 'just updating' to a new version of Windows seems odd, strange, untested, and..... risky. But maybe this is exactly what we need right now, a new way of getting new features and functionality delivered as it's developed, straight from the cloud to your desktop. This new thinking from Microsoft shows that they are thinking ahead, not only in relation to Windows, but also to how they deliver services for their most profitable products. Office 365 updates all the time and if you use it, you barely notice. New features, bugs fixed, win-win. Windows users will see a similar model, abilities will be added, and you can opt in to get the changes,or opt out to remain on a stable version, and pay for it. Whatever happens, Windows 10 might be the last version of Windows, or it might not, either way i'm looking forward to the next version of Windows after Windows 10. That might be Windows 11 and if it is that version number will be driven by the desire to upgrade to the latest and greatest regardless of whether Windows 10 already has all those new features added. Microsoft might want to kill the concept of changing Windows versions after Windows 10 but I believe it will be a hard sell. Time will tell.
-
build and capture getting stuck on updates
anyweb replied to regan's topic in Configuration Manager 2012
what does the windowsupdate.log on the client reveal ? are any updates getting deployed/installed ? -
Since the successful release of the free NiCE Log File MP (for log file monitoring) last year, the NiCE team has received a tremendous amount of feedback from the users of the solution. In addition to all the positive feedback on the management pack's functionality, we received some requests/suggestions on additional product functionalities. After consolidating all the feedback, we are pleased to announce the ALL IMPROVED NiCE Log file MP - version 1.30. Best of all - it's still 100% FREE! What’s new (based on community feedback): Improved SCOM Authoring Console Wizards Improved Cluster Support Enhanced Self-Monitoring Performance and stability improvements The above improvements are in addition to all the other features and functionalities that the NiCE Log file MP has. Features & Functionalities of the NiCE Log File MP Equipped with a set of custom authoring wizards so you can createAlert Rules Performance Counters Unit Monitors Allows you to filter log entries using regular expression language Includes a powerful program execution interface to run scripts and programs Correlate your log lines Allows you to define log file names as absolute paths Customize behavior if log file does not exist Set the log file directory using a regex pattern with no restriction Still not sure that this FREE solution will be useful to you? Check out some feedback from current users of the NiCE Log File Management Pack. Some NiCE Log File MP user feedback: NETHERLANDS “I am very happy with the Log File Management Pack. This is a great add-on for SCOM” SWEDEN “We have implemented NiCE Log File MP in our production environment and it works great. This solution is really useful for us” Czech Republic “The management pack is very helpful for us, as we are able to monitor some logs for specific entries without writing complicated scripts. Thanks for releasing it!” ROMANIA “Everything is working as designed. Was easy to set up and is working as expected” DENMARK “I would like to say that I'm REALLY pleased with the NiCE Log File MP. It works great!” GERMANY “das Log File MP deckt unsere Anforderungen ab (The Log File MP covers our needs)” Ready to download the upgraded NiCE Log File MP? Email: solutions@nice.de for more information. Smart Application Monitoring You Can Rely On

-
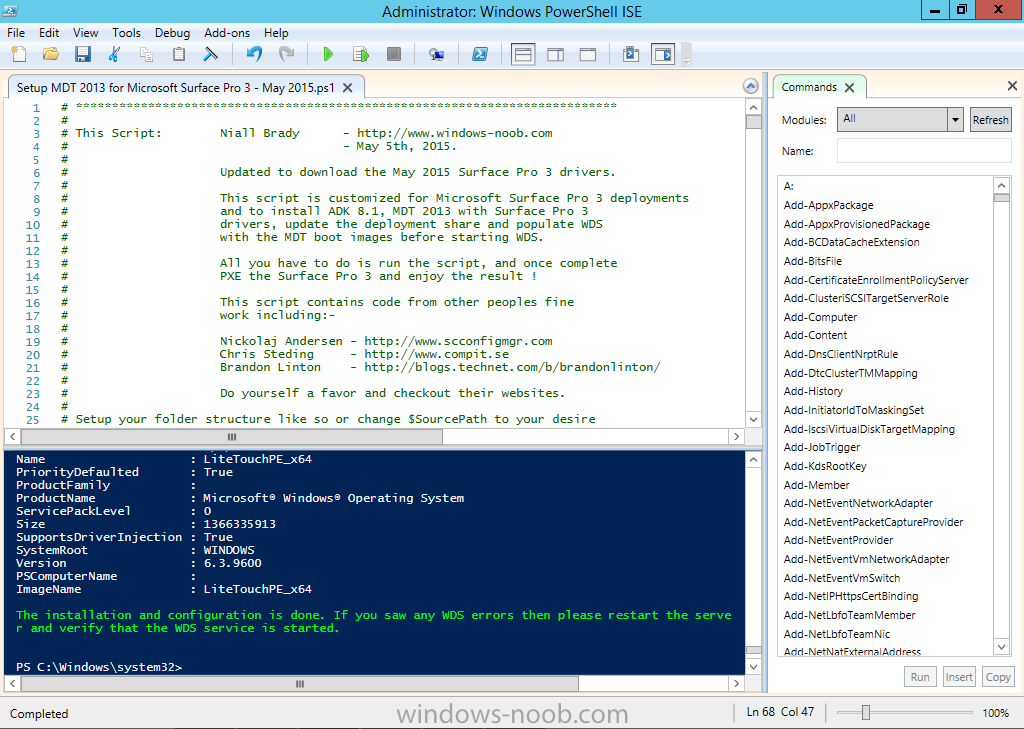
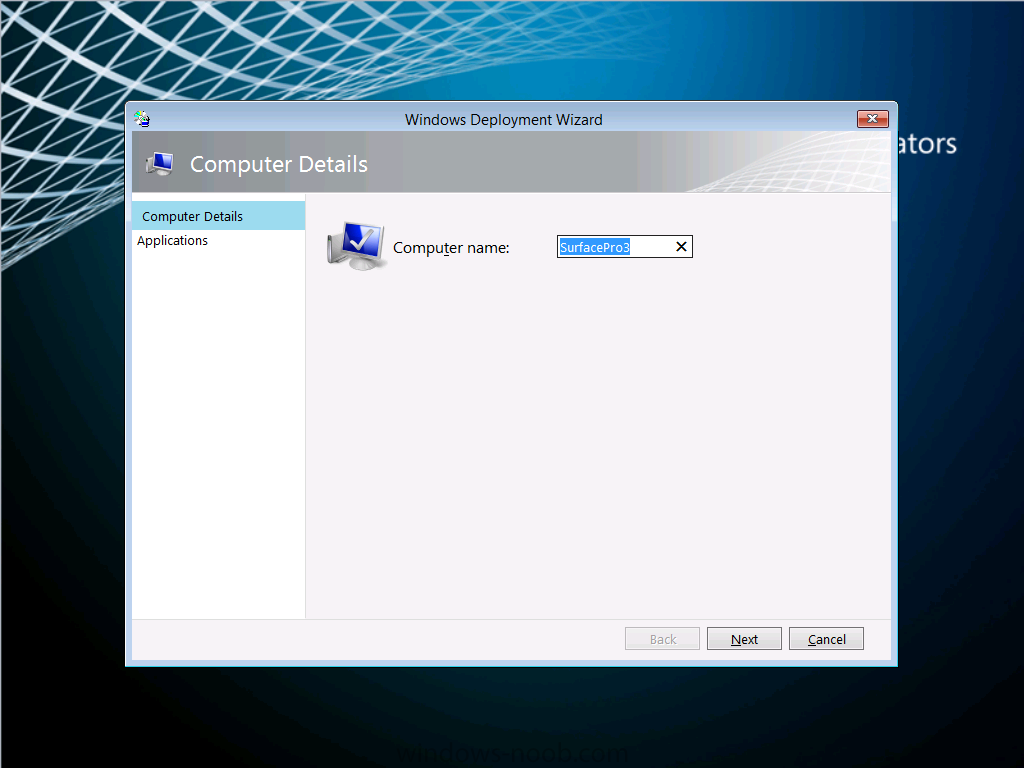
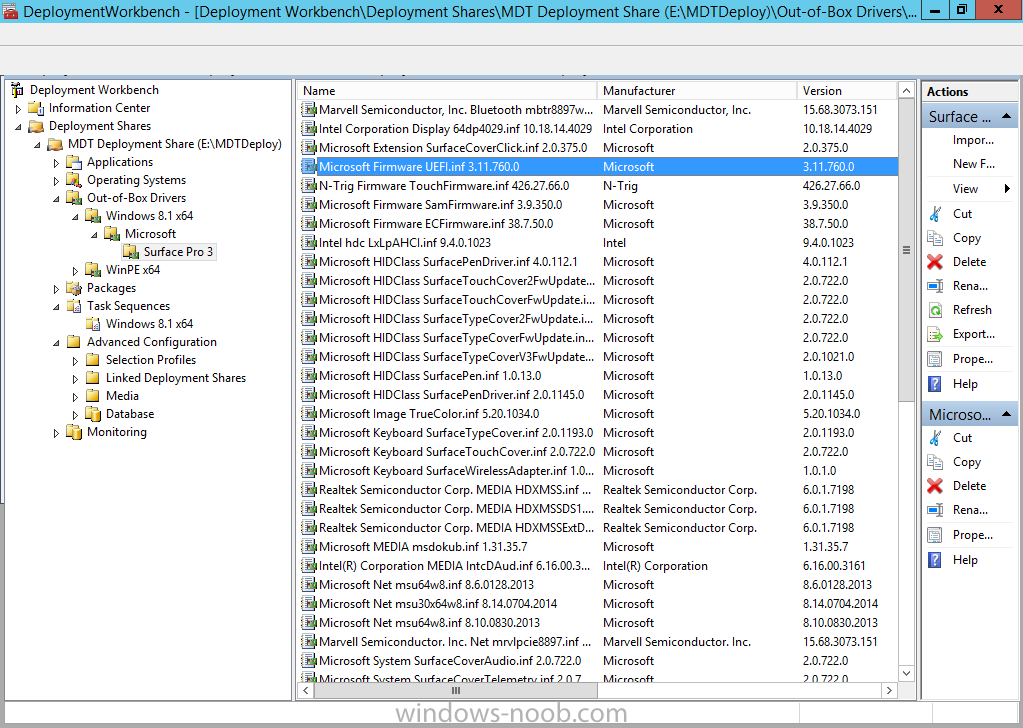
Microsoft has recently released new updated drivers for the Surface Pro 3 (May 2015). Here's a blog explaining what those driver updates contain. Note: This release also contains drivers for the Surface 3 but as I don't have that hardware yet I cannot test/verify. About the drivers Here's a breakdown of what those drivers are, the README below describes the versions of the components found in the Surface Pro 3 cumulative firmware and driver update package, released in May 2015. FIRMWARE: EC 38.7.50.0 ECFirmware.inf SAM 3.9.350.0 SamFirmware.inf TOUCH 426.27.66.0 TouchFirmware.inf UEFI 3.11.760.0 UEFI.inf DRIVERS: Accessory SurfaceAccessoryDevice 2.0.1012.0 SurfaceAccessoryDevice.inf Accessory SurfaceCoverAudio 2.0.722.0 SurfaceCoverAudio.inf Accessory SurfaceCoverClick 2.0.375.0 SurfaceCoverClick.inf Accessory SurfaceCoverTelemetry 2.0.722.0 SurfaceCoverTelemetry.inf Accessory SurfaceTouchCover 2.0.722.0 SurfaceTouchCover.inf Accessory SurfaceTouchCover2FwUpdate 2.0.722.0 SurfaceTouchCover2FwUpdate.inf Accessory SurfaceTouchCoverFwUpdate 2.0.722.0 SurfaceTouchCoverFwUpdate.inf Accessory SurfaceTypeCover 2.0.1193.0 SurfaceTypeCover.inf Accessory SurfaceTypeCover2FwUpdate 2.0.722.0 SurfaceTypeCover2FwUpdate.inf Accessory SurfaceTypeCoverFwUpdate 2.0.722.0 SurfaceTypeCoverFwUpdate.inf Accessory SurfaceTypeCoverV3FwUpdate 2.0.1021.0 SurfaceTypeCoverV3FwUpdate.inf Accessory SurfaceWirelessAdapter 1.0.1.0 SurfaceWirelessAdapter.inf Audio DockingStationAudioDevice 1.31.35.7 msdokub.inf Audio HdAudio 6.0.1.7198 HDXMSSDS1.inf Camera LifeCam 5.20.1034.0 TrueColor.inf Display DisplayAudio 6.16.00.3161 IntcDAud.inf Display Graphics 10.18.14.4029 64dp4029.inf Display SurfaceDisplayCalibration 2.0.1002.0 SurfaceDisplayCalibration.inf Network Bluetooth 15.68.3073.151 mbtr8897w81x64.inf Network SurfaceEthernetAdapter 8.10.0830.2013 msu64w8.inf Network SurfaceGigabitEthernetAdapter 8.14.0704.2014 msu30x64w8.inf Network WiFi 15.68.3073.151 mrvlpcie8897.inf Pen SurfacePen 1.0.13.0 SurfacePen.inf Pen SurfacePenSettingsDriver 4.0.112.1 SurfacePenDriver.inf System CapacitiveHomeButton 2.0.1179.0 SurfaceCapacitiveHomeButton.inf System CardReader 6.2.9200.30164 RtsUStor.inf System GPIO 1.1.165.1 iaLPSS_GPIO.inf System I2C 1.1.165.1 iaLPSS_I2C.inf System LowPinCount 9.4.0.1023 LxLpCore.inf System ManagementEngine 9.5.24.1790 heci.inf System SATA_AHCI 9.4.0.1023 LxLpAHCI.inf System SMBus 9.4.0.1023 LxLpSMB.inf System SurfaceIntegrationDriver 2.0.1182.0 SurfaceIntegrationDriver.inf System SurfacePciController 2.0.1151.0 SurfacePciController.inf Download the new PowerShell script Below you can download the updated PowerShell script to download the new drivers. Setup MDT 2013 for Microsoft Surface Pro 3 - May 2015.zip Running the script Run the PowerShell script in ISE as administrator on a Windows 2012R2 Server with an internet connection, after running it should look like so. After running the script, the MDT Deployment Workbench will be fully populated with the May 2015 drivers for the Surface Pro 3, you can see there are updated UEFI firmware drivers, keyboard drivers and more and everything is automatically configured by the script so that you can start deploying Surface Pro 3's in your organization immediately. For details about how the script works see this post. After successful running the script, you can UEFI network boot a Surface Pro 3 to test the new drivers, below is what you'll see after UEFI network booting your Surface Pro 3. continue through the lite touch wizard and you'll have your Surface Pro 3 deployed automatically in no time at all. enjoy ! and spread the word ! cheers niall.


-
Windows PE 5.x boot problem
anyweb replied to balubeto's question in Deploying Windows 10, Windows 8.1, Windows 7 and more...
i'm not really sure why you are doing this, can you explain why you are not using MDT or SCCM to create boot wims ? -
Watch the Ignite keynote live from Chicago! Tune in early at 8:30AM CDT on May 4, 2015 to catch the pre-show. Microsoft CEO, Satya Nadella, will take the stage at 9:00AM CDT to outline Microsoft’s company strategy and how we are working hard to empower every person and every organization on the planet to achieve more. Check out the other keynote speakers below.


-
i mean on the client itself
-
thanks ! please attach your smsts*.log file so we can figure out the issue
-
Skip SCCM Client install task sequence
anyweb replied to xzile609's topic in Configuration Manager 2012
it's not possible, if you want to skip the client installation altogether then use MDT task sequences (not MDT integrated in SCCM). -
does the windowsupdate.log reveal anything
-
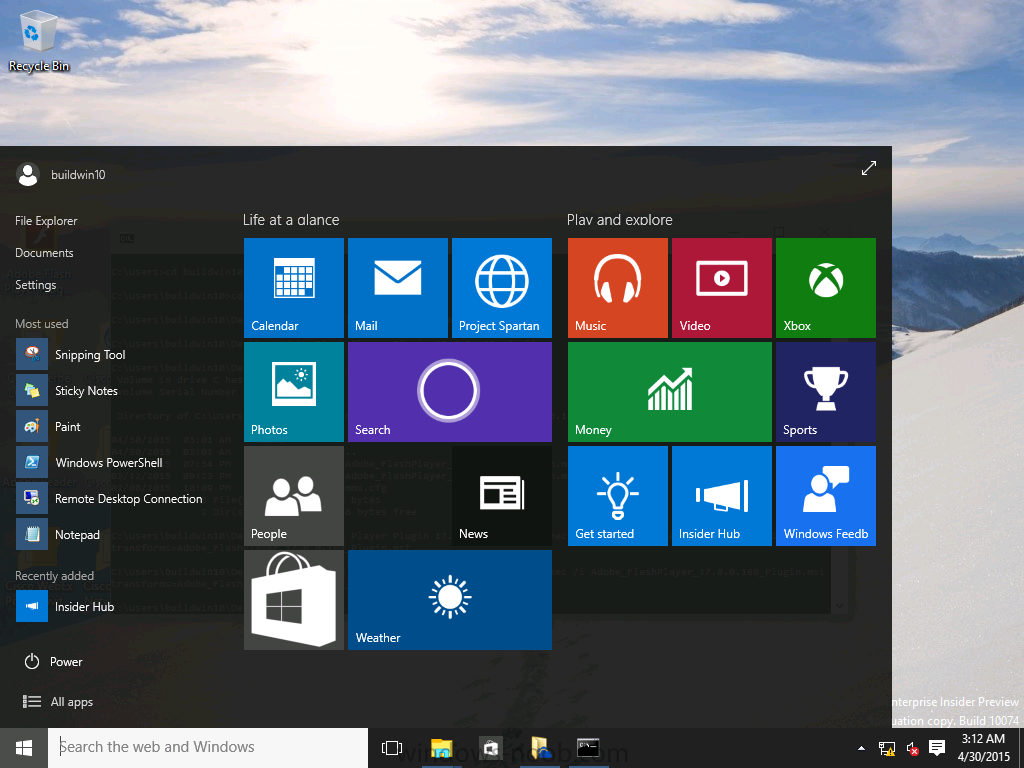
Microsoft have released yet another Windows 10 build, build 10074 available via the links below or via the fast/slow ring in Windows update Pro ISO from Windows Insiders: http://windows.microsoft.com/en-us/windows/preview-iso-update-1504 Enterprise ISO from Evaluation Center: https://www.microsoft.com/en-us/evalcenter/evaluate-windows-enterprise-insider-preview for details about what's new and what's fixed in the build see the following post http://blogs.windows.com/bloggingwindows/2015/04/29/new-windows-10-insider-preview-build-10074-now-available/ What about the Windows ADK for Windows 10 Update: The ADK is available too, at the bottom of this page: https://msdn.microsoft.com/en-us/windows/hardware/dn913721(v=vs8.5).aspx

-
- 1
-
-
i see you realised the problem, but i'll just reiterate for others, check your client agent settings targeted to those clients, how often are they set to check for updates ?
-
probably because it's logging somewhere else, check your registry for known logfile names