


anyweb
-
Posts
9271 -
Joined
-
Last visited
-
Days Won
371
Everything posted by anyweb
-
This is a short post to provide links for downloading the ISOS from MSDN. Microsoft have released Windows 10 officially today to the general public, and if you opted for the Windows Insider program you are probably already running that version of Windows 10. Download Windows 10 Enterprise ISOSIf however you want to download the ISOs for use with Configuration Manager or MDT then the ISO’s can be downloaded from Microsoft using the following links: X86 http://msdn.microsoft.com/en-us/subscriptions/downloads/?FileId=64732 X64 http://msdn.microsoft.com/en-us/subscriptions/downloads/?FileId=64780 What about the other versions ?Windows 10 (like previous releases of Windows) comes in different flavors (SKUs) to target different markets, and the following versions are available on MSDN today: Windows 10 (Multiple Editions) Windows 10 Education Windows 10 Enterprise Windows 10 Enterprise 2015 LTSB Windows 10 Features on Demand So what does each version mean, let’s take them one by one using explanations gathered from MSDN itself. Windows 10 (Multiple Editions)This release contains Windows 10 Professional and Windows 10 Home. Please refer to your product keys to determine which products are included with your subscription. To explain those two versions see below. Windows 10 Pro Windows 10 Pro is designed for small and medium businesses enabling organizations to manage their devices and apps, protect their business data, facilitate remote and mobile scenarios as well as take advantage of the cloud technologies for their organizations. In addition to small and medium businesses, Windows 10 Pro devices would be a good choice for organizations supporting CYOD programs. Windows 10 Home Windows 10 Home is the definitive Windows 10 experience for general consumers. It offers a familiar and personal experience combined with new innovations for getting things done and having more fun. New features include: an all-new web browser built for doing things online; Windows Hello which providers users a warm welcome and a convenient log-on*; and great new multi-tasking features including snapping multiple apps on the screen and creating virtual desktops for more space. Windows 10 EducationThis release is available just for education customers in volume licensing programs. Windows 10 Education includes features from Windows 10 Enterprise that are ideal for advanced security, and the comprehensive device control and management needs of today’s educational institution. Windows 10 Education also enables simplified deployment in the education space; this edition provides a direct path for many devices to upgrade from Windows 10 Home or Windows 10 Pro. Windows 10 EnterpriseThis version of Windows 10 builds on Windows 10 Pro adding premium features designed to address the needs of large and mid-size organizations (including large academic institutions), such as advanced protection against modern security threats, full flexibility of OS deployment, updating and support options; as well as comprehensive device and app management and control capabilities. Windows 10 Enterprise 2015 LTSBThis edition provides customers with access to the Long Term Servicing Branch as a deployment option for their mission critical devices and environments. The LTSB version will receive security updates just like you do today for previous versions of Windows, and is in contrast to the other branch called Current Branch. That version allows users to not only be updated for security issues but also to avail of new features as they become available to Windows 10. Windows 10 Features on DemandWindows 10 features on demand are additional feature options available through Windows Update. This download allows organizations to pre-configure Windows 10 installation software with these features prior to deployment. This download can also be used to install features from local media. So how can I upgrade my Windows 7 (or Windows 8) to Windows 10 ?You can use the Upgrade task sequence in Configuration Manager as detailed here or if you are doing this manually, to get details about upgrading to Windows 10 see this link from Microsoft. cheers niall
-
press f8 and grab your smsts.log file in x:\windows\temp\smstslog it will reveal the issue attach it here. Note that i've a script which will aid you with this type of issue here: CM12 in a Lab - Updated Script: How can I check for network connectivity & storage before starting a task sequence in System Center 2012 R2 Configuration Manager ?
-
ok then what happens when you run this manually (press f8) in WinPE before the step does it... manage-bde.exe -protectors -get d: > x:\BLInfo.txt what is created in x:\blinfo.txt ?
-
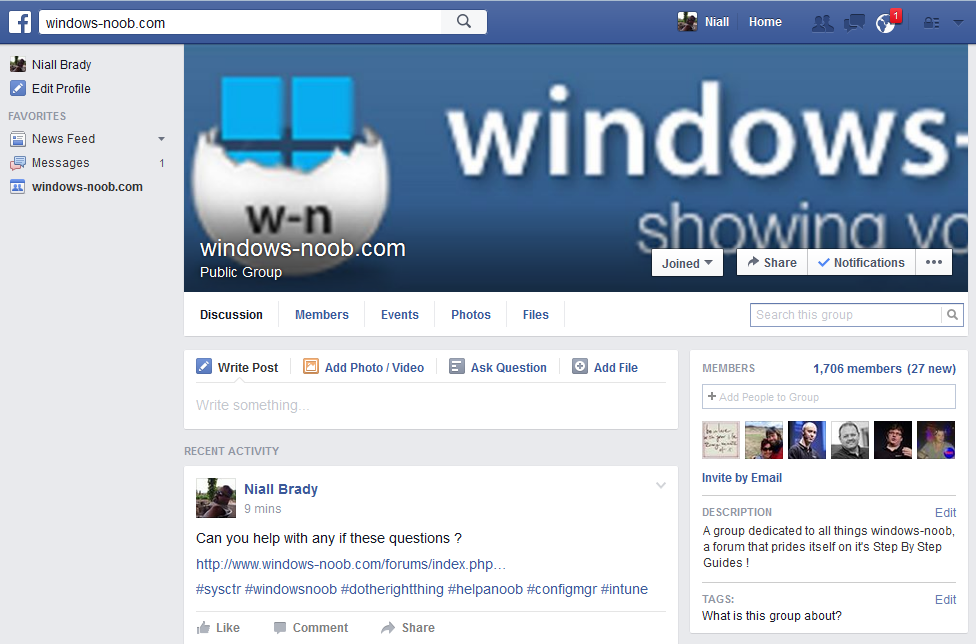
I really appreciate the time and effort you all do here, and I just want to remind you that windows-noob.com has a Facebook presence, if you are on Facebook please join in ! here's the windows-noob.com Facebook group https://www.facebook.com/groups/windowsnoob/ cheers niall
-
 not natively no, you'd have to create a package/program or something similar to do that.
 -
i dont think the promptrestart will work however as it's running in system context, if you want a prompt for the user you'll need to use serviceui.exe from the MDT toolkit, i've blogged about how to run commands using that here
-
SCCM 2012 R2 Console unable to Connect its SQL 2012 Database
anyweb replied to angurpatel's question in How do I ?
what does the event viewer tell you ? have you tried a reboot -
this script is hard coded to d: see here Wshell.Run "%comspec% /C manage-bde.exe -protectors -get d: > x:\BLInfo.txt",1,true Set InfoFile=fso.OpenTextFile("x:\BLInfo.txt") you can change that to point to a variable instead (I believe i'm doing that in the CM12 UEFI BitLocker HTA which contains an updated version of this script) so if your bitlocker disk is not on d: it will not unlock it
-
Trigger consistency check
anyweb replied to cmilli's question in System Center Data Protection Manager
hi, Robert replied to your question on the windows-noob facebook group here. https://www.facebook.com/groups/windowsnoob/430097697191247/ -
your command isn't correct and is missing at least one backslash C:Windows\System32\WUSA.exe /uninstall /kb:2531912 /quiet /promptrestart try this instead cmd.exe /c "C:\Windows\System32\WUSA.exe /uninstall /kb:2531912 /quiet"
-
Surface Pro 3 wim Imaging
anyweb replied to ykgreene's question in Deploying Windows 10, Windows 8.1, Windows 7 and more...
have you seen this yet ? http://www.niallbrady.com/2015/02/11/a-list-of-surface-pro-3-resources-for-both-mdt-2013-and-system-center-2012-r2-configuration-manager/ -
without going into details i'll reply in a very short version indeed:- a CAS is only required if you want to support over 100,000 clients or need a hierarchy of primary sites (that means, more than one primary) a PS is a Primary and is required to support the functions necessary for normal operations a Secondary site is generally used to 'offload' the load on a wan (for example) when you have say 3000 or so clients at a remote location and don't want policy requests going over the wan to the primary, instead, they (the policy requests) will go to the secondary site. for more information about all those different options refer to the Technet links i posted in part 1 of this guide pasted below for your pleasure: Technet Recommended Reading:- Release Notes for System Center 2012 Configuration Manager- http://technet.micro...y/jj870706.aspx Fundamentals of Configuration Manager - http://technet.micro...y/gg682106.aspx Supported Configurations for Configuration Manager - http://technet.micro...y/gg682077.aspx Planning for Configuration Manager Sites and Hierarchy - http://technet.micro...y/gg682075.aspx Example Scenarios for planning a simplified Hierarchy - http://technet.micro...y/gg712989.aspx Site and Role Scalability - http://technet.micro...iteAndRoleScale Getting Started with Configuration Manager 2012 - http://technet.micro...y/gg682144.aspx What’s New in Configuration Manager - http://technet.micro...y/gg699359.aspx Planning for Site Systems in Configuration Manager - http://technet.micro...y/gg712282.aspx Install Sites and Create a Hierarchy for Configuration Manager - http://technet.micro...y/gg712320.aspx Technical Reference for Site Communications in Configuration Manager - http://technet.micro...y/gg712990.aspx Migrating from Configuration Manager 2007 to Configuration Manager 2012 - http://technet.micro...y/gg682006.aspx Frequently Asked Questions for Configuration Manager - http://technet.micro...y/gg682088.aspx
-
here's your failure fix that and then it should continue, why however are you doing this ?
-
what software are you trying to deploy using GPO and what errors were encountered on the target computers assuming you looked at the event viewer.
-
have you looked at parallels ?
-
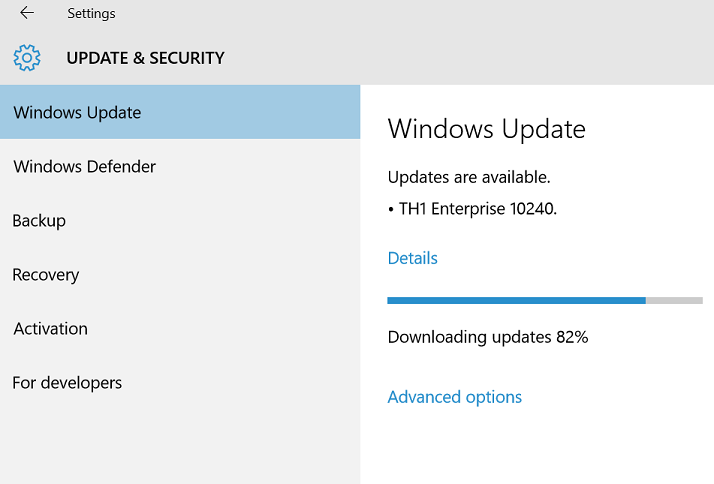
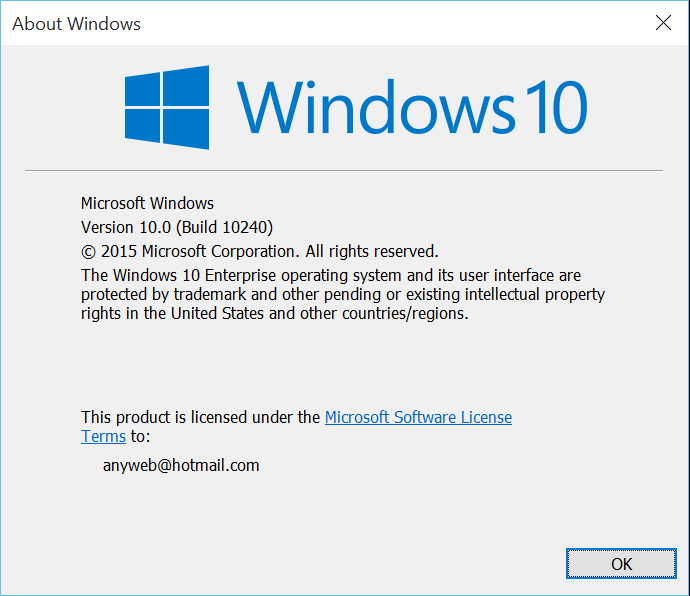
Yet another build of Windows 10, this time 10240 is available, and it's a TH build meaning threshold or 'very near to RTM'. and after the update is complete you get a new OOBE requiring you to accept the license terms, review the new apps like Microsoft EDGE and then accept the settings changes, once you login, the Watermark is gone, you can review the Windows version using winver in a cmd prompt. This build feels complete, even The Verge claims it might be the RTM release. You can read about the release here. http://blogs.windows.com/bloggingwindows/2015/07/15/build-10240-now-available-for-windows-insiders-in-fast-and-slow-rings/
-
OSD Windows 7x64 and UEFI partitioning
anyweb replied to jrgonzalez_nyc's topic in Configuration Manager 2012
my advice with UEFI is use UEFI designed os's for UEFI deployments and that would be Windows 8 and onwards, I've done Windows 7 deployments in UEFI mode and they are patchy at best, for example on lenovo's they work as long as CSM mode is enabled but Secure boot must be disabled as it's not Windows 7 aware, rather than struggle with Windows 7 and UEFI, why not just go for Windows 10 in UEFI mode ? -
is the MDT server configured using this script or otherwise ?
-
OSD Windows 7x64 and UEFI partitioning
anyweb replied to jrgonzalez_nyc's topic in Configuration Manager 2012
yup, and if you look at your log it looks ok <![LOG[successfully completed the action (Partition Disk 0 - UEFI) with the exit win32 code 0]LOG]!><time="12:55:10.084+420" date="07-13-2015" component="TSManager" context="" type="1" thread="560" file="instruction.cxx:830"> so... what happens after this ? are you sure it's failing at this point, can you press f8 when it's failing and verify that you are capturing the log from x:\windows\temp\smstslog\smsts.log -
OSD Windows 7x64 and UEFI partitioning
anyweb replied to jrgonzalez_nyc's topic in Configuration Manager 2012
well the disks are in legacy non-gpt mode so i think that's causing issues, are you starting the task sequence in windows or via PXE ? -
OSD Windows 7x64 and UEFI partitioning
anyweb replied to jrgonzalez_nyc's topic in Configuration Manager 2012
are you starting this in Windows ? and is the system in UEFI mode or LEGACY mode prior to running the task sequence ? -
your hta is not showing as it's running as system and therefore hidden from the user (you) try running it with serviceUI.exe from the mdt 2013 toolkit and it will work just fine (in Windows) to find out how to use serviceUI.exe see this post
-
here is your error make sure that xml file is present in the package referenced (ZTS00001)
-
what does the scanstate.log say ? this is the log generated by the capture * state step
-
to troubleshoot press f8 at that point and review the smsts.log using cmtrace have you tried that ? you can attach it here if you wish in winpe its at x:\windows\temp\smstslog\smsts.log


