


anyweb
-
Posts
9,108 -
Joined
-
Last visited
-
Days Won
363
Posts posted by anyweb
-
-
If you'd like to test the newest version of SQL Server 2008 then look no further
Microsoft® SQL Server® 2008 Enterprise Evaluation: Trial Experience for IT Professionals
Download SQL Server 2008 180-day Trial Software. Microsoft SQL Server 2008 is a database platform for large-scale online transaction processing (OLTP), data warehousing, and e-commerce applications; it is also a business intelligence platform for data analysis and reporting solutions.
Release notes and readme.
Microsoft SQL Server 2008 Release Notes08/19/2008 19:31:54
This Release Notes document describes known issues that you should read about before you install or troubleshoot SQL Server 2008. This document also provides search tips to help you find more known issues in Knowledge Base (KB) articles on the Microsoft Help and Support Web site. The Release Notes document and the Knowledge Base articles supplement SQL Server 2008 Books Online.
The Release Notes document is available only online, not on the installation media, and is updated periodically. The current version of this file is available on the Release Notes download page.
For information about how to get started with installing SQL Server 2008, see the SQL Server 2008 Readme. The Readme is available on the installation media and from the Readme download page.
Before You Install
Before you install SQL Server 2008, read the following required actions and KB articles.
Required Actions
If you have installed Visual Studio 2008 or have installed prerelease versions of SQL Server 2008, you might have to perform prerequisite actions before you install SQL Server 2008. To determine which actions that you might have to perform, use the following table.
Visual Studio 2008 installation status SQL Server 2008 installation status Required action before you install SQL Server 2008
Is not installed.
Prerelease version was never installed.
No action is required.
Is not installed.
Prerelease version is currently or was previously installed.
Follow these steps:
1. Uninstall the prerelease version of SQL Server 2008.
2. Additionally, you might have to uninstall Visual Studio 2008 features that were added by a prerelease installation of SQL Server 2008. In Windows, use Add or Remove Programs and uninstall the following features if they are installed: Visual Studio 2008 Shell (integrated mode) and Visual Studio Tools for Applications 2.0.
Is installed, and the release version of Visual Studio 2008 Service Pack 1 (SP1) is not installed.
Prerelease version was never installed.
Perform one of the following options:
* Install Visual Studio 2008 SP1 before you install SQL Server 2008.
* Uninstall Visual Studio 2008, and then install SQL Server 2008. After SQL Server 2008 is installed, you can install Visual Studio 2008 and then install Visual Studio 2008 SP1.
* Do not install the following components of SQL Server 2008 that require Visual Studio 2008: Management Tools (both Basic or Complete), Integration Services, and Business Intelligence Development Studio features. If you want to later install any of these features, you must first install Visual Studio 2008 SP1.
Is installed, and the release version of Visual Studio 2008 SP1 is not installed.
Prerelease version is currently or was previously installed.
Follow these steps:
1. Uninstall the prerelease version of SQL Server 2008.
2. Perform one of the following options:
* Install Visual Studio 2008 SP1 before you install SQL Server 2008.
* Uninstall Visual Studio 2008, and then install SQL Server 2008. After SQL Server 2008 is installed, you can install Visual Studio 2008 and then install Visual Studio 2008 SP1.
* Do not install the following components of SQL Server 2008 that require Visual Studio 2008: Management Tools (both Basic or Complete), Integration Services, and Business Intelligence Development Studio features. If you want to later install any of these features, you must first install Visual Studio SP1.
Visual Studio 2008 SP1 release version is installed.
Prerelease version was never installed.
No action is required.
Visual Studio 2008 SP1 release version is installed.
Prerelease version is currently installed.
Uninstall the prerelease version of SQL Server 2008.
If you install Visual Studio 2008 after you have installed SQL Server 2008, you must install Visual Studio 2008 SP1 to have a supported configuration. Visual Studio 2008 SP1 is not required if you did not install the following features that require Visual Studio 2008: Management Tools (both Basic or Complete), Integration Services, and Business Intelligence Development Studio.
For more information about how to install SQL Server 2008 with Visual Studio 2008, see the blog entry SQL Server 2008, Visual Studio 2008 SP1, and .Net Framework 3.5 SP1 Explained on MSDN and KB article 956139. For more information about Visual Studio 2008 SP1, see this Visual Studio Web site.
Known Issues to Read First
The following KB articles highlight known issues that are important to read before you install SQL Server 2008. To find more KB articles about installation, use this Before You Install query.
KB ID Summary
956139
Visual Studio 2008 SP1 may be required for SQL Server 2008 installations
956427
You cannot add a cluster node when you install SQL Server 2008 Analysis Services and you do not install the SQL Server 2008 Database Engine
956005
The status indicator for a SQL Server 2008 mirror database differs from SQL Server 2005
955949
Cluster upgrade to SQL Server 2008 fails when SQL Server 2005 cluster nodes have different installed features
955396
How to troubleshoot SQL Server 2008 Setup issues
956138
You cannot upgrade a non-English instance of SQL Server 2000 Reporting Services to SQL Server 2008 Reporting Services
955399
If upgrade to SQL Server 2008 fails, uninstall the upgrade before retrying the upgrade
955973
You might receive this error message when you try to upgrade to SQL Server 2008 on a computer that is running Windows Server: "Access to the path '<Path>\perf-MSSQL$SQL2008sqlctr.dll' is denied"
955389
How SQL Server 2008 updates what feature usage data to collect
How to Find More Known Issues
We recommend that you view more known issues by searching for "SQL Server 2008" on the Microsoft Support Web site. To find KB articles on specific topics, click any of the following suggested searches, or create your own custom search strings.
* Before You Install, Upgrade, and Configure SQL Server 2008
o Planning and Prerequisites
o Stand-alone Install
o Failover Cluster Install
o Stand-Alone Upgrade
o Failover Cluster Upgrade
o Configure
o Uninstall
o Repair
* Analysis Services
* Connectivity
* Database Engine
* Failover Cluster
* Full-text Search
* Integration Services
* Logo Certification
* Replication
* Reporting Services
* Tools
You can also join the SQL Server Community to share your experiences and learn from other people who are using SQL Server 2008. For more information, see the SQL Server Community Web site.
SQL Server 2008 Books Online is the primary documentation for SQL Server 2008. You can view SQL Server 2008 Books Online on MSDN, or download a stand-alone version from the SQL Server 2008 Books Online download page.
Additional Issues
* Error and Usage Reporting Help Button Does Not Respond. If you click the Help button in the SQL Server Error and Usage Reporting dialog box, it does not respond. To view the content, see Error and Usage on MSDN.
-
Part 4. Install the IIS 6 Management compatibility
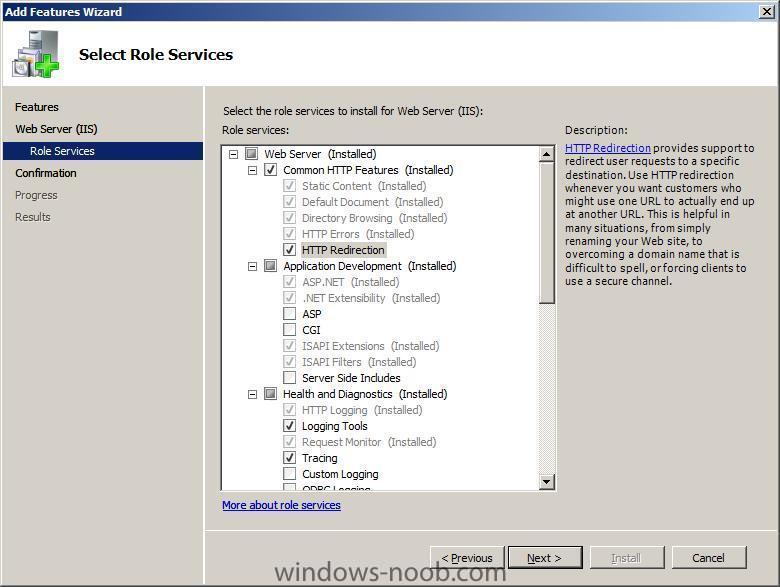
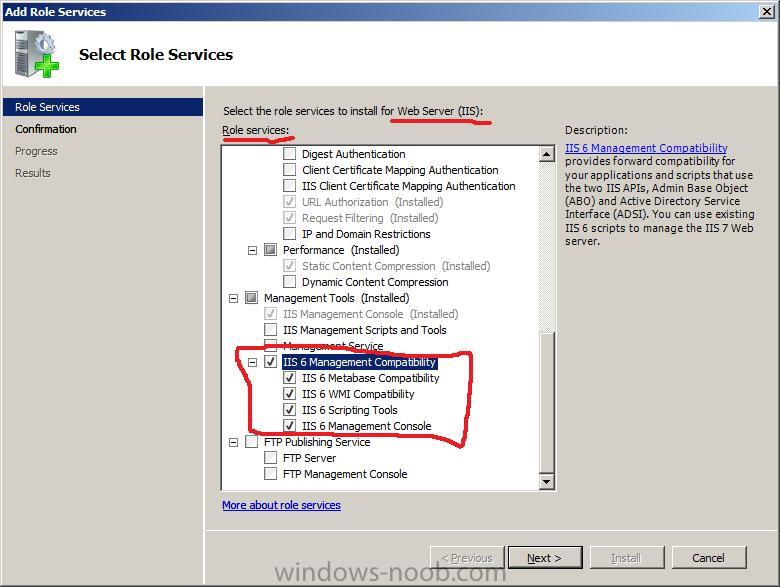
Open Server Manager, select Roles, Select Web Server (IIS), select Roles services and scroll down to Management Tools, check if IIS 6 Management Compatibility is installed, if it is not installed, click on Add role Services in the right pane and install it.
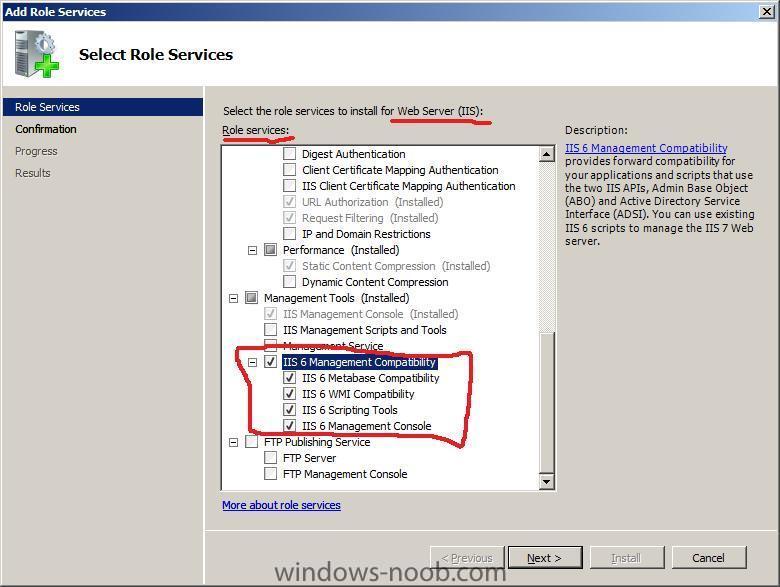
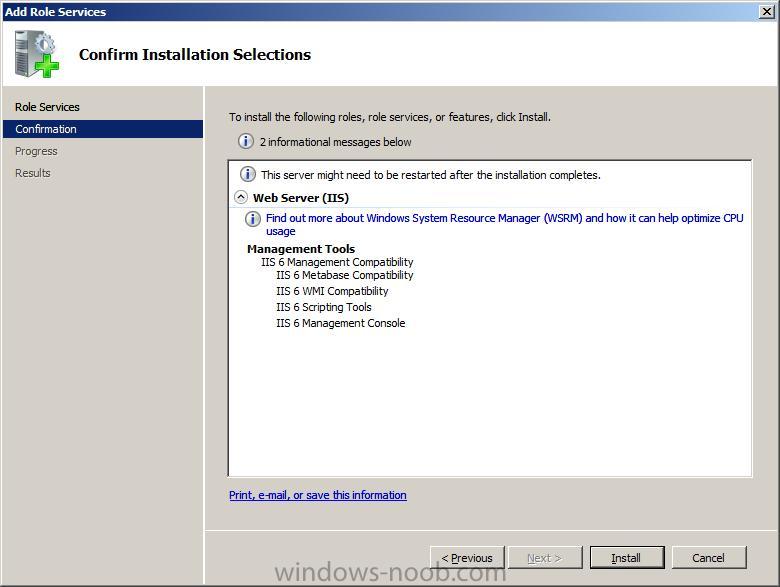
click next to confirm the install, and then Install.

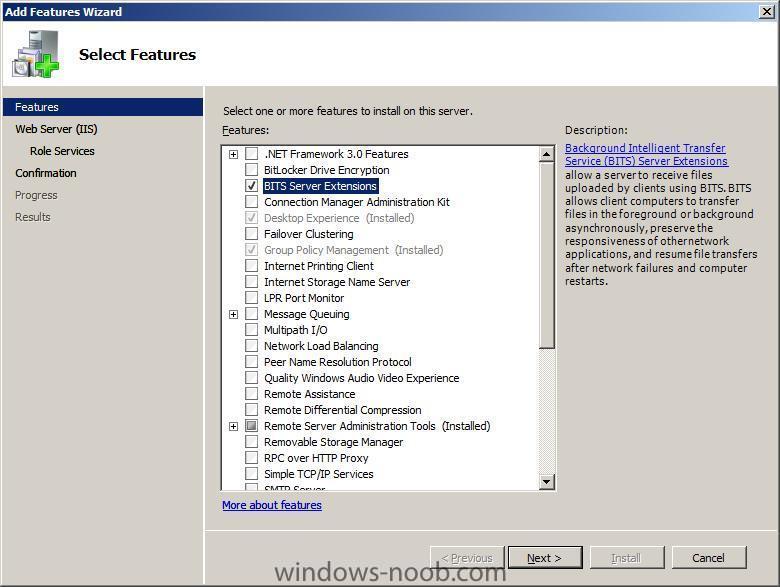
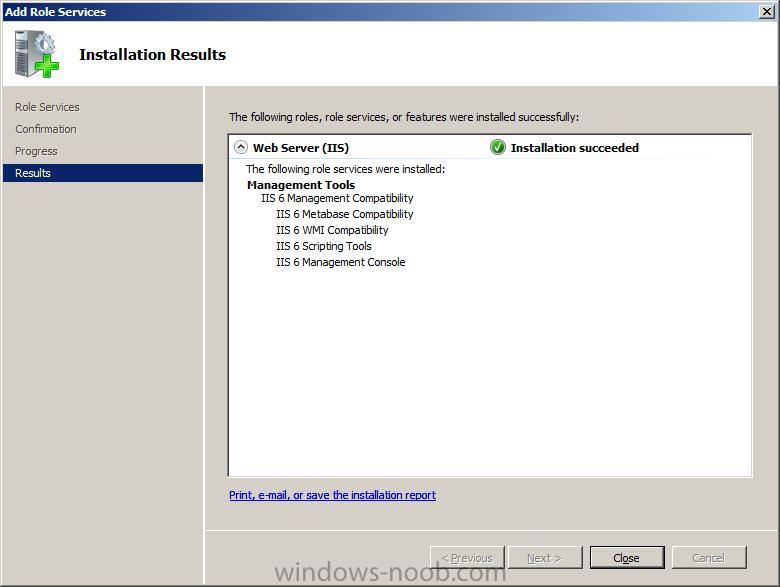
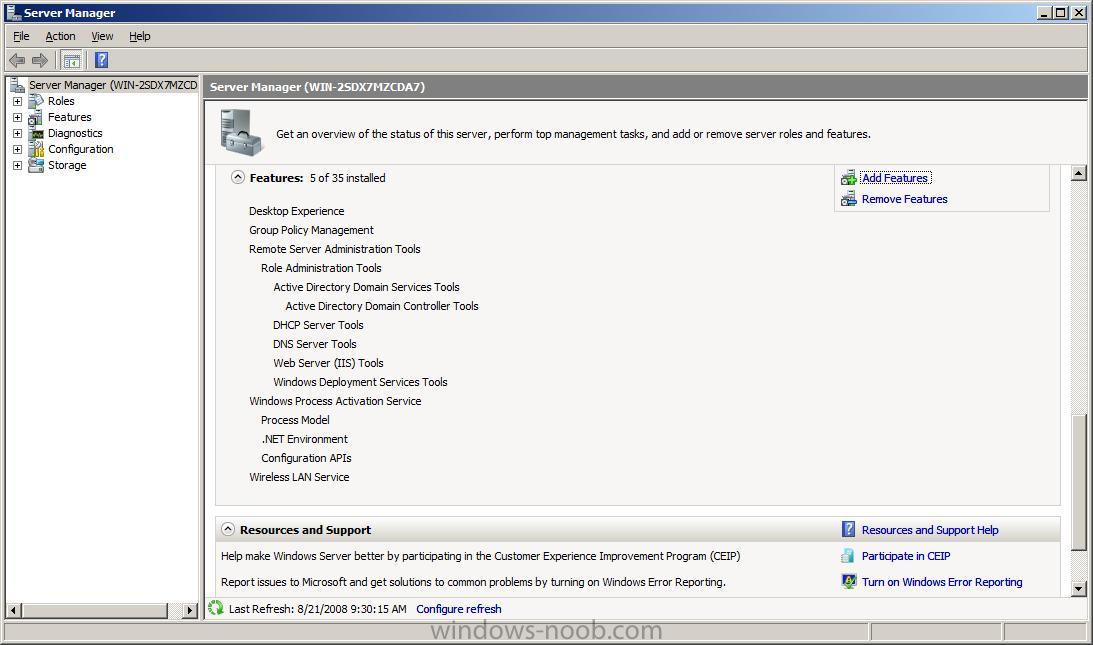
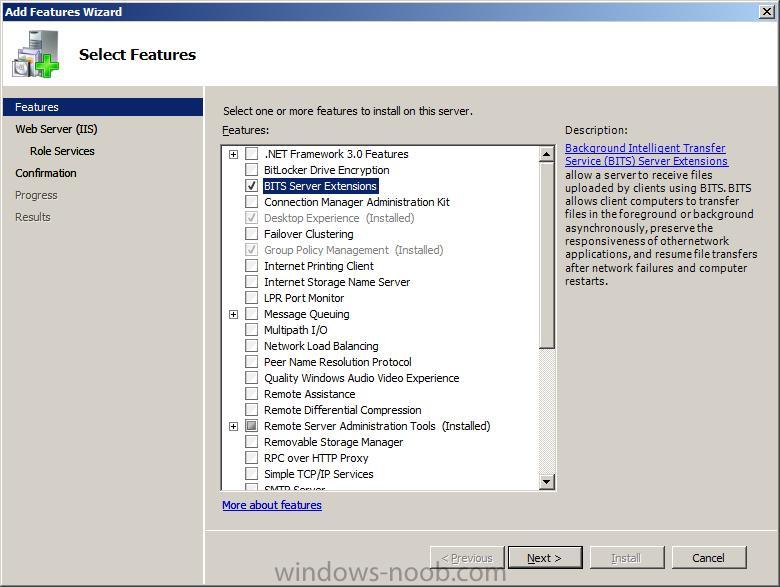
Part 5. Install the BITS Server Extensions
Open Server Manager, select Features

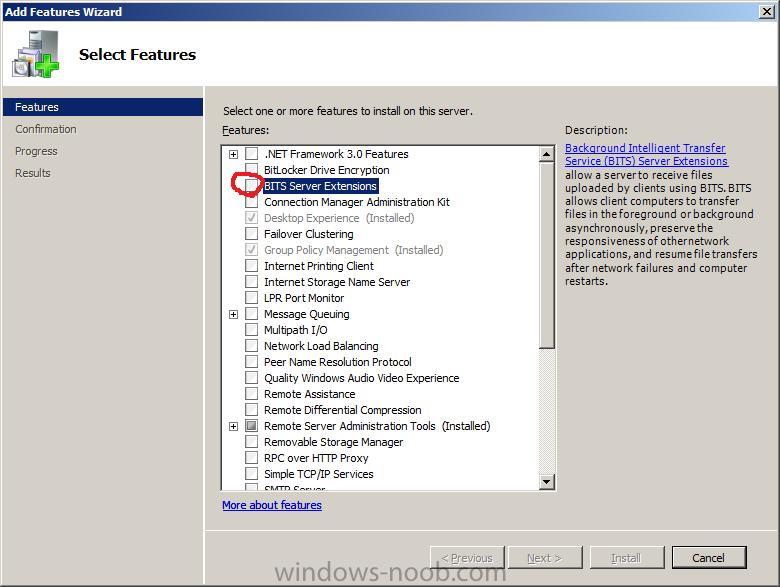
click on Add Features, and placed a checkmark in the BITS Server Extensions box

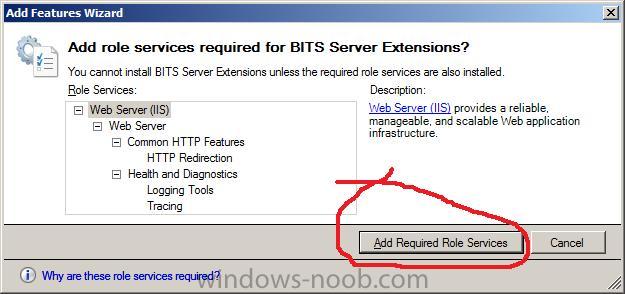
when the 'add role services required for BITS Server Extensions' query comes up, click on Add required role services
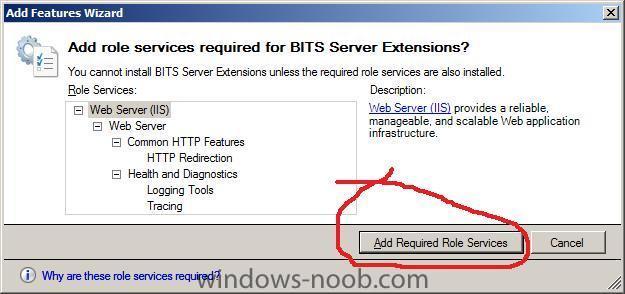
click next to proceed
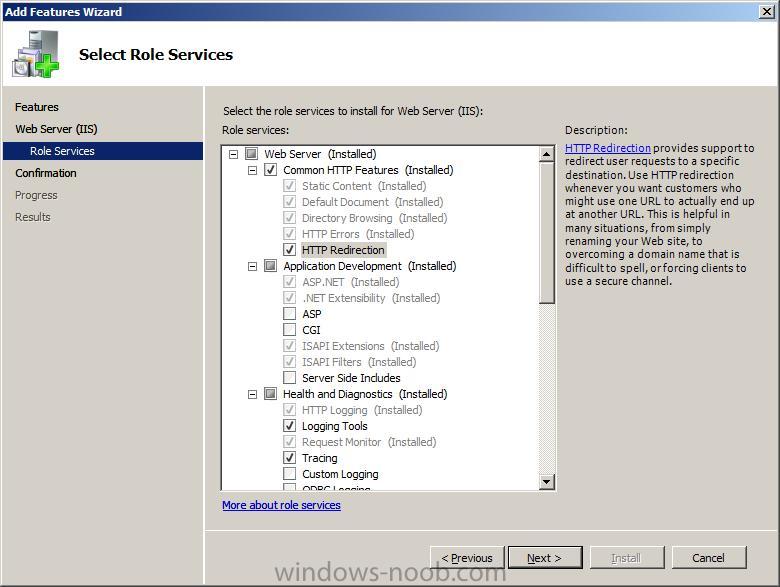
you'll get an IIS introduction, click next
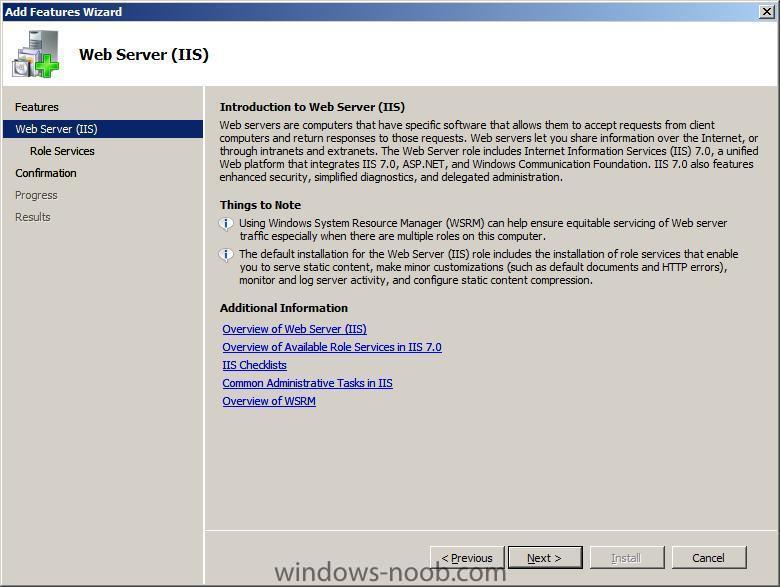
review the new choices it's made for you and click next
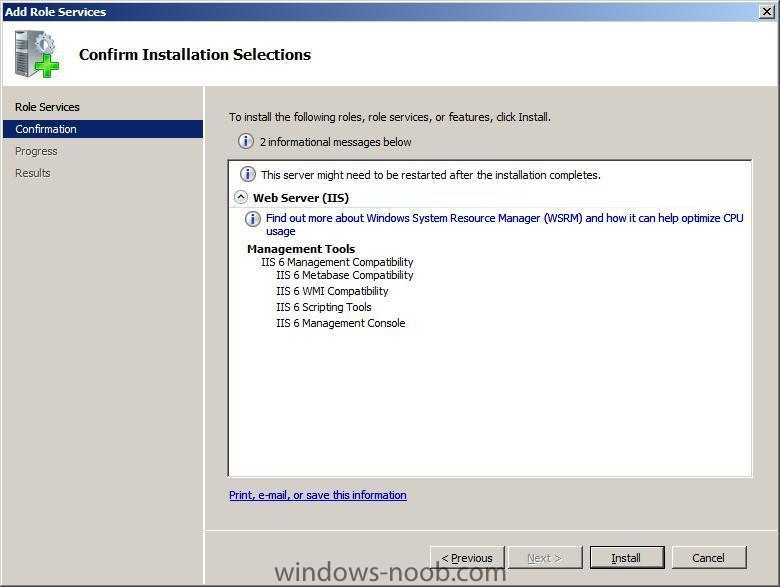
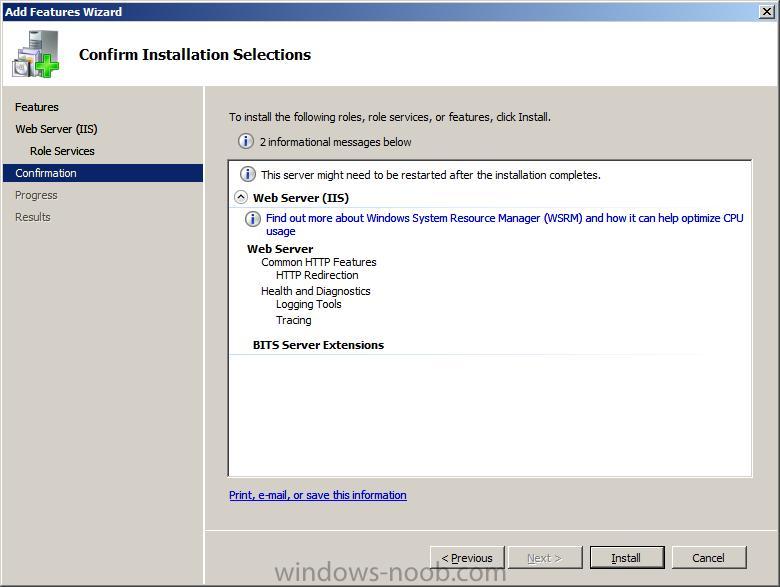
confirm the selections it made, and click install

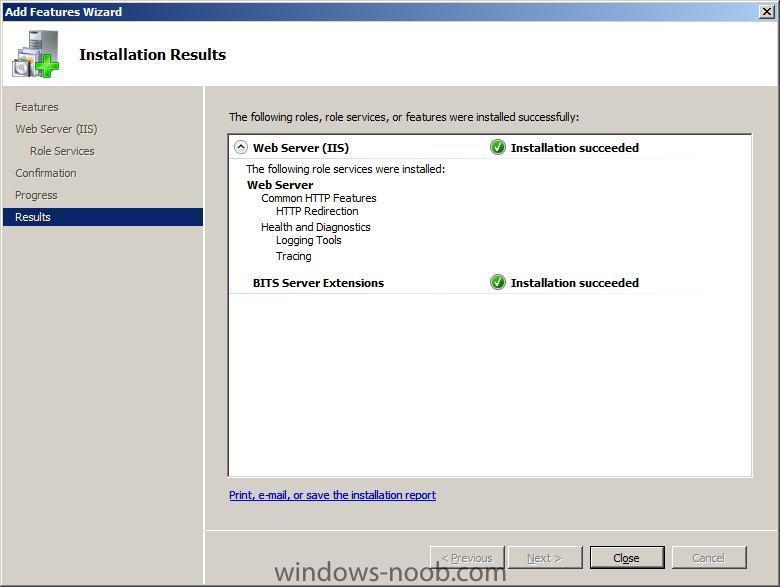
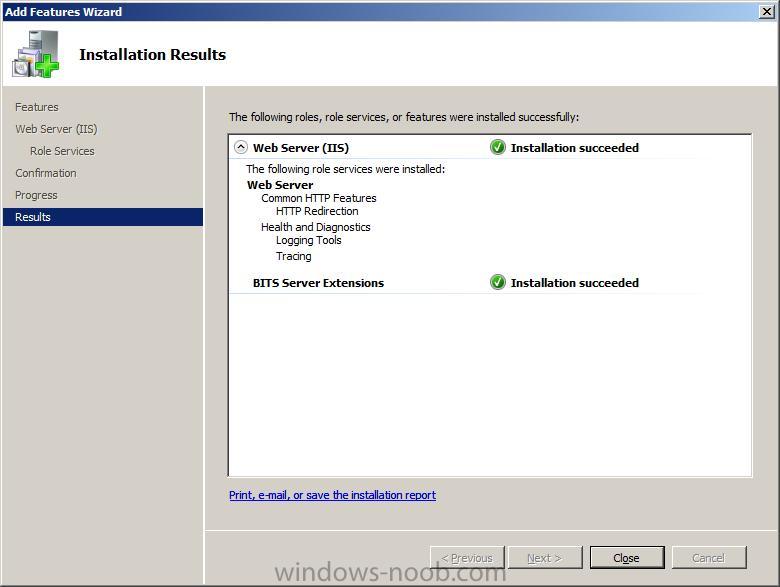
finally you should see BITS installation successful
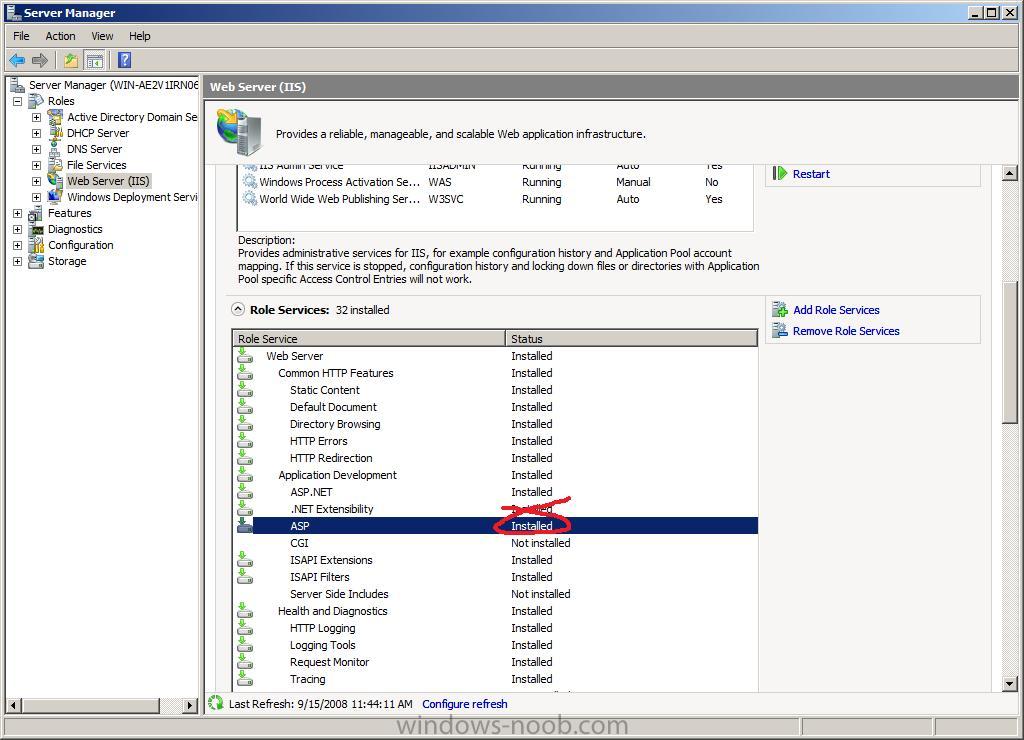
Part 6. Add ASP (required for ConfigMgr Reporting Point to function)
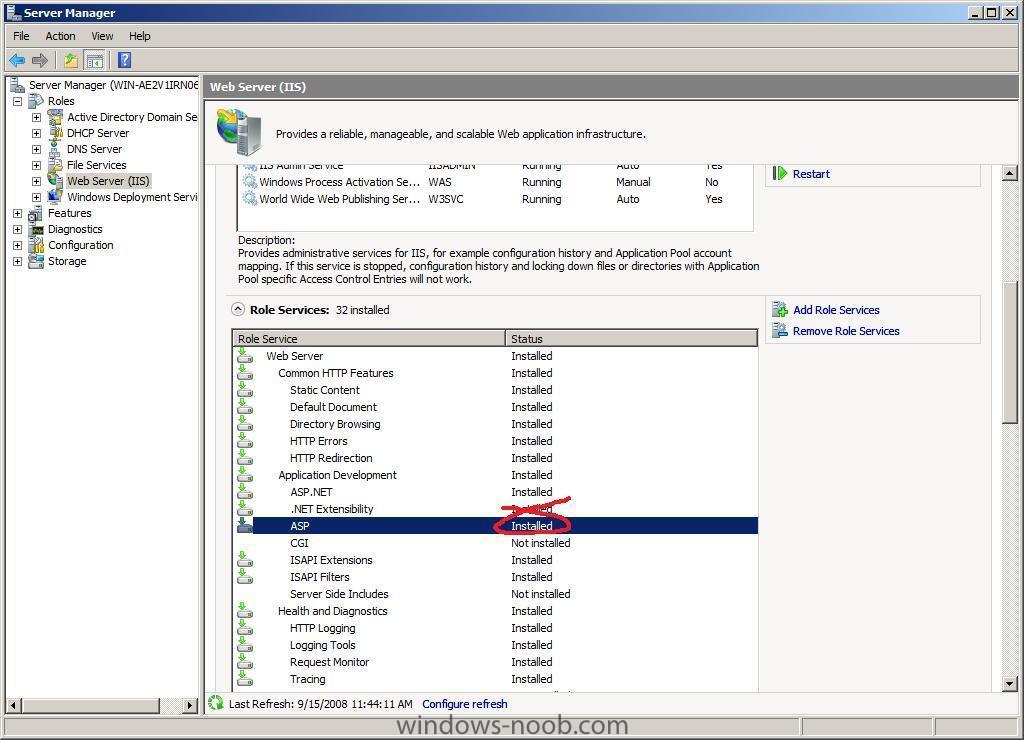
Open Server Manager, select Roles, Select Web Server (IIS), select Roles services and scroll down to Application Development, verify that ASP is installed, if it isn't, install it.
Summary
The following Web Server role services should be installed.
IIS Role Services
Web Server
Common HTTP Features
Static Content
Default Document
Directory Browsing
HTTP Errors
HTTP Redirection
Application Development
ASP.NET
.NET Extensibility
ASP
ISAPI Extensions
ISAPI Filters
Health and Diagnostics
HTTP logging
Logging tools
Request Monitor
Tracing
Security
Basic Authentication
Windows Authentication
URL Authorization
Request Filtering
IP and Domain Restrictions
Performance
Static Content Compression
Management Tools
IIS Management Console
IIS Management Scripts and Tools
Management Service
IIS 6 Management Compatibilty
IIS 6 Metabase Compatibility
IIS 6 WMI Compatibility
IIS 6 Scripting Tools
IIS 6 Management Console
-
Part 3. Verify that you have Authorization and Authentication configured
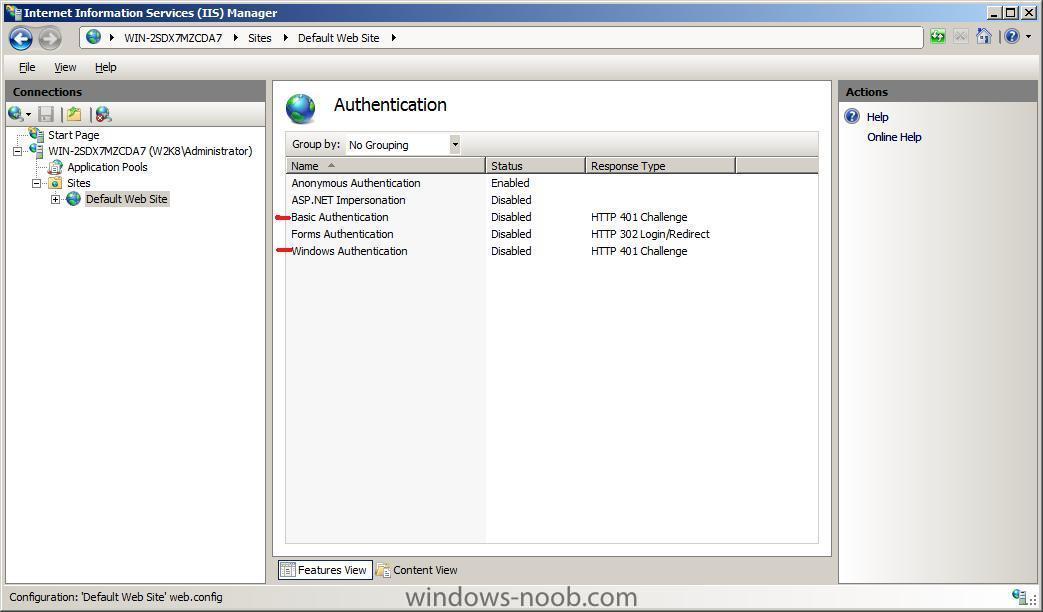
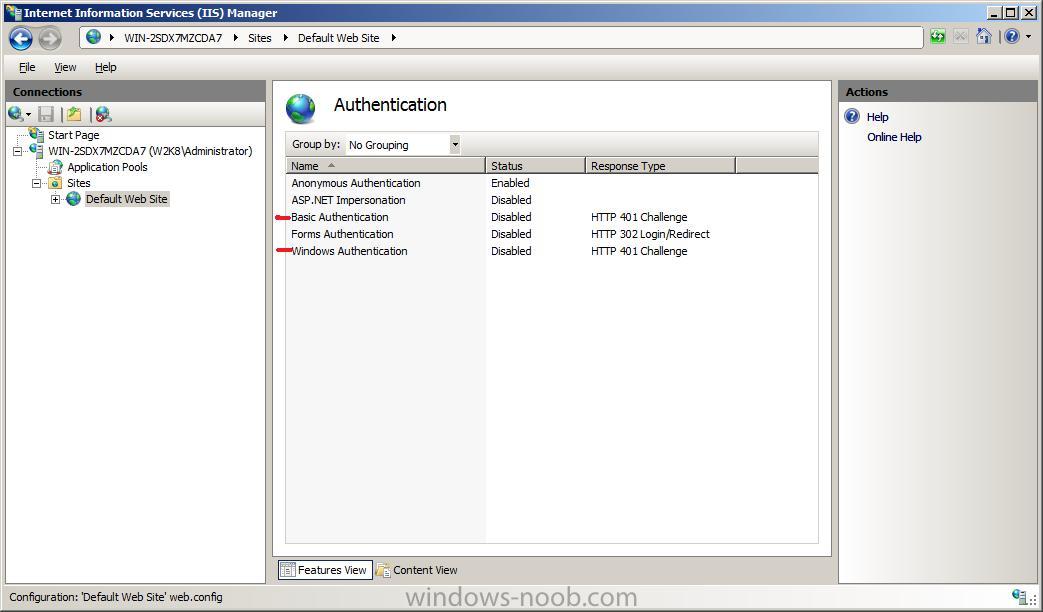
In IIS Manager, click on Default Web Site in the left pane, and choose the Authentication icon under IIS.

in this example (default install of IIS 7 in Windows Server 2008) we can see the following Authentication types are installed
Anonymous Authentication - Enabled
ASP.NET Impersonation - Disabled
Forms Authentication - Disabled
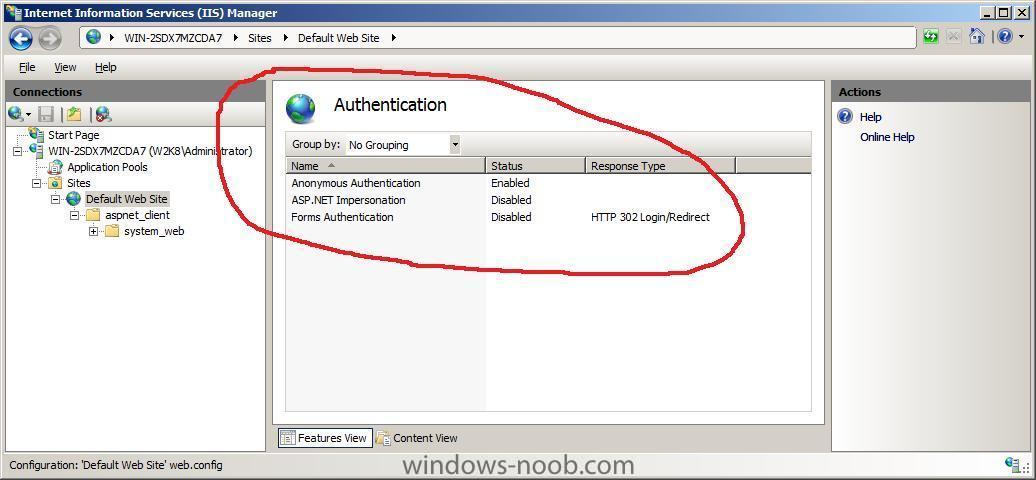
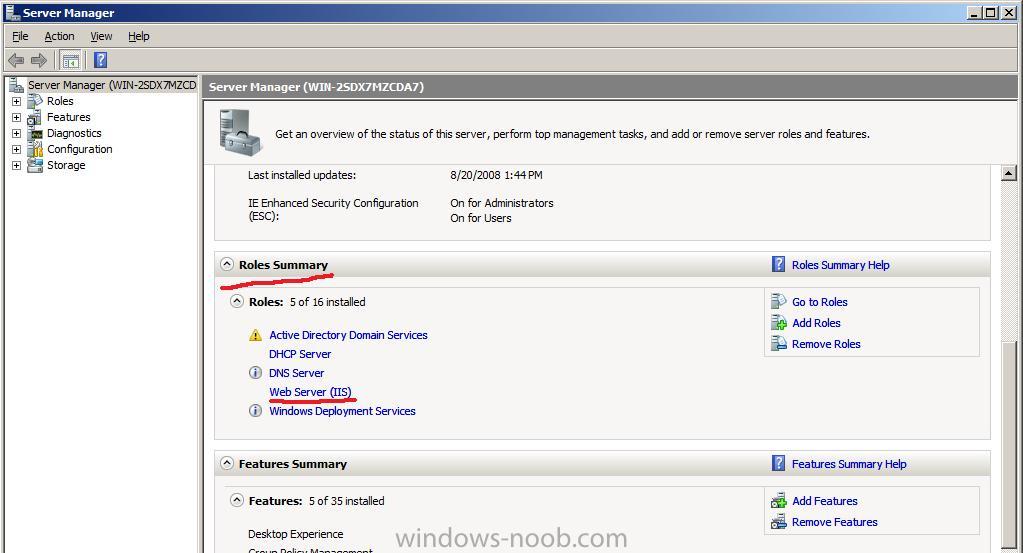
We want to add Basic Authentication and Windows Authentication to proceed further. To do this Click on Server Manager and scroll down to Roles Summary.
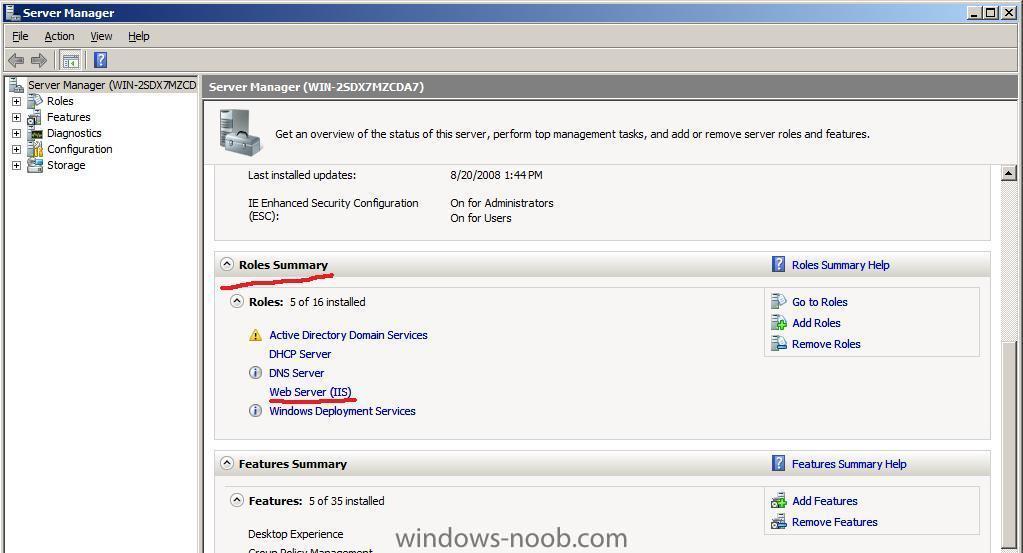
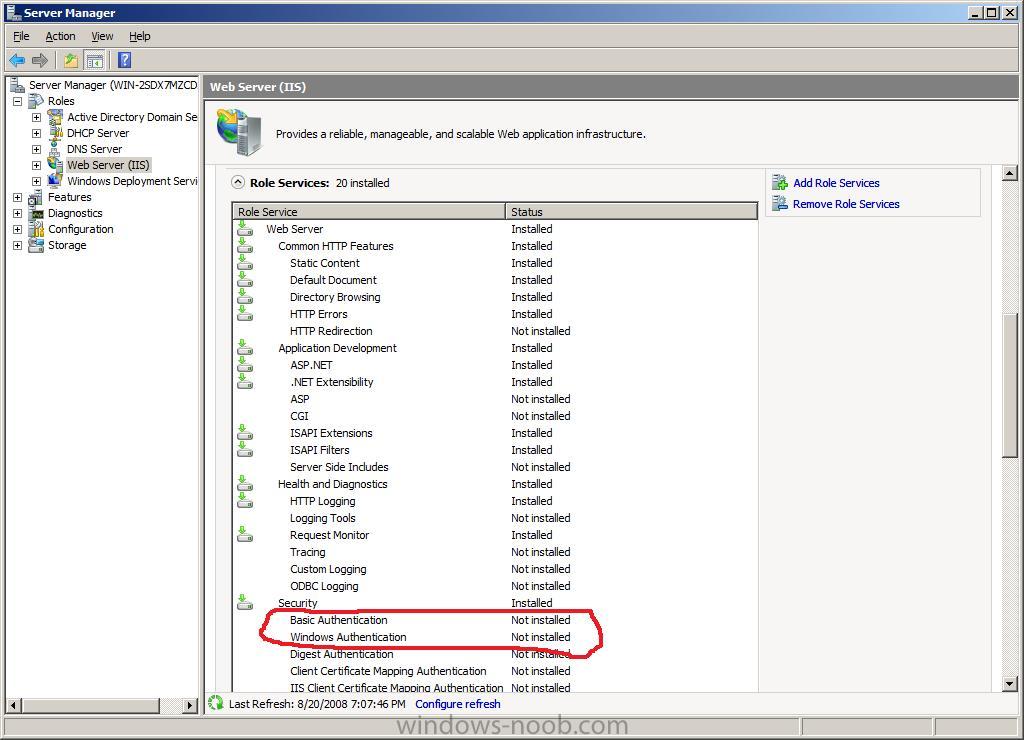
Click on Web Server (IIS) and scroll down to Role Services.
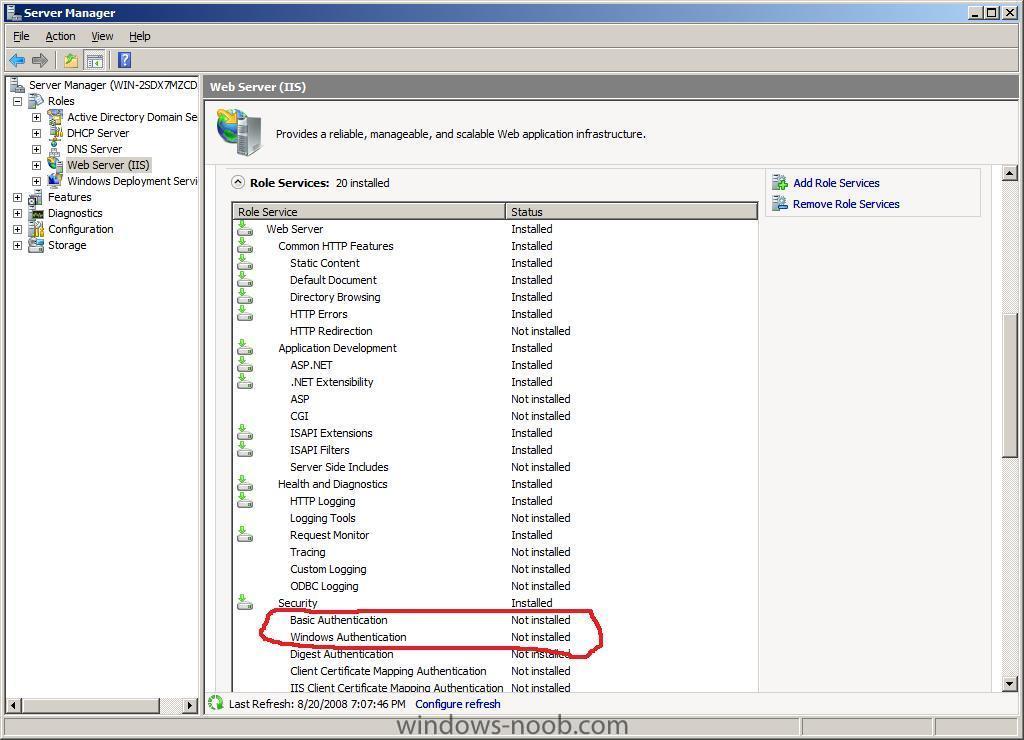
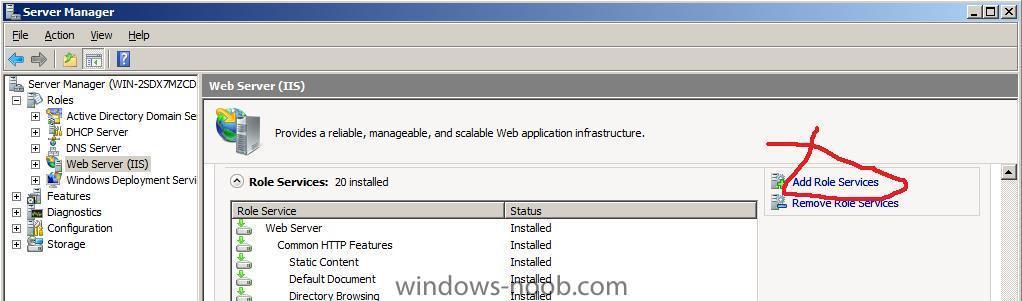
In this example both Basic and Windows Authentication are not installed, so let's install them. click on Add role services in the actions pane to the right.
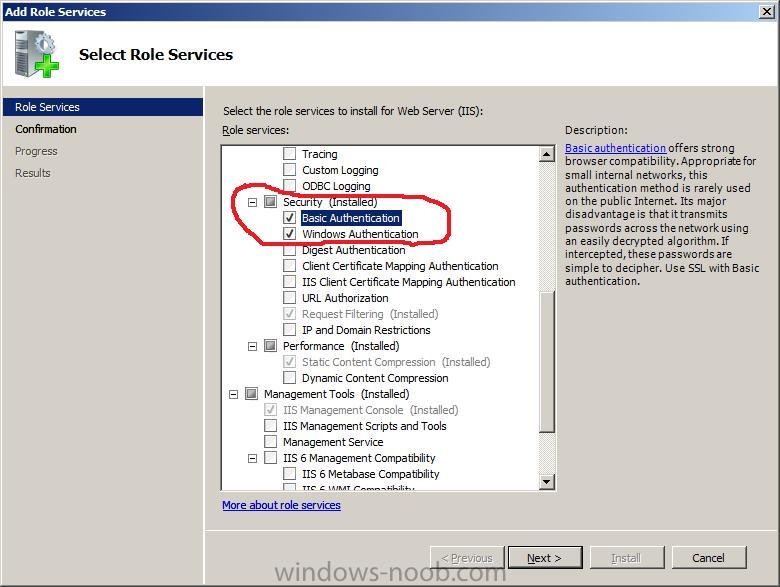
scroll down to security and put a check mark in Basic and Windows Authentication, click next.
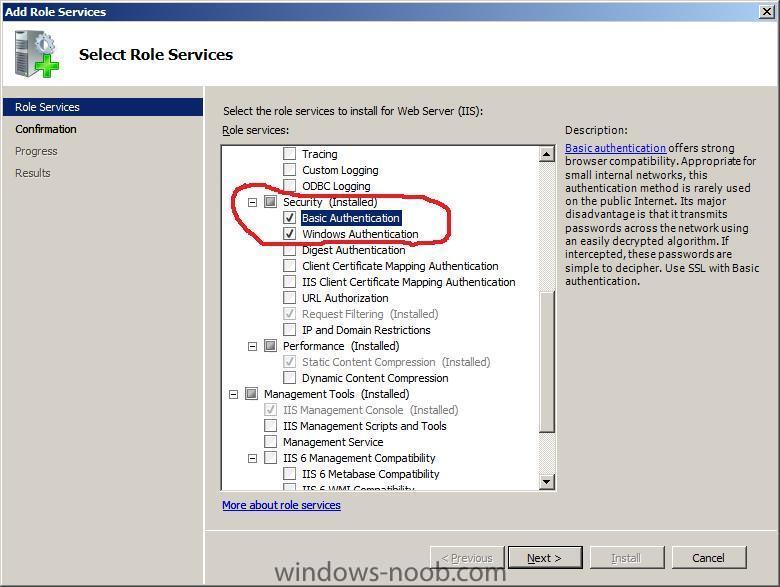
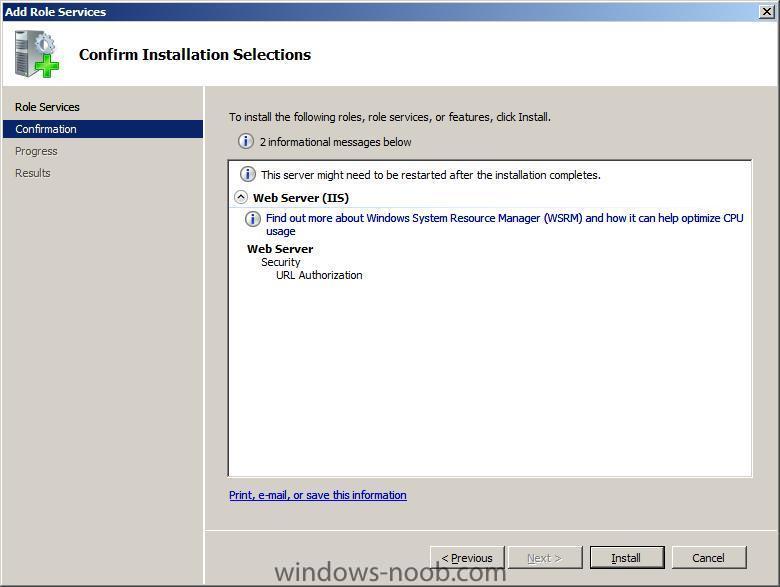
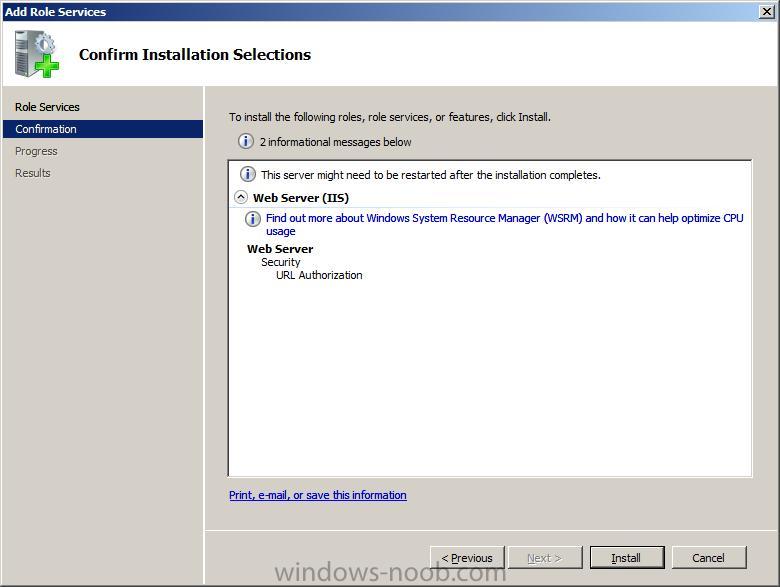
confirm your selections
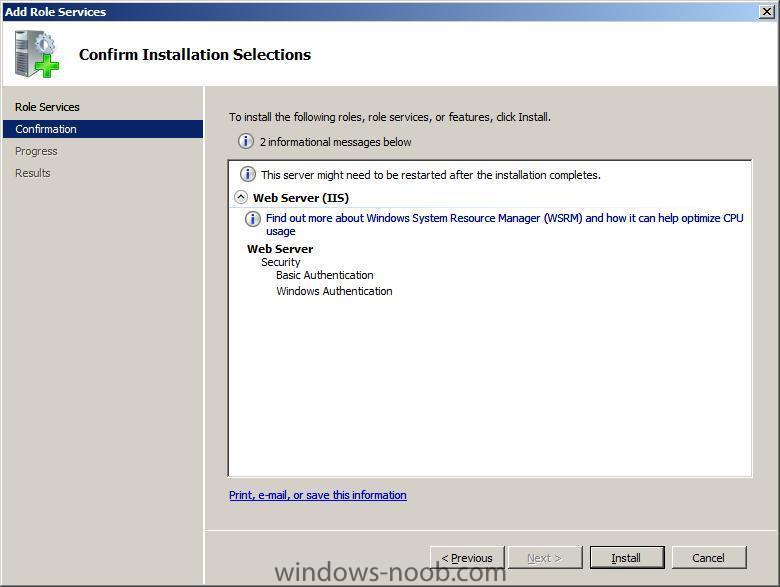
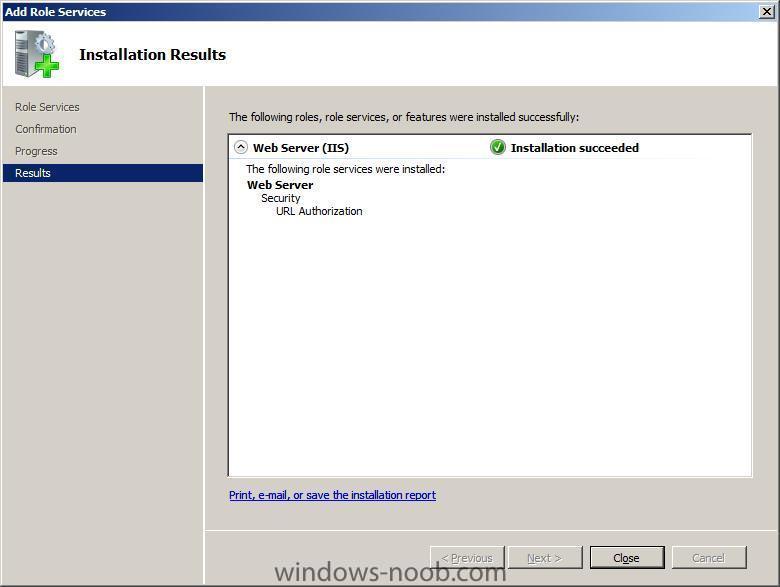
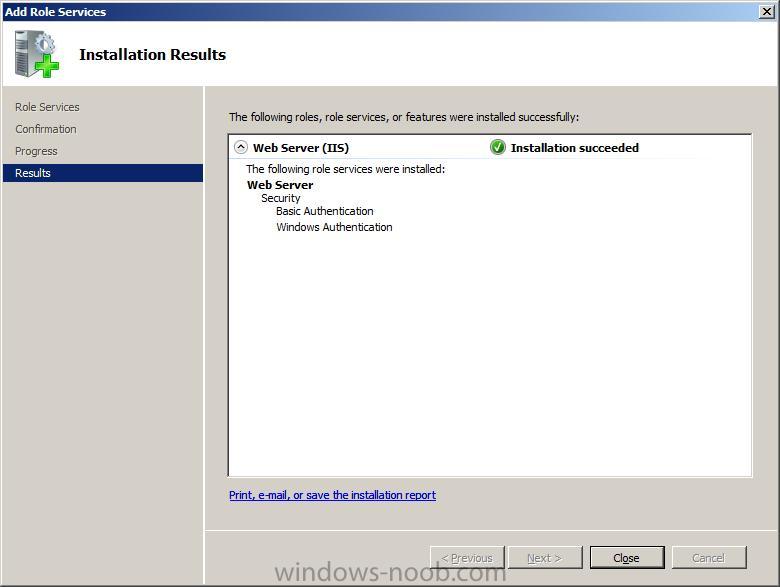
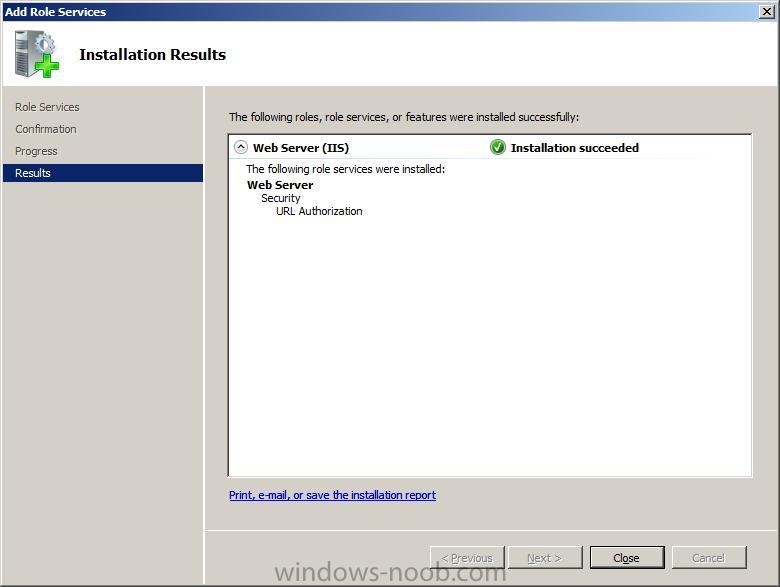
and click install, once done you'll see a results screen

At this point you can close the IIS server manager, restart the World Wide Web Publishing Service service (W3SVC) and go back into the IIS server manager, when you click on Default Web Site now and the Authentication icon, you should see the two new authentication methods added.
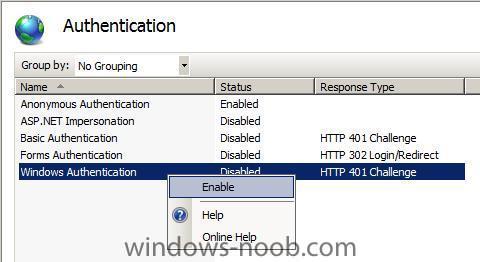
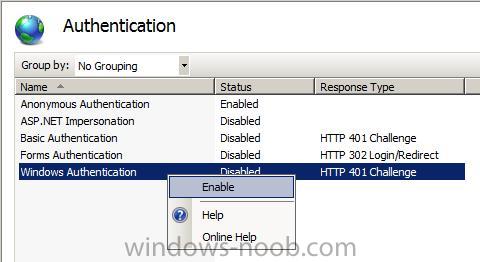
Right click on Windows Authentication and choose Enable (Note: You can use Basic Authentication with WebDAV, but the WebDAV redirector will only use Basic Authentication with SSL connections, so we will not be using it here, I just installed it so that you were aware of it.)
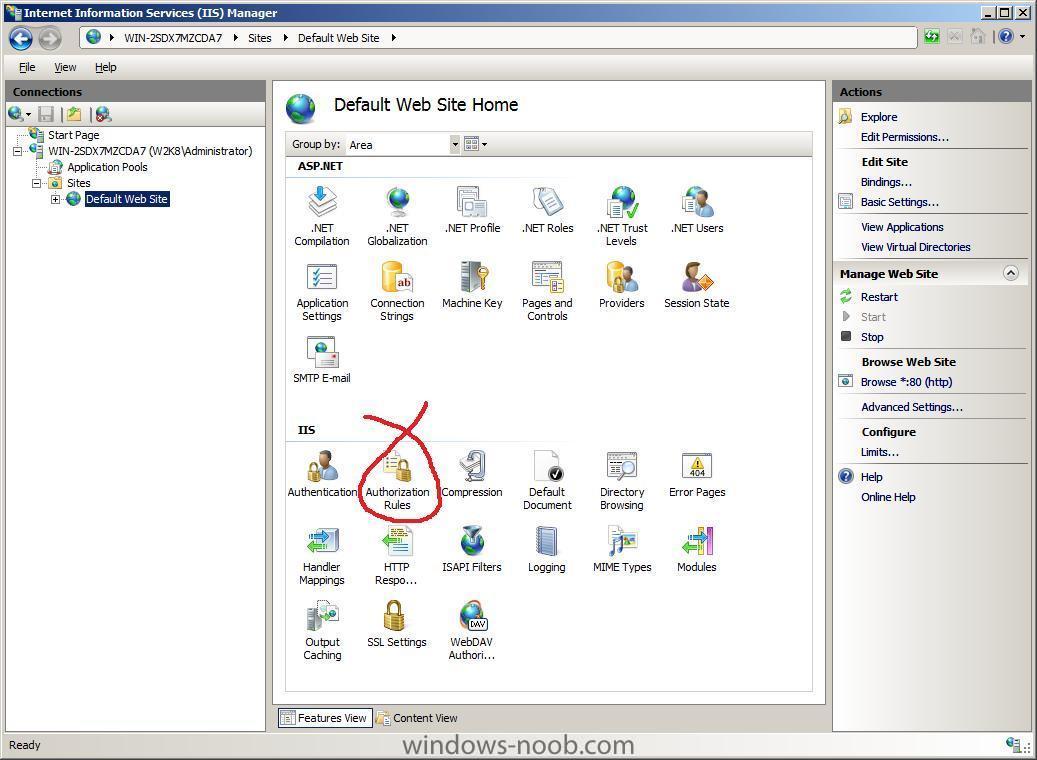
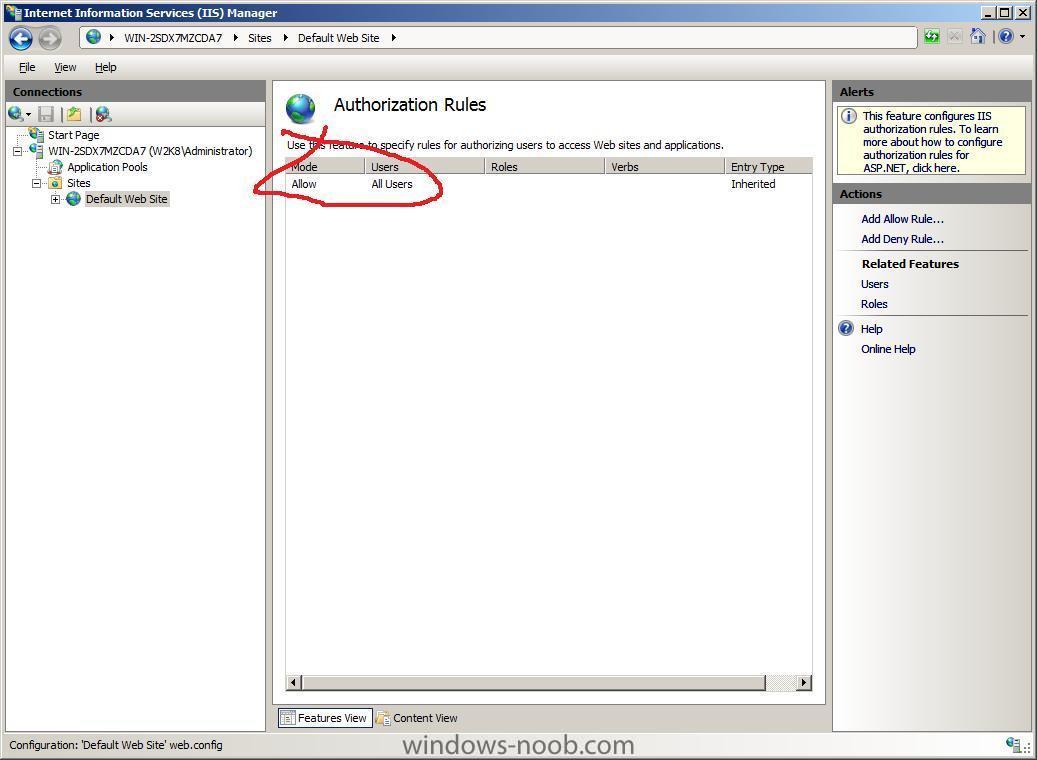
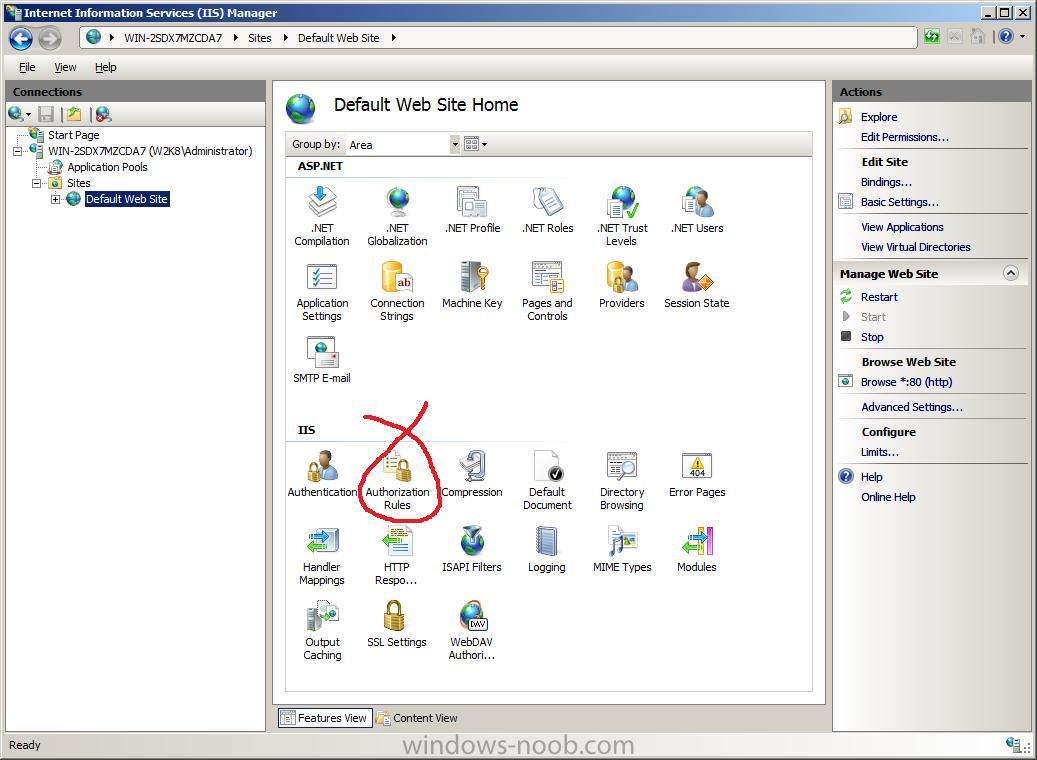
In IIS Manager, click the Default Web Site under the Sites node in the tree, Double-click the Authorization rules icon.
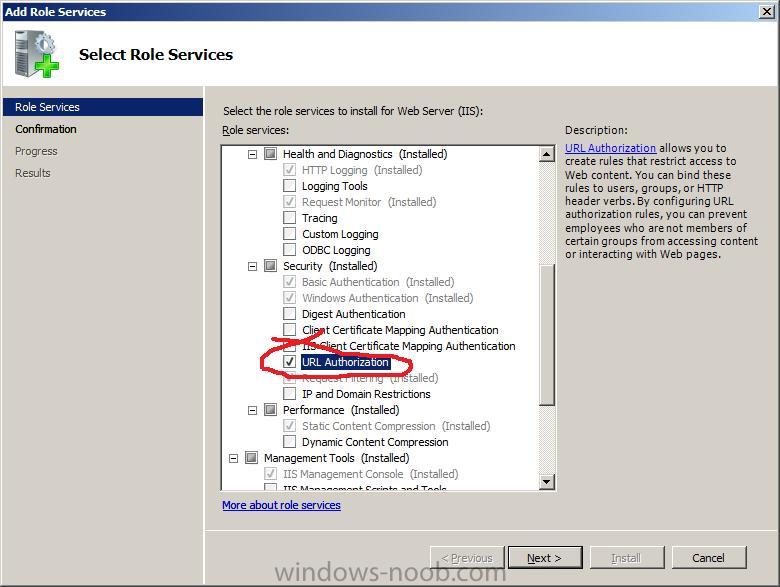
NOTE: if (like me) you do not see the Authorization rules icon (feature) then go back into Server Manager, select Roles, Select Web Server (IIS), select Roles services and scroll down to Security, check if URL Authorization is installed, if it is not installed, click on Add role Services in the right pane and install it,
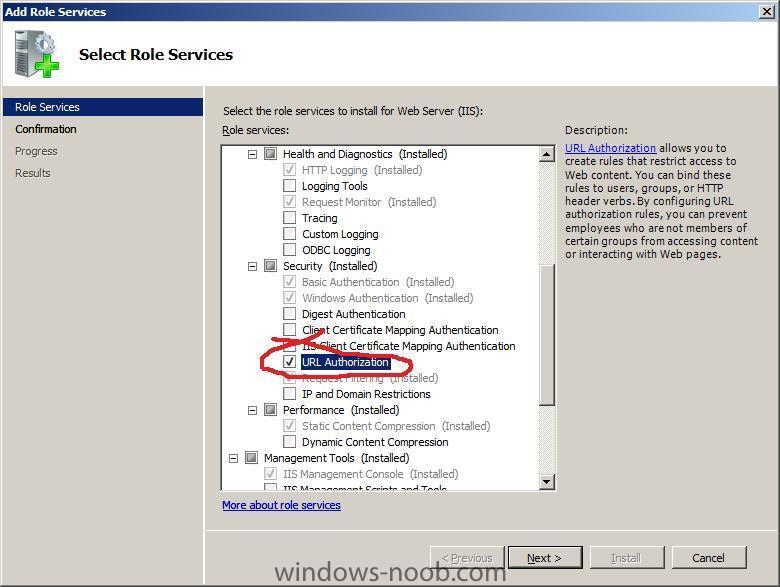
then restart the Internet Information Services (IIS) Manager. The icon (feature) should now appear....
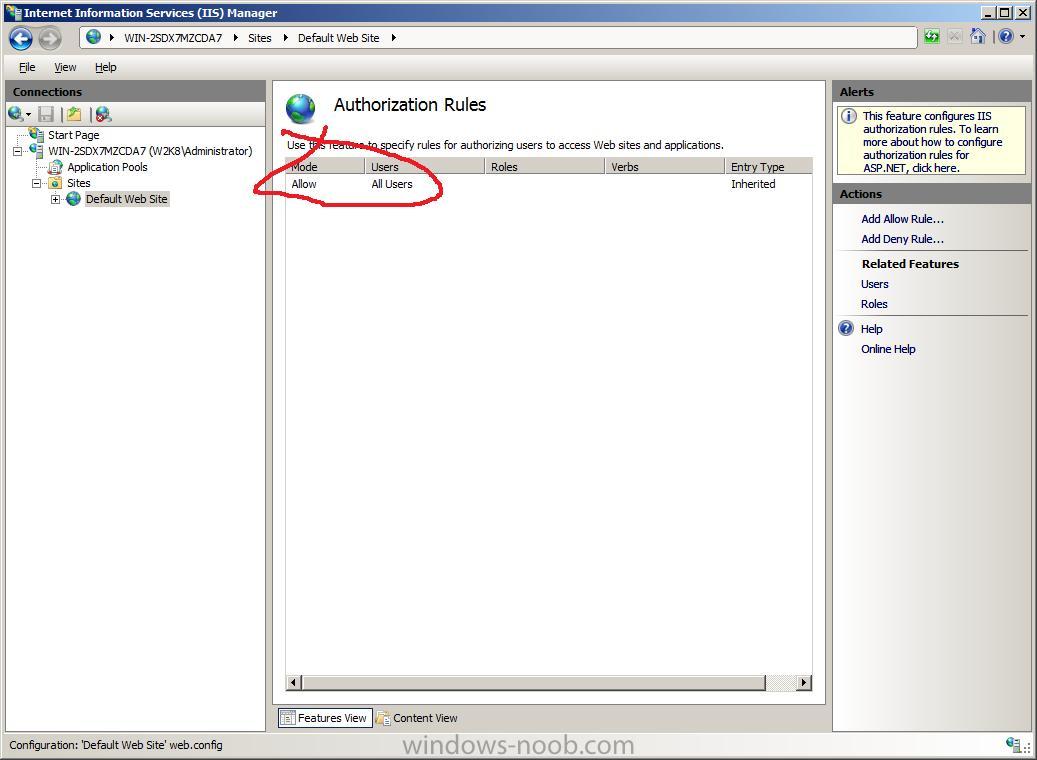
When the Authorization feature opens, make sure that an Allow rule is defined that includes the administrator account. IE: the default rule for IIS allowing access to All Users will include the administrator account.
you can now test logging into your WebDav site using your administrator account by opening a command prompt and typing this
net use * http://localhost/
after a few moments you should see a result like this
C:\Users\Administrator>net use * http://localhost/Drive Z: is now connected to http://localhost/.
The command completed successfully.
If you don't see the above, for example if you get a an error like this
"System error 67 has occurred." The network name cannot be found.then install the Desktop Experience Feature using the Add Features Wizard) reboot the server and try again. The reason we need the Desktop Experience feature installed in Server 2008 is because it will install the Webclient service which is required for this.
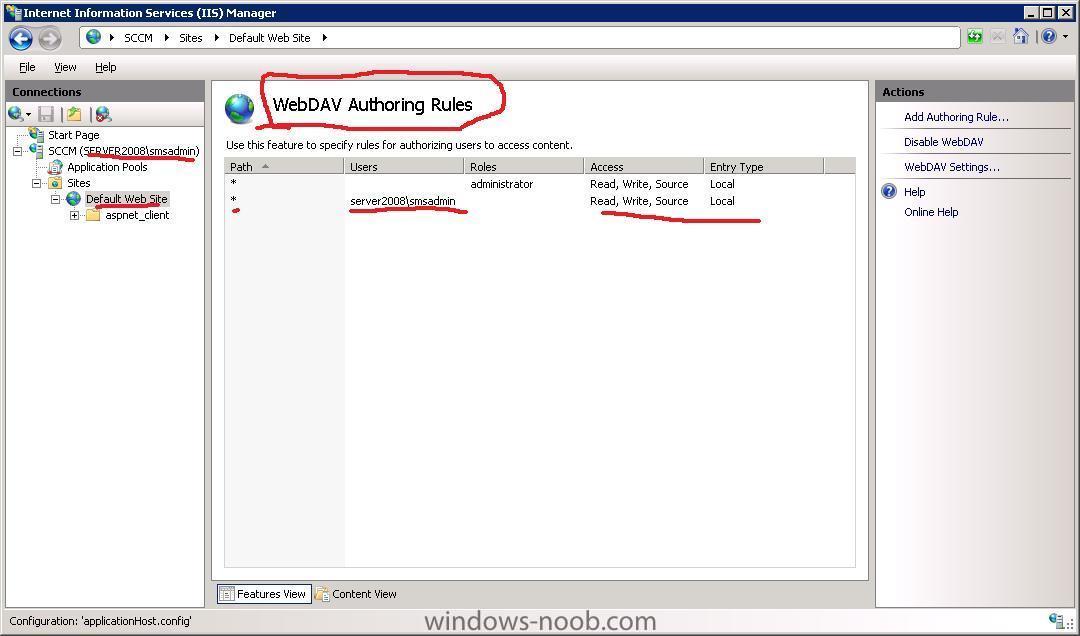
Note: if you now get a new error which states
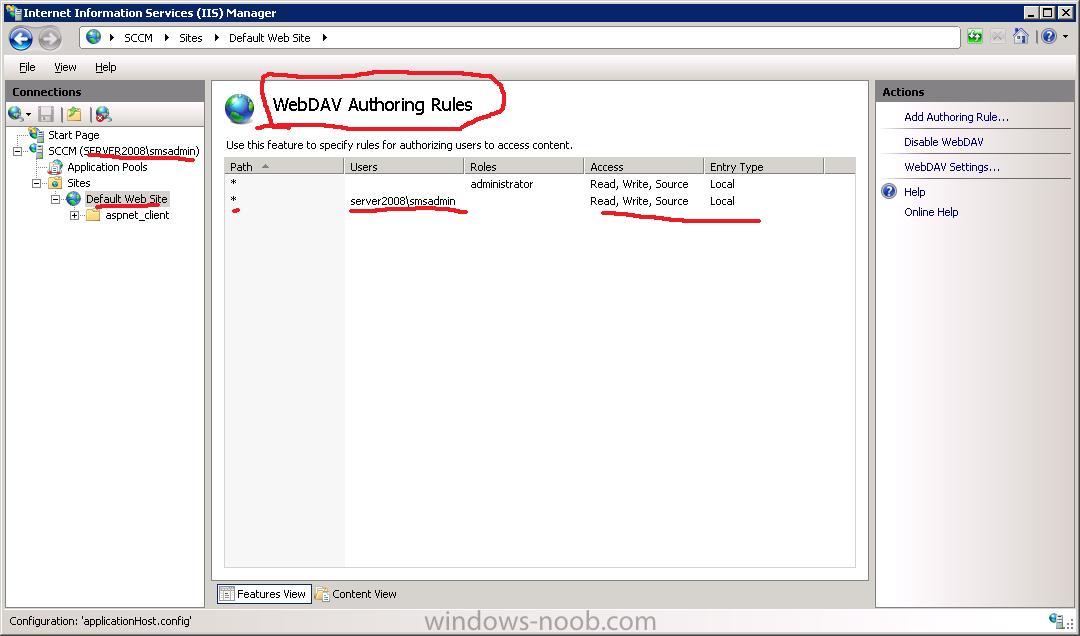
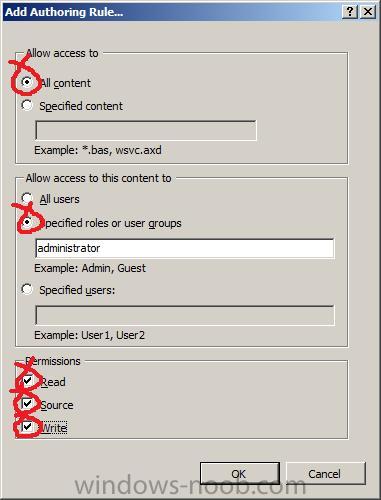
System error 1920 has occurred. The file cannot be accessed by the system.Then you must open up IIS Manager, click on Default Web Site, and go into the WebDav Authoring Rules and add the current user you are attempting to do this as (eg: add user DOMAIN\user). See below screenshot.
Tip: for a list of webdav errors and solutions to resolving them see this page
so now we have mapped drive Z: to the WebDav site, using the administrator account and using the authorization rules we setup above, we have read/write/source acccess to the directory.
-
get it from here
Microsoft® SQL Server® 2008 Express
SQL Server 2008 Express is a free edition of SQL Server that is ideal for learning and building desktop and small server applications, and for redistribution by ISVs.
Overview
Microsoft SQL Server 2008 Express is a powerful and reliable data management system that delivers a rich set of features, data protection, and performance for embedded application clients, light Web applications, and local data stores. Designed for easy deployment and rapid prototyping, SQL Server 2008 Express is available at no cost, and you are free to redistribute it with applications. It is designed to integrate seamlessly with your other server infrastructure investments. For more information about SQL Server Express, including other versons and downloadable components now available, see Microsoft SQL Server Express.
Instructions
Note: You must have administrative rights on the computer to install SQL Server 2008 Express.
We recommend that you read the Release Notes and Readme before installing SQL Server 2008 Express.
Step 1: Download and install Microsoft .Net Framework 3.5 SP1.
Step 2: Download and install Windows Installer 4.5.
Step 3: Download SQL Server 2008 Express by clicking the appropriate link later on this page. To start the installation immediately, click Run. To install SQL Server Express at a later time, click Save.
Note: Note: SQL Server 2008 Express includes both 32-bit and 64-bit versions. SQLEXPR32_x86 is a smaller package that can be used to install SQL Server 2008 Express onto only 32-bit operating systems. SQLEXPR_x86 is the same product but supports installation onto both 32-bit and 64-bit (WoW) operating systems. SQLEXPR_x64 is a native 64-bit SQL Server 2008 Express and supports installation onto only 64-bit operating systems. There is no other difference between these packages.
-
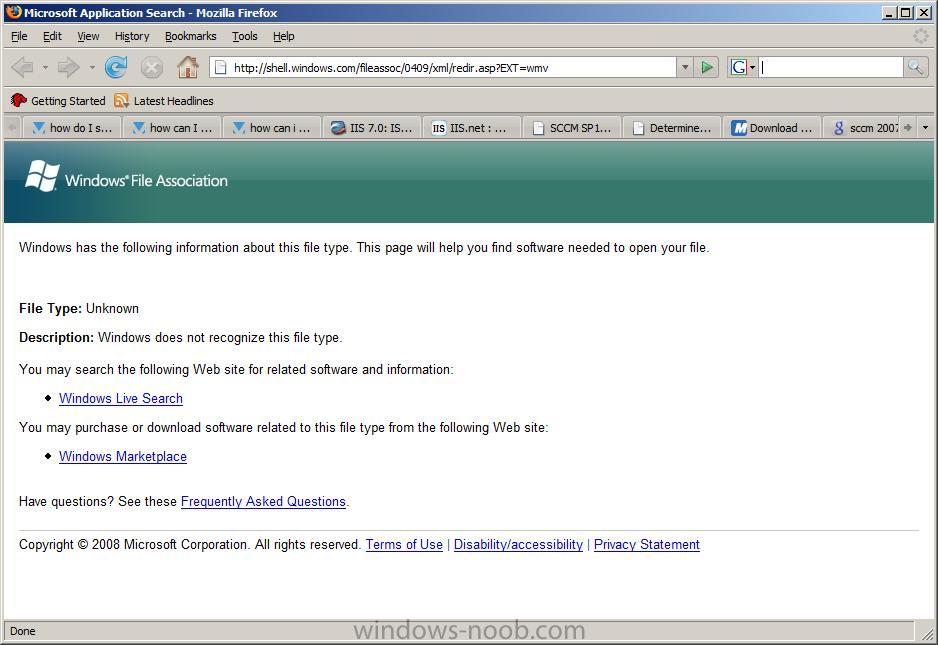
I downloaded a wmv file about SCCM 2007, and when I clicked on it I was greeted with this
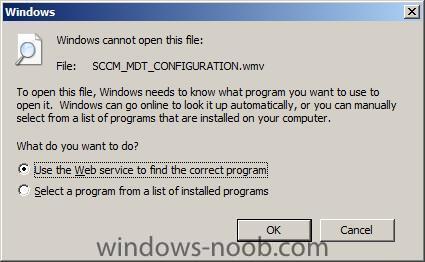
I chose the default (check web services for a solution) and it showed me the following web page.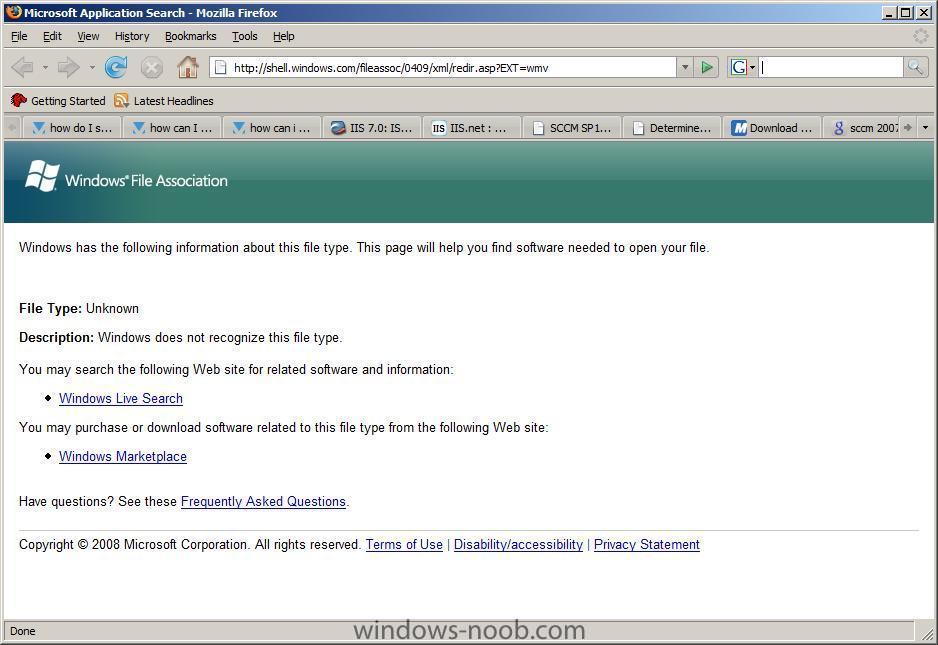
and I quote:Windows has the following information about this file type. This page will help you find software needed to open your file.
File Type: Unknown
Description: Windows does not recognize this file type.
Yes, it's amusing that Microsoft doesn't understand it's own WMV file format.
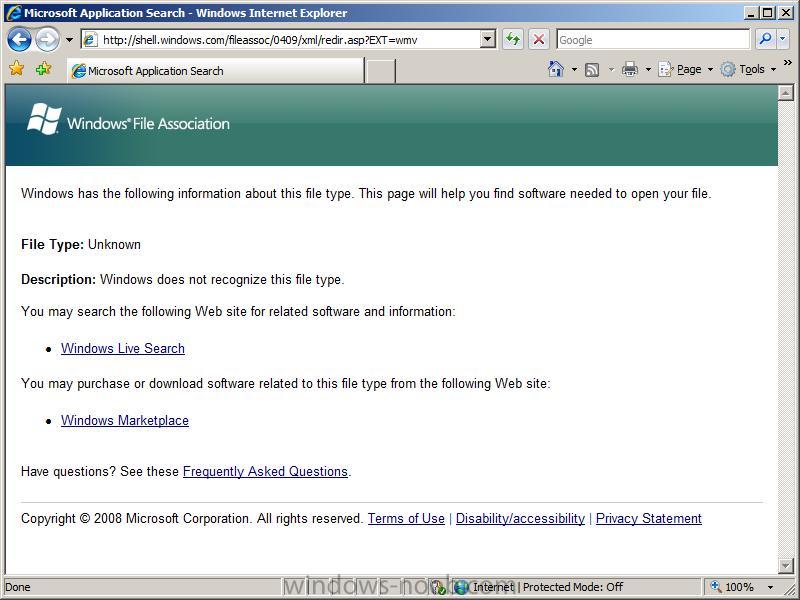
thinking it was a Firefox issue, I tried the same URL in Internet Explorer
http://shell.windows.com/fileassoc/0409/xml/redir.asp?EXT=wmv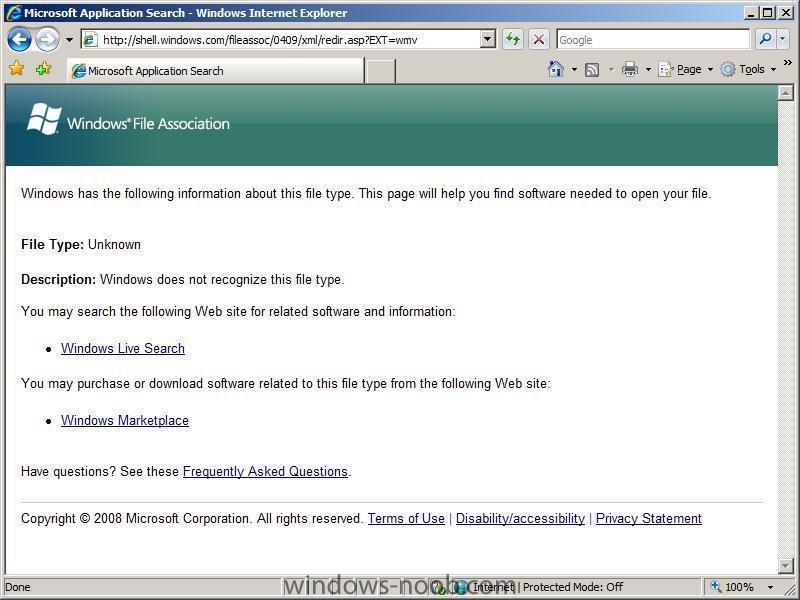
Oddly I got the same result, apparently Windows own websites don't understand what the WMV file extension is for....
A quick google shows lot's of sites that correctly identify the .wmv extension as a Windows Media Video file.
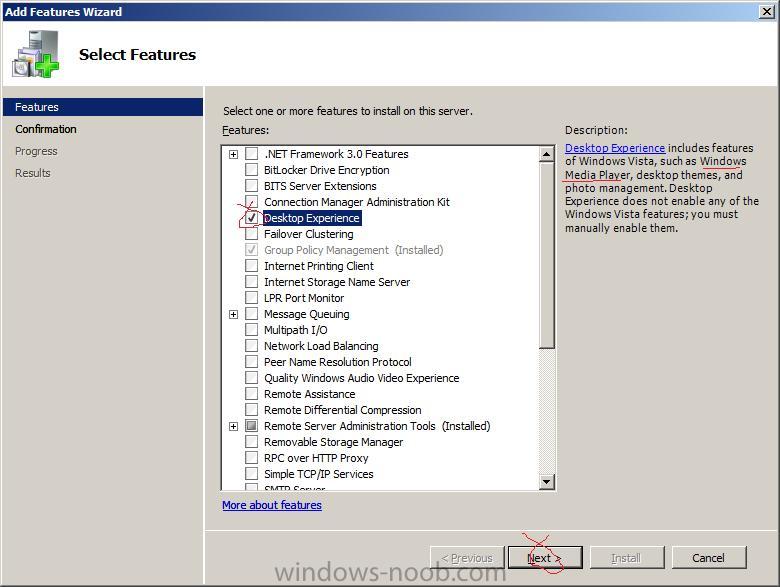
Anyway, back to my problem, by default I can't play a wmv file in Windows Server 2008, so to fix this I do as follows:-
Open server manager, click on Add features (found under Features Summary), select Desktop Experience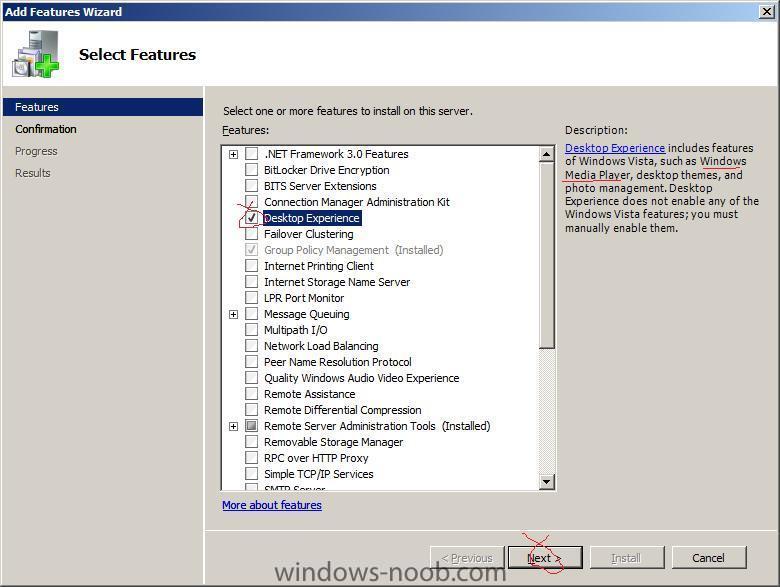
and next and then Install, you'll be informed that the Server will need to be restarted after the installation.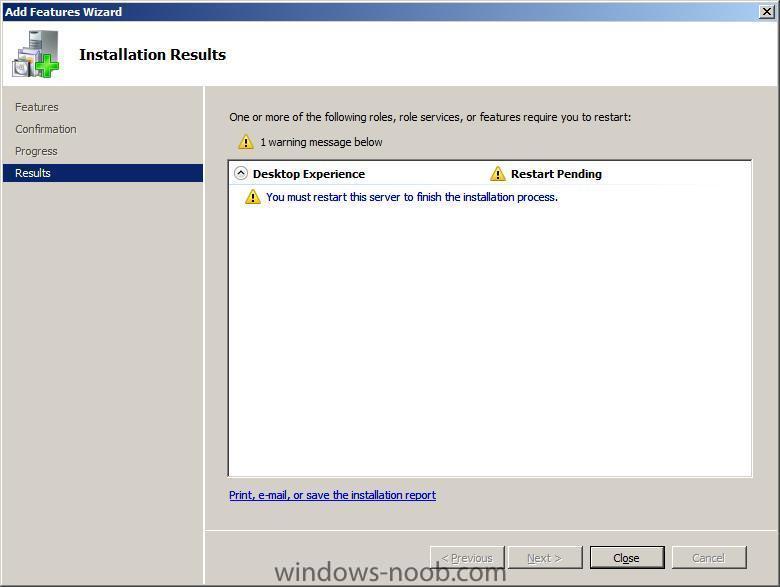 after the restart, the Add roles wizard will complete it's actions and you'll be able to watch WMV in all it's glory.
Alternatively you could save yourself the pain and install VLC.
-
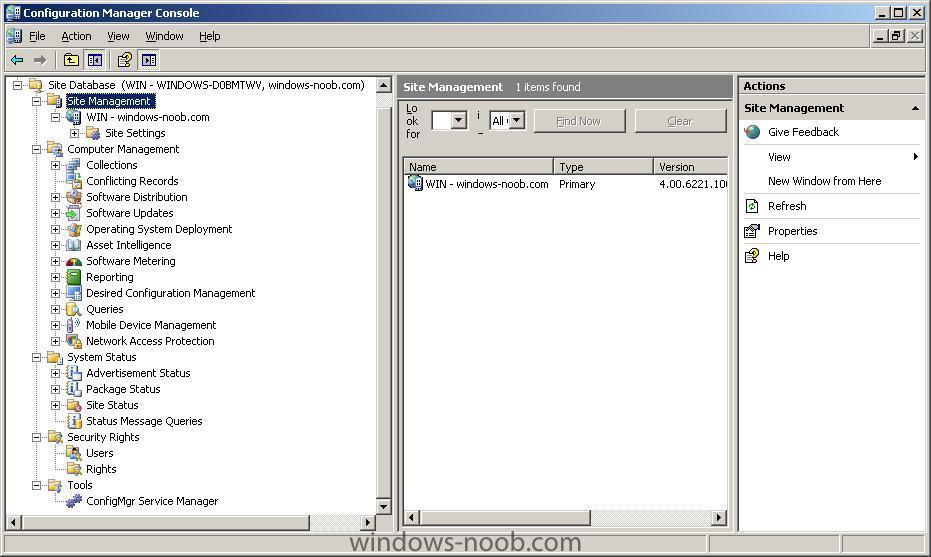
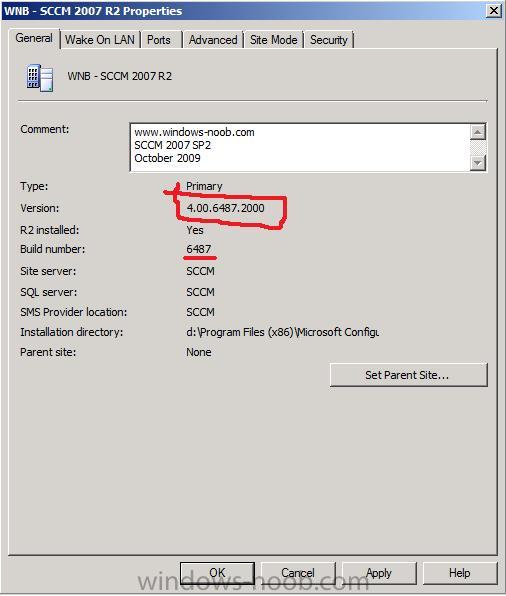
From the SCCM 2007 ConfigMgr Console --> Site Database --> Site Management --> right click your site + Properties
you should see the version number there (see screenshot)
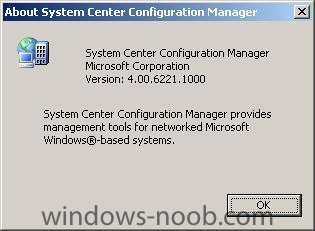
Help --> About System Center Configuration Manager displays the same correct version number.
Below are the current versions of SCCM 2007
For RTM, it is 4.00.5931.0000
For SP1, it is 4.00.6221.1000
For SP2, it is 4.00.6487.2000
so based on this, the screenshot above is from a SCCM 2007 SP1 system.
Is R2 installed ?
If you right click on Site Properties you'll see the version number plus you can identify if R2/R3 are installed - see below

What about Beta and Release Candiate versions ?
For SP2 beta, it is 4.00.6425.2000
For SP2 RC, it is 4.00.6468.2001
cheers
niall
-
you can do it two ways, either by logging in as Administrator and choose Add roles from the Server manager, then add the Web Server role, or as a script
here's the script
start /w pkgmgr /iu:IIS-WebServerRole;IIS-WebServer;IIS-CommonHttpFeatures;IIS-StaticContent;IIS-DefaultDocument;IIS-DirectoryBrowsing;IIS-HttpErrors;IIS-HttpRedirect;IIS-ApplicationDevelopment;IIS-ASPNET;IIS-NetFxExtensibility;IIS-ASP;IIS-CGI;IIS-ISAPIExtensions;IIS-ISAPIFilter;IIS-ServerSideIncludes;IIS-HealthAndDiagnostics;IIS-HttpLogging;IIS-LoggingLibraries;IIS-RequestMonitor;IIS-HttpTracing;IIS-CustomLogging;IIS-ODBCLogging;IIS-Security;IIS-BasicAuthentication;IIS-WindowsAuthentication;IIS-DigestAuthentication;IIS-ClientCertificateMappingAuthentication;IIS-IISCertificateMappingAuthentication;IIS-URLAuthorization;IIS-RequestFiltering;IIS-IPSecurity;IIS-Performance;IIS-HttpCompressionStatic;IIS-HttpCompressionDynamic;IIS-WebServerManagementTools;IIS-ManagementConsole;IIS-ManagementScriptingTools;IIS-ManagementService;IIS-IIS6ManagementCompatibility;IIS-Metabase;IIS-WMICompatibility;IIS-LegacyScripts;IIS-LegacySnapIn;IIS-FTPPublishingService;IIS-FTPServer;IIS-FTPManagement;WAS-WindowsActivationService;WAS-ProcessModel;WAS-NetFxEnvironment;WAS-ConfigurationAPI
-
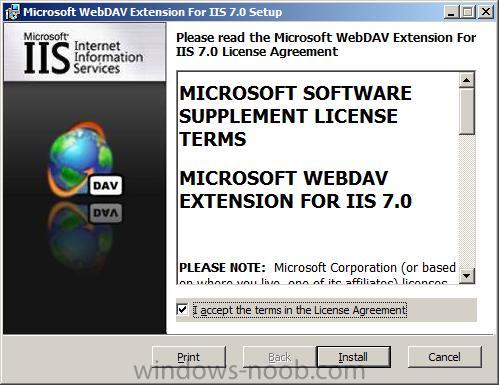
Part 2. Download and install Webdav for IIS 7
Note: If you are using Server 2008 R2 which has Webdav 7.5 then read this post first
An important note from Microsoft:-
Enabling WebDAV and modifying the requestFiltering section for the Web site increases the attack surface of the computer. Enable WebDAV only when required for management points and BITS-enabled distribution points. If you enable WebDAV on the default Web site, it is enabled for all applications using the default Web site. If you modify the requestFiltering section, it is modified for all Web sites on that server. The security best practice is to run Configuration Manager 2007 on a dedicated Web server. If you must run other applications on the Web server, use a custom Web site for Configuration Manager 2007. For more information, see Best Practices for Securing Site Systems.pick your version below
Microsoft WebDAV Extension for IIS 7.0 (x64)
or
Microsoft WebDAV Extension for IIS 7.0 (x86)
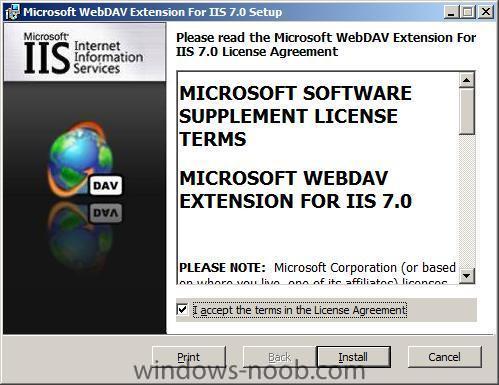
Accept the license agreement and let it install itself
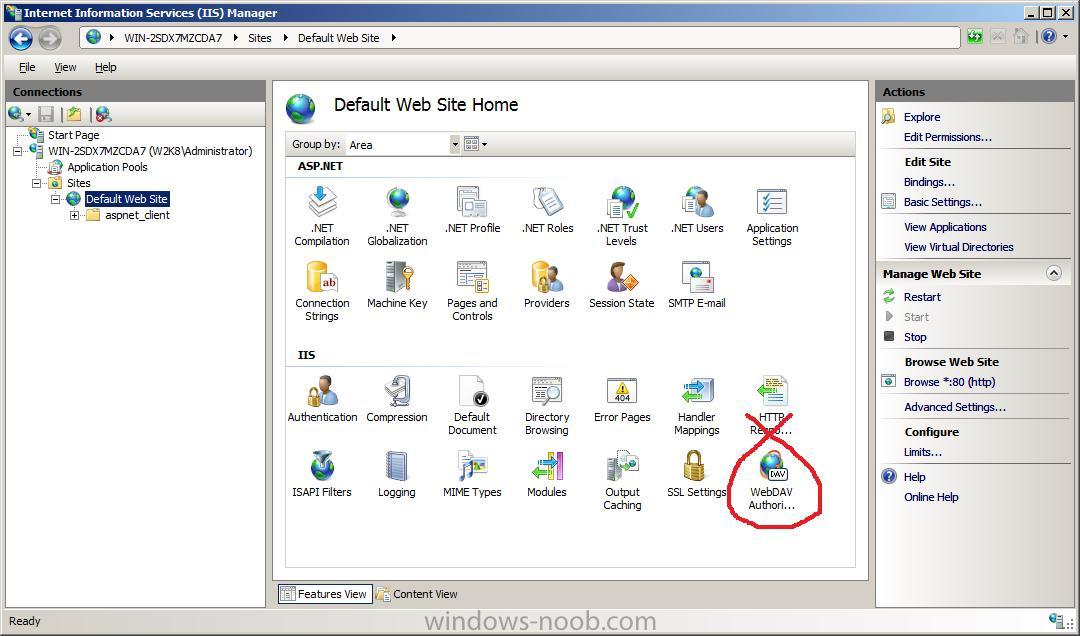
Once we have installed Webdav, we need to Enable WebDAV Publishing Using the IIS Manager.
Enabling WebDAV Publishing Using the IIS Manager.
Startup IIS Manager and in the Connections pane, expand the Sites node in the tree, then click the Default Web Site, then double-click the WebDAV Authoring Rules icon.

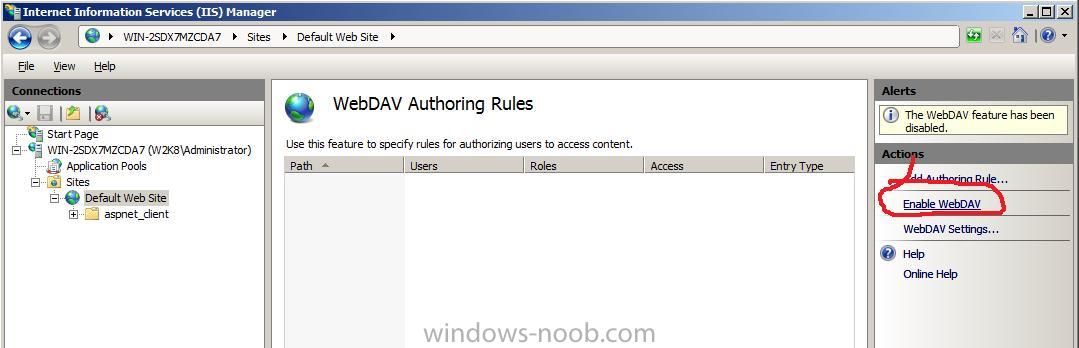
Click enable webdav in the Actions pane on the right side
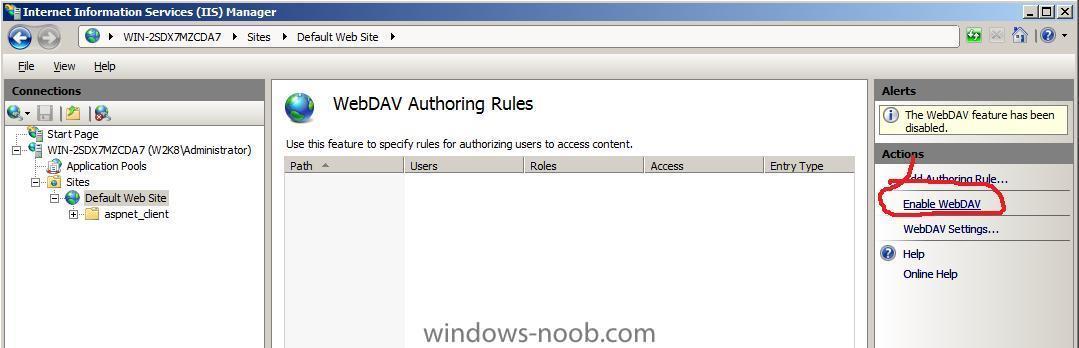
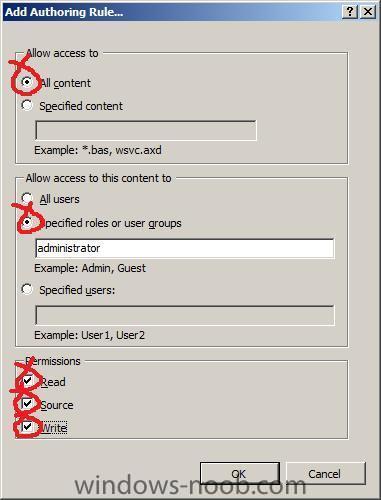
Once you've clicked it it will then say 'Disable webdav' so be sure not to click there again, now we need to click the Add Authoring Rule task in the Actions pane and set your options as below
That's it, you've now enabled WebDAV authoring in IIS 7. We will return to Webdav later in the guide, if you want to do them now then read Step 1 of this post or just continue with the below as we will get to it later anyway.
-
here's a working SIF
[data]floppyless = "1"
msdosinitiated = "1"
OriSrc = "\\%SERVERNAME%\RemInst\%INSTALLPATH%\%MACHINETYPE%"
OriTyp = "4"
LocalSourceOnCD = 1
;DisableAdminAccountOnDomainJoin = 1
[setupData]
OsLoadOptions = "/noguiboot /fastdetect"
SetupSourceDevice = "\Device\LanmanRedirector\%SERVERNAME%\RemInst\%INSTALLPATH%"
[unattended]
OemPreinstall = yes
DriverSigningPolicy=ignore
OEMPnPDriversPath=drivers\755\audio\i386\SMAXWDM\W2K_XP;drivers\755\nic\WinXP_2K;drivers\755\sata;drivers\755\video\ati\Driver\XP_INF;drivers\755\video\intel\Graphics;
;drivers\755\video\intel\HDMI;
FileSystem = LeaveAlone
ExtendOEMPartition = 0
TargetPath = \WINDOWS
OemSkipEula = yes
InstallFilesPath = "\\%SERVERNAME%\RemInst\%INSTALLPATH%\%MACHINETYPE%"
LegacyNIC = 1
[MassStorageDrivers]
"Intel® ICH9 SATA AHCIController (Desktop ICH9R)" = "OEM"
"IDE CD-ROM (ATAPI 1.2)/PCI IDE Controller" = "RETAIL"
; Use info from the Txtsetup.oem file
[OEMBootFiles]
iaStor.inf
iaStor.cat
IaStor.sys
Txtsetup.oem
[userData]
;FullName = "%USERFIRSTNAME% %USERLASTNAME%"
Fullname = RISXPSP2
OrgName = "%ORGNAME%"
ComputerName = %MACHINENAME%
ProductID = "xxxxx-xxxxx-xxxxx-xxxxx-xxxxx"
[GuiUnattended]
OemSkipWelcome = 1
OemSkipRegional = 1
TimeZone = %TIMEZONE%
AdminPassword = "*"
AutoLogon=Yes
;AutoLogonCount=99
[GuiRunOnce]
;"Regedit /s C:\drivers\755\Setup\custom.reg"
"Regedit /s C:\dell\dell_wallpaper.reg"
"c:\Dell\windowsupdates\windowsupdate.bat"
"C:\drivers\755\Setup\install.bat"
[Display]
BitsPerPel = 32
XResolution = 1024
YResolution = 768
VRefresh = 75
[Networking]
[RegionalSettings]
LanguageGroup = 1
Language = 00000409
[TapiLocation]
[Fax]
[Win9xUpg]
[systemFileProtection]
[Components]
; accessopt = On
; calc = On
; cdplayer = On
; certsrv = Off
; certsrv_client = Off
; certsrv_server = Off
; charmap = On
; chat = Off
; deskpaper = On
; dialer = On
; fp = Off
; freecell = On
; hypertrm = On
; iis_common = Off
; iisdbg = Off
; iis_doc = Off
; iis_ftp = Off
; iis_htmla = Off
; iis_inetmgr = Off
; iis_nmtp = Off
; iis_nmtp_docs = Off
; iis_pwmgr = Off
; iis_smtp = Off
; iis_smtp_docs = Off
; iis_www = Off
; indexsrv_system = Off
; media_clips = On
; media_utopia = Off
; minesweeper = On
; mousepoint = On
; mplay = On
; msmq = Off
msmsgs= off
msnexplr = Off
; mswordpad = On
; netcis = Off
; netoc = On
; objectpkg = Off
; paint = On
; pinball = On
; rec = On
; rstorage = Off
; solitaire = On
; templates = On
; TSClients = Off
; vol = On
OEAccess = Off
Zonegames = Off
[shell]
DefaultStartPanelOff = Yes
DefaultThemesOff = Yes
[NetServices]
MS_Server=params.MS_PSched
[identification]
JoinDomain = RIS2
DoOldStyleDomainJoin = yes
CreateComputerAccountInDomain = 0
[RemoteInstall]
Repartition = Yes
UseWholeDisk = Yes
[OSChooser]
Description ="Dell Optiplex 755 - Windows XP Pro ENG-SP2-VLK."
Help ="SIF/Win2k3/This is for Dell Optiplex 755. SIF file created by anyweb@windows-noob.com"
LaunchFile = "%INSTALLPATH%\%MACHINETYPE%\templates\startrom.com"
ImageType =Flat
Version="5.1"
and here's the install.bat file referenced in the SIF to install apps/drivers that can't be installed via the SIF
@echo offREM
REM
REM Additional drivers installed here for the Dell Optiplex 755
REM this takes place after the os install and after the first login.
REM
REM anyweb@windows-noob.com
REM
echo.
echo.
echo Please do not close this window!
echo.
echo Applying needed drivers.
echo.
echo.
echo Installing Dell Desktop System Software
c:\drivers\755\ddss\setup.exe -s
c:\drivers\755\setup\sleep.exe 10
echo Installing Intel Chipset
c:\drivers\755\chipset\setup.exe -s
c:\drivers\755\setup\sleep.exe 10
echo Installing Audio
c:\drivers\755\audio\setup.exe -s
c:\drivers\755\setup\sleep.exe 30
rem echo Installing .net Framework 1.1 (needed for ATI Catalyst Control Panel)
rem c:\drivers\755\dotnetfx.exe /q:a /c:"install.exe /q"
rem c:\drivers\755\setup\sleep.exe 10
rem echo Updating bios to version O755-A03.EXE. (if required)
rem C:\drivers\755\bios\o755-A03.EXE /nopause /noreboot
rem c:\drivers\755\setup\sleep.exe 10
echo Installing Intel Accelerated Video Driver
c:\drivers\755\video\intel\setup.exe -32x1024x768x60 -s
c:\drivers\755\setup\sleep.exe 10
rem echo Installing ATI Video Driver
rem c:\drivers\755\video\ati\setup.exe /s
rem c:\drivers\755\setup\sleep.exe 20
echo Installing Intel Gigabit LOM
c:\drivers\755\nic\setup.exe -s
c:\drivers\755\setup\sleep.exe 10
REM
REM installing APPS below
REM
echo Installing Sonic DVD 7.1 Deluxe Edition
c:\Dell\apps\sonicdvd\RN\RNENU.msi /quiet /norestart
c:\drivers\755\setup\sleep.exe 10
echo Installing PowerDVD 5.5
c:\Dell\apps\powerdvd\setup.exe -s
c:\drivers\755\setup\sleep.exe 10
echo Installing Mozilla Firefox 2.0.0.3
c:\Dell\non_dell\"Firefox Setup 2.0.0.3.exe" -ms
c:\drivers\755\setup\sleep.exe 10
echo.
echo.
echo All done, thanks for waiting!
echo.
echo rebooting now.
echo.
echo.
c:\drivers\755\setup\sleep.exe 5
shutdown -r -f -t 5 -c "All Done. I am now Rebooting the Computer to finish Installation."
Goto End
:End
-
here's a working SIF file
[data]floppyless = "1"
msdosinitiated = "1"
OriSrc = "\\%SERVERNAME%\RemInst\%INSTALLPATH%\%MACHINETYPE%"
OriTyp = "4"
LocalSourceOnCD = 1
;DisableAdminAccountOnDomainJoin = 1
[setupData]
OsLoadOptions = "/noguiboot /fastdetect"
SetupSourceDevice = "\Device\LanmanRedirector\%SERVERNAME%\RemInst\%INSTALLPATH%"
[unattended]
OemPreinstall = Yes
OEMPnPDriversPath=drivers\170L\nic\WinXP;drivers\170L\chipset\xp;drivers\170L\audio\SMAXWDM\W2K_XP;drivers\170L\video\graphics\win2000;drivers\170L\modem;
filesystem=ConvertNTFS
NoWaitAfterTextMode = 0
ExtendOEMPartition = 0
ConfirmHardware = no
TargetPath = \WINDOWS
OemSkipEula = yes
InstallFilesPath = "\\%SERVERNAME%\RemInst\%INSTALLPATH%\%MACHINETYPE%"
LegacyNIC = 1
CrashDumpSetting=1
[userData]
FullName = "%USERFIRSTNAME% %USERLASTNAME%"
OrgName = "%ORGNAME%"
ComputerName = %MACHINENAME%
ProductID = "xxxxx-xxxxx-xxxxx-xxxxx-xxxxx"
[GuiUnattended]
OemSkipWelcome = 1
OemSkipRegional = 1
TimeZone = %TIMEZONE%
AdminPassword = "*"
AutoLogon=Yes
;AutoLogonCount=99
[GuiRunOnce]
"Regedit /s C:\drivers\170L\Setup\custom2.reg"
"C:\drivers\170L\Setup\install.bat"
[Display]
ConfigureAtLogon = 0
BitsPerPel = 16
XResolution = 1024
YResolution = 768
VRefresh = 60
AutoConfirm = 1
[Networking]
[NetServices]
MS_Server=params.MS_PSched
[identification]
JoinDomain = risserver
DoOldStyleDomainJoin = yes
CreateComputerAccountInDomain = 0
[RemoteInstall]
Repartition = Yes
UseWholeDisk = Yes
[OSChooser]
Description ="Dell Optiplex 170L - Windows XP Pro ENG-SP1-VLK."
Help ="This is for Dell Optiplex 170L. SIF file created by anyweb@windows-noob.com"
LaunchFile = "%INSTALLPATH%\%MACHINETYPE%\templates\startrom.com"
ImageType =Flat
Version="5.1"
and here are the contents of the install.bat file referred to in the sif
@echo offREM
REM
REM Additional drivers installed here for the Dell Optiplex 170L
REM this takes place after the os install and after the first login.
REM
REM anyweb@windows-noob.com
REM
echo.
echo.
echo Please do not close this window!
echo.
echo Applying needed drivers.
echo.
echo.
echo Installing Intel Chipset
c:\drivers\170L\chipset\setup.exe -s
c:\drivers\170L\setup\sleep.exe 10
echo Installing Audio
c:\drivers\170L\audio\setup.exe -s
c:\drivers\170L\setup\sleep.exe 10
echo Installing Intel Video Driver
c:\drivers\170L\video\setup.exe -32x1024x768x60 -s
c:\drivers\170L\setup\sleep.exe 10
REM
REM
REM note the different switch below, /S instead of -s
REM
REM
echo Installing Intel Gigabit LOM
c:\drivers\170L\nic\winxp\setup.exe /S
echo.
echo.
echo All done, thanks for waiting!
echo.
echo rebooting now.
echo.
echo.
c:\drivers\170L\setup\sleep.exe 5
shutdown -r -f -t 5 -c "All Done. I am now Rebooting the Computer to finish Installation."
Goto End
:End
-
With all Windows PE problems and errors that you may (most likely will..) encounter during SCCM OSD Deployment, you'll want to enable the F8 feature in your Windows PE boot images, which allows you to do some basic testing by giving you access to a CMD prompt within the Windows PE session
So how do you enable this troubleshooting feature ?
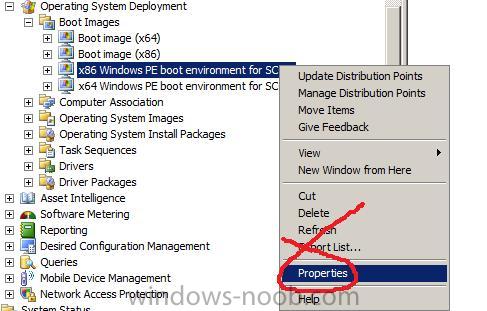
locate your boot images in the Operating System Deployment section of SCCM
right-click on your chosen boot image (for example 32 bit) and choose Properties

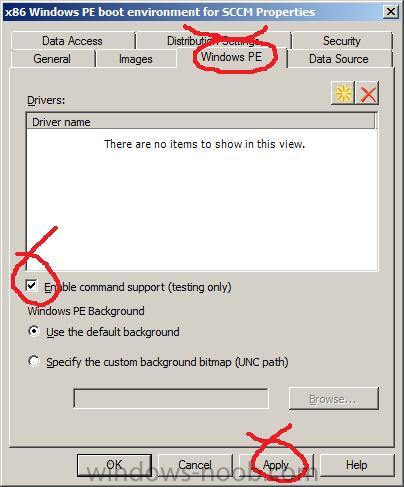
Select the Windows PE tab from the properties, and place a checkmark in Enable command support then click apply
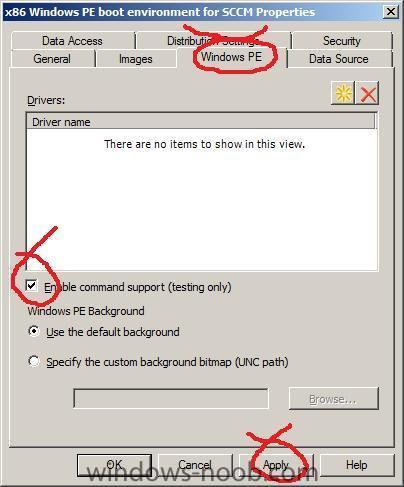
Don't forget to re-distribute your boot images to their Distribution Points after making this change, and give them some time for doing so.
Once distributed, when you PXE boot your clients and you want to troubleshoot any Windows PE deployment issues, press F8 once Windows PE has loadedand you'll get a command prompt.
In addition this will keep Windows PE operational in situations where whatever error you were getting would cause Windows PE to reboot with no warnings thereby giving you a chance to read the logs and perform troubleshooting.
SMSTS Log File location
If the task sequence completes when running in the full operating system with a Configuration Manager 2007 client installed on the computer: <CCM Install Dir>\Logs
If the task sequence completes when running in the full operating system with no Configuration Manager 2007 client installed on the computer: %Temp%\SMSTSLOG
If the task sequence completes when running in Windows PE: <largest fixed partition>\SMSTSLOG
Note:
In addition, the logs for SCCM (during the Windows PE phase) are stored in X:\Windows\Temp\SMSTSLog\ and C:\SMSTSLog and C:\_SMSTaskSequence.
More often than not, the Log file you need to be reading is the smsts.log file to see what is going wrong in your deployment...
After Windows PE is done and Windows installation is complete you can find the logs elsewhere such as C:\Windows\System32\CCM\Logs or C:\Windows\SysWOW64\CCM\Logs for 32bit and 64bit respectively. In those directories you'll find a log file named (for example) smsts-20081125-122856.log, the actual name of the file will change based on the date/time that you do the deployment.
I've enabled Command Prompt Support, now what ?
Once command prompt support is enabled you've got lots of options for troubleshooting.
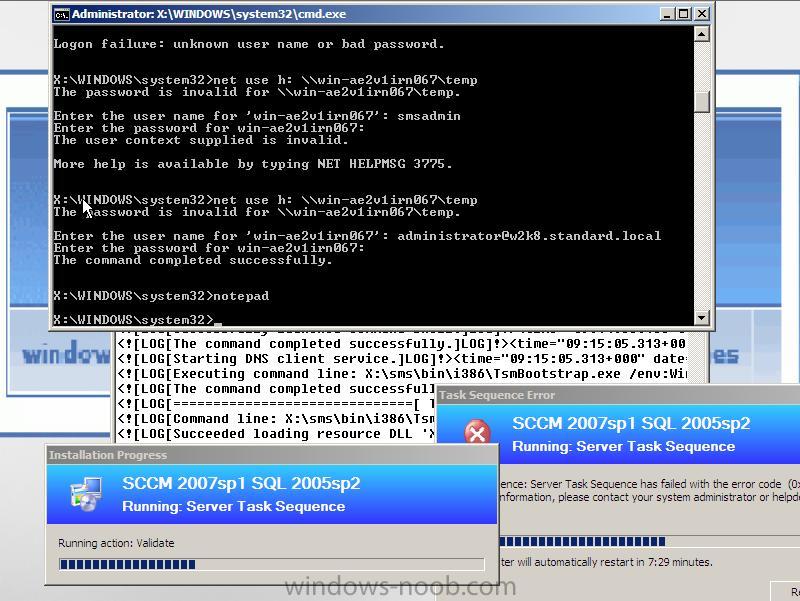
network testing (ipconfig/ping...) or map a share such as
net use h: \\servername\share
If the user you are trying to logon with is a DOMAIN user then use this format
Enter the user name for 'servername':
DOMAIN\domainuser
disk testing (diskpart...)
read LOGS to look for errors that explain why the deployment is failing... using notepad
Troubleshooting Links
List of Custom Error Codes for Configuration Manager 2007.
Troubleshooting tips on Technet see here
Troubleshooting made easy > http://blogs.msdn.co...e-easy-way.aspx
Sample Troubleshooting Session
The Below is taken from a real troubleshooting session...
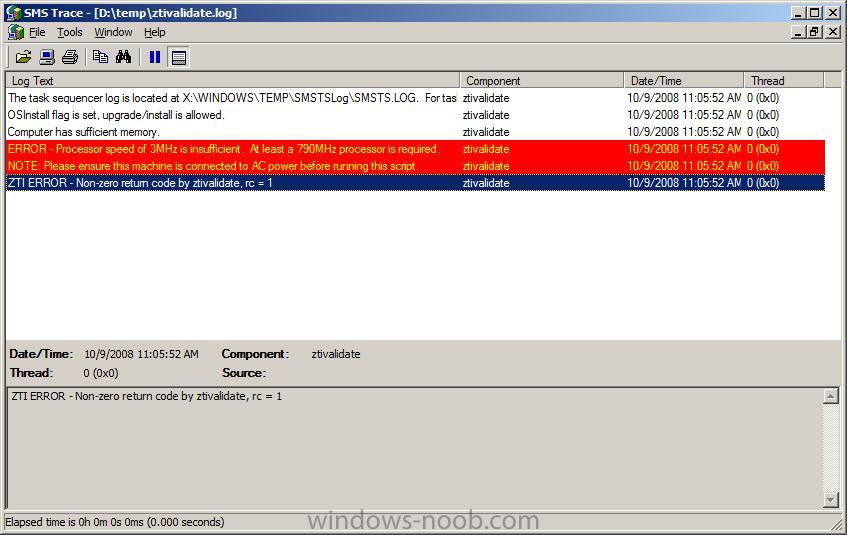
During the Windows PE phase of a Windows Server 2008 Deployment I got an error
Task Sequence has failed with the error code (0x00000001)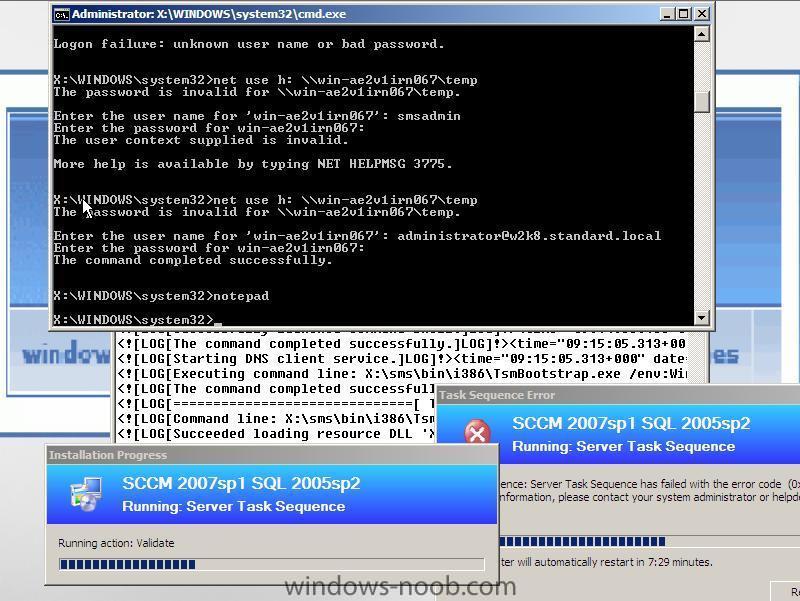
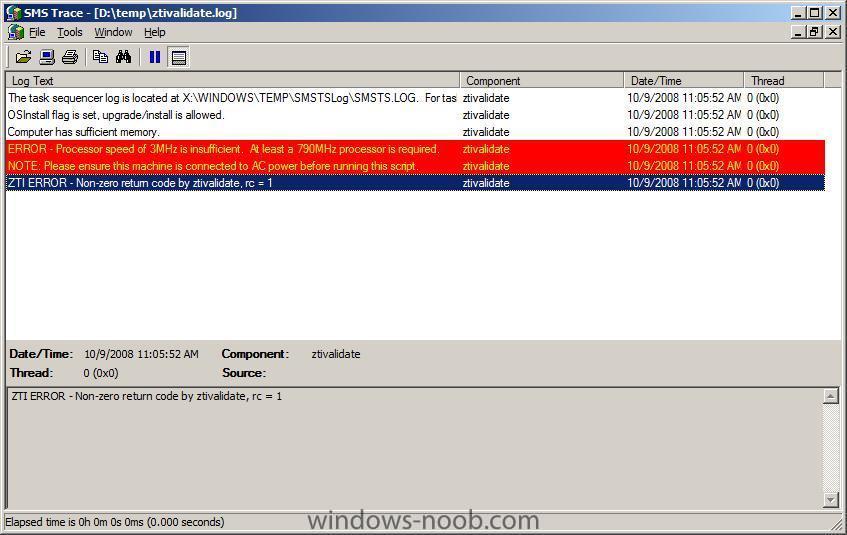
In the example above it's complaining about a Validate issue in the Task Sequence deployment of Windows Server 2008,
looking at the log file located at X:\Windows\Temp\SMSTSLog\ztivalidate
I can see that it's complaining about the speed of the processor (because this is a Virtual Machine)
Hint: Open the log file with SMS Trace. SMS trace is one of the tools that you can find in SCCM 2007 Toolkit. You can download it from here.Once you open the log file it will highlight the problems in Red.
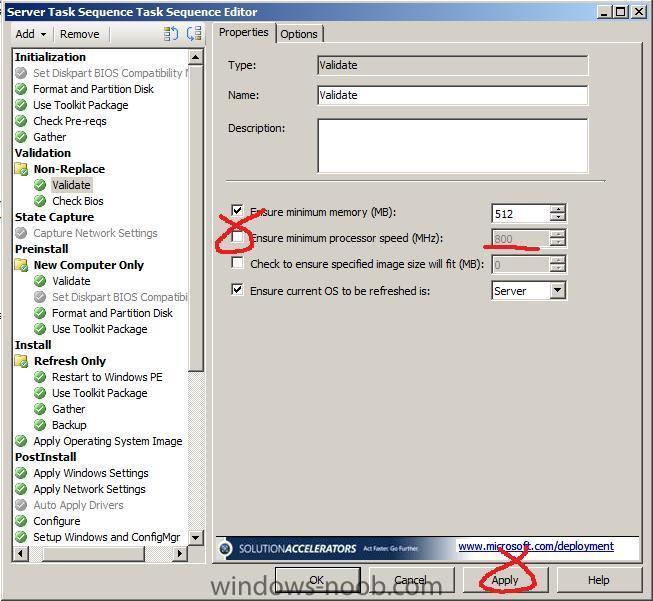
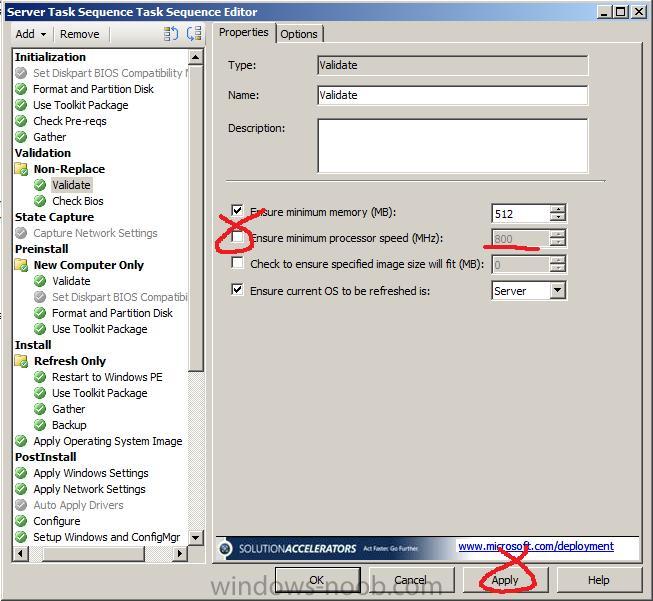
so to fix this problem required editing the Validate section of the Task Sequence and removing the check for CPU speed
-
You need to have completed Part 1 and Part 2 before starting this part.
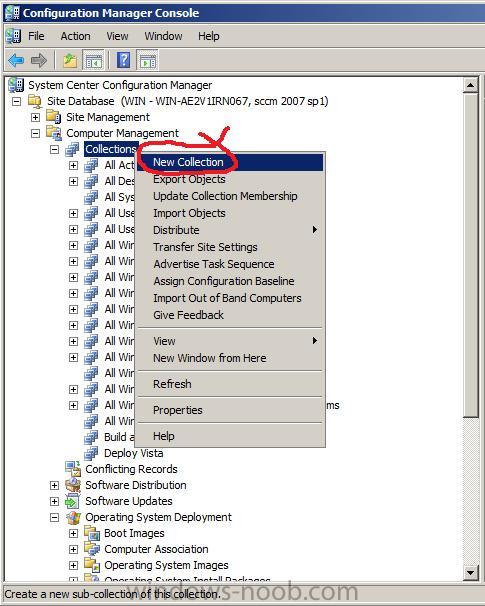
Create a new collection
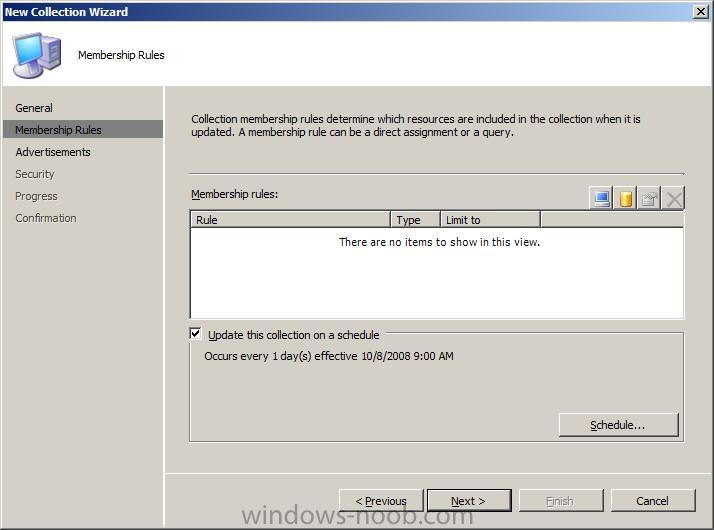
In ConfigMgr right click on Collections and choose new collection
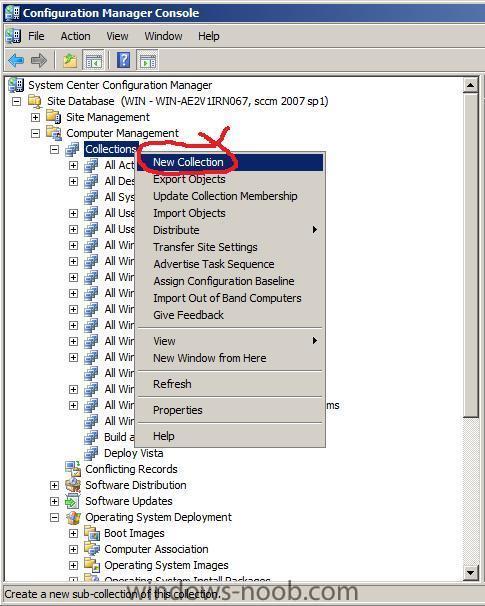
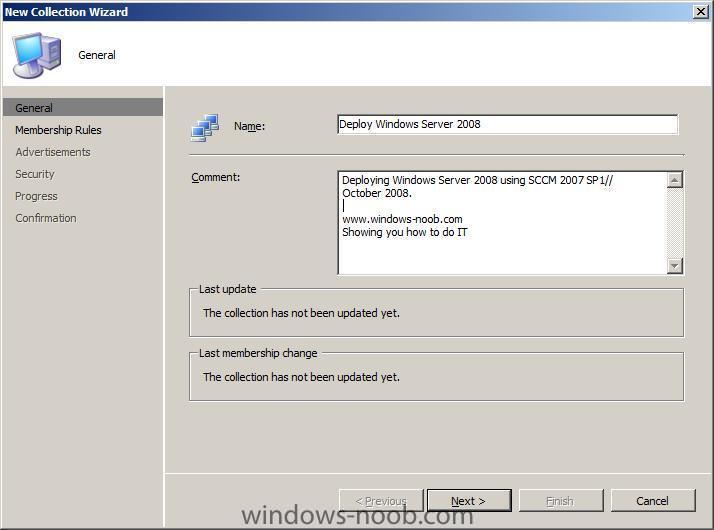
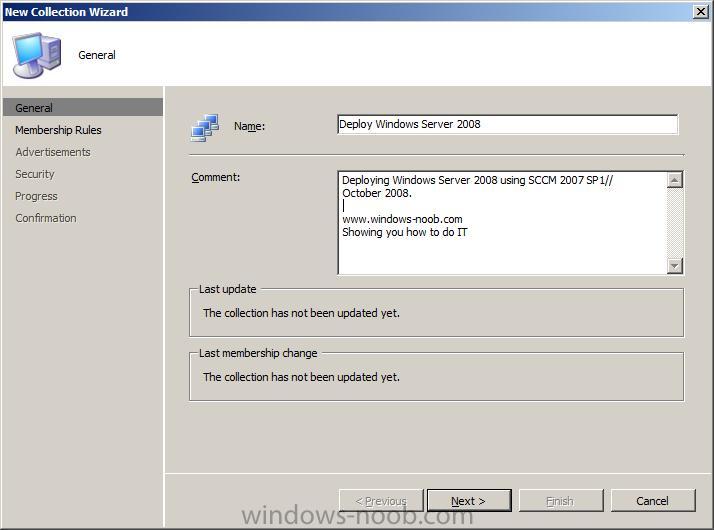
for collection name call it Deploy Windows Server 2008 and fill in the comments
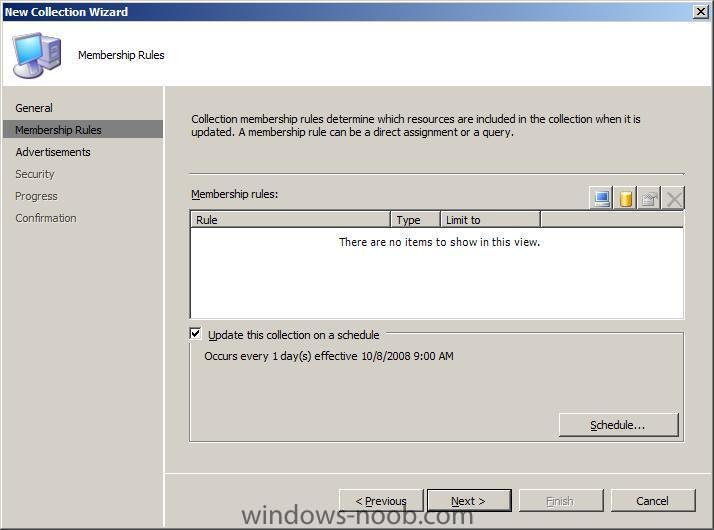
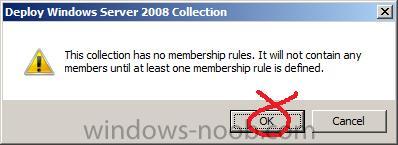
for membership, click next and ok to the warning,

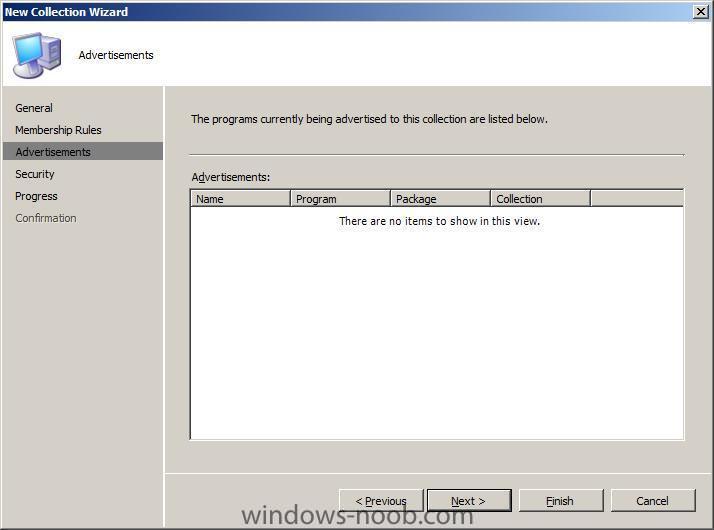
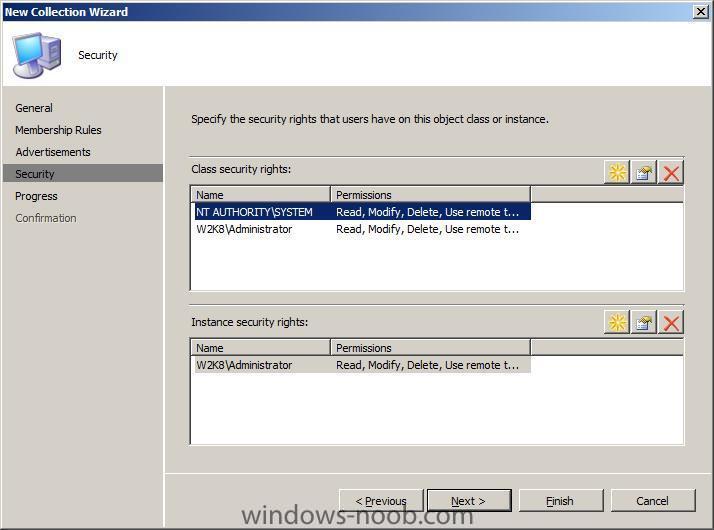
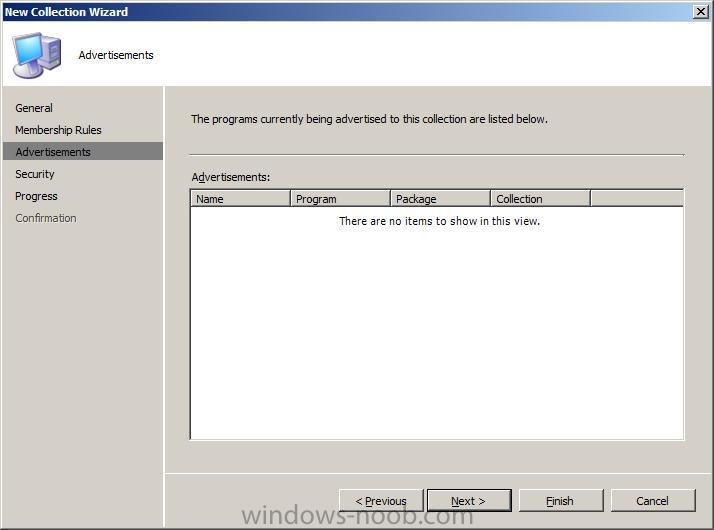
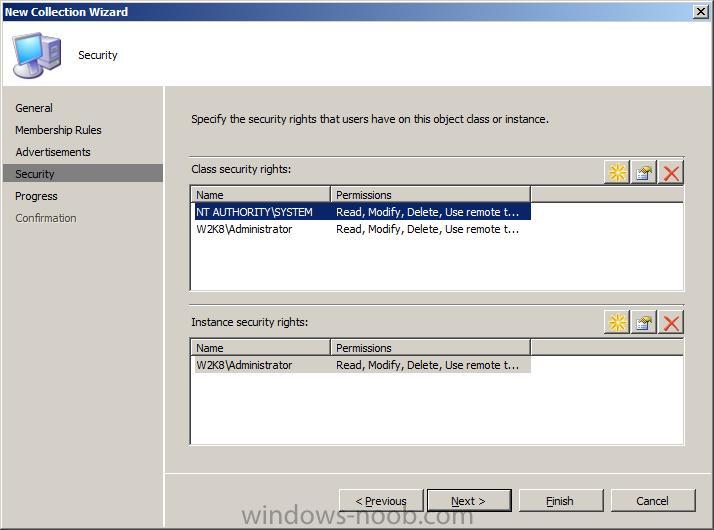
for advertisements and security click next also
click close once done and you should see your new empty collection listed.
Advertising the Task Sequence to a collection
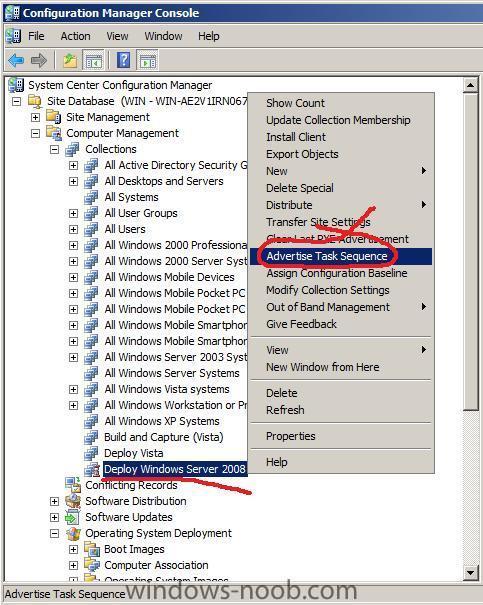
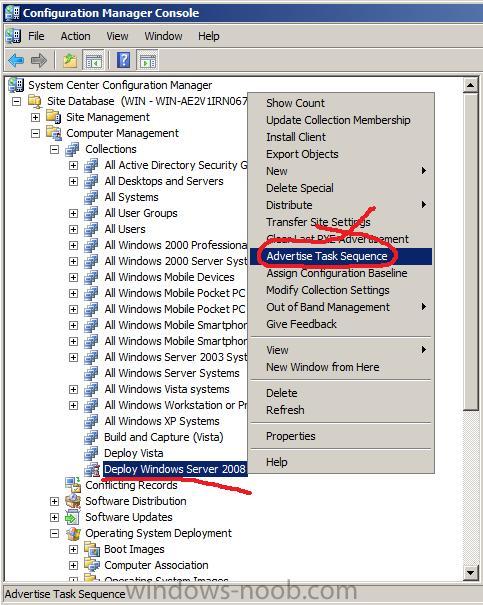
Under the Computer Management node in SCCM ConfigMgr, right-click the collection we have just made (Deploy Windows Server 2008) and choose advertise task sequence
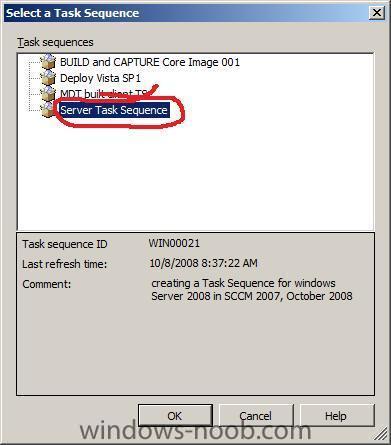
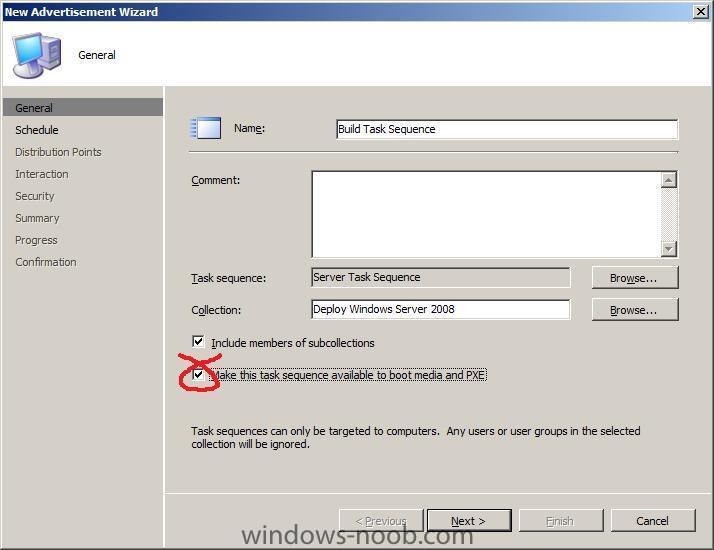
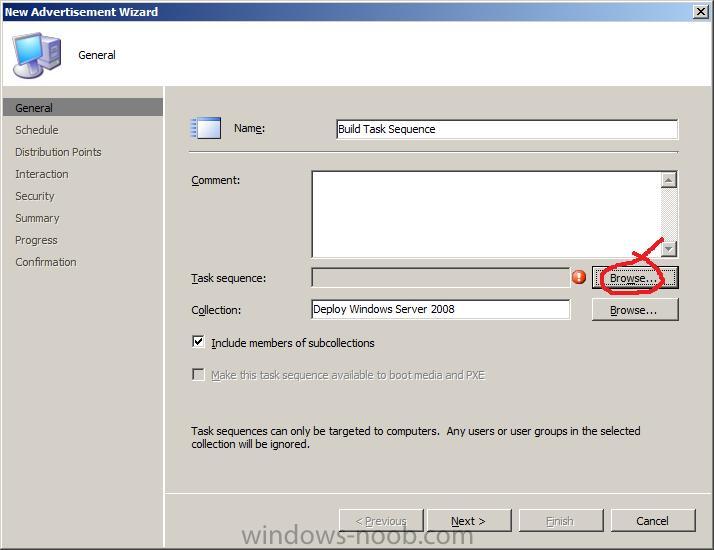
fill in the description Build Task Sequence, ..... the task sequence should then be selected by clicking on Browse,

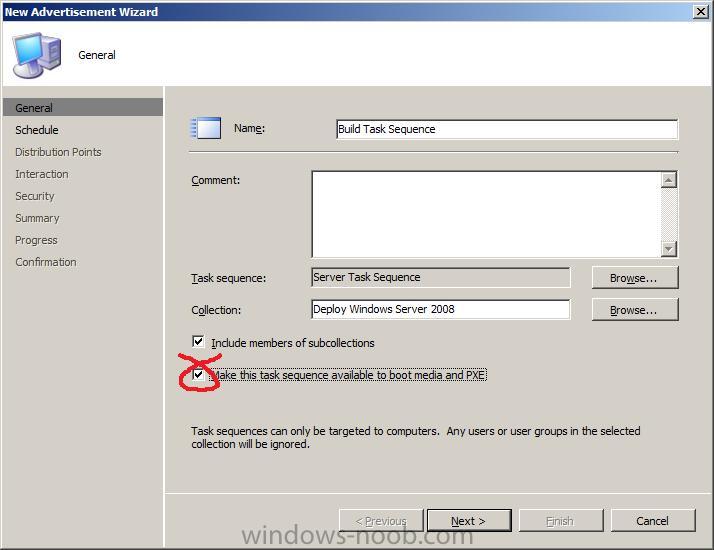
select the Server Task Sequence we made earlier
select Make this task sequence available to both media and PXE
Alternatively, right click the task sequence itself and choose 'advertise' to get to this same step.
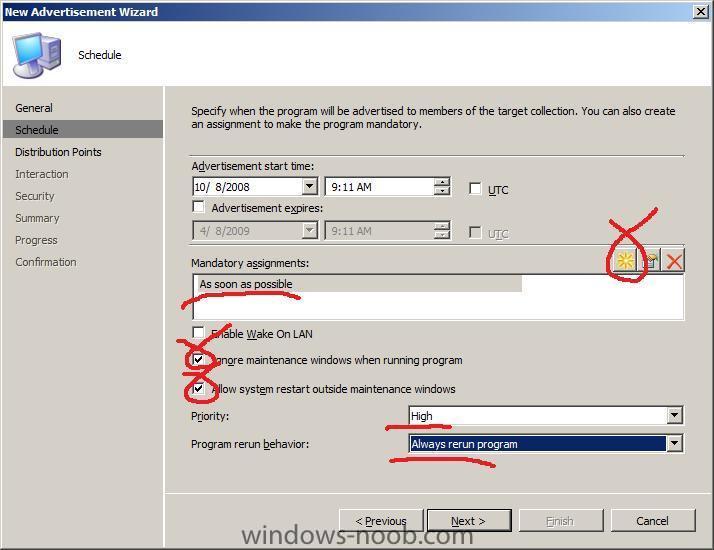
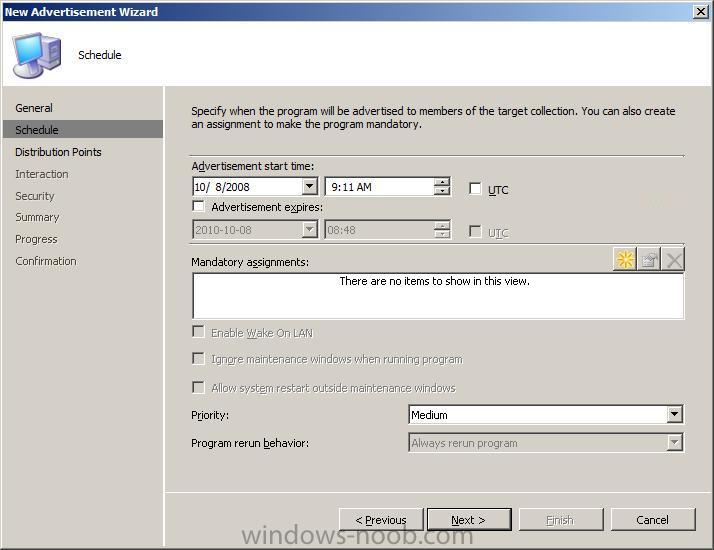
Schedule
Set your schedule depending on whether you are in a Lab or Production Environment.
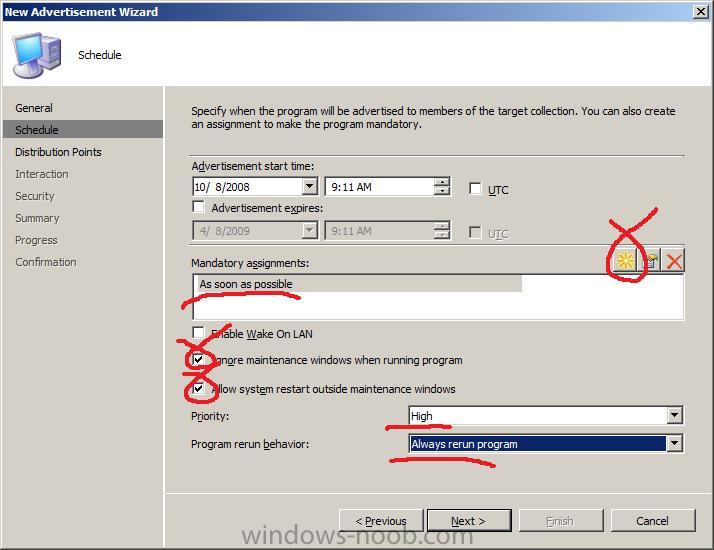
For a Lab Environment
Make the Task Sequence mandatory by clicking on the yellow star and select As soon as possible.
Select ignore maintenance windows when runing program and allow system restart, set the program rerun behaviour to always rerun program so that we can rerun the task sequence over and over as we require for testing.
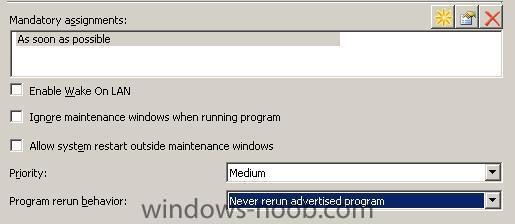
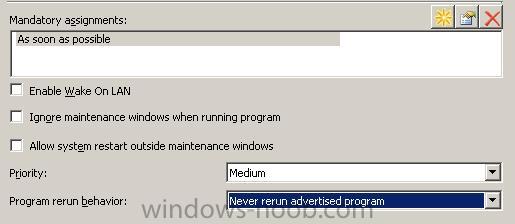
For a Production Environment
In a Production environment set the advertisement from Mandatory to Optional, this gives us less risk of an accidental deployment but also introduces the possibilty of choice.

if you want to remove choice then keep the advertisement mandatory but change the program rerun behaviour to never rerun (see below screenshot).
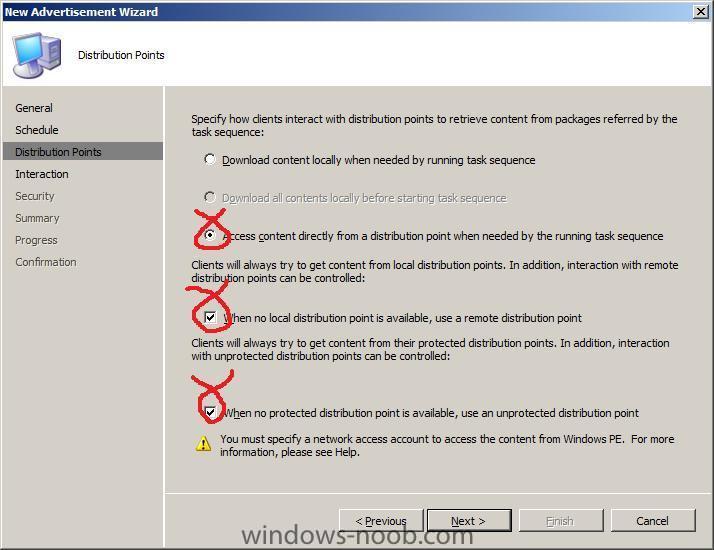
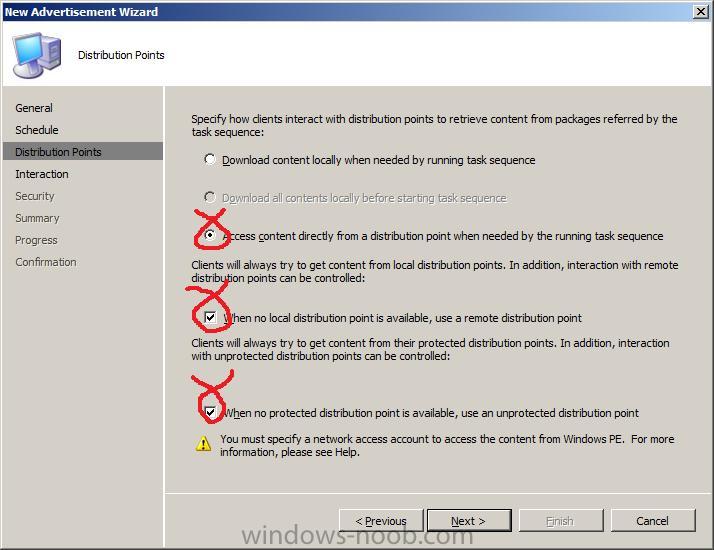
Distribution Points
set to Access content directly from a distribution point as we will be wiping the hard disc as our first task in the task sequence
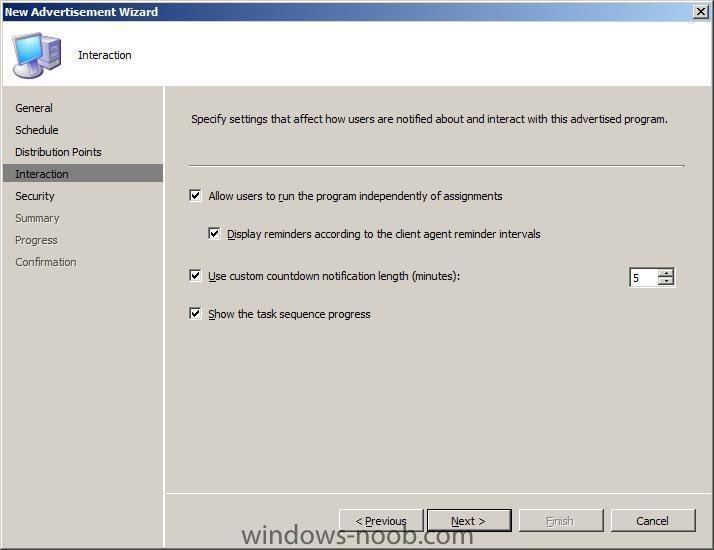
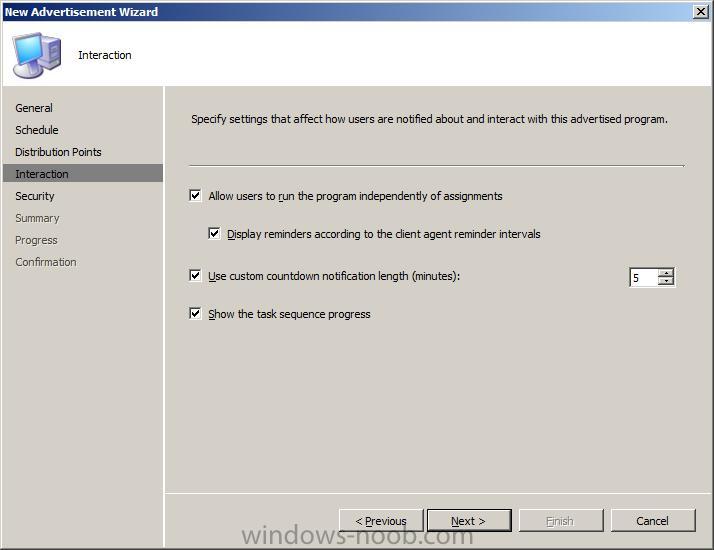
Interaction
adjust interaction to suit your needs
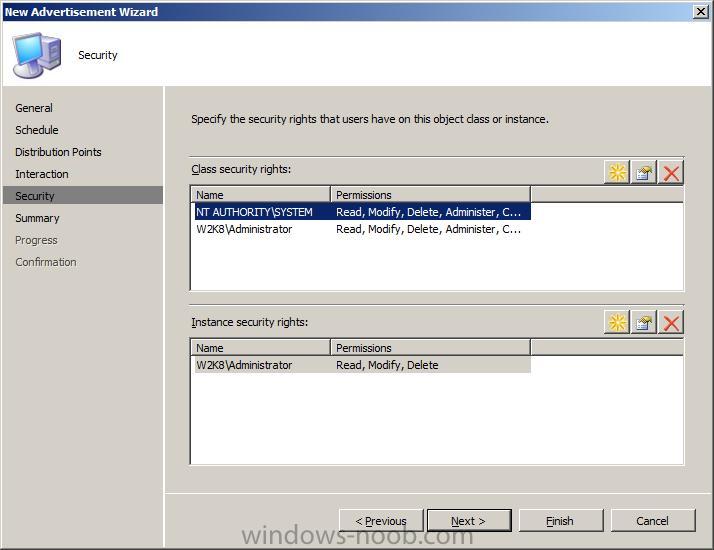
Security
and security
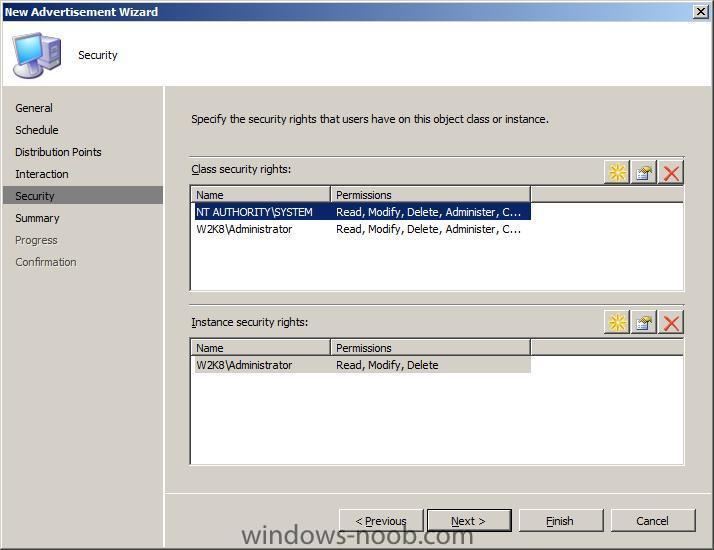
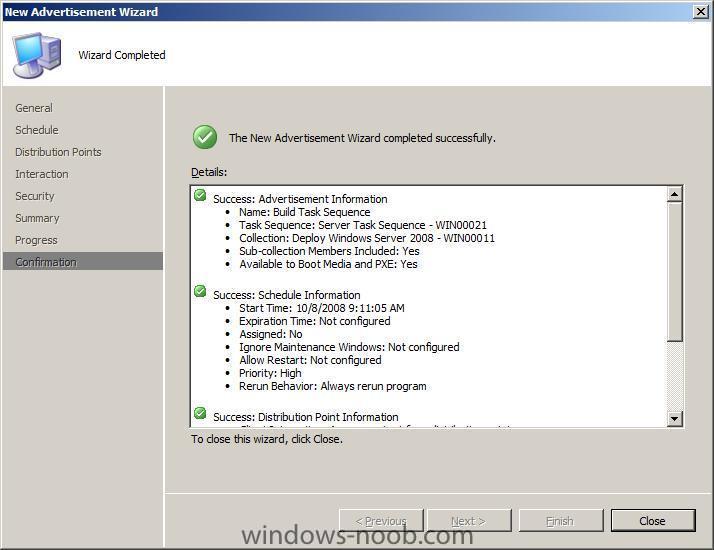
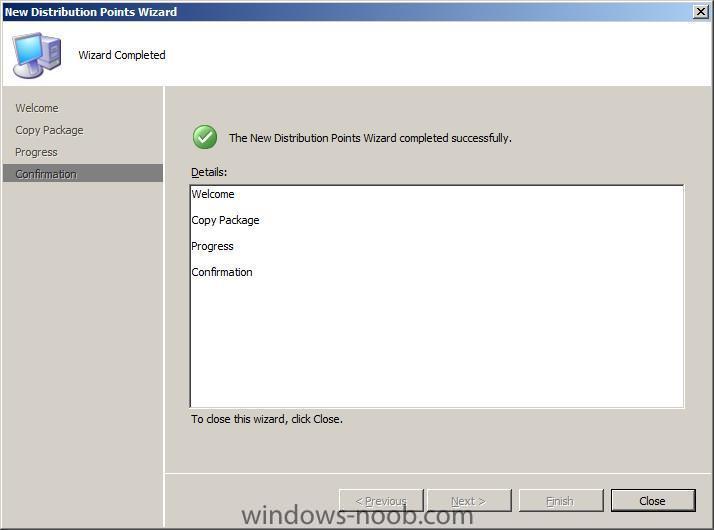
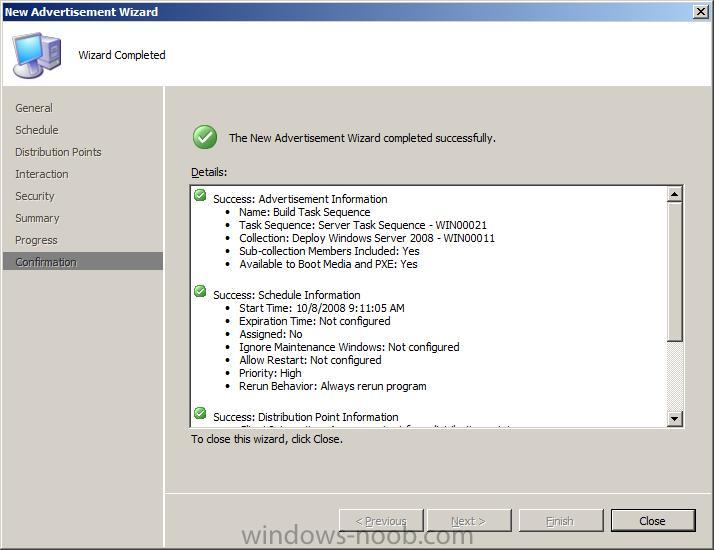
review the summary and click next to proceed, then verify that all went well in the confirmation window.
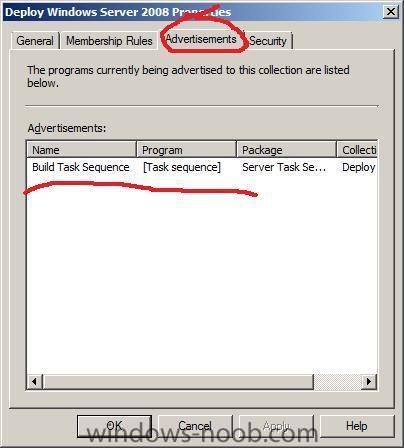
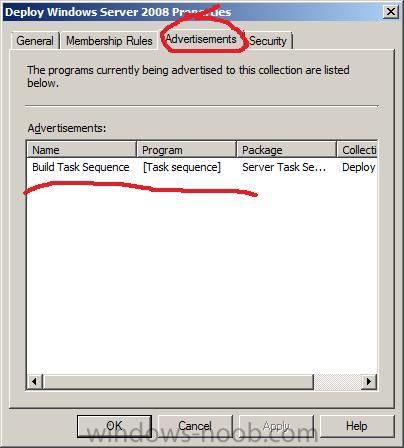
at this point right clicking on our chosen collection and clicking on the Advertisements tab will list the Task Sequence we just added.
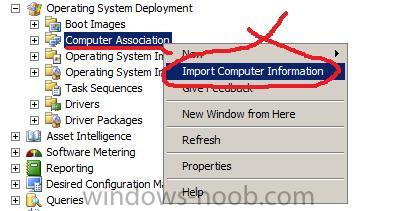
Add server to collection
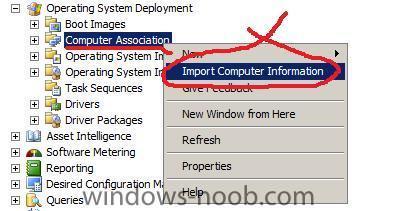
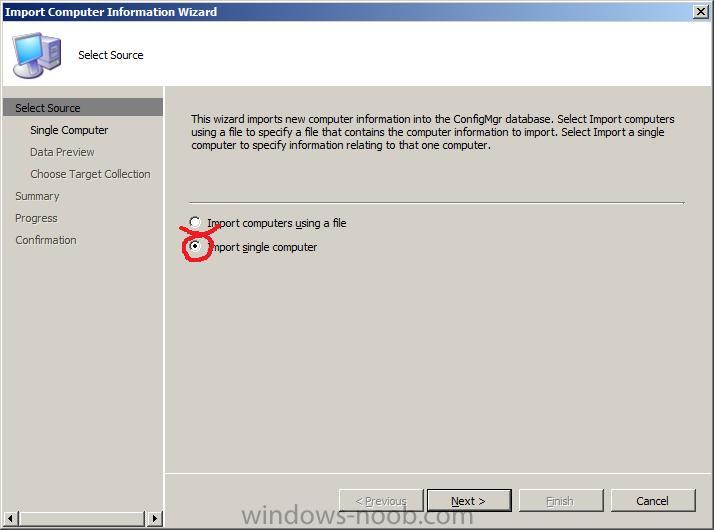
Under Operating System Deployment, right click on Computer Association and choose import computer information,
select Import Single Computer (if you want to import multiple computers select using a file instead)

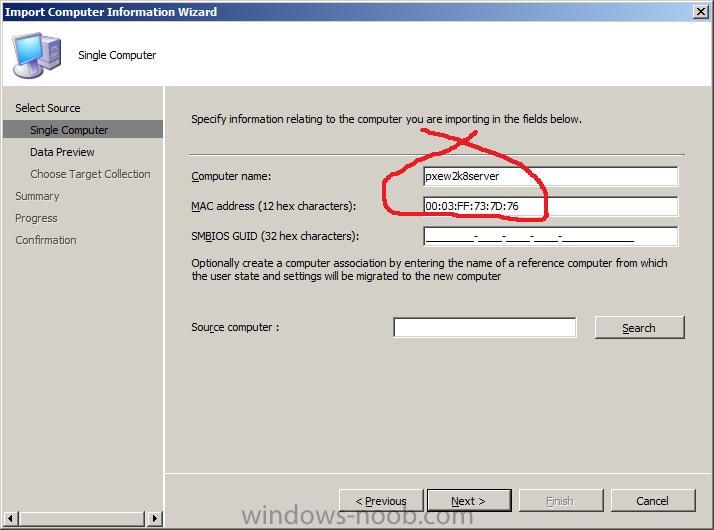
in the example below i'm just giving the server a name and using it's MAC address
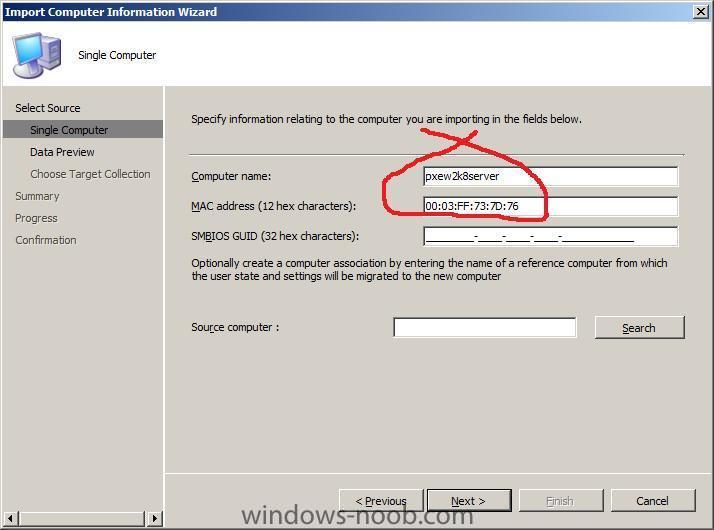
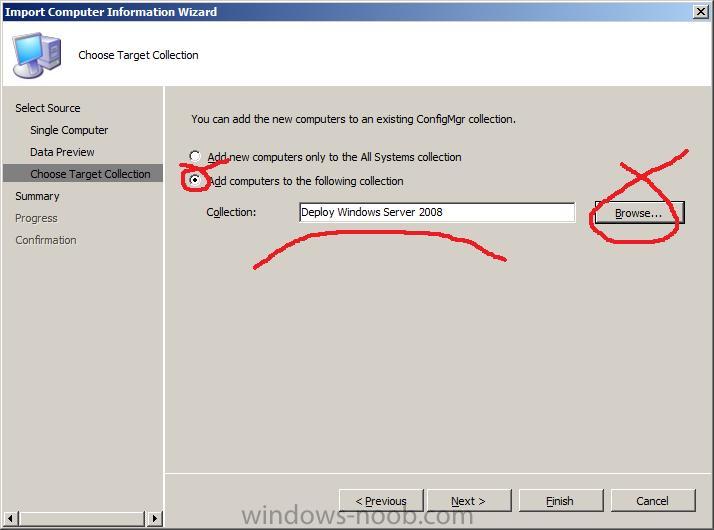
click next to the data preview and then for Choose Target Collection, hit browse and select the collection we made above
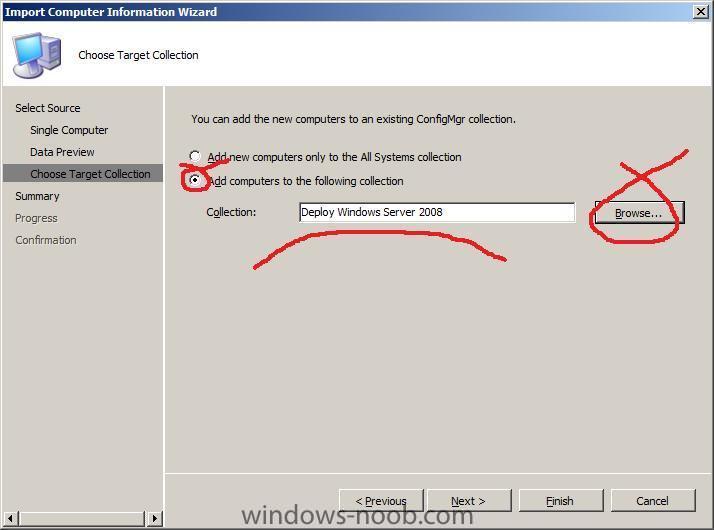
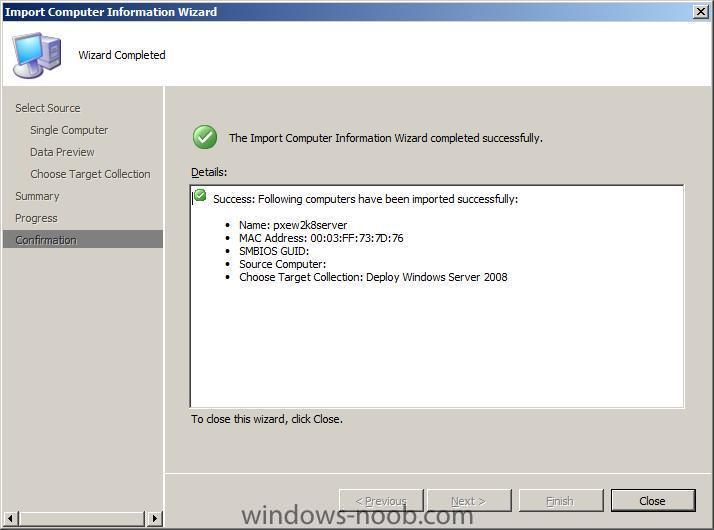
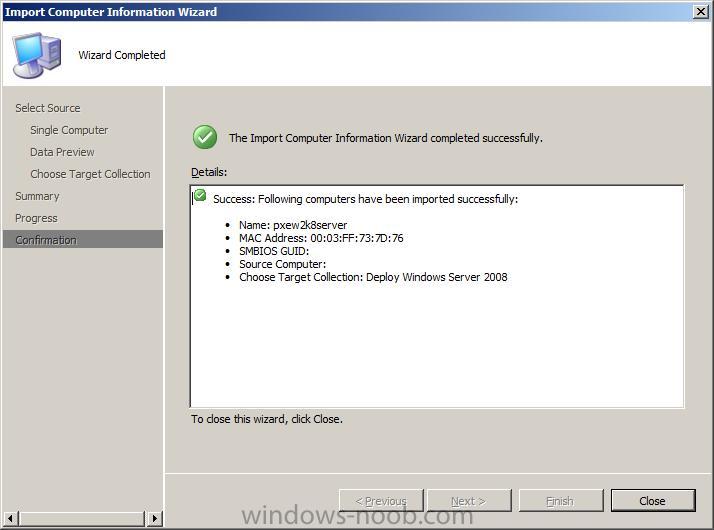
click next until the wizard is complete
-
You need to have completed Part 1 before starting this part.
Create and then Update distribution points for the MDT Server packages
Now that we have created the Task Sequence, packages files and folders necessary to support the Server deployment we need to make sure to create and then update distribution points for each MDT Server package, the Configuration Manager Client Installation package has already been pushed out to the distribution points so we don't need to do that again.
Expand Microsoft MDT Server Settings files and right click on distribution points, click new distribution points and when the wizard starts click next.
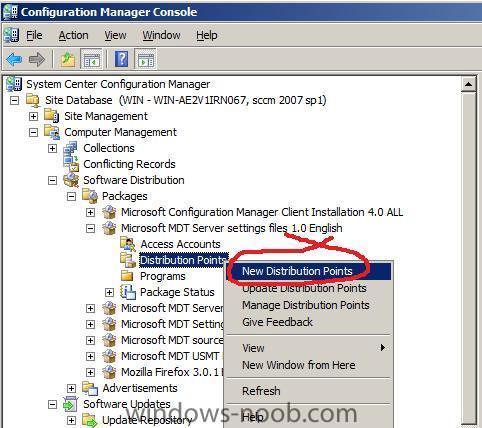
Select the standard distribution point only and click next, then close when done.
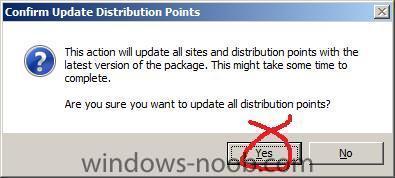
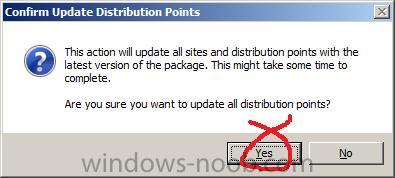
Right click the Distribution point and choose upadte distribution points,

answer yes at the confirmation screen
Repeat the above (create distribution points and then update them) for Microsoft MDT Server Source Files.
-
Please note that this guide is designed to get you Deploying Windows Server 2008 with SCCM in a LAB Environment as quickly as possible. This guide is provided as is, if you find any errors please report them in the forums.
In a production environment please consult Technet for best practise, see below links:
Operating System Deployment:
Operating System Deployment in Configuration Manager
Overview of Operating System Deployment
Configuration:
System Center Configuration Manager 2007
Best Practices:
Configuring Configuration Manager Sites for Best Performance
Checklist for Security Best Practices
Best Practices for Central and Primary Site Hardware and Software Configuration
Best Practices for Operating System Deployment
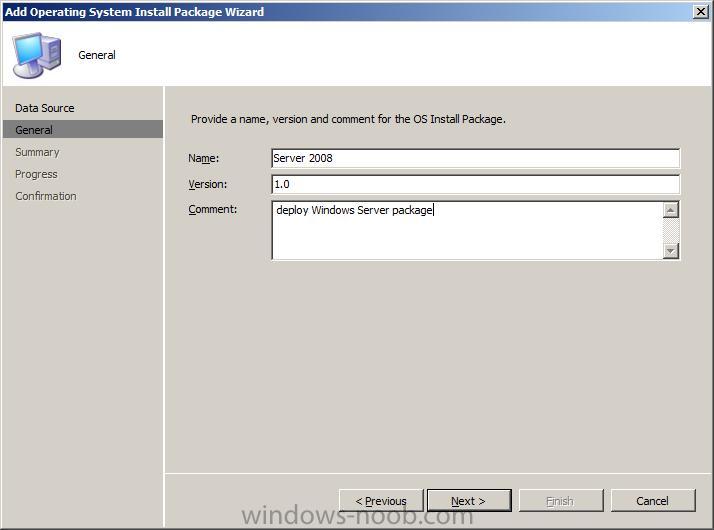
Add new Operating System Install Package
We will make an Operating System install package, this package will contain the files necessary to support the installation of the Windows Server 2008.
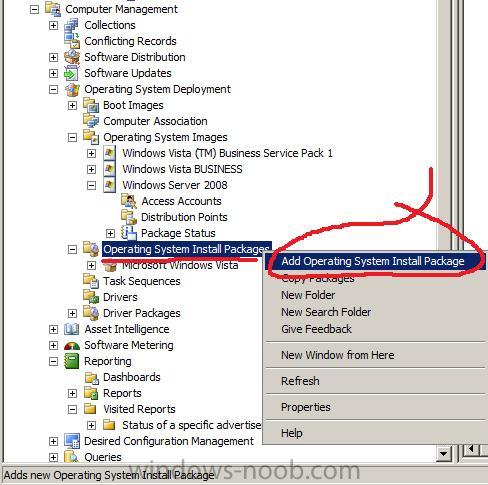
In SCCM ConfigMgr expand the Operating System Deployment node and select Operating System Install Package from the list of available options., right click and choose Add Operating System Install Package
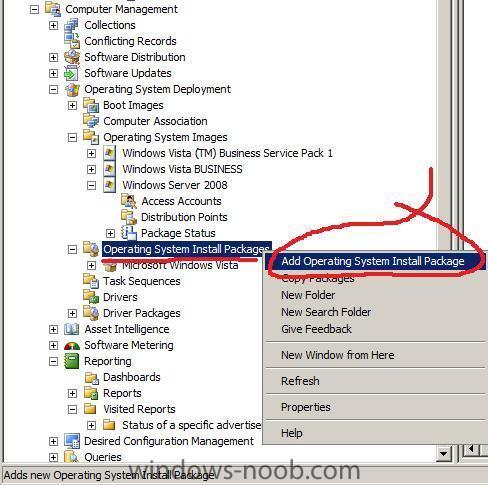
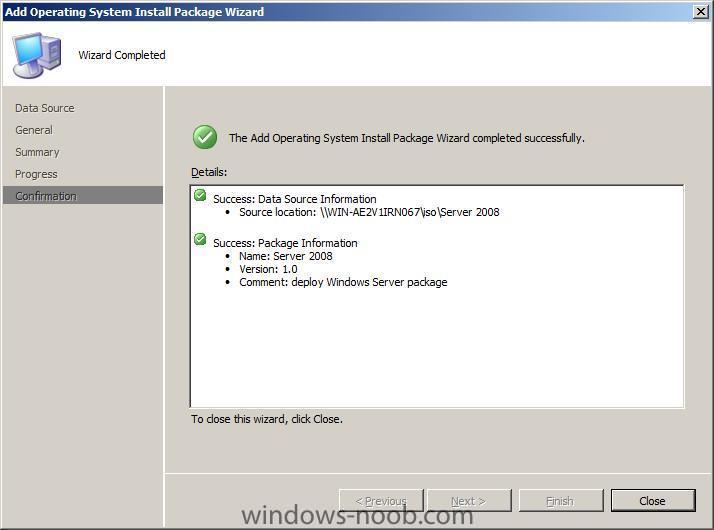
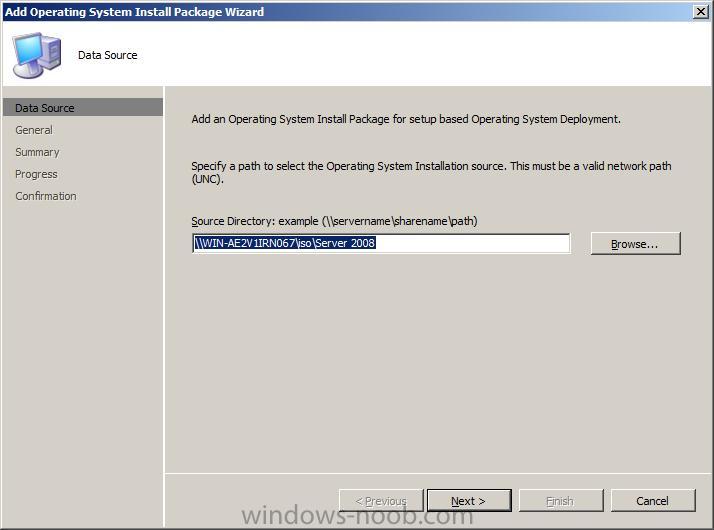
point to the UNC path of the root of our Windows Server 2008 DVD (which we copied to a network share earlier)
eg:
\\WIN-AE2V1IRN067\iso\Server 2008
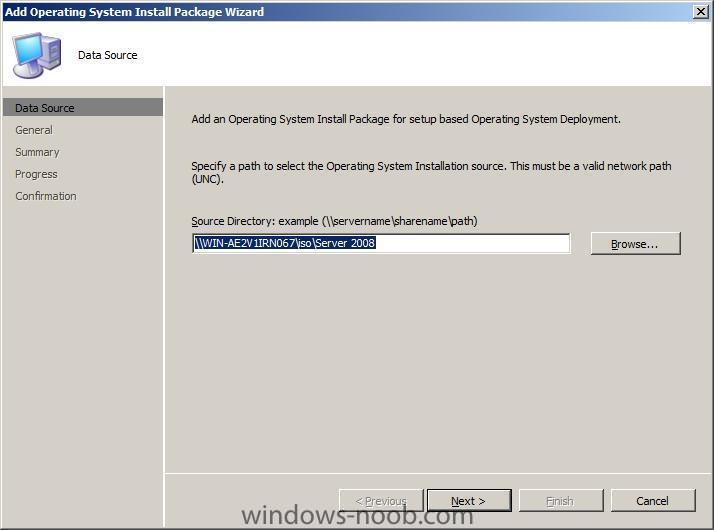
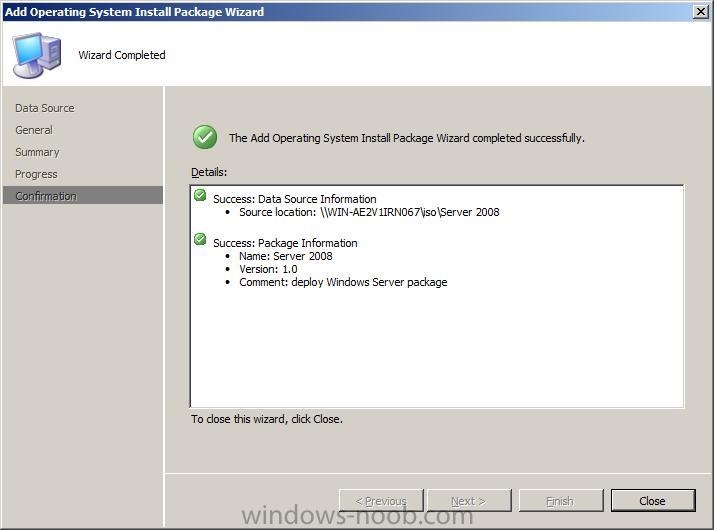
fill in the details
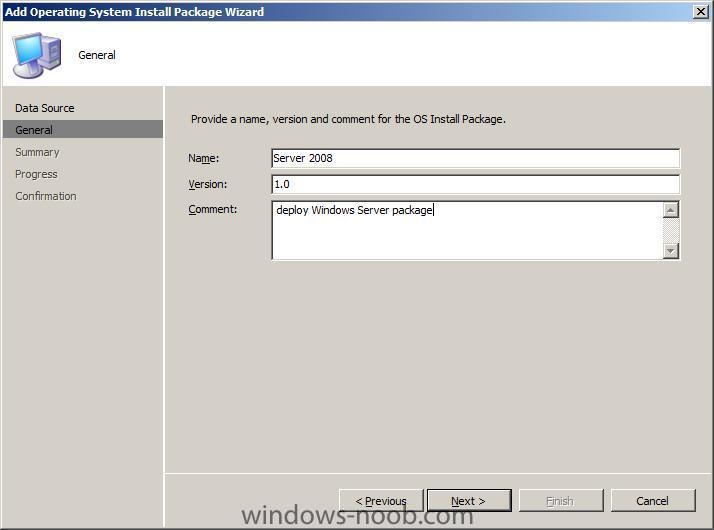
click next and review the summary and then click close
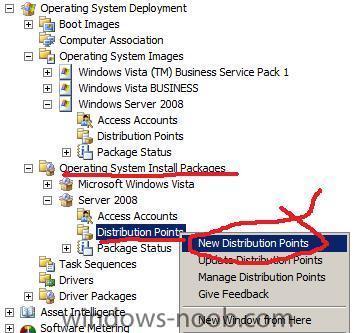
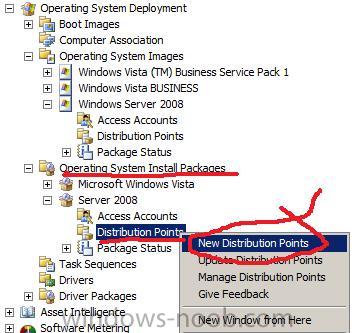
now that we've added this package, we again need to distribute it to our distribution point, however we will add it only to the normal distribution point and not the pxe one.
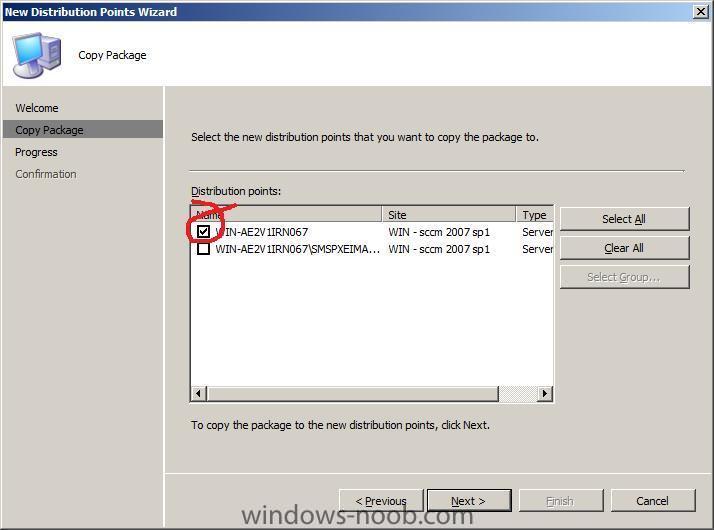
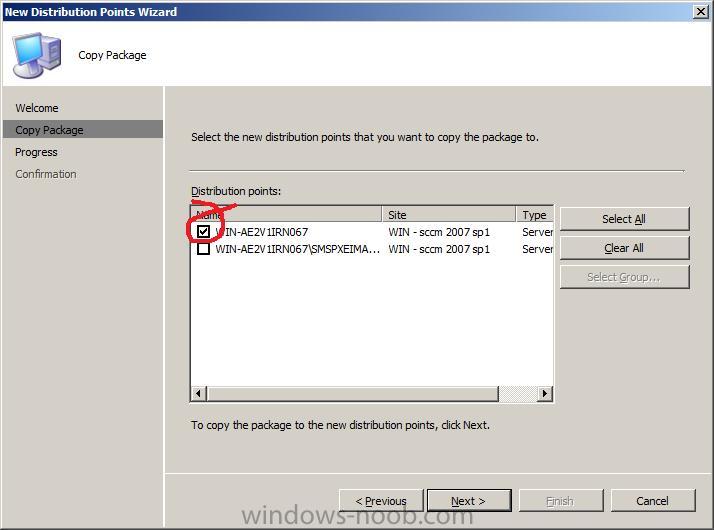
Expand the Operating System Install Package node we've just added, right click on Distribution Points and choose New Distribution Points.
click next when the wizard appears and select the first of the two dist points, then next again
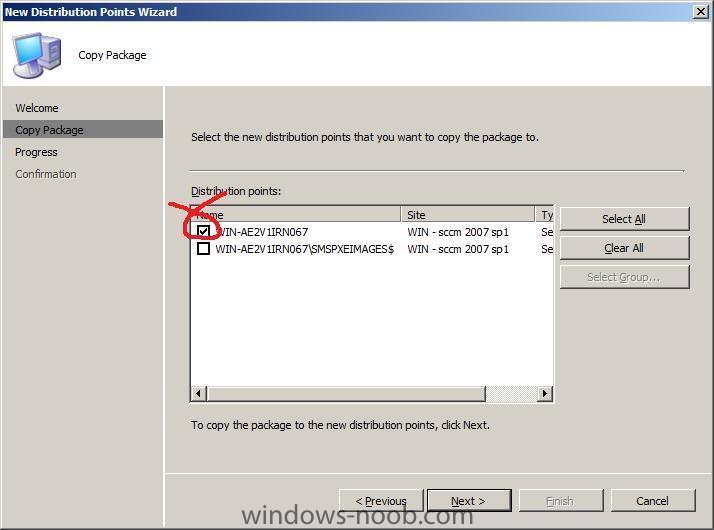
click close when done.
-
The following Step by Step 3 part guide to Deploying Windows Server 2008 using SCCM 2007 covers all the steps necessary to get you up and running in no time at all, screenshots and helpful text show you how to do IT including preconfiguring roles such as Active Directory (ADDS) and DNS.
This 3 part guide is aimed at those of you who can succesfully deploy applications (such as Microsoft Office or Firefox) and Operating Systems (such as Windows Vista SP1 and Windows XP sp3. You'll need to be familiar with Microsoft SMS or SCCM and understand what packages, advertisements and collections mean, the guide will however link you to other guides to bring you every step of the way down the entire path.
* Add new Operating System Install Package
* Import new Task Sequence
* Create and then Update distribution points for the MDT Server packages
* Editing the Task Sequence
* Adding Server Roles and Features
* Create a new collection
* Advertise the Task sequence to a collection
* Add server to collection
* Set the IP address as a variable
* The Deployment
The guide above has taken a lot of time to document and I'm quite sure that you will find it helpful (lots of screenshots of every step..)
good luck,
cheers
anyweb
-
Welcome to Engineering Windows 7
Welcome to our first post on a new blog from Microsoft—the Engineering Windows 7 blog, or E7 for short. E7 is hosted by the two senior engineering managers for the Windows 7 product, Jon DeVaan and Steven Sinofsky. Jon and Steven, along with members of the engineering team will post, comment, and participate in this blog.
Beginning with this post together we are going to start looking forward towards the “Windows 7” project. We know there are tons of questions about the specifics of the project and strong desire to know what’s in store for the next major release of Windows. Believe us, we are just as excited to start talking about the release. Over the past 18 months since Windows Vista’s broad availability, the team has been hard at work creating the next Windows product.
...
We’re excited about this blog. As active bloggers on Microsoft’s intranet we are both looking forward to turning our attention and blogging energies towards the community outside Microsoft. We know the ins and outs of blogging and expect to have fun, provide great information, and also make a few mistakes. We know we’ll misspeak or what we say will be heard differently than we intended. We’re not worried. All we ask is that we have a dialog based on mutual respect and the shared goal of making a great release of Windows 7.
Our intent is to post “regularly”. We’ll watch the comments and we will definitely participate both in comments and potentially in follow-up posts as required. We will make sure that members of the Windows 7 development team represent themselves as such as well. While we want to keep the dialog out in the open, please feel free to use email to steven.sinofsky@microsoft.com should you wish to. In particular, email is a good way to suggest topics we might have a chance to discuss on the blog.
With that, we conclude our welcome post and ask you to stay tuned and join us in this dialog about the engineering of Windows 7.
Steven and Jon
The full article > http://blogs.msdn.com/e7/
-
The Windows 7 craze is barely over, and yet the internet is already buzzing with the next big thing from Microsoft: a project called Midori. The SD Times claims to have seen internal Microsoft documents detailing what Midori actually is, and they say it's the clean-break from Windows many of us have been waiting for. The SD Times article is heavy on the details, and quite technical, but luckily Ars Technica provides a more accessible summary of what Microsoft has in store for Midori.
via osnews.com
-
what steps did you follow to setup DHCP in ipv6 mode ?
if it was a guide then give me a link and i'll check it out
do your vista clients have a firewall enabled ?
-
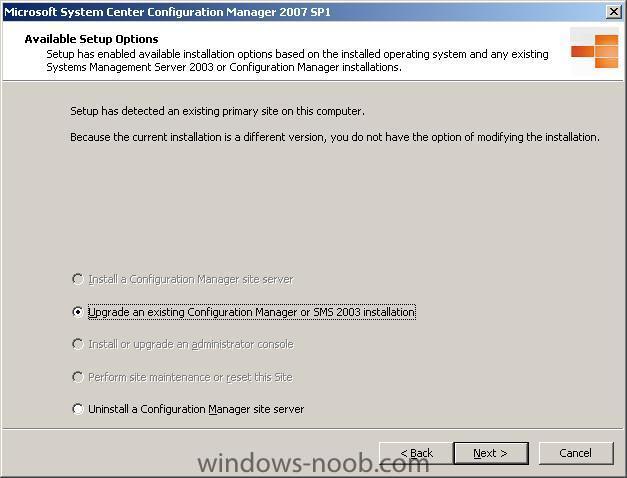
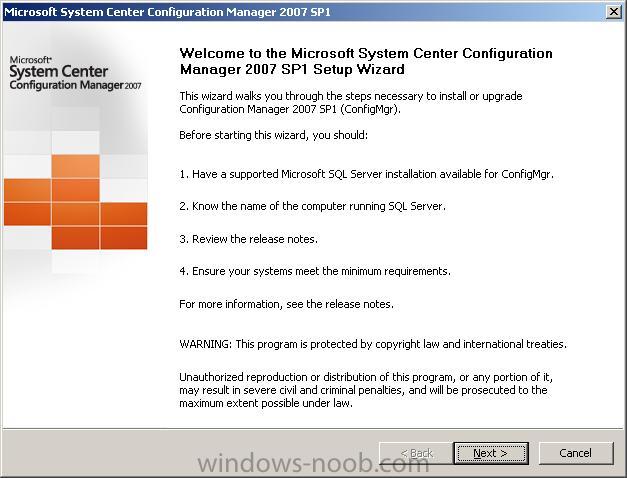
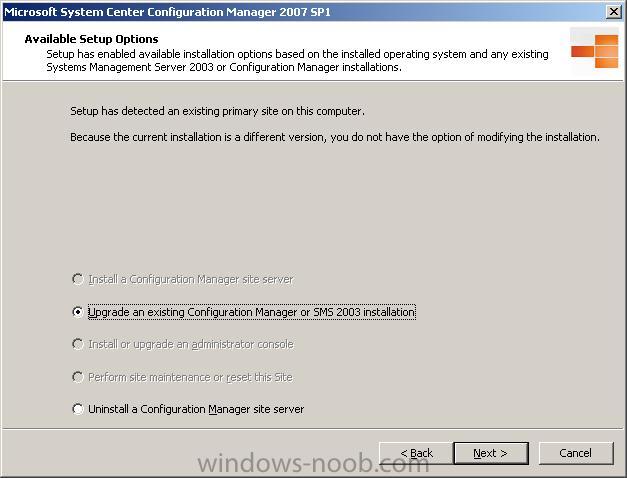
Part 2. Run the SCCM 2007 SP1 installation wizard.
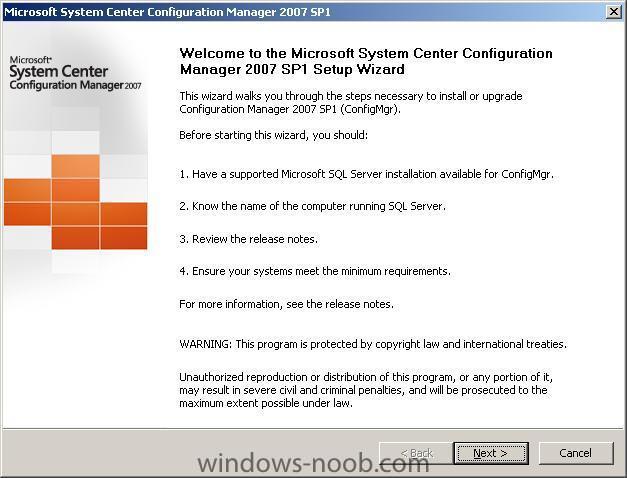
Click Next to continue and choose the default option which is to 'Upgrade...'.
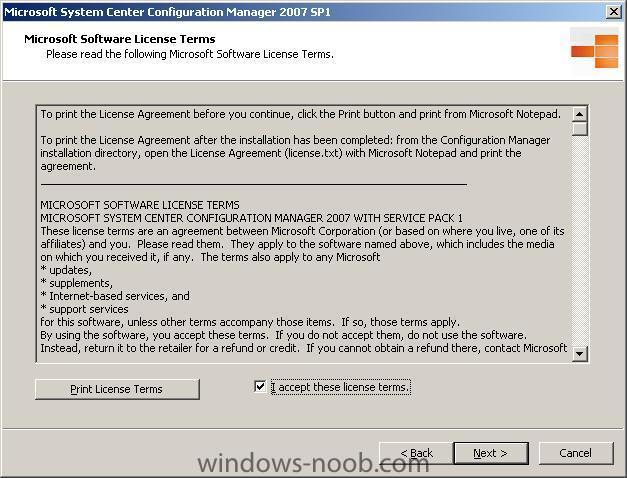
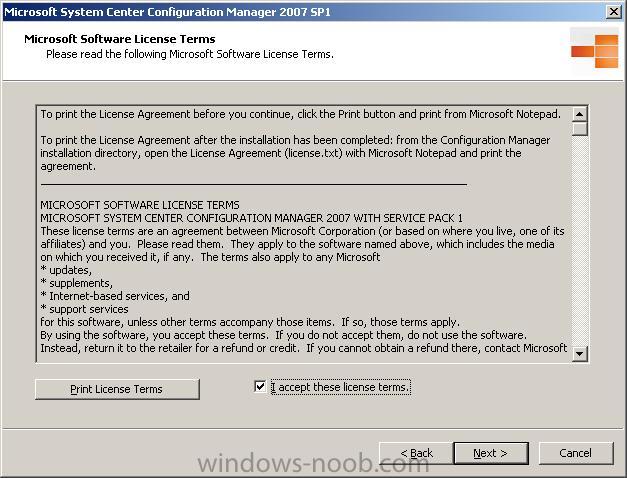
accept the license and click next
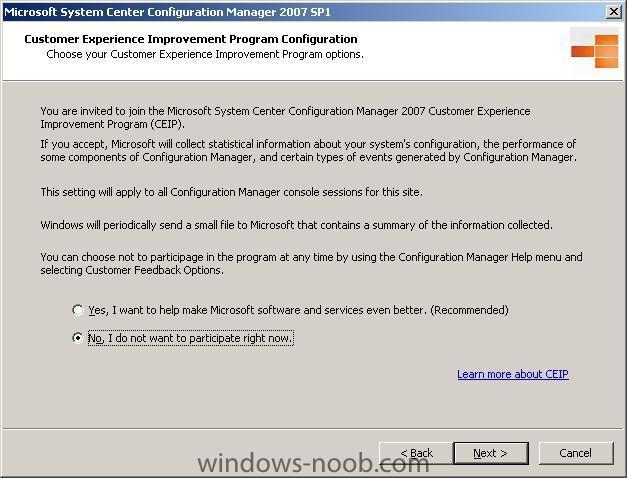
decide if you want to participate in the CEIP
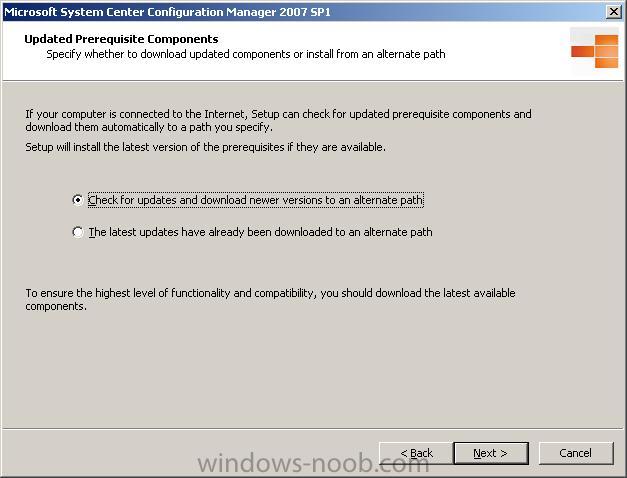
let the wizard check for updates....
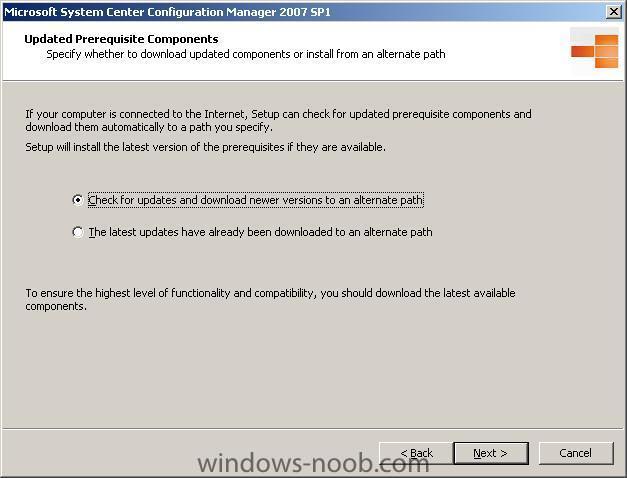
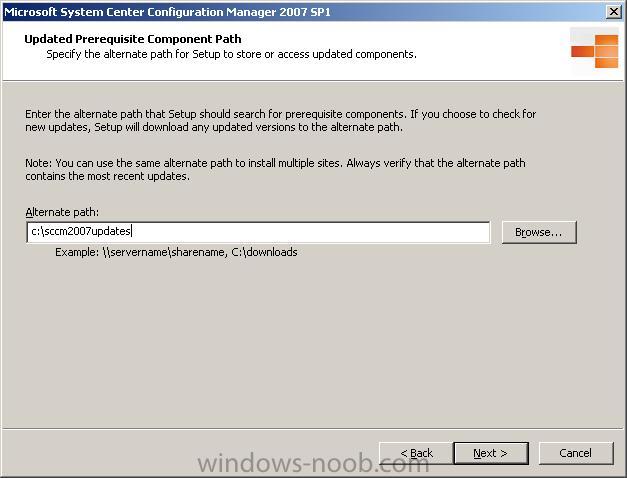
create a new local directory and then give that path to the wizard for the local updates to be stored...

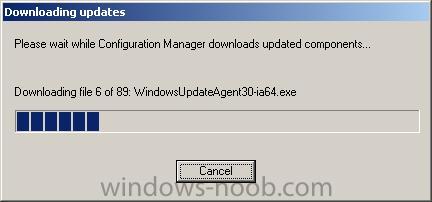
updates are downloaded (89 in my case...)

you'll be told the update download is complete,

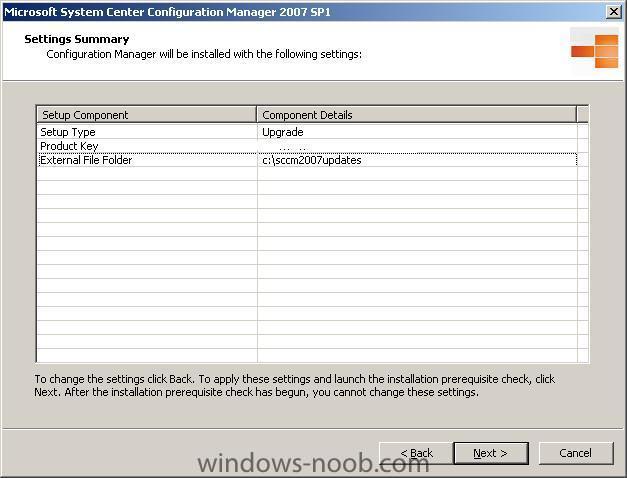
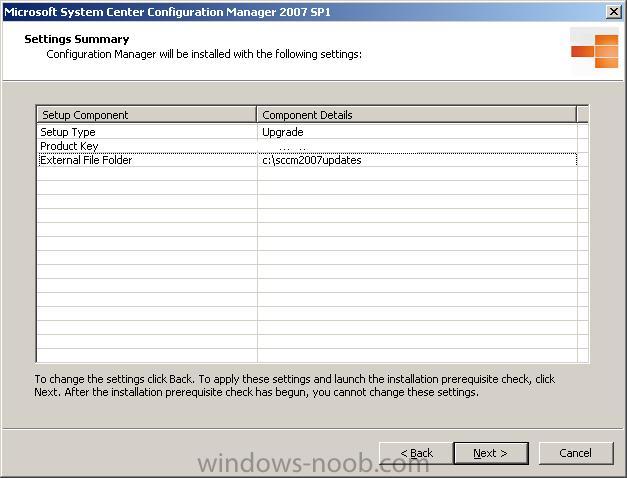
and you'll get an upgrade summary
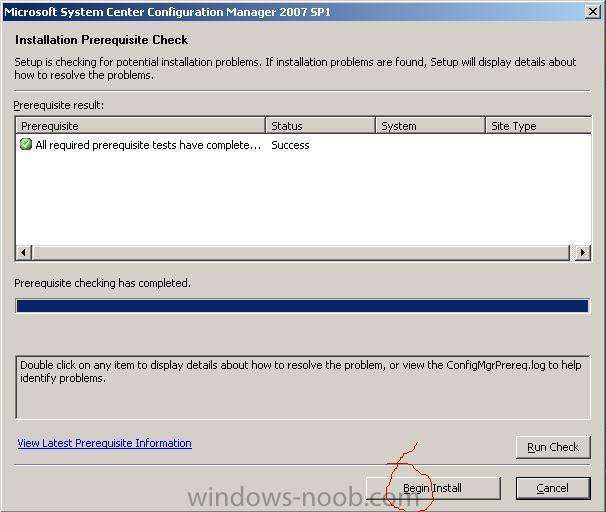
clicking next will run the pre-requisite checker again ! but now you'll see a new button, Begin Install
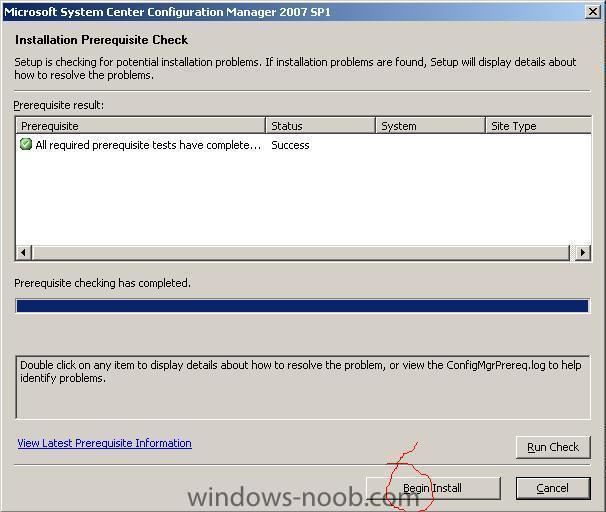
Clicking that will start the actual process (how long winded can it all get ?) and this process can take some time (no kidding...) so go make a cup of coffee... or 10
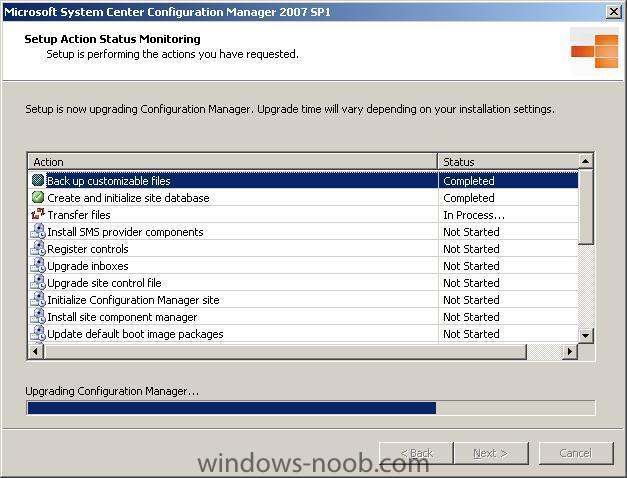
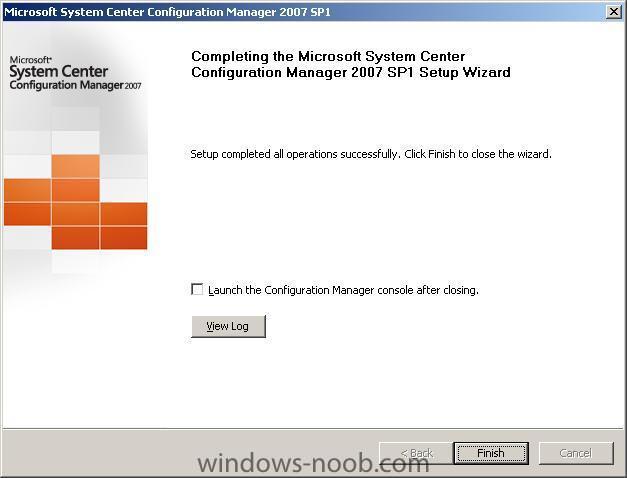
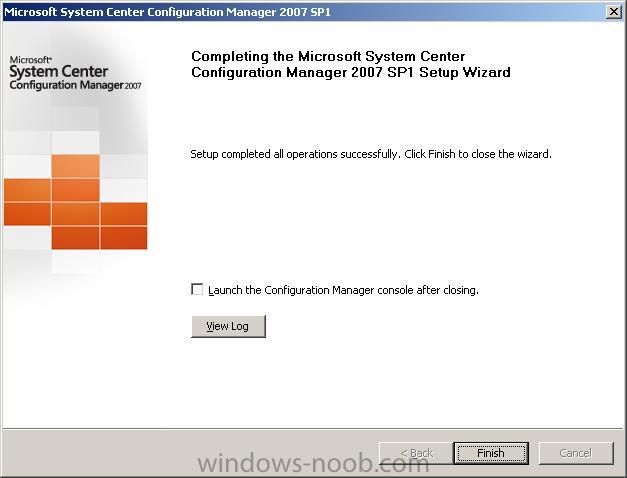
after what seems like an eternity the process will finish and you have to click next...
if you liked this guide and would like to see more Free guides, then please DIGG it.
-
 1
1
-
-
when you try to upgrade SCCM 2007 to SCCM 2007 SP1 by first running the pre-requisite checker, you may see a warning which states:-
MMC updates for Configuration Manager (Software Updates); Warning; This software update addresses several MMC errors that may occur when running the Configuration Manager console. This update should be applied if any of the following occur: Configuration Manager console stops responding when the host computer is low on available memory, context menu errors on console home pages, or inconsistent display after drag-and-drop operations do not succeed. More information about this update is available at: http://go.microsoft.com/fwlink/?LinkId=98349.If you open the file ConfigMgrPrereq.log and look at the errors within, just before the above statement will be a line which reads something like this:-
<08-10-2008 21:04:57> Failed to connect to registry for KB940848 with 203.
If you have already applied the hotfix from Microsoft then you might need this workaround.
The reason for the pre-requisite test getting confused appears to be that it is looking for a string in the REGISTRY but it doesn't match what it's expecting to find
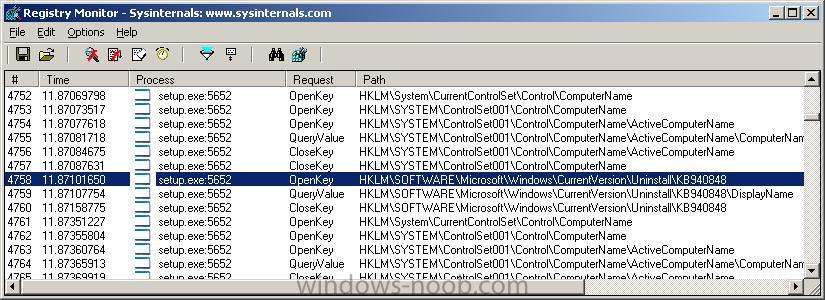
Using RegMon from sysinternals I logged the entire process while doing the pre-requisite checks and sure enough it fails to find some keys in the registry even though we have installed the correct hotfix (KB940848), the checker looks for the following key(s)
HKLM\SOFTWARE\Microsoft\Windows\CurrentVersion\Uninstall\KB940848
HKLM\SOFTWARE\Microsoft\Windows\CurrentVersion\Uninstall\KB940848\DisplayName
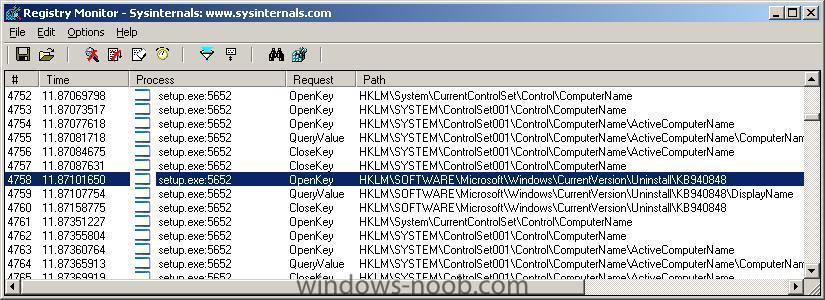
However they are not found because when we installed the hotfix it placed them at
HKLM\SOFTWARE\Microsoft\Windows\CurrentVersion\Uninstall\KB940848-v3
as a workaround I created a new regedit file with the exact same info as the v3 one (I exported that key in regedit).
Here's the file, rename by removing .txt and run to add this key to the registry.
I then did a search and replace, and replaced -v3 with blank. Running the resulting reg file and then starting the pre-req checker again now finally removes the MMC warning from the list !
cheers
anyweb
-
1
-
-
This guide was done on a Windows 2003 Server (sp2) running SCCM 2007 which in turn was upgraded from SMS 2003.
As a result, your results may vary, if they do, post them here.
Part 1. Run the Pre-requisite checks and fix the warnings/errors reported.
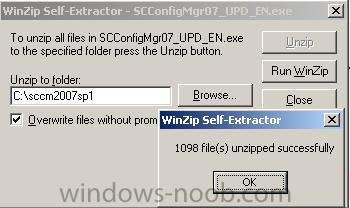
First of all download the Service Pack 1 update and then run the EXE file which will unzip it to a folder of your choice (I chose to call the folder sccm2007sp1)
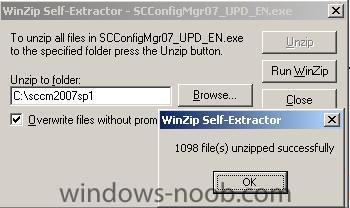
Once unzipped you can burn that to a DVD or run the splash.hta file contained in C:\sccm2007sp1\SCConfigMgr07_UPD_EN
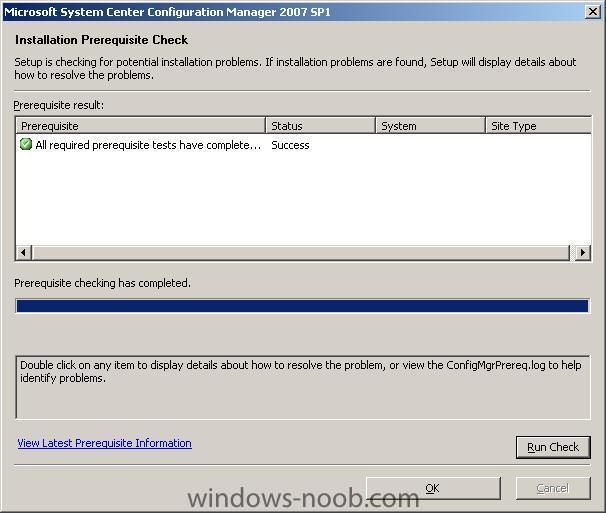
Once it starts you can run the prerequisite checker to see what you need to fix before continuing...
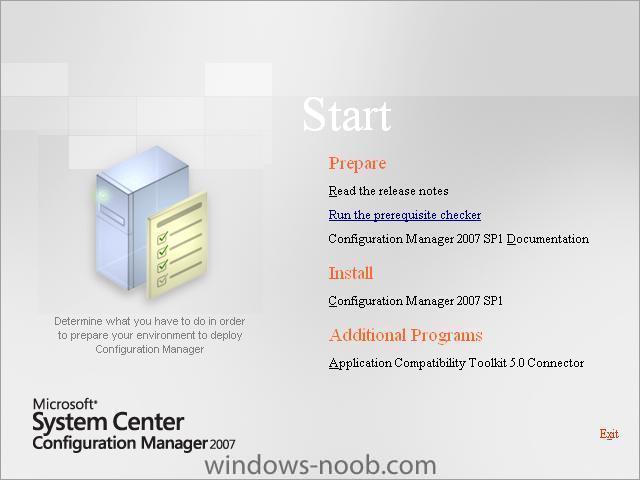
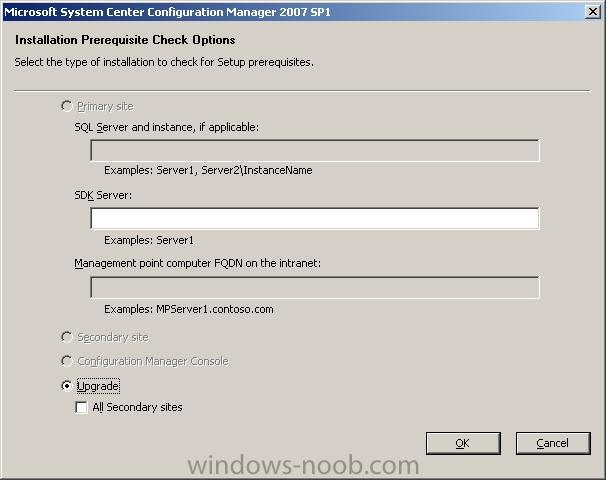
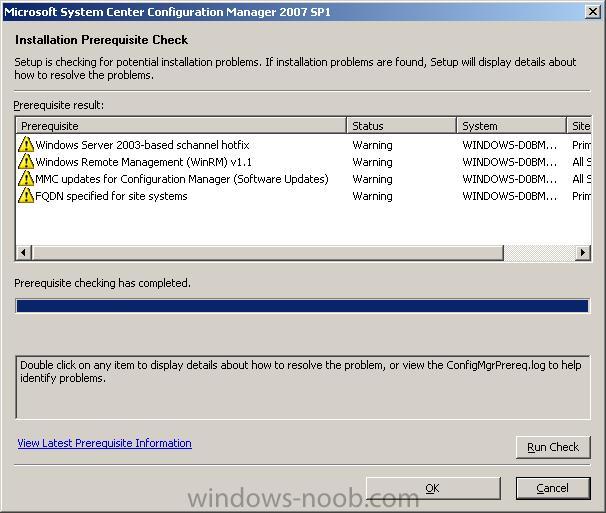
you will be presented with a prerequisite check
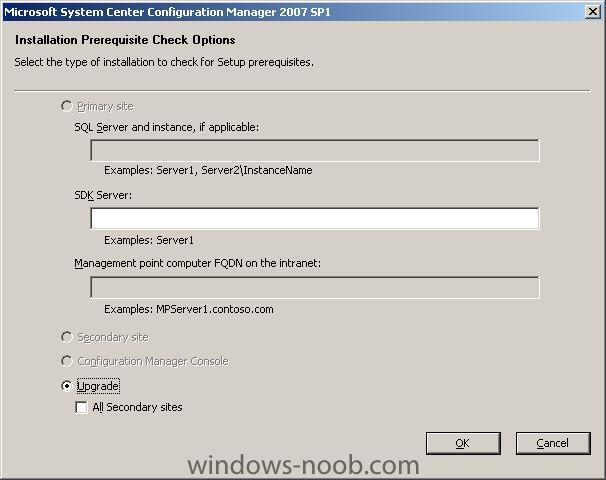
I left everything as it was and clicked on OK
once done you'll get a list of errors that need to be resolved such as below, double click on any one to see what the recommended action is and then action each one
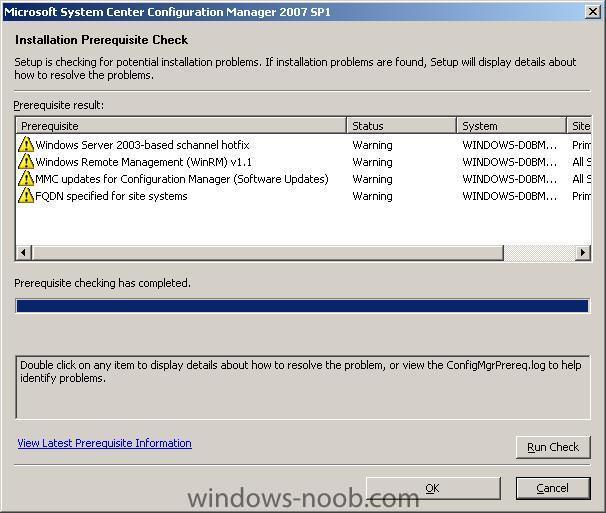
My first error told me that I needed to do as follows:
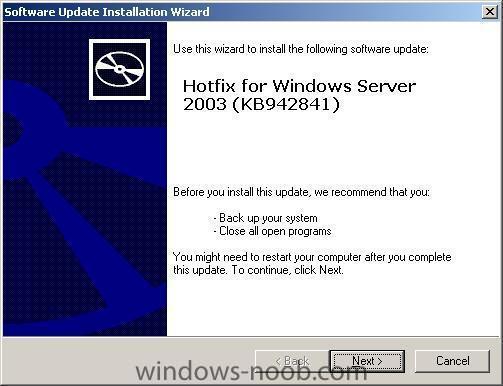
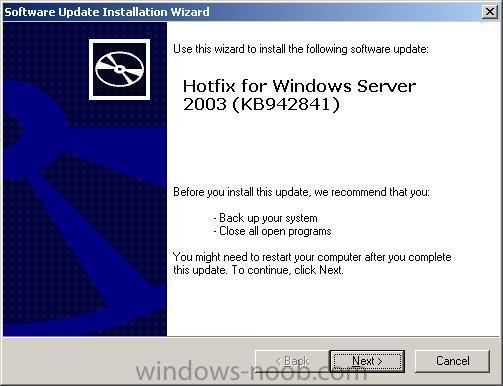
Configuration Manager out of band service point requires Windows Server 2003-based schannel hotfix. The schannel hotfix is available for download at: http://support.microsoft.com/kb/942841/en-us.as this was a hotfix i was pleasantly surprised to see that Microsoft now allow you to download the hotfix semi-directly, you have to enter your email address twice and input a number displayed on screen, you then get an email with the hotfix download details...
So I downloaded the first one and extracted it with the password supplied in the email.
While the hotfix installed I clicked OK on the prerequisite checker for SCCM 2007 sp1.
Once the hotfix was done installing, it wanted a reboot, so I rebooted. And then I ran the SCCM 2007 SP1 prerequisite checker again by starting at the beginning and running splash.hta...
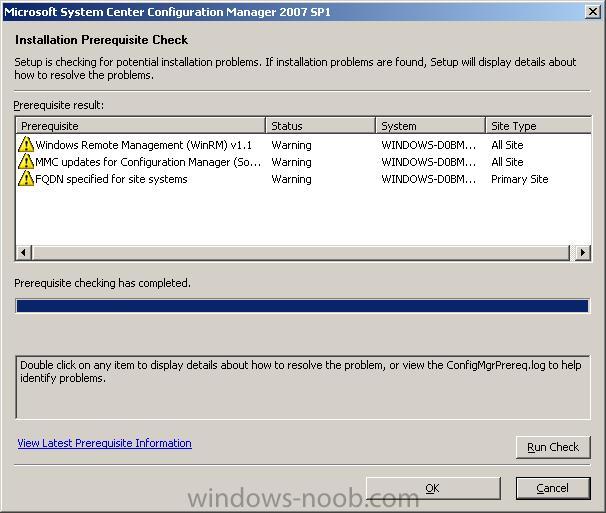
This time however I was down to only 3 warnings

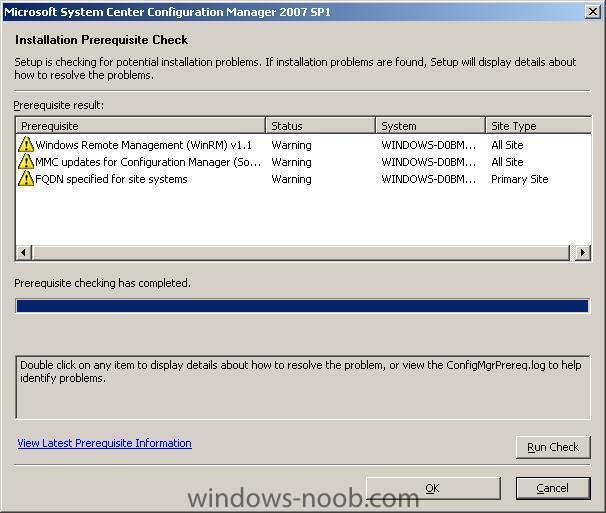
Next up I had to do the following:-
WinRM v1.1 is required to run the out of band console and must be installed before primary site or Configuration Manager console installations or upgrades. WinRM 1.1 is available for download at: http://support.microsoft.com/kb/KB936059.That brought up a page with 3 download links (xp/windows server and so on).... confusing, inconsistent ? yep.. but I got the following file
WindowsServer2003-KB936059-x86-ENU.exe
I must have been lucky because when I ran the SCCM sp1 prerequisite checker again, I was only shown 2 warnings (below)
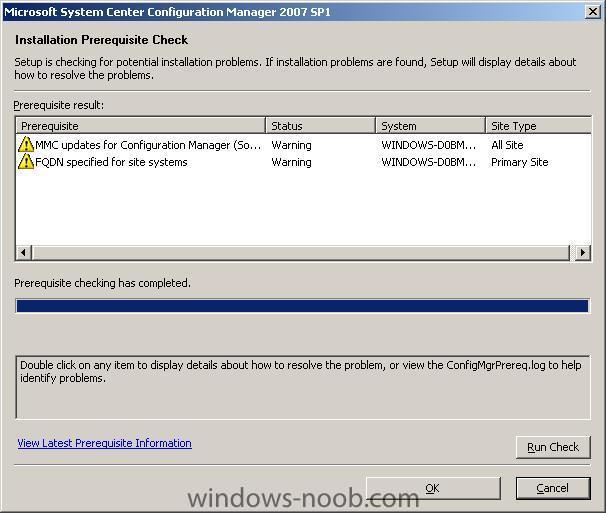
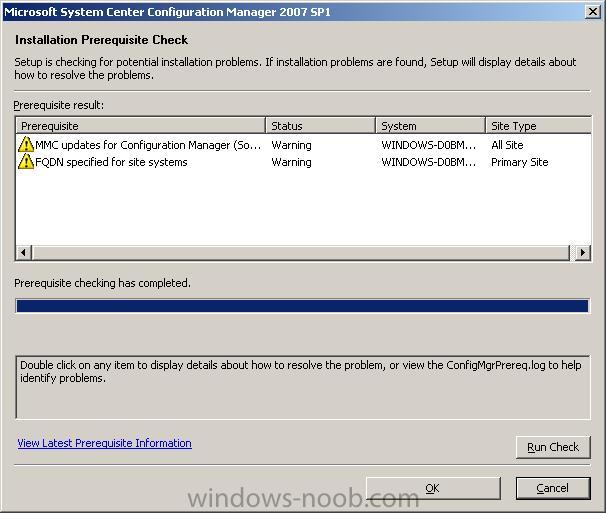
Next up was my MMC update
This software update addresses several MMC errors that may occur when running the Configuration Manager console. This update should be applied if any of the following occur: Configuration Manager console stops responding when the host computer is low on available memory, context menu errors on console home pages, or inconsistent display after drag-and-drop operations do not succeed. More information about this update is available at: http://go.microsoft.com/fwlink/?LinkId=98349.Once installed, I ran the SCCM 2007 SP1 pre requisite checker again, it told me i still needed this fix, so I decided to reboot (the hotfix didn't request it), the reboot didn't help it still listed it as a warning...
so I viewed the ConfigMgrPrereq.log file (stored in the root of C:\) and it had a line that read
Failed to connect to registry for KB940848 with 203 that lead me to this post
Using regmon from Sysinternals I found the missing key and made a reg file of it, if you want it make sure you've applied the correct hotfix first then:-
As a workaround I've produced the following hack.
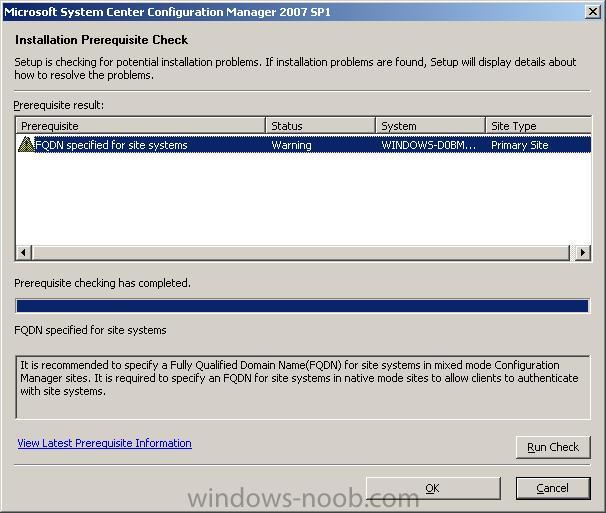
FQDN Warning.
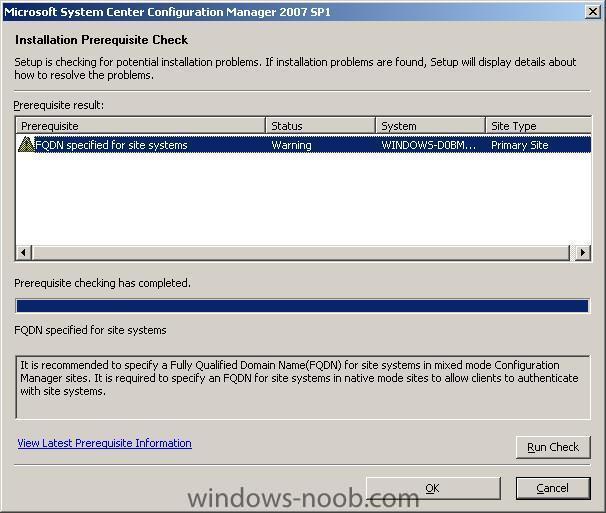 It is recommended to specify a Fully Qualified Domain Name(FQDN) for site systems in mixed mode Configuration Manager sites. It is required to specify an FQDN for site systems in native mode sites to allow clients to authenticate with site systems.
As my SCCM 2007 site is mixed mode I chose to resolve this warning by doing as follows:-
To fix the FQDN error try the following:
1. Start SCCM Console
2. Click Site Database
3. Click Site Management
4. Click on Site
5. Click Site Settings
6. Go to Site Systems
7. Click on SCCM Server (where State Migration Point is located)
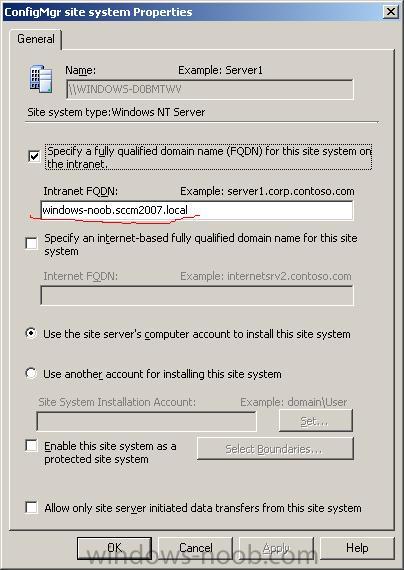
8. Right click on “Configmgr Site System”

9. Click on Properties
10. In the "Specify a fully qualified domain name (FQDN) for this site system on the intranet” change the Intranet FQDN to something like my example here
it was WINDOWS-DOBMTWV
I changed it to windows-noob.sccm2007.local and clicked apply,
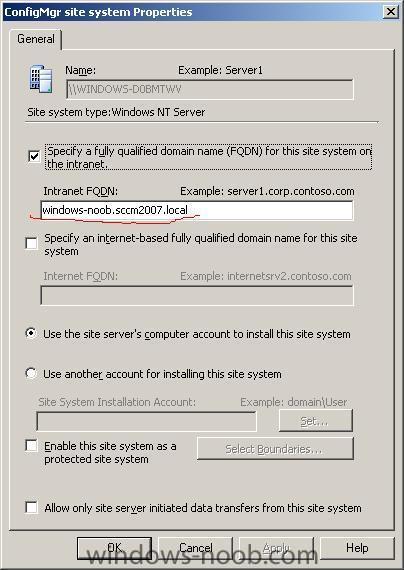
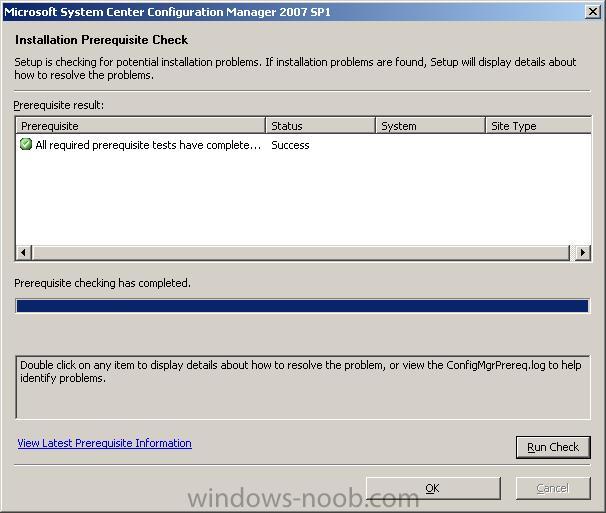
after waiting a few minutes for SCCM 2007 to udpate itself I ran the pre-req checker again and finally, success !
-
Microsoft Deployment Toolkit (MDT) 2008 Update 1 is now available from here
What’s New in MDT 2008 Update 1?
MDT 2008 Update 1 includes new capability for OEM preload scenarios, a revised System Center Operations Manager Management Pack, bug fixes, and revised documentation. This updated version provides guidance in the .chm help file format only. If you need the guidance in .doc file format, you can download it here.
MDT 2008 Update 1 enables deployment of the following Microsoft products:
* Windows Vista Business, Enterprise, and Ultimate (32 and 64 bit) RTM and SP1
* Office Professional, Professional Plus, Enterprise, and Ultimate 2007
* Windows Server 2008
* Windows Server 2003 R2 (32 and 64 bit)
* Windows XP Professional with Service Pack 2 and Service Pack 3 (32 and 64 bit) or Windows XP Tablet PC Edition
Choosing the Right Version
Microsoft Deployment Toolkit 2008 Update 1 is offered in two versions to support Solution Accelerator component installation on x64 or x86 hosts. Select the version that corresponds with your host hardware type. Both versions of Microsoft Deployment Toolkit support deployment of x86 and x64 Windows operating systems.
The Quick Start and Getting Started guides for MDT 2008 Update 1 are available as a separate download on this page for those who want to quickly evaluate MDT by viewing condensed, step-by-step instructions for using it to install Windows operating systems.
Send questions or feedback to us directly at SATfdbk@microsoft.com
I cannot download MDT 2008 !!!
Can't find the download any more ? don't worry, it's still available right here
-
Configuration Manager 2007 SP1 now offers full support for management with Windows Vista SP1 and Windows Server 2008, integrates customer feedback, feature Integration with Intel vPro Technology and enhances Asset Intelligent features.
the download (1gb) is available here
System Requirements
System Center Configuration Manager 2007 installed
Please see the Configuration Manager 2007 SP1 System Requirement page for detailed requirements.
-
i'm sure we could get around this problem without the need to use a cd, have you tried diskpart at all ?


how to install WSUS 3.0 sp1
in WSUS
Posted
The guide requires you to download the WSUS package from here and you must also download the Microsoft Report viewer redistributable.
This guide also assumes that you have setup and installed IIS in Windows 2008 and that you have configured and installed SQL 2008 or SQL 2005.
Please note: Since this guide was originally written, WSUS SP2 has been added as a role within Server 2008 R2 so if you are using Server 2008 R2 you can install WSUS Sp2 by adding the role.
Overview
WSUS 3.0 SP1 delivers important customer-requested management, stability, and performance improvements. Some of the features and improvements include:
* Support for Windows Server 2008.
* Support for SQL Server 2008.
* Enhanced bulk approval capability, preserving existing approvals.
* Support for separate proxy servers and ports for SSL and non-SSL traffic.
* Office Excel report export.
WSUS 3.0 SP1 can be installed alone, or as an upgrade of either WSUS 3.0 RTM or WSUS 2.0 SP1.
This package installs both the WSUS 3.0 SP1 Server and WSUS 3.0 SP1 Administration Console components, for all Windows Server 2003 SP1 supported languages. Additionally, the WSUS 3.0 SP1 client is included in all supported client platform languages. You must install the server components on a computer running Windows Server 2008 or Windows Server 2003 SP1 or later. You may install the Administration Console on a remote computer running Windows Server 2008, Windows Vista, Windows Server 2003 SP1, or Windows XP SP2.
WSUS 3.0 SP1 Server Installation on Windows Small Business Server 2003
If you are installing the WSUS 3.0 SP1 product on Windows Small Business Server 2003, follow the instructions in Installing Windows Server Update Services 3.0 on Windows Small Business Server 2003.
There are 4 common methods of deploying WSUS:
* Single WSUS server
* Multiple independant WSUS servers
* Multiple Internally synchronised WSUS servers
* Disconnected WSUS servers
A Single Wsus server would be suitable for a small or simple network. It will synchronise with Microsoft update and then distribute its updates to your servers/clients.
Multiple independant WSUS servers could be setup to synchronise with microsoft Update and configured to for example, update only one specific type of client, eg: XP clients or Vista, then another WSUS server in your organisation could be setup just to update your Server 2008 servers.
Multiple Internally synchronised WSUS servers is where you have multiple WSUS servers in your organisation but only one connects to Microsoft Update, this is called the Upstream WSUS server and all other WSUS servers (called the Downstream WSUS servers) synchronise via this WSUS server. The synchronisation methods can be either Autonomous or Replica.
Disconnected WSUS servers are not connected to the internet at all. You would typically utilise this setup in an organisation that doesn't have or allow internet access. The Microsoft Updates would have to be pulled down from another internet conencted WSUS server and then burned to cd or dvd and copied to the disconnected WSUS server.
Installation
Install the Report Viewer first
Double-click on the Report viewer exe, choose next to continue at the welcome screen
accept the license terms
click Install to install
once done click finish.
Install WSUS
Double click on the WSUS exe, choose next at the welcome screen
choose the Full Server installation
accept the license agreement
Select your update source (local or on windowsupdate)
now if you havn't installed SQL 2008 yet, then please do so as the next screen will allow us to pick between an internal windows database (first option) or to connect to our MSSQL database (default) second option.
Choose use existing database as below in the screenshot
it will hopefully successfully connect to your database, click next to continue
when prompted what IIS website to use, choose the default option (use the existing IIS website)
you'll see a summary click next to continue
that's it, all done, click Finish.
Note: if you are going to use SCCM to manage patch management, then do NOT run the WSUS configuration wizard below
The WSUS configuration wizard automatically starts after the Setup wizard completes. Because Configuration Manager 2007 SP1 manages the WSUS settings, you should exit the configuration wizard after it opens.