Search the Community
Showing results for tags 'virtualization'.
Found 3 results
-
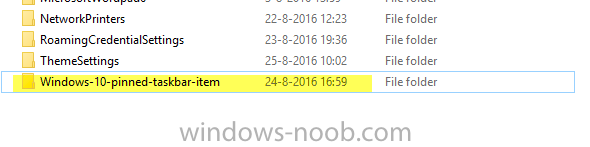
Hello, I hope this is the right forum group, because I don't see a special group for UE-V. At this moment I'm working to deploy Windows 10 1511.2 (1604) with SCCM, MBAM and UE-V. Everything is working fine, except one thing. The taskbar icons are not in the default UE-V templates, so I created one XML template specially for the Windows 10 Taskbar pinned taskbar icons. See below the code of the XML file. <?xml version="1.0"?><SettingsLocationTemplate xmlns="http://schemas.microsoft.com/UserExperienceVirtualization/2013A/SettingsLocationTemplate"> <Name>Windows 10 Pinned Taskbar Item</Name> <ID>Windows-10-pinned-taskbar-item</ID> <Version>1</Version> <Author> <Name>Jeroen Burgerhout</Name> </Author> <Processes> <ShellProcess /> </Processes> <Settings> <File> <Root> <EnvironmentVariable>APPDATA</EnvironmentVariable> </Root> <Path Recursive="true">Microsoft\Internet Explorer\Quick Launch\User Pinned\Taskbar</Path> </File> </Settings></SettingsLocationTemplate> The export/backup is working fine, see screenshot, but when an user logs in again with his mandatory profile, then the taskbar is back to default. With other words, the UE-V does not import the package. Can someone help me to solve this problem and give me the right solution? Thanks in advance. Jeroen
-
 Everyone, I have an SCCM Server that is currently running in VMware, but we're moving all our environment over to Hyper-V. We have moved everything over by using the Microsoft Virtual Machine Converter Tool, and so far have had 0 issues. It scares me to mess with my SCCM server, but we're going to have to get it over to Hyper-V one way or another. My question to you all, do we convert and move or back-up and rebuild? My environment is very basic. Single site, and one server (the one being moved) that houses all roles (site server/database/reporting/management point/etc). This is a school district, and we have 4 remote campuses throughout our town, and we have distribution points setup. That's the extent of our SCCM Infrastructure. I have a feeling the best route would be to back-up and rebuild the server from scratch. If that's the case, can someone point me in the right direction for best practices for that process? I'm open to any suggestion(s) for this. I appreciate any and all input, thank you!
 -
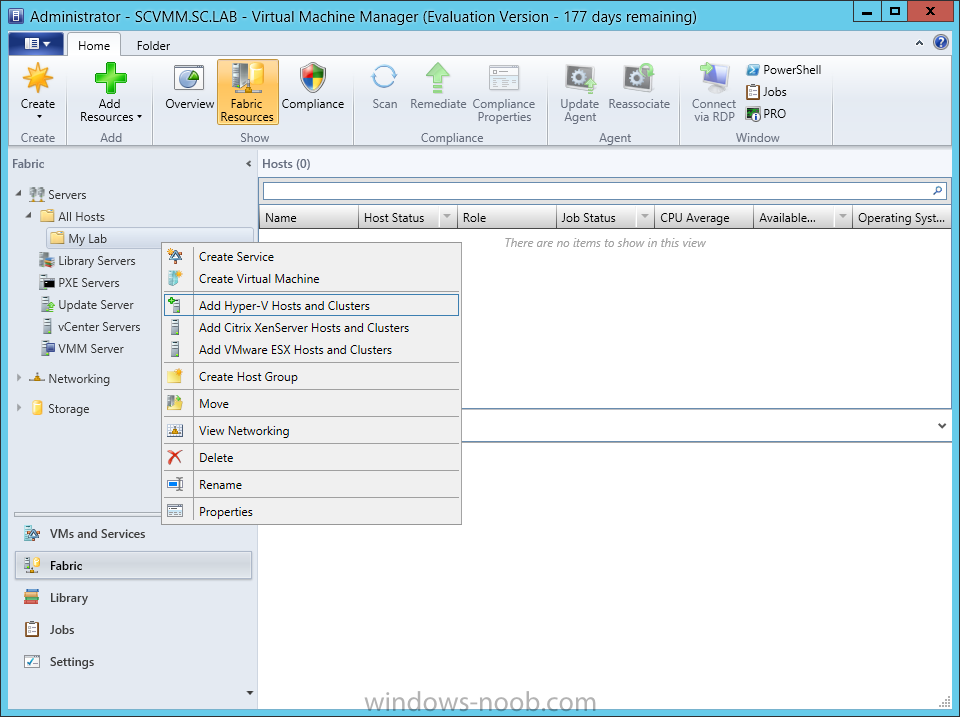
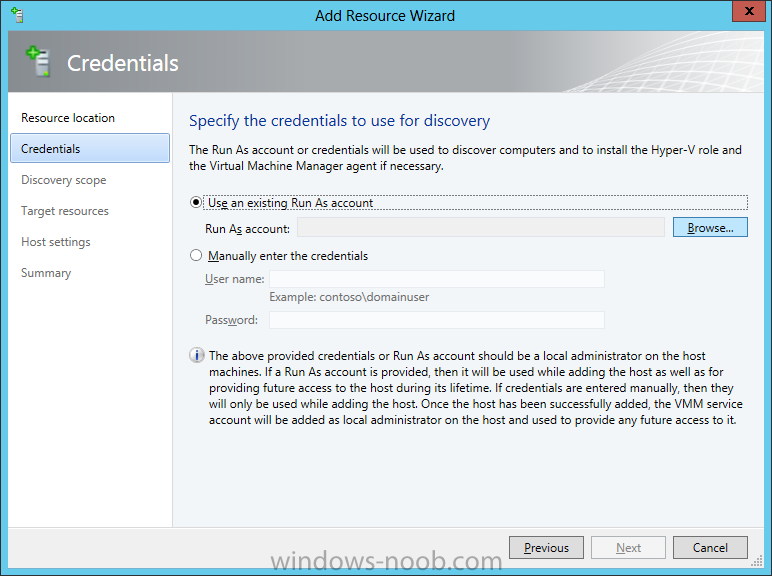
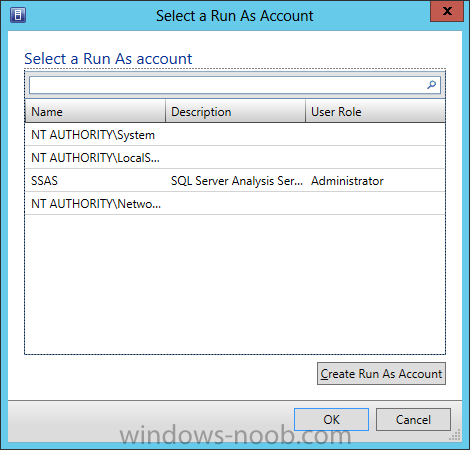
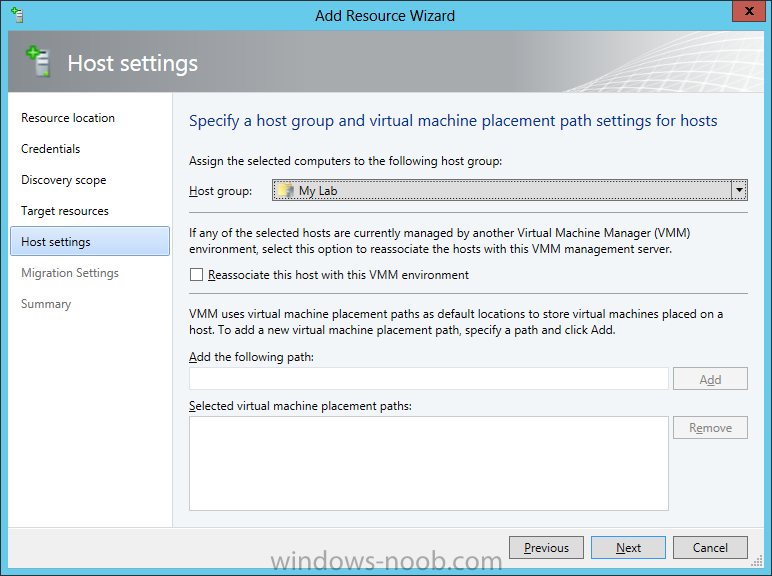
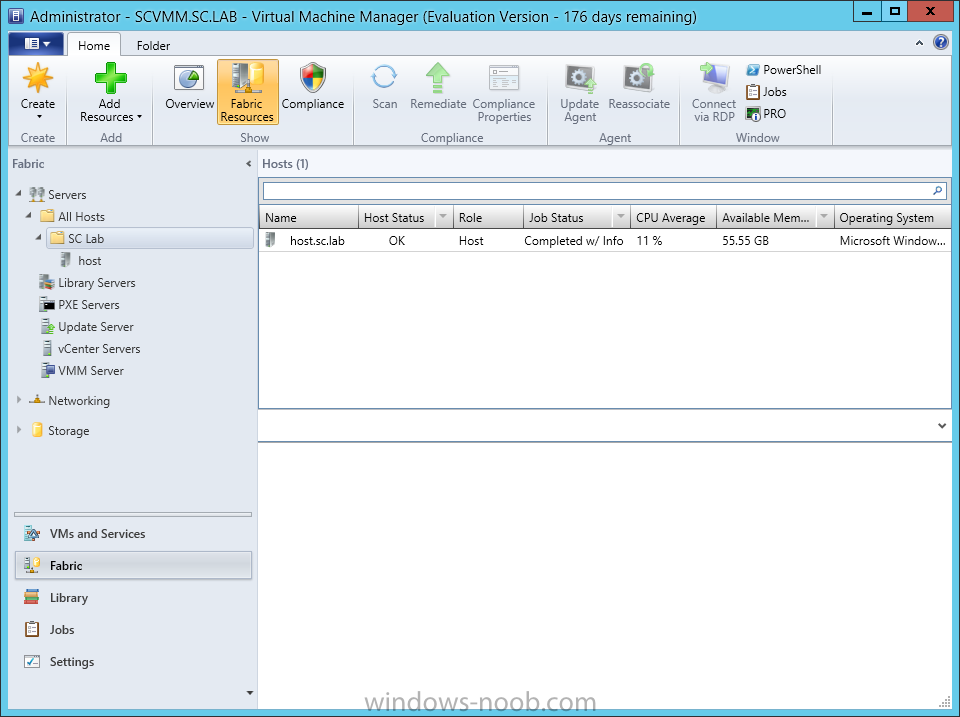
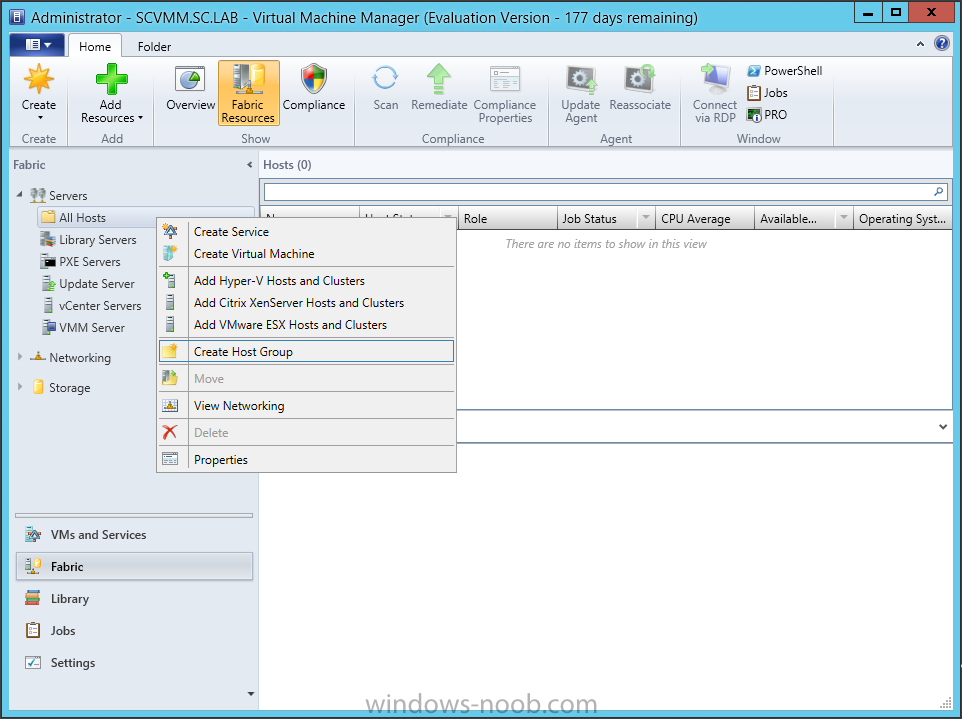
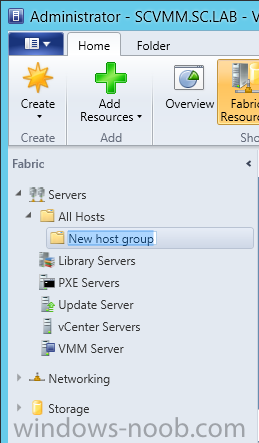
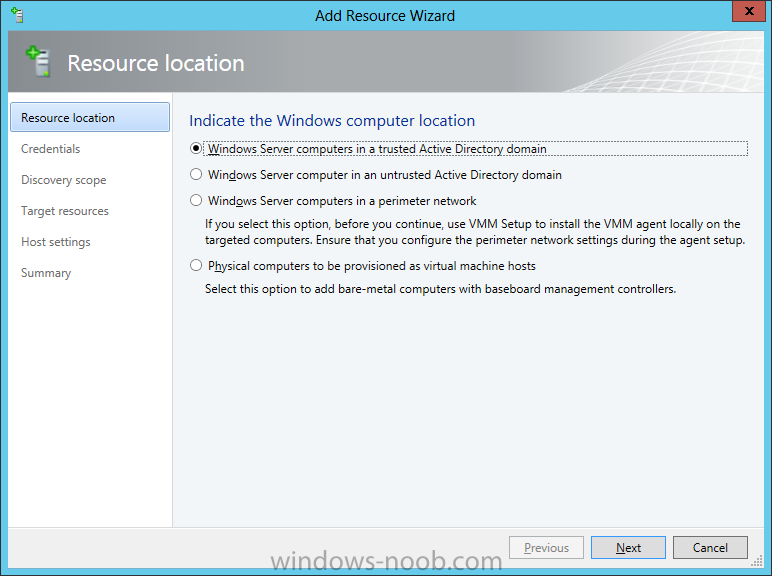
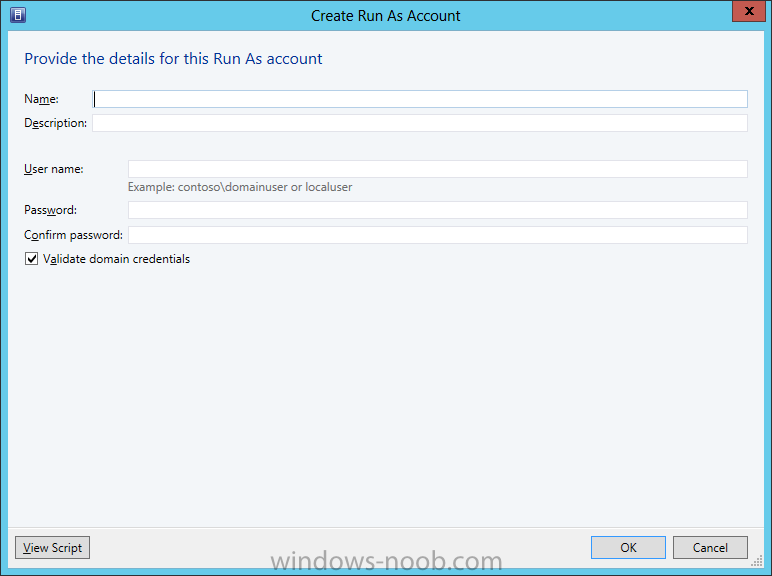
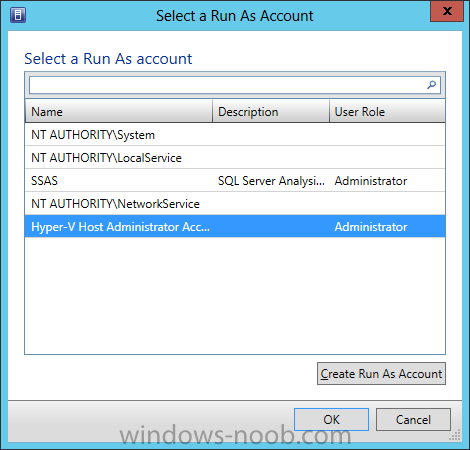
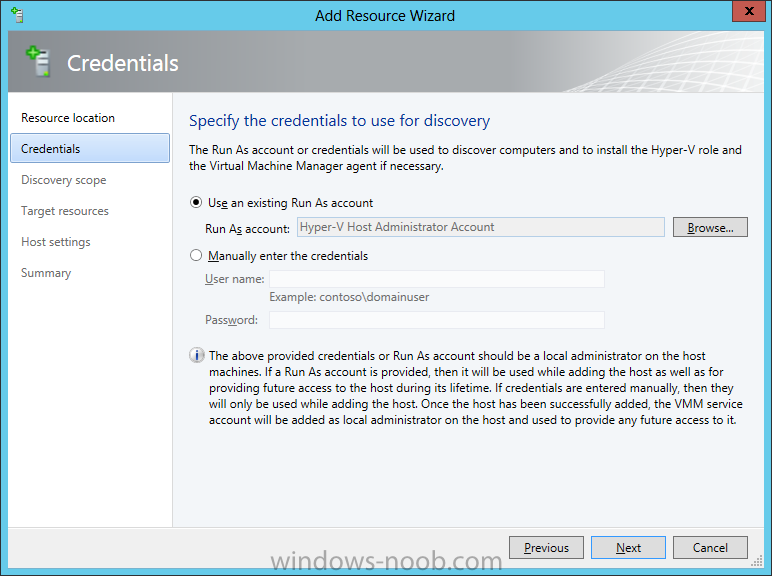
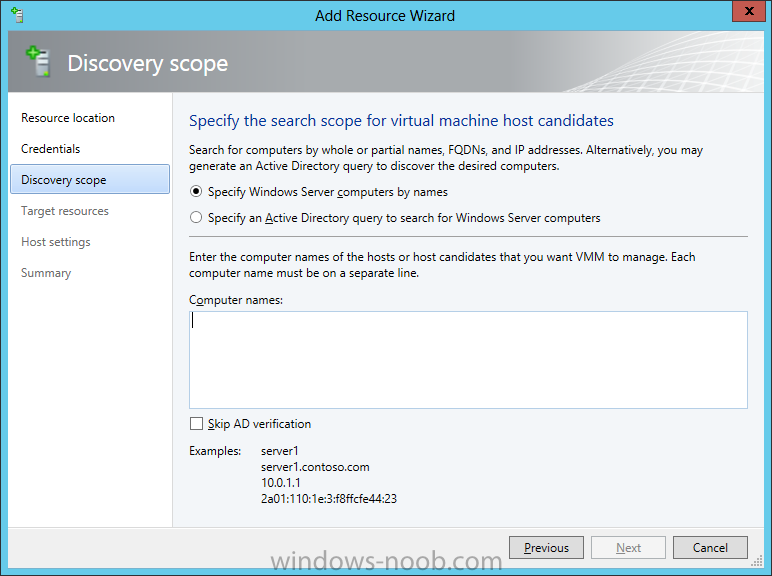
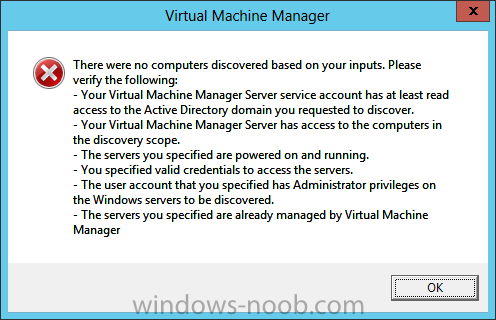
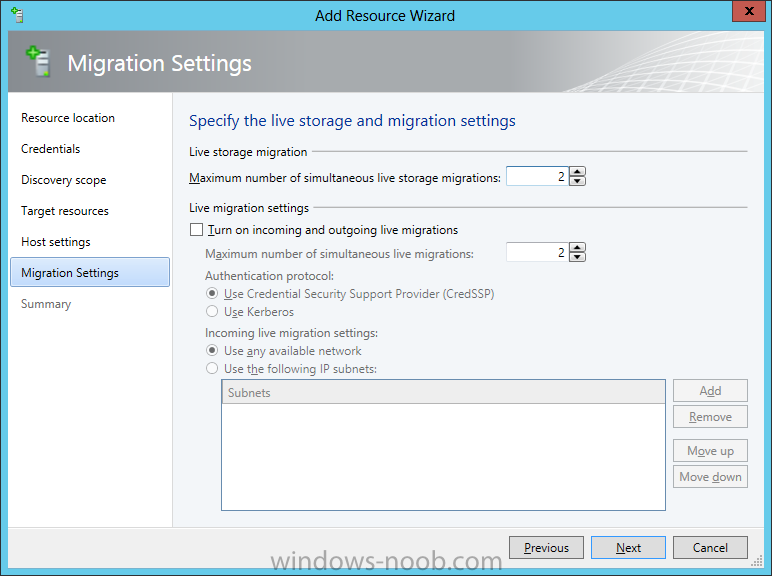
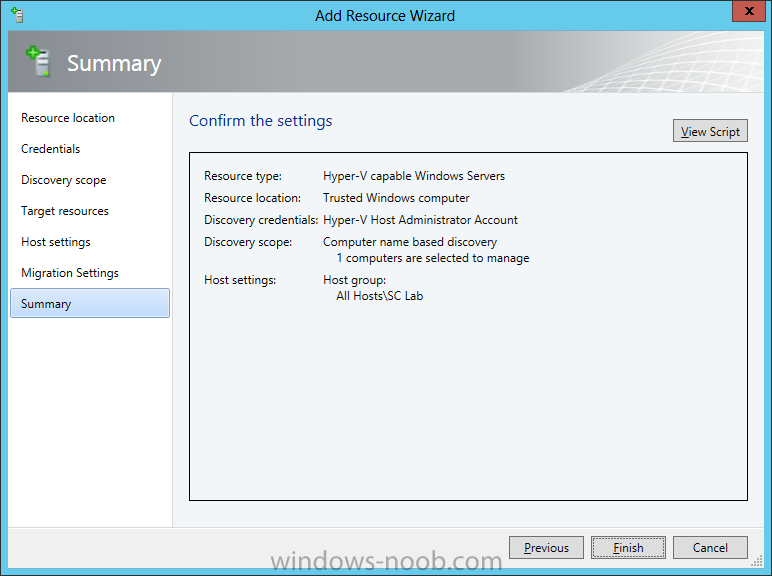
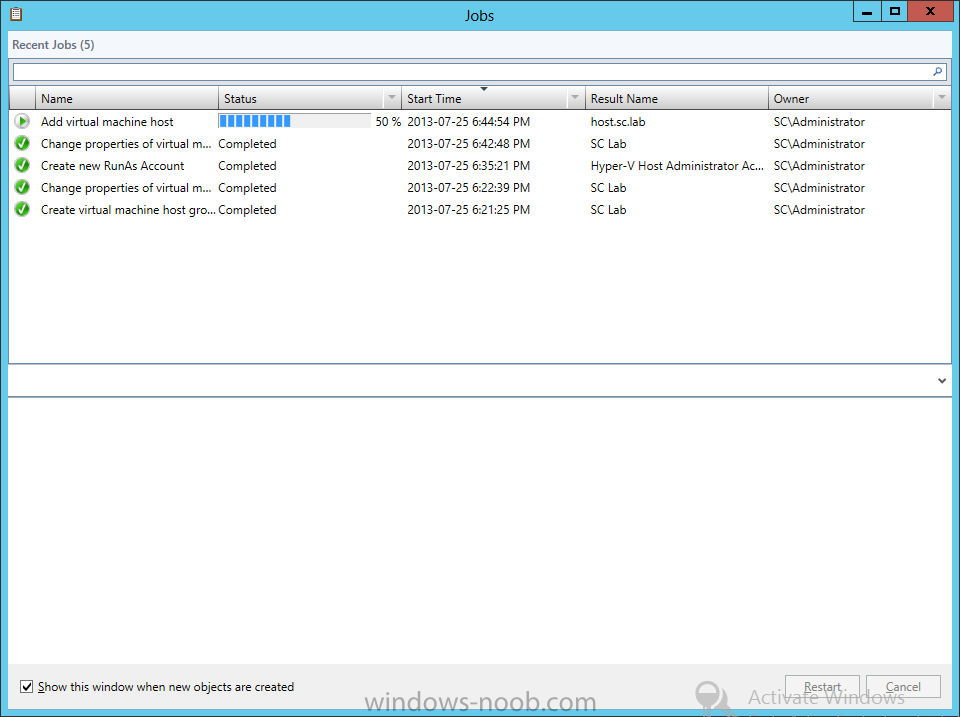
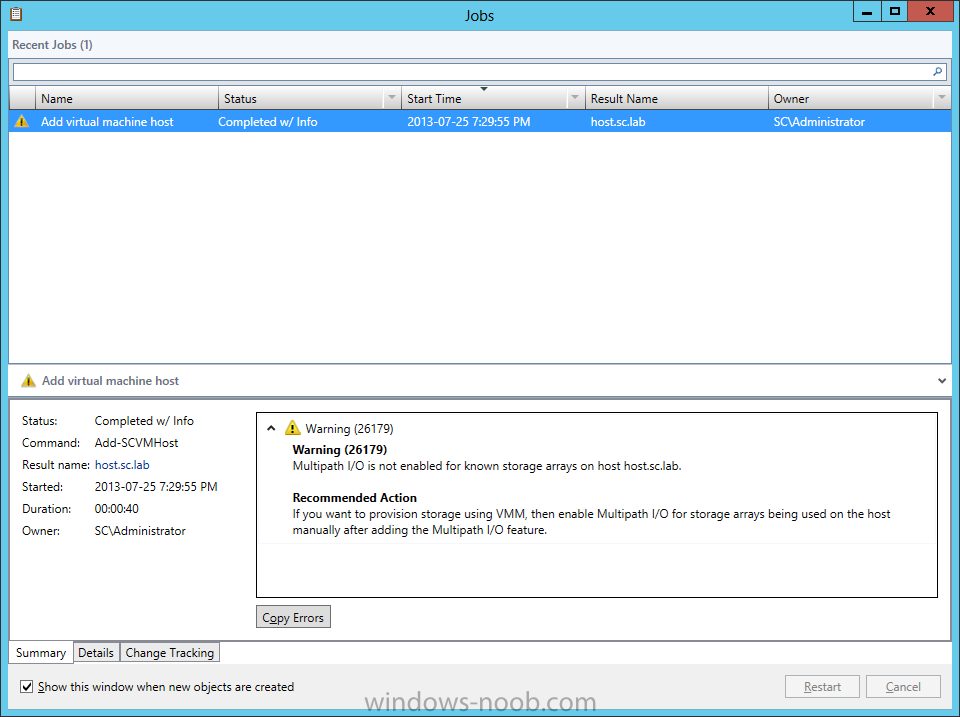
 In our last post we finished installing Forecast Analysis Reporting. Now we will start on the configuration. Hello everyone, if you have been following along with my guides, you should now have SCVMM installed. But SCVMM won’t do you any good if it doesn’t know about any Hypervisor/virtualization hosts or VMs, so that’s where we will start as part of these Configuration guides. First, start by launching the SCVMM console. Click on Fabric in the lower left. Now expand the ‘Servers’ directory. From there, right-click on ‘All Hosts’ and choose ‘Create Host Group’. Name your custom Host Group whatever you want. Note, you can rename it at any time if you need to. Now right-click on your new Host Group and choose ‘Add Hyper-V Hosts and Clusters’. On the Resource Location screen of the Add Resource Wizard, make the appropriate selection for the Windows Computer Location, and then click Next. Note that you can even choose ‘Physical computers to be provisioned as virtual machine hosts’, which would allow you to provision bare-metal systems! For our lab example, since we have an Active Directory domain that the SCVMM server is a member of, we will choose the first option. On the Credentials screen, click Browse so that we can add an existing account as the Run As account. Note the information at the bottom of this screen, which reminds us that the Run As account needs to be a Local Administrator on the host machines you want to manage. On the Select a Run As Account, click the ‘Create Run As Account’ button, since we don’t have an account already within SCVMM to use. On this screen you need to provide the details about the account. You can give it a name (Note that this is NOT the actual username used for the account, but an identifying name), and description. You will need to provide the actual username and password for the account. In my lab example I created an account called SCVMMAdmin, and used that on this screen. Enter an applicable account on this screen and then click OK. Now our newly added account is available to be selected. You will notice in my example that I named the account “Hyper-V Host Administrator Account”. Select your account and then click OK. Now the Credentials screen will show the account that we have selected. Now click Next. On the Discovery Scope screen, choose the appropriate the scope option. You can use an Active Directory query, or type the names to search for. In my lab example, I just typed the names. Make your appropriate choice and then click Next. NOTE: You can opt to ‘Skip AD Verification’ however it is best to perform AD verification to ensure the system can be communicated with. If there are issues with the wizard not being able to communicate with the Host(s), you may encounter this error. Read the message displayed and then click OK. Perform whatever actions are required to resolve the communication issues, and then re-attempt to add a host system. On the Target Resources screen, if the host system(s) are able to be contacted, they will appear here. Select the system(s) that you want to add as hosts, and then click Next. On the Host Settings screen, you can assign the selected computers to a specific Host Group (i.e. the one we originally created). You could use the Host Groups to organize hosts based on area/zone (i.e. PROD, UAT, TST, DEV, etc.). For our lab example, just click Next. On the Migration Settings screen you can specify how many live migrations (for both storage, and VMs) can be performed simultaneously. For this example in my lab, since I don’t have a second physical host to use for live migrations, I won’t turn this feature on. At this point, just click Next. Review the information on the Summary screen and then click Finish. This will open the Jobs screen, and show the progress of adding the host. If there are any issues, you will be alerted to them here. Correct any issues, and re-attempt to add the host. Once it has been added successfully, you can close the Jobs window. You will notice in my lab example, that adding my host completed but with a Warning. This is because my physical host does not have Multipath I/O. This is used in reference to SAN storage, which I don’t have. Back in the main SCVMM console your Host will now be present. Congratulations, you now have SCVMM installed, along with adding a Host hypervisor (in our case, Hyper-V) system to be managed. Next we will create host groups and clouds.