anyweb
-
Posts
9259 -
Joined
-
Last visited
-
Days Won
371
Everything posted by anyweb
-
 no need to extend the schema again, it's a one time operation,
 -
Does the Surface Pro 3 still have the original factory installed image on it ? have you tried network booting it using a Microsoft USB network card, does that work or not ? do any of your devices succeed in UEFI network booting (as this requires UEFI network boot, not PXE/legacy boot...) you say you've updated to the latest firmware, how did you do that cheers niall
-
could be a lack of space in your temp drive, check your environmental variables to see where temp is by typing set
-
without further details i'm guessing you are missing network drivers can you post the SMSTS.log file from a failing machine please ?
-
1. yes 2. yes cheers niall
-
Configure boot to desktop instead of start screen
anyweb replied to ITguy87's question in Microsoft Deployment Toolkit (MDT)
you need to set the value for the default user account before any user logs on, that way all new user accounts created have the desired value, like so..where %OSDISK% is the drive with windows on... you can either create a script or run as a run command line step at the end of the task sequence reg load HKU\Default %OSDisk%\Users\Default\ntuser.dat reg add HKU\Default\Software\Microsoft\Windows\CurrentVersion\Explorer\StartPage /v OpenAtLogon /t REG_DWORD /d 1 /f reg unload HKU\Default or via group policy, Boot to Desktop using Group Policy Open Group Policy Management Console Right-Click on your Windows 8.1 Users Group Policy and select "Edit" Navigate to the following section: User Configuration\Administrative Templates\Start Menu and Taskbar Locate the following setting: "Go to the desktop instead of Start when signing in or when all the apps on a screen are closed" (yes – it’s really called that) Enable the setting -
if you are sure that your setup is all ok, then i would advise you to place a support call with Microsoft Intune, see what they say.
-
For those of you that are not aware, there's a Deployment Roadshow coming in December by three of the greatest OSD Guru's on the planet, Johan Arwidmark, Mikael Nystrom and Michael Niehaus. The event details are below, these guys really know there stuff and are a joy to watch/listen, sign up if you get the chance ! Windows 10 & Windows Server Technical Preview Suddenly it happens! Windows 10 and Windows Server Technical Preview has been released as early test versions and it’s time to get your teeth into everything new before it is released. Therefore, we have invited over legend and one of the world’s premier on Windows and OS Deployment – Michael Niehaus, the man who created the MDT. Together with Mikael Nyström and Johan Arwidmark, he delivers a day filled with news about the new Windows Client and Windows Server. Knowledge Factory and TrueSec arranges Deployment Roadshow, a technical seminar on the deployment and management of Windows 10 and Windows Server Technical Preview. As usual it is a demo intensive day, based on accumulated experience from the TAP program. And the fact that we have actually been using this new platform in production. We will visit five locations in Sweden and Norway, between the 1st and 5th December 2014. More information and registration. The event details in Swedish here > http://events.truesec.se/Event/Deployment_Roadshow cheers niall.

-
Installing Windows Intune as Part of Task Sequence
anyweb replied to TheWes's topic in Configuration Manager 2012
not supported as you can imagine, however why not just deploy the image from MDT and install the intune client that way ? or as a longshot use the smstspostaction variable to run a script which uninstalls the ccm client and then installs the intune client. -
windows deployment services image capture wizard next greyed out
anyweb replied to P.Bohm's question in Windows Deployment Services (WDS)
did you try pressing left shift and f10 ? -
sccm 2012 r2 offline deployment win7 - usb stick/mdt 2013
anyweb replied to sccmrookie's topic in Configuration Manager 2012
hi the following guides will help you get MDT working with Configuration Manager if you follow them step by step CM12 in a lab - Part 16. Integrating MDT 2012 RC1 with Configuration Manager 2012 CM12 in a lab - Part 17. Using MDT 2012 RC1 with Configuration Manager 2012 CM12 in a lab - Part 18. Deploying a UDI Client Task Sequence once done, if you want to setup a clean MDT environment for building images then you could use this script to create a standalone environment from scratch and just modify the variables to suit your setup as regards capturing your master image, either do it in MDT or use capture media in Configuration Manager to capture the wim file, or use a pxe based build and capture task sequence, some links below. CM12 in a lab - How can I capture an image using Capture Media in Configuration Manager 2012 ? CM12 in a lab - Part 7. Build and Capture Windows 7 X64 using System Center 2012 Configuration Manager - Part 7. Build and Capture Windows 7 X64 SP1 -
Guide: Multiple Operating Systems from UDI wizard
anyweb replied to Atomic12's question in Microsoft Deployment Toolkit (MDT)
here's another take on that CM12 in a Lab - How can I dynamically deploy multiple operating systems with System Center 2012 R2 Configuration Manager ? -
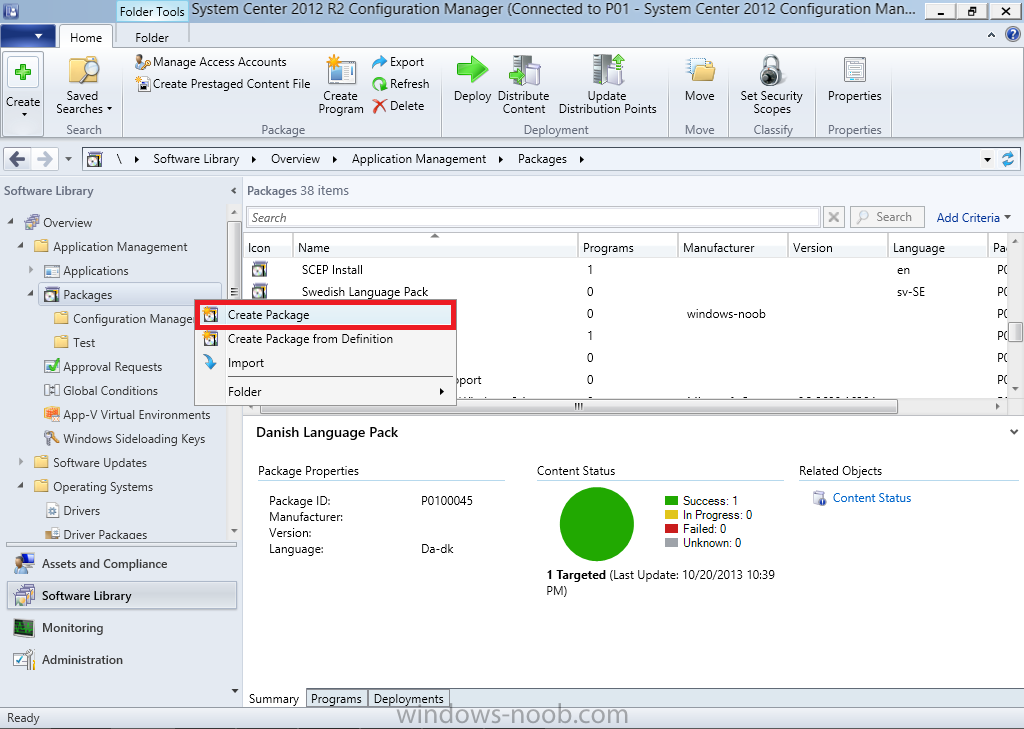
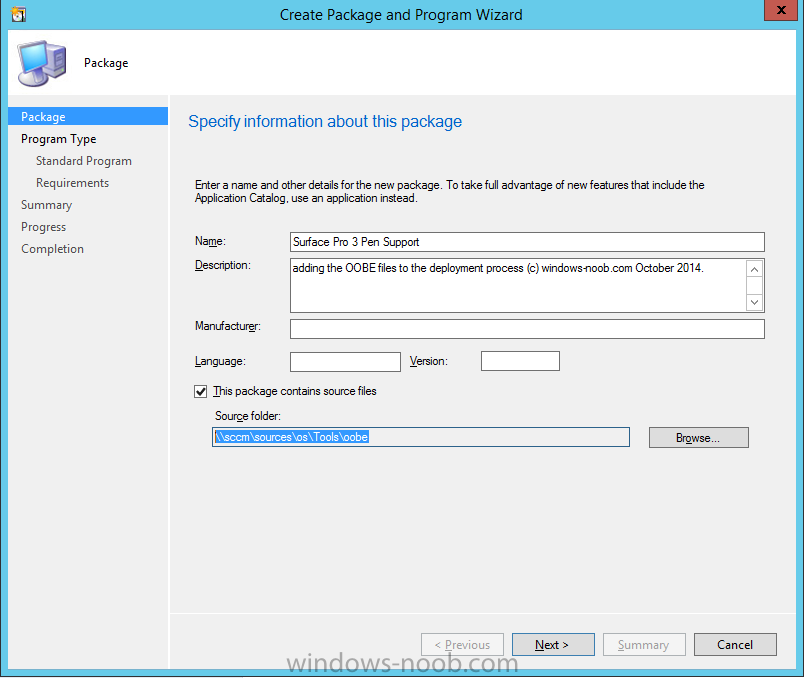
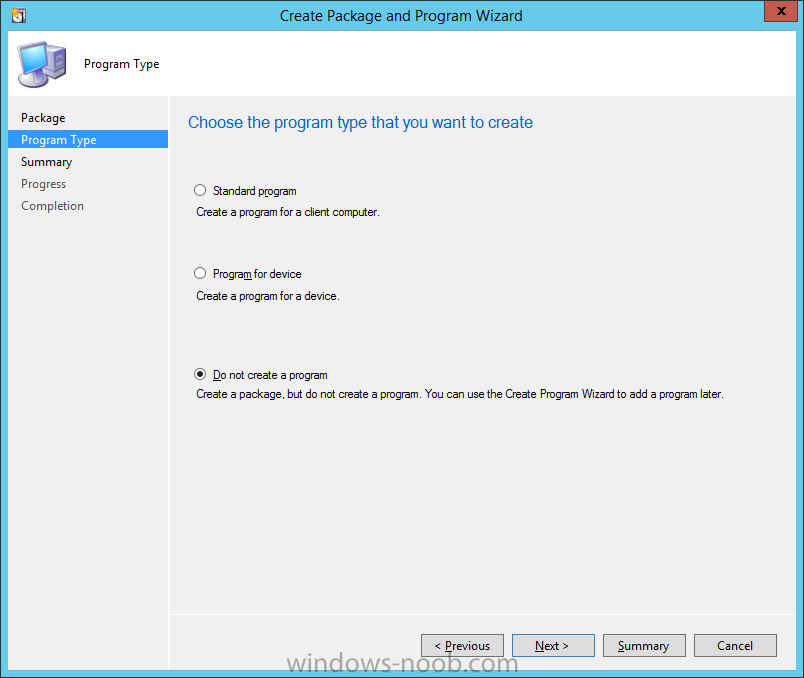
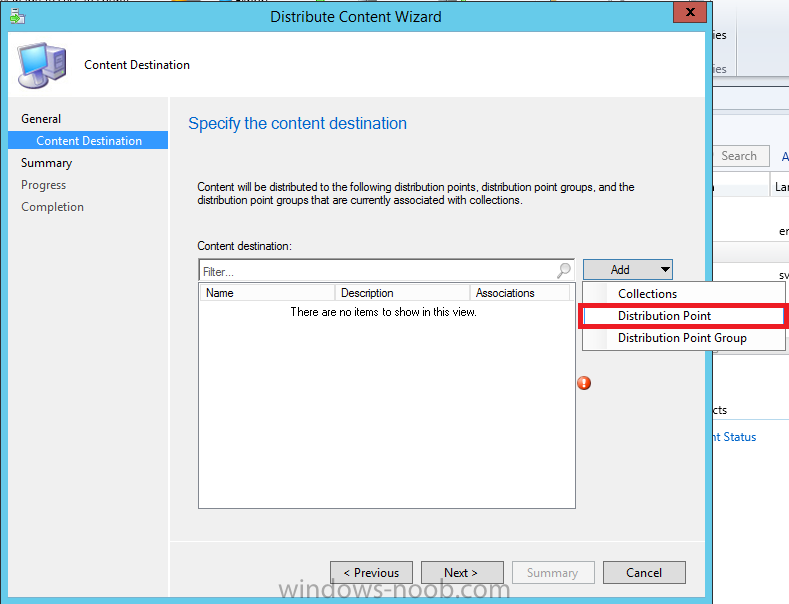
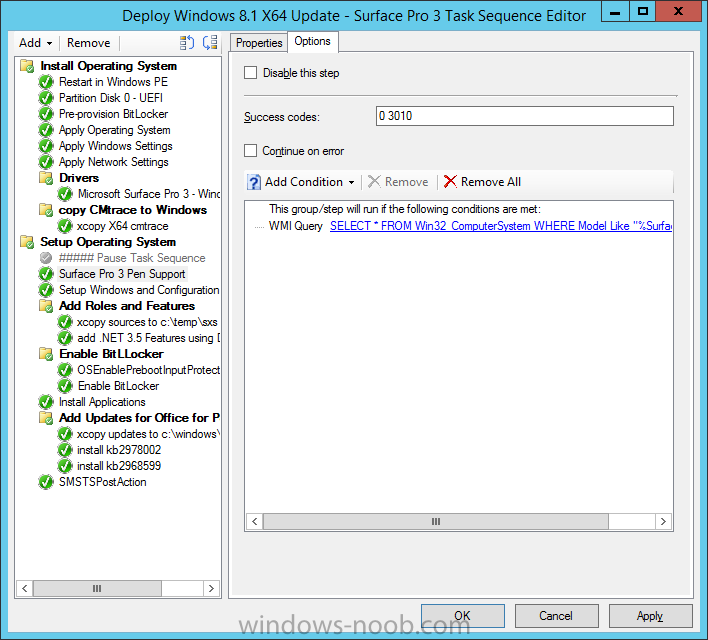
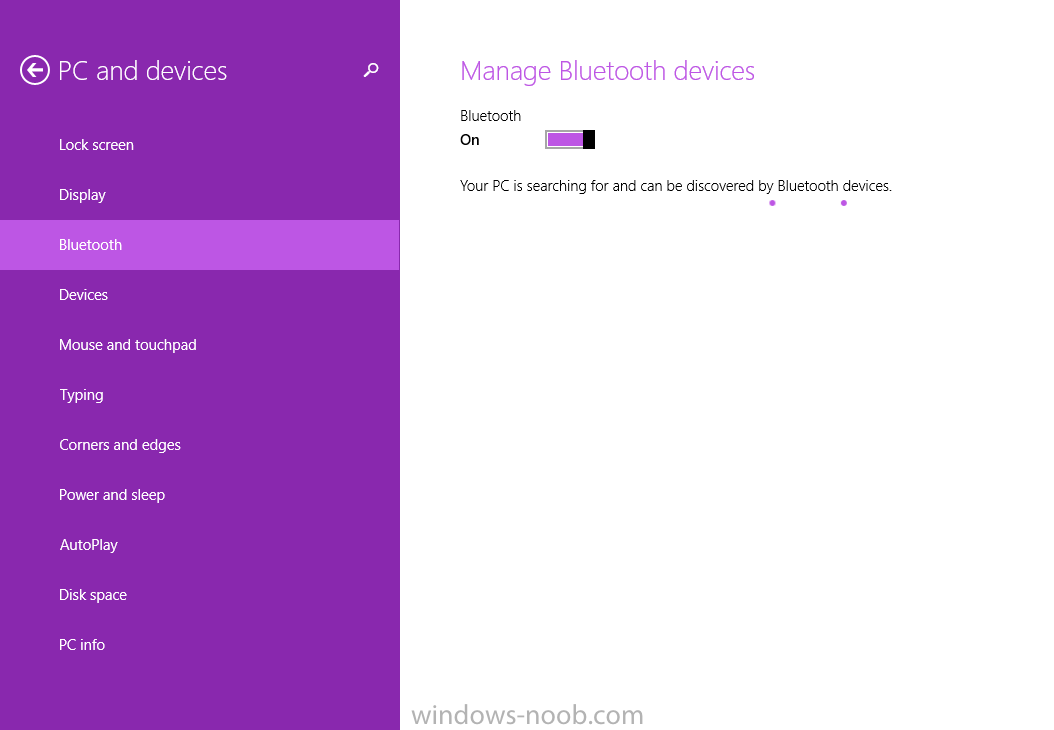
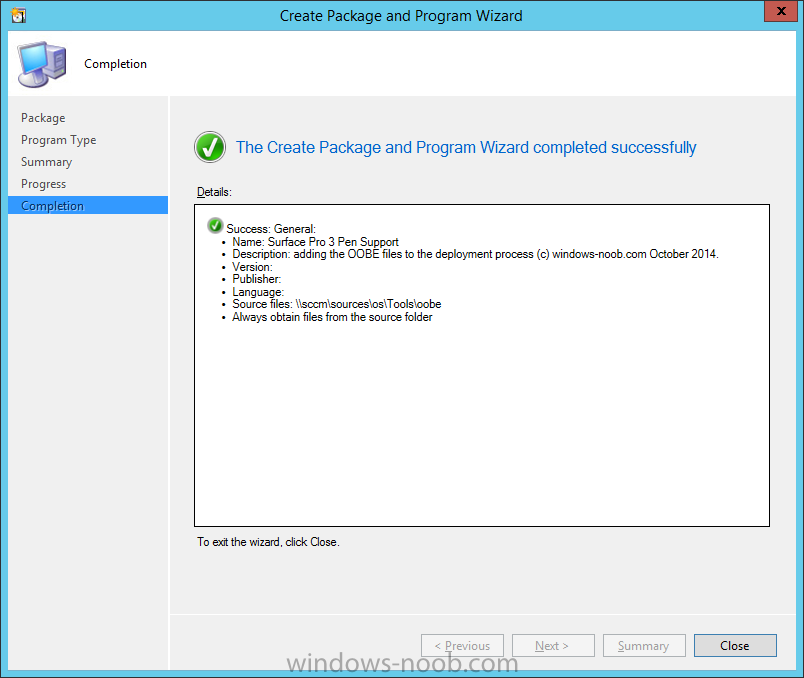
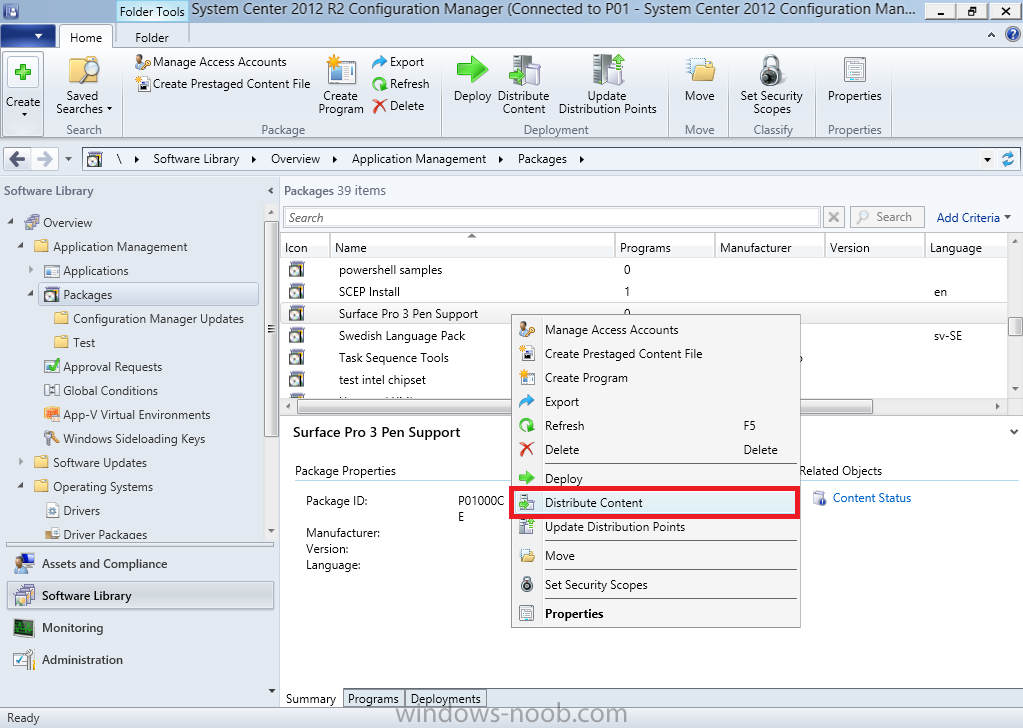
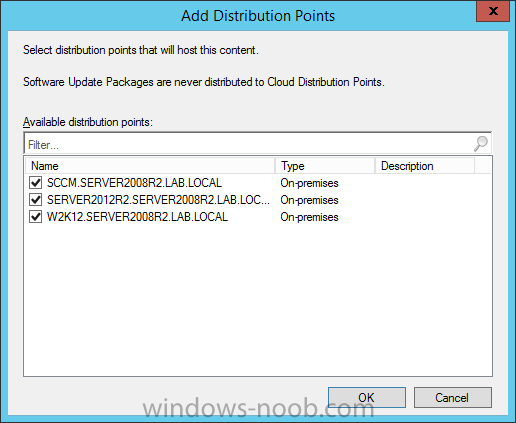
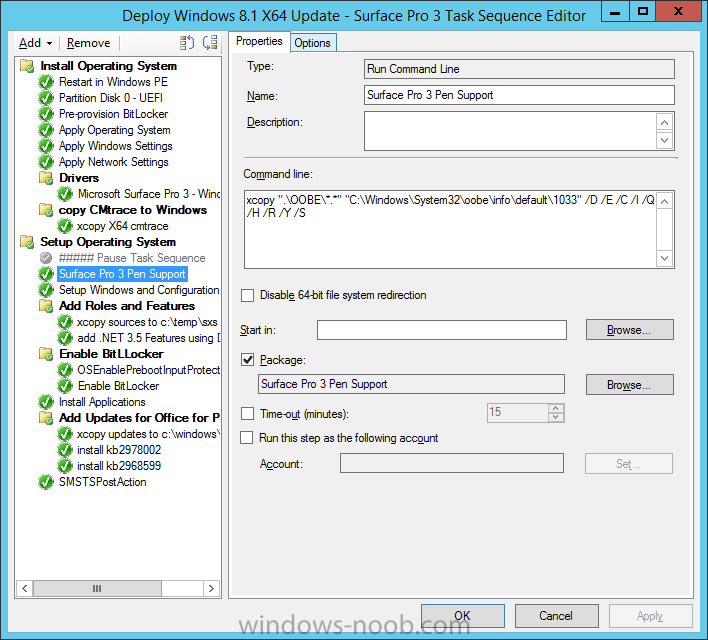
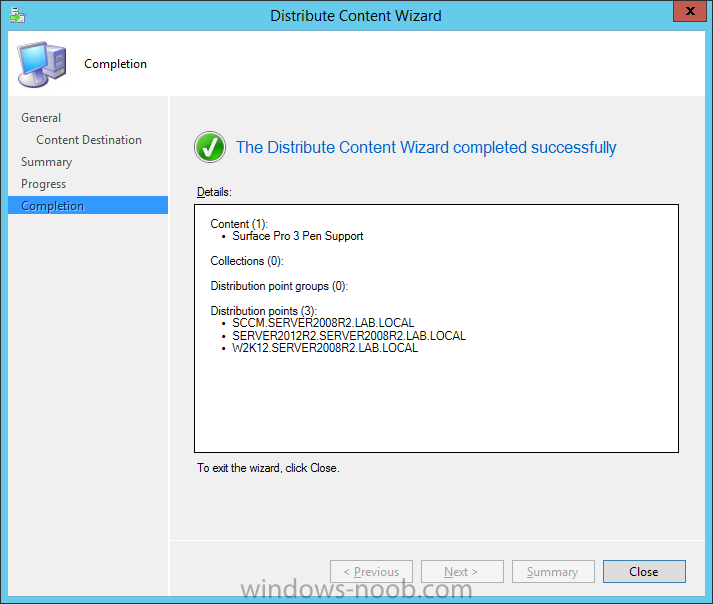
Introduction In a previous post I showed you how you can deploy Windows 8.1 x64 to the Microsoft Surface Pro 3 using System Center 2012 R2 Configuration Manager. The Surface Pro 3 comes with a re-worked pen that has bluetooth capability and some additional functionality to do some very cool things. When you get a Surface Pro 3 directly from the store and start it up, you'll go through a process called Out Of Box Experience (OOBE) and this process will gather some information from you in addition to allowing you to pair the bluetooth pen with your new Surface. I wanted to add that functionality back when deploying the Surface but you need a few things in place before you can do it, and once you do have the ability, you cannot control it that much (you'll see what I mean later in the video). But before I start take note of the note below. Note: This process will only work when you use Windows 8.1 x64 Update, in other words the media used must be the 'update' to Windows 8.1, if you try this on regular Windows 8.1 then nothing will happen. Step 1. Download the files Get the four files from a brand new Surface Pro 3 (one that has not been reimaged) in the following folder C:\Windows\System32\oobe\info\default\1033. If you don't have access to those files you can download them from here. oobe.zip Unzip the attachment and copy the files to your Configuration Manager server (for example copy them to \\sccm\sources\os\Tools\oobe) Step 2. Create a new package Create a new package by right clicking on Packages in Software Library as shown below give the package a suitable name like Surface Pro 3 Pen Support as shown below do not create any program as none is needed complete the wizard Step 3. Distribute the package to your distribution points Locate the package, and right click, choose Distribute Content as shown below click on Add, then select distribution point choose from your available distribution points and click on ok and then next when done the Distribute Content wizard is complete Step 4. Add a Run Command Line step to your task sequence Edit your previously created Deploy Windows 8.1 to the Microsoft Surface Pro 3 task sequence and add a run command line step, the step must occur before the Setup Windows and Configuration Manager step and after the Apply Operating System step Paste the following code into the step, note that it's looking in a folder called OOBE in your package. xcopy ".\OOBE\*.*" "C:\Windows\System32\oobe\info\default\1033" /D /E /C /I /Q /H /R /Y /S next select the package we created above as shown below, click apply when done finally, click on the Options tab and select WMI Query from the drop down options, paste in the following code SELECT * FROM Win32_ComputerSystem WHERE Model Like "%Surface Pro 3%" as shown below Step 5. Deploy a Surface Pro 3 and observe the new behaviour In the video below I show you exactly what you should see when the above steps are done, note that this will not show up on a virtual machine as the step is set to only run if a Surface Pro 3. And that's it, job done If you do not succeed in pairing the pen during Windows setup, you can do it after the event, while in Windows by clicking on Settings and configuring your bluetooth devices (pairing). until next time, adios ! Related Reading CM12 in a Lab - Why is my Surface Pro 3 not BitLockered after OSD via System Center 2012 R2 Configuration Manager ? CM12 in a Lab - Where do I find the MAC address of my Surface Pro 3 Ethernet Adapter in order to use UEFI network boot ? CM12 in a Lab - How can I deploy Windows 8.1 x64 to the Microsoft Surface Pro 3 using System Center 2012 R2 Configuration Manager ? CM12 in a Lab - Why does my Surface Pro 3 take a very long time to UEFI Network Boot using System Center 2012 R2 Configuration Manager ? CM12 in a Lab - How can I sync the BIOS date in WinPE to avoid PXE boot failure with System Center 2012 R2 Configuration Manager ? MDT 2013 - How can I deploy Windows 8.1 x64 to the Microsoft Surface Pro 3 using MDT 2013 ? Summary Adding Pen Support to the Surface Pro 3 during the OSD process using System Center 2012 R2 Configuration Manager is easy once you know how, just remember to use Windows 8.1 X64 Update as the version of Windows, otherwise it will fail to run the OOBE process.


-
windows deployment services image capture wizard next greyed out
anyweb replied to P.Bohm's question in Windows Deployment Services (WDS)
got a valid ip adress in winpe ? -
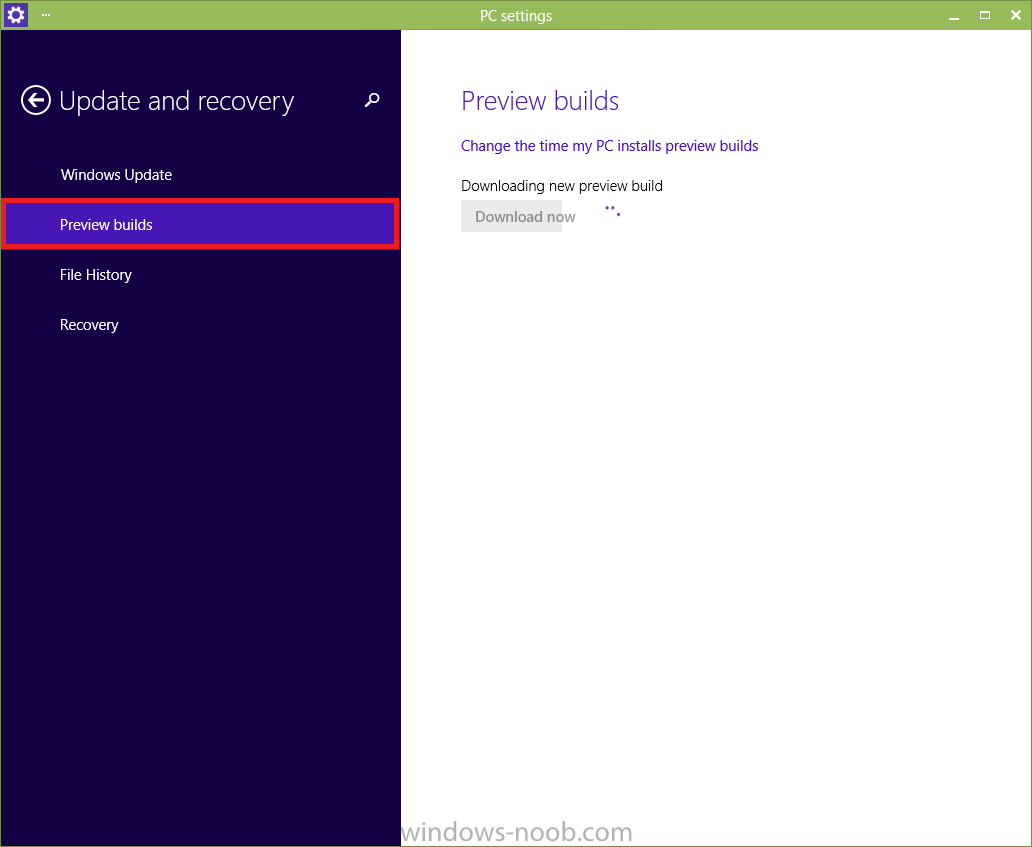
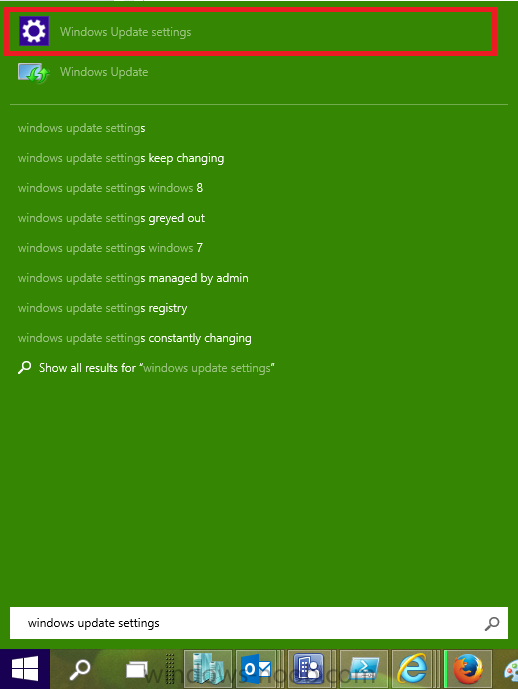
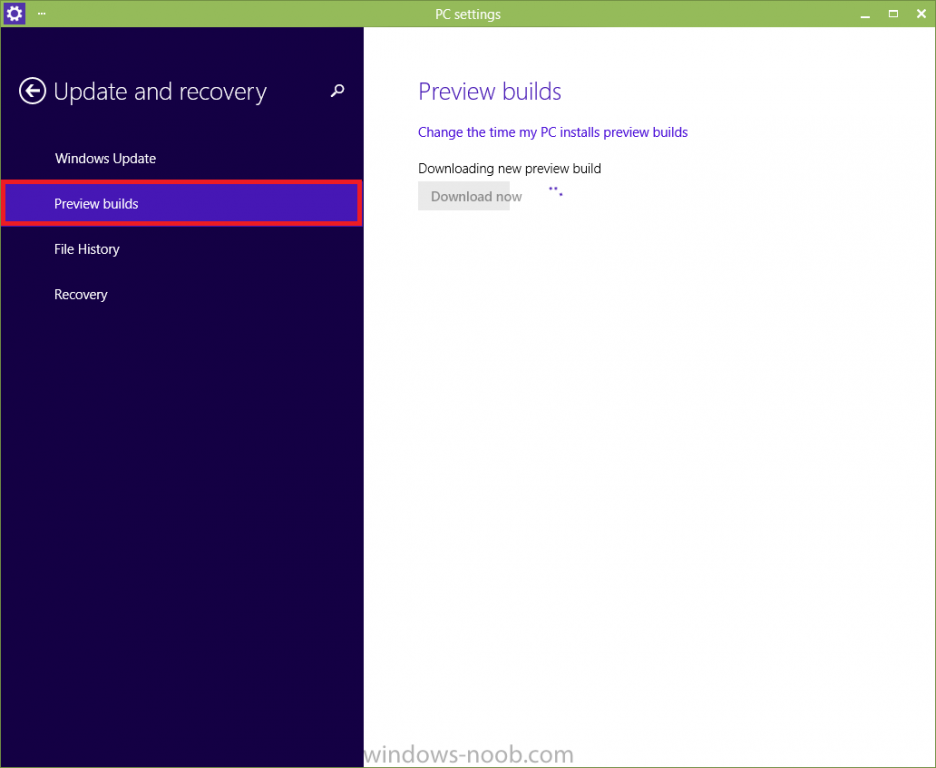
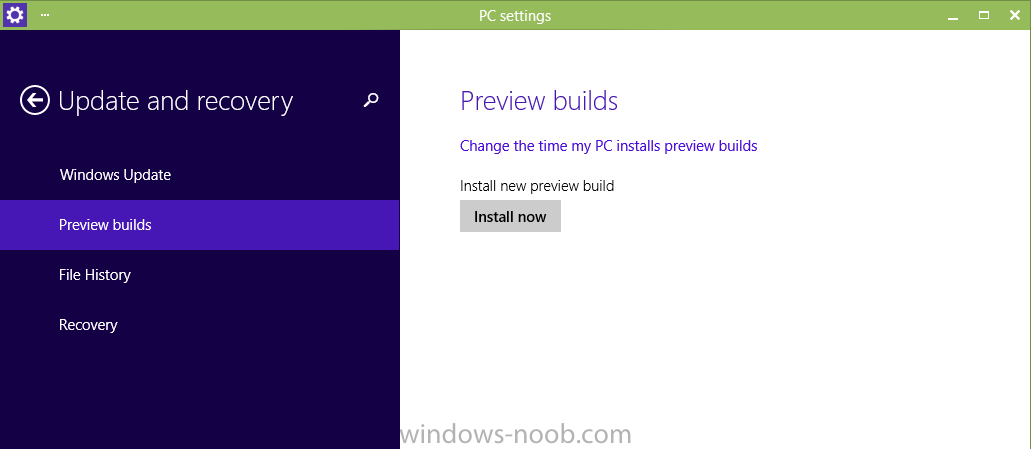
There's a new build available (build 9860), and you can get it like so, click on the start icon, type in Windows Update Settings as shown below when Windows Update Settings opens up, select Preview Builds and then select Download now after it's downloaded you'll be prompted to install it, and after a short installation, you'll be prompted to restart, you can choose restart Now or delay it for up to 8 hours via the drop down menu for more info about what's new in Build 9860 see below from ZDnet http://www.zdnet.com/whats-in-the-latest-windows-10-technical-preview-update-build-9860-7000034929/

-
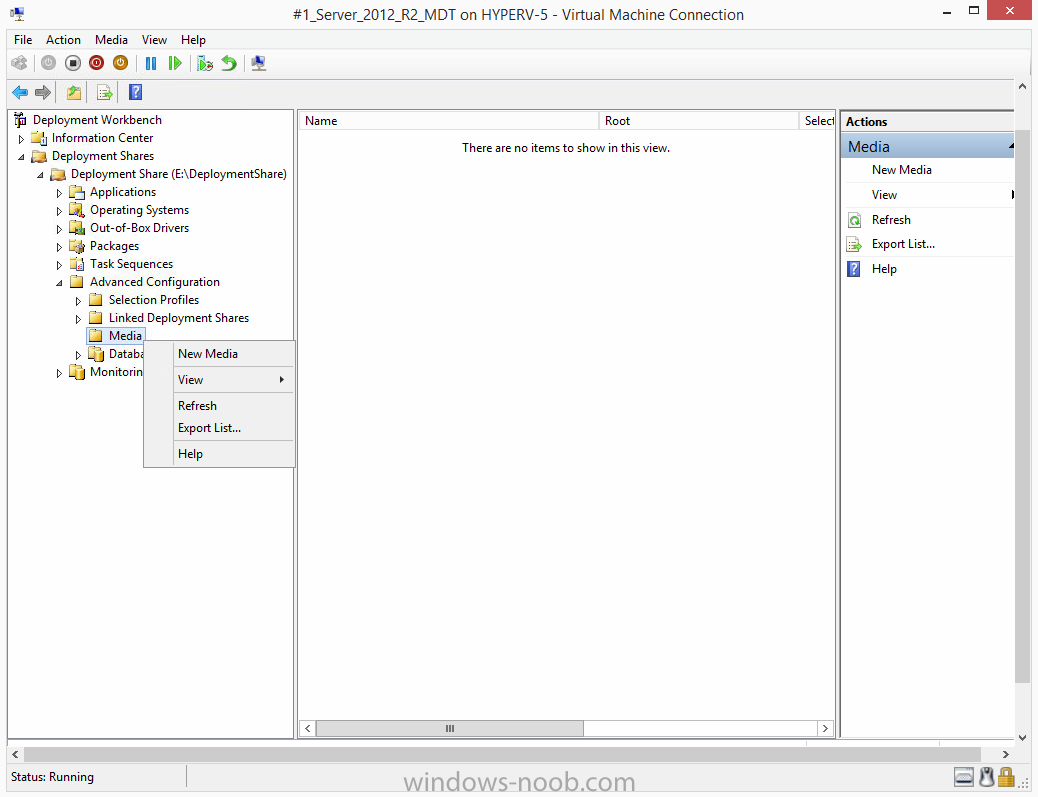
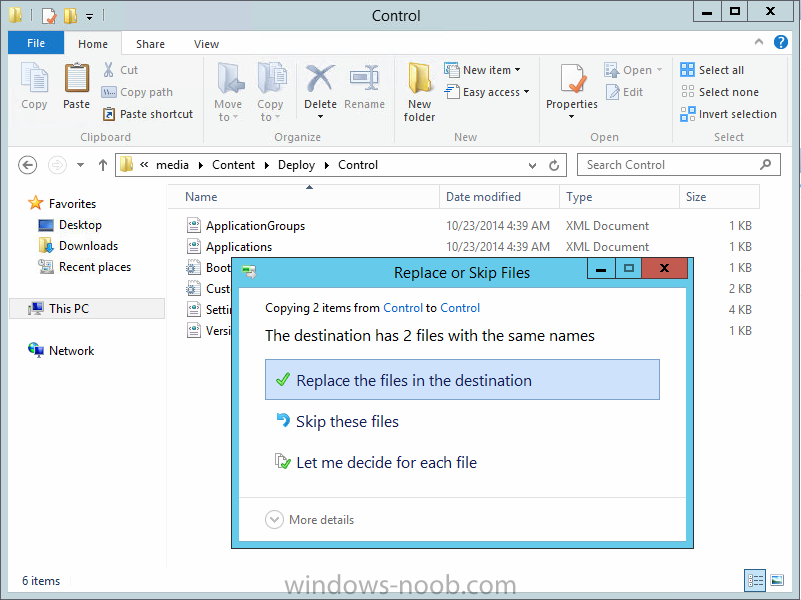
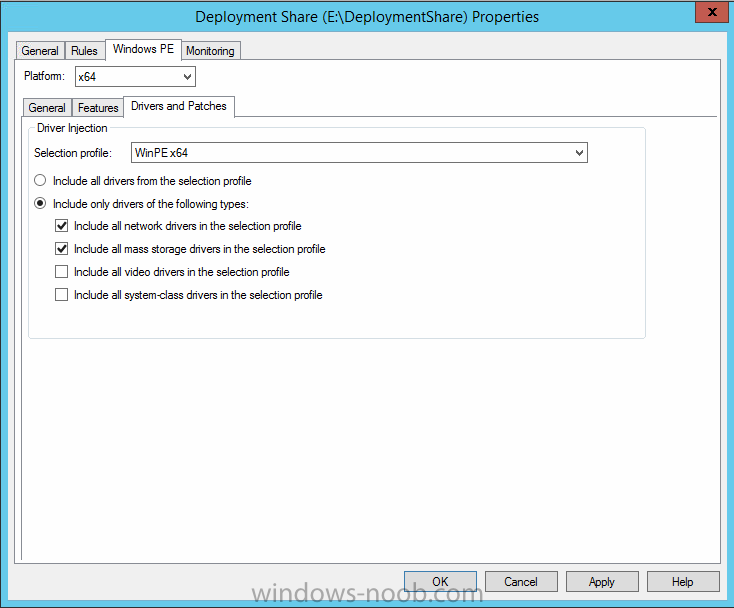
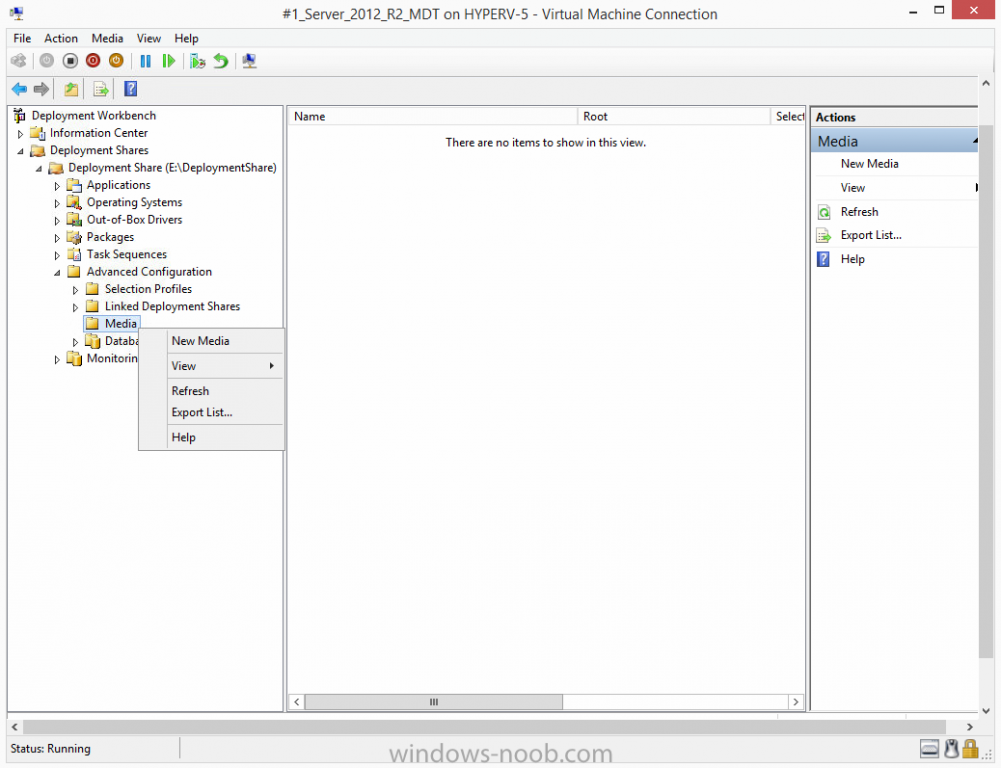
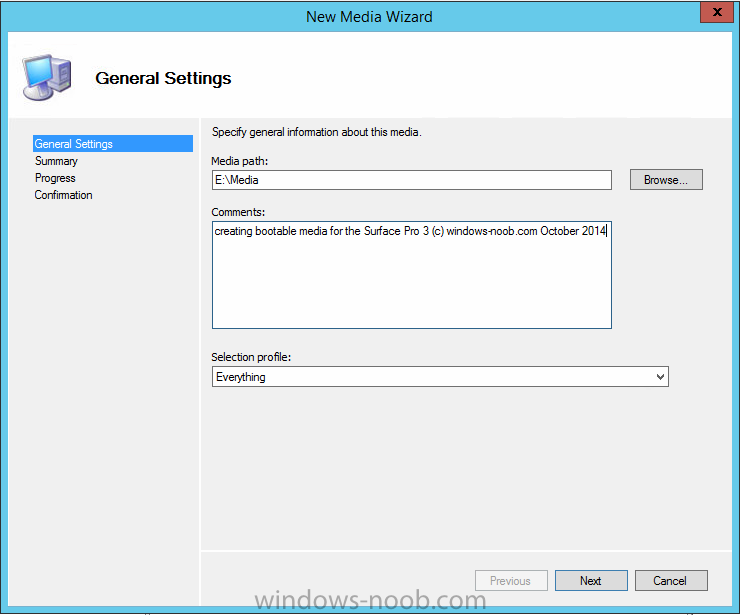
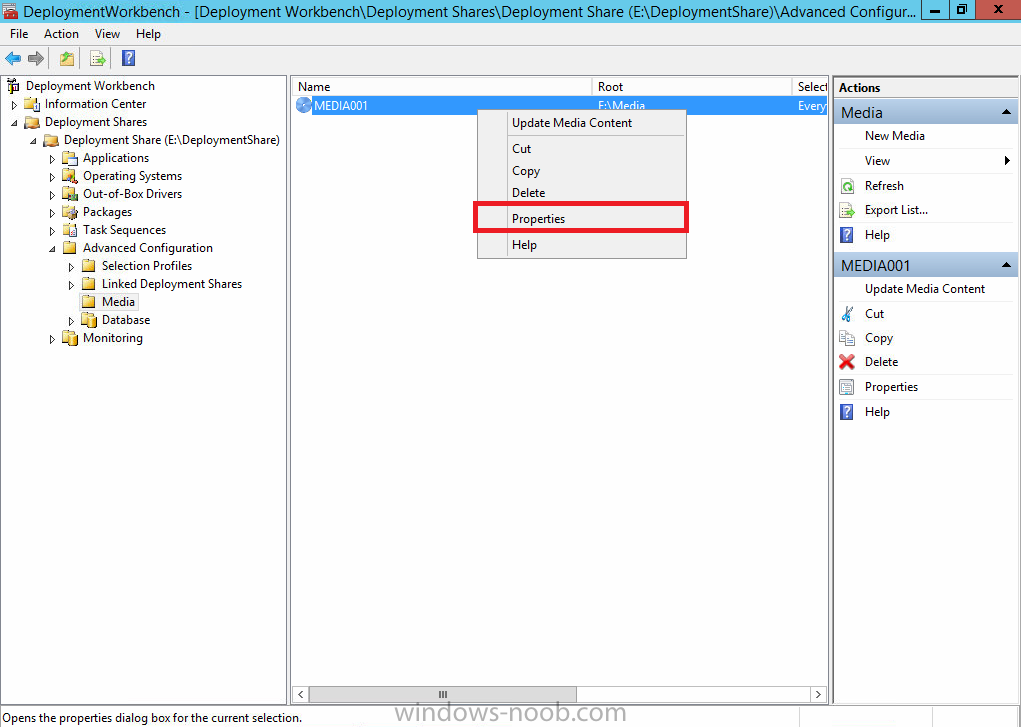
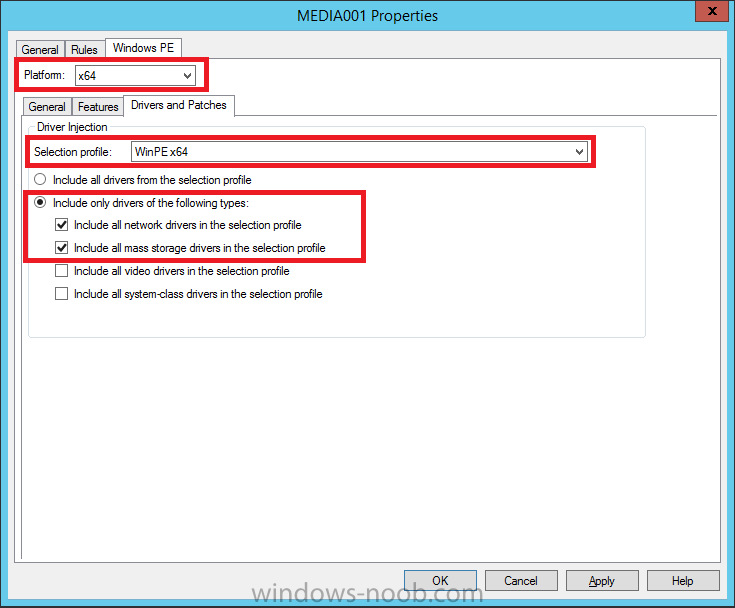
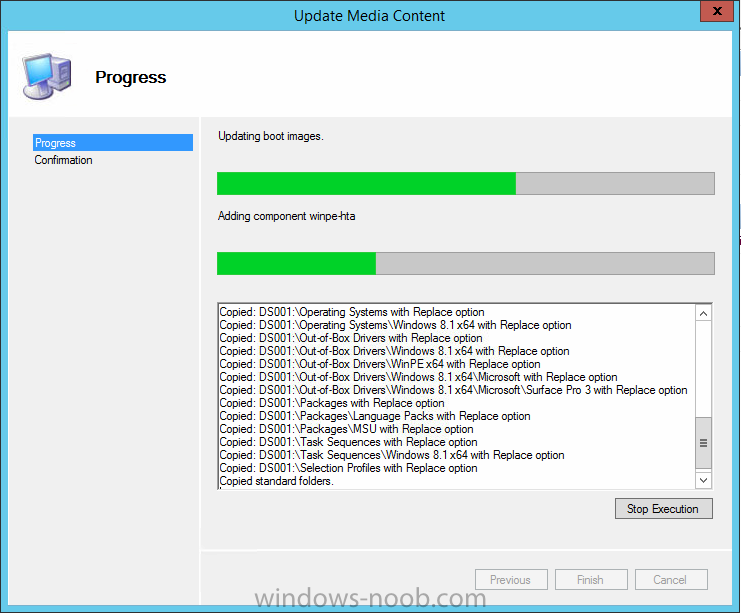
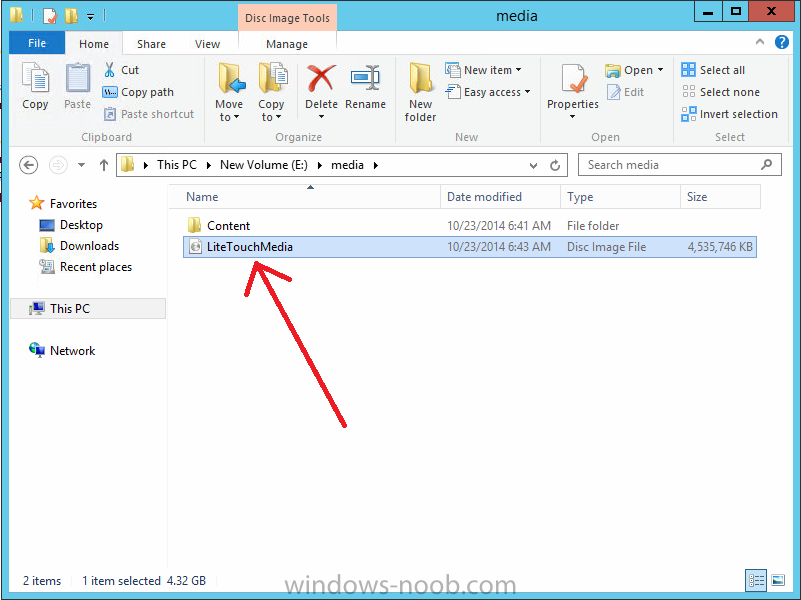
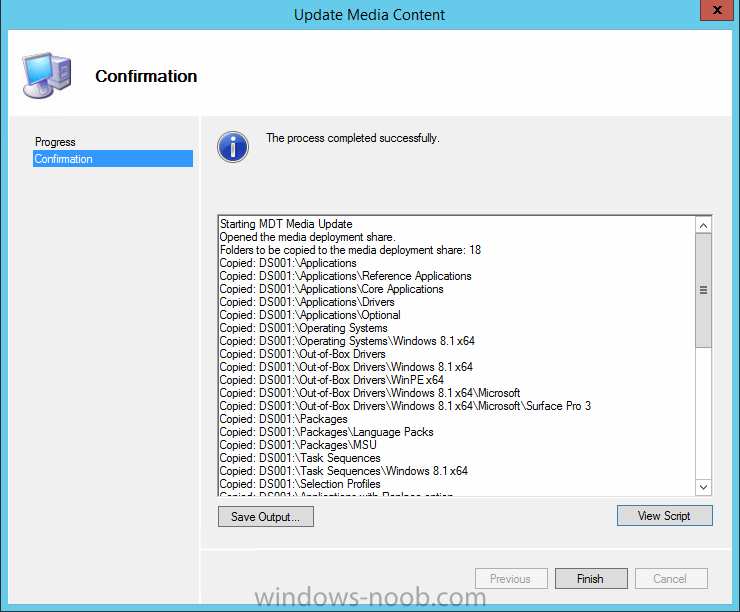
assuming you've completed my guide above and have run the script, and everything finished successfully, then try expanding Advanced, select Media, right click and choose New Media point to a blank folder (such as E:\Media) for the Media Path step and select the Everything selection profile as shown below continue through that wizard until completion, here's the powershell to do the above Import-Module "C:\Program Files\Microsoft Deployment Toolkit\bin\MicrosoftDeploymentToolkit.psd1" New-PSDrive -Name "DS001" -PSProvider MDTProvider -Root "E:\DeploymentShare" new-item -path "DS001:\Media" -enable "True" -Name "MEDIA001" -Comments "creating bootable media for the Surface Pro 3 (c) windows-noob.com October 2014" -Root "E:\Media" -SelectionProfile "Everything" -SupportX86 "True" -SupportX64 "True" -GenerateISO "True" -ISOName "LiteTouchMedia.iso" -Verbose new-PSDrive -Name "MEDIA001" -PSProvider "MDTProvider" -Root "E:\Media\Content\Deploy" -Description "Embedded media deployment share" -Force -Verbose Next, manually copy BootStrap.ini and CustomSettings.ini from E:\DeploymentShare\Control to E:\Media\Content\Deploy\Control and answer yes to the replace. Next, right click on the new Media, choose properties remove support for the X86 boot wim as it's not needed for support Surface Pro 3 Select the Windows PE Tab, and choose the drop down for X64, then select Drivers and patches and make sure the WinPEx64 selection profile is selected close the wizard when done. Finally, right click the Media001 and choose Update Media Content, continue through that wizard or use this powershell script Import-Module "C:\Program Files\Microsoft Deployment Toolkit\bin\MicrosoftDeploymentToolkit.psd1" New-PSDrive -Name "DS001" -PSProvider MDTProvider -Root "E:\DeploymentShare" Update-MDTMedia -path "DS001:\Media\MEDIA001" -Verbose Once done, browse to your media folder, eg: E:\Media and use the ISO provided to image your Surface Pro 3. alternatively, you can mount the ISO and copy the contents to a FAT32 formatted usb key/disc and boot from that instead, you might need to use diskpart to make that partition (vol) active, the USB disc must be formatted as FAT32 as UEFI devices cannot boot from USB media formatted as NTFS.


-
thanks ! can you access that address via a web browser ? is the internet connection proxied ?
-
this script will solve your date/time issues on those Surface's http://www.windows-noob.com/forums/index.php?/topic/11016-how-can-i-sync-the-bios-date-in-winpe-to-avoid-pxe-boot-failure-with-system-center-2012-r2-configuration-manager/
-
the 80070003 error means The system cannot find the path specified. Source: Windows but why you are seeing that i don't know, can you post the entire deploytovhd.log file please, are you out of space on the drive it's creating the vhd on
-
that blog post was for the original Surface Pro surely based on the date (16th of May 2013...), this blog post is for the Surface Pro 3 which was released earlier this year Surface Pro: February 9, 2013[3] Surface Pro 2: October 22, 2013 Surface Pro 3: June 20, 2014 there were issues with older firmware on Surface Pro 3 causing slow UEFI boot but that's fixable by a variety of methods including those below Why does my Surface Pro 3 take a very long time to UEFI Network Boot using System Center 2012 R2 Configuration Manager ? http://www.niallbrad...anager-2012-r2/ Updating the UEFI firmware offline - http://blogs.technet...-usb-drive.aspx
-
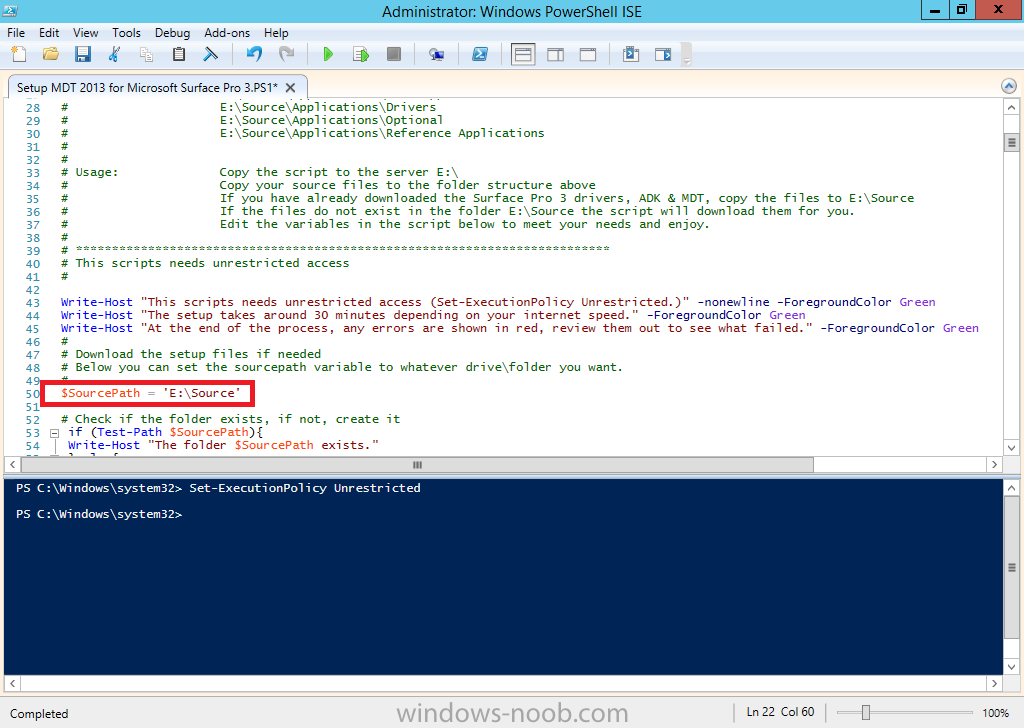
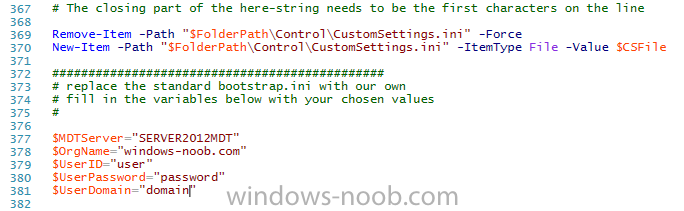
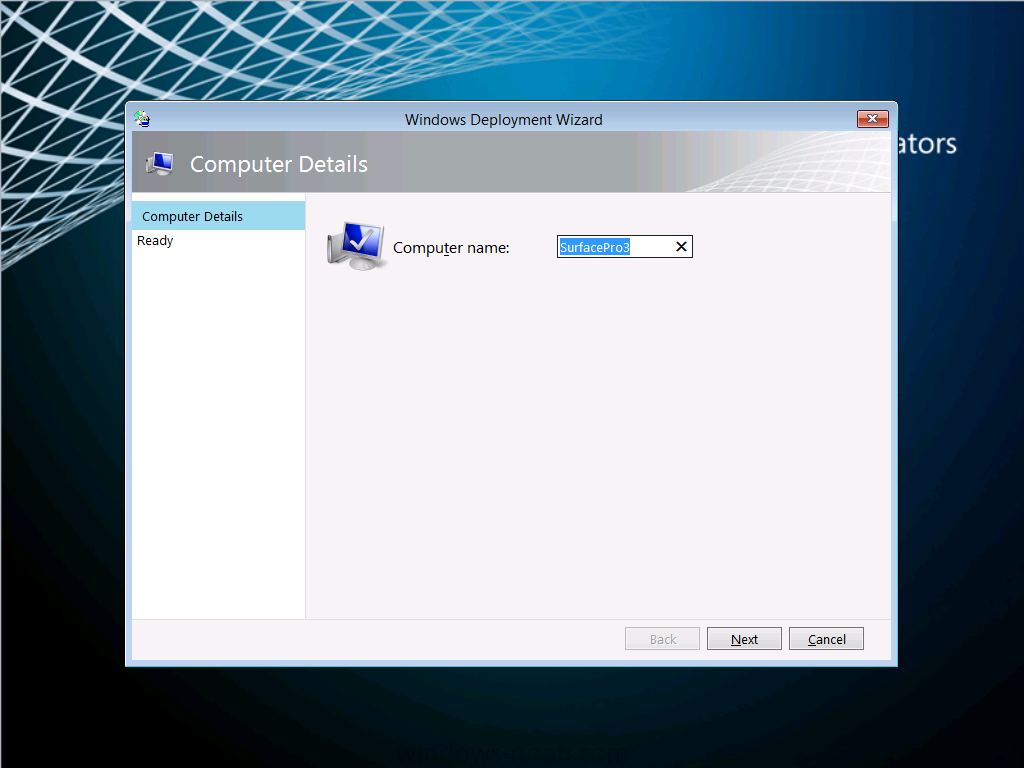
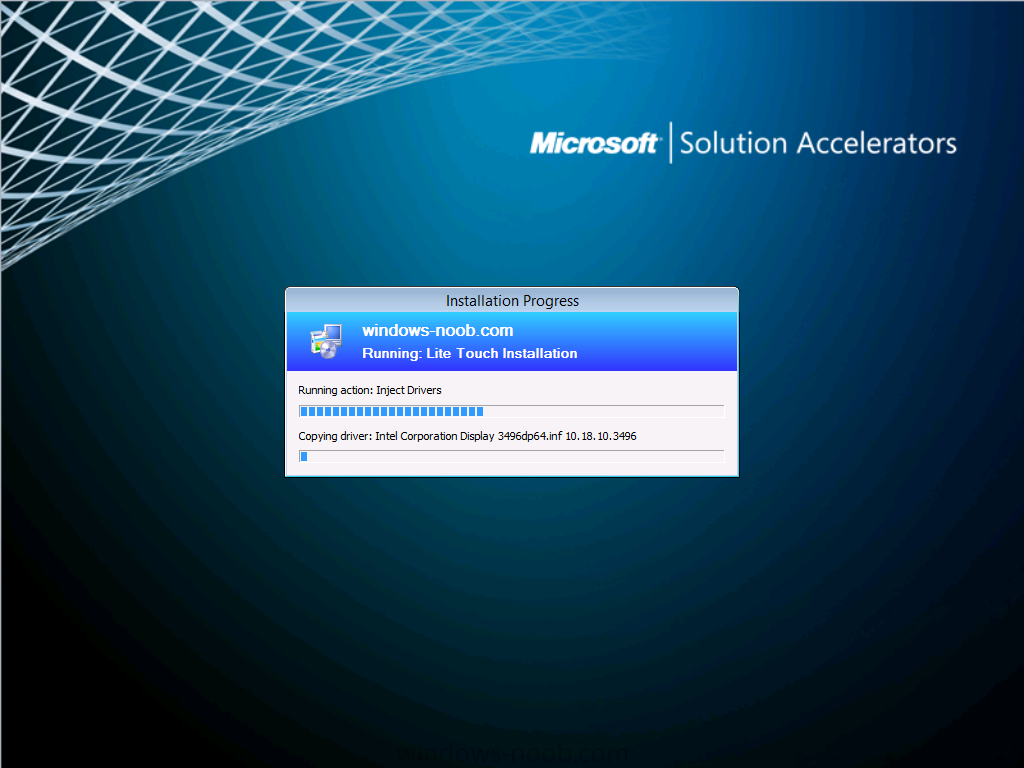
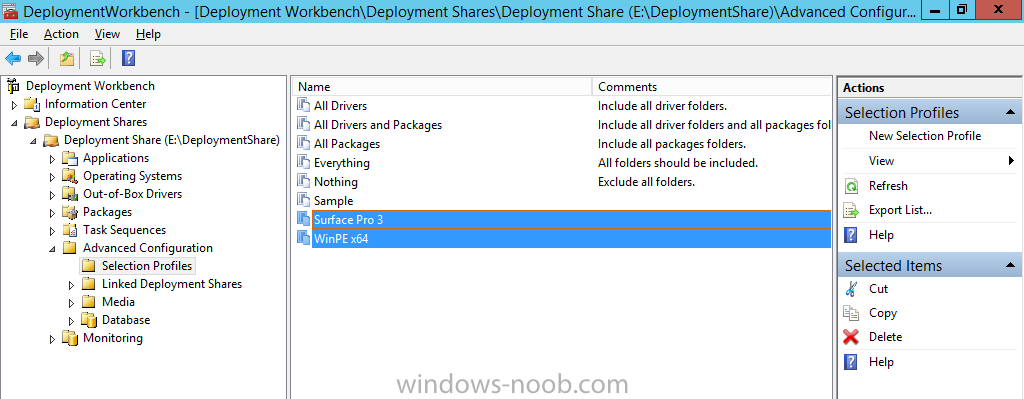
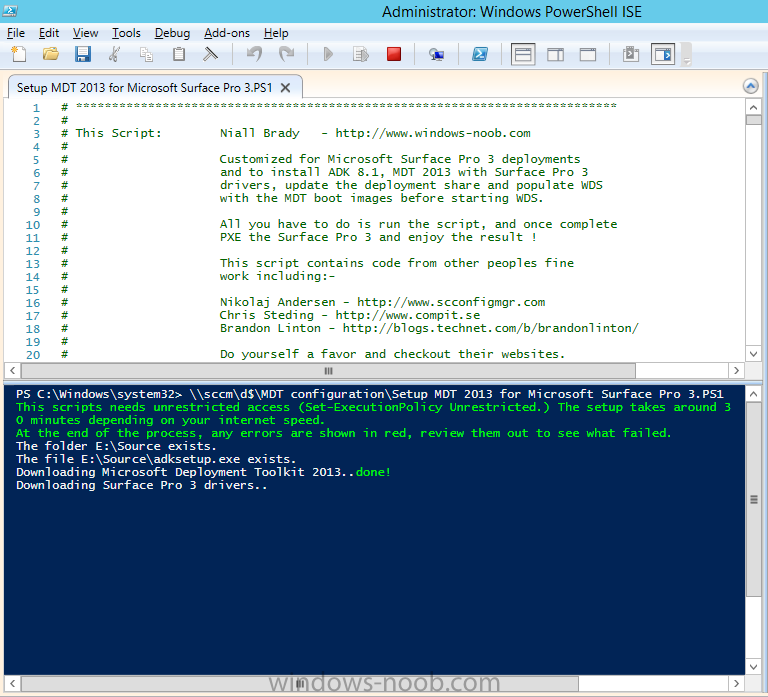
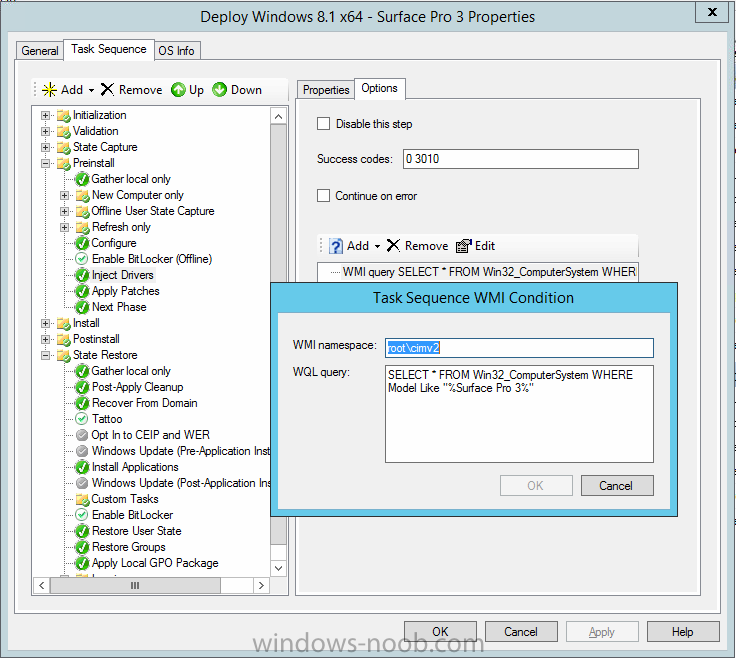
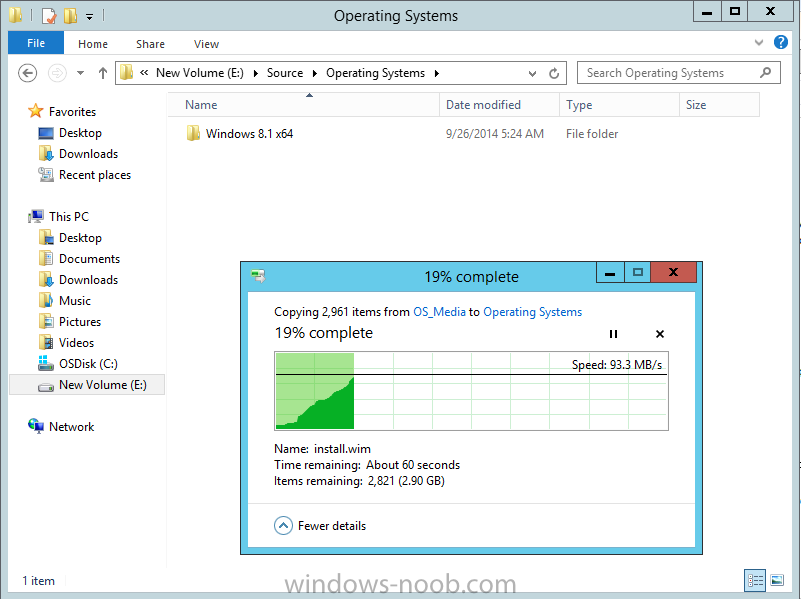
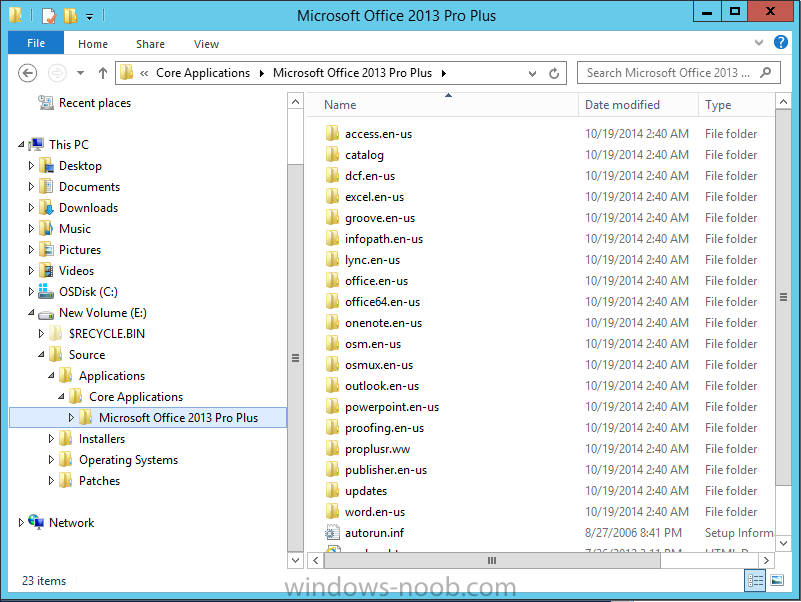
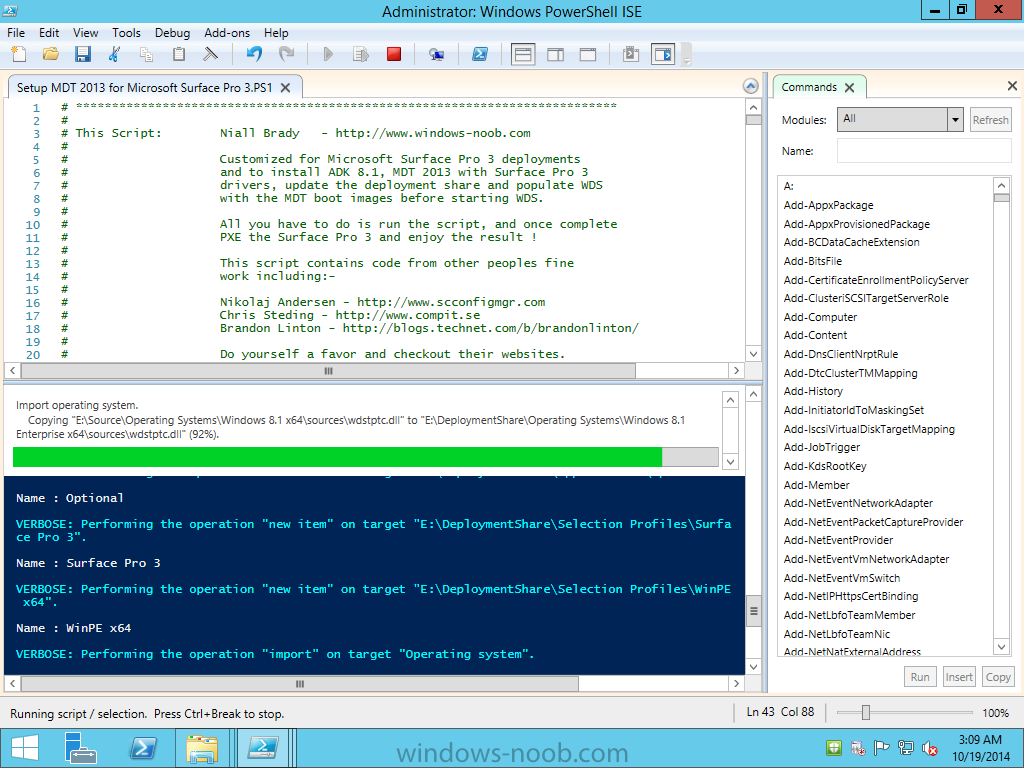
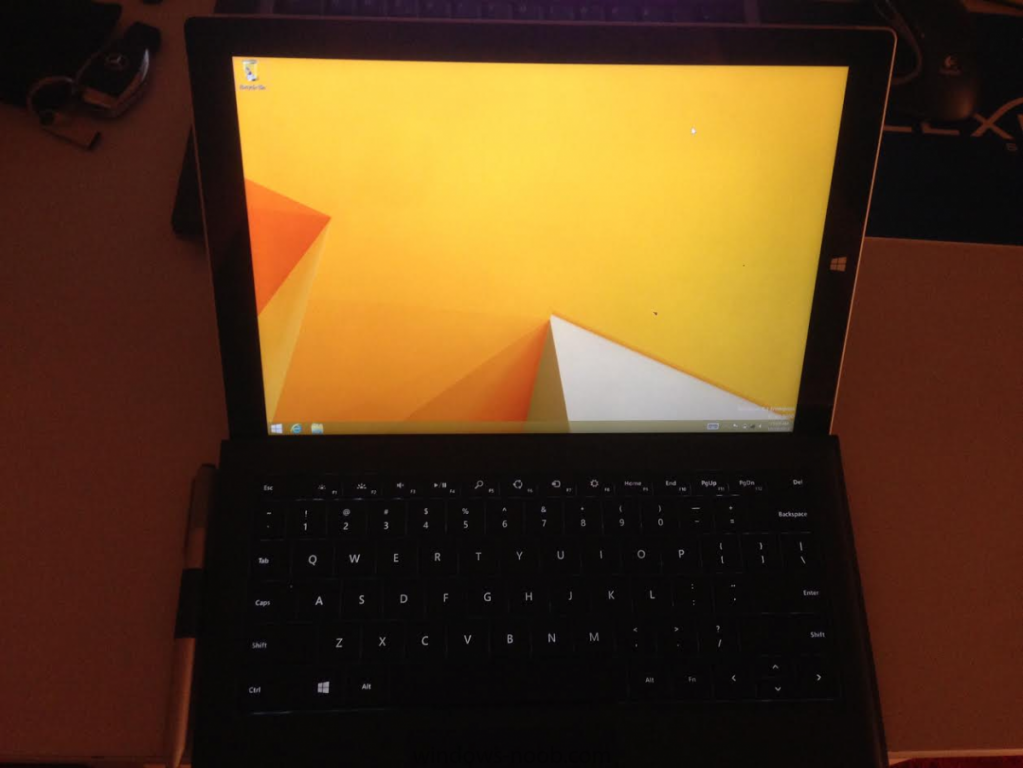
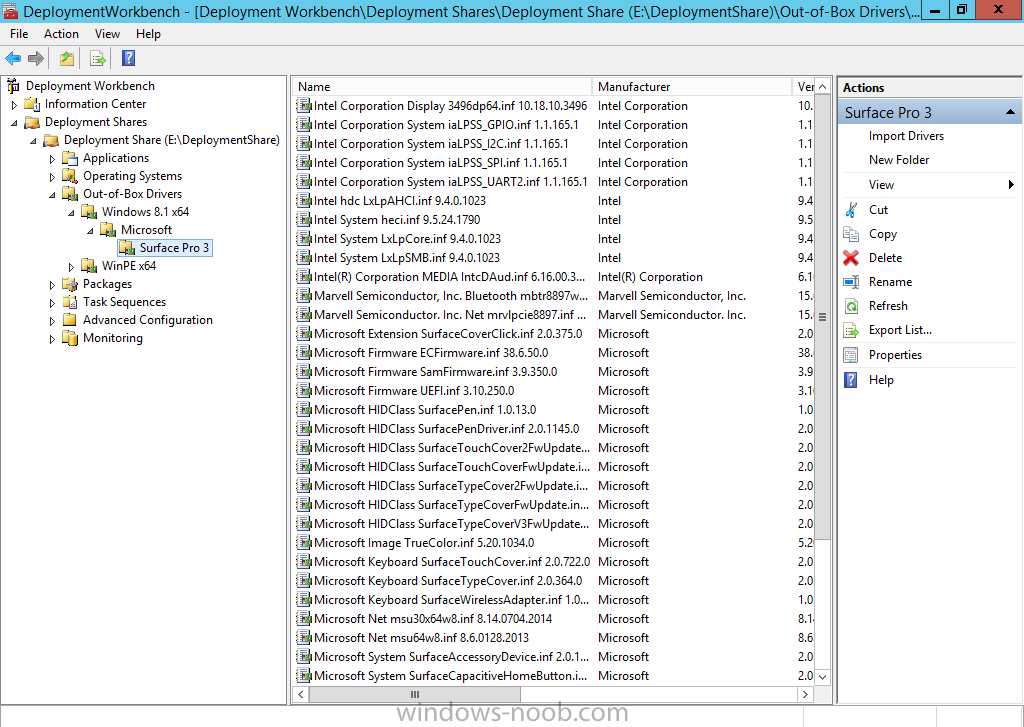
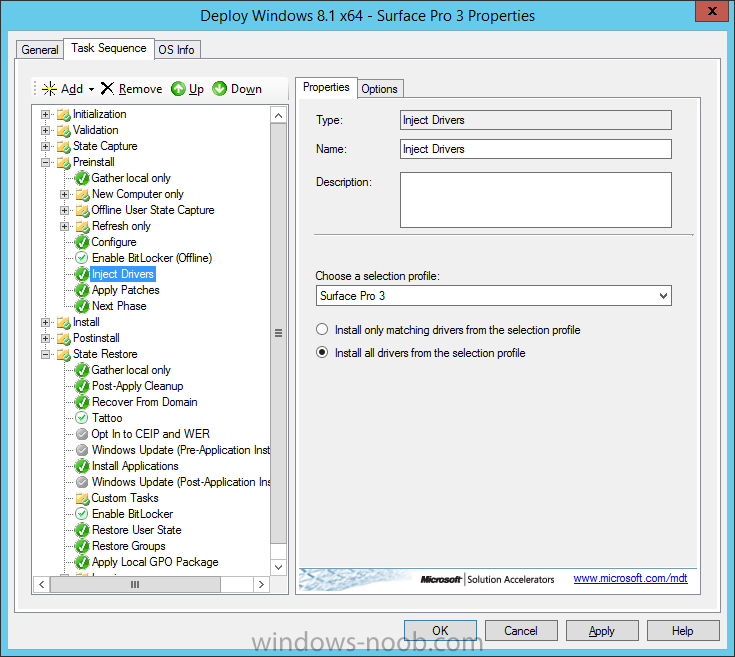
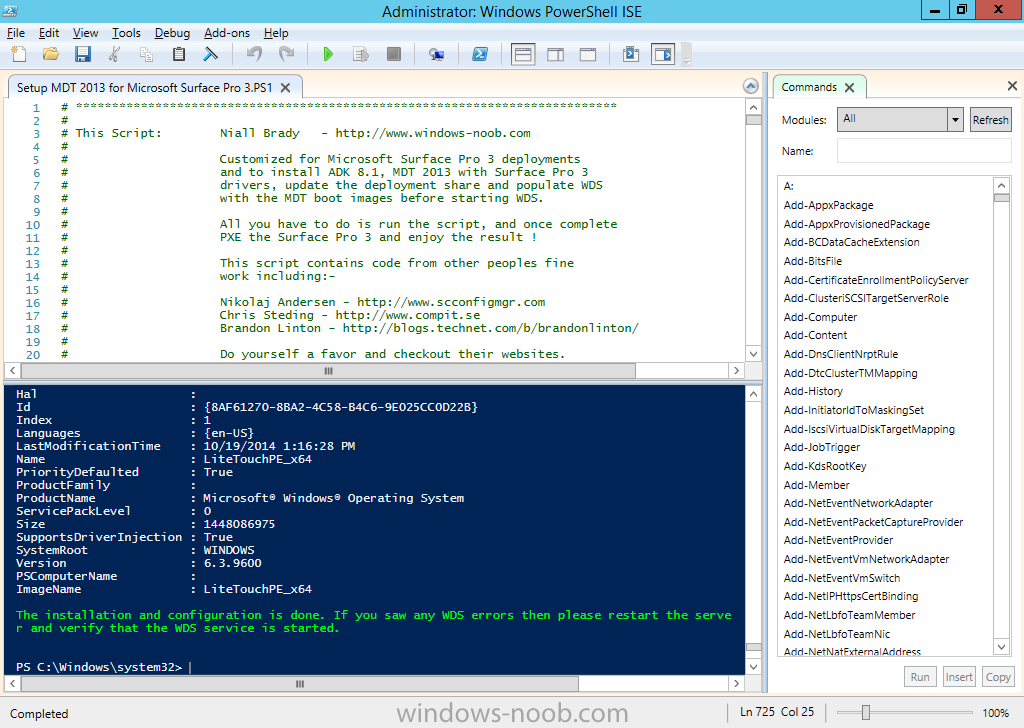
Introduction In a previous post I showed you how you can deploy Windows 8.1 x64 to the Microsoft Surface Pro 3 using System Center 2012 R2 Configuration Manager. In this post I'll show you how to do the same thing with Microsoft Deployment Toolkit (MDT) 2013, except this is fully automated, all you have to provide is a server, the operating system files and change a few variables in the script. Note: As this is fully automated, and as this does install a WDS server role hosting a boot image, you should test it in a lab first and modify the script accordingly. There are many PowerShell scripts out there to create fully automated labs (hydration kits) from MDT gurus like Johan Arwidmark or Mikael Nystrom or upcoming cool dudes like Nickolaj Andersen, but this script is tailored for one thing only, deploying Windows 8.1 x64 to the Microsoft Surface Pro 3 with all drivers loaded. You may want to download it and customize it to suit your needs for other hardware because what it does is pretty cool. This script performs the following actions:- Downloads and then Installs Windows ADK 8.1 (if you have not done so already) Downloads and then Installs MDT 2013 (if you have not done so already) Downloads all required drivers for Microsoft Surface Pro 3 (see screenshot below) Adds the Windows 8.1 x64 operating system into MDT Adds the Microsoft Surface Pro 3 drivers into MDT (see screenshot below) Creates Selection Profiles for Microsoft Surface Pro 3 and WinPE x64 (see screenshot below) Creates a Deploy Windows 8.1 x64 - Surface Pro 3 task sequence Edits the Deploy Windows 8.1 x64 - Surface Pro 3 task sequence and adds an inject drivers step for Microsoft Surface Pro 3 (see screenshot below) in addition, it sets the WMI query for the Surface Pro 3 on that step (see screenshot below) Injects the Microsoft Surface Pro 3 network drivers into the LiteTouchPE_x64.wim Creates new CustomSettings.ini and BootStrap.ini files Disables the X86 boot wim (not needed for Surface Pro 3) Changes the Selection Profile for the X64 boot wim to use the WinPE x64 selection profile (see screenshot below) Installs the Windows Deployment Service role Configures the WDS role and adds the previously created LiteTouchPE_x64.wim (see screenshot below) Starts the WDS service so that you can PXE boot (UEFI network boot).All you have to do is download the script below, then place some files in the right place, PXE boot a Microsoft Surface Pro 3 and sit back and enjoy the show. So let's get on with what you need to do... Step 1. Download the script This PowerShell script will do all the hard work for you, download it and place it on your server that is designated to be the MDT 2013 server. I've tested it on Server 2012R2 only, if you run it on a different operating system and have issues then post your results below. Setup MDT 2013 for Microsoft Surface Pro 3.zip Update: I've updated the script above to include the March 2015 drivers and updates and it's available here. Step 2. Configure the variables in the script Once you have downloaded the script, you should configure the variables interspersed throughout the script, the most important of them is the $SourceFolder variable as this decides where to get the content from (if you've copied it already) and where to store it. This variable should point to a valid drive letter, the folder name will be created if it does not exist. The $FolderPath variable will be the MDT Deployment share root folder eg: E:\DeploymentShare. There are other variables to configure, scroll down through the script to find them, such as the ones below You will also want to edit the CustomSettings.ini and BootStrap.ini settings within the script to suit your own environment. Step 3. Copy the Windows 8.1 x64 operating system files Mount a Microsoft Windows 8.1 x64 Enterprise ISO and copy the contents to $SourceFolder\Operating Systems\ as shown below Step 4. Copy MDT 2013, ADK 8.1, Surface Pro 3 drivers (optional) If you've already downloaded the above files then place them in the source folder, otherwise the script will download them for you. In the screenshot below you can see I'm manually copying the offline ADK 8.1 files, you do not have to do this as the script will download the content for you if it's not found. Step 5. Copy your Applications to the respective folders (optional) If you have apps like Office 2013, copy them to their respective folders as shown below If you do add apps, then you'll also need to change the following section of CustomSettings.ini SkipApplications=YES to SkipApplications=NO Step 6. Run the script On the server that is to be your MDT server, start the script in PowerShell ISE or which method you prefer, below you can see the script in action, it has just created the selection profiles for the Surface Pro 3 After the script is complete, you are ready to test deploying a Microsoft Surface Pro 3 installation. and below you can see the E:\Source folder after the script has run, it has downloaded a bunch of stuff ! Step 7. Sit back and watch the deployment Take a properly shutdown Surface Pro 3, and power it on using the following sequence Hold the down volume key and then press the power button while continuing to hold down the volume key, it should PXE boot Press enter when prompted and then it will load the MDT LitetouchPE_X64 boot wim. before prompting you for a computername, note that it's currently set to SurfacePro3, you can change it in the UI itself or automate it via the many methods available such as those that Mikael describes here click next and off it goes, inject the Surface Pro 3 drivers (oh and of course, you've got working network in WinPE as the network drivers were added to the boot wim already) and after a wee while, it's done. Troubleshooting If the script has issues starting WDS (and you see the error below) then restart the server, as you were asked to do at the end of the script ;-). For deployment issues, you can review the logs found in the following locations depending on what part of the OSD process you are in:- In WinPE X:\windows\temp\SMSTSLOG In Windows C:\Windows\Temp\DeploymentLogs C:\MININT\SMSOSD\OSDLOGS C:\Users\Administrator\Appdata\Local\temp\SMSTSLog Summary Automating the deployment of Windows 8.1 x64 Enterprise to the Microsoft Surface Pro 3 is not only possible but relatively easy with MDT 2013 and a custom powershell script like the one above. I must also say a big thanks to Nikolaj who helped me with some issues in the script, you are awesome ! Related Reading Using PowerShell to modify settings in MDT 2013 - http://www.scconfigmgr.com/2014/08/23/using-powershell-to-modify-settings-in-mdt-2013/ Where do I find the MAC address of my Surface Pro 3 Ethernet Adapter in order to use UEFI network boot ? - http://www.niallbrady.com/2014/09/11/where-do-i-find-the-mac-address-of-my-surface-pro-ethernet-adapter-in-order-to-use-uefi-network-boot/ Why is my Surface Pro 3 not BitLockered after OSD via System Center 2012 R2 Configuration Manager ? - http://www.niallbrady.com/2014/09/18/why-is-my-surface-pro-3-not-bitlockered-after-osd-via-system-center-2012-r2-configuration-manager/ Why does my Surface Pro 3 take a very long time to UEFI Network Boot using System Center 2012 R2 Configuration Manager ? http://www.niallbrady.com/2014/09/09/why-does-my-surface-pro-3-take-a-very-long-time-to-uefi-network-boot-using-system-center-configuration-manager-2012-r2/ Surface Pro 3, Surface Pro 2, and Surface Pro firmware and driver packs http://www.microsoft.com/en-us/download/details.aspx?id=38826 Updating the UEFI firmware offline - http://blogs.technet.com/b/askpfeplat/archive/2014/10/20/how-to-update-the-surface-pro-3-firmware-offline-using-a-usb-drive.aspx Deploy Windows to Surface Pro 3 using Microsoft Deployment Toolkit


-
MMS is back ! The folks putting on the Midwest Management Summit were able to get the hotel to extend conference room discount pricing, so they are also extending the normal conference registration price until Friday, October 17th. After that, you would have to pay full price for the conference and hotel rooms. The Midwest management Summit is a 3-day conference purposely capped to just 500 attendees so that nobody gets lost in the crowd. Almost 60 Microsoft MVP’s will be presenting real-world solutions to systems management challenges with ConfigMgr, OpsMgr, SCOrch, PowerShell, and more. Hotel Rooms Discount If you are using our user group discount code, you’ll need to book the discounted hotel room rate through https://www.radissonhotels.com/en-us/hotels/radisson-blu-bloomington-mall-of-america using the promotion code ‘MNSCUG’ before Friday, October 17th. Midwest Management Summit November 10-11-12, 2014 http://mms.mnscug.org Twitter and Facebook The MMS Conference Committee Key Contacts: Nash Pherson – User Group Coordinator – nash@mnscug.org Kalsey Beach - Event Coordinator - kalsey@dogoodevents.com MMS Conference Committee - Everybody - mms@mnscug.org
-
hi you posted your questions on the end of someone elses thread, and they weren't related so I separated this, in future, please raise a new topic when posting your questions.
-
have you verified the contents of the unattend.xml file before and after setup windows and configmgr step ?