anyweb
-
Posts
9261 -
Joined
-
Last visited
-
Days Won
371
Everything posted by anyweb
-
 can you do teamviewer ?
 -
Many system administrators have been working with on-premises infrastructure for their whole careers so moving to a cloud-based environment can feel like a leap of faith. However, making the leap to Azure doesn’t have to be daunting. With the right preparation it can be a smooth transition, consistent with your current on-premises configuration. This free eBook written by veteran IT consultant and Microsoft Certified trainer Paul Schnakenberg covers all aspects of setting up and maintaining a high-performing Azure IaaS environment. It starts from the very basics, introducing key terms and features you need to get started, including migration, and goes on to explain everyday maintenance and best practices before covering more advanced features. To get the best results from this eBook, it is recommended to follow along with the step-by- step tutorials using your own Azure subscription. If you don’t currently have access, the eBook explains how to set up a free 30-day trial alongside $200 worth of Azure resources to use and 12 months of additional free resources! Altaro consistently delivers high-quality eBooks that are packed full of valuable guidance for system administrators and this latest eBook is no exception. If you currently use Azure IaaS or are planning to use it, this is an awesome free resource that you definitely should not miss. Download your free eBook today

-
so search for it on that drive and copy it to that location, that's what i'd try... and repeat for each one
-
application management DP issue
anyweb replied to rob343's topic in System Center Configuration Manager (Current Branch)
pull the logs from a client that shows the problem and start reading them for clues -
thanks for the feedback, i will amend the guide to point this out, however the guide does not show a powershell cmd prompt for that cmd, fyi and i'm sure you've noticed that by now...
-
does this file exist ? WARNING: Failed to find default package file F:\SCCM Install Folder\Microsoft Configuration Manager\bin\x64\00000409\CMUpdateInstallationStatus.en-US.resx. LastError=2
-
it could be anything, is there 3rd party av installed on the server ? any details of the setup would be useful as would a full cmupdate.log, that snippet doesn't help unfortunately and the failure would be before that...
-
it worked for me when i blogged it, do you have teamviewer, i could remote in and test with what you have...
-
what version of ConfigMgr are you upgrading from (and to...?)
-
WU4B vs WU
anyweb replied to Kevin79's topic in System Center Configuration Manager (Current Branch)
the main benefits would be that it can be totally cloud based (if that's what you configure via intune) versus on premise infrastructure, and it simplifies things by lowering complexity, here's a dated but fairly decent blog post about it and here's a more recent blog post detailing abilities -
why not use powershell application deployment kit, it will take care of this for you no problem
-
@BlakeGetzcan i take a look at it via teamviewer ? alternatively try this, open regedit and change the following reg key value. [HKEY_LOCAL_MACHINE\SOFTWARE\Microsoft\SMS\SRSRP] "SRSInitializeState"=dword:00000000 The value should be changed to 0, then wait for the value to change back to 1. It will change to 2 for a while. You can amonitor the srsrp.log while you wait
-
nice, you should share the updated code here
-
Introduction In an earlier post I showed you how you can enable Full Disk Encryption via a task sequence in Microsoft Endpoint Manager Configuration Manager version 1910. The screenshots in that blog post were taken from virtual machines and won’t run correctly on virtual machines, as for some reason, Full Disk Encryption (FDE) in the Pre-Provision Bitlocker step requires real hardware. In this blog post I want to show you how those steps work on real hardware, in this case a HP Prodesk 600 G3 SFF fitted with an old 256GB hdd. I’ve placed pause steps before and after each of the BitLocker related steps and will issue various commands to ‘see’ the effect of those steps on real hardware. In this post we’ll look in detail at how Full Disk Encryption functions within the two BitLocker specific steps, namely: Pre-Provision BitLocker Enable BitLocker Note that the TPM has already been enabled in the UEFI firmware on this hardware. Pre-Provision Bitlocker The Pre-Provision Bitlocker step allows you to save time by encrypting only used space (normally) so how does this step work when Use full disk encryption is selected. The first thing you need to keep in mind is that enabling FDE will significantly increase OSD build times. So, now that we’ve paused the task sequence at this point, it’s good to note that the HDD has been formatted in the previous Partition Disk 0 – UEFI step and due to that, it is not encrypted in any way as the following command reveals. manage-bde -status Conversion Status: Fully Decrypted After running the Pre-Provision BitLocker step we can see the following in smsts.log the interesting bits in relation to the TPM are shown below: Tpm is enabled Tpm is activated Tpm is owned Tpm ownership is allowed Tpm has compatible SRK Tpm has EK pair Initial TPM state: 63 For comparison’s sake, here’s a view of smsts.log on the same hardware after the TPM has been cleared in Windows using TPM.MSC as administrator. Tpm is enabled Tpm is activated Tpm is not owned Tpm ownership is allowed Tpm has compatible SRK Tpm has EK pair Initial TPM state: 55 As you can see in that example, the TPM is not owned so ownership is instigated by the Pre-Provision BitLocker step: Taking ownership of TPM Note: You can perform hardware actions such as clearing the TPM, via hardware vendor specific custom steps in your task sequence, or do them manually in the UEFI firmware, or via tpm.msc in Windows (as Administrator). and further down in smsts.log it lists that it is Encrypting full disk. and, if we look at manage-bde -status it reveals the following, the drive is being encrypted ! You can see the rest of this blog post here https://www.niallbrady.com/2020/02/25/full-disk-encryption-a-closer-look-on-real-hardware/
-
yes well spotted, probably a typo in $logstriing... as regards sysnative, try changing it to C:\Windows\system32\WindowsPowerShell\v1.0\powershell.exe
-
Bitlocker - Drives not Encrypting
anyweb replied to ukg_matt's topic in System Center Configuration Manager (Current Branch)
are you saying they are reporting as non compliant but are in fact, compliant ? if so have you installed the hotfix available for 1910 in the console ? -
i'll try and do up a blog post on this in the coming weeks, time willing of course
-
you could follow this guide and it should populate your keys in configmgr's database https://docs.microsoft.com/en-us/microsoft-desktop-optimization-pack/mbam-v25/how-to-enable-bitlocker-by-using-mbam-as-part-of-a-windows-deploymentmbam-25
-
just to be clear, are you saying you want to have your OSD task sequences take care of Bitlocker Encryption and storage of the key in ConfigMgr 1910 with the bitlocker management feature enabled ?
-
SCCM CB 1910 - Bitlocker
anyweb replied to FSiglmueller's topic in System Center Configuration Manager (Current Branch)
hi Florian, I'd suggest you look inside the powershell script itself, and use switches based on that, here's a hint, post your results here. And as regards the Bitlocker Management websites being in SSL or not, Microsoft recommends but doesn't require the use of HTTPS for the Bitlocker websites (HTTPS is still required in CM1910 for the MP recovery service endpoint though) https://docs.microsoft.com/en-us/configmgr/protect/deploy-use/bitlocker/setup-websites
-
SCCM CB 1910 - Bitlocker
anyweb replied to FSiglmueller's topic in System Center Configuration Manager (Current Branch)
it's covered in this video, simply point it to the servername where you intend those services to run and the command lines are here. -
SCCM CB 1910 - Bitlocker
anyweb replied to FSiglmueller's topic in System Center Configuration Manager (Current Branch)
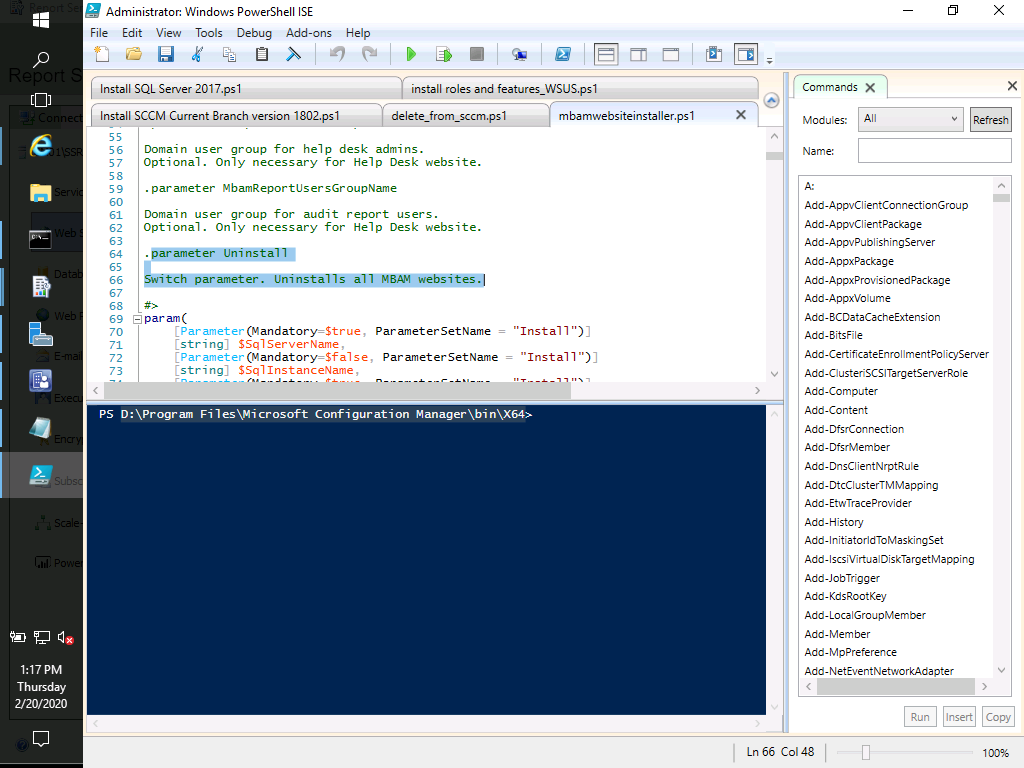
you can move them by running the powershell script to install the helpdesk and self service desk on another site server, it must have IIS installed along with the prerequisites below In version 1910, to create a BitLocker management policy, you need the Full Administrator role in Configuration Manager. To integrate the BitLocker recovery service in Configuration Manager requires a HTTPS-enabled management point. On the properties of the management point, the Client connections setting must be HTTPS. Note In version 1910, it doesn't support Enhanced HTTP. To use the BitLocker management reports, install the reporting services point site system role. For more information, see Configure reporting. Note In version 1910, for the Recovery Audit Report to work from the administration and monitoring website, only use a reporting services point at the primary site. To use the self-service portal or the administration and monitoring website, you need a Windows server running IIS. You can reuse a Configuration Manager site system, or use a standalone web server that has connectivity to the site database server. Use a supported OS version for site system servers. Note In version 1910, only install the self-service portal and the administration and monitoring website with a primary site database. In a hierarchy, install these websites for each primary site. On the web server that will host the self-service portal, install Microsoft ASP.NET MVC 4.0. The user account that runs the portal installer script needs SQL sysadmin rights on the site database server. During the setup process, the script sets login, user, and SQL role rights for the web server machine account. You can remove this user account from the sysadmin role after you complete setup of the self-service portal and the administration and monitoring website. -
SCCM 1910 - PXE Boot 0xc0000001
anyweb replied to Joe13's topic in System Center Configuration Manager (Current Branch)
did you try to restart the wds service and redist your boot images after doing the change ? -
hi, see below do we need to enable full disk encryption during the OSD for this to work? the following docs explain that you can do this during OSD By default, the Enable BitLocker task sequence step only encrypts used space on the drive. BitLocker management uses full disk encryption. Configure this task sequence step to enable the option to Use full disk encryption. For more information, see Task sequence steps - Enable BitLocker. -do we need to set bitlocker encryption levels in the OSD still and GPOs or just use the new Bitlocker deployment policy after the machine is online? it's up to you which way works better, do you want to control bitlocker (keys) during OSD or after, that's entirely up to you, the easiest way is to simply target the policy after it's imaged, but the safest way is to configure it during OSD.
-
Tasksequence auto selection
anyweb replied to FlyFly's topic in System Center Configuration Manager (Current Branch)
if you want to remove choice then simply deploy the task sequence with a purpose of Required, but, be warned, be very careful about what collection you deploy any required task sequences too because they are Mandatory and can cause all sorts of issues if you get your queries wrong, or if you target a collection with many computers inside...