anyweb
-
Posts
9271 -
Joined
-
Last visited
-
Days Won
371
Everything posted by anyweb
-
 i've emailed them, let's see if they reply
 -
I can check with the product group if you can wait on their reply ?
-
no you don't but you do need the serviceui,exe from mdt, can you post your smsts.log so i can see what's going wrong ? and a view of your actual step in the task sequence
-
it's still here, just click on the download (it's only available to logged in registered members)
-
Mbam Website Installer Error
anyweb replied to ukg_matt's topic in System Center Configuration Manager (Current Branch)
ok good info, i'll try my best to verify this when I have time... -
everything inside the LAB should be on a private network, that way everything in the lab can talk to itself without interference from the outside, if you map a switch to a network card then that effectively gives your lab access to anything on that network and vice versa, so if your network card is connected say to your internal company network, and you set your switch to External, using your onboard NIC, then your dhcp server could start handing out ip's on your company network, and you don't want that. so keep your lab private, and only share internet into the lab using a smoothwall or similar. if you want to 'test' deploying things (like operating systems or otherwise) to computers outside of the lab, then follow my guide here
-
hi, if you are planning on doing this on a Surface that's fine as long as it has at least 16GB of ram (minimum) for all the virtual machines, and lots of storage. for both #1 and #2 configure the switch as PRIVATE that way it won't matter that you are running DHCP as it will be self contained in it's own private network
-
Mbam Website Installer Error
anyweb replied to ukg_matt's topic in System Center Configuration Manager (Current Branch)
also can you modify your cmdline to correctly specify the reportserver via the -ReportWebServiceUrl switch, yours is currently pointing to Reports and it should point to Reportserver here's a sample .\MBAMWebSiteInstaller.ps1 -SqlServerName cm01.windowsnoob.lab.local -SqlInstanceName MSSQLSERVER -SqlDatabaseName CM_P01 -ReportWebServiceUrl http://cm01.windowsnoob.lab.local/Reportserver -HelpdeskUsersGroupName "windowsnoob\MBAM_HD" -HelpdeskAdminsGroupName "windowsnoob\MBAM_HD_Adv" -MbamReportUsersGroupName "windowsnoob\MBAM_HD_Report" -SiteInstall -
Mbam Website Installer Error
anyweb replied to ukg_matt's topic in System Center Configuration Manager (Current Branch)
ok got them, when you created the certs did you get any errors during that process or did it all proceed happily ? did you verify that it met all these requirements ? The name of the BitLocker management encryption certificate must be BitLockerManagement_CERT. Encrypt this certificate with a database master key. The following SQL users need Control permissions on the certificate: RecoveryAndHardwareCore RecoveryAndHardwareRead RecoveryAndHardwareWrite Deploy the same certificate at every site database in your hierarchy. Create the certificate with the latest version of SQL Server in your environment. For example: Certificates created with SQL Server 2016 or later are compatible with SQL Server 2014 or earlier. Certificates created with SQL Server 2014 or earlier aren't compatible with SQL Server 2016 or later. and lastly, did you verify the certificate creation using the Verify certificate SQL script ? please confirm, what i can try and do (in my lab) is to revert it and go through this process, see how it works for me, but... it is dependent on time, -
thanks for the feedback, but no it's not missing, that is why we do cd \ in step 5, it moves us from c:\windows\system32 to c:\ before running the command, which in turn, creates the cert in that location, if you want to specify the location of it go ahead and it's possible, but it's not 'missing' if you follow the steps above exactly, it will work 100% this command retrieves the CA certificate from the issuingca and places (recreates it) using the name you specify in the folder you are currently in see docs: https://docs.microsoft.com/en-us/windows-server/administration/windows-commands/certutil -ca.cert CertUtil [Options] -ca.cert OutCACertFile [Index] Retrieve the CA's certificate OutCACertFile: output file Index: CA certificate renewal index (defaults to most recent) [-f] [-split] [-config Machine\CAName] cheers niall
-
Mbam Website Installer Error
anyweb replied to ukg_matt's topic in System Center Configuration Manager (Current Branch)
ok what command line did you use to install, can you paste it here please and did you create all the certificates or just one, what command lines did you use to create the certificates, the more info I have the more i can help if you don't want to post it here then mail it to me, niall AT windows-noob DOT com cheers niall -
Thank you for the lab (up to part 6 its all working fine) Great to hear it ! Just a short question: how can I add templates? My PaloAlto FW needs the Subordinate Certification Authority template for inspecting network traffic. It is only with "new - certificate template to issue"? (This sounds too easy ? ) in Certsrv.msc on the IssuingCA right click on Certificate Templates, and choose Manage, you can then select a known Certificate Template (for example Workstation Authentication) that matches what is required for your FW, check the documentation of the FW to see exactly what type of certificate it requires and duplicate it by chgoosing Duplicate Template then rename it to your needs and adjust it to suit the FW requirements and as for your other question, see this answer from Technet. According to https://docs.microsoft.com/en-us/windows-server/networking/core-network-guide/cncg/server-certs/prepare-the-capolicy-inf-file the LoadDefaultTemplate flag only applies to an enterprise CA. My assumption is that if you set up a standalone, the templates will be loaded nevertheless. LoadDefaultTemplates only applies during the install of an Enterprise CA. This setting, either True or False (or 1 or 0), dictates if the CA is configured with any of the default templates.
-
good to hear it, the 5th report is the one in the language specific folder, eg: en-us. for auditing of recovery keys. to confirm you only did a HINV cycle on the client and the error above vanished ? can you also confirm that you had the up to date 1910 client installed on the client or was that also part of your problem ? cheers niall
-
ok that's odd, so are you getting errors on all the 5 bitlocker reports ? do all other non-bitlocker reports render correctly for the same user ? lastly, have you looked at this post to see does it give you any pointers https://www.niallbrady.com/2019/11/12/a-quick-look-at-reporting-in-mbam-integrated-with-microsoft-endpoint-manager-configuration-manager/
-
thanks for the thanks what version of Configuration Manager are you using ?
-
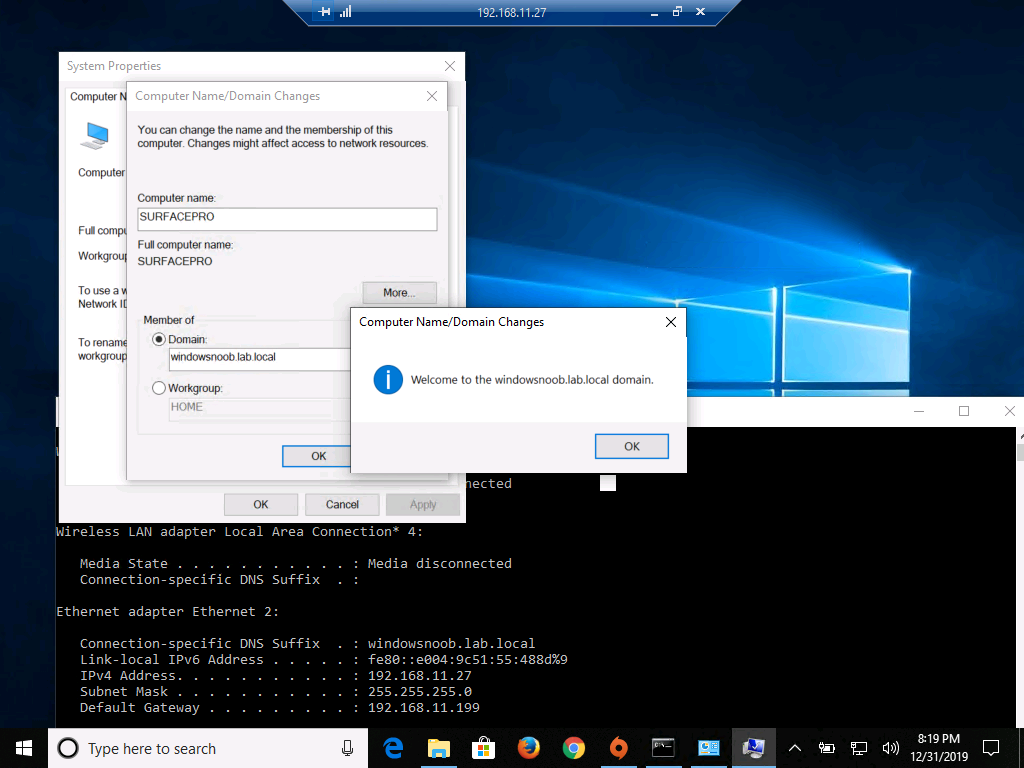
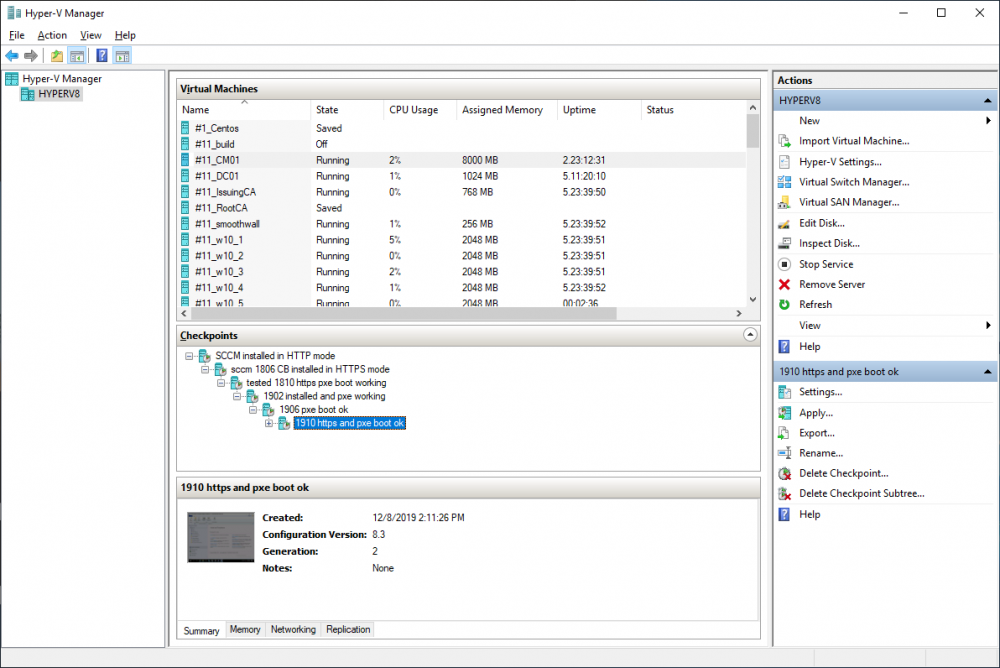
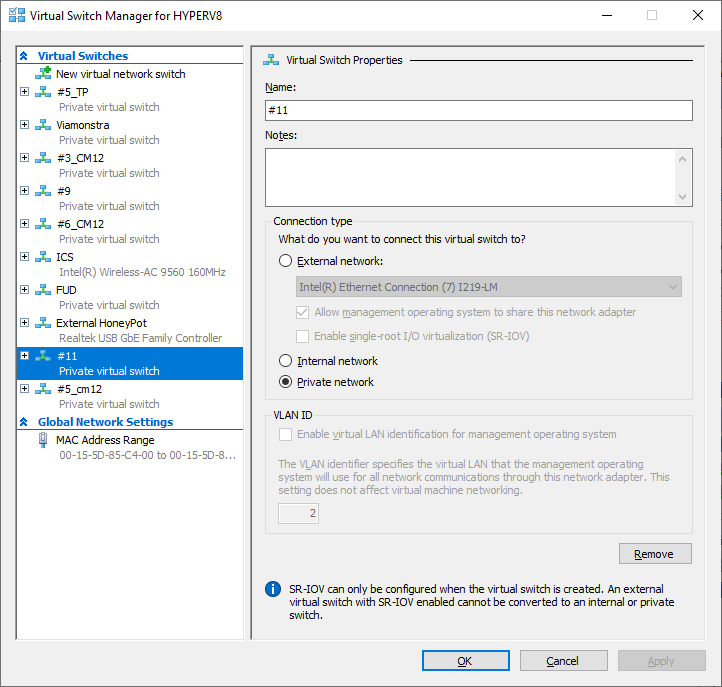
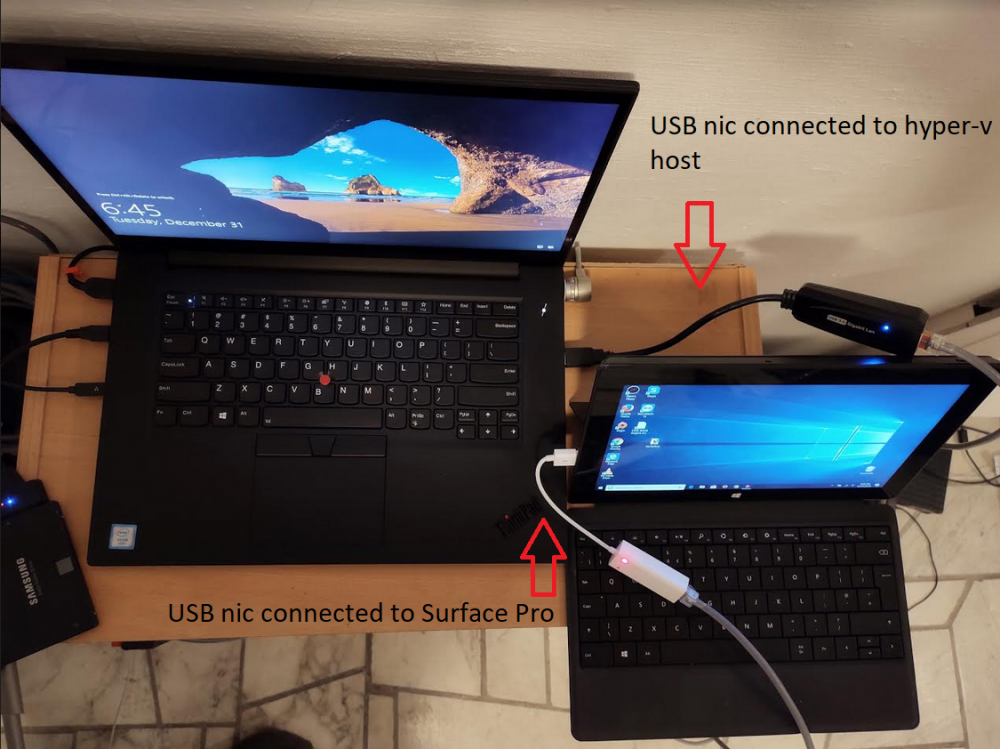
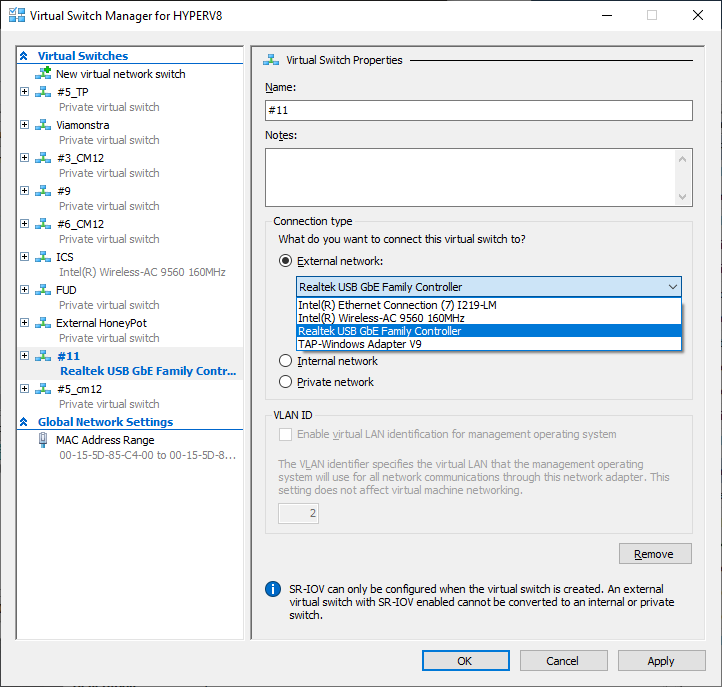
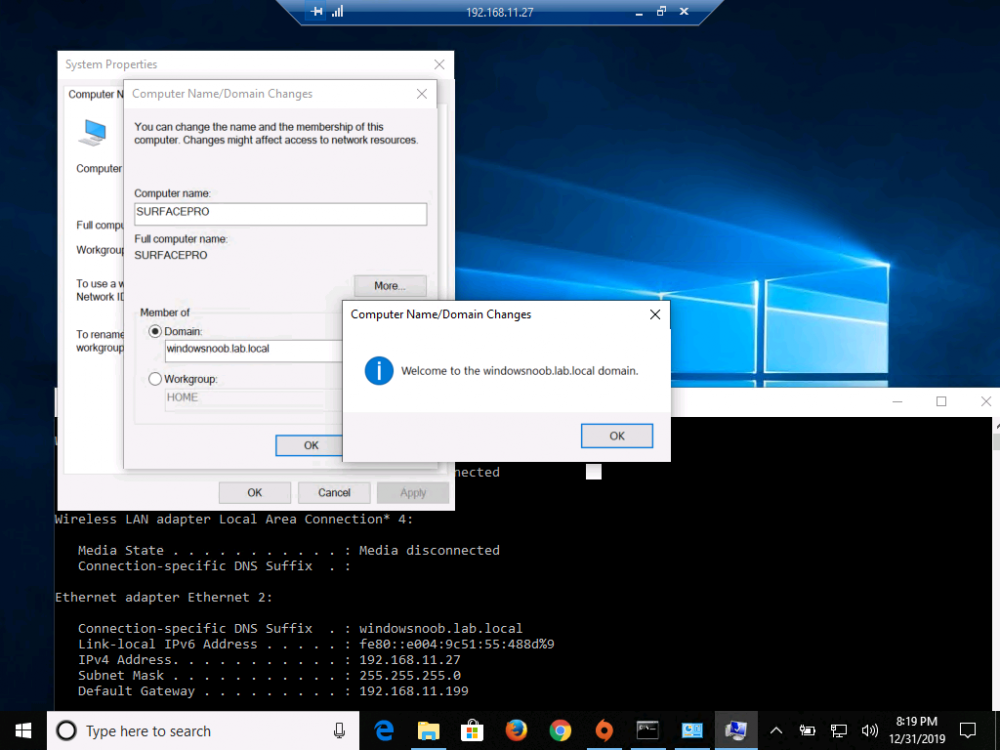
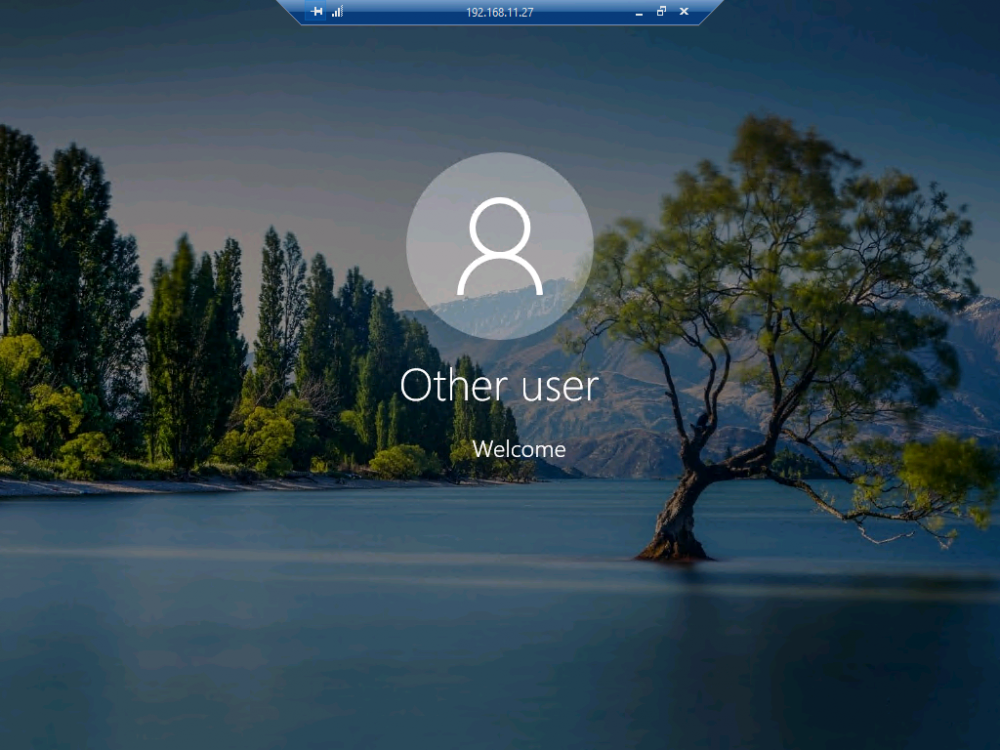
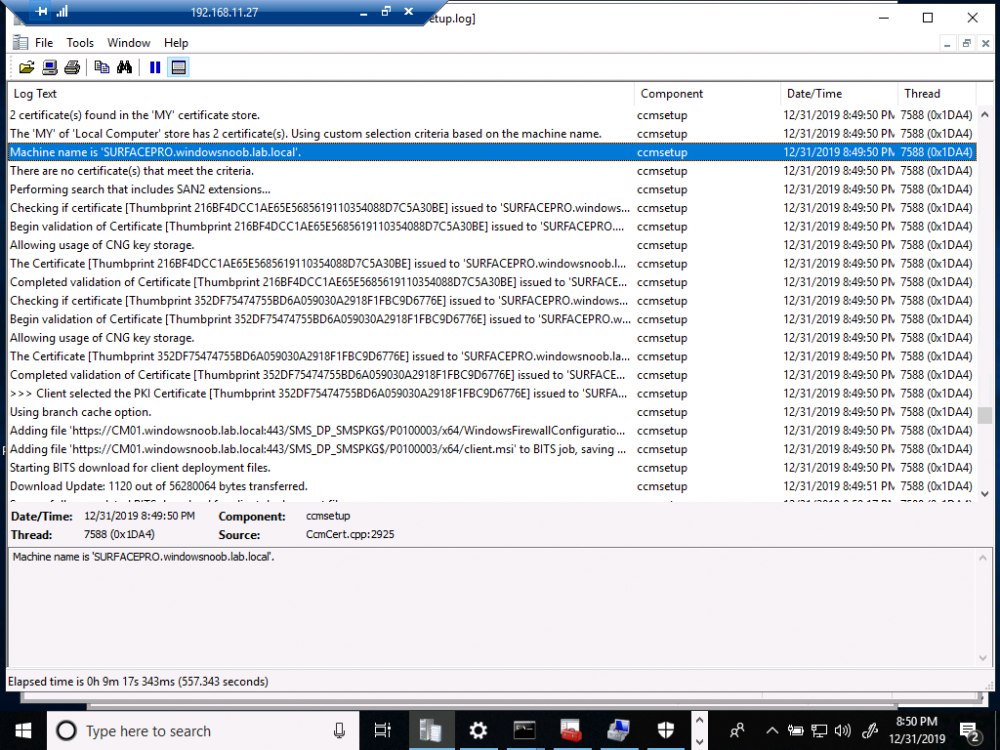
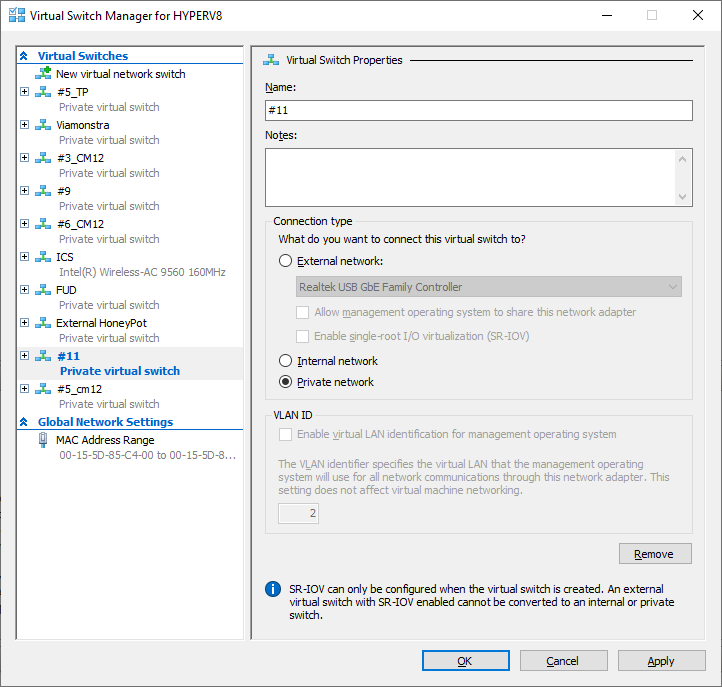
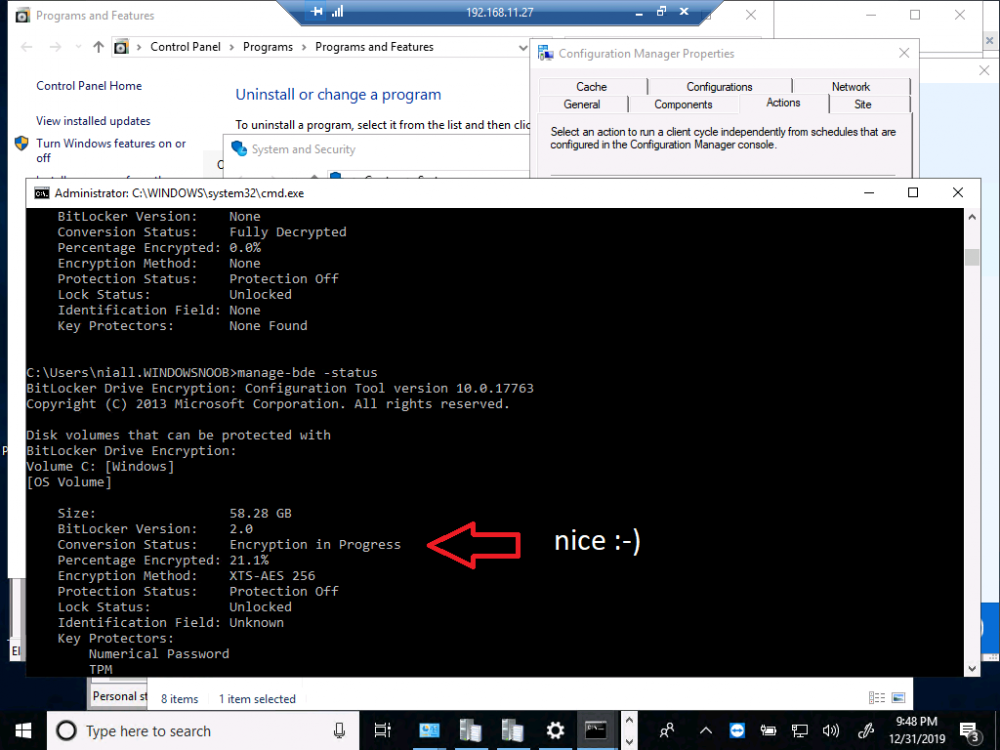
Introduction I occasionally want to connect real physical computers directly within one of my hyper-v based virtual labs to test various functionality within that lab which may require real hardware. A good example of that is testing MBAM Bitlocker management via Microsoft Endpoint Configuration Manager version 1910. This post will show you one way of connecting physical hardware to your internal hyper-v lab easily. Note: There are other ways of doing this, but this is really easy and quick and I thought i'd share it with you. Requirements To get the job done, you'll need some equipment, here's a small list. A hyperv host A working lab A physical computer to connect to your lab 2 USB network cards 1 network cable Optional: a DHCP scope inside your lab to share IP addresses to the real physical computer Optional: a Switch or hub if you want to connect more than one physical device Step 1. Connect the physical computer to the hyper-v host Here, I simply connect the network cable above to the 2 USB network cards, and plug one USB nic into the physical computers' USB port, and the other USB Nic into a free USB port on the Hyper-v host. the hyper-v host in this photo is the amazing Lenovo P1 laptop on the left of the picture, the 'physical computer' is the old Surface Pro computer. Step 2. Identify your labs virtual switch In Hyper-v, locate the lab you want to use. In the screenshot below, I'm going to use lab #11 for this as it's my main Microsoft Endpoint Configuration Manager (Current Branch) lab for testing MBAM functionality. In the right pane of the Hyper-v management console, click on Virtual Switch Manager to see your configured switches. Here you can see the virtual switch which I'm using for the #11 lab, it's called #11 and it's a private network. Note: If the USB nic used for this external access is already in use on your hyper-v host on another network switch, such as mine is, on the External Honeypot, you should first remove it from that network switch before trying to assign it to another network switch. Step 3. Change the network connection type Now that you've identified the target network switch, you can now switch the network connection type temporarily for the period of your test. I like to keep my labs on a private network unless otherwise called for, such as for this test. Set the connection type to External Network and next, select the USB nic from the list of available network cards, that is physically connected to your hyper-v host. Once done, de-select the option to Allow management operating system to share this network adapter. Click Apply when done. Step 4. Utilize the lab network on a physical computer Now that you've connected a physical computer to the internal hyper-v host lab, you can do whatever testing you hoped to carry out. In the below screenshot I have used RDP to connect to the physical computer from inside of the #11 lab and from there I can now join it to the internal lab domain for further testing. I could of course re-image the device but as it's a shared device (aka the kids) I won't be doing that this time. and after the reboot you can login as a user that has Remote Desktop access and do whatever testing you wanted to carry out on real physical hardware. Install the ConfigMgr client... Step 5. Once done testing, set your lab back to Private Network Now that you are done testing, don't forget to set your labs network connection back to Private Network. This will avoid problems with networks getting crossed or devices talking to each other that shouldn't be. And don't forget to click Apply that's it, until next time, cheers niall.

-
Configuring BitLocker in Intune - Part 2. Automating Encryption
anyweb replied to anyweb's topic in Microsoft Intune
thanks @olavrb this is a good contribution, please keep them coming, as regards your profile pic, you need at least 10 posts to be able to change it, cheers ! niall -
Just wanted to follow up and let you know I have had great success utilizing your script.. the error checking is superb.. thank you for the work and troubleshooting you have done to vet your script.. you are a life saver!! great to hear it ! and thanks for the kind words @Jerzystransfer
-
first things first, why are you deploying Windows 7, it goes end of life January 14th, 2010, so in a couple of weeks. Secondly i've no idea what your actual problem is, I can't read Chinese.. can you try translating your issue first in google translate and post it here ?
-
Configuring BitLocker in Intune - Part 2. Automating Encryption
anyweb replied to anyweb's topic in Microsoft Intune
sure post your updated code here -
why are you still using and even considering moving SCCM 2012 SP2 into Azure ? this version of ConfigMgr is out of mainstream support and is on extended support currently. https://support.microsoft.com/en-us/lifecycle/search/1060 if you want to use ConfigMgr in Azure then you'll need to be on a Current Branch release see - https://docs.microsoft.com/en-us/configmgr/core/understand/configuration-manager-on-azure
-
can you give some details of what you were doing here exactly and what type of drive D:\ is ?
-
you also need to remove any encryption on those devices before implementing BitLocker.
-
IP Helper question
anyweb replied to twidener's topic in System Center Configuration Manager (Current Branch)
iphelpers should point to where you intend to PXE boot from, so from the local (nearest) distribution point hosting a WDS role -
it's trying to copy a file (CM_site.mdf), not a folder. is the file in the source and target location ?