anyweb
-
Posts
9257 -
Joined
-
Last visited
-
Days Won
371
Everything posted by anyweb
-
 before you reconfigure anything, check if any software update has been downloaded or if you are simply looking at the index of available software updates..
 -
open a command prompt and type this cd %temp% seriously though, you should know this already (where temp folders are located) ...you may have to unhide system files, check folder options.
-
what happens when you try to click on the log file ? i would presume the log file is stored in your %temp% profile
-
what does your loadstate.log file reveal (can you attach it here please)
-
do you have an extremely slow network ?
-
use whatever is available as long as it meets the minimum supported requirements here http://technet.microsoft.com/en-us/library/gg682077.aspx#BKMK_SupConfigSQLDBconfig
-
and what does the setup log file tell you about the problem ?
-
without a nice visio picture of your layout above it's hard to get a 'clear picture' however as you've already said you have a remote site with bad bandwidth (Walker Pre-K Facility), then yes sticking a DP here would be a good idea.
-
does the machine account have read access to \\bafflo\software$\
-
hi Arvin, please post a screenshot of the path you are importing from...
-
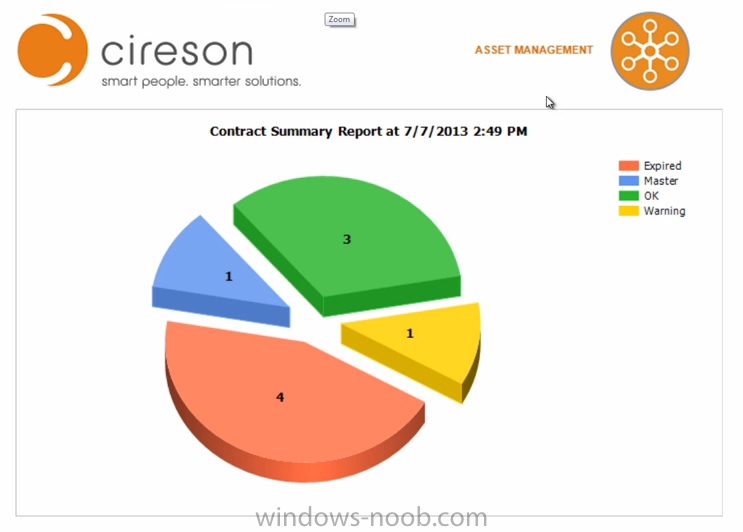
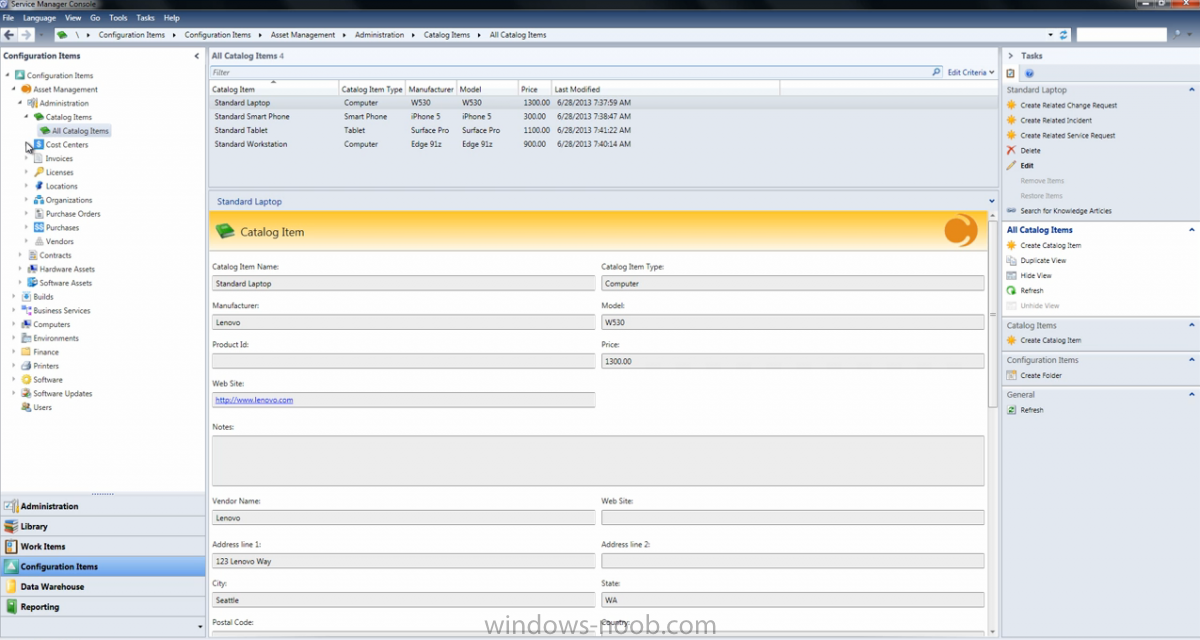
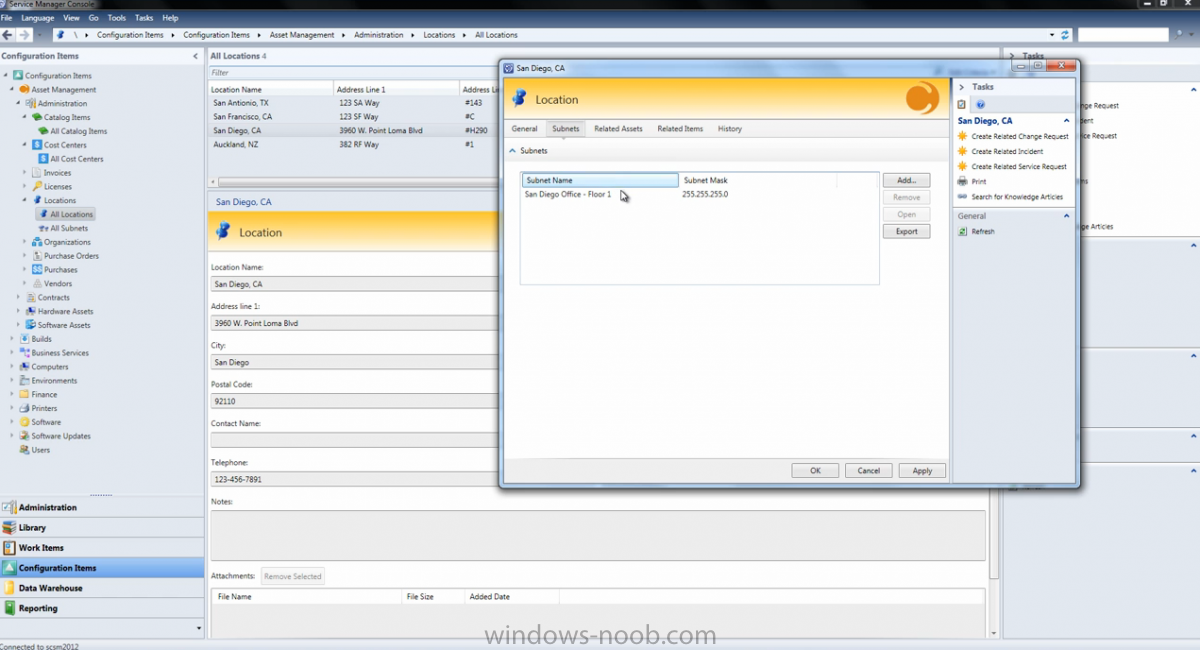
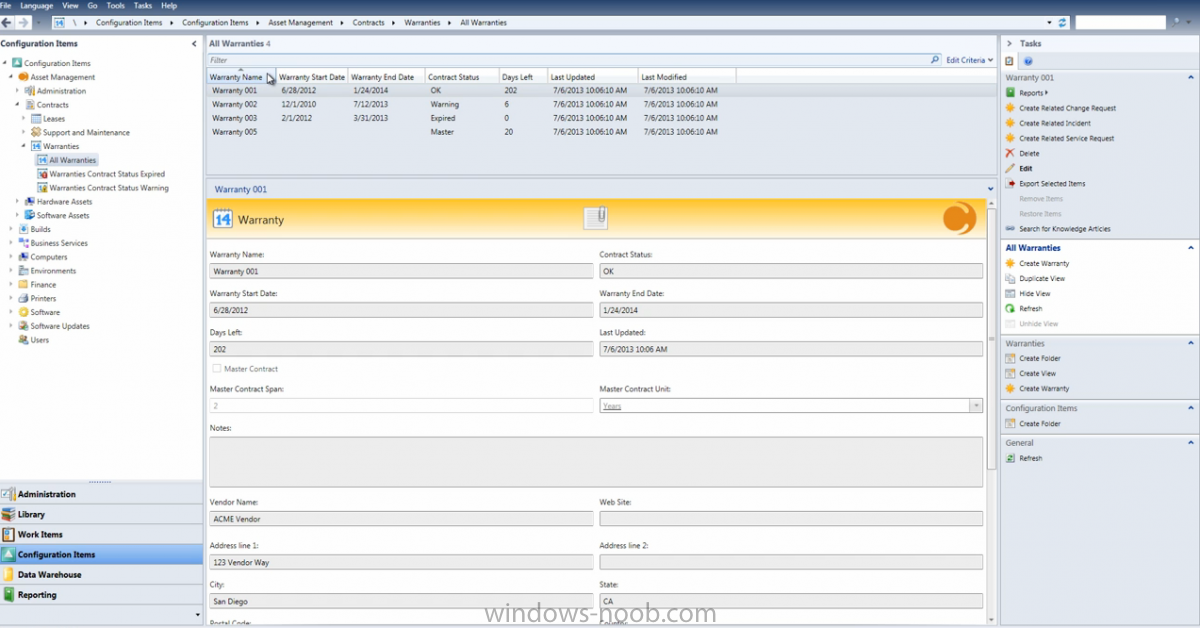
After recently releasing the newest version of the Asset Management app for Microsoft System Center (Features Press Release), this post goes a little more in depth to explain some of the amazing features included in this latest release. Always striving to make life easier and more productive for those who use and implement SCSM, they put a lot of thought into the features clients asked for and updates everyone was clamoring for. Highlighted below are a few of notable enhancements, including the Cireson full Asset Catalog, Location to IP Awareness, Contract Management and Reporting. The full Asset Catalog found within the Cireson Asset Management app allows users to define standard hardware types, as well as information such as model, manufacturer, and price. With access to a comprehensive yet simple and informative page view with all the relevant information in one place, users can better manage the standardization of asset types no matter what the scale of the organization. Location to IP Awareness is now also an incredibly exciting feature. This function tracks where hardware assets exist, and also allows for hardware to location awareness based on IP address – information which is provided by System Center 2012 Configuration Manager. This is a great example of how Cireson works to utilize all System Center components in order to provide the most insightful and rich experience possible. Expanding on the extensive Contract Management capabilities of the Asset Management app, the new version boasts the ability to perform full contract management with different types of contracts that relate to various software and hardware assets under management. Support and maintenance contracts, leases, and warranties represent the main areas of contract management. Highly unique to the Cireson app is the ability to manage contract status via a built-in SLA engine, with notifications upon near breach or expiration of a contract’s end date. In addition, the superior reporting functions of this new version allows for comprehensive reporting based on asset data from the data warehouse and cube reporting engine within Service Manager. These rich out-of-the-box reporting solutions cover contract, hardware asset, license, and software asset reports, amongst others. Other enhanced capabilities of the Cireson Asset Management app now include, app metering data tracking against software asset types to understand installation vs. utilization vs. purchased count, and over 250 brand new features that make the System Center Service Manager experience better than ever before. For more information, videos, and overviews relating to Cireson Asset Management for System Center, visit the app store at www.cireson.com. Disclaimer: The article is from a windows-noob recommends partner.

-
of course, why are you installing R2 though it's preview software, are you doing this in a lab only ? can you show me a screenshot of the error you are seeing
-
see my answers below: Importing my ref os wims from mdt to Configmgr ? - you can add those wims and use them no problem in Configuration Manager Importing task sequences? not possible, you'll have to rebuild them Importing apps and their configuration? you'll have to add the apps to Configuration Manager Importing drivers.? Although this is simple enough to do same as above it's worth noting that Configuration Manager 2012 is way more advanced and offers way more capability than what you had with MDT 2012. You can however integrate them as you can see here and gain the benefits that both offer, cheers niall
-
keep em coming
-
have a read of this, does it help.
-
as far as i'm aware you can't change the color of it via configuration manager, however as you say there might be some unsupported method such as a registry hack which could be deployed via CM.
-
you are welcome ! glad you found it and i've fixed the links along with some missing text in the guide (it must have got dropped during an edit)
-
try running it as a user with Administrator permissions on the box
-
see below
-
it should be no problem as they are not sharing the same database, however check with a SCOM expert first.
-
try restarting WDS again and verify it's starting ok, then verify that pxe is enabled for that DP, then try to pxe boot a computer and monitor the smspxe.log
-
is the Windows Deployment Services Service started, if you restart that service does the file update ?
-
it's not getting updated because you are looking at the wrong log file, after SP1 the SMSPXE.log file is located in Program Files\Microsoft Configuration Manager\logs check there and see what that log file says.
-
and now it's fixed, thanks Peter, so please verify !
-
personally i'd recommend you move to Configuration Manager 2012 SP1 as soon as you can, and then do whatever you need after that migration. As regards license costs, you'll need to speak to your local Microsoft Rep as they may offer you a better deal than what is offered publicly