anyweb
-
Posts
9271 -
Joined
-
Last visited
-
Days Won
371
Everything posted by anyweb
-
no you dont, the Use Toolkit package step immediatly before that takes care of it
-
well pause a machine by pressing f8 and grab the logs before that step without the logs I can't really advise you
-

using SCCM 2012 beta 2 in a LAB - Part 1. Installation
anyweb replied to anyweb's topic in Configuration Manager 2012
i've updated the guide to make it clearer which download you need -
This list of guides is all about System Center 2012 R2 Configuration Manager. If you want to learn about SCCM 2012 this is how you can do it ! I've put together this list together to help people like you learn about Configuration Manager 2012 R2 and to help people learn about how they can integrate Microsoft Intune with Configuration Manager 2012 R2 to manage their iOS, Android and Windows Phone mobile devices. If you are looking for some of my other guides then please check below: Microsoft Intune (standalone) in Azure step by step guides are here Microsoft Intune (hybrid) guides look here (over 61,103 views as of July 2017) System Center Configuration Manager (Current Branch and Technical Preview) here (96,953 views, May 2018) Configuration Manager 2007 guides then look here (over 948388 views as of July 2017) Microsoft Deployment Toolkit guides are here SMS 2003 guides are here (over 10423 views as of July 2017) Note: Some of my guides are also available for download, please see below links download the Microsoft Intune Mobile Device Management guides here. download the Standalone Primary guides in PDF and WORD format here. Step-by-Step Guides CM12 in a Lab - PXE boot failure after upgrading to System Center 2012 Configuration Manager Service Pack 1 CM12 in a Lab - How can I deploy Windows 8 X64 to the Microsoft Surface Pro using Configuration Manager 2012 SP1 ? CM12 in a Lab - How can I deploy System Center 2012 Endpoint Protection Definition Updates from a UNC file share CM12 in a Lab - How can I determine what Antimalware Policy is applied to my SCEP 2012 SP1 client ? CM12 in a Lab - when running /testdbupgrade for System Center 2012 Configuration Manager SP1 you get an error: SQL Native client 11 is not installed CM12 in a Lab - How can I backup System Center 2012 Configuration Manager ? CM12 in a Lab - SQL Server 2012 SP1 support in System Center 2012 Configuration Manager SP1 CM12 in a Lab - The CM12 BitLocker FrontEnd HTA - video CM12 in a Lab - The CM12 BitLocker FrontEnd HTA CM12 in a Lab - Where can I download additional clients for System Center 2012 Configuration Manager SP1 ? CM12 in a Lab - How can I sequence applications using App-V version 5 for Configuration Manager 2012 SP1 CM12 in a Lab - How can I deploy a Hidden task sequence in Configuration Manager 2012 SP1 ? CM12 in a Lab - How can I pre-provision BitLocker in WinPE during Windows 8 deployments using Configuration Manager 2012 SP1 ? CM12 in a Lab - How can i disable “Connect to a wireless network” during Windows 8 OOBE ? CM12 in a Lab - How can I deploy Windows 8 in UEFI mode using Configuration Manager 2012 ? CM12 in a Lab - Why is my System Center 2012 Configuration Manager console in read-only mode ? CM12 in a Lab - How can I view hidden Endpoint Protection Reports in System Center 2012 Configuration Manager ? CM12 in a Lab - How can I upgrade System Center 2012 Configuration Manager ? CM12 in a Lab - How can I add a PXE enabled Distribution Point on Server 2008 X86 for System Center 2012 Configuration Manager ? CM12 in a Lab - How can I display my System Center 2012 Configuration Manager hierarchy in Bing Maps ? CM12 in a Lab - How can I enable Debug View in the Configuration Manager console? CM12 in a Lab - How can I easily prompt for a computer name in Configuration Manager 2012 CM12 in a Lab - Importing Computers using a file CM12 in a Lab - Two New Endpoint Protection Reports added, What are they and what do they look like CM12 in a Lab - How can I setup a Distribution Point on a Windows 7 PC in Configuration Manager 2012 ? CM12 in a Lab - How can I capture an image using Capture Media in Configuration Manager 2012 ? Hierarchy with CAS using System Center 2012 Configuration Manager - Part 1. Installation - CAS using System Center 2012 Configuration Manager - Part 2. Install the Primary server - P01 using System Center 2012 Configuration Manager - Part 3. Configuring Discovery and Boundaries using System Center 2012 Configuration Manager - Part 4. Adding roles and configuring custom Client Device Settings and custom Client User Settings using System Center 2012 Configuration Manager - Part 5. Adding WSUS, Adding the SUP role, deploying the Configuration Manager Client Agent using System Center 2012 Configuration Manager - Part 6. Adding the Endpoint Protection role, configure Alerts and custom Antimalware Policies using System Center 2012 Configuration Manager - Part 7. Build and Capture Windows 7 X64 SP1 using System Center 2012 Configuration Manager - Part 8. Deploying Applications using System Center 2012 Configuration Manager - Part 9. Deploying Monthly Updates using System Center 2012 Configuration Manager - Part 10. Monitoring our Monthly Updates Automatic Deployment Rule using System Center 2012 Configuration Manager - Part 11. Upgrading your hierarchy to Service Pack 1 using System Center 2012 Configuration Manager - Part 12. Connecting Powershell and building a reference image of Windows 8 with .NET 3.5 using System Center 2012 Configuration Manager - Part 13. Deploying Windows 8 X64 with custom Start screen using System Center 2012 Configuration Manager - Part 14. Using Compliance Settings
-
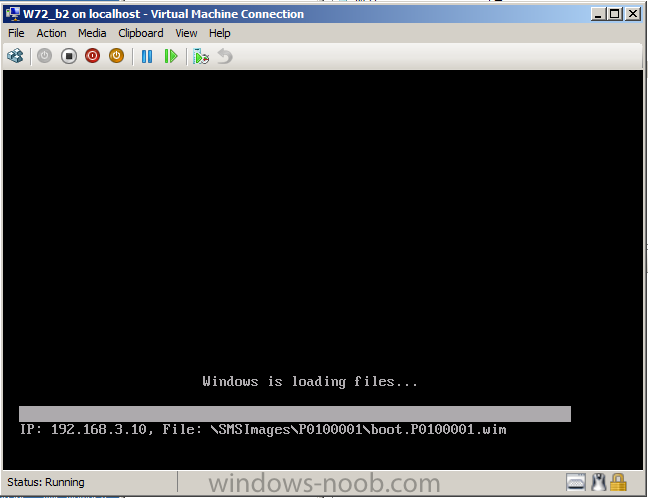
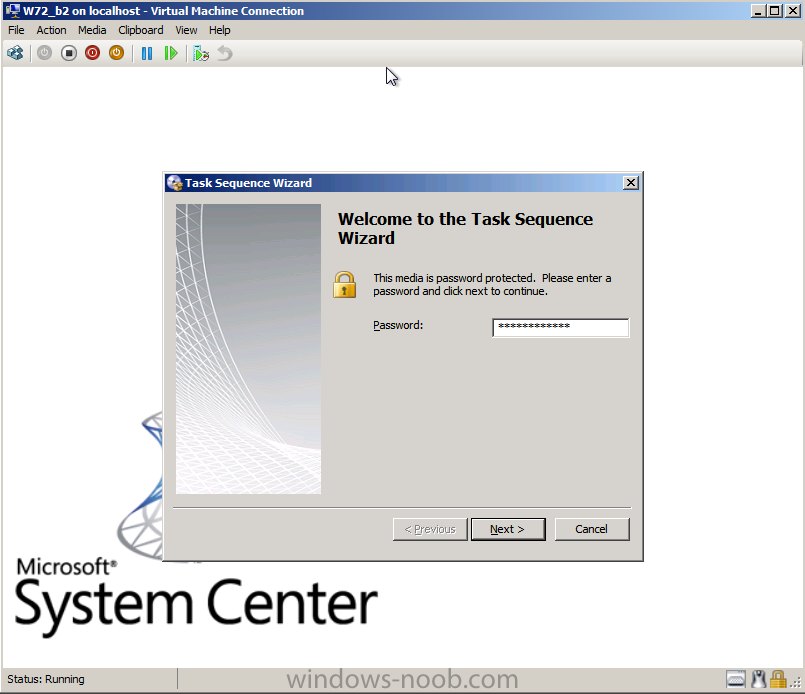
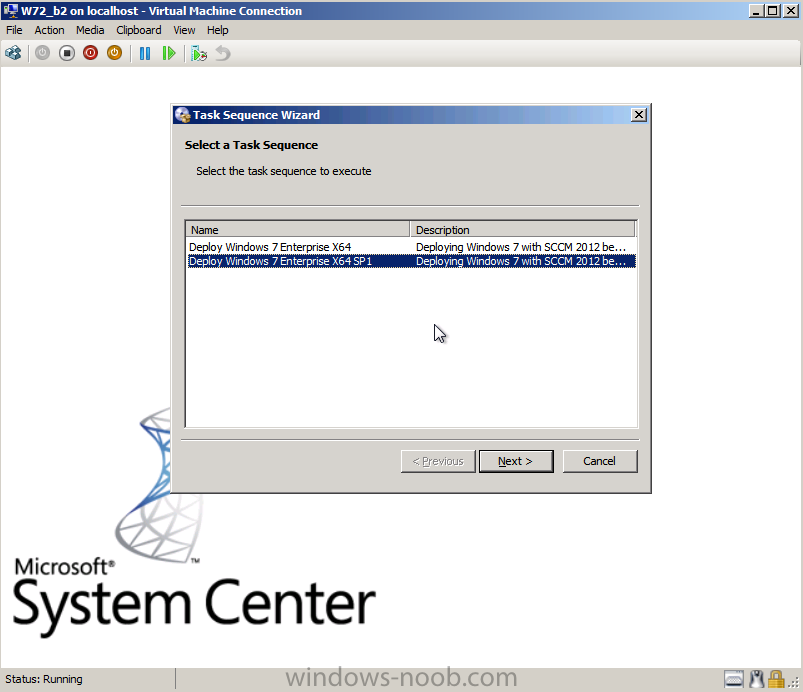
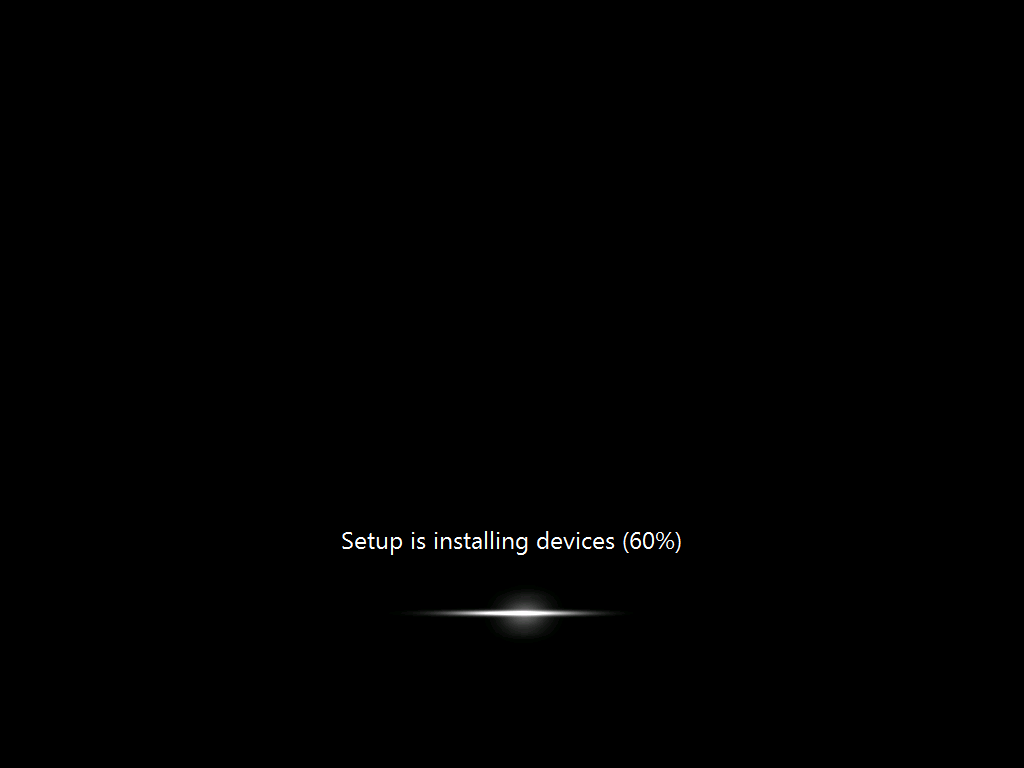
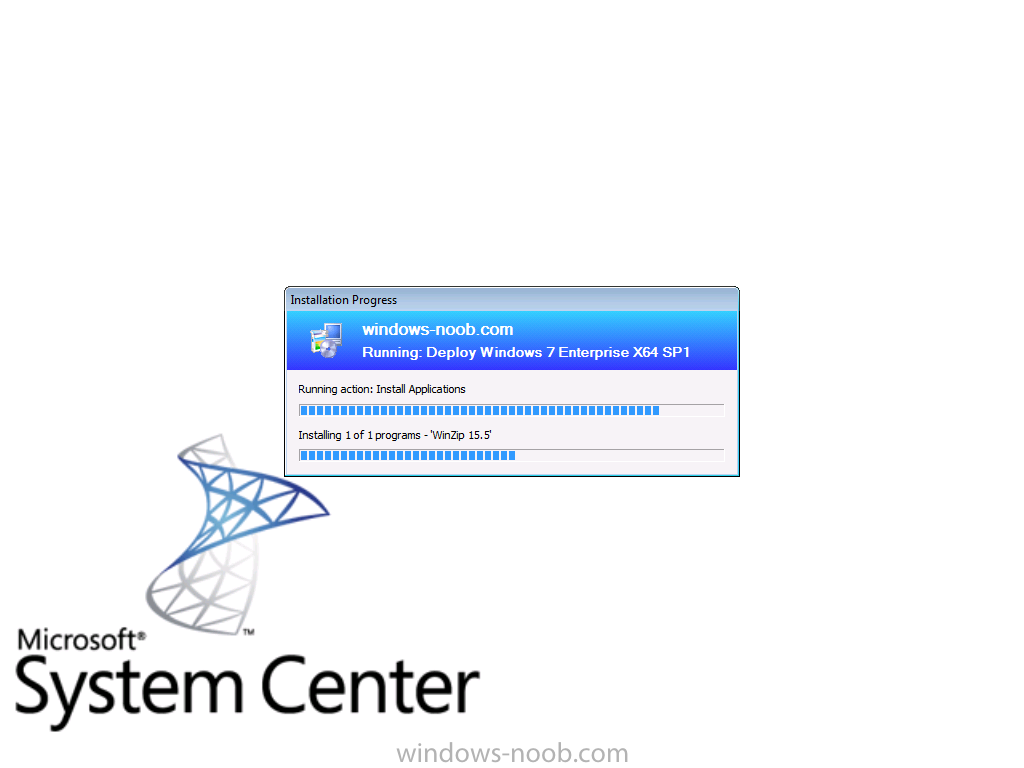
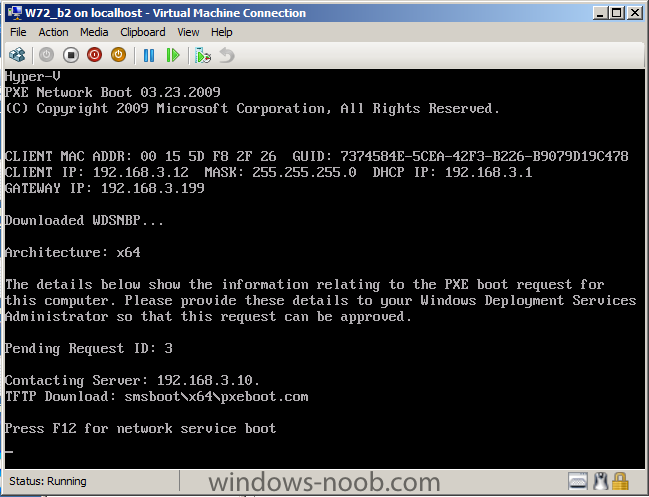
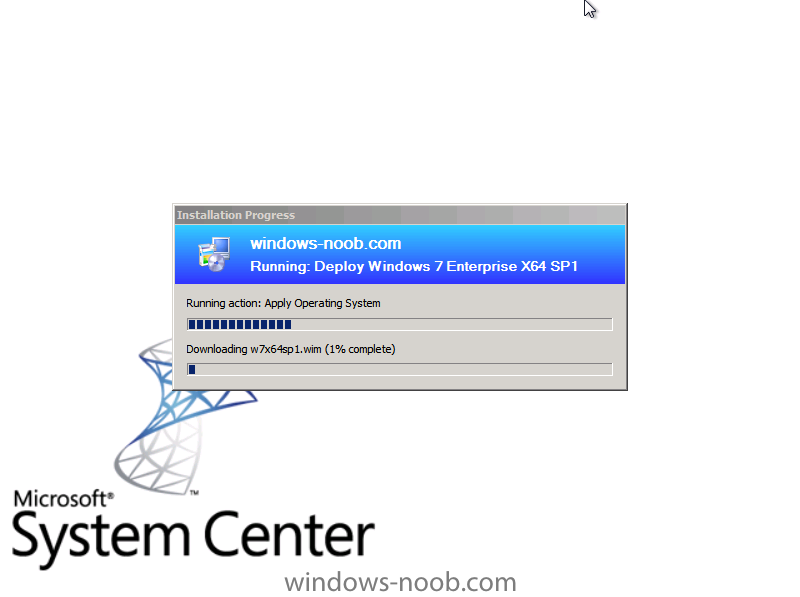
Step 5. Create a new VM and PXE boot it Create a new virtual machine and PXE boot it, as the virtual machine is New and New to SCCM 2012, it's considered Unknown and therefore we should see whatever deployments we targetted to the All Unknown Computers collection, you should see the following press F12 to PXE boot, and the boot image starts loading we'll get prompted for our PXE password, enter it and click next and our task sequence menu appears, select Deploy Windows 7 Enterprise X64 SP1 and click next and our Deployment begins ! Ths OS installs... our new application Gets installed Create another Virtual Machine and PXE boot it, but this time choose Deploy Windows 7 Enterprise X64 and click next.


-
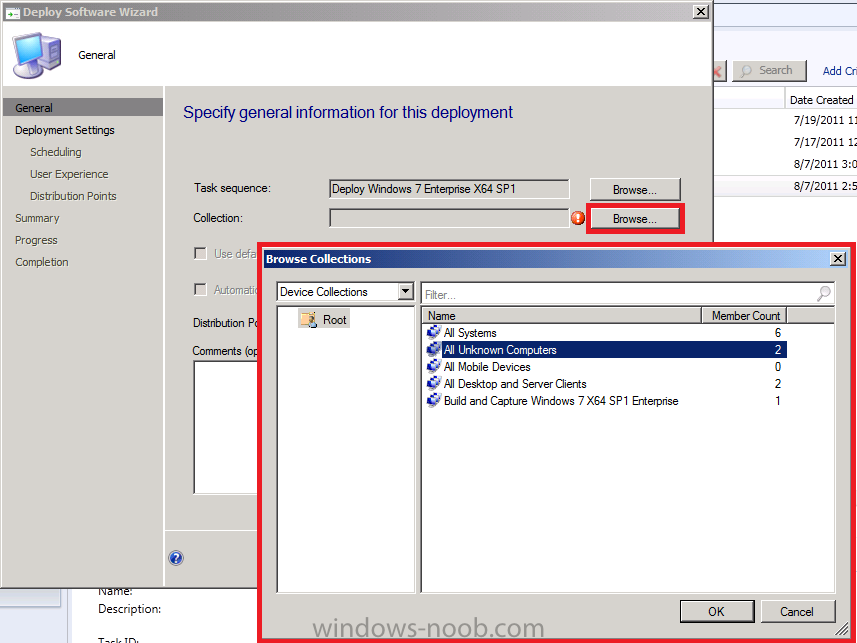
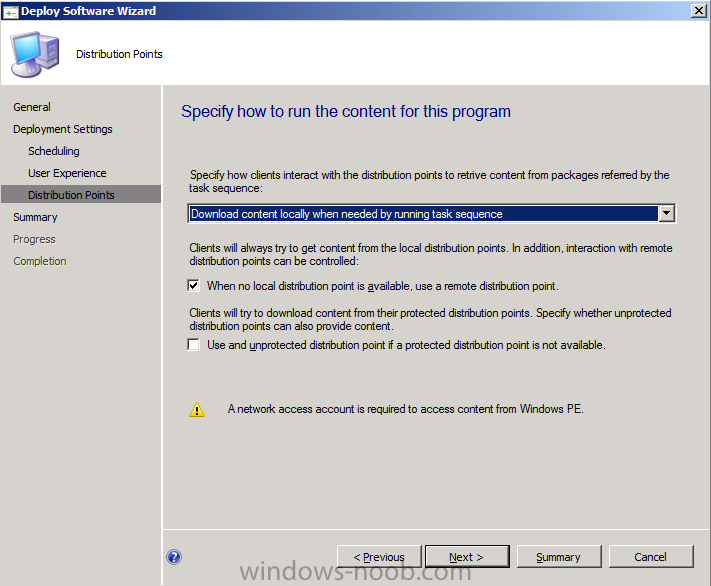
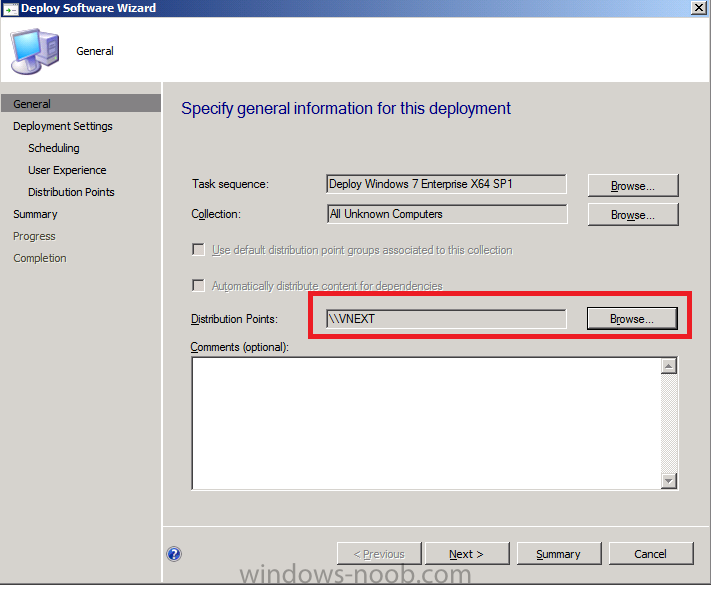
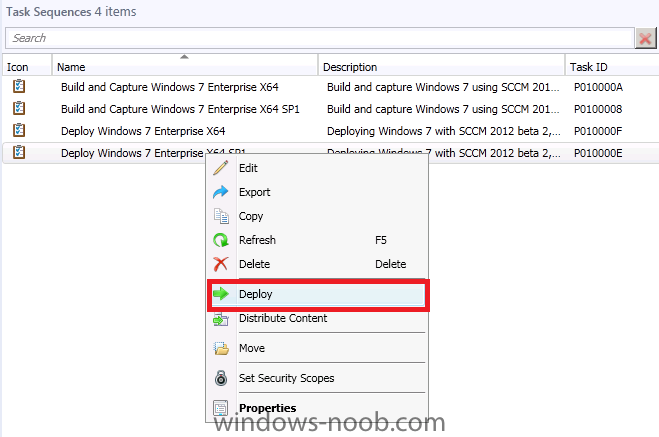
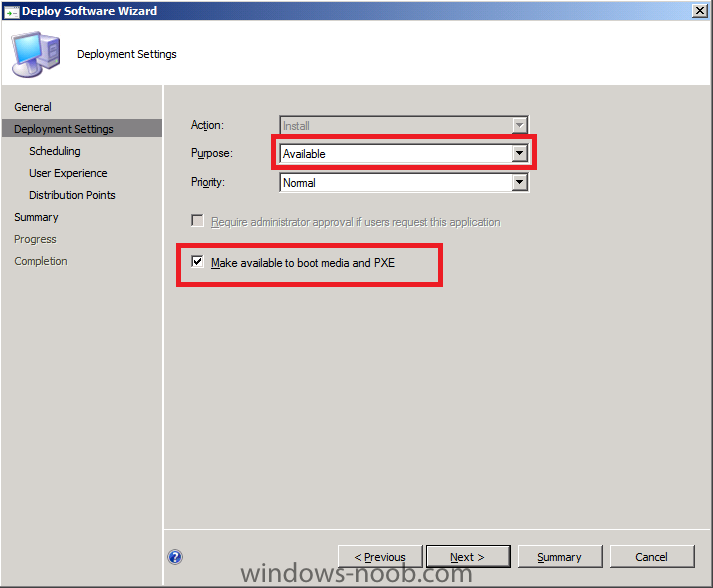
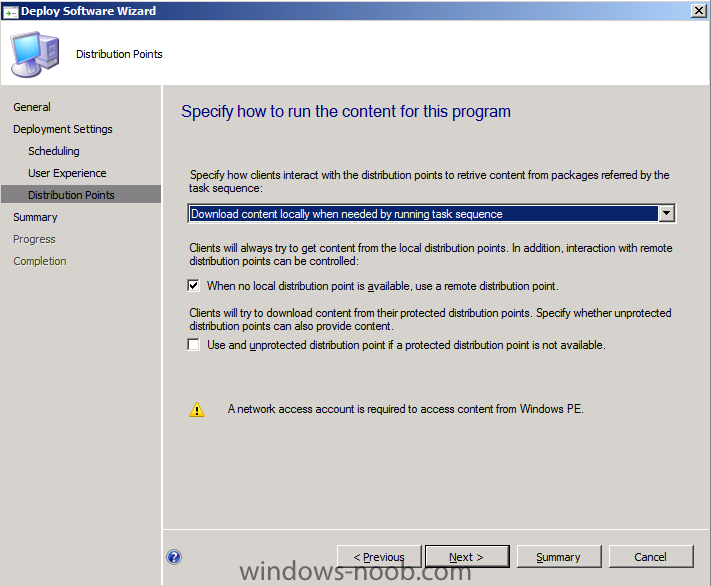
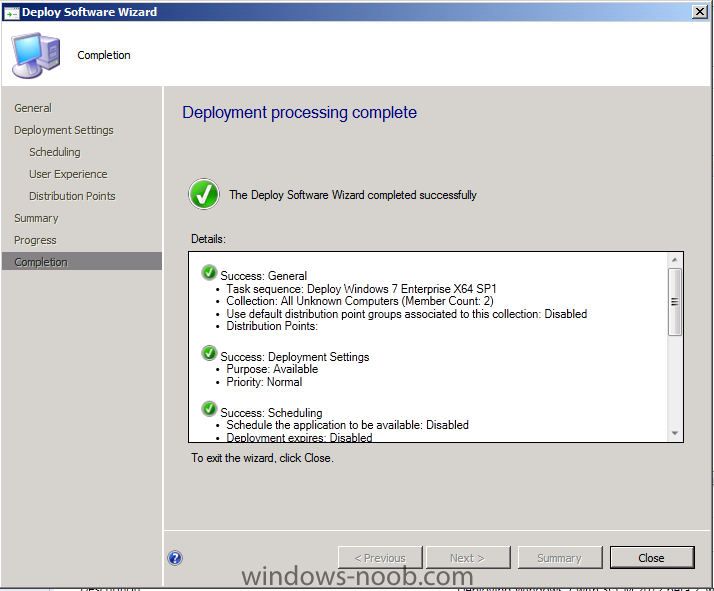
Step 4. Deploy the Task Sequence to the All Unknown Computers collection In Software Library, select Task Sequences, select our Deploy Windows 7 Enterprise X64 SP1 Task sequence and right click, choose Deploy (of course you can also select the task sequence and click Deploy from the Ribbon above) for collection, click browse and select All Unknown Computers make sure to select the Vnext Distribution point then click next for Deployment Settings Purpose, make it available (optional) and place a checkmark in Make available to boot media and PXE click next through schedule (don't set anything there), and User experience, for Distribution keep the defaults, click close at the Deployment completion repeat the above for the Deploy Windows 7 X64 Enterprise Task Sequence.


-
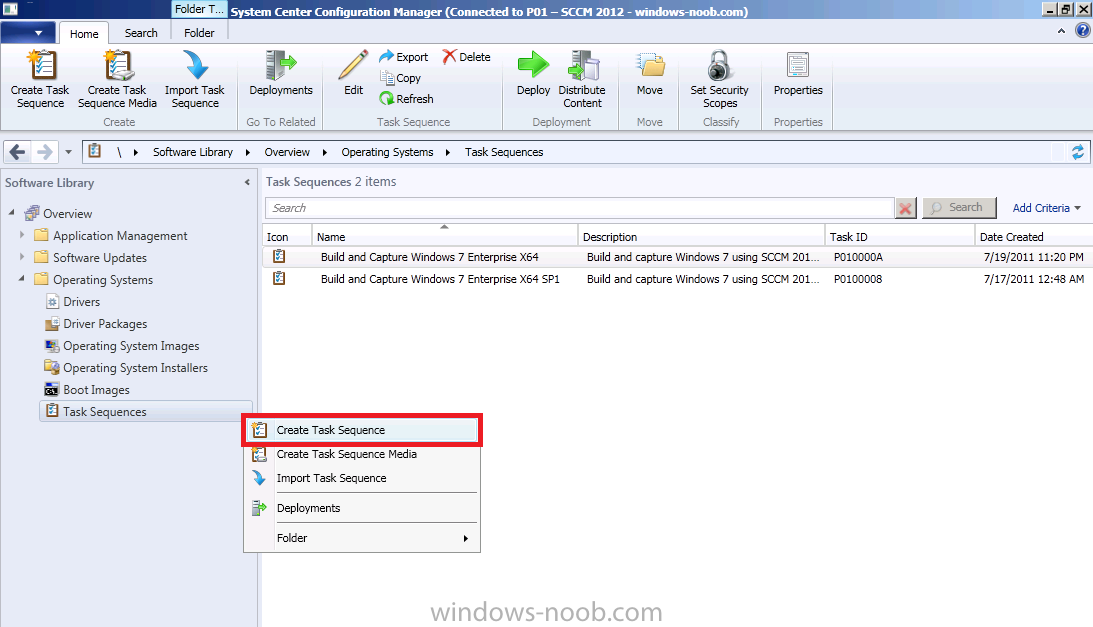
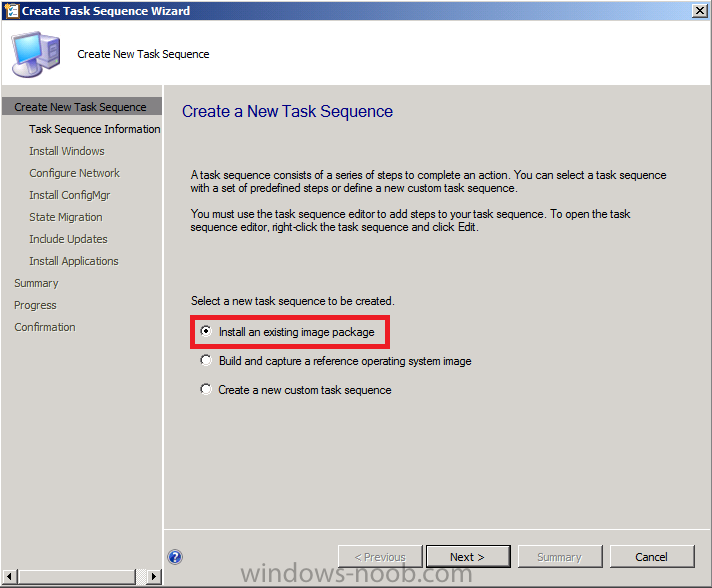
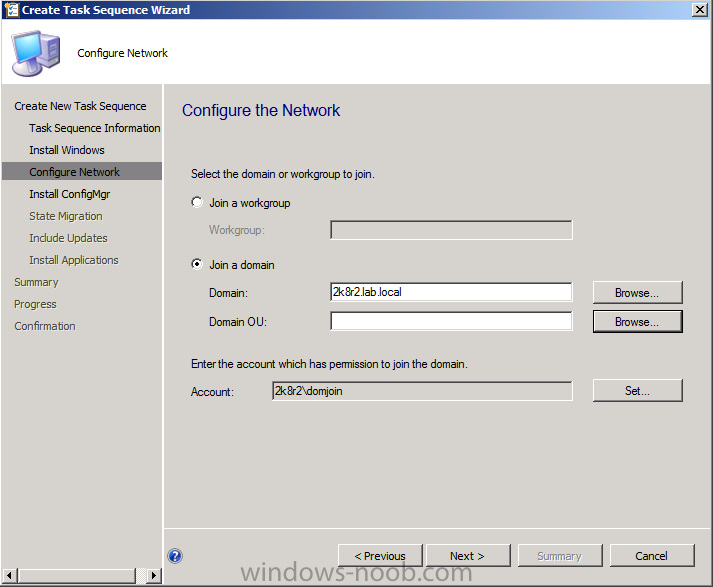
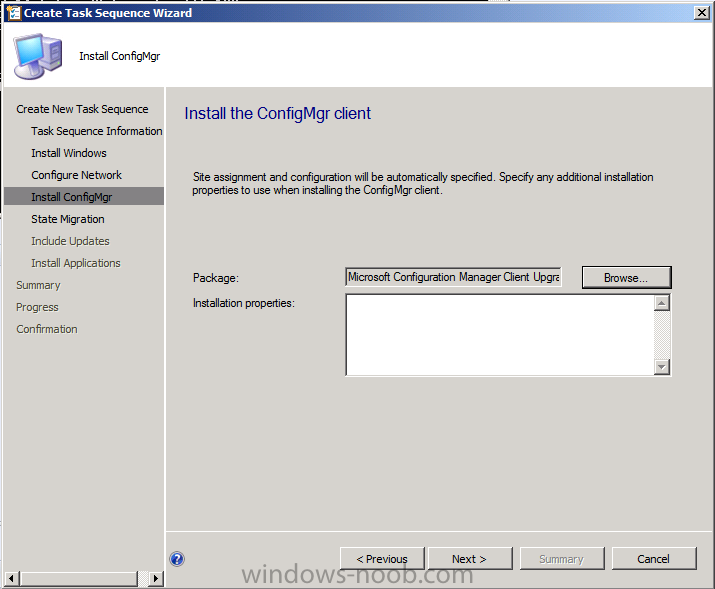
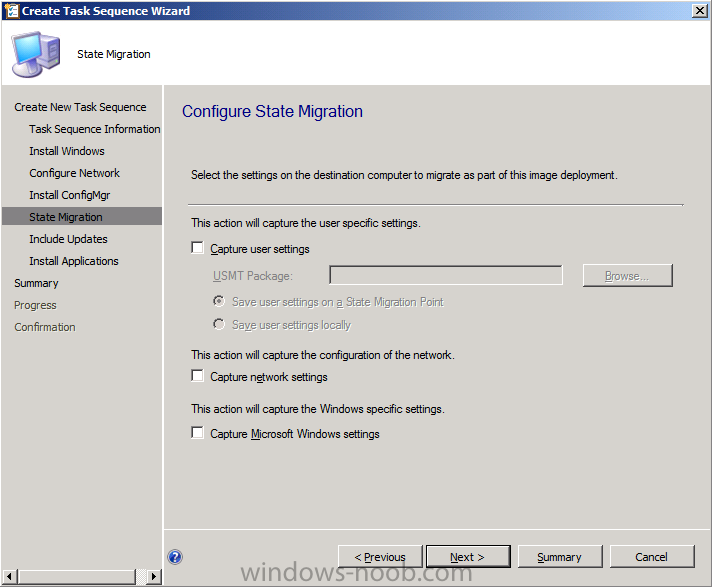
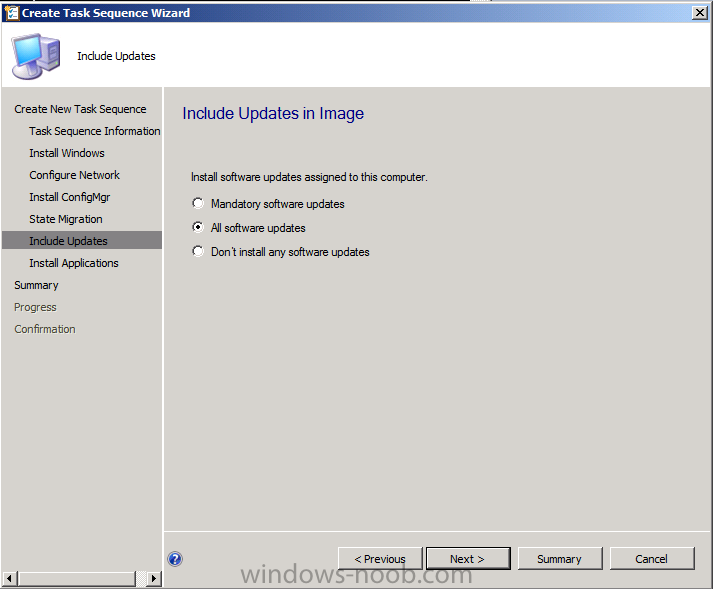
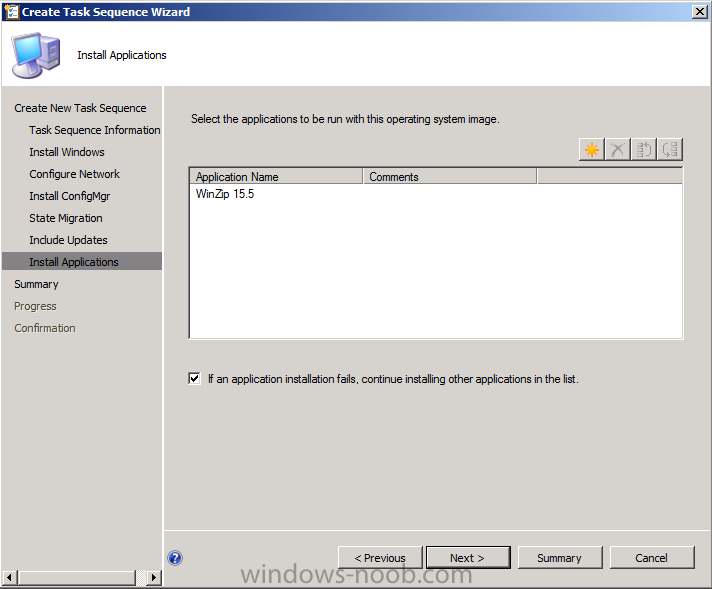
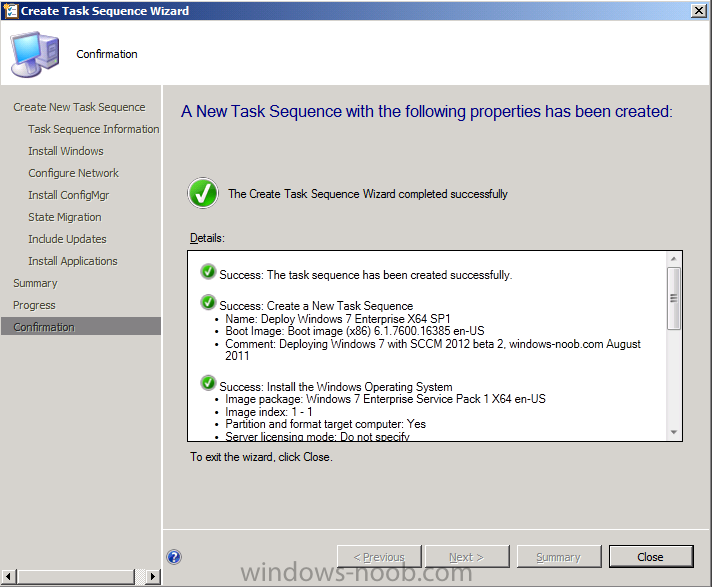
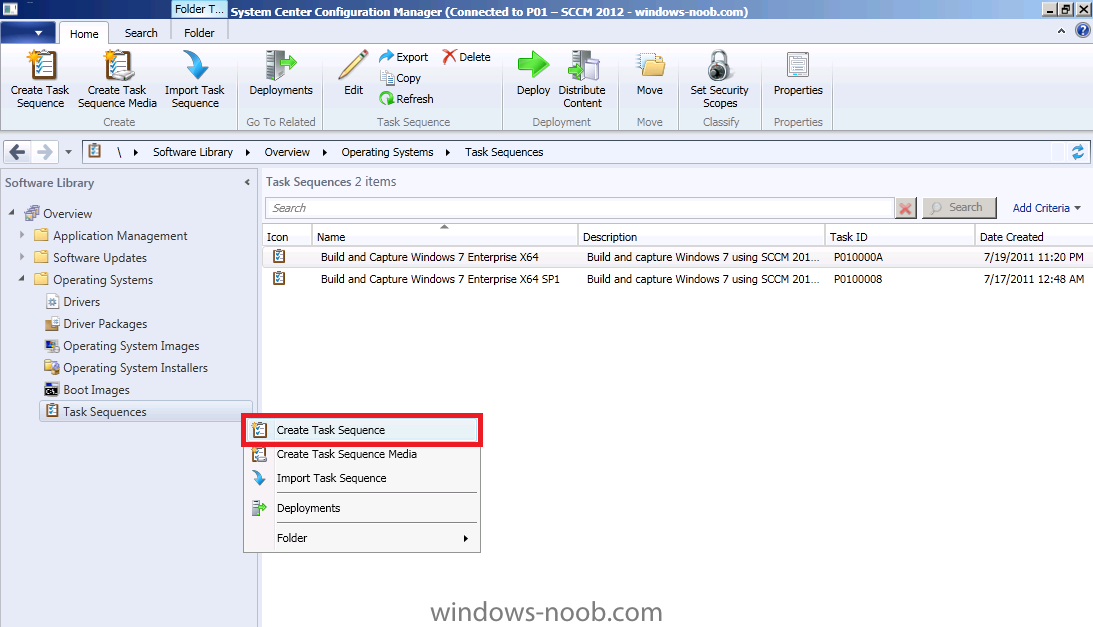
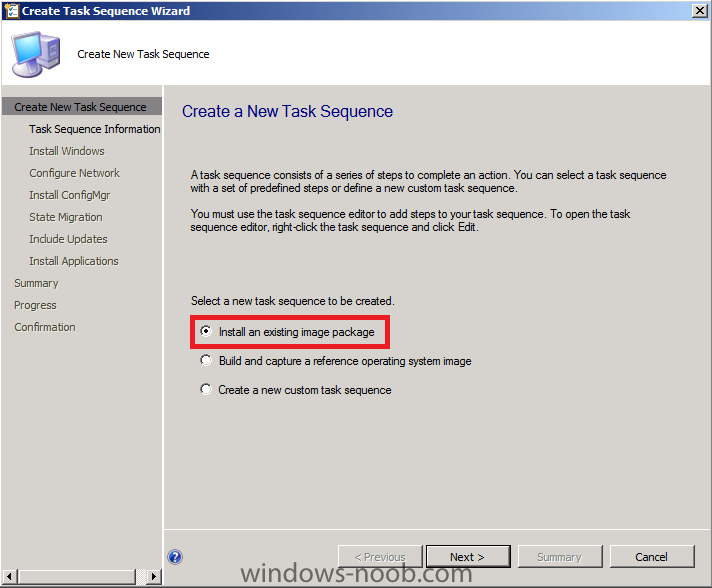
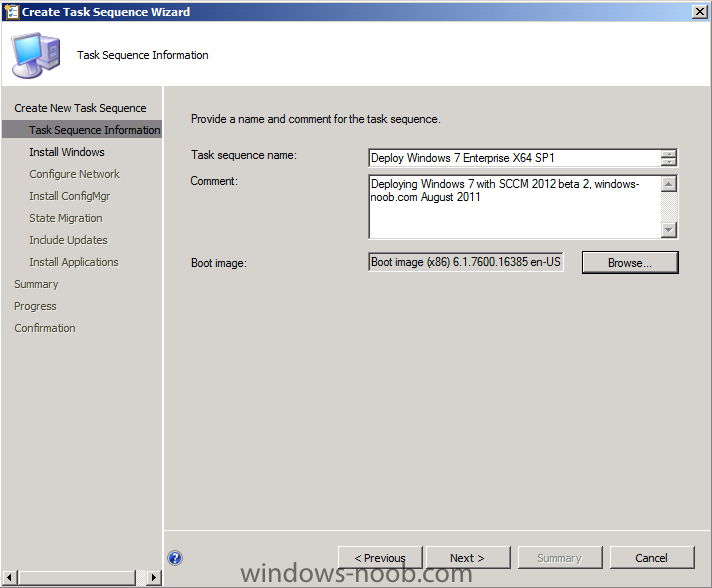
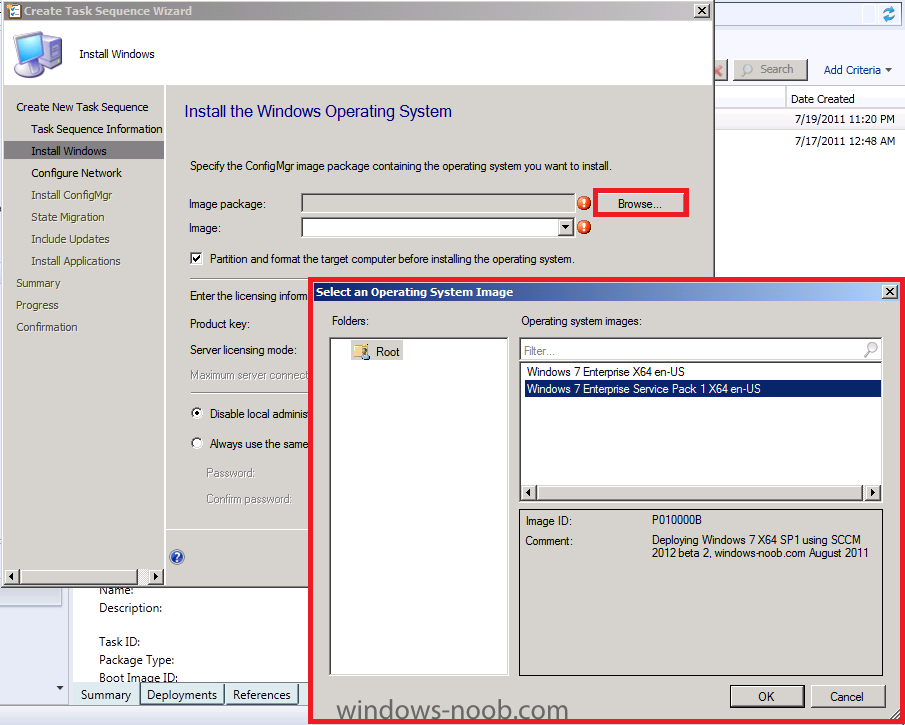
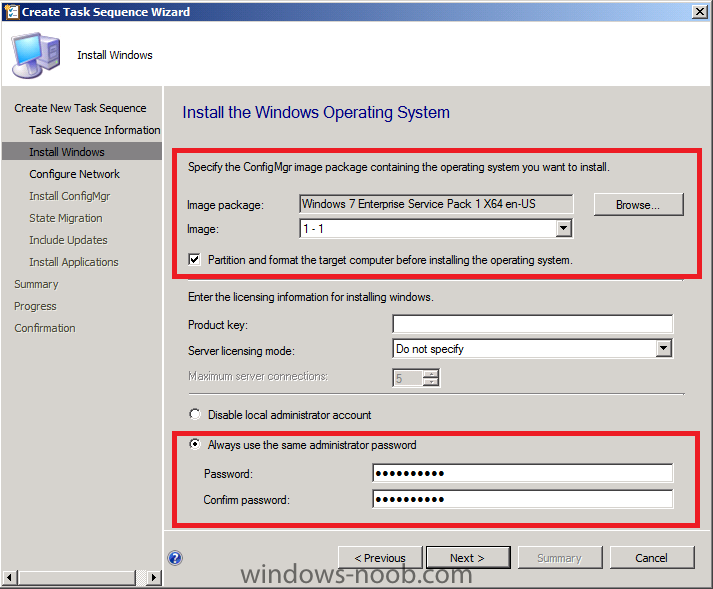
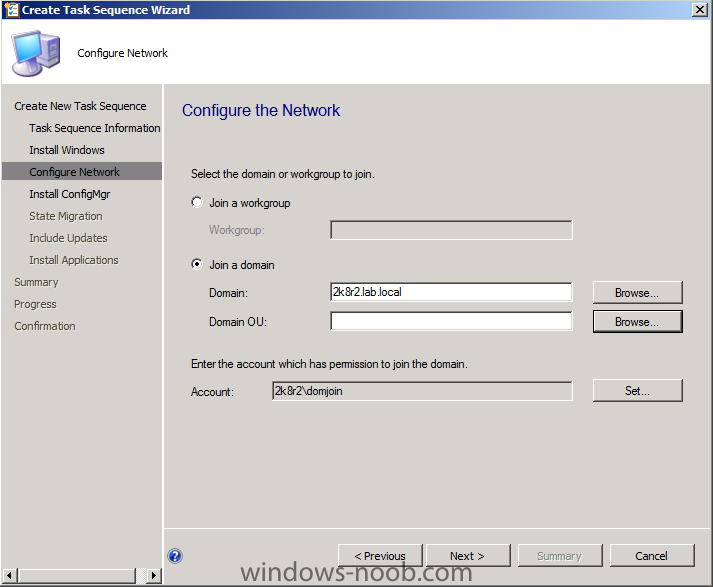
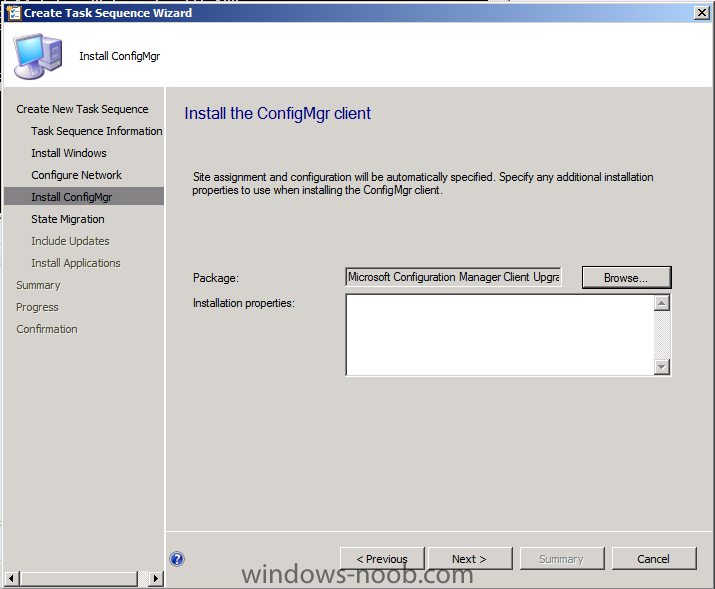
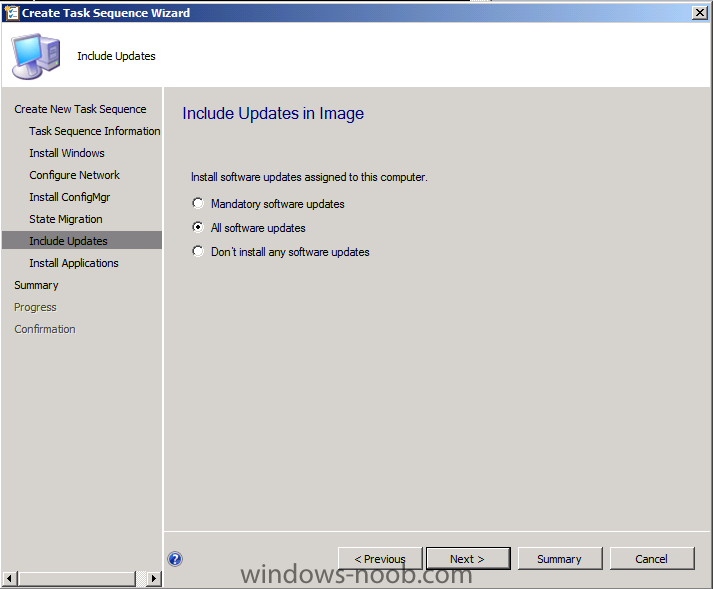
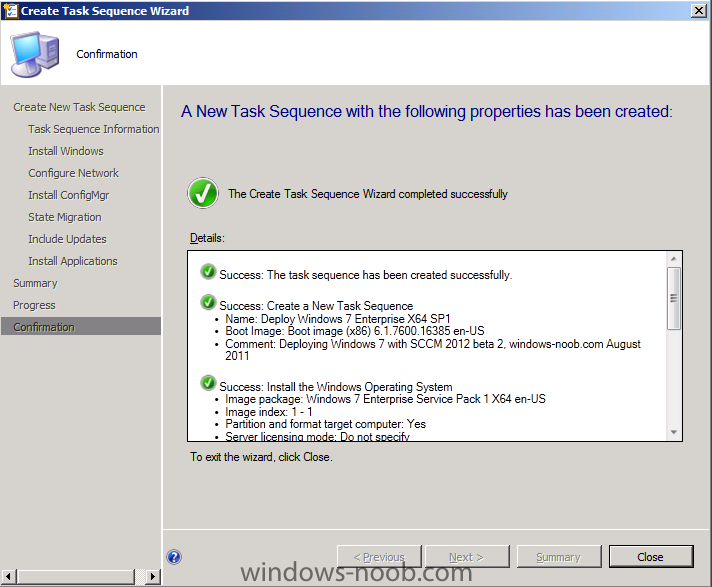
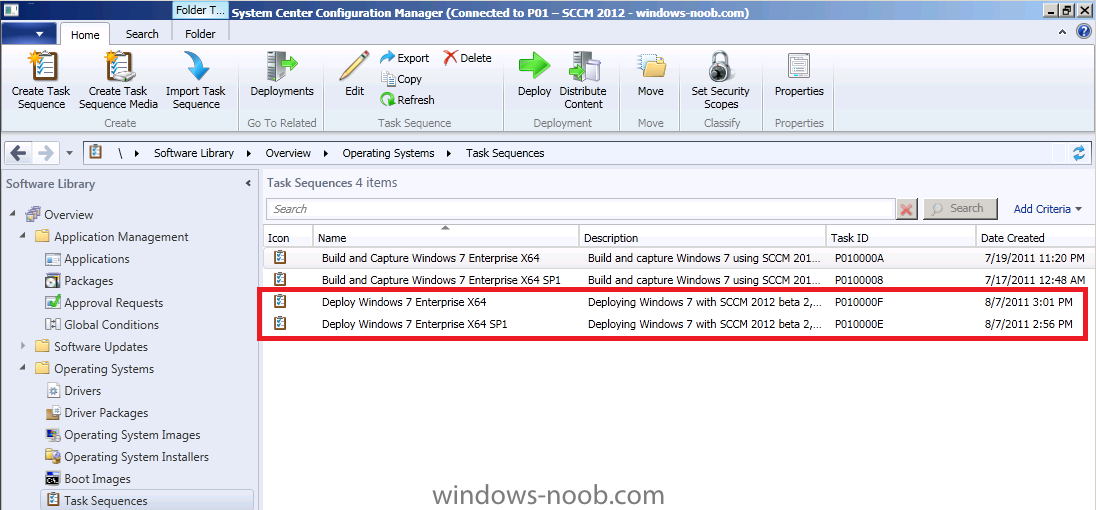
Step 3. Create the Deploy Task Sequence Now that we have added our captured operating system images to Configmgr, and distributed them to our dp's we want to create a Deploy Task sequence to Deploy the image. In Task Sequences, right click and choose Create Task Sequence. This time select the first option, Install an existing image package fill in some details about the image and select the X86 boot image for Image package, click on browse and select our Windows 7 Enterprise X64 Service Pack 1 image for Image click on the drop down and change it from All Images to 1 - 1 and enter a password for the Local Administrator account (good for troubleshooting failed installations), notice there is an already checked Partition and Format the target computer before installing the operating system step enter your Domain Joining credentials and specify an OU if you wish, I didn't. Note: please don't select the Computer Container as that is a container (not an OU). for the configmgr client step, select the configuration manager client package and click next we are not migrating any data at this point so remove the State capture options for Install updates select All Software Updates and for Add applications, we'll add a new app (please add it first using this guide) called Winzip 15 (you can download the MSI file from here, and I want to you specify Install for System, whether or not a user is logged on in the Install for User or System step. click next through the summary... and click close at the confirmation screen Repeat the above process for our Windows 7 RTM image now we have two new Deploy Windows 7 Task Sequences listed


-
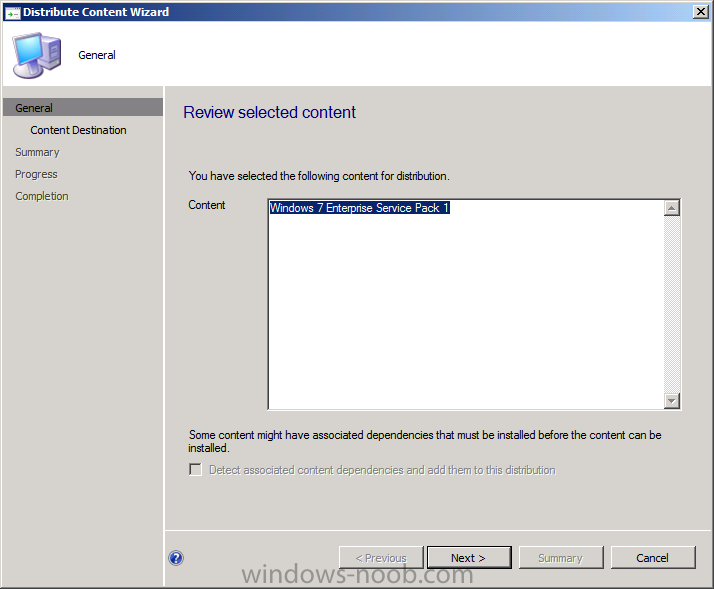
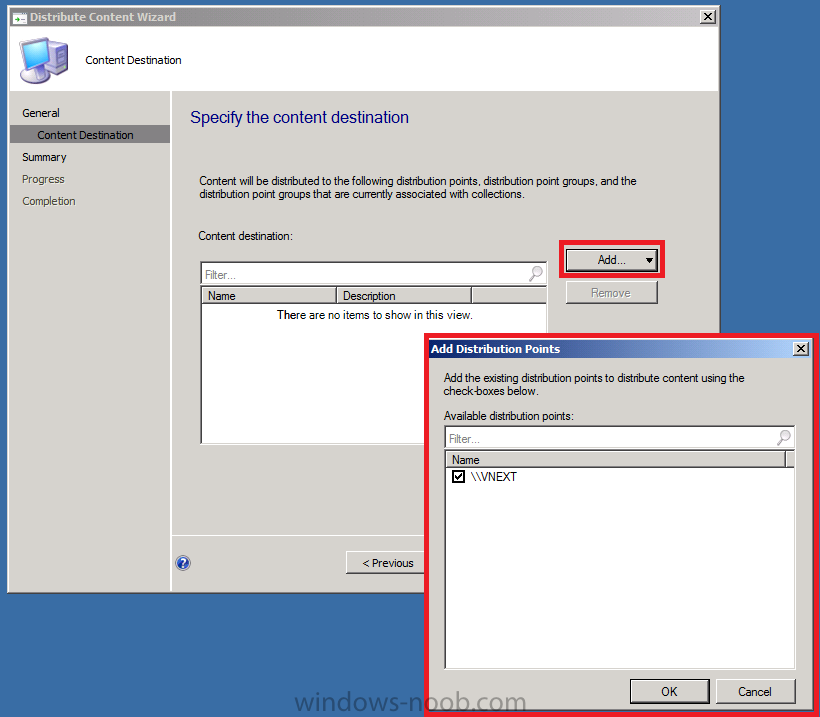
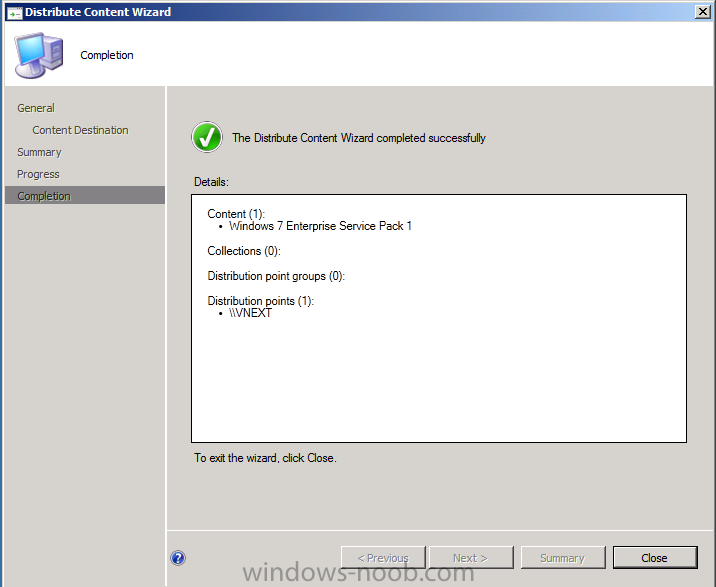
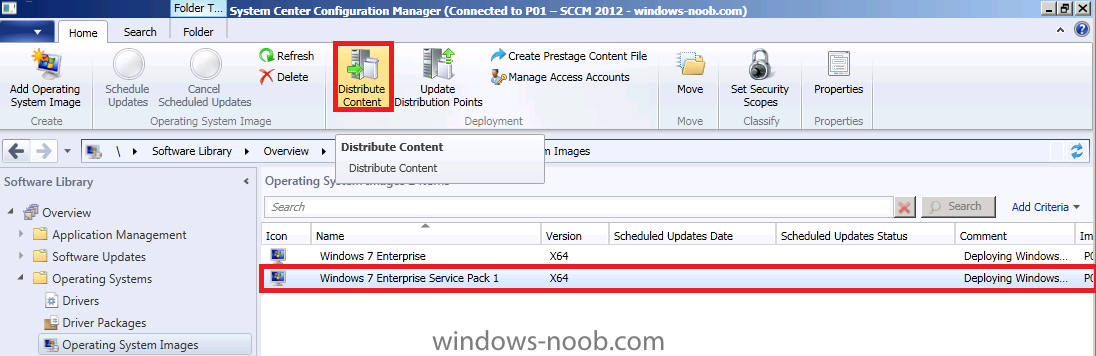
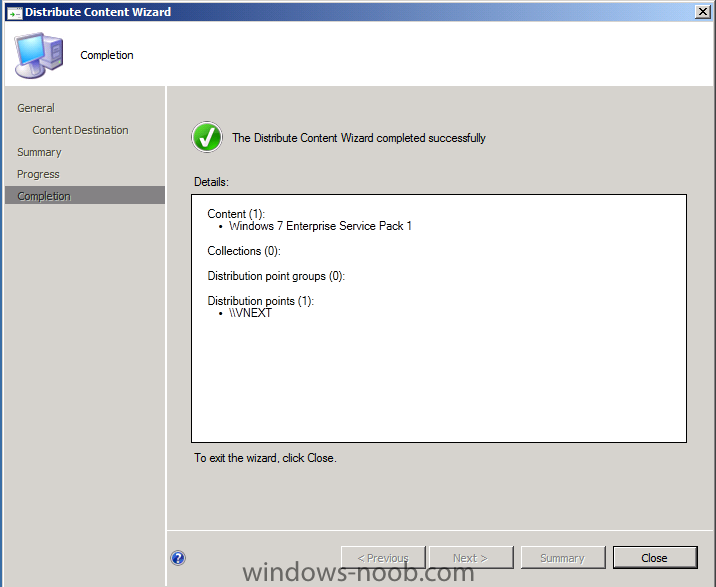
Step 2. Distribute Content We now need to distribute our imported images to our distribution points. Select Our Windows 7 Enterprise Service pack 1 image and in the ribbon above click on Home and then Distribute Content when the Distribute Content wizard appears click next specify our vnext Distribution Point click next, next and review the Wizard Completion click Close and then repeat the above for our other Windows 7 image.


-
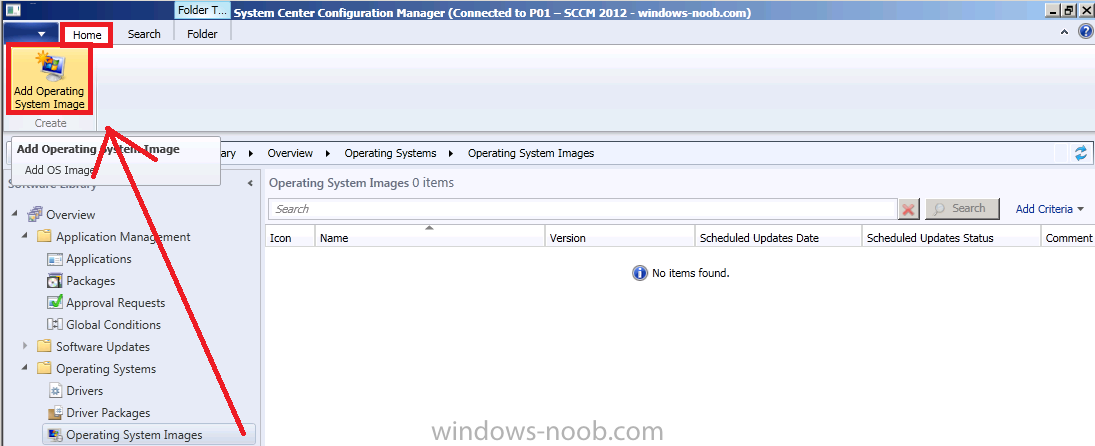
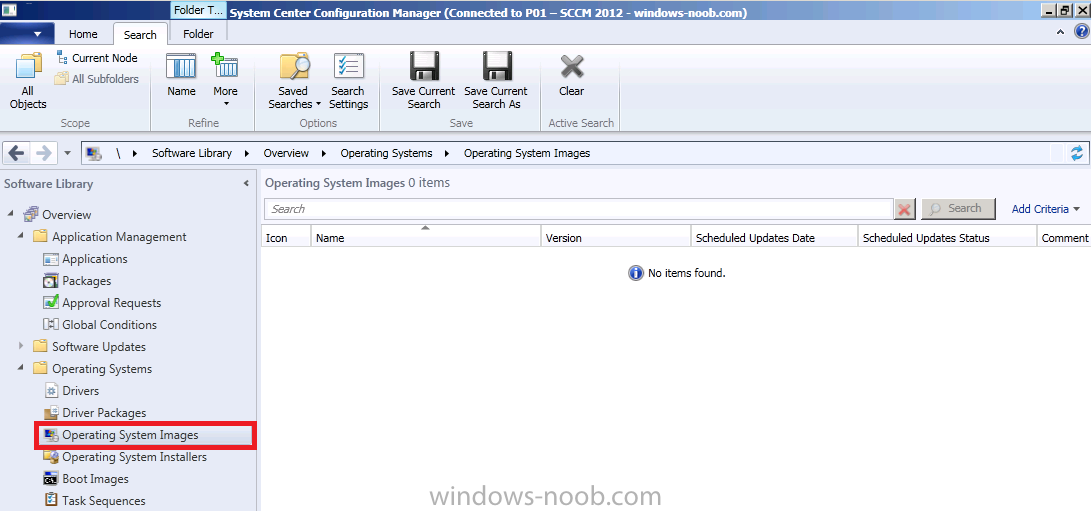
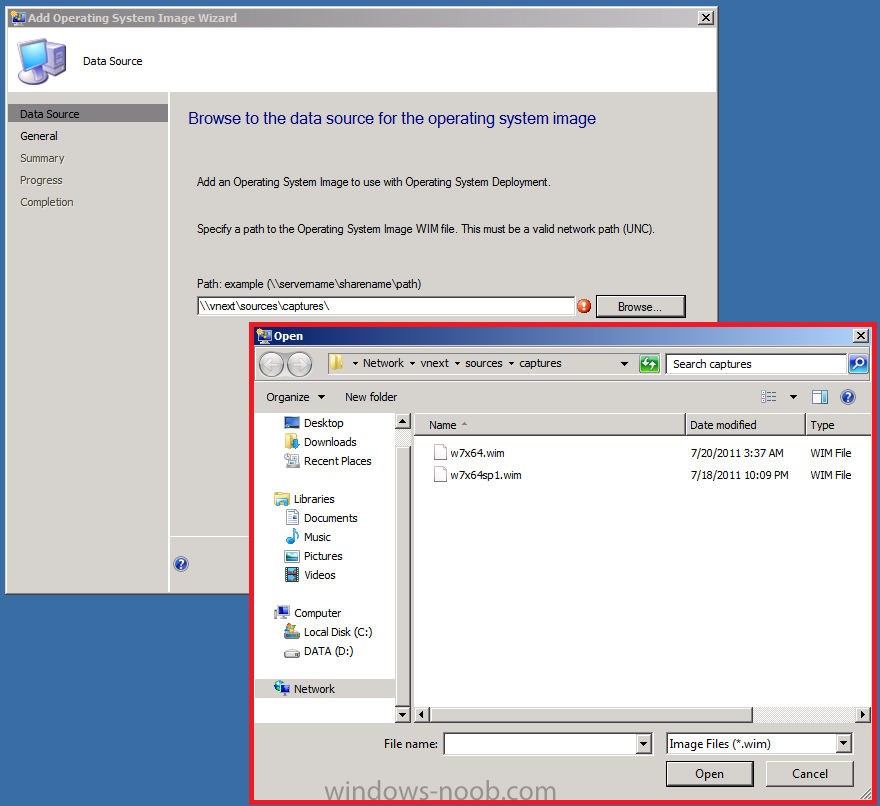
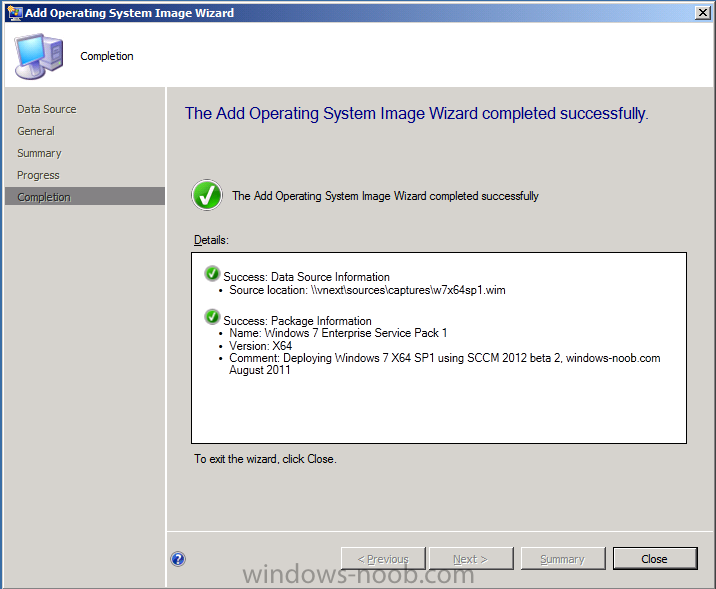
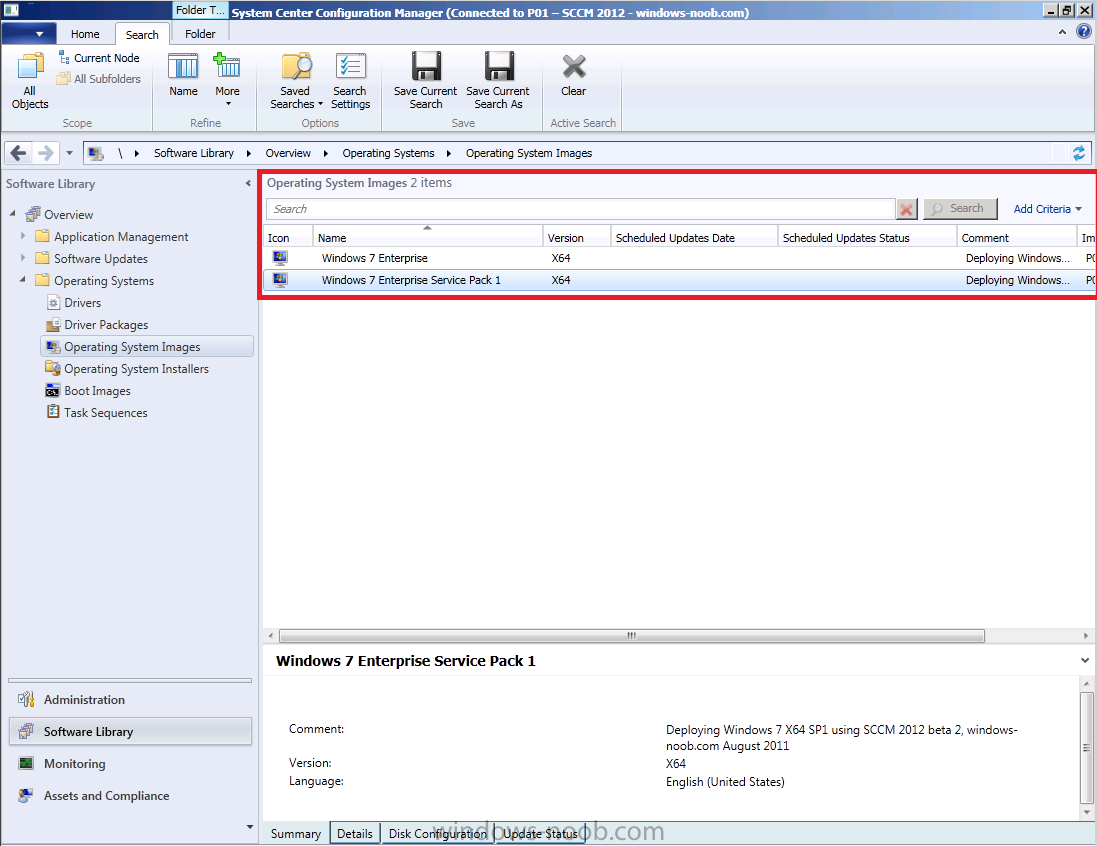
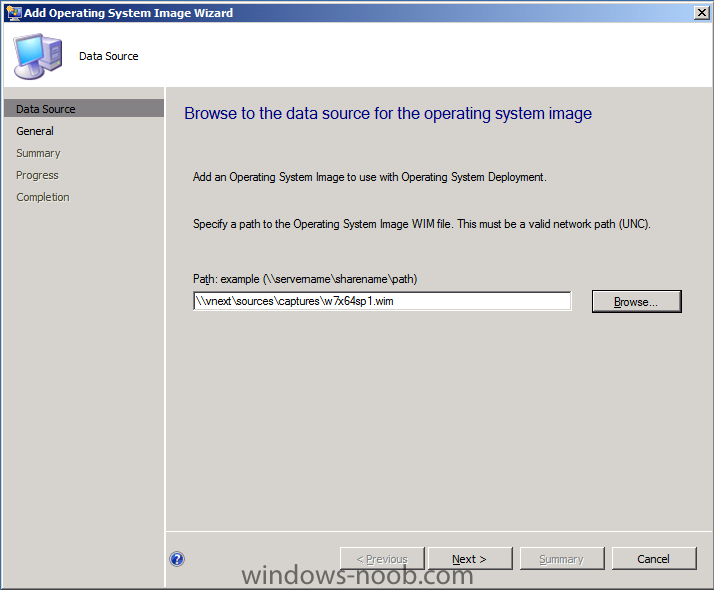
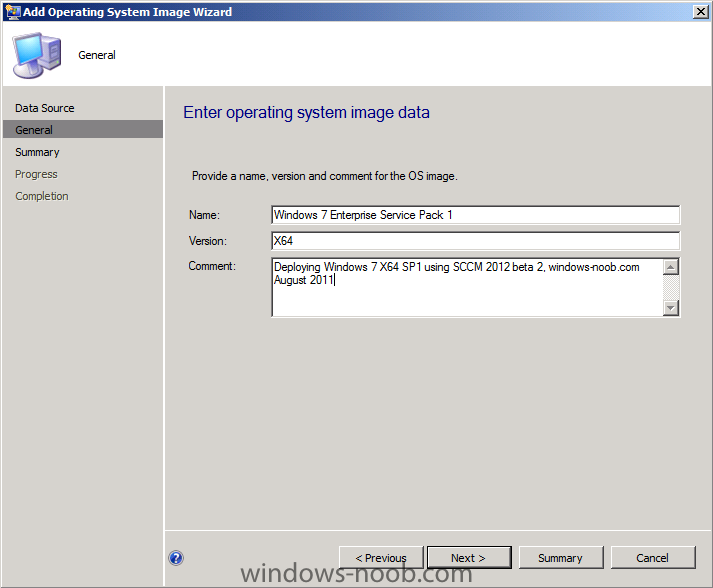
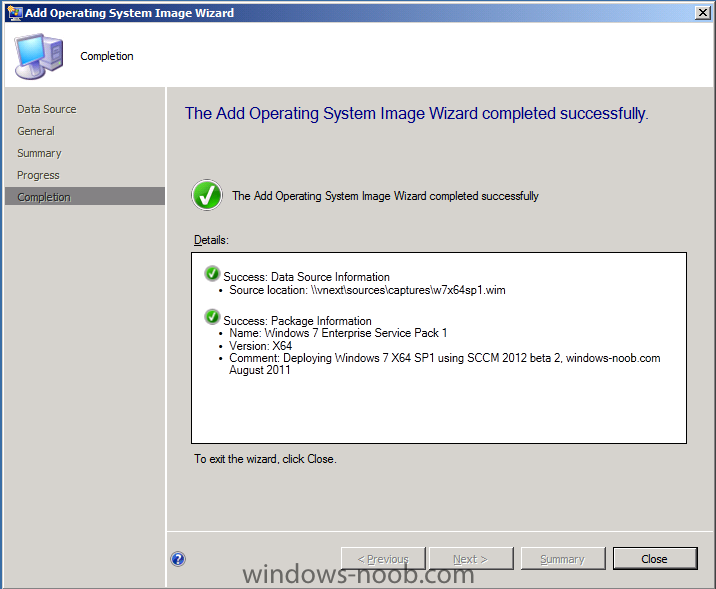
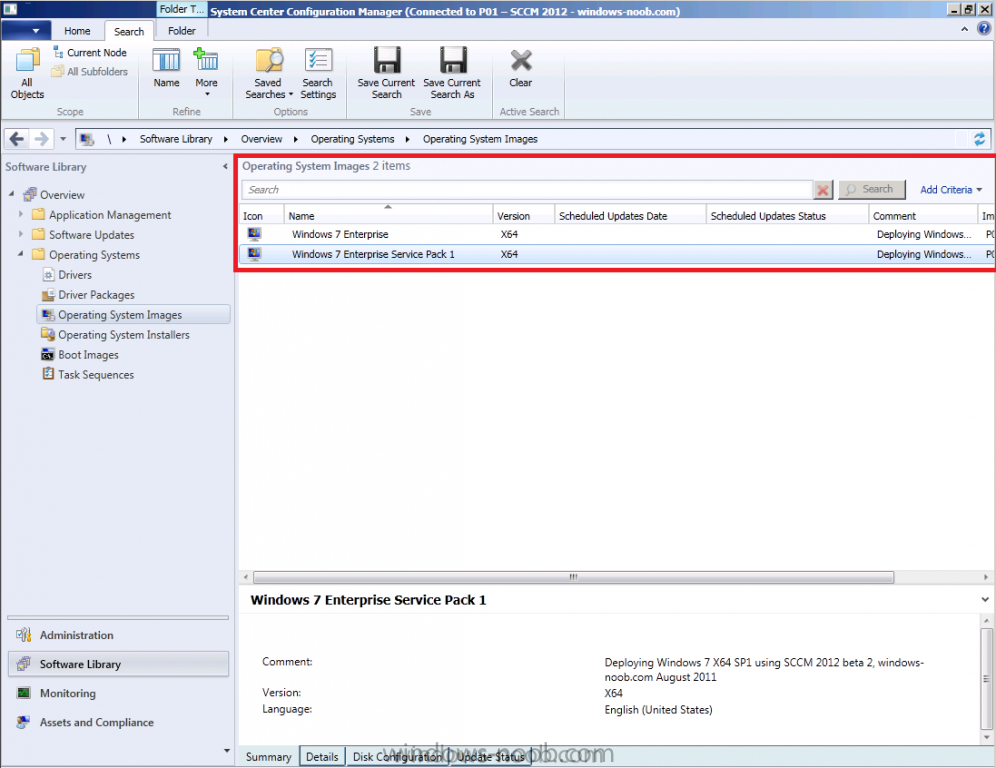
In Part 1. of this series we Installed SCCM 2012, in Part 2 we started to configure it. In Part 3, we configured Beta 2 some more by enabling Active Directory discovery methods, adding some site system roles, configuring the computer client agent and client push settings and finally doing a manual client installation to verify it all worked, in Part 4 we looked at installing an application using Application Management and the Software Catalog and the Software Center features of SCCM 2012, and in Part 5, we added the FSP, SLP, SMP, SUP. In Part 6 we got our SCCM 2012 server ready for Deploying Windows 7 Enterprise SP1 so that we could start deploying some Windows 7 clients to enhance our LAB, then in Part 7 we created a Build and Capture Task Sequence and deployed it to our Build and Capture collection. In Part 8 we created our Network Access Account and captured our Windows 7 SP1 image (and Windows 7 RTM). Now we will deploy that captured image to a new Virtual Machine. Perform the following on your SCCM 2012 beta 2 server as SMSadmin. Step 1. Import the captured images If you havn't already done so repeat the Build and Capture Process so that we have both Windows 7 X64 SP1 and Windows 7 X64 images captured. In the Software Library, Operating Systems section of the Configmgr console, click on Operating System Images, you'll note that it is empty because we havn't imported any images yet. In the ribbon above, click on Home and then Add Operating System Image for data source enter the capture UNC eg: \\vnext\sources\captures and click on browse, select the W7x64SP1.wim file enter the operating system image data click next and next again review the add operating system image Wizard completion message click Close, then repeat the above process for our Windows 7 X64 image (RTM). Both images should now appear


-
via Ned Pyle, Microsoft. Ned here. We rarely release USMT KB articles, so this post is to spread the word on a scenario that is easy to run into: do not allow calling of the Microsoft-Windows-COM-ComPlus-Setup-DL or Windows-COM-ComPlus-Setup manifests if migrating from x86 to x64. Bad things will happen otherwise, and while fixing it is easy on one machine, fixing it on 10,000 is not. For steps on preventing the issue and remediation, see: USMT 4.0 migration from x86 to x64 results in corrupted COM+ components - http://support.microsoft.com/kb/2481190 This effectively means that CONFIG.XML is now a required option for SCANSTATE, if you are moving from 32-bit to 64-bit OS. If going from 32-bit to 32-bit, or 64-bit to 64-bit, you have nothing to worry about. Until next time. Ned “Com Minus” Pyle via > http://blogs.technet.com/b/askds/archive/2011/08/03/usmt-x86-to-x64-migration-do-not-migrate-com-setup-manifest.aspx
-
in our production environment at work we have quite complex build and capture task sequences that have evolved over time. start with one change at a time and thoroughly test it until everything is stable, do this in your lab, once it is stable make the changes in production, and continue with your testing (back in the lab) please take a look at this post for some guidance around build and capture of windows 7 any issues you are having we can help with, but as before, keep the changes simple, one at a time and test thoroughly, all too often people add 4 different new steps to a task sequence and one or more of those steps breaks the smooth working process, it's all about testing testing testing cheers niall
-
SCCM out of space! Temporary Distribution Point
anyweb replied to lnew's question in Deploying Operating Systems
just leave it there, it will get used unless of course you dont want a drive used in which case you must place a no_sms_on_drive.sms file on it -
task sequences are executed in Local System context, access to packages is done using the network access account, can you try pxe booting again and see if you can press F8 before it reboots, post the smsts.log here please
-
correct two steps step 1. use toolkit package step 2. xcopy gpo's the toolkit package has several files/folders one folder is called scripts, copy your customscripts folder (and subsequent folders/files) to the scripts folder so the package is now \\server\sources\MDT Toolkit package\scripts\customscripts\group policy then update that package to it's dp's then test the task sequence
-
ok so you've integrated MDT 2012beta into SCCM 2012 beta 2? does it work without mdt integrated ?
-
you can do it like so along as you have integrated MDT 2010 update 1 with SCCM 2007. Create a sub folder off of your scripts folder in MDT Toolkit files package, then copy the group policy files from a computer that has had the policies applied, in order to use this you must then have a Use Toolkit Package the actual copy command (Run Command Line) is like so xcopy.exe "%deployroot%\scripts\Customscripts\GroupPolicy" "c:\" /E /C /I /Q /H /R /Y /S and must take place BEFORE the Setup Windows and configmgr Step cheers niall
-
Problem with SCCM 2012 system deployment
anyweb replied to night.walker's topic in Configuration Manager 2012
you said that means DNS is not working correctly, have a read of this and see can you fix it -
xcopy doesnt copy those files at all, the copying (backup aka Scanstate) is done entirely by the hardlinking process (re-indexing of files)
-
Problem with SCCM 2012 system deployment
anyweb replied to night.walker's topic in Configuration Manager 2012
fqdn is more like this sccm2012.windows-noob.lab.local try again and try testing nslookup on the vnext/sccm2012 beta 2 computer paste the results here -
How to create a Driver Package
anyweb replied to emmathews83's question in Deploy software, applications and drivers
doesn't matter if the post is old, whats your query ? -
Problem with SCCM 2012 system deployment
anyweb replied to night.walker's topic in Configuration Manager 2012
are you using virtual machines for this ? if so which type ? if it's hyperV set the NIC to Legacy Network adaptor, if it's vmware i believe you need the e1000 nic drivers added to your boot.wim files. to verify if you have dns issues check nslookup -
can you also confirm that the state of that package is Installed (look at package status)
-
well done, nice find
-
SCCM Issue - Client reboots from hard disk after picking the bootimage
anyweb replied to Gundeti's question in Deploying Operating Systems
have you seen this yet ? workaround for AbortPxe.com how to get rid of abortpxe.com -
If you’re a Windows watcher, circle this date on your calendar: April 10, 2012. That’s the date when mainstream support for Windows Vista officially ends. And it cannot come soon enough for Microsoft, whose public image was badly damaged by the massively unliked Vista. If the rumors about a possible Windows 8 release in April 2012 are true, it will be an almost perfect changing of the guard. But vanquishing the ghost of Windows Vista is the easy challenge for Microsoft. Windows XP is still hanging around on stage, bumping into scenery and generally interfering with Microsoft’s careful messaging about all the cool and useful stuff it’s doing today. I thought about that date as I watched the keynote addresses from this week’s Microsoft Worldwide Partner Conference in Los Angeles. Some of the people I follow on Twitter were disappointed that Microsoft didn’t divulge more details about Windows 8 or even publicly release a platform preview. That shouldn’t have been surprising. WPC is, after all, a show for partners who are out there selling Microsoft products every day. Yes, they want to know what’s coming up, but they’re far more interested in the present. And for their (mostly business) customers, there are only two Windows choices these days: the 10-year-old XP and the still-new Windows 7. It’s almost like Vista never happened. Consider the words of Chief Operating Officer Kevin Turner, who told a packed audience, “Windows XP, Office 2003, and Internet Explorer 6 deserve a standing ovation. We love those products.” As Turner noted, those products made Microsoft and its partners a lot of money. After a pause for dramatic effect, he added, “But they’re dead.” Oh dear. I guess that means 300 million PCs still powered by Windows XP are zombies, and we all know how hard those are to kill. Which might explain why Corporate Vice President Tami Reller was practically pleading with partners to help them migrate customers away from XP “to a modern OS.” That’s happening, slowly. XP has lost roughly 10 percent of its share over the past year and should be below the 50% mark by the time Vista support ends next year. But the paradox for Microsoft is that businesses—notoriously conservative and slow to adopt new technology—are most likely to embrace Windows 7 when it’s old news. When it comes to Windows, businesses like being on the last version, not the current one. When Windows 8 is released, it will instantly make Windows 7 the safe choice for businesses. Not rational, I know, but that’s how the psychology works. More than anything else, Microsoft is looking forward to shipping Windows 8 so it can finally get back on a regular cadence with its operating system releases: the current one for consumers and early-adopter businesses, the previous one for conservative businesses and cheapskate consumers. With Vista finally out of the mix, that proposition will finally make sense again. via > http://www.zdnet.com/blog/bott/can-windows-8-finally-vanquish-the-ghosts-of-xp-and-vista/3570?tag=content;feature-roto