anyweb
-
Posts
9259 -
Joined
-
Last visited
-
Days Won
371
Everything posted by anyweb
-
do you have an ip address when it fails ? open a command prompt (f8) and type ipconfig
-

using vNext in a LAB - Part 9. Configuring SUP
anyweb replied to anyweb's topic in Configuration Manager 2012
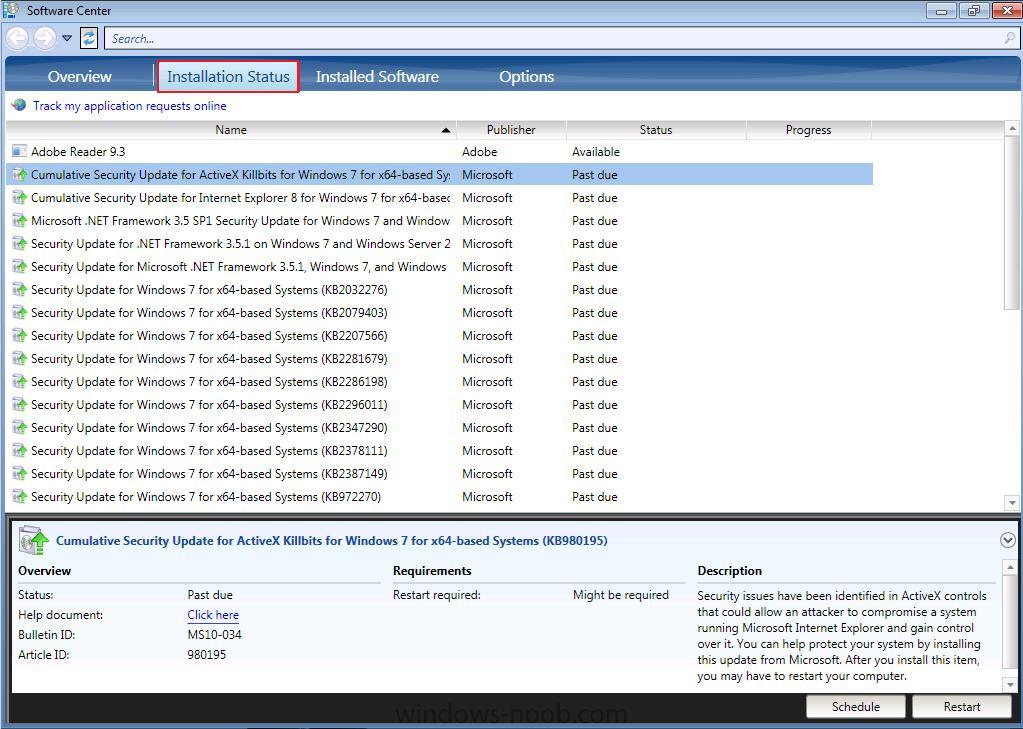
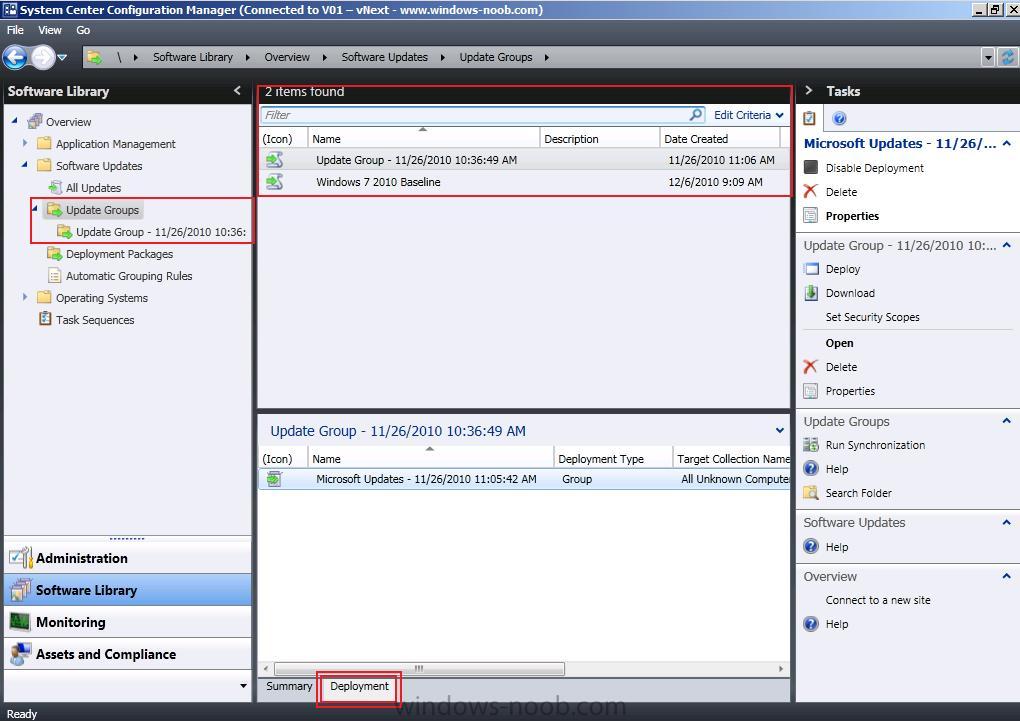
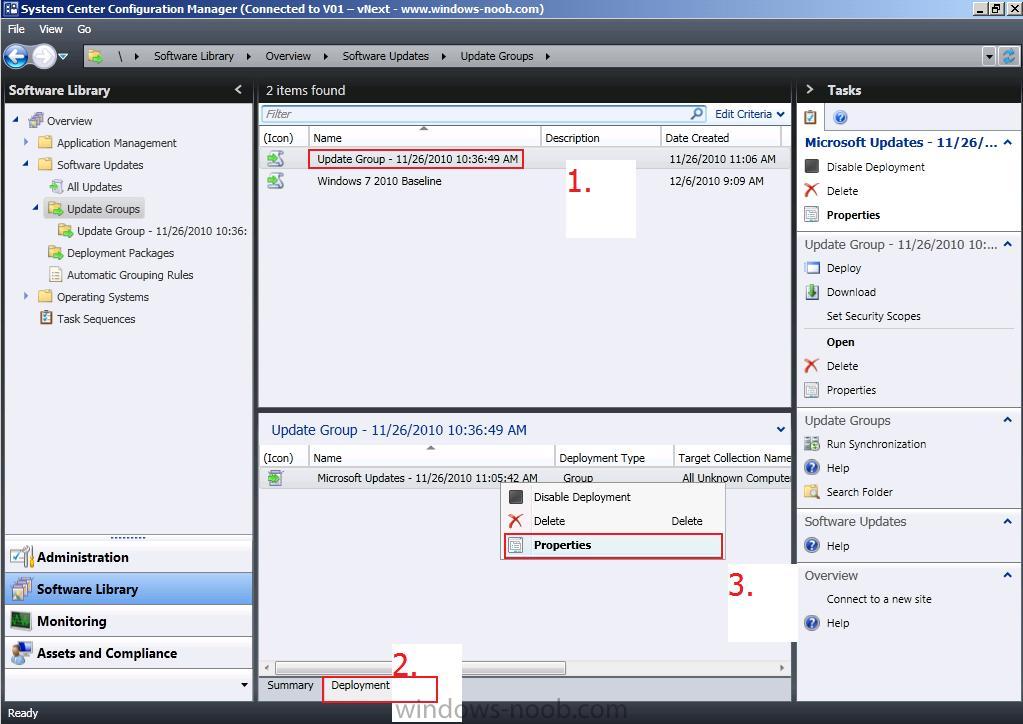
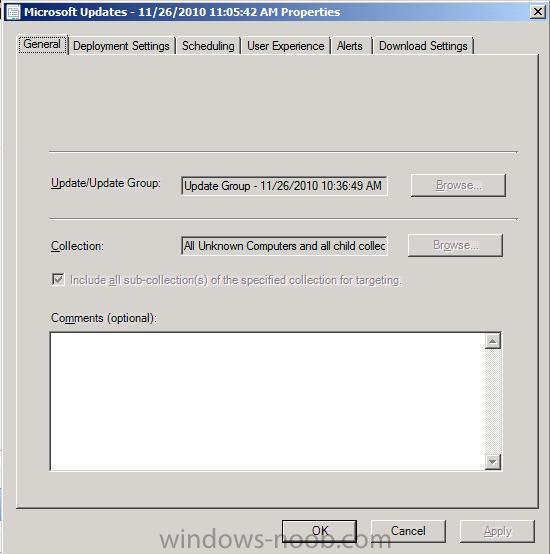
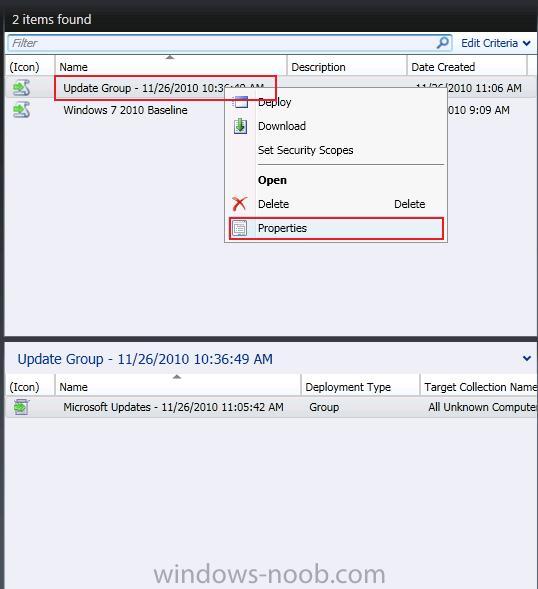
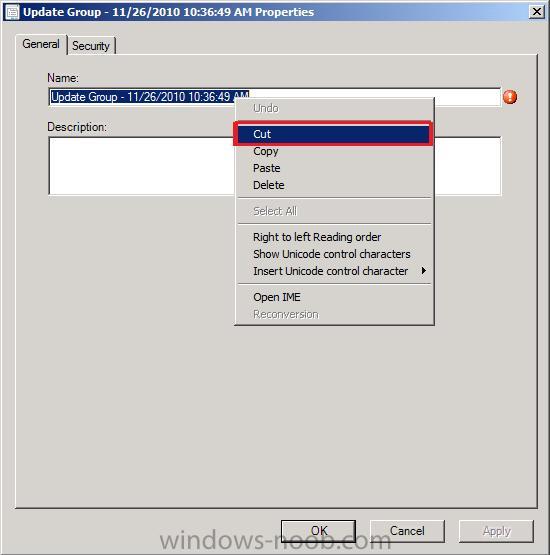
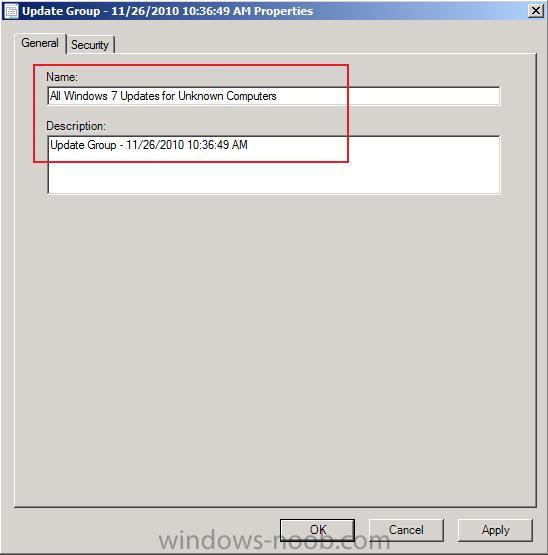
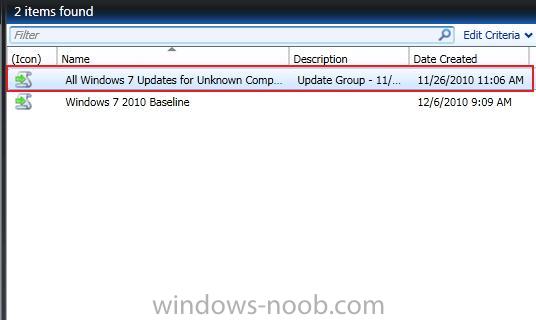
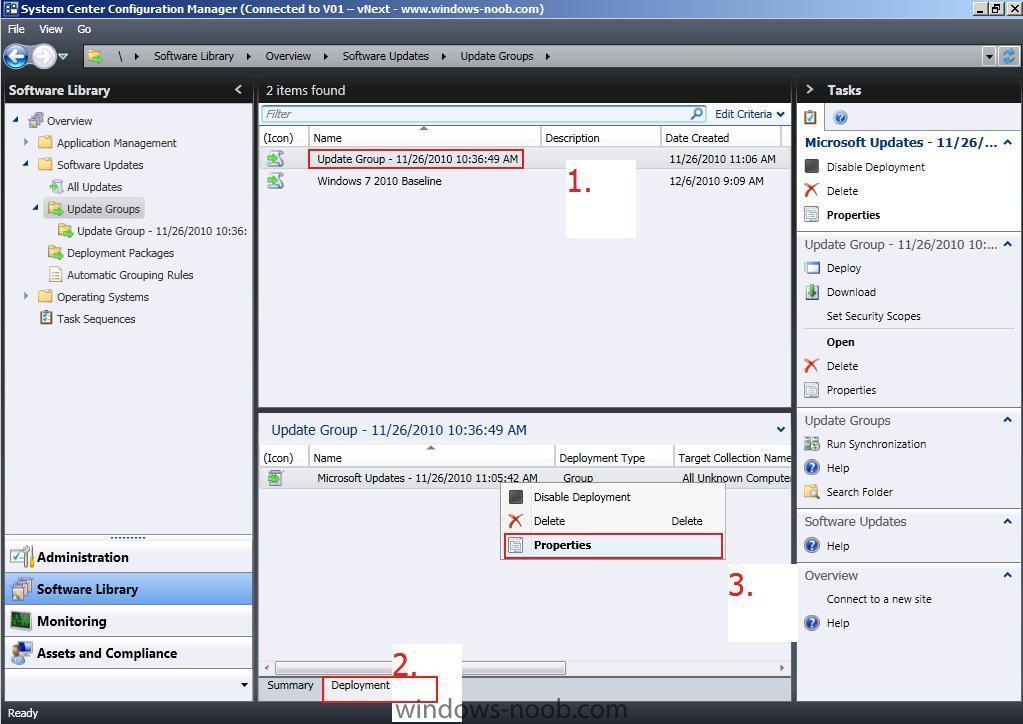
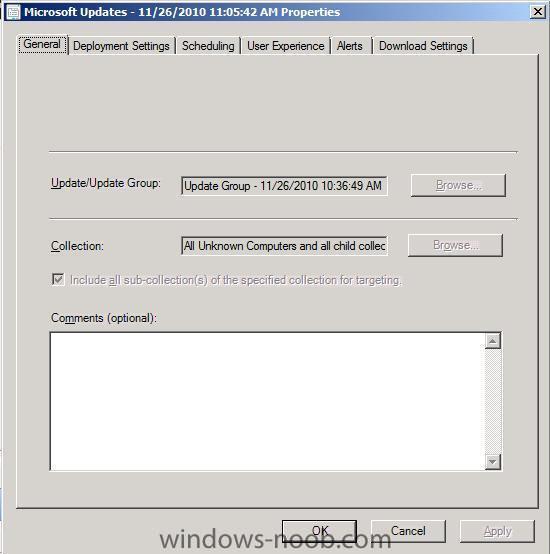
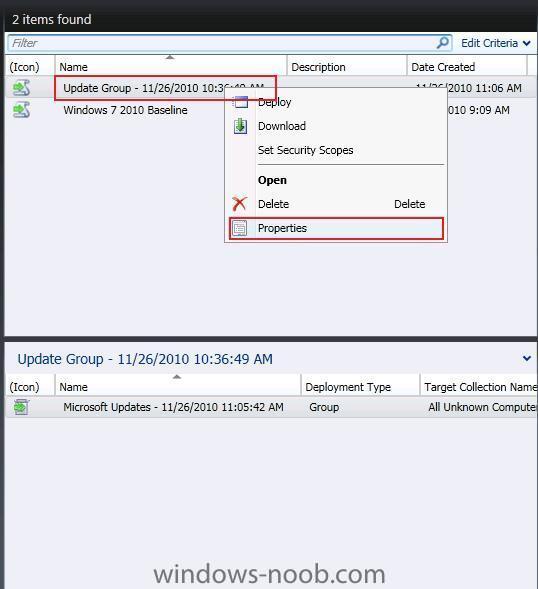
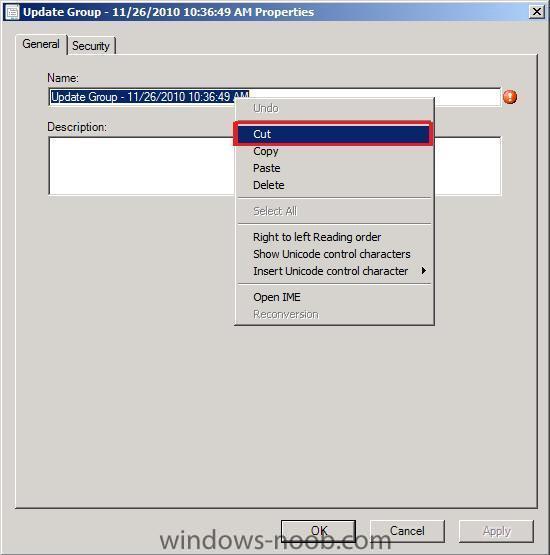
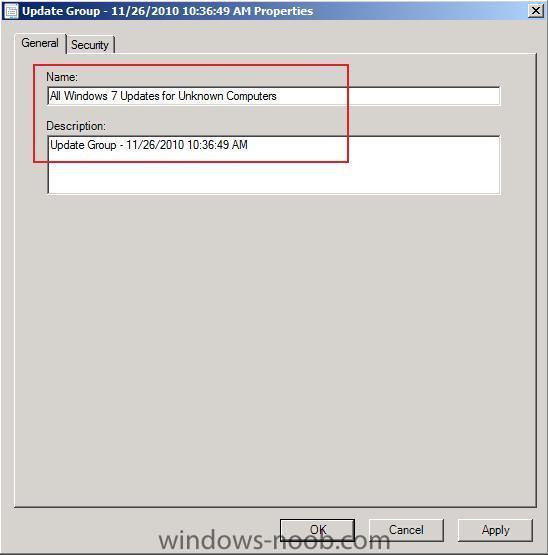
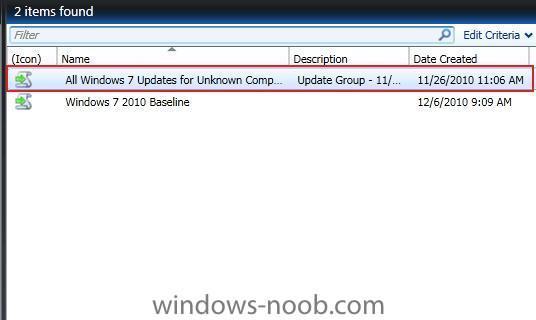
Step 6. Deploy the Windows 7 updates to our new collection repeat step 4 using the All Windows 7 collection we created above, except name the deployment Windows 7 2010 Baseline. Any Windows 7 client that you have running will now receive these new policies and the All Windows 7 targetted deployment will mean that these updates are deployed, you can review them being installed in the Installation Status tab of Software Center. To Summarise, we created Two Software Update deployments, one to the All Unknown Computers (this targets Windows 7 updates to computers getting deployed via OSD) and the other to All Windows 7 Computers. Step 7. Review our Deployment Settings. You can review these two Deployments (advertisements or Deployment Management Tasks if you are thinking the same way as before with SCCM 2007) by Selecting Update Groups if you select one Deployment (1.)and then click on the Deployment Tab (2.), Right click on Microsoft Updates below, and select Properties (3.). now you can review/change settings of the original Deployment by selecting the various tabs. click Cancel to exit. Step 8. Rename our Update Group Right click on our original Update Group Deployment called Update Group.... Choose Properties when the properties appear, Mark the Name, right click, choose Cut, Paste the information that you Cut above into the Description Field (so that you know when the Deployment was made) and give it a new, meaningful name like All Windows 7 Updates for Unknown Computers, click apply then ok. Notice how our Software Updates Deployments look now...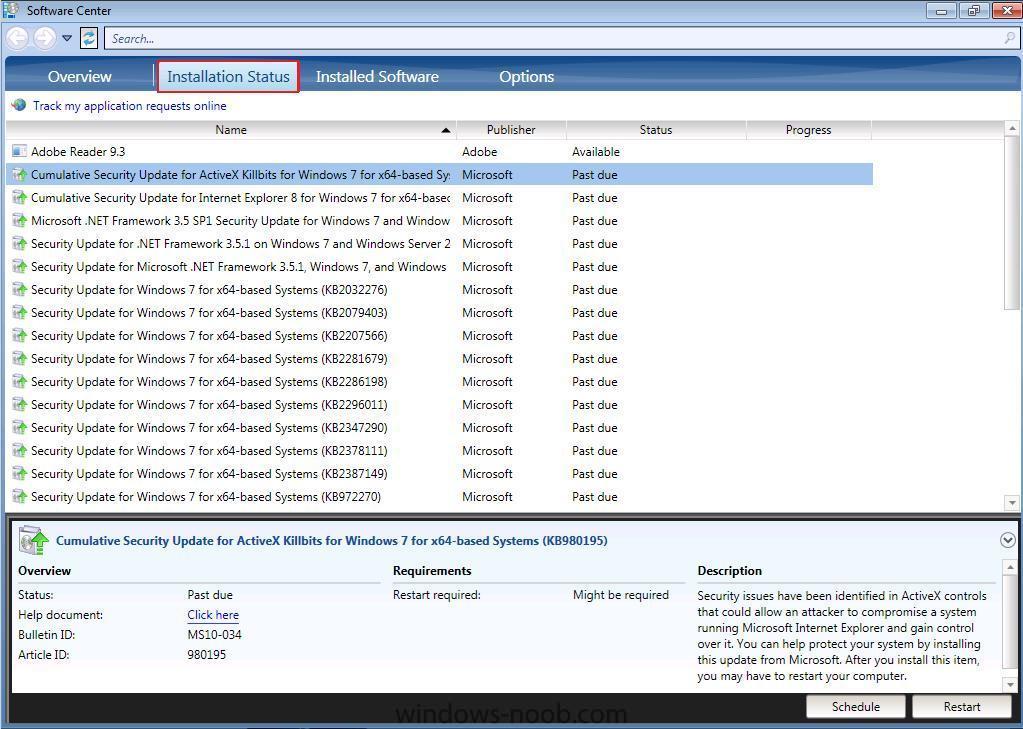

-
using vNext in a LAB - Part 9. Configuring SUP
anyweb replied to anyweb's topic in Configuration Manager 2012
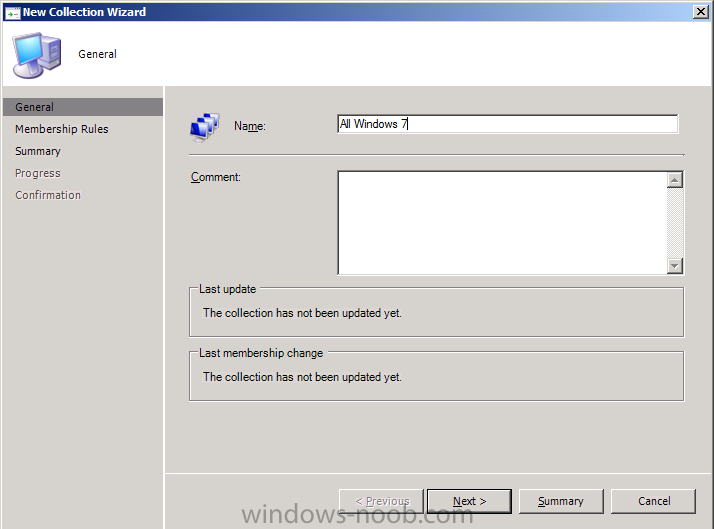
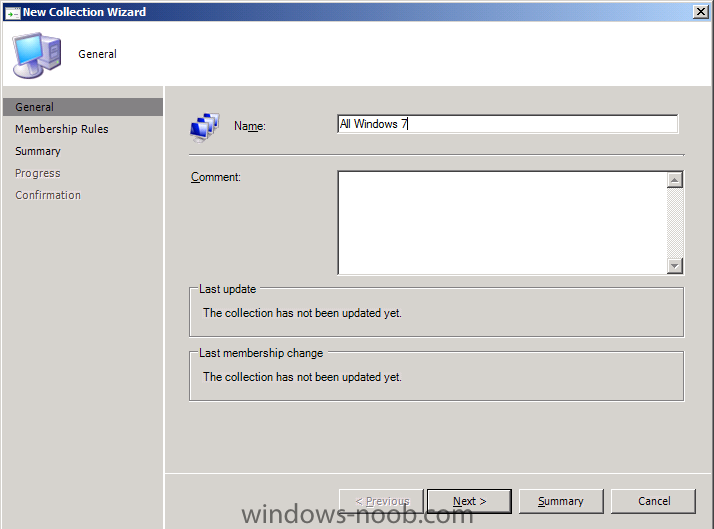
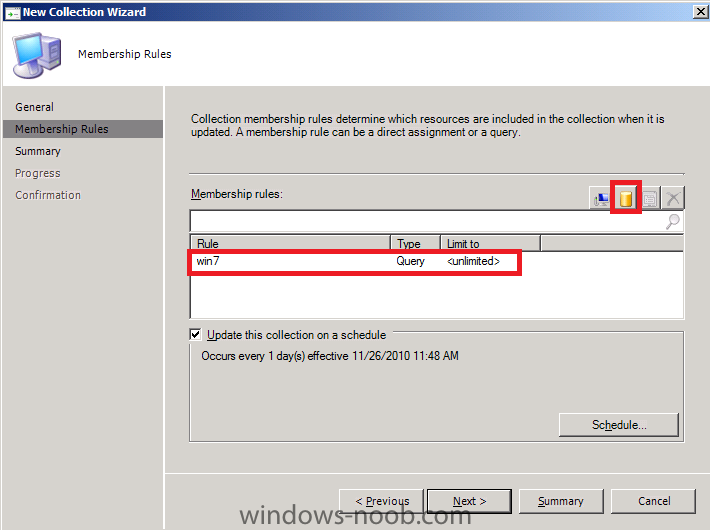
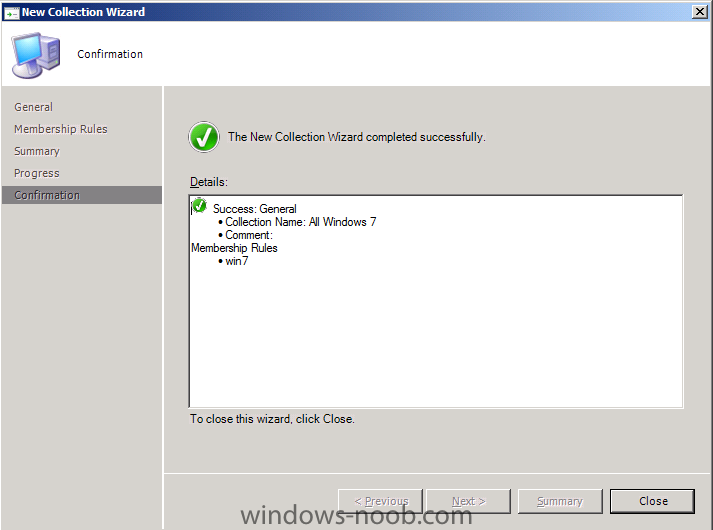
Step 5. Create All Windows 7 collection In the wunderbar click on Assets and compliance and select Device Collections, click on Create Collection in the Tasks Pane give the collection a name, All Windows 7 fill in the query with this select * from SMS_R_System where SMS_R_System.OperatingSystemNameandVersion like "%Workstation 6.1%" success !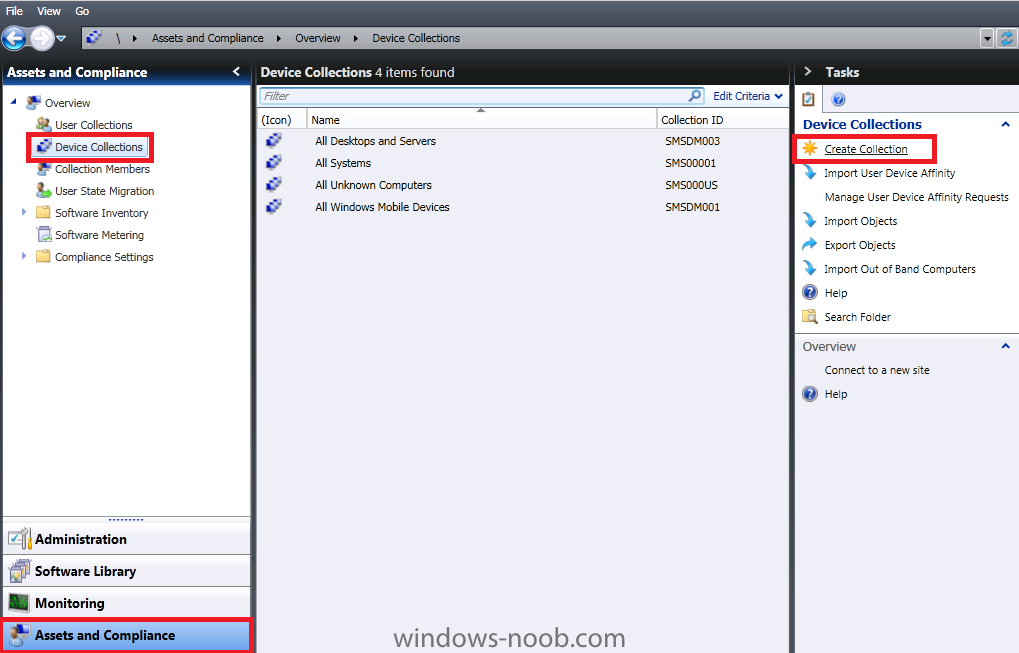
-
using vNext in a LAB - Part 9. Configuring SUP
anyweb replied to anyweb's topic in Configuration Manager 2012
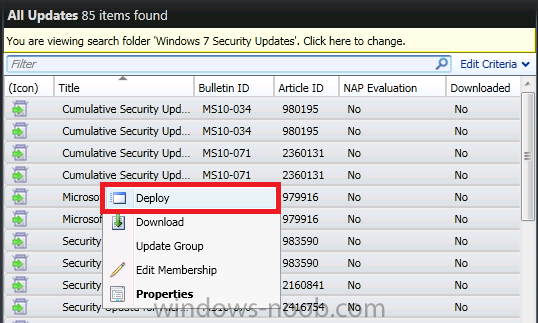
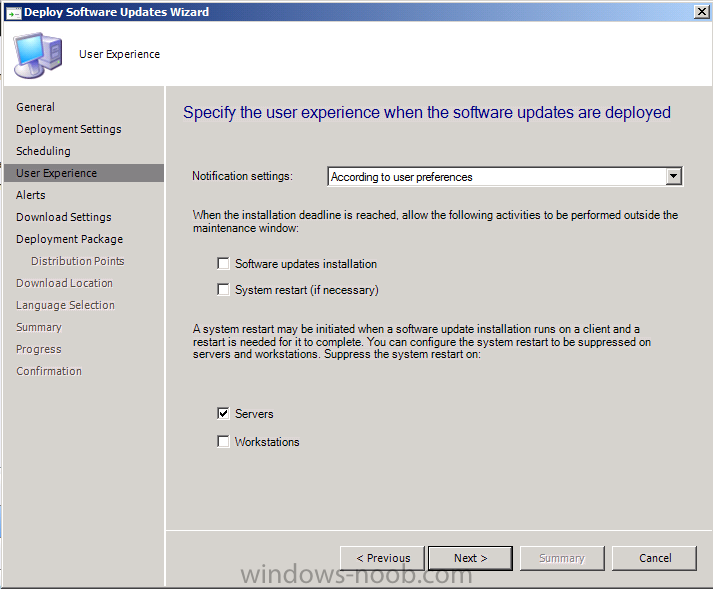
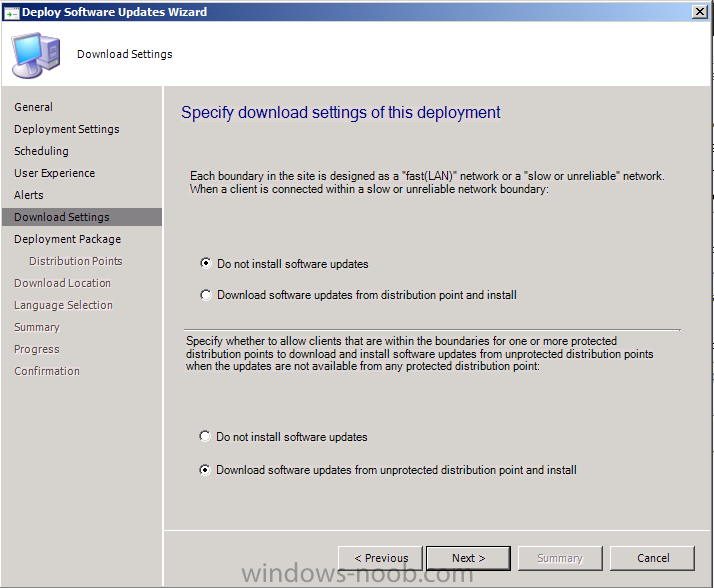
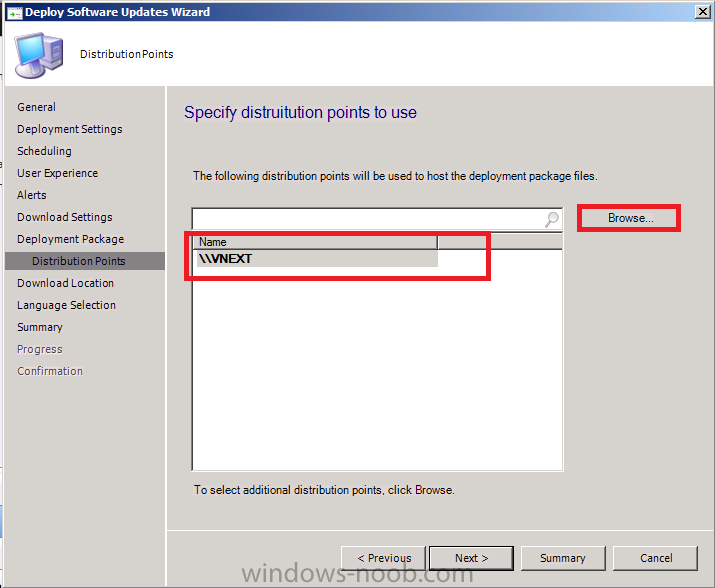
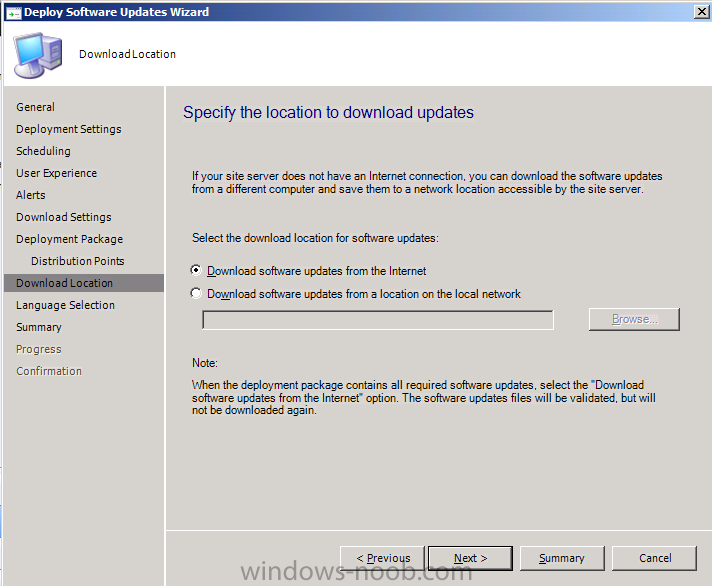
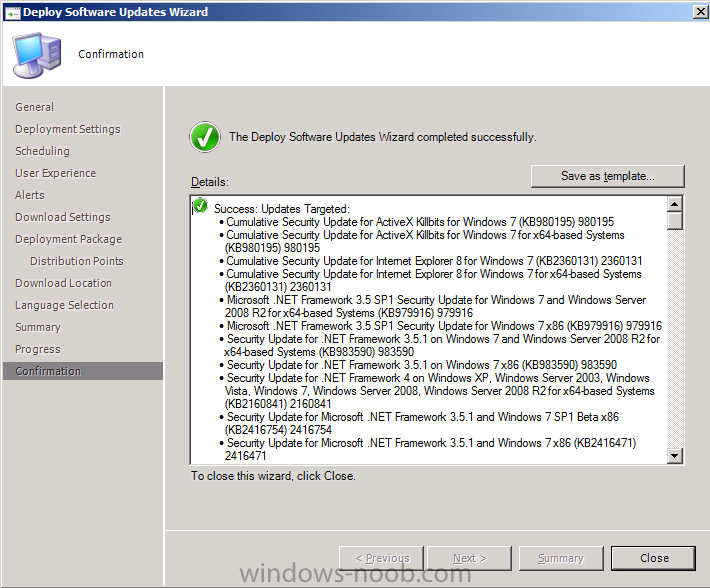
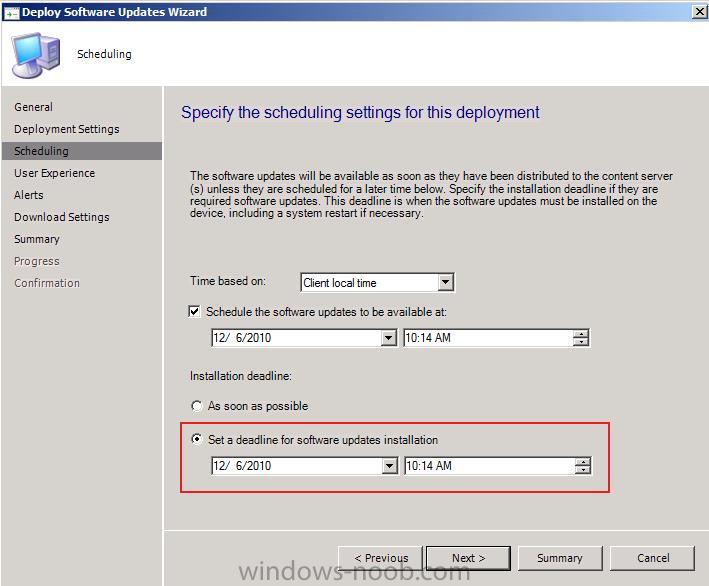
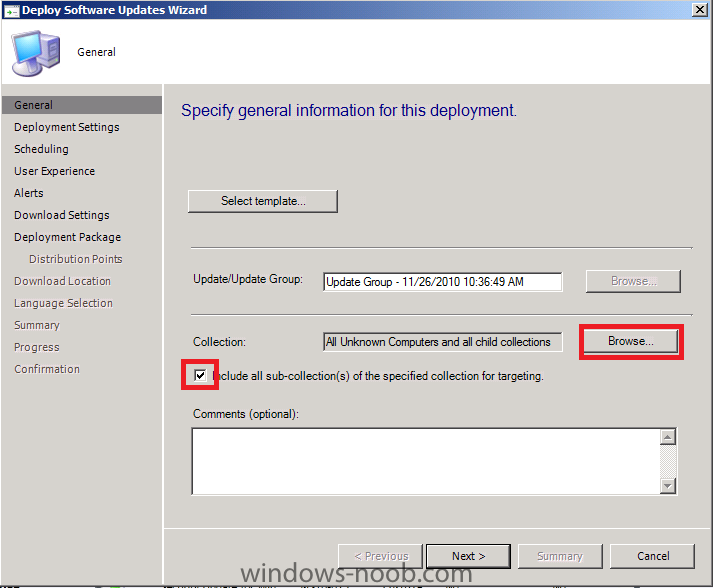
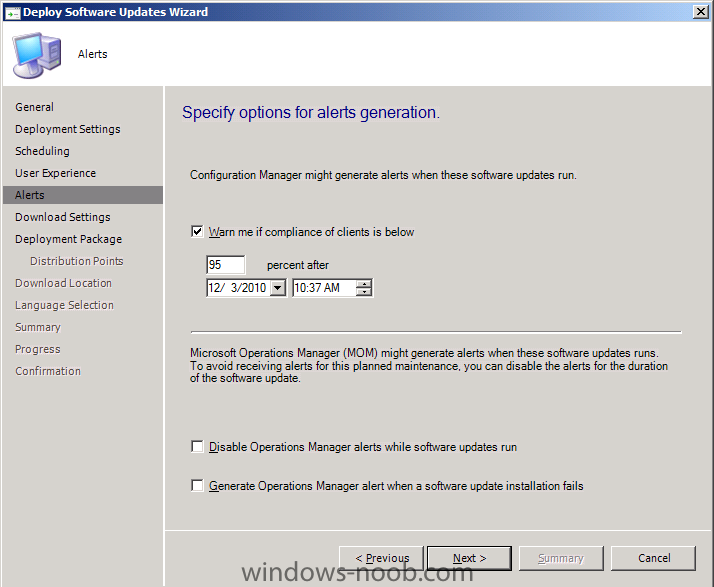
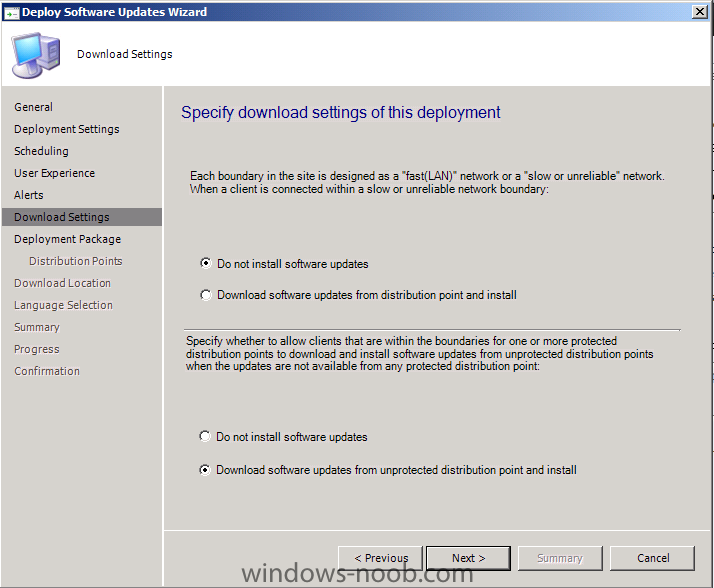
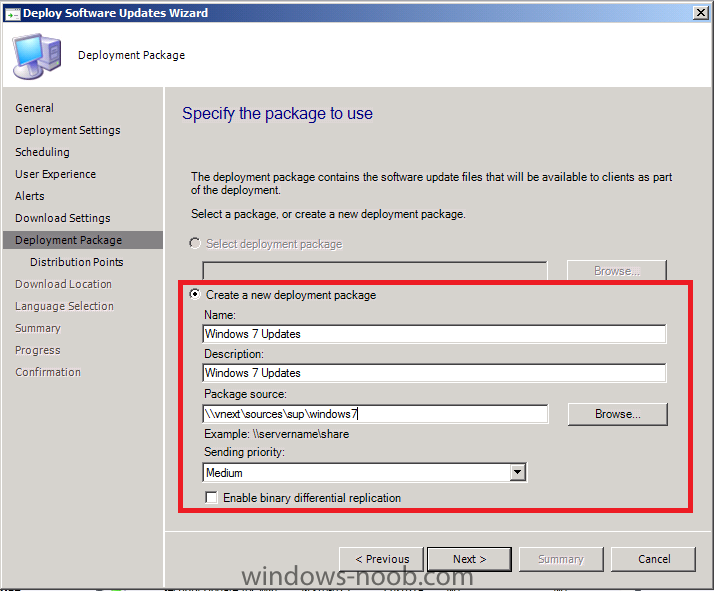
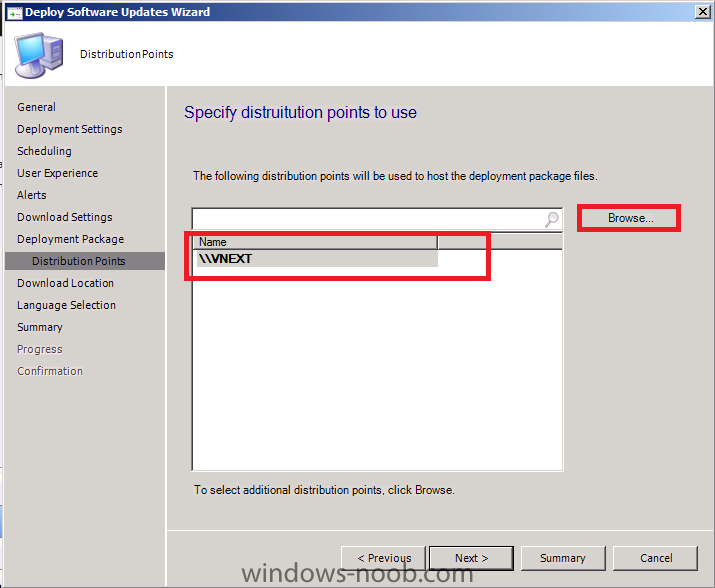
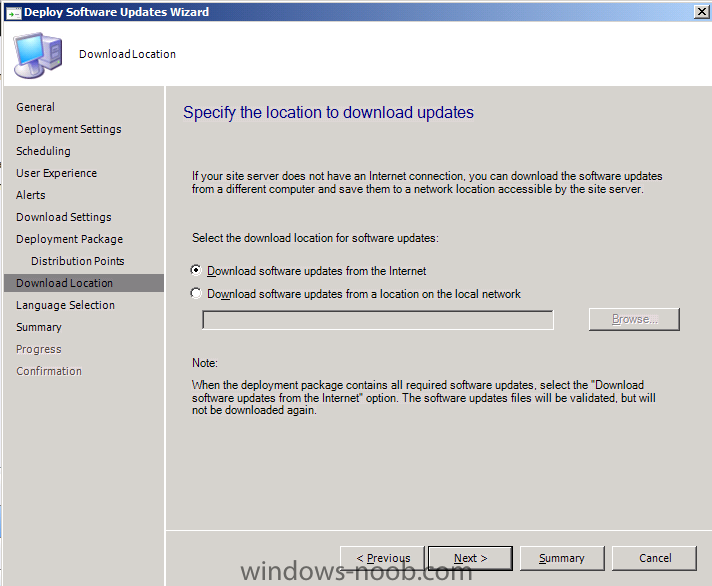
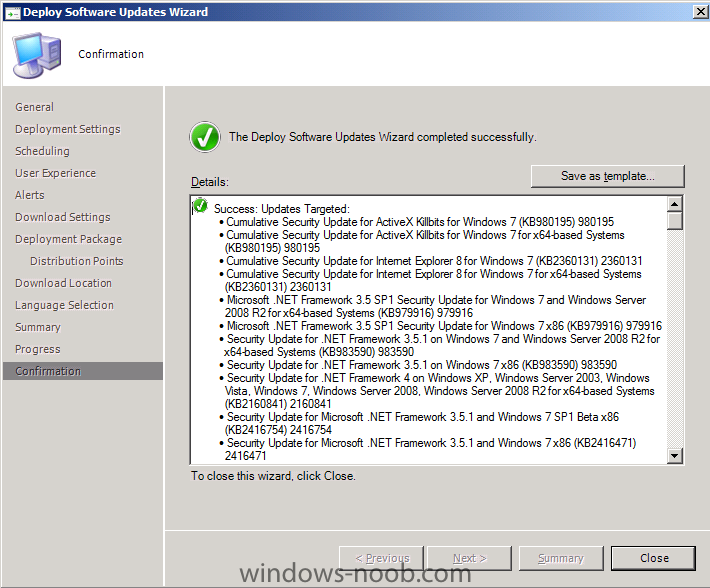
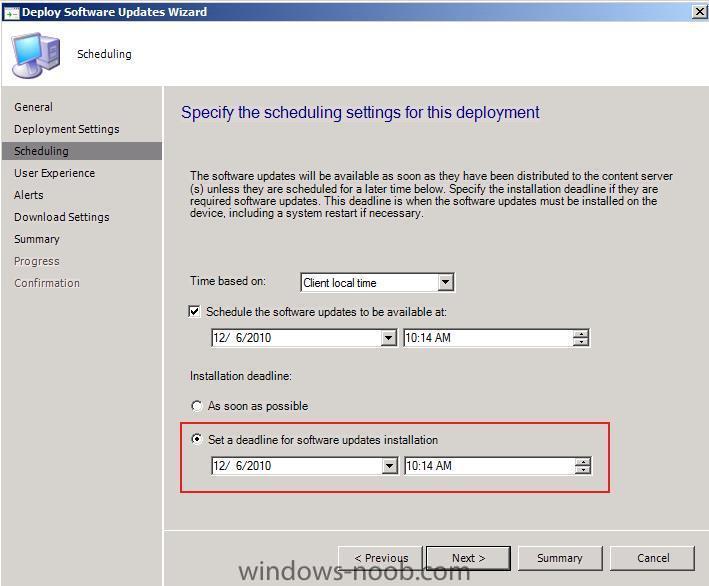
Step 4. Deploy our Windows 7 Updates We want our Windows 7 computers that are being deployed to get these new updates. So let's target both the Unknown Computers collection and All Windows 7 computers collection with these updates. Select the first update in the list, scroll down and select the last so that all are selected (you can press CTRL and A to select All). Notice that all items are now selected right click and choose Deploy on the General screen, select browse and browse to the All Unknown computers collection set the Intent to Required (this makes the deployment mandatory) set the Schedule, and make sure to choose Set A Deadline set your User Experience options set your Alert options, I entered 95% review your download settings (leave as default) for Specify the Package to use, enter the following details (it's a new deployment package) select our VNEXT dp by click on browse, Change to Distribution Points, vnext select the download from internet option select English as the language, click next at the summary, and review the confirmation done !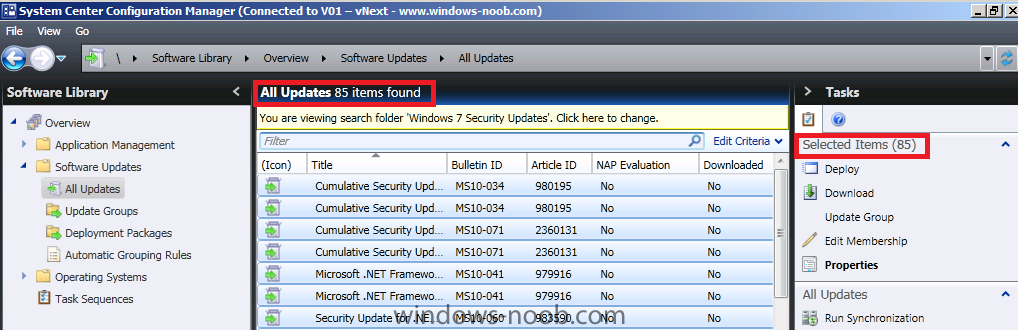


-
using vNext in a LAB - Part 9. Configuring SUP
anyweb replied to anyweb's topic in Configuration Manager 2012
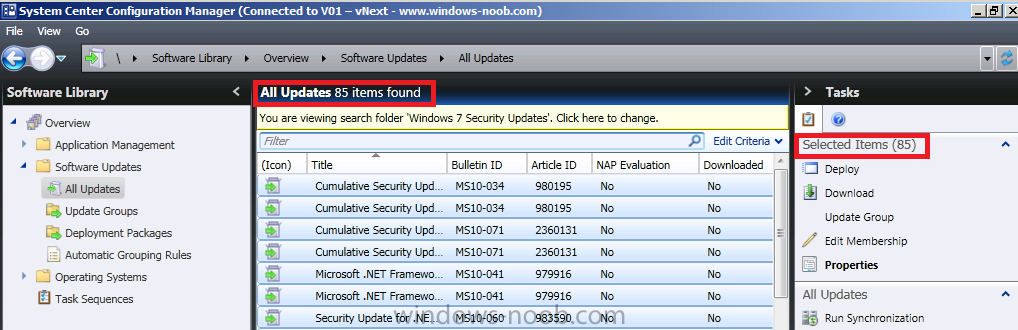
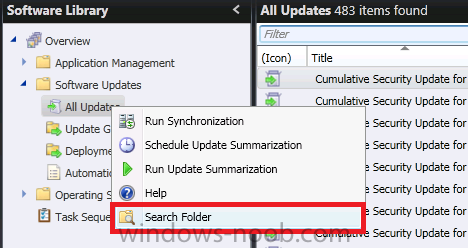
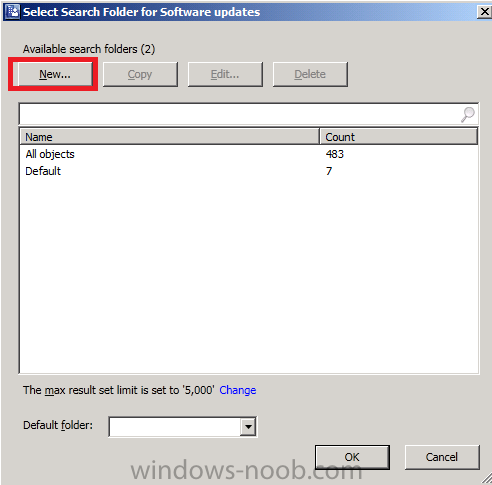
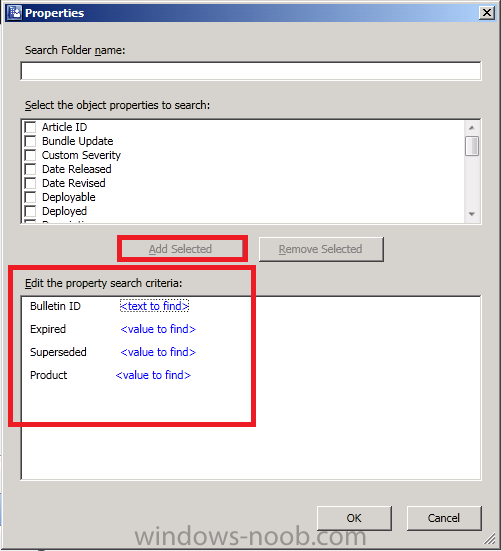
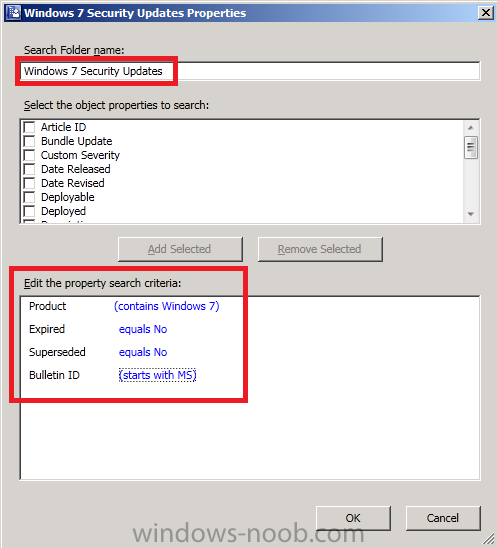
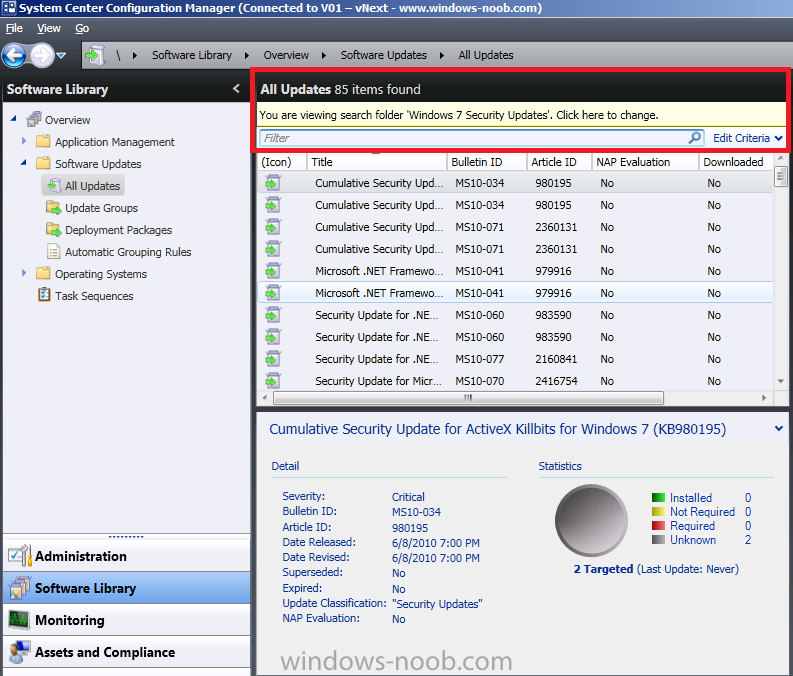
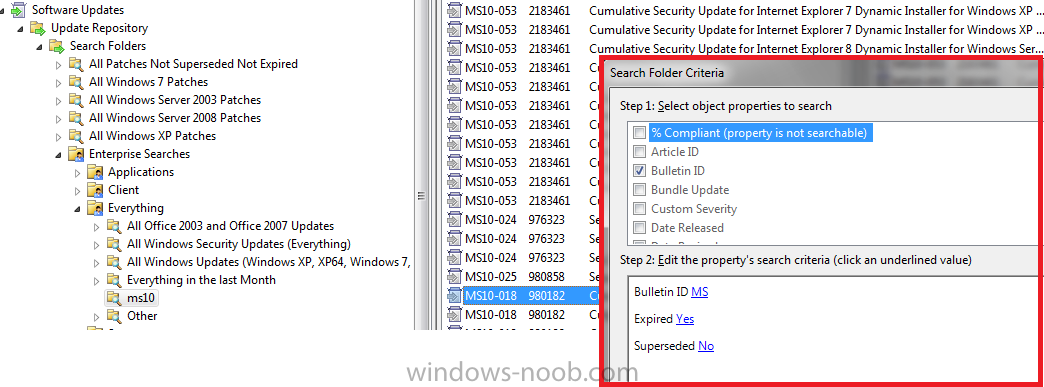
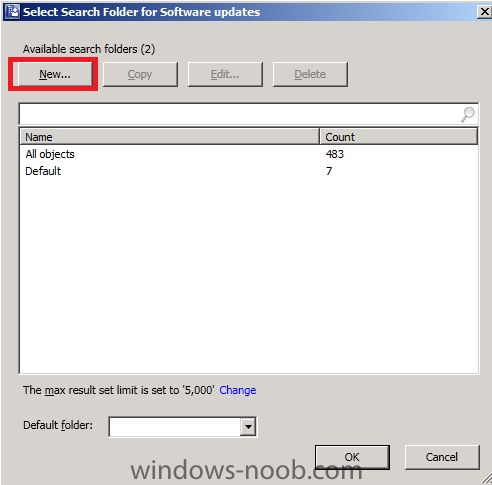
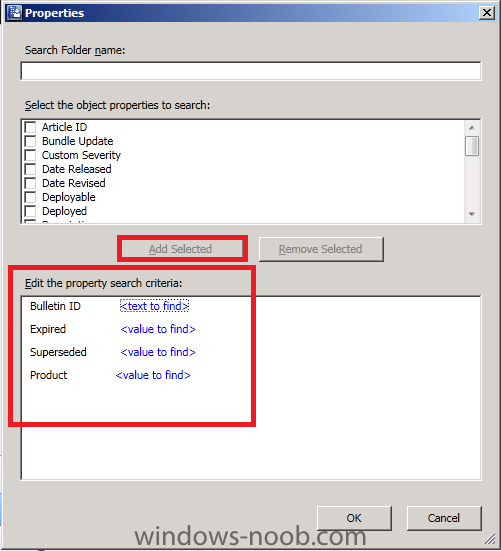
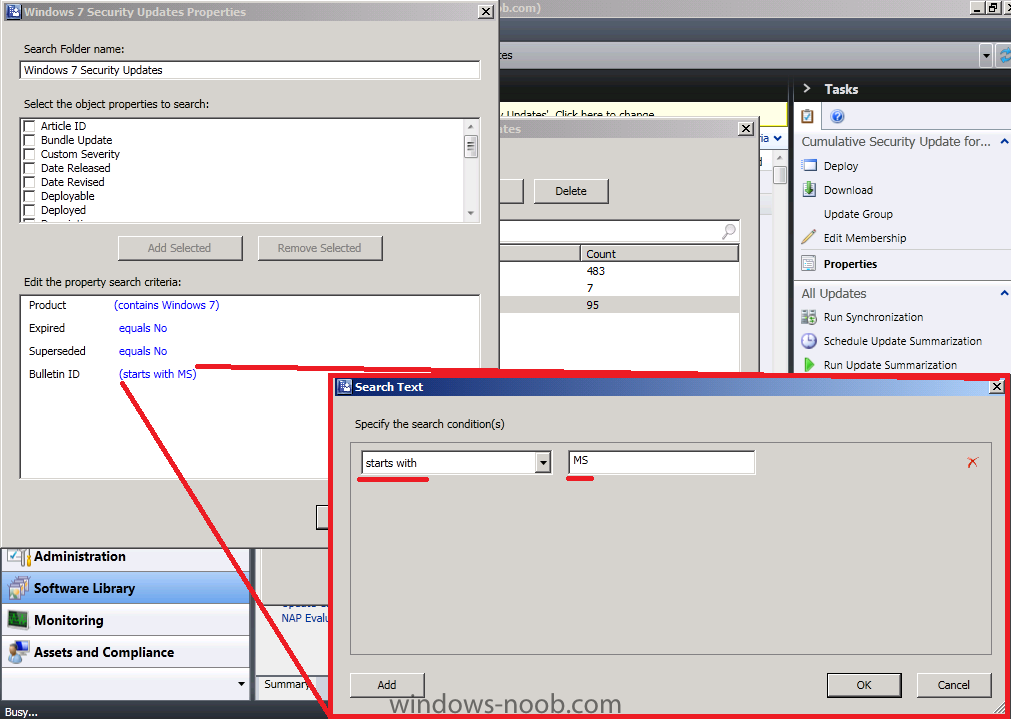
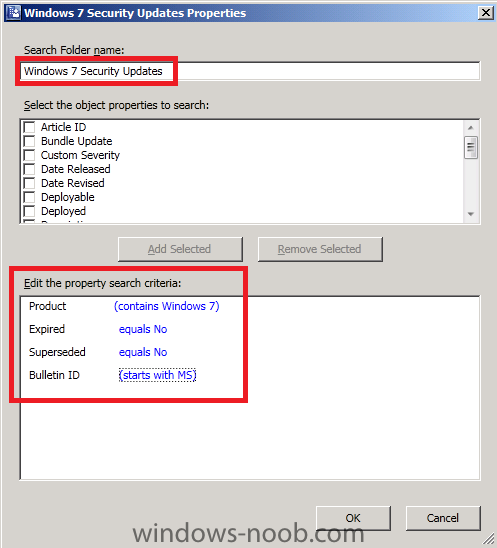
Step 3. Create a new Search Folder Right click on All Updates, choose Search Folder click on New select the following options Bulletin ID Expired Superseded Product click Add Selected when done Click on Bulletin ID, when the window appears, type in the value MS and change Equals to Starts With for Expired and Superseded, select No as the value, and for Product select Windows 7, give your search folder the name Windows 7 Security Updates click ok and ok again. Notice the number of updates changes to much less than above, as we have filtered them to only show Windows 7 Security Updates that are not expired or superseded. Now we have 85 updates (Windows 7 security Updates)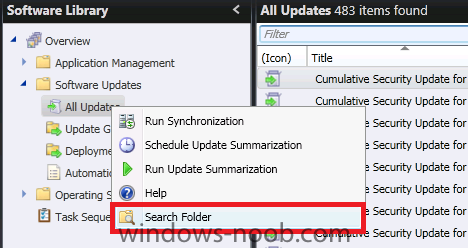

-
using vNext in a LAB - Part 9. Configuring SUP
anyweb replied to anyweb's topic in Configuration Manager 2012
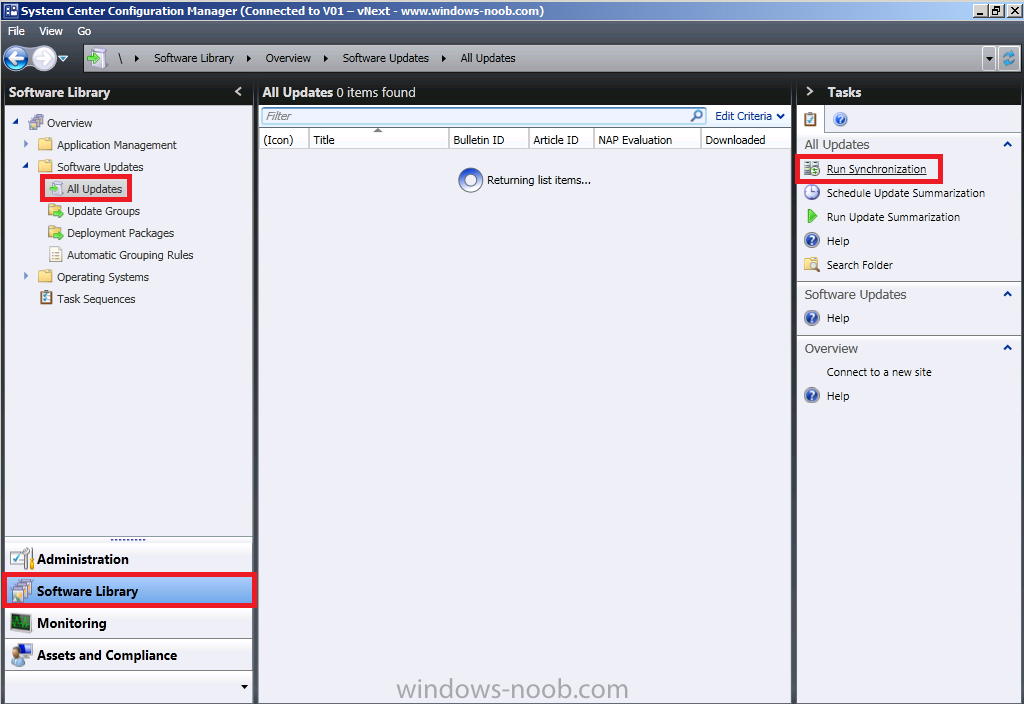
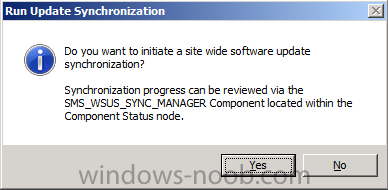
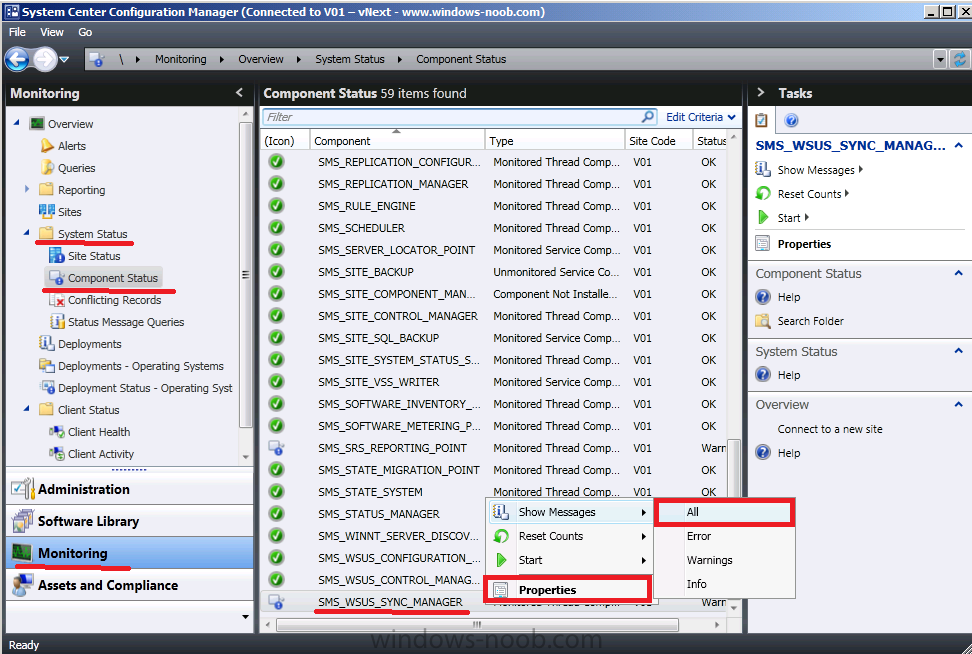
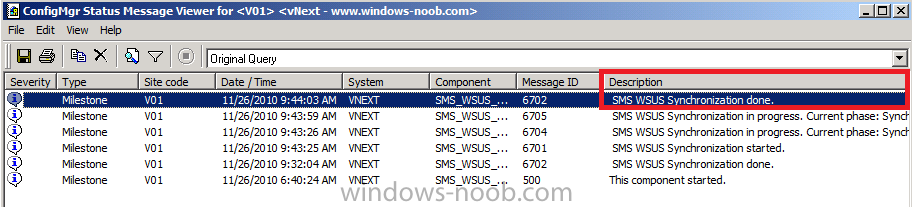
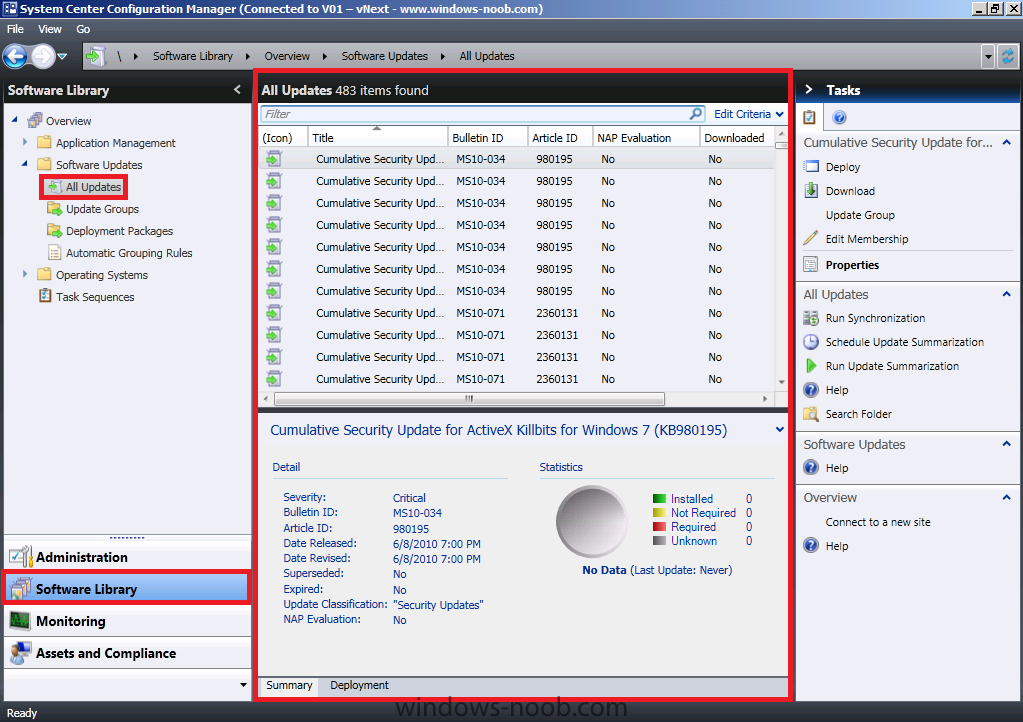
Step 2. Run a Synchronisation In the Wunderbar, click on Software Library, Select Software Updates, All Updates, note that 0 items appear, Click on Run Synchronization in the Tasks pane. You will be prompted to review the sms_wsus_sync_manager log to get confirmation, answer Yes. In the Wunderbar, click on Monitoring, system Status, Component Status, Select our SMS_WSUS_SYNC_MANAGER component, right click and choose Show Messages, All. Click Ok to the 1 day prompt. Look for the Message ID 6702 Sync Done message,press F5 to refresh while waiting... Once the Sync is done, and you've verified it in the logs, in the Wunderbar click on Software Library, Software Updates, All Updates. You should see hundreds of updates listed like so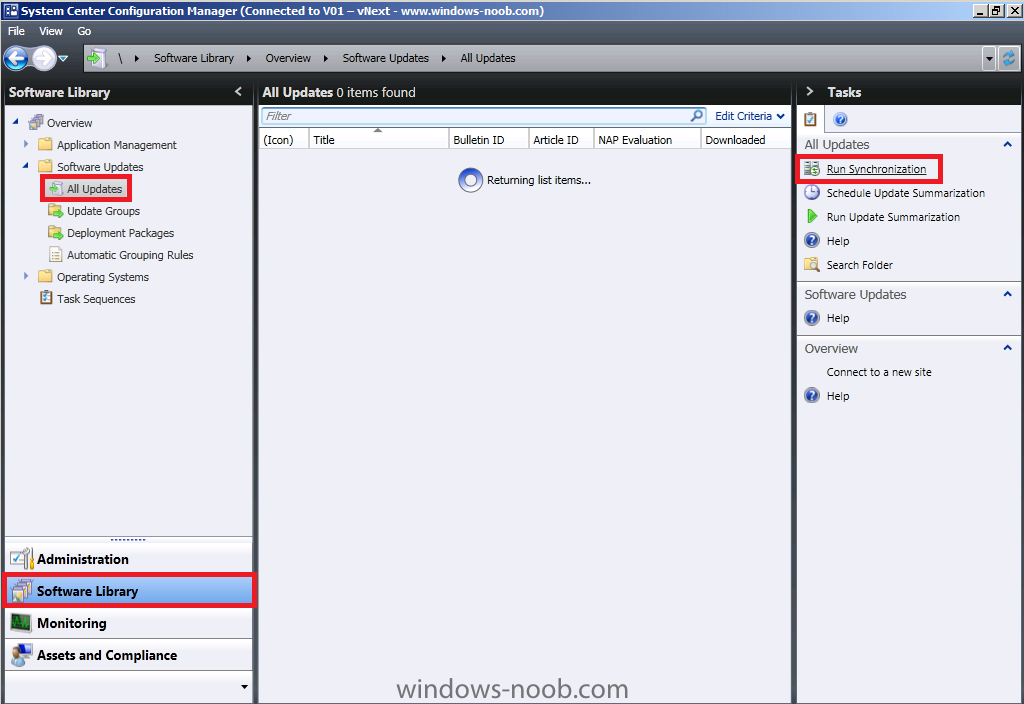


-
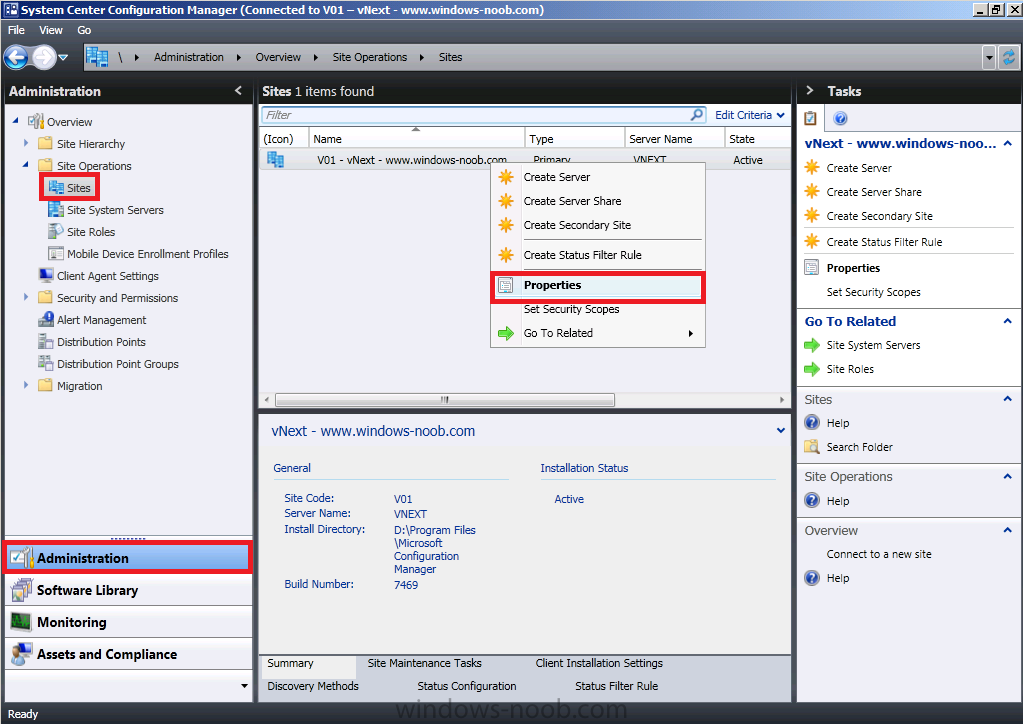
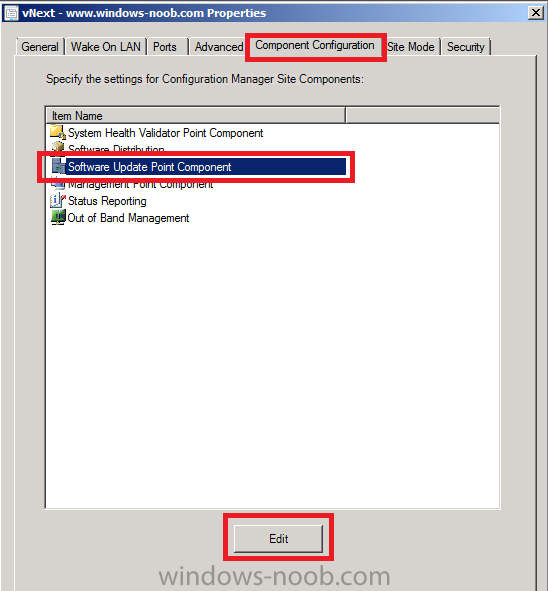
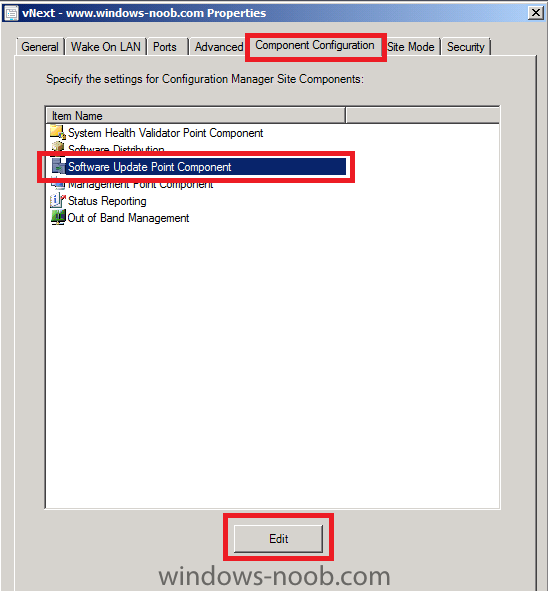
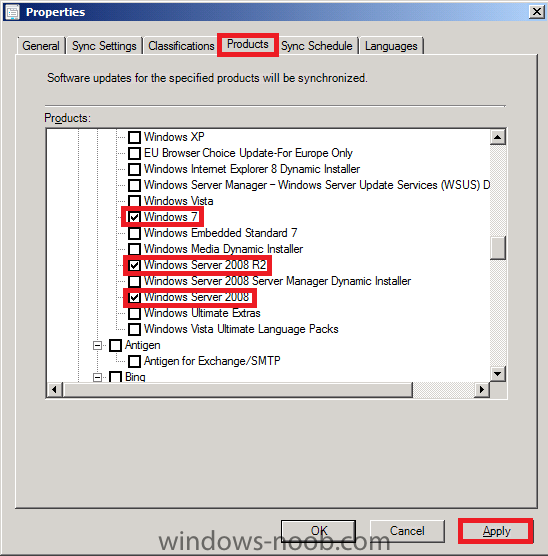
In Part 1. of this series we Installed vNext. In Part 2., we then Configured vNext to use the New AD Site as a boundary and Configured Discovery Methods in vNext. In Part 3, we installed the Reporting Point Role along with some additional roles and configured them. In Part 4 we configured the client Agents and deployed the vNext Client. In Part 5 we deployed an Application to All Users. In Part 6 we added Windows Deployment Services, added the PSP role, added the Windows 7 Enterprise image, and updated our boot image for Deploying Windows 7. In Part 7 we created our Build and Capture Task Sequence, enabled the Network Access Account, Advertised (Deployed) the Task Sequence, and created a new hyper-v virtual machine for capturing the wim on. In Part 8 we installed WSUS and then the SUP and SLP roles. Now we will configure add some products to get sync info about, and target some updates to collections. Step 1. Select some Products. In the Wunderbar click on Administration. Select Site Operations, Sites and then Right click our Site Server and click Properties. When the properties appear, select the Component Configuration Tab, Select Software Update Point and click on Edit. Click on the Products tab and scroll down, select the following products. Windows 7 Windows Server 2008 R2 Windows Server 2008 Click Apply when done. Then click Ok and Ok again.

-
Winrumors has reported that a new 0-day vulnerability affecting Windows XP, Vista and 7 has been discovered. The vulnerability resides in win32k.sys, "the kernel mode part of the Windows subsystem." This exploit allows user priviledge elevation, enabling even limited accounts to execute arbitrary code. Marco Giuliani of Prevx has stated that no malware is currently exploiting this flaw, but also warned that it would be "very soon" before malware authors begin exploiting the vulnerability. The API in which the vulnerability is located does not correctly validate input, resulting in stack overflow. This means that an attacker could control the destination of the "overwritten return address" and in essence execute their code with kernel mode privileges. Since this exploits user elevation, it bypasses UAC and leaves Vista and 7 vulnerable. This is specifically important due to the fact that UAC was originally implemented to prevent unauthorized privilege elevation. Prevx is well known for mistakenly stating, last year, that Windows Update was creating a "black screen of death." It was later revealed that the black screen was caused by a malware infection, rather than an oversight or mistake on Microsoft's part. Microsoft has confirmed that they are evaluating this vulnerability so a fix could be in the works. via > http://www.neowin.net/news/windows-0-day-vulnerability-bypasses-uac
-
yeah offline mode in Windows PE is how we do it here, and it works great (however we are also using a HTA Frontend to set some variables, which are in turn looked for in the task sequence)
-
trying to add boot image to wds
anyweb replied to snoopy86's question in Windows Deployment Services
looks like it wants boot files from a different architecture, so which are you using 32bit or 64bit ? -
SCCM Security Update list messed up by a newbie
anyweb replied to MrHaugen's question in Deploy software, applications and drivers
MS10-018 is expired and MS10-020 is available in configmgr play around with your search folder criteria for example if you have one search folder for Expired=yes you'll see MS018 listed as an expired update
-
theres no problem migrating from xp to windows 7 via pxe boot, what issue are you seeing exactly ??? can you post your logs ?
-
SCCM Security Update list messed up by a newbie
anyweb replied to MrHaugen's question in Deploy software, applications and drivers
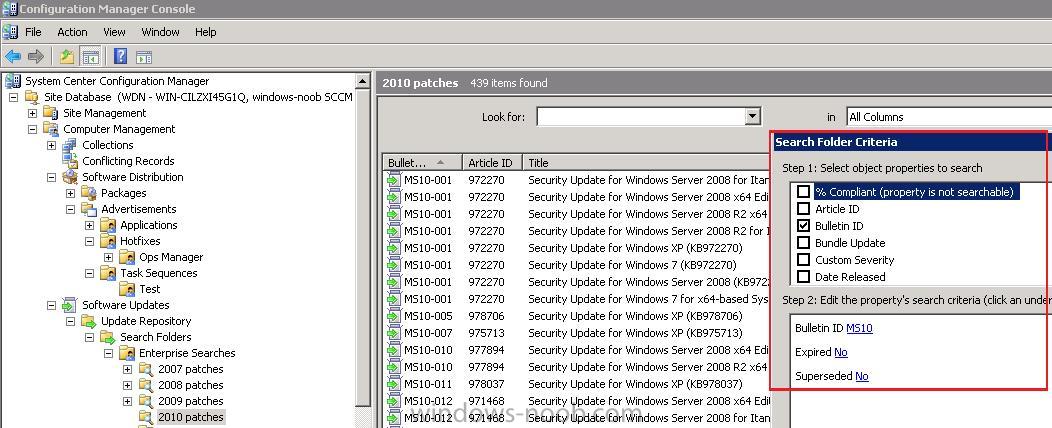
looks alright to me, compare it to my lab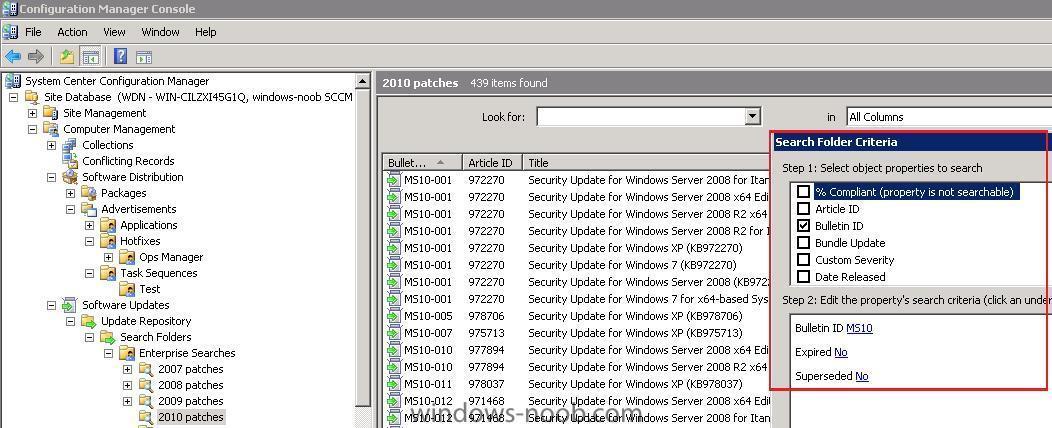
-
SCCM Security Update list messed up by a newbie
anyweb replied to MrHaugen's question in Deploy software, applications and drivers
welcome to the forums, can you show me a screenshot of what you are seeing please ? -
does this step happen after you've installed the configmgr client ?
-
still not working for me, i'm still seeing the IPB favicon, tried in firefox and IE, same on both
-
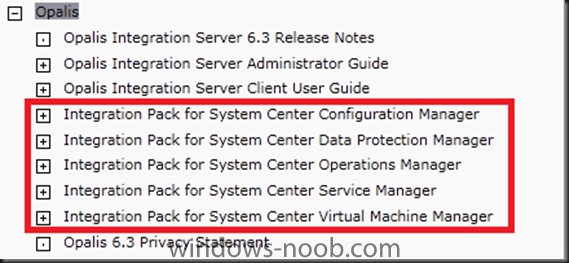
Hi Everybody Just a quick post to let you know that the Opalis 6.3 Technet Library is now live at http://technet.microsoft.com/en-us/library/ff630946.aspx As you can see in the screenshot below, this includes detailed information on the new System Center Integration Packs and the activities within these IP’s. via > http://blogs.technet.com/b/systemcenter/archive/2010/11/21/the-opalis-6-3-technet-library-is-live.aspx
-
hmm, cleared my cache, restarted firefox, still see the old IPB one :/
-
seems the ico shows up correctly at http://www.windows-noob.com but as that re-directs to http://www.windows-noob.com/forums then the favico changes back to the standard one... even though i copied it to both places
-
welcome to the forums, to remove a patch using WSUS change the approval type on the WSUS server to 'Remove' to effect the uninstall of the update on the clients.
-
Opalis 6.3 introduces four new System Center Integration Packs (for SCCM, SCSM, SCVMM, and SCDPM) and updates the existing OpsMgr IP. We'll be posting a number of deep dives into the different Integration Packs to show some of the scenarios we used in creating them, but I thought that for Configuration Manager I would add a "Getting Started" article to walk through all of the different activities and how to quickly build useful workflows with them. What's In the Configuration Manager IP (with links to the TechNet docs for each): * Add Computer to Collection * Advertise Task Sequence * Create Advertisement * Create Collection * Delete Collection * Deploy Software Update * Get Advertisement Status * Get Collection Member * Get Software Update Compliance * Refresh Client * Refresh Collection Each of these activities has a specific purpose, and when combined with all of the other activities available in the base product and other Integration Packs, the potential variations are virtually limitless. It's a very flexible set of activities that addresses a specific slice of activities faced by ConfigMgr admins. Some of you may look at this list and say it addresses the majority of the things you do every day. Others may look at the list and want even more activities because you do things other than the scenarios we thought about when designing the Integration Pack. For those of you who want more, I encourage you to check out the article I wrote a couple of days ago: Making Custom Objects and Integration Packs using PowerShell Scripts. For now, let's talk about the general scenarios we were shooting for in this release. We concentrated on datacenter scenarios, but didn't forget about the client scenarios. In thinking about how customers would use this IP with Configuration Manager, these two overall themes stood out: * In the data center, Opalis provides for repeatable processes, integrated with change management, that take potential human error out of the deployment and management of critical server systems. * For client management, Opalis provides a way to increase IT efficiencies by reduce the human effort involved in handling large-scale problems like remediating client update compliance. We looked at the basic tasks that the majority of ConfigMgr admins tackle every day, and determined what kinds of Opalis activities would be useful in performing these tasks As you can see, there are a number of actions that are used across all the scenarios. We also add a couple of other utility activities: Delete Collection and Get Collection Member. The workflows I show above are very simple, but are functional as they are. All that is required is to configure the various properties of the activities. These simple workflows are actually enough to get you going with automating Configuration Manager activities like these. Of course, you'll want to add more details like error checking / handling, integration with change management, and more. Going back to my "Building Blocks" article, you can think of workflows like LEGOs, where you start with a simple configuration and then build on it to make it more sophisticated. That's what we'll explore in more detail in the next few articles. For now, this is enough to "get your feet wet" and start building workflows with Opalis to automate Configuration Manager activities. via > http://blogs.technet.com/b/opalis/archive/2010/11/21/opalis-6-3-getting-started-with-the-configuration-manager-ip.aspx
-
i like it, and would love it if it had a white or similar 'halo' effect, i've tried copying it to the forums root but it's not showing up, feel free to move/copy the file yourself Peter ! cheers niall
-
Microsoft has announced that version 6.3 of Opalis is now available for download which includes cool new features such as new Integration Packs (for ConfigMgr, DPM, SCSM & SCVMM), an updated OpsMgr Integratraion Pack for W2K8, and support of the Opalis infrastructure running on W2K8. You can find the links to the various Opalis downloads on the Opalis website at: http://www.microsoft.com/systemcenter/en/us/opalis.aspx You might also be interested in checking out the following blog post from the System Center Team blog where Adam Hall has posted some links to various interviews with those involved with the 6.3 release: http://blogs.technet.com/b/systemcenter/archive/2010/11/19/opalis-6-3-release-interviews-with-the-engineering-team.aspx
-
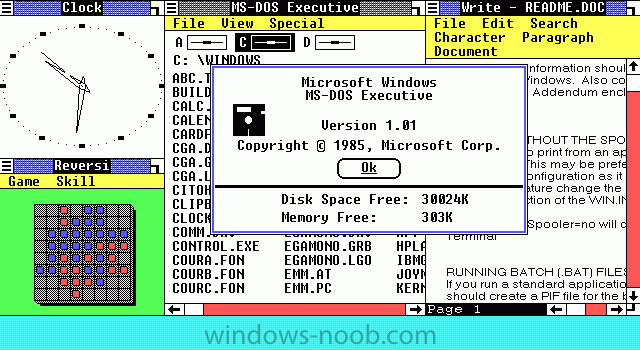
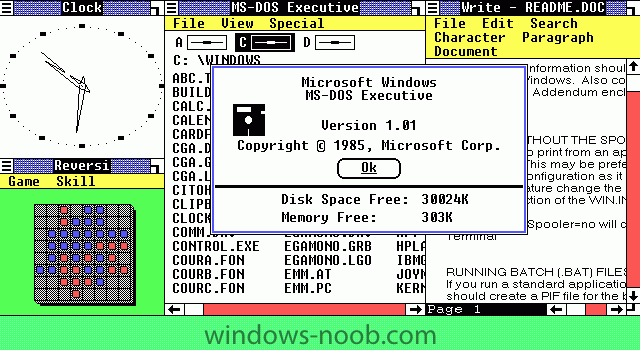
Microsoft Windows, the operating system that rose to dominance of the home and business PC market turns 25 years old today. Windows 1.0 was released on November 20, 1985, and at first didn't catch on as well as Microsoft had hoped. Two years later Microsoft would release Windows 2.0, and then Windows 3.1 which got the ball rolling. Windows 1.0 started as a graphical user interface for MS-DOS back in September 1981 and at the time named "Interface Manager." Bill Gates would later on present this development to the public on November 10 1983 where it was renamed "Windows." The name "Windows" comes from the name given to the graphic elements of individual tasks which could be moved around. Microsoft was very proud of their product, but others weren't ready to jump on the bandwagon yet, or even think there was going to be a bandwagon. Carnegie Mellon IT guy Nathaniel Borenstein didn't see Windows as anything special, and according to Gizmodo even had this to say when demoed the GUI: "We laughed, just laughed them out of the place because we had a vastly superior window manager of our own, and these guys came in with this pathetic and naïve system. We just knew they were never going to accomplish anything." Two years later Windows 1.0 shipped, but not as much more than a user interface to DOS with very limited functionality, including the inability to overlap windows. Over at Apple, in 1984 Mac OS was released, which was a functional, yet command line lacking OS. Microsoft had to play catch up and make something that wasn't strictly a GUI to MS-DOS, but that would have features of its own too. Microsoft Windows would come to be respected in the workplace with Windows 3.1, and then even more at home with the release of Windows 95. From there the next major improvement came with Windows NT which operating systems Windows 2000 and Windows XP through Windows 7 are based on, and included a new file system, NTFS. Windows has certainly come a long way in usability, concepts, looks, innovation, and even popularity from its early days. Here is to another 25 good years, you've earned it! via > http://www.neowin.net/news/windows-celebrates-25-years-of-computing
-
hi Bogdan, and welcome to the forums first of all, can I ask you why you want to install SQL remote ?