anyweb
-
Posts
9276 -
Joined
-
Last visited
-
Days Won
371
Everything posted by anyweb
-
post the results of nslookup here
-
the only one that should work properly through WinPE is the Offline one, that is designed for that very purpose, http://www.windows-noob.com/forums/index.php?/topic/1735-using-offline-mode-in-windows-pe-using-usmt-4-via-a-task-sequence-in-sccm-2007-sp2/ have you tried that one ? which task sequence are you having the problems with please ?
-

The MED-V v1 SP1 Release Candidate is now available
anyweb posted a question in Application Virtualization
This week we recently released a new version of MDOP that includes six virtualization and management tools for Windows desktops. Along with the new App-v 4.6, we have also released the MED-V v1 SP1 Release Candidate, with support for Windows 7 32 bit and 64 bit for download. It’s final release is expected on April 2010 as mentioned in the MDOP blog announcement earlier this week. I had the opportunity to sit and chat with Ran Oelgiesser, Sr. Product Manager for MED-V and have him answer some of the common questions about MED-V: Stephen: Why would I look to use MED-V? Ran: When you upgrade from Windows XP (or even Windows 2000) to Windows 7, you need to map and test all your business applications. It’s not a secret that some applications will not work on Windows 7, and while there are many ways to fix them, there is always a small set of applications that are more stubborn and could not be fixed. So what MED-V (or in length – Microsoft Enterprise Desktop Virtualization) does, is running a virtual Windows environment (Windows XP or Windows 2000) to enable all those incompatible applications to operate in their “native” environment. And the great thing is that the user just launches those applications from his Windows 7 start menu and gets a completely seamless experience. Stephen: So I can deploy Windows 7 without all of my critical applications being 100% compatible? Ran: Yes. That’s one of the major advantages that MED-V brings in the way you think about deploying a new operating system. In the past you could not take advantage of any of the new features and productivity gains of a new OS until you had all of your critical applications 100% compatible or fixed. With MED-V you can deploy Windows 7 even if you have a few critical applications that still require Windows XP. Stephen: So should you do that for any application that does not run in Windows 7? Ran: Actually no. I’d recommend that you first try to run the application in compatibility mode and use all the tools we provide to fix the application. A great place to start is in the Springboard App Compat Zone. Only when applications cannot be fixed, you should use MED-V. Even then, I wouldn’t keep the application in a virtual Windows XP environment forever. MED-V should be used as transitional solution – eventually you should be able to upgrade the application to a new version that support Windows 7 (or if it’s a home-grown application, fix it). Stephen: When I deploy MED-V, does the end user see and interact with a virtual machine? Ran: No, to the end user the applications running in Windows XP look and feel like they are installed directly on Windows 7. Users will see icons for their applications in the Windows 7 start menu, they can even create shortcuts for them on the desktop. When they launch the application it appears as a window, they never see the Windows XP virtual machine running in the background. Their applications just work. A great way to see this in action is in this quick MED-V demo walkthrough. the full interview and download via > http://windowsteamblog.com/blogs/springboard/archive/2010/02/23/the-med-v-v1-sp1-release-candidate-is-now-available.aspx -
how to set a password on PXE boot ?
anyweb posted a question in Troubleshooting, Tools, Hints and Tips
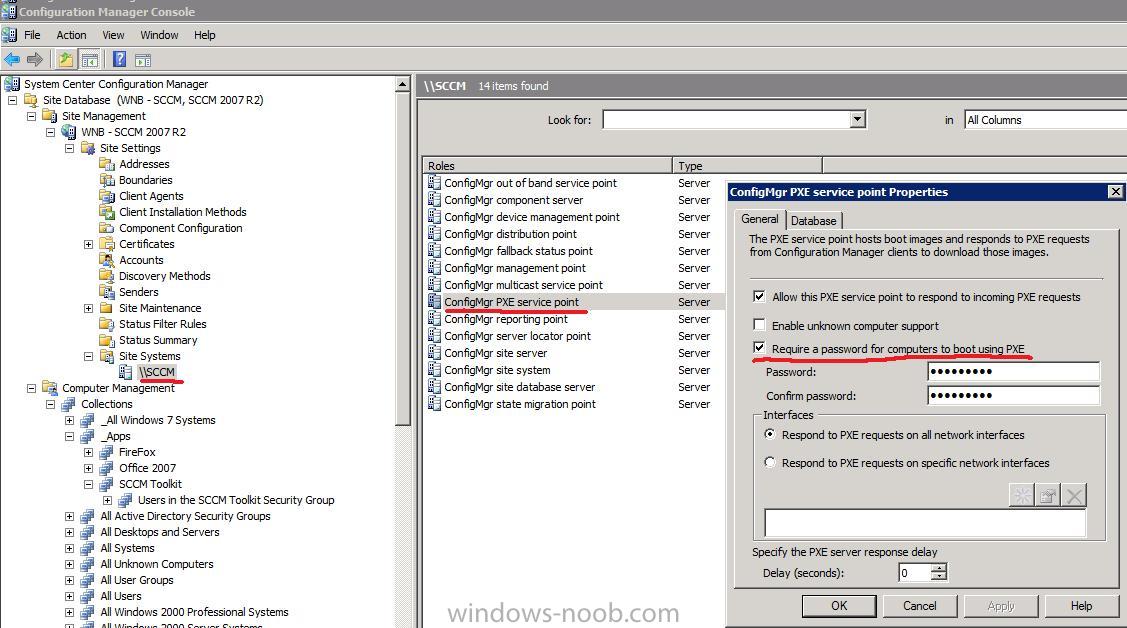
Note: If you want to set a password then simply locate your PSP (PXE Service Point) role in your Site Systems, right click on it, choose properties and enter a password where provided. after the password is set you will see a password prompt after booting to your PXE service point and before the Task Sequence is selected.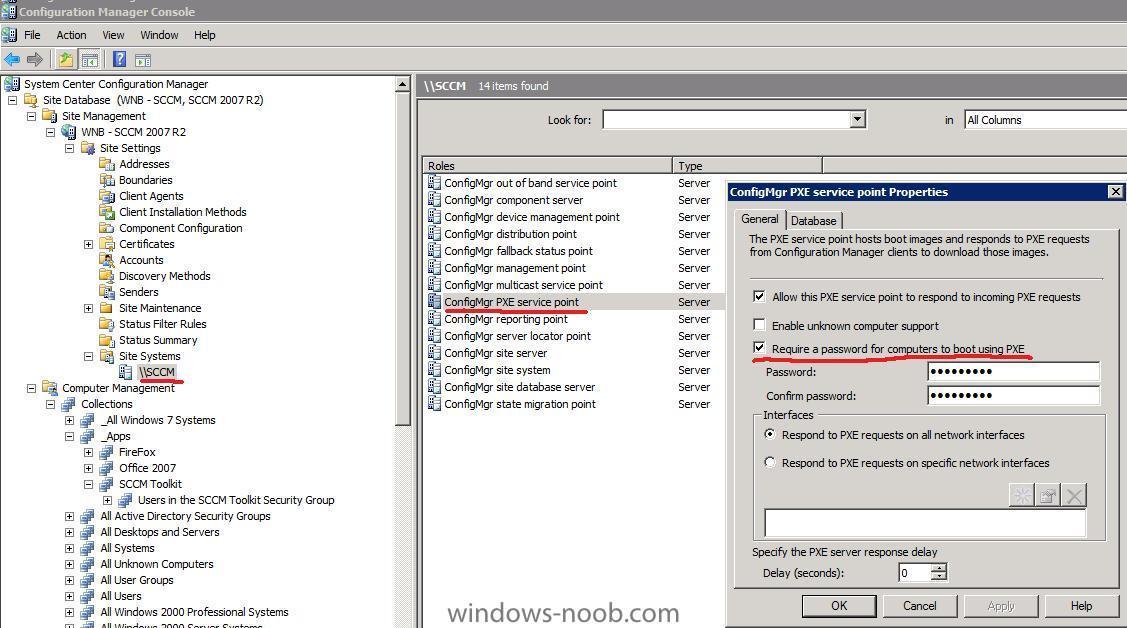
-
if you are using SCCM SUP to install the updates then just don't include it in any Deployment Management task,
-
did you add a legacy network adapter to that VM ?
-
Patch Management report statistics in SMS /SCCM
anyweb replied to Eswar Koneti's question in Reports
nice, keep them coming -
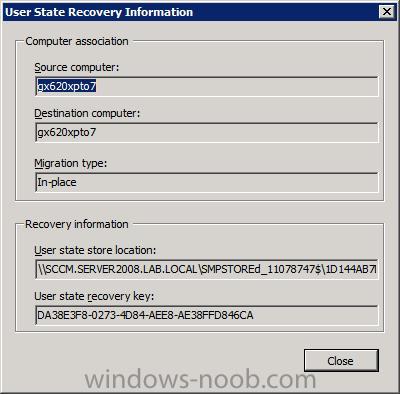
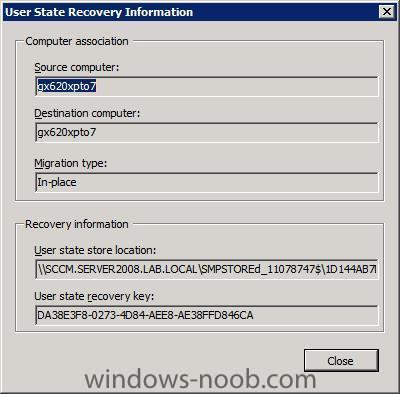
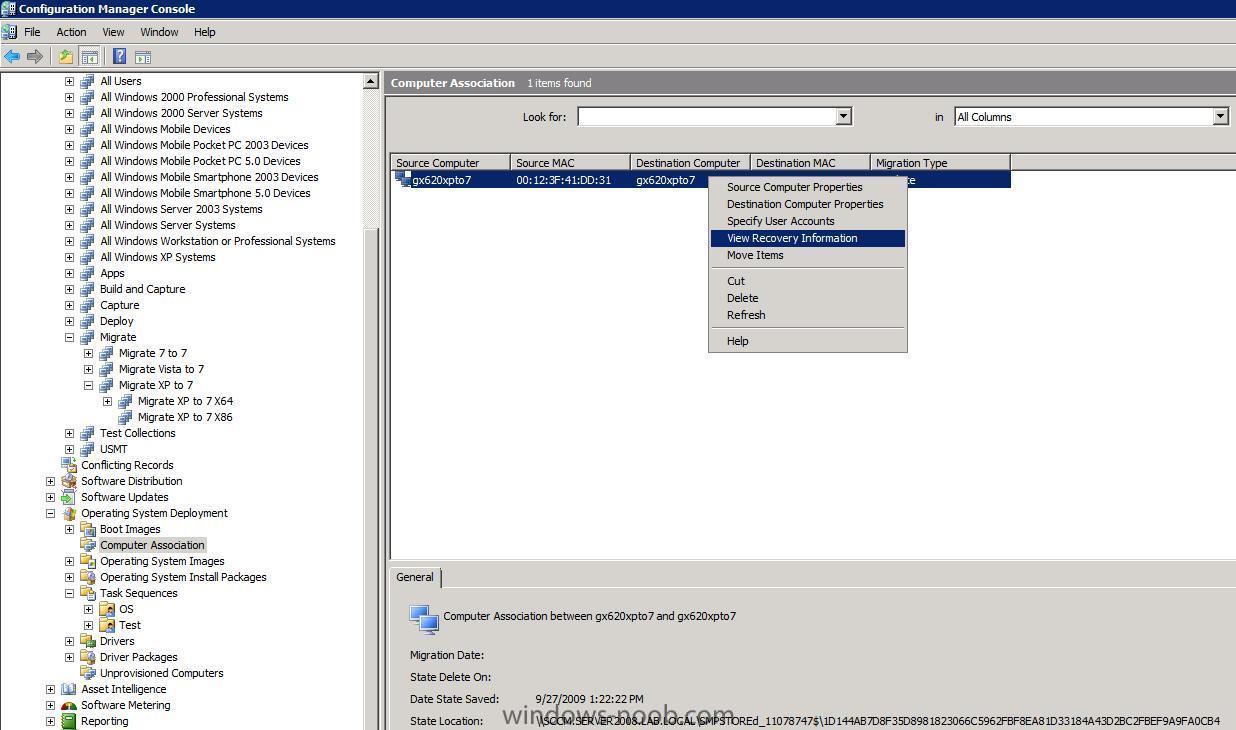
Emergency recovery of User State you've done a Computer Association between a Destination and Source computer, captured the user state, and now for some reason need to manually restore it. However to do so you need the User State Recovery Key, so how do you find out what that is ? To do that open Computer Association and right click on the Computer Association you need to get details from. select view recovery information from the choices and you'll see the following:- user state recovery information, this reveals the following details Computer Association Source Computer Destination Computer Migration Type Recovery Information User State Store Location User State Recovery Key see below:- Finding the encryption key via the Database In addition to the above, the encryption key is stored in the database table StateMigration.
-
Many of us try to enable as few categories as possible in ConfigMgr for software updates synchronization. You may encounter a need to deploy an update from a classification or product you don’t normally synchronize. To accomplish this task, you could choose one of the following: 1. Create a standard Package/Program/Advertisement, which means you will have to take care of proper targeting 2. Modify the Software Update Component on your central site to allow synchronization of the new classification and/or product, but then you may end up synchronizing a lot more than you did previously. 3. Use System Center Updates Publisher (SCUP) to create deployment rules. This would work great, but requires additional effort on your part also. 4. Use the Windows Update Catalog to import the update. This works great for many reasons: 1) it requires the least effort, 2) has the least database bloat, 3) will handle the detection rules for you, and 3) deploy like a ‘normal’ Microsoft Update, giving you the best end-user experience possible. What is the Microsoft Update Catalog? “It's a service from Microsoft that provides a listing of updates that can be distributed over a corporate network. You can use it as a one-stop location for finding Microsoft software updates, drivers, and hotfixes.” It allows you to search the catalog (kind of like a shopping experience), add updates to the basket, then import them to WSUS. After importing, you then launch the “Run Synchronization” action on the ConfigMgr Update Repository to make the updates visible in the ConfigMgr console. Follow these steps to import an update from the Windows Update Catalog: 1. From your ConfigMgr Central Site server, launch the Windows Server Update Services console. 2. Expand the tree to “Updates”, then select “Import Updates” from the action pane. This launches the Microsoft Update Catalog in your web browser (internet access required). 3. Search by keyword, KB number, or even plug-and-play ID! 4. Click “Add” on desired updates: read the full article from Greg Ramsey here > http://myitforum.com/cs2/blogs/gramsey/archive/2010/02/25/how-to-import-a-microsoft-update-into-configmgr.aspx
-
screenshots describing the above process are here
-
to create the USMT 4 package point to the USMT 4 folder root and you are done, no need to create any program, make sure to distribute the package to your dp's. which task sequence did you look at ?
-
if you leave the Product key blank in the Task Sequence does it work then ?
-
power management (core parking) branchcache direct access just a few thoughts, cheers niall
-
yes download mdt2010 instead (needed for win7) and continue with the vista guide substitue any reference to mdt 2008 with mdt2010 cheers niall
-
The Solution Accelerator team has released an updated guide: Microsoft Application Virtualization 4.6. This free guide, now updated for App-V 4.6, provides actionable guidance for planning your application virtualization infrastructure. With App-V, your organization can respond to the complex challenge of managing applications. This guide simplifies your App-V planning process. Updates now include information on how App-V supports Windows 7 and Windows Server 2008 R2, including such features as BranchCache; support for 64-bit clients; and server-sizing data. Strategically planning your infrastructure can help you avoid problems before they begin, allowing you to serve your customers more accurately and reliably, as well as saving you time and money. more > http://blogs.technet.com/appv/archive/2010/02/24/infrastructure-planning-and-design-guide-for-microsoft-app-v-4-6-now-available.aspx
-
- 1
-

-
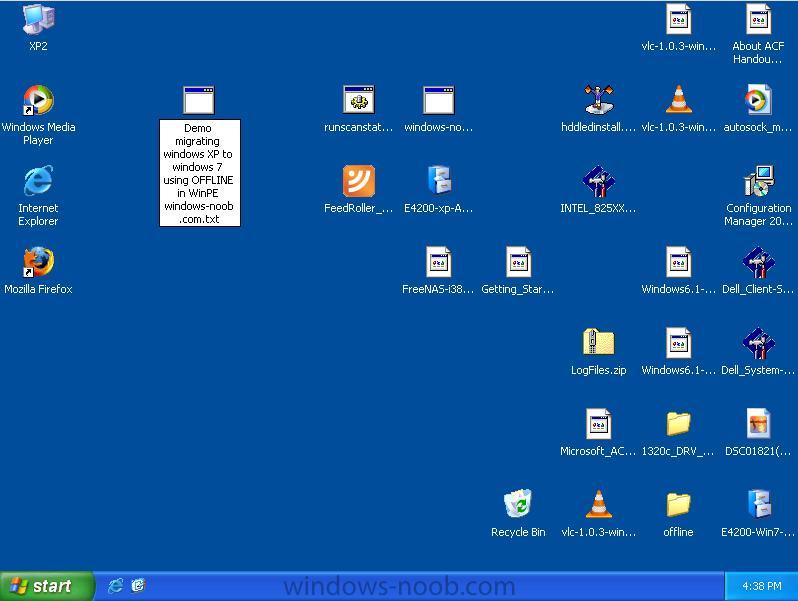
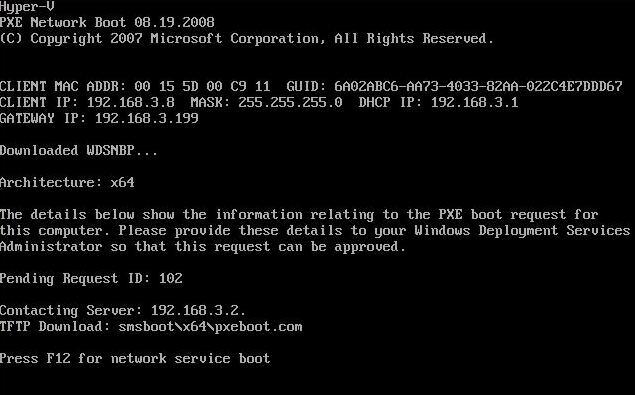
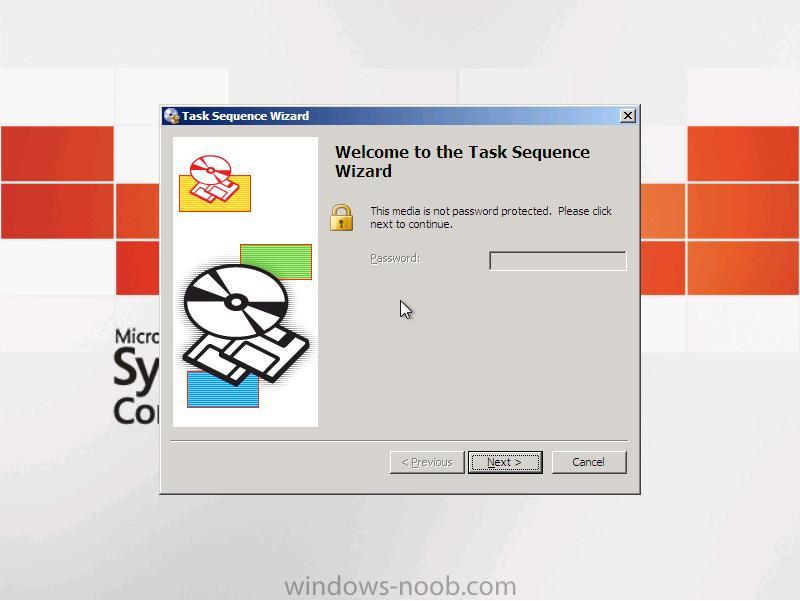
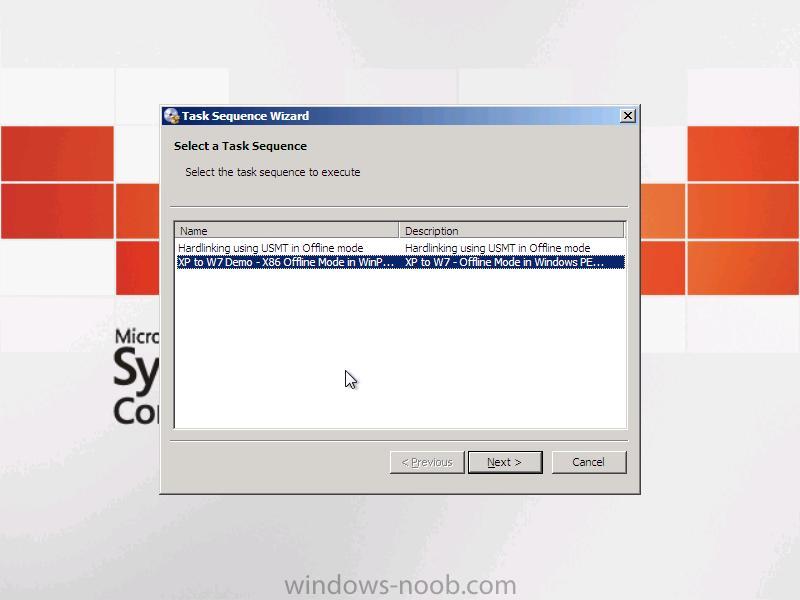
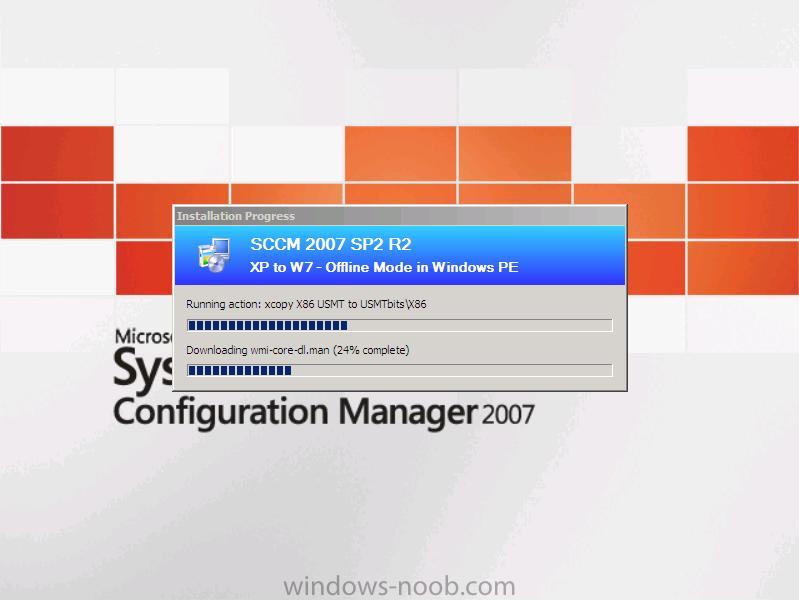
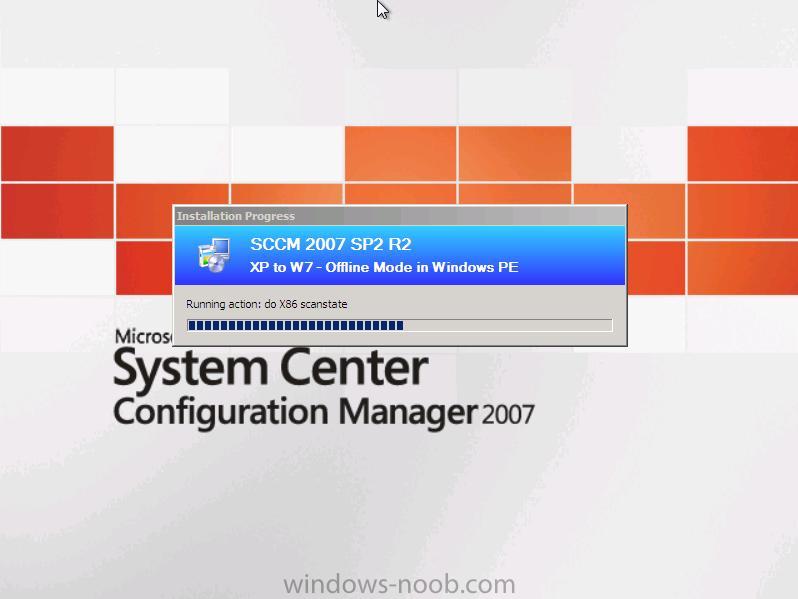
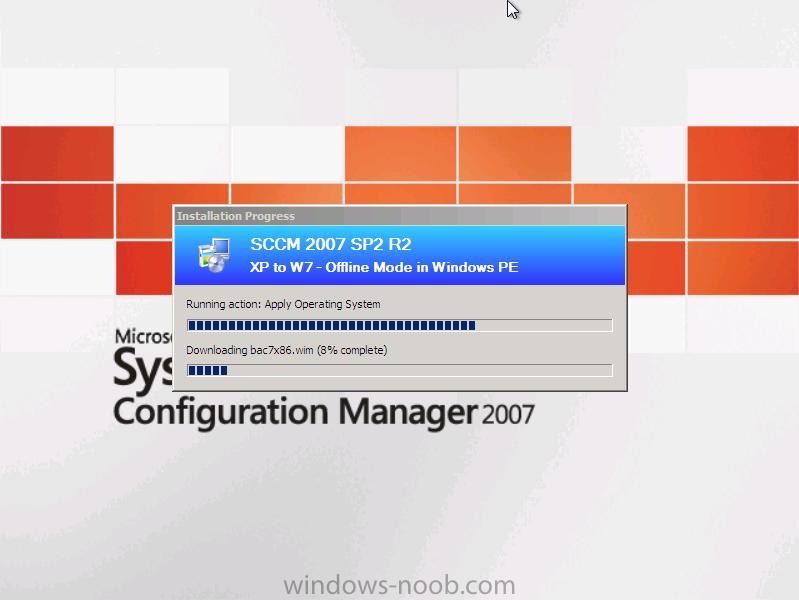
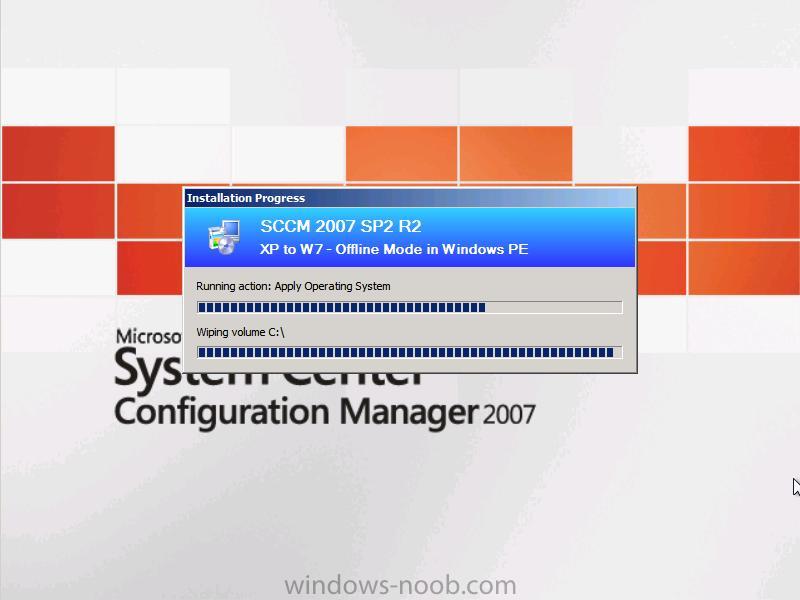
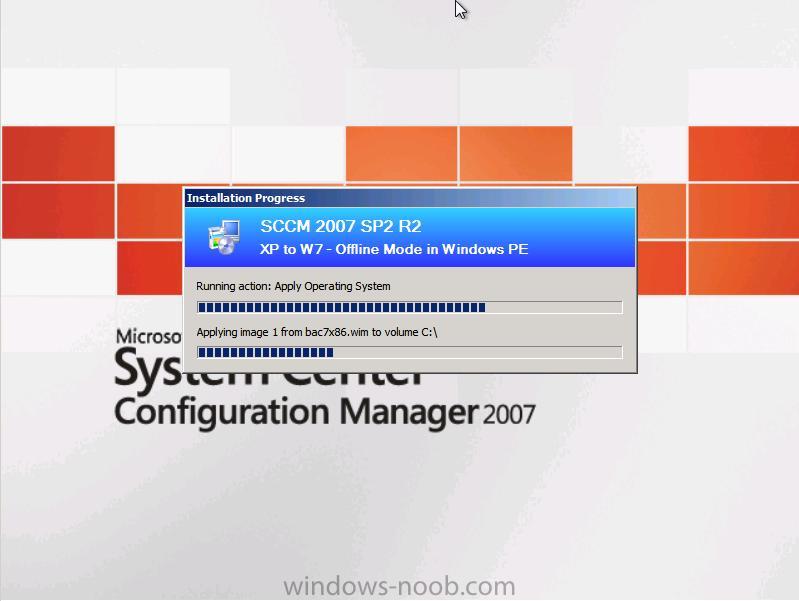
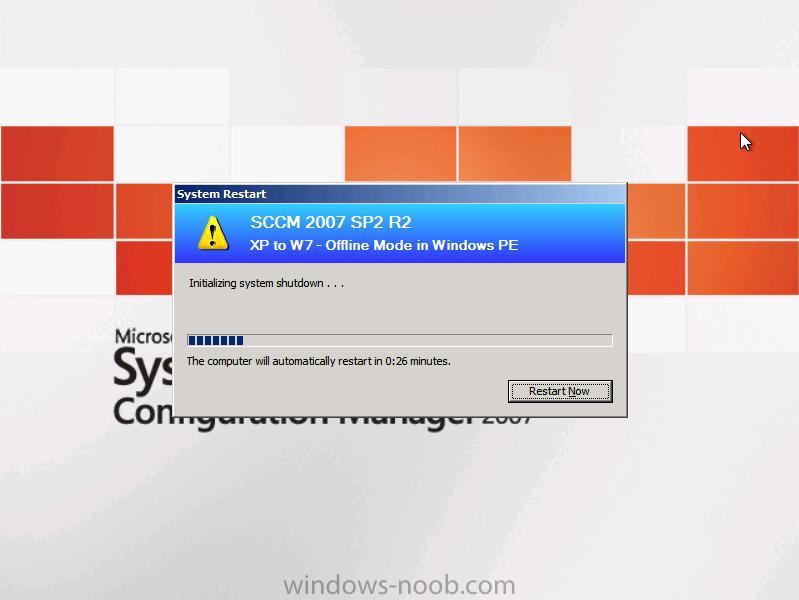
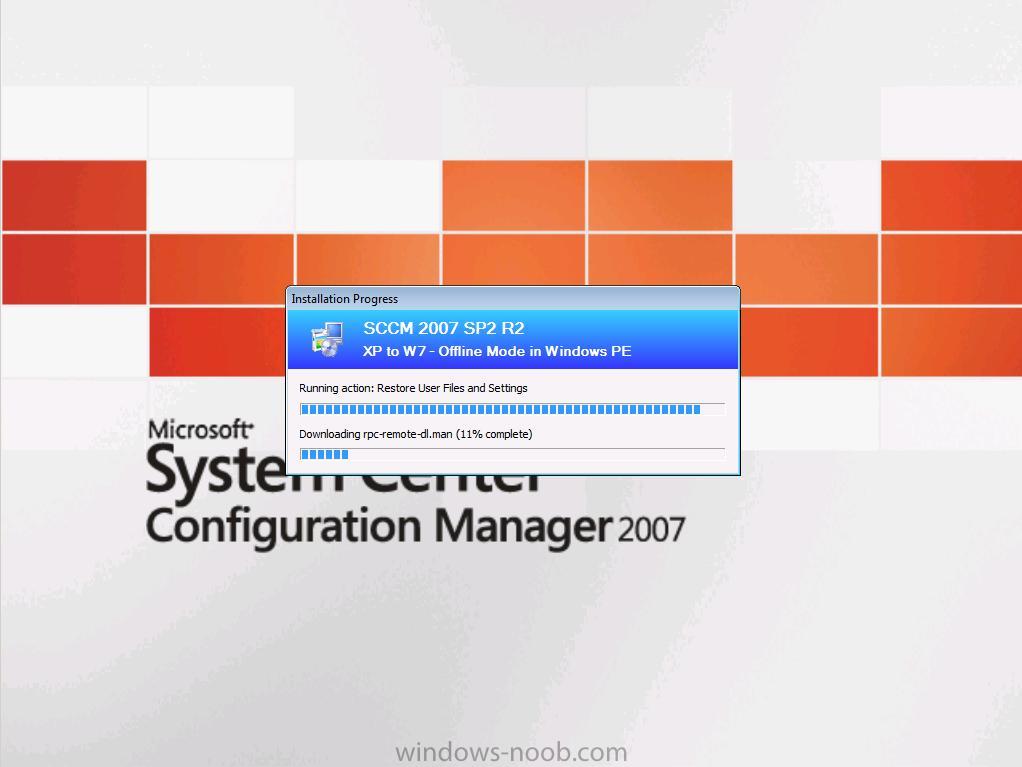
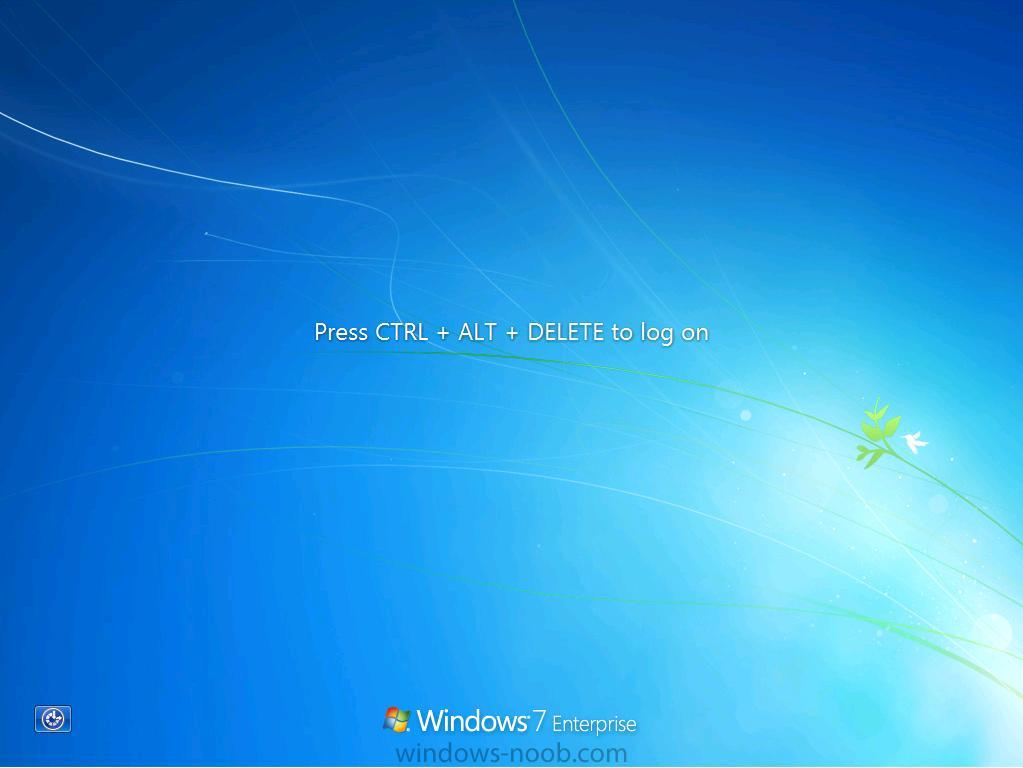
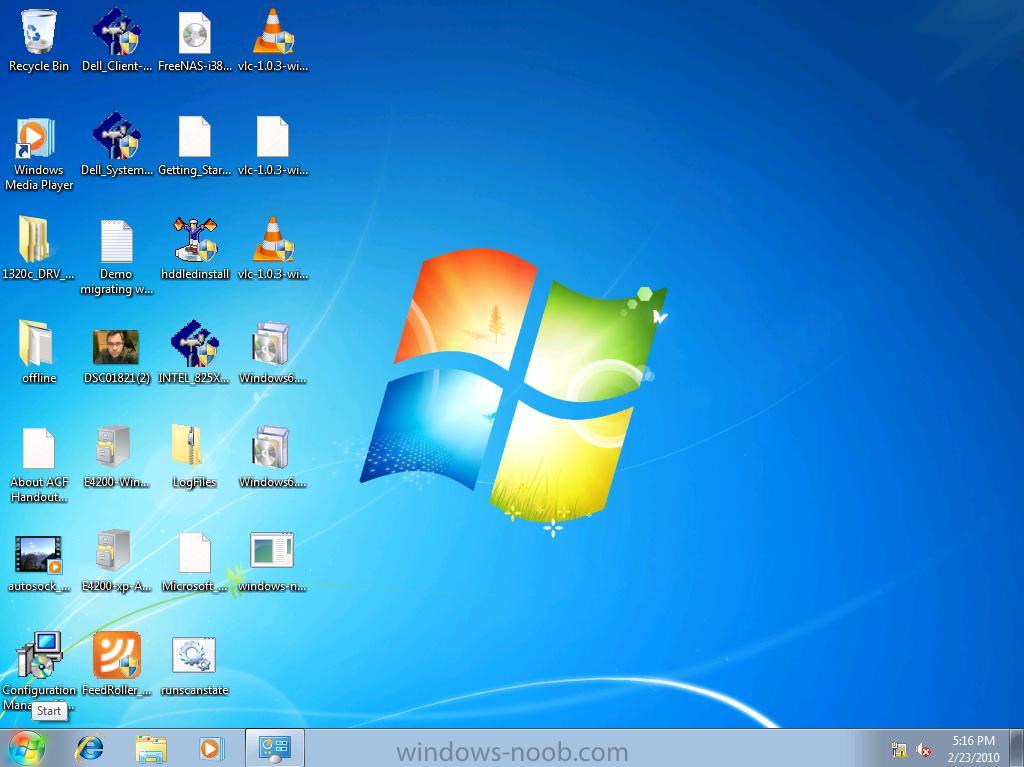
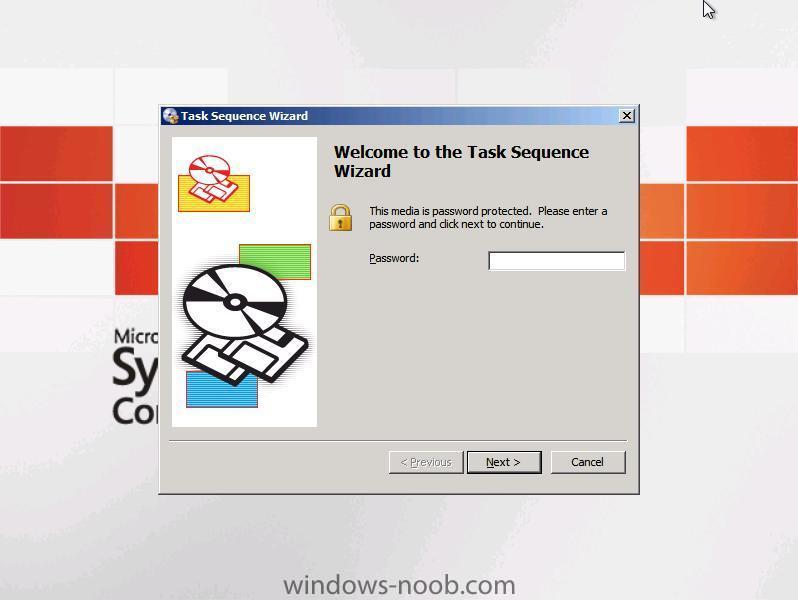
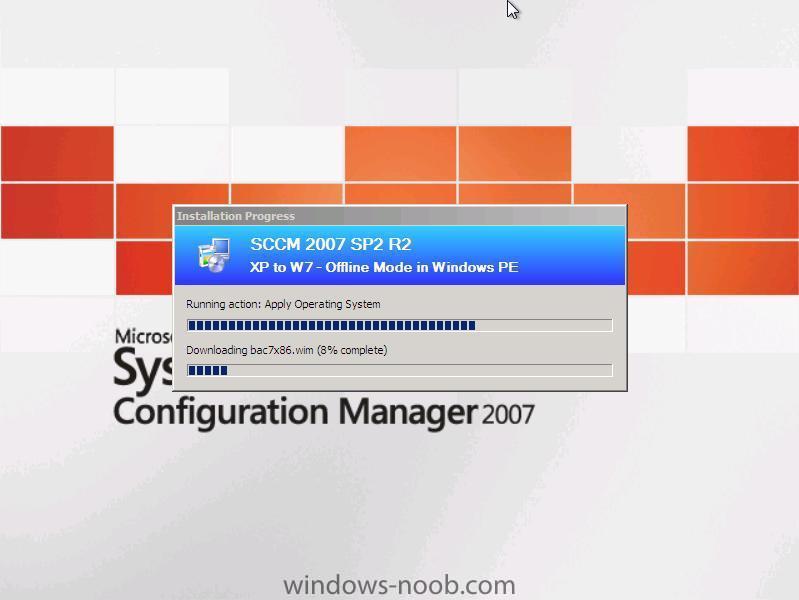
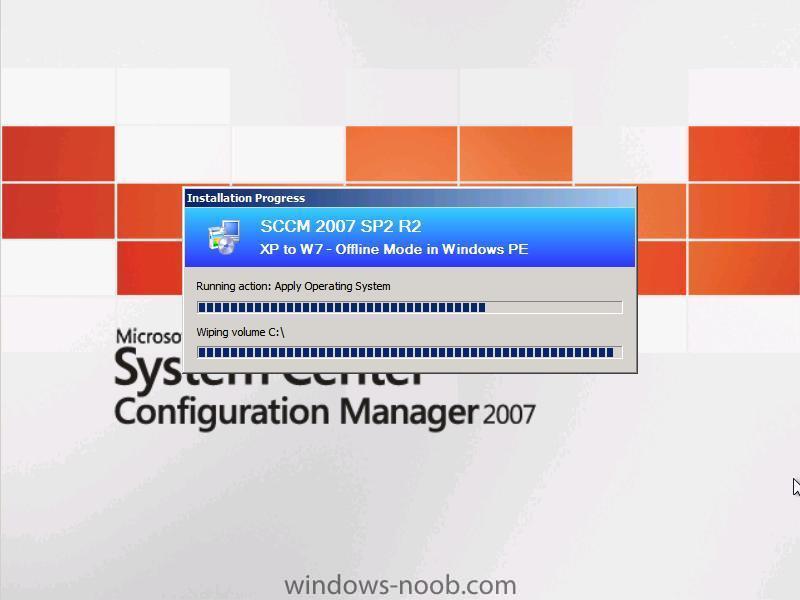
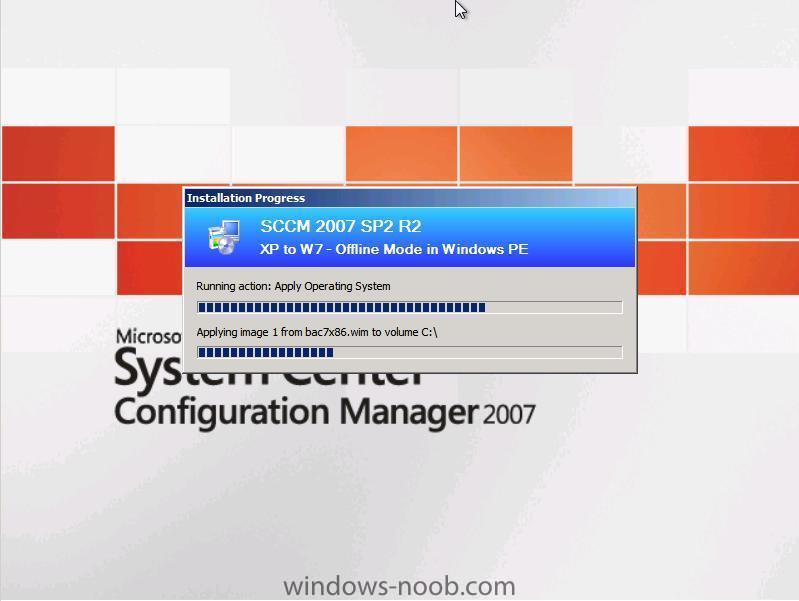
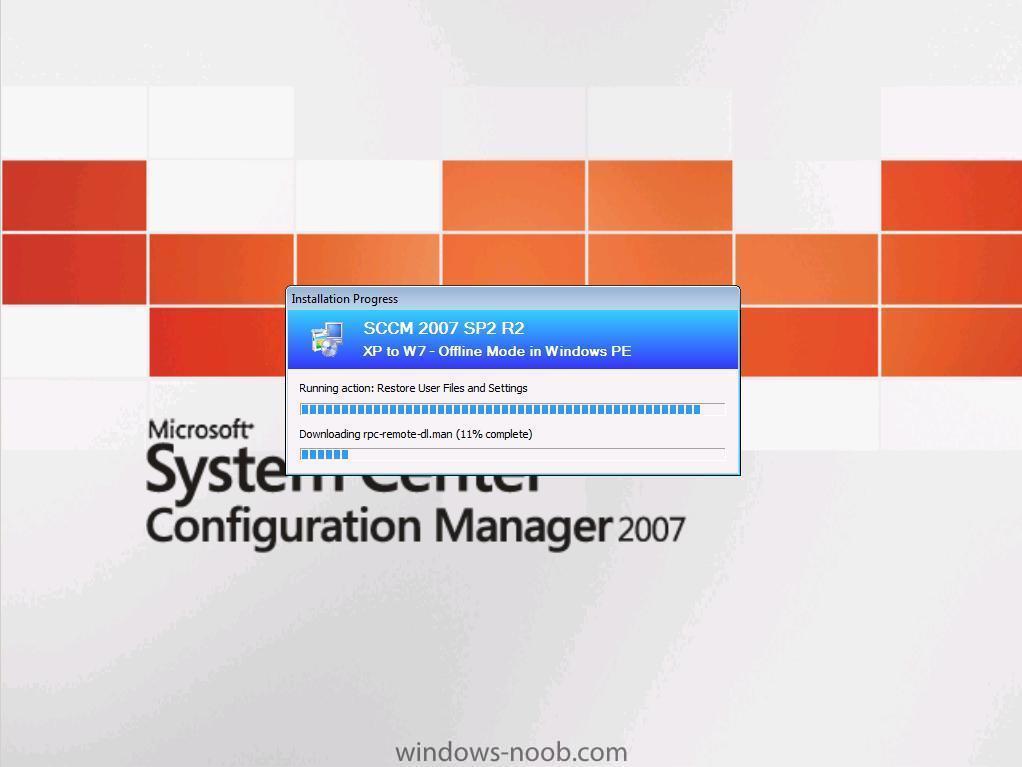
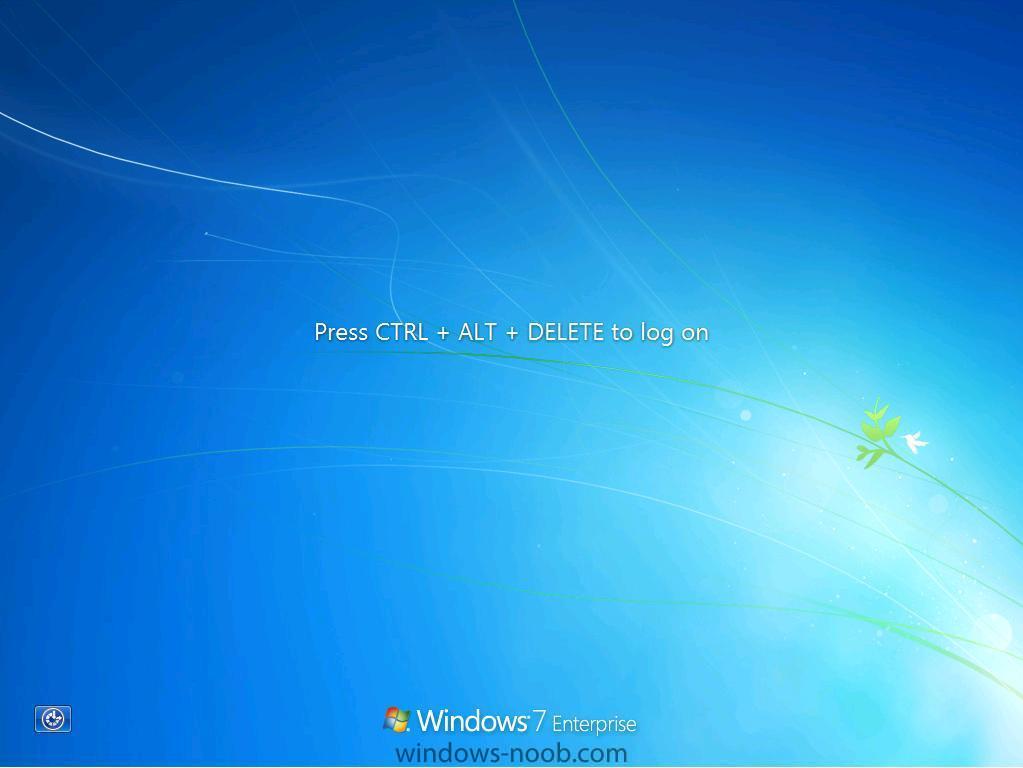
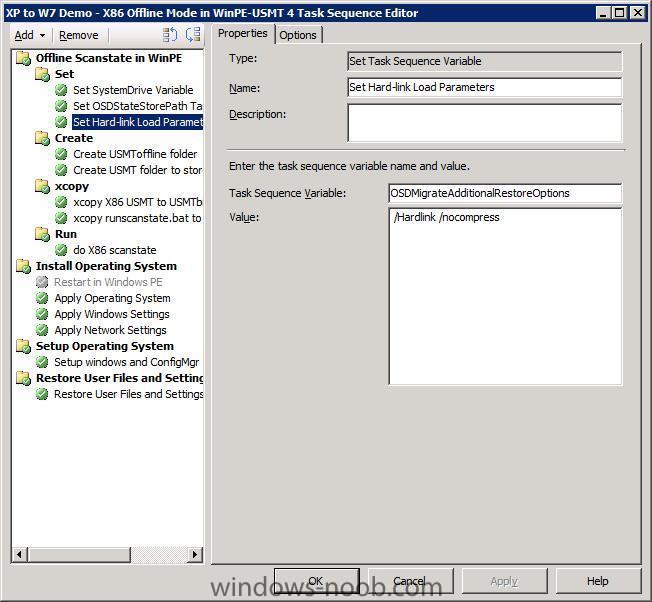
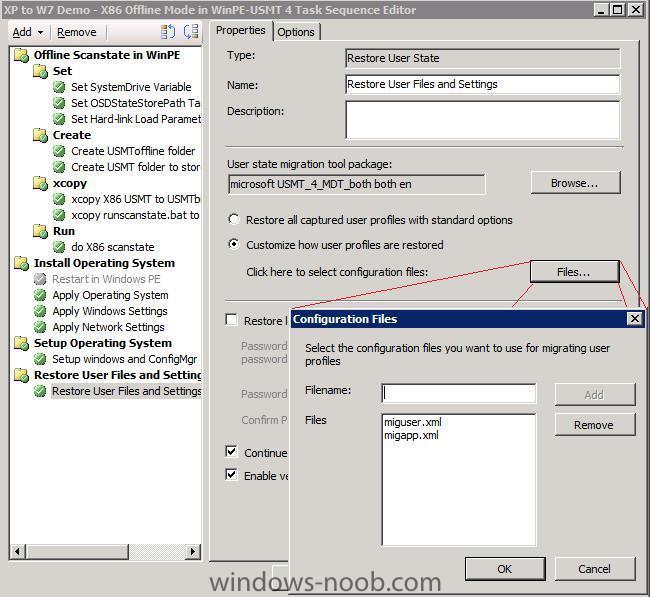
I've been testing scanstate in Offline mode while in Windows PE in the last few days for Windows XP to Windows 7 migrations and it's impressive and fast, so I thought this would be a good way of showing you how the process works using some screenshots and links to info. First of all we start with a Windows XP desktop, nothing fancy, I’ve just dumped 2.5GB of data onto the desktop for the Demo. All of this data will migrate via scanstate in offline MODE while in Windows PE. So let’s get started with that and reboot into PXE to start the process. I’m doing this in a hyperV environment which is great for testing and I highly recommend you have a virtual environment for testing/demoing. As the screenshot says press F12 for network service boot. The reason we are seeing this is because I have advertised Optional Task Sequences to my Migrate Windows XP to Windows 7 X86 collection. Having the task sequences optional instead of Mandatory means you get to choose which one you want from a list (provided that there are more than one Task Sequence). Once the Task Sequence wizard starts we can be prompted for a password, in this example we have none set so we can just click Next. If you want to set a PXE Service Point password then read this post. And then we see our list of task sequences, in this particular example only two optional task sequences are advertised to this collection, so that’s all we see. Select the appropriate one and click next. The task sequence starts and the appropriate variables are set, then folders are created and finally packages and files are xcopy’d into place. Once everything is in place, we kick off scanstate in Offline mode by initiating the scanstate batch file which all takes place in the do X86 Scanstate step. When scanstate is done hardlinking in OFFLINE mode in Windows PE, the task sequence downloads the windows 7 WIM which we captured before. Then the drive is wiped which deletes all of Windows XP but leaves our migrated and hardlinked data in c:\usmtoffline along with logs files and the captured Windows 7 wim... Windows 7 wim gets applied And then windows Reboots After the reboot we see the Windows 7 boot screen Windows setup starts installing devices etc… Installs the configmgr client...and Reboots again and then Restores all the migrated data (this bit requires that you set the following variable, otherwise it will fail with USMT error 38) OSDMigrateAdditionalRestoreOptions=/Hardlink /nocompress And finally we see the Windows 7 login screen. We login as the same Domain user that we migrated, (testuser) And that’s it, the data is all migrated using Offline mode while in Windows PE. Cool huh ? If you want to download the Task Sequences used above, click here.


-
Problems with SCCM 2007 SP2 + MDT 2010
anyweb replied to Sypher's question in Troubleshooting, Tools, Hints and Tips
i think you guys are having the same problem as this http://social.technet.microsoft.com/Forums/en-US/configmgrosd/thread/70b3f6e4-6629-4e88-bc11-33b69fa2516b/#ceddfba7-87fb-48da-80d9-38d07f32dd00 and I quote: -
Setting computername during deployment
anyweb replied to anyweb's question in Troubleshooting, Tools, Hints and Tips
if you want to rename the computer without using MDT try the suggestion here -
App-V 4.6 is now available: http://blogs.technet.com/appv/archive/2010/02/22/app-v-4-6-is-now-available-plus-some-new-resource-kit-tools.aspx
-
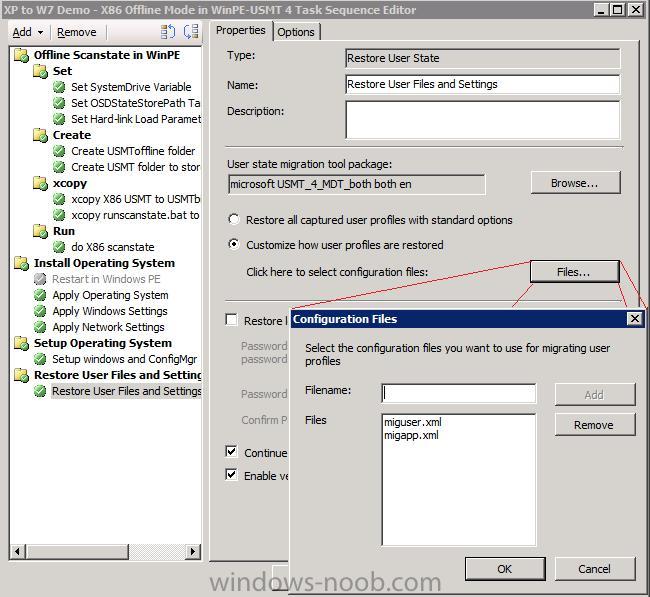
Migrate XP to Windows 7 using Offline mode in Windows PE Once you have the above working you'll want to actually Migrate XP to Windows 7 using Offline Mode in Windows PE. Ok now you know it works, use the above theory and task sequence within a working Migrate XP to Windows 7 Task sequence. Here's how, Import the following task sequence XP to W7 Demo - X86 Offline Mode in WinPE-USMT 4.xml Once imported resolve the package requirements namely * X86 boot image * USMT 4 X86 package *special usmt 4 package containing only the x86 folder) * Operating System image (captured Windows 7 image if you don't have one yet read this) * ConfigMgr client package from definition * USMT 4 (both) package containing the native x86 and x64 folders for USMT 4... * runscanstate.bat package from above the key bits in the TS are set hard-link load parameters and the rest is the same as above I'll post some more screenshots soon but here's two to get you excited XP desktop before migration Windows 7 desktop after migration If you are having problems understanding the USMT4 packages used in this workaroun/proof of concept then please read all of this post Related reading: How to use USMT 4 hardlinking in a Configuration Manager 2007 Task Sequence http://blogs.technet.com/b/configurationmgr/archive/2010/06/30/how-to-use-usmt-4-hardlinking-in-a-configuration-manager-2007-task-sequence.aspx How can I use Offline Mode in Windows PE using USMT 4 Using a scanstate (using offlinewindir in winpe ) Task Sequence in SCCM 2007 SP2 Some Sample XP to Windows 7 task sequences showing Hardlinking hardlinking and SMP Customise the XML files http://technet.microsoft.com/en-us/library/dd560786%28WS.10%29.aspx What does USMT 4 migrate ? http://technet.microsoft.com/en-us/library/ff383238(WS.10).aspx have fun ! cheers niall


-
why are you trying to import a winpe image ? and to import the nic drivers you need the windows 7 network drivers for the notebook in question, once you have them, select your boot image in the OSD node of configmgr, click on drivers and add the driver there, distribute it to a dp, once done, import that driver into your boot image by right clicking on the boot image, choose the windows PE tab, select the driver cheers niall
-
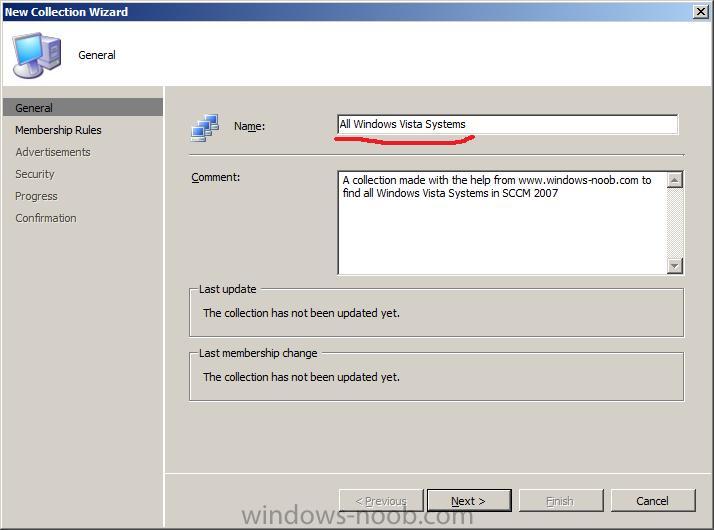
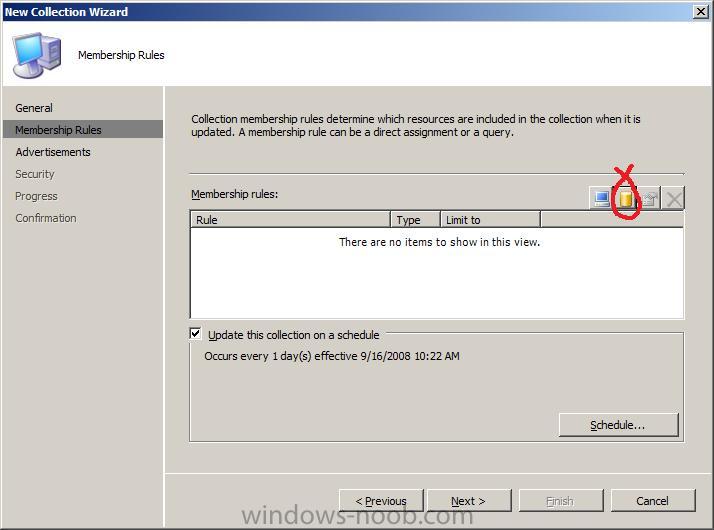
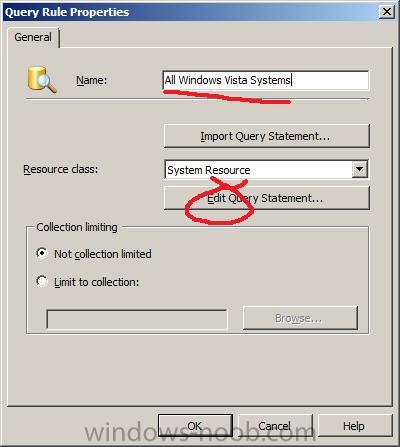
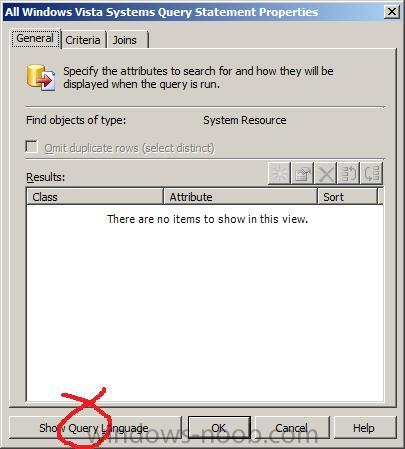
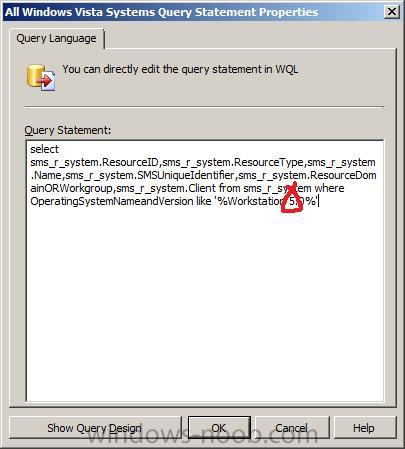
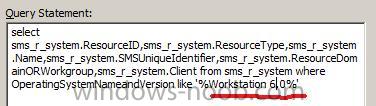
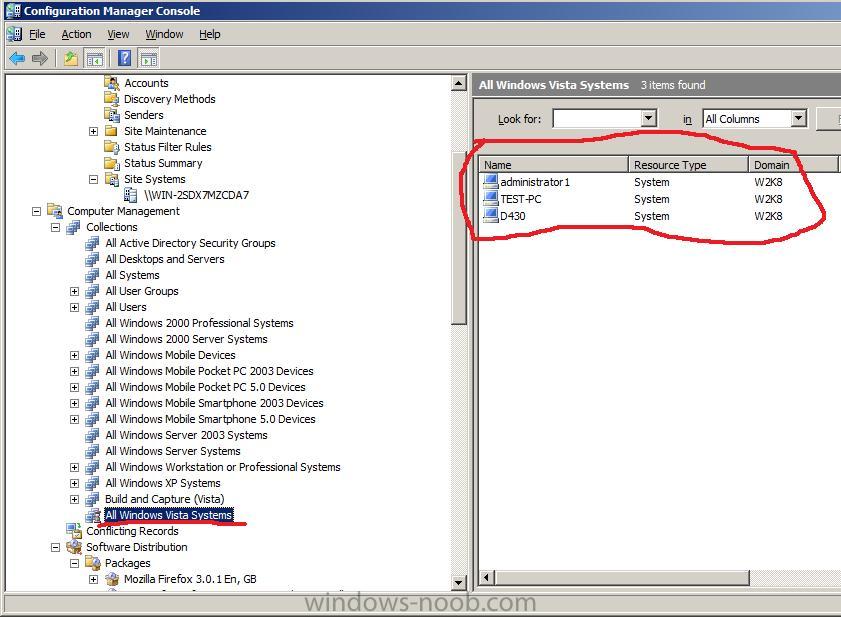
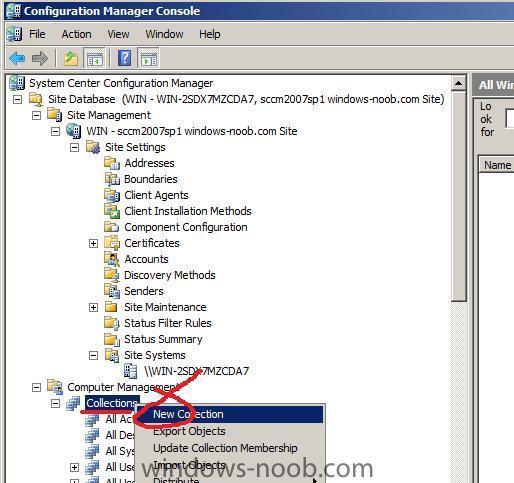
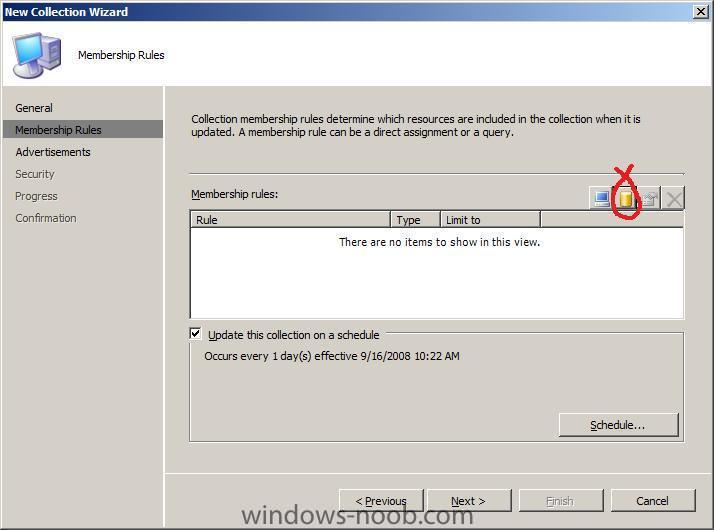
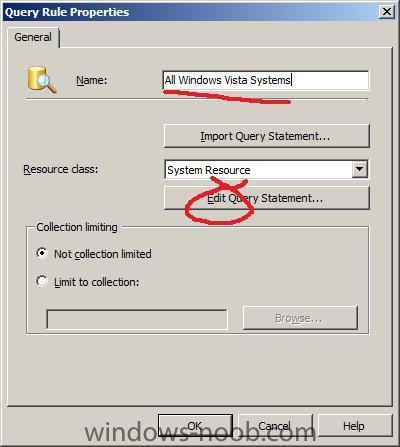
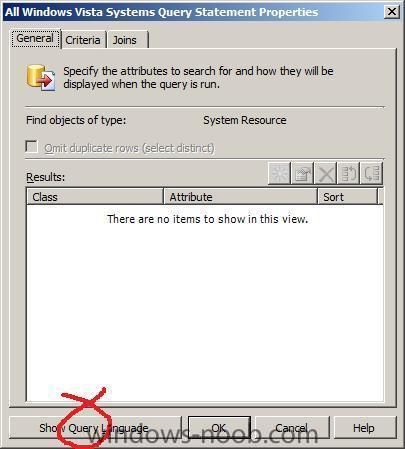
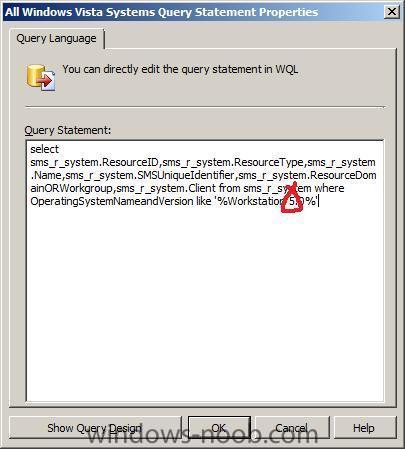
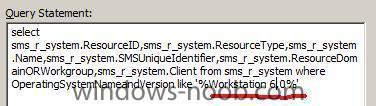
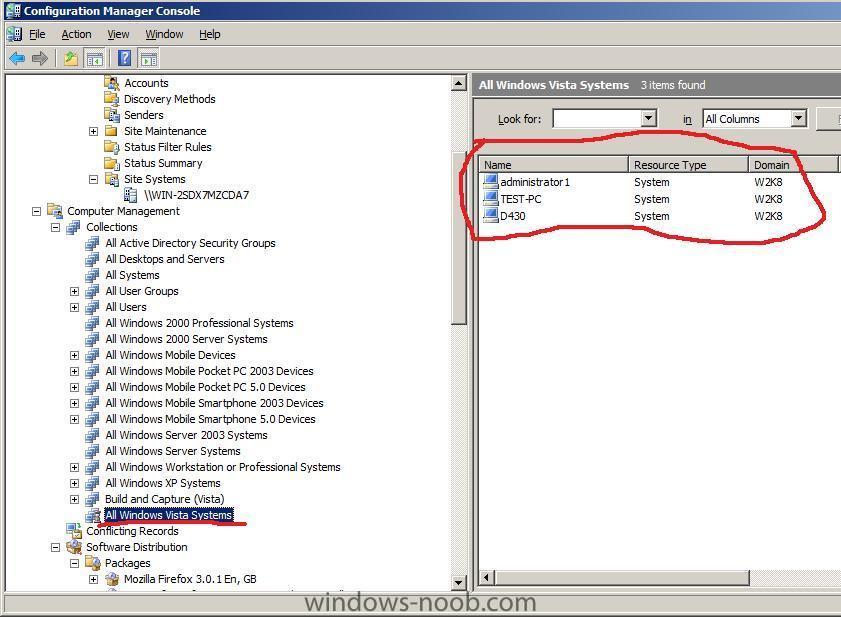
Create New Collection right click on Collections in the SCCM Configuration Manager console, choose New Collection. when the New Collection wizard appears, give the collection a name like All Windows Vista Systems fill in the comments and click Next, In the membership rules page, click on the New Query Statement icon, in the Query Rule Properties, give the rule a name eg: All Windows Vista systems then click on Edit Query Statement In the General tab, click on Show Query Language and paste in the code we copied from above. Change the value at the end of the query from 5.0 to 6.0 and click Ok, then Ok, then next, next, next and close. original query below select sms_r_system.ResourceID,sms_r_system.ResourceType,sms_r_system.Name,sms_r_system .SMSUniqueIdentifier,sms_r_system.ResourceDomainORWorkgroup,sms_r_system.Client from sms_r_system where OperatingSystemNameandVersion like '%Workstation 5.0%' change to this select sms_r_system.ResourceID,sms_r_system.ResourceType,sms_r_system.Name,sms_r_system .SMSUniqueIdentifier,sms_r_system.ResourceDomainORWorkgroup,sms_r_system.Client from sms_r_system where OperatingSystemNameandVersion like '%Workstation 6.0%' that's it, you now have a new collection called All Windows Vista Systems now that you are done and you know how to make the collection, you can also create one for All Windows Server 2008 systems here's the query for you select SMS_R_SYSTEM.ResourceID,SMS_R_SYSTEM.ResourceType,SMS_R_SYSTEM.Name,SMS_R_SYSTEM .SMSUniqueIdentifier,SMS_R_SYSTEM.ResourceDomainORWorkgroup,SMS_R_SYSTEM.Client from sms_r_system where OperatingSystemNameandVersion like '%Server 6.0%' Here's Microsofts Technet page on making Collections.

-
Using the same steps as done in the Create New Collection as outlined here we will:- Create a New Collection and call it All 64 bit Systems, for Membership rules Click on the Yellow cylinder (to create a New Query), Create a New Query, call it All 64 bit systems query, click on Edit Query Statement then Criteria, Show Query Language, replace the text that reads:- Select * from SMS_R_System by pasting the following in for the query select SMS_R_SYSTEM.ResourceID,SMS_R_SYSTEM.ResourceType,SMS_R_SYSTEM.Name,SMS_R_SYSTEM.SMSUniqueIdentifier,SMS_R_SYSTEM.ResourceDomainORWorkgroup,SMS_R_SYSTEM.Client from SMS_R_System inner join SMS_G_System_PROCESSOR on SMS_G_System_PROCESSOR.ResourceID = SMS_R_System.ResourceId where SMS_G_System_PROCESSOR.AddressWidth = 64 done !
-
select Microsoft as the manufacturer, do you see it then ? if not post a screenshot of what you see
-
did you see this post ? http://www.windows-noob.com/forums/index.php?/topic/1660-customising-windows-7-deployments-part-1/