anyweb
-
Posts
9257 -
Joined
-
Last visited
-
Days Won
371
Everything posted by anyweb
-
hi I havnt got access to an R2 server right now, but if i get time i'll do an install.... so I cannot comment about R2's support for unknown computers sorry. you'll need at least 512mb ram in the XP box otherwise you'll see problems during deployment (windows PE won't like less than 512) you can see how I created my task sequence for XP here
-
anything abortpxe related means no advertisement is targetted to the selected computer and in your second post kindof confirms that... so, have you advertised a Task Sequence to any collection ? if so what one ? and will this unknown computer be part of that collection ?
-

Silent F12 PXE boot prompt
anyweb replied to wells2050's question in Windows Deployment Services (WDS)
think outside the box ! what hardware are these pcs ? i know that dell's have a 'one time boot menu' which is operated by F12, and from there you can select what you want to boot to, perhaps your computer clients have a one time boot menu also, thereby leaving normal boot as the default (to c:) and one time boot menu when you press the correct Fxx key alternatively look at WDS pxe response settings, and set it to respond only to known client computers you'd need to prestage the computer in order for WDS to continute though more about that here cheers anyweb -
No SMS_SiteToSiteConnection_WIN found, but
anyweb replied to togeoff's topic in Configuration Manager 2007
shouldn't matter at all, when you instaslled SCCM, did you install it on a computer which is joined to this AD (joined to this domain) ? -
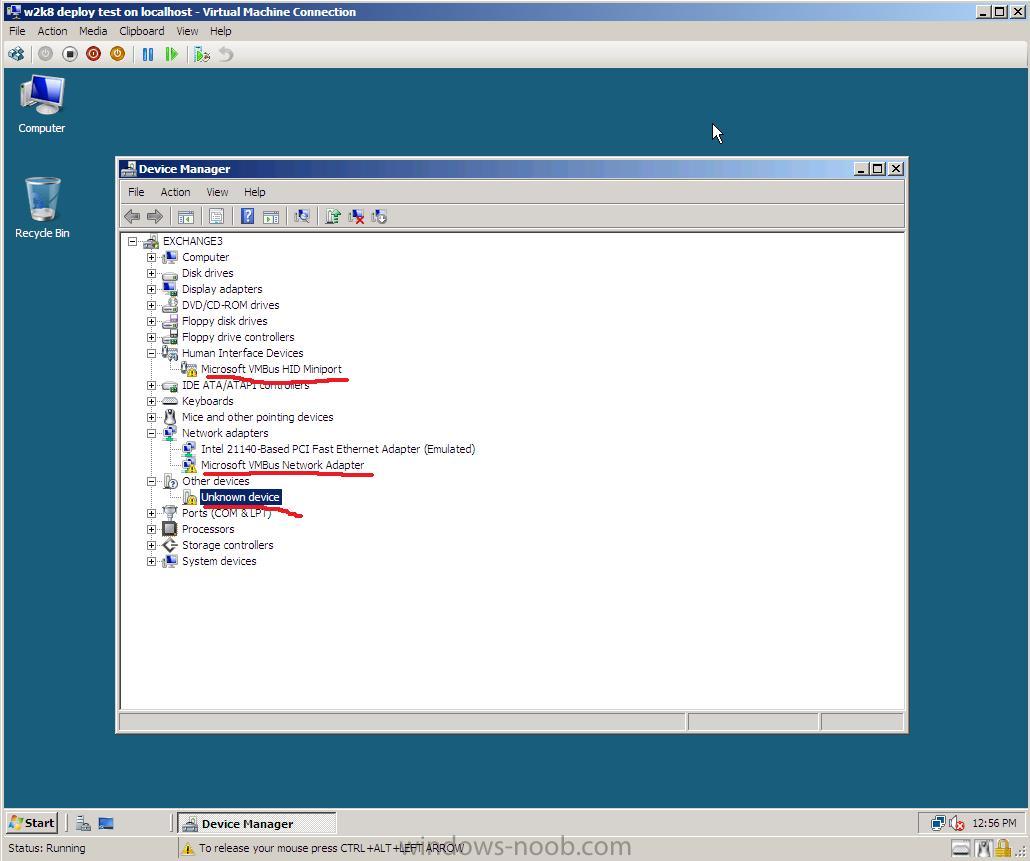
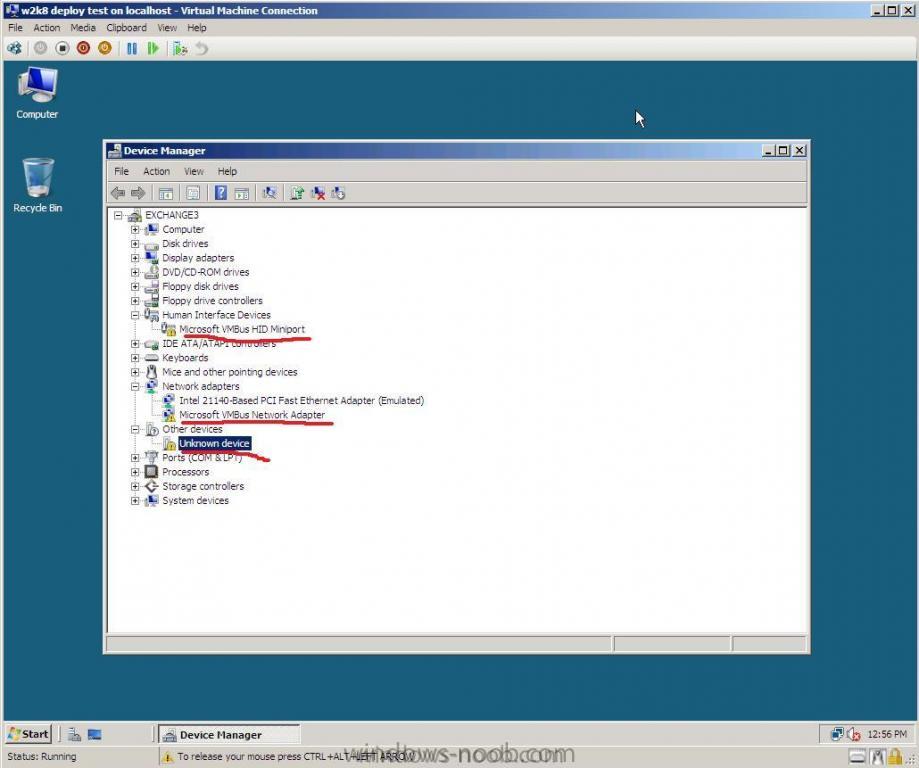
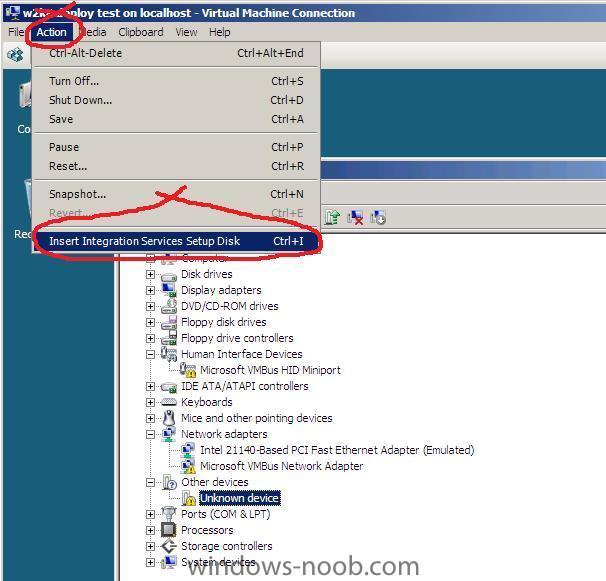
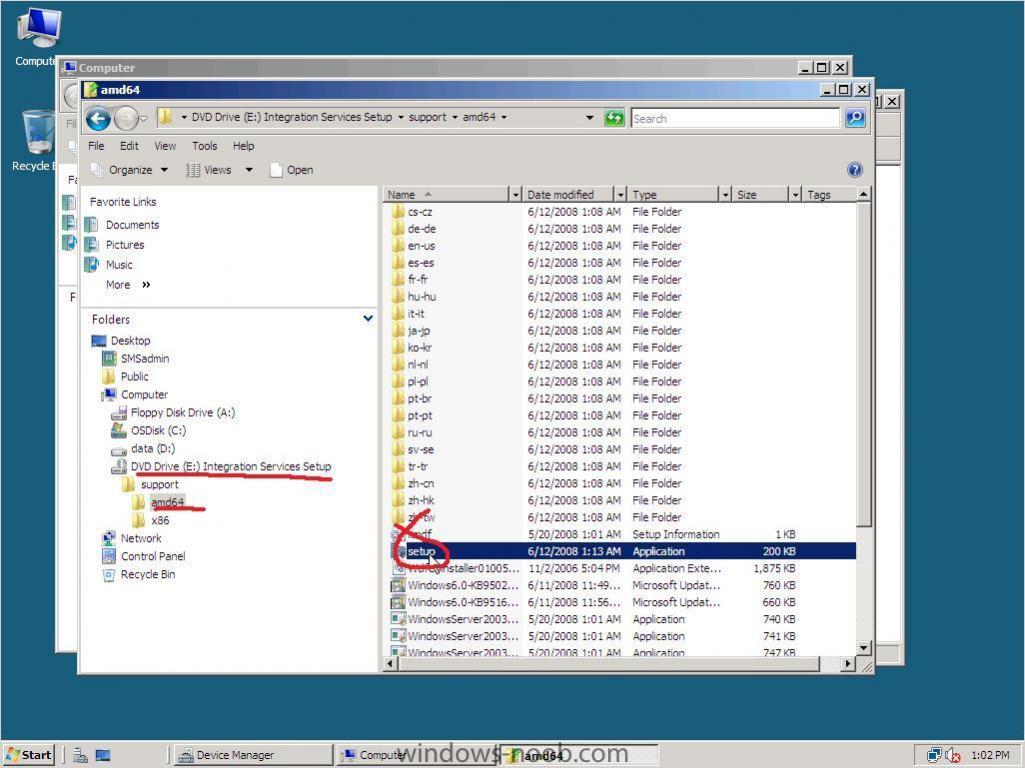
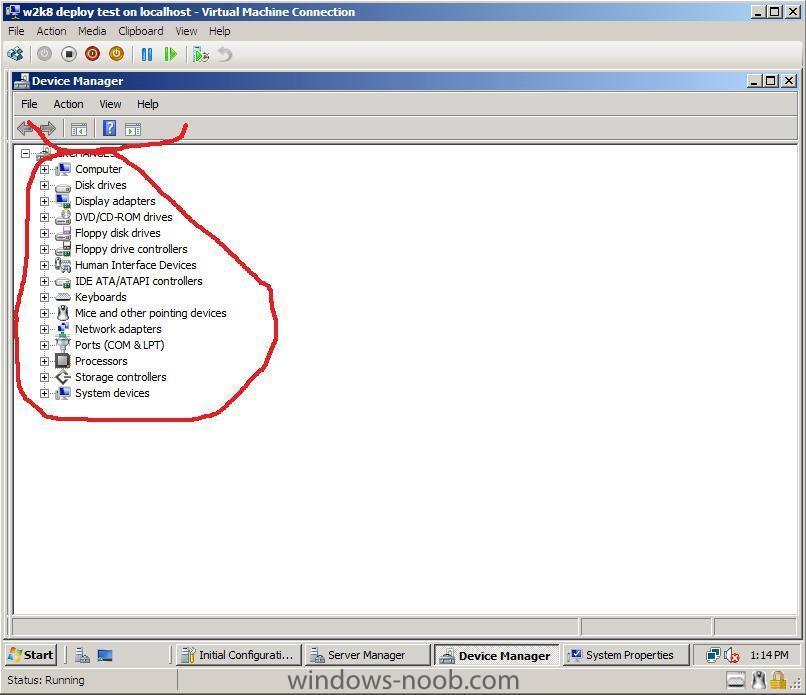
If you are unsure as to whether you need to install the Hyper V Integration Services Setup Disk then take a look in the device manager of your virtual machine if it looks like this, then you need to install the software, To Install the software click on Action in the VM menu and choose to insert the Integration Services setup disk *you can also press CTRL+I to do this* if Setup doesnt start automatically then open Windows Explorer and browse to your DVD drive, select the Architecture of your server (or OS) and run setup.exe reboot when prompted all should be ok after that !
-
No SMS_SiteToSiteConnection_WIN found, but
anyweb replied to togeoff's topic in Configuration Manager 2007
just in case there's any confusion look at this screenshot of my Active Directory Users and Computers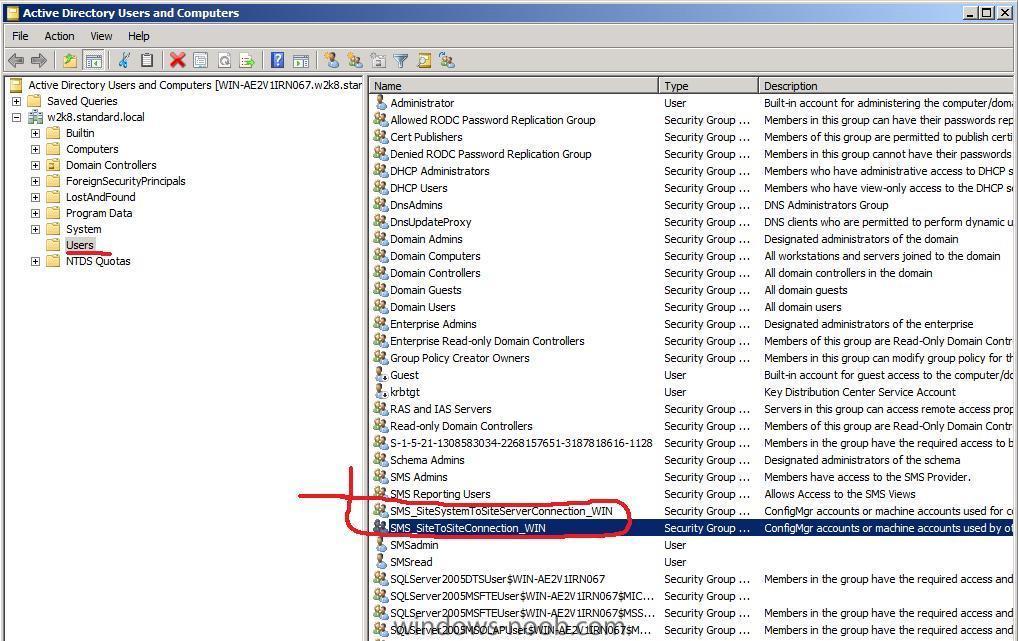
-
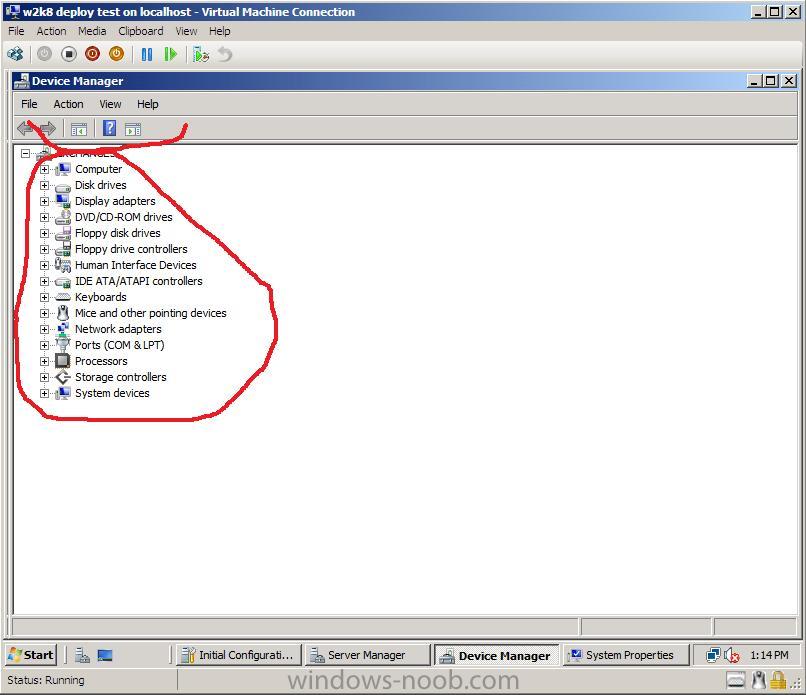
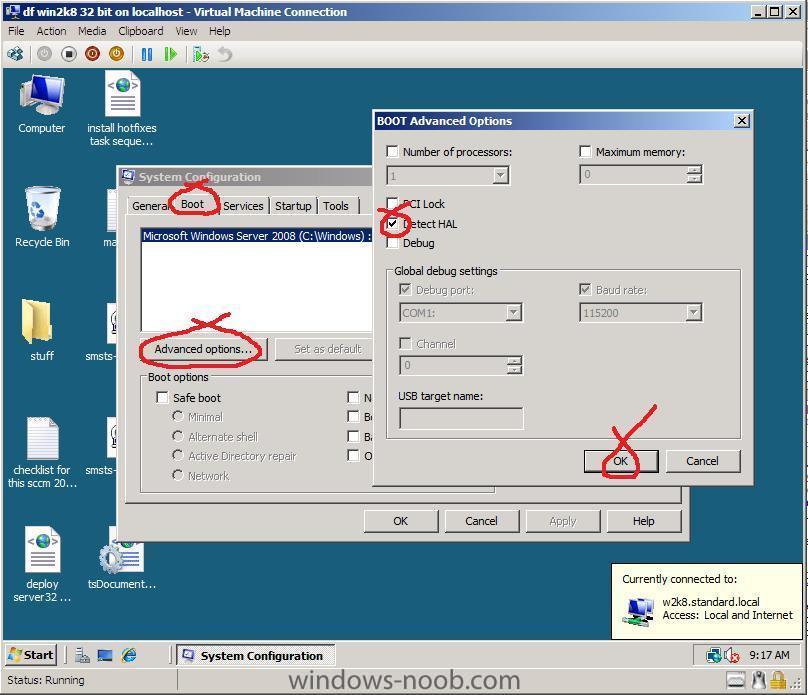
I imported some VHD's from Microsoft Virtual PC to Hyper V, and I noticed that one of my VM's had a problem, I couldn't add a second network card to it (I could add it in settings, but it would never appear as a new device on the VM or in the VM's device manager), so I checked out the device manager, there was a device with a yellow exclamation mark on it called VMBus. Double clicking on that showed me the following error After some googling I found this post and the advice in there was spot on, I had already installed my Intergration Services Setup disk and rebooted, but my problem remained, the VMBus was now called Virtual Machine Bus but still no network, so I ran MSCONFIG, clicked on boot, then clicked on the advanced tab and put a checkmark in Detect HAL, I clicked ok and reboot, some windows drivers were redetected and lo and behold my problem disappeared ! cheers ! anyweb
-
thanks Westlander, your project sounds exciting, I hope you succeed and that you do indeed contribute here on the site are you going to introduce sccm 2007 sp1 or R2 into the data center ? good luck ! cheers anyweb
-
Microsoft plans to offer one more public test version of Internet Explorer 8 before releasing the final version of the updated browser, the company said late Wednesday. The next test, essentially a "release candidate" version will come in the first quarter of 2009. That means the final release won't hit Microsoft's initial goal of finishing the browser this year. "Our next public release of IE (typically called a "release candidate") indicates the end of the beta period," general manager Dean Hachamovitch said in a blog posting, "We want the technical community of people and organizations interested in Web browsers to take this update as a strong signal that IE8 is effectively complete and done." via osnews.com
-
how can I troubleshoot Windows PE booting in SCCM
anyweb replied to anyweb's question in Troubleshooting, Tools, Hints and Tips
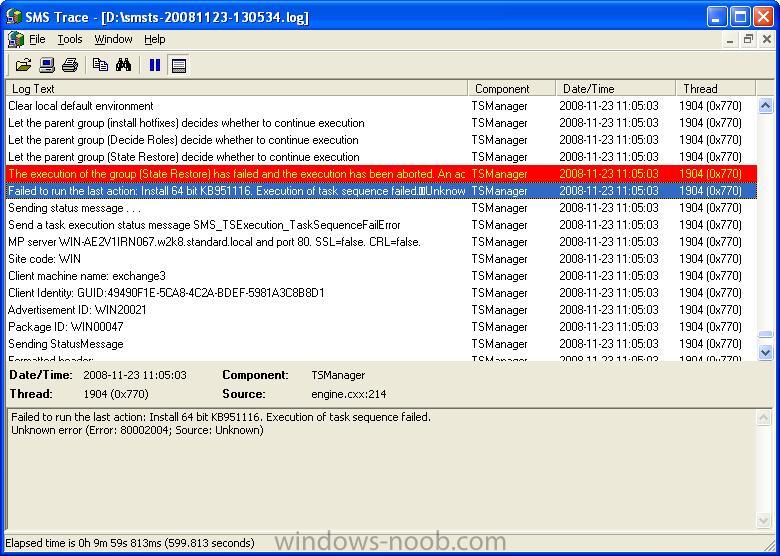
got this error last night while trying to install software (ignore the fact that I mention a hotfix, it actually doesnt matter), it turns out it failed because i hadn't defined my regional settings in the test task sequence, meaning that the SCCM server and Client were about 8 hours apart time wise, once I set the timezone in the task sequence to the same as the server I was deploying, the error disappeared and the TS completed normally.
-
Overview This software development kit (SDK) contains documentation and samples for developing Configuration Manager 2007 applications that integrate with the Configuration Manager console, the SMS Provider (server-side applications), and the client-side applications. The SDK enables developers to build plug-ins for the Configuration Manager console, to build automation scripts for batch processing to the SMS Provider, and to manipulate client settings. Top of page System Requirements Supported Operating Systems: Windows Server 2003 System Center Configuration Manager 2007 Microsoft Visual Studio 2005 Microsoft Management Console 3.0 Microsoft .NET Framework version 2.0 download it here
-
No SMS_SiteToSiteConnection_WIN found, but
anyweb replied to togeoff's topic in Configuration Manager 2007
is SCCM installed on the server that you are attempting to locate this information on ? the SMS_* groups are created when SCCM is installed... you are looking in Active Directory users and Computers in the USERS section arnt you ???? give me more details please cheers anyweb -
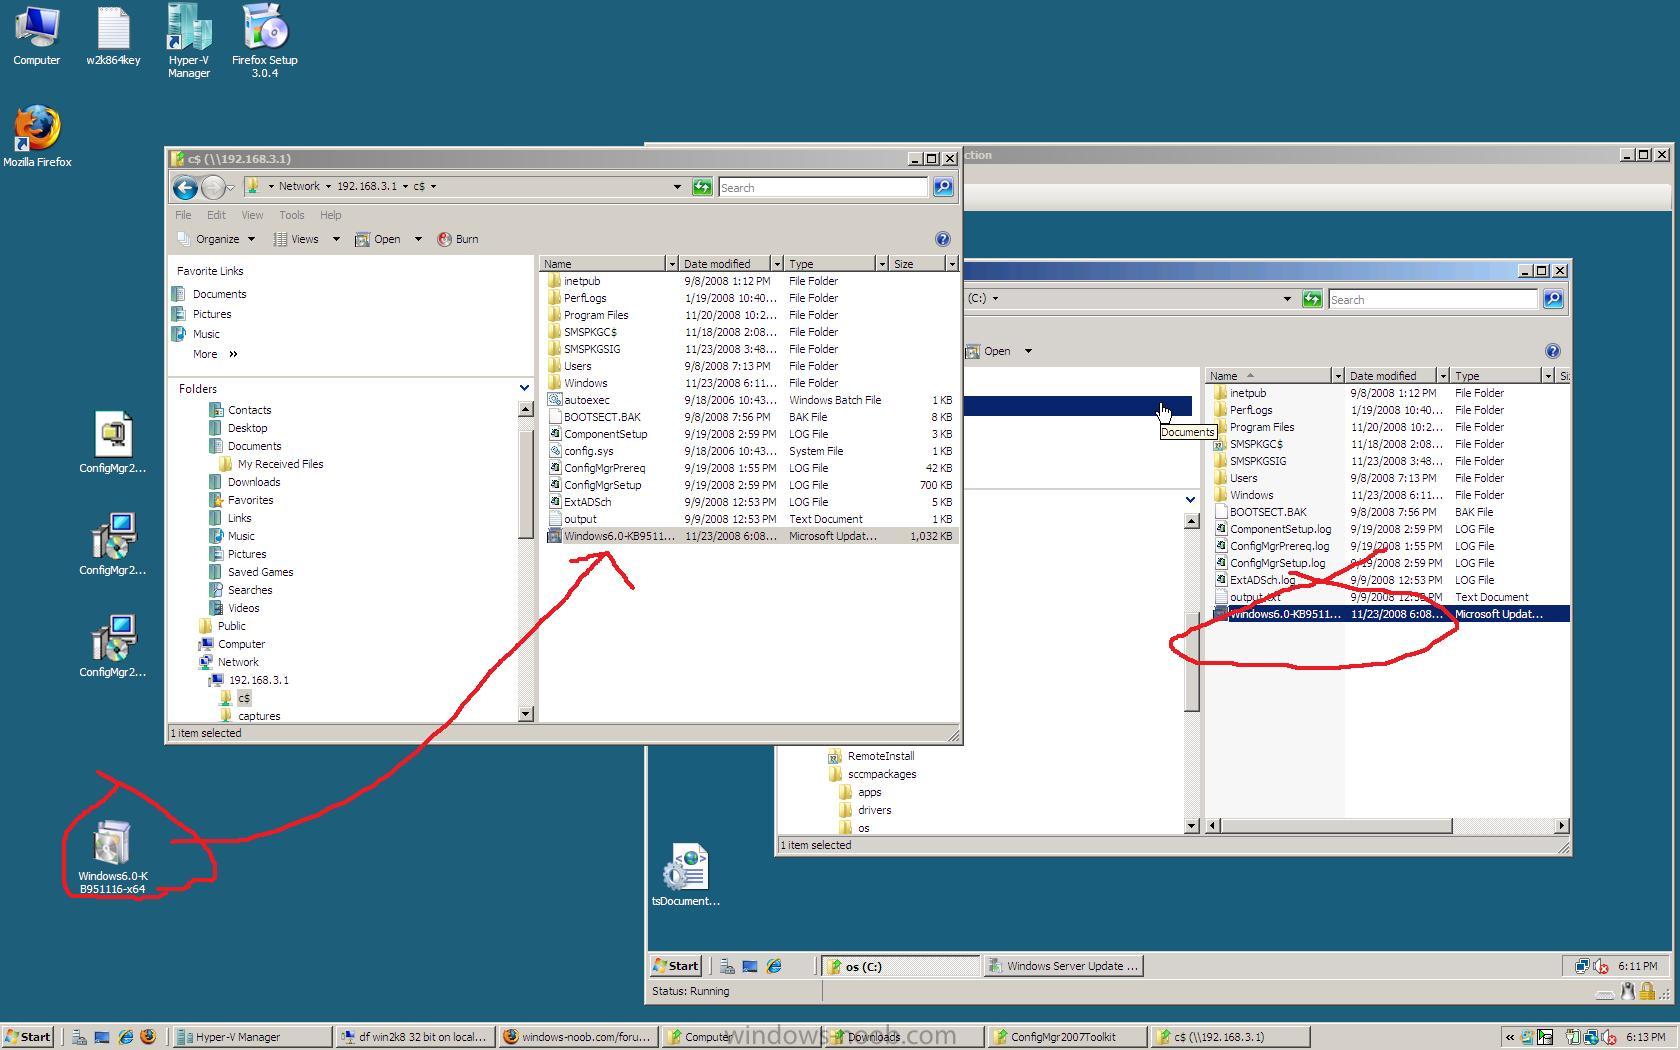
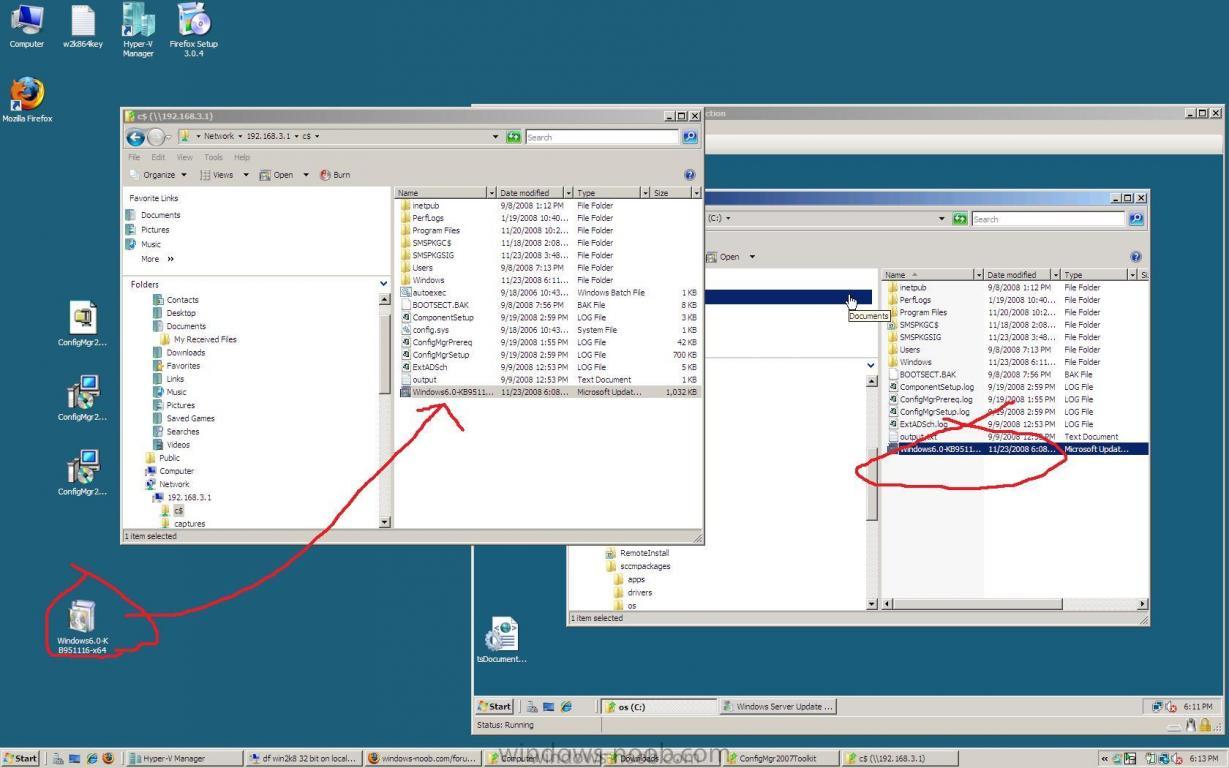
those of you used to Microsoft Virtual PC will find it odd that you can no longer drag and drop files from your desktop to the virtual machine in Hyper V, but all is not lost, you can copy/paste files to/from the Virtual machine by using standard network sharing, in the screenshot below I first connected to my virtual machine using Windows Explorer and browsed to the C$ share on the virtual machine, i then dragged a file from my desktop to that share, and you can see the file is present locally on the virtual machine which is also shown on the desktop (to the right) f.y.i
-
This Configuration Pack helps track configuration compliance for your Configuration Manager 2007 site server roles, such as management points, distribution points, and software update points. Overview Software installation errors and misconfigurations compromise security and stability, resulting in escalated support costs. The System Center Configuration Manager 2007 Configuration Pack can help prevent errors, increasing your organizational uptime and helping you build a more secure and reliable Configuration Manager 2007 infrastructure. This Configuration Pack contains Configuration Items intended to manage your Configuration Manager 2007 site system roles using the desired configuration management component in Configuration Manager 2007. This configuration pack monitors the following site system roles: management points, distribution points, and software update points. The Configuration Pack can also monitor Windows Server Update Services (WSUS) components on software update points or upstream WSUS servers. To manage your site system roles with this Configuration Pack, import and assign the Microsoft System Center Configuration Manager 2007 Server Roles configuration baseline to a collection which contains your Configuration Manager 2007 site systems. While there is one configuration baseline for all site systems, it evaluates compliance only for roles configured on the site system. For example, if a computer has only the distribution point role, it will not be evaluated for management point configurations. To understand in detail what each configuration item will be evaluating, review the properties of that configuration Iitem in the context of the Configuration Manager 2007 Server Role being addressed. System Center Configuration Manager 2007 site roles covered: • Management points • Distribution points • Software update points download it here
-
SCCM Vulnerability Assessment Configuration Pack
anyweb posted a question in Troubleshooting, Tools, Hints and Tips
This Configuration Pack helps track common software mis-configurations which might make client computers more vulnerable to attack. Software installation errors and misconfigurations compromise security and stability, resulting in escalated support costs. System Center Configuration Manager 2007 Vulnerability Assessment Configuration Pack can help prevent errors, increasing your organizational uptime and helping you build a more secure infrastructure. This configuration pack provides vulnerability assessment reporting for common software misconfigurations using the desired configuration management component in Configuration Manager 2007. The Configuration Manager 2007 Vulnerability Assessment Configuration Pack monitors the configuration of Microsoft Windows operating systems, Internet Explorer, Microsoft Office, SQL Server, and Internet Information Services (IIS). To use this Configuration Pack, import and assign the three configuration baselines (Vulnerability Assessment: IIS Baseline, Vulnerability Assessment: SQL Server Baseline, Vulnerability Assessment: Windows Baseline) to a collection containing the computers you want to monitor. To understand in detail what each configuration item will be evaluating, review the properties of the configuration item. Scenarios: • Scan for potential security issues that may exist because of misconfigurations. • Example checks: o Are unnecessary services installed and running? o Do shared folders have appropriate permissions? o Is Windows Firewall enabled? o Are strong passwords enforced? o Are unsecured guest accounts enabled? download it here -
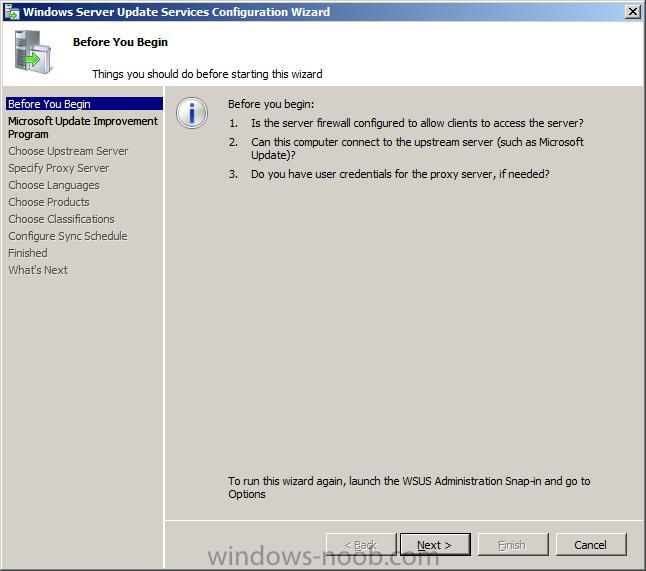
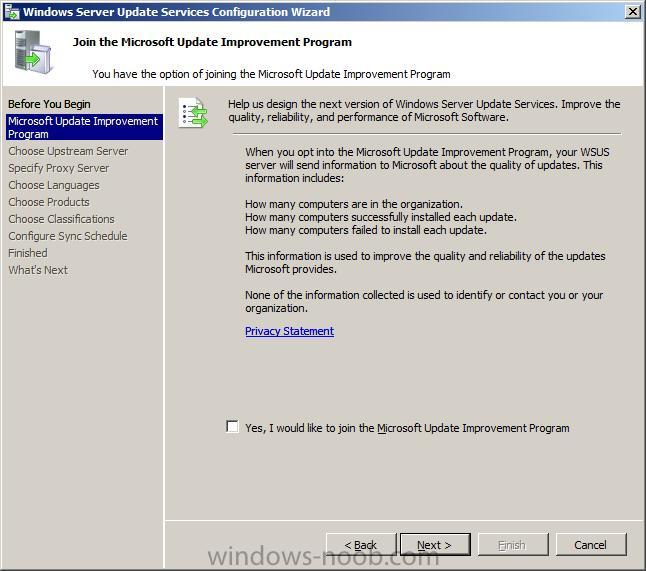
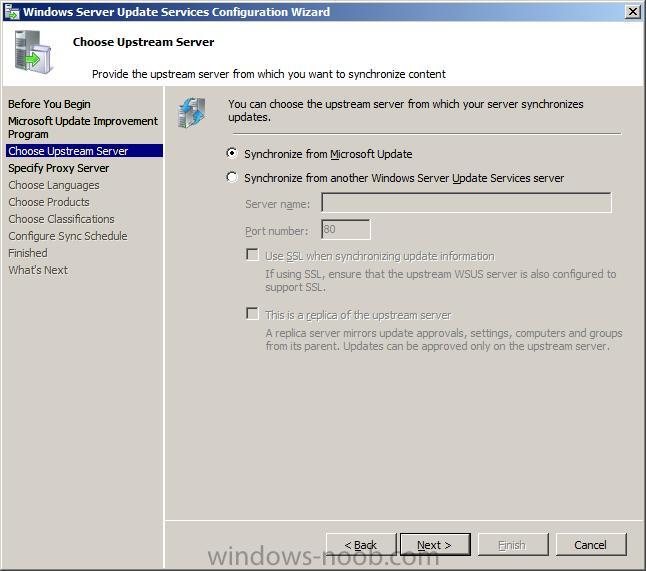
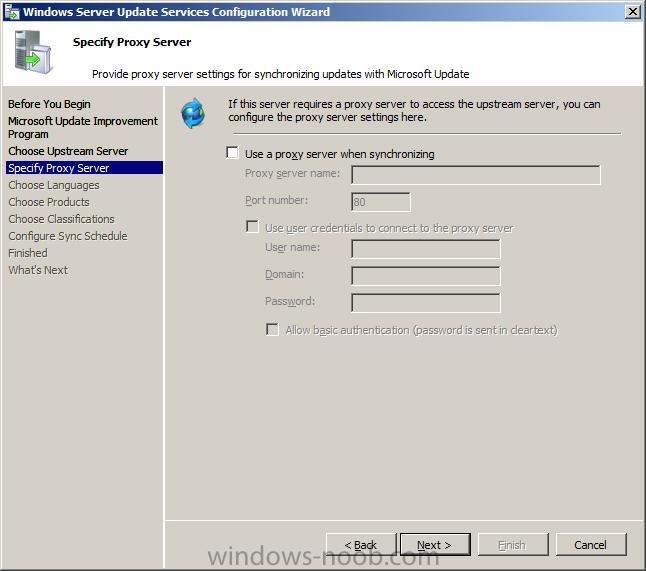
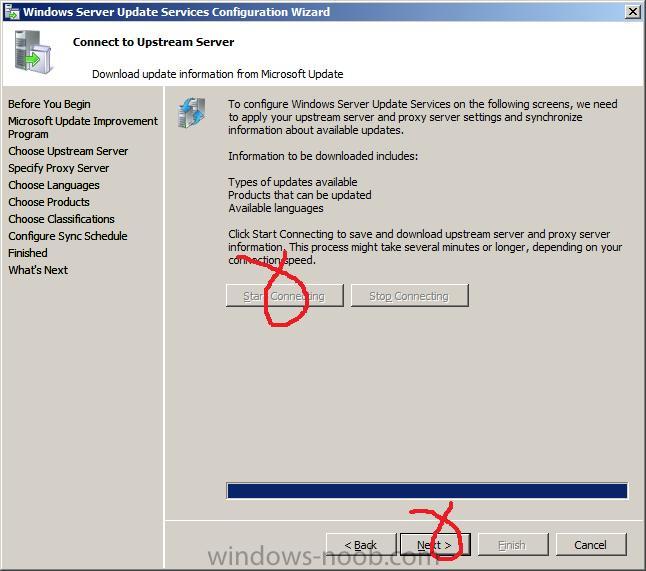
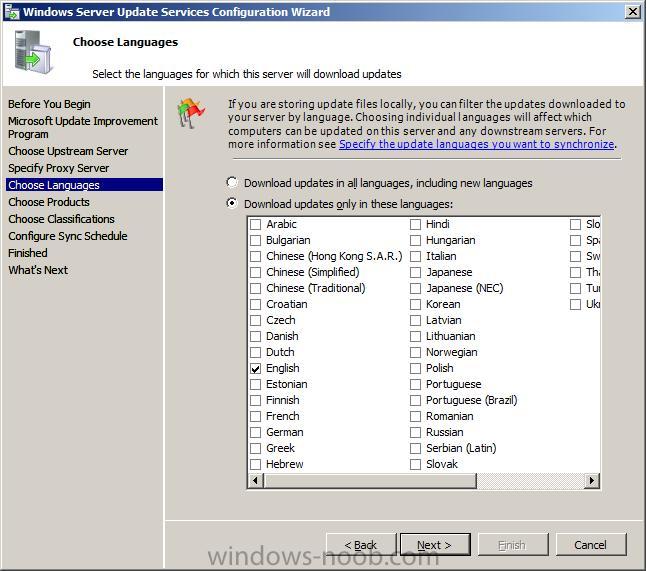
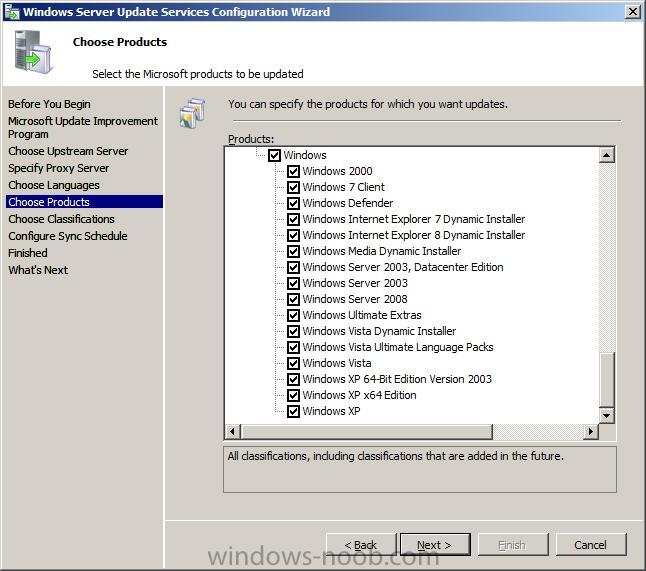
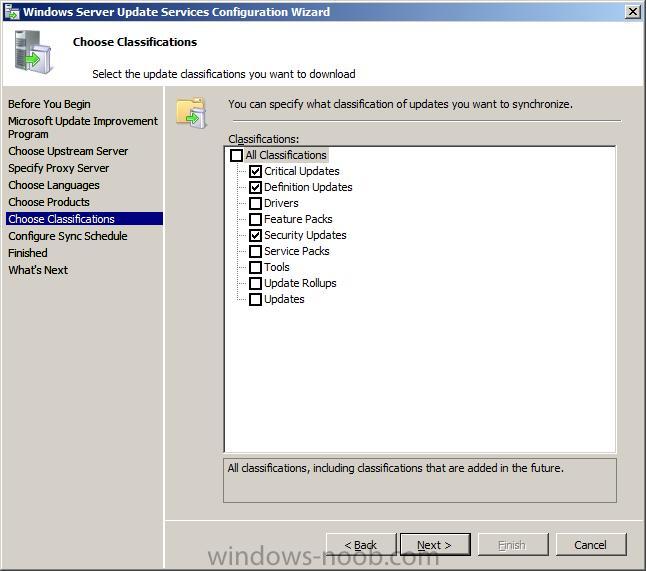
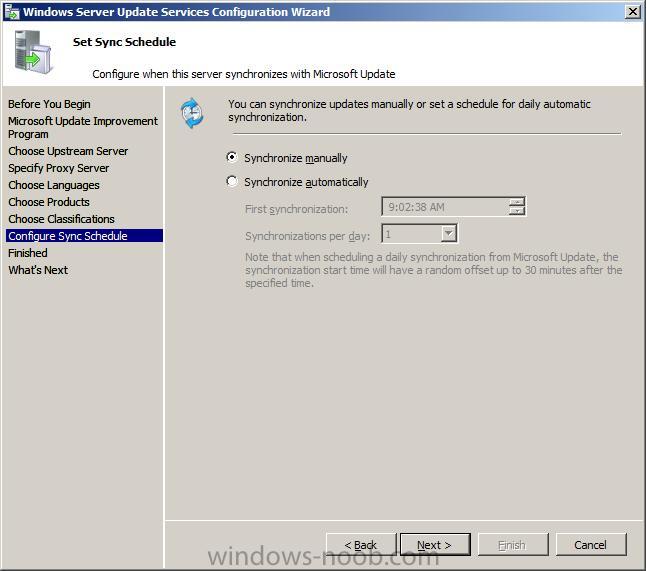
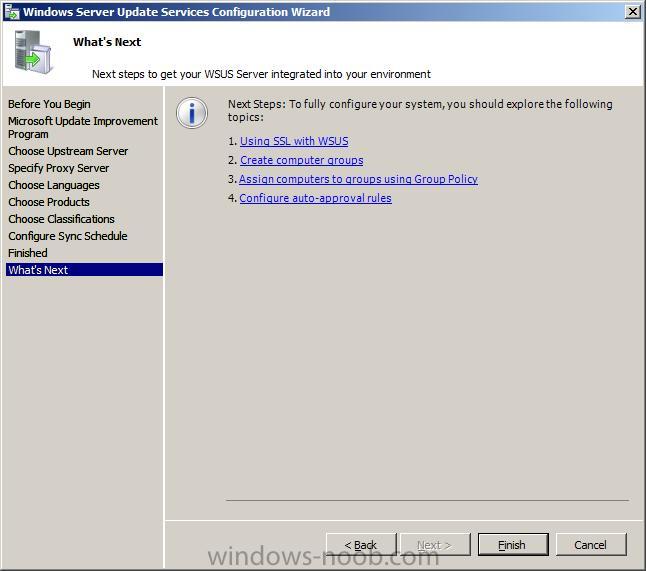
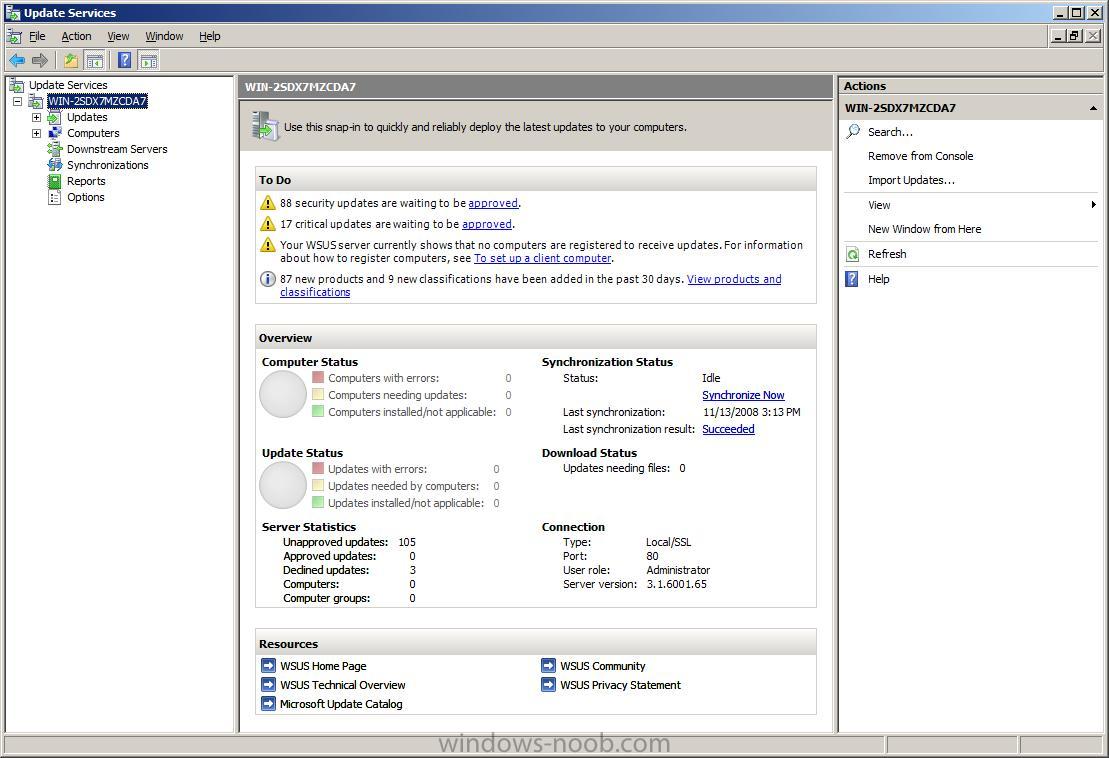
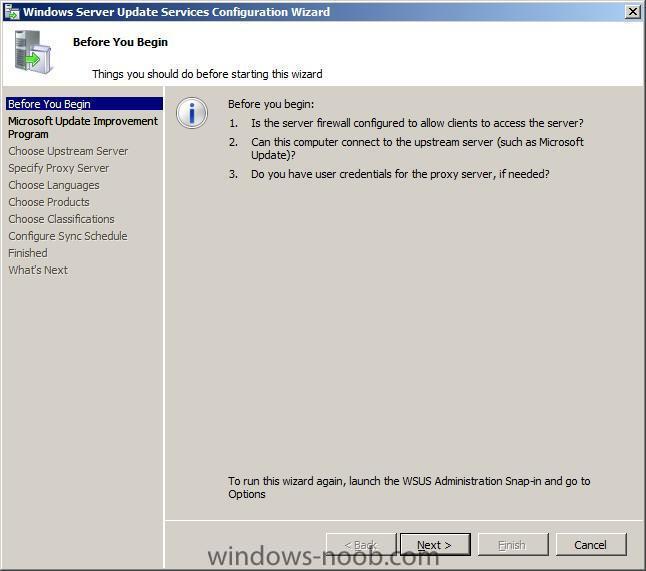
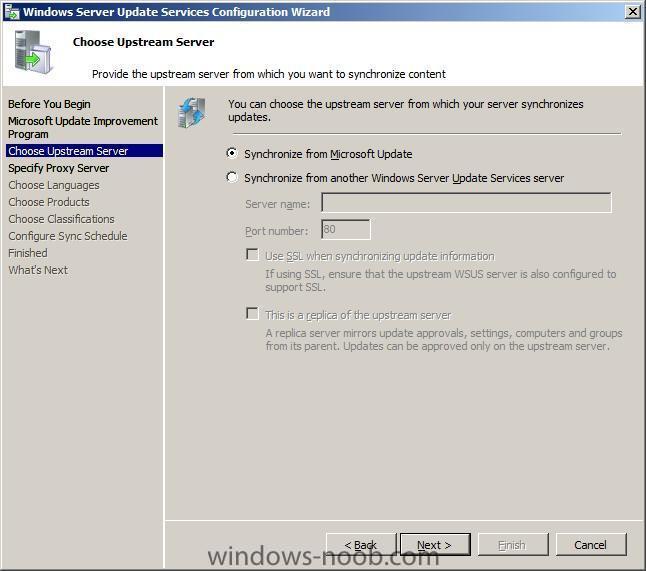
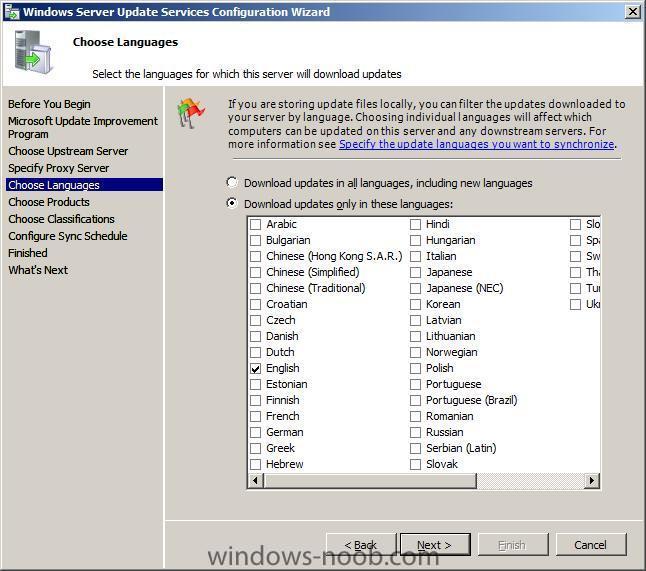
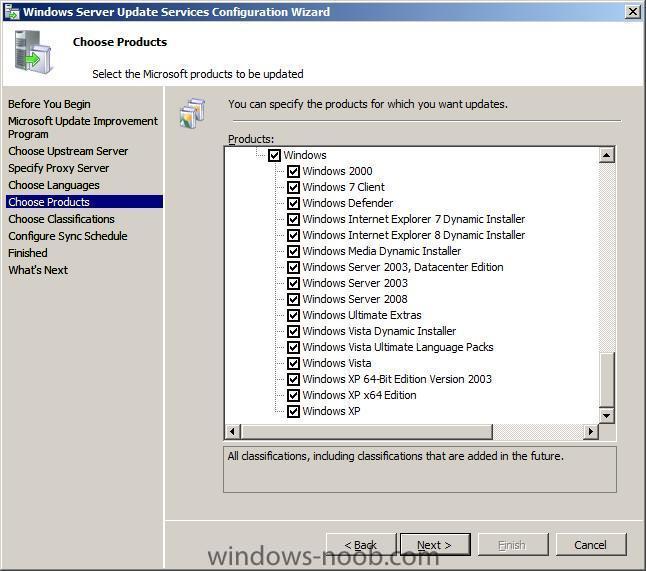
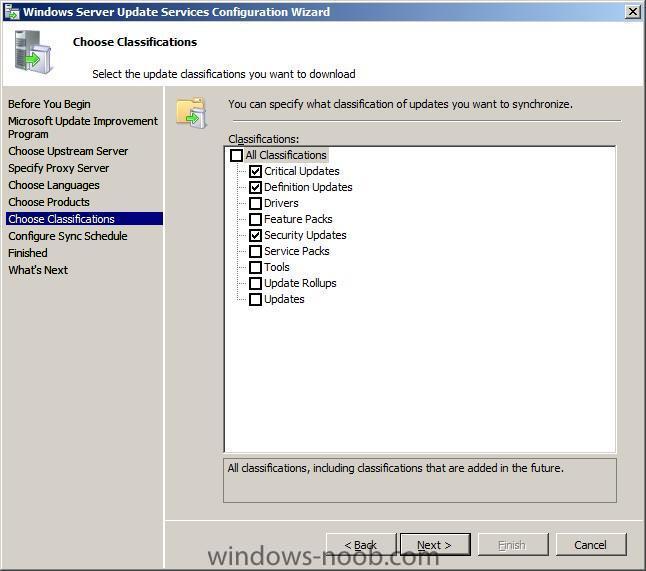
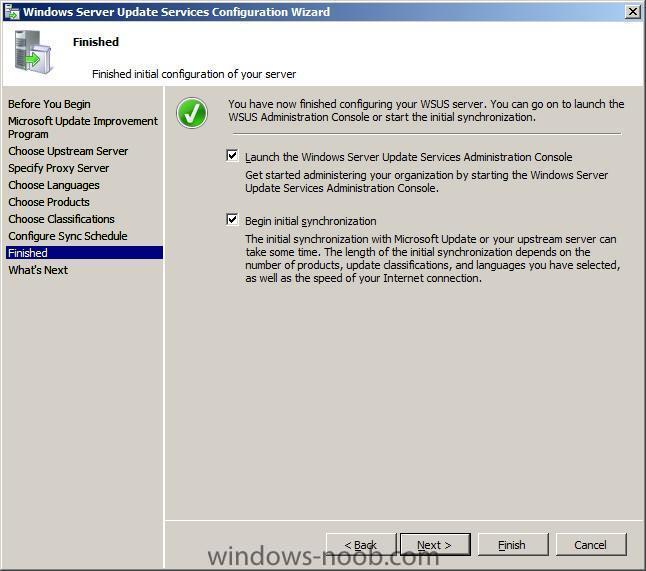
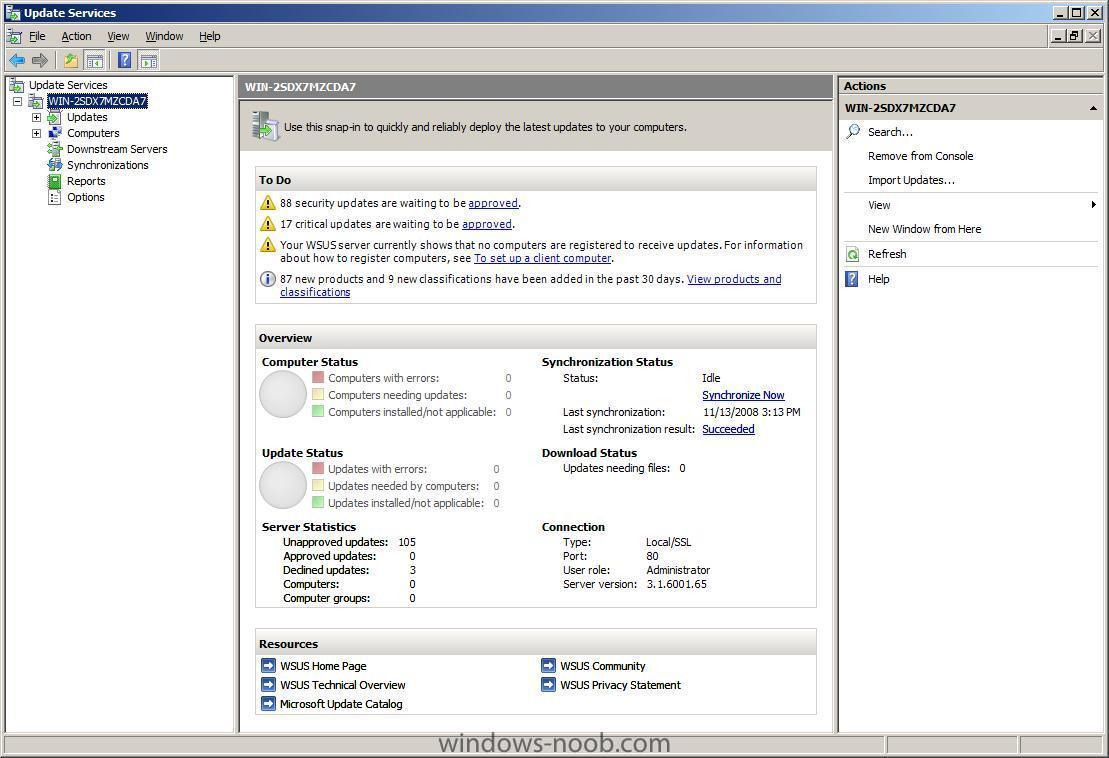
Note: if you are going to use SCCM to manage patch management, then do NOT run the WSUS configuration wizard below Starting WSUS for the first time Click on Start/All Programs/Administrative tools/Microsoft Windows Server Update Services 3.0 SP1 this will start a wizard (pictured below) click next choose to opt in or opt out (default is opt in) Next you can choose your Upstream Server, I stayed with the default option enter your proxy settings (if any) click next and then start connecting once the Wizard has synchronized information with the Microsoft Update web servers you can click next to continue next you get to choose which languages to support and which Microsoft Products to support by default all office versions and all windows versions are selected, remove those which you don't need as all of these updates etc will take up storage space next you can choose what type of updates to download pick a schedule to synchronise finished ! review next steps and then click on Finish to end the wizard. At this point you can now use the WSUS UI Troubleshooting: verify the following LOGS to see how WSUS installation went. MWusSetup.log WSUSSetup.log WSUSSetupmsi_100211_2212.log the last LOG will have it's name based upon the installation date/time as you can see. These logs will be found in the users AppData\Local\Temp folder eg: if the user that installed WSUS was SMSadmin then these logs will be found here: C:\Users\smsadmin\AppData\Local\Temp\ next steps >> how can I configure WSUS to deploy updates


-
No SMS_SiteToSiteConnection_WIN found, but
anyweb replied to togeoff's topic in Configuration Manager 2007
did you verify you have advanced view turned on in AD users and computers... -
how can I install MSU updates ?
anyweb posted a question in Deploy software, applications and drivers
if you want to install msu update files then you can use WUSA to do the job eg: wusa "Windows6.0-KB934307-x86.msu" /quiet /norestart the /quiet switch means no user interaction and the /norestart means just that you can add this to a task sequence -
can you take a screenshot of your task sequence and/or export it to xml and attach it here ?
-
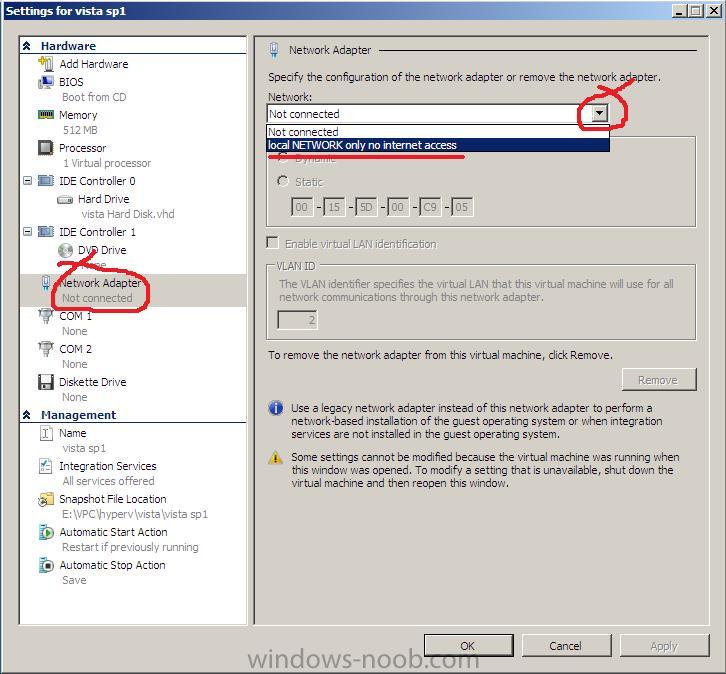
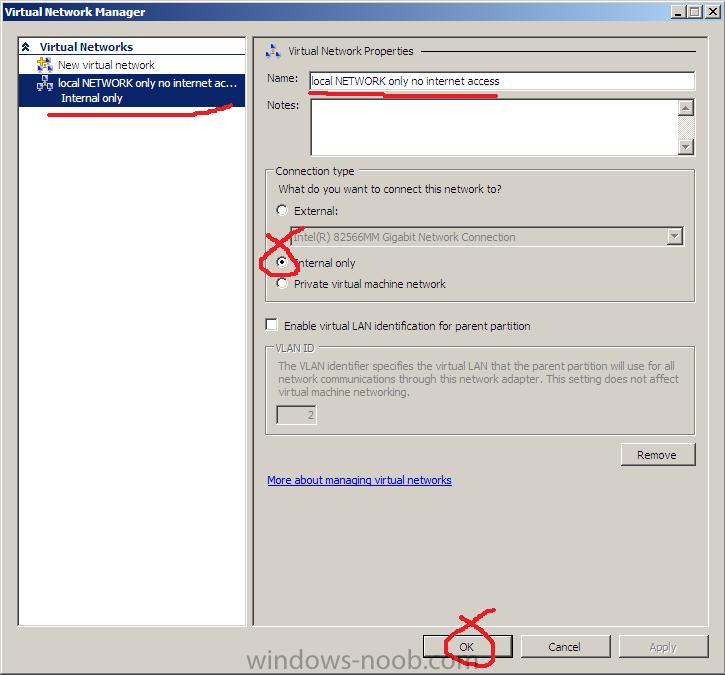
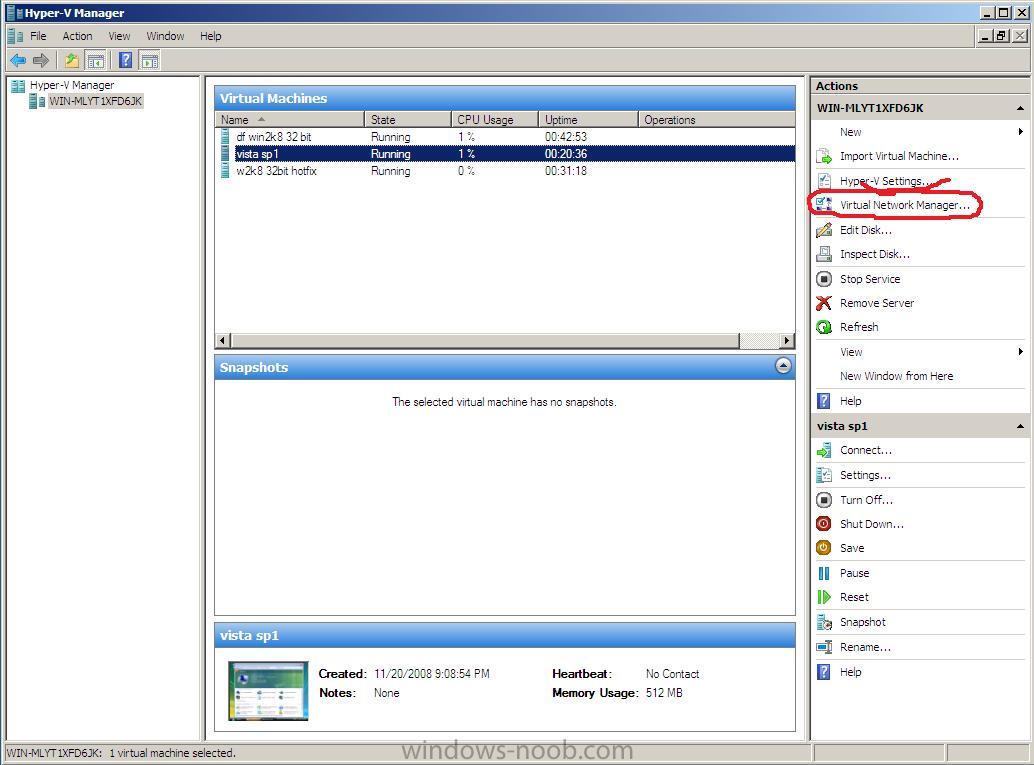
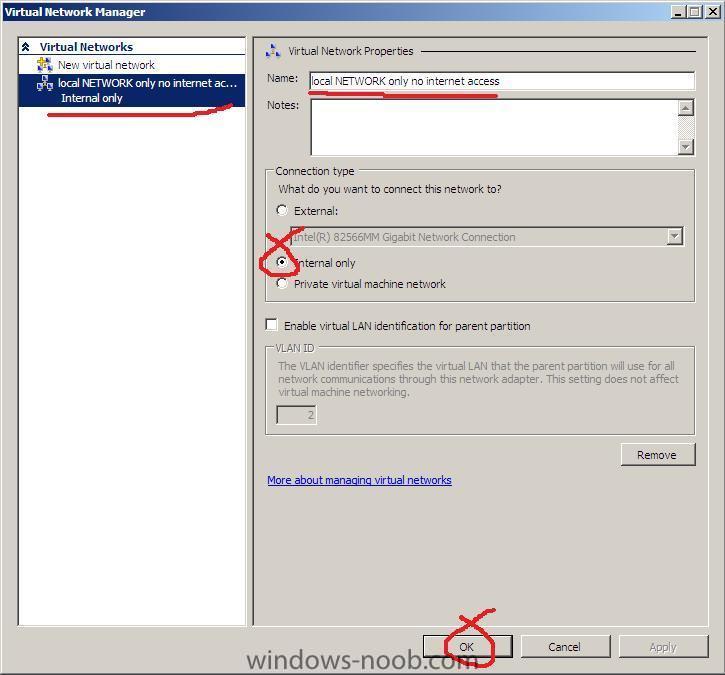
If you have just installed Hyper V in Windows 2008 Server and start a new VM and click on it's settings, you may notice that the network adapater does not have any option except 'Not Connected' in the drop down menu. The solution is simple enough go into Hyper V Managerand right click on your Server (or in the Actions Pane on the right), choose Virtual network Manager, click Add, and choose an External, Internal or Private network, give it a name (like Local network only...) once done click apply, Now go back to your VM and click on settings, Network Adapter, you should now be able to choose the drop down menu and select the new virtual network you just created cheers anyweb


-
as regards the admin password did you check this ? (below the red circle...)
-
how can I sysprep Windows Vista ?
anyweb replied to anyweb's question in Deploying Windows 10, Windows 8.1, Windows 7 and more...
which admin account are you talking about ? the built in Administrator account or some other one that you created ? -
how are you installing the image ? is the image already created ?
-
so let me get this straight, you are mounting boot.wim and writing the new driver to it, then unmounting the file with the changes (using imagex) or are you doing this another way ?