anyweb
-
Posts
9262 -
Joined
-
Last visited
-
Days Won
371
Everything posted by anyweb
-

Deploy Office 365 Update SCCM 2010
anyweb replied to walid's topic in System Center Configuration Manager (Current Branch)
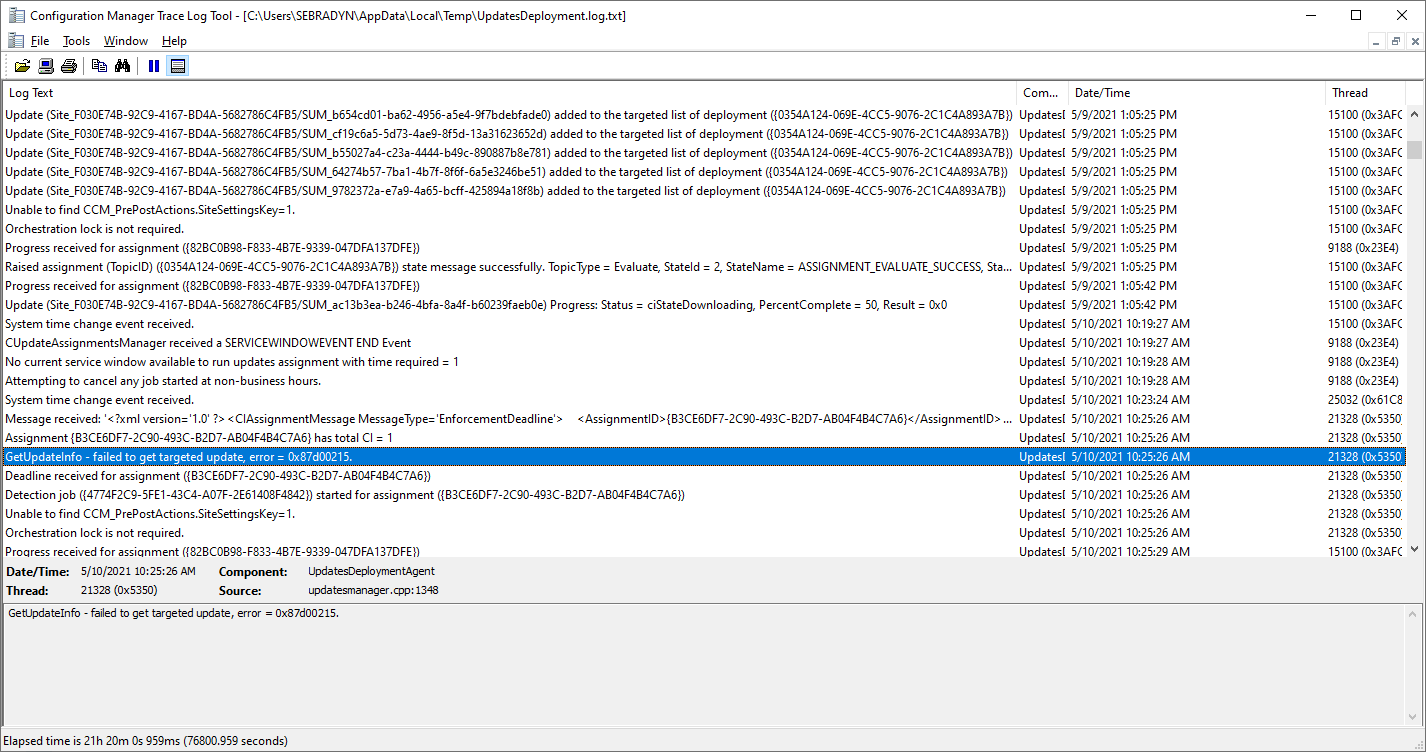
from the log and look at this, further down in the log so have you defined maintenance windows here ?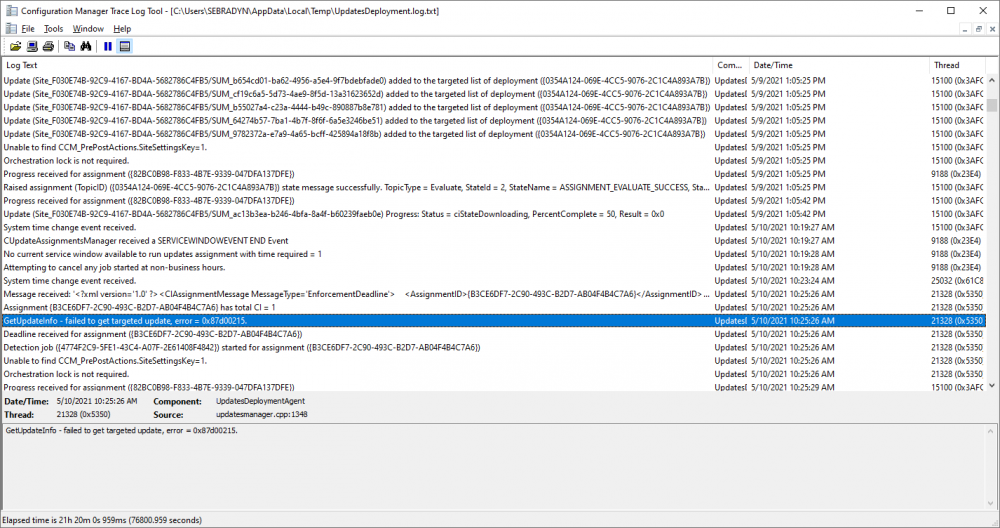
-
looks like you have the same problem as this guy, have you tried contacting Dell about it ?
-
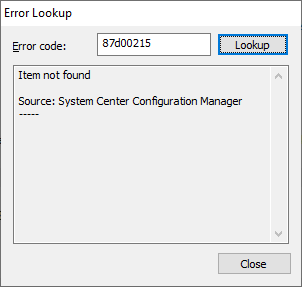
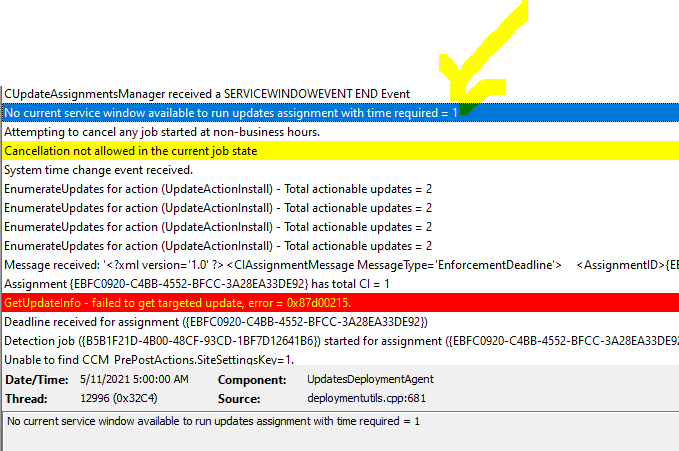
from what I can see it looks like it's related to software updates that were approved but are no longer downloadable from Microsoft, hence the 404, so start looking in that direction
-
there are two reasons, if you deploy this as required to your autopilot devices then how will you know when to run it, when deployed to users you can look for the username and make sure it doesn't match defaultuser0 (the user account used by windows during autopilot oobe), to ignore that user and only do actions based on a valid user, you could probably use this method in your scenario but you'll need to get creative in adapting it, or start targeting users you could do it by verifying that the logged on user is NOT defaultuser0 and that there is a logged on user, sounds weird but that could do it
-
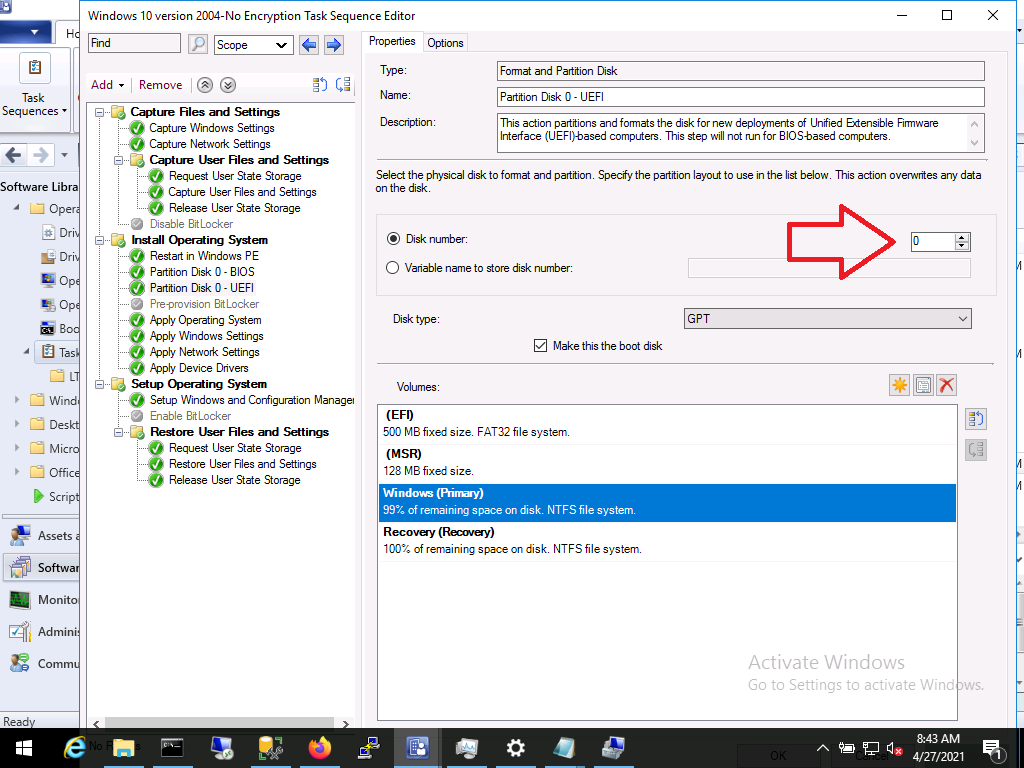
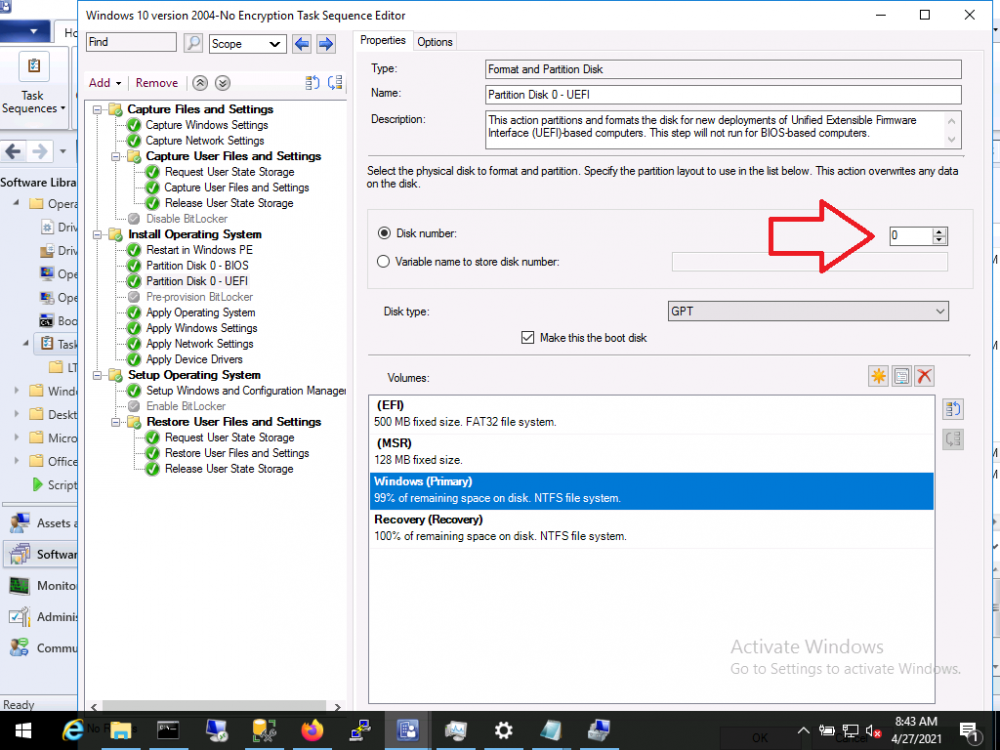
well you could create a powershell script to check the size of both discs and find out which is smaller, should be easy to do, and based on that set an sccm variable which will govern whether the partition disk step runs on that disk or not
-
i couldn't see it before I think the issue was on Microsoft's side, but it works now
-
3rd party updates
anyweb replied to jkjk12's topic in System Center Configuration Manager (Current Branch)
have you reviewed this video yet ? if not skip through it to see what you've missed, it's based on ConfigMgr 1910 but it'll give you some clues hopefully -
not great but you'll need to figure out what disk number each type of disk is normally reported as, if they are consistently the same across models then use that knowledge to modify the Format Partition steps to only target the disk you want (and not the other disk) if they are not consistent then you'll need to build a powershell script or clever WMI checks to determine what type of disk it is and whether to format it or not
-
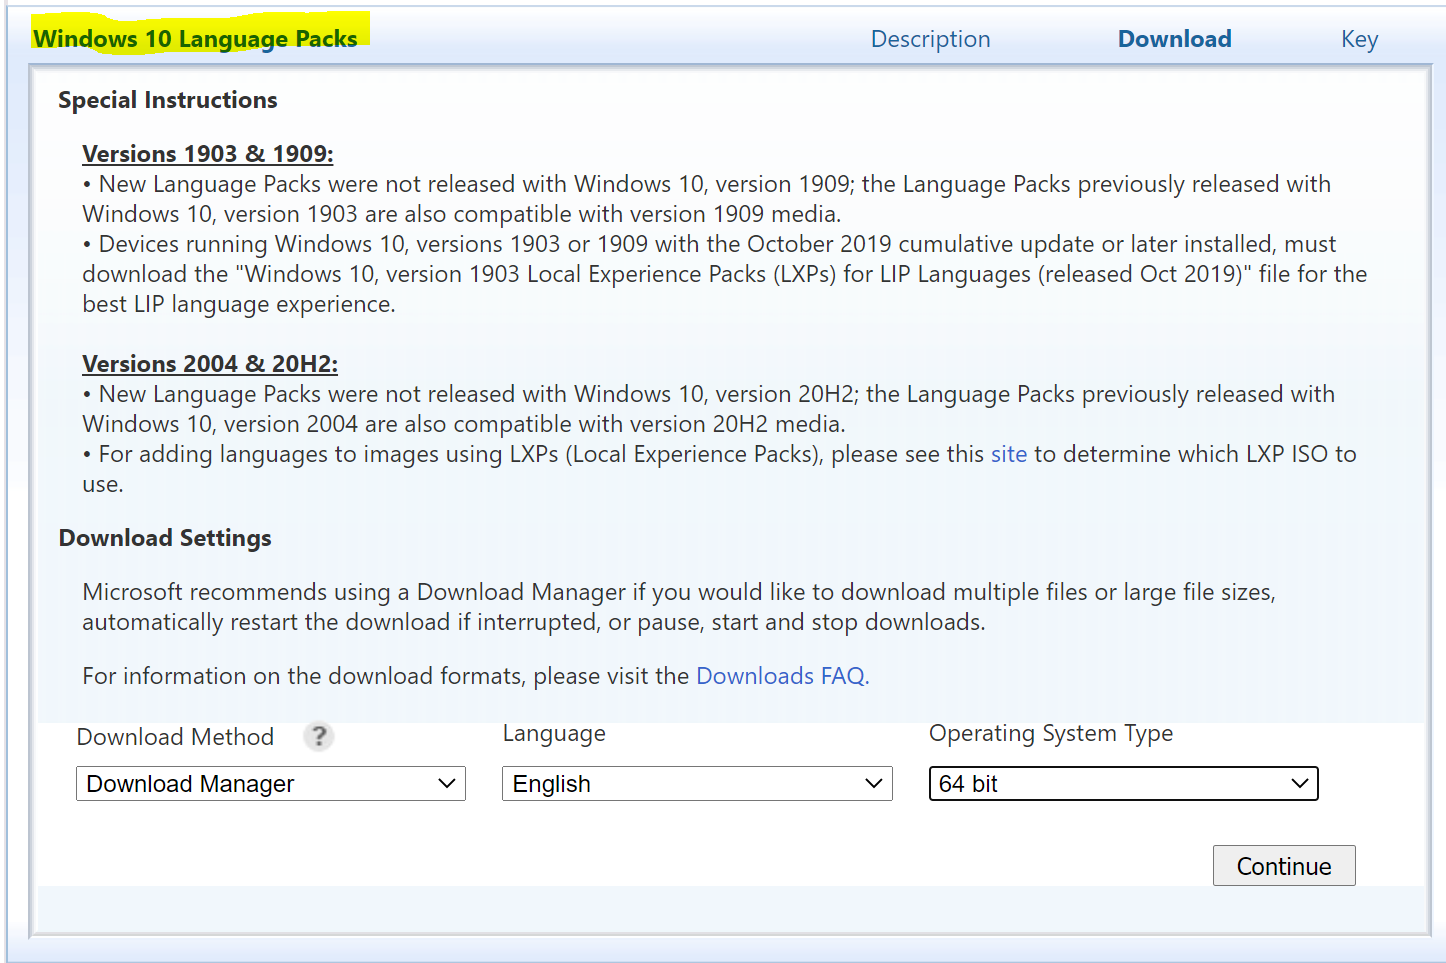
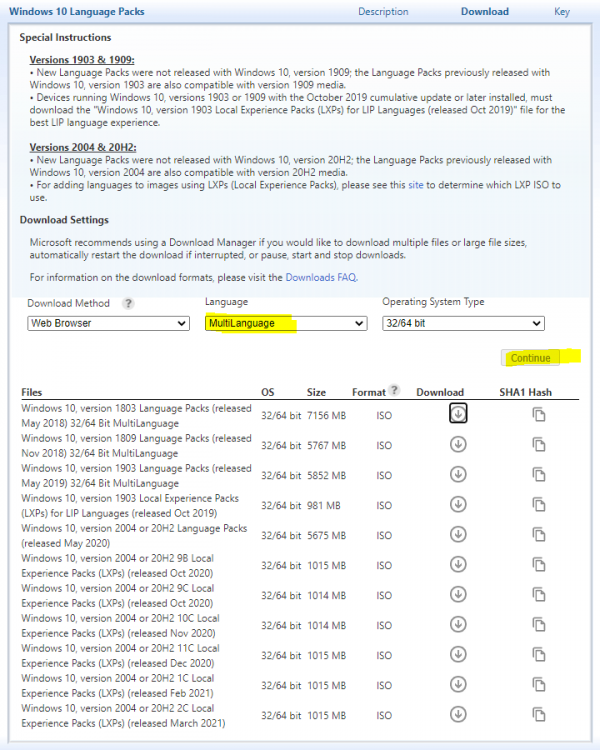
go back in vlsc, make sure to select Multilanguage as i have done here, then click continue, guess what you'll see then
-
Getting into scripting can be daunting. It’s easier to just use existing scripts found online, but if you choose this route you’ll quickly run into limitations. If you take the time to learn how to create your scripts, trust me, you’ll never look back! Automating vSphere is particularly useful for countless applications and the best way is through PowerCLI – a version of PowerShell developed specifically for VMware. Learn how to develop your own PowerCLI scripts with this free 100+ page eBook from Altaro, PowerCLI: The Aspiring Automator’s Guide. Written by VMware vExpert Xavier Avrillier, this eBook presents a use-case approach to learning how to automate tasks in vSphere environments using PowerCLI. We start by covering the basics of installation, set up, and an overview of PowerCLI terms. From there we move into scripting logic and script building with step-by-step instructions of truly useful custom scripts, including how to retrieve data on vSphere objects; display VM performance metrics; how to build HTML reports and schedule them; the basics on building functions; and more! Stop looking at scripts online in envy because you wish you could build your own scripts. Get started on your path to automation greatness – Download the eBook now!

-
3rd party updates
anyweb replied to jkjk12's topic in System Center Configuration Manager (Current Branch)
did you setup a schedule ? did you monitor the wsus logs generated when it synced ? do the status messages give any clues -
is WSUS configured in https mode ?
-
Failed to run Task Sequence 0x80004005
anyweb replied to CindyP750's topic in Configuration Manager 2012
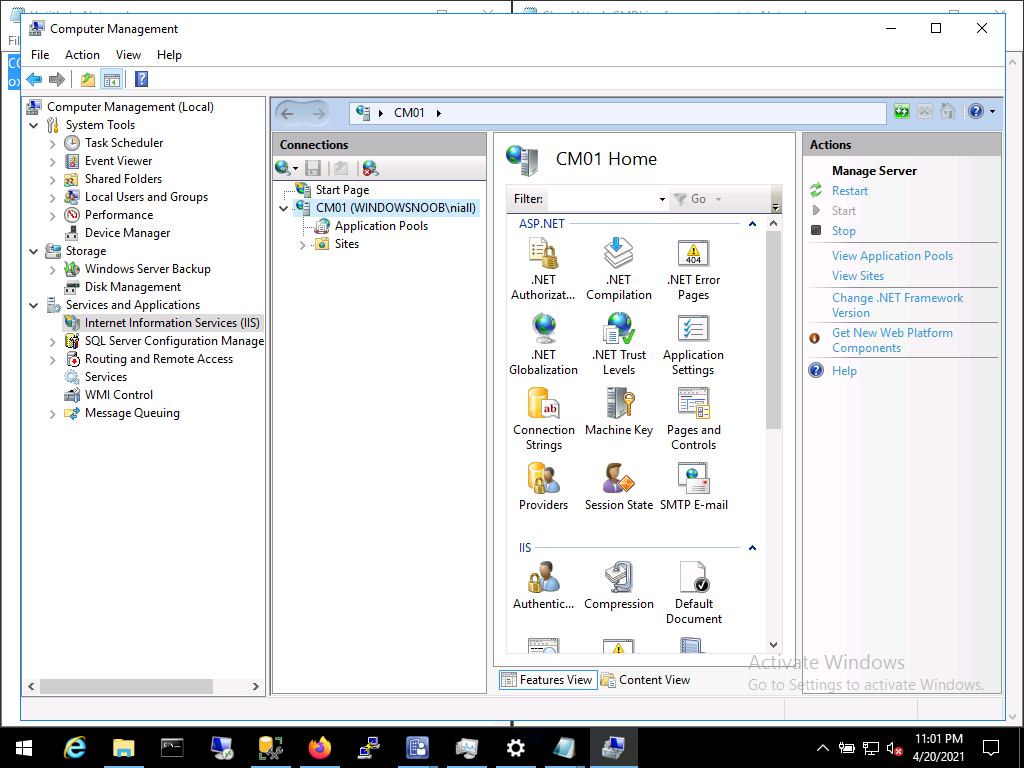
ok so based on this, can you check the IIS services on your mp, and verify it is started (or not), if not, try starting it. IIS=Internet Information Services (IIS), such as here...the actions in the right pane govern start/stop etc...
-
Failed to run Task Sequence 0x80004005
anyweb replied to CindyP750's topic in Configuration Manager 2012
I'm happy to help but this is just the ccmsetup log from a client, it's nothing to do with attempting to image a computer, you need to first review the management point status on your site server, if and only if that is ok then move on to troubleshooting the clients -
- In Tune, Surface hubs not registering in MDM
anyweb replied to RobbieJ's topic in Microsoft Intune
that makes sense, give it a go and report back with your success or lack of -
- In Tune, Surface hubs not registering in MDM
anyweb replied to RobbieJ's topic in Microsoft Intune
I checked with a Hub user and this was his response 1) autoenrollment is not enrolling in to intune, only Azure AD 2) all policy and apps need to be assigned to a device group, as there is no "concept" of a user on the device -
- In Tune, Surface hubs not registering in MDM
anyweb replied to RobbieJ's topic in Microsoft Intune
I'd like to help but I don't have a surface hub lying around, I'll ask someone who does... -
Failed to run Task Sequence 0x80004005
anyweb replied to CindyP750's topic in Configuration Manager 2012
ok well one step at a time then, if you cannot get policy then either its a client issue, a network issue or a server issue, to rule out the server having an issue, check your component status logs in the Monitoring node of ConfigMgr for anything MP related -
Failed to run Task Sequence 0x80004005
anyweb replied to CindyP750's topic in Configuration Manager 2012
ok so to summarise when you pxe boot you cannot get policy is that your problem ? if not please add more details -
Failed to run Task Sequence 0x80004005
anyweb replied to CindyP750's topic in Configuration Manager 2012
check date time on the client computer, today is the 19th but your log is from the 16th, so which is correct ? the client must have the same date/time as the MP, and it's not able to get policy from the MP as you can see here <![LOG[SyncTimeWithMP() failed. 80004005.]LOG]!><time="17:00:38.460+480" date="04-16-2021" component="TSMBootstrap" context="" type="3" thread="1572" file="tsmbootstraputil.cpp:1516"> <![LOG[Failed to get time information from MP: http://xxx.yyy.com.]LOG]!><time="17:00:38.460+480" date="04-16-2021" component="TSMBootstrap" context="" type="3" thread="1572" file="tsmbootstraputil.cpp:1976"> <![LOG[MpCnt > 0, HRESULT=80004005 (tsmbootstraputil.cpp,2058)]LOG]!><time="17:00:38.460+480" date="04-16-2021" component="TSMBootstrap" context="" type="0" thread="1572" file="tsmbootstraputil.cpp:2058"> <![LOG[QueryMPLocator: no valid MP locations are received]LOG]!><time="17:00:38.460+480" date="04-16-2021" component="TSMBootstrap" context="" type="3" thread="1572" file="tsmbootstraputil.cpp:2058"> <![LOG[TSMBootstrapUtil::QueryMPLocator ( true, sSMSTSLocationMPs.c_str(), sMediaPfx.c_str(), sMediaGuid.c_str(), sAuthenticator.c_str(), sEnterpriseCert.c_str(), sServerCerts.c_str(), nHttpPort, nHttpsPort, bUseCRL, m_bWinPE, httpS, http, accessibleMpCnt), HRESULT=80004005 (tsmediawizardcontrol.cpp,1039)]LOG]!><time="17:00:38.460+480" date="04-16-2021" component="TSMBootstrap" context="" type="0" thread="1572" file="tsmediawizardcontrol.cpp:1039"> <![LOG[Failed to query Management Point locator]LOG]!><time="17:00:38.460+480" date="04-16-2021" component="TSMBootstrap" context="" type="3" thread="1572" file="tsmediawizardcontrol.cpp:1039"> <![LOG[Exiting TSMediaWizardControl::GetPolicy.]LOG]!><time="17:00:38.460+480" date="04-16-2021" component="TSMBootstrap" context="" type="0" thread="1572" file="tsmediawizardcontrol.cpp:1482"> <![LOG[pWelcomePage->m_pTSMediaWizardControl->GetPolicy(), HRESULT=80004005 (tsmediawelcomepage.cpp,304)]LOG]!><time="17:00:38.460+480" date="04-16-2021" component="TSMBootstrap" context="" type="0" thread="1572" file="tsmediawelcomepage.cpp:304"> <![LOG[Setting wizard error: An error occurred while retrieving policy for this computer (0x80004005). For more information, contact your system administrator or helpdesk operator.]LOG]!><time="17:00:38.460+480" date="04-16-2021" component="TSMBootstrap" context="" type="0" thread="1476" file="tsmediawizardcontrol.cpp:1673"> <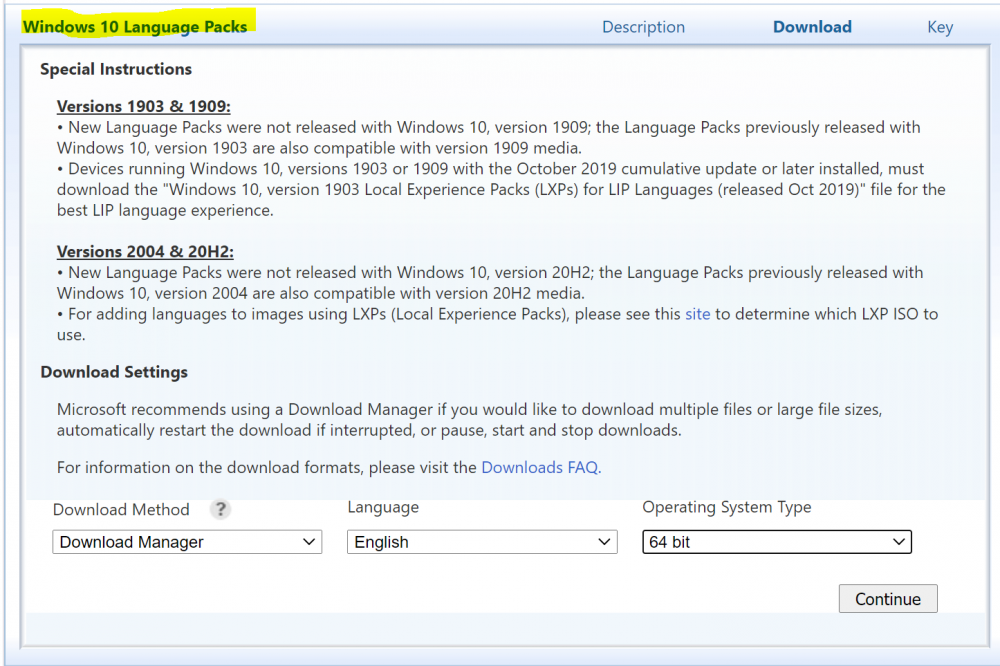
-
PXE Boot on current branch 2010
anyweb replied to Quinten's topic in System Center Configuration Manager (Current Branch)
did you distribute boot images to the pxe enabled dp ?