anyweb
-
Posts
9278 -
Joined
-
Last visited
-
Days Won
371
Everything posted by anyweb
-
sup requires a wsus backend but it must NOT be configured,. read the SUP guides here on the forums http://www.windows-noob.com/forums/index.php?/forum/66-software-update-point/ cheers niall
-
 have you correctly configured the boundaries for your site ?
 -
verify that the boot.wim file is the correct version after updating sccm to sp2. if it is, check to see if you have a bitlocker partition
-
what version of windows 7 is it ? where is it prompting you to create a user ? doesn't it join the domain ?
-
you have these errors over and over in the log these errors started 4th of november and are reoccuring ever since then... perhaps the permissions on c:\windows\temp\PXEbootfiles are wrong
-
Updating SCCM 2007 SP2 RC (or beta) to SP2 Final
anyweb replied to anyweb's topic in Configuration Manager 2007
does you boot image match the version listed above ? i just added command line support to my standard X86 boot image with no problem at all Success: Boot image to update: Microsoft Windows PE (x86) Success: Actions to perform: Add ConfigMgr binaries Enable Windows PE command line support Add drivers Success: Drivers that will be included: perhaps i should try the same on a boot image that had drivers imported into it -
Computerworld - Microsoft late on Friday confirmed that an unpatched vulnerability exists in Windows 7, but downplayed the problem, saying most users would be protected from attack by blocking two ports at the firewall. In a security advisory, Microsoft acknowledged that a bug in SMB (Server Message Block), a Microsoft-made network file- and print-sharing protocol, could be used by attackers to cripple Windows 7 and Windows Server 2008 R2 machines. The zero-day vulnerability was first reported by Canadian researcher Laurent Gaffie last Wednesday, when he revealed the bug and posted proof-of-concept attack code to the Full Disclosure security mailing list and his blog. According to Gaffie, exploiting the flaw crashes Windows 7 and Server 2008 R2 systems so thoroughly that the only recourse is to manually power off the computers. full story > http://www.computerworld.com/s/article/9140858/Microsoft_confirms_first_Windows_7_zero_day_bug
-
do you have SCCM 2007 SP2 installed ? you'll have to create a collection query for the windows 7 systems, like this.. select SMS_R_SYSTEM.ResourceID,SMS_R_SYSTEM.ResourceType,SMS_R_SYSTEM.Name,SMS_R_SYSTEM.SMSUniqueIdentifier,SMS_R_SYSTEM.ResourceDomainORWorkgroup,SMS_R_SYSTEM.Client from sms_r_system where OperatingSystemNameandVersion like '%Workstation 6.1%'
-
What is the right way to create collections for software deployment?
anyweb replied to Rajiv's question in Collections
in that particular example i would go for option 2 -
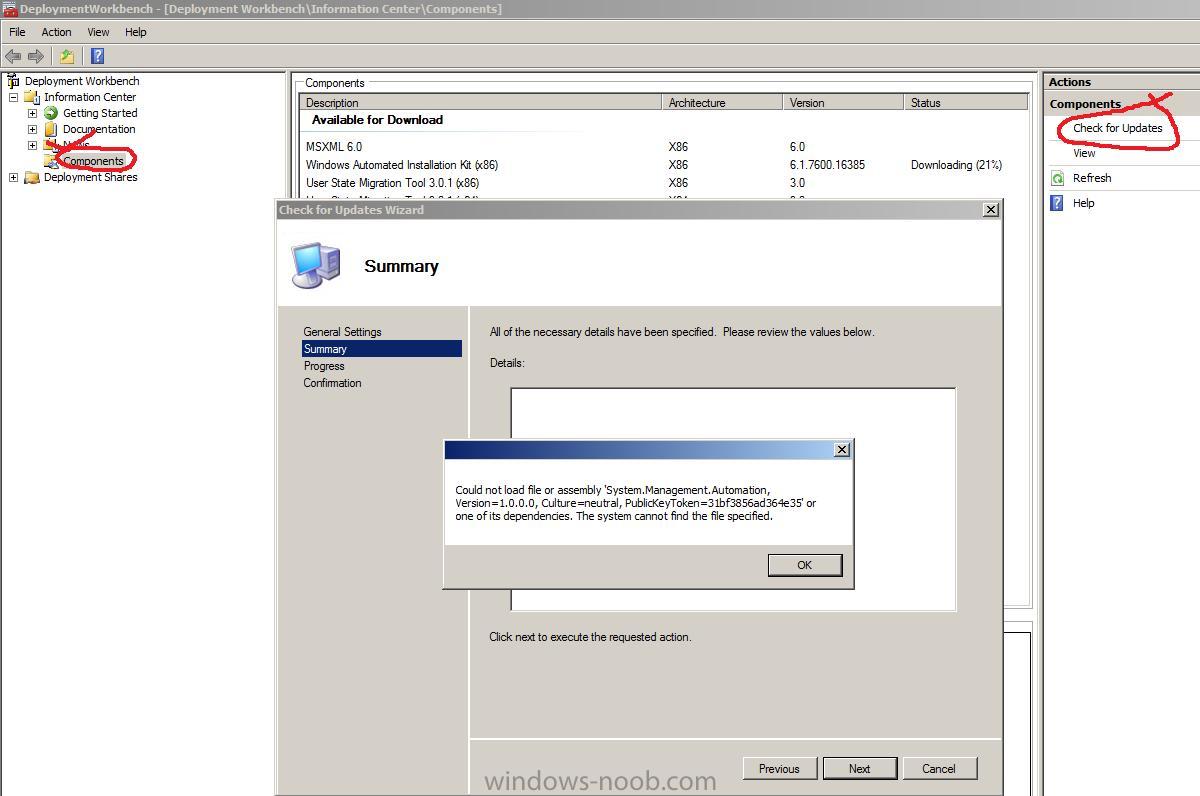
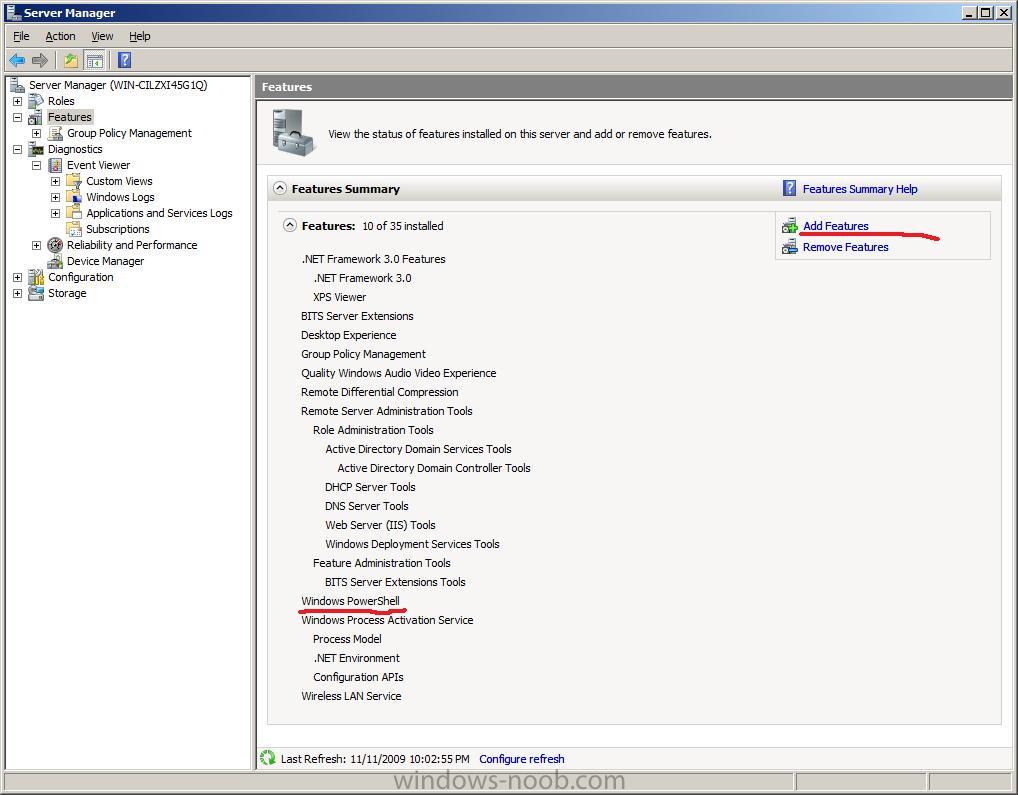
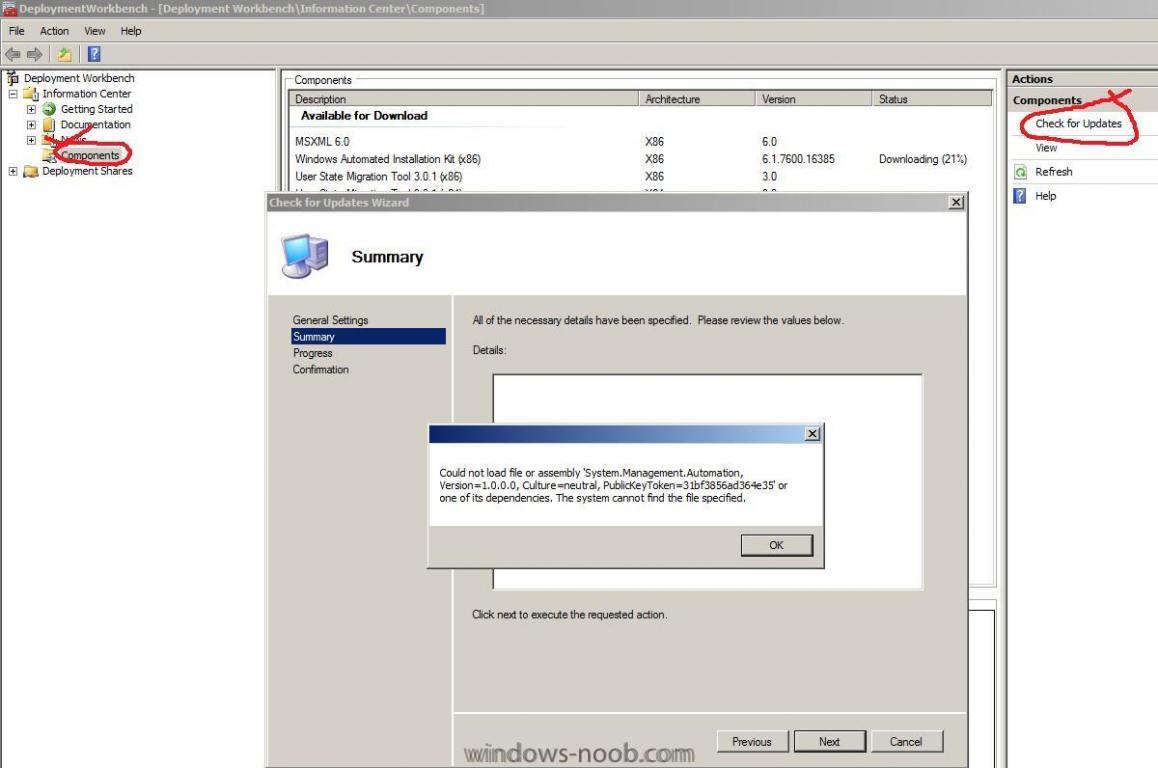
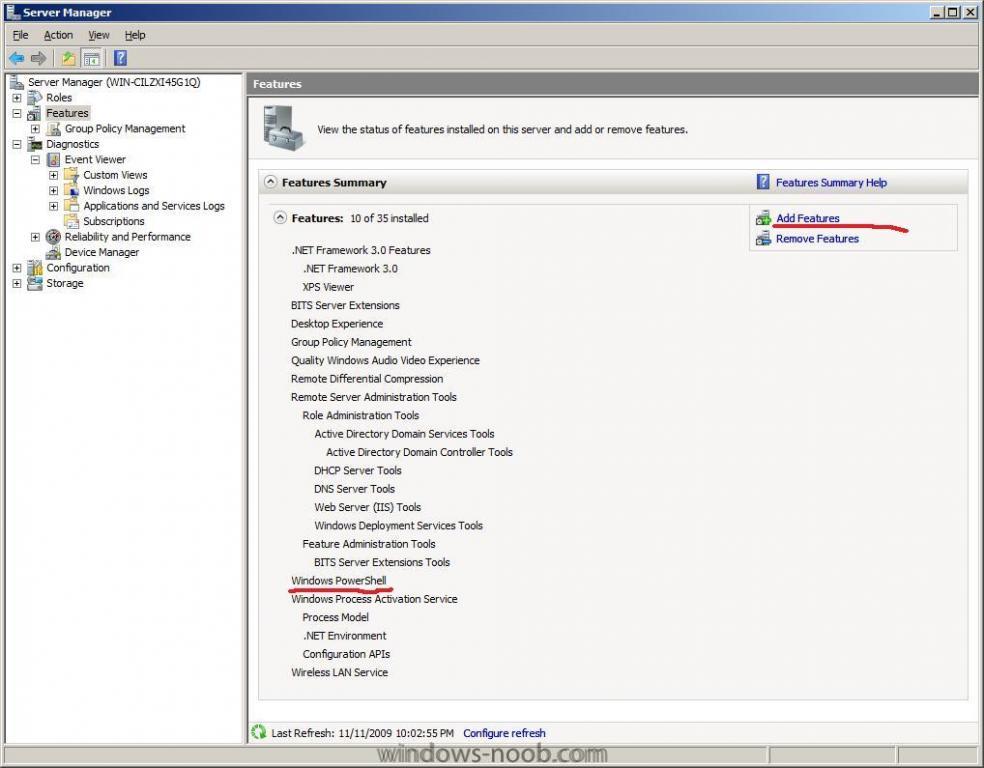
You've just installed SCCM 2007 SP2 and MDT 2010 and want to use MDT's features in SCCM so you try to create a Microsoft Deployment Toolkit task sequence, all goes well until the end of the task sequence when you get a bizarre error: As a quick test, start up Microsoft Deployment Toolkit 2010 and click on the Components node. Click on Check for Updates. If you get the same error repeated above (a few times followed by a missing key error) then you need to install Windows Powershell. Startup Server Manager, click on Features, Click on Add Features and select Windows Powershell. Once Windows Powershell is installed, close the MDT MMC and start it again. Do the Check For Updates test, if it works fine this time then your error creating the SCCM task sequence should also be resolved. cheers niall
-
if you delete that client from the All Systems collection and try again what happens
-
are you logged on with local admin permissions on that server ?
-
autodesk inventor 2009 deployement problem
anyweb replied to nizar's question in Deploy software, applications and drivers
can you include a zip file of your ccm logs in c:\windows\system32\ccm\logs -
Unless you're seriously into networking (and okay, maybe you are), all the features in the new Secure Remote Connection - not to mention the pieces required to make it work - can be fairly tough to figure out. But the benefits make sense: "With this feature," writes Steven Vaughan-Nichols, "a user on any Windows 7 system can gain access to the corporate intranet's resources. In short, with the right back-end setup you can run office-only programs and get to server-based files from any Windows 7 PC." He explains it all in Accessing Office Resources from Anywhere using Secure Remote Connection. via > http://www.osnews.com/story/22474/Explaining_Windows_7_s_Secure_Remote_Connection
-
autodesk inventor 2009 deployement problem
anyweb replied to nizar's question in Deploy software, applications and drivers
when you click on the popup what happens ? do you get an error? -
Deploying Multiple Packages With OS TS
anyweb replied to Robbie Wallis's question in Deploy software, applications and drivers
have you seen this ? does it help at all ? -
was MDT ever integrated with SCCM on this server ?
-
what os is the server running SCCM on and what version of sccm is this ?
-
is the WDS service started on the server hosting the PSP role ?
-
did you definetly make sure to update the dps with the newly updated boot image after installing SP2 ? is bitlocker enabled ?
-
Everyone loves a killer feature: that must-have capability or technology that prompts you to plunk down your hard-earned cash in an effort to upgrade your computing experience. In the case of Windows, there have been precious few versions that included a truly killer feature. Windows 3.1 was a killer version because it allowed PCs to finally break (or at least reduce the impact of) the dreaded 640K barrier. Windows NT was a killer version (at least for power users) because it introduced the concepts of client/server security and true, hardware-based memory protection to the environment. [ How to choose between 32-bit Windows 7 and 64-bit Windows 7. | Get InfoWorld's 21-page hands-on look at the new version of Windows, from InfoWorld’s editors and contributors. | Find out what's new, what's wrong, and what's good about Windows 7 in InfoWorld's "Windows 7: The essential guide." ] Windows XP was a killer version because it bridged the gap between the consumer (Windows 9x) and business (Windows NT) computing spaces. And though generally considered a flop, Vista was a killer version in that it forced the Windows ecosystem to evolve beyond the Windows XP paradigm and thus paved the way for Windows 7. Which brings me to my main point: Windows 7 is a killer version -- but not for the reasons you think. It's not because it fixes Vista's many faults -- it doesn't. Rather, it glosses them over with fresh paint and behavioral tricks. It's also not because of the new UI. Although I'm a huge fan of the new task-bar-driven interface, much of the underlying concept is merely a rip-off of the Mac's aging dock metaphor. And it's not because Windows 7 is somehow lighter than Vista -- testing shows it takes up about the same amount of RAM when executing an identical workload. full story > http://www.infoworld.com/d/windows/windows-7s-real-killer-feature-427?source=IFWNLE_nlt_entwindows_2009-11-04
-
Click-to-Run is a new technology Microsoft are introducing to allow you to test out Office 2010 quickly and easily, by literally streaming the app to your computer from the Internet into a virtualised space. This technology is one piece in Microsoft’s plan to make Office 2010 easier to obtain, including Office 2010 starter, an advert-supported, crippled version being sold to OEMs Click-to-Run is designed to sweeten the experience of trying and buying Office by avoiding a lengthy download and multi-step unpacking / installing process. Click-to-Run always sends you the latest up to date version, so you don’t need to download update after update, even after you’ve installed Office. The software delivered by Click-to-Run is also virtualised so that you can cleanly run it side by side with other versions of Office software to evaluate changes. more > http://www.osnews.com/story/22449/Click-to-Run_Streaming_Microsoft_Office_2010_
-
autodesk inventor 2009 deployement problem
anyweb replied to nizar's question in Deploy software, applications and drivers
its the apps size that is your problem, most likely bigger than your sccm cache on the local machine, choose to 'Run from Distribution point' -
autodesk inventor 2009 deployement problem
anyweb replied to nizar's question in Deploy software, applications and drivers
how big is the app, you could change the advertisement to Run from Distribution Point instead of download..... -
i believe it is, please go ahead and configure things and let us know how you get on, the only thing i think that may cause you issues is how to set DHCP scope options 66 and 67 cheers niall