anyweb
-
Posts
9271 -
Joined
-
Last visited
-
Days Won
371
Everything posted by anyweb
-
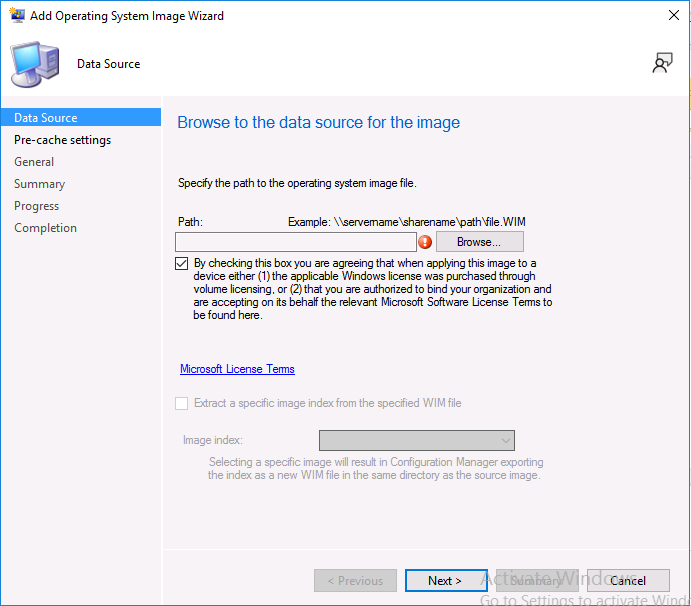
ok it seems that it's a bug, but the button IS there you just can't see it, try this > use Tab to navigate and hit the Enter to launch the selection dialog, or you could use English version console to launch the wizard.
-
first things first, why do you want to revert ?
-
are you remoted to a console for this ? can you try and increase the native resolution of the console to see if the browse button shows up ? this is how it should look, you will need to select the checkbox also
-
ok i will ask the PG for comment and come back to you
-
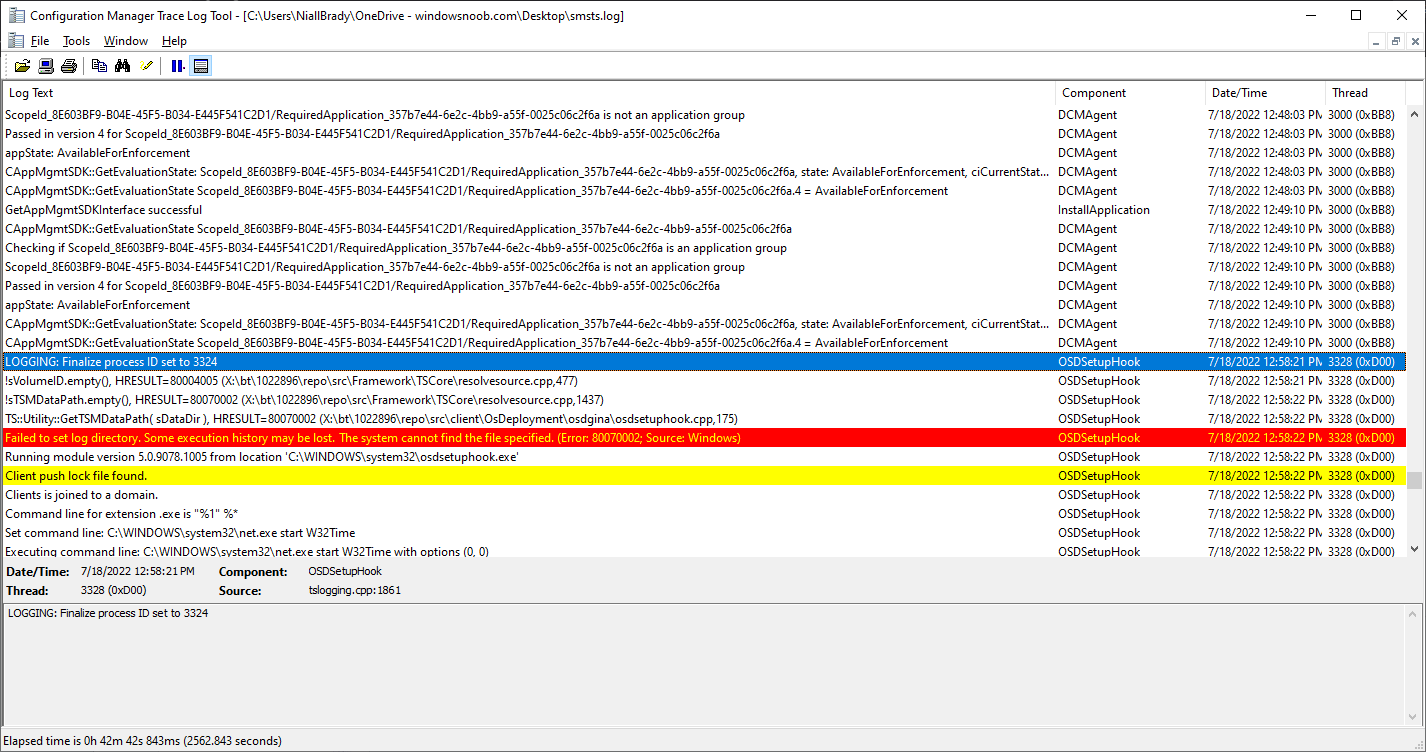
and this worked perfectly before you upgraded to 2203 as the same user ? is the provided smsadminui.log from when the problem occurred ?
-
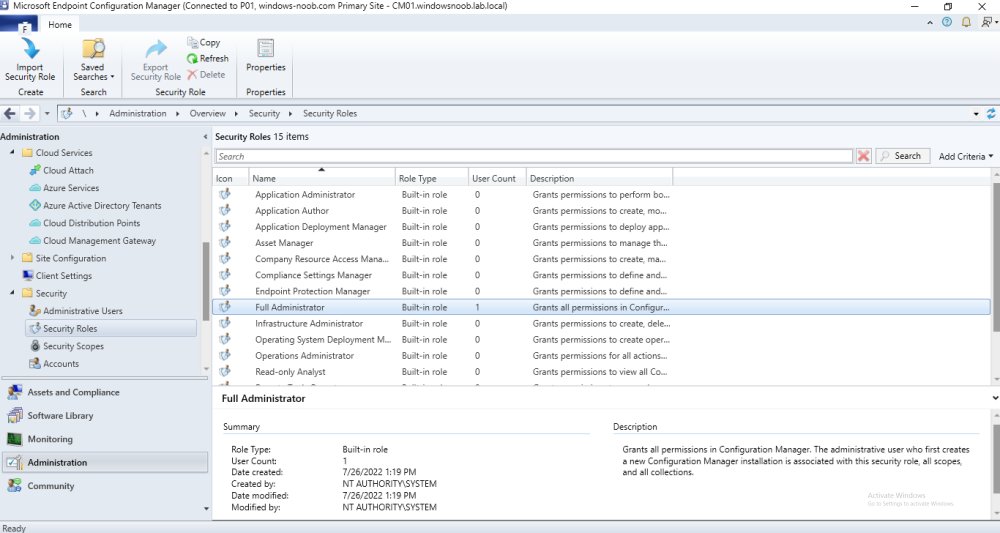
i meant if the user you were logged onto the console with has the Full Administrator role in SCCM like this...
-

Getting started with Windows 365 - Part 1. Introduction
anyweb replied to anyweb's topic in Windows 365
if you mean the remaining blog posts in the series, they'll come as we add them, each takes days (or weeks) to research and put together, but we'll try and be timely -
is your role a full administrator ?
-
what media are you using ? i'll remind you of this bit.. Requirements The method requires that you use the English (En-US) version of Windows 10 as delivered from your OEM. If any other language is applied from the factory then it might cause some of the logic to fail. If you do go down that route, then you'll need to prepare language specific versions of the zonemapping.csv and other files as necessary. So let's get started. You can always install language packs later.
-
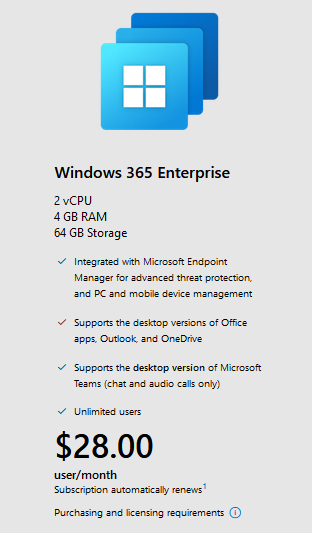
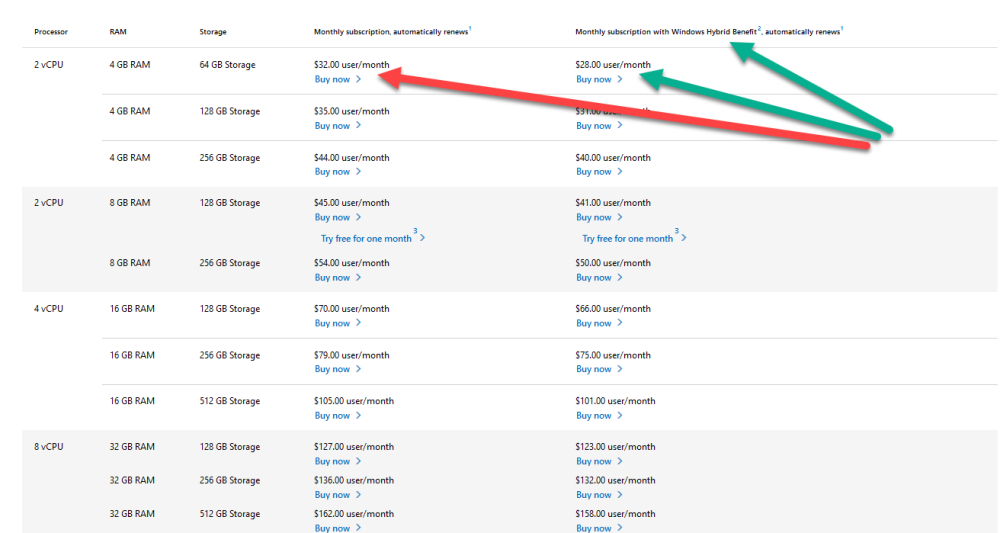
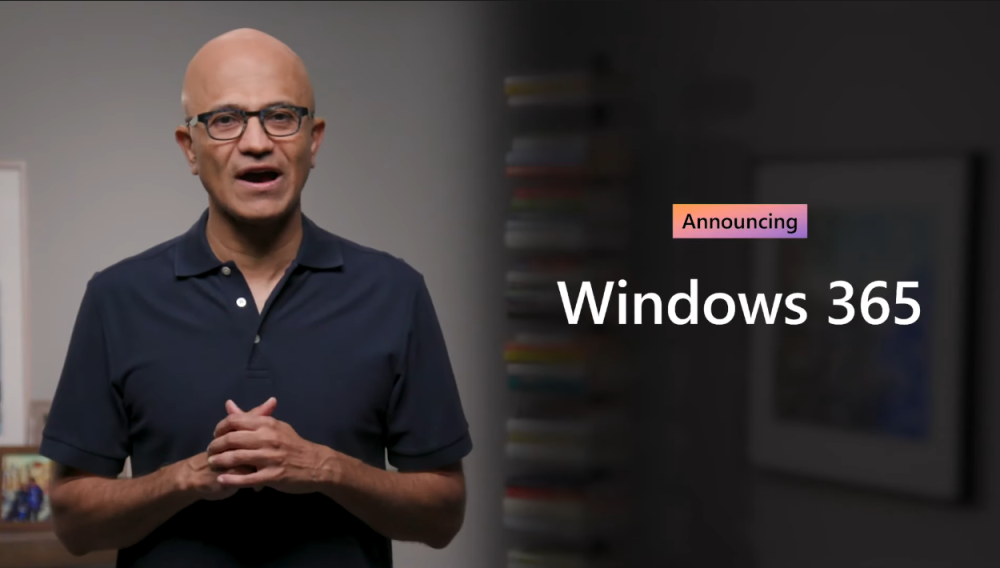
Introduction This is Part 1 in a new series of guides about getting started with Windows 365. This series of guides will help you to learn all about Windows 365 in a clear and insightful way. This series is co-written by Niall & Paul, both of whom are Enterprise Mobility MVP’s with broad experience in the area of modern management. At the time of writing, Paul is a 6 times Enterprise Mobility MVP based in the UK and Niall is a 12 times Enterprise Mobility MVP based in Sweden. In this series we aim to cover everything we learn about Windows 365 and share it with you to help you to deploy it safely and securely within your own organization. This part will focus on an introduction about what Windows 365 actually is, selecting the right edition with the level of management that you need, choosing the plan that suits your users needs at a cost you can afford, or modifying the configuration to make it more suited to individual needs, purchasing licenses and saving money for your organization via the Windows Hybrid Benefit. Below you can find all parts in this series: Getting started with Windows 365 - Part 1. Introduction <- you are here Getting started with Windows 365 - Part 2. Provisioning an Azure Ad Joined Cloud PC Getting started with Windows 365 - Part 3. Provisioning a Hybrid Azure Ad Joined Cloud PC Getting started with Windows 365 - Part 4. Connecting to your Cloud PC Getting started with Windows 365 - Part 5. Managing your Cloud PC Getting started with Windows 365 - Part 6. Point in time restore Getting started with Windows 365 - Part 7. Patching your Cloud PCs with Windows Autopatch Getting started with Windows 365 - Part 8. Windows 365 boot Getting started with Windows 365 - Part 9. Windows 365 switch Getting started with Windows 365 - Part 10. Windows 365 offline In this part we'll cover the following: What is Windows 365 ? What editions are available ? What plans are available ? Configuring your own plan How do I purchase licenses ? Saving money with Windows Hybrid Benefit Recommended reading Get involved What is Windows 365 ? Windows 365 was introduced just over a year ago in July 2021 by Satya Nadella during the Microsoft Inspire Keynote. It was released to the public (General Availability) August 2nd, 2021. Windows 365 is a Cloud PC that runs in Microsoft's cloud and can be either Azure AD joined or Hybrid Azure AD joined. Windows 365 can be connected to from any device as long as it's HTML 5 capable. There is no need for any extra client agent. According to the official Microsoft Windows 365 FAQ (we've marked the important bits in bold) it is: As long as your device has a web browser that is HTML 5 capable then you'll be able to use a Cloud PC. That device could be iOS, Android, Linux, Mac or Windows 10 or Windows 11. There is no need for any additional Virtual Desktop Infrastructure (VDI) resources or expertise as it's all available via a web browser URL and manageable via the Admin controls (Business edition) or via Microsoft Endpoint Manager (Enterprise edition). A Cloud PC has several positives including the ability to access the Cloud PC from any device and from anywhere, it's secure as the business data contained within stays in the Cloud, and the cost is predictable. Microsoft have also recently released a new video celebrating one year with Windows 365 here and it highlighted new features that were added over the last year based on customer feedback. in addition the video revealed that the following new abilities are coming soon... Windows 365 Boot Windows 365 Switch Windows 365 Offline What editions are available ? At the time of writing there are currently 2 editions, listed below. Windows 365 Business (select this if your businesses has up to 300 users, comes with basic management) Windows 365 Enterprise (select this for unlimited users and full management with MEM) These two editions also differ based on the type of management available, so if you need to manage your Cloud PC's using Microsoft Endpoint Manager (Intune) then the Enterprise edition is for you otherwise you'll have only basic management available via the web browser session with the Business edition. What plans are available ? By default there are currently 3 plans offered for both Business and Enterprise editions. Basic Standard Premium These are pre-configured templates of Cloud PC's that should be enough for most people, the price increases as you move from Basic to Premium. These versions may not be what you actually want or need, in that case you should configure your own. Configuring your own plan You can of course configure your own by clicking on the Configure your Cloud PC link based on the edition of Windows 365 that you selected. Configure your Cloud PC - Business Configure your Cloud PC - Enterprise Once you choose to manually configure your Cloud PC the options available and the price per user per month shown to the right change depending on what you click on. For example, if you wanted the lowest possible config, then select 2 vCPU, 4GB RAM and 64GB storage, that'll come to only 28$ per user, per month (at the time of writing). Conversely, if you max out on all the options available (at the time of writing) and order a 8 vCPU, 32GB RAM and 512GB storage then it'll cost you 158$ per user, per month. How do I purchase licenses ? After picking the plan that is right for your users, you can purchase licenses for Windows 365 directly from https://www.windows365.com or via your Microsoft Sales rep or Microsoft Partner. Saving money with Windows Hybrid Benefit To get more details about all available pricing/plans and price reductions for Windows 365 see here. Take note of the ability to reduce the price based on something called Windows Hybrid Benefit. This benefit requires the following: Windows Hybrid Benefit is available to Windows 365 Business customers who have devices with valid Windows 11 Pro or Windows 10 Pro licenses. Each person assigned a Windows 365 Business license with a Windows Hybrid Benefit license must be the primary user of a Windows 11 Pro or Windows 10 Pro licensed device, and that device must be their primary work device. To maintain your discounted pricing, during any subscription term in which you access the Windows 365 service, you must also access the service from your Windows 11 Pro or Windows 10 Pro licensed device at least once during that same term. So if your users are using a Mac, iOS, Android or Linux device with a HTML 5 capable browser, then they do not qualify for the Windows Hybrid Benefit. Likewise, this is only for Windows 365 Business customers and is therefore not applicable to Windows 365 Enterprise customers. Recommended reading Windows 365 - https://windows365.com Windows 365 Trial - https://aka.ms/CPCTrial Windows 365 Overview - What is Windows 365 Enterprise? | Microsoft Docs Windows 365 Requirements - Windows 365 requirements | Microsoft Docs Announcing the General Availability of Windows 365 - https://techcommunity.microsoft.com/t5/windows-it-pro-blog/announcing-the-general-availability-of-windows-365/ba-p/2595481 Windows 365 FAQ - https://www.microsoft.com/en-us/windows-365/faq Windows 365 editions - https://www.microsoft.com/en-us/windows-365?ms.url=w365&rtc=1 Windows 365 pricing plans - https://www.microsoft.com/en-us/windows-365/all-pricing?pricing-tab=1 Getting started with a Windows 365 POC - https://techcommunity.microsoft.com/t5/manufacturing/getting-started-with-a-windows-365-poc/ba-p/3060929 Windows 365 Admin setup and management - https://techcommunity.microsoft.com/t5/microsoft-mechanics-blog/windows-365-admin-setup-and-management-tutorial-for-cloud-pcs/ba-p/2598140#M72 Hybrid Identity - What is hybrid identity with Azure Active Directory? - Microsoft Entra | Microsoft Docs Get Involved If you'd like to provide feedback directly to Microsoft or ask questions about problems you've encountered then use the links below, alternatively you can post it here on windows-noob in the Windows 365 forum and we'll help you with it. Windows 365 Feedback - https://aka.ms/W365Feedback Windows 365 Technical Channel - https://aka.ms/W365TC That's all for this blog post, please join us in Part 2 where we will assign licenses to users and provision a Cloud PC.


-
Can you believe it's here again? SysAdmin Day is back, and with it comes endless gratitude for all the great SysAdmins who support us 24/7. For all the times you've prevented disasters and saved us from catastrophes, for all the hard work and patience, we, the Altaro Backup team, want to say a big thank you! If you use Microsoft 365/Office 365, Hyper-V or VMware, celebrate with us. All you have to do is sign up for a 30-day free trial of either Altaro VM Backup or Altaro Office 365 Backup – it's your choice! What can you win? · Receive a guaranteed $20 Amazon gift voucher when you sign up for and use the trial of Altaro Office 365 Backup or Altaro VM Backup · Get a chance to WIN one of our Grand Prizes by completing the following sentence: "You know you're a SysAdmin when…"! What are you waiting for? Sign up now!

-
New sccm site showing warning
anyweb replied to lalajee's topic in System Center Configuration Manager (Current Branch)
why would you delete it ? I thought you were setting up a new site, is there already an existing site ? -
New sccm site showing warning
anyweb replied to lalajee's topic in System Center Configuration Manager (Current Branch)
-
New sccm site showing warning
anyweb replied to lalajee's topic in System Center Configuration Manager (Current Branch)
read through my guide it covers at least one of your issues. -
New sccm site showing warning
anyweb replied to lalajee's topic in System Center Configuration Manager (Current Branch)
follow this series of guides (replace 1902 with 2203) and you'll be fine... -
The task sequence error cannot be executed
anyweb replied to zhangyongcheng's topic in Configuration Manager 2012
you are welcome, 1. the official docs are the place to start https://docs.microsoft.com/en-us/mem/configmgr/ 2. as long as it's Current Branch, you can upgrade in increments via the console, to upgrade follow the advice from my old post here 3. I'm not sure what scripts you are referring to... -
The task sequence error cannot be executed
anyweb replied to zhangyongcheng's topic in Configuration Manager 2012
dns is needed by the client(s) and servers so that they can all communicate with each other, for example the clients need to send state messages to the Management Point, aside from this, a network (whether LAB or Production) should always have working DNS otherwise you'll have problems with pretty much everything -
The task sequence error cannot be executed
anyweb replied to zhangyongcheng's topic in Configuration Manager 2012
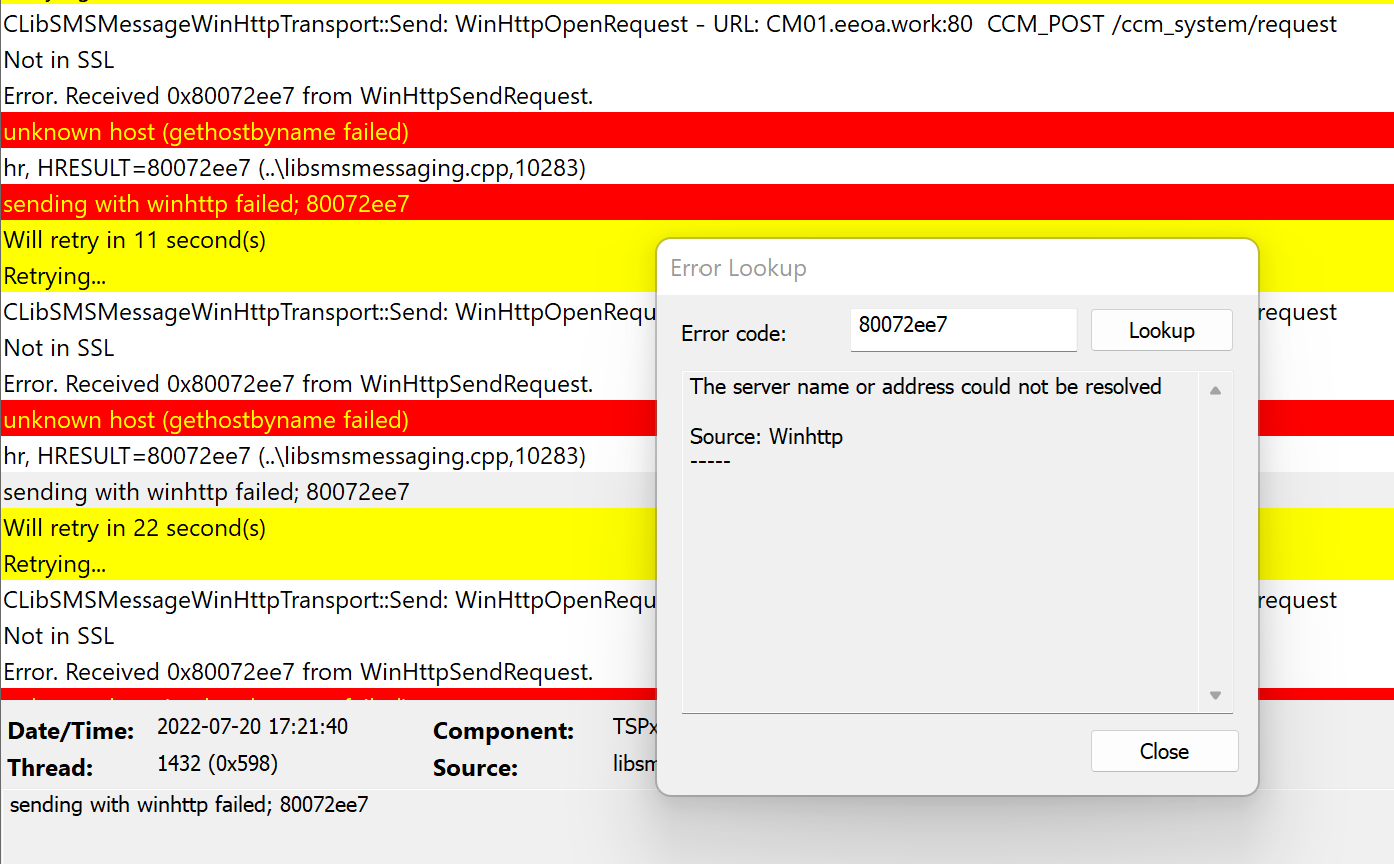
ok it looks very like a DNS issue to me verify that DNS is working before trying again, you can do simple ping tests to the servers in question from a cmd prompt, or tracert/nslookup tests.
-
try it again now
-
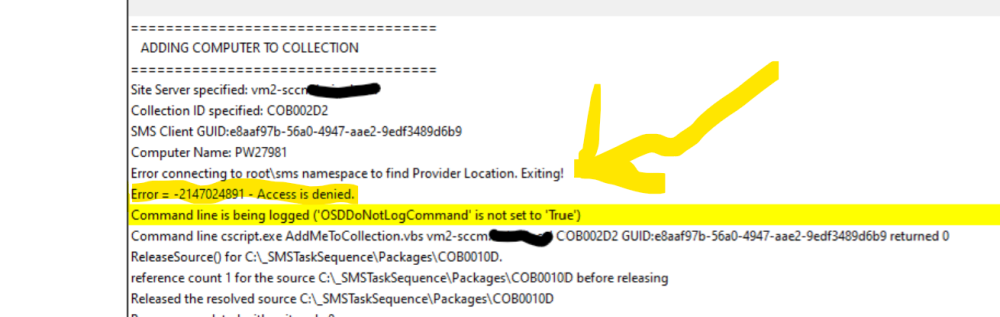
looking at your error, the actual problem is connecting to the root\sms namespace to find the provider location take a look at this see does it give you some pointers https://docs.microsoft.com/en-us/troubleshoot/windows-server/system-management-components/sms-administrator-console-connectivity-issue if it doesn't help try disabling the DCOM hardening. https://support.microsoft.com/en-us/topic/kb5004442-manage-changes-for-windows-dcom-server-security-feature-bypass-cve-2021-26414-f1400b52-c141-43d2-941e-37ed901c769c
-
yup please share the script and i can test it in my lab, if you want email it to me niall@windows-noob.com
-
Free report: Managing risks and costs at the edge
anyweb posted a topic in Official Forum Supporters
New research shows 50% of endpoints are at risk 600 CISOS, IT SecOps Directors, and Managers report that almost half of devices are vulnerable to attack because they are undetected by IT or have outdated operating systems. Thousands if not hundreds of thousands of devices at the edge need to work securely no matter where they are. But three significant factors are standing in the way: Device proliferation: 61% of respondents say distribution points have increased in the past 2 years and only 33% are confident they can reduce that sprawl. An expanding threat landscape: Only 39% of respondents believe their organizations are effective at preventing and detecting endpoint attacks. Rapid decentralization: 57% of IT professionals say that a remote workforce has made it difficult to deliver necessary security updates and patches to endpoints. So why is it that despite the average $4.3 million IT budget dedicated to endpoint protection ($31.50/endpoint) do only 34% of organizations have enough resources to minimize endpoint risk? The speed and scalability of their endpoint management solutions have everything to do with it. Get over 50 pages of peer insights in this year's Managing Risks and Costs at the Edge report from Ponemon Institute and Adaptiva.
-
is the password defined in a variable in the task sequence, if so, re-enter it
-
The task sequence error cannot be executed
anyweb replied to zhangyongcheng's topic in Configuration Manager 2012
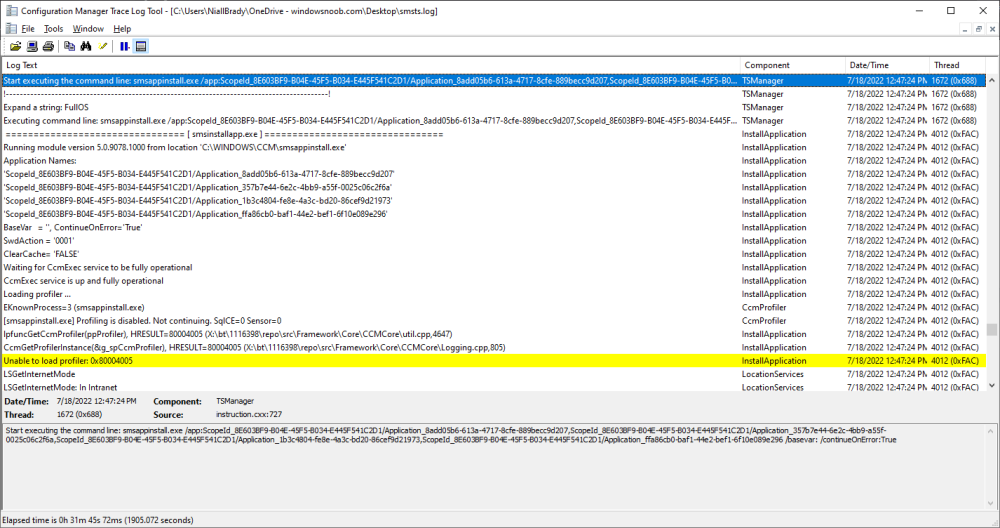
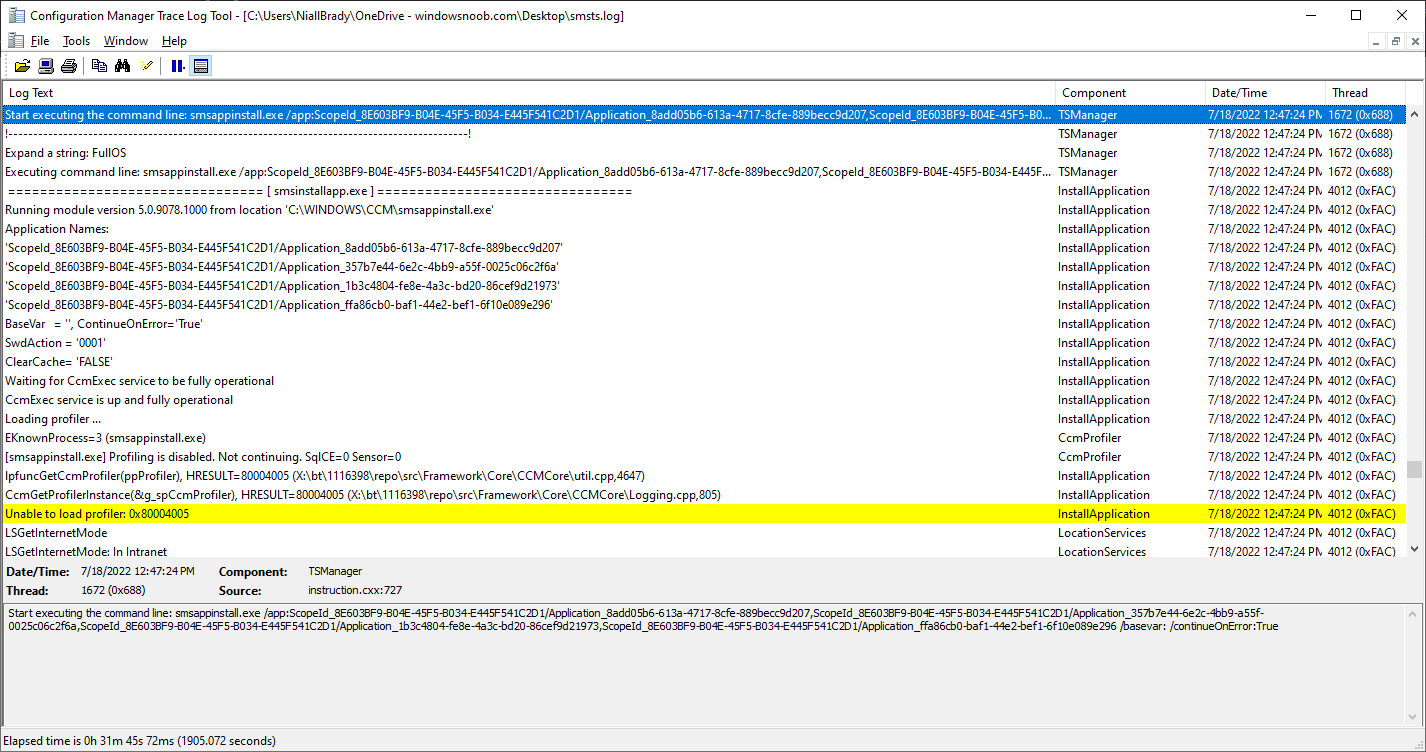
can you please attach the entire smsts.log file here so we can see what is failing ? -
the last step it runs is installing some applications, Installing application 'Base Office 365 2019 v1902_SA_(Build 14131-20278)' does this app restart the computer unexpectedly ? after that it seems to have issues, i'm guessing your step occurs after this point ? can we see a screenshot of your task sequence with the step you are expecting to run ?