anyweb
-
Posts
9270 -
Joined
-
Last visited
-
Days Won
371
Everything posted by anyweb
-
 do you see any value in the registry key mentioned in the script ?
 -
glad to hear it worked, what error did you get in PowerShell ISE as a matter of interest ?
-
1802 upgrade stuck at replication
anyweb replied to amit paul's topic in System Center Configuration Manager (Current Branch)
you still have these issues, and until they are fixed there's no point trying to upgrade CONFIGURATION_MANAGER_UPDATE service is starting... $$<CONFIGURATION_MANAGER_UPDATE><08-21-2018 15:29:46.024+240><thread=2868 (0xB34)> Microsoft System Center Configuration Manager v5.00 (Build 8540) $$<CONFIGURATION_MANAGER_UPDATE><08-21-2018 15:29:46.024+240><thread=2868 (0xB34)> Process ID: 2844 $$<CONFIGURATION_MANAGER_UPDATE><08-21-2018 15:29:46.024+240><thread=2868 (0xB34)> Worker thread ID: 2868 $$<CONFIGURATION_MANAGER_UPDATE><08-21-2018 15:29:46.024+240><thread=2868 (0xB34)> Inbox source is local on abc.com $$<CONFIGURATION_MANAGER_UPDATE><08-21-2018 15:29:46.024+240><thread=2868 (0xB34)> Set inbox to C:\Program Files\Microsoft Configuration Manager\inboxes\cmupdate.box $$<CONFIGURATION_MANAGER_UPDATE><08-21-2018 15:29:46.024+240><thread=2868 (0xB34)> This running on active site server abc.com. $$<CONFIGURATION_MANAGER_UPDATE><08-21-2018 15:29:46.024+240><thread=2868 (0xB34)> Inbox source is local on abc.com $$<CONFIGURATION_MANAGER_UPDATE><08-21-2018 15:29:46.040+240><thread=2868 (0xB34)> *** [28000][18456][Microsoft][SQL Server Native Client 11.0][SQL Server]Login failed for user 'NT AUTHORITY\SYSTEM'. $$<CONFIGURATION_MANAGER_UPDATE><08-21-2018 15:29:46.165+240><thread=2868 (0xB34)> *** [42000][4060][Microsoft][SQL Server Native Client 11.0][SQL Server]Cannot open database "CM_MDC" requested by the login. The login failed. $$<CONFIGURATION_MANAGER_UPDATE><08-21-2018 15:29:46.165+240><thread=2868 (0xB34)> *** [28000][18456][Microsoft][SQL Server Native Client 11.0][SQL Server]Login failed for user 'NT AUTHORITY\SYSTEM'. $$<CONFIGURATION_MANAGER_UPDATE><08-21-2018 15:29:46.181+240><thread=2868 (0xB34)> *** [42000][4060][Microsoft][SQL Server Native Client 11.0][SQL Server]Cannot open database "CM_MDC" requested by the login. The login failed. $$<CONFIGURATION_MANAGER_UPDATE><08-21-2018 15:29:46.181+240><thread=2868 (0xB34)> *** Failed to connect to the SQL Server, connection type: SMS ACCESS. $$<CONFIGURATION_MANAGER_UPDATE><08-21-2018 15:29:46.181+240><thread=2868 (0xB34)> ExecuteSqlCMUpdateInitScripts: Can't get SQL connection $$<CONFIGURATION_MANAGER_UPDATE><08-21-2018 15:29:46.181+240><thread=2868 (0xB34)> *** [28000][18456][Microsoft][SQL Server Native Client 11.0][SQL Server]Login failed for user 'NT AUTHORITY\SYSTEM'. $$<CONFIGURATION_MANAGER_UPDATE><08-21-2018 15:29:46.196+240><thread=2868 (0xB34)> *** [42000][4060][Microsoft][SQL Server Native Client 11.0][SQL Server]Cannot open database "CM_MDC" requested by the login. The login failed. $$<CONFIGURATION_MANAGER_UPDATE><08-21-2018 15:29:46.196+240><thread=2868 (0xB34)> *** [28000][18456][Microsoft][SQL Server Native Client 11.0][SQL Server]Login failed for user 'NT AUTHORITY\SYSTEM'. $$<CONFIGURATION_MANAGER_UPDATE><08-21-2018 15:29:46.196+240><thread=2868 (0xB34)> *** [42000][4060][Microsoft][SQL Server Native Client 11.0][SQL Server]Cannot open database "CM_MDC" requested by the login. The login failed. $$<CONFIGURATION_MANAGER_UPDATE><08-21-2018 15:29:46.196+240><thread=2868 (0xB34)> *** Failed to connect to the SQL Server, connection type: SMS ACCESS. $$<CONFIGURATION_MANAGER_UPDATE><08-21-2018 15:29:46.196+240><thread=2868 (0xB34)> ERROR: Can not get InstallationType from SetupInfo $$<CONFIGURATION_MANAGER_UPDATE><08-21-2018 15:29:46.196+240><thread=2868 (0xB34)> Failed to initialize. -
1802 upgrade stuck at replication
anyweb replied to amit paul's topic in System Center Configuration Manager (Current Branch)
and if it's stuck on the upgrade then once again, share the logs (cmupdate.log)... -
1802 upgrade stuck at replication
anyweb replied to amit paul's topic in System Center Configuration Manager (Current Branch)
try restarting sms_executive and see does it kick into action -
1802 upgrade stuck at replication
anyweb replied to amit paul's topic in System Center Configuration Manager (Current Branch)
so are you still getting the errors ? is SQL on the same box as the primary or is SQL remote ? -
1802 upgrade stuck at replication
anyweb replied to amit paul's topic in System Center Configuration Manager (Current Branch)
does NT Authority\System have dbo connect permission in SQL ? -
1802 upgrade stuck at replication
anyweb replied to amit paul's topic in System Center Configuration Manager (Current Branch)
this is the most recent failure. System cannot connect to SQL, start troubleshooting it - https://support.microsoft.com/en-us/help/4009936/solving-connectivity-errors-to-sql-server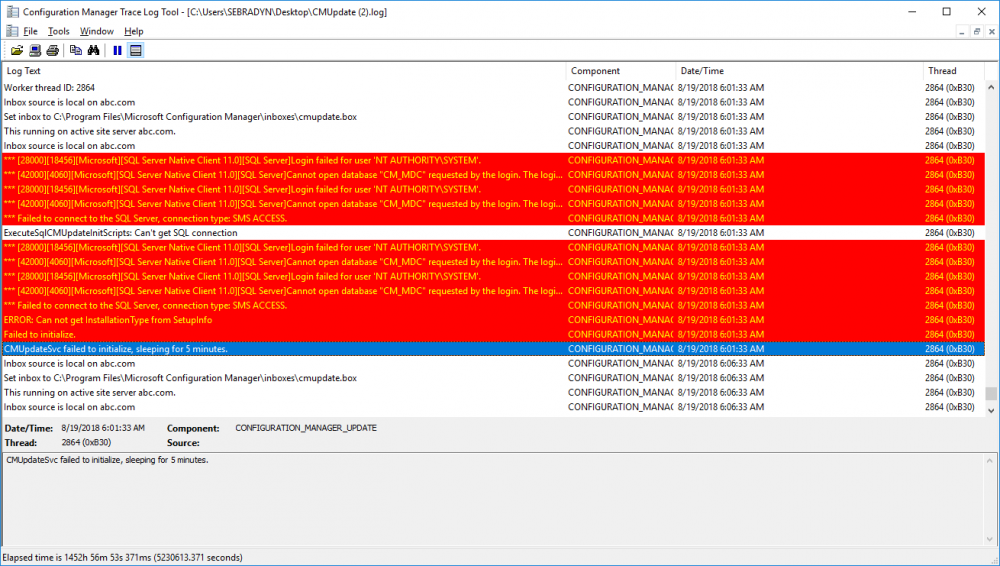
-
1802 upgrade stuck at replication
anyweb replied to amit paul's topic in System Center Configuration Manager (Current Branch)
from the log there are several reports of SQL access issues, double check your permissions before trying again. *** [42000][4060][Microsoft] [SQL Server]Cannot open database "CM_MDC" requested by the login. The login failed.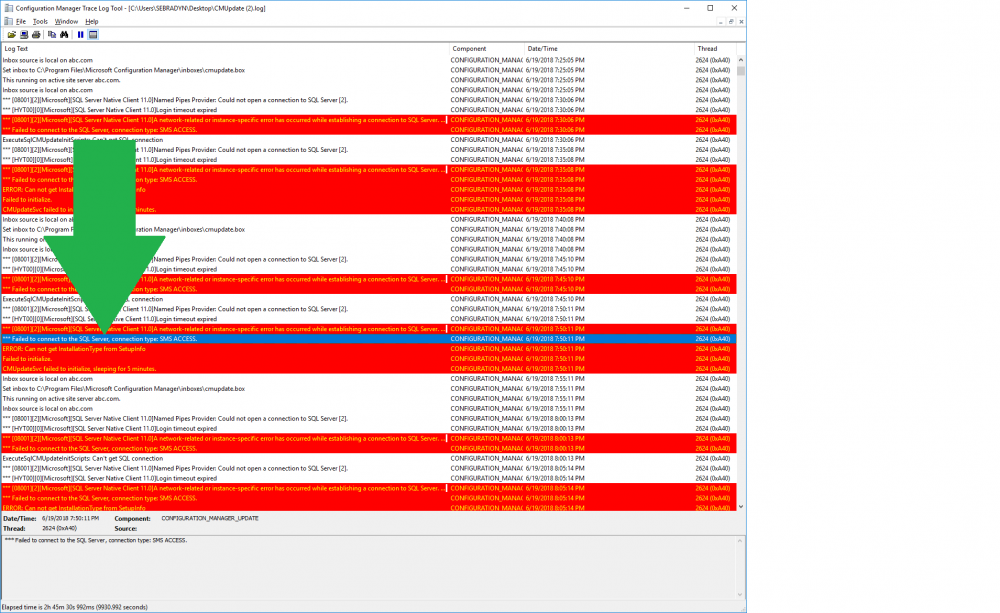
-
1802 upgrade stuck at replication
anyweb replied to amit paul's topic in System Center Configuration Manager (Current Branch)
please attach your cmupdate.log.... -
have you made sure it's got the latest bios ?
-
can you explain what you mean by " due to home lab situation. "
-
I assume you upgraded the CAS first and then the PRI, are there any errors at all in the cmupdate.log that you think may be important on either site ?
-
if i have the energy and time this week (doubt it) I might try and test this for you...
-
nope haven't had time yet, what if anything do the logs tell you ? what adk are you using ?
-
hi are you seeing this after completing my 8 part lab ?, I've booted mine up, and verified on the IssuingCA as EntAdmin with pkiview that everything looks good, and it still does after leaving it running for a day, i'd suggest you start at the beginning again and work your way through it, it's a good exercise anyway, take snapshots after completing each Part, so that you can always revert if there's an issue later.
-
4gb should be ok but i would put a pause before the install offline language step and after to analyze logs to see what's happening.. here's one way - also try and move to a supported scenario, as it's impossible to say if this is because you are running unsupported right now...without me too trying it, and i don't have time, sorry
-
hmm you are using adk 1803 to deploy windows 10 1607 images ? i don't think that's supported, but aside from that, how much ram is in these computers and have you also updated the mdt integration to a newer release ? are you really still deploying windows 10 1607 it's eol in November
-
did you try rebooting the cas & pri to see if it makes any difference ?
-
take a look at this old post to give you some ideas of where you are going wrong
-
yes you can do that, but if you are installing more than one language then you must include all the language packs you intend to install together
-
Microsoft has introduced support for the Web Authentication specification in Microsoft Edge, enabling better, more secure user experiences and a passwordless experience on the web. With Web Authentication, Microsoft Edge users can sign in with their face, fingerprint, PIN, or portable FIDO2 devices, leveraging strong public-key credentials instead of passwords. A web without passwords Staying secure on the web is more important than ever. We trust web sites to process credit card numbers, save addresses and personal information, and even to handle sensitive records like medical information. All this data is protected by an ancient security model—the password. But passwords are difficult to remember, and are fundamentally insecure—often re-used, and vulnerable to phishing and cracking. For these reasons, Microsoft has been leading the charge towards a world without passwords, with innovations like Windows Hello biometrics and pioneering work with the FIDO Alliance to create an open standard for passwordless authentication – Web Authentication. We started this journey in 2016, when we shipped the industry’s first preview implementation of the Web Authentication API in Microsoft Edge. Since then, we have been updating our implementation to as we worked with other vendors and the FIDO alliance to develop the standard. In March, the FIDO Alliance announced that the Web Authentication APIs have reached Candidate Recommendation (CR) status in the W3C, a major milestone for the maturity and interoperability of the specification. Authenticators in Microsoft Edge Beginning with build 17723, Microsoft Edge supports the CR version of Web Authentication. Our implementation provides the most complete support for Web Authentication to date, with support for a wider variety of authenticators than other browsers. Windows Hello allows users to authenticate without a password on any Windows 10 device, using biometrics—face and fingerprint recognition—or a PIN number to sign in to web sites. With Windows Hello face recognition, users can log in to sites that support Web Authentication in seconds, with just a glance. Users can also use external FIDO2 security keys to authenticate with a removable device and your biometrics or PIN. For websites that are not ready to move to a completely passwordless model, backwards compatibility with FIDO U2F devices can provide a strong second factor in addition to a password. via > https://blogs.windows.com/msedgedev/2018/07/30/introducing-web-authentication-microsoft-edge
-
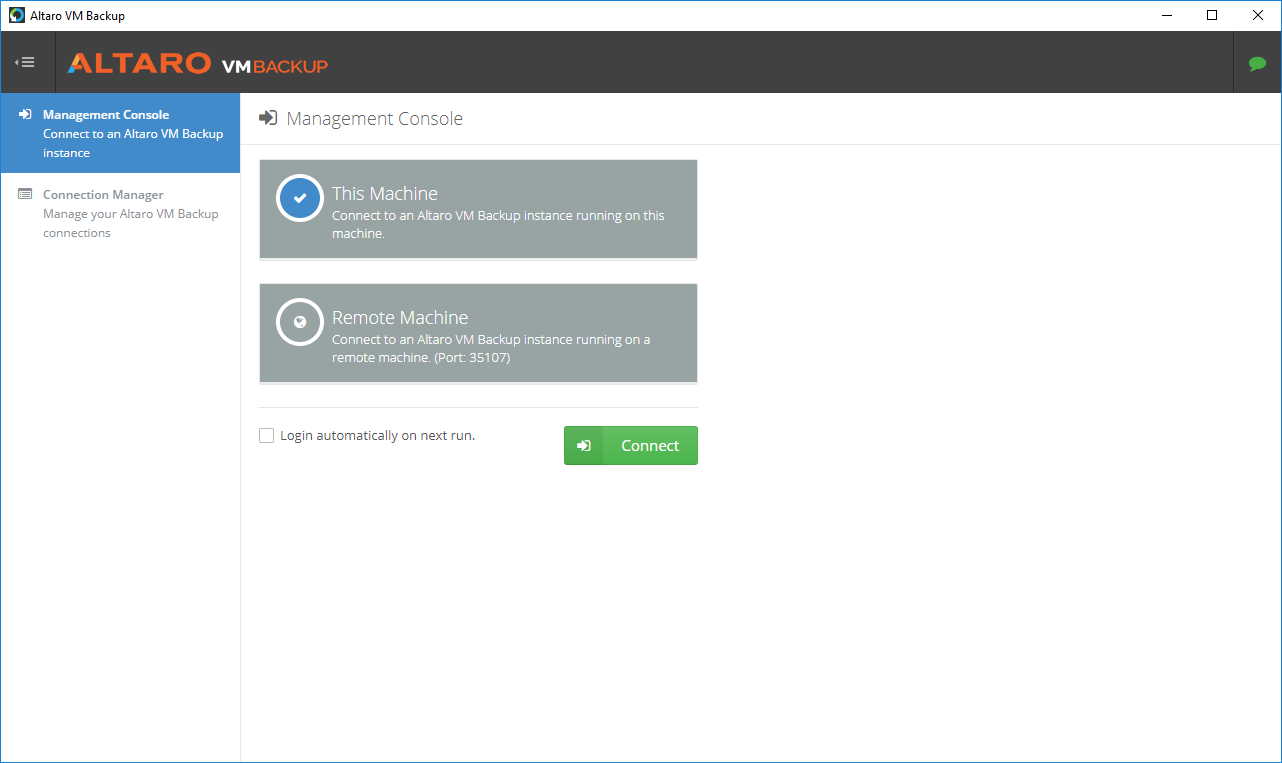
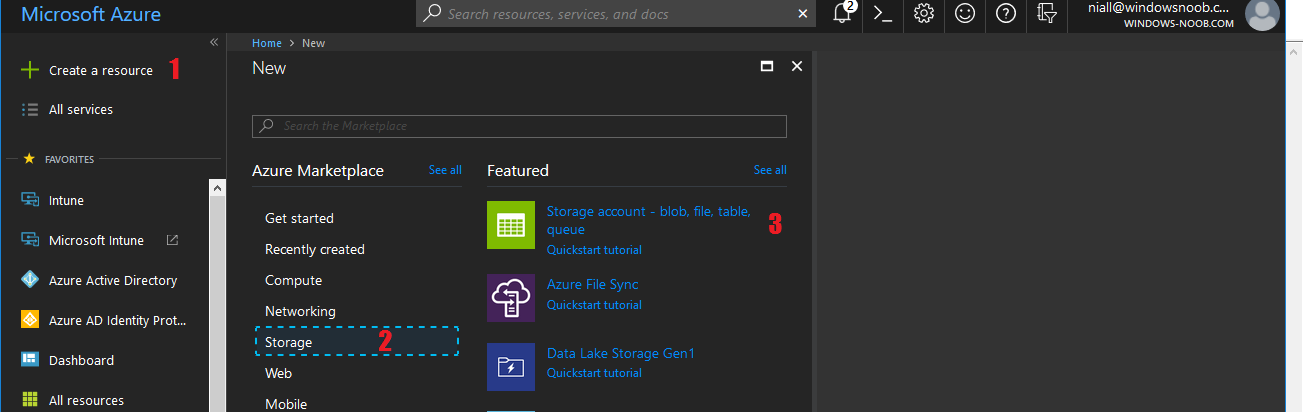
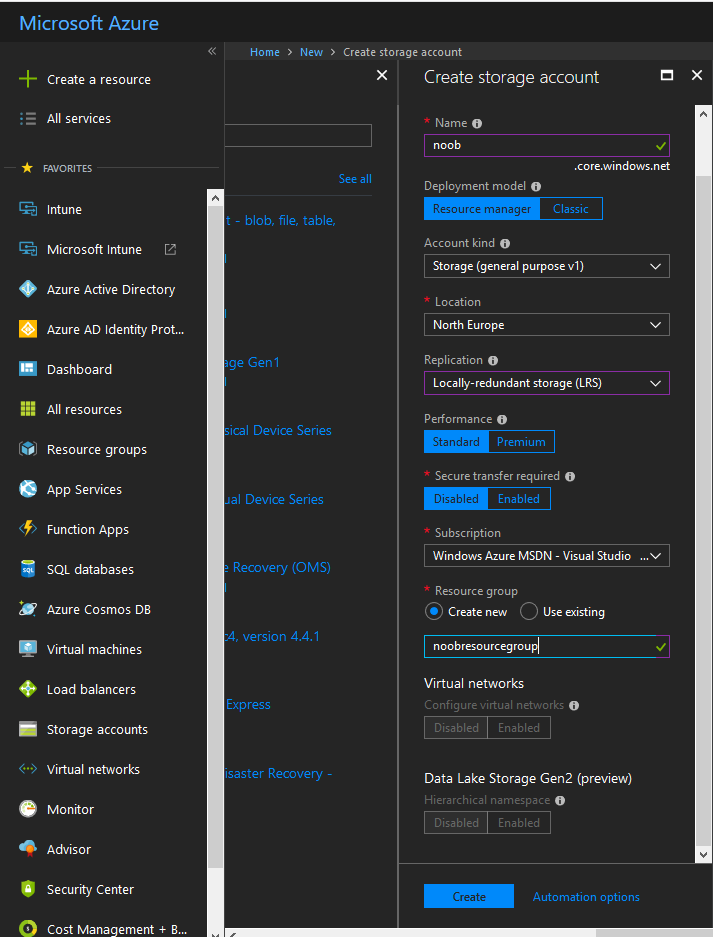
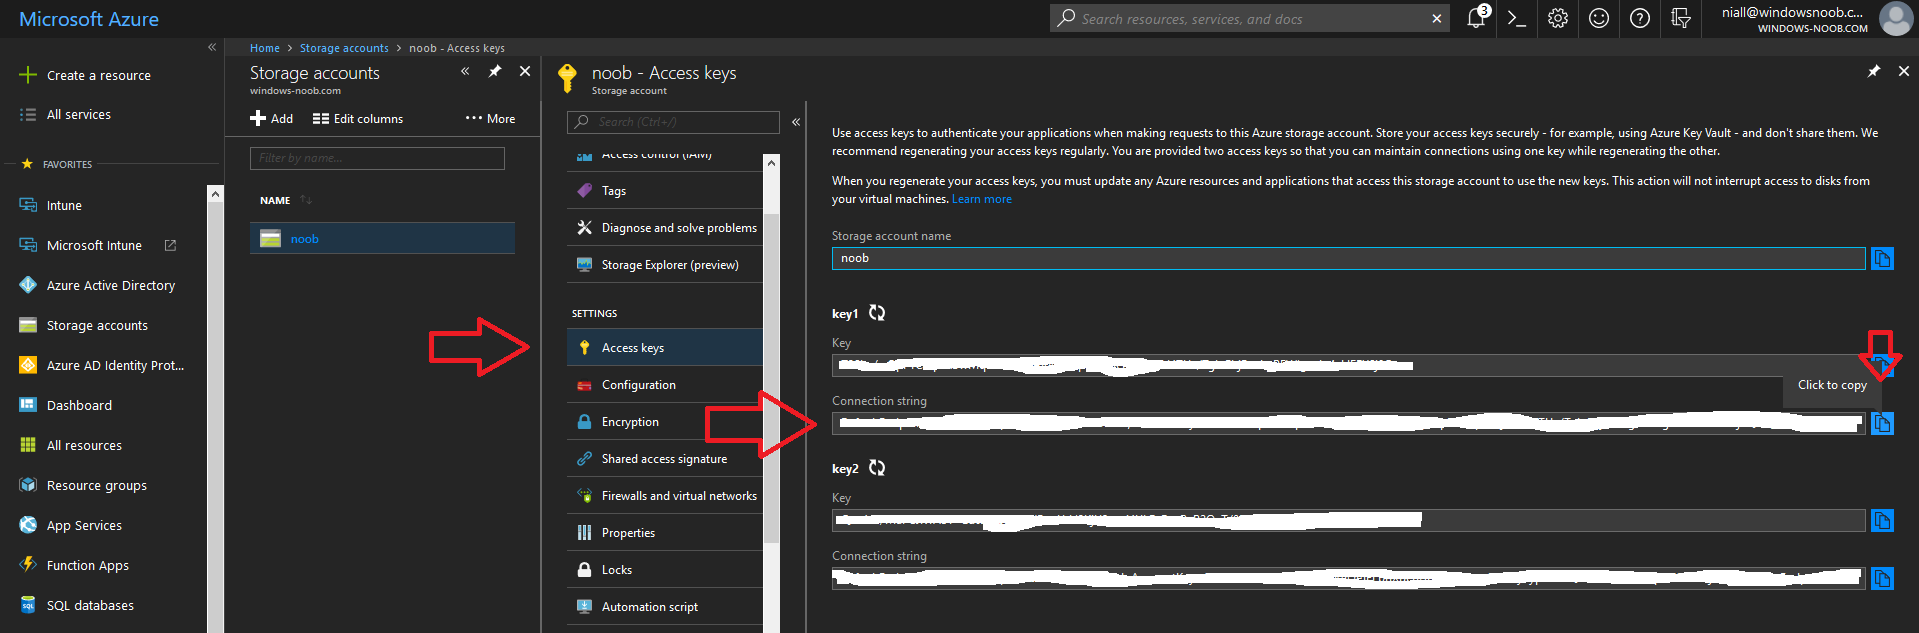
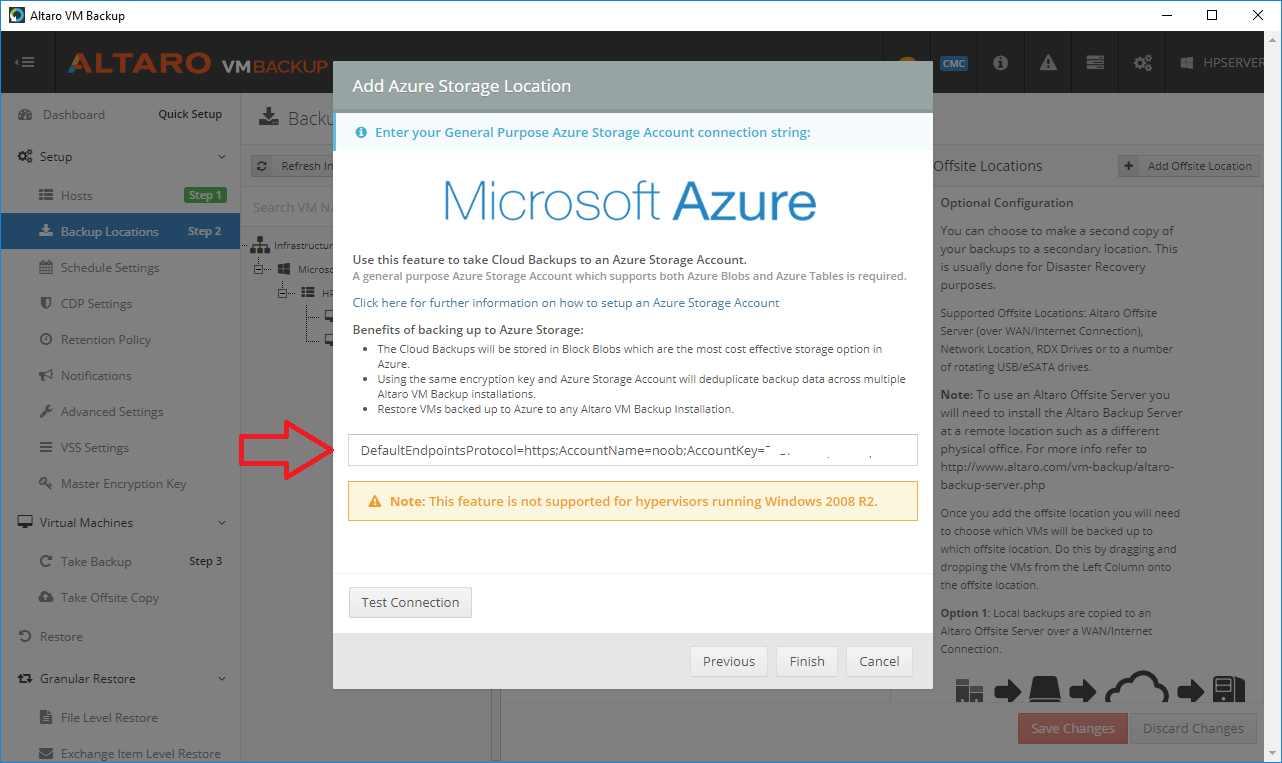
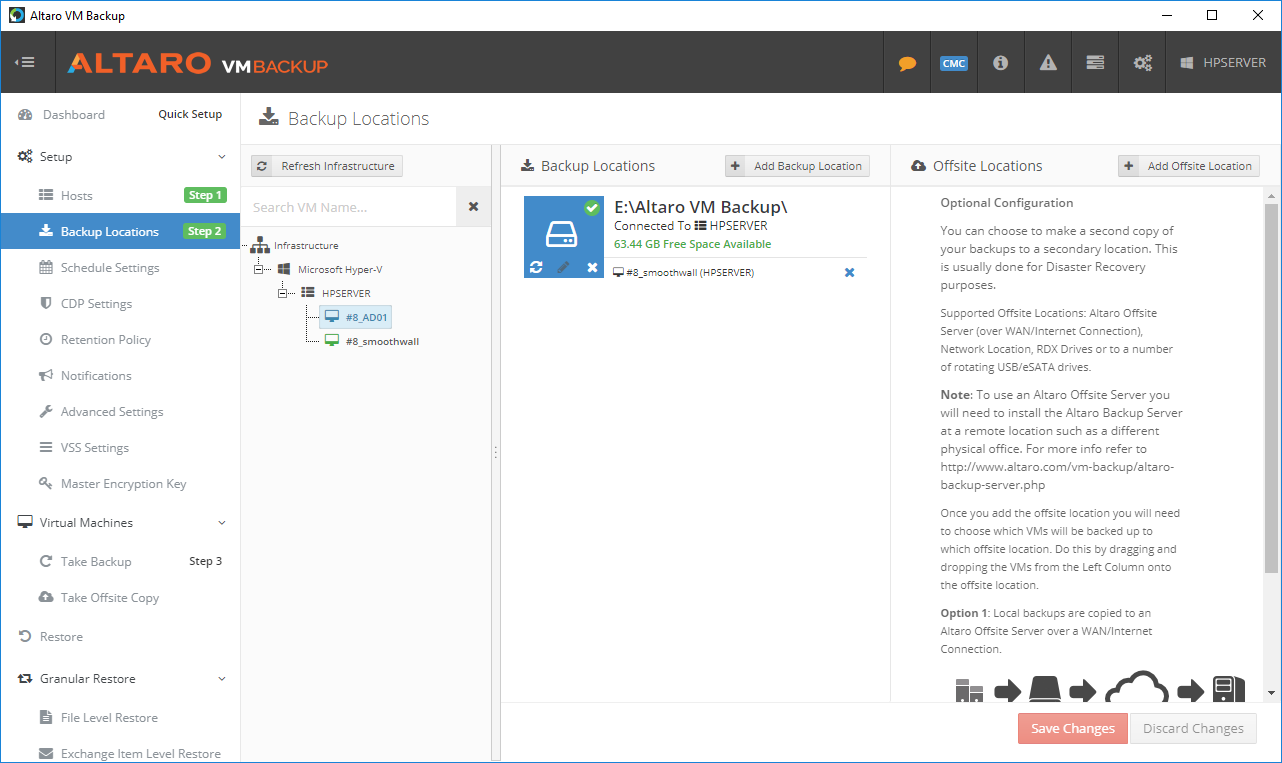
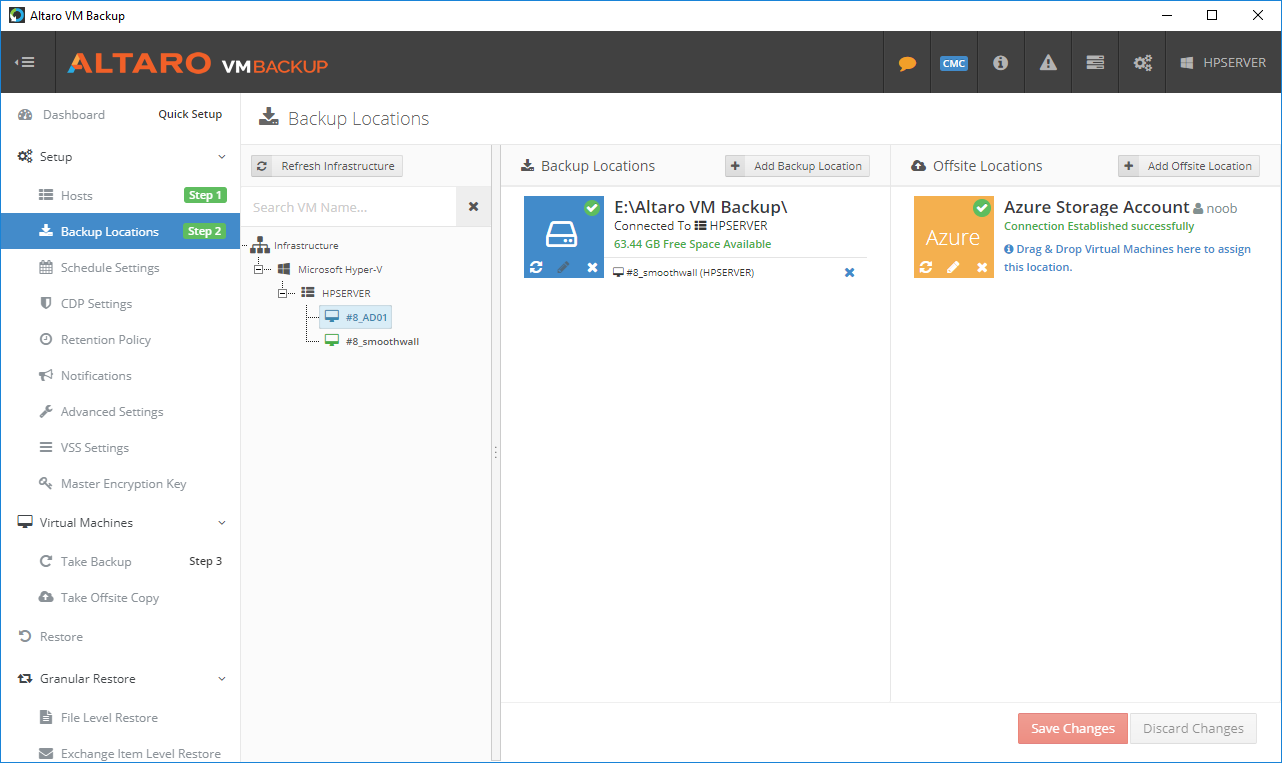
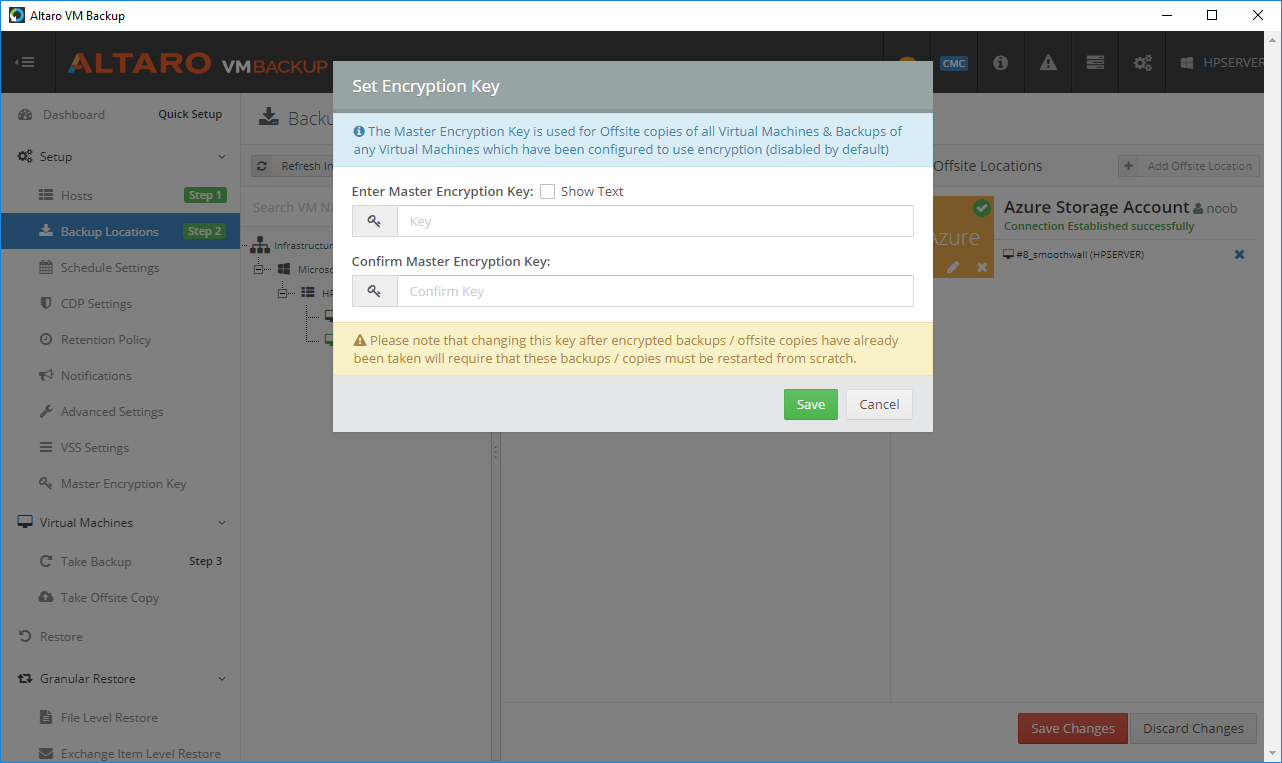
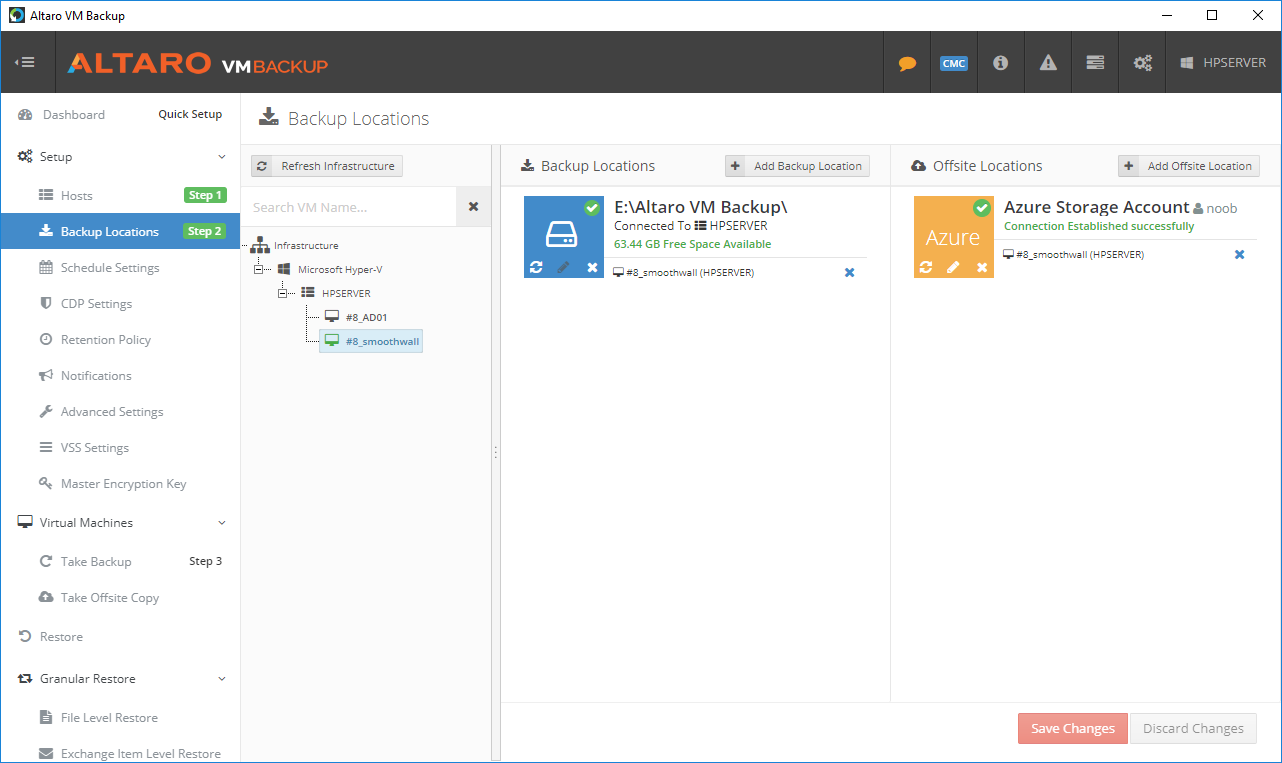
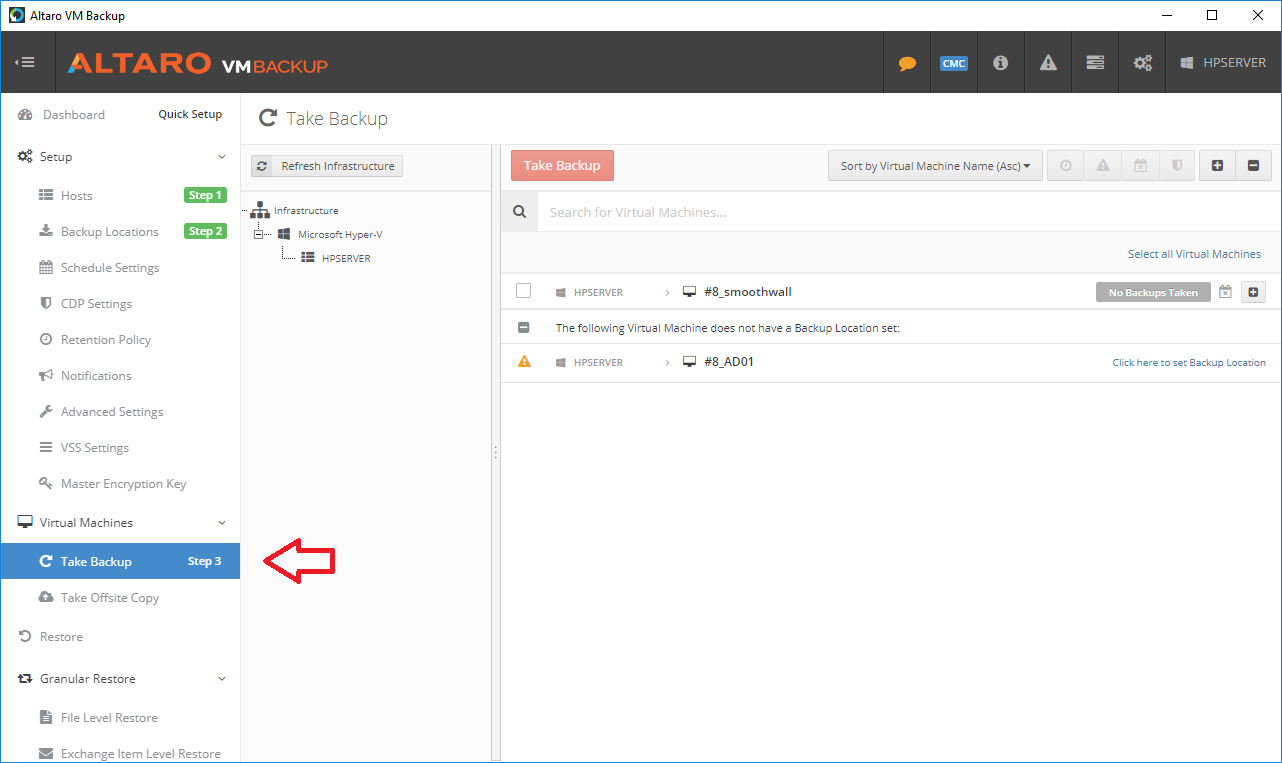
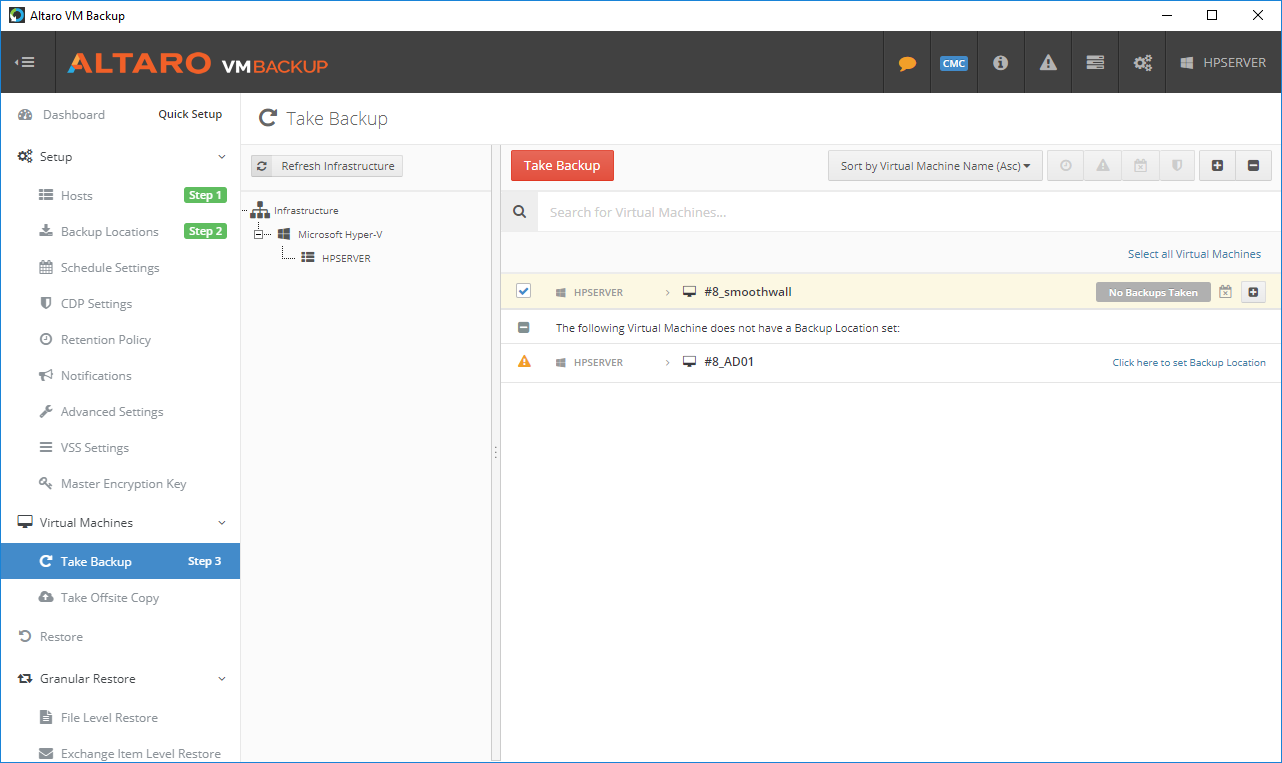
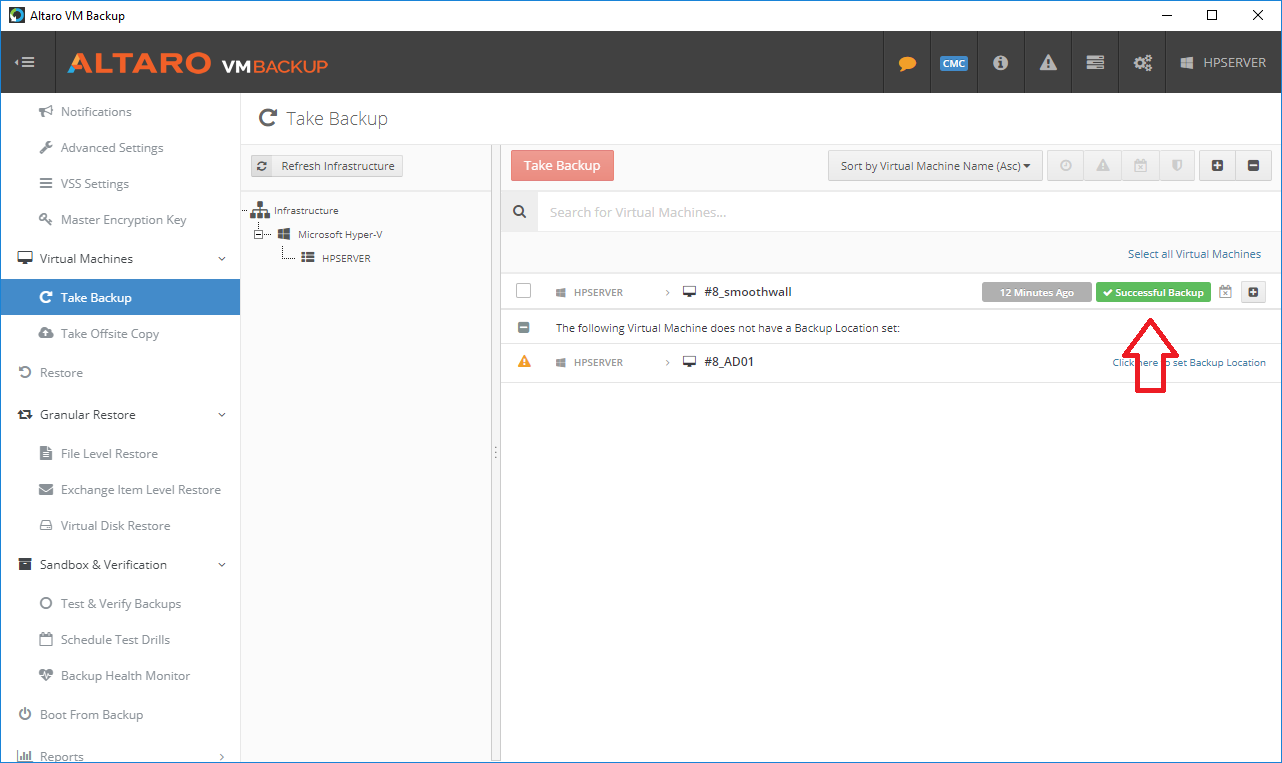
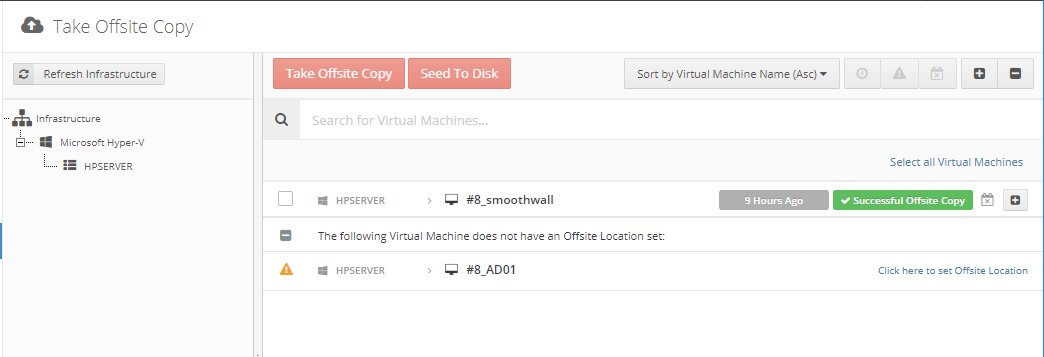
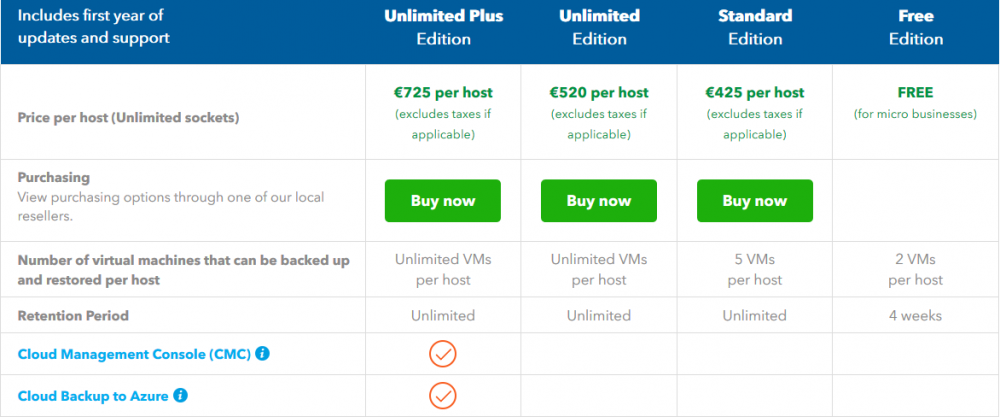
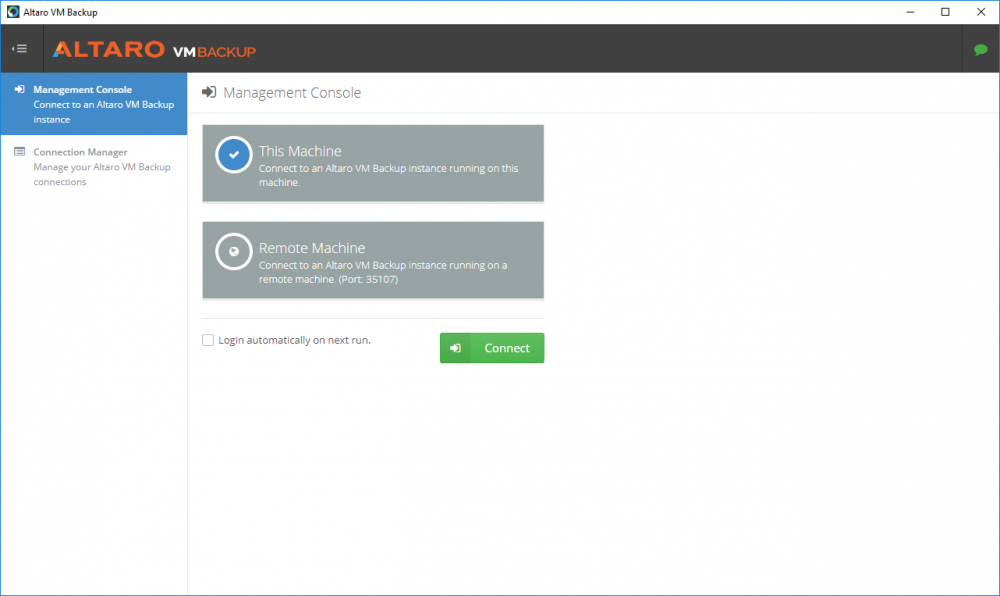
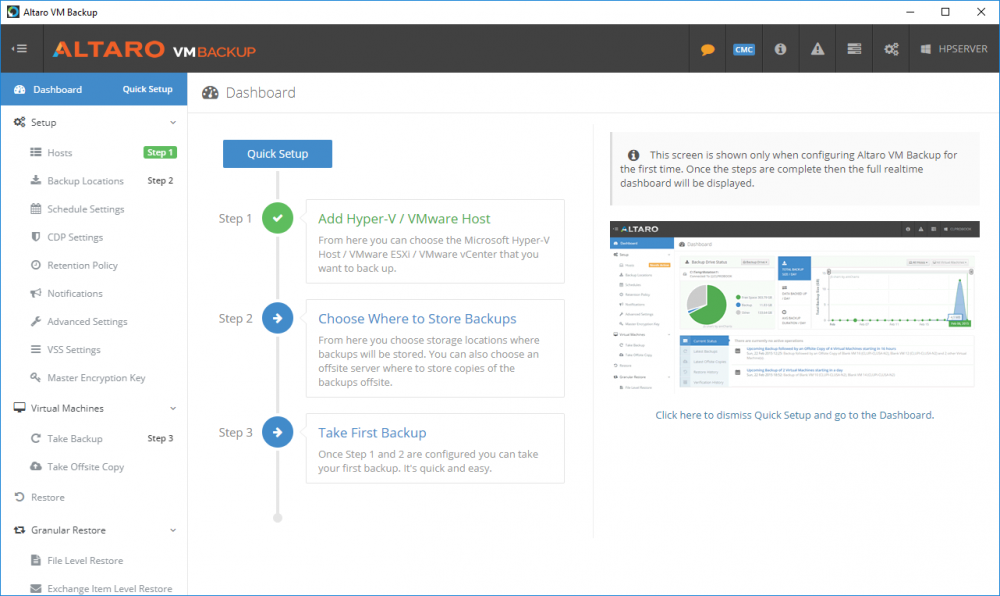
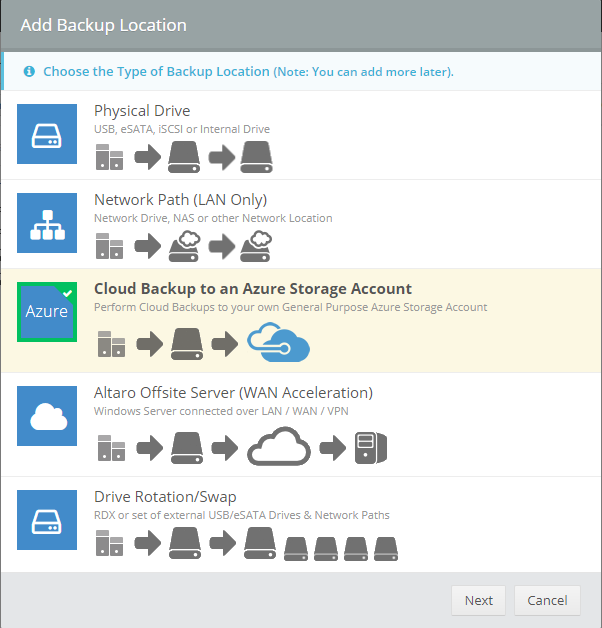
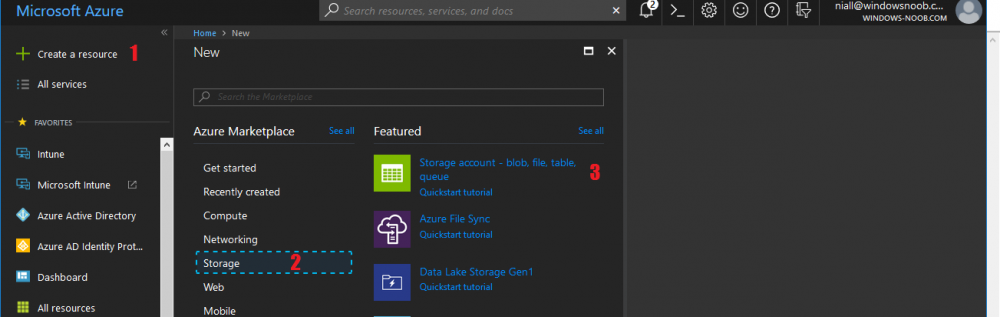
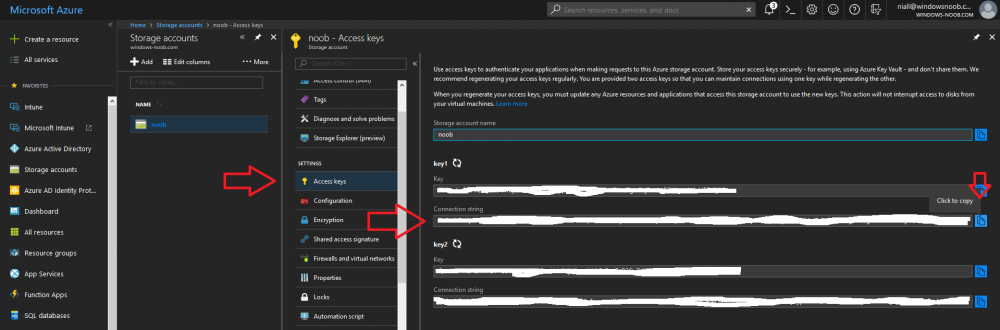
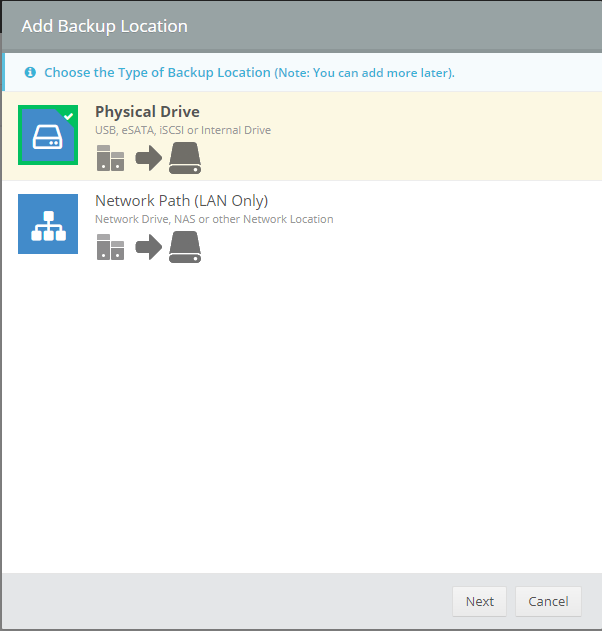
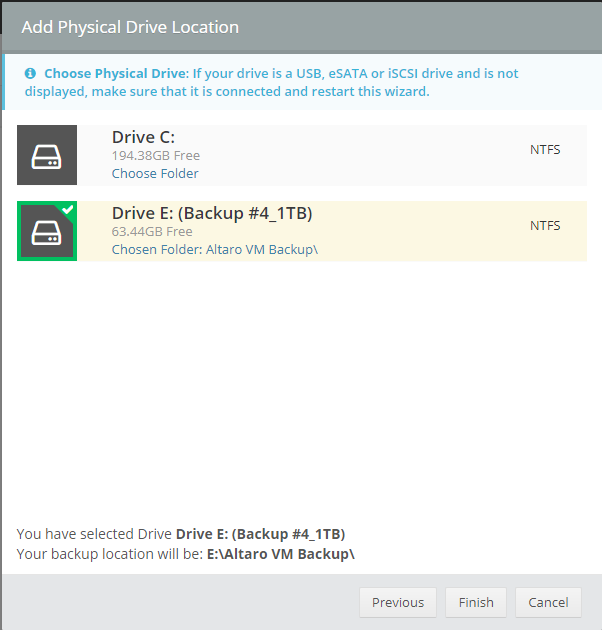
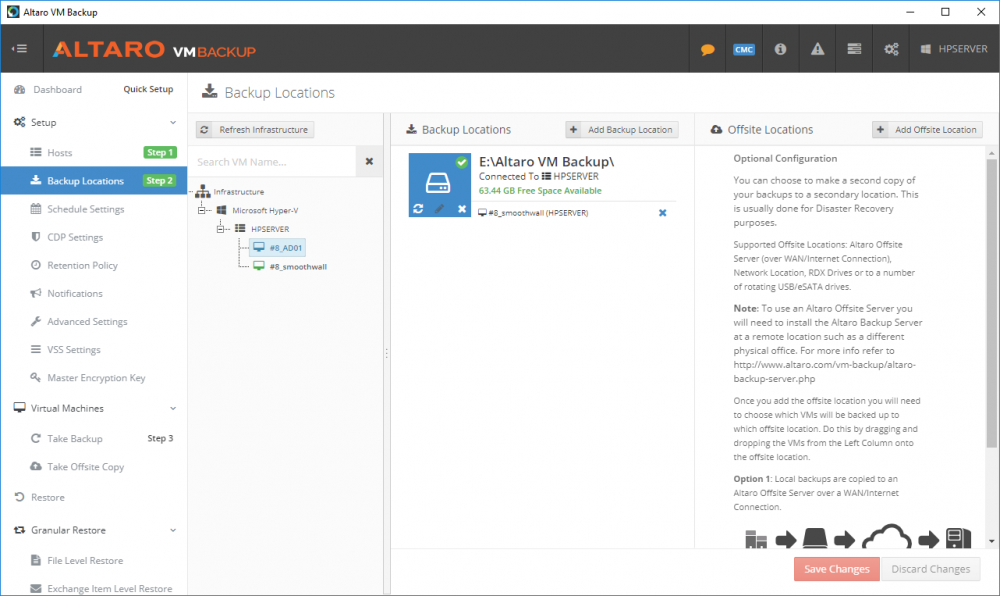
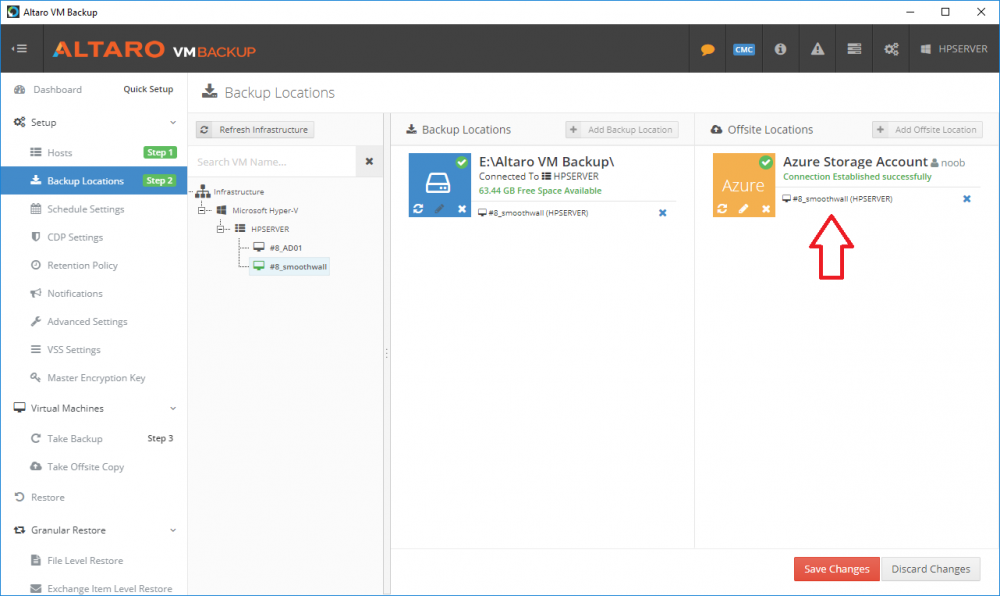
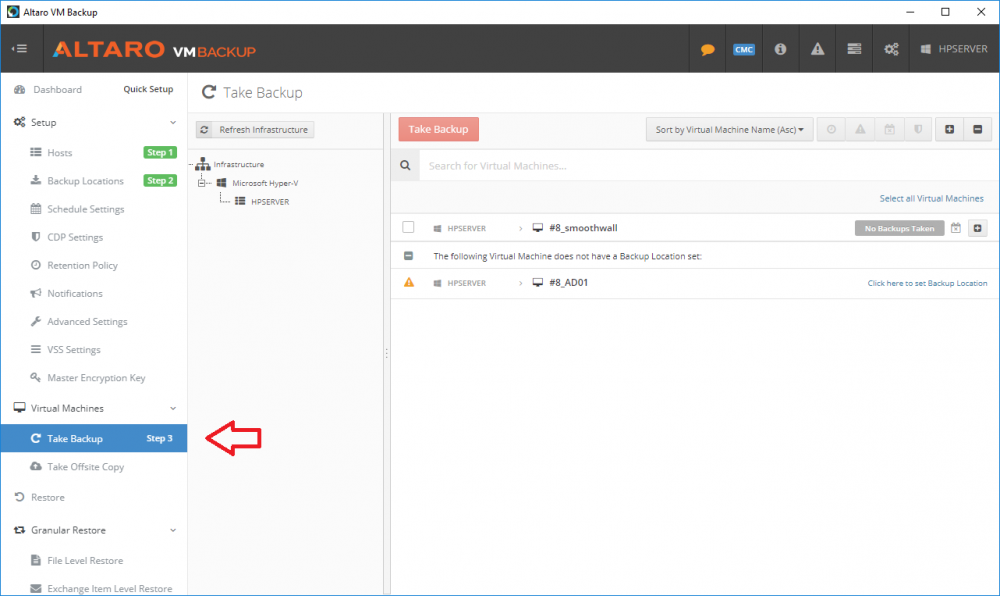
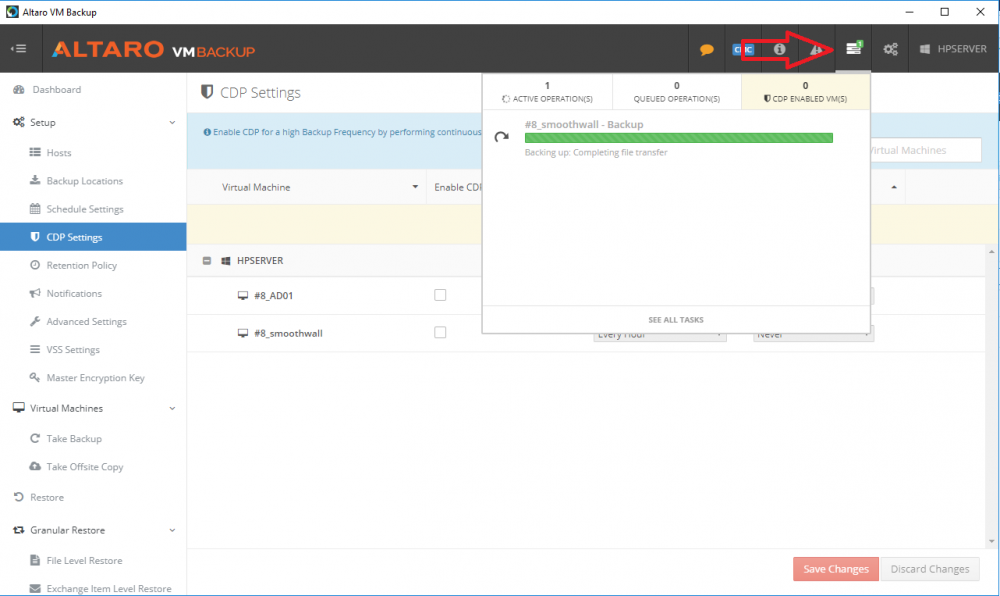
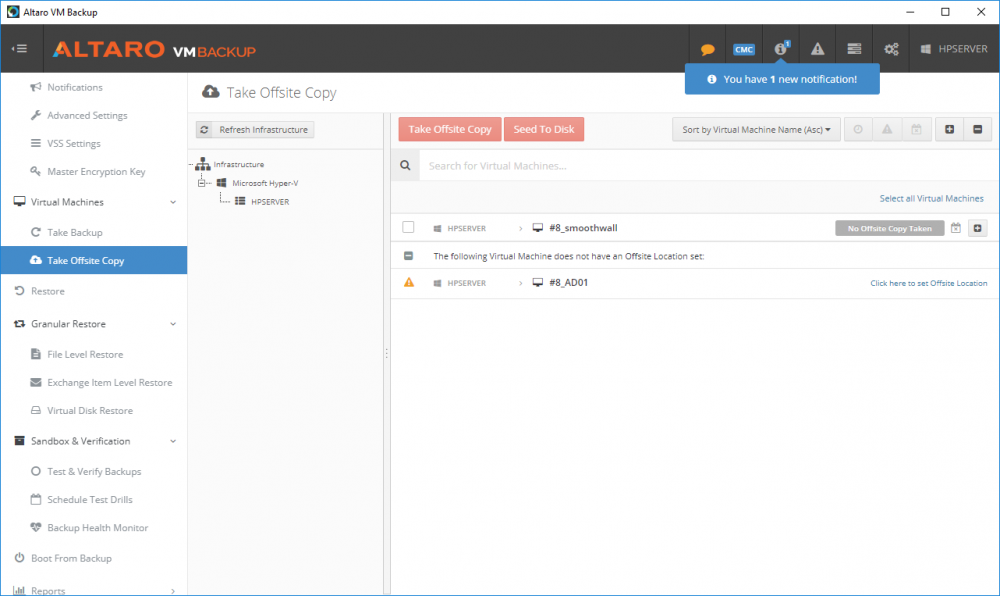
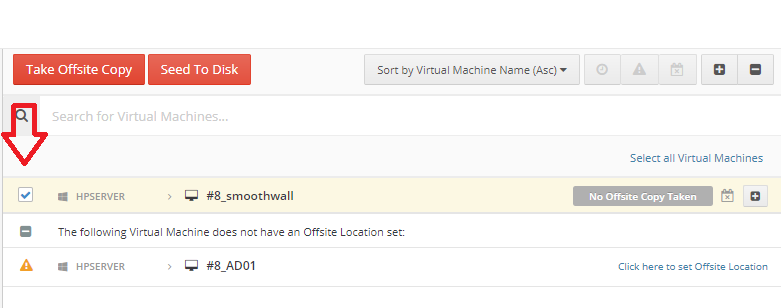
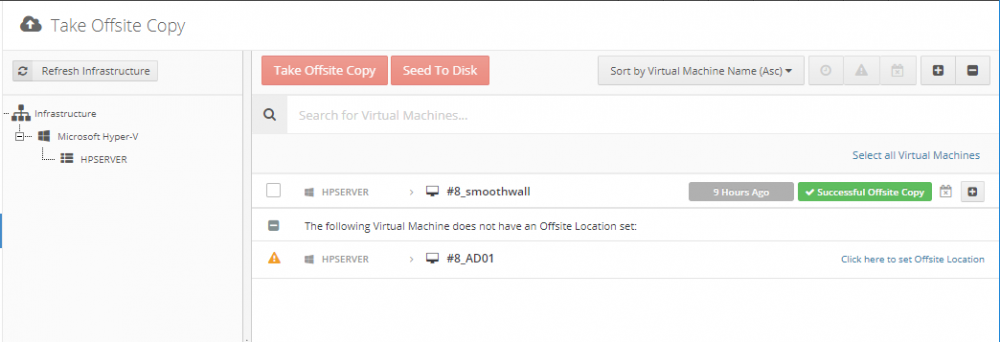
Introduction Those of you who regularly read my guides know that I favor using Hyper-V over VMware for virtual machine work. I like the seamless integration with Windows and the fact that it comes built in to Windows 10. This blog post is about backing up your Hyper-V virtual machines on Windows Server 2016 to Microsoft Azure Cloud Storage using Altaro VM backup software, their software does show the process in 3 steps, but in reality, you need to do more things which I've detailed below. Step 1. Configure Azure Cloud Storage If you've already done this, please skip to step 2 otherwise sign in (or sign up) to the Azure Portal account using https://portal.azure.com. In the Azure Portal, click on the + sign to Create a resource (1) select Storage (2) then select Storage Account (3) Give the storage account a name and select General Purpose v1 as the Account kind (as General Purpose v2 would cost more). For Replication, select Locally redundant storage (LRS). For Performance, leave the default setting of Standard. Click on Create when done. Note: Ensure you select General Purpose v1 as the Account kind as it will result in the lowest cost. This is due to: "workloads with high churn or high read rates may benefit from this account type." Reference: https://docs.microsoft.com/en-us/azure/storage/blobs/storage-account-options Step 2. Download & install Altaro VM Backup software Next you need to go to Altaro's website here where you can download the 30-day free trial of Altaro VM Backup. If you’re opting for the free edition, you will still automatically get a 30-day trial of the Unlimited Plus version, which includes the backup to Azure feature. Note: You'll need Windows Server operating system such as Windows Server 2016 to host Hyper-V for this to work, Altaro VM Backup does not support Windows 10 (sadly). To see a list of supported operating systems click on this link. Once you've downloaded the trial, install it. It's a very simple installation wizard and once done you can launch the Altaro VM Backup console. Step 3. Configure an on premise backup location Now that you've installed Altaro VM Backup, you can start configuring it. In the console ensure that This machine is selected then click on Connect. Below is what it looks like when you haven't yet configured anything. Note: You are required to configure an on premise backup location prior to backing up over the WAN to Azure Cloud Storage. Select Backup Locations in the left pane, and then click on one of the two available on premise locations, in my example I selected Physical drive. click Next and select the destination drive (and previously created folder) where you want to store the backups. click on Finish. Step 4. Select which virtual machines to backup Now that you've configured a backup location, select one or more virtual machines and drag and drop them to the on premise backup location. Each selected virtual machine that you drag and drop, will then appear under that backup location. Click on Save Changes in the lower right corner of the Altaro VM Backup console once done. Step 5. Configure Offsite Location In the Altaro VM Backup console Click on Add Offsite Location (top right) and from the Offsite options that appear, select Azure (Cloud Backup to an Azure Storage Account) and then click Next. Note: There is a link to How to set up Offsite Copies to an Azure Cloud Storage Account, if you need help configuring that click on it otherwise see Step 2 above. Next, you'll need to find the Azure Storage Connection string associated with your Azure Cloud Storage. To do that, in the Azure Portal, select Storage Accounts, select the storage you previously created, and then select Access Keys. The Connection String will be listed, select it and copy it. Paste that Connection String into the empty field in Altaro VM Backup Click Finish. You should see Connection Established Successfully in the top right corner. next, drag and drop the virtual machine(s) that you want to backup to the cloud and finally, click on Save Changes in the lower right corner. You'll be prompted to Set an Encryption Key. This key is basically a text based password that you will use to protect your backups, so make sure it's something secure and that all people that need to access the backups are aware of. click on the green Save button. Once done, you'll notice that Save Changes is RED in colour, this means you cannot click on it, I found it a bit confusing but as long as you've done the steps I've outlined you'll be ok. Step 6. Take a (on premise) backup Now that you've configured an Azure Storage Account as an offsite backup location, you are ready to take a backup. However, you must first take a primary backup (on premise) before being able to backup to the cloud. To do that, click on Take Backup in the left pane. Select one or more virtual machines that you want to backup before clicking on the even redder Take Backup button. you can then click on the Storage symbol (shown here with a red arrow) to get live information about the backup in progress. Once the backup is done, you can verify it's progress in the Take Backup window. Step 7. Take an offsite backup At this point, everything is in place for your first backup to Azure Cloud Storage. So go ahead and click on Take Offsite Copy. As before, select one or more virtual machines to backup and then click on Take Offsite Copy, you'll see a small popup And after the backup is done you'll see the status has updated real time, look for Successful Offsite copy Job done ! Summary Cons: I found the Altaro VM Backup console to be a little bit confusing at times necessitating calling their support number (please change the hold music) What was not immediately clear from the console was that in order to backup to the cloud, you must first define an on-premise (disk or network location) backup location as the primary location, and only after you've successfully backed up to that primary location, can you attempt the offsite backup. (I've given this feedback to Altaro directly.) Pros: Great quick support Altaro VM Backup is definitely one of the best Virtual Machine backup softwares out there today, and it's very competitive The ability to backup to Azure Cloud Storage is a great addition I'd recommend you give it a test run yourself: http://bit.ly/altaro-download Recommended reading Microsoft Azure storage pricing details - https://azure.microsoft.com/en-us/pricing/details/storage/ Microsoft Azure replication options - https://docs.microsoft.com/en-gb/azure/storage/storage-redundancy Altaro support for setting up Azure Cloud Storage - http://support.altaro.com/customer/portal/articles/2814316 Altaro VM Backup best practises - http://support.altaro.com/customer/en/portal/articles/2268483-best-practices-for-setting-up-altaro-vm-backup?b_id=14453 Microsoft Azure Storage Explorer - https://azure.microsoft.com/en-us/features/storage-explorer/ Note: Some of you may have already noticed that Altaro is a sponsor of windows-noob.com, and that is a good thing, please return the favor and use their software.


-
glad to see you are doing my lab, it is intended for use in a Lab environment, i'd recommend consulting with a PKI expert to get the answers to your capolicy.inf question that said, here's microsoft documentation on the subject https://docs.microsoft.com/en-us/windows-server/networking/core-network-guide/cncg/server-certs/prepare-the-capolicy-inf-file