Search the Community
Showing results for tags 'sccm'.
-
 Good morning, I am experiencing an issue with my wireless clients. I'm able to get some information. However, I am unable to get any software deployed to them. For example: - I get the green check, I am getting policy requests, heartbeat DDR, hardware scan, etc. I have the following applications deployed to a collection, I've kicked off "Machine Policy Retrieval & Evaluation Cycle" on the client, and wait. After a bit, I check the ccmcache folder, and all I see is this: " Upon investigating CAS.log, I see the following messages. Location update from CTM for content Content_9fca0c3a-abb4-45cf-8607-9002e09ff55d.1 and request {5BE028BD-31EF-40D7-ACCC-B68B5EAB238A} ContentAccess 3/29/2019 12:29:12 AM 8724 (0x2214) Download request only, ignoring location update ContentAccess 3/29/2019 12:29:12 AM 8724 (0x2214) Location update from CTM for content Content_f71ec7c6-8d83-4cff-baed-d042bee249db.1 and request {D933FF2F-430E-4AA3-9B2C-061131DA6764} ContentAccess 3/29/2019 12:29:13 AM 3416 (0x0D58) Download request only, ignoring location update ContentAccess 3/29/2019 12:29:13 AM 3416 (0x0D58) Location update from CTM for content Content_79793beb-8d31-491e-b97d-6e83188fa407.1 and request {3E6E2FEA-A93F-4642-9B18-B8006B334F95} ContentAccess 3/29/2019 12:29:13 AM 3416 (0x0D58) Download request only, ignoring location update ContentAccess 3/29/2019 12:29:13 AM 3416 (0x0D58) Location update from CTM for content Content_5354c64f-945a-4b08-a003-064130a4566a.1 and request {AEF8926C-5624-4BC0-B24F-1B7D4758212D} ContentAccess 3/29/2019 12:29:13 AM 4256 (0x10A0) Download request only, ignoring location update ContentAccess 3/29/2019 12:29:13 AM 4256 (0x10A0) Location update from CTM for content Content_3bea231e-1c77-4cda-8026-85eebee83451.1 and request {FA24E938-E4C0-4B3D-B0B8-ABD927785070} ContentAccess 3/29/2019 12:29:13 AM 4256 (0x10A0) Download request only, ignoring location update ContentAccess 3/29/2019 12:29:13 AM 4256 (0x10A0) Location update from CTM for content Content_637b724f-2a10-4111-9ca0-b0583587edaa.1 and request {F1AD0338-79E5-43B8-A996-D0E573C57A97} ContentAccess 3/29/2019 12:29:13 AM 7972 (0x1F24) Download request only, ignoring location update ContentAccess 3/29/2019 12:29:13 AM 7972 (0x1F24) Location update from CTM for content LIB00003.15 and request {9E0C4E3D-1981-4E35-8872-22BDDEED324F} ContentAccess 3/29/2019 12:29:13 AM 7972 (0x1F24) Download request only, ignoring location update ContentAccess 3/29/2019 12:29:13 AM 7972 (0x1F24) Location update from CTM for content Content_6a919932-b12f-46e1-be00-73c7d9c33269.1 and request {FF212273-2733-494F-87EE-33D06D76368A} ContentAccess 3/29/2019 12:29:13 AM 3416 (0x0D58) Download request only, ignoring location update ContentAccess 3/29/2019 12:29:13 AM 3416 (0x0D58) Location update from CTM for content Content_f7c36f23-6552-4ba8-b79c-2fb0d0a6463f.1 and request {CAEC8A21-7228-465F-80BC-BE1833D7321C} ContentAccess 3/29/2019 12:29:13 AM 7972 (0x1F24) Download request only, ignoring location update ContentAccess 3/29/2019 12:29:13 AM 7972 (0x1F24) Location update from CTM for content Content_9fca0c3a-abb4-45cf-8607-9002e09ff55d.1 and request {5BE028BD-31EF-40D7-ACCC-B68B5EAB238A} ContentAccess 3/29/2019 1:29:12 AM 3416 (0x0D58) Download request only, ignoring location update ContentAccess 3/29/2019 1:29:12 AM 3416 (0x0D58) Location update from CTM for content Content_f71ec7c6-8d83-4cff-baed-d042bee249db.1 and request {D933FF2F-430E-4AA3-9B2C-061131DA6764} ContentAccess 3/29/2019 1:29:13 AM 3416 (0x0D58) Download request only, ignoring location update ContentAccess 3/29/2019 1:29:13 AM 3416 (0x0D58) Location update from CTM for content Content_79793beb-8d31-491e-b97d-6e83188fa407.1 and request {3E6E2FEA-A93F-4642-9B18-B8006B334F95} ContentAccess 3/29/2019 1:29:13 AM 3416 (0x0D58) Download request only, ignoring location update ContentAccess 3/29/2019 1:29:13 AM 3416 (0x0D58) Location update from CTM for content Content_5354c64f-945a-4b08-a003-064130a4566a.1 and request {AEF8926C-5624-4BC0-B24F-1B7D4758212D} ContentAccess 3/29/2019 1:29:13 AM 2532 (0x09E4) Download request only, ignoring location update ContentAccess 3/29/2019 1:29:13 AM 2532 (0x09E4) Location update from CTM for content Content_3bea231e-1c77-4cda-8026-85eebee83451.1 and request {FA24E938-E4C0-4B3D-B0B8-ABD927785070} ContentAccess 3/29/2019 1:29:13 AM 4372 (0x1114) Download request only, ignoring location update ContentAccess 3/29/2019 1:29:13 AM 4372 (0x1114) Location update from CTM for content Content_637b724f-2a10-4111-9ca0-b0583587edaa.1 and request {F1AD0338-79E5-43B8-A996-D0E573C57A97} ContentAccess 3/29/2019 1:29:13 AM 4372 (0x1114) Download request only, ignoring location update ContentAccess 3/29/2019 1:29:13 AM 4372 (0x1114) Location update from CTM for content LIB00003.15 and request {9E0C4E3D-1981-4E35-8872-22BDDEED324F} ContentAccess 3/29/2019 1:29:13 AM 2532 (0x09E4) Download request only, ignoring location update ContentAccess 3/29/2019 1:29:13 AM 2532 (0x09E4) Location update from CTM for content Content_6a919932-b12f-46e1-be00-73c7d9c33269.1 and request {FF212273-2733-494F-87EE-33D06D76368A} ContentAccess 3/29/2019 1:29:13 AM 3856 (0x0F10) Download request only, ignoring location update ContentAccess 3/29/2019 1:29:13 AM 3856 (0x0F10) Location update from CTM for content Content_f7c36f23-6552-4ba8-b79c-2fb0d0a6463f.1 and request {CAEC8A21-7228-465F-80BC-BE1833D7321C} ContentAccess 3/29/2019 1:29:13 AM 7276 (0x1C6C) Download request only, ignoring location update ContentAccess 3/29/2019 1:29:13 AM 7276 (0x1C6C) Location update from CTM for content Content_9fca0c3a-abb4-45cf-8607-9002e09ff55d.1 and request {5BE028BD-31EF-40D7-ACCC-B68B5EAB238A} ContentAccess 3/29/2019 2:29:13 AM 4620 (0x120C) Download request only, ignoring location update ContentAccess 3/29/2019 2:29:13 AM 4620 (0x120C) Location update from CTM for content Content_f71ec7c6-8d83-4cff-baed-d042bee249db.1 and request {D933FF2F-430E-4AA3-9B2C-061131DA6764} ContentAccess 3/29/2019 2:29:13 AM 4984 (0x1378) Download request only, ignoring location update ContentAccess 3/29/2019 2:29:13 AM 4984 (0x1378) Location update from CTM for content Content_79793beb-8d31-491e-b97d-6e83188fa407.1 and request {3E6E2FEA-A93F-4642-9B18-B8006B334F95} ContentAccess 3/29/2019 2:29:13 AM 6088 (0x17C8) Download request only, ignoring location update ContentAccess 3/29/2019 2:29:13 AM 6088 (0x17C8) Location update from CTM for content Content_5354c64f-945a-4b08-a003-064130a4566a.1 and request {AEF8926C-5624-4BC0-B24F-1B7D4758212D} ContentAccess 3/29/2019 2:29:13 AM 7584 (0x1DA0) Download request only, ignoring location update ContentAccess 3/29/2019 2:29:13 AM 7584 (0x1DA0) Location update from CTM for content Content_3bea231e-1c77-4cda-8026-85eebee83451.1 and request {FA24E938-E4C0-4B3D-B0B8-ABD927785070} ContentAccess 3/29/2019 2:29:13 AM 7276 (0x1C6C) Download request only, ignoring location update ContentAccess 3/29/2019 2:29:13 AM 7276 (0x1C6C) Location update from CTM for content Content_637b724f-2a10-4111-9ca0-b0583587edaa.1 and request {F1AD0338-79E5-43B8-A996-D0E573C57A97} ContentAccess 3/29/2019 2:29:13 AM 7276 (0x1C6C) Download request only, ignoring location update ContentAccess 3/29/2019 2:29:13 AM 7276 (0x1C6C) Location update from CTM for content LIB00003.15 and request {9E0C4E3D-1981-4E35-8872-22BDDEED324F} ContentAccess 3/29/2019 2:29:13 AM 5576 (0x15C8) Download request only, ignoring location update ContentAccess 3/29/2019 2:29:13 AM 5576 (0x15C8) Location update from CTM for content Content_6a919932-b12f-46e1-be00-73c7d9c33269.1 and request {FF212273-2733-494F-87EE-33D06D76368A} ContentAccess 3/29/2019 2:29:14 AM 7584 (0x1DA0) Download request only, ignoring location update ContentAccess 3/29/2019 2:29:14 AM 7584 (0x1DA0) Location update from CTM for content Content_f7c36f23-6552-4ba8-b79c-2fb0d0a6463f.1 and request {CAEC8A21-7228-465F-80BC-BE1833D7321C} ContentAccess 3/29/2019 2:29:14 AM 5576 (0x15C8) Download request only, ignoring location update ContentAccess 3/29/2019 2:29:14 AM 5576 (0x15C8) Location update from CTM for content Content_9fca0c3a-abb4-45cf-8607-9002e09ff55d.1 and request {5BE028BD-31EF-40D7-ACCC-B68B5EAB238A} ContentAccess 3/29/2019 3:29:13 AM 2124 (0x084C) Download request only, ignoring location update ContentAccess 3/29/2019 3:29:13 AM 2124 (0x084C) Location update from CTM for content Content_f71ec7c6-8d83-4cff-baed-d042bee249db.1 and request {D933FF2F-430E-4AA3-9B2C-061131DA6764} ContentAccess 3/29/2019 3:29:13 AM 3856 (0x0F10) Download request only, ignoring location update ContentAccess 3/29/2019 3:29:13 AM 3856 (0x0F10) Location update from CTM for content Content_79793beb-8d31-491e-b97d-6e83188fa407.1 and request {3E6E2FEA-A93F-4642-9B18-B8006B334F95} ContentAccess 3/29/2019 3:29:14 AM 4028 (0x0FBC) Download request only, ignoring location update ContentAccess 3/29/2019 3:29:14 AM 4028 (0x0FBC) Location update from CTM for content Content_5354c64f-945a-4b08-a003-064130a4566a.1 and request {AEF8926C-5624-4BC0-B24F-1B7D4758212D} ContentAccess 3/29/2019 3:29:14 AM 3856 (0x0F10) Download request only, ignoring location update ContentAccess 3/29/2019 3:29:14 AM 3856 (0x0F10) Location update from CTM for content Content_3bea231e-1c77-4cda-8026-85eebee83451.1 and request {FA24E938-E4C0-4B3D-B0B8-ABD927785070} ContentAccess 3/29/2019 3:29:14 AM 7276 (0x1C6C) Download request only, ignoring location update ContentAccess 3/29/2019 3:29:14 AM 7276 (0x1C6C) Location update from CTM for content Content_637b724f-2a10-4111-9ca0-b0583587edaa.1 and request {F1AD0338-79E5-43B8-A996-D0E573C57A97} ContentAccess 3/29/2019 3:29:14 AM 4028 (0x0FBC) Download request only, ignoring location update ContentAccess 3/29/2019 3:29:14 AM 4028 (0x0FBC) Location update from CTM for content LIB00003.15 and request {9E0C4E3D-1981-4E35-8872-22BDDEED324F} ContentAccess 3/29/2019 3:29:14 AM 7276 (0x1C6C) Download request only, ignoring location update ContentAccess 3/29/2019 3:29:14 AM 7276 (0x1C6C) Location update from CTM for content Content_6a919932-b12f-46e1-be00-73c7d9c33269.1 and request {FF212273-2733-494F-87EE-33D06D76368A} ContentAccess 3/29/2019 3:29:14 AM 3856 (0x0F10) Download request only, ignoring location update ContentAccess 3/29/2019 3:29:14 AM 3856 (0x0F10) Location update from CTM for content Content_f7c36f23-6552-4ba8-b79c-2fb0d0a6463f.1 and request {CAEC8A21-7228-465F-80BC-BE1833D7321C} ContentAccess 3/29/2019 3:29:14 AM 4028 (0x0FBC) Download request only, ignoring location update ContentAccess 3/29/2019 3:29:14 AM 4028 (0x0FBC) Location update from CTM for content Content_9fca0c3a-abb4-45cf-8607-9002e09ff55d.1 and request {5BE028BD-31EF-40D7-ACCC-B68B5EAB238A} ContentAccess 3/29/2019 4:29:13 AM 8668 (0x21DC) Download request only, ignoring location update ContentAccess 3/29/2019 4:29:13 AM 8668 (0x21DC) Location update from CTM for content Content_f71ec7c6-8d83-4cff-baed-d042bee249db.1 and request {D933FF2F-430E-4AA3-9B2C-061131DA6764} ContentAccess 3/29/2019 4:29:13 AM 8668 (0x21DC) Download request only, ignoring location update ContentAccess 3/29/2019 4:29:13 AM 8668 (0x21DC) Location update from CTM for content Content_79793beb-8d31-491e-b97d-6e83188fa407.1 and request {3E6E2FEA-A93F-4642-9B18-B8006B334F95} ContentAccess 3/29/2019 4:29:13 AM 9084 (0x237C) Download request only, ignoring location update ContentAccess 3/29/2019 4:29:13 AM 9084 (0x237C) Location update from CTM for content Content_5354c64f-945a-4b08-a003-064130a4566a.1 and request {AEF8926C-5624-4BC0-B24F-1B7D4758212D} ContentAccess 3/29/2019 4:29:13 AM 7276 (0x1C6C) Download request only, ignoring location update ContentAccess 3/29/2019 4:29:13 AM 7276 (0x1C6C) Location update from CTM for content Content_3bea231e-1c77-4cda-8026-85eebee83451.1 and request {FA24E938-E4C0-4B3D-B0B8-ABD927785070} ContentAccess 3/29/2019 4:29:13 AM 4904 (0x1328) Download request only, ignoring location update ContentAccess 3/29/2019 4:29:13 AM 4904 (0x1328) Location update from CTM for content Content_637b724f-2a10-4111-9ca0-b0583587edaa.1 and request {F1AD0338-79E5-43B8-A996-D0E573C57A97} ContentAccess 3/29/2019 4:29:13 AM 8668 (0x21DC) Download request only, ignoring location update ContentAccess 3/29/2019 4:29:13 AM 8668 (0x21DC) Location update from CTM for content LIB00003.15 and request {9E0C4E3D-1981-4E35-8872-22BDDEED324F} ContentAccess 3/29/2019 4:29:13 AM 4904 (0x1328) Download request only, ignoring location update ContentAccess 3/29/2019 4:29:13 AM 4904 (0x1328) Location update from CTM for content Content_6a919932-b12f-46e1-be00-73c7d9c33269.1 and request {FF212273-2733-494F-87EE-33D06D76368A} ContentAccess 3/29/2019 4:29:14 AM 4904 (0x1328) Download request only, ignoring location update ContentAccess 3/29/2019 4:29:14 AM 4904 (0x1328) Location update from CTM for content Content_f7c36f23-6552-4ba8-b79c-2fb0d0a6463f.1 and request {CAEC8A21-7228-465F-80BC-BE1833D7321C} ContentAccess 3/29/2019 4:29:14 AM 7596 (0x1DAC) Download request only, ignoring location update ContentAccess 3/29/2019 4:29:14 AM 7596 (0x1DAC) Location update from CTM for content Content_9fca0c3a-abb4-45cf-8607-9002e09ff55d.1 and request {5BE028BD-31EF-40D7-ACCC-B68B5EAB238A} ContentAccess 3/29/2019 5:29:13 AM 7708 (0x1E1C) Download request only, ignoring location update ContentAccess 3/29/2019 5:29:13 AM 7708 (0x1E1C) Location update from CTM for content Content_f71ec7c6-8d83-4cff-baed-d042bee249db.1 and request {D933FF2F-430E-4AA3-9B2C-061131DA6764} ContentAccess 3/29/2019 5:29:13 AM 7708 (0x1E1C) Download request only, ignoring location update ContentAccess 3/29/2019 5:29:13 AM 7708 (0x1E1C) Location update from CTM for content Content_79793beb-8d31-491e-b97d-6e83188fa407.1 and request {3E6E2FEA-A93F-4642-9B18-B8006B334F95} ContentAccess 3/29/2019 5:29:13 AM 5440 (0x1540) Download request only, ignoring location update ContentAccess 3/29/2019 5:29:13 AM 5440 (0x1540) Location update from CTM for content Content_5354c64f-945a-4b08-a003-064130a4566a.1 and request {AEF8926C-5624-4BC0-B24F-1B7D4758212D} ContentAccess 3/29/2019 5:29:13 AM 5440 (0x1540) Download request only, ignoring location update ContentAccess 3/29/2019 5:29:13 AM 5440 (0x1540) Location update from CTM for content Content_3bea231e-1c77-4cda-8026-85eebee83451.1 and request {FA24E938-E4C0-4B3D-B0B8-ABD927785070} ContentAccess 3/29/2019 5:29:14 AM 5440 (0x1540) Download request only, ignoring location update ContentAccess 3/29/2019 5:29:14 AM 5440 (0x1540) Location update from CTM for content Content_637b724f-2a10-4111-9ca0-b0583587edaa.1 and request {F1AD0338-79E5-43B8-A996-D0E573C57A97} ContentAccess 3/29/2019 5:29:14 AM 5440 (0x1540) Download request only, ignoring location update ContentAccess 3/29/2019 5:29:14 AM 5440 (0x1540) Location update from CTM for content LIB00003.15 and request {9E0C4E3D-1981-4E35-8872-22BDDEED324F} ContentAccess 3/29/2019 5:29:14 AM 7708 (0x1E1C) Download request only, ignoring location update ContentAccess 3/29/2019 5:29:14 AM 7708 (0x1E1C) Location update from CTM for content Content_6a919932-b12f-46e1-be00-73c7d9c33269.1 and request {FF212273-2733-494F-87EE-33D06D76368A} ContentAccess 3/29/2019 5:29:14 AM 8668 (0x21DC) Download request only, ignoring location update ContentAccess 3/29/2019 5:29:14 AM 8668 (0x21DC) Location update from CTM for content Content_f7c36f23-6552-4ba8-b79c-2fb0d0a6463f.1 and request {CAEC8A21-7228-465F-80BC-BE1833D7321C} ContentAccess 3/29/2019 5:29:14 AM 7708 (0x1E1C) Download request only, ignoring location update ContentAccess 3/29/2019 5:29:14 AM 7708 (0x1E1C) Location update from CTM for content Content_9fca0c3a-abb4-45cf-8607-9002e09ff55d.1 and request {5BE028BD-31EF-40D7-ACCC-B68B5EAB238A} ContentAccess 3/29/2019 6:29:13 AM 6536 (0x1988) Download request only, ignoring location update ContentAccess 3/29/2019 6:29:13 AM 6536 (0x1988) Location update from CTM for content Content_f71ec7c6-8d83-4cff-baed-d042bee249db.1 and request {D933FF2F-430E-4AA3-9B2C-061131DA6764} ContentAccess 3/29/2019 6:29:13 AM 7728 (0x1E30) Download request only, ignoring location update ContentAccess 3/29/2019 6:29:13 AM 7728 (0x1E30) Location update from CTM for content Content_79793beb-8d31-491e-b97d-6e83188fa407.1 and request {3E6E2FEA-A93F-4642-9B18-B8006B334F95} ContentAccess 3/29/2019 6:29:13 AM 7728 (0x1E30) Download request only, ignoring location update ContentAccess 3/29/2019 6:29:13 AM 7728 (0x1E30) Location update from CTM for content Content_5354c64f-945a-4b08-a003-064130a4566a.1 and request {AEF8926C-5624-4BC0-B24F-1B7D4758212D} ContentAccess 3/29/2019 6:29:14 AM 7728 (0x1E30) Download request only, ignoring location update ContentAccess 3/29/2019 6:29:14 AM 77 I've also checked the boundaries and boundary groups to ensure that the correct network is in there. Other stuff: DP is HTTPS enabled, "allow intranet-only connections", using a PKI certificate, MP is HTTPS enabled "allow intranet-only connections" as well. Wireless clients are domain joined, and all of these application deployments work fine on wired clients. Any help where to look is appreciated!


-
Hello, I've deployed a group of Windows updates to a collection which has no maintenance window and it's works correcty and all devices are comliant excep one who do not getting the updates and showing "Client check passed/Active" state. I've tried to stop wuauserv service and delete "SoftwareDistribution" floder but it isn't works for me. below details about my environment. Client Device : windows Server 2012 R2 whitch hosts the McAfee antivirus solution. FYI: I've tried to stop McAfee services but it restart automaticaly when the process of updates begin. SCCM Management Server: SCCM 2012 R2 SP1, WSUS 4.0 (6.3.9600.18694) Logs : - WUAHandler.log : Successfully completed scan - UpdatesDeployment.log : EnumerateUpdates for action (UpdateActionInstall) - Total actionable updates = 0 - LocationServices.log : ALL its correct - WindowsUpdate.log : 4 Warning WARNING: IsSessionRemote: WinStationQueryInformationW(WTSIsRemoteSession) failed for session 9, GetLastError=2250 WARNING: Failed to get Wu Exemption info from NLM, assuming not exempt, error = 0x80240037 WARNING: Failed to initialize event uploader for new server {9482F4B4-E343-43B6-B170-9A65BC822C77} with hr = 8024043d. WARNING: Network Cost is assumed to be not supported as something failed with trying to get handles to wcmapi.dll Thank you in advance for your help. cordially. Hadjer YAHIAOUI Infra Admin
-
Hi all, In all our company uses 8 distribution point and the majority are 2008 R2 domain controllers. About two days ago I have done an inplace upgrade on one server to 2012 R2. The upgrade went mostly without a hitch except for the SCCM DP. The error that I was getting was "access denied" or something along those lines when the site server was attempting to distribute content. So I have tried a lot of things so far to the point where I decided to remove the distribution point and start over. No Joy... I am getting an error on the distribution point in the SCCM console stating "Failed to verify the disk drive". when looking further into the distmgr.log, nothing makes sense to me. please see the below log. ~Sleep 60 seconds... $$<SMS_DISTRIBUTION_MANAGER><05-01-2014 22:20:35.310-600><thread=5576 (0x15C8)> ~Sleep 60 seconds... $$<SMS_DISTRIBUTION_MANAGER><05-01-2014 22:20:44.178-600><thread=5576 (0x15C8)> Upgrading DP with ID 18. Thread 0x1e1c. Used 1 threads out of 5. $$<SMS_DISTRIBUTION_MANAGER><05-01-2014 22:20:59.248-600><thread=5868 (0x16EC)> ~Processing 18.INS $$<SMS_DISTRIBUTION_MANAGER><05-01-2014 22:20:59.253-600><thread=7708 (0x1E1C)> ~DPID 18 - NAL Path ["Display=\\[sERVER NAME HERE]\"]MSWNET:["SMS_SITE=RDO"]\\[sERVER NAME HERE]\ , ServerName = [sERVER NAME HERE], DPDrive = E:, IsMulticast = 0, PXE = 0, RemoveWDS = 0 $$<SMS_DISTRIBUTION_MANAGER><05-01-2014 22:20:59.263-600><thread=7708 (0x1E1C)> Sleep 20 minutes... $$<SMS_DISTRIBUTION_MANAGER><05-01-2014 22:20:59.255-600><thread=5868 (0x16EC)> ~Created policy provider trigger for ID 18 $$<SMS_DISTRIBUTION_MANAGER><05-01-2014 22:20:59.308-600><thread=5860 (0x16E4)> DPConnection::Connect: For [sERVER NAME HERE], logged-on as rondo\sccmpush~ $$<SMS_DISTRIBUTION_MANAGER><05-01-2014 22:21:02.712-600><thread=7708 (0x1E1C)> Found notification for package 'RDO00002' $$<SMS_DISTRIBUTION_MANAGER><05-01-2014 22:21:04.263-600><thread=5576 (0x15C8)> Found notification for package 'RDO00003' $$<SMS_DISTRIBUTION_MANAGER><05-01-2014 22:21:04.268-600><thread=5576 (0x15C8)> Sleep 20 minutes... $$<SMS_DISTRIBUTION_MANAGER><05-01-2014 22:21:04.302-600><thread=5868 (0x16EC)> ~Package Thread Limit: 3 $$<SMS_DISTRIBUTION_MANAGER><05-01-2014 22:21:04.310-600><thread=5576 (0x15C8)> ~Per package Thread Limit: 5 $$<SMS_DISTRIBUTION_MANAGER><05-01-2014 22:21:04.315-600><thread=5576 (0x15C8)> ~Retry interval: 30 $$<SMS_DISTRIBUTION_MANAGER><05-01-2014 22:21:04.320-600><thread=5576 (0x15C8)> ~DP upgrade thread Limit: 5 $$<SMS_DISTRIBUTION_MANAGER><05-01-2014 22:21:04.325-600><thread=5576 (0x15C8)> ~DP upgrade retry interval: 20 $$<SMS_DISTRIBUTION_MANAGER><05-01-2014 22:21:04.330-600><thread=5576 (0x15C8)> ~Used 0 out of 3 allowed processing threads. $$<SMS_DISTRIBUTION_MANAGER><05-01-2014 22:21:04.360-600><thread=5576 (0x15C8)> Failed to find a valid drive on the distribution point ["Display=\\[sERVER NAME HERE]\"]MSWNET:["SMS_SITE=RDO"]\\[sERVER NAME HERE]\ $$<SMS_DISTRIBUTION_MANAGER><05-01-2014 22:21:04.541-600><thread=7708 (0x1E1C)> ~Starting package processing thread, thread ID = 0x88 (136) $$<SMS_DISTRIBUTION_MANAGER><05-01-2014 22:21:04.919-600><thread=5576 (0x15C8)> DPConnection::Disconnect: For [sERVER NAME HERE], reverted to SYSTEM context~ $$<SMS_DISTRIBUTION_MANAGER><05-01-2014 22:21:05.131-600><thread=7708 (0x1E1C)> user(NT AUTHORITY\SYSTEM) runing application(SMS_DISTRIBUTION_MANAGER) from machine ([sITE SERVER NAME HERE]) is submitting SDK changes from site(RDO) $$<SMS_DISTRIBUTION_MANAGER><05-01-2014 22:21:05.348-600><thread=7708 (0x1E1C)> ~Starting package processing thread, thread ID = 0x2B78 (11128) $$<SMS_DISTRIBUTION_MANAGER><05-01-2014 22:21:05.426-600><thread=5576 (0x15C8)> ~Sleep 3600 seconds... $$<SMS_DISTRIBUTION_MANAGER><05-01-2014 22:21:05.434-600><thread=5576 (0x15C8)> STATMSG: ID=2304 SEV=I LEV=M SOURCE="SMS Server" COMP="SMS_DISTRIBUTION_MANAGER" SYS=[sITE SERVER NAME HERE] SITE=RDO PID=3112 TID=11128 GMTDATE=Thu May 01 12:21:05.440 2014 ISTR0="RDO00003" ISTR1="" ISTR2="" ISTR3="" ISTR4="" ISTR5="" ISTR6="" ISTR7="" ISTR8="" ISTR9="" NUMATTRS=1 AID0=400 AVAL0="RDO00003" $$<SMS_DISTRIBUTION_MANAGER><05-01-2014 22:21:05.440-600><thread=11128 (0x2B78)> ~Retrying package RDO00003 $$<SMS_DISTRIBUTION_MANAGER><05-01-2014 22:21:05.450-600><thread=11128 (0x2B78)> No action specified for the package RDO00003. $$<SMS_DISTRIBUTION_MANAGER><05-01-2014 22:21:05.455-600><thread=11128 (0x2B78)> STATMSG: ID=2304 SEV=I LEV=M SOURCE="SMS Server" COMP="SMS_DISTRIBUTION_MANAGER" SYS=[sITE SERVER NAME HERE] SITE=RDO PID=3112 TID=136 GMTDATE=Thu May 01 12:21:05.440 2014 ISTR0="RDO00002" ISTR1="" ISTR2="" ISTR3="" ISTR4="" ISTR5="" ISTR6="" ISTR7="" ISTR8="" ISTR9="" NUMATTRS=1 AID0=400 AVAL0="RDO00002" $$<SMS_DISTRIBUTION_MANAGER><05-01-2014 22:21:05.440-600><thread=136 (0x88)> ~Retrying package RDO00002 $$<SMS_DISTRIBUTION_MANAGER><05-01-2014 22:21:05.469-600><thread=136 (0x88)> No action specified for the package RDO00002. $$<SMS_DISTRIBUTION_MANAGER><05-01-2014 22:21:05.476-600><thread=136 (0x88)> Start adding package to server ["Display=\\[sERVER NAME HERE]\"]MSWNET:["SMS_SITE=RDO"]\\[sERVER NAME HERE]\... $$<SMS_DISTRIBUTION_MANAGER><05-01-2014 22:21:05.494-600><thread=136 (0x88)> Will wait for 1 threads to end. $$<SMS_DISTRIBUTION_MANAGER><05-01-2014 22:21:05.501-600><thread=136 (0x88)> Thread Handle = 00000000000035C0 $$<SMS_DISTRIBUTION_MANAGER><05-01-2014 22:21:05.507-600><thread=136 (0x88)> Start adding package to server ["Display=\\[sERVER NAME HERE]\"]MSWNET:["SMS_SITE=RDO"]\\[sERVER NAME HERE]\... $$<SMS_DISTRIBUTION_MANAGER><05-01-2014 22:21:05.473-600><thread=11128 (0x2B78)> Attempting to add or update a package on a distribution point. $$<SMS_DISTRIBUTION_MANAGER><05-01-2014 22:21:05.501-600><thread=9852 (0x267C)> The distribution point ["Display=\\[sERVER NAME HERE]\"]MSWNET:["SMS_SITE=RDO"]\\[sERVER NAME HERE]\ is not installed or upgraded yet. $$<SMS_DISTRIBUTION_MANAGER><05-01-2014 22:21:05.538-600><thread=9852 (0x267C)> Error occurred. Performing error cleanup prior to returning. $$<SMS_DISTRIBUTION_MANAGER><05-01-2014 22:21:05.546-600><thread=9852 (0x267C)> ~Failed to install DP files on the remote DP. Error code = 15 $$<SMS_DISTRIBUTION_MANAGER><05-01-2014 22:21:05.455-600><thread=7708 (0x1E1C)> ~Drive E: is not valid. Error = 15 $$<SMS_DISTRIBUTION_MANAGER><05-01-2014 22:21:05.566-600><thread=7708 (0x1E1C)> STATMSG: ID=2360 SEV=E LEV=M SOURCE="SMS Server" COMP="SMS_DISTRIBUTION_MANAGER" SYS=[sITE SERVER NAME HERE] SITE=RDO PID=3112 TID=7708 GMTDATE=Thu May 01 12:21:05.573 2014 ISTR0="["Display=\\[sERVER NAME HERE]\"]MSWNET:["SMS_SITE=RDO"]\\[sERVER NAME HERE]\" ISTR1="[sERVER NAME HERE]" ISTR2="" ISTR3="" ISTR4="" ISTR5="" ISTR6="" ISTR7="" ISTR8="" ISTR9="" NUMATTRS=1 AID0=404 AVAL0="["Display=\\[sERVER NAME HERE]\"]MSWNET:["SMS_SITE=RDO"]\\[sERVER NAME HERE]\" $$<SMS_DISTRIBUTION_MANAGER><05-01-2014 22:21:05.573-600><thread=7708 (0x1E1C)> ~Will try again after 20 mins ... $$<SMS_DISTRIBUTION_MANAGER><05-01-2014 22:21:05.582-600><thread=7708 (0x1E1C)> Will wait for 1 threads to end. $$<SMS_DISTRIBUTION_MANAGER><05-01-2014 22:21:05.522-600><thread=11128 (0x2B78)> Thread Handle = 00000000000029C8 $$<SMS_DISTRIBUTION_MANAGER><05-01-2014 22:21:05.612-600><thread=11128 (0x2B78)> Attempting to add or update a package on a distribution point. $$<SMS_DISTRIBUTION_MANAGER><05-01-2014 22:21:05.522-600><thread=10028 (0x272C)> DP thread with array index 0 ended. $$<SMS_DISTRIBUTION_MANAGER><05-01-2014 22:21:06.124-600><thread=136 (0x88)> DP thread with thread handle 00000000000035C0 and thread ID 9852 ended. $$<SMS_DISTRIBUTION_MANAGER><05-01-2014 22:21:06.131-600><thread=136 (0x88)> The distribution point ["Display=\\[sERVER NAME HERE]\"]MSWNET:["SMS_SITE=RDO"]\\[sERVER NAME HERE]\ is not installed or upgraded yet. $$<SMS_DISTRIBUTION_MANAGER><05-01-2014 22:21:06.136-600><thread=10028 (0x272C)> Error occurred. Performing error cleanup prior to returning. $$<SMS_DISTRIBUTION_MANAGER><05-01-2014 22:21:06.164-600><thread=10028 (0x272C)> DP thread with array index 0 ended. $$<SMS_DISTRIBUTION_MANAGER><05-01-2014 22:21:06.198-600><thread=11128 (0x2B78)> DP thread with thread handle 00000000000029C8 and thread ID 10028 ended. $$<SMS_DISTRIBUTION_MANAGER><05-01-2014 22:21:06.205-600><thread=11128 (0x2B78)> ~Package RDO00002 does not have a preferred sender. $$<SMS_DISTRIBUTION_MANAGER><05-01-2014 22:21:06.645-600><thread=136 (0x88)> The package and/or program properties for package RDO00002 have not changed, need to determine which site(s) need updated package info. $$<SMS_DISTRIBUTION_MANAGER><05-01-2014 22:21:06.653-600><thread=136 (0x88)> ~CDistributionSrcSQL::UpdateAvailableVersion PackageID=RDO00002, Version=3, Status=2301 $$<SMS_DISTRIBUTION_MANAGER><05-01-2014 22:21:06.659-600><thread=136 (0x88)> ~StoredPkgVersion (3) of package RDO00002. StoredPkgVersion in database is 3. $$<SMS_DISTRIBUTION_MANAGER><05-01-2014 22:21:06.687-600><thread=136 (0x88)> ~SourceVersion (3) of package RDO00002. SourceVersion in database is 3. $$<SMS_DISTRIBUTION_MANAGER><05-01-2014 22:21:06.694-600><thread=136 (0x88)> STATMSG: ID=2302 SEV=E LEV=M SOURCE="SMS Server" COMP="SMS_DISTRIBUTION_MANAGER" SYS=[sITE SERVER NAME HERE] SITE=RDO PID=3112 TID=136 GMTDATE=Thu May 01 12:21:06.700 2014 ISTR0="Configuration Manager Client Package" ISTR1="RDO00002" ISTR2="" ISTR3="" ISTR4="" ISTR5="" ISTR6="" ISTR7="" ISTR8="" ISTR9="" NUMATTRS=1 AID0=400 AVAL0="RDO00002" $$<SMS_DISTRIBUTION_MANAGER><05-01-2014 22:21:06.700-600><thread=136 (0x88)> ~Failed to process package RDO00002 after 33 retries, will retry 67 more times $$<SMS_DISTRIBUTION_MANAGER><05-01-2014 22:21:06.711-600><thread=136 (0x88)> ~Exiting package processing thread. $$<SMS_DISTRIBUTION_MANAGER><05-01-2014 22:21:06.720-600><thread=136 (0x88)> ~Package RDO00003 does not have a preferred sender. $$<SMS_DISTRIBUTION_MANAGER><05-01-2014 22:21:06.721-600><thread=11128 (0x2B78)> The package and/or program properties for package RDO00003 have not changed, need to determine which site(s) need updated package info. $$<SMS_DISTRIBUTION_MANAGER><05-01-2014 22:21:06.749-600><thread=11128 (0x2B78)> ~CDistributionSrcSQL::UpdateAvailableVersion PackageID=RDO00003, Version=1, Status=2301 $$<SMS_DISTRIBUTION_MANAGER><05-01-2014 22:21:06.757-600><thread=11128 (0x2B78)> ~StoredPkgVersion (1) of package RDO00003. StoredPkgVersion in database is 1. $$<SMS_DISTRIBUTION_MANAGER><05-01-2014 22:21:06.784-600><thread=11128 (0x2B78)> ~SourceVersion (1) of package RDO00003. SourceVersion in database is 1. $$<SMS_DISTRIBUTION_MANAGER><05-01-2014 22:21:06.790-600><thread=11128 (0x2B78)> STATMSG: ID=2302 SEV=E LEV=M SOURCE="SMS Server" COMP="SMS_DISTRIBUTION_MANAGER" SYS=[sITE SERVER NAME HERE] SITE=RDO PID=3112 TID=11128 GMTDATE=Thu May 01 12:21:06.797 2014 ISTR0="Configuration Manager Client Upgrade Package" ISTR1="RDO00003" ISTR2="" ISTR3="" ISTR4="" ISTR5="" ISTR6="" ISTR7="" ISTR8="" ISTR9="" NUMATTRS=1 AID0=400 AVAL0="RDO00003" $$<SMS_DISTRIBUTION_MANAGER><05-01-2014 22:21:06.797-600><thread=11128 (0x2B78)> ~Failed to process package RDO00003 after 33 retries, will retry 67 more times $$<SMS_DISTRIBUTION_MANAGER><05-01-2014 22:21:06.806-600><thread=11128 (0x2B78)> ~Exiting package processing thread. $$<SMS_DISTRIBUTION_MANAGER><05-01-2014 22:21:06.814-600><thread=11128 (0x2B78)> Sleep 20 minutes... $$<SMS_DISTRIBUTION_MANAGER><05-01-2014 22:21:09.311-600><thread=5868 (0x16EC)> ~Package Thread Limit: 3 $$<SMS_DISTRIBUTION_MANAGER><05-01-2014 22:21:10.463-600><thread=5576 (0x15C8)> ~Per package Thread Limit: 5 $$<SMS_DISTRIBUTION_MANAGER><05-01-2014 22:21:10.469-600><thread=5576 (0x15C8)> ~Retry interval: 30 $$<SMS_DISTRIBUTION_MANAGER><05-01-2014 22:21:10.476-600><thread=5576 (0x15C8)> ~DP upgrade thread Limit: 5 $$<SMS_DISTRIBUTION_MANAGER><05-01-2014 22:21:10.482-600><thread=5576 (0x15C8)> ~DP upgrade retry interval: 20 $$<SMS_DISTRIBUTION_MANAGER><05-01-2014 22:21:10.488-600><thread=5576 (0x15C8)> ~Used 0 out of 3 allowed processing threads. $$<SMS_DISTRIBUTION_MANAGER><05-01-2014 22:21:10.509-600><thread=5576 (0x15C8)> ~Sleep 1826 seconds... $$<SMS_DISTRIBUTION_MANAGER><05-01-2014 22:21:10.517-600><thread=5576 (0x15C8)> Sleep 20 minutes... $$<SMS_DISTRIBUTION_MANAGER><05-01-2014 22:21:14.320-600><thread=5868 (0x16EC)> ~Used 0 out of 3 allowed processing threads. $$<SMS_DISTRIBUTION_MANAGER><05-01-2014 22:21:15.544-600><thread=5576 (0x15C8)> ~Sleep 1821 seconds... $$<SMS_DISTRIBUTION_MANAGER><05-01-2014 22:21:15.553-600><thread=5576 (0x15C8)> Sleep 20 minutes... $$<SMS_DISTRIBUTION_MANAGER><05-01-2014 22:21:19.332-600><thread=5868 (0x16EC)> ~Used 0 out of 3 allowed processing threads. $$<SMS_DISTRIBUTION_MANAGER><05-01-2014 22:21:20.581-600><thread=5576 (0x15C8)> ~Sleep 1816 seconds... $$<SMS_DISTRIBUTION_MANAGER><05-01-2014 22:21:20.589-600><thread=5576 (0x15C8)> ~Sleep 1816 seconds... $$<SMS_DISTRIBUTION_MANAGER><05-01-2014 22:21:20.732-600><thread=5576 (0x15C8)> ~Sleep 1816 seconds... $$<SMS_DISTRIBUTION_MANAGER><05-01-2014 22:21:20.872-600><thread=5576 (0x15C8)> So I have two questions, How can I fix this and how do I prevent it from happening to the remainder? Thank you all in advance. Daniel.
-
Quick question, is it necessary when updating an application with two separate deployment types to update content on each deployment type? I assume I should do both?

-
 Hi, I am working on a Company that have two Enterprises each one has a domain, both have two-ways domain trust. In the Enterprise A: we have SCCM 1810 Current Branch Primary site, the Enterprise B wants to have SCCM, but the Enterprise A need to have control on the Enterprise B, we are wondering which is the best option we need to take: Scenario 1: install secondary site on the Enterprise B with DP, MP and SUP (download updates directly from internet and not getting updates from the primary site on the Enterprise A) and PXE may be in the future. Scenario 2: Install distribution point on the Enterprise B, but in this option we are wondering if it is will use a lot traffic with enterprise A and if it is possible to install WSUS(independent WSUS) with DP. Notes: Enterprise A has SCCM 1810 primary site with MP, DP, SUP, etc... Enterprise B has a central office and many branches, the idea is, the enterprise B use the minimum network traffic with the Enterprise A, this latter wants to have full control and can gather all inventory information from Enterprise B, also the each IT should manage their site. Please could some someone advise? Regards
 -
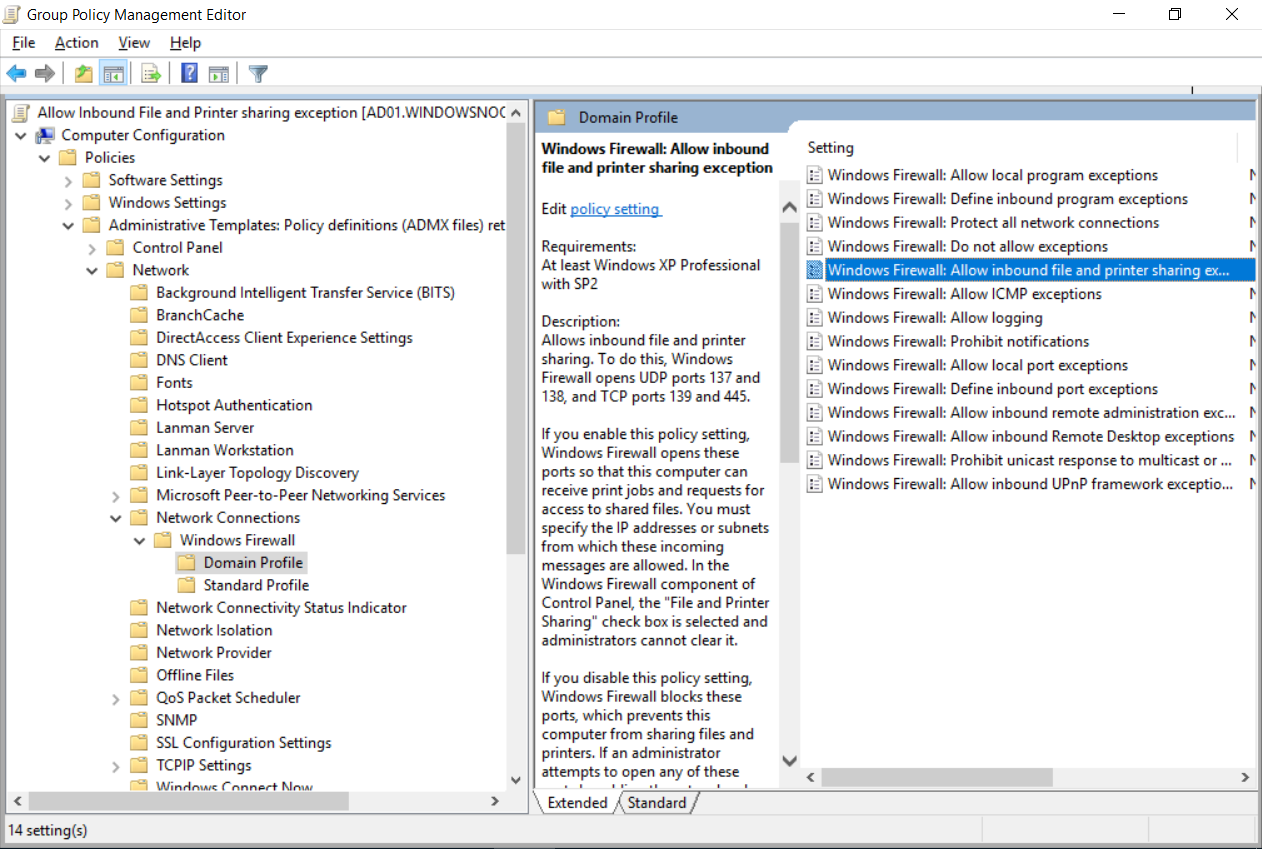
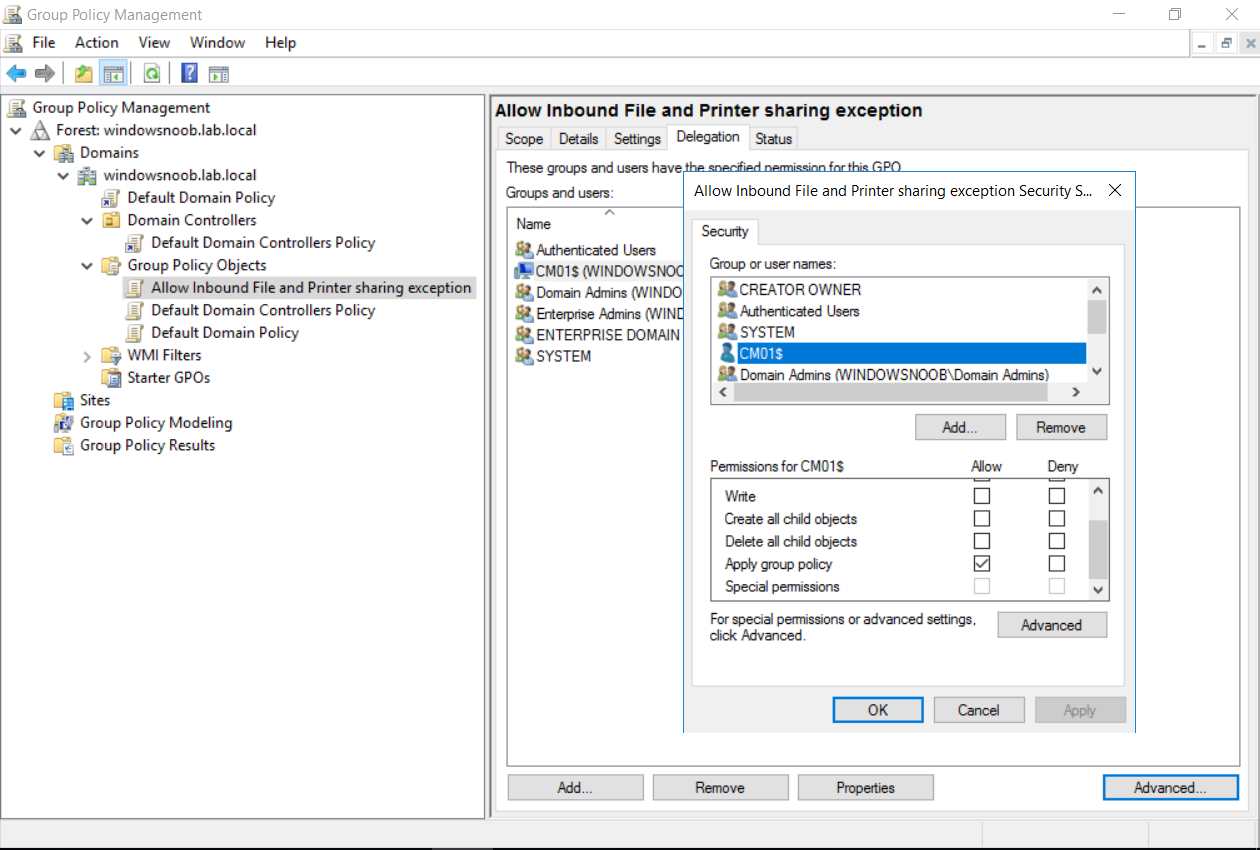
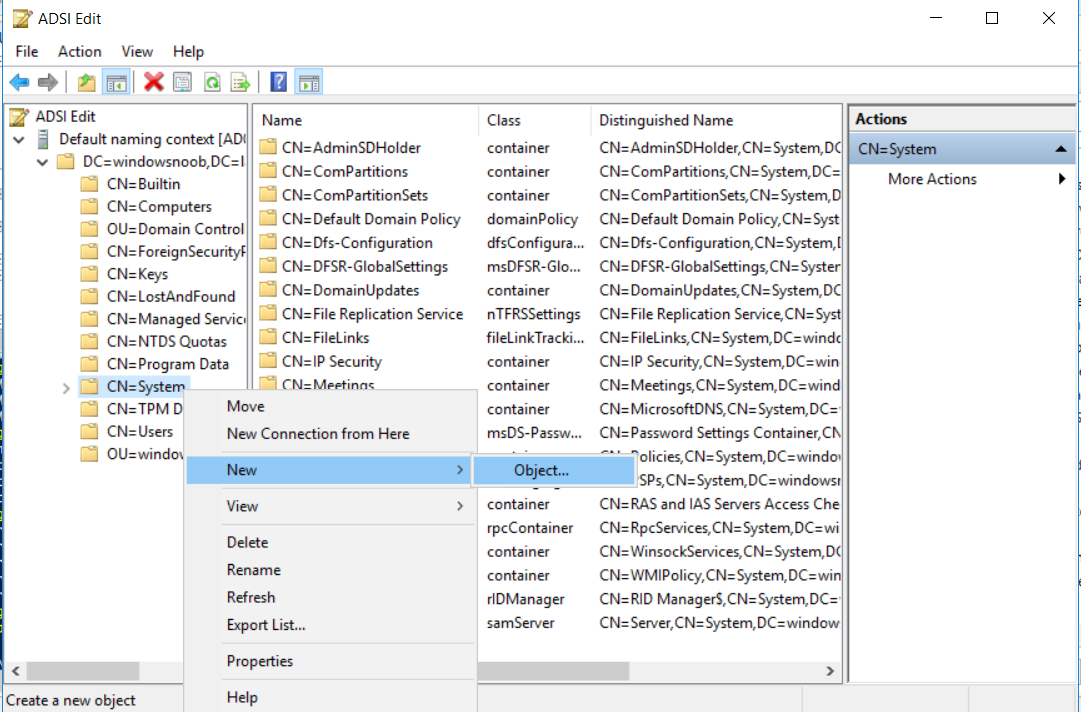
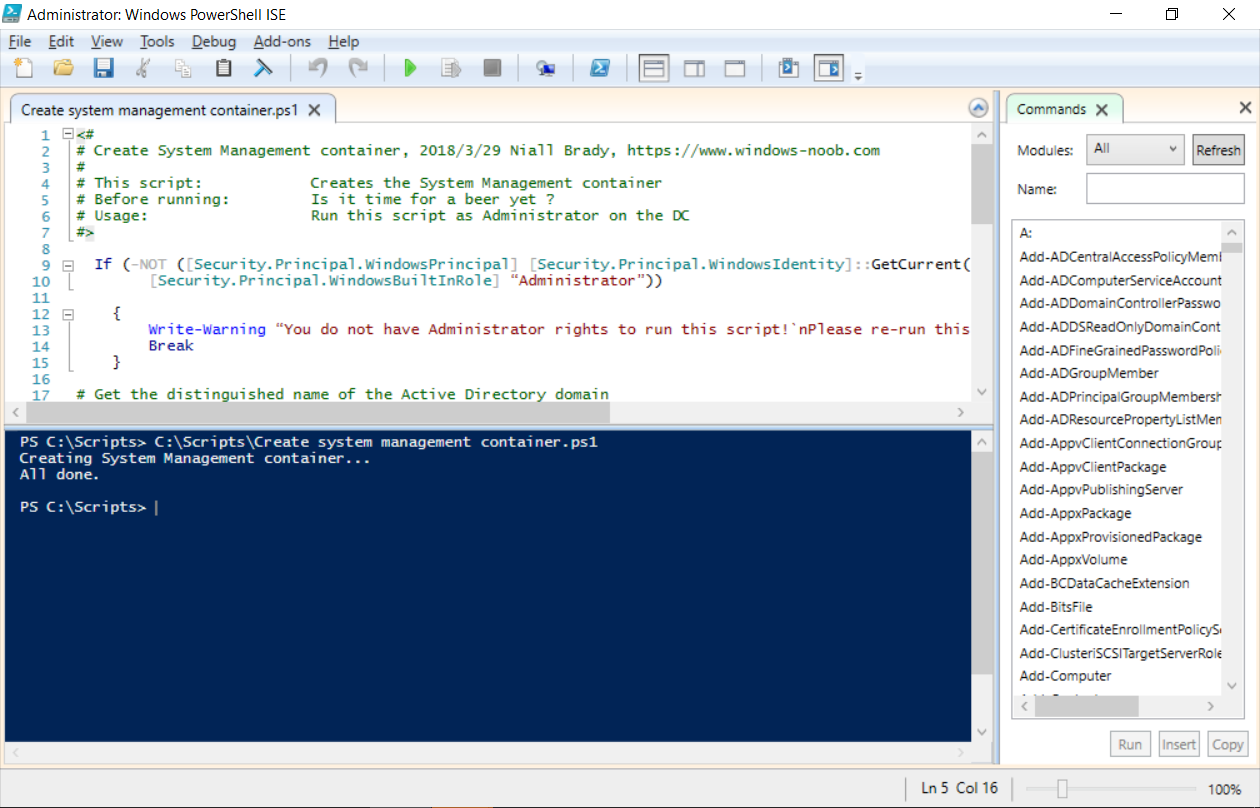
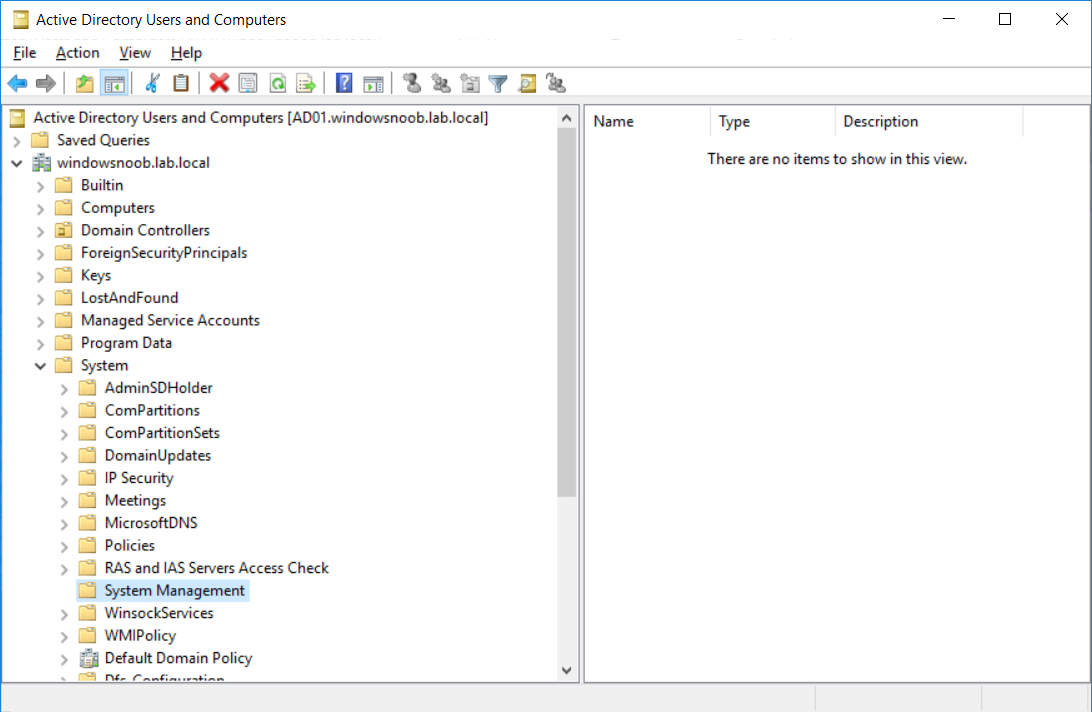
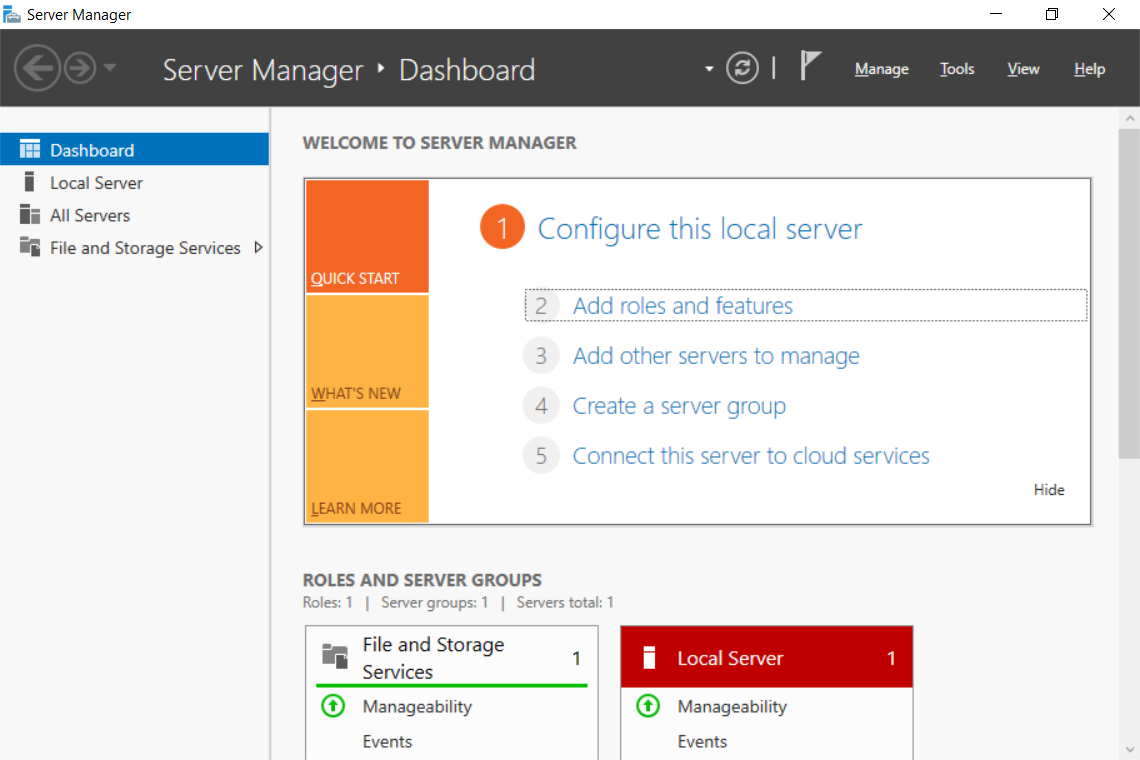
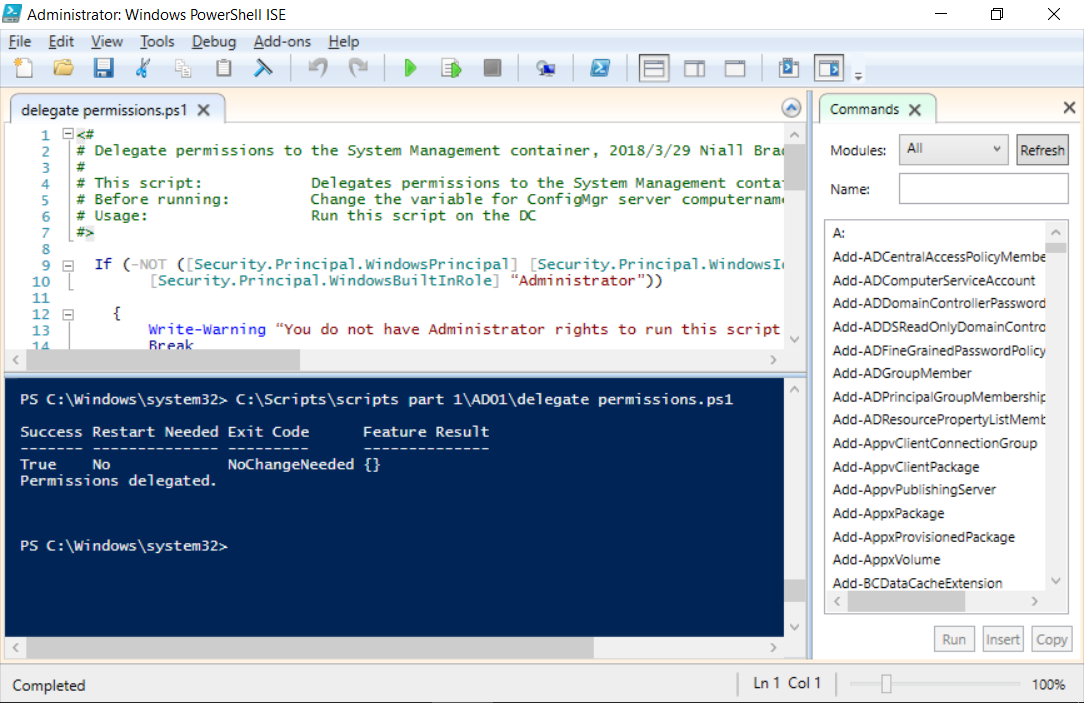
 In this Guide we will Go Step by Step for installation SCCM 1606 on Remote SQL Server, let’s Go with the below plan for our Deployment: 1. Create Two Domain Accounts as Service Account, one as a domain admin for SCCM and the other for SQL Services (Domain user) 2. Create System Management Container and Give the Computer Account for site server the needed permissions 3. Extend AD Schema 4. Install ADK 5. Install the Required Roles and Features For SCCM 6. Install SQL Server on Remote virtual machine 7. Configure Static Port for SQL and Add SCCM Site Server As local Admin on SQL Server 8. Install SCCM primary server Stand-alone You can find the guide in the attachment : ) Install SCCM On Remote SQL Step By Step.pdf
 -
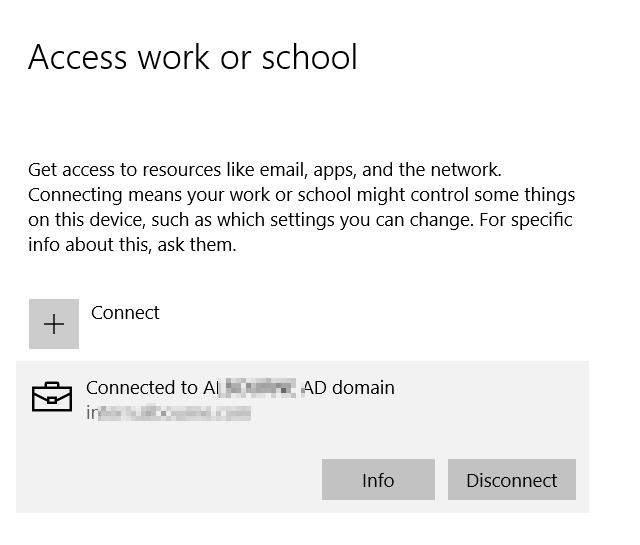
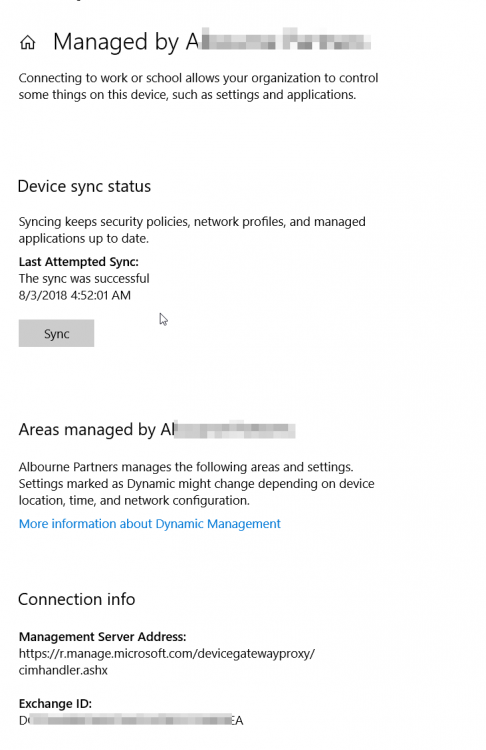
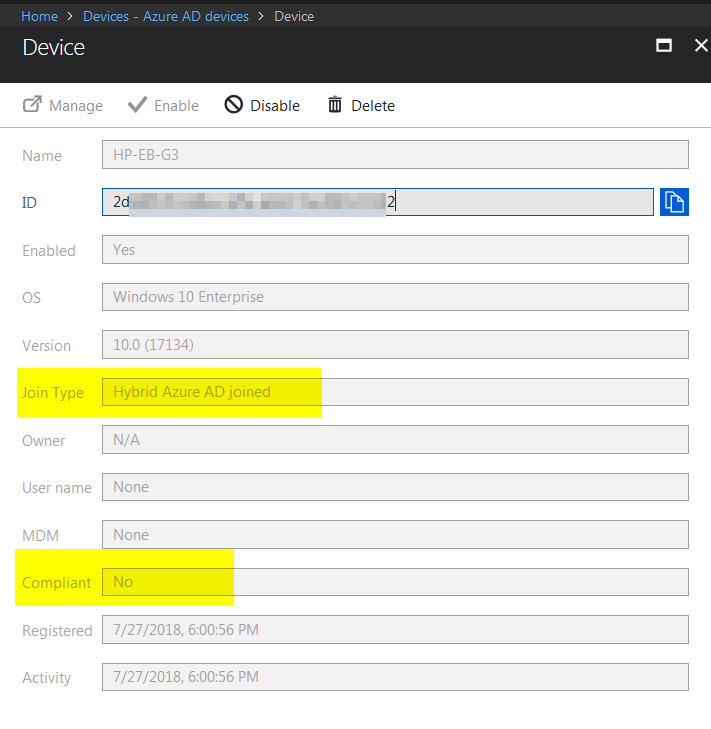
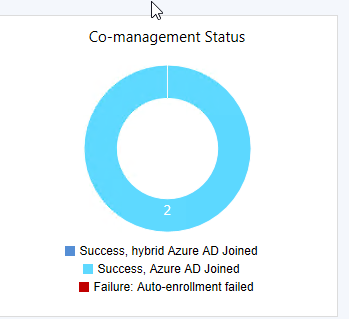
 I am facing a very weird issue with SCCM CoManagement where Windows 10 machines registered to AzureAD in Hybrid Azure AD Join, are shown as Azure AD Joined. I will be focusing on one machine so we see the issue in depth. Configuration details SCCM Current Branch 1802 with all three hotfixes installed Windows 10 Enterprise 1803 with latest updates Co-Management Enabled for All Devices (no pilot group) No workloads have yet been migrated to Intune Group Policies for Automatic Enrollment to MDM and Automatic Registration with AzureAD enabled SCCM Client Cloud option for Automatic Registration enabled Intune set as Standalone Intune Enrollment set as MDM only (MAM disabled) ADFS Federated Domain 3.0 (2012R2) with AAD Connect Federation Facts SSO et. all are working as expected on the client Client detects client as Hybrid Azure AD Joined Intune detects client as Hybrid Azure AD Joined Issue SCCM detects client as Azure AD Joined I will now provide all relevant screenshots from Intune, SCCM and Client. SCCM As seen below, SCCM thinks the device is Azure AD Join and not Hybrid Azure AD Join. I also used the following SCCM query: select SMS_R_System.NetbiosName, SMS_Client_ComanagementState.Authority, SMS_Client_ComanagementState.AADDeviceID, SMS_Client_ComanagementState.ComgmtPolicyPresent, SMS_Client_ComanagementState.EnrollmentErrorDetail, SMS_Client_ComanagementState.EnrollmentFailed, SMS_Client_ComanagementState.EnrollmentStatusCode, SMS_Client_ComanagementState.HybridAADJoined, SMS_Client_ComanagementState.MDMEnrolled, SMS_Client_ComanagementState.MDMWorkloads, SMS_Client_ComanagementState.AADJoined from SMS_R_System inner join SMS_Client_ComanagementState on SMS_Client_ComanagementState.ResourceID = SMS_R_System.ResourceId where SMS_Client_ComanagementState.ComgmtPolicyPresent = 1 and SMS_Client_ComanagementState.MDMEnrolled = 1 And had the following results, same probem. Azure AD Joined = Yes, Hybrid Azure AD Joined = No AzureAD As seen on the Devices > Azure AD Devices, the machine is properly detected as Hybrid Azure AD Joined As seen below, DeviceTrustType = Domain Joined and DeviceTrustLevel = Managed should be correct (see here). Get-MsolDevice -Name hp-eb-g3 Enabled : True ObjectId : cxxxxxxxxxxxxxxxxxxxxxxxx0 DeviceId : 2xxxxxxxxxxxxxxxxxxxxxxxxxxxxx2 DisplayName : HP-EB-G3 DeviceObjectVersion : 2 DeviceOsType : Windows 10 Enterprise DeviceOsVersion : 10.0 (17134) DeviceTrustType : Domain Joined DeviceTrustLevel : Managed DevicePhysicalIds : {[USER-GID]:2xxxxxxxxxxxxxxxxxxxxxxxxxxxxxx2, [GID]:g:6xxxxxxxxxxxxxxxx2, [USER-HWID]:2xxxxxxxxxxxxxxxxxxxxxxxxxxxxx2, [HWID]:h:6xxxxxxxxxxxxxxxxxx2} ApproximateLastLogonTimestamp : 27/07/2018 15:00:56 AlternativeSecurityIds : {X509:<SHA1-TP-PUBKEY>0xxxxxxxxxxxxxxxxxxxxxxxxxxxxxxxxxxxxxx} DirSyncEnabled : True LastDirSyncTime : 03/08/2018 02:31:16 RegisteredOwners : {} GraphDeviceObject : Microsoft.Azure.ActiveDirectory.GraphClient.Device Intune This is how the device shows up in Intune Client DeviceManagement Log event 75 properly happened Client properly seeing management from Intune dsregcmd properly recognizes machine as AAD and MDM enrolled and AD Domain Joined dsregcmd /status +----------------------------------------------------------------------+ | Device State | +----------------------------------------------------------------------+ AzureAdJoined : YES EnterpriseJoined : NO DeviceId : 2xxxxxxxxxxxxxxxxxxxxxxxxx2 Thumbprint : 0xxxxxxxxxxxxxxxxxxxxxxA KeyContainerId : cxxxxxxxxxxxxxxxxxxxxxx7 KeyProvider : Microsoft Platform Crypto Provider TpmProtected : YES KeySignTest: : PASSED Idp : login.windows.net TenantId : 9xxxxxxxxxxxxxxxxxxx2 TenantName : Axxxxxxxxxxxxxs AuthCodeUrl : https://login.microsoftonline.com/9xxxxxxxxxxxxxxxxxxxx2/oauth2/authorize AccessTokenUrl : https://login.microsoftonline.com/9xxxxxxxxxxxxxxxxxxxxxxxxx2/oauth2/token MdmUrl : https://enrollment.manage.microsoft.com/enrollmentserver/discovery.svc MdmTouUrl : https://portal.manage.microsoft.com/TermsofUse.aspx MdmComplianceUrl : https://portal.manage.microsoft.com/?portalAction=Compliance SettingsUrl : JoinSrvVersion : 1.0 JoinSrvUrl : https://enterpriseregistration.windows.net/EnrollmentServer/device/ JoinSrvId : urn:ms-drs:enterpriseregistration.windows.net KeySrvVersion : 1.0 KeySrvUrl : https://enterpriseregistration.windows.net/EnrollmentServer/key/ KeySrvId : urn:ms-drs:enterpriseregistration.windows.net WebAuthNSrvVersion : 1.0 WebAuthNSrvUrl : https://enterpriseregistration.windows.net/webauthn/9xxxxxxxxxxxxxxxxxxxxxxxxxxxx2/ WebAuthNSrvId : urn:ms-drs:enterpriseregistration.windows.net DeviceManagementSrvVersion : 1.0 DeviceManagementSrvUrl : https://enterpriseregistration.windows.net/manage/9xxxxxxxxxxxxxxxxxxxxxxxxxxxxxxx2/ DeviceManagementSrvId : urn:ms-drs:enterpriseregistration.windows.net DomainJoined : YES DomainName : XXXXXXXXXX +----------------------------------------------------------------------+ | User State | +----------------------------------------------------------------------+ NgcSet : NO WorkplaceJoined : NO WamDefaultSet : YES WamDefaultAuthority : organizations WamDefaultId : https://login.microsoft.com WamDefaultGUID : {Bxxxxxxxxxxxxxxxxxxxxxxxxxxxxx0} (AzureAd) AzureAdPrt : YES AzureAdPrtAuthority : https://login.microsoftonline.com/9xxxxxxxxxxxxxxxxxxxxxxxxxx2 EnterprisePrt : NO EnterprisePrtAuthority : +----------------------------------------------------------------------+ | Ngc Prerequisite Check | +----------------------------------------------------------------------+ IsUserAzureAD : YES PolicyEnabled : NO PostLogonEnabled : YES DeviceEligible : YES SessionIsNotRemote : NO CertEnrollment : none AadRecoveryNeeded : NO PreReqResult : WillNotProvision Can anyone having a similar configuration crosscheck and let me know what difference there is? References: https://www.imab.dk/flipping-the-switch-how-to-enable-co-management-in-configuration-manager-current-branch/ https://allthingscloud.blog/automatically-mdm-enroll-windows-10-device-using-group-policy/ -- Alex
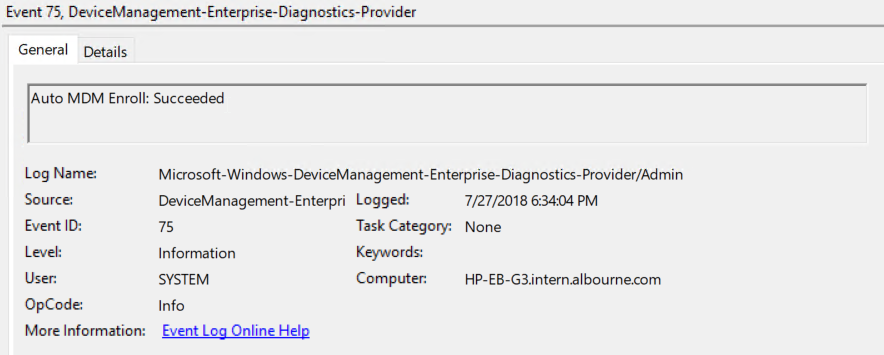


-
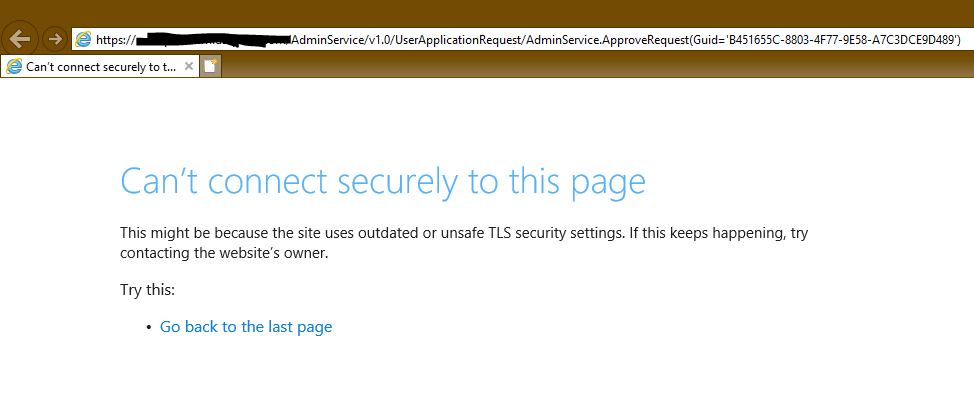
 Been checking out the new email approval feature for application requests in CB1810, however, I am running into an issue and can't seem to figure it out. To start, I can successfully request an application and SCCM triggers the alert and I successfully receive an email. However, when I attempt to approve or deny the request, I get a website security error and can't proceed. I am not using Azure integration and I am attempting this on my local intranet. Any ideas? (Sensitive information removed) Thanks! Mark
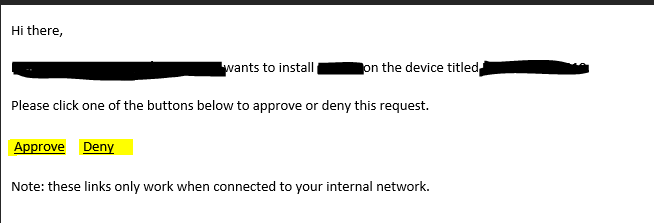
-
We have SCCM setup for 10k or more PC's that are all domain joined and all that works fine. I'm trying to add workgroup ones (one right now for testing) All the sites I've found say its possible with some limitations. I have the client on the PC, It sees the server and the applications but anything we try to install from SCCM just sits there at 0% downloading. I have the test pc plugged into the LAN on the same subnet the BG is set for my PC so its in a boundary group. The only log I've found that I understand (attached) says "Error logging on as a network access account" We have a Network access account setup, I have it on the SCCM server and distribution point with rights to access via network. Does anyone know what I'm missing to make this work?

-
 Hey Guys / Niall - I'm wrapping up the build of a brand new environment on a new domain we are migrating to and installing the last Secondary Site of 7. The destination servers of all the Secondary sites are all new 2012 R2 installations where I manually installed all pre-reqs, deployed the Secondary site from the console, and once complete added SUP & SMP. All 6 installed prior to this one went great with no issues. However, this last one is a pain even though I installed it the exact same way. It shows it completed successfully, but that's not the case. Below is a list of characteristics of the issue , what I've tried so far, and finally log info. I'm referring to the Secondary with issues as "TEX" and primary site as "ABC" Characteristics of Secondary Site Issues (As it appears 24 hours after installation / deployment) Installation completes successfully and under Sites its listed as "Active." All results within Installation Results pass except for 2 pre-req warnings BITS & IIS6 WMI compatibility component for IIS7 are not installed or cannot be verified Setup unable to establish a remote connection to WMI on secondary site Site Status & Component Status lists do not contain and entries from "TEX" yet lists ones from the 6 other Secondaries AD Forests / Publishing Status lists all 6 Secondaries + 1 Primary including TEX - however - the "Last Publishing Time" & "Last Publishing Status" are empty only for TEX There are no entries for "TEX" within System Management container In Monitoring / Database Replication, it states "Link is being configured" & "Initializing data between the parent site and child site". Replication Analyzer Inconsistent public keys - asks me to initiate public key transfer for target site TEX on source site ABC File replication route is required for site-to-site communication and file replication route is missing for site ABC on site TEX Replication initialization is aborted in site ABC for the replication groups: Secondary_Site_Replication_Configuration. RLA recommends reinitializing the above mentioned groups on site TEX. This may take several hours A boundary group with ~200 IP Ranges is associated with the Secondary Site Groups for local admins on TEX are the same as all other secondaries Distribution is not working / processing anything to TEX although should be What I've Tried to Resolve Issue Uninstall Secondary Site then reinstall Delete Secondary Site from console then manually uninstall all SCCM & SQL components, delete related files, registry entries, and even uninstalled roles / features; rebooted; then reinstalled all from scratch - same issue persists Manually added server's hostname to System Management container delegating full access to it Chosen to run all suggested actions in Replication Link Analyzer. After doing each, same issue appeared so had to skip rule to get it to continue Used the commands "preinst.exe /keyforchild" and "preinst.exe /keyforparent" then copied the resulting files into the hman.inbox where they belonged. They were processed and disappeared but nothing changed Considering uninstall / reinstall again but using a different site code. Only thing is that if that worked I feel I'd have some crap left over in database from old site code and don't want to jeopardize stability or performance Log FIles Below are individual log files as well as ZIPs of multiple ones taken from when I worked on it this afternoon. TEX_to_ABC Diagnostics.csv ReplicationAnalysis.htm rcmctrl_(Primary ABC).log rcmctrl_(Secondary_TEX).log AllReplicationLogs.zip SecondaryLogFiles.zip SecondaryInstallLogs.zip replmgr_(Primary ABC).log replmgr_(Secondary_TEX).log The site is 2012 R2 SP1 CU4 with all site servers running 2012 R2 OS. Any help or suggestions you could provide would be fantastic - Thank You!!
 -
I am trying to create an email notification that will report all the systems that completed their hardware inventory (which occurs daily) and those that haven't, and send an email notification with the status. Is this possible? Thanks
-
 Introduction UPDATE: please use the newer version of this guide here. This multi-part guide will show you how to install the latest baseline version of Configuration Manager from Microsoft. The latest available baseline version is System Center Configuration Manager (Current Branch) version 1802 as of March 29th 2018. How can I install System Center Configuration Manager (Current Branch) version 1802 on Windows Server 2016 with SQL Server 2017 – Part 1 How can I install System Center Configuration Manager (Current Branch) version 1802 on Windows Server 2016 with SQL Server 2017 – Part 2 How can I install System Center Configuration Manager (Current Branch) version 1802 on Windows Server 2016 with SQL Server 2017 – Part 3 How can I install System Center Configuration Manager (Current Branch) version 1802 on Windows Server 2016 with SQL Server 2017 – Part 4 You can use this multi-part guide to get a hierarchy up and running on Windows Server 2016 using SQL Server 2017. The concept behind this is to guide you through all the steps necessary to get a working Configuration Manager Primary site installed (for lab use) using manual methods or automated using PowerShell. This gives you the power to automate the bits that you want to automate, while allowing you to manually do other tasks when needed. You decide which path to take. PowerShell knowledge is desired and dare I say required if you are in any way serious about Configuration Manager. I will show you how to do most steps via two methods shown below, it's up to you to choose which method suits you best but I highly recommend automating everything that you can, using PowerShell. Method #1 - Do it manually Method #2 - Automate it with PowerShell Get your lab ready In this guide I assume you have already installed two WorkGroup joined servers with Windows Server 2016 installed, how you install the operating system is up to you. When installing the servers please choose Windows Server 2016 Standard (Desktop Experience). The servers used in this guide are configured as listed below, the SmoothWall (NAT) is optional. Server name: AD01 Server function: Domain Controller Server status: Workgroup joined IPv4 Address: 192.168.9.1 Subnet Mask: 255.255.255.0 Default Gateway: 192.168.9.199 DNS: 192.168.9.1 Server name: CM01 Server function: Configuration Manager Primary site Server status: Workgroup joined IPv4 Address: 192.168.9.2 Subnet Mask: 255.255.255.0 Default Gateway: 192.168.9.199 DNS: 192.168.9.1 Server name: Smoothwall Server function:Linux firewall Server status: 2 legacy nics eth0: 192.168.9.199 eth1: x.x.x.x (internet facing ip) Step 1. Configure Active Directory Domain Services (ADDS) Note: Perform the following steps on the AD01 server as a Local Administrator. To setup Active Directory Domain Services you could manually click your way through the appropriate wizard in Server Manager or automate it using PowerShell. For your benefit I'll show you both methods below, all you have to do is choose which one suits you. Method #1 - Do it manually Open Server Manager. Click on Add roles and features On the Before You Begin screen click Next For Installation Type select Role-based or Feature-based installation For Server Selection select Select a server from the server pool and choose AD01 For Server Roles select Active Directory Domain Services, when prompted to add features that are required for Active Directory Domain Services select Add Features Select DNS Server, when prompted to add features that are required for DNS Server, accept the changes by clicking on Add Features Continue the the wizard by clicking Next On the Features screen click Next On the AD DS screen click Next On the DNS Server screen click Next On the Confirmation screen click Install and then click on Close After it's finished, perform the Post Deployment Configuration by clicking on Promote this server to a domain controller select the Add a new forest option, give it a root domain name such as windowsnoob.lab.local Next, depending on your requirements set the Forest functional level and Domain functional level, I've selected the default options below however you may want to configure it differently for your hierarchy, For the password field use P@ssw0rd, Click Next when ready, for DNS options, click Next, Next verify the NetBIOS name and click Next To specify the location of the AD DS database, log files and so forth, either accept the defaults, or change them to something that suits your hierarchy and click Next. Next you can review the options (clicking view script will save your actions to a PowerShell script for use later if you wish). Click Next when done. Next, click Install to begin Once it is complete making the changes it will automatically reboot the server Method #2 - Automate it with PowerShell To configure ADDS and DNS automatically, use the ConfigureADDS.ps1 PowerShell script. 1. Copy the script to C:\scripts on AD01 2. Edit the variables in lines 17-24 as desired before running. 3. Start Windows PowerShell ISE as Administrator and run the script by clicking on the green triangle. Once the script is run, it will automatically reboot. Step 2. Join CM01 to the domain Note: Perform the following on the ConfigMgr server (CM01) as Local Administrator Method #1 - Do it manually To join the domain manually, login to CM01. Start Windows File Explorer. Right-click on This-PC and choose Properties. The System screen will appear. Click on Change settings to the right of Computer name. For the option To rename this computer or change its domain or workgroup, click Change, click Change and for Member of select Domain, enter the Domain details used in Step 1 and click OK when prompted for credentials, enter them and click OK You'll be welcomed to the Domain. Click OK. And prompted to reboot the computer, Click OK. In the Computer Name/Domain changes screen, click Close then click Restart now when prompted. Method #2 - Automate it with PowerShell To join the domain automatically, use the joindomain.ps1 PowerShell script. 1. Copy the script to C:\Scripts on CM01 2. Edit the variables (lines 16-18) as desired before running. 3. Start Windows PowerShell ISE as Administrator and run the script by clicking on the green triangle. Note: If DNS is not set correctly on the CM01 Network Properties, then the Domain Join process will fail. The script checks for success and reports an error if one occurs. If successful it will automatically restart the computer after the Domain Join process is complete. Step 3. Create users (optional) Note: Perform the following on the Active Directory Domain Controller server (AD01) as Administrator Method #1 - Do it manually To create users manually, click on Start and choose Windows Administrative Tools and then select Active Directory Users and Computers. In Active Directory Users and Computers, add new users by expanding <domain name>, select Users and right click, choose New then select User. In the wizard that appears fill in the New Object user details enter the Password details using password P@ssw0rd and click Finish when done Repeat the above process to add remaining users as appropriate for your environment Testuser, used for testing stuff CM_BA, used for building ConfigMgr created images CM_JD, used for joining computers to the domain CM_RS, used for reporting services. CM_CP, used when installing the Configuration Manager Client for Client Push. CM_NAA, (Network Access Account) used during OSD Note: The PowerShell script creates users and makes a user a local admin on the CM01 server. To facilitate the local administrator creation, you'll need to (optionally) manually create a GPO on AD01 called Allow Inbound File and Printer sharing exception which sets Windows Firewall: Allow inbound file and printer sharing exception to Enabled. To Create the GPO on AD01, click the Start menu and choose Windows Administrative Tools, then select Group Policy Management. Expand Group Policy Objects and Right click, choose New and give it a Name: Allow Inbound File and Printer Sharing Exception. In the GPO settings, expand Computer Configuration, Policies, Administrative Templates, then select Network, Network Connections, Windows Firewall and select the Domain Profile. Locate the Windows Firewall: Allow inbound file and printer sharing exception and set it to Enabled. Apply the changes. Here you can see the path to the GPO setting. After creating the GPO, you'll want to limit it to only apply to your ConfigMgr server (or servers). To do that select the Delegation tab of the GPO, and click on Advanced button. Select the Authenticated Users security group and then scroll down to the Apply Group Policy permission and un-tick the Allow security setting. This denies authenticated users from applying this GPO setting Next, click on the Add button, for Select this object type make sure to select Computers from the Object Types and select the group or Computer object that you want to have this policy apply to. Then select the group (e.g. ConfigMgr Servers) and scroll the permission list until you see the Apply group policy option and then tick the Allow permission as shown here. Finally, you need to Link the GPO, to do that, right click on your Domain (in this example it's windowsnoob.lab.local) and select Link an existing GPO and then select the newly created GPO Note: Once the above is completed, please update Group Policy on CM01 using Gpupdate /force prior to running the PowerShell script below. Method #2 - Automate it with PowerShell To create users automatically, use the Create Users Usergroups and OUs in AD.ps1 PowerShell script. Tip: You should edit the script and adjust the variables to your liking, for example if you want to change the default password. You may also want to rem out the MDT and MBAM user/groups that are created and change some of the user names within the script. To rem out a line place a # in front of it. 1. Copy the script to C:\scripts on AD01 2. Edit the variables [lines 79-100] as desired before running. 3. Start Windows PowerShell ISE as Administrator and run the script by clicking on the green triangle. Once the script is complete you can browse Active Directory Users and Groups to see the Users and Groups it created. Step 4. Create the System Management Container Note: Perform the following on the Active Directory Domain Controller server (AD01) as Local Administrator For details of why you are doing this see https://docs.microsoft.com/en-us/sccm/core/plan-design/network/extend-the-active-directory-schema Method #1 - Do it manually Open ADSI Edit, click on Action, then Connect To and click Ok, Double Click on Default Naming Context and the DC= that appears below it. Click on the > and scroll down to CN=System. Right Click on CN=System and choose New, Object choose Container from the options, click Next enter System Management as the value. Click Next and then click Finish. Method #2 - Automate it with PowerShell Note: Perform the following on the Active Directory Domain Controller server (AD01) as Local Administrator To create the System Management container automatically, use the Create System Management container.ps1 PowerShell script. Step 5. Delegate Permission Note: Perform the following on the Active Directory Domain Controller server (AD01) as Local Administrator Method #1 - Do it manually Open Active Directory Users and Computers. Click on view, select Advanced Features. Select the System Management Container under System Right click the System Management container, choose All Tasks and Delegate Control. When the Welcome to Delegation of Control Wizard appears click next, then click Add. click on Object Types, select Computers. Type in your Configuration Manager server name (CM01) and click on Check Names, it should resolve. Click Ok Click Next then select Create a Custom Task to Delegate, click Next, make sure This folder, existing objects in this folder and creation of new objects in this folder is selected. Click next, select the 3 permissions General, Property-Specific and Creation-deletion of specific child objects are selected then place a check mark in Full Control. Tip: Repeat the above process for each site server that you install in a Hierarchy. Method #2 - Automate it with PowerShell To delegate permissions to the System Management container automatically, use the Delegate Permissions.ps1 PowerShell script on AD01. Edit line 24 to point to the ConfigMgr server if you are using a different computer name than CM01. Note: You need to start Windows PowerShell ISE as a user that has Administrative Permissions in AD on the AD01 server. Downloads The scripts used in this guide are available for download here. Unzip to C:\Scripts on both servers. The scripts are placed in the corresponding folder (Part 1, Part 2 etc) and sorted into which server you should run the script on (AD01 or CM01). Scripts.zip Summary Using PowerShell to automate things leaves more time for yourself and it's fun. Please join me in Part 2 of this multi-part guide where you will configure Windows Server 2016 roles and features and then install SQL Server 2017. Continue to Part 2 of this guide > https://www.windows-noob.com/forums/topic/16116-how-can-i-install-system-center-configuration-manager-current-branch-version-1802-on-windows-server-2016-with-sql-server-2017-part-2/
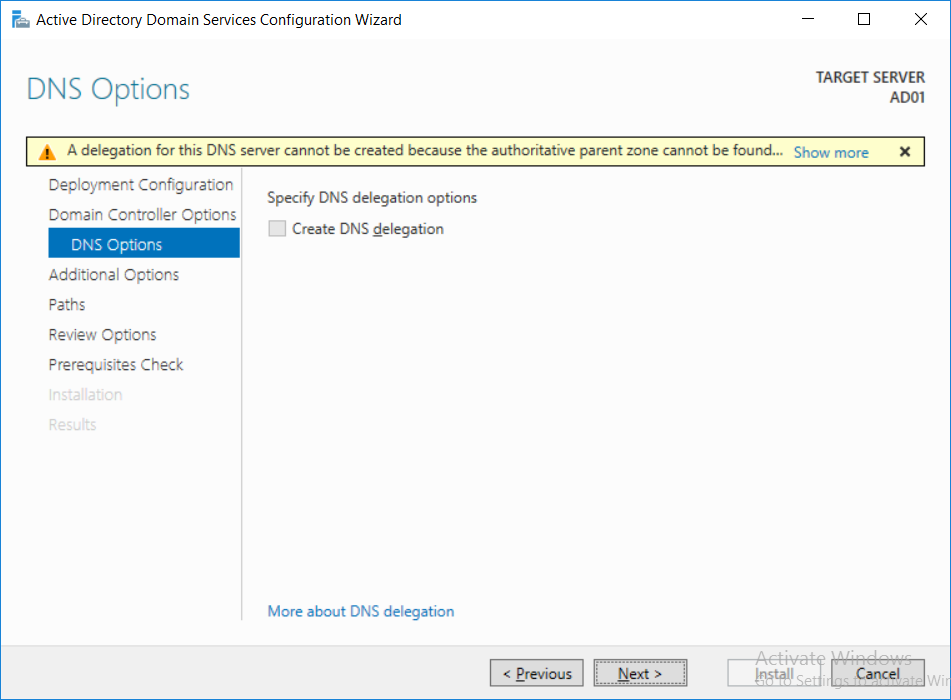
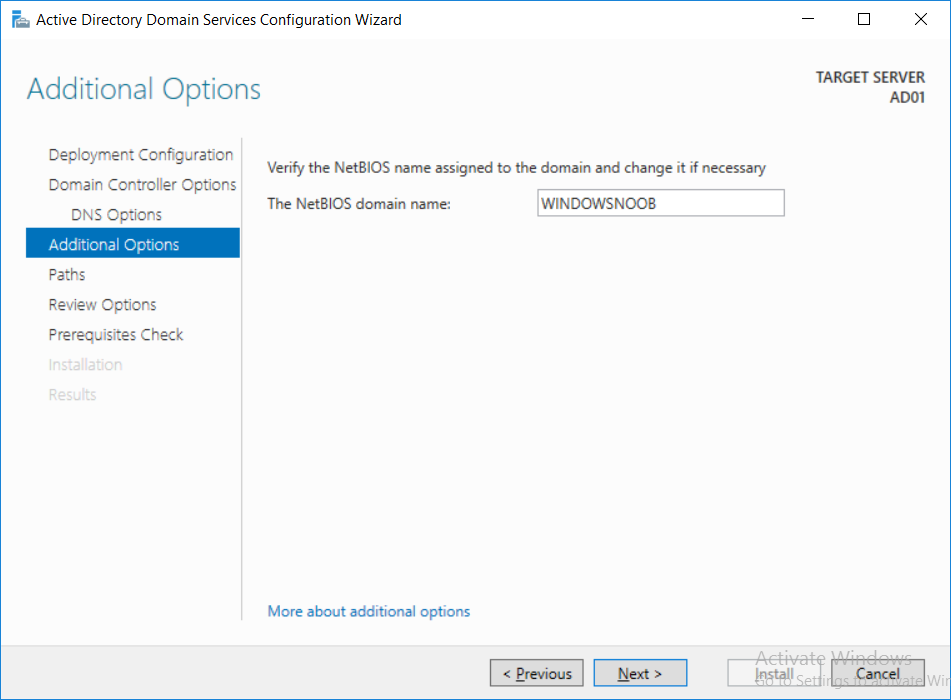
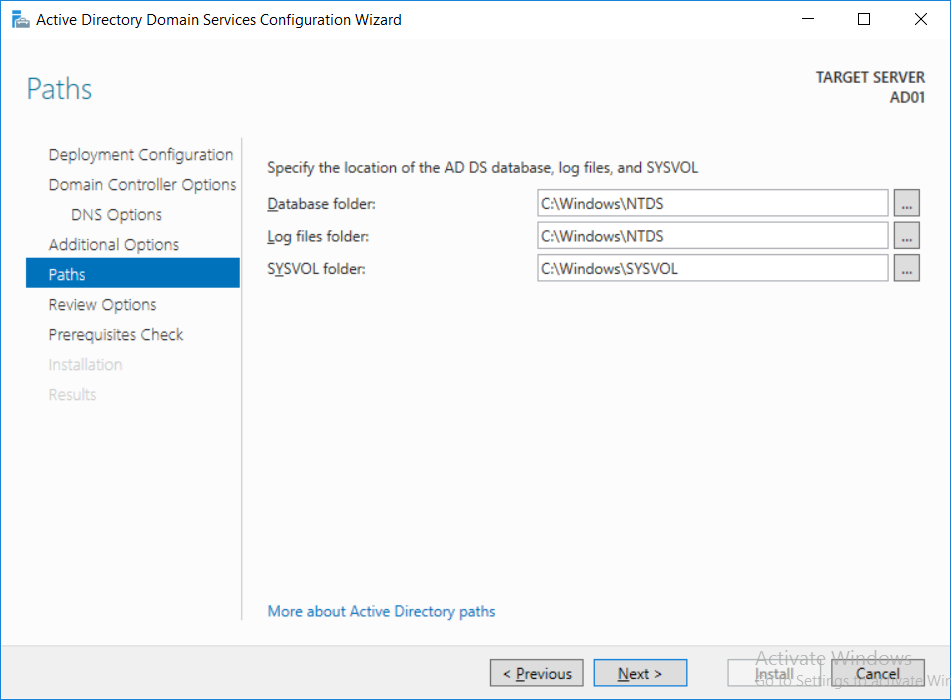
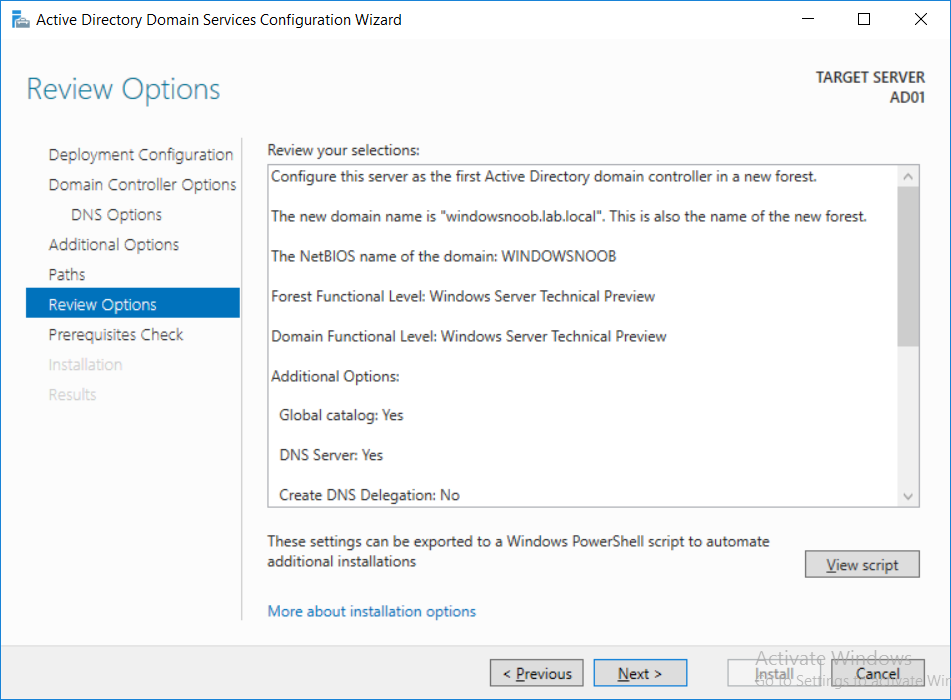
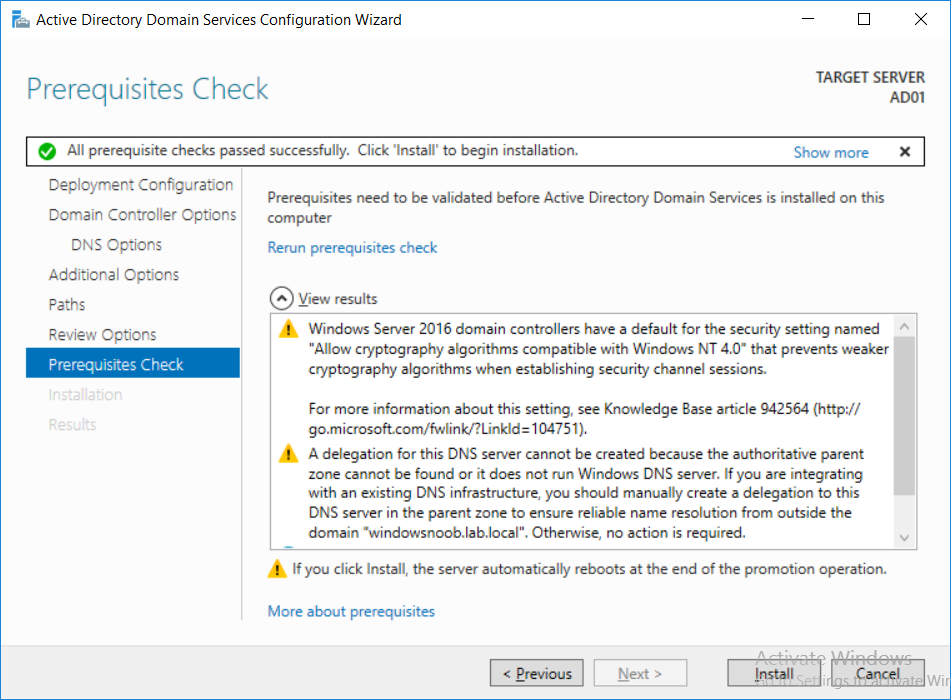
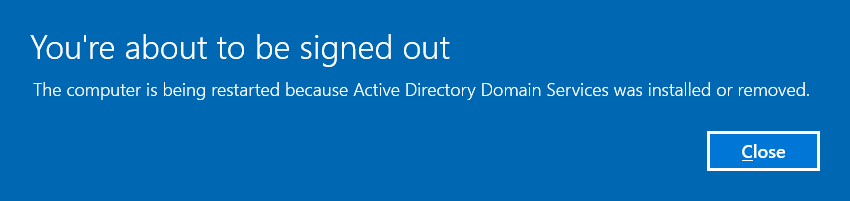

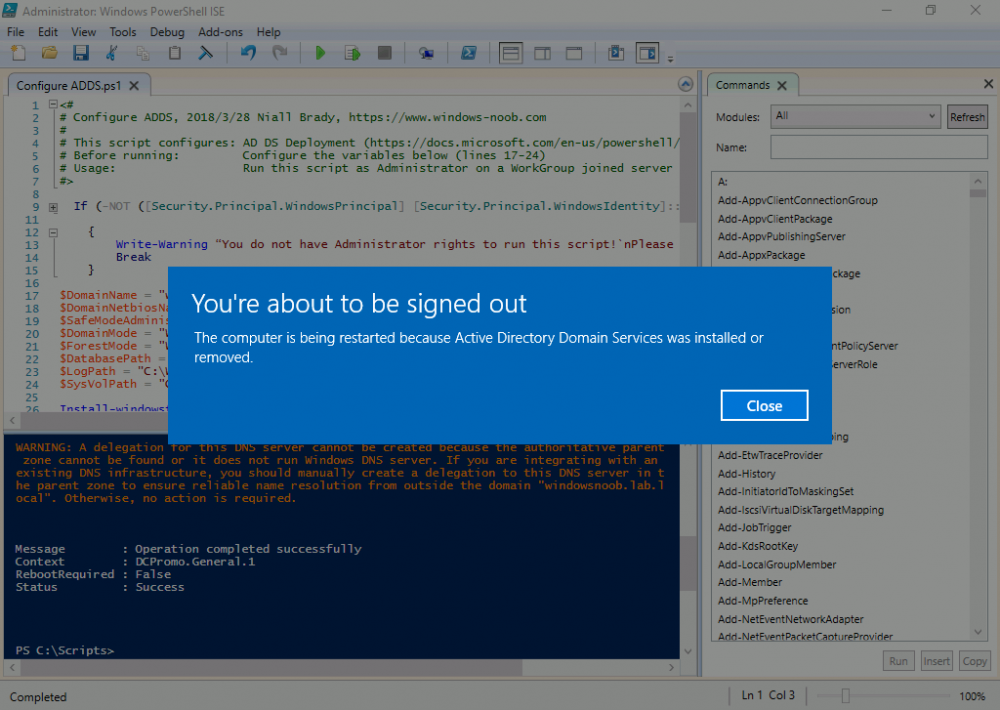
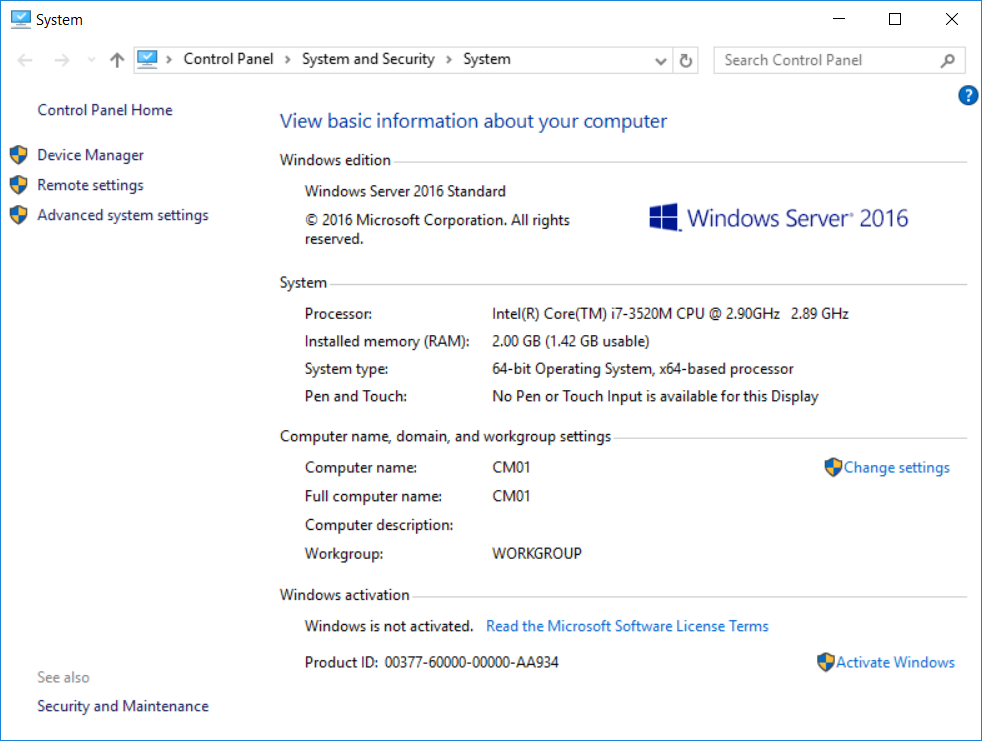
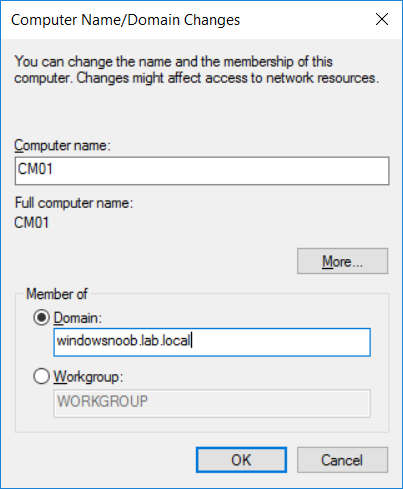
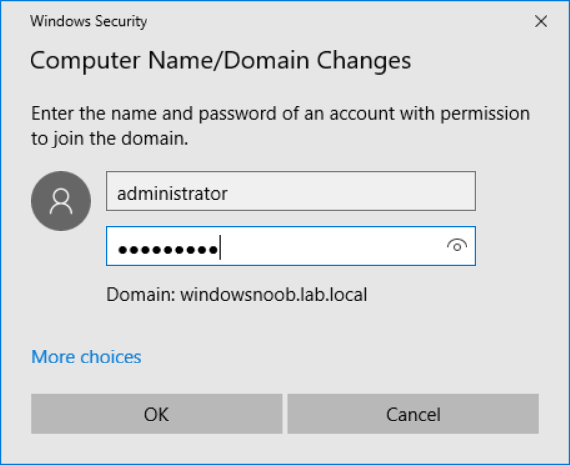
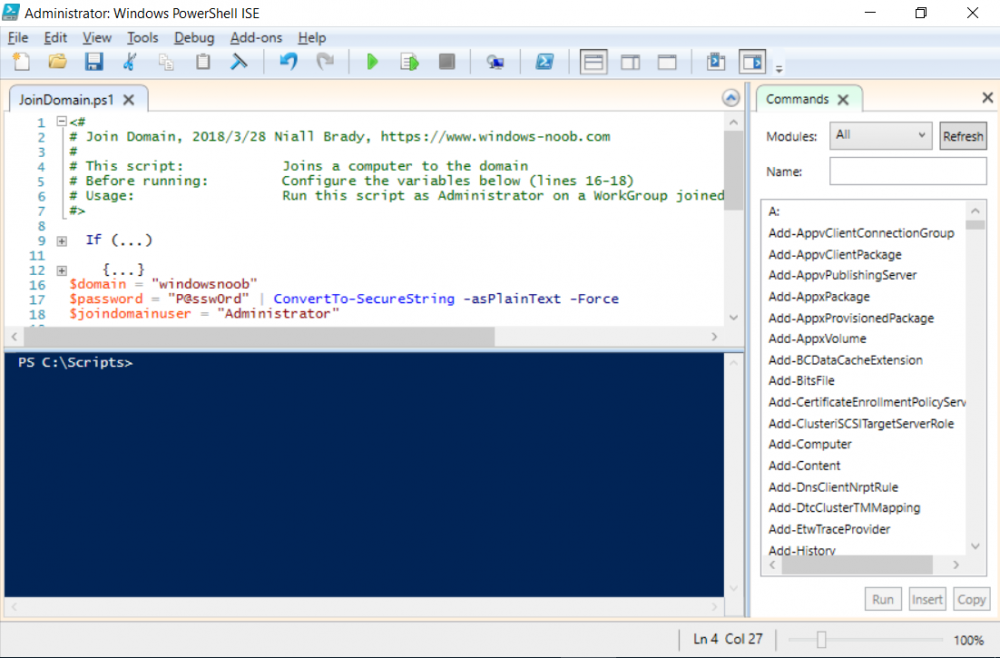
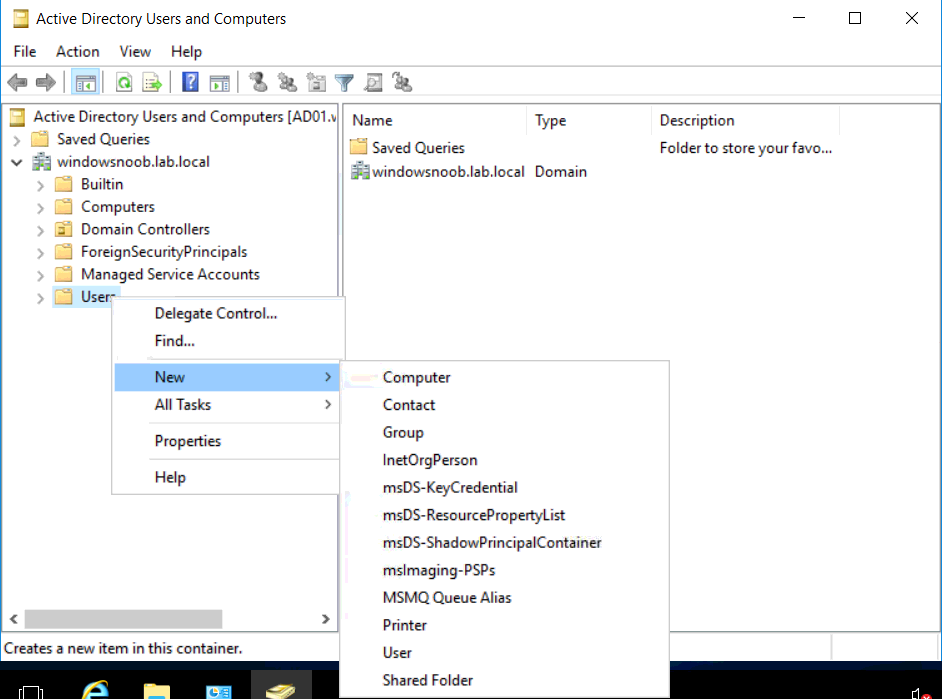
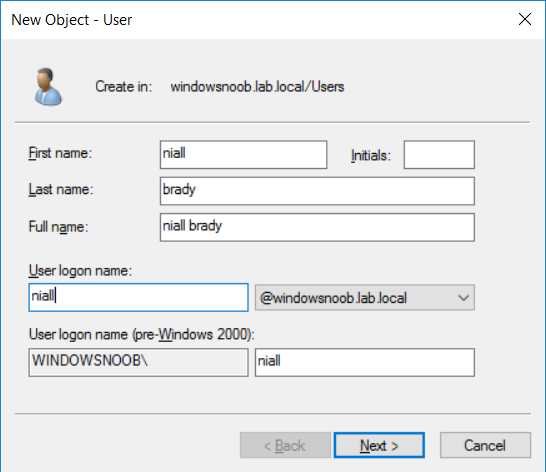
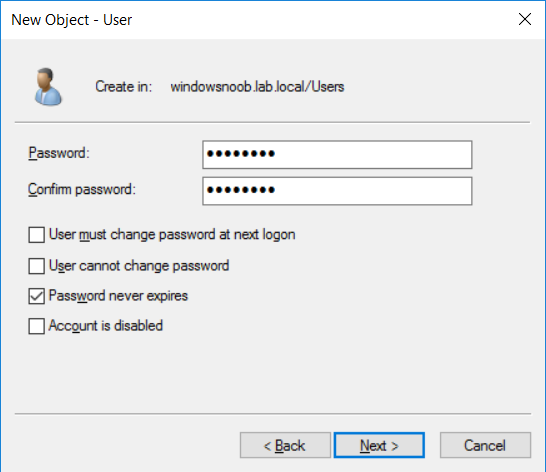
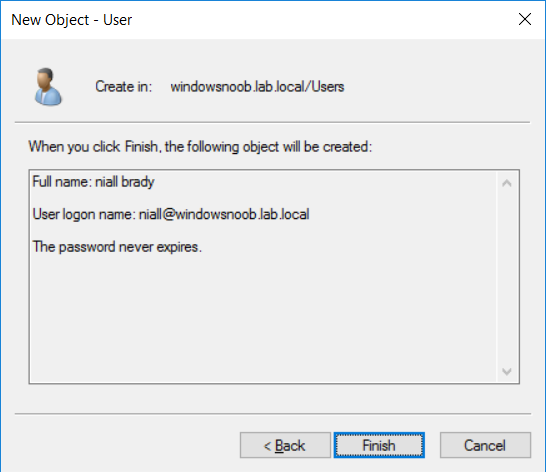
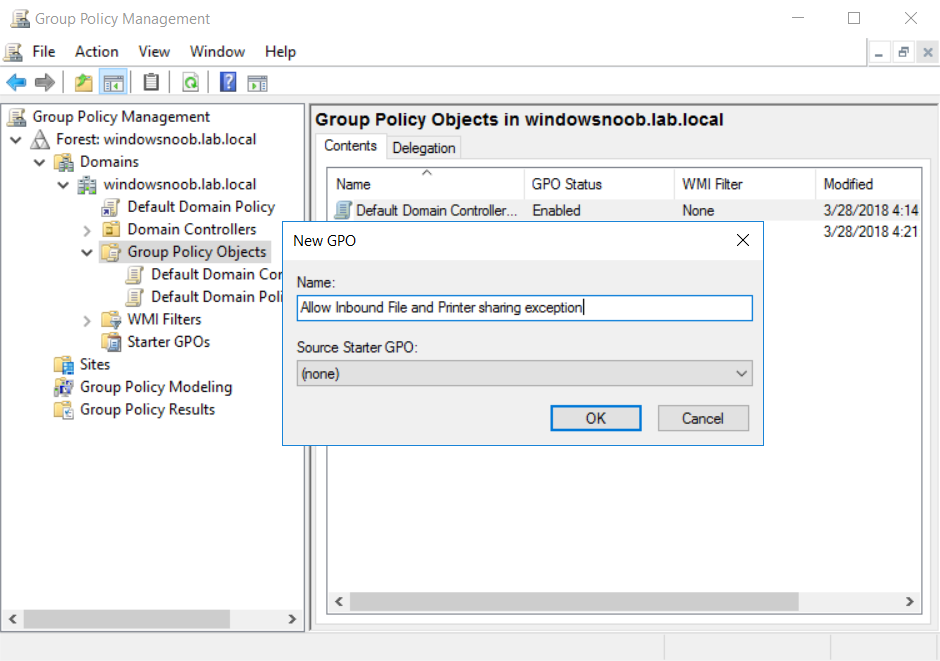

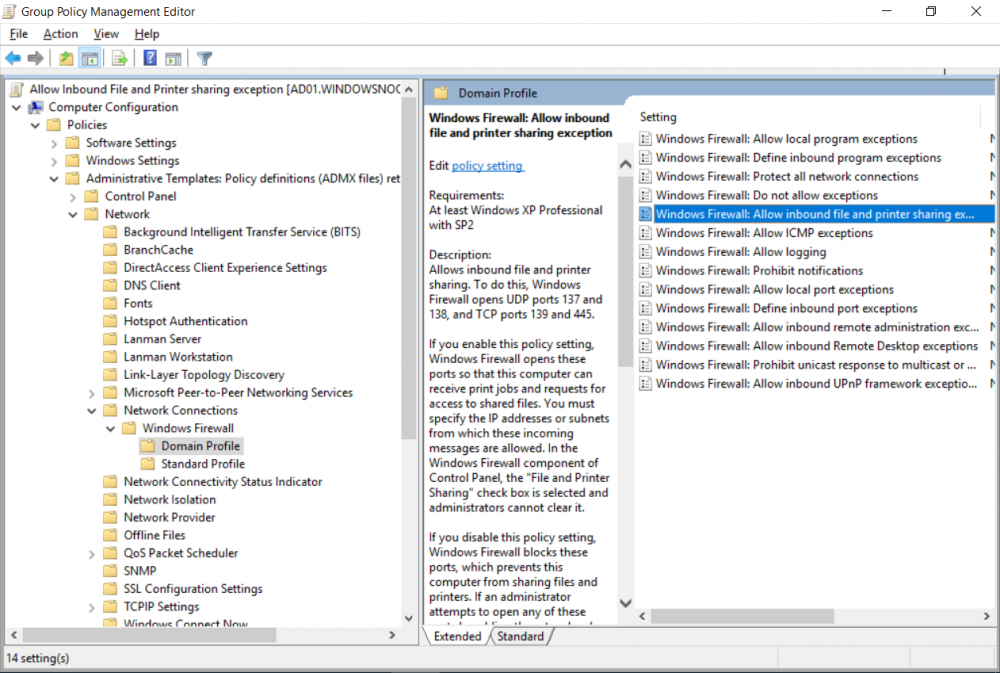

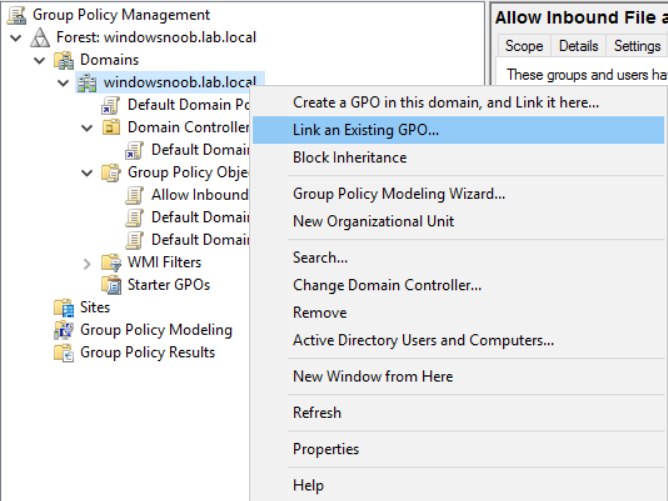
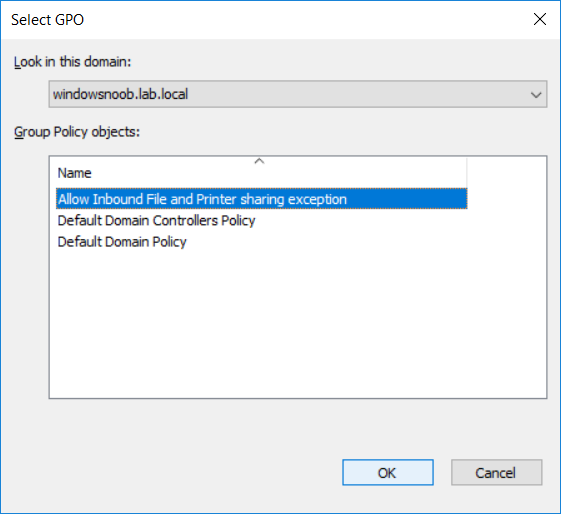
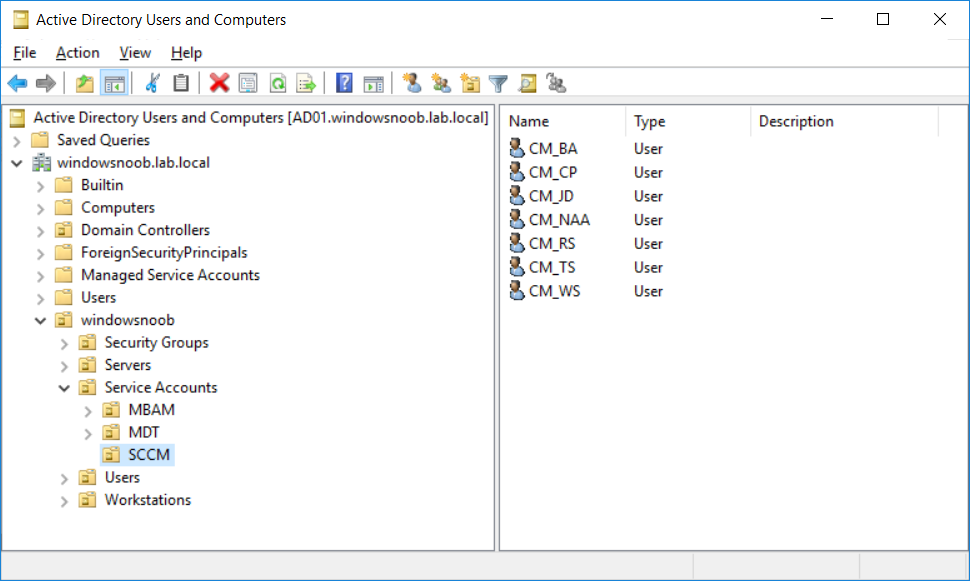
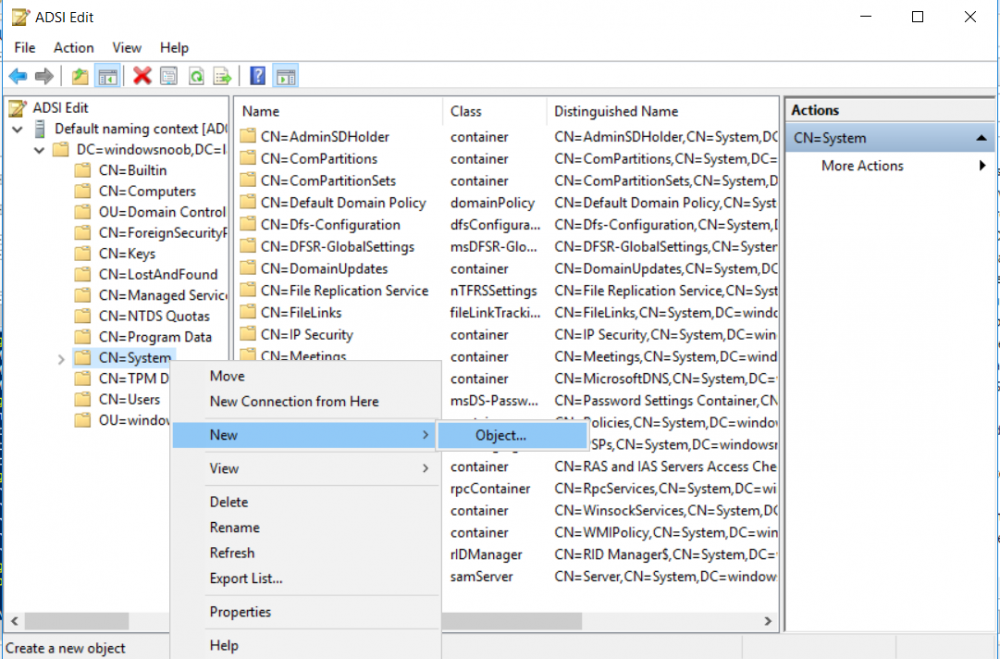
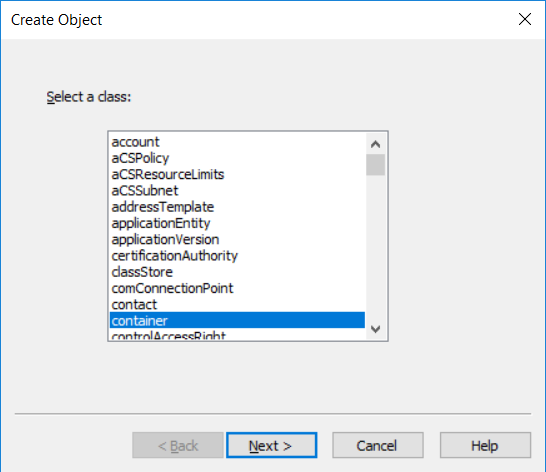


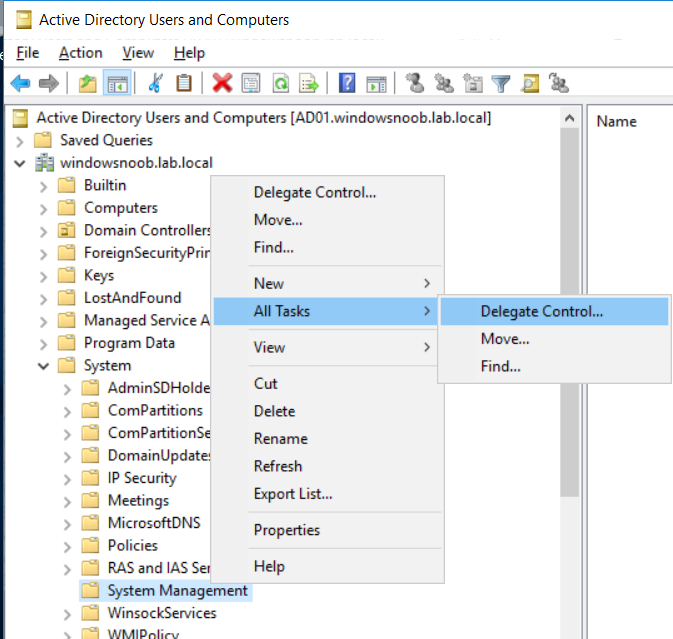
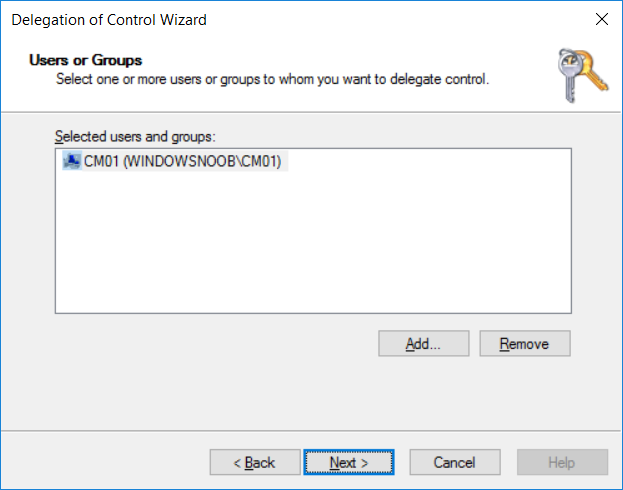
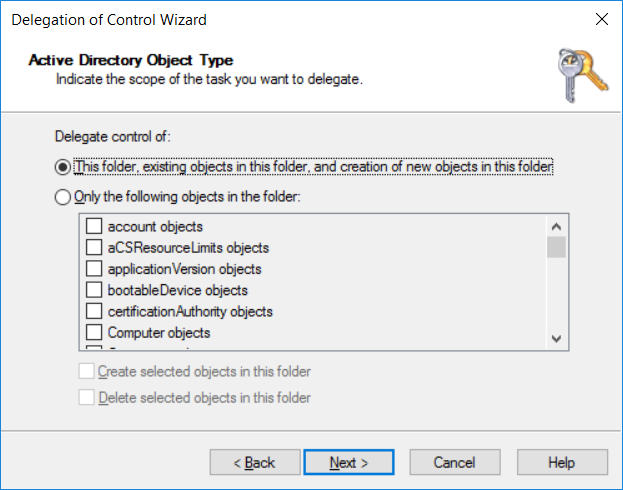
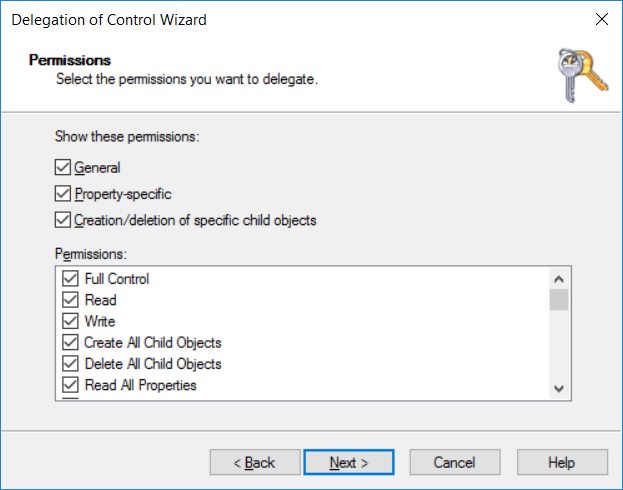

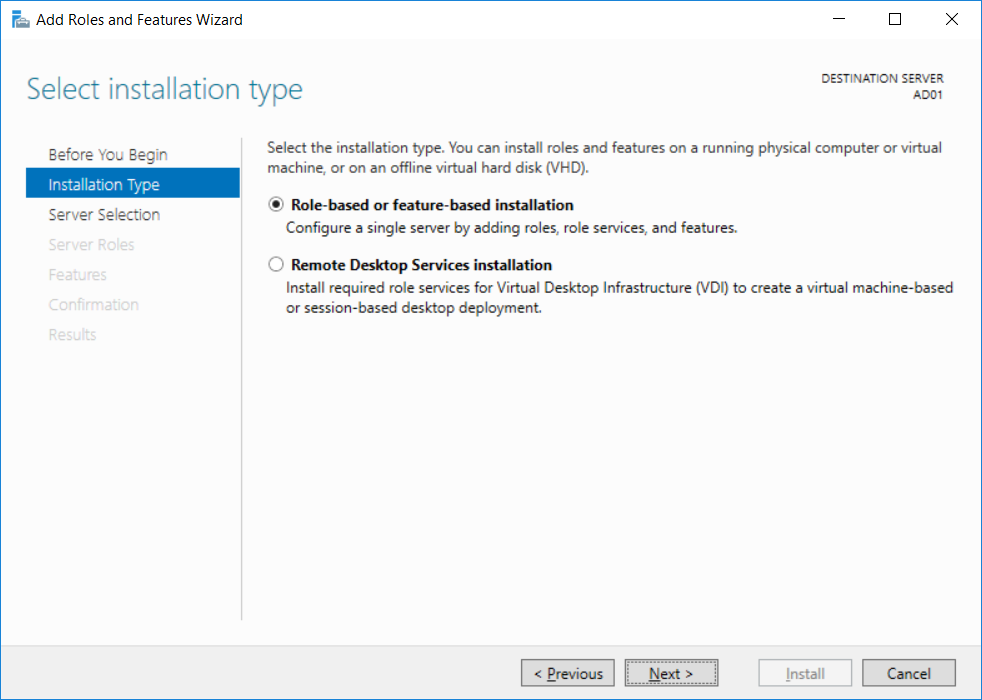
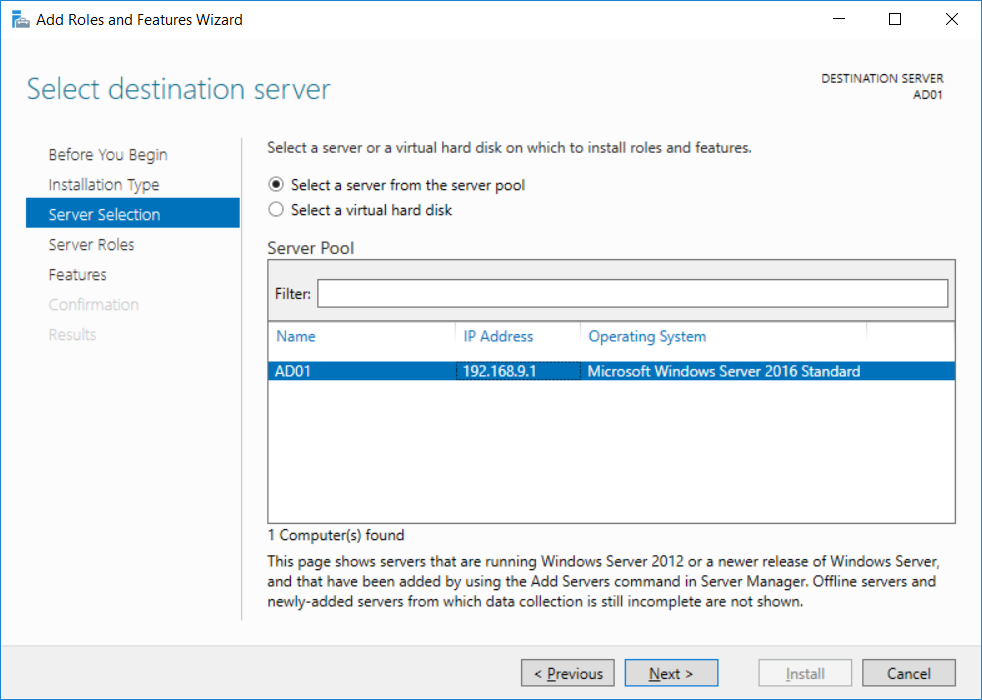
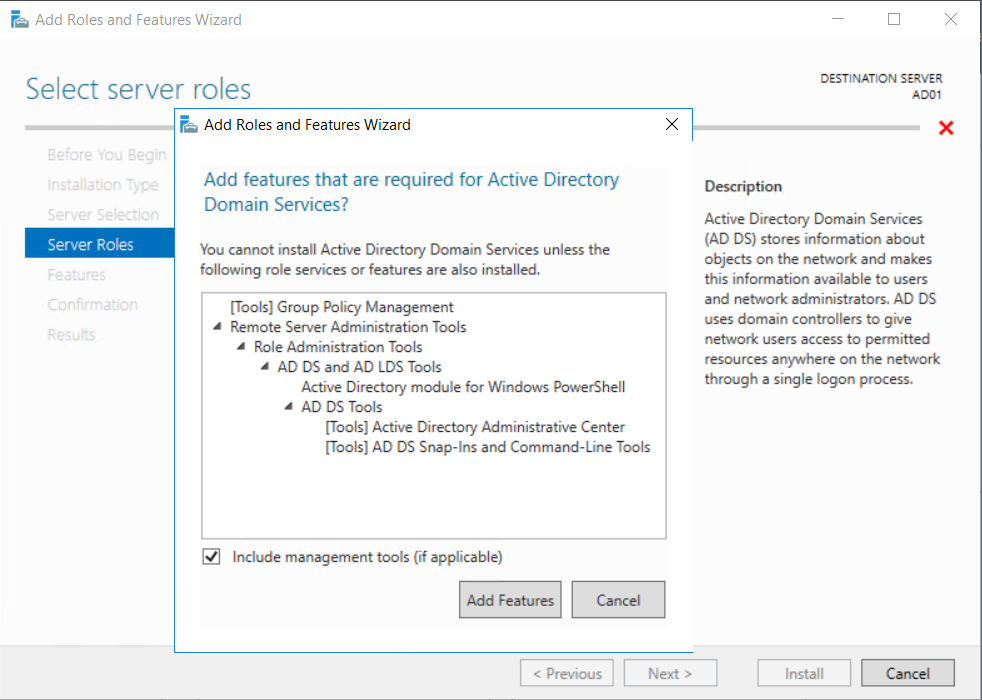
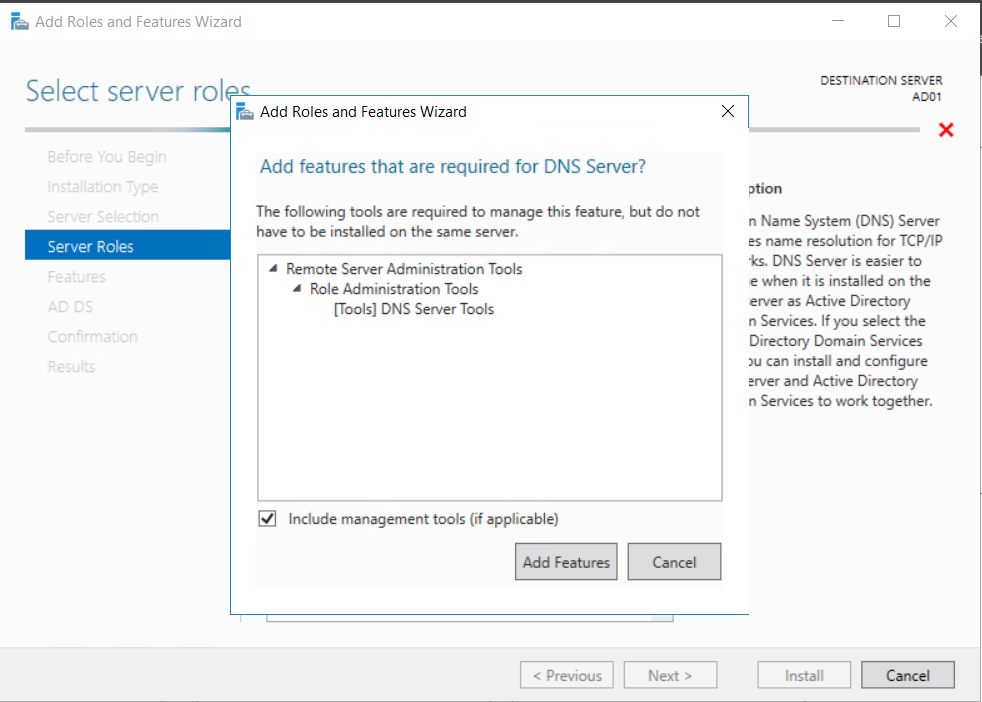
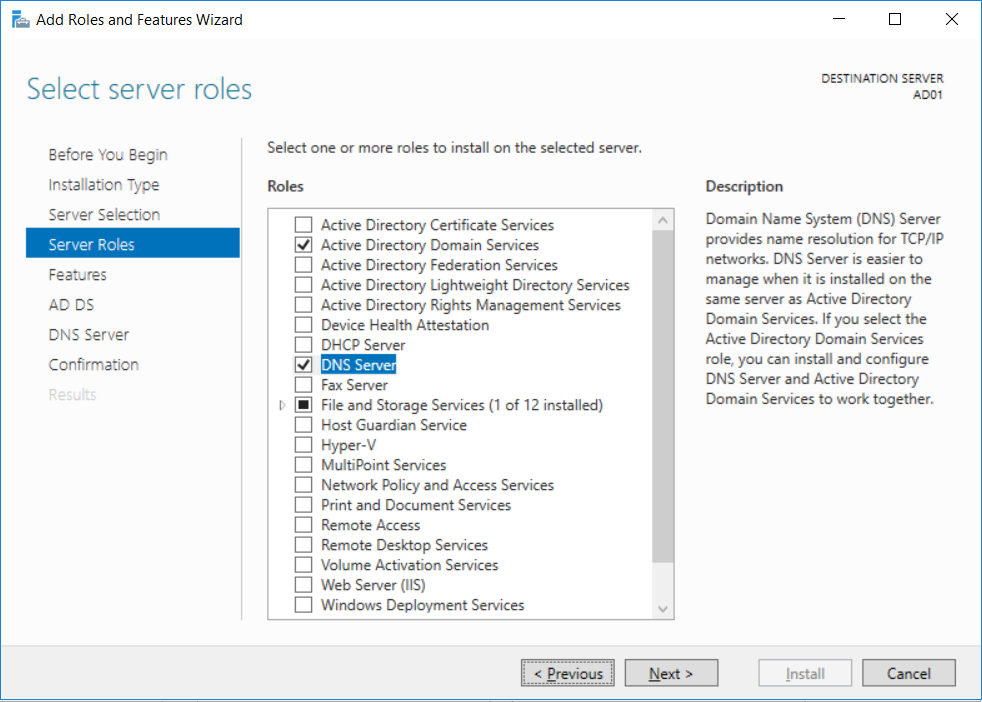
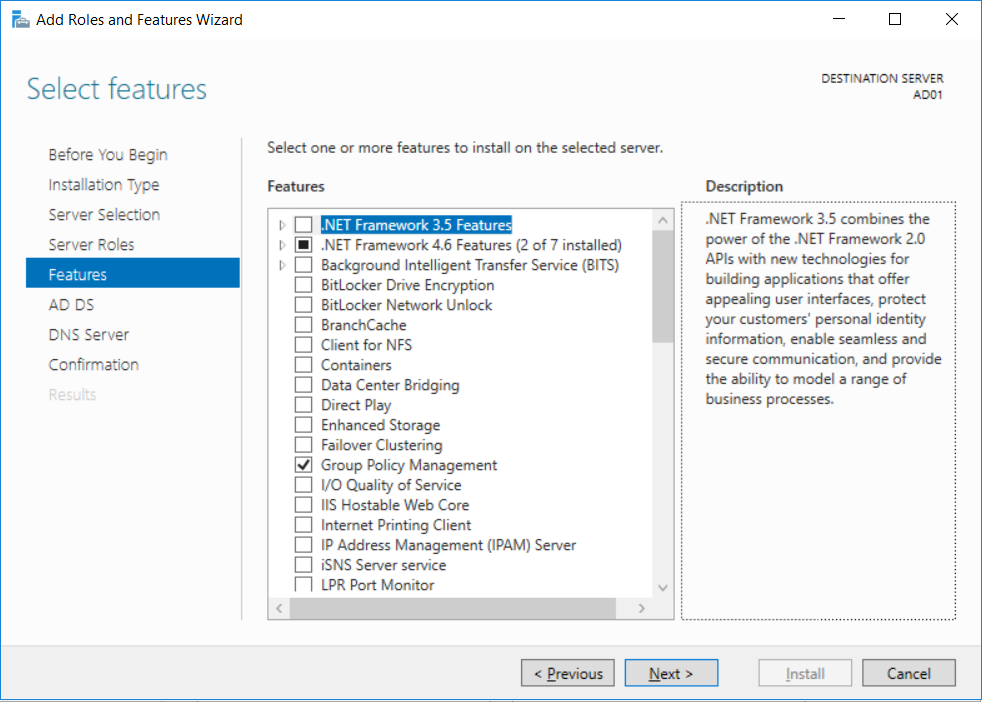
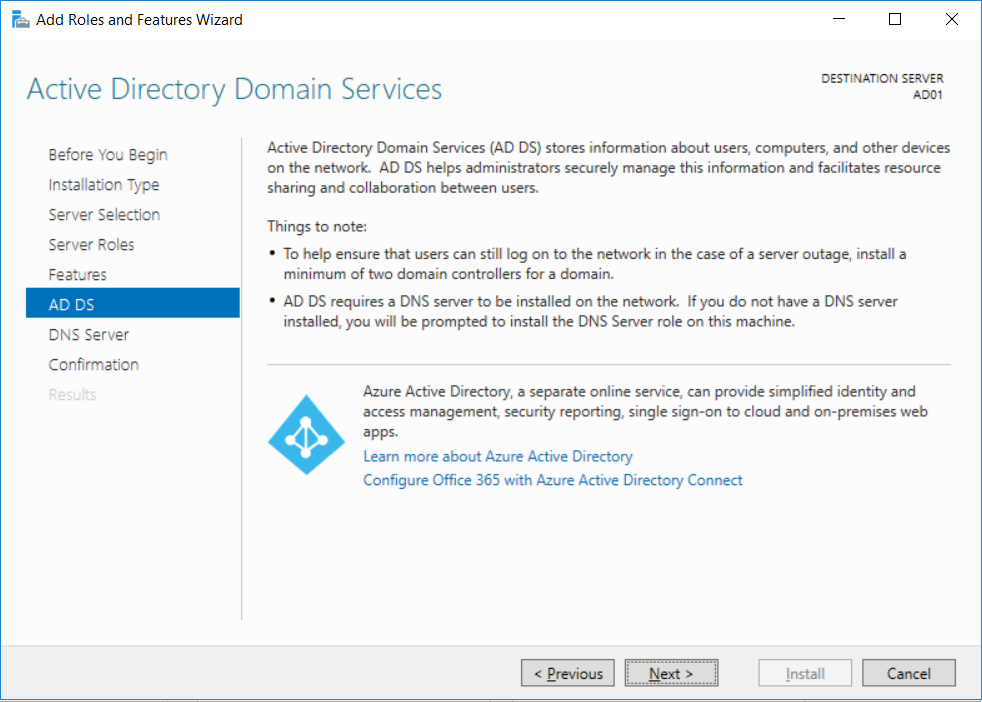
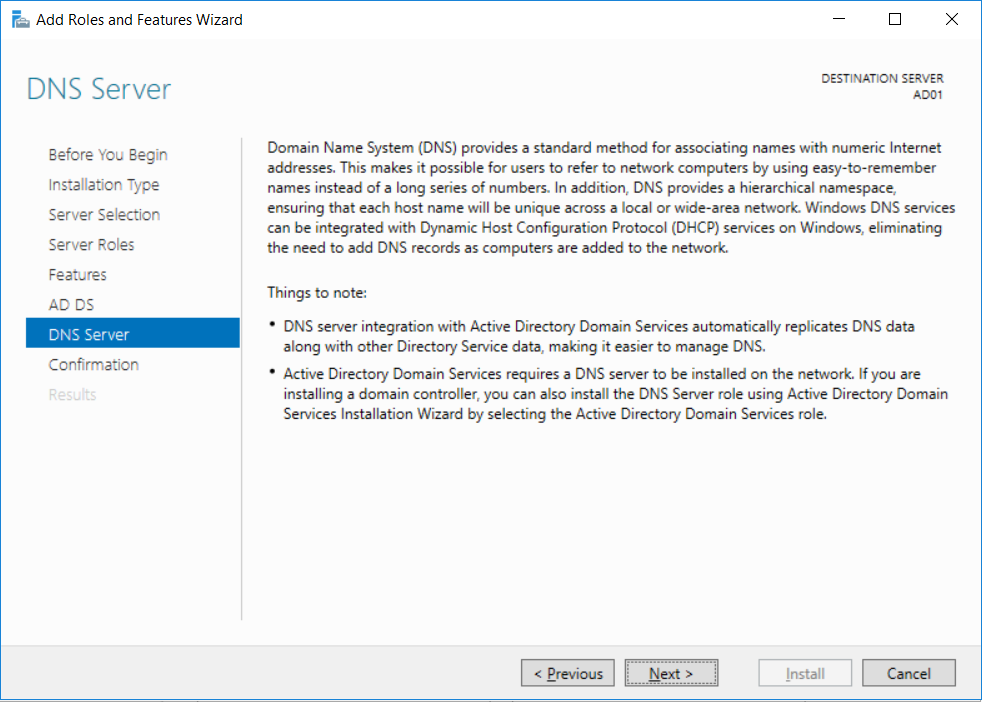
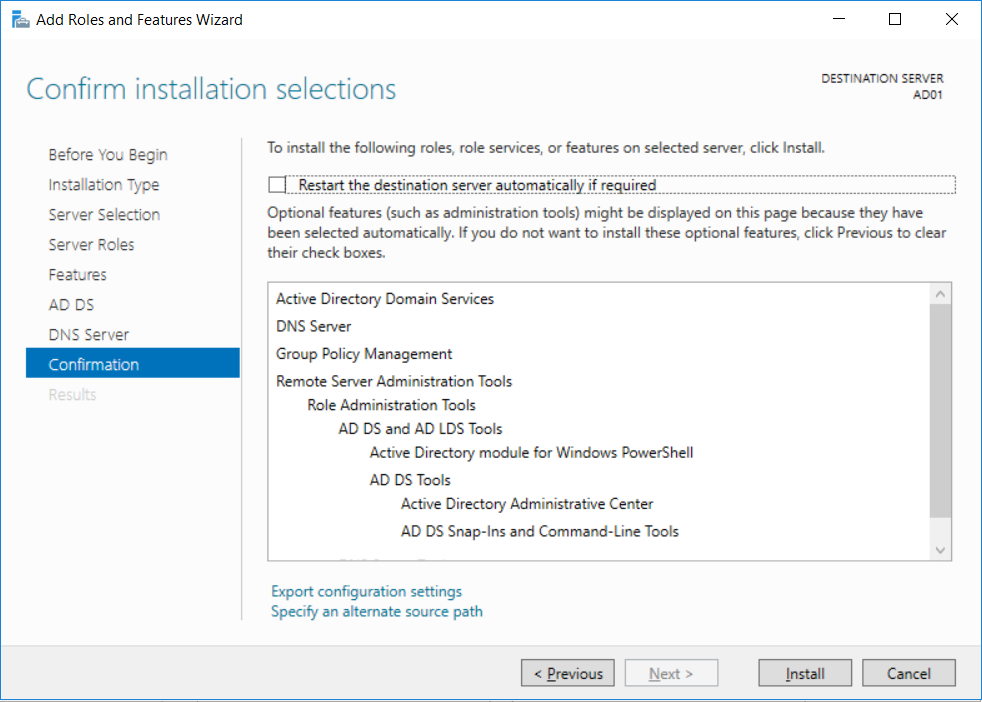
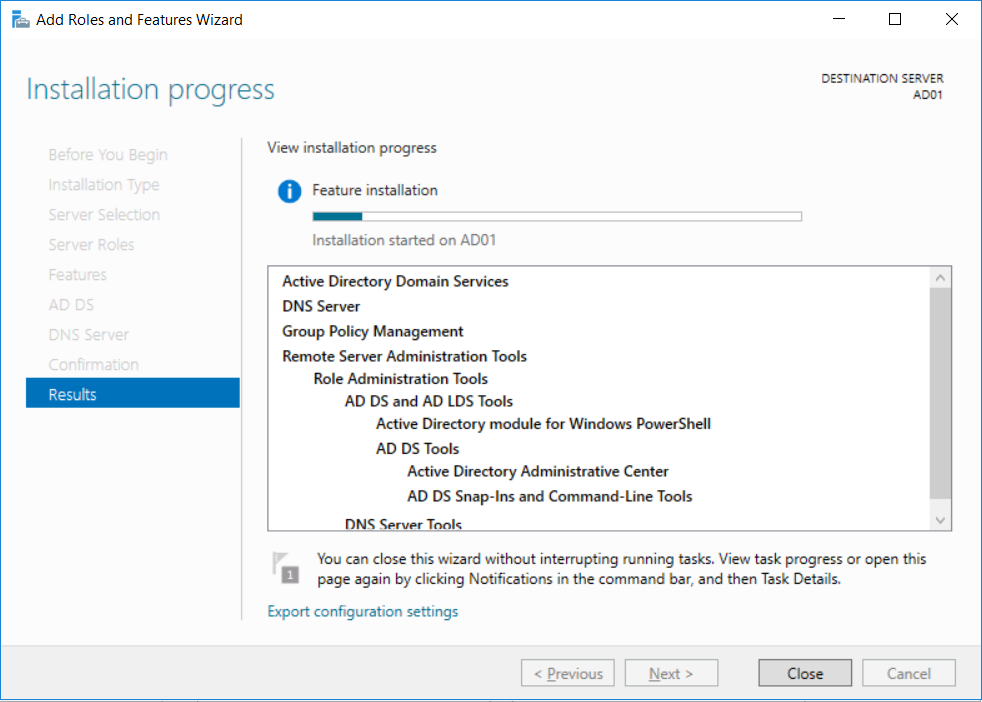

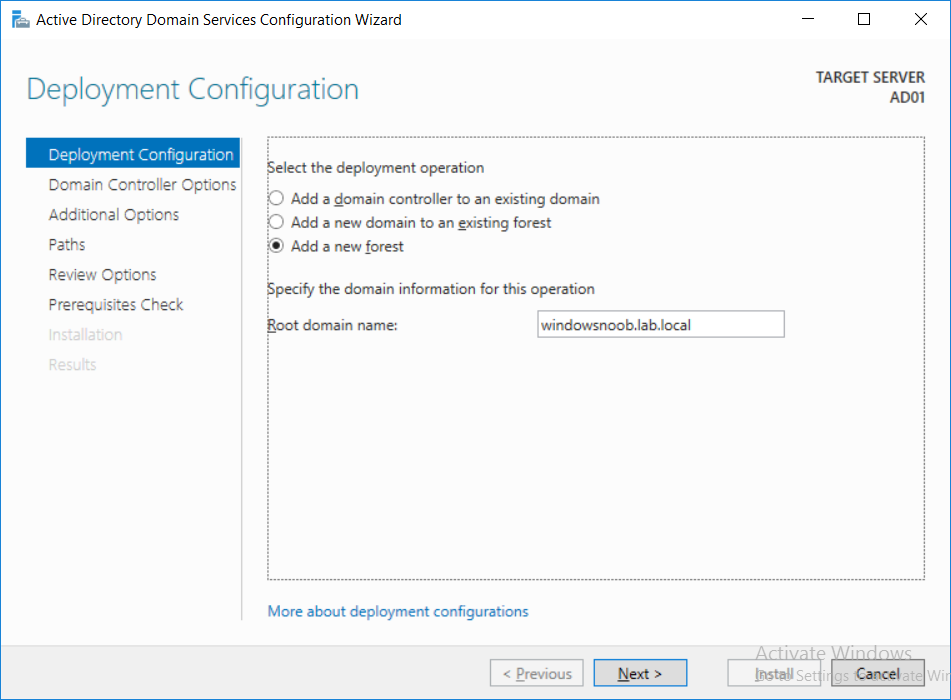
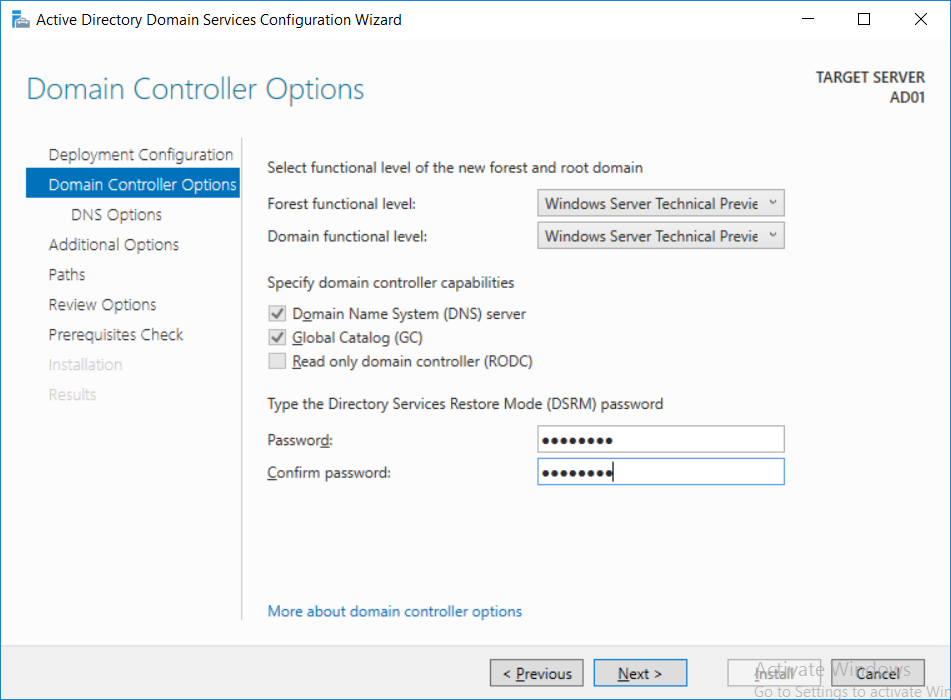


-

Multiple Tasks to Select OS on PXE Deplopyment
MagnumVP posted a question in Microsoft Deployment Toolkit (MDT)
We have been using the guides on this site for over 2 years without issues, but for some reason I can't find a guide that helps me through this issue. We have been deploying Win 10 Enterprise 2016 without issues (Add PC and MAC to SCCM, add new computer to group, boot PC to PXE and done....) We want to deploy Win 10 v1803. Here is what I did; Added the OS to SCCM - Distributed Content Copied the OS Task Sequence for 2016, named it 2019 Edited 2019. The only change the OS to Apply to the 2019 Deployed 2019 to the same groups (Unknown Computers and Deploy Windows 10) PC booted into PXE as expected, but is ONLY presented with the 2019 Task. Task 2016 is gone. If I disable the 2019 Task, the computer is rejected and doesn't boot. Is these something that I"m missing? Why if I copy a Task does it no longer show? Is there a "special" guide to have multiple OS task Sequences presented to the PC? -
Hi, I'm in the process of deploying Windows 10 (x64 Enterprise Build 1809) at a customer site using Configuration Manager Current Branch (1806 + Hotfix). Office 365 Click-to-Run is a Tier 1 application that I am installing during deployment of the OS to the endpoint machine. In order to ensure the O365 C2R content is the latest "Semi-Annual Channel" version (client is bound by regulation to patch applications, so testing this with Office) I've setup the following: "Content" for the Application in CM is JUST setup.exe plus XML files for the install. Two XML files for install for two different locations (one of which is on at a low-speed WAN site). Each XML refers to source content in an open share on the Distribution Point servers - one of which is at the low-speed WAN site. Two deployment types in the Application - one for each XML. Setup a Scheduled Task on the Distribution Point servers to update the share (not the Application content) on a regular basis So my plan was then to use a "Requirement" on the application using a custom Global Condition that determines the Active Directory site (created using PowerShell). The idea then being that during deployment, the application installs using the latest available SAC version and administrators don't need to worry about the Application content being updated. And of course, the XML file then tells it to grab the content from the local site, which is highly connected. Works wonderfully well in Software Center in my testing. BUT, doesn't seem to work in OSD Task Sequence ☹️. If I am reading error logs right, it seems as though the PowerShell in the Global Condition is not being allowed to run (even when I set Execution Policy to "Bypass" earlier in the Task Sequence. So, perhaps I am making things more complex than they should be. Simplest thing to do would be to create two separate applications using the same method (i.e. not just two deployment types) and use a Dynamic Variable in the Task Sequence that installs one or the other dependent upon gateway IP. However, throwing it out there for some thoughts on how I could do this using the multiple deployment methods on the single app. Thanks, Matt
-
 Hello all, I am new to this forum so thank you for feedback about possibly not following certain rules. I want to deploy an application to about 3000 users. This will be a required user-based application deployment. I created 1 AD distribution group, tied to 1 collection and the plan is to populate this group over a period of a few weeks with blocks of about 200 to 500 users, depending on fails etc. Because of this I made the application available as soon as possible and the installation deadline as soon as possible and configured a grace period of 96 hours in the client settings. I checked the "Delay enforcement of this application according to user preferences, up to the grace period defined in client settings." There are no maintenance windows configured on any devices. When I add a user to the AD distribution group and log in, the installation starts immediately which leads me to believe I am missing something in my configuration. Anyone any thoughts about this? Thanks for the feedback.
 -
 Hey Windows Pros, I work as a tech-marketer for ManageEngine. We have some exciting news from Patch Connect Plus, which I thought will be valuable to you. We have introduced "Standard edition" which offers third-party software catalogs to your SCCM 1806. These catalogs can also be used to publish to SCUP too. So if you'd like to avail a free trial and see how it works on your SCCM environment, you can get started here. Here's a list of applications supported: https://www.manageengine.com/sccm-third-party-patch-management/supported-applications.html You can learn how to add the third-party catalogs to SCCM from the video: You can write to sales@manageengine.com if you would like to avail an extension of the free trial(30 days default)/avail more applications under the Standard edition for catalogs. Happy to help.
 -
 Hi WN I created a function to connect to the CMSite and load the cmdlet for ConfigurationManager. Could the function be improved in any way or is it as good it can be? is the logic best practice or? You can download it at : https://gallery.technet.microsoft.com/Connect-ConfigMgr64-db5e9d0a function Connect-ConfigMgr64 { $initParams = @{ } if ((Get-Module ConfigurationManager) -eq $null) { try { Import-Module "$($ENV:SMS_ADMIN_UI_PATH)\..\ConfigurationManager.psd1" @initParams -Scope Global } catch { $ModulePath = (Get-ItemProperty HKLM:\SOFTWARE\Wow6432Node\Microsoft\ConfigMgr10\Setup -Name "UI Installation Directory").'UI Installation Directory' Import-Module $ModulePath\bin\ConfigurationManager.psd1 -Scope Global } } if ((Get-Module ConfigurationManager) -ne $null) { $SiteCode = Get-PSDrive -PSProvider CMSITE if ((Get-PSDrive -Name $SiteCode -PSProvider CMSite -ErrorAction SilentlyContinue) -eq $null) { $ProviderMachineName = (Get-ItemProperty HKLM:\SOFTWARE\Wow6432Node\Microsoft\ConfigMgr10\AdminUI\Connection -Name Server).Server New-PSDrive -Name $SiteCode -PSProvider CMSite -Root $ProviderMachineName @initParams } if ((Get-PSProvider -PSProvider CMSite) -ne $null) { Set-Location $SiteCode":\" Write-Host 'Type "Get-Command -Module ConfigurationManager" for a list of SCCM CMDlets.' -ForegroundColor Green } else { $CustomError = [String]"Error: Can't find CMSite provider" Throw $CustomError } } else { $CustomError = [String]"Unable to locate System Center Configuration Manager installation folder!" Throw $CustomError } } Connect-ConfigMgr64
 -
Hi All, We are running SCCM 1806 and Windows 10 1709 clients and currently have an issue where we try to image a machine using PXE we get the following error: Previously it was working fine (about 6 weeks ago) but it has now just stopped. If i look at the SMSPXE.log i get the following: 16/10/2018 12:25:30 PM ============> Received from client: 16/10/2018 12:25:30 PM Operation: BootRequest (1) Addr type: 1 Addr Len: 6 Hop Count: 0 ID: 09DF8E1C Sec Since Boot: 0 Client IP: 000.000.000.000 Your IP: 000.000.000.000 Server IP: 000.000.000.000 Relay Agent IP: 000.000.000.000 Addr: 00:15:5d:98:2f:03: Magic Cookie: 63538263 Options: Type=53 Msg Type: 1=Discover Type=57 Max Msg Size: 05c0 Type=55 Param Request List: 0102030405060c0d0f111216171c28292a2b3233363a3b3c4243618081828384858687 Type=97 UUID: 00c5aa2830da4b354c927442798bf8d6fd Type=94 UNDI: 010300 Type=93 Client Arch: EFI BC Type=60 ClassId: PXEClient:Arch:00007:UNDI:003000 16/10/2018 12:25:30 PM Prioritizing local MP http://xxxxxxxx.xxxxxxxx.local. 16/10/2018 12:25:30 PM Not in SSL 16/10/2018 12:25:31 PM Not in SSL 16/10/2018 12:25:31 PM Client lookup reply: <ClientIDReply><Identification Unknown="0" DuplicateSMBIOS="0" DuplicateMACAddress="0" ItemKey="16777501" ServerName=""><Machine><ClientID/><NetbiosName/></Machine></Identification></ClientIDReply> 16/10/2018 12:25:31 PM 00:15:5D:98:2F:03, 3028AAC5-4BDA-4C35-9274-42798BF8D6FD: device is in the database. 16/10/2018 12:25:31 PM Prioritizing local MP http://xxxxxxxx.xxxxxxxxx.local. 16/10/2018 12:25:31 PM Not in SSL 16/10/2018 12:25:31 PM Request using architecture 9. 16/10/2018 12:25:31 PM Not in SSL 16/10/2018 12:25:31 PM Client boot action reply: <ClientIDReply><Identification Unknown="0" DuplicateSMBIOS="0" DuplicateMACAddress="0" ItemKey="16777501" ServerName=""><Machine><ClientID/><NetbiosName/></Machine></Identification><PXEBootAction LastPXEAdvertisementID="" LastPXEAdvertisementTime="" OfferID="" OfferIDTime="" PkgID="" PackageVersion="" PackagePath="" BootImageID="" Mandatory=""/></ClientIDReply> 16/10/2018 12:25:31 PM 00:15:5D:98:2F:03, 3028AAC5-4BDA-4C35-9274-42798BF8D6FD: no advertisements found 16/10/2018 12:25:31 PM Prioritizing local MP http://xxxxxxx.xxxxxxxxxx.local. 16/10/2018 12:25:31 PM Not in SSL 16/10/2018 12:25:31 PM Not in SSL 16/10/2018 12:25:31 PM 00:15:5D:98:2F:03, 3028AAC5-4BDA-4C35-9274-42798BF8D6FD: No boot action. Aborted. 16/10/2018 12:25:31 PM Operation: BootReply (2) Addr type: 1 Addr Len: 6 Hop Count: 0 ID: 09DF8E1C Sec Since Boot: 0 Client IP: 000.000.000.000 Your IP: 000.000.000.000 Server IP: 192.168.152.025 Relay Agent IP: 000.000.000.000 Addr: 00:15:5d:98:2f:03: Magic Cookie: 63538263 Options: Type=53 Msg Type: 2=Offer Type=54 Svr id: 192.168.152.025 Type=97 UUID: 00c5aa2830da4b354c927442798bf8d6fd Type=60 ClassId: PXEClient 16/10/2018 12:25:31 PM 00:15:5D:98:2F:03, 3028AAC5-4BDA-4C35-9274-42798BF8D6FD: Not serviced. 16/10/2018 12:25:34 PM ============> Received from client: 16/10/2018 12:25:34 PM Operation: BootRequest (1) Addr type: 1 Addr Len: 6 Hop Count: 0 ID: 09DF8E1C Sec Since Boot: 0 Client IP: 000.000.000.000 Your IP: 000.000.000.000 Server IP: 000.000.000.000 Relay Agent IP: 000.000.000.000 Addr: 00:15:5d:98:2f:03: Magic Cookie: 63538263 Options: Type=53 Msg Type: 3=Request Type=54 Svr id: 192.168.152.017 Type=50 Requested IP: 192.168.152.100 Type=57 Max Msg Size: ff00 Type=55 Param Request List: 0102030405060c0d0f111216171c28292a2b3233363a3b3c4243618081828384858687 Type=97 UUID: 00c5aa2830da4b354c927442798bf8d6fd Type=94 UNDI: 010300 Type=93 Client Arch: EFI BC Type=60 ClassId: PXEClient:Arch:00007:UNDI:003000 16/10/2018 12:25:34 PM ============> Received from client: 16/10/2018 12:25:34 PM Operation: BootRequest (1) Addr type: 1 Addr Len: 6 Hop Count: 0 ID: 0404FBE8 Sec Since Boot: 0 Client IP: 192.168.152.100 Your IP: 000.000.000.000 Server IP: 000.000.000.000 Relay Agent IP: 000.000.000.000 Addr: 00:15:5d:98:2f:03: Magic Cookie: 63538263 Options: Type=53 Msg Type: 3=Request Type=55 Param Request List: 0102030405060c0d0f111216171c28292a2b3233363a3b3c4243618081828384858687 Type=57 Max Msg Size: 05c0 Type=60 ClassId: PXEClient:Arch:00007:UNDI:003000 Type=93 Client Arch: EFI BC Type=94 UNDI: 010300 Type=97 UUID: 00c5aa2830da4b354c927442798bf8d6fd 16/10/2018 12:25:34 PM Prioritizing local MP http://xxxxxxx.xxxxxxxxx.local. 16/10/2018 12:25:34 PM Not in SSL 16/10/2018 12:25:34 PM Request using architecture 9. 16/10/2018 12:25:34 PM Not in SSL 16/10/2018 12:25:34 PM Client boot action reply: <ClientIDReply><Identification Unknown="0" DuplicateSMBIOS="0" DuplicateMACAddress="0" ItemKey="16777501" ServerName=""><Machine><ClientID/><NetbiosName/></Machine></Identification><PXEBootAction LastPXEAdvertisementID="" LastPXEAdvertisementTime="" OfferID="" OfferIDTime="" PkgID="" PackageVersion="" PackagePath="" BootImageID="" Mandatory=""/></ClientIDReply> 16/10/2018 12:25:34 PM 00:15:5D:98:2F:03, 3028AAC5-4BDA-4C35-9274-42798BF8D6FD: no advertisements found 16/10/2018 12:25:35 PM Prioritizing local MP http://xxxxxxxxxxx.xxxxxxxxxxx.local. 16/10/2018 12:25:35 PM Not in SSL 16/10/2018 12:25:35 PM Not in SSL 16/10/2018 12:25:35 PM ============> REQUEST Reply to client ([192.168.152.100:4011]) Len:285 16/10/2018 12:25:35 PM Operation: BootReply (2) Addr type: 1 Addr Len: 6 Hop Count: 0 ID: 0404FBE8 Sec Since Boot: 0 Client IP: 192.168.152.100 Your IP: 000.000.000.000 Server IP: 192.168.152.025 Relay Agent IP: 000.000.000.000 Addr: 00:15:5d:98:2f:03: BootFile: smsboot\x64\wdsmgfw.efi Magic Cookie: 63538263 Options: Type=53 Msg Type: 5=Ask Type=54 Svr id: 192.168.152.025 Type=97 UUID: 00c5aa2830da4b354c927442798bf8d6fd Type=60 ClassId: PXEClient Type=250 020105 16/10/2018 12:25:35 PM <============ REQUEST Reply (end) Any help would be appreciated. Thanks in Advance. Paul
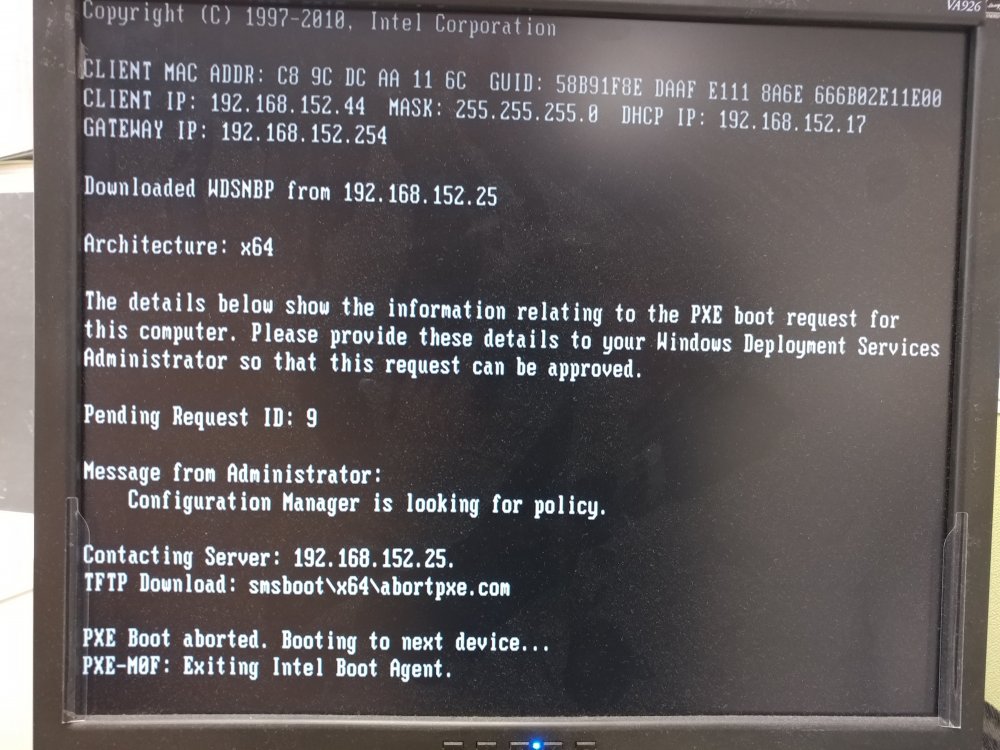
-
 Hello, I have the problem with my SCCM that I cannot open the Administration Console anymore. The last think I have do bevor it don't works anymore was to fix my 0% downloading from Software Center Problem. I have tried these steps from Arthur_Li (because the fix with the .mof files don't work for me): https://social.technet.microsoft.com/Forums/windows/en-US/df00b2e4-3bab-4b46-ad5a-95e82617a039/wmi-errors?forum=winserverNIS Here are the SMSAdmin Logs: [19, PID:1928][10/11/2018 08:50:07] :Transport error; failed to connect, message: 'The SMS Provider reported an error.'\r\nMicrosoft.ConfigurationManagement.ManagementProvider.WqlQueryEngine.WqlQueryException\r\nThe SMS Provider reported an error.\r\n at Microsoft.ConfigurationManagement.ManagementProvider.WqlQueryEngine.WqlQueryResultsObject.<GetEnumerator>d__74.MoveNext() [19, PID:1928][10/11/2018 08:50:07] :Transport error; failed to connect, message: 'The SMS Provider reported an error.'\r\nMicrosoft.ConfigurationManagement.ManagementProvider.WqlQueryEngine.WqlQueryException\r\nThe SMS Provider reported an error.\r\n at Microsoft.ConfigurationManagement.ManagementProvider.WqlQueryEngine.WqlQueryResultsObject.<GetEnumerator>d__74.MoveNext() at Microsoft.ConfigurationManagement.AdminConsole.SmsSiteConnectionNode.GetConnectionManagerInstance(String connectionManagerInstance)\r\nConfigMgr Error Object: instance of __ExtendedStatus{Operation = "ExecQuery";ParameterInfo = "SELECT * FROM SMS_Site WHERE SiteCode = 'PS0'";ProviderName = "WinMgmt"; } Error Code: ProviderLoadFailure [19, PID:1928][10/11/2018 08:50:07] :Transport error; failed to connect, message: 'The SMS Provider reported an error.'\r\nMicrosoft.ConfigurationManagement.ManagementProvider.WqlQueryEngine.WqlQueryException\r\nThe SMS Provider reported an error.\r\n at Microsoft.ConfigurationManagement.ManagementProvider.WqlQueryEngine.WqlQueryResultsObject.<GetEnumerator>d__74.MoveNext() I have tried to reinstall the console with the AdminConsole.msi but this don't work. Also I have tried to connect with my IP, but also no success. The complete D drive where SCCM is installed, the SMSAdmins Group has "Full control" permissions. At this group are all user where can connected to the server and the server itself. All sms services are running. One think I found out is that my wmi maybe don't work right. At another Topic (https://www.windows-noob.com/forums/topic/10298-applications-suddenly-wont-deploy-hung-stuck-at-0-downloading/) they tried "Run the query select * from sms_sci_component where componentname=SMS_DISTRIBUTION_MANAGER" to fix the wmi problem, but if I try this query I get the following error: Number: 0x80041017Facility: WMIDescription: Invalid query Could it be that this query is only for 2012? At the wmiprov.log I get this error by trying to open the Console from SCCM: (Wed Oct 10 10:16:42 2018.780762406) : WDM call returned error: 5 The WMIDIAG Log is attach below WMIDIAG-V2.2_2K12R2.SRV.RTM.64_SRV-SCCM_2018.10.12_09.52.41-REPORT.TXT
 -
Hi all, I've tried and failed miserably! to work out how to do this using the Report Builder. Could anyone possibly help with creating an SQL query to create a deployment report which includes the Administrative Category? Example: Application Name, Application Administrative Category, Target Collection, Success, In Progress, Fail, Requirements not met, Unknown. Would really appreciate any assistance. Thanks
-
Did you know that Enhansoft is giving away a free report set on Software Update Health? Check out the blog about it. https://www.enhansoft.com/blog/software-update-health-dashboard-set-special-microsoft-ignite-giveaway They give away something every month too! https://giveaway.enhansoft.com/ Keep in mind that I do work for them too.
-
So, I have a few custom groups in my task sequence that install applications based upon some WMI queries using a naming convention. But I am having some issues trying to get it working exactly. Here is what I am trying to do. I have two groups. Employee and Labs. The naming convention for employees is LIB-AU and for the Labs its LIB-AUXXXXX-XX where the X's represent numbers I have this particular "If" statement. Here is the query in question that I currently have for employee SELECT * FROM Win32_ComputerSystem WHERE Not Name LIKE 'LIB-AU%-%' Here is the query for the labs group. SELECT * FROM Win32_ComputerSystem WHERE Name LIKE 'LIB-AU%-%' The behavior that occurs is that everything under the employees group installs to a system if it has the name "LIB-AUXXXXX-XX" - I don't want this to happen. I only want it to run the steps if it meets the 'LIB-AUXXXXX' naming, but otherwise skip it. The query for the "labs" group works fine. Any suggestions?

-
Hi, I've recently had an issue were my Windows 10 1803 clients don't get signature updates although the definition updates seem to apply ok. Looking through the logs nothing really stuck out except that the machine didn't have a antimalware policy. I check SCCM and the policy is deployed and apperently installed ok (going from the console). Any ideas would really be great!
-
 Hello Folks! Firstly I want to say that I'm new here to this forum, so hello. ? The ConfigMgr team just released the latest version av SCCM CB, 31 July if I understood correctly. Now, it is 8 August and 1806 hasn't appeared in the Updates and Servicing node for us. I have clicked on the button Check for Updates and even checked the dmpdownloader.log but no error messages seems to strike out. I have even restarted the SMS_EXECUTIVE component without any issues. I am currently running out of ideas, I have been googling for some answers why new versions don't appear in the node but don't find any relevant so I'm reaching out to you guys. Our current environment is SCCM CB 1802, 5.00.8634.1000 (Not the hotfix though). The only update that is available in there is the hotfix CB 1802 Hotfix KB4163547. If it isn't that what's causing the trouble? Am i too early that is searching for that update or is there something wrong that I'm doing? Can't really hesitate to try out the new third party update feature and even CMPivot! Have a great day everyone, cheers!